


primonido new
[Young & Culla]
IT Istruzioni d’uso
EN Instructions for use
FR Notice d’emploi
DE Gebrauchsanleitung
ES Instrucciones de uso
PT Instruções para uso
NL Gebruiksaanwijzing
DK Brugsanvisning
FI Käyttöohjeet
CZ Návod na použití
SK Návod na použitie
HU Használati útmutató
SL Navodila za uporab
RU Инструкции по пользованию
TR Kullanim klavuzu
EL Οδηγίες χρήσεως

1 2
3 4
b
a
c
d
5
7 8
6

NO
NO
N
NO
AUTO - CAR - VOITURE
9
10
11 12
14
13

15 16
17 18

19 20
21
22

23 24
25 26

27
28
29
30

33
31
32

11
3
2
5
7
6
4
1
Primonido [Young & Culla]
IT• Ricambi disponibili in piú colori da specificare nella richiesta.
EN• Spare parts available in different colours to be specified when ordering.
FR• Pièces de rechange disponibles en plusieurs couleurs à spécifier dans la demande.
DE• Ersatzteile in mehr Farben vorhanden, die in der Anfrage spezifiziert werden müssen.
ES• Repuestos disponibles en otros colores que se especificarán en el pedido.
PT• Peças de reposição disponíveis em cores alternativas a serem especificadas no pedido.
NL• Reserveonderdelen verkrijgbaar in meerdere kleuren, bij bestelling te specificeren.
DK• Reservedele kan leveres i flere farver som bør specificeres ved bestillingen.
FI• Varaosia saatavana eri värisinä: ilmoita väri tilauksessa.
CZ• U náhradních dílů, které jsou k dispozici ve více barvách, je nutné na objednávce specifikovat příslušnou barvu.
SK• Pri náhradných dieloch, ktoré sú k dispozícii vo viacerých farbách, je potrebné pri objednávke špecifikovať želanú farbu.
HU• A tartalék alkatrészek különböző színekben elérhetők, melyeket rendeléskor kell kiválasztani.
SL• Rezervni deli so na voljo v več barvah, ki jih je treba navesti pri naročilu.
RU• Запчасти имеются различных цветов, необходимый указать в запросе.
TR• Siparişte belirtilen değişik renklerdeki yedek parçalari mevcuttur.
EL• Ανταλλακτικά διαθέσιμα σε διάψορα χρώματα. Προσδιορίστε όταν παραγγείλετε.
1) IIEPNA•
2) BCAYON• (Young)
2) BCACWE•/BCACWP• (Culla)
3) BCOYON• (Young)
3) BCOCWE•/BCOCWP• (Culla)
4) SAPI0037L30
5) SAPI6432KL50B
6) SUCI0073GR
7) SPST4578•

12
Grazie per aver scelto un prodotto
Peg-Pérego.
• Peg-Pérego S.p.A. è certificata ISO 9001.
• La certificazione offre ai clienti e ai
consumatori la garanzia di una trasparenza e
fiducia nel modo di lavorare dell'impresa.
La carrozzina Primonido New è
disponibile nel modello Young o Culla.
Caratteristiche prodotto
Carrozzina-auto, Gruppo 0, categoria
“Universale”
• La carrozzina è omologata secondo il regolamento UN/
ECE R44/04 per bambini di peso da 0-10 kg. Adatto alla
maggior parte dei sedili delle autovetture, ma non a tutti.
• La carrozzina può essere correttamente installata se nel
manuale d’uso e manutenzione del veicolo è indicata la
compatibilità con sistemi di ritenuta “Universali” di Gruppo 0.
• La carrozzina è classificata “Universale” secondo criteri di
omologazione più severi rispetto ai modelli precedenti che
non dispongono di questa scritta.
• Il dispositivo può essere utilizzato solo su veicoli dotati di
sedile posteriore a 2 o 3 posti dotati di cinture di sicurezza
a 2 o 3 punti, omologate in conformità al regolamento UN/
ECE R16 o a normative equivalenti.
• In caso di dubbi, o per ulteriori informazioni sul fissaggio di
la carrozzina su vetture specifiche, rivolgersi al costruttore o
al rivenditore.
IMPORTANTE
• “La carrozzina”, gruppo 0, deve essere installata
perpendicolare al senso di marcia.
• Non installare la carrozzina su sedili rivolti in direzione
opposta al senso di marcia o trasversalmente al senso
comune di marcia del veicolo.
• Questo articolo è numerato progressivamente.
AVVERTENZA
IMPORTANTE: leggere attentamente queste istruzioni
e conservarle nell'apposita sede per tutta la vita del
prodotto. La sicurezza del bambino potrebbe essere
messa a rischio se non si eseguono queste istruzioni.
• Potrebbe essere pericoloso lasciare il vostro bambino
incustodito.
• Le operazioni di assemblaggio e preparazione dell'articolo
devono essere effettuate da adulti.
• Non utilizzate il prodotto se presenta parti mancanti o rotture.
• Prima dell’ uso assicurarsi che tutti i meccanismi di
aggancio siano fissati correttamente.
• Evitare di introdurre le dita nei meccanismi.
• Non utilizzare vicino a fonti di calore, fiamme libere od
oggetti pericolosi a portata delle braccia del bambino.
• Potrebbe essere pericoloso utilizzare accessori non
approvati dal costruttore.
•
Assicurarsi che le cinghie per fissare la carrozzina al veicolo
siano sempre tese e regolare quelle che bloccano il bambino.
• Non attorcigliare mai le cinghie.
• Si raccomanda di sostituire il dispositivo nel caso sia stato
sottoposto a sollecitazioni eccessive durante un incidente
o abbia evidenti segni di rottura o deformazione.
• Il dispositivo di sicurezza non deve essere modificato in
nessun caso dall’utilizzatore.
• Seguire scrupolosamente le istruzioni fornite dal
fabbricante del sistema di tenuta del bambino.
• Non lasciare il bambino nella carrozzina in auto, senza
sorveglianza.
• La carrozzina deve essere sempre fissata con le cinture
di sicurezza del veicolo, anche quando non è occupata
dal bambino. In caso di frenata improvvisa, potrebbe
provocare lesioni agli occupanti del veicolo.
• Durante i viaggi in auto non tenere mai in braccio il bambino
e non sistemarlo mai al di fuori della carrozzina. In caso di
frenata improvvisa, anche a bassa andatura, il bambino
verrebbe facilmente catapultato in avanti.
• Prestare particolare attenzione a bagagli o oggetti che
IT_Italiano

13
possono causare lesioni al bambino nella carrozzina, in
caso di incidente.
• Non lasciare la carrozzina nella vettura sotto l’esposizione
del sole, alcune parti potrebbero essersi surriscaldate e
nuocere alla pelle delicata del bambino, controllare prima
di collocare il bambino.
• Prestare attenzione che la carrozzina non rimanga bloccata
da una parte mobile del sedile o da una portiera.
• Non utilizzare la carrozzina senza il rivestimento di tessuto,
tale rivestimento non puó essere sostituito da uno non
approvato dal costruttore in quanto costituisce parte
integrante della carrozzina e della sicurezza. In caso di
sostituzione utilizzare un ricambio originale.
• La carrozzina é stata progettata con dispositivo di
assorbimento d’urto in polistirolo, integrato direttamente
nella scocca, sotto l’imbottitura: non rimuovere.
• Questo prodotto è adatto solo a bambini che non si
possono mettere da soli in posizione seduta.
• Questo prodotto e' inteso per bambini dalla nascita fino a 9
kg di peso. Usato in auto inteso fino ai 10 kg di peso.
• Utilizzare solo su superfici dure, orizzontali ed asciutte.
• Non lasciare altri bambini a giocare incustoditi vicino alla
carrozzina.
• Prestare attenzione alla presenza del bambino quando
si effettuano operazioni di regolazione dei meccanismi
(maniglione, schienale).
• Controllare regolarmente il maniglione (o le maniglie) ed
il fondo della carrozzina e verificare l'assenza di segni di
rottura o danneggiamento.
• Nell'utilizzare la carrozzina con uno stand, verificate la
massima lunghezza della carrozzina specificata sullo stand.
Istruzioni d’uso
utilizzo della carrozzina
1• CAPOTTINA E COPERTINA: per agganciare la capottina
inserire gli attacchi nei fori (fig_a) e abbottonarla sul retro.
Abbottonare la copertina da entrambi i lati (fig_b).
2• REGOLAZIONE SCHIENALE: tirare la manopola verso
l'esterno e ruotarla in senso orario per alzare lo schienale o
in senso antiorario, per abbassarlo.
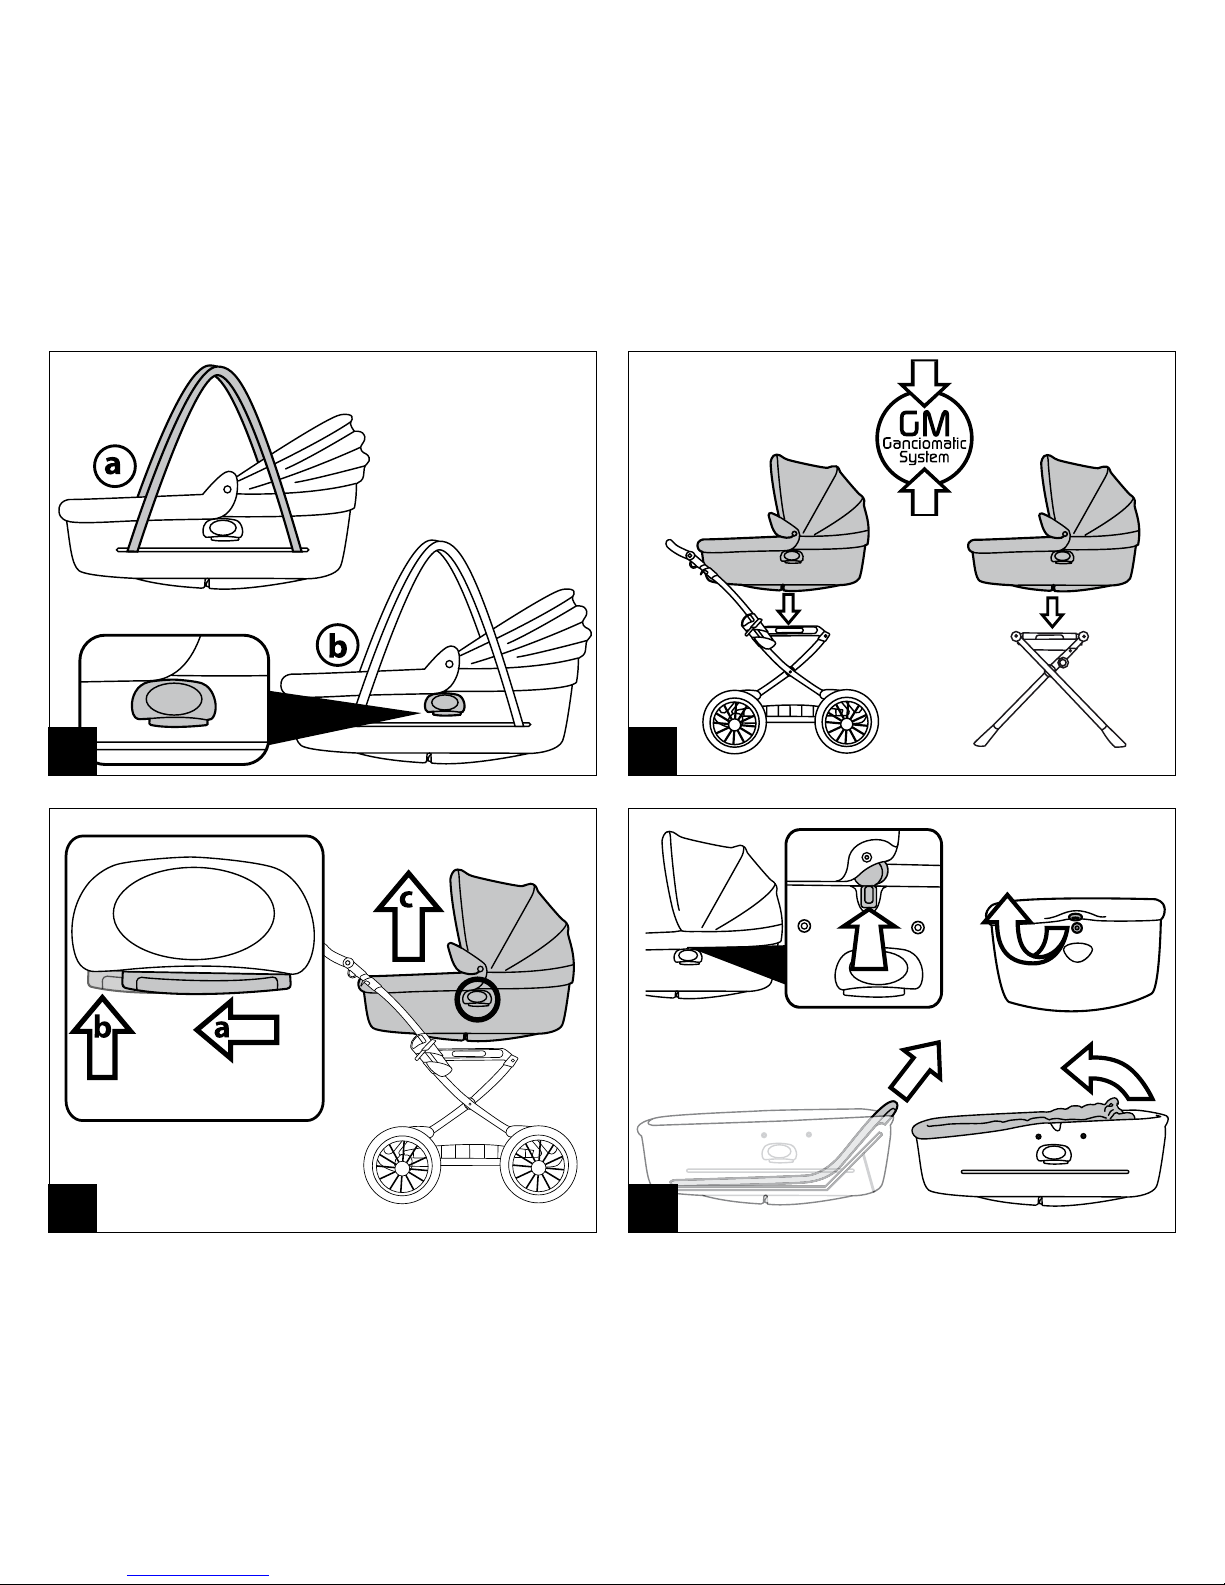
3• POSIZIONE DONDOLINO: la carrozzina é dotata di piedini
estraibili, posizionati sotto la base, con i quali é possibile
scegliere se dondolare (fig_a) o non dondolare (fig_b) il bebé.
Ruotare i piedini verso l’esterno per trasformare la carrozzina in
un comodo lettino (fig_c).
4• SISTEMA QUATTRO STAGIONI: la carrozzina é dotata di una
levetta, posizionata sotto la base, dalla quale è possibile
regolare la circolazione dell’aria interna.
Spostare la levetta sul blu per creare un ambiente fresco
e arieggiato (in estate), o sul rosso per limitare l’entrata
dell’aria (in inverno).
5• CINTURE DI TRASPORTO: per trasportare la carrozzina
abbassare la capottina, ed estrarre dalle tasche laterali le
cinture di trasporto (fig_a). É possibile trasportarla anche
impugnando le maniglie Ganciomatic (fig_b).
Ganciomatic system
6•
Ganciomatic System é il sistema pratico e veloce che ti
permette di agganciare la carrozzina alla base Ganciomatic del:
Carrello Classico 58.5, Carrello Classico Velo, Bassinet Stand,
con un solo gesto (acquistabili separatamente).
Per agganciare la carrozzina, posizionarla sul carrello e
premere con entrambi le mani fino al click.
Azionare sempre il freno del carrello prima di agganciare e
sganciare la carrozzina.
Verificare che la carrozzina sia correttamente agganciata.
7• Per sganciarla, spostare nel senso della freccia la leva della
maniglia Ganciomatic (freccia_a), contemporaneamente
premere la leva (freccia_b) e tirare verso l’alto fino a
sganciarla (freccia_c).
Sfoderabilità
8• SFODERARE la carrozzina: sbottonare la copertina e la
capottina; premere sugli attacchi e sfilare verso l'alto la
capottina (fig_a); alzare lo schienale e sfilare il materassino
(fig_b); sbottonare (fig_c) e togliere il rivestimento interno
(fig_d).
Manutenzione dell'imbottitura
• spazzolare le parti in tessuto per allontanare la polvere e lavare
a mano a una temperatura massima di 30° non torcere;

14
• non candeggiare al cloro;
• non stirare;
• non lavare a secco;
• non smacchiare con solventi e non asciugare a mezzo di
asciugabiancheria a tamburo rotativo.
Pulizia del prodotto
• Il vostro prodotto necessita un minimo di manutenzione.
Le operazioni di pulizia e manutenzione devono essere
effettuate solo da adulti.
• Si raccomanda di tenere pulite tutte le parti in movimento
e se occorre, lubrificarle con olio leggero.
• Periodicamente pulire le parti in plastica con un panno
umido, non usare solventi o altri prodotti simili.
• Spazzolare le parti in tessuto per allontanare la polvere.
• Non pulire il dispositivo di assorbimento d’urto in
polistirolo con solventi o altri prodotti simili.
• Proteggere il prodotto da agenti atmosferici, acqua,
pioggia o neve; l’esposizione continua e prolungata al sole
potrebbe causare cambiamenti di colore in molti materiali.
• Conservare il prodotto in un posto asciutto.
Kit Auto
come montare il cinturino di sicurezza
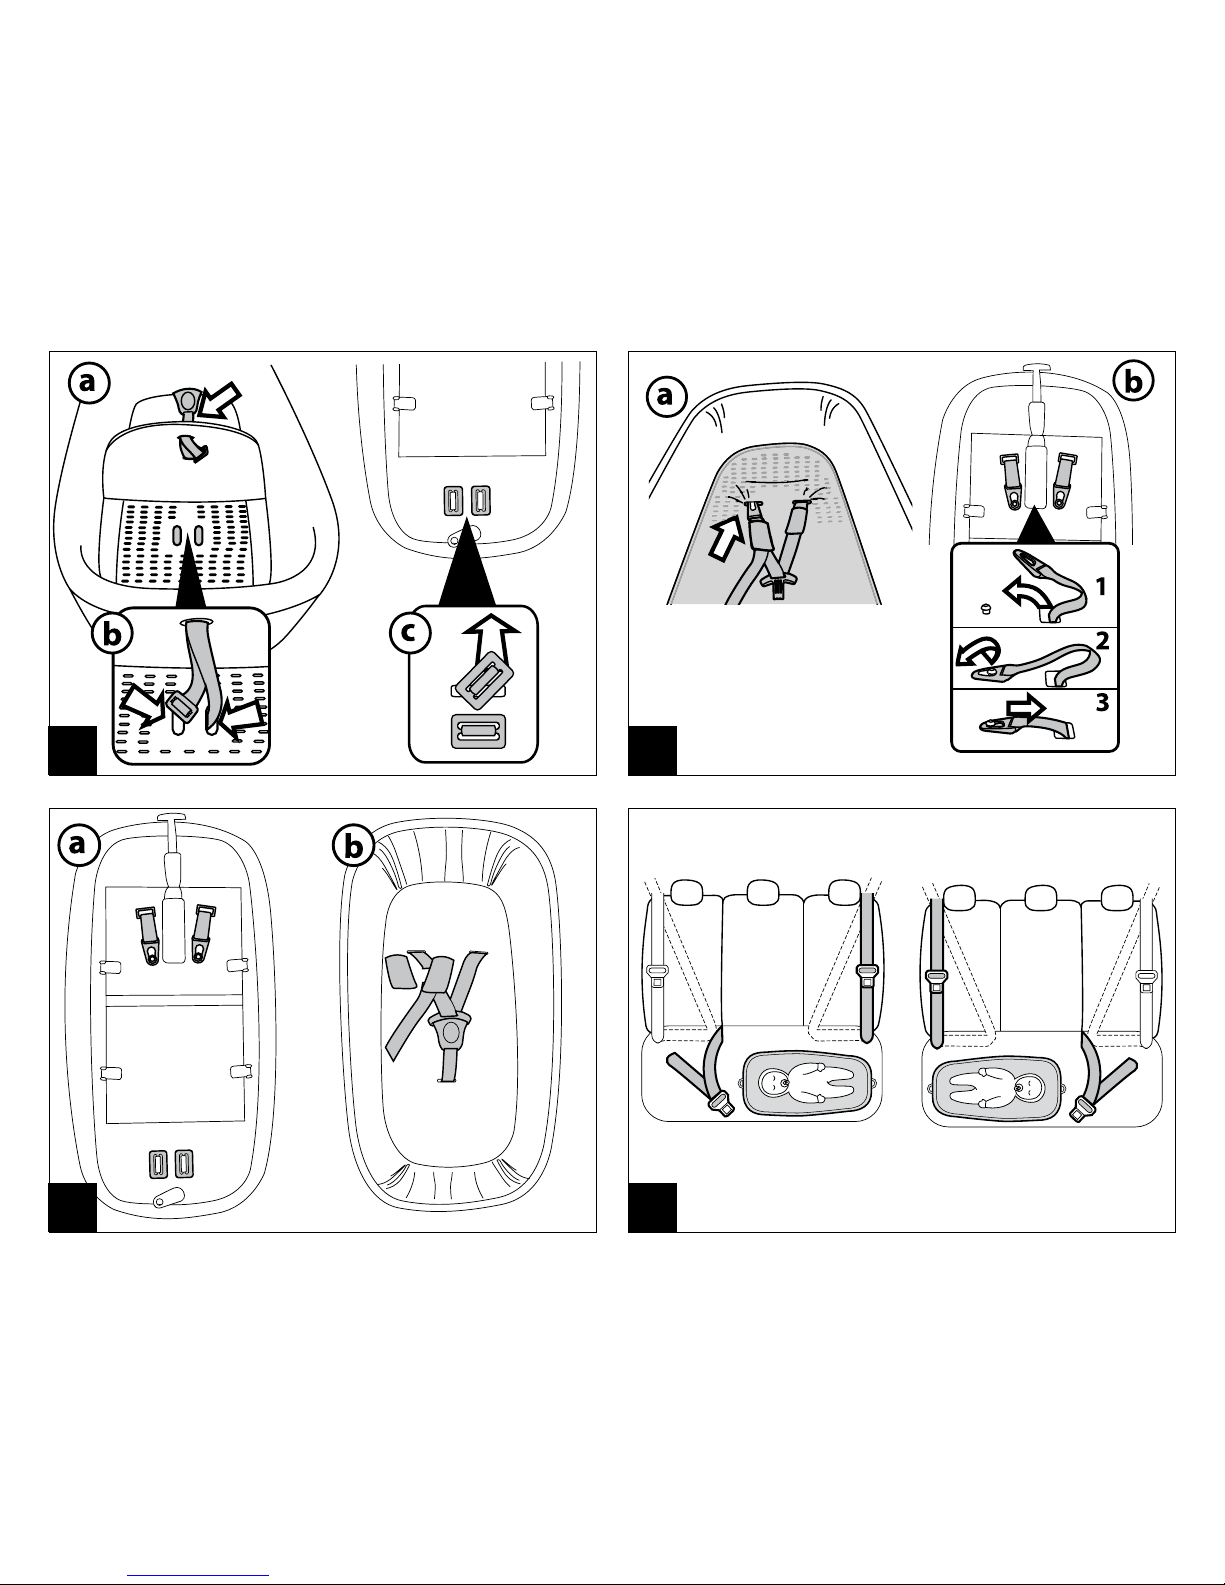
9•
Posizionare la carrozzina con schienale e capottina abbassate.
10• Durante il trasporto in auto, rimuovere eventuali
materassini aggiuntivi.
11• CINTURINO A 3 PUNTI: Infilare il cinturino spartigambe nella
fessura del materassino (fig_a) e nelle fessure della scocca
(fig_b) fino ad oltrepassarla (fig_c).
12• Infilare le due estremità delle bretelle nelle fessure del
materassino e della scocca (fig_a) e agganciarli ai perni (fig_b).
13• Cinturini aggangiati sotto la scocca (fig_a) e internamente a La
carrozzina (fig_b).
Aggancio in auto con cinture di sicurezza
AGGANCIO DELLA CARROZZINA IN AUTO: Il sedile posteriore
dell'auto (a 3 posti) ha 3 cinture di sicurezza e quella centrale
può essere dorsale o ventrale, in entrambi i casi è possibile
procedere all’aggancio della navicella in auto.
Consigliamo di posizionare la carrozzina sul sedile posteriore
lasciando il lato della testa in corrispondenza del sedile centrale.
14• La carrozzina posizionata in auto con cintura ventrale.
15• La carrozzina posizionata in auto con cintura a 3 punti.
16• La carrozzina, è posizionabile anche centralmente al sedile
posteriore a 3 posti, utilizzando le due cinture di sicurezza
più esterne (fig_a). La carrozzina non è posizionabile come
in fig_b perchè può essere fissata in auto solo con cinture
orientate in senso opposto.
17• Posizionamento della carrozzina su sedile posteriore a 2
posti. La carrozzina può essere rivolta con la parte dei piedi
del bambino sia da un lato che dall'altro.
Se il sedile dell’auto non è in piano ma inclinato si può
renderlo orizzontale con degli asciugamani.
18• Prendere la cintura del sedile posteriore dalla parte della
carrozzina in corrispondenza dei piedi del bambino,
ripiegarla (fig_a) e infilarla nella fessura di una delle due fibbie
metallicche in dotazione (fig_b). Infilare la barretta rossa della
fibbia metallica all'interno della cintura ripiegata (fig_c).
19• Premere sulla levetta grigia di sinistra (fig_a) e agganciare la
fibbia metallica all'anello della carrozzina (fig_b).
• Ripetere l'operazione con la cintura posta dalla parte della
carrozzina corrispondente alla testa del bambino.
20•
Una volta agganciata la fibbia metallica all'anello della
carrozzina, occorre tendere la cintura di sicurezza per
stabilizzare correttamente la carrozzina in auto. Tirare la cintura
ripiegata verso di sè (freccia_a) e, tenendola fissata, tendere la
cintura dal retro della fibbia metallica (freccia_b) per fissarlo.
21•
Cinghietto agganciato alla cintura di sicurezza della
carrozzina nella parte dei piedi (fig_a). Cinghietto
agganciato alla cintura di sicurezza della carrozzina nella
parte della testa (fig_b).
22• La carrozzina in auto.
23• SGANCIO DELLA CARROZZINA DALL' AUTO: premere la
levetta grigia della fibbia metallica (fig_a) ed estrarlo dagli
anelli posti ai due lati della carrozzina (fig_b). Se una delle
due fibbie metallicche dovesse risultare troppo tesa e
difficile da smollare, occorre premere sulla carrozzina e
contemporaneamente sganciare la fibbia metallica.
Come accomodare il bambino sulla
carrozzina
24• CINTURA DI SICUREZZA 3 PUNTI: allentare le bretelle,

15
premendo sulla fibbia (fig_a) e allungarle (fig_b).
25• premere il pulsante rosso (fig_a) e sganciare le bretelle
dallo spartigambe (fig_b).
26• Posizionare il bambino all'interno della carrozzina e inserire
la fibbia delle bretelle nel cinturino spartigambe fino ad
agganciarlo.
27• Il bambino all'interno della carrozzina deve essere ben
legato. Se i cinturini sono allentati, ridurre la lunghezza
delle bretelle tirando l'estremità del cinturino.
Le cinture devono essere tensionate il più possibile per
la sicurezza del bambino in caso di incidente. Lasciare un
minimo di gioco (lo spessore di un dito tra la cintura e il
torace del bambino).
28• RIMUOVERE I CINTURINI: per rimuovere i cinturini dalla
scocca della carrozzina, infilare le fibbie dello spartigambe
nelle fessure poste sotto la scocca e sfilare (fig_a). Per sfilare
gli attacchi delle bretelle da sotto la scocca, sganciarli dai
perni e infilarli nelle proprie fessure (fig_b).
29• Riporre il cinturino sganciato nell'apposita tasca.
Accessori
30• PARAPIOGGIA COVER ALL: Parapioggia copri-tutto trasparente.
BORSA: Borsa con materassino per il cambio del bebè,
agganciabile al carrello.
31• BASSINET STAND: base d'appoggio pratica e compatta.
32• COMPLETO ANTISOFFOCO: materassino più cuscino.
Compatibile con il nostro kit auto a 3 punti.
Numeri di serie
33• La carrozzina riporta sotto la base, informazioni relative alla
data di produzione della stessa.
• Nome del prodotto, data di produzione e numerazione seriale
dello stesso (fig_a).
Kit Auto:
• Etichetta di omologazione (fig_b);
• Data di produzione del cinturino (fig_c);
Questi elementi sono utili al consumatore nel caso in cui il
prodotto dovesse presentare delle problematiche.
Come leggere l’etichetta di omologazione
• In questo paragrafo vi spieghiamo come leggere l’etichetta
di omologazione (etichetta arancione).
• In alto all’etichetta c’è il marchio dell’azienda produttrice e
il nome del prodotto.
• 0-10 kg Y indica che il prodotto è omologato per bambini
dalla nascita fino a 10 kg di peso e che il dispositivo è
dotato di cintura a 3 punti.
• La lettera E in un cerchio: indica il marchio di
omologazione Europea e il numero definisce il paese che
ha rilasciato l’omologazione (1: Germania, 2: Francia, 3:
Italia, 4: Paesi Bassi, 11: Gran Bretagna e 24: Irlanda).
• Numero di omologazione: se inizia con 04 vuol dire che è
il quarto emendamento (quello attualmente in vigore) del
regolamento R44.
• Normativa di riferimento: UN/ECE R44/04.
• Numero progressivo di produzione: personalizza ogni
navicella, dal rilascio dell’omologazione ognuno è
contraddistinto dal proprio numero.
Servizio assistenza
Se fortuitamente parti del modello venissero perse o
danneggiate, usare solo pezzi di ricambio originali PegPérego. Per eventuali riparazioni, sostituzioni, informazioni
sui prodotti, la vendita di ricambi originali e accessori,
contattare il Servizio Assistenza Peg-Pérego:
• tel.: 0039-039-60.88.213
• numero verde: 800.147.414
• fax: 0039-039-33.09.992
• e-mail: assistenza@pegperego.it
• sito internet: www.pegperego.com
Peg-Pérego potrà apportare in qualunque momento
modifiche ai modelli descritti in questa pubblicazione, per
ragioni di natura tecnica o commerciale.
Cosa pensi di noi?
La Peg-Pérego è a disposizione dei suoi Consumatori
per soddisfare al meglio ogni loro esigenza. Per questo,
conoscere il parere dei ns. Clienti, è per noi estremamente
importante e prezioso. Le saremo quindi molto grati se,
dopo aver utilizzato un ns. prodotto, vorrà compilare
il QUESTIONARIO SODDISFAZIONE CONSUMATORE,
segnalando eventuali osservazioni o suggerimenti, che
troverà nel nostro sito internet: www.pegperego.com

16
Thank you for choosing a Peg-Pérego
product.
• Peg-Pérego S.p.A. is ISO 9001 certified.
• This certification offers customers and
consumers a guarantee of transparency
and confidence in the company’s mode of
operation.
The pram Primonido New is available in
the model Young or Culla.
Product characteristics
Pram-auto, Group 0, “Universal” category
• The pram is approved under regulation UN ECE R44/04 for
children weighing from 0-10 kg. It is suitable for installation
on the majority of vehicle seats, but not all.
• The pram can be properly installed if the vehicle's use
and maintenance manual states that it is compatible with
“Universal” Group 0 restraint systems.
• The pram is classified as “Universal” in compliance with
stricter approval criteria than previous models that do not
have this label.
• The device can only be used on vehicles with 2 or 3 rear
seats fitted with 2- or 3-point safety belts, approved in
compliance with UN ECE R16 or equivalent regulations.
•
For any questions or further information on installing the pram
in specific vehicles, contact the manufacturer or the retailer.
IMPORTANT
• "The pram” (Group 0) must be fitted perpendicular to the
vehicle’s normal direction of travel.
• Do not fit the pram on vehicle seats that face away or
sideways with respect to the normal direction of travel of
the vehicle.
• The item is given a serial number.
EN_English
WARNING
IMPORTANT: Read these instructions carefully and
store them in the holder provided throughout the
lifecycle of the product. The child’s safety could be put
at risk if these instructions are not followed.
• It could be dangerous to leave your child unattended.
• Assembly and preparation of the item must be carried out
by adults.
• Do not use the product if there are missing or broken parts.
• Before use make sure that all of the attachment
mechanisms are connected properly.
• Do not insert fingers into the mechanisms.
• Do not use near heat sources, open flames or dangerous
objects that are within reach of the child.
• It could be dangerous to use accessories which are not
approved by the manufacturer.
• Make sure the belts fastening the pram to the vehicle are
always taut and adjust the straps securing the child.
• Never twist the belts.
• Replace the item if it undergoes significant strain in an
accident or shows clear signs of breakage or deformation.
• The safety device should not be modified by users in any
circumstances.
• Carefully follow the instructions supplied by the
manufacturer of the child restraint system.
• Never leave the child unattended in the pram in a vehicle.
• The pram must always be secured with the vehicle’s safety
belts, even when the child is not present. In the event
of sudden braking, it could injure the occupants of the
vehicle.
• When travelling in vehicles, never hold the child in your
arms and never put him/her anywhere but in the pram. In
the event of sudden braking, even at low speeds, the child
would be flung forward.
• Take particular care to make sure that luggage or other
objects are not located where they may injure the child in
the pram in the event of an accident.
• Do not leave the pram in vehicles exposed to the sun.
Some parts might heat up and be harmful to the delicate
skin of the child – check before placing the child in the
seat.

17
• Make sure that the pram is not obstructed by any moving
parts of the vehicle’s seat or by one of the doors.
• Do not use the pram without its fabric covering, which
cannot be replaced with one not approved by the
manufacturer since it is an integral part of the pram and
the safety system. If replacing it, use an official spare part.
• The design of the pram features a polystyrene shock
absorption device built directly into the shell, below the
padding: do not remove it.
• This product is only suitable for children who are unable to
sit up by themselves.
• This product is designed for children from birth up to a
weight of 9 kg. When used in vehicles it is designed for
weights of up to 10 kg.
• Only use the product on surfaces that are hard, horizontal
and dry.
• Do not leave other children playing unattended near the
carriage.
• Take care when adjusting the mechanisms (handle,
backrest) with the child present.
• Regularly check the handle (or the handles) and the
bottom of the pram to make sure that there are no signs of
breakage or damage.
• When using the pram with a stand, check the maximum
length of the carriage specified on the stand.
Instructions for use
Using the pram
1• HOOD AND COVER: to attach the hood, insert the clips into
the holes (fig_a) and button it onto the back. Fasten the
press studs on both sides of the cover (fig_b).
2• BACKREST ADJUSTMENT: pull the handle outwards and
rotate it clockwise to raise the backrest or anticlockwise to
lower it.
3• ROCKING POSITION: the pram has extractable feet under
the base which can be adjusted to allow the child to rock
(fig_a) or a remain still (fig_b). Rotate the feet outwards to
transform the pram into a comfortable cot (fig_c).
4• FOUR SEASONS SYSTEM: the pram is equipped with a lever
under the base which allows the internal air circulation
to be adjusted. Move the lever to blue for a cool, well-
ventilated environment (summer), or to red to limit the
intake of air (winter).
5• CARRIER STRAPS: to move the pram, lower the hood and
extract the carrier straps from the side pockets (fig_a). It
can also be carried by the Ganciomatic handles (fig_b).
Ganciomatic system
6• Ganciomatic System is the quick, practical system that
makes it possible to attach the pram to the Ganciomatic
Base of the Classico 58.5 chassis, the Classico Velo chassis,
the Bassinet Stand in a single step (available for purchase
separately).
To attach the pram, put it on the chassis and press with
both hands until it clicks into place.
Always apply the brakes on the chassis before attaching
and removing the pram.
Check that the pram is properly attached.
7• To release the pram, move the clip on the Ganciomatic
handle in the direction of arrow_a while pressing it in
(arrow_b) and lift the pram until it comes free (arrow_c).
Removing the lining
8• REMOVING THE LINING OF THE PRAM: Unbutton the
cover and the hood. Press the fasteners and pull the hood
upwards to release it (fig_a). Raise the backrest and remove
the mattress pad (fig_b). Unbutton (fig_c) and remove the
inner lining (fig_d).
Padding cleaning instructions
• Brush the fabric parts to remove dust and hand wash at a
maximum temperature of 30° without wringing.
• Do not use chlorine bleach.
• Do not iron.
• Do not dry clean.
• Do not remove stains with solvents and do not tumble dry.

18
Product cleaning
• This product requires a small amount of maintenance.
Cleaning and maintenance must only be carried out by adults.
• Keep all moving parts clean and if necessary lubricate
them with light oil.
• Clean the plastic parts periodically with a damp cloth. Do
not use solvents or similar substances.
• Brush the fabric parts to remove dust.
• Do not clean the polystyrene shock absorbing device with
solvents or other similar products.
• Protect the product from atmospheric agents: humidity,
rain or snow. Extended exposure to sunshine can cause
colour changes in many materials.
• Store the product in a dry environment.
Car Kit
How to fit the safety harness
9• Fit the pram with the backrest and hood lowered.
10• When travelling in vehicles, remove any additional mattress
pads.
11• 3-POINT SAFETY HARNESS: Pass the leg divider straps
through the slot in the mattress pad (fig_a) and the slots
in the shell (fig_b) so that they come out on the other side
(fig_c).
12• Pass the two ends of the shoulder straps through the slots
in the mattress pad and the shell (fig_a), then clip them to
the pins (fig_b).
13• Straps attached under the shell (fig_a) and inside the pram
(fig_b).
Attachment in vehicles with safety belts
ATTACHING THE PRAM UNIT IN VEHICLES: It is possible to
install the pram in cars if there are 3 rear seats with 3 safety
belts. The central one can be 3-point or a lap belt.
We recommend positioning the pram on the vehicle’s rear
seats with the end for the child’s head above the central seat.
14• The pram fitted in a vehicle with a lap belt.
15• The pram fitted in a vehicle with a 3-point belt.
16• The pram can also be positioned in the centre of a
3-person rear seat, using the two outer safety belts (fig_a).
It cannot be positioned as in fig_b because it can only
be secured in vehicles using safety belts that come from
opposite sides.
17• Position of the pram on a 2-person rear seat. The pram can
be positioned with the child’s feet on either side of the
vehicle. If the seat of the vehicle inclines, towels can be
used to provide a horizontal surface.
18• Take the safety belt of the vehicle's rear seat located at the
end with the child's feet, fold it (fig_a) and insert it in the slot
of one of the two straps provided (fig_b). Insert the red bar
on the strap into the loop of the folded safety belt (fig_c).
19• Press the grey lever on the left (fig_a) and attach the strap
to the ring on the pram (fig_b).
• Repeat the procedure with the belt located at the end of
the pram for the child’s head.
20 Once the strap is fastened to the ring of the pram, tighten
the safety belt to ensure the pram is properly secured in
the vehicle. Pull the safety belt towards you (arrow_a), hold
it still and tighten it from the back of the strap (arrow_b) to
secure it.
21• Strap fastened to the safety belt and the pram at the feet
end (fig_a). Strap fastened to the safety belt and the pram
at the head end (fig_b).
22• The pram installed in vehicles.
23• RELEASING THE PRAM FROM VEHICLES: Press the grey lever
on the strap (fig_a) and remove it from the rings on the
two sides of the pram (fig_b). If one of the two straps is
too tight and difficult to loosen, press on the pram as you
release the strap.
How to put the child in the pram
24• 3-POINT SAFETY HARNESS: Slacken the straps by pressing
on the buckle (fig_a) and lengthen them (fig_b).
25• Press the red button (fig_a) and release the straps from the
leg divider (fig_b).
26• Place the child in the pram then buckle together the straps
and the leg divider.
27• The child must be securely fastened in the pram. If the
straps are loose, tighten them by pulling on the end.
The straps must be as tight as possible to protect the child
in the event of an accident. Leave a minimal amount of

19
play (the width of a finger between the harness and the
child’s chest).
28• REMOVE THE STRAPS: To remove the straps from the shell
of the pram, pass the buckles of the leg divider through
the slots under the shell and pull them through (fig_a). To
remove the strap fasteners from under the shell, release
them from the clips and pass them through the slots
(fig_b).
29• Put the harness back in its pocket once it has been removed.
Accessories
30• COVER ALL RAIN CANOPY: made of clear.
BORSA: satchel with pad for changing baby’s diaper.
Fastens to the chassis.
31• BASSINET STAND: Practical, compact support base.
32• ANTI-SUFFOCATION SET: mattress plus cushion. Compatible
with our 3-point car kit.
Serial numbers
33• Information about the production date of pram can be
found under the base.
• Product name, production date and serial number (fig_a).
Car Kit:
• Approval label (fig_b).
• Harness production date (fig_c).
In the event of problems with the product, these details
will be of use to customers.
How to read the approval label
• This paragraph explains how to interpret the approval label
(the orange one).
• The top of the label displays the trademark of the
manufacturing company and the name of the product.
• 0-10 kg Y means that the product is approved for children
from birth up to 10 kg in weight and that it is fitted with a
3-point safety harness.
• The letter E in a circle indicates the European approval
mark and the number indicates the country that issued the
approval (1: Germany, 2: France, 3: Italy, 4: Netherlands, 11:
Great Britain and 24: Republic of Ireland).
• Approval number: if it starts with 04, this indicates
the fourth amendment (the one currently in force) of
Regulation R44.
• Reference standard: UN ECE R44/04.
• Production serial number: on issue of approval, each pram
is given its own unique number.
•
Assistance service
• If parts of the product are lost or damaged, replace only
with original Peg-Pérego spare parts. For any repairs,
replacements, product information and the sale of original
spare parts and accessories contact the Peg-Pérego
Assistance Service:
• tel.: 0039 039 60 88 213
• fax: 0039 039 33 09 992
• e-mail: assistenza@pegperego.it
• web site: www.pegperego.com
Peg-Pérego may modify the products described in this
publication at any time for technical or commercial reasons.
•
What do you think of us?
Peg-Pérego makes itself available to all its customers in
order to best satisfy their various needs. Knowing the
opinion of our customers is extremely important and
valuable to us. We would therefore be very grateful if,
after using our product, you would fill in the CONSUMER
SATISFACTION QUESTIONNAIRE, adding any observations
or suggestions, on our web site: www.pegperego.com

20
Merci d’avoir choisi un produit Peg-Pérego.
• Peg-Pérego S.p.A. est certifiée ISO 9001.
• La certification offre à la clientèle une
garantie de transparence et constitue un gage
de confiance dans la façon de travailler de
l’entreprise.
Le landau Primonido New est disponible
comme modèle Young ou Culla.
Caractéristiques du produit
landau-auto, Groupe 0, catégorie
d’homologation « Universelle »
• Le landau est homologué conforme au Règlement UN/ECE
R44/04 pour le transport d’enfants d'un poids de 0 à 10 kg.
Il s’adapte à la plupart des sièges d’automobiles mais pas à
tous.
• Pour installer correctement le landau vérifier dans le
manuel d'utilisation et d'entretien de votre véhicule si ce
dernier peut recevoir des systèmes de fixation « Universels
» du Groupe 0.
• Le landau a été classé dans la catégorie d'homologation
« Universelle » selon des critères d’homologation
plus sévères que ceux des modèles antérieurs qui ne
bénéficient pas de cette catégorie.
•
Le landau peut être utilisé uniquement sur des véhicules
munis de siège postérieur à 2 ou 3 places dotés de
ceintures di sécurité 2 ou 3 points, homologuées conformes
au règlement UN/ECE R16 ou normes équivalentes.
• En cas de doute ou pour plus de renseignements sur
l’installation du landau sur un véhicule particulier, contacter
le fabricant ou le revendeur.
IMPORTANT
• «Le landau», groupe 0, doit être installé
FR_Français
perpendiculairement au sens de marche.
• Ne pas installer le landau sur un siège orienté dans
la direction opposée au sens de la marche ou
transversalement au sens de marche normal du véhicule.
• Cet article porte un numéro séquentiel de fabrication.
AVERTISSEMENT
IMPORTANT : lire attentivement ces instructions et les
conserver dans la poche prévue à cet effet pendant
toute la durée de vie utile du produit. Le non-respect
de ces instructions pourrait compromettre la sécurité
de l’enfant.
• Ne pas laisser l’enfant seul et sans surveillance.
• Les opérations d’assemblage et de préparation de l’article
doivent être effectuées par des adultes.
• Ne pas utiliser le landau s’il manque des pièces ou s'il est
endommagé.
• Avant d’utiliser le landau, vérifier si tous les mécanismes de
fixation sont correctement enclenchés.
• Ne pas mettre les doigts dans les mécanismes.
• Ne pas utiliser le landau près de sources de chaleur, de
flammes nues ou près d’objets dangereux et à la portée
des bras de l’enfant.
• L’emploi d’accessoires non approuvés par le fabricant peut
s’avérer dangereux.
• Vérifier si les sangles de fixation au véhicule du landau sont
bien tendues et régler celles qui retiennent l’enfant.
• Ne jamais entortiller les sangles.
• Il est recommandé de remplacer le landau s’il a été
soumis à des sollicitations excessives suite à un accident
ou s’il présente des signes de cassure ou de déformation
évidents.
• En aucun cas l’utilisateur ne doit modifier le dispositif de
sécurité.
• Suivre scrupuleusement les instructions fournies par le
fabricant du landau.
• Ne jamais laisser l’enfant seul et sans surveillance dans le
landau en voiture.
• Le landau doit toujours être fixé avec les ceintures de
sécurité du véhicule, même lorsqu’il est vide car il pourrait
blesser les occupants du véhicule en cas de coup de frein

21
brusque.
• Pendant les voyages en voiture, ne tenez jamais l’enfant
dans vos bras et installez-le toujours dans le landau car
même à petite vitesse, en cas de coup de frein brusque
l’enfant serait catapulté en avant.
• Prêter une attention particulière aux bagages ou autres
objets se trouvant dans l’habitacle car ils pourraient blesser
l’enfant en cas d’accident.
• Ne pas laisser le landau dans le véhicule exposé au soleil
; certaines parties pourraient chauffer et brûler la peau
délicate de l'enfant. Vérifier la température du landau avant
d'y installer l'enfant.
• Veiller à ce que le landau ne reste pas coincé dans une
partie mobile du siège de la voiture ou dans une portière.
• Ne pas utiliser le landau sans sa housse en tissu. Cette
housse ne peut être remplacée que par une autre housse
approuvée par le fabricant car elle fait partie intégrante
du landau et est une garantie de sa sûreté. En cas de
remplacement, utiliser uniquement une housse originale
du fabricant.
• Le landau a été conçu avec un dispositif en polystyrène
pour l’absorption des chocs, qui est incorporé directement
dans la coque, sous la housse : ne pas l‘ôter.
• Cet article ne convient qu’aux enfants qui ne savent pas
encore s’asseoir tout seul.
• Cet article a été conçu pour le transport des enfants à
partir de la naissance et jusqu’à un poids de 9 kg. Il a été
conçu pour utilisation en voiture jusqu’à un poids de 10 kg.
•
Utiliser uniquement sur des surfaces dures, planes et sèches.
• Ne pas laisser d’autres enfants jouer sans surveillance près
du landau.
• Tenir compte de la position de l’enfant pendant les
opérations de réglage des mécanismes (poignée, dossier).
• Contrôler régulièrement la poignée centrale (ou les
poignées de transport) et le fond du landau. Vérifier s’il
présente des signes de cassure ou d’endommagement.
• Si le landau est utilisé avec un stand, vérifier la longueur
maximale du landau indiquée sur le stand.
• “Conforme aux exigences de securite”.
• Norme NF S 54-001.
Mode d’emploi
Utilisation du landau
1• CAPOTE ET TABLIER : pour accrocher la capote, insérer les
fixations dans leurs logements (fig_a) et la boutonner à
l’arrière. Boutonner la capote des deux côtés (fig_b).
2• RÉGLAGE DU DOSSIER : tirer la manette vers l’extérieur et la
faire tourner dans le sens des aiguilles d’une montre pour
relever le dossier, dans le sens contraire des aiguilles d’une
montre pour l’abaisser.
3• POSITION BASCULE : Le landau est équipé de pieds
rabattables situés sous la base, qui permettent de mettre le
landau en position balancelle (fig a) et fixe (fig b)
Faire pivoter les pieds vers l’extérieur pour transformer le
landau en un pratique petit lit (fig_c).
4• SYSTÈME QUATRE SAISONS : Le landau est équipé d’un
petit levier situé sous la base, qui permet de réguler la
circulation de l’air à l’intérieur du landau.
Déplacer le petit levier sur le bleu pour créer une
atmosphère fraîche et aérée (en été), ou sur le rouge pour
limiter l’entrée d’air (en hiver).
5• CEINTURES DE TRANSPORT : pour transporter le landau,
abaisser la capote et extraire les ceintures de transport des
poches latérales (fig_a). Il peut aussi être transporté par les
poignées Ganciomatic (fig_b).
Ganciomatic system
6• Ganciomatic System est un système pratique et rapide qui
vous permet de fixer le landau à la base Ganciomatic du :
Châssis Classico 58.5, Châssis Classico Velo, Bassinet Stand,
d’un seul geste. (à acheter séparément).
Pour fixer le landau, le placer sur le châssis et appuyer avec
les deux mains jusqu’au déclic.
Toujours actionner le frein du châssis avant de fixer ou de
libérer le landau.
Vérifier si la nacelle est bien fixée.
7• Pour la libérer, pousser le levier de la poignée Ganciomatic
dans le sens de la flèche (flèche_a) tout en appuyant sur
le levier (flèche_b) et tirer vers le haut jusqu’à ce que la
nacelle se décroche (flèche_c).

22
Déhoussage
8• DÉHOUSSER LE SIÈGE du landau: déboutonner la
couverture et la capote; appuyer sur les fixations et tirer la
capote vers le haut (fig_a) ; relever le dossier et retirer le
matelas (fig_b) ; déboutonner le revêtement interne (fig_c)
et le retirer (fig_d).
Entretien des parties en tissu
• brosser les éléments en tissu pour retirer la poussière et
laver à la main à une température maximale de 30° ; ne pas
tordre;
• ne pas utiliser de chlore;
• ne pas repasser;
• ne pas laver à sec;
• ne pas détacher à l’aide de solvants et ne pas sécher dans
un sèche-linge à tambour rotatif.
Nettoyage du produit
• Ce produit requiert un entretien minimum. Les opérations
de nettoyage et d’entretien doivent être effectuées
uniquement par des adultes.
• Il est recommandé de nettoyer régulièrement les parties
mobiles et, si nécessaire, de les lubrifier avec de l’huile
légère.
• Nettoyer périodiquement les parties en plastique avec un
linge humide ; ne pas utiliser de solvants ou tout produit
similaire.
• Épousseter les éléments en tissu pour chasser la poussière.
• Ne pas nettoyer le dispositif d’absorption des chocs en
polystyrène avec des solvants ou autres produits similaires.
• Protéger le produit des agents atmosphériques (eau, pluie
ou neige) ; une exposition continue et prolongée au soleil
peut provoquer la décoloration de nombreux matériaux.
• Conserver le produit dans un endroit sec.
Kit Auto
Comment monter la ceinture de sécurité
9• Installer le landau avec le dossier et la capote baissée.
10• Pendant le transport en voiture, retirer les matelas
éventuellement ajoutés.
11• CEINTURE À 3 POINTS: Insérer la sangle d’entrejambes dans
le passant du matelas (fig_a) et dans ceux de la coque
(fig_b) jusqu’à ce qu’elle soit complètement passée (fig_c).
12• Insérer les deux extrémités des bretelles dans les passants
du matelas et de la coque (fig_a) et les accrocher aux
fixations (fig_b).
13• Les ceintures sont maintenant accrochées sous la coque
(fig_a) et à l’intérieur du landau (fig_b).
Installation avec les ceintures de sécurité
du véhicule
FIXATION DE LA NACELLE DANS LA VOITURE : le siège
arrière de la voiture (à 3 places) est doté de 3 ceintures
de sécurité et la ceinture du milieu peut être dorsale ou
ventrale. Dans les deux cas, il est possible de fixer la nacelle
dans la voiture.
Nous conseillons de placer la nacelle sur le siège arrière
avec le côté tête vers le siège central.
14• Le landau installé dans la voiture avec la ceinture ventrale.
15• Le landau installé dans la voiture avec la ceinture 3 points.
16• Le landau peut aussi être placé au milieu du siège arrière à
3 places en utilisant les deux ceintures de sécurité les plus
externes (fig_a). Le landau ne peut pas être installé comme
illustré sur la fig_b parce qu’il ne peut être fixé dans la
voiture que si les ceintures sont orientées dans le sens
opposé.
17• Installation du landau sur un siège arrière à 2 places. Le
landau peut être orienté avec le côté pieds placé d’un côté
ou de l'autre.
Si le siège de la voiture n’est pas horizontal mais incliné, on
peut y remédier en intercalant des serviettes.
18• Prendre la ceinture du siège arrière du côté de la nacelle
correspondant côté pieds l’enfant, la replier (fig_a) et la
faire passer dans la boucle de l’une des deux sangles
fournies (fig_b). Enfiler le clip rouge de la sangle dans la

23
ceinture repliée (fig_c).
19• Appuyer sur le clip gris de gauche (fig_a) et accrocher la
sangle à l'anneau prévu sur le landau (fig_b).
• Répéter la même opération avec la ceinture située sur le
côté de la nacelle côté tête de l’enfant.
20• Une fois que la sangle est fixée à l'anneau du landau,
tendre la ceinture de sécurité pour bien stabiliser la nacelle
dans le véhicule. Tirer la ceinture repliée vers soi (flèche_a)
et en la maintenant fixée, tendre la ceinture de derrière la
sangle (flèche_b) pour la fixer.
21• Sangle fixée à la ceinture de sécurité du véhicule et à la
nacelle côté pieds de l’enfant (fig_a). Sangle fixée à la
ceinture de sécurité du véhicule et à la nacelle côté tête de
l’enfant (fig_b).
22• Le landau une fois installé dans la voiture.
23• POUR LIBÉRER LA NACELLE : appuyer sur le clip gris de la
sangle (fig_a) et l’extraire des anneaux situés sur les deux
côtés de la nacelle (fig_b). Si l’une des deux sangles s’avère
trop tendue et difficile à desserrer, faire pression sur la
nacelle tout en détachant la sangle.
Comment installer l’enfant sur le landau
24• CEINTURE DE SÉCURITÉ 3 POINTS : desserrer les bretelles en
appuyant sur la boucle (fig_a) puis les allonger (fig_b).
25• Appuyer sur le bouton rouge (fig_a) et décrocher les
bretelles d’entrejambes (fig_b).
26• Installer l’enfant dans le landau et introduire la boucle des
bretelles dans la sangle d’entrejambes jusqu’à ce qu’elle
s’enclenche.
27• L’enfant doit être bien attaché dans le landau. Si les sangles
sont détendues, raccourcir les bretelles en tirant l'extrémité
de la sangle.
Les ceintures doivent être tendues le plus possible pour
assurer la sécurité de l’enfant en cas d’accident. Laisser un
minimum de jeu (l’épaisseur d’un doigt entre la ceinture et
le buste de l’enfant).
28• ÔTER LES SANGLES: pour ôter les sangles de la coque du
landau, enfiler les boucles d’entrejambes dans les fentes
situées sous la coque et tirer (fig_a). Pour décrocher
les fixations des bretelles du dessous de la coque, les
décrocher des axes et les faire passer dans leurs propres
fentes (fig_b).
29• Lorsque la ceinture est décrochée, la replacer dans la
poche prévue à cet effet.
Accessoires en option
30• 30• BÂCHE INTÉGRALE (COVER ALL): bâche intégrale
transparent.
BORSA: sac avec petit matelas pour changer le bébé ; peut
être accroché au chariot.
31• BASSINET STAND : support pratique et compact.
32• KIT ANTI-ETOUFFEMENT: comprenant un matelas plus
coussin.Compatible avec notre kit auto a trois points.
Numéros de série
33• Des informations telles que la date de production sont
reportées sous la base du landau.
• Nom du produit, date de production et numéro de série
(fig_a).
Kit Auto :
• Étiquette d’homologation (fig_b) ;
• Date de production de la ceinture (fig_c) ;
Ces informations sont utiles au client au cas où des
problèmes sur le produit apparaîtraient.
Comment lire l'étiquette d'homologation
• Ce paragraphe explique les inscriptions figurant sur
l'étiquette d'homologation (étiquette orange).
• En haut de l'étiquette figurent la marque du fabricant et le
nom de l’article.
• 0-10 kg Y indique que le produit est homologué conforme
pour le transport d’enfants de la naissance à 10 kg et que le
dispositif est doté de ceinture 3 points.
• La lettre E au milieu d’un cercle indique la marque
d’homologation européenne tandis que le numéro se
réfère au pays qui a délivré l’homologation (1 : Allemagne,
2 : France, 3 : Italie, 4 : Pays Bas, 11 : Grande Bretagne et 24 :
Irlande).
• Numéro d'homologation : s'il commence par 04, il se réfère
au quatrième amendement (celui qui est actuellement en
vigueur) du règlement R44.
24
• Norme de référence : UN/ECE R44/04.
• Numéro séquentiel de fabrication : ce numéro personnalise
chaque nacelle ; lorsque l'homologation est délivrée,
chaque produit est caractérisé par un numéro qui lui est
propre.
Service d’assistance
• En cas de perte de pièces ou de rupture de l’une d’elles,
utiliser exclusivement des pièces de rechange originales
Peg-Pérego. Pour d’éventuelles réparations, remplacements,
demandes d’informations relatives aux produits ou à la
vente de pièces de rechange originales et d’accessoires,
contacter le service d’assistance Peg-Pérego :
• tél. : 0039-039-60.88.213
• fax : 0039-039-33.09.992
• e-mail : assistenza@pegperego.it
• site Internet : www.pegperego.com
Peg-Pérego se réserve le droit d’apporter à tout moment
des modifications aux modèles décrits dans le présent
ouvrage, pour des raisons de nature technique ou
commerciale.
Que pensez-vous de nous ?
Peg-Pérego est à disposition de sa clientèle pour satisfaire
au mieux chacune de ses exigences. En cela, il est très
important et précieux pour nous de connaître l’opinion de
nos clients. Nous vous saurions donc gré, après avoir utilisé
un de nos produits, de remplir le QUESTIONNAIRE DE
SATISFACTION CONSOMMATEUR, en nous faisant part de
toute observation ou suggestion éventuelle. Vous trouverez
ce questionnaire sur notre site Internet, à l’adresse: www.
pegperego.com
Vielen Dank, dass Sie sich für ein
Produkt Peg-Pérego entschieden haben.
• Peg-Pérego S.p.A. besitzt das Zertifikat ISO 9001.
•
Die Zertifizierung bietet den Kunden und
Konsumenten die Garantie für Transparenz und
Vertrauen in die Arbeitsweise des Unternehmens.
Der Kindersitz Primonido ist in den
Modellen Young und Culla erhältlich.
Produkteigenschaften
Auto-Kindersitz, Gruppe 0, „Universal“
• Der Kindersitz ist gemäß europäischer Prüfnorm UN/ECE R44/04
für Kinder mit einem Gewicht von 0 bis 10 kg zugelassen.
Geeignet für die meisten Autositze, jedoch nicht für alle.
• Der Kindersitz kann in allen Fahrzeugen korrekt befestigt
werden, in deren Beschreibungs- bzw. Wartungshandbuch die
Kompatibilität mit Sicherungssystemen der Kategorie „Universal“
der Gruppe 0 angegeben wird.
• Der Kindersitz ist als „Universal“ eingestuft. Die Prüfkriterien
hierfür sind strenger als bei den Vorgängermodellen ohne diese
Zulassung.
• Das Produkt darf nur in Fahrzeugen mit einem Rücksitz für 2
oder 3 Personen verwendet werden, der mit Zwei- oder DreiPunkt-Sicherheitsgurten ausgestattet ist, die gemäß europäischer
Prüfnorm UN/ECE R16 oder gleichbedeutender Vorschriften
zugelassen sind.
• Bei Fragen oder für nähere Informationen zur Befestigung des
Kindersitzes in den einzelnen Fahrzeugtypen wenden Sie sich
bitte an den Hersteller oder Händler.
WICHTIG
• Der Kindersitz Gruppe 0 muss in Fahrtrichtung befestigt
werden.
• Der Kindersitz darf nicht auf Autositzen befestigt werden,
DE_Deutsch

25
die entgegengesetzt oder quer zur Fahrtrichtung
ausgerichtet sind.
• Dieser Artikel ist mit einer laufenden Seriennummer
gekennzeichnet.
WARNUNG
WICHTIG: Lesen Sie diese Anweisungen aufmerksam durch
und bewahren Sie sie für die gesamte Verwendungsdauer
des Produktes am dafür vorgesehenen Platz auf. Wenn Sie
diese Anweisungen nicht beachten, könnte die Sicherheit
Ihres Kindes gefährdet sein.
• Es kann gefährlich sein, Ihr Kind unbeaufsichtigt zu lassen.
• Montage und Voreinstellung des Produktes müssen von
Erwachsenen durchgeführt werden.
• Verwenden Sie das Produkt nicht, wenn es unvollständig ist
oder Schäden aufweist.
• Vergewissern Sie sich vor Gebrauch, dass alle
Haltevorrichtungen korrekt befestigt sind.
• Achten Sie darauf, die Finger nicht zwischen den Bauteilen
einzuklemmen.
• Nicht in der Nähe von Wärmequellen, offenem Feuer oder
gefährlichen Gegenständen verwenden, die in Reichweite
des Kindes sind.
• Es kann gefährlich sein, Zubehörteile zu verwenden, die
nicht vom Hersteller zugelassen sind.
•
Vergewissern Sie sich, dass die Gurte, mit denen der Kindersitz
am Fahrzeug befestigt wird, immer straff gespannt sind und
stellen Sie die Sicherheitsgurte für das Kind immer genau ein.
• Die Gurte dürfen keinesfalls verdreht sein.
• Nach übermäßiger Beanspruchung durch einen Unfall oder
wenn er sichtbar beschädigt oder verformt ist, muss der
Kindersitz ersetzt werden.
• Das Sicherheitssystem darf unter keinen Umständen vom
Benutzer verändert werden.
• Folgen Sie genauestens den vom Hersteller des
Sicherungssystems mitgelieferten Anweisungen.
• Lassen Sie das Kind im Auto nicht unbeaufsichtigt im
Kindersitz.
• Auch wenn kein Kind darin sitzt, muss der Kindersitz
mit den Sicherheitsgurten des Fahrzeugs befestigt sein.
Andernfalls könnten mitfahrende Personen bei plötzlichem,
scharfen Bremsen verletzt werden.
•
Das Kind während der Fahrt nie auf den Arm nehmen oder
außerhalb des Kindersitzes setzen. Andernfalls könnte das Kind
bei plötzlichem Bremsen nach vorn geschleudert werden. Dies
gilt auch für sehr geringe Fahrgeschwindigkeiten.
• Achten Sie besonders darauf, dass das Kind im Kindersitz
bei einem Unfall nicht von Gepäckstücken oder anderen
Gegenständen verletzt werden kann.
•
Lassen Sie den Kindersitz nicht unter direkter
Sonneneinstrahlung im Fahrzeug, da einige Teile überhitzen
und die empfindliche Kinderhaut verletzen könnten.
Überprüfen Sie dies, bevor Sie das Kind in den Sitz setzen.
•
Achten Sie darauf, dass der Kindersitz nicht durch bewegliche
Teile des Autositzes oder einer Autotür blockiert ist.
•
Den Kindersitz nicht ohne Bezug verwenden. Der Bezug
kann nur gegen ein vom Hersteller zugelassenes Produkt
ausgetauscht werden, da er fester Bestandteil des Produkts
und der entsprechenden Sicherheitsvorrichtungen ist. Beim
Austausch von Teilen nur Originalersatzteile verwenden.
• Der Kindersitz ist zur Dämpfung von Stößen mit einem
Aufprallschutz aus Polystyrol ausgestattet, der unter der
Polsterung direkt in die Kunststoffschale integriert ist. Er
darf nicht entfernt werden.
• Das Produkt ist nur für Kinder geeignet, die sich noch nicht
allein aufrichten können.
• Das Produkt ist für Kleinkinder von der Geburt bis zu einem
Gewicht von 9 kg vorgesehen. Im Auto kann es für Kinder
von bis zu 10 kg genutzt werden.
• Nur auf stabilen, horizontalen und trockenen Oberflächen
verwenden.
• Andere Kinder dürfen nicht unbeaufsichtigt in der Nähe
des Kindersitzes spielen.
• Verwenden Sie das Produkt nicht, wenn es unvollständig ist
oder Schäden aufweist.
• Verwenden Sie nur vom Hersteller zugelassene Sitzeinlagen.
Achtung, verwenden Sie die Sitzeinlagen nicht im Auto.
• Versichern Sie sich vor Gebrauch, dass alle
Haltevorrichtungen korrekt befestigt sind.
• Bei Nutzung mit einem Standgestell auf die zulässige
Höchstlänge des Kindersitzes achten.
• Achten Sie immer auf das Kind, wenn Sie Teile des

26
Kinderwagens (Griff, Rückenlehne) verstellen.
•
Überprüfen Sie regelmäßig den Griff (oder die Griffe) und die
Unterseite des Kinderwagens und vergewissern Sie sich, dass
keine Anzeichen für Risse oder sonstige Schäden vorliegen.
• Wenn Sie die den Kindersitz auf einem Ständer verwenden,
beachten Sie die zulässige Maximallänge, die auf dem
Ständer angegeben ist.
Gebrauchsanleitung
Nutzung des Kindersitzes
1• VERDECK UND DECKE: Um das Verdeck zu montieren,
die Anschlussvorrichtungen in die Öffnungen (Abb. a)
einfügen und auf der Rückseite anknöpfen. Die Decke auf
beiden Seiten anknöpfen (Abb. b).
2• EINSTELLUNG DER RÜCKENLEHNE: Den Griff nach außen hin
ziehen und im Uhrzeigersinn drehen, um die Rückenlehne
aufzustellen, und gegen den Uhrzeigersinn, um sie tief zu stellen.
3•
POSITION BABYWIPPE: Der Kindersitz ist mit ausziehbaren
Füßen versehen, die unterhalb des Gestells angebracht sind
und die Wahl zwischen den Positionen Schaukeln (Abb.
a) und Nichtschaukeln (Abb. b) des Babys ermöglichen.
Die Füße nach außen drehen, um den Kindersitz in ein
bequemes Bettchen zu verwandeln (Abb. c).
4• WINTER- UND SOMMEREINSTELLUNG: Der Kindersitz ist mit
einem Mechanismus zur Regulierung der Luftzirkulation
ausgestattet.
Den Hebel auf Blau stellen, um ein frisches und belüftetes
Ambiente zu schaffen (im Sommer) oder auf Rot, um die
Luftzufuhr zu vermindern (im Winter).
5• TRANSPORTRIEMEN: Um den Kindersitz zu transportieren,
das Verdeck tief stellen und die Transportriemen aus den
Seitentaschen herausziehen (Abb. a). Alternativ kann der Sitz
auch an den Ganciomatic-Griffen getragen werden (Abb. b).
Ganciomatic system
6• Das Ganciomatic System ermöglicht praktisch, schnell und
mit wenigen Handgriffen die Befestigung des Kindersitzes
auf der Ganciomatic-Basis der Modelle: Carrello Classico
58.5, Carrello Classico Velo und Bassinet Stand (separat zu
erwerben). Um den Kindersitz zu befestigen, diesen auf
dem Gestell positionieren und mit beiden Händen nach
unten drücken, bis er mit einem hörbaren „Klick“ einrastet.
Vor dem Befestigen oder Abnehmen des Kindersitzes
grundsätzlich die Bremsen der Räder feststellen.
Vergewissern Sie sich, dass der Kindersitz korrekt befestigt ist.
7• Zum Abnehmen den Hebel (Pfeil_a) am Ganciomatic-Griff
in Pfeilrichtung schieben, gleichzeitig den Hebel (Pfeil_b)
drücken und den Kindersitz nach oben ziehen, bis er aus
dem Gestell ausgehakt (Pfeil_c).
Abnehmen des Bezugs
8• ABZIEHEN DES BEZUGS: Knöpfen Sie die Fußdecke und das
Verdeck ab. Drücken Sie auf die Verschlüsse und ziehen
Sie das Verdeck nach oben ab (Abb_a). Stellen Sie die
Rückenlehne auf und entnehmen Sie die Einlage (Abb_b).
Lösen Sie die Knöpfe des Bezugs und nehmen Sie ihn
heraus (Abb_d).
Pflege der Polsterung
• die Stoffbereiche abbürsten, um den Staub zu entfernen.
Waschen nur von Hand bei einer maximalen Temperatur
von 30° C. Nicht auswringen oder schleudern;
• nicht mit Bleichmittel behandeln;
• nicht bügeln;
• keine Trockenwäsche anwenden
• nicht mit Fleckenlöser behandeln und nicht im
Drehtrommeltrockner trocknen.
Reinigung
• Ihr Produkt braucht nur geringe Wartung. Reinigung und
Wartung dürfen nur von Erwachsenen durchgeführt werden.
• Alle beweglichen Teile unbedingt sauber halten und bei
Bedarf mit einem leichten Öl schmieren.
•
Regelmäßig die Kunststoffteile mit einem feuchten Tuch reinigen,
keine Lösungsmittel oder ähnliche Produkte verwenden.
• Stoffteile mit einer Bürste von Staub befreien.
• Den Stoßdämpfer aus Styropor nie mit Lösungsmitteln
oder anderen ähnlichen Produkten reinigen.

27
• Das Produkt vor Wasser und Witterungseinflüssen wie
Regen oder Schnee schützen; wird das Produkt wiederholt
und über längere Zeit der Sonne ausgesetzt, können die
Farben vieler Materialien verblassen.
• Das Produkt trocken aufbewahren.
Auto-Ausstattung
Befestigen des Sicherheitsgurtes
9• Den Kindersitz mit abgesenkter Rückenlehne und
heruntergeklapptem Verdeck positionieren.
10• Entfernen Sie bei Autofahrten die zusätzlichen
Kinderwageneinlagen.
11• DREI-PUNKT-SICHERHEITSGURT: Ziehen Sie den
Schrittgurt durch die Öffnung in der Einlage (Abb_a) und
anschließend durch die Öffnungen der Kunststoffschale
(Abb_b) vollständig hindurch (Abb_c).
12• Ziehen Sie die Enden der Schultergurte durch die
Öffnungen der Einlage und der Kunststoffschale (Abb_a)
und haken Sie sie in die Verschlüsse ein (Abb_b).
13• Die befestigten Sicherheitsgurte an der Unterseite der
Kunststoffschale (Abb_a) und im Inneren des Kindersitzes
(Abb_b).
Befestigung im Auto mit Sicherheitsgurten
BEFESTIGUNG DES KINDERSITZES IM AUTO: Der Rücksitz
des Fahrzeugs (für 3 Personen) ist mit 3 Sicherheitsgurten
ausgestattet, von denen der mittlere entweder ein Beckenoder ein Schultergurt sein kann. In beiden Fällen kann die
Babyschale im Fahrzeug befestigt werden.
Es wird empfohlen, den Kindersitz so auf dem Rücksitz zu
positionieren, dass das Kopfende zum mittleren Sitz hin
ausgerichtet ist.
14• Der Kindersitz im Fahrzeug mit Beckengurt.
15• Der Kindersitz im Fahrzeug mit Drei-Punkt-Sicherheitsgurt.
16• Der Kindersitz kann mit den äußeren Sicherheitsgurten
(Abb_a) auch mittig auf dem dreiteiligen Rücksitz befestigt
werden. Der Kindersitz kann nicht wie in Abb_b befestigt
werden, da die Sicherheitsgurte immer gegenläufig
ausgerichtet sein müssen.
17•
Der Kindersitz auf einem Rücksitz für 2 Personen. Hier kann er
mit dem Fußende in beiden Richtungen befestigt werden.
Wenn der Autositz nicht waagerecht, sondern geneigt ist,
können Sie die Neigung mit Handtüchern ausgleichen.
18• Nehmen Sie den Sicherheitsgurt des Rücksitzes am
Fußende des Kindersitzes, legen Sie ihn einmal um (Abb_a)
und ziehen Sie ihn durch eine der zwei mitgelieferten
Schnallen (Abb_b). Ziehen Sie den roten Sicherheitsbügel
der Schnalle durch die Gurtschlaufe (Abb_c).
19• Drücken Sie den grauen Hebel an der linken Seite
der Schnalle (Abb_a) und hängen Sie den Gurt in die
Halterung des Kindersitzes ein (Abb_b).
• Wiederholen Sie diese Schritte mit dem Sicherheitsgurt am
Kopfende des Kindersitzes.
20• Nachdem die Schnalle in der Halterung des Kindersitzes
befestigt ist, muss der Sicherheitsgurt festgezogen werden,
um den Sitz stabil im Auto zu befestigen. Ziehen Sie den
zur Schlaufe gelegten Sicherheitsgurt zu sich hin (Pfeil_a),
halten Sie ihn fest und ziehen Sie den hinteren Lauf des
Gurtes straffer (Pfeil_b).
21• Schnalle am Sicherheitsgurt und an des Kindersitzes am
Fußende befestigt (Abb_a). Schnalle am Sicherheitsgurt
und am Kopfende des Kindersitzes befestigt (Abb_b).
22• Der Kindersitz im Auto.
23•
HERAUSNEHMEN DES KINDERSITZES AUS DEM AUTO:
Drücken Sie den grauen Hebel der Schnalle (Abb_a) und
lösen Sie die Schnalle von den Halterungen an beiden Seiten
des Kindersitzes (Abb_b). Wenn eine der Schnallen zu fest
sitzt und sich nur schwer lösen lässt, drücken Sie auf den
Kindersitz und lösen zugleich die Schnalle aus der Halterung.
So legen Sie Ihr Kind in den Kindersitz
24• DREI-PUNKT-SICHERHEITSGURT: Zum Verlängern der
Schultergurte drücken Sie auf die Schnalle (Abb_a) und
lockern Sie den Gurt (Abb_b).
25 Drücken Sie den roten Knopf (Abb_a) und trennen Sie die
Schultergurte vom Schrittgurt (Abb_b).
26•
Legen Sie das Kind in den Kindersitz und schieben Sie die
Schnalle der Schultergurte bis zum Einrasten in den Schrittgurt.
27• Das Kind muss in dem Kindersitz gut gesichert sein.
Wenn die Sicherheitsgurte zu locker sitzen, ziehen Sie am
Gurtende, um sie festzuziehen.

28
Die Sicherheitsgurte müssen so fest wie möglich anliegen,
um bei einem möglichen Unfall größtmögliche Sicherheit
für das Kind zu gewährleisten. Lassen Sie bei den Gurten
etwas Spielraum (ein Fingerbreit zwischen dem Gurt und
dem Brustkorb des Kindes).
2 8• ENTFERNEN DER SICHERHEITSGURTE: Um die
Sicherheitsgurte aus dem Kindersitz zu ziehen, schieben
Sie die Schnallen des Schrittgurtes durch die Schlitze an
der Unterseite der Kunststoffschale und ziehen Sie sie
hindurch (Abb_a). Um die Verschlüsse der Schultergurte
durch die Unterseite der Kunststoffschale zu ziehen, lösen
Sie sie aus den Halterungen und ziehen sie durch die
Schlitze (Abb_b).
29• Schieben Sie den Sicherheitsgurt wieder in die hierfür
vorgesehene Tasche.
Zubehör
30•
REGENSCHUTZ COVER ALL: Transparenter Komplettregenschutz.
WICKELTASCHE: Tasche mit Wickelunterlage zum Wickeln
des Babys, die am Kinderwagen befestigt werden kann
31• BASSINET STÄNDER: Praktisches und kompaktes Gestell
32• ANTI-ERSTICKUNGS-SET: matratze plus kissen. Mit unserem
3-punkte-auto-kit kompatibel.
Seriennummern
33• An der Unterseite des Kindersitzes finden Sie das
Herstellungsdatum.
• Produktname, Herstellungsdatum und Seriennummer der
Babyschale (Abb_a).
Auto-Ausstattung:
• Prüfzertifikat (Abb_b)
• Herstellungsdatum des Sicherheitsgurtes (Abb_c)
Für den Benutzer sind diese Informationen bei eventuellen
Problemen mit dem Produkt wichtig.
Informationen auf dem Prüfzertifikat
• In diesem Abschnitt erläutern wir, welche Informationen
Sie dem orangefarbenen Prüfetikett entnehmen können.
• Oben auf dem Prüfetikett befinden sich das Markenzeichen
des Herstellers und die Produktbezeichnung.
• Die Kennzeichnung 0-10 kg Y bedeutet, dass das Produkt
für Neugeborene und Kleinkinder bis zu einem Gewicht
von 10 kg zugelassen ist und dass es mit einem Drei-PunktSicherheitsgurt ausgestattet ist.
•
Kreis mit dem Buchstaben E: bedeutet, dass das Produkt
europäischen Normen entspricht. Die Nummer zeigt das Land an,
in dem die Zulassung erfolgt ist (1: Deutschland, 2: Frankreich, 3:
Italien, 4: Niederlande, 11: Großbritannien, 24: Irland).
• Zulassungsnummer: Beginnt sie mit den Ziffern 04,
bedeutet dies, dass es sich um die vierte, derzeit gültige
Zusatzbestimmung zur Norm R44 handelt.
• Referenznorm: UN/ECE R44/04.
• Laufende Produktionsnummer: Kennzeichnet jedes
einzelne Produkt. Nach der Zulassung ist jeder Kindersitz
anhand seiner Produktionsnummer identifizierbar.
Kundendienst
• Falls Teile des Modells verloren gehen oder
beschädigt werden sollten, nur Originalersatzteile
von Peg- Pérego benutzen. Für Reparaturen,
Ersatzteile, Produktinformationen sowie den Kauf von
Originalersatzteilen und Zubehör wenden Sie sich bitte an
den Kundendienst von Peg-Pérego:
• Tel.: 0039-039-60.88.213
• Fax: 0039-039-33.09.992
• E-Mail: assistenza@pegperego.it
• Homepage: www.pegperego.com
• Peg-Pérego behält sich das Recht vor, jederzeit aus
technischen oder geschäftlichen Gründen Änderungen an
den hier beschriebenen Modellen vorzunehmen.
Ihr Feedback
• Die Firma Peg-Pérego steht ihren Konsumenten zur Verfügung,
um allen ihren Bedürfnissen möglichst zufriedenstellend
entgegen zu kommen. Daher ist es für uns sehr wichtig und
wertvoll, die Meinung unserer Kunden kennen zu lernen.
Wir wären Ihnen sehr dankbar, wenn Sie, nachdem Sie
unser Produkt verwendet haben, den FRAGEBODEN ZUR
KUNDENZUFRIEDENHEIT ausfüllen würden (fügen Sie ruhig
eventuelle Bemerkungen oder Ratschläge hinzu). Sie finden ihn
auf unserer Homepage www.pegperego.com.

29
Le agradecemos haber elegido un
producto Peg-Pérego.
• Peg-Pérego S.p.A. posee la certificación ISO 9001.
• La certificación ofrece a los clientes y a los
consumidores la garantía de transparencia y
confianza en cuanto a los procedimientos de
trabajo de la empresa.
La silla de paseo Primonido New está
disponible en el modelo Young o Culla.
Características del producto
Silla de paseo-auto, Grupo 0, categoría
“Universal”
• La silla de paseo está homologada de acuerdo con el
reglamento UN/ECE R44/04 para bebés de un peso
comprendido entre 0-10 kg. Apto para la mayoría de los
asientos de los vehículos, pero no todos.
• La silla de paseo puede instalarse correctamente si en el
manual de uso y mantenimiento del vehículo figura la
compatibilidad con sistemas de retención “Universales” de
Grupo 0.
• La silla de paseo se ha clasificado “Universal” en virtud de
criterios de homologación más severos respecto de los
modelos precedentes, los cuales no disponen de esta
inscripción.
• El dispositivo debe utilizarse únicamente en vehículos
con asientos traseros de 2 o 3 plazas que dispongan de
cinturones de seguridad de 2 o 3 puntos, homologados
conformemente al reglamento UN/ECE R16 o a normas
equivalentes.
• En caso de dudas, o para una mayor información acerca del
acoplamiento de la silla de paseo en vehículos específicos,
contactar con el fabricante o el vendedor.
ES_Español
IMPORTANTE:
• “Pram”, grupo 0, debe instalarse perpendicularmente al
sentido de marcha.
• No instalar Pram en asientos colocados en dirección
opuesta al sentido de la marcha o transversalmente al
sentido normal de la marcha del vehículo.
• Este artículo está enumerado en orden consecutivo.
ADVERTENCIA
IMPORTANTE: Leer atentamente estas instrucciones
y conservarlas en su respectivo alojamiento durante
toda la vida útil del producto. La seguridad del
bebé podría comprometerse si se incumplen dichas
instrucciones.
• Podría ser peligroso dejar a su bebé sin vigilancia.
• Las operaciones de montaje y de preparación del artículo
deben efectuarse por adultos.
• No utilizar el producto si existen rupturas o le faltan piezas.
• Antes del uso, cerciorarse de que todos los mecanismos de
enganche estén enganchados correctamente.
• Evitar introducir los dedos dentro de los mecanismos.
• No utilizar cerca de fuentes de calor, llamas libres u objetos
peligrosos que estén al alcance de los brazos del bebé.
• Podría ser peligroso utilizar accesorios no aprobados por el
fabricante.
• Asegurarse de que las correas para fijar la silla de paseo
al vehículo estén siempre tensas y ajustar aquellas que
bloqueen el bebé.
• No doblar nunca las correas.
• Se aconseja reemplazar el dispositivo si ha estado
sometido a fuertes golpes debido a un accidente o si
existen signos evidentes de ruptura o deformación.
• El usuario no debe modificar el dispositivo de seguridad
bajo ningún concepto.
• Seguir atentamente las instrucciones del sistema de
retención del bebé que proporciona el fabricante.
• No dejar el bebé sin vigilancia dentro de la silla de paseo
en el automóvil.
• La silla de paseo debe estar siempre fijada con los
cinturones de seguridad del vehículo, incluso cuando el
bebé no esté en su interior. En caso de frenado repentino,

30
podría ocasionar lesiones a los ocupantes del vehículo.
• Durante los viajes en automóvil, no tener nunca al bebé en
brazos y no ponerlo nunca fuera de la silla de paseo.
En caso de frenado repentino, incluso a baja velocidad, el
bebé se proyectaría fácilmente hacia adelante.
• Prestar especial atención a maletas u otros objetos que
puedan ocasionarle lesiones al bebé estando dentro de la
silla de paseo en caso de accidente.
• No dejar la silla de paseo en el vehículo expuesta al sol,
pues algunas partes podrían recalentarse y dañar la piel
del bebé, por lo que se debe controlar antes de colocar al
bebé.
• Prestar especial atención a que la silla de paseo no quede
bloqueada ni por una parte móvil del asiento ni por la
puerta.
• No utilizar la silla de paseo sin su forro de tejido, el cual
no puede reemplazarse por otro no aprobado por el
fabricante, puesto que es parte integrante de la silla de
paseo y de la seguridad.
En caso de sustitución, utilizar un repuesto original.
• La silla de paseo se ha diseñado con dispositivo de
absorción de impacto en poliestireno, incorporado
directamente en el chasis debajo del acolchado. No quitar.
• Este producto es únicamente apto para bebés que no
puedan sentarse por sí solos.
• Este producto se ha concebido para bebés desde
el nacimiento hasta los 9 kg de peso. Si se usa en el
automóvil, se permite hasta los 10 kg de peso.
• Utilizar únicamente en superficies duras, horizontales y
secas.
• No dejar que otros niños jueguen sin vigilancia cerca del
cochecito.
• Prestar especial atención a la presencia del bebé cuando
se realicen operaciones de ajuste de los mecanismos
(manillar, respaldo).
• Controlar con frecuencia el manillar (o las asas) y el fondo
del cochecito y comprobar la inexistencia de rupturas o
desperfectos.
• Cuando utilice el cochecito con un soporte, comprobar
la máxima longitud del cochecito que se especifique en
dicho soporte.
Instrucciones de uso
Uso de la silla de paseo
1• CAPOTA Y CUBREPIÉS: para enganchar la capota, introducir
los acoples en los orificios (fig_a) y abrocharla por detrás.
Abrochar la capota en ambos lados (fig_b).
2• REGULACIÓN DEL RESPALDO: tirar de la manivela hacia el
exterior y girarla en el sentido de las agujas del reloj para
levantar el respaldo o en sentido contrario a las agujas del
reloj para bajarlo.
3• POSICIÓN BALANCÍN: la silla de paseo está dotada de pies
extraíbles, colocados debajo de la base, con los que se
puede elegir si balancear (fig_a) o no balancear (fig_b) al
niño.
Girar los pies hacia el exterior para transformar la silla de
paseo en una cómoda cuna (fig_c).
4• SISTEMA CUATRO ESTACIONES: la silla de paseo está dotada
de una palanca, colocada debajo de la base, con la que se
puede regular la circulación del aire en su interior.
Desplazar la palanquita sobre el color azul para crear un
ambiente fresco y ventilado (en verano) o sobre el color
rojo, para limitar la entrada de aire (en invierno).
5• CORREAS DE TRANSPORTE: para transportar la silla de
paseo bajar la capota y extraer de los bolsillos las correas
de transporte (fig_a). También puede transportarse al asir
las asas Ganciomatic (fig_b).
Ganciomatic system
6• Ganciomatic System es el sistema práctico y rápido que
permite enganchar la silla de paseo a la base Ganciomatic
de: Classico 58.5, Classico Velo, Bassinet Stand, con un solo
movimiento (adquiribles por separado).
Para enganchar la silla de paseo, colocarla sobre el carrito y
presionar con ambas manos hasta oír el clic.
Accionar siempre el freno del carrito antes de enganchar y
desenganchar la silla de paseo.
Comprobar que la silla de paseo esté correctamente
enganchada.
7• Para desengancharlo, mover la palanca del asa
Ganciomatic en el sentido que muestra la flecha (flecha_a),
al mismo tiempo que presiona la palanca (flecha_b) y, por
último, tirar hacia arriba hasta desengancharlo (flecha_c).

31
Desenfundar
8• DESENFUNDAR la silla de paseo: Desabrochar el cubrepiés
y la capota. Presionar sobre los enganches y quitar por
arriba la capota (fig_a). Levantar el respaldo y sacar
el colchoncito (fig_b). Desabrochar (fig_c) y quitar el
acolchado interno (fig_d).
Mantenimiento del acolchado
• cepillar las partes de tejido para retirar el polvo y lavar a
mano a una temperatura máxima de 30º;
• no estrujar;
• no planchar;
• no lavar en seco;
• no eliminar manchas con solventes y no secar en sec adora
de tambor rotativo.
Limpieza del producto
• Este producto requiere de un mantenimiento mínimo.
Las operaciones de limpieza y mantenimiento sólo deben
realizarse por adultos.
• Se aconseja mantener limpias todas las partes móviles y, en
caso necesario, lubricarlas con aceites ligeros.
• Limpiar asiduamente las partes de plástico con un trapo
húmedo sin usar disolventes ni otros productos similares.
• Cepillar las partes de tejido para eliminar el polvo.
• No limpiar el dispositivo de absorción de impacto de
poliestireno con disolventes u otros productos parecidos.
• Proteger el producto contra agentes atmosféricos (agua,
lluvia o nieve). Una exposición continua y prolongada al sol
puede causar cambios de color de muchos materiales.
• Conservar el producto en un lugar seco.
Kit Auto
Montaje del arnés de seguridad
9• Colocar la silla de paseo estando el respaldo y la capota
bajados.
10• Durante el transporte en el automóvil, quitar los eventuales
colchoncitos que se hayan añadido.
11• ARNÉS DE 3 PUNTOS: Introducir la tira entrepiernas en el
orificio del colchón (fig_a) y en los del chasis (fig_b) hasta
atravesarlo (fig_c).
12• Introducir los dos extremos de las correas en los orificios
del colchón y del chasis (fig_a) y engancharlos a los pernos
(fig_b).
13• Correas enganchadas por debajo del chasis (fig_a) y por
dentro de la silla de paseo (fig_b).
Enganche en el automóvil con los
cinturones de seguridad
ENGANCHE DE LA SILLA DE PASEO EN EL AUTOMÓVIL: El
asiento trasero del vehículo (de tres plazas) dispone de tres
cinturones de seguridad, siendo el cinturón central o dorsal
o ventral, y en ambos casos se puede enganchar la silla de
paseo en el automóvil.
Se aconseja colocar la silla de paseo en el asiento trasero
ubicando el lado de la cabeza en el asiento central.
14• La silla de paseo colocada en el automóvil con el cinturón
ventral.
15• La silla de paseo colocada en el automóvil con el cinturón
de 3 puntos.
16• La silla de paseo también puede colocarse en el centro del
asiento trasero de tres plazas, utilizando los dos cinturones
de seguridad externos (fig_a). La silla de paseo no puede
colocarse como en la ilustración de la fig_b, puesto
que sólo puede fijarse en el automóvil con cinturones
orientados en sentido opuesto.
17• Colocación de la silla de paseo en asientos traseros de 2
plazas. La silla de paseo puede colocarse con la parte de
los pies orientada hacia ambos lados.
Si el asiento del automóvil está inclinado en vez de recto,
se puede poner en posición horizontal mediante toallas.
18• Tomar el cinturón del asiento trasero del lado de la silla
de paseo correspondiente a los pies del bebé, plegarlo
(fig_a) e introducirlo en el orificio de una de las dos hebillas
proporcionadas (fig_b). Introducir la barrita roja de la
hebilla dentro del cinturón enrollado (fig_c).
19• Presionar la palanca gris de la izquierda (fig_a) y enganchar
la hebilla al anillo de la silla de paseo (fig_b).
• Repetir la operación con el cinturón ubicado en el lado de

32
la silla de paseo correspondiente a la cabeza del bebé.
20• Una vez enganchada la hebilla al anillo de la silla de
paseo, extender el cinturón de seguridad para fijar
adecuadamente la silla de paseo en el automóvil. Tirar
del cinturón enrollado hacia sí (flecha_a) y mientras lo
mantiene fijo, extender el cinturón por detrás de la hebilla
(flecha_b) para fijarlo.
21• Hebilla enganchada al cinturón de seguridad y a la silla de
paseo en el lado de los pies (fig_a). Hebilla enganchada al
cinturón de seguridad y a la silla de paseo en el lado de la
cabeza (fig_b).
22• La silla de paseo en el automóvil.
23• DESENGANCHE DE LA SILLA DE PASEO DEL AUTOMÓVIL:
Presionar la palanca gris de la hebilla (fig_a) y sacarla de
los anillos colocados a ambos lados de la silla de paseo
(fig_b). Si una de las dos hebillas está demasiado tensa y
es difícil aflojarla, deberá presionar sobre la silla de paseo y
simultáneamente desenganchar la hebilla.
Colocación del bebé en la silla de paseo
24• CINTURÓN DE SEGURIDAD DE 3 PUNTOS: Aflojar las correas
pulsando la hebilla (fig_a) y alargarlas (fig_b).
25• Pulsar el botón rojo (fig_a) y desenganchar las correas de la
tira entrepiernas (fig_b).
26• Colocar el bebé dentro de la silla de paseo e introducir
la hebilla de las correas en la tira entrepiernas hasta que
quede enganchada.
27• El bebé debe estar bien sujeto dentro de la silla de paseo.
Si las correas están poco apretadas, reducir la longitud
tirando de su extremidad.
Las correas deben estar lo más tensas posible para la
seguridad del bebé en caso de accidente. Dejar el bebé
un poco suelto (el espesor de un dedo entre la correa y su
tórax).
28• QUITAR LAS CORREAS: Para quitar las correas del chasis
de la silla de paseo, introducir las hebillas de la tira
entrepiernas en los orificios presentes debajo del chasis y
quitarse (fig_a). Para quitar los enganches de las correas
por debajo del chasis, desengancharlos de los pernos e
introducirlos en sus respectivas ranuras (fig_b).
29• Volver a colocar el arnés desenganchado en su bolsillo.
Accesorios
30• PLÁSTICO DE LLUVIA COVER ALL: Plástico de lluvia integral
transparente.
BORSA (Bolso cambiador): Bolsa con colchoneta para
cambiar al bebé, que se puede enganchar al cochecito.
31• BASSINET STAND: base de soporte práctica y compacta.
32• COMPLETO ANTI AHOGAMIENTO: colchoncito más cojín.
Compatible
Números de serie
33• Bajo la base de la silla de paseo figuran las informaciones
relativas a su fecha de fabricación.
• Nombre del producto, fecha de fabricación y numeración
de serie del mismo (fig_a).
Kit Auto:
• Etiqueta de homologación (fig_b)
• Fecha de fabricación del arnés (fig_c)
Dichos elementos son de utilidad para el consumidor en
caso de que el producto presente problemas.
Significado de la etiqueta de
homologación
• Este apartado explica el significado de la etiqueta de
homologación (etiqueta naranja).
• En la parte superior de la etiqueta figura la marca de la
empresa fabricante y el nombre del producto.
• 0-10 kg Y indica que el producto está homologado para
bebés desde el nacimiento hasta los 10 kg de peso y que
el dispositivo dispone de cinturón de 3 puntos.
• La letra E dentro de un círculo indica el certificado de
homologación europea y el número identifica el país que
ha emitido dicha homologación (1: Alemania; 2: Francia; 3:
Italia; 4: Países Bajos; 11: Gran Bretaña y 24: Irlanda).
• Número de homologación: Si empieza por 04 hace
referencia a la cuarta enmienda (actualmente en vigor) del
reglamento R44.
• Norma de referencia: UN/ECE R44/04.
• Numeración en orden consecutivo de producción:
Personaliza cada silla de paseo, pues al emitirse la
homologación se identifica cada modelo con su
33
correspondiente número.
Servicio de asistencia
• En caso de daños o pérdidas fortuitos, utilizar sólo
respuestos originales Peg-Pérego. Para eventuales
reparaciones, cambios e informaciones sobre los
productos, así como para la venta de repuestos originales y
accesorios, contactar el Servicio de Asistencia Peg-Pérego:
• tel.: 0039-039-60.88.213
• fax: 0039-039-33.09.992
• e-mail: assistenza@pegperego.it
• sitio Internet: www.pegperego.com
• Peg-Pérego podrá modificar en cualquier momento, por
razones técnicas o comerciales, los productos que se
describen en esta publicación.
¿Qué piensa de nosotros?
• Peg Pérego está a disposición de sus Consumidores para
cumplir satisfactoriamente con todas sus exigencias. Por
ello, es importante y fundamental para la empresa saber lo
que piensan sus Clientes. Le estaríamos muy agradecidos
que una vez utilizado el producto rellenase, indicando las
posibles observaciones o sugerencias, el FORMULARIO DE
SATISFACCIÓN DEL CONSUMIDOR que encontrará en la
siguiente página Web: www.pegperego.com.
Obrigado por ter escolhido um produto
Peg-Pérego.
• Peg-Pérego S.p.A. é certificada ISO 9001.
• A certificação oferece aos clientes e aos
consumidores a garantia de transparência e
confiança no que se refere ao modo com que
a empresa trabalha.
A alcofa Primonido New é disponível
para os modelos Young e Culla
Características do produto
Alcofa New-auto, Grupo 0, categoria
“Universal”
• A alcofa é homologada de acordo com a norma ECE
R44/04 para crianças com peso de 0-10 kg. Adapta-se à
maior parte dos bancos de automóveis, mas não a todos.
• A alcofa pode ser correctamente instalada se no manual
de uso e manutenção do veículo estiver indicada a
compatibilidade com sistemas de retenção “Universais” do
grupo 0.
• A alcofa é classificada “Universal” de acordo com
critérios de homologação extremamente severos,
comparativamente com os modelos anteriores que não
dispõem desta classificação.
• A alcofa pode ser usada apenas em veículos dotados
de banco traseiro com 2 ou 3 lugares e com cintos
de segurança de 2 ou 3 pontos, homologados em
conformidade com a norma ECE R16 ou com normas
equivalentes.
• Em caso de dúvidas, ou para mais informações sobre a
fixação da alcofa em modelos específicos de automóveis,
dirija-se ao fabricante ou ao revendedor.
PT_Português
34
IMPORTANTE
• “A alcofa”, grupo 0, tem de ser instalada
perpendicularmente ao sentido de marcha.
• Não instale a alcofa em bancos virados na direcção oposta
ao sentido de marcha ou transversalmente ao normal
sentido de marcha do veículo.
• Este artigo está numerado progressivamente.
ADVERTÊNCIA
IMPORTANTE: leia com atenção estas instruções e
conserve-as no específico alojamento durante toda a
vida útil do produto. A segurança da criança pode ser
posta em risco se não seguir estas instruções.
• Pode ser perigoso deixar a criança sem vigilância.
• As operações de montagem e de preparação do artigo
devem ser realizadas por adultos.
• Não utilize o produto se faltarem peças ou se estiver
partido.
• Antes do uso certifique-se de que todos os mecanismos de
encaixe estão correctamente fixados.
• Evite introduzir os dedos nos mecanismos.
• Não utilize perto de fontes de calor, chamas livres e não
deixe objectos perigosos ao alcance da criança.
• Pode ser perigoso utilizar acessórios não aprovados pelo
fabricante.
• Certifique-se de que os cintos de fixação da alcofa ao
veículo estão bem esticados e regule os que prendem a
criança à mesma.
• Nunca torça os cintos.
• Aconselha-se de substituir a alcofa caso tenha sofrido
esforços excessivos durante um acidente ou apresente
sinais de evidente ruptura ou deformação.
• O dispositivo de segurança não deve ser modificado em
caso algum pelo utilizador.
• Siga rigorosamente as instruções fornecidas pelo fabricante
do sistema de retenção infantil.
• Não deixe a criança na alcofa dentro do automóvel, sem
vigilância.
• A alcofa deve ser sempre fixada com os cintos de
segurança do veículo, mesmo quando não é usada pela
criança. No caso de travagem repentina, poderia provocar
lesões aos ocupantes do veículo.
• Durante as viagens de automóvel nunca transporte a
criança ao colo e nunca a sente fora da alcofa. No caso de
travagem repentina, mesmo a baixa velocidade, a criança
seria facilmente atirada para a frente.
• Preste muita atenção à bagagem ou objectos que podem
ferir a criança na alcofa, em caso de acidente.
• Não deixe a alcofa na viatura exposta ao sol, algumas peças
podem ficar muito quentes e queimar a pele delicada da
criança, verifique antes de sentar a criança.
• Preste atenção para que a alcofa não fique bloqueada por
uma parte móvel do banco ou por uma porta.
• Não utilize a alcofa sem o revestimento de tecido, esse
revestimento não pode ser substituído por outro não
aprovado pelo fabricante pois constitui parte integrante da
alcofa e da sua segurança. No caso de substituição, utilize
um modelo de reposição original.
• A alcofa foi concebida com dispositivo de absorção de
choque em poliestireno, directamente integrado na sua
estrutura, debaixo do forro; não remover.
• Este produto só pode ser utilizado por crianças que não se
conseguem sentar sozinhas.
• Este produto foi concebido para crianças do nascimento
até aos 9 kg de peso. Usado no automóvel até aos 10 kg de
peso.
• Utilize apenas sobre superfícies duras, horizontais e secas.
• Nunca deixe outras crianças a brincar sem vigilância perto
da alcofa.
• Se estiver presente a criança, preste atenção quando
efectua as operações de regulação dos mecanismos (pega,
encosto).
• Verifique regularmente a pega (ou as pegas) e o fundo da
alcofa e verifique se existem sinais de ruptura ou de danos.
• Quando utiliza a alcofa com um apoio, verifique o
comprimento máximo da alcofa especificada no apoio.
Instruções de uso
Utilização da alcofa
1• CAPOTA E COBRE-PÉS: para montar a capota insira os
encaixes nos orifícios (fig_a) e aperte as molas por trás.
Aperte as molas do cobre-pés de ambos os lados (fig_b).
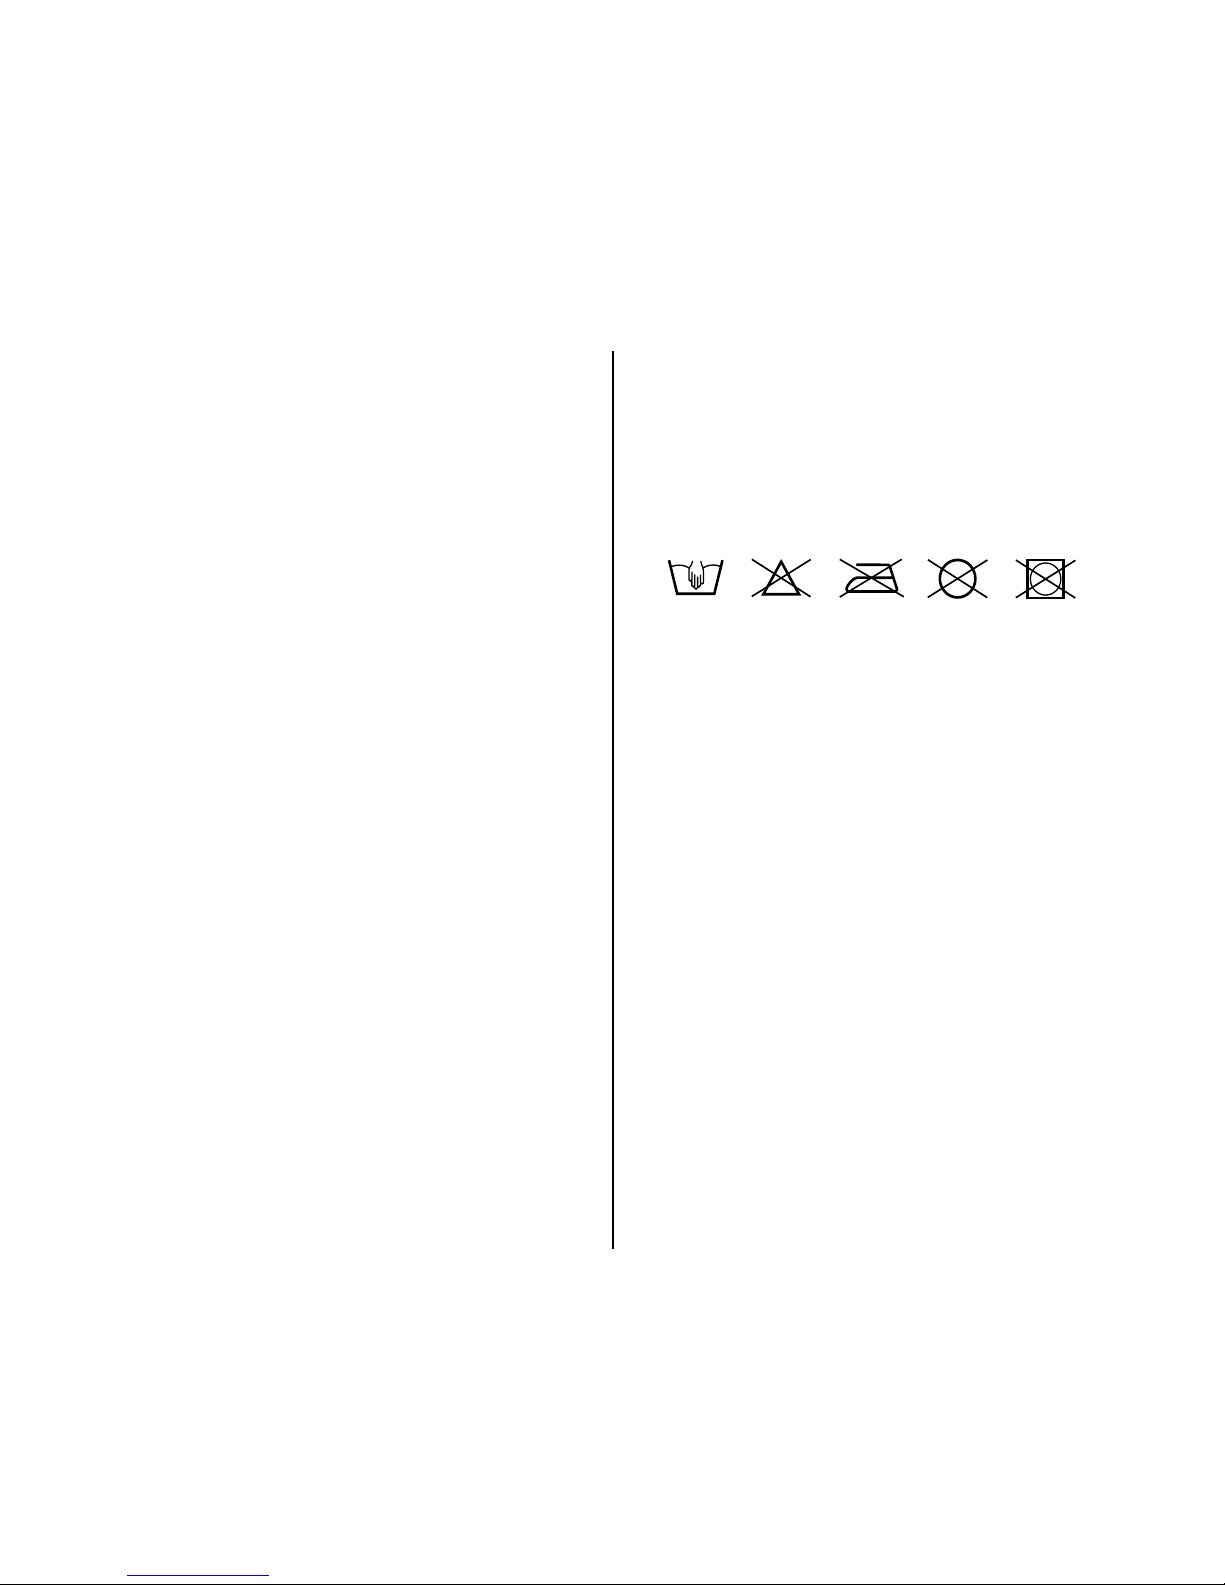
35
2• REGULAÇÃO DO ENCOSTO: puxe o manípulo para fora
e rode-o para a direita para erguer o encosto ou para a
esquerda para baixá-lo.
3• POSIÇÃO DE BALOIÇO: a alcofa possui pés amovíveis,
situados na base, com os quais pode escolher se balançar
(fig. a) ou não balançar (fig. b) o bebé. Rode os pés para
fora para transformar a alcofa numa confortável caminha
(fig. c).
4• SISTEMA QUATRO ESTAÇÕES: a alcofa possui uma alavanca,
localizada por baixo da base, com a qual é possível regular
a circulação de ar interno.
Coloque a alavanca na posição azul, para criar um
ambiente fresco e arejado (no Verão), ou na posição
vermelha para limitar a entrada de ar (no Inverno).
5• ALÇAS DE TRANSPORTE: para transportar a alcofa baixe a
capota, e extraia dos bolsos laterais as alças de transporte
(fig. a). Também é possível transportá-la agarrando nas
pegas Ganciomatic (fig. b).
Ganciomatic system
6• Ganciomatic System é o sistema prático e rápido que
lhe permite acoplar a alcofa do carrinho de bebé à base
Ganciomatic: do Carrinho Classico 58.5 do Carrinho
Classico Velo, Bassinet Stand com um só gesto. (vendidos
separadamente)
Para acoplar a alcofa, posicione-a sobre o carrinho e prima
com ambas as mãos até ouvir o clique.
Accione sempre o travão do carrinho antes de acoplar e
desacoplar a alcofa.
Verifique se a alcofa está correctamente acoplada.
7• Para a desacoplar, desloque no sentido da seta a alavanca
da pega Ganciomatic (seta a), ao mesmo tempo prima a
alavanca (seta b) e puxe para cima até a desacoplar (seta c).
Retirar a forra
8• RETIRAR O FORRO DA ALCOFA: desaperte as molas do
cobre-pés e da capota; prima nos encaixes e remova para
cima a capota (fig. a); erga o encosto e remova o colchão
(fig. b); desaperte as molas (fig. c) e remova o revestimento
interno (fig. d).
Manutenção do revestimento
• escove as partes em tecido para remover o pó e lave à
mão a uma temperatura máxima de 30° não torça;
• não use lixívia com cloro;
• não passe a ferro;
• não lave a seco;
• não remova as manchas com solventes e não seque na
máquina de secar roupa com tambor rotativo.
Limpeza do produto
• O seu produto precisa de uma manutenção mínima.
As operações de limpeza e manutenção devem ser
efectuadas somente por adultos.
• Aconselha-se manter limpas as partes em movimento e se
necessário, lubrifique-as com óleo.
• Periodicamente limpe as partes em plástico com um pano
húmido, não use solventes ou outros produtos similares.
• Escove as partes em tecido para retirar a poeira.
• Não limpe o dispositivo de absorção de choques em
poliestireno com solventes ou outros produtos similares.
• Proteja o produto dos agentes atmosféricos, água, chuva
ou neve; a exposição contínua e prolongada ao sol poderia
causar alterações na cor de muitos materiais.
• Conserve o produto num sítio seco.
Kit Auto
como montar o cinto de segurança
9• Posicione a alcofa com o encosto e a capota baixados.
10• Durante o transporte no veículo, remova eventuais
colchões adicionais.
11• CINTO DE 3 PONTOS: Enfie o cinto entre-pernas na fissura
do colchão (fig_a) e nas fissuras da estrutura (fig_b) até a
atravessar (fig_c).
12• Enfie as duas extremidades das correias superiores nas
fissuras do colchão e da estrutura (fig_a) e prenda-as nos
pernos (fig_b).
13• Cintos presos por baixo da estrutura (fig. a) e dentro da
alcofa (fig. b).

36
Fixação no automóvel com cintos de
segurança
FIXAR A ALCOFA NO AUTOMÓVEL: O banco traseiro do
carro (de 3 lugares) possui 3 cintos de segurança e o
central pode ser do tipo dorsal ou abdominal. Em ambos
os casos, é possível efectuar a fixação da alcofa no carro.
Aconselha-se de posicionar a alcofa no banco traseiro
deixando o lado da cabeça ao nível do banco central.
14• Alcofa posicionada no automóvel com cinto abdominal.
15• Alcofa posicionada no automóvel com cinto de 3 pontos.
16• A alcofa também pode ser posicionada centralmente no
banco traseiro de 3 lugares, utilizando os dois cintos de
segurança mais externos (fig. a). A alcofa não pode ser
posicionada como na fig. b, pois pode ser fixada no carro
apenas com cintos vindos do sentido oposto.
17• Posicionamento da alcofa no banco traseiro de 2 lugares.
A alcofa pode ficar virada com a parte dos pés da criança
quer para um lado quer para o outro.
Se o banco do automóvel for inclinado pode torná-lo
horizontal usando toalhas.
18• Agarre o cinto do banco traseiro do lado da alcofa
correspondente aos pés da criança, dobre-o (fig. a) e
insira-o na abertura de uma das duas fivelas fornecidas
com a alcofa (fig. b). Enfie a barra vermelha da fivela dentro
do cinto dobrado (fig. c).
19• Prima a patilha cinzenta da esquerda (fig. a) e prenda a
fivela no anel da alcofa (fig. b).
• Repita a operação com o cinto do lado da alcofa
correspondente à cabeça da criança.
20• Após ter fixado a fivela ao anel da alcofa, é necessário
esticar o cinto de segurança para estabilizar correctamente
a alcofa no automóvel. Puxe para si o cinto dobrado (seta.
a) e, mantendo-o fixo, estique o cinto da parte traseira da
fivela (seta. b) para o fixar.
21• Fivela presa ao cinto de segurança e à alcofa do lado dos
pés (fig. a). Fivela presa ao cinto de segurança e à alcofa do
lado da cabeça (fig. b).
22• Alcofa no automóvel.
23• DESMONTAR A ALCOFA DO AUTOMÓVEL: prima a patilha
cinzenta da fivela (fig. a) e extraia-a dos anéis situados dos
dois lados da alcofa (fig. b). Se uma das duas fivelas estiver
demasiado esticada e difícil de soltar, é necessário premer
na alcofa e ao mesmo tempo soltar a fivela.
Como colocar a criança na alcofa
24• CINTO DE SEGURANÇA DE 3 PONTOS: afrouxe as correias
superiores, premendo na fivela (fig_a) e alargue-as (fig_b).
25• prima o botão vermelho (fig_a) e solte as correias
superiores do cinto entre-pernas (fig_b).
26• Posicione a criança dentro da alcofa e insira a fivela das
correias superiores no cinto entre-pernas até o apertar.
27• A criança tem que estar sempre bem presa dentro
da alcofa. Se os cintos estiverem frouxos, reduza o
comprimento das correias superiores puxando a
extremidade do cinto.
Os cintos têm de estar esticados o mais possível para
garantir a segurança da criança em caso de acidente. Deixe
uma folga mínima (da grossura de um dedo entre o cinto e
o peito da criança).
28• REMOVER OS CINTOS: para remover os cintos da estrutura
da alcofa, insira as fivelas do cinto entre-pernas nas
aberturas por baixo da estrutura e desenfie-as (fig. a). Para
desenfiar as fivelas das correias superiores por baixo da
estrutura, solte-as dos pernos e insira-as nas suas aberturas
(fig. b).
29• Recoloque o cinto desapertado no respectivo bolso.
Acessórios
30• PROTECTOR DE CHUVA COVER ALL: Protector de chuva
cobre-tudo em PVC transparente.
BOLSA DE TROCAS: Bolsa com colchonete para trocar o
bebé, que se prende ao carrinho.
31• BASSINET STAND (base para berço): base de apoio prática e
compacta.
32• COMPLETO ANTI-SUFOCAMENTO: colchão e almofada.
Compatível com o nosso kit auto de três pontos.
Números de série
33• A alcofa, por baixo da base, possui informações relativas à
data de fabrico da alcofa.
• Nome do produto, data de produção e numeração de série
da mesma (fig_a).

37
Kit Auto:
• Etiqueta de homologação (fig_b);
• Data de produção do cinto (fig_c);
Estes elementos são úteis para o consumidor no caso do
produto apresentar problemas.
Como ler a etiqueta de homologação
• Neste parágrafo explicamos como ler a etiqueta de
homologação (etiqueta cor-de-laranja).
• Na parte superior da etiqueta encontra-se o símbolo da
empresa fabricante e o nome do produto.
• 0-10 kg Y indica que o produto é homologado para
crianças desde o nascimento até 10 kg de peso e que o
dispositivo possui cinto de 3 pontos.
• A letra E dentro de um círculo: indica a marca de
homologação Europeia e o número define o país que
emitiu a homologação (1: Alemanha, 2: França, 3: Itália, 4:
Holanda, 11: Grã-Bretanha e 24: Irlanda).
• Número de homologação: se iniciar por 04 quer dizer
que é a quarta emenda (a actualmente em vigor) do
regulamento R44.
• Norma de referência: ECE R44/04.
• Número progressivo de fabrico: personaliza cada alcofa,
a partir da emissão da homologação cada uma está
identificada com um número específico.
Serviço de assistência
Se casualmente partes do modelo forem perdidas ou
danificadas, use somente peças sobressalentes originais
Peg-Pérego. Para eventuais reparos, substituições,
informações sobre o produto, venda de sobressalentes
originais e acessórios, contacte o Serviço de Assistência
Peg-Pérego.
• tel.: 0039-039-60.88.213
• fax: 0039-039-33.09.992
• e-mail: assistenza@pegperego.it
• site internet: www.pegperego.com
• Peg-Pérego poderá realizar em qualquer momento
alterações nos modelos descritos nesta publicação, por
motivos técnicos ou comerciais.
O que pensa de nós?
• A Peg-Pérego está à disposição dos seus Consumadores
para satisfazer ao máximo suas exigências. Portanto,
conhecer a opinião de nossos Clientes, é para nós
extremamente importante e precioso. Ficaremos muito
agradecidos se depois de ter utilizado um nosso produto,
quiser preencher o QUESTIONÁRIO DE SATISFAÇÃO DO
CONSUMADOR, a indicar eventuais observações ou
sugestões, que encontrará em nosso site Internet:
www.pegperego.com
38
Wij danken u voor de keuze van een
Peg-Pérego product.
• Peg-Pérego S.p.A. heeft een ISO 9001
certificaat.
•
De certificering biedt klanten en consumenten
de garantie van transparantie en vertrouwen in
de werkwijze van de onderneming.
De reiswieg Primonido New is
verkrijgbaar in het model Young of Culla.
Productkenmerken
Reiswieg-auto, Groep 0, categorie
“Universeel”
• De reiswieg is gehomologeerd volgens de richtlijn UN/
ECE R44/04 voor kinderen met een gewicht tussen 0-10 kg.
Geschikt voor de meeste autostoelen, maar niet voor alle.
• De reiswieg kan correct geïnstalleerd worden indien
in de handleiding van het voertuig aangegeven
wordt dat het voertuig compatibel is met “Universele”
bevestigingssystemen voor de groep 0.
• De reiswieg is geclassificeerd als “Universeel” volgens
de strengste homologatiecriteria in vergelijking met
voorgaande modellen die geen etiket hebben.
• Dit product kan alleen in voertuigen worden gebruikt die
een achterbank hebben met 2 of 3 zitplaatsen en uitgerust
zijn met twee- of driepuntsveiligheidsgordels, en die
gehomologeerd zijn volgens het reglement UN/ECE R16 of
gelijkwaardige normen.
• Wend u in geval van twijfel of voor meer informatie over
de bevestiging van de reiswieg in specifieke voertuigen tot
de fabrikant of verkoper.
BELANGRIJK
• “De reiswieg”, groep 0, moet haaks op de rijrichting
NL_Nederlands
geïnstalleerd worden.
• Installeer de reiswieg niet op een autostoel die in de
tegenovergestelde richting of dwars staat ten opzichte van
de rijrichting van het voertuig.
• Dit product is voorzien van een volgnummer.
WAARSCHUWING
BELANGRIJK: lees vóór het gebruik deze instructies
aandachtig en bewaar ze op een geschikte plek
zolang u het product heeft. Het niet in acht nemen
van deze instructies kan risico’s voor uw kind met zich
meebrengen.
• Het kan gevaarlijk zijn uw kind onbewaakt achter te laten.
• De montage en het gereedmaken van het product moeten
door een volwassene worden uitgevoerd.
• Gebruik het product niet indien er onderdelen stuk zijn of
ontbreken.
• Controleer vóór het gebruik of alle
bevestigingsmechanismen correct zijn vastgemaakt.
• Steek uw vingers niet in of tussen de mechanismen.
• Gebruik dit product niet dichtbij warmtebronnen, open
vuur of gevaarlijke voorwerpen binnen handbereik van het
kind.
• Het kan gevaarlijk zijn om accessoires te gebruiken die niet
zijn goedgekeurd door de fabrikant.
• Controleer altijd of de gordels die de reiswieg in het
voertuig vastzetten gespannen zijn en die welke het kind
vastzetten regelmatig zijn.
• De gordels mogen nooit gedraaid zitten.
• We raden aan het product te vervangen indien het tijdens
een ongeluk aan hevige krachten is blootgesteld of indien
het schade of afwijkingen vertoont.
• De gebruiker mag in geen geval het
veiligheidsmechanisme wijzigen.
• Volg nauwkeurig de instructies van de fabrikant op voor
het systeem waarmee het kind wordt vastgezet.
• Laat het kind niet zonder toezicht in de reiswieg in de auto.
• De reiswieg moet altijd vastgezet worden met de
veiligheidsgordels van het voertuig, ook wanneer het
kind er niet in zit. In geval van plotseling remmen kan het
namelijk letsel veroorzaken aan de inzittenden van het

39
voertuig.
• Houd het kind tijdens de reis nooit in uw armen of op
schoot en laat het niet uit de reiswieg. In geval van
plotseling remmen, ook bij lage snelheid, kan het kind
makkelijk naar voren schieten.
• Let er goed op dat het kind in de reiswieg niet verwond
kan worden door bagage of andere voorwerpen in geval
van een ongeluk.
• Laat de reiswieg niet aan zonlicht blootgesteld, enkele
delen kunnen oververhit raken en de gevoelige huid van
het kind beschadigen. Controleer dit alvorens het kind erin
te plaatsen.
• Let op dat de reiswieg niet geblokkeerd blijft door een
bewegend deel van de zitting of door een portier.
• Gebruik de reiswieg niet zonder de bekleding. Deze
bekleding kan niet vervangen worden door bekleding die
niet goedgekeurd is door de fabrikant omdat ze integraal
deel uitmaakt van de reiswieg en van de veiligheid. Gebruik
bij vervanging altijd een origineel reserveonderdeel.
• De reiswieg is uitgerust met een schokabsorptiesysteem
van polystyreen, direct geïntegreerd in de kuip, onder de
bekleding. U mag dit niet verwijderen.
• Dit product is alleen bedoeld voor kinderen die niet
zelfstandig rechtop kunnen gaan zitten.
•
Dit product is bedoeld voor kinderen vanaf de geboorte tot 9
kg. Voor gebruik in de auto bedoeld voor kinderen tot 10 kg.
• Alleen op harde, horizontale en droge oppervlakken
gebruiken.
• Laat andere kinderen niet zonder toezicht bij de
kinderwagen spelen.
•
Houd rekening met de aanwezigheid van het kind wanneer
u de mechanismen instelt (handgreep, rugleuning).
• Controleer regelmatig de duwstang (of de handgrepen) en
de onderkant van de reiswieg op scheuren of schade.
• Als u de reiswieg met een staander gebruikt, controleer
dan de maximale toegestane lengte van de kinderwagen.
Deze staat aangegeven op de staander.
Gebruiksaanwijzing
Gebruik van de reiswieg
1• KAP EN DEKENTJE: om de kap te bevestigen steekt u de
bevestigingen in de openingen (fig_a) en knoopt u hem
aan de achterkant vast.
Knoop het dekentje aan beide zijden vast (fig_b).
2• RUGLEUNING INSTELLEN: trek de knop naar buiten en draai
hem met de klok mee om de rugleuning omhoog te doen,
en tegen de klok in om deze omlaag te doen.
3• SCHOMMELSTAND: de reiswieg is voorzien van uittrekbare
steunen, onderaan de basis, waarmee het mogelijk is de
baby te wiegen (fig_a) of niet (fig_b). Draai de steunen
naar buiten om de reiswieg in een comfortabel bedje te
veranderen (fig_c).
4• SEIZOENSSYSTEEM: de reiswieg is onder de basis voorzien
van een hendeltje, waarmee de luchtcirculatie in de wieg
geregeld kan worden.
Met het hendeltje op blauw creëert u een frisse en
geventileerde omgeving (‘s zomers), en op rood beperkt u
de luchtdoorgang (‘s winters).
5• TRANSPORTHENGSELS: om de reiswieg te vervoeren doet
u de kap omlaag en haalt u de transporthengsels uit de
zijzakken (fig_a). U kunt de wieg ook bij de Ganciomatic
handgrepen vastpakken (fig_b).
Ganciomatic system
6• Ganciomatic System is het praktische en snelle systeem
dat u in staat stelt om in één beweging de reiswieg op de
Ganciomatic-basis van de Carrello Classico 58.5, Carrello
Classico Velo en Bassinet Stand te bevestigen (deze zijn
afzonderlijk verkrijgbaar).
Om de reiswieg te bevestigen plaatst u hem op de
kinderwagen en drukt u er met beide handen op tot het
klikt.
Activeer altijd de rem van de kinderwagen alvorens de
reiswieg te bevestigen of eraf te halen.
Controleer of de reiswieg correct is bevestigd.
7• Om de wieg eraf te halen beweegt u de hendel van de
Ganciomatic-handgreep in de richting van de pijl (pijl_a),
drukt u tegelijkertijd de hendel in (pijl_b) en trekt u de
wieg omhoog tot hij eraf komt (pijl_c).
Verwijdering van de bekleding
8• DE BEKLEDING VAN de reiswieg VERWIJDEREN: knoop het
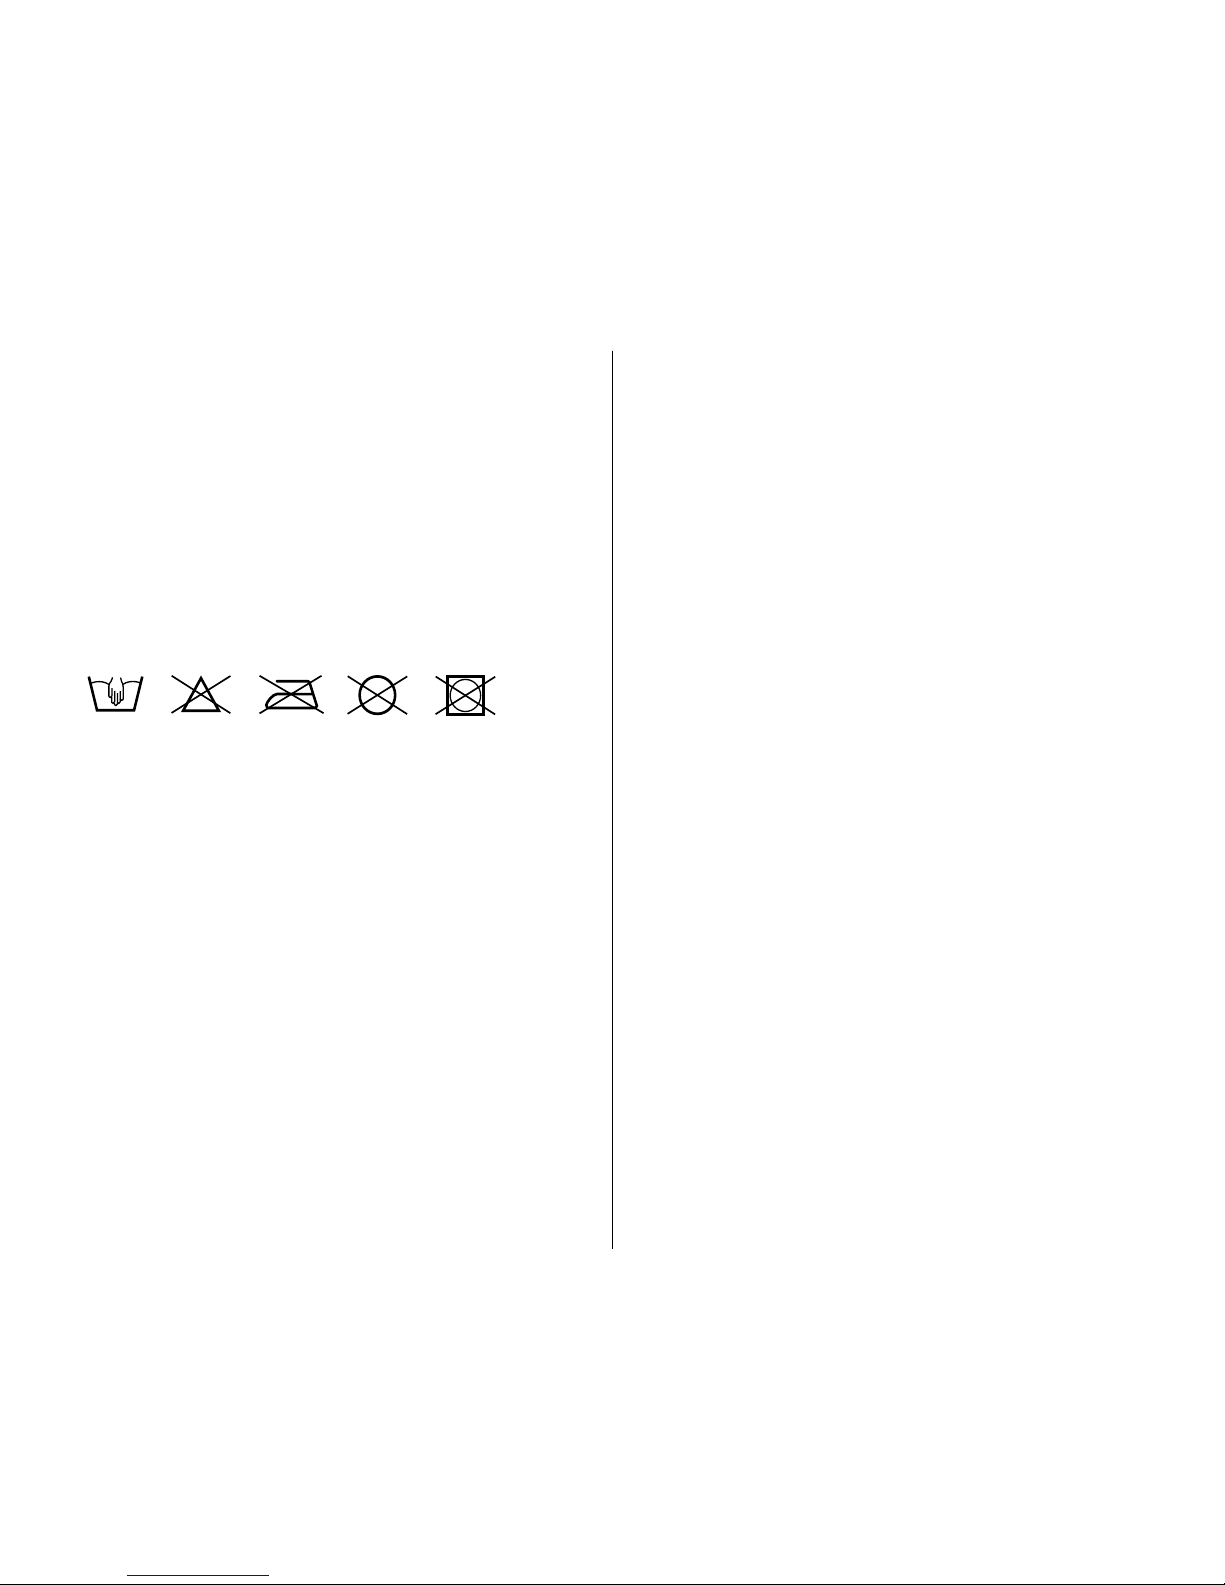
40
dekentje en de kap los; druk op de bevestigingen en trek de
kap omhoog (fig_a); doe de rugleuning omhoog en trek het
matrasje eruit (fig_b); knoop de binnenbekleding los (fig_c)
en verwijder deze (fig_d).
Onderhoud van de vulling
• borstel de stoffen delen om het stof te verwijderen en was
de binnenbekleding op de hand bij een temperatuur van
maximaal 30°. Niet wringen;
• niet in chloor bleken;
• niet strijken;
• niet droog reinigen;
• niet met oplosmiddelen reinigen en niet drogen in de
droogtrommel.
Reiniging van het product
• Uw product vereist minimaal onderhoud. De reiniging
en het onderhoud mogen alleen door volwassenen
uitgevoerd worden.
• Het wordt aanbevolen om alle bewegende delen schoon
te houden en deze zonodig te smeren met lichte olie.
• Reinig het deel van polystyreen, dat voor de absorptie van
schokken dient, niet met oplosmiddelen of met andere
gelijkaardige producten.
• Borstel de bekleding af om stof te verwijderen.
• Reinig het deel van polystyrol, dat voor de absorptie van
schokken dient, niet met oplosmiddelen of met andere
gelijkaardige producten.
• Bescherm het product tegen de weersomstandigheden,
water, regen of sneeuw. De continue en langdurige
blootstelling aan zonlicht zou een kleurverandering van
vele materialen tot gevolg kunnen hebben.
• Bewaar het product in een droge plaats.
Kit Auto
Het veiligheidsgordeltje monteren
9• Plaats de reiswieg met de rugleuning en kap neer.
10• Verwijder eventuele extra matrasjes bij vervoer in de auto.
11• DRIEPUNTSGORDELTJE: Steek het benenriempje in de
opening van het matrasje (fig_a) en in de openingen van de
kuip (fig_b) zodat de twee delen er doorheen komen (fig_c).
12• Steek de twee uiteinden van de schouderriempjes in de
openingen van het matrasje en die van de kuip (fig_a) en
haak ze aan de pinnen vast (fig_b).
13• De riempjes vastgehaakt onder de kuip (fig_a) en in de
reiswieg (fig_b).
Bevestiging in de auto met
veiligheidsgordels
BEVESTIGING VAN DE REISWIEG IN DE AUTO: De achterbank
van de auto (met 3 plaatsen) heeft 3 veiligheidsgordels en de
middelste kan over de rug of buik geplaatst worden. In beide
gevallen kan de reiswieg in de auto bevestigd worden.
We raden aan de reiswieg op de achterbank te plaatsen met
de kant van het hoofd naar het midden.
14• De reiswieg met buikgordel in de auto geplaatst.
15• De reiswieg met driepuntsgordel in de auto geplaatst.
16• De reiswieg kan ook in het midden van de driezitsachterbank
geplaatst worden, met behulp van de twee buitenste
veiligheidsgordels (fig_a). De reiswieg kan niet geplaatst
worden zoals aangegeven in fig_b omdat de wieg alleen
met de gordels in tegenovergestelde richting vastgezet mag
worden.
17• Plaatsing van de reiswieg op een tweezitsachterbank. Het
maakt geen verschil naar welke kant de reiswieg gedraaid
staat.
Indien de zitting van de autostoel niet recht is, maar helt,
kan deze horizontaal worden gemaakt met behulp van
handdoeken.
18• Pak de gordel van de stoel achterin aan de kant van het
voeteneind van de reiswieg, vouw hem dubbel (fig_a) en
steek hem in de opening van een van de twee bijgeleverde
gespen (fig_b). Steek de rode pal tussen de dubbelgevouwen
gordel (fig_c).
19• Druk op het grijze hendeltje aan de linkerkant (fig_a) en haak
de gesp aan de ring van de reiswieg (fig_b).
• Doe hetzelfde met de gordel aan de kant van het hoofdeinde.
20• Als de gesp aan de ring van de reiswieg zit, moet de

41
veiligheidsgordel gespannen worden om de reiswieg correct
in de auto te stabiliseren. Trek de dubbelgevouwen gordel
naar u toe (pijl_a), houd hem vast en span de gordel aan de
achterkant van de gesp (pijl_b) om hem vast te zetten.
21• Gesp met veiligheidsgordel bevestigd aan het voeteneinde
van de reiswieg (fig_a). Gesp met veiligheidsgordel bevestigd
aan het hoofdeinde van de reiswieg (fig_b).
22• De reiswieg in de auto.
23• DE REISWIEG UIT DE AUTO HALEN: druk op het grijze
hendeltje van de gesp (fig_a) en haal hem los van de ringen
aan beide zijkanten van de reiswieg (fig_b). Als een van de
gespen te strak zit en moeilijk los te halen is, dient u op de
reiswieg te drukken en tegelijkertijd de gesp los te maken.
Het kind in de reiswieg plaatsen
24• DRIEPUNTSVEILIGHEIDSGORDEL: maak de
schouderriempjes losser door op de gesp te drukken
(fig_a), en verleng ze (fig_b).
25• druk op de rode knop (fig_a) en maak de schouderriempjes
los van het beenstuk (fig_b).
26• Plaats het kind in de reiswieg en steek de gesp van de
schouderriempjes in het beenstuk tot deze vastzit.
27• Het kind in de reiswieg moet goed vastzitten. Als de
riempjes loszitten, verkort ze dan door aan het uiteinde te
trekken.
De riemen moeten zo strak mogelijk zitten voor de
veiligheid van het kind bij een ongeval. Zorg voor een
minimale speling (een vingerdikte tussen de riem en de
borstkas van het kind).
28• DE RIEMPJES VERWIJDEREN: om de riempjes uit de kuip
van de reiswieg te halen steekt u de gespen van het
beenstuk door de openingen onder de kuip en haalt u
de riempjes eruit (fig_a). Om de bevestigingen van de
schouderriempjes van onder de kuip los te halen maakt u
ze los van de steunen en steekt u ze door de openingen
(fig_b).
29• Plaats het losgehaakte gordeltje terug in het zakje.
Accessoires
30• REGENSCHERM COVER ALL: a lles afdekkend regenscherm
van transparant materiaal.
VERSCHONINGSTAS: tas met matrasje om de baby te
verschonen, kan aan de wagen gehaakt worden.
31• BASSINET STAND: praktische en compacte steun.
32• ANTIVERSTIKKINGSSET: matrasje met kussen.
Compatibel met onze 3-punts kit auto.
Serienummers
33• Onder de basis van de reiswieg staat informatie over de
productiedatum.
• Naam van het product, productiedatum en serienummer
(fig_a).
Kit Auto:
• Homologatie-etiket (fig_b);
• Productiedatum van het gordeltje (fig_c);
Deze gegevens zijn nuttig voor de consument indien het
product gebreken mocht vertonen.
Lezen van het homologatie-etiket
• In deze paragraaf wordt uitgelegd hoe het homologatie-
etiket gelezen moet worden (het oranje etiket).
• Aan de bovenzijde van het etiket staat het merk van de
fabrikant en de naam van het product.
• 0-10 kg Y geeft aan dat het product gehomologeerd is
voor kinderen vanaf de geboorte tot 10 kg en dat het
voorzien is van een driepuntsgordel.
• De letter E in een cirkel: duidt op het Europese
homologatiemerk en het nummer duidt op het land dat
de homologatie afgegeven heeft (1: Duitsland, 2: Frankrijk,
3: Italië, 4: Nederland, 11: Groot-Brittannië en 24: Ierland).
• Homologatienummer: begint dit met 04 dan duidt dit op
het vierde amendement (dat op dit moment van kracht is)
van verordening R44.
• Referentienorm: UN/ECE R44/04.
• Volgnummer productie: is voor elke reiswieg uniek, vanaf
de afgifte van de homologatie wordt elke wieg door een
eigen nummer gekenmerkt.
Assistentiedienst
• Mochten delen van het model kwijt geraakt of beschadigd
zijn dan dienen alleen originele reserveonderdelen van

42
Peg-Pérego gebruikt te worden. Voor eventuele reparaties,
vervangingen, informatie over het product en de verkoop
van originele reserveonderdelen en accessoires contact
opnemen met de assistentiedienst van Peg-Pérego:
• tel.: 0039-039-60.88.213
• fax: 0039-039-33.09.992
• e-mail: assistenza@pegperego.it
• internet site: www.pegperego.com
• Peg-Pérego kan op elk gewenst moment wijzigingen
aanbrengen aan de modellen die in deze publicatie
beschreven worden, om redenen van technische of
commerciële aard.
Wat vind je van ons?
• Peg-Pérego staat de consumenten ter beschikking om
zo goed mogelijk aan al hun eisen te voldoen. Het is
daarom uiterst belangrijk en kostbaar om de mening van
onze klanten te kennen. Wij zijn u dan ook zeer dankbaar
indien i na het gebruik van ons product deze VRAGENLIJST
TEVREDENHEID CONSUMENT in te vullen en opmerkingen
of suggesties te vermelden. De vragenlijst staat in onze
internet site: www.pegperego.com
Tak for dit valg af et produkt fra
Peg-Pérego.
• Peg-Pérego S.p.A. er ISO 9001 certificeret.
• Certificeringen yder kunder og forbrugere
garanti for gennemskuelighed og tillid til
måden firmaet arbejder på.
Primonido New autoliften fås i
modellerne Young eller Culla.
Egenskaber for produktet
Autostol, Gruppe 0, kategori "Universal"
• Autoliften er typegodkendt i henhold til UN/ECE R44/04 for
børn med en vægt på mellem 0-10 kg. Den passer til de
fleste automobilsæder, men ikke til alle.
• Autoliften kan installeres korrekt i bilen, såfremt der i
vognens manual for brug og vedligeholdelse er anført, at
vognen er egnet til "universal" fastspændingssystemer i
gruppe 0.
• Autoliften er klassificeret som "Universal" i henhold
til strengere kriterier for typegodkendelse end de
gældende for tidligere modeller, der ikke er udstyret med
typegodkendelsesmærkat.
• Produktet må kun anvendes i biler, der er udstyret med
2- eller 3-punkts sikkerhedsseler på bagsædet med 2 eller 3
pladser, og er typegodkendt i henhold til UN/ECE R16 eller
tilsvarende standarder.
• I tvivlstilfælde eller for yderligere oplysninger om
montering af autoliften på specifikke køretøjer bedes du
henvende dig til producenten eller til din forhandler.
VIGTIGT
• “Autoliften”, gruppe 0, skal installeres i samme retning som
kørselsretningen.
• Installer ikke autoliften på sæder, der vender modsat
DK_Dansk

43
kørselsretningen eller på tværs af bilens almindelige
kørselsretning.
• Dette produkt er progressivt nummereret.
PAS PÅ!
VIGTIGT: Læs disse anvisninger omhyggeligt og
opbevar dem i den dertil indrettede holder i hele
produktets levetid. Du kan udsætte dit barn for en
sikkerhedsrisiko, hvis disse anvisninger ikke følges.
• Det kan være farligt at efterlade dit barn uden opsyn.
• Montering og klargøring af produktet må kun foretages af
voksne.
• Brug ikke produktet, hvis der er tegn på manglende dele
eller brud.
• Før brugen skal du sikre dig, at alle tilkoblingsmekanismer
er korrekt spændt til.
• Undgå at stikke fingrene ind i bevægelige dele.
• Brug den ikke i nærheden af varmekilder, åben ild eller
farlige genstande, som barnet kan nå med hånden.
• Det kan indebære en fare at anvende tilbehør, som ikke er
godkendt af producenten.
• Kontroller at selerne til fastspænding af autoliften i vognen
altid er strammet helt og reguler de seler, der holder barnet
fastspændt.
• Vikl aldrig selerne omkring hinanden.
• Det er vigtigt at udskifte anordningen, såfremt den har
været udsat for voldsomme stød i forbindelse med en
ulykke eller udviser synlige tegn på brud eller deformering.
• Brugeren må ikke under nogen omstændigheder foretage
ændringer på sikkerhedsanordningen.
• Følg producentens anvisninger for sikkerhedssystemet til
barnet med største nøjagtighed.
• Efterlad aldrig barnet i autoliften i bilen uden opsyn.
• Autoliften skal altid være fastspændt med bilens
sikkerhedsseler, også selv om barnet ikke sidder i stolen.
I tilfælde af en hård opbremsning vil den ellers kunne
forårsage skader på passagerer i vognen.
• Under kørsel i bilen må barnet aldrig sidde på skødet og
må aldrig anbringes udenfor autoliften. I tilfælde af en hård
opbremsning, selv ved lav hastighed, vil barnet kunne blive
skubbet hårdt fremad.
• Vær især opmærksom på bagage eller genstande i bilen,
som kunne forårsage skade på barnet i autoliften i tilfælde
af en ulykke.
• Efterlad ikke autoliften i bilen under stærk sol, da visse af
delene vil kunne blive meget varme og dermed skade
barnets sarte hud; kontroller dette før barnet anbringes i
stolen.
• Pas på at autoliften ikke blokeres af bilsædets bevægelige
dele eller klemmes af døren.
• Brug ikke autoliften uden dens stofbetræk, som ikke
må udskiftes med en anden type betræk, som ikke er
godkendt af producenten, da betrækket er en integreret
del af autoliften og dennes sikkerhed. Ved udskiftninger
skal du altid anvende originale reservedele.
• Autoliften er konstrueret med en støddæmpende
anordning i polystyren, som er indbygget i selve stellet
under beklædningen. Den må ikke fjernes.
• Denne vogn er kun egnet til børn, der ikke selv kan sætte
sig op.
• Denne vogn er beregnet til brug fra fødslen og indtil en
vægt på 9 kg. Anvendt i bilen betragtes det som en vægt
på 10 kilo.
• Anbring kun produktet på faste, tørre horisontale
overflader
• Lad ikke andre børn lege uden opsyn i nærheden af
barnevognen.
• Pas på barnet, når der udføres reguleringer af
mekanismerne (det store håndgreb, ryglænet).
• Kontroller jævnligt det store håndgreb (eller håndtag) samt
autoliftens bund for at tilsikre, at der ikke er tegn på brud
eller beskadigelser.
• Når autoliften bruges med et understel, skal det
kontrolleres at Autoliftens maksimale længde passer til det
anførte på stellet.
Brugsanvisning
sådan anvendes autoliften
1• KALECHE OG OVERSTYKKE: For at montere kalechen
indsættes beslagene i de tilhørende huller (fig_a), hvorefter
den knappes til på bagsiden.
Knap overstykket til på begge sider (fig_b).

44
2• INDSTILLING AF RYGLÆNET: Træk grebet udad og drej det i
urets retning for at løfte ryglænet og modsat urets retning
for at sænke det.
3• VUGGEINDSTILLING: Autoliften er udstyret med
udtrækkelige støtteben, som befinder sig på undersiden,
og det er således muligt at vælge imellem, om baby skal
gynges (fig_a) eller ikke (fig_b). Drej støttebenene udad for
at omdanne autoliften til en behagelig babyseng (fig_c).
4• SYSTEMET DE FIRE ÅRSTIDER: Autoliften er udstyret med
et lille greb, der befinder sig på undersiden af denne, med
hvilket du kan regulere luftcirkulationen i Autoliften.
Flyt grebet hen på 'blå' for at få et friskt og ventileret miljø
(om sommeren), eller på 'rød' for at begrænse luftindtaget
(om vinteren).
5• TRANSPORTSELER: For at transportere autoliften sænkes
kalechen, hvorefter du kan trække transportremmene
ud fra sidelommerne (fig_a). Det er også muligt at
transportere den ved hjælp af Ganciomatic håndtagene
(fig_b).
Ganciomatic systemet
6• Ganciomatic Systemet er det praktiske og hurtige
system, der gør det muligt at fastspænde autoliften
på Ganciomatic-basen på stellet Carello Classico 58.5,
Carrello Classico Velo, og på Bassinet Stand med en enkel
bevægelse, (kan købes separat).
For at hægte autoliften på, anbringer du den på
understellet og trykker nedad med begge hænder, indtil
du hører et klik.
Aktiver altid stellets bremse før du hægter autoliften på.
Kontroller om Autoliften er hægtet korrekt på.
7• Træk Ganciomatic-beslaget i pilens retning (pil_a) og tryk
samtidig grebet (pil_b) ind og træk det opad for at løsne
autoliften (pil_c).
Aftagelig beklædning
8• SÅDAN TAGES BEKLÆDNINGEN AF AUTOLIFTEN: Knap
overstykket og kalechen af, tryk på beslagene og
træk kalechen opad (fig_a); ret ryglænet helt op og
træk overmadrassen ud (fig_b); knap den indvendige
beklædning af (fig_c) og fjern den (fig_d).
Vedligeholdelse af beklædningen
• Børst stofdelene for at fjerne støv og vask så polstringen
i hånden ved en maksimumstemperatur på 30º; må ikke
vrides;
• må ikke klorbleges;
• må ikke stryges;
• må ikke kemisk renses;
• fjern ikke pletter med opløsningsmidler og tør ikke
polstringen i en tørretumbler.
Rengøring af produktet
• Produktet har kun brug for et minimum af vedligeholdelse.
Rengøring og vedligeholdelse må kun udføres af voksne.
• Det anbefales at holde alle bevægelige dele rene og om
nødvendigt smøre dem med en let olie.
• Rengør delene i plastik regelmæssigt med en fugtig klud;
brug ikke opløsningsmidler eller lignende produkter.
• Stofdelene skal børstes for at fjerne støv.
• Rens ikke udstyrets støddæmpende dele i polystyren med
opløsningsmidler eller andre lignende produkter.
• Beskyt produktet mod vejrforholdene, vand, regn eller sne;
mange materialer vil skifte farve, såfremt de udsættes for
sollys i længere tid.
• Opbevar produktet på et tørt sted.
Kit Auto
Sådan monteres sikkerhedsselen
9• Anbring autoliften med ryglæn og kaleche sænket ned.
10• Under transport i bilen skal eventuelle ekstra madrasser
fjernes.
11• 3-PUNKTSSELE: Stik skridtremmen ind gennem sprækken
på madrassen (fig_a) og gennem sprækkerne i stellet
(fig_b), indtil den er ført helt igennem (fig_c).
12• Stik skulderselernes to ender ind gennem sprækkerne i
madrassen og stellet (fig_a) og hægt dem fast på tapperne
(fig_b).
13• Selerne er hægtet på under stellet (fig_a) og indeni Pram
(fig_b).

45
Fastspænding i bilen med
sikkerhedsselerne
SÅDAN SPÆNDES AUTOLIFTEN FAST I BILEN: Bilens
bagsæde (med 3 pladser) er udstyret med sikkerhedsseler
og den midterste kan anvendes enten som bækken- eller
brystsele, men i begge tilfælde kan den bruges til at
spænde Autoliften fast i bilen.
Vi anbefaler, at autoliften anbringes på bagsædet som vist
på tegningen, med hovedenden ind mod midtersædet.
14• Autoliften som anbragt i bilen med bækkenselen.
15• Autoliften som anbragt i bilen med 3-punktsselen.
16• Det er også muligt at placere autoliften midt på bagsædet
med 3 pladser ved hjælp af de to yderste sikkerhedsseler
(fig_a). autoliften kan ikke anbringes som på figur b,
fordi den kun kan placeres i bilen med sikkerhedsselerne
gående i modsat retning.
17• Autoliften anbragt på bageste autosæde med 2 pladser.
Autoliften kan anbringes med barnets fødder både i den
ene retning og den anden.
Hvis bilens sæde ikke er plant, men hælder en smule, kan
bunden gøres vandret ved hjælp af nogle håndklæder.
18• Tag fat i bagsædets sikkerhedssele i fodenden af autoliften,
fold selen (fig_a) og stik den ind i sprækken på en af de
medfølgende spænder (fig_b). Stik spændets lille røde
stang ind i den sammenbukkede sikkerhedssele (fig_c).
19• Tryk på den grå greb til venstre (fig_a) og hægt spændet
fast på ringen på autoliften (fig_b).
• Gentag dette med selen på den modsatte side af
Autoliften ved barnets hovedende.
20• Når spændet er hægtet fast på ringen på Autoliften, skal
sikkerhedsselen strammes til for at autoliften er fastspændt
stabilt i bilen.. Træk den bukkede sele ind mod dig selv
(pil_a) og mens du holder den fast, trækker du i selen fra
bagsiden af spændet (pil_b) for at holde den fast.
21• Sådan er spændet hægtet på sikkerhedsselen og på
autoliften i dennes fodende (fig_a). Sådan er spændet
hægtet på sikkerhedsselen og på autoliften i dennes
hovedende (fig_b).
22• Autoliften i bilen.
23• SÅDAN LØSNER DU AUTOLIFTEN FRA BILEN: Tryk på det
grå greb på spændet (fig_a) og træk det ud fra ringene på
begge sider af autoliften (fig_b). Hvis et af spænderne er
strammet for meget og er svært at løsne, skal du trykke på
autoliftens side, samtidigt med at du løsner spændet.
Sådan anbringes barnet i autoliften
24• 3-PUNKTS SIKKERHEDSSELE: Løsn skulderselerne ved at
trykke på spændet (fig_a) og forlænge dem (fig_b).
25• Tryk på den røde knap (fig_a) og frigør skulderselerne fra
skridtselen (fig_b).
26• Anbring barnet i autoliften og indsæt skulderselernes
spænde i skridtselen indtil det klikker fast.
27• Barnet skal være godt fastspændt i autoliften. Hvis selerne
er løse, skal skulderselerne længde reduceres ved at trække
i spændets yderste stykke.
Sikkerhedsselerne skal være strammet til så meget som
muligt for at sikre barnet i tilfælde af en ulykke. Lad der
være en smule fri plads (en fingers tykkelse mellem selen
og barnet brystkasse).
28• SÅDAN FJERNES SELERNE: For at fjerne selerne fra
autoliftens stel, indsættes skridtselens spænde i
sprækkerne under stellet, hvorefter de trækkes ud (fig_a).
Skulderselernes hægter trækkes ud under stellet, når de
er frigjort fra tapperne, hvorefter de føres gennem de
tilhørende sprækker (fig_b).
29• Anbring den løsnede sele i den tilhørende lomme.
Tilbehør
30• Regnslag ‘Cover All’: Regnslag i gennemsigtigt PVC, som
garanterer total beskyttelse af liften, når den er hægtet på
klapvognen.
TASKE TIL BLESKIFT: med indbygget underlag for bleskift;
kan hægtes på klapvognen.
31• BASSINET STAND: praktisk og kompakt støttebase.
32• ANTI-KVÆLNINGSSÆT: Madras og pude.
Tilpasset vores 3-punkts auto-sæt.
Serienumre
33• Du kan finde oplysninger om produktionsdatoen under
autoliftens base.
• Produktnavn, produktionsdato og produktets serienummer

46
(fig_a).
Kit Auto:
• Typegodkendelsesmærkat (fig_b);
• Sikkerhedsselens produktionsdato (fig_c);
Disse oplysninger er nyttige for forbrugeren at vide, såfremt
der skulle opstå problemer med produktet.
Sådan læses
typegodkendelsesmærkaten
• I dette afsnit finder du forklaringer på, hvordan
typegodkendelsesmærkaten læses (orange mærkat).
• Øverst på mærkaten findes den producerende
virksomheds varemærke samt produktets navn.
• 0-10 kg Y angiver, at produktet er typegodkendt til børn fra
fødslen indtil en vægt på 10 kg og at produktet er udstyret
med en 3-punktssele.
• Bogstavet E indeni en cirkel: angiver mærket for den
europæiske typegodkendelse, og nummeret angiver det
land, der har udstedt typegodkendelsen (1: Tyskland, 2:
Frankrig, 3: Italien, 4: Holland, 11: Storbritanien og 24:
Irland).
• Typegodkendelsesnummer: Hvis nummeret starter med 04
angiver det den fjerde ændring (den aktuelt gældende) af
R44 reglementet.
• Referencenorm: UN/ECE R44/04.
• Progressivt produktionsnummer: individualiserer hver
enkelt lift; fra typegodkendelsesdatoen har hver enkelt lift
sit eget nummer.
Serviceafdeling
• Skulle det ske, at dele af modellen mistes eller beskadiges,
må der kun anvendes originale Peg-Pérego reservedele. For
eventuelle reparationer, udskiftninger, produktoplysninger,
salg af originale reservedele og tilbehør bedes du kontakte
Serviceafdelingen hos Peg-Pérego:
• Tlf.: 0039-039-60.88.213
• fax: 0039-039-33.09.992
• e-mail: assistenza@pegperego.it
• Internetside: www.pegperego.com
Peg-Pérego forbeholder sig retten til på ethvert tidspunkt
at foretage ændringer af de heri beskrevne modeller af
tekniske eller forretningsmæssige grunde.
Lad os høre din mening om os
• Peg-Pérego er til forbrugernes disposition med henblik
på at opfylde deres behov på bedste måde. Det er derfor
yderst vigtigt og værdifuldt for os at høre, hvad vores
kunder mener. Vi vil derfor være dig taknemmelige, hvis
du efter anvendelsen af et af vores produkter udfylder
SPØRGESKEMAET VEDR. KUNDETILFREDSHED, som
du finder på vores internetside, hvor du kan anføre
bemærkninger eller forslag: www.pegperego.com

47
Kiitos, kun olet valinnut Peg-Pérego-
tuotteen.
• Peg-Pérego S.p.A. on ISO 9001 sertifioitu.
• Sertifiointi takaa yhtiön työtapojen
läpinäkyvyyden ja sen, että asiakkaamme
voivat luottaa niihin.
Primonido New rattaat on saatavina
Young- tai Culla-malleissa.
Tuotteen ominaisuudet
Pram-auto, ryhmä 0, kategoria Universal
• Rattaat on tyyppihyväksytty standardin UN/ECE R44/04
mukaisesti lapsille joiden paino on 0-10 kg. Sopii
asennettavaksi melkein kaikkien ajoneuvojen istuimiin,
mutta ei aivan kaikkiin.
• Rattaat voidaan asentaa oikein, jos ajoneuvon käyttö- ja
huolto-oppaassa mainitaan että ajoneuvo on yhteensopiva
Universal ryhmä 1-kiinnitysjärjestelmien kanssa.
• Rattaat kuuluvat luokkaan Universal
tyyppihyväksyntäkriteerien mukaisesti, jotka ovat
tiukemmat kuin aikaisemmissa, ilman tätä mainintaa
olevissa malleissa.
• Primonido Newia voidaan käyttää ainoastaan sellaisissa
ajoneuvoissa, joiden kaksi- tai kolmepaikkaisella
takapenkillä on UN/ECE R16 -standardin tai vastaavan
normin mukaisesti tyyppihyväksytyt 2- tai 3-pisteturvavyöt.
• Ellet ole asiasta varma tai jos tarvitset lisätietoja Primonido
Newin kiinnittämisestä tiettyyn ajoneuvoon, ota yhteys
valmistajaan tai jälleenmyyjään.
TÄRKEÄÄ
• Rattaat, ryhmä 0, on asennettava ajosuunnan suhteen
kohtisuoraan.
• Älä asenna rattaita istuimille, jotka ovat ajoneuvon
ajosuunnan suhteen vastakkaisessa tai poikittaisessa
FI_Suomi
asennossa.
• Tuotteessa on progressiivinen valmistusnumero.
HUOMAA
TÄRKEÄÄ: Lue nämä ohjeet huolellisesti ja pidä
ne tallessa koko tuotteen käyttöiän ajan. Lapsen
turvallisuus saattaa vaarantua ellei näitä ohjeita
noudateta.
• Voi olla vaarallista jättää lapsi ilman valvontaa.
• Tuotteen kokoamis- ja valmistelutoimenpiteet saa tehdä
vain aikuinen.
• Älä käytä tuotetta, josta puuttuu osia tai joka on viallinen.
• Ennen käyttöä on varmistettava, että kaikki
kiinnitysmekanismit ovat kunnolla kiinni.
• Älä laita sormia mekanismeihin.
• Älä käytä lähellä lämmönlähteitä tai avotulta. Varmista, ettei
lapsen käsien ulottuvilla ole vaarallisia esineitä.
• Voi olla vaarallista käyttää muita kuin valmistajan
hyväksymiä lisävarusteita.
• Varmista, että hihnat, joilla rattaat kiinnitetään ajoneuvoon,
ovat aina kireällä, ja säädä hihnat, jotka ovat lapsen
ympärillä.
• Älä koskaan laita hihnoja kierteille.
• On suositeltavaa vaihtaa tuote, jos siihen on kohdistunut
voimakasta rasitusta onnettomuuden johdosta tai jos siinä
näkyy rikkinäisiä tai vääntyneitä kohtia.
• Käyttäjä ei missään tapauksessa saa muuttaa turvalaitetta.
• Noudata tarkoin lapsen turvajärjestelmän valmistajan
antamia ohjeita.
• Älä jätä lasta autoon rattaissa ilman valvontaa.
• Rattaat täytyy aina kiinnittää ajoneuvon turvavöillä,
silloinkin kun se on tyhjä. Äkillisen jarrutuksen vuoksi se
saattaa aiheuttaa tapaturmia ajoneuvon matkustajille.
• Älä koskaan pidä lasta sylissä ajomatkan aikana äläkä sijoita
lasta muualle kuin rattaisiin. Äkillisen jarrutuksen sattuessa
hitaassakin vauhdissa lapsi helposti sinkoutuu eteenpäin.
• Varo erityisesti matkatavaroita tai muita esineitä, jotka
onnettomuuden sattuessa voivat vahingoittaa rattaissa
olevaa lasta.
• Älä jätä rattaita autoon auringonpaisteeseen. Jotkut sen
osat saattavat kuumentua ja vahingoittaa lapsen herkkää
48
ihoa. Tarkista asia ennen lapsen sijoittamista tuotteeseen.
• Varo, etteivät rattaat jää kiinni johonkin istuimen tai oven
liikkuvaan osaan.
• Älä käytä rattaita ilman kangaspäällystä. Päällyksen saa
vaihtaa ainoastaan toiseen valmistajan hyväksymään
päällykseen, koska se on rattaiden ja turvallisuuden
olennainen osa. Jos se täytyy vaihtaa, käytä alkuperäistä
varaosaa.
• Rattaisiin kuuluu polystyreenistä tehty iskunvaimennusosa,
joka on rakennettu kiinni runkoon pehmusteen alle: älä
irrota sitä.
• Tämä tuote soveltuu ainoastaan lapsille, jotka eivät pysty
itse nousemaan istumaan.
• Tuote on tarkoitettu vastasyntyneistä 9 kg painaviin lapsiin
saakka. Autossa käytettäessä 10 kg painaviin lapsiin saakka.
• Käytä ainoastaan kovalla, vaakasuoralla ja kuivalla pinnalla.
• Älä anna muiden lasten leikkiä vaunujen läheisyydessä
ilman valvontaa.
• Varo lasta kun säädät mekanismeja (kahvaa, selkänojaa).
• Tarkista säännöllisesti työntöaisa (tai kahvat) sekä rattaiden
pohja ja varmista, ettei niissä ole rikkoutumia tai vikoja.
• Jos käytät rattaita telineen kanssa, tarkista telineeseen
merkitty kopan enimmäispituus.
Käyttöohjeet
Rattaiden käyttö
1• KUOMU JA PEITE: Kuomu kiinnitetään asettamalla
kiinnikkeet reikiin (kuva_a) ja napittamalla takaa.
Napita kuomu molemmilta puolilta (kuva_b).
2• SELKÄNOJAN SÄÄTÄMINEN: Vedä nuppia ulospäin ja
käännä sitä myötäpäivään selkänojan nostamiseksi tai
vastapäivään sen laskemiseksi.
3• KEINUASENTO: Rattaat on varustettu pohjan alle sijoitetuilla,
irrotettavilla jaloilla, joiden avulla on mahdollista valita
keinuva (kuva_a) tai keinumaton (kuva_b) asento. Käännä
jalkoja ulospäin rattaiden muuttamiseksi mukavaksi
vuoteeksi (kuva_c).
4• JÄRJESTELMÄ NELJÄ VUODENAIKAA: Rattaat on varustettu
pohjan alle sijoitetulla vivulla, jolla voidaan säätää sisäistä
ilmankiertoa.
Siirrä vipu siniselle kun haluat viileän ja ilmastoidun
ympäristön (kesällä) tai punaiselle ilmankierron
rajoittamiseksi (talvella).
5• KULJETUSHIHNAT: Primonido Newin kuljettamista varten
laske kuomu alas ja ota kuljetushihnat sivutaskuista
(kuva_a). Voit kuljettaa sitä myös ottamalla kiinni
Ganciomatic-kahvoista (kuva_b).
Ganciomatic-järjestelmä
6• Ganciomatic-järjestelmä on kätevä ja nopea järjestelmä,
jonka avulla voit kiinnittää rattaat Classico 58.5 –vaunun,
Classico Velo vaunun, ja Bassinet-telineen Ganciomaticalustaan yhdellä liikkeellä (voidaan hankkia erikseen).
Rattaat kiinnitetään sijoittamalla ne vaunulle ja painamalla
molemmin käsin, kunnes se naksahtaa paikalleen.
Lukitse aina jarru ennen rattaiden kiinnittämistä ja
irrottamista.
Varmista, että rattaat ovat oikein kiinni.
7• Se irrotetaan siirtämällä Ganciomatic-kahvan vipua nuolen
suuntaan (nuoli_a), painamalla samalla vipua (nuoli_b) ja
vetämällä ylös, kunnes se irtoaa (nuoli_c).
Päällysteen irrottaminen
8• Rattaiden PÄÄLLYSTEEN IRROTTAMINEN: Avaa peitteen
ja kuomun napit, paina kiinnikkeitä ja vedä kuomu ylös
(kuva_a); nosta selkänoja ylös ja poista patja (kuva_b); avaa
napit (kuva_c) ja irrota sisäosan päällyste (kuva_d).
Pehmusteen hoitaminen
• harjaa pöly irti kangasosista ja pese käsin korkeintaan 30 °C:
n lämpötilassa. Ei saa vääntää kuivaksi;
• ei kloorivalkaisua;
• ei silitystä;
• ei kuivapesua;
• älä käytä liuotteita tahranpoistoon; ei rumpukuivausta.
Tuotteen puhdistus
• Tuotteenne edellyttää pienen määrän huoltoa.
Puhdistamis- ja huoltotoimenpiteet tulee suorittaa

49
ainoastaan aikuisten toimesta.
• Kaikkia liikkuvia osia suositellaan pidettäväksi puhtaina ja,
jos tarpeen, voitele ne kevyellä öljyllä.
• Puhdista säännöllisesti muoviosat kostealla pyyhkeellä. Älä
käytä liuottimia tai muita samankaltaisia tuotteita.
• Harjaa kankaisista osista pölyt pois.
• Älä puhdista iskuja vaimentavia polystyreenisiä laitteita
liuottimilla tai muilla samankaltaisilla tuotteilla.
• Suojaa tuote ulkoisilta tekijöiltä, vedeltä, sateelta tai lumelta;
jatkuva ja pitkäaikainen auringon paisteessa pitäminen voi
aiheuttaa värimuutoksia useisiin materiaaleihin.
• Säilytä tuotetta kuivassa paikassa.
Autoonasennussarja
turvavyön asentaminen
9• Sijoita rattaat paikalleen selkänoja ja kuomu laskettuina.
10• Autossa kuljettamisen ajaksi mahdolliset lisäpatjat täytyy
poistaa.
11• 3-PISTETURVAVYÖ: Työnnä jalkojen välistä kulkevaa vyötä
patjan aukkoon (kuva_a) sekä korin aukkoihin (kuva_b)
kunnes se tulee läpi (kuva_c).
12• Työnnä olkahihnojen päät patjan ja korin aukkoihin
(kuva_a) ja kiinnitä ne tappeihin (kuva_b).
13• Vyöt kiinnitettyinä korin alle (kuva_a) sekä Pramin sisälle
(kuva_b).
Kiinnittäminen autoon turvavöillä
RATTAIDEN KIINNITTÄMINEN AUTOON: Auton takapenkissä
(kolmipaikkaisessa) on 3 turvavyötä ja keskimmäinen
voi olla olkavyö tai lantiovyö. Molemmissa tapauksissa
turvakaukalo voidaan kiinnittää autoon.
On suositeltavaa sijoittaa rattaat takapenkille niin että pää
on keski-istuimen kohdalla.
14• Rattaat sijoitettuna autoon, jossa on lantiovyö.
15• Rattaat sijoitettuna autoon, jossa on 3-pisteturvavyö.
16• Rattaat voidaan sijoittaa keskelle kolmipaikkaista
takapenkkiä käyttämällä kahta ulompaa turvavyötä
(kuva_a) Rattaita ei voi sijoittaa kuten toisessa kuvassa,
kuva_b, koska se voidaan kiinnittää autoon vain vöillä
joiden suunta on vastakkainen.
17• Rattaiden sijoittaminen kaksipaikkaiseen takapenkkiin.
Primonido New voidaan kääntää niin että lapsen jalkopää
on kumpaan tahansa suuntaan.
Jos auton istuin ei ole vaakasuora vaan kalteva, voit saada
sen vaakasuoraksi pyyhkeiden avulla.
18• Ota takapenkin vyö rattaista lapsen jalkopään puolelta,
taita se (kuva_a) ja työnnä se toisen varusteisiin kuuluvan
vyöosan solkeen (kuva_b). Työnnä soljen punainen vipu
taitetun turvavyön sisään (kuva_c).
19• Paina vasemmanpuoleista harmaata vipua (kuva_a) ja
kiinnitä vyöosa rattaiden renkaaseen (kuva_b).
• Toista toimenpide rattaiden toiselle, lapsen pään puolella
olevalle turvavyölle.
20• Kun vyöosa on kiinni rattaiden renkaassa, turvavyö
täytyy kiristää, jotta rattaat pysyvät paikallaan autossa.
Vedä taitettua vyötä itseesi päin (nuoli_a) ja pidä siitä
kiinni, kiristä turvavyö vyöosan takaa (nuoli_b) sen
kiinnittämiseksi.
21• Turvavyöhön ja rattaiden jalkopäähän kiinnitetty vyöosa
(kuva_a). Turvavyöhön ja rattaiden pääpuoleen kiinnitetty
vyöosa (kuva_b).
22• Rattaat autossa.
23• RATTAIDEN IRROTTAMINEN AUTOSTA: Paina vyöosan
harmaata vipua (kuva_a) ja irrota se rattaiden molemmilla
puolilla olevista renkaista (kuva_b). Mikäli toinen vyöosista
on liian kireällä ja vaikeasti irrotettavissa, paina rattaita ja
irrota samalla vyöosa.
Lapsen sijoittaminen rattaisiin
24• 3-PISTETURVAVYÖ: Löysää olkahihnat painamalla solkea
(kuva_a) ja pidennä niitä (kuva_b).
25• Paina punaista painiketta (kuva_a) ja irrota olkahihnat
jalkojen välisestä hihnasta (kuva_b).
26• Sijoita lapsi rattaiden sisään ja työnnä olkahihnojen solkea
jalkojen välisen hihnan lukkoon, kunnes se kiinnittyy.
27• Rattaiden sisällä lapsen täytyy olla hyvin sidottu paikalleen.
Jos hihnat ovat löysällä, lyhennä niitä vetämällä hihnan
päätä.
Hihnojen täytyy olla mahdollisimman kireällä. Näin lapsi
on paremmin suojattu onnettomuuden sattuessa. Jätä
hyvin pieni liikkumisvara (sormen paksuus hihnan ja lapsen

50
rintakehän välillä).
28• HIHNOJEN IRROTTAMINEN: Rattaiden hihnat irrotetaan
työntämällä jalkojen välisen hihnan soljet rungon alla
olevien aukkojen läpi (kuva_a). Olkahihnojen poistamiseksi
rungon alta ne täytyy irrottaa tapeista ja työntää ne niiden
omien aukkojen läpi (kuva_b).
29• Laita irrotettu vyö takaisin taskuun.
Lisävarusteet
30• Sateensuoja Cover All: Läpinäkyvästä PVC:stä valmistettu
sateensuoja takaa rattaisiin kiinnitetylle korille täyden
suojan.
VAIHTOLAUKKU: sisältää vauvanvaihtoalustan, voidaan
kiinnittää rattaisiin.
31• BASSINET STAND: käytännöllinen ja kompakti tukiteline
32• TUKEHTUMISELTA SUOJAAVA SETTI: patja ja tyyny
Soveltuu 3-piste autoonasennussarjaamme
Sarjanumerot
33• Rattaiden pohjan alla ovat sen valmistusta koskevat tiedot.
• Tuotteen nimi, valmistuspäivämäärä sekä sarjanumero
(kuva_a).
Autoonasennussarja:
• Tyyppihyväksyntäetiketti (kuva_b);
• Vyön valmistuspäivämäärä (kuva_c);
Nämä tiedot ovat käyttäjälle hyödyllisiä mikäli tuotteessa
ilmenee ongelmia.
Tyyppihyväksyntäetiketin lukeminen
• Tässä kappaleessa kuvataan miten tyyppihyväksyntäetiketti
luetaan (oranssi etiketti).
• Yläosassa on valmistajan merkki ja tuotteen nimi.
• 0-10 kg Y osoittaa, että tuote on tyyppihyväksytty
vastasyntyneistä 10 kg painaviin lapsiin saakka ja että siinä
on 3-pisteturvavyö.
• E-kirjain ympyrän sisällä: eurooppalainen
tyyppihyväksyntämerkintä, numero osoittaa maan, jossa
hyväksyntä on myönnetty (1: Saksa, 2: Ranska, 3: Italia, 4:
Alankomaat, 11: Iso Britannia ja 24: Irlanti).
• Tyyppihyväksyntänumero: jos luku alkaa 04, kyseessä on
säännöksen R44 neljäs muutos (tällä hetkellä voimassa).
• Viitenormi: UN/ECE R44/04.
• Progressiivinen valmistusnumero: identifioi jokaisen
tuotteen, tyyppihyväksynnästä lähtien jokaisella on oma
numeronsa.
Huoltopalvelu
• Jos mallin osia sattuu hukkaantumaan tai vahingoittumaan,
käytä vain alkuperäisiä Peg-Péregon varaosia. Mahdollisia
korjauksia, osien vaihtoja, tuotetietoa ja alkuperäisten
varaosien ja lisälaitteiden myyntiä varten, ota yhteyttä
myynninjälkeiseen asiakaspalveluun
• Puh: 0039-039-60.88.213
• Fax: 0039-039-33.09.992
• E-mail: assistenza@pegperego.it
• Internet-sivut: www.pegperego.com
• Peg-Pérego voi koska tahansa tehdä muutoksia tässä
julkaisussa kuvattuihin malleihin teknisistä tai kaupallisista
syistä.
Mitä mieltä olette meistä?
• Peg-Pérego haluaa palvella asiakkaitaan ja vastata
parhaansa mukaan kaikkiin heidän tarpeisiinsa.
Siksi asiakkaidemme mielipiteet ovat meille erittäin
tärkeitä ja arvokkaita. Olisimmekin hyvin kiitollisia, jos
haluaisit tuotettamme käytettyäsi täyttää KULUTTAJAN
TYYTYVÄISYYSKYSELYYN mielipiteesi tai kehittämisideat.
Löydät kyselyn Internetistä osoitteesta:
www.pegperego.com

51
Děkujeme, že jste si vybrali výrobek
Peg-Pérego.
• Společnost Peg-Pérego S.p.A. je
certifikovaná podle normy ISO 9001.
• Tato certifikace představuje pro zákazníky a
spotřebitele záruku transparentnosti a důvěry
ohledně způsobu práce společnosti.
Kočárek Primonido New je k dispozici v
typu Young nebo Culla.
Vlastnosti výrobku
Kočárek-auto, skupina 0, kategorie
“Univerzální”
• Kočárek je homologovaný podle nařízení UN/ECE R44/04
pro děti ve váze 0-10 kg. Je vhodný pro většinu sedadel v
autě, ale ne pro všechny.
• Kočárek lze do auta správně instalovat, jestliže je v
návodu k použití a údržbě auta uvedena kompatibilita s
univerzálními poutacími systémy skupiny 0.
• Kočárek je klasifikován jako univerzální typ podle
nejpřísnějších homologačních kritérií v porovnání s
předchozími modely, které toto homologační označení
nemají.
• Kočárek lze použít pouze v autech se zadním dvoumístným
nebo třímístným sedadlem vybaveným dvoubodovými
nebo tříbodovými bezpečnostními pásy homologovanými
podle nařízení UN/ECE R16 nebo rovnocenných nařízení.
• V případě pochybností, nebo chcete-li získat další
informace o připevnění kočárku do zvláštních vozidel, se
obraťte na výrobce nebo na prodejce.
DŮLEŽITÉ UPOZORNĚNÍ
• Kočárek skupiny 0 musí být instalován kolmo ke směru jízdy.
• Neinstalujte kočárek na sedadla obrácená proti směru jízdy
nebo šikmo ke směru jízdy vozidla.
CZ_Čeština
• Tento výrobek je číslován vzestupně.
UPOZORNĚNÍ
DŮLEŽITÉ UPOZORNĚNÍ: přečtěte si pozorně tyto
pokyny a uchovejte je na vhodném místě po celou
dobu životnosti výrobku. V případě nedodržení těchto
pokynů můžete ohrozit bezpečnost dítěte.
• Ponechání dítěte bez dohledu může být nebezpečné.
• Sestavení a přípravu kočárku smějí provádět pouze dospělé
osoby.
• Nepoužívejte výrobek, jestliže jsou na něm praskliny nebo
nějaké součásti chybějí.
• Před použitím ověřte, že jsou všechny připevňovací
mechanismy správně připevněné.
• Nestrkejte prsty do připevňovacích mechanismů.
• Nepoužívejte v dosahu rukou dítěte zdroje tepla, otevřený
plamen nebo nebezpečné předměty.
• Použití příslušenství, která nejsou schválena výrobcem,
může být nebezpečné.
• Ověřte si, že jsou pásy určené k připevnění kočárku v autě
stále napnuté a seřiďte pásy poutající dítě.
• Pásy nesmějí být zkroucené.
• V případě, že byl kočárek vystaven přílišnému tlaku během
nehody, nebo si na něm všimnete zřetelných prasklin nebo
deformací, nepoužívejte jej.
• Uživatel nesmí v žádném případě měnit bezpečnostní
zařízení.
• Řiďte se přesně pokyny poskytnutými výrobcem
upevňovacího systému dítěte.
• Nikdy nenechávejte dítě v kočárku bez dozoru.
• Kočárek musí být vždy připevněn bezpečnostními pásy
auta, i když v něm není dítě. V případě náhlého zabrzdění
by totiž mohl zranit cestující v autě.
• Během jízdy v autě nikdy nedržte dítě v náručí a nikdy ho
nepokládejte mimo kočárek. V případě náhlého zabrzdění
by i při pomalé jízdě mohlo být dítě snadno vymrštěno
směrem dopředu.
• V autě věnujte obzvláštní pozornost zavazadlům nebo
jiným předmětům, které by mohly v případě nehody dítě v
kočárku zranit.
• Nenechávejte kočárek v autě na slunci, některé části by se

52
mohly přehřát a poškodit jemnou dětskou pokožku; vždy
zkontrolujte teplotu sedačky ještě před vložením dítěte.
• Dávejte pozor, aby kočárek nebyl zablokován pohyblivou
částí sedadla nebo dveřmi.
• Nepoužívejte kočárek bez látkového potahu a nevyměňujte
potah za jiný; potah smíte vyměnit pouze za potah
schválený výrobcem, protože tvoří nedílnou část kočárku a
jeho bezpečnosti. V případě výměny použijte náhradní díly.
• Kočárek byl zkonstruován s polystyrénovou částí tlumící
nárazy, která je zabudovaná přímo do skořepiny, pod
vložku: neodstraňujte ji prosím.
• Tento výrobek je vhodný pouze pro děti, které se samy
ještě neposadí.
• Tento výrobek je určený pro děti od narození do váhy 9 kg.
V autě se používá až do váhy 10 kg.
• Používejte pouze na tvrdé, vodorovné a suché ploše.
• Nedovolte jiným dětem, aby si bez dohledu hrály v blízkosti
kočárku.
• Při seřizování různých mechanismů (držadlo, zádová
opěrka) dávejte pozor na dítě.
• Pravidelně kontrolujte držadlo (nebo držadla) a spodek
kočárku, zda nejsou prasklé nebo poškozené.
• Chcete-li postavit kočárek na stojan, zkontrolujte nejprve
maximální délku kočárku povolenou pro tento stojan.
Návod k použití
Používání kočárku
1• STŘÍŠKA A NÁNOŽNÍK stříšku připevníte zasunutím úchytů
do otvorů (obr_a) a zapnutím knoflíku na zadní straně.
Nánožník se připíná knoflíky na obou stranách (obr_b).
2• NASTAVENÍ POLOHY OPĚRKY ZAD: zatažením za rukojeť
směrem ven a otočením ve směru hodinových ručiček
zádovou opěrku zdvihnete, otočením proti směru
hodinových ručiček ji sklopíte.
3• POLOHA KOLÉBKY: kočárek je vybaven vysunovatelnými
nožičkami na spodku kočárku, pomocí kterých si můžete
vybrat, zda chcete dítě v kočárku kolébat (obr_a) nebo ne
(obr_b). Otočením těchto nožiček směrem ven změníte
kočárek na pohodlné lehátko (obr_c).
4• SYSTÉM ČTYŘ ROČNÍCH OBDOBÍ: kočárek je vybaven
páčkou umístěnou v podstavci, kterou je možné regulovat
oběh vnitřního vzduchu.
Chcete-li vytvořit svěží a větrané prostředí (v létě), nastavte
páčku na modrou, chcete-li naopak přívodu vzduchu
zabránit (v zimě), nastavte ji na červenou.
5• PŘEPRAVNÍ PÁSY: chcete-li kočárek, sklopte stříšku a
vytáhněte z bočních kapes přepravní pásy (obr_a). Kočárek
můžete přenášet také pomocí držadel Ganciomatic (obr_b).
Systém ganciomatic
6• Systém Ganciomatic je praktický a rychlý systém, který
umožňuje jediným pohybem připevnit kočárek k podstavci
Ganciomatic: Carrello Classico 58.5, Carrello Classico Velo,
Bassinet Stand ( nutné zakoupit samostatně).
Kočárek se postaví na podvozek a oběma rukama se
přitiskne, až zaklapne.
Před připevňováním a odstraňováním kočárku vždy
podvozek zabrzděte.
Zkontrolujte, zda je kočárek správně připevněn.
7• Chcete-li ji uvolnit, posuňte ve směru šipky páčku držadla
Ganciomatic (šipka_a) a současně páčku tiskněte (šipka_b)
a zatáhněte za kočárek směrem nahoru, až se uvolní
(šipka_c).
Sejmutí potahu
8• ODSTRANĚNÍ POTAHU kočárku: rozepněte knoflíky
nánožníku a stříšky; stiskněte úchyty a vytáhněte stříšku
směrem nahoru (obr_a); zdvihněte zádovou opěrku a
vytáhněte matraci (obr_b); rozepněte knoflík (obr_c) a
sejměte vnitřní potah (obr_d).
Údržba potahu
• vykartáčujte látkové části potahu a vyperte je v ruce při
maximální teplotě 30°, neždímejte;
• nebělte chlórem;
• nežehlete;
• nečistěte chemicky;
• neodstraňujte skvrny pomocí rozpouštědel a nesušte v
sušičce s otočným bubnem.
53
Čištění výrobku
• Tento výrobek si vyžaduje minimální údržbu. Veškeré
operace spojené s čištěním a údržbou mohou provádět
pouze dospělé osoby.
• Doporučujeme udržovat v čistém stavu veškeré pohyblivé
části autosedačky a v případě potřeby je namazat lehkým
olejem.
• Pravidelně čistěte umělohmotné části výrobku vlhkým
hadrem; nepoužívejte rozpouštědla anebo jiné podobné
prostředky.
• Jestliže jsou textilní části autosedačky zaprášené,
vykartáčujte je.
• Nečistěte část z polystyrénu tlumící nárazy pomocí
rozpouštědel nebo jiných podobných prostředků.
• Chraňte výrobek před atmosférickými vlivy, vodou, deštěm
a sněhem; nepřetržité a dlouhodobé vystavení slunečnímu
záření může způsobit změnu barvy mnohých materiálů.
• Uchovávejte výrobek na suchém místě.
Sada do auta
Jak namontovat bezpečnostní pás
9• Kočárek položte na sedadlo se sklopenou zádovou opěrkou
i stříškou.
10• Pro jízdu v autě odstraňte případné přidané matrace.
11• Pás nožiček protáhněte otvorem v matraci (obr_a) a otvory
plastu skořepiny (obr_b), tak abyste ho vysunuli ven
(obr_c).
12• Oba konce ramenního pásu zasuňte do otvorů v matraci a
ve skořepině (obr_a) a připevněte je ke kolíčkům (obr_b).
13• Pásy připevněné zespodu skořepiny (obr_a) a uvnitř
kočárku (obr_b).
Připevnění v autě bezpečnostními pásy
PŘIPEVNĚNÍ KOČÁRKU V AUTĚ: Zadní sedadlo (třímístné)
má 3 bezpečnostní pásy; prostřední pás může být zádový
nebo břišní, v obou případech je možné v autě připevnit
kočárek.
Doporučujeme umístit kočárek na zadní sedadlo tak, aby
strana s hlavičkou dítěte byla na prostředním sedadle.
14• Kočárek v autě s břišním pásem.
15• Kočárek v autě s tříbodovým pásem.
16• Kočárek lze také umístit doprostřed třímístného zadního
sedadla s použitím dvou vnějších bezpečnostních
pásů (obr_a). Kočárek nelze umístit jako na obrázku
obr_b, protože musí být v autě připevněn pouze s pásy
nasměrovanými v opačném směru.
17• Umístění kočárku na zadní dvoumístné sedadlo. Kočárek
lze obrátit s částí pro nožičky dítěte na jednu nebo druhou
stranu.
Jestliže není sedadlo v autě vodorovné, ale je nakloněné,
můžete kočárek vypodložit ručníky.
18• Vezměte pás zadního sedadla na straně kočárku, kde má
dítě nožičky, přehněte ho (obr_a) a protáhněte otvorem
jedné ze dvou spon, které jsou součástí vybavení (obr_b).
Červený kolík spony zasuňte do složeného pásu (obr_c).
19• Stiskněte šedou páčku na levé straně (obr_a) a připevněte
sponu ke kroužku kočárku (obr_b).
• Opakujte postup s pásem umístěným na straně kočárku s
hlavičkou dítěte.
20• Po připevnění spony ke kroužku kočárku je nutné napnout
bezpečnostní pás tak, aby zajišťoval dobrou stabilitu
kočárku v autě. Přitáhněte složený pás k sobě (šipka_a) a
držte ho připevněný. Napnutím pásu ze zadní strany spony
(šipka_b) ho upevníte.
21• Spona připevněná k bezpečnostnímu pásu a ke kočárku v
části nožiček (obr_a). Spona připevněná k bezpečnostnímu
pásu a ke kočárku v části hlavičky ( obr_b).
22• Kočárek v autě.
23• UVOLNĚNÍ KOČÁRKU V AUTĚ: stiskněte šedou páčku spony
(obr_a) a vytáhněte ji z kroužků umístěných po obou
stranách kočárku (obr_b). Jestliže je spona na jedné straně
příliš napnutá a nejde uvolnit, je nutné zatlačit na kočárek a
současně sponu uvolnit.
Jak uložit dítě do kočárku
24• TŘÍBODOVÝ BEZPEČNOSTNÍ PÁS: povolte ramenní pásy
stisknutím přezky (obr_a) a prodlužte je (obr_b).

54
25• stiskněte červené tlačítko (obr_a) a vytáhněte ramenní pásy
z přezky pásu nožiček (obr_b).
26• Vložte do kočárku dítě a zasuňte přezku ramenních pásů
do přezky pásu nožiček, až zacvakne.
27• Dítě musí být uvnitř kočárku dobře připoutané. Jestliže jsou
pásy uvolněné, zkraťte délku ramenních pásů zatažením za
jejich konce.
Pásy by měly být v zájmu bezpečnosti dítěte pro případ
nehody co nejvíce natažené. Ponechte jen minimální vůli
(na tloušťku prstu mezi pásem a hrudníčkem dítěte).
28• ODSTRANĚNÍ PÁSŮ: pásy se vytáhnou ze skořepiny kočárku
tak, že zasunete spony pásu nožiček do štěrbin umístěných
na spodku skořepiny a vyvléknete je (obr_a). Úchyty
ramenních pásů vyvléknete ze spodní části skořepiny jejich
uvolněním z kolíčků a zasunutím do příslušných štěrbin
(obr_b).
29• Odepnutý pás uložte do příslušné kapsy.
Řada doplňků
30• Pláštěnka Cover All: průhledná pláštěnka z PVC, která
zajišťuje naprostou ochranu.
PŘEBALOVACÍ TAŠKA: s přebalovací podložkou, lze připevnit
ke kočárku
31• BASSINET STAND: praktický a kompaktní opěrný podstavec
32• SADA PROTI ZADUŠENÍ: matrace a polštář.
Kompatibilní s naším trojbodovým auto-vybavením.
Sériová čísla
33• Kočárek má na spodní straně údaje o datu výroby korby.
• Název výrobku, datum výroby a sériové číslo výrobku
(obr_a).
Sada do auta:
• Homologační štítek (obr._b);
• Datum výroby pásu (obr_c);
Tyto údaje jsou důležité pro případ, že by uživatel zjistil
nějakou závadu výrobku.
Jak číst údaje na homologačním štítku
• V tomto odstavci vám vysvětlíme, co znamenají údaje na
homologačním štítku (oranžový štítek).
• Nahoře na štítku je značka výrobního podniku a název výrobku.
• 0-10 kg Y znamená, že výrobek získal homologaci pro děti
až do 10 kg váhy a je vybaven tříbodovým pásem.
• Písmeno E v kroužku: znamená značku evropské
homologace a číslo označuje zemi vydání homologace (1:
Německo, 2: Francie, 3: Itálie, 4: Nizozemí, 11: Velká Británie
24: Irsko).
• Homologační číslo: jestliže začíná 04, znamená to, že jde
o čtvrté pozměňovací znění (to, které je v současné době
platné) nařízení R44.
• Příslušné normy: UN/ECE R44/04.
• Zvyšující se výrobní číslo: odlišuje každou korbu, od vydání
homologace je každá korba označená svým vlastním číslem.
Servisní služba
• Vpřípadě ztráty anebo poškození některých částí
výrobku použijte pouze originální díly Peg-Pérego. Pro
případné opravy, výměnu, informace o výrobcích, prodeji
originálních náhradních dílů a doplňků kontaktujte servisní
službu společnosti Peg-Pérego:
• tel.: 0039-039-60.88.213
• fax: 0039-039-33.09.992
• e-mail: assistenza@pegperego.it
• internetové stránky: www.pegperego.com
• Společnost Peg-Pérego si vyhrazuje právo provést jakékoliv
změny a úpravy na modelech popsaných vtéto publikaci,
vyžádají-li si to technické nebo komerční důvody.
Co si o nás myslíte?
• Společnost Peg-Pérego je kdispozici svým zákazníkům,
aby co nejlépe uspokojila veškeré jejich potřeby.
Ztohoto důvodu je pro nás velmi užitečné a cenné znát
názory našich klientů. Budeme vám proto velmi vděční,
když po použití našeho výrobku vyplníte DOTAZNÍK O
SPOKOJENOSTI ZÁKAZNÍKŮ, který naleznete na našich
internetových stránkách www.pegperego.com a seznámíte
nás svašimi případnými připomínkami a podněty.
55
Ďakujeme, že ste si vybrali výrobok
Peg-Pérego.
• Spoločnosť Peg-Pérego S.p.A. je
certifikovaná podľa normy ISO 9001.
• Tento certifikát predstavuje pre zákazníkov a
spotrebiteľov záruku transparentnosti a dôvery
v spôsobe práce tejto spoločnosti.
Detský kočík Primonido New je k
dispozícii ako model Young alebo Culla.
Charakteristiky výrobku
Vanička – auto, Skupina 0, kategória
“Univerzálna”
• Vanička je homologovaná v súlade s nariadením UN/ECE
R44/04 pre deti s hmotnosťou 0-10 kg. Vhodná pre väčšinu
sedadiel vo vozidlách, ale nie pre všetky.
• Vanička sa môže správne nainštalovať, ak v návode na
použitie a údržbu vozidla je uvedené, že sedadlo je
kompatibilné s upevňovacími systémami “Univerzálne”,
skupiny 0.
• Vanička je klasifikovaná ako “Univerzálna” podľa
najprísnejších kritérií homologácie oproti predchádzajúcim
modelom, na ktorých nie je uvedené prehlásenie.
• Zariadenie sa dá používať iba vo vozidlách vybavených
zadnými s 2 alebo 3-miestnymi sedadlami s
bezpečnostnými pásmi s 2 alebo 3 bodmi upnutia,
homologovanými v súlade s nariadením UN/ECE R16 alebo
ekvivalentnými normami.
• Ak máte pochybnosti alebo si chcete vypýtať ďalšie
podrobnosti o upevnení vaničky v špecifických vozidlách,
obráťte sa na výrobcu alebo na predajcu.
DÔLEŽITÉ UPOZORNENIE
• "Vanička", skupina 0, sa musí nainštalovať kolmo na smer
SK_Slovenčina
jazdy.
• Vaničku neinštalujte na sedadlá obrátené proti smeru jazdy
alebo priečne na normálny smer jazdy vozidla.
• Tento výrobok je označený poradovým číslom.
UPOZORNENIE
DÔLEŽITÉ UPOZORNENIE: pozorne si prečítajte všetky
pokyny a odložte si ich, aby ste ich mali k dispozícii
počas celej životnosti výrobku. Ak by ste nedodržali
pokyny v tomto návode, mohlo by to ohroziť
bezpečnosť dieťaťa.
• Mohlo by byť nebezpečné nechať dieťa bez dozoru.
• Prípravné práce a montáž výrobku smú vykonávať
výhradne dospelé osoby.
• Výrobok nepoužívajte, ak niektorá jeho časť chýba alebo je
poškodená.
• Pred používaním sa uistite, že sú dobre upevnené všetky
úchytné mechanizmy.
• Dávajte pozor, aby ste si nepricvikli prsty v mechanizmoch
zariadenia.
• Nepoužívajte v blízkosti tepelných zdrojov, otvoreného
plameňa a nepoužívajte nebezpečné predmety v dosahu
detí.
• Používanie príslušenstva, ktoré nie je schválené výrobcom,
by mohlo predstavovať nebezpečenstvo.
• Skontrolujte, či pásy na upevnenie vaničky vo vozidle sú
vždy dostatočne napnuté a nastavte tie, ktoré pridržiavajú
dieťa.
• Pásy nikdy neprekrúcajte.
• Odporúčame vám zariadenie vymeniť v prípade, že bolo
vystavené nadmernému namáhaniu počas nehody alebo
sú na ňom viditeľné známky poškodenia alebo deformácie.
• Bezpečnostné zariadenie používateľ nesmie v žiadnom
prípade modifikovať.
• Dôsledne dodržiavajte pokyny dodané výrobcom
bezpečnostného zariadenia pre dieťa.
• Nenechávajte dieťa vo vaničke vo vozidle bez dozoru.
• Vanička musí byť vždy upevnená bezpečnostnými pásmi
vozidla, aj keď v ňom nie je dieťa. V prípade prudkého
zabrzdenia by mohla poraniť cestujúcich vo vozidle.
• Počas jazdy vozidlom nikdy nedržte dieťa v náručí a

56
nikdy ho nenechajte sedieť mimo vaničky. Pri prudkom
zabrzdení, aj pri nízkej rýchlosti, by sa dieťa nárazom mohlo
prehodiť dopredu.
• V aute dávajte mimoriadny pozor na batožinu alebo iné
predmety, ktoré by mohli v prípade nehody poraniť dieťa
vo vaničke.
• Nikdy nenechávajte vaničku vo vozidle tak, aby bola
vystavený na slnku, niektoré jej časti by sa mohli veľmi
zohriať a popáliť jemnú detskú pokožku; pred posadením
dieťaťa ju skontrolujte.
• Dávajte pozor, aby vanička neostala zablokovaná časťou
sedadla alebo dverami automobilu.
• Vaničku nepoužívajte bez tkaninového poťahu, tento poťah
sa nesmie vymeniť za poťah, ktorý nie je odporúčaný
výrobcom, pretože tvorí jej súčasť a ovplyvňuje jej
bezpečnosť. V prípade výmeny vždy používajte originálny
náhradný diel.
• Vanička bola navrhnutá s polystyrénovým zariadením
tlmiacim nárazy, ktoré tvorí súčasť kostry pod čalúnením:
nevyberajte ho.
• Tento výrobok je vhodný iba pre deti, ktoré nevedia sedieť
samé.
• Tento výrobok je určený pre deti od narodenia až do 9 kg
hmotnosti. Používa sa iba v odporúčanom vozidle, pre deti
do 10 kg.
• Používajte výhradne na tvrdých, vodorovných a suchých
povrchoch.
• Nenechávajte iné deti hrať sa bez dozoru v blízkosti kočíka.
• Pri regulácii mechanizmov (rukoväť, operadlo) dávajte v
prítomnosti dieťaťa mimoriadny pozor.
• Pravidelne kontrolujte rukoväť (alebo rukoväte) a dno
kočíka, aby ste sa uistili, že na nich nevidno znaky
nalomenia alebo iného poškodenia.
• Nepoužívajte kočík na jednej opore, skontrolujte
maximálnu špecifickú dĺžku kočíka na opore.
Návod na použitie
používanie kočíka
1• STRIEŠKA A KRYT: aby ste upevnili striešku, vsuňte úpony
do otvorov (obr_a) a zapnite ju vzadu.
Zapnite gombíky na oboch stranách krytu (obr_b).
2• REGULÁCIA CHRBTOVÉHO OPERADLA: potiahnite rukoväť
smerom von a otočte ju vpravo, aby sa operadlo narovnalo
alebo v opačnom smere, ak chcete operadlo sklopiť.
3• KOLÍSKOVÁ POLOHA: kočík je vybavený vysúvacími
nožičkami nachádzajúcimi sa pod základňou, pomocou
ktorých sa dá prestaviť do polohy kolísania (obr_a) alebo
do pevnej polohy (obr_b). Otočte nožičky smerom von,
čím sa kočík premení na pohodlnú postieľku (obr_c).
4• SYSTÉM ŠTYROCH ROČNÝCH OBDOBÍ: kočík je vybavený
páčkou nachádzajúcou sa pod základňou, pomocou ktorej
sa dá regulovať prúdenie vzduchu vnútri.
Ak páčku premiestnite na modrú oblasť, vytvoríte čerstvé
a vetrané prostredie (v lete); ak ju premiestnite na červenú
oblasť, prívod vzduchu sa obmedzí (v zime).
5• PREPRAVNÉ PÁSY: aby ste vaničku mohli preniesť, znížte
striešku a z bočných vreciek vyberte prepravné pásy
(obr_a). Môžete ju prepravovať aj vďaka bočnej rukovätiam
Ganciomatic (obr_b).
Systém ganciomatic
6• Ganciomatic System je praktický a rýchly systém, ktorý
umožňuje prichytiť vaničku k základni Ganciomatic
podvozku Carrello Classico 58.5, Carrello Classico velo a
k Bassinet Stand jediným úkonom (je možné ich zakúpiť
samostatne).
Pri montáži vaničky ju položte na podvozok a zatlačte
oboma rukami, kým nedosadne na miesto. Budete počuť
kliknutie.
Pred pristúpením k montáži vaničky vždy aktivujte brzdu.
Skontrolujte, či je vanička správne upevnená.
7• Pri jej odmontovaní presuňte v smere šípky rukoväť
Ganciomatic (šípka_a), a súčasne stlačte páčku (šípka_b) a
potiahnite smerom hore, aby sa uvoľnila (šípka_c).
Stiahnutie poťahu
8• STIAHNUTIE POŤAHU vaničky: odopnite striešku a kryt,
stlačte na západky a potiahnite striešku smerom hore
(obr_a); nadvihnite operadlo a stiahnite matrac (obr_b);
odopnite (obr_c) a vyberte vnútorný poťah (obr_d).
57
Údržba výplne
• textilné časti výrobku vykefujte, čím odstránite prach a
vyperte v rukách pri maximálnej teplote 30°; nežmýkajte;
• nepoužívajte čistiace prostriedky obsahujúce chlór;
• nežehlite;
• nečistite chemicky;
• na odstraňovanie škvŕn nepoužívajte rozpúšťadlá a nesušte
v sušičke s otáčajúcim bubnom.
Čistenie a údržba
• Tento výrobok si vyžaduje minimálnu údržbu. Všetky
operácie spojené s čistením a údržbou musia vykonávať
len dospelé osoby.
• Doporučujeme udržiavať v čistom stave všetky pohyblivé
časti výrobku a v prípade potreby ich namazať ľahkým
olejom.
• Pravidelne čistite vlhkou handričkou umelohmotné časti
výrobku; nepoužívajte rozpúšťadlá alebo iné podobné
prostriedky.
• Textilné časti vykefujte, čím odstránite prach.
• Nečistite časť tlmiacu nárazy z polystyrénu pomocou
rozpúšťadiel alebo iných podobných prostriedkov.
• Chráňte výrobok pred atmosférickými vplyvmi, vodou,
dažďom a snehom; nepretržité a dlhodobé vystavenie
slnečnému žiareniu môže spôsobiť zmenu farby mnohých
materiálov.
• Uchovávajte výrobok na suchom mieste.
Súprava do auta
ako namontovať bezpečnostný pás
9• Vaničku umiestnite tak, aby bolo operadlo a strieška
sklopené.
10• Počas prepravy vo vozidle vyberte prípadné prídavné
matrace.
11• BEZPEČNOSTNÝ PÁS S 3 BODMI UPNUTIA: Vsuňte
medzinožný pás do otvoru v matraci (obr_a) a do otvorov
rámu (obr_b), až kým ho nepresiahne (obr_c).
12• Vsuňte dva konce popruhov do otvorov matraca rámu
(obr_a) a zapnite ich na čapy (obr_b).
13• Pásy uchytené pod rámom (obr_a) a vnútri vanička (obr_b).
Upevnenie vo vozidle s bezpečnostnými
pásmi
UPEVNENIE VANIČKY VO VOZIDLE: Zadné sedadlo vozidla
(3-miestne) je vybavené 3 bezpečnostnými pásmi, pričom
stredný môže byť určený na uchytenie hrudníka alebo
panvy, v oboch prípadoch sa dá zaručiť upevnenie vaničky
vo vozidle.
Odporúčame umiestniť vaničku na zadnom sedadle tak,
aby bola hlavová strana na strednom sedadle.
14• Vanička upevnená vo vozidle s panvovým bezpečnostným
pásom.
15• Vanička upevnená vo vozidle s 3-bodovým bezpečnostným
pásom.
16• Vanička sa dá umiestniť aj v strednej polohe na zadnom
3-miestnom sedadle použitím dvoch vonkajších
bezpečnostných pásov (obr_a) Vanička sa nedá umiestniť
ako na obr_b, pretože by sa dala upevniť vo vozidle iba
bezpečnostnými pásmi orientovanými v opačnom smere.
17• Umiestnenie vaničky na zadnom 2-miestnom sedadle.
Vanička sa dá umiestniť tak, aby bola obrátená časťou s
nohami dieťaťa v jednom alebo druhom smere.
Ak sedadlo vozidla nie je ploché, ale naklonené, treba ho
vyrovnať vankúšmi.
18• Vezmite bezpečnostný pás zadného sedadla zo strany
vaničky v časti nôh dieťaťa, zložte ho (obr_a) a vsuňte do
otvoru jedného z dodaných popruhov (obr_b). Vsuňte
červenú časť popruhu do vnútra zloženého pásu (obr_c).
19• Stlačte sivú páčku vľavo (obr_a) a zapnite popruh ku krúžku
vaničky (obr_b).
• Zopakujte operáciu s pásom nachádzajúcim sa na časti
vaničky s hlavou dieťaťa.
20• Po zapnutí popruhu ku krúžku vaničky bude treba napnúť
bezpečnostný pás, aby sa vanička správne pripevnila vo
vozidle. Potiahnite zložený pás smerom k sebe (šípka_a)
a pokiaľ ju pridržíte upevnenú, potiahnite pás zo zadnej
strany popruhu (šípka_b), aby sa upevnil.
21• Popruh upevnený k bezpečnostnému pásu a k vaničke

58
v časti s nohami dieťaťa (obr_a). Popruh upevnený k
bezpečnostnému pásu a k vaničke v časti s hlavou dieťaťa
(obr_b).
22• Vanička vo vozidle.
23• UVOĽNENIE VANIČKY VO VOZIDLE: stlačte sivú páčku
popruhu (obr_a) a vyberte ho z krúžkov nachádzajúcich
sa na dvoch stranách vaničky (obr_b). Ak by bol jeden z
dvoch popruhov veľmi napnutý a ťažko by sa odopínal,
treba vaničku zatlačiť a súčasne odopnúť popruh.
Ako uložiť dieťa do vaničky
24• 3-BODOVÝ BEZPEČNOSTNÝ PÁS: uvoľnite pásy stlačením
pracky (obr_a) a predĺžte ich (obr_b).
25• stlačte červené tlačidlo (obr_a) a uvoľnite pásy z priehradky
medzi nohami (obr_b).
26• Uložte dieťa do vaničky a vsuňte pracku pásov do
medzinožného pásu, aby sa zapla.
27• Dieťa musí byť vnútri vaničky dobre pripevnené. Ak sú pásy
voľné, skráťte ich potiahnutím koncov pásov.
Pásy musia dobre priliehať, aby bola v prípade nehody
zaručená bezpečnosť dieťaťa. Nechajte minimálnu voľnosť
(na hrúbku jedného prsta medzi pásom a hrudníkom
dieťaťa).
28• ODMONTUJTE PÁSY: aby ste odmontovali pásy od kostry
vaničky, vsuňte pracky medzinožného pásu do otvorov
pod kostrou a vytiahnite (obr_a). Aby ste vytiahli úpony
spod kostry, uvoľnite ich z čapov a vsuňte ich do vlastných
otvorov (obr_b).
29• Uložte odpojený pás do príslušného vrecka.
Línia doplnkov
30• Plášť Cover All: priesvitný plášť z PVC, ktorý zaručuje úplnú
ochranu športovej korby pripnutej ku kočíku.
TAŠKA NA PREBAĽOVANIE: s podložkou na prebaľovanie
dieťaťa, ktorá sa dá upevniť na športový kočík.
31• BASSINET STAND: praktická a kompaktná oporná základňa.
32• PRÍSLUŠENSTVO ZABRAŇUJÚCE ZADUSENIU: matrac a
vankúš.
Je kompatibilné s našou 3 bodovou súpravou do auta.
Sériové čísla
33• Na základni kočíka sú uvedené údaje týkajúce sa dátumu
výroby.
• Názov výrobku, dátum výroby a sériové číslo samotného
výrobku (obr_a).
Súprava do auta:
• Homologačný štítok (obr_b);
• Dátum výroby -pásu (obr_c);
Tieto údaje sú užitočné pre zákazníka pre prípad, že by sa
na výrobku vyskytli akékoľvek poruchy.
Ako čítať homologačnú etiketu
• V tomto odseku vysvetlíme, ako čítať etiketu o homologácii
(oranžová etiketa).
• V hornej časti etikety je značka výrobcu a názov výrobku.
• 0-10 kg Y znamená, že výrobok je homologovaný pre deti
od narodenia až po hmotnosť 10 kg a že zariadenie je
vybavené 3-bodovým pásom.
• Písmeno E v kruhu: indikuje európsku homologačnú
značku a číslo definuje krajinu, ktorá vydala homologáciu
(1: Nemecko, 2: Francúzsko, 3: Taliansko, 4: Holandsko, 11:
Veľká Británia 24: Írsko).
• Číslo homologácie: ak začína 04, znamená to, že ide o štvrú
úpravu (práve vplatnosti) nariadenia R44.
• Referenčná norma: UN/ECE R44/04.
• Poradové výrobné číslo: identifikuje vaničku, vydaním
homologačného čísla je každá vanička charakterizovaná
svojím vlastným číslom.
Asistenčná služba
• V prípade straty alebo poškodenia niektorých častí výrobku,
použite len originálne náhradné diely Peg-Pérego. Pre
prípadné opravy, výmenu, informácie o výrobkoch, predaji
originálnych náhradných dielov a príslušenstva, kontaktujte
asistenčnú službu Peg-Pérego:
• tel.: 0039-039-60.88.213
• fax: 0039-039-33.09.992
• e-mail: assistenza@pegperego.it
• internetová stránka: www.pegperego.com
• Spoločnosť Peg-Pérego môže z technických alebo

59
Köszönjük, hogy a Peg-Pérego termékét
választották.
• A Peg-Pérego Rt. ISO 9001 tanúsítvánnyal
rendelkezik.
• A tanúsítvány a vállalati munkamódszer
rendszerezettségének és az abban való
bizalomnak a garanciáját kínálja az ügyfeleknek
és a fogyasztóknak.
A Primonido New gyermekülés Young
és Culla modellben kapható
A termék jellemzői
A gyermekülés-auto, 0. Csoport,
“Univerzális” kategória
• A gyermekülés az UN/EGK R44/04 rendelet szerint 0-10 kg
súlyú gyermekek számára tanúsított termék. A gépjármű
ülések legnagyobb részéhez illeszthető, de nem mindhez.
• A gyermekülés helyesen beszerelhető, ha a jármű
használati és karbantartási utasításában szerepel a 0.
Csoport „Univerzális” rendszerekkel való kompatibilitás.
• A gyermekülés “Univerzális” besorolást kapott az előző
modellekhez képest szigorúbb tanúsítási szempontok
alapján; a korábbi modellek nem rendelkeznek ilyen
felirattal.
• A készüléket csak 2 vagy három, 2 vagy 3 pontos biztonsági
övvel ellátott és az UN/EGK R16 rendeletnek vagy avval
egyenértékű előírásoknak megfelelően tanúsított üléssel
rendelkező járművön szabad használni.
• Kétség esetén, vagy, ha további információkra van szüksége
a gyermekülés specifikus járműbe történő beszereléséről,
forduljon a gyártóhoz vagy a viszonteladóhoz.
FONTOS
• “A gyermekülés”, 0 csoport – a menetirányra merőlegesen
kell beszerelni.
HU_Magyar
obchodných dôvodov kedykoľvek vykonať zmeny na
modeloch uvedených v tomto návode.
Čo si o nás myslíte?
• Spoločnosť Peg-Pérego je k dispozícii svojim zákazníkom,
aby čo najlepšie uspokojila ich potreby. Preto poznanie
názoru našich zákazníkov je pre nás veľmi dôležité a
vzácne. Budeme Vám preto veľmi vďační ak po použití
nášho výrobku vyplníte DOTAZNÍK O SPOKOJNOSTI
ZÁKAZNĺKOV, ktorý nájde na našej internetovej stránke:
www.pegperego.com, čím nás oboznámite s prípadnými
pozorovaniami a návrhmi.

60
• A gyermekülést ne szerelje fel a menetiránnyal
ellentétes irányba néző ülésre, vagy a jármű szokásos
menetirányárához képest átlós irányban.
• Ennek az árucikknek növekvő sorrendű a számozása.
FIGYELMEZTETÉS
FONTOS: figyelmesen olvassa el a jelen használati
utasítást, és a termék teljes élettartama alatt tartsa
a megfelelő tárolóban. A gyermek biztonsága
veszélyeztetve lehet, ha nem tartják be a jelen
utasításokat.
• Veszélyes lehet a gyermek felügyelet nélkül hagyása.
• A termék összeszerelését és előkészítését felnőttek kell,
hogy végezzék.
• Ne használja a terméket, ha hiányoznak róla egyes részek,
vagy, ha törött.
• Használat előtt ellenőrizze, hogy minden rögzítő
mechanizmus helyesen rögzítve van-e.
• Ne helyezze az ujját a mechanizmusokba.
• A gyermek számára elérhető helyen ne használjon
hőforrást, nyílt lángot és veszélyes tárgyakat.
• A gyártó által nem elfogadott tartozékok használata
veszélyes lehet.
• Ellenőrizze, hogy a gyermekülést a járműhöz rögzítő szíjak
mindig feszesek legyenek, és állítsa be a gyermeket rögzítő
szíjakat.
• A szíjakat soha ne csavarja meg.
• Javasoljuk, hogy cserélje ki a készüléket, ha az egy baleset
során túlzott erőhatásnak lett kitéve, vagy egyértelmű törés
vagy alakváltozás jele látszik rajta.
• A felhasználó semmilyen körülmények között nem
módosíthatja a biztonsági mechanizmust.
• Szigorúan kövesse a gyermeket tartó rendszer gyártója által
megadott utasításokat.
• Ne hagyja a gyermeket az autóban felügyelet nélkül a
gyermekülésben.
• A gyermekülés mindig a biztonsági övekkel rögzített
állapotban kell legyen, akkor is, ha nem ül benne a
gyermek. Hirtelen fékezésnél a járműben utazó személyek
megsérülhetnek miatta.
• Autós utazás közben soha ne tartsa ölben a gyermeket,
és soha ne helyezze el a gyermekülésen kívül. Hirtelen
fékezéskor, még lassú haladás esetén is, a gyermek
könnyen előre vetődhet.
• Különösen figyeljen oda azokra a csomagokra és tárgyakra,
amelyek baleset esetén a gyermekülésben ülő gyermek
sérülését okozhatják.
• Ne hagyja a gyermekülést a járműben a napon, néhány
része túlhevülhet, és sértheti a gyermek érzékeny bőrét, a
gyermek behelyezése előtt ellenőrizze ezt.
• Figyeljen oda, hogy a gyermekülést ne szorítsa be az ülés
egy mozgó része vagy egy ajtó.
• Ne használja az gyermekülést a textil huzat nélkül, ezt
a huzatot nem lehet egy a gyártó által el nem fogadott
huzattal helyettesíteni, mivel a gyermekülés és annak
biztonsága szervesen összefügg vele. Csere esetén eredeti
terméket használjon.
• A gyermekülést a párnázat alatt közvetlenül a struktúrába
beépített polisztirol ütés csillapító eszközzel tervezték: ne
távolítsa ezt el.
• Ez a termék csak olyan gyermekeknek felel meg, akik nem
tudnak egyedül felülni.
• A jelen termék újszülött kortól 9 kg-os súly eléréséig
használandó. Autóban történő használat esetén 10 kg-s
súlyig használható.
• Csak kemény, vízszintes és száraz felületen használja.
• Ne hagyja, hogy más gyermekek felügyelet nélkül
játsszanak a babakocsi közelében.
• Figyeljen oda a gyermek jelenlétére, amikor a
mechanizmusok (tolókar, háttámla) beállítását végzi.
• Rendszeresen ellenőrizze a tolókart (vagy a kis karokat), és
a gyermekülés alját, bizonyosodjon meg róla, hogy nem
mutatják törés vagy sérülés jelét.
• Amikor a gyermekülést vázon (stand) használja, ellenőrizze
a vázon feltüntetett maximális babakocsi hossz értékét.
Használati utasítás
A gyermekülés használata
1• KUPOLA ÉS BURKOLAT: a kupola beakasztásához illessze
be a csatlakozó elemeket a furatokba (a ábra), és hátul
gombolja be a kupolát.
Mindkét oldalon gombolja be a burkolatot (b ábra).

61
2• HÁTTÁMLA BEÁLLÍTÁS: húzza kifelé a kart, és forgassa el az
óramutató járásának irányában a háttámla fölemeléséhez,
illetve az óramutató járásával ellentétes irányban a
leengedéséhez.
3• RINGATÁSI POZÍCIÓ: A gyermekülés az alap alatt
elhelyezett kihúzható lábakkal rendelkezik, amikkel be lehet
állítani a ringatási (a ábra) és a fix (b ábra) pozíciót. Csavarja
kifelé a lábakat a gyermekülés kényelmes kisággyá történő
átalakításához (c ábra).
4• NÉGY ÉVSZAK RENDSZER: A gyermekülésen az alap alatt
található egy kar, amivel be lehet állítani a belső levegő
keringetését.
A kar kékre állításával friss és levegős környezetet alakít ki
(nyáron), a pirosra történő beállítással korlátozza a levegő
bevitelt (télen).
5• SZÁLLÍTÓ PÁNTOK: a Primonido New szállításához engedje
le a kupolát, és az oldalzsebekből húzza ki a hordozó
pántokat (a ábra). A Ganciomatik fogantyúk segítségével is
lehet szállítani (b ábra).
Ganciomatic system
6• A Ganciomatic System gyakorlatias és gyors megoldást
biztosít, amivel a gyermekülést egy mozdulattal rá lehet
akasztani a Carrello Classico 58.5 , a Carrello Classico
Velo, a Bassinet Stand Ganciomatic alapjára. (külön
megvásárolhatóak).
A gyermekülés beakasztásához helyezze azt a kocsira, és
mindkét oldalon kézzel kattanásig nyomja le.
A gyermekülés beakasztása és kiakasztása előtt mindig
rögzítse le a fékkel a kocsit.
Ellenőrizze, hogy a gyermekülés rögzítése megfelelő-e.
7• Kiakasztásához mozdítsa el a Ganciomatic karját a nyíl
irányában (a nyíl), evvel egy időben nyomja le a kart (b
nyíl), és húzza fölfelé mindaddig, amíg ki nem akad (c nyíl).
Levehető huzat
8• A GYERMEKÜLÉS HUZATÁNAK LEHÚZÁSA: gombolja
le a burkolatot és a kupolát; nyomja meg a csatlakozó
elemeket, és húzza fölfelé a kupolát (a ábra); emelje föl a
háttámlát, és húzza ki a matracot (b ábra); gombolja le (c
ábra), és távolítsa el a belső huzatot (d ábra).
A párnázat karbantartása
• keféljék le a szövetrészeket a por eltávolításához és
legfeljebb 30C°-os hőmérsékleten, kézzel mossák ki, ne
facsarják;
• ne fehérítsék klórral;
• ne vasalják;
• szárazmosást ne alkalmazzanak;
• ne tisztítsák a foltokat oldószerekkel és ne szárítsák
forgódobos szárítógépben.
A termék tisztítása
• A termék minimális karbantartást igényel. A tisztító és
karbantartó műveleteket csak felnőttek végezhetik.
• Valamennyi mozgó rész tisztántartása javasolt, és
amennyiben az szükséges, könnyű olajjal kenjék be azokat.
• Egy nedves törlőruhával rendszeresen tisztítsák meg a
műanyagból készült részeket, ne használjanak oldószereket
vagy egyéb hasonló termékeket.
• A szövetrészeket keféljék le a por eltávolításához.
• Ne tisztítsák a polisztirolból készült ütésfelfogó elemet
oldószerekkel vagy egyéb hasonló termékkel.
• Óvják a terméket a légköri hatóerőktől, víztől, esőtől vagy
hótól; a folytonos és hosszadalmas napsütésnek való kitétel
sok alapanyagban színváltozást okozhat.
• Száraz helyen tárolják a terméket.
Autós készlet
a biztonsági öv beszerelése
9• A gyermekülést leengedett háttámlával és kupolával
helyezze be.
10• Az autós szállítás során távolítsa el az esetleges plusz
matracokat.
11• 3 PONTOS ÖV Illessze be a láb közötti övet a matrac
nyílásába (a ábra), majd a váz nyílásaiba (b ábra), végül
húzza át (c ábra).
12• Húzza át a szíjak végét a matrac és a váz nyílásain (a ábra),
majd akassza be őket a peckekbe (b ábra).

62
13• A váz alatt (a ábra) és a Pram belsejébe beakasztott övek (b
ábra)
Autóba történő rögzítés biztonsági
övekkel
A GYERMEKÜLÉS RÖGZÍTÉSE AZ AUTÓBAN: Az autó hátsó
(3 helyes) ülésén 3 biztonsági öv található, a középső lehet
vállöv, vagy deréköv, a Mózes betétet mindkét esetben be
lehet szerelni.
Javasoljuk, hogy a gyermekülést úgy helyezze el a hátsó
ülésen, hogy a fejrésze a középső hely felé nézzen.
14• A gyermekülés derékövvel beszerelve az autóba.
15• A gyermekülés 3 pontos övvel beszerelve az autóba.
16• A gyermekülés, a 3 üléses hátsó ülés közepén is
elhelyezhető, ekkor a két szélső biztonsági övet kell
használni (a ábra). A Primonido New nem lehet behelyezni
a b ábra szerint, mert csak egymással ellentétes irányú
övekkel lehet rögzíteni az autóban.
17• A gyermekülés elhelyezése 2 helyes hátsó ülésen. A
gyermekülést a lábrésszel egyik és a másik irányba is lehet
állítani.
Ha az autó ülése nem vízszintes, hanem döntött,
törülközőkkel tudja kiegyenesíteni.
18• Fogja meg a gyermekülés lábrészénél lévő hátsó
ülés övét, hajtsa össze (a ábra), és illessze be a két szíj
egyikének nyílásába (b ábra). Húzza be a szíj piros rúdját az
összehajtott öv belsejébe (c ábra).
19• Nyomja meg a baloldali szürke kart (a ábra), és akassza be a
szíjat a gyermekülés gyűrűjébe (b ábra).
• Ismételje meg a műveletet a gyermekülés fejrészénél lévő
övvel.
20• Miután a szíjat beakasztotta a gyermekülés gyűrűjébe, meg
kell húzni a biztonsági övet a gyermekülés autóban történő
megfelelő rögzítéséhez. Húzza maga felé az összehajtott
övet (a nyíl), és erősen tartva feszítse meg a szíj hátulja felől
a biztonsági övet (b nyíl ) a rögzítéshez.
21• A biztonsági övbe és a gyermekülés lábrészéhez
beakasztott szíj (a ábra). A biztonsági övbe és a
gyermekülés fejrészéhez beakasztott szíj (b ábra).
22• A gyermekülés az autóban.
23• A GYERMEKÜLÉS KISZERELÉSE AZ AUTÓBÓL: nyomja le a
szíj szürke karját (a ábra), és húzza ki a gyermekülés két
oldalán elhelyezett gyűrűből (b ábra). Ha a két szíj egyike
túlságosan feszes lenne, és nehezen engedne, meg
kell nyomni a gyermekülést, és evvel egy időben kell
kiakasztani a szíjat.
A gyermek behelyezése a gyermekülésbe
24• 3 PONTOS BIZTONSÁGI ÖV: lazítsa meg a pántokat úgy,
hogy lenyomja a csatot (a ábra), és meghúzza a pántokat (b
ábra).
25• nyomja meg a piros gombot (a ábra), és akassza ki a
pántokat a láb közötti elemből (b ábra).
26• Helyezze be a gyermeket a gyermekülésbe, és illessze a
pántok csatját a lábközép pántba beakasztásig.
27• A gyermek jól bekötött állapotban kell, hogy legyen a
gyermekülésben. Ha a szíjak lazák, csökkentse a pántok
hosszát a szíj végének meghúzásával.
A gyermek biztonságának baleset esetén történő
biztosításához a szíjak a lehető legfeszesebbek kell
legyenek. Hagyjon egy minimális játékot (egy ujjnyi
vastagság az öv és a gyermek mellkasa között).
28• TÁVOLÍTSA EL A SZÍJAKAT: a szíjaknak a gyermekülés vázáról
történő eltávolításához csúsztassa át a lábközép csatokat
a váz alján található nyílásokon, és húzza ki őket (a ábra). A
pántok csatlakozó elemeinek a váz alól történő kihúzásához
akassza ki a peckeket, és húzza át őket a nyílásaikon (b
ábra).
29• A kiakasztott övet helyezze vissza a megfelelő zsebbe.
Kiegészítők
30• COVER ALL ESŐVÉDŐ: Átlátszó készült, mindent betakaró
esővédő.
BORSA (Pelenkázó Táska).Táska matraccal együtt a baba
pelenkázásához, amely a kocsivázra akasztható.
31• BASSINET STAND: praktikus és kompakt mózeskosár állvány.
32• FULLADÁSGÁTLÓ FELSZERELÉS: matrac és párnázat.
Illeszthető autós felszerelésünkhöz 3 pontban.
Sorozatszámok
33• A gyermekülés alapja alatt leolvasható a gyártás dátuma.

63
• A termék neve, gyártási időpontja és sorozatszáma (a ábra).
Autós készlet:
• Tanúsítási címke (b ábra);
• Az öv gyártásának időpontja (c ábra);
Ezek az információk hasznosak a vevő számára, ha a
terméknél valamilyen probléma jelentkezik.
A tanúsítási címke leolvasása
• Ebben a bekezdésben megmagyarázzuk, hogyan kell
leolvasni a tanúsítási címkét (narancssárga címke)
• A címke tetején a gyártó cég márkajelzése és a termék
neve látható.
• 0-10 kg Y azt jelenti, hogy a termék újszülött kortól 10 kg-s
súlyig van tanúsítva, és, hogy a készülék 3 pontos övvel
rendelkezik.
• Az E betű jelentése: az európai tanúsítást jelzi, és a szám a
tanúsítást kiadó országot azonosítja be (1: Németország,
2: Franciaország, 3: Olaszország 4: Hollandia, 11: Egyesült
Királyság és 24: Írország).
• Tanúsítási szám: ha 04-gyel kezdődik, ez az R44 rendelet
negyedik (jelenleg érvényes) módosítására utal.
• Vonatkozó jogszabály: UN/EGK R44/04.
• Növekvő gyártási szám: minden Mózes betétnek saját
száma van, a tanúsításnál mindegyik terméket saját szám
azonosít.
Vevőszolgálat
• Ha véletlenül a modell részei elvesznek vagy károsodnak,
akkor csak eredeti Peg-Pérego alkatrészeket használjanak!
Az esetleges javítások, cserék, a termékkel kapcsolatos
információk valamint az eredeti alkatrészek és tartozékok
értékesítése ügyében vegyék fel a kapcsolatot a PegPérego Vevőszolgálatával:
• tel.: 0039-039-60.88.213
• fax: 0039-039-33.09.992
• e-mail: assistenza@pegperego.it
• internet weboldal: www.pegperego.com
• A Peg-Pérego az ebben a kiadásban ismertetett
modelleknél műszaki vagy kereskedelmi jellegű okokból
kifolyólag bármikor végrehajthat módosításokat.
Mi a véleményük rólunk?
• A Peg-Pérego a Fogyasztóinak rendelkezésére áll minden
igényük legjobb kielégítése céljából. Ehhez az Ügyfeleink
véleményének megismerése számunkra rendkívül
fontos és értékes. Ezért nagyon hálásak lennénk, ha a
termékünk használatbavétele után kitöltenék a FOGYASZTÓ
ÉRTÉKELÉSE KÉRDŐÍVET, amelyet az alábbi internetes
weboldalunkon találnak meg: www.pegperego.com; ott
feltüntethetik az esetleges észrevételeiket vagy ötleteiket.
64
Hvala, ker ste izbrali izdelek Peg Perego.
• Podjetje Peg Perego S.p.A. je nosilec
certifikata ISO 9001.
• Certifikat za stranke in porabnike pomeni
garancijo transparentnosti in zaupanja v delo
podjetja.
Za voziček Primonido sta razpoložljiva
modela Young in Culla.
Lastnosti izdelka
Voziček za avto, Supina 0, kategorija
“Universale”
• Voziček je homologiran v skladu s pravilnikom UN/ECE
R44/04 za otroke, težke od 0-10 kg. Primeren je za večino
sedežev v vozilih, ne pa za vse.
• Voziček lahko pravilno namestite, če je v priročniku za
uporabo in vzdrževanje vozila navedena združljivost
z varnostnimi sistemi za univerzalno ("Universale")
pripenjanje skupine 0.
• Voziček nosi klasifikacijo “Universale” v skladu z najstrožjimi
homologacijskimi merili glede na predhodne modele, ki
nimajo tega napisa.
• Pripomoček se sme uporabljati samo v vozilih, opremljenih
z zadnjim sedežem z 2 ali 3 sedišči, opremljenimi z 2- ali
3- točkovnimi varnostnimi pasovi, homologiranimi v skladu
s pravilnikom UN/ECE R16 ali enakovrednim predpisom.
• V primeru dvomov ali če potrebujete dodatne informacije
o pritrditvi vozička v posamična vozila, se obrnite na
proizvajalca ali prodajalca.
POMEMBNO
• “Voziček skupina 0, je treba namestiti pravokotno na smer
vožnje.
• Vozička ne nameščajte na avtomobilske sedeže v nasprotni
smeri od smeri vožnje ali prečno glede na smer vožnje
SL_Slovenščina
vozila.
• Ta izdelek je zaporedno oštevilčen.
OPOZORILO
POMEMBNO: pozorno preberite ta navodila in jih
shranite v ustrezno ležišče za vso življenjsko dobo
izdelka. Otrok je lahko v nevarnosti, če ne upoštevate
teh navodil.
• Otroka ne puščajte samega, saj je to lahko nevarno.
• Sestavljanje in pripravo pripomočka morajo izvesti odrasle
osebe.
• Ne uporabljajte izdelka, če nekateri njegovi deli manjkajo
ali so poškodovani.
• Pred uporabo se prepričajte, da so vsi mehanizmi za
pripenjanje pravilno pripeti.
• V mehanizme ne vtikajte prstov.
• Ne uporabljajte ob virih toplote, odprtem ognju ali
nevarnih predmetih, ki so na dosegu otrokovih rok.
• Uporabljanje dodatne opreme, ki je ni odobril proizvajalec,
bi lahko bilo nevarno.
• Prepričajte se, da so pasovi za pritrditev vozička v vozilu
vedno napeti in uravnavajte tiste, ki zadržujejo dojenčka.
• Pasov nikoli ne zvijajte.
• Svetujemo vam, da zamenjate blokirno napravo za pas, če
je bila preobremenjena med avtomobilsko nesrečo ali če
so na njej očitna znamenja okvare ali deformacije.
• Varnostne naprave ne sme uporabnik v nobenem primeru
spreminjati ali prilagajati.
• Skrbno upoštevajte navodila proizvajalca sistema za
zadrževanje dojenčka.
• Otroka ne puščajte v vozičku v avtomobilu brez nadzora.
• Voziček mora biti vedno pripet z varnostnimi pasovi vozila,
tudi ko otrok ne sedi v njem. Ob nenadnem zaviranju bi
lahko povzročil poškodbe drugih potnikov v vozilu.
• Med vožnjo otroka nikoli ne držite v naročju in nikoli ne
pustite, da se pelje drugače, kakor pripet v vozičku. Tudi ob
nenadnem zaviranju med počasno vožnjo lahko otroka kaj
hitro katapultira naprej.
• Pazite, da okoli vozička ni prtljage ali predmetov, ki bi
poškodovali dojenčka v košari v primeru nesreče.
• Nikoli ne puščajte vozička v avtomobilu na soncu. Nekateri

65
deli se lahko pregrejejo in poškodujejo nežno otrokovo
kožo. Preverite jih, preden vanj položite otroka.
• Pazite, da se voziček ne zatakne v gibljiv del sedeža ali v
vrata.
• Vozička ne uporabljajte brez prevleke iz blaga. Prevleke
ne smete zamenjati s tako, ki je proizvajalec ni odobril,
saj je sestavni del vozička in varnostnih ukrepov. V
primeru zamenjave sestavnega dela, uporabite originalni
nadomestni del.
• Voziček je bil načrtovan tako, da stiropor, vgrajen v ogrodje
stolčka pod prevleko, ublaži udarec ob trku: zato ga ne
odstranjujte.
• Izdelek je primeren samo za otroke, ki še ne znajo
samostojno sedeti.
• Izdelek je namenjen otrokom od rojstva do 9 kg teže. Za
uporabo v avtomobilu je namenjen do 10 kg teže.
• Uporabljajte le na trdih, vodoravnih in suhih površinah.
• Ne dovolite, da se drugi otroci igrajo okoli ali blizu vozička.
• Pazite na otroka, ko prilagajate mehanizme (ročaj, hrbtni
naslon).
• Redno preverjajte ročaj (ali ročaje) in dno vozička, da niso
obrabljeni ali polomljeni.
• Pri uporabljanju vozička na stojalu preverite maksimalno
dolžino vozička, ki je navedena na stojalu.
Navodila za uporabo
Uporaba vozička
1• STREHICA IN ODEJICA: da bi pripeli strehico, vstavite
priključke v odprtine (risba a) in jo pripnite na hrbtni strani.
Pripnite odejico na obeh straneh (risba b).
2• URAVNAVANJE HRBTNEGA NASLONA: povlecite ročaj
navzven in ga zavrtite v smeri urinega kazalca, da bi hrbtni
naslon dvignili, ter v nasprotni smeri urinega kazalca, da bi
ga spustili.
3• POLOŽAJ ZIBKA: voziček je opremljen z nožicami, ki jih
je mogoče izvleči na podstavku. Z njimi nastavimo, ali
bomo otroka zibali (risba a) ali ga ne bomo (risba b).
Zavrtite nožice navzven, da bi spremenili voziček v udobno
posteljico (risba c).
4• SISTEM ŠTIRJE LETNI ČASI: voziček je opremljen z vzvodom,
postavljenim pod osnovo, s katerim lahko uravnavate
kroženje zraka v njem.
Premaknite vzvod na modro, da bi ustvarili sveže in zračno
okolje (poleti) ali na rdeče, da bi omejili dotok svežega
zraka (pozimi).
5• TRAKOVI ZA PRENAŠANJE: da bi voziček lahko prenašali,
spustite strehico in iz žepov ob strani izvlecite trakove za
prenašanje (risba a). Možno ga je prenašati tudi za ročaje
Ganciomatic (risba b).
Sistem ganciomatic
6• Sistem Ganciomatic System je praktičen in hiter sistem, ki
omogoča pripenjanje vozička na podstavek Ganciomatic
podvozja Classico 58.5, Classico Velo, stojala Bassinet Stand
z eno samo potevo (lahko jih je kupiti posebej).
Da bi pripeli voziček, ga postavite na podvozje in z obema
rokama potisnite navzdol, dokler ne klikne.
Preden s podvozja odpenjate in pripenjate voziček, vedno
zavrite podvozje.
Preverite, ali je voziček pravilno pripet.
7• Da bi jo odpeli, v smeri puščice prestavite vzvod ročaja
Ganciomatic (puščica a), sočasno pritisnite vzvod (puščica
b), povlecite navzgor in odpnite (puščica c).
Snemljivost prevlek
8• SNEMANJE PREVLEK z vozička: odpnite odejico in strehico;
pritisnite na priključke in navzgor povlecite strehico (risba
a); dvignite hrbtni naslon in izvlecite oblazinjeni vložek
(risba b); odpnite (risba c) in odstranite notranjo oblogo
(risba d).
Vzdrževanje prevleke
• blago skrtačite, da z njega odstranite prah in ga operite na
roke pri največ 30° Celzija; ne ožemajte;
• ne uporabljajte klorovega belila;
• ne likajte;
• ne uporabljajte kemičnega čiščenja;
• ne čistite s topili in ne uporabljajte sušilca za perilo z
vrtljivim bobnom.
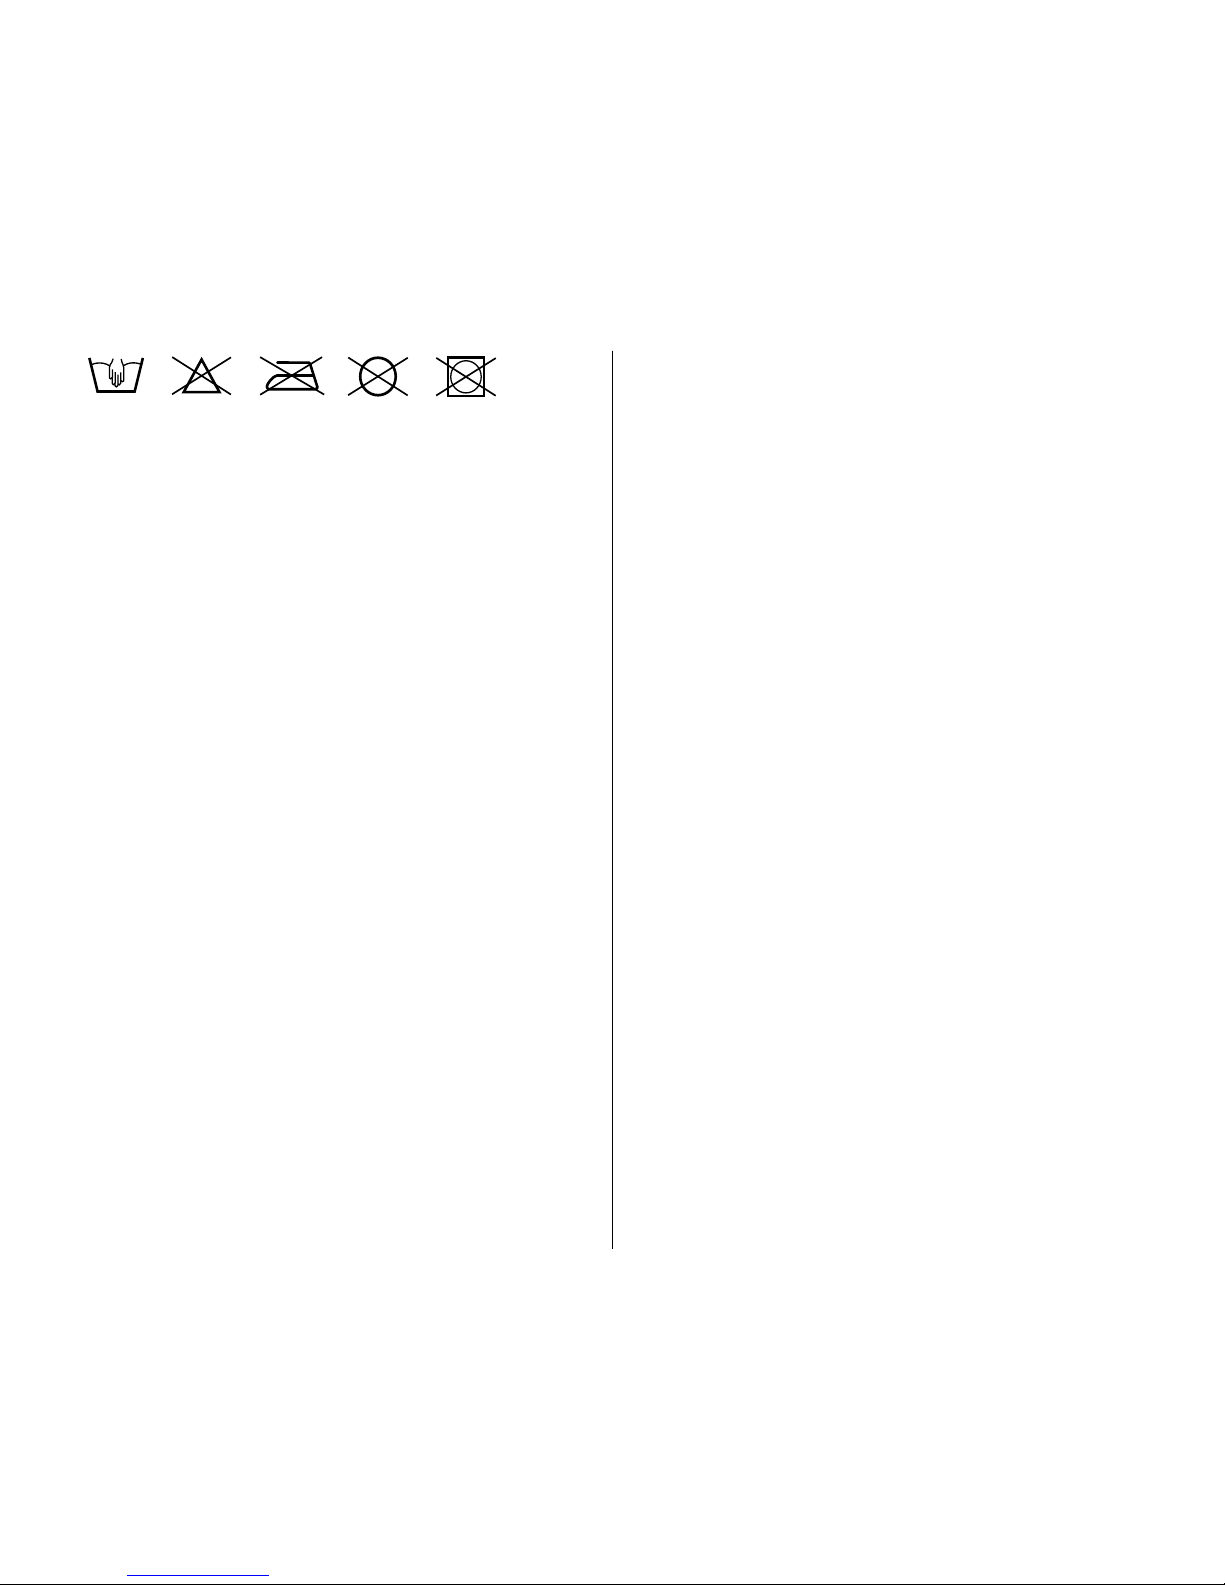
66
Čiščenje izdelka
• Izdelek ne potrebuje veliko vzdrževanja. Čistijo in vzdržujejo
ga lahko samo odrasli.
• Svetujemo vam, da redno čistite vse premikajoče se dele in
jih, če je to potrebno, podmažete z lahkim oljem.
• Plastične dele redno brišite z vlažno krpo. Ne uporabljajte
topil ali drugih podobnih izdelkov.
• Blago skrtačite, da z njega odstranite prah.
• Naprave za blaženje udarcev iz stiropora ne čistite s topili
ali drugimi podobnimi izdelki.
• Izdelek zaščitite pred atmosferskimi vplivi, vodo, dežjem
ali snegom; daljše izpostavljanje soncu lahko povzroči
spremembo barve veliko materialov.
• Izdelek hranite v suhem prostoru.
Komplet za avtomobil
kako namestiti varnostni pas
9• Postavite voziček s spuščenim hrbtnim naslonom in
strehico.
10• Med transportom v avtomobilu odstranite morebitne
dodatne oblazinjene vložke.
11• 3-TOČKOVNI JERMEN: Vstavite mednožni jermenček v režo
prevleke (risba a) in v reže na školjke (risba b), da pride čez
(risba c).
12• Vstavite konca naramnic v reže prevleke in školjke (risba a)
in jih pripnite na zatiče (risba b).
13• Jermenčki so pripeti pod školjko (risba a) in na notranji
strani Primonido New (risba b).
Pripenjanje v avtomobil z avtomobilskimi
varnostnimi pasovi
PRIPENJANJE VOZIČKA V AVTOMOBIL: Zadnji sedež
avtomobila (3 sedeži) ima 3 varnostne pasove. Srednji je
lahko hrbtni ali pasni. V obeh primerih lahko pripnete z
njim košaro v avtomobil.
Svetujemo vam, da voziček postavite na zadnji sedež, kot
je prikazano na risbi, pri čemer pustite stran z vzglavjem na
srednjem sedežu.
14• Voziček, postavljena v avto s pasnim varnostnim pasom.
15• Voziček, postavljena v avtu s 3-točkovnim varnostnim
pasom.
16• Voziček je Vozička ni mogoče postaviti, kot je prikazano
na risbi b, ker jo je mogoče v avtomobil pritrditi le z
varnostnimi pasovi, usmerjenimi v nasprotno smer.
17• Postavitev vozička na zadnji sedež z 2 sediščema. Voziček
je mogoče obrniti tako, da so otrokove nogice na eni ali na
drugi strani.
Če avtomobilski sedež ni raven, ampak nagnjen, voziček
podložite, na primer z zvito brisačo.
18• V roko vzemite varnostni pas zadnjega sedeža na strani
vozička, kjer so otrokove noge, prepognite ga (risba a) in ga
vstavite v režo enega ali dveh priloženih jermenčkov (risba
b). Rdečo prečko jermenčka vstavite na notranjo stran
prepognjenega pasu (risba c).
19• Pritisnite na sivi vzvodek na levi strani (risba a) in jermenček
pripnite na obroček voziček (risba b).
• Ponovite postopek, ko je pas na strani vozička, kjer je
otrokova glava.
20• Ko pripnete jermenček na obroček vozička, je treba
varnostni pas napeti, da bi pravilno stabilizirali voziček v
avtomobil. Povlecite prepognjeni pas proti sebi (puščica
a) in ga držite napetega, nato napnite pas z zadnje strani
jermenčka (puščica b), da bi ga pritrdili.
21• Jermenček je pritrjen na varnostni pas in na voziček na
strani nog (risba a). Jermenček je pritrjen na varnostni pas
in na voziček na strani glave (risba b).
22• Voziček v avtomobilu.
23• ODPENJANJE VOZIČKA IZ AVTOMOBILA: pritisnite sivi
vzvodek jermenčka (risba a) in ga izvlecite iz obročkov ob
straneh vozička (risba b). Če bi bil jermenček preveč napet
in bi ga bilo pretežko zrahljati, je treba pritisniti na voziček
in sočasno odpeti jermenček.
Kako otroka položiti v voziček
24• 3-TOČKOVNI VARNOSTNI PAS: zrahljajte naramnice, pritisnite
na sponko (risba a) in jih podaljšajte (risba b).
25• pritisnite rdeči gumb (risba a) in odpnite naramnice
mednožnega jermenčka (risba b).

67
26• Otroka položite v voziček in vstavite sponko naramnic v
mednožni jermenček, tako da se spneta.
27• Otrok mora biti v vozičku dobro privezan. Če so pasovi
zrahljani, skrajšajte naramnice tako, da potegnete konec
jermenčka.
Pasovi morajo biti kar najbolj napeti, da bi zavarovali otroka
v primeru nesreče.(Med varnostnimi pasovi in trupom
otroka pustite za prst prostora).
28• ODSTRANITE PASOVE: da bi odstranili pasove s šasije
vozička, vstavite sponke mednožnega jermenčka v reže
pod šasije in izvlecite (risba a). Da bi izvlekli priključke
naramnic izpod šasije, jih odpnite z zatičev in vstavite v
ustrezne reže (risba b).
29• Odpet jermenček vtaknite nazaj v za to namenjen žep.
Dodatki
30• DEŽNA PREVLEKA COVER ALL: Dežna prevleka iz prozorne
plastike.
TORBA: Torba s podlogo za previjanje otroka, ki jo je
mogoče pripeti na voziček.
31• STOJALO BASSINET: praktičen, kompakten podstavek za
bassinet.
32• KOMPLET PROTI ZADUŠITVI: vzmetnica in blazna. Združljivo
z našim 3-točkovnim kompletom za avto.
Serijske številke
33• Pod podstavkom vozička so informacije, ki se nanašajo na
datum proizvodnje izdelka.
• Ime izdelka, datum proizvodnje in serijska številka izdelka
(risba a).
Komplet za avtomobil:
• Homologacijska nalepka (risba b);
• Datum izdelave varnostnega pasu (risba c);
Ti podatki so za potrošnika koristni, če se izkaže, da ima z
izdelkom težave.
Kako beremo homologacijsko nalepko
• V tem poglavju je razloženo, kako beremo homologacijsko
nalepko (oranžna nalepka).
• Na vrhu nalepke je znak proizvajalca in ime izdelka.
• 0-10 kg Y pomeni, da je izdelek homologiran za otroke od
rojstva do teže 10 kg in da je pripomoček opremljen s 3točkovnim varnostnim pasom.
• Črka E v krogcu: je znak evropske homologacije, številka
pa pomeni državo, ki je homologacijo izdala (1:Nemčija,
2:Francija, 3:Italija, 4:Nizozemska, 11:Velika Britanija in 24:
Irska).
• Številka homologacije: če se začne z 04, pomeni, da gre za
četrti popravek (trenutno veljaven) pravilnika R44.
• Ustrezni normativ: UN/ECE R44/04.
• Serijska številka proizvodnje: posebna številka za vsako
košaro; od izdaje homologacije je vsak izdelek označen s
svojo številko.
Pomoč uporabnikom
• Če izgubite ali poškodujete sestavni del izdelka, uporabite
izključno originalne rezervne dele Peg Perego. Za
morebitna popravila, zamenjave, podatke o izdelkih,
prodajo originalnih rezervnih delov in dodatkov, stopite v
stik s centrom za pomoč uporabnikom Peg Perego:
• tel.: 0039-039-60.88.213
• telefaks: 0039-039-33.09.992
• e-pošta: assistenza@pegperego.it
• spletna stran: www.pegperego.com
• Peg Perego se lahko kadarkoli odloči, da bo spremenil
modele, objavljene v katalogu, najsi bo to zaradi tehničnih
ali tržnih razlogov.
Kaj mislite o nas?
• Peg Perego je vedno na voljo svojim strankam, da v kar
največji meri izpolni njihove potrebe. Zato je za nas zelo
pomembno, da poznamo mnenje svojih strank. Hvaležni
vam bomo, če si boste, ko boste uporabili naš izdelek, vzeli
čas in izpolnili VPRAŠALNIK O ZADOVOLJSTVU STRANK, ki
ga boste našli na naših spletnih straneh, na naslovu:
www.pegperego.com
68
Благодарим вас за то, что вы выбрали
продукцию компании Peg-Pеrego.
• Peg-Perego S.p.A. сертифицирована по ISO
9001.
• Сертификация гарантирует заказчикам
и потребителям, что компания работает,
соблюдая принципы гласности и доверия.
Детская коляска Primonido New
предлагается в модели Young или
Culla.
Характеристики изделия
Primonido New-auto, Класс 1, категория
“Универсальная”
• Детская коляска сертифицирована в соответствии с
Европейским нормативным требованием UN/ECE R44/04
для детей весом 0-10 кг. Совместима с большинством
автомобильных сидений, но не со всеми.
• Детская коляска может быть правильно установлена,
если в руководстве пользователя вашего автомобиля
говорится о совместимости с "Универсальными"
системами крепления класса 0.
• По сравнению с предыдущими моделями, не имеющими
письменной сертификации, это детская коляска
классифицирована как “Универсальная” согласно самым
строгим критериям.
• Данное устройство можно использовать только с
автомобилями, имеющими заднее сиденье на 2 или 3
места, оснащенными двух- или трехточечным ремнем
безопасности и сертифицированными согласно
Европейскому нормативному требованию UN/ECE R°16
или аналогичным нормам.
• В случае сомнений и для получения дополнительной
информации о креплении детской коляски на
RU_Pусский
автомобилях обратитесь к производителю или продавцу
этого устройства.
ВАЖНО
• Детскую коляску, группа 0, надо устанавливать
перпендикулярно ходу движения.
• Детскую коляску нельзя устанавливать на сиденьях,
расположенных обратно либо перпендикулярно ходу
движения автомобиля.
• Устройство выпускается со сквозной серийной
нумерацией.
ПРЕДУПРЕЖДЕНИЕ
ВАЖНО: Внимательно прочтите настоящую
инструкцию и сохраняйте ее в течение всего
срока пользования устройством. Невыполнение
инструкции может поставить под угрозу
безопасность ребенка.
• Оставлять ребенка в детской коляске без присмотра
может быть опасно;
• Операции по сборке и регулировке устройства должны
выполняться только взрослыми.
• Не пользуйтесь устройством, если оно сломано или
если в нём отсутствуют детали.
• Перед использованием убедитесь, что все механизмы
фиксации закреплены правильно.
• Не вставляйте пальцы в механизмы.
• Не используйте устройство вблизи источников тепла,
открытого пламени и опасных объектов, которые могут
оказаться в досягаемости ребенка.
• Использование аксессуаров, не рекомендованных
производителем, может быть опасным.
• Убедитесь, что ремни безопасности, которые будут
фиксировать детскую коляску в автомобиле, постоянно
натянуты и отрегулируйте ремни, удерживающие
ребенка.
• Никогда не перекручивайте ремни.
• Если детская коляска уже подвергалась чрезмерным
нагрузкам во время аварии или имеет видимые
повреждения и деформации, рекомендуется заменить
его на новое.

69
• Модифицировать устройство безопасности строго
запрещается.
• Тщательно следуйте инструкции к системе крепления
ребенка, предоставленной изготовителем.
• Не оставляйте ребенка без присмотра в детской
коляске, находящейся в машине.
• Детская коляска должна быть все время зафиксирована
с помощью автомобильных ремней безопасности,
даже если там нет ребенка. Иначе, в случае резкого
торможения, она может нанести вред пассажирам
автомобиля.
• Во время поездки на автомобиле ни в коем случае не
держите ребенка на руках и обязательно сажайте его в
детскую коляску. В случае неожиданного торможения,
даже на низкой скорости, ребенок легко может быть
выброшен вперед.
• Обращайте особое внимание на размещение в салоне
автомобиля багажа и объектов, которые, в случае
аварии, могут нанести вред ребенку, находящемуся в
детской коляске.
• Не оставляйте детскую коляску в автомобиле стоящем
на солнце – некоторые ее части могут нагреться и
повредить чувствительную кожу ребенка, поэтому
контролируйте расположение коляски с ребенком.
• Следите за тем, чтобы детская коляска не блокировалась
движущимися частями сиденья или дверцей
автомобиля.
• Не пользуйтесь детской коляской без тканевого чехла;
используйте чехлы, рекомендованные производителем,
потому что они являются составной частью детской
коляски и системы безопасности. При необходимости
замены пользуйтесь запчастями от производителя.
• Частью конструкции детской коляски является система
для смягчения толчков, изготовленная из полистирола
и встроенная непосредственно в раму под подкладкой.
Не удаляйте ее.
• Это устройство предназначено исключительно
для детей, которые пока не способны сидеть
самостоятельно.
• Оно подходит для детей с рождения, весом до 9 кг. При
использовании в автомобиле – до 10 кг.
• Используйте устройство только на твердых,
горизонтальных и сухих поверхностях.
• Если другие дети играют рядом с люлькой, не
оставляйте их без присмотра.
• Следите за положением ребёнка во время регулировки
устройства (рукоятки, спинки).
• Регулярно проверяйте рукоятку (или ручки) и дно
детской коляски, убеждаясь в отсутствии видимых
поломок или повреждений.
• При использовании детской коляски вместе со стойкой
(stand), убедитесь, что коляска подходит к ней по длине.
Инструкции по использованию
Использование детской коляски
1• ТЕНТ И ПОКРЫВАЛО: установите тент, вставив крепления
в соответствующие отверстия (рис_a) и застегните
кнопку сзади.
Пристегните покрывало кнопками с обеих сторон
(рис_b).
2• РЕГУЛИРОВКА СПИНКИ: потяните ручку наружу и
поверните ее по часовой стрелке, чтобы поднять
спинку, или против часовой стрелки, чтобы опустить ее.
3• ПОЗИЦИЯ ПОДВЕСКИ: Детская коляска снабжена
выдвижными ножками, расположенными под базой,
с помощью которых можно по желанию покачивать
(рис_a) или не покачивать (рис_b) ребенка. Поверните
ножки наружу, чтобы превратить детскую коляску в
удобную кроватку (рис_c).
4• СИСТЕМА ЧЕТЫРЕ СЕЗОНА: Детская коляска снабжена
рычажком, расположенным под базой, с помощью
которого можно регулировать ток воздуха внутри
коляски.
Передвиньте рычажок на деление голубого цвета, чтобы
открыть доступ воздуха и начать проветривание (летом)
или на деление красного цвета, чтобы ограничить
приток воздуха (зимой).
5• РЕМНИ ДЛЯ ПЕРЕНОСКИ: чтобы перенести детскую
коляску, опустите тент и извлеките из боковых карманов
ремни для переноски (рис_a). Также вы можете
переносить коляску, присоединив ручки Ganciomatic
(рис_b).
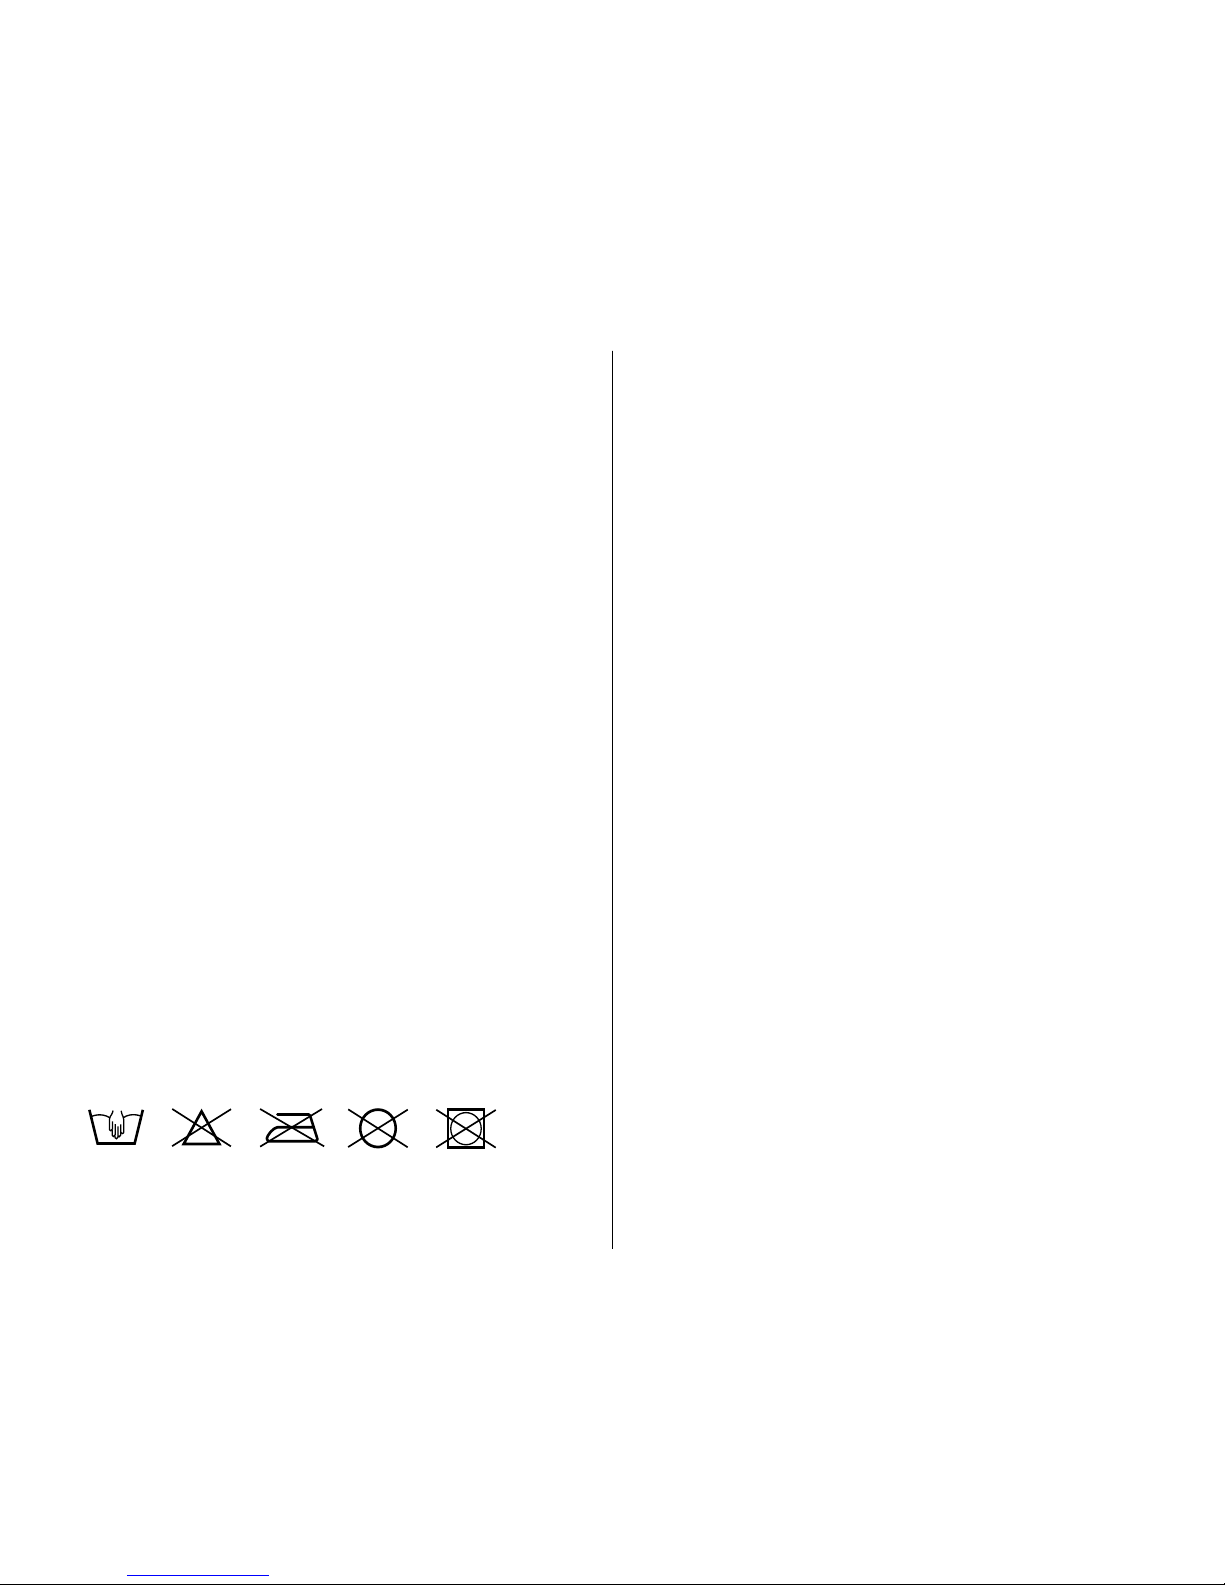
70
Ganciomatic system
6• Ganciomatic System – это практичная и быстрая система,
позволяющая одним движением присоединять детскую
коляску к базе Ganciomatic шасси Carrello Classico 58.5,
Carrello Classico Velo, Bassinet Stand (приобретаются
отдельно).
Чтобы присоединить детскую коляску, расположите ее
на шасси и двумя руками нажмите на нее до щелчка.
Перед присоединением и снятием детской коляски
всегда задействуйте тормоз.
Убедитесь, что детская коляска присоединена
правильно.
7• Чтобы снять ее, сместите рычаг ручки Ganciomatic по
стрелке (стрелка_a), одновременно нажимая на рычаг
(стрелка_b) и потяните люльку наверх до отсоединения
(стрелка_c).
Pазборка
8• РАЗБОРКА детской коляски: отстегните кнопки
покрывала и тента; нажмите на крепления и снимите
тент, потянув его вверх (рис_a); поднимите спинку и
снимите матрац (рис_b); отстегните кнопки (рис_c) и
удалите внутреннее покрытие (рис_d).
Yход за подкладкой:
• чистите щеткой тканые части, чтобы удалить пыль, и
стирайте вручную при максимальной температуре 30°,
не выкручивать;
• не отбеливать хлором;
• не гладить;
• не чистить в химчистке;
• не обрабатывать растворителями и не сушить в
барабанных сушильных машинах.
Чистка изделия
• Ваше изделие нуждается в несложном уходе. Операции
чистки и ухода должны выполнять только взрослые.
• Рекомендуется содержать в чистоте все движущиеся
части, при необходимости смажьте их легким маслом.
• Периодически очищайте пластмассовые детали
влажной тряпкой, не пользуйтесь растворителями и
сходными веществами.
• Почистите щеткой тканые части, чтобы удалить пыль.
• Не чистите ударопоглощающее устройство из
полистирола растворителями или сходными с ними
веществами.
• Защитите изделие от атмосферных осадков - воды,
снега или дождя. Постоянная и продолжительная
подверженность солнечным лучам может вызвать
цветовые изменения многих материалов.
• Храните изделие в сухом месте.
Kit Auto
как устанавливать ремень
безопасности
9• Располагайте детскую коляску с опущенными спинкой и
тентом.
10• Во время перевозки в автомобиле удаляйте
дополнительные матрацы.
11• ТРЕХТОЧЕЧНЫЙ РЕМЕНЬ БЕЗОПАСНОСТИ: Проденьте
пояс вставки для разделения ног в прорезь матраца
(рис_a) и в прорези рамы (рис_b) так, чтобы пояс вышел
наружу (рис_c).
12• Проденьте концы лямок в прорези матраца и рамы
(рис_a) и прикрепите их к штифтам (рис_b).
13• Ремни присоединены под рамой (рис_a) и внутри
детской коляски (рис_b).
Присоединение к автомобилю с
помощью ремней безопасности.
КРЕПЛЕНИЕ ДЕТСКОЙ КОЛЯСКИ В АВТОМОБИЛЕ: Заднее
сиденье автомобиля (на три места) оснащено 3 ремнями
безопасности, причем центральное место может иметь
как плечевой, так и поясной ремень. Детская коляска
может быть присоединена к автомобилю в обоих
случаях.

71
Советуем устанавливать детскую коляску на заднее
сиденье так, чтобы голова ребенка приходилась на
центральное место.
14• Расположение детской коляски в автомобиле с поясным
ремнем.
15• Расположение детской коляски в автомобиле с
трехточечным ремнем.
16• Кроме того, детская коляска может располагаться по
центру трехместного заднего сиденья с использованием
двух внешних ремней безопасности (рис_a). Детскую
коляску нельзя располагать как на рис_b, потому что
её можно фиксировать в автомобиле только с помощью
ремней, ориентированных в разные стороны.
17• Установка детской коляски на двухместном заднем
сиденье. Отделение детской коляски, в котором
располагаются ноги ребенка, может быть направлено
как в одну, так и в другую стороны.
Если сиденья автомобиля расположены с наклоном,
то для создания горизонтальной поверхности можно
подложить под люльку полотенце.
18• Возьмите ремень заднего сиденья со стороны детской
коляски, где располагаются ноги ребенка, согните
его (рис_a), и проденьте в прорезь одного из двух
ремней, входящих в комплект поставки люльки (рис_b).
Проденьте красную планку ремня люльки внутрь
согнутого ремня безопасности (рис_c).
19• Нажмите на серый рычажок слева (рис_a) и повесьте
ремень детской коляски на соответствующую петлю
(рис_b).
• Повторите операцию для ремня безопасности с той
стороны детской коляски, где располагается голова
ребенка.
20• После присоединения ремня к петле детской коляски,
потяните за ремень безопасности, чтобы правильно
расположить детскую коляску в автомобиле. Потяните
согнутый ремень к себе (стрелка_a) и, продолжая
удерживать его, натяните ремень со стороны задней
части металлической пряжки (стрелка_b), чтобы
зафиксировать его.
21• Ремень, присоединенный к ремню безопасности
и детской коляске со стороны ног (рис_a). Ремень,
присоединенный к ремню безопасности и к детской
коляске со стороны головы (рис_b).
22• Детская коляска в автомобиле.
23• СНЯТИЕ ДЕТСКОЙ КОЛЯСКИ С АВТОМОБИЛЯ: нажмите
на серый рычажок металлической пряжки (рис_a) и
снимите его с колец на обеих сторонах детской коляски
(рис_b). Если одна из двух металлических пряжек будет
слишком натянута, и вы не сможете её снять, то нажмите
на детскую коляску и одновременно отсоедините
металлическую пряжку.
Как расположить ребенка в детской
коляске
24• ТРЕХТОЧЕЧНЫЙ РЕМЕНЬ БЕЗОПАСНОСТИ: ослабьте
лямки, нажав на пряжку (рис_a) и удлините их (рис_b).
25• нажмите на красную кнопку (рис_a) и отсоедините
лямки от вставки для разделения ног (рис_b).
26• Расположите ребенка внутри детской коляски и
присоедините пряжку лямок к ремню, разделяющему
ноги.
27• Ребенок должен быть хорошо закреплен внутри детской
коляски. Если ремни ослаблены, уменьшите длину
лямок, потянув ремни за концы.
Для безопасности ребенка в случае аварии, ремни
должны быть натянуты как можно сильнее. Оставьте
ребенку возможность играть (зазор толщиной в палец
между ремнем и торсом ребенка).
28• УДАЛИТЕ РЕМНИ ЛЮЛЬКИ: для снятия ремней с рамы
детской коляски, проденьте пряжку вставки для
разделения ног в отверстия на нижней части рамы
и снимите ее (рис_a). Чтобы отсоединить крепления
лямок снизу рамы, снимите их с осей и проденьте в
соответствующие отверстия (рис_b).
29• Снятый ремень необходимо поместить в
соответствующий карман.
Аксессуары (продаются отдельно)
30• ДОЖДЕВИК COVER ALL: Универсальный прозрачный
дождевик.
СУМКА: Сумка с матрасиком для пеленания ребенка, ее

72
можно прикрепить к шасси.
31• BASSINET STAND: практичная и компактная опорная
база.
32• АНТИУДУШАЮЩИЙ КОМПЛЕКТ: матрас и подушка.
Совместим с нашим 3-точечным автонабором.
Cерийные номера
33• Внизу базы детской коляски находится информация о
дате изготовления.
• Название устройства, дата его изготовления и серийный
номер (рис_a).
Kit Auto:
• Табличка сертификации (рис_b);
• Дата изготовления ремня (рис_c);
Эта информация понадобится пользователю в случае
каких-либо проблем с устройством.
Как читать табличку сертификации
• В этом параграфе мы объясним, как читать табличку
сертификации (табличка оранжевого цвета).
• Наверху этикетки указана марка фирмы производителя
и название устройства.
• 0-10 кг Y означает, что устройство сертифицировано для
детей с рождения, весом до 9 кг, и что оно оборудовано
трехточечным ремнем безопасности.
• Буква E в круге: указывает на то, что данная марка
сертифицирована в ЕС, а номер обозначает страну,
выдавшую сертификат (1: Германия, 2: Франция, 3:
Италия, 4: Нидерланды, 11: Великобритания и 24:
Ирландия).
• Номер сертификации: то, что он начинается на 04,
означает четвертую редакцию (ныне действующую)
нормативного требования R44.
• Нормативно-справочные документы: UN/ECE R44/04.
• Сквозной серийный номер продукта: персональный для
каждой люльки – после выпуска сертификата каждое
кресло должно иметь свой собственный номер.
Cлужба обслуживания
• В случае утери или повреждения частей изделия,
используйте только фирменные запасные части PegPerego. Для выполнения ремонта, замены деталей,
получения справок об изделии, продажи фирменных
запчастей и принадлежностей вы можете обращаться в
службу обслуживания Peg-Perego:
• тел.: 0039-039-60.88.213
• факс: 0039-039-33.09.992
• e-mail: assistenza@pegperego.it
• сайт в интернете: www.pegperego.com
Компания Peg Perego имеет право внести в
любой момент изменения в модели, описанные в
настоящем издании, по причинам технического или
организационного характера.
Что вы думаете о нас?
Peg-Perego находится к услугам своих клиентов для
полного удовлетворения всех их требований. Поэтому,
для нас очень важно знать мнение наших клиентов.
Поэтому, мы будем вам признательны, если после
использования нашего изделия вы заполните АНКЕТУ
ОБ УДОВЛЕТВОРЕННОСТИ ПОТРЕБИТЕЛЯ, которую
можно найти на нашем сайте в Интернете, высказывая
свои замечания или рекомендации
www.pegperego.com
73
Bir Peg-Perego ürününü tercih ettiğiniz
için size teşekkür ederiz.
• Peg-Perego S.p.A. ISO 9001 sertifikasına
haizdir.
• Söz konusu sertifikalandırma, Kullanıcılara,
Şirketin şeffaf ve güvenilir çalışmaları
konusunda garanti sunmaktadır.
Primonido New portbebe, Young veya
Culla modelinde mevcuttur.
Ürün özellikleri
Oto-portbebe, Grup 0, “Universale/
Evrensel” kategori
• Portbebe, 0-10 kg ağırlığındaki bebekler için, UN/ECE
R44/04 mevzuatına göre tip onayı almıştır. Motorlu araç
koltuklarının büyük bir kısmı için uygundur, fakat hepsi için
uygun değildir.
• Portbebe, aracın kullanım ve bakım kılavuzunda Grup 0
“Universale/Evrensel” tutma sistemleri ile uyumluluğunun
belirtilmiş olması halinde düzgün bir şekilde takılabilir.
• Portbebe, bu yazıyı bulundurmayan önceki modellerine
nispeten, daha titiz onaylama kriterleri uyarınca “Universale/
Evrensel” olarak sınıflandırılmıştır.
• Bu donanım, sadece 2 veya 3 noktalı emniyet kemeri
ile donatılmış, 2 ya da 3 kişilik koltuklara sahip, UN/ECE
R16 mevzuatına veya eşdeğer standartlara uygunluğu
onaylanmış olan araçlarda kullanılabilir.
• Emin olunmaması halinde veya portbebenin özel araçlara
sabitlenmesi hakkında daha fazla bilgi almak amacıyla
imalatçı firmayla veya satıcıyla görüşünüz.
ÖNEMLİ
• “Portbebe”, grup 0, aracın gidiş yönüne göre dik olacak
şekilde takılmalıdır.
TR_Türkçe
• Portbebeyi, gidiş yönünün tersine çevrilmiş veya aracın
genel gidiş yönüne çapraz şekilde döndürülmüş olarak
koltuklara monte etmeyiniz.
• Bu ürün, artan şekilde numaralandırılmıştır.
UYARI
ÖNEMLİ: Bu talimatları dikkatlice okuyunuz ve ürünün
kullanım ömrü süresince tahsis edilmiş olan özel
bölmesinde saklayınız. Bu talimatlara uyulmaması
halinde, bebeğin güvenliği tehlikeye girebilir.
• Bebeğinizi denetimsiz halde bırakmanız tehlikeli olabilir.
• Montaj işlemleri ve ürünün hazırlanması yetişkinler
tarafından yapılmalıdır.
• Eksik parçaların veya kırıkların olması halinde, lütfen ürünü
kullanmayınız.
• Kullanmadan önce, tüm montaj mekanizmalarının doğru
şekilde sabitlendiğinden emin olunuz.
• Mekanizmaların içerisine parmaklarınızı sokmayınız.
• Isı kaynaklarının, açık haldeki ateşlerin veya bebeğin elinin
ulaşabileceği tehlikeli nesnelerin yakınında kullanmayınız.
• İmalatçı firma tarafından onaylanmayan aksesuarların
kullanılması tehlike arz edebilir.
• Portbebenin sabitleme kayışlarının daima gergin
olduğundan ve bebeği bağlayan kayışların daima düzgün
olduğundan emin olunuz.
• Kayışları asla bükmeyiniz.
• Bir kaza nedeniyle aşırı şekilde gerilmiş olması veya belirgin
çatlakları ve deformasyonları olması halinde donanımı
değiştiriniz.
• Hiçbir şekilde, kullanıcı tarafından emniyet donanımı
üzerinde değişiklik yapılmamalıdır.
• Bebek sabitleme sisteminin üretici firması tarafından verilen
talimatları harfiyen uygulayınız.
• Bebeği denetimsiz şekilde arabada, portbebenin içinde
bırakmayınız.
• Portbebe donanımının içerisinde bebek olmasa bile, daima
araca emniyet kemerleriyle sabitlenmelidir. Aksi halde, ani
fren durumunda, araçta bulunanların yaralanmasına neden
olabilir.
• Araba ile seyahat esnasında, bebeği kesinlikle kucağınıza
almayınız ve bakımını portbebenin dışında yapmayınız. Ani

74
bir fren durumunda, düşük hızda seyahat ediliyor olsa bile
bebek öne doğru fırlayabilir.
• Arabanın içerisinde, kaza durumunda portbebenin içindeki
bebeğin yaralanmasına neden olabilecek bagaj veya başka
nesneleri bulundurmamaya özellikle dikkat gösteriniz.
• Portbebeyi aracın içerisinde güneşe maruz kalacak şekilde
bırakmayınız, bazı kısımları fazla ısınabilir ve bebeğin hassas
cildine zarar verebilir, bebeği yerleştirmeden önce lütfen
kontrol ediniz.
• Portbebenin bir kapı veya koltuğun hareketli bir kısmı
tarafından sıkıştırılmamasına dikkat ediniz.
• Portbebeyi kumaş kılıfı olmaksızın kullanmayınız,
portbebenin ve emniyetin tamamlayıcı bir unsuru olması
nedeniyle bu kılıf, imalatçı firma tarafından onaylanmayan
başka bir kılıfla değiştirilmemelidir. Değiştirilmesi
durumunda, orijinal bir yedeğini kullanınız.
• Portbebe, dolgunun altındaki gövdeye direk olarak entegre
edilmiş polistirenden yapılma darbe emici donanım ile
birlikte tasarlanmıştır: Bunu çıkarmayınız.
• Bu ürün sadece kendi başına oturamayan bebekler içindir.
• Bu ürün, bebeğin doğumundan itibaren 9 kg. oluncaya
kadar geçen dönem süresince kullanım için tasarlanmıştır.
Otomobilde, 10 kg. ağırlığa gelinceye kadar kullanılabilir.
• Sadece sert, yatay ve kuru yüzeyler üzerinde kullanınız.
• Diğer çocukların bebek arabasının etrafında denetimsiz
şekilde oynamalarına izin vermeyiniz.
• Mekanizmaları (tutma kolu, arkalık) ayarlama işlemi
gerçekleştirilirken, bebeğin olup olmadığına dikkat ediniz.
• Tutma kolunu (veya kulpları) ve portbebenin tabanını
düzenli olarak kontrol ediniz ve çatlak veya hasar olup
olmadığını kontrol ediniz.
• Portbebeyi bir stand ile birlikte kullanırken, portbebenin
stand üzerinde belirtilen maksimum uzunluğunu kontrol
ediniz.
Kullanma talimatları
Portbebenin kullanımı
1• TENTE VE ÖRTÜ: Tenteyi takmak için bağlantı yerlerini
deliklere geçiriniz (şek_a) ve arkadan ilikleyiniz.
Tenteyi her iki taraftan da ilikleyiniz (şek_b).
2• SIRT DAYANAGININ AYARLANMASI: Düğmeyi dışa doğru
çekiniz ve sırt dayanağını yukarıya kaldırmak için saat
yönünde, indirmek için ise saatin tersi yönde çeviriniz.
3• SALINCAGIN KONUMU: Portbebe, bebeği sallama (şek_a)
veya sallamama (şek_b) arasında seçim yapmayı sağlayan,
tabana yerleştirilmiş çıkarılabilir ayaklara sahiptir.
Portbebeyi rahat bir yatağa dönüştürmek için ayakları
dışarıya doğru çeviriniz (şek_c).
4• DÖRT MEVSİM SİSTEMİ: Portbebe, içeride hava
sirkülasyonunun ayarlanmasını sağlayan, tabanın altına
yerleştirilmiş bir kola sahiptir.
Ferah ve havadar bir ortam yaratmak için (yazın) kolu mavi
rengin üzerine getiriniz, hava girişini önlemek için ise (kışın)
kırmızı rengin üzerine getiriniz.
5• TAŞIMA KEMERLERİ: Portbebeyi taşımak için tenteyi indiriniz
ve taşıma kemerlerini yan ceplerden çıkarınız (şek_a).
Ganciomatic tutma yerlerini kavrayarak da taşınabilir
(şek_b).
Kancalama sistemi
6• Ganciomatic System (Otomatik Kancalama Sistemi),
portbebeyi tek bir hareketle, Carrello Classico 58.5, Carrello
Classico Velo, Bassinet Stand Ganciomatic tabana takmanızı
sağlayan pratik ve hızlı bir sistemdir. (ayrı olarak satın
alınabilirler).
Portbebeyi takmak için, çocuk arabasının üzerine
yerleştiriniz ve klik sesi gelinceye kadar iki elinizle bastırınız.
Portbebeyi takmadan ve sökmeden önce daima çocuk
arabasının frenini aktive ediniz.
Portbebenin düzgün şekilde takılıp takılmadığını kontrol
ediniz.
7• Sökmek için, Ganciomatic tutma yerinin kolunu ok
yönünde hareket ettiriniz (ok_a), aynı anda kola basınız
(ok_b) ve yerinden çıkana kadar yukarıya doğru çekiniz
(ok_c).
Kılıfını çıkarma
8• Portbebenin KILIFININ ÇIKARILMASI: Örtünün ve tentenin
düğmelerini çözünüz; bağlantı yerlerinin üzerine bastırınız
ve örtüyü yukarıya çekerek çıkarınız (şek_a); sırt dayanağını
yukarıya kaldırınız ve minderi çıkarınız (şek_b); düğmelerini
sökünüz (şek_c) ve iç kılıfını çıkarınız (şek_d).

75
Dolgunun bakımı
• Kumaş kısımlarda biriken tozu gidermek için fırçalayınız ve
azami 30° derece ısıdaki suda el ile yıkayınız ve sıkmayınız;
• Klorlu çamaşır suyu kullanmayınız;
• Ütülemeyiniz;
• Kuru temizleme yapmayınız;
• Leke çözücü solvent kullanmayınız ve döner merdaneli
kurutma uygulamayınız.
Ürünün temizliği
• Elinizdeki ürünün çok az bir bakıma ihtiyacı vardır. Temizlik
işlemleri sadece yetişkin kişiler tarafından yapılmalıdır.
• Bütün hareketli kısımlarının temiz tutulması ve gerekirse
hafif yağ ile yağlanması tavsiye edilir.
• Plastik kısımlarını periyodik olarak nemli bez ile temizleyiniz,
çözücü ve benzeri ürünler kullanmayınız.
• Tozdan arındırmak için kumaş kısımlarını fırçalayınız.
• Polistrol darbe emiciyi çözücü veya benzeri ürünler ile
temizlemeyiniz.
• Ürünü su, yağmur veya kar gibi atmosfer etkenlerinden
koruyunuz; devamlı ve uzun süre güneş altında kalması
birçok malzemede renk değişikliklerine yol açabilir.
• Ürünü kuru bir yerde saklayınız.
Araba Kiti
Emniyet kemerinin takılması
9• Portbebenin arkalık ve tente indirilmiş şekilde
yerleştirilmesi.
10• Arabada taşınması esnasında, varsa ek minderleri çıkarınız.
11• ÜÇ (3) NOKTALI EMNİYET KEMERİ: Bacak ayırıcı kemeri
minderin üzerindeki deliğe (şek_a) ve gövdedeki deliklere
(şek_b) takıp, dışarıya çıkıncaya kadar geçiriniz (şek_c).
12• Askılarının iki ucunu, minderdeki ve gövdedeki deliklere
geçiriniz (şek_a) ve sonra pimlere takınız (şek_b).
13• Kemerler, gövdenin alt kısmına (şek_a) ve portbebenin iç
kısmına (şek_b) takılı durumda.
Emniyet kemerleriyle arabaya monte etme
PORTBEBENİN ARABAYA TAKILMASI: Arabanın arka
koltuğunda (3 kişilik) 3 emniyet kemeri bulunur ve ortadaki
sırt veya karın bölgesi için olabilir, her iki durumda da
beşiğin arabaya takılması mümkündür.
Portbebeyi arka koltuğun üzerine, baş kısmı orta koltuk
hizasına gelecek şekilde yerleştirmeniz önerilmektedir.
14• Portbebe arabaya karın bölgesi kemeri ile yerleştirilmiş
şekilde.
15• Portbebe arabaya 3 noktalı kemer ile yerleştirilmiş şekilde.
16• Portbebe, en dıştaki iki emniyet kemerini kullanmak
suretiyle (şek_a) 3 kişilik arka koltuğa ortalanarak da
yerleştirilebilir. Portbebe şek_b’deki gibi yerleştirilemez
çünkü sadece ters yöne çevrilmiş kemerlerle arabaya
sabitlenebilir.
17• Portbebenin 2 kişilik arka koltuğa yerleştirilmesi. Portbebe,
bebeğin ayak kısmı bir yöne veya diğer yöne gelecek
şekilde çevrilebilir.
Arabanın koltuğu düz değilse, eğik durumda ise havlular
yardımıyla yatay konuma getirilebilir.
18• Arka koltuğun emniyet kemerini portbebenin bulunduğu
kısımdan bebeğin ayaklarının hizasına getiriniz, katlayınız
(şek_a) ve ürünle birlikte verilen iki kayıştan birinin deliğine
geçiriniz (şek_b). Kayışın kırmızı çubuğunu katlanmış
kemerin iç kısmına geçiriniz (şek_c).
19• Soldaki gri kola basınız (şek_a) ve kayışı portbebenin
halkasına takınız (şek_b).
• Aynı işlemi portbebenin bebeğin baş tarafına gelen
kısmında bulunan kayış ile tekrarlayınız.
20• Kayış portbebenin halkasına takıldıktan sonra, portbebeyi
arabanın içerisinde düzgün şekilde dengelemek için
emniyet kemerinin gerdirilmesi gerekmektedir. Katlanmış
kemeri kendinize doğru çekiniz (ok_a) ve sabit tutarak,
sabitlemek için kemeri kayışın arka tarafından (ok_b)
gerdiriniz.
21• Kayış emniyet kemerine ve ayak kısmından portbebeye
takılı durumda (şek_a). Kayış emniyet kemerine ve baş
kısmından portbebeye takılı durumda (şek_b).
22• Portbebe arabanın içerisinde.
23• PORTBEBENİN ARABADAN SÖKÜLMESİ: Kayışın gri koluna
basınız (şek_a) ve portbebenin iki tarafında bulunan

76
halkalardan çıkarınız (şek_b). İki kayıştan birinin çok gergin
ve yumuşatılmasının zor olması halinde, portbebenin
üzerine basmak ve aynı anda kayışı çıkarmak gerekir.
Bebeğin portbebeye yerleştirilmesi
24• 3 NOKTALI EMNİYET KEMERİ: Tokanın üzerine bastırarak
(şek_a) omuz askılarını gevşetiniz ve uzatınız (şek_b).
25• Kırmızı düğmeye basınız (şek_a) ve askıları bacak ayırıcıdan
çıkarınız (şek_b).
26• Bebeği portbebenin içine yerleştiriniz ve askıların tokasını
bacak ayırıcı kayışa takılıncaya kadar geçiriniz.
27• Portbebe içindeki bebek sıkıca bağlanmış olmalıdır.
Kemerlerin gevşemiş olması halinde, kemerin uçlarından
çekmek suretiyle askıların boyunu kısaltınız. Kemerler,
bir kaza durumunda bebeğin güvenliği için mümkün
olduğunca gergin olmalıdır. Minimum bir oynama mesafesi
bırakınız (kemer ile bebeğin göğüs kısmı arasında bir
parmak mesafe).
28• KEMERLERİN ÇIKARILMASI: Kemerleri portbebenin
gövdesinden çıkarmak için, bacak ayırıcının tokalarını
gövdenin altındaki deliklere geçiriniz ve çıkarınız (şek_a).
Askıların bağlantı yerlerini gövdenin altından sökmek için,
bağlantı yerlerini pimlerden çıkarınız ve uygun deliklere
geçiriniz (şek_b).
29• Çözülen emniyet kemerini özel cebine yerleştiriniz.
Aksesuarlar
30• COVER ALL YAGMURLUK: Şeffaf den mamul tam korumalı
yağmurluk.
BEZ DEGIŞTIRME ÇANTASI: Bu çanta şilteli olup, bebeğin
yedek bezlerinin taşınabilmesi için bebek arabasına
takılabilir.
31• BASSINET STAND: Pratik ve kompakt dayama bazası.
32• BOĞULMAYI ÖNLEME KİTİ: Şilte artı yastık.
3 noktalı araba kitimiz ile uyumlu.
Seri numaraları
33• Portbebe, tabanının alt kısmında, üretilme tarihi ile ilgili
bilgiler yer almaktadır.
• Ürünün adı, üretilme tarihi ve seri numarası (şek_a).
Araba Kiti:
• Onay etiketi (şek_b);
• Emniyet kemerinin üretim tarihi (şek_c);
Ürün ile ilgili bir sorunla karşılaşılması halinde, bu bilgiler
tüketici için gereklidir.
Onay etiketinin okunması
• Bu paragrafta, tip onayı etiketinin nasıl okunacağı
açıklanmaktadır (turuncu etiket).
Etiketin üst kısmında üretici firmanın markası ve ürünün adı
yer almaktadır.
• 0-10 kg Y, bu ürünün doğumdan itibaren 10 kg ağırlığa
kadar olan bebekler için onaylanmış olduğunu ve
teçhizatın 3 noktalı kemerle donatılmış olduğunu belirtir.
• Daire içerisindeki E harfi: Avrupa onay işaretini belirtir ve
numara ise onayın verildiği ülkeyi tanımlar (1: Almanya, 2:
Fransa, 3: İtalya, 4: Hollanda, 11: İngiltere ve 24: İrlanda).
• Onay numarası: 04 ile başlaması R4 mevzuatının (şu
an yürürlükte olan) dördüncü düzeltmesi anlamına
gelmektedir.
• Referans standart: UN/ECE R44/04.
• Artan şekilde üretim numarası: Her bebe beşiğini
özelleştirir, onay verildikten itibaren her biri kendi numarası
ile tanımlanır.
Bakım servisi
• Herhangi bir sebepten dolayı ürünün parçaları kaybolur
veyahut hasar görür ise sadece orijinal Peg-Perego yedek
parçalarını kullanınız. Olabilecek tamiratlar, ikameler, bilgiler,
orijinal yedek parçalar ve aksesuarlar için Peg-Perego Bakım
Servisi ile temasa geçiniz:
• tel.: 0039-039-60.88.213
• fax: 0039-039-33.09.992
• e-mail: assistenza@pegperego.it
• internet sitesi: www.pegperego.com
• Peg-Perego, her daim, teknik veyahut ticari sebeplerden
dolayı bu broşürde konu olan modellerde değişiklikler
yapabilir.

77
Hakkımızda ne düşünüyorsunuz?
Peg-Perego firması Müşterilerinin ihtiyaçlarını en iyi şekilde
giderebilmek amacı ile emrindedir. Bundan dolayı, bizim
için müşterilerimizin düşünceleri çok önemli ve değerlidir.
Bu bakımdan, ürünümüzü kullandıktan sonra www.
pegperego. com internet adresimizde bulabileceğiniz
TÜKETİCİ MEMNUNİYET ANKETİ’ni uyarı ve önerileriniz
doğrultusunda doldurduğunuz takdirde sizlere müteşekkir
kalırız.
Σας ευχαριστούμε που επιλέξατε ένα
προϊόν Peg-Perego.
• H Peg-Pérego S.p.A.είναι πιστοποιημένη
κατά ISO 9001.
• Η πιστοποίηση παρέχει στους πελάτες
και τους καταναλωτές την εγγύηση μιας
διαφάνειας και εμπιστοσύνης στον τρόπο με
τον οποίο δουλεύει η εταιρία.
Το πολυκαρότσι Primonido New είναι
διαθέσιμο στα μοντέλα Young ή Culla.
Χαρακτηριστικά προϊόντος
Πολυκαρότσι-auto, Ομάδα 0, κατηγορία
“Γενικού τύπου”
• To πολυκαρότσι είναι εγκεκριμένο σύμφωνα με τον
κανονισμό UN/ECE R44/04 για παιδιά με βάρος από 0-10
kg. Κατάλληλο για το μεγαλύτερο μέρος των καθισμάτων
των αυτοκινήτων, αλλά όχι για όλα.
• Το πολυκαρότσι μπορεί να τοποθετηθεί σωστά εάν
στο εγχειρίδιο χρήσης και συντήρησης του οχήματος
αναφέρεται η συμβατότητα με συστήματα συγκράτησης
“Γενικού τύπου” Ομάδας 0.
• Το πολυκαρότσι έχει ταξινομηθεί ως “Γενικού τύπου”
σύμφωνα με κριτήρια έγκρισης πιο αυστηρά σε σχέση με
τα προηγούμενα μοντέλα τα οποία δεν διαθέτουν αυτήν
την ένδειξη.
• Η διάταξη μπορεί να χρησιμοποιηθεί μόνον σε οχήματα
που διαθέτουν πίσω κάθισμα 2 ή 3 θέσεων εξοπλισμένων
με ζώνες ασφαλείας 2 ή 3 σημείων, οι οποίες έχουν εγκριθεί
σύμφωνα με τον κανονισμό UN/ECE R16 ή ισοδύναμους
κανονισμούς.
• Σε περίπτωση αμφιβολιών, ή για περισσότερες
πληροφορίες σχετικά με τη στερέωση του πολυκαροτσιού
επάνω σε ειδικά οχήματα, απευθυνθείτε στον
κατασκευαστή ή στον πωλητή.
ΕL_Eλληνικα

78
ΣΗΜΑΝΤΙΚΟ
• "Το πολυκαρότσι”, ομάδα 0, πρέπει να εγκατασταθεί κάθετα
προς τη φορά της πορείας.
• Μην εγκαθιστάτε το πολυκαρότσι επάνω σε καθίσματα
γυρισμένα σε αντίθετη κατεύθυνση από τη φορά της
πορείας ή εγκάρσια προς την συνήθη φορά πορείας του
οχήματος.
• Το προϊόν αυτό έχει προοδευτική αρίθμηση.
ΠΡΟΕΙΔΟΠΟΙΗΣΗ
ΣΗΜΑΝΤΙΚΟ: διαβάστε προσεκτικά αυτές τις οδηγίες
και φυλάξτε τις στην ειδική θέση για όλη τη διάρκεια
ζωής του προϊόντος. Η ασφάλεια του παιδιού θα
μπορούσε να τεθεί σε κίνδυνο εάν δεν ακολουθήσετε
τις οδηγίες αυτές.
• Μπορεί να είναι επικίνδυνο εάν αφήσετε το παιδί σας χωρίς
επίβλεψη.
• Οι εργασίες συναρμολόγησης και προετοιμασίας του
προϊόντος πρέπει να εκτελούνται από ενήλικες.
• Μην χρησιμοποιείτε το προϊόν εάν παρουσιάζει μέρη που
λείπουν ή είναι σπασμένα.
• Πριν από τη χρήση βεβαιωθείτε ότι όλοι οι μηχανισμοί
σύνδεσης είναι συνδεμένοι σωστά.
• Μην εισάγετε τα δάχτυλα μέσα στους μηχανισμούς.
• Μην το χρησιμοποιείτε κοντά σε πηγές θερμότητας,
ελεύθερες φλόγες ή επικίνδυνα αντικείμενα στα οποία
μπορεί να φθάσει το παιδί με τα χέρια του.
• Μπορεί να είναι επικίνδυνη η χρήση εξαρτημάτων που δεν
έχουν την έγκριση του κατασκευαστή.
• Βεβαιωθείτε ότι οι ιμάντες για τη στερέωση του
πολυκαροτσιού στο όχημα είναι πάντα τεντωμένοι και
ρυθμίστε αυτούς που μπλοκάρουν το παιδί.
• Μην στριφογυρίζετε ποτέ τους ιμάντες.
• Συνιστάται να αντικαθιστάτε τη διάταξη στην περίπτωση
που έχει υποβληθεί σε υπερβολικές πιέσεις κατά τη
διάρκεια ενός ατυχήματος ή έχει εμφανείς ενδείξεις
σπασίματος ή παραμόρφωσης.
• Η διάταξη ασφαλείας δεν πρέπει να τροποποιείται σε καμία
περίπτωση από το χρήστη.
• Ακολουθήστε αυστηρά τις οδηγίες που παρέχονται από τον
κατασκευαστή του συστήματος συγκράτησης του παιδιού.
• Μην αφήνετε το παιδί στο πολυκαρότσι μέσα στο
αυτοκίνητο, χωρίς επίβλεψη.
Το πολυκαρότσι πρέπει να στερεώνεται πάντα με τις ζώνες
ασφαλείας του οχήματος, ακόμη και όταν δεν κάθεται
το παιδί. Σε περίπτωση απότομου φρεναρίσματος, θα
μπορούσε να προκαλέσει τραυματισμούς στους επιβάτες
του οχήματος.
• Κατά τη διάρκεια των ταξιδιών με το αυτοκίνητο μην
κρατάτε ποτέ στην αγκαλιά το παιδί και μην το βάζετε
ποτέ έξω από το πολυκαρότσι. Σε περίπτωση απότομου
φρεναρίσματος, ακόμη και με χαμηλή ταχύτητα, το παιδί
μπορεί να πέσει με ευκολία μπροστά.
• Προσέξτε ιδιαίτερα τις αποσκευές ή αντικείμενα που
μπορούν να προκαλέσουν τραυματισμούς στο παιδί μέσα
στο πολυκαρότσι σε περίπτωση ατυχήματος.
• Μην αφήνετε το πολυκαρότσι στο όχημα υπό την
έκθεση του ήλιου, ορισμένα μέρη του μπορούν να
υπερθερμανθούν και να βλάψουν το ευαίσθητο δέρμα του
παιδιού, ελέγξτε πριν να βάλετε το παιδί.
• Προσέξτε το πολυκαρότσι να μην παραμένει
μπλοκαρισμένο από ένα κινητό μέρος του καθίσματος ή
από μία πόρτα.
• Μην χρησιμοποιείτε το πολυκαρότσι χωρίς την υφασμάτινη
επένδυση, η επένδυση αυτή δεν μπορεί να αντικατασταθεί
από άλλη μη εγκεκριμένη από τον κατασκευαστή καθώς
αποτελεί αναπόσπαστο μέρος του πολυκαροτσιού και της
ασφάλειας. Σε περίπτωση αντικατάστασης χρησιμοποιείστε
ένα γνήσιο ανταλλακτικό.
• Το πολυκαρότσι έχει κατασκευαστεί με διάταξη
απορρόφησης προσκρούσεων από πολυστυρένιο, το οποίο
είναι ενσωματωμένο απευθείας στο σκελετό, κάτω από το
γέμισμα: μην το αφαιρείτε.
• Το προϊόν αυτό είναι κατάλληλο μόνο για παιδιά που δεν
μπορούν να σταθούν μόνα τους σε καθιστή θέση.
• Το προϊόν αυτό προορίζεται για παιδιά από τη γέννηση έως
9 kg βάρος. Η χρήση του στο αυτοκίνητο εννοείται έως 10
kg βάρος.
• Να χρησιμοποιείται μόνον επάνω σε σκληρές, οριζόντιες
και στεγνές επιφάνειες.
• Μην αφήνετε άλλα παιδιά να παίζουν χωρίς επίβλεψη
κοντά στο πολυκαρότσι.

79
• Προσέχετε ιδιαίτερα όταν εκτελείτε εργασίες ρύθμισης των
μηχανισμών (χειρολαβή, πλάτη) παρουσία του παιδιού.
• Να ελέγχετε τακτικά τη χειρολαβή (ή τα χερούλια) και τον
πάτο του πολυκαροτσιού και να εξακριβώνετε την απουσία
ενδείξεων σπασίματος ή φθοράς.
• Όταν χρησιμοποιείτε το πολυκαρότσι με μία βάση, ελέγξτε
το μέγιστο μήκος του πολυκαροτσιού που προσδιορίζεται
επάνω στη βάση.
Οδηγίες χρήσης
Χρήση του πολυκαροτσιού
1• ΚΟΥΚΟΥΛΑ ΚΑΙ ΠΟΔΟΣΑΚΟΣ: για να συνδέσετε την
κουκούλα περάστε τους συνδέσμους στις οπές (εικ_a) και
κουμπώστε την στο πίσω μέρος.
Κουμπώστε τον ποδόσακο και από τις δύο πλευρές (εικ_b).
2• ΡΥΘΜΙΣΗ ΠΛΑΤΗΣ: τραβήξτε τη λαβή προς τα έξω και
γυρίστε την δεξιόστροφα για να σηκώσετε την πλάτη ή
αριστερόστροφα, για να την κατεβάσετε.
3• ΘΕΣΗ ΚΟΥΝΙΑΣ: Το πολυκαρότσι διαθέτει αποσπώμενα
ποδαράκια, τοποθετημένα κάτω από τη βάση, με τα οποία
είναι δυνατόν να επιλέξετε εάν κουνήσετε (εικ_a) ή δεν
κουνήσετε (εικ_b) το παιδί. Γυρίστε τα ποδαράκια προς
τα έξω για να μετατρέψετε το πολυκαρότσι σε ένα άνετο
κρεβατάκι (εικ_c).
4• ΣΥΣΤΗΜΑ ΤΕΣΣΑΡΩΝ ΕΠΟΧΩΝ: Το πολυκαρότσι διαθέτει
ένα μοχλό, τοποθετημένο κάτω από τη βάση, από τον
οποίο είναι δυνατόν να ρυθμίσετε την κυκλοφορία του
εσωτερικού αέρα.
Μετακινήστε το μοχλό στο μπλε για να δημιουργήσετε
ένα δροσερό και αεριζόμενο χώρο (το καλοκαίρι), ή
στο κόκκινο για να περιορίσετε την είσοδο του αέρα (το
χειμώνα).
5• ΖΩΝΕΣ ΜΕΤΑΦΟΡΑΣ: για να μεταφέρετε το πολυκαρότσι
κατεβάστε την κουκούλα, και βγάλτε από τις πλευρικές
τσέπες τις ζώνες μεταφοράς (εικ_a). Μπορείτε να το
μεταφέρετε και πιάνοντας τα χερούλια Ganciomatic (εικ_b).
Ganciomatic system
6• Το Ganciomatic System είναι το πρακτικό και γρήγορο
σύστημα που σας επιτρέπει να συνδέσετε το πολυκαρότσι
στη βάση Ganciomatic του: Καροτσιού Classico 58.5,
Καροτσιού Classico Velo, Bassinet Stand, με μία μόνο
κίνηση. (μπορείτε να τα αγοράσετε χωριστά).
Για να συνδέσετε το πολυκαρότσι, τοποθετήστε το επάνω
στο καρότσι και πατήστε και με τα δύο χέρια μέχρι να
ακουστεί το κλικ.
Ενεργοποιείτε πάντα το φρένο του καροτσιού πριν να
συνδέσετε και αποσυνδέσετε το πολυκαρότσι.
Ελέγξτε ότι το πολυκαρότσι είναι σωστά συνδεμένο.
7• Για να το αποσυνδέσετε, μετακινήστε προς τη φορά του
τόξου το μοχλό του χερουλιού Ganciomatic (τόξο_a),
ταυτόχρονα πατήστε το μοχλό (τόξο_b) και τραβήξτε προς
τα πάνω μέχρι να τον αποσυνδέσετε (τόξο_c).
Αφαίρεση της επένδυσης
8• ΑΦΑΙΡΕΣΗ ΤΗΣ ΕΠΕΝΔΥΣΗΣ πολυκαροτσιού: ξεκουμπώστε
τον ποδόσακο και την κουκούλα∙ πατήστε επάνω στους
συνδέσμους και βγάλτε προς τα πάνω την κουκούλα
(εικ_a)∙ σηκώστε την πλάτη και βγάλτε το στρωματάκι
(εικ_b)∙ ξεκουμπώστε (εικ_c) και βγάλτε την εσωτερική
επένδυση (εικ_d).
Συντήρηση του γεμίσματος
• βουρτσίστε τα μέρη από ύφασμα για να απομακρύνετε τη
σκόνη και πλένετε στο χέρι σε μέγιστη θερμοκρασία 30°,
μην το στύβετε∙
• μην λευκαίνετε με χλώριο∙
• μην σιδερώνετε∙
• μην κάνετε στεγνό καθάρισμα∙
• μην αφαιρείτε τους λεκέδες με διαλυτικά και μην
στεγνώνετε με στεγνωτήριο με περιστροφικό κύλινδρο.
Καθάρισμα το προϊόντος
• Το προϊόν σας χρειάζεται μία ελάχιστη συντήρηση.
Οι εργασίες καθαρισμού και συντήρησης πρέπει να
εκτελούνται μόνον από ενήλικες.
• Συμβουλεύουμε να διατηρείτε καθαρά όλα τα μέρη που
κινούνται και εάν χρειάζεται, να τα λιπαίνετε με ελαφρύ

80
λάδι.
• Περιοδικά καθαρίζετε τα πλαστικά μέρη με ένα υγρό πανί,
μη χρησιμοποιείτε διαλυτικά ή άλλα παρόμοια προϊόντα.
• Βουρτσίστε τα υφασμάτινα μέρη για να απομακρύνετε τη
σκόνη.
• Μην καθαρίζετε τη διάταξη απορρόφησης προσκρούσεων
από πολυστυρένιο με διαλυτικά ή άλλα παρόμοια
προϊόντα.
• Προστατεύετε το προϊόν από ατμοσφαιρικούς παράγοντες,
βροχή, νερό ή χιόνι. Η συνεχής έκθεση στον ήλιο για πολύ
καιρό θα μπορούσε να προκαλέσει αλλαγές στο χρώμα
πολλών υλικών.
• Φυλάξτε το προϊόν σε ξηρό χώρο.
kit auto
Πώς θα τοποθετήσετε τη ζωνίτσα
ασφαλείας
9• τοποθετήστε το πολυκαρότσι με πλάτη και κουκούλα
κατεβασμένες και χειρολαβή σηκωμένη.
10• Κατά τη διάρκεια της μεταφοράς με το αυτοκίνητο,
αφαιρέστε ενδεχόμενα πρόσθετα στρωματάκια.
11• ΖΩΝΙΤΣΑ 3 ΣΗΜΕΙΩΝ: Περάστε τη ζωνίτσα του
διαχωριστικού για τα πόδια στη σχισμή του στρώματος
(εικ_a) και στις σχισμές του σκελετού (εικ_b) μέχρι να την
ξεπεράσετε (εικ_c).
12• Περάστε τα δύο άκρα των τιραντών στις σχισμές του
στρώματος και του σκελετού (εικ_a) και συνδέστε τα με
τους πείρους (εικ_b).
13• Ζωνίτσες συνδεμένες κάτω από το σκελετό (εικ_a) και
εσωτερικά του πολυκαροτσιού (εικ_b).
Σύνδεση στο αυτοκίνητο με ζώνες
ασφαλείας
ΣΥΝΔΕΣΗ ΤΟΥ ΠΟΛΥΚΑΡΟΤΣΙΟΥ ΣΤΟ ΑΥΤΟΚΙΝΗΤΟ:
Το πίσω κάθισμα του αυτοκινήτου (3 θέσεων) έχει 3
ζώνες ασφαλείας και η κεντρική μπορεί να είναι ραχιαία
ή κοιλιακή, και στις δύο περιπτώσεις είναι δυνατόν
να προχωρήσετε στη σύνδεση του πορτ-μπεμπέ στο
αυτοκίνητο.
Συνιστούμε να τοποθετήσετε το πολυκαρότσι επάνω στο
πίσω κάθισμα αφήνοντας την πλευρά του κεφαλιού σε
αντιστοιχία του κεντρικού καθίσματος.
14• Το πολυκαρότσι τοποθετημένο στο αυτοκίνητο με κοιλιακή
ζώνη.
15• Το πολυκαρότσι τοποθετημένο στο αυτοκίνητο με ζώνη 3
σημείων.
16• Το πολυκαρότσι, μπορεί να τοποθετηθεί και κεντρικά στο
πίσω κάθισμα 3 θέσεων, χρησιμοποιώντας τις δύο πιο
εξωτερικές ζώνες ασφαλείας (εικ_a) το πολυκαρότσι δεν
μπορεί να τοποθετηθεί όπως φαίνεται στην εικ_b επειδή
μπορεί να στερεωθεί στο αυτοκίνητο μόνο με ζώνες
κατευθυνόμενες με αντίθετη φορά.
17• Τοποθέτηση του πολυκαροτσιού επάνω σε πίσω κάθισμα
2 θέσεων. Το πολυκαρότσι μπορεί να είναι γυρισμένο με το
μέρος των ποδιών του παιδιού είτε από τη μία πλευρά είτε
από την άλλη.
Εάν το κάθισμα του αυτοκινήτου δεν είναι οριζοντιωμένο
αλλά έχει κλίση μπορείτε να το οριζοντιώσετε με πετσέτες.
18• Πάρτε τη ζώνη του πίσω καθίσματος από το μέρος του
πολυκαροτσιού σε αντιστοιχία των ποδιών του παιδιού,
αναδιπλώστε την (εικ_a) και περάστε την στη σχισμή ενός
από τους δύο ιμάντες του εξοπλισμού (εικ_b). Περάστε
την κόκκινη μπαρέτα του ιμάντα στο εσωτερικό της
αναδιπλωμένης ζώνης (εικ_c).
19• Πατήστε επάνω στο γκρι μοχλό αριστερά (εικ_a) και
προσδέστε τον ιμάντα στο δακτύλιο του πολυκαροτσιού
(εικ_b).
• Επαναλάβατε το χειρισμό με τη ζώνη τοποθετημένη από
την πλευρά του πολυκαροτσιού που αντιστοιχεί στο κεφάλι
του παιδιού.
20• Αφού προσδέσετε τον ιμάντα στο δακτύλιο του
πολυκαροτσιού, χρειάζεται να τεντώσετε τη ζώνη
ασφαλείας για να σταθεροποιήσετε σωστά το πολυκαρότσι
στο αυτοκίνητο. Τραβήξτε την αναδιπλωμένη ζώνη προς το
μέρος σας (τόξο_a) και, κρατώντας την σταθερή, τεντώστε
τη ζώνη από την πίσω πλευρά του ιμάντα (τόξο_b) για να
τον στερεώσετε.
21• Ιμάντας συνδεμένος στη ζώνη ασφαλείας και στο
πολυκαρότσι στην πλευρά των ποδιών (εικ_a). Ιμάντας
συνδεμένος στη ζώνη ασφαλείας και στο πολυκαρότσι
στην πλευρά του κεφαλιού (εικ_b).

81
22• To πολυκαρότσι στο αυτοκίνητο.
23• ΑΠΟΣΥΝΔΕΣΗ ΤΟΥ ΠΟΛΥΚΑΡΟΤΣΙΟΥ ΑΠΟ ΤΟ
ΑΥΤΟΚΙΝΗΤΟ: πατήστε το γκρι μοχλό του ιμάντα (εικ_a) και
βγάλτε τον από τους δακτυλίους που βρίσκονται στις δύο
πλευρές του πολυκαροτσιού (εικ_b). Εάν ένας από τους
δύο ιμάντες είναι πολύ τεντωμένος και είναι δύσκολο να
βγει, χρειάζεται να πατήσετε επάνω στο πολυκαρότσι και
ταυτόχρονα να αποσυνδέσετε τον ιμάντα.
Πώς τοποθετείται το παιδί στο
πολυκαρότσι
24• ΖΩΝΗ ΑΣΦΑΛΕΙΑΣ 3 ΣΗΜΕΙΩΝ: λασκάρετε τις τιράντες,
πατώντας επάνω στην αγκράφα (εικ_a) και μακρύνετε
αυτές (εικ_b).
25• πατήστε το κόκκινο κουμπί (εικ_a) και αποσυνδέστε τις
τιράντες από το διαχωριστικό για τα πόδια (εικ_b).
26• Τοποθετήστε το παιδί μέσα στο πολυκαρότσι και περάστε
την αγκράφα των τιραντών στη ζωνίτσα του διαχωριστικού
για τα πόδια μέχρι να την προσδέσετε.
27• Το παιδί πρέπει να είναι δεμένο καλά μέσα στο
πολυκαρότσι. Εάν τα λουράκια είναι χαλαρά, μειώστε το
μήκος των τιραντών τραβώντας το άκρο του λουριού.
Οι ζώνες πρέπει να είναι τεντωμένες όσο το δυνατόν
περισσότερο για την ασφάλεια του παιδιού σε περίπτωση
ατυχήματος. Αφήστε ένα ελάχιστο διάστημα (το πάχος ενός
δάχτυλου ανάμεσα στη ζώνη και το θώρακα του παιδιού).
28• ΑΦΑΙΡΕΣΗ ΤΩΝ ΛΟΥΡΙΩΝ: για να αφαιρέσετε τα λουριά από
το σκελετό του πολυκαροτσιού, περάστε τις αγκράφες του
διαχωριστικού για τα πόδια στις σχισμές που βρίσκονται
κάτω από το σκελετό και βγάλτε τα (εικ_a). Για να βγάλετε
τους συνδέσμους των τιραντών κάτω από το σκελετό,
αποσυνδέστε τους από τους πείρους και περάστε τους στις
σχισμές τους (εικ_b).
29• Τοποθετήστε και πάλι τη ζωνίτσα που έχει αποσυνδεθεί
στην ειδική τσέπη.
Σειρά εξαρτημάτων
30• Προστατευτικό κάλυμμα για τη βροχή Cover All:
Προστατευτικό κάλυμμα για τη βροχή ολικής κάλυψης από
διαφανές.
Τσάντα: Τσάντα με στρωματάκι για την αλλαξιά του μωρού,
συνδεόμενη στο καρότσι.
31• BASSINET STAND: πρακτική και συμπαγής βάση στήριξης.
32• ΣΕΤ ΕΝΑΝΤΙΑ ΣΤΗΝ ΑΣΦΥΞΙΑ: στρωματάκι και μαξιλάρι.
Συμβατό με το kit auto 3 σημείων.
Αριθμοί σειράς
33• Το πολυκαρότσι αναφέρει κάτω από τη βάση, πληροφορίες
σχετικά με την ημερομηνία παραγωγής αυτής.
• Ονομασία του προϊόντος, ημερομηνία παραγωγής και
σειριακή αρίθμηση αυτού (εικ_a).
Κιτ Αυτοκινήτου:
• Ετικέτα έγκρισης (εικ_b)∙
• Ημερομηνία παραγωγής της ζωνίτσας (εικ_c)∙
Αυτά τα στοιχεία είναι χρήσιμα για τον καταναλωτή σε
περίπτωση που το προϊόν παρουσιάσει προβλήματα.
Πώς διαβάζεται η ετικέτα έγκρισης
• Στην παράγραφο αυτή σας εξηγούμε πώς διαβάζεται η
ετικέτα έγκρισης (πορτοκαλί ετικέτα).
• Στο επάνω μέρος της ετικέτας υπάρχει το σήμα της
κατασκευάστριας εταιρίας και το όνομα του προϊόντος.
• 0-10 kg Y δείχνει ότι το προϊόν είναι εγκεκριμένο για παιδιά
από τη γέννηση έως 10 kg βάρος και ότι η διάταξη διαθέτει
ζώνη 3 σημείων.
• Το γράμμα E εντός κύκλου: δείχνει το σήμα Ευρωπαϊκής
έγκρισης και ο αριθμός προσδιορίζει τη χώρα που
χορήγησε την έγκριση (1: Γερμανία, 2: Γαλλία, 3: Ιταλία, 4:
Κάτω Χώρες, 11: Μεγάλη Βρετανία και 24: Ιρλανδία).
• Αριθμός έγκρισης: εάν αρχίζει με 04 σημαίνει ότι είναι
η τέταρτη τροπολογία (αυτή που ισχύει τώρα) του
κανονισμού R44.
• Κανονισμός αναφοράς: UN/ECE R44/04.
• Προοδευτικός αριθμός παραγωγής: εξατομικεύει κάθε
πορτ-μπεμπέ, από τη χορήγηση της έγκρισης το καθένα
επισημαίνεται από τον αριθμό του.
Υπηρεσία υποστήριξης
• Εάν τυχόν χαθούν ή καταστραφούν μέρη του μοντέλου,
χρησιμοποιήστε μόνον γνήσια ανταλλακτικά Peg-Pérego.

82
Για τυχόν επισκευές, αντικαταστάσεις, πληροφορίες σχετικά
με τα προϊόντα, την πώληση γνήσιων ανταλλακτικών
και εξαρτημάτων, επικοινωνήστε με την Υπηρεσία
Υποστήριξης Peg-Pérego:
• τηλ.: 0039-039-60.88.213
• fax: 0039-039-33.09.992
• e-mail: assistenza@pegperego.it
• ιστοσελίδα διαδικτύου www.pegperego.com
Η Peg-Pérego θα μπορεί να επιφέρει ανά πάσα στιγμή
τροποποιήσεις στα μοντέλα που περιγράφονται στην
παρούσα δημοσίευση, για λόγους τεχνικής ή εμπορικής
φύσης.
Ποια είναι η γνώμη σας για μας;
Η Peg-Pérego είναι στη διάθεση των Καταναλωτών της
για να ικανοποιήσει όσο το δυνατόν καλύτερα όλες τις
απαιτήσεις τους. Για το λόγο αυτό, για μας είναι εξαιρετικά
σημαντικό και πολύτιμο να γνωρίζουμε τη γνώμη των
Πελατών μας. Θα σας είμαστε λοιπόν ευγνώμονες εάν,
αφού χρησιμοποιήσετε ένα προϊόν μας, συμπληρώσετε
το ΕΡΩΤΗΜΑΤΟΛΟΓΙΟ ΙΚΑΝΟΠΟΙΗΣΗΣ ΚΑΤΑΝΑΛΩΤΗ,
επισημαίνοντας ενδεχόμενες παρατηρήσεις ή υποδείξεις,
που θα βρείτε στην ιστοσελίδα μας στο διαδίκτυο.
www.pegperego.com
83
PEG PEREGO SpA
Via De Gasperi, 50
20043 Arcore (MI) Italy
www.pegperego.com
ΠΑΙΔΙΚΑ ΕΙΔΗ ΒΡΕΦΑΝΑΠΤΥΞΗΣ ΚΑΙ ΠΑΙΧΝΙΔΙΑ ΕΓΓΥΗΣΗ
Η PEG – PEREGO εγγυάται για τυχόν εργοστασιακά ελαττώματα των προιόντων της για διάστημα έξι μηνών από την ημερομηνία αγοράς. Η προσκόμιση
της ανάλογης ταμειακής απόδειξης αγοράς είναι απαραίτητη. Εξαιρούνται της εγγύγησης οι επαναφορτιζόμενες μπαταρίες και οι μετασχη-ματιστές
παιχνιδιών. (βλ. αναλυτικές οδηγίες χρήσεως παιχνιδιών).
Η παρούσα εγγύηση ισχύει μόνον εφ’ όσον το προιόν χρησιμοποιείται σωστά και βάσει των οδηγιών χρήσεως. Ο κατασκευαστής και οι εντεταλμένοι
συνεργάτες του διατηρούν το δικαίωμα τεχνικού ελέγχου.
Ο κατασκευαστής δεν μπορεί να θεωρηθεί υπεύθυνος εφ’ όσον:
•• Δεν τηρηθούν οι ανάλογες οδηγίες χρήσεως του κάθε προιόντος.
•• Καταστραφεί τυχαία το προιόν ή προκληθούν βλάβες από κακή χρήση αυτού.
•• Υπάρξει τεχνική παρέμβαση ξένου προς την εταιρεία μας τεχνικού, πράγμα το οποίο απαγορεύεται και αποτελεί κίνδυνο για την ασφάλεια του παιδιού.
•• Φυσιολογική φθορά του προιόντος.
Διατηρείτε την εγγύηση και τις οδηγίες χρήσεως και για μελλοντική χρήση.
ΕΓΓΥΗΣΗ
ΟΝΟΜΑΤΕΠΩΝΥΜΟ ΑΓΟΡΑΣΤΟΥ : ....................................................................................................
ΔΙΕΥΘΥΝΣΗ : .........................................................................................................................................
ΤΗΛΕΦΩΝΟ : ..........................................................................................................................................
ΕΙΔΟΣ ΠΡΟΙΟΝΤΟΣ : .............................................................................................................................
ΚΩΔΙΚΟΣ ΠΡΟΙΟΝΤΟΣ : .......................................................................................................................
ΗΜΕΡΟΜΗΝΙΑ ΑΓΟΡΑΣ ΣΦΡΑΓΙΔΑ ΚΑΤΑΣΤΗΜΑΤΟ
Προσοχή: Η εγγύηση ισχύει μονο εφ’ όσον εχει συμπληρωθεί και σφραγισθεί από τον πωλητή η ημερομηνία αγοράς. Ζητείστε το από το κατάστημα τη
στιγμή της αγοράς. Αν χαθεί ή καταστραφεί το απόκομμα της εγγύησης δεν μπορεί να αντικατασταθεί.
&

primonido new
[Young & Culla]
FI001101I113 - 14/12/2010
PEG PEREGO S.p.A. VIA DE GASPERI 50 20043 ARCORE MI ITALIA
tel. 0039•039•60881 - fax 0039•039•615869-616454
Servizio Post Vendita/After Sale: tel. 0039•039•6088213 - fax: 0039•039•3309992
PEG PEREGO U.S.A. Inc.
3625 INDEPENDENCE DRIVE FORT WAYNE INDIANA 46808
phone 260 482 8191 fax 260 484 2940
Call us toll free: 1 800 671 1701
PEG PEREGO CANADA Inc.
585 GRANITE COURT PICKERING ONTARIO CANADA L1W3K1
phone 905 839 3371 fax 905 839 9542
Call us toll free: 1 800 661 5050
www.pegperego.com
 Loading...