

Page 1
SIERRA DE INMERSIÓN /
SEGA AD IMMERSIONE PTSS 1200 A1
SIERRA DE INMERSIÓN
Instrucciones de utilización y de seguridad
Traducción del manual de instrucciones original
PLUNGE SAW
Operation and Safety Notes
Translation of the original instructions
IAN 104460
SEGA AD IMMERSIONE
Indicazioni per l’uso e per la sicurezza
Traduzione delle istruzioni d’uso originali
TAUCHSÄ GE
Bedienungs- und Sicherheitshinweise
Originalbetriebsanleitung
Page 2

Antes de empezar a leer abra la página que contiene las imágenes y, en seguida, familiarícese con todas
las funciones del dispositivo.
Prima di leggere aprire la pagina con le immagini e prendere confidenza con le diverse funzioni
dell’apparecchio.
Before reading, unfold the page containing the illustrations and familiarise yourself with all functions of the
device.
Klappen Sie vor dem Lesen die Seite mit den Abbildungen aus und machen Sie sich anschließend mit allen
Funktionen des Gerätes vertraut.
ES Instrucciones de utilización y de seguridad Página 5
IT / MT Indicazioni per l’uso e per la sicurezza Pagina 17
GB / MT Operation and Safety Notes Page 29
DE / AT / CH Bedienungs- und Sicherheitshinweise Seite 39
Page 3

14 1
15
2
3
4
13
12
11
8
5
6
10
9
7
8
BA
18
11
11
16 16
9 a141714 a 14 b
8 a
11 20
19
DC
23
22
21
Page 4

Page 5

Índice
Introducción
Uso adecuado ................................................................................................................................ Página 6
Equipamiento................................................................................................................................... Página 6
Contenido ........................................................................................................................................ Página 6
Características técnicas .................................................................................................................. Página 6
Indicaciones generales de seguridad para
herramientas eléctricas
1. Seguridad en el lugar de trabajo .............................................................................................. Página 7
2. Seguridad eléctrica .................................................................................................................... Página 7
3. Seguridad de las personas ........................................................................................................ Página 8
4. Manejo y uso cuidadoso de las herramientas eléctricas ........................................................ Página 8
5. Asistencia técnica ....................................................................................................................... Página 9
Indicaciones específicas de seguridad para sierra
circular manual
Indicaciones de seguridad para cualquier sierra ......................................................................... Página 9
Indicaciones de seguridad adicionales para cualquier sierra ..................................................... Página 10
Accesorios / aparatos adicionales originales ............................................................................... Página 11
Puesta en funcionamiento
Montar / cambiar la hoja de corte ................................................................................................ Página 11
Conexión del aspirador de virutas ................................................................................................ Página 12
Revisar función de la cubierta protectora ..................................................................................... Página 12
Manejo
Encender y apagar el aparato ...................................................................................................... Página 12
Ajustar profundidad de corte (corte de inmersión)....................................................................... Página 12
Ajustar ángulo de corte (ángulo de inglete) ................................................................................. Página 12
Observar línea de corte ................................................................................................................. Página 12
Unión de rieles ................................................................................................................................ Página 13
Tornillos excéntricos ........................................................................................................................ Página 13
Serrado (sin rieles) .......................................................................................................................... Página 13
Serrado (con rieles) ........................................................................................................................ Página 13
Serrado de inmersión con rieles .................................................................................................... Página 14
Mantenimiento y limpieza............................................................................................ Página 14
Garantía ....................................................................................................................................... Página 14
Desecho del producto ....................................................................................................... Página 15
Traducción de la declaración de conformidad original /
Fabricante ................................................................................................................................... Página 15
5 ES
Page 6
Sierra de inmersión PTSS 1200 A1
Introducción
Enhorabuena por la adquisición de su nuevo aparato. Ha optado por un producto de alta calidad. El
manual de instrucciones forma parte de este producto.
Contiene importantes indicaciones sobre seguridad,
uso y eliminación. Antes de usar el producto, familiarícese con todas las indicaciones de manejo y de
seguridad. Utilice el producto únicamente como se
describe a continuación y para las aplicaciones indicadas. Adjunte igualmente toda la documentación
en caso de entregar el producto a terceros.
Uso adecuado
11
Rueda de ajuste para configuración del
ángulo de corte
12
Ajuste de profundidad de corte
13
Escala de profundidad de corte
14
Hoja de sierra
14 a
Tornillo tensor / arandela
14 b
Panel de montaje
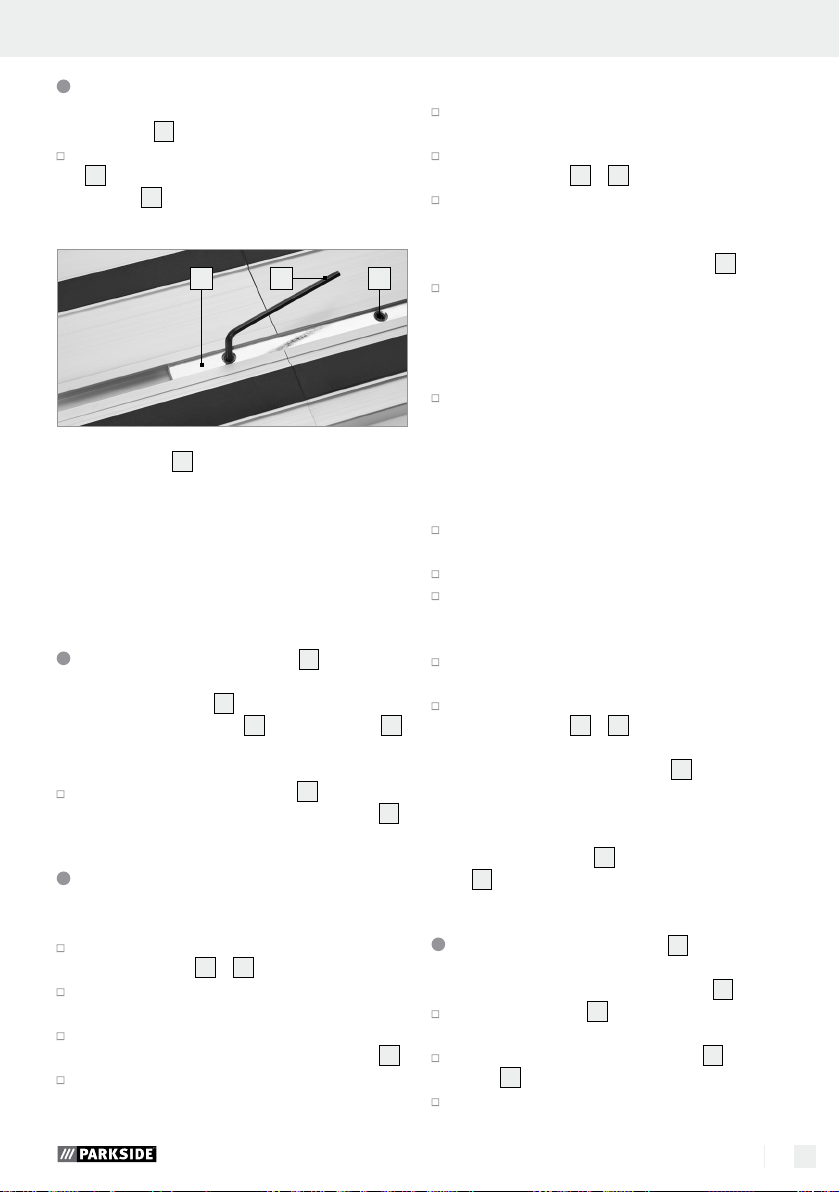
15
Mango adicional
16
Marca de ancho de corte
17
Expulsor de virutas (giratorio)
18
Palanca de bloqueo para cambio de
2 x
hoja de sierra
19
Bloqueo del eje
20
Muesca para rieles
21
Carril guía
22
Tornillo prisionero
23
Elemento de unión
La sierra de incisión (en adelante „aparato“ o
„máquina“) está diseñada para realizar cortes
transversales, longitudinales y de inmersión en superficies firmes como la madera, tableros de aglomerado, materiales plásticos y ligeros. No se permite
el trabajo con metales ferrosos. El aparato puede
utilizarse con los rieles suministrados (únicamente
para las técnicas de corte descritas). Cualquier uso
diferente o modificación de la máquina se considerará inadecuado y conllevará considerables peligros
de accidente. No apto para uso industrial.
Equipamiento
1
Bloqueo de encendido
2
Interruptor ON / OFF
3
Tirador
4
Llave Allen (pequeña)
5
Llave Allen (grande)
6
Unidad de motor
7
Adaptador de expulsor de virutas
8
Tornillo de ajuste para un ángulo de corte de 0 °
8 a
Tornillo de ajuste para un ángulo de corte
de 45 °
9
Mesa de sierra
9 a
Marcas de líneas de corte
10
Tornillo excéntrico 2 x
6 ES
Contenido
1 sierra de inmersión
1 hoja de sierra 165 mm / 24 dientes (montado)
2 rieles de guía
1 elemento de unión
1 adaptador de expulsor de virutas
2 llave Allen
1 manual de instrucciones
Características técnicas
Aparato: Sierra de incisión
PTSS 1200 A1
Tensión nominal: 230 V∼, 50 Hz
Absorción nominal: 1200 W
Revoluciones en vacío: n₀ 5200 min-¹
Alojamiento de hoja
de sierra: ø 20 mm
Hoja de sierra: 165 mm
Hoja base: 1,4 mm
Grosor de diente: 2,6 mm
Profundidad de
corte máx.: 56 mm en 90 °
Ángulo de inglete
42 mm en 45 °
Ángulo de inglete
Con rieles menos de 5 mm
Page 7

Introducción / Indicaciones generales de seguridad para herramientas eléctricasIntroducción
Clase de protección: II /
Accesorio: Riel 2 x
700 mm x 180 mm
Información sobre ruido y vibraciones:
Valor de medida del ruido conforme a la normativa
EN 60745. Los niveles de ruido de tipo A del aparato ascienden normalmente a:
Nivel de presión de sonido: 90,43 dB(A)
Nivel de potencia de sonido: 101,43 dB(A)
Incertidumbre K: 3 dB
¡Utilice protecciones para los oídos!
Aceleración típica evaluada:
Vibración mano / brazo a
Incertidumbre K = 1,5 m / s
do en estas instrucciones se ha determinado según
un procedimiento de medición fijado en la norma
EN 60745 y puede usarse como base para la
comparación con otros aparatos. El valor de emisiones vibratorias indicado puede utilizarse para
realizar una evaluación preliminar de la suspensión.
El nivel de vibraciones variará dependiendo del
uso de la herramienta eléctrica y puede en muchos
casos superar el valor indicado en estas instruc
Podría subestimarse la carga de vibraciones si se usa
con regularidad la herramienta eléctrica de este modo.
Advertencia: Para un cálculo exacto de la carga
de oscilación durante un determinado intervalo de
trabajo se deben tener en cuenta los tiempos en los
que la máquina está desconectada o está conectada pero no está funcionando. Esto podría reducir
considerablemente la carga de vibraciones en el
intervalo total de trabajo.
: 2,582 m / s
h,W
²
El nivel de vibración indica-
2
ciones.
Indicaciones generales
de seguridad para
herramientas eléctricas
¡Lea las advertencias e indicaciones de seguridad! El incumplimiento de las
advertencias e indicaciones de seguridad puede
provocar descargas eléctricas, incendios y / o lesiones graves.
¡Guardar todas las advertencias e indicaciones de seguridad por si las necesita en
un futuro!
El concepto utilizado en las instrucciones de seguridad “herramienta eléctrica” se refiere a aparatos
eléctricos operados desde la red (con cable de red)
y a herramientas eléctricas operadas con batería
(sin cable de red).
1. Seguridad en el
lugar de trabajo
a) Mantenga el lugar de trabajo limpio
y bien iluminado. El desorden y los lugares
de trabajo mal iluminados pueden provocar
accidentes.
b) No utilice el aparato en áreas poten-
cialmente explosivas en las que haya
líquidos, gases o polvos inflamables.
Las herramientas eléctricas producen chispas
que podrían encender el polvo o los vapores.
c) Mantenga a los niños y a otras perso-
nas alejados de la herramienta eléctrica
cuando la esté utilizando. Las distraccio
pueden hacerle perder el control del aparato.
nes
2. Seguridad eléctrica
a) El enchufe debe ser el adecuado para
la toma de corriente. No se debe modificar de ningún modo el enchufe del
aparato. No utilice nunca adaptadores
con los aparatos que están provistos
de derivación a tierra. Los conectores sin
modificar y las tomas adecuadas reducen el
riesgo de descarga eléctrica.
b) Evite el contacto físico con superficies
conectadas a tierra, como tubos metálicos, radiadores, cocinas o frigoríficos.
Existe un riesgo muy elevado de descarga
eléctrica si su cuerpo deriva a tierra.
7 ES
Page 8

c) Mantenga el aparato protegido de la
lluvia y la humedad. Si penetra agua en
un aparato eléctrico aumenta el riesgo de
descarga eléctrica.
d) No utilice el cable para otros fines,
como para transportar o colgar el
aparato o para tirar de la clavija de
red al desenchufarlo. Mantenga el cable al resguardo del calor, del aceite,
de los bordes afilados o de las piezas
móviles del aparato. Los cables dañados
o retorcidos aumentan el riesgo de descarga
eléctrica.
e) Al trabajar con herramientas eléctricas
al aire libre, utilice sólo cables de extensión que también estén autorizados
para su uso en exteriores. El uso de una
extensión adecuada para su empleo en exteriores disminuye el riesgo de descarga eléctrica.
f) Si es inevitable usar esta herramienta
eléctrica en un entorno húmedo, utilice
un interruptor de corriente de defecto.
El uso de un interruptor de corriente de defecto reduce el riesgo de descarga eléctrica.
3. Seguridad de las personas
eléctrica esté desconectada antes de
conectarla al suministro eléctrico, antes
de sostenerla o moverla. Si al mover el
aparato ha puesto el dedo sobre el interruptor
de CONEXIÓN / DESCONEXIÓN o si ha conectado el aparato, podrían producirse accidentes.
d) Extraiga las herramientas de ajuste
o llaves antes de encender el aparato.
Cualquier herramienta o llave que se encuentre
en una pieza giratoria del aparato puede
provocar lesiones.
e) Evite posturas inadecuadas. Procure
estar en una posición segura y mantenga en todo momento el equilibrio.
De este modo podrá controlar mejor el aparato, especialmente en situaciones inesperadas.
f) Utilice ropa adecuada. No use joyas
ni ropas flojas. Mantenga su cabello,
ropa y guantes alejados de las partes
móviles. La ropa floja, las joyas o el pelo lar-
go pueden engancharse en las piezas móviles.
g) Si los dispositivos de aspiración y re-
colección de polvo están montados,
asegúrese de que estén conectados y
sean correctamente utilizados. El uso
de estos dispositivos disminuye los peligros
causados por el polvo.
a) Sea cuidadoso en todo momento, pres-
te atención a lo que hace y proceda
con prudencia al trabajar con una herramienta eléctrica. No utilice el aparato si está cansado o si se encuentra
bajo el efecto de drogas, alcohol o
medicamentos. Un simple momento de
descuido durante el uso del aparato podría
causar lesiones graves.
b) Lleve equipo de protección individual
y siempre unas gafas de protección.
Si lleva equipo de protección personal, como
mascarilla antipolvo, zapatos de seguridad
antideslizantes, casco de seguridad o protección auditiva, en función del tipo y la utilización
de la herramienta eléctrica, reducirá el riesgo
de daños.
c)
Evite una conexión accidental del aparato.
Asegúrese de que la herramienta
8 ES
4. Manejo y uso cuidadoso de
las herramientas eléctricas
a) No sobrecargue el aparato. Emplee
en su trabajo la herramienta eléctrica
adecuada para el mismo. Si usa la herra-
mienta adecuada dentro de la potencia indicada trabajará mejor y de forma más segura.
b) No utilice una herramienta eléctrica
cuyo interruptor tenga algún defecto.
Una herramienta eléctrica que no se puede encender o apagar es un peligro y debe reparar
c) Retire la clavija del enchufe antes de
realizar ajustes en el aparato, cambiar accesorios o depositar el aparato
sobre una superficie. Esta medida de
precaución evita que se ponga en marcha el
aparato por accidente.
se.
Page 9

… / Indicaciones específicas de seguridad para sierra circular manualIndicaciones generales de seguridad para herramientas eléctricas
d) Conserve las herramientas eléctricas
que no use fuera del alcance de los niños. No permita utilizar el aparato a
personas que no estén familiarizadas
con él o que no hayan leído estas
indicaciones. Las herramientas eléctricas son
peligrosas si las usan personas sin experiencia.
e) Cuide el aparato. Compruebe que las
piezas móviles funcionen correctamente y no se atasquen, y que no haya
piezas rotas o tan dañadas que perjudiquen al funcionamiento del aparato.
Haga reparar las piezas dañadas antes de usar el equipo. La causa de muchos
accidentes es el uso de herramientas eléctricas
que no han recibido el mantenimiento adecuado
f) Mantenga las herramientas de corte
afiladas y limpias. Las herramientas de
corte con filos cortantes conservadas cuidadosamente se enganchan menos y son más
fáciles de manejar.
g) Utilice la herramienta eléctrica, los ac-
cesorios, las herramientas adicionales,
etc. de acuerdo con estas indicaciones
y del modo que se describe para este
tipo de aparato en concreto. Tenga en
cuenta las condiciones de trabajo y la
actividad que se va a realizar. El uso
de herramientas eléctricas para fines diferentes
de los previstos puede provocar situaciones
peligrosas.
5. Asistencia técnica
a) Deje que el servicio de mantenimiento
o un técnico electricista reparen sus
ratos y sólo con repuestos originales.
De este modo se garantiza que el aparato seguirá siendo seguro.
apa-
Indicaciones específicas
de seguridad para sierra
circular manual
Indicaciones de seguridad
para cualquier sierra
Procedimiento de serrado
a)
PELIGRO: No toque nunca con las
manos la zona de serrado ni la hoja de
la sierra. Sujete con la otra mano el mango
adicional o la carcasa del motor. Si ambas
manos sujetan la sierra, no podrán resultar
dañadas por la hoja de la misma.
b) Nunca ponga la mano bajo la pieza de
trabajo. La cubierta protectora le protegerá
.
bajo la pieza de trabajo, no delante de la
hoja de la sierra.
c) Adapte la profundidad del corte al
grosor de la pieza de trabajo. Debajo
de la pieza de trabajo debería quedar visible
menos de la altura de un diente de la sierra.
d) Nunca sostenga la pieza que va a ser-
rar en la mano o sobre la pierna. Sujete
la pieza de trabajo con un soporte estable. Es importante fijar bien la pieza de
trabajo para minimizar peligros por contacto
con el cuerpo, atasco de la hoja de la sierra o
pérdida del control.
e) Sostenga la herramienta eléctrica por
las superficies de sujeción aisladas
cuando realice trabajos en los que la
herramienta pueda coincidir con conducciones eléctricas ocultas o con el
propio cable de red. El contacto con un
conductor de electricidad puede poner también bajo tensión las partes metálicas de la herramienta y producir una descarga eléctrica.
f) Utilice siempre un tope o un canto rec-
to para los cortes longitudinales. Esto
mejora la exactitud en el corte y reduce la posibilidad de que la hoja de la sierra se atasque.
g) Utilice siempre hojas de sierra de la
medida adecuada y con un orificio de
alojamiento adecuado (por ej. en forma de estrella o redondeado). Las hojas
de sierra que no se ajustan a las piezas de
montaje de la sierra funcionan irregularmente
9 ES
Page 10

y producen una pérdida de control sobre la
herramienta.
h) Nunca utilice arandelas o tornillos para
hojas de sierra que estén dañados o
sean erróneos. Las arandelas y tornillos
para hojas de sierra han sido especialmente
fabricados para esta sierra para un rendimiento óptimo y seguridad en su funcionamiento.
Indicaciones de seguridad adi-
cionales para cualquier sierra
Incidentes - Causas e instrucciones de
seguridad adecuadas
- Un retroceso es la reacción repentina que se
produce cuando la hoja de la sierra se atasca,
se dobla o está mal colocada, lo que provoca
que la sierra se descontrole y se mueva desde
la pieza de trabajo hacia el trabajador.
- Cuando la hoja de la sierra se atasca o se dobla, se bloquea, y el motor empuja la máquina
en dirección del trabajador.
- Si la hoja de la sierra se retuerce o está mal
colocada, los dientes del canto de la hoja de
sierra trasera en la superficie superior de la
pieza de trabajo podrían engancharse, en cuyo
caso la hoja de la sierra se mueve fuera de la
hendidura y entonces la sierra saltaría hacia el
trabajador.
Los incidentes se producen como consecuencia de
una utilización errónea o incorrecta de la sierra. Estos
pueden evitarse tomando las medidas de seguridad
adecuadas, como se describe a continuación.
a) Sujete la sierra firmemente con ambas
manos y coloque sus brazos en una
posición en la que pueda controlar la
fuerza de retroceso. Colóquese siempre de lateral respecto a la hoja de la
sierra, nunca coloque la hoja en línea
con su cuerpo. En caso de incidente, la sier-
ra circular podría saltar hacia atrás, pero el
trabajador puede controlar la fuerza de retroceso con las medidas de seguridad adecuadas.
b) En caso de que la hoja de la sierra se
atasque o que usted interrumpa el
10 ES
trabajo, apague la sierra y manténgala en el material de trabajo hasta que
la hoja de la sierra se haya parado
completamente. Nunca intente retirar
la sierra del material de trabajo o moverla hacia atrás mientras todavía se
mueva la hoja, ya que esto podría provocar un incidente. Encuentre y repare la
causa del atasco de la hoja de la sierra.
c) Cuando quiera volver a poner en
marcha la sierra que ya está colocada
en la pieza de trabajo, centre la hoja
en la hendidura de la sierra y compruebe que los dientes no se enganchen
en la pieza de trabajo. En caso de que la
hoja de la sierra se doble, podría moverse fuera de la pieza de trabajo o provocar un incidente si vuelve a poner la sierra en marcha.
d) Sostenga las placas grandes para evi-
tar los posibles riesgos de incidente en
caso de atasco de la hoja de la sierra.
Las placas grandes pueden doblarse por su
propio peso. Las placas deben quedar sujetas
a ambos lados, tanto cerca de la hendidura
de la sierra como por los cantos.
e) No utilice hojas de sierra romas o da-
ñadas. Las hojas de sierra con dientes romos
o mal dirigidos pueden provocar una gran
fricción, el atasco de la hoja de la sierra e incidentes por una hendidura muy estrecha de
la sierra.
f) Antes de proceder al serrado asegure
la profundidad del corte y el modo del
ángulo. Si cambia el modo durante el serra-
do, la hoja de la sierra podría atascarse y
provocar un incidente.
g) Tenga especial cuidado con el serrado
en paredes ya existentes o en otros
lugares no visibles. El serrado en objetos
doblados puede bloquear la sierra y provocar
un incidente.
Función de la cubierta protectora
a) Antes de cada utilización, compruebe
que la cubierta protectora cierra correctamente. No utilice la sierra cuando
la cubierta protectora no pueda moverse libremente y no se cierre automáti-
Page 11
Indicaciones específicas de seguridad para sierra … / Puesta en funcionamientoIndicaciones específicas de seguridad para sierra circular manual
camente. No bloquee ni inmovilice la
cubierta protectora si se encuentra en
posición abierta. En caso de que la sierra
se cayese al suelo sin querer, la cubierta protectora podría doblarse. Compruebe que se
pueda mover sin problemas y que no roce ni
la hoja de la sierra ni otras piezas en todos
los ángulos y profundidades de corte.
b) Compruebe el estado y la función de los
resortes para la cubierta protectora.
Si la cubierta protectora y los resortes
no funcionan correctamente, espere un
rato antes de utilizar el aparato. Las
piezas dañadas, los depósitos pringosos o la
acumulación de virutas impiden que la cubierta
protectora funcione correctamente.
c) Asegure la placa de base de la sierra
frente a desplazamientos laterales cuando realice un „corte de inmersión“
que no sea de forma rectangular. Un
desplazamiento lateral puede provocar que
la hoja de la sierra se atasque y esto ocasione
un incidente.
d) No deje la sierra en el banco de tra-
bajo o en el suelo sin haber cubierto la
hoja de la sierra con la cubierta protectora. Una hoja de sierra sin protección y
con el movimiento de inercia mueve la sierra
en la dirección del corte y sierra todo lo que
se encuentra en el camino. Tenga en cuenta el
tiempo total de parada de la sierra.
Instrucciones adicionales:
No utilice discos de lija.
Utilice únicamente hojas de sierra con el mis-
mo diámetro que el señalado en las indicaciones de la sierra.
¡PELIGROS CAUSA-
DOS POR EL POLVO! En caso de trabajar la
madera durante un tiempo prolongado, y sobretodo cuando se trate de materiales que produzcan polvos tóxicos para la salud, conecte
el aparato a un dispositivo externo de aspiración de polvo.
¡Utilice guantes de protección!
¡Lleve puesta una mascarilla
protectora contra el polvo!
¡Utilice gafas protectoras!
¡Utilice siempre un protector
de oídos!
Evite el sobrecalentamiento de los dientes de
la sierra.
Si utiliza la sierra con piezas de plástico, pro-
cure que el plástico no se funda al cortarlo.
¡VAPORES TÓXI-
COS! Trabajar con polvo nocivo / tóxico supone un riesgo para la salud de quien maneja el
aparato o de las personas que estén cerca.
No trabaje con materiales que contengan ami-
anto. El amianto puede producir cáncer.
Accesorios / aparatos
adicionales originales
Utilice exclusivamente los accesorios y apara-
tos adicionales indicados en las instrucciones de
uso y que sean compatibles con el producto.
Únicamente se permite la utilización de rieles
originales.
Puesta en funcionamiento
Montar / cambiar la
hoja de corte
Antes de efectuar cualquier tipo de trabajo en el
aparato desenchúfelo de la corriente.
1. Pulse el bloqueo de conexión
unidad de motor
6
hacia delante.
2. Abra la palanca de bloqueo
queo de conexión 1. La unidad motor se encaja.
3. El tornillo tensor / arandela
la placa
14 b
.
4. Presione el bloqueo del eje
llave Allen
5
el tornillo tensor / arandela
1
y pulse la
18
. Suelte el blo-
14 a
se encuentra en
19
y abra con una
14 a
.
11 ES
Page 12
5. Retirar hoja de sierra 14.
6. Instalación de la hoja de corte
14
en orden
inverso al descrito anteriormente.
La dirección de giro de la hoja de sierra y la
máquina deben coincidir.
Conexión del aspirador
de virutas
Conecte el adaptador de expulsor de virutas 7
al expulsor de virutas
17
.
Conecte un aspirador de virutas y polvo auto-
rizado.
Revisar función de la
cubierta protectora
Nota: Para este proceso coloque la placa de base
al filo de una superficie estable de forma que sea
posible bajar la hoja de corte
Baje la sierra de incisión.
Revise si la hoja de corte 14 se desliza en la
tapa protectora y si vuelve por sí sola a la posición de salida.
14
.
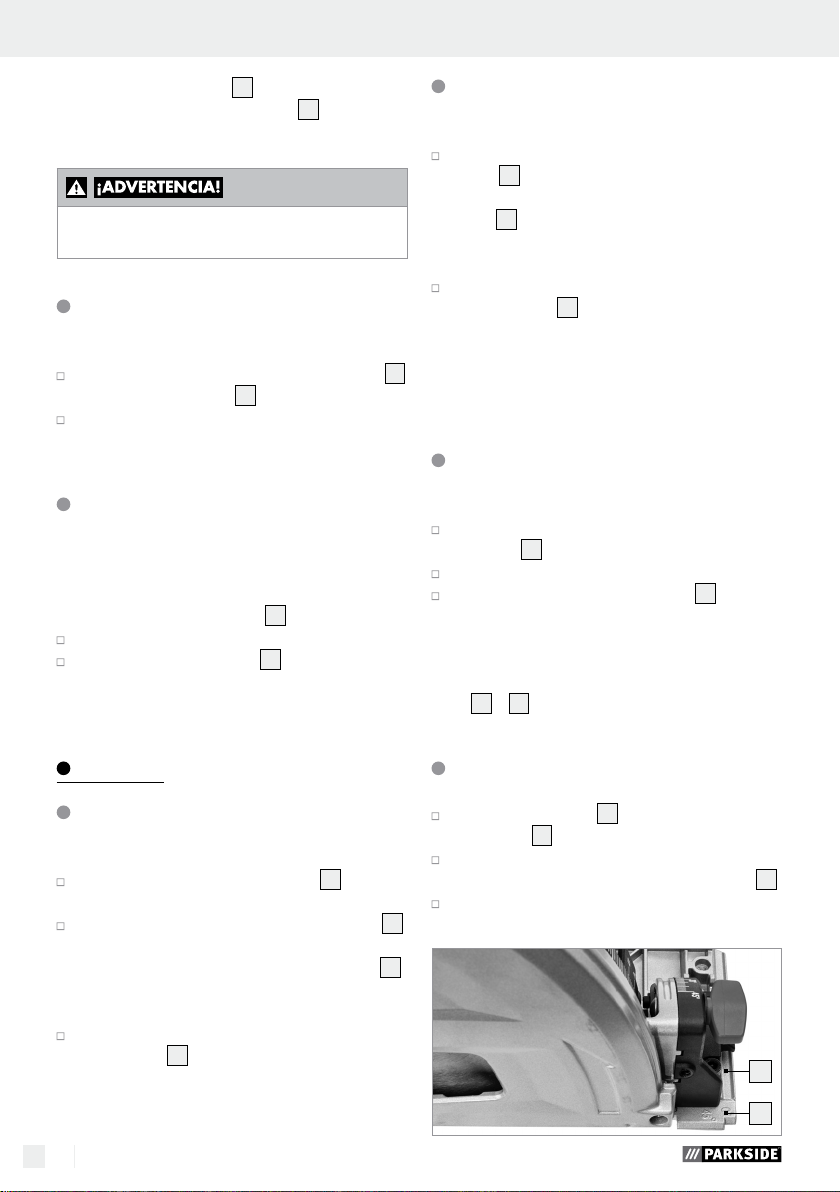
Ajustar profundidad de corte
(corte de inmersión)
Suelte los tornillos de ajuste de profundidad de
12
corte
y desplace el tope hasta la profundi-
dad de corte deseada en la escala de profund-
13
idad
:
- Sin riel, ver marca A.
- Con riel, ver marca B.
Vuelva a fijar los tornillos de ajuste de profund-
idad de corte
12
.
Nota: Adapte la profundidad del corte al grosor de la pieza de trabajo. Debajo de la pieza
de trabajo debería quedar visible como máx. la
altura de un diente.
Ajustar ángulo de corte
(ángulo de inglete)
Afloje ambas ruedas de ajuste para el ángulo
de corte
Gire el motor en el ángulo de corte deseado.
Vuelva a fijar las ruedas de ajuste 11.
Nota: En caso de que el ajuste del ángulo de corte
para 0 ° o 45 ° se haya desajustado, puede volver
a ajustarlo con el tornillo de ajuste del ángulo de
corte
11
.
8
8 a
y
.
Manejo
Encender y apagar el aparato
Conexión:
Desplace el bloqueo de conexión 1 hacia
arriba y manténgalo en posición.
Pulse el interruptor ENCENDIDO / APAGADO 2.
En cuanto la máquina se ponga en funcionamiento puede soltar el bloqueo de conexión
Desconexión:
Suelte el interruptor ENCENDIDO /
APAGADO
12 ES
2
.
Observar línea de corte
En la mesa de corte 9 hay marcas de corte de
0 ° / 45 °
9 a
.
Ajuste el aparato según el ángulo de corte es-
tablecido a la marca de corte de 0 ° o 45 °
Los puntos de referencia en este caso son las
superficies inclinadas.
1
.
9 a
9 a
9
.
Page 13
ManejoPuesta en funcionamiento / Manejo
Unión de rieles
Con los rieles 21 puede realizar cortes rectos.
Para unir 2 rieles coloque el elemento de unión
23
en la muesca del riel. Fije los tornillos sin
22
cabeza
con la llave e hexágono interior
incluida.
4 2223
Nota: los rieles 21 disponen de protección antias-
tillado (reborde de caucho). La protección antiastillado debe ajustarse antes del primer corte. Coloque
los rieles sobre una pieza de trabajo. Fije una profundidad de corte de aprox. 10 mm. Encienda la
sierra y guíela de forma regular y con suavidad en
la dirección de corte.
Tornillos excéntricos
10
Los tornillos excéntricos 10 sirven para ajustar la precisión de la mesa de sierra
9
en el carril guía 21
previsto.
Apriete los tornillos excéntricos 10 para minimi-
zar la holgura entre la sierra y el carril guía
Serrado (sin rieles)
21
Corte de inglete hasta 45 °
Establezca el ángulo y la línea de corte como
se describe.
Sujete firmemente la máquina con ambas manos
por los mangos
3
y 15.
Encender el aparato tal y como se describe en
el apartado „Encendido y apagado“. Coloque
el aparato sobre la pieza de trabajo con la
parte delantera de la mesa de sierra
Gire el motor hacia abajo y realice los cortes
con presión moderada hacia delante, nunca
hacia atrás.
Cortes de inmersión
Asegure la placa de base de la sierra frente a
desplazamientos laterales cuando realice un
„corte de inmersión“ que no sea de forma rectangular. Un desplazamiento lateral puede provocar que la hoja de la sierra se atasque y esto
ocasione un incidente.
Configure la profundidad de corte deseada tal
y como se describe arriba.
Coloque el aparato sobre la pieza de trabajo.
Evite un desplazamiento inesperado y coloque e
canto posterior en un tope (como se muestra en la
imagen D del apartado „Sierra con carril guía“).
Encender el aparato tal y como se describe en
el apartado „Encendido y apagado“.
Sujete firmemente la máquina con ambas manos
por los mangos
Nota: La marca de ancho de corte
3
y 15 y desplácela.
16
al lado de la
cubierta protectora muestra el punto de corte ante
y posterior con una hoja de sierra de 165 mm, con
.
profundidad de corte máxima. Esto se aplica tanto
para el corte con rieles
21
rieles
.
21
como para el corte sin
9
.
l
rior
Serrado perpendicular
Sujete firmemente la máquina con ambas manos
por los mangos
3
y 15.
Encender el aparato tal y como se describe en
el apartado „Encendido y apagado“.
Coloque el aparato sobre la pieza de trabajo
con la parte delantera de la mesa de sierra
Gire el motor hacia abajo y realice los cortes
con presión moderada hacia delante, nunca
hacia atrás.
Serrado (con rieles)
Serrado perpendicular con rieles
Coloque los rieles 21 con los elementos de
gomaespuma sobre la pieza de trabajo.
9
.
Coloque el aparato con la muesca 20 en los
21
rieles
.
Encender el aparato tal y como se describe en
el apartado „Encendido y apagado“.
21
21
13 ES
Page 14
Sujete firmemente la máquina con ambas manos
por los mangos
3
y 15 y desplácela.
Corte de inglete hasta 45 °
Coloque los rieles 21 con los elementos de
gomaespuma sobre la pieza de trabajo.
Coloque el aparato con la muesca 20 en el
carril guía
Establezca el ángulo y la línea de corte como
21
.
se
describe.
Sujete firmemente la máquina con ambas manos
por los mangos
3
y 15.
Encender el aparato tal y como se describe en
el apartado „Encendido y apagado“. Coloque
el aparato sobre la pieza de trabajo con la parte
delantera de la mesa de sierra
9
.
Gire el motor hacia abajo y realice los cortes
con presión moderada hacia delante, nunca
hacia atrás.
Serrado de inmersión con rieles
Coloque los rieles 21 con los elementos de
gomaespuma sobre su pieza de trabajo.
Coloque el aparato con la muesca 20 en los
21
rieles
.
Configure la profundidad de corte deseada tal
y como se describe arriba.
Coloque el canto trasero (tanto como sea posibl
e)
en un tope (ver fig. D).
Encender el aparato tal y como se describe en
el apartado „Encendido y apagado“.
Sujete firmemente la máquina con ambas manos
por los mangos
Nota: La marca de ancho de corte
3
y 15 y desplácela.
16
al lado de
la cubierta protectora muestra el punto de corte anterior y posterior con una hoja de sierra de 165 mm,
con profundidad de corte máxima. Esto se aplica
tanto para el corte con rieles
sin rieles
21
.
21
como para el corte
No se permiten aplicaciones distintas.
Mantenimiento y limpieza
¡PELIGRO DE LESIONES!
Antes de efectuar cualquier tipo de trabajo en el
aparato desenchúfelo de la corriente.
El aparato deberá estar siempre limpio, seco y
libre de aceite o grasas lubricantes.
Para limpiar la carcasa, utilice un paño seco.
En caso de tener que sustit
uir
la línea de alimentación, solicítelo al fabricante o a
un representante del mismo para evitar riesgos de
seguridad.
Nota: Las piezas de repuesto no incluidas (como
escobillas o interruptores) pueden ser solicitadas en
nuestro Centro de Llamadas.
Garantía
Con este aparato recibe usted 3 años de
garantía desde la fecha de compra. El aparato ha sido fabricado cuidadosamente
y ha sido probado antes de su entrega.
Guarde el comprobante de caja como
justificante de compra. Si necesitara hacer
uso de la garantía, póngase en contacto
por teléfono con su centro de servicio habitual. Éste es el único modo de garantizar
un envío gratuito.
La garantía cubre sólo defectos de fabricación o
del material, pero no los daños de transporte, piezas sujetas a desgaste y los daños sufridos por las
piezas frágiles p. ej. el interruptor o baterías. Este
producto ha sido diseñado exclusivamente para el
uso particular y no para el uso industrial.
En caso de manipulación indebida e incorrecta, uso
de la fuerza y en caso de abrir el aparato personas
extrañas a nuestros centros de asistencia técnica autorizados, la garantía pierde su validez. Esta garantía
no reduce en forma alguna sus derechos legales.
14 ES
Por el mero hecho de hacer uso de la garantía no
implica la prolongación del período de válidez de
Page 15
… / … / Traducción de la declaración de conformidad original / Fabricante
la garantía. Ello rige también para piezas sustituidas
y reparadas. Los posibles daños y defectos detectados al comprar el producto, se han de notificar
de inmediato o como muy tarde dos días desde la
fecha de compra. Finalizado el periodo de garantía,
las reparaciones se han de abonar.
ES
Servicio España
Tel.: 902 59 99 22
(0,08 EUR/Min. + 0,11 EUR/
llamada (tarifa normal))
(0,05 EUR/Min. + 0,11 EUR/
llamada (tarifa reducida))
e-mail: kompernass@lidl.es
IAN 104460
Desecho del producto
El embalaje está compuesto por materiales no contaminantes que pueden ser desechados en el centro de reciclaje local.
¡No tire las herramientas eléctri-
cas en la basura doméstica!
Directiva de máquinas
(2006 / 42 / EC)
Directiva europea de baja tensión
(2006 / 95 / EC)
Compatibilidad electromagnética
(2004 / 108 / EC)
RoHS Directiva
(2011 / 65 / EU)
Normas armonizadas aplicadas
EN 60745-1:2009+A11
EN 60745-2-5:2010
EN 55014-1:2006+A1+A2
EN 55014-2:1997+A1+A2
EN 61000-3-2:2006+A1+A2
EN 61000-3-3:2013
Tipo / Designación de la máquina:
Sierra de inmersión PTSS 1200 A1
Date of manufacture (DOM): 03–2015
Número de serie: IAN 104460
Bochum, 31.03.2015
Según la directiva europea 2012 / 19 / EU sobre
residuos de aparatos eléctricos las herramientas
eléctricas usadas deben separarse y reciclarse sin
dañar el medio ambiente.
Para obtener información sobre las posibles formas
de deshacerse del producto cuando ya no sirva, acuda a la administración de su comunidad o ciudad.
Traducción de la declaración
de conformidad original /
Fabricante
Nosotros, la empresa KOMPERNASS HANDELS
GMBH, Responsable de la documentación: Señor
Semi Uguzlu, BURGSTRASSE 21, 44867 BOCHUM,
GERMANY, declaramos que este producto cumple
las siguientes normas, documentos normativos y directivas comunitarias:
Semi Uguzlu
- Responsable de calidad -
Reservado el derecho a realizar modificaciones
técnicas destinadas al perfeccionamiento del dispositivo.
15 ES
Page 16

16
Page 17

Indice
Introduzione
Utilizzo conforme ............................................................................................................................ Pagina 18
Dotazione ........................................................................................................................................ Pagina 18
Contenuto della confezione ........................................................................................................... Pagina 18
Dati tecnici ....................................................................................................................................... Pagina 18
Istruzioni di sicurezza generali per utensili elettrici
1. Sicurezza dell’area di lavoro .................................................................................................... Pagina 19
2. Sicurezza elettrica ...................................................................................................................... Pagina 19
3. Sicurezza delle persone............................................................................................................. Pagina 20
4. Utilizzo attento di dispositivi elettrici ......................................................................................... Pagina 20
5. Assistenza ................................................................................................................................... Pagina 21
Avvertenze di sicurezza specifiche dell‘apparecchio
per seghe circolare
Indicazioni di sicurezza per tutte le seghe .................................................................................... Pagina 21
Ulteriori indicazioni di sicurezza per tutte le seghe ...................................................................... Pagina 22
Accessori / utensili originali ............................................................................................................ Pagina 23
Avvio
Montaggio / Sostituzione della lama ............................................................................................ Pagina 23
Collegare l‘aspirazione .................................................................................................................. Pagina 23
Verificare il funzionamento della custodia protettiva ................................................................... Pagina 23
Uso
Accensione e spegnimento ............................................................................................................. Pagina 24
Impostazione profondità taglio (profondità immersione) ............................................................. Pagina 24
Impostazione angolo (angolatura) ................................................................................................ Pagina 24
Osservare la linea del taglio .......................................................................................................... Pagina 24
Collegamento barre-guida ............................................................................................................. Pagina 24
Viti eccentriche ................................................................................................................................ Pagina 25
Segatura (senza barre-guida) ........................................................................................................ Pagina 25
Segatura (con barre-guida) ............................................................................................................ Pagina 25
Segatura a immersione con barre-guida ....................................................................................... Pagina 26
Manutenzione e pulizia .................................................................................................. Pagina 26
Garanzia ...................................................................................................................................... Pagina 26
Smaltimento .............................................................................................................................. Pagina 27
Traduzione dall‘originale dichiarazione di conformità /
Produttore .................................................................................................................................. Pagina 27
17 IT/MT
Page 18

Introduzione
Sega ad immersione PTSS 1200 A1
Introduzione
Ci congratuliamo con voi per l‘acquisto del vostro
nuovo prodotto. Avete optato per un prodotto di
qualità. Le istruzioni d‘uso sono parte integrante di
questo prodotto. Esse contengono importanti av
ze sulla sicurezza, l‘impiego e lo smaltimento. Prima
dell‘utilizzo del prodotto, prendere conoscenza di tutte le istruzioni d‘uso e delle avvertenze di sicurezza.
Utilizzare il prodotto solo come descritto e per i
di applicazione indicati. Consegnare tutte le documentazioni su questo prodotto quando viene ceduto
a terzi.
Utilizzo conforme
La sega ad immersione (di seguito definita come „apparecchio“ o „macchina“) è adatta alla segatura
tagli lunghi, trasversali e ad immersione su supporti
stabili in legno massiccio, truciolato, plastica e materiali da costruzione leggeri. Non eseguire lavori su
metalli ferrosi. L‘apparecchio può essere utilizzato se
si vuole con le barre-guida in dotazione, ma solamente per le tecniche di taglio descritte. Ogni altro uso
o modifica della macchina sarà considerato come
non appropriato e può essere causa di infortuni.
idoneo per uso commerciale / professionale.
Dotazione
1
Blocco di accensione
2
Interruttore ON / OFF
3
Impugnatura
4
Chiave esagonale a brugola (piccola)
5
Chiave esagonale a brugola (grande)
6
Unità motore
7
Adattatore espulsore
8
Viti di aggiustamento per angolo di taglio a 0 °
8 a
V
ite di aggiustamento per angolo di taglio a 45 °
9
Banco sega
9 a
Marcatura linea di taglio
10
Vite eccentrica (2 x)
alta
verten-
campi
con
Non
11
Manopola d‘impostazione per l‘angolazione
del taglio (
12
Regolatore di profondità del taglio
13
Scala di profondità del taglio
14
Lama
14 a
Arridatoio / Rosetta
14 b
Pannello montaggio
15
Impugnatura supplementare
16
Marcatura larghezza di taglio
17
Espulsore (girevole)
18
Leva di arresto per il cambio della lama
19
Blocco del mandrino
20
Fessura per barra-guida
21
Barra-guida
22
Viti senza testa
23
Elemento di collegamento
Contenuto della confezione
2 x)
1 sega ad immersione
1 lama 165 mm / 24 denti (montata)
2 barre-guida
1 elemento di collegamento
1 adattatore espulsore
2 chiave esagonale a brugola
1 manuale di istruzioni
Dati tecnici
Apparecchio: Sega ad immersione
PTSS 1200 A1
Tensione nominale: 230 V∼, 50 Hz
Assorbimento nominale: 1200 W
Numero di giri a vuoto: n₀ 5200 min-¹
Supporto lama: ø 20 mm
Lama: 165 mm
Spessore lama: 1,4 mm
Spessore denti: 2,6 mm
Profondità taglio max.: 56 mm a 90° angolo
42 mm a 45° angolo
con barra-guida
meno 5 mm
Classe di protezione: II /
Accessori: Barra-guida 2 x
700 mm x 180 mm
18 IT/MT
Page 19

Introduzione / Istruzioni di sicurezza generali per utensili elettrici
Informazioni su rumore e vibrazioni:
I valori di rumore e vibrazione sono stati rilevati
secondo la norma EN 60745. Il livello di rumore
A stimato dell‘elettroutensile ammonta a:
Livello di pressione acustica: 90,43 dB(A)
Livello di intensità sonora: 101,43 dB(A)
Scostamento di K: 3 dB
Indossare le cuffie!
Accelerazione stimata, tipicamente:
Vibrazione braccio / mano a
Scostamento K = 1,5 m / s
: 2,582 m / s
h,W
2
2
Il valore relativo al livello di
vibrazioni indicato nelle presenti istruzioni d’uso è
stato misurato in conformità alla procedura di misurazione esplicata nella norma EN 60745 e può
essere utilizzato per il confronto tra apparecchi. Il
valore relativo all‘emissione delle vibrazioni può
essere utilizzato anche per stabilire una valutazione
iniziale della sospensione.
Il livello di vibrazione potrà variare a seconda
dell’impiego dell’utensile elettrico e in alcuni casi pu
essere superiore al valore indicato nelle presenti istruzioni. Il carico di vibrazione potrebbe essere stimato
in difetto, perché l’utensile elettrico viene utilizzato
sempre in modalità simili.
Nota: per una stima esatta del carico di oscillazioni in un determinato periodo di lavoro si dovrebbero considerare anche i tempi, in cui l’apparecchio è
spento oppure quando è acceso ma non è effettivamente in uso. Ciò può ridurre nettamente il carico di
oscillazioni nell’intero periodo di lavoro.
Istruzioni di sicurezza generali
per utensili elettrici
Leggere tutte
le indicazioni e gli avvisi di sicurezza! Eventuali mancanze nell’osser-
vanza delle indicazioni e degli avvisi di sicurezza
possono provocare una scossa elettrica, un incendio e / o gravi lesioni.
Conservare tutte le indicazioni e gli avvisi
di sicurezza per eventuali necessita’ future!
La parola “attrezzo elettrico“ utilizzata nelle istruzioni
d’uso si riferisce agli attrezzi elettrici funzionanti
all’interno di una rete (con cavo di rete) e agli attrezzi elettrici che funzionano mediante batterie
(senza cavo di rete).
1. Sicurezza dell’area di lavoro
a) Mantenere l’area di lavoro pulita e
ben illuminata. Il disordine ed aree di lavoro
poco illuminate possono determinare incidenti.
b) Non lavorare con l’apparecchio in
un’atmosfera dove si trovino liquidi
infiammabili, esplosiva, gas e polveri.
Gli utensili elettrici generano scintille che possono infiammare la polvere o i gas.
c) Durante l’utilizzo del dispositivo elet-
trico tenere lontani bambini e persone
estranee. In caso di distrazione potreste
ò
perdere il controllo dell’apparecchio.
2. Sicurezza elettrica
a) La spina di connessione dell’apparec-
chio deve essere adatta alla presa elettrica nella quale essa viene inserita. In
nessun caso l’adattatore deve essere
modificato. Non utilizzare spine con
apparecchi messi a terra. Spine non mo-
dificate e prese adatte riducono il rischio di una
scossa elettrica.
b)
Evitare il contatto del corpo con superfici
messe a terra, quali ad esempio quelle
di tubi, caloriferi, cucine economiche
e frigoriferi. Sussiste un elevato rischio di
scossa elettrica, qualora il Vostro corpo fosse
messo a terra.
c) Mantenere l’apparecchio lontano da
pioggia o umidità. La penetrazione di
acqua in un apparecchio elettrico accresce il
rischio di scossa elettrica.
d) Non utilizzare il cavo in modo non
conforme, cioè per tirare l’apparec
chio,
19 IT/MT
Page 20

Istruzioni di sicurezza generali per utensili elettrici … / Avvertenze di sicurezza specifiche dell‘apparecchio per seghe circolare
per appenderlo o per estrarre la spina
dalla presa elettrica. Tenere il cavo
lontano da calore, olio, spigoli acuti o
di parti in movimento dell’apparecchio.
Cavi danneggiati o attorcigliati accrescono il
rischio di scossa elettrica.
e) In caso di lavori all’aperto utilizzare
solamente prolunghe ammesse anche
per un loro utilizzo all‘aperto. L’utilizzo
di una tale prolunga riduce il rischio di scossa
elettrica.
f) Qualora non si possa evitare l‘eserci-
zio dell’elettroutensile in un ambiente
umido, fare uso di un interruttore
differenziale, circostanza che riduce il
rischio di una scossa elettrica.
3. Sicurezza delle persone
a) Fare sempre estrema attenzione a ciò
che si fa e accostarsi al lavoro con il
dispositivo elettrico sempre in modo
cosciente. Non utilizzare l’apparecchio
quando si è stanchi o sotto l’influsso
di droghe, alcol o medicinali. Un solo
attimo di disattenzione nell’utilizzo dell’apparecchio può provocare serie lesioni.
b) Indossare sempre l’equipaggiamento
di protezione personale e gli occhiali
protettivi. Indossando l’equipaggiamento di
protezione personale, quale una mascherina
antipolvere, scarpe di sicurezza antisdrucciolevoli, un casco di protezione o una protezione
auricolare, a seconda del tipo e dell’utilizzo
dell’apparecchiatura elettrica, riduce il rischio
di lesioni.
c) Evitare qualsiasi avvio involontario
dell’utensile. Assicurarsi che l’utensile
sia disinserito prima di collegarlo alla
rete di alimentazione elettrica, di sollevarlo o di trasportarlo. Se durante il
trasporto dell’apparecchio il dito dell’utilizzatore
si trova sull’interruttore ON / OFF oppure l’apparecchio è inserito, possono determinarsi incidenti.
d) Prima di avviare l’apparecchio, rimuo-
vere il dispositivo di regolazione o la
20 IT/MT
chiave per dadi. Un utensile o una chiave
che si trovi in una parte di apparecchio in rotazione può provocare lesioni.
e) Mantenere una postura del corpo nor-
male. Assicurarsi di avere un sostegno
sicuro e mantenere sempre l’equilibrio.
In questo modo è possibile controllare meglio
l’apparecchio, in modo particolare in caso di
situazioni impreviste.
f) Indossare un abbigliamento appropria-
to. Non indossare un abbigliamento
largo o bigiotteria. Mantenere capelli,
abbigliamento e guanti lontano da
parti in movimento. Abbigliamento sciolto,
gioielli o capelli lunghi possono essere trascinati da parti in movimento.
g) Quando vengono montati dispositivi
di aspirazione e di cattura della polvere, assicurarsi che questi siano stati
montati ed utilizzati correttamente.
L’utilizzo di questi dispositivi riduce i pericoli
provocati dalla polvere.
4. Utilizzo attento
di dispositivi elettrici
a) Non sovraccaricare l’apparecchio.
Per un determinato lavoro utilizzare
sempre il dispositivo elettrico a ciò appropriato. Con il dispositivo elettrico appro-
priato si lavora meglio e con maggiore sicurezza
nello specifico ambito di utilizzo.
b) Non utilizzare dispositivi elettrici il cui
interruttore sia difettoso. Un dispositivo
elettrico che non si può più accendere e spegnere rappresenta un pericolo, e deve essere
riparato.
c) Estrarre la spina dalla presa elettrica
prima di eseguire regolazioni all‘apparecchio, sostituire accessori o riporre
l‘apparecchio. Queste misure di prudenza
impediscono l’avvio involontario dell’apparecchio.
d) Mantenere dispositivi elettrici non uti-
lizzati fuori dalla portata di bambini.
Non fare utilizzare l’apparecchio da
persone che non lo conoscano o del
quale non abbiano letto le istruzioni
Page 21

… / Avvertenze di sicurezza specifiche dell‘apparecchio per seghe circolare
d’uso. I dispositivi elettrici sono pericolosi se
utilizzati da persone inesperte.
e) Avere cura dell’apparecchio. Control-
lare se parti mobili dell’apparecchio funzionano perfettamente e non si bloccano,
se parti di esso sono rotte o danneggiate,
che la funzionalità dell’apparecchio non
sia messa a rischio. Fare riparare le parti
danneggiate prima di utilizzare di nuovo
l’apparecchio. Molti incidenti sono provocati
dal fatto che i dispositivi elettrici non vengono
sottoposti ad una corretta manutenzione.
f) Mantenere gli utensili di taglio affilati
e puliti. Utensili di taglio curati con attenzione
e fornitidi bordi taglienti si incastrano meno
frequentemente e sono semplici da guidare
durante il lavoro.
g) Utilizzare dispositivi elettrici, accessori,
i dispositivi da inserire ecc, in conformità alle presenti istruzioni e nel modo
descritto per questo particolare tipologia di apparecchio. In questo senso,
tenere presente le condizioni di lavoro
e l’attività da eseguire. L’utilizzo di dispo-
sitivi elettrici per scopi diversi da quelli previsti
può provocare situazioni di pericolo.
5. Assistenza
a) Fare riparare l’apparecchio dal Centro
di Assistenza o da un elettricista specializzato e solo con pezzi di ricambio
originali. In questo modo viene garantita la
sicurezza dell’apparecchio.
Avvertenze di sicurezza
specifiche dell‘apparecchio
per seghe circolare
Indicazioni di sicurezza
per tutte le seghe
Segatura
a)
PERICOLO: non mettere le mani
nella zona di segatura e sulla lama.
Con la seconda mano tenere l‘impugnatura
aggiuntiva o l‘alloggiamento del motore. Tenendo la sega con entrambe le mani si evita che
queste vengano ferite dalla lama.
b) Non mettere le mani sotto al pezzo
da lavorare. Non è possibile proteggere la
copertura protettiva dalla lama al di sotto del
pezzo da lavorare.
c) Adattare la profondità del taglio in
proporzione allo spessore del pezzo
da lavorare. Deve essere visibile al di sotto
del pezzo per un‘altezza inferiore a un dente
della sega.
d) Non bloccare mai il pezzo da segare
con la mano o sulla gamba. Bloccare il
pezzo da lavorare ad una presa stabile. E‘ importate fissare bene il pezzo per ridurre
il rischio di contatto corporeo, l‘incepparsi della
lama o la perdita di controllo.
e) Impugnare l’apparecchio solamente
alle superfici di presa isolate quando si
eseguono dei lavori in occasione dei
quali l’inserto può toccare linee di corrente nascoste o il cavo di alimentazione dell’apparecchio stesso. Impugnare
l’apparecchio solamente alle superfici
di presa isolate quando si eseguono dei
lavori in occasione dei quali l’inserto può
toccare linee di corrente nascoste o il
cavo di alimentazione dell’apparecchio
stesso. Il contatto con un cavo elettrico può
mettere sotto tensione anche le parti metalliche
dell‘apparecchio e provocare una scossa elettrica.
f) In caso di tagli in lunghezza utilizzare
sempre un supporto o una guida diritta.
Ciò aiuta a migliorare la precisione del taglio e
riduce la possibilità che la lama si inceppi.
g) Utilizzare sempre la sega nella misura
giusta e con la ripresa di perforazione
adatta (per es. a forma di stella o tonda). Le lame non adatte al montaggio sulla
sega girano in modo sbilanciato e possono
provocare una perdita del controllo.
h) Non utilizzare mai viti o bulloni dann-
eggiati o non adatti per le lame. Le viti e
i bulloni delle lame sono stati appositamente
costruiti per questa sega e per fornire una prestazione ottimale e sicurezza nel funzionamento.
21 IT/MT
Page 22

Avvertenze di sicurezza specifiche dell‘apparecchio per seghe circolare Avvertenze di sicurezza specifiche dell‘apparecchio per seghe circolare / Avvio
Ulteriori indicazioni di
sicurezza per tutte le seghe
Cause di contraccolpi e rispettive indicazioni di sicurezza
- Un contraccolpo è una reazione improvvisa
dovuta all‘impigliamento, inceppamento o inclinazione errata della lama che porta la sega
senza controllo a sollevarsi dal pezzo da lavorare e a rivolgersi verso la persona che l‘utilizza;
- Se la lama si impiglia, inceppa o si blocca
nella chiusura del taglio e il motore porta
l‘apparecchio a rivolgersi verso l‘utilizzatore;
-
la lama è inserita al contrario o con un‘inclinazione
sbagliata e i denti del bordo posteriore della
lama possono impigliarsi sulla superficie del
pezzo da lavorare, facendo sì che la lama in
movimento fuoriesca dall‘apertura del taglio e
rimbalzi verso l‘utilizzatore.
Un contraccolpo è la conseguenza di un utilizzo
sbagliato o errato della sega. Può essere evitato attuando misure prudenziali come di seguito indicate.
a) Mantenere saldamente la sega con
entrambe le mani e posizionare le
braccia in modo da poter assorbire
la potenza di eventuali contraccolpi.
Posizionarsi sempre lateralmente rispetto alla lama e mai in linea con essa.
In caso di contraccolpo la lama tonda può saltare all‘indietro, sebbene l‘utilizzatore possa
riuscire a controllare la tensione del contraccolpo tramite misure di sicurezza adatte.
b) Se la lama si inceppa o il lavoro viene
interrotto, spegnere la sega e lasciare
che si fermi completamente nel pezzo
da lavorare. Non cercare mai di estrarre la sega dal pezzo da lavorare o di
tirarla al contrario quando è ancora
in movimento; ciò potrebbe provocare
un contraccolpo. Individuare ed eliminare
la causa dell‘inceppamento della sega.
c) Quando si vuole far ripartire una sega
che si trova ancora nel pezzo, centrare
la lama nel taglio e controllare che i
denti non siano impigliati nel pezzo.
22 IT/MT
Se la lama si inceppa, essa può muoversi al di
fuori del pezzo o causare un contraccolpo una
volta riavviata.
d) Fornirsi di un supporto per la lamina
grande per evitare il rischio di contraccolpo dovuto all‘inceppamento. Le la-
mine grandi possono piegarsi sotto il proprio
peso. Le lamine devono essere supportate da
entrambi i lati, sia in prossimità del taglio, sia
in corrispondenza del bordo.
e) Non utilizzare lame smussate o dann-
eggiate. Lame smussate o con i denti orientati
nella direzioni sbagliata possono sfregarsi,
incepparsi o provocare un contraccolpo più
facilmente nel caso di un taglio molto stretto.
f) Prima della segatura regolare precisa-
mente le impostazioni di profondità e
angolazione del taglio. Se si cambiano
le impostazioni durante la segatura, la lama
può incepparsi e provocare un contraccolpo.
g) Procedere con particolare attenzione
durante la segatura su pareti fisse o
altre aree in cui non è possibile vederci attraverso. La la lama inserita in oggetti
incurvati può bloccarsi e provocare un contraccolpo.
Funzione della custodia protettiva
a) Prima di ogni utilizzo, assicurarsi che la
custodia protettiva si chiuda senza problemi. Non utilizzare la sega quando
la custodia protettiva non si muove liberamente e non si chiude immediatamente. Non incastrare o collegare la
custodia in posizione aperta. Se la sega
dovesse cadere inavvertitamente a terra, la
custodia potrebbe piegarsi. Assicurarsi che si
muova liberamente e che non tocchi la lama o
latri pezzi a qualsiasi impostazione di angolazione o profondità di taglio.
b) Controllare lo stato e la funzione delle
molle per la custodia protettiva. Se la
custodia e le molle non funzionano perfettamente, aspettare prima di effettu
re la segatura. Parti danneggiate, infiltrazioni
appiccicose o accumulo di trucioli ritardano il
funzionamento della custodia protettiva.
a-
Page 23

Avvertenze di sicurezza specifiche dell‘apparecchio per seghe circolare / Avvio
c) In caso di „taglio in profondità“ ese-
guito con un‘angolazione inclinata,
fissare la lamina di base della sega in
modo che non si sposti lateralmente.
Uno spostamento laterale può far inceppare
la lama e provocare così un contraccolpo.
d) Non appoggiare la sega sul piano di
lavoro o sul pavimento senza che questa sia fornita di custodia protettiva.
Una lama in funzione non protetta porta la
sega a spostarsi in direzione del taglio e sega
tutto ciò che trova davanti. In questo caso osservare il periodo di follow-up della sega.
Indicazioni aggiuntive:
Non utilizzare dischi abrasivi.
Utilizzare solamente lame dal diametro adatto
alle caratteristiche sega.
RISCHIO DA ESPOSI-
ZIONE A POLVERI! In caso di prolungata
lavorazione del legno e, in particolare, di materiali dai quali possono generarsi polveri nocive
per la salute, collegare l’apparecchio ad un
dispositivo di aspirazione esterno.
Indossare guanti protettivi!
Indossare una mascherina
antipolvere!
Accessori / utensili originali
Utilizzare esclusivamente accessori e apparecchi
supplementari indicati nelle istruzioni per l‘uso oppure il cui attacco sia compatibile con l‘apparecchio.
Utilizzare solamente le barre-guida originali.
Avvio
Montaggio / Sostituzione
della lama
Estrarre la spina dalla presa di rete prima di eseguire ogni intervento sull‘apparecchio.
1. Azionare il blocco di accensione
l‘unità motore
2. Aprire la leva di arresto
comando
3. L‘arridatoio / rosetta
pannello
6
in avanti.
18
1
. L‘unità motore si ingrana.
14 a
si trovano solo nel
14 b
.
4. Spingere il blocco del mandrino
l‘arridatoio / la rosetta
gonale a brugola
5. Estrarre la lama
6. Montare la lama
14 a
5
.
14
.
14
seguendo rispettivamente
il procedimento descritto al contrario.
1
e spingere
. Mollare la leva di
19
e aprire
con la chiave esa-
Indossare occhiali protettivi!
Indossare sempre le cuffie di
protezione!
Evitare un surriscaldamento delle punte dei denti
della sega.
Evitare durante la segatura della plastica la
fusione della stessa.
VAPORI TOSSICI! La
lavorazione che genera polveri dannose / velenose rappresenta un pericolo per la salute
dell’utilizzatore o delle persone che si trovano
nelle vicinanze.
E‘ vietato lavorare materiale contenente amianto.
L‘amianto è ritenuto un materiale cancerogeno.
L
a direzione della sega e della macchina devon
o
combaciare.
Collegare l‘aspirazione
Se si desidera, inserire l‘adattatore 7 sull‘espul-
17
sore
per aspirare la polvere.
Collegare un‘aspirazione delle polveri.
Verificare il funzionamento
della custodia protettiva
Nota: per questo passaggio posizionare la piastra
sul bordo di un ripiano stabile in modo che la lama
della sega
14
possa essere abbassata.
23 IT/MT
Page 24

Avvio / Uso Uso
Abbassare la sega ad immersione.
Verificare che la lama della sega 14 scorra sulla
custodia protettiva e che ritorni autonomamente
nella posizione di uscita.
Uso
Accensione e spegnimento
Accensione:
Spostare il blocco di accensione 1 verso l‘alto
e tenerlo in questa posizione.
Premere l’interruttore ON / OFF 2. Dopo che
la macchina è avviata, è possibile rilasciare
nuovamente il blocco di accensione
1
.
Spegnimento:
Rilasciare l’interruttore ON / OFF 2.
Impostazione profondità taglio
(profondità immersione)
Allentare la vite del regolatore di profondità del
12
taglio
desiderata sulla scala di profondità
- senza barra-guida vedere marcatura A.
- con barra-guida vedere marcatura B.
Riavvitare la vite del regolatore di profondità
del taglio
Nota: adattare la profondità del taglio in proporzione allo spessore del pezzo da lavorare.
Al di sotto del pezzo deve essere visibile per
un‘altezza massima pari a quella dei denti della sega.
e impostare la profondità di taglio
13
:
12
.
Nota: qualora l‘angolo di taglio di 0 ° o 45 ° si
dovesse essere modificato, è possibile regolarlo a
8
posteriori tramite le viti di aggiustamento
Osservare la linea del taglio
e
8 a
Sul banco sega 9 sono incise le marcature
linea di taglio
9 a
0 ° / 45 °.
Posizionare l‘apparecchio nella direzione par-
allela all‘angolo di taglio in base alla linea di
marcatura
9 a
, 0 ° o 45 °.
I punti di riferimento sono le superfici inclinate.
9
9 a
Collegamento barre-guida
Con le barre-guida 21 è possibile effettuare tagli diritti.
Per collegare le 2 barre-guida, spostare l‘ele-
mento di collegamento
guide. Stringere le viti di bloccaggio
23
nella fessura delle
22
con la
chiave a brugola in dotazione.
4 2223
.
Impostazione angolo
(angolatura)
Allentare entrambe le manopole per
l‘impostazione dell‘angolo
Spostare il motore nella posizione di angolatura
desiderata.
Rimontare le manopole di impostazione 11.
24 IT/MT
11
.
Nota: le barre-guida 21 posseggono una protezion
(linguetta nera in gomma). Adattare la protezione
prima di effettuare il primo taglio. Poggiare le guide
su un pezzo da lavorare. Impostare un profondità
taglio di ca. 10 mm. Attivare la sega e utilizzarla in
maniera uniforme con un movimento leggero nella
direzione di taglio.
e
Page 25

Uso
Viti eccentriche
10
Le viti eccentriche 10 sono previste per la regolazione del perfetto incastro del banco sega
barre-guide
21
.
9
nelle
Avvitare bene le viti eccentriche 10 per minimiz-
zare il gioco tra la sega e la barra-guida
Segatura (senza barre-guida)
21
.
Segatura ad angolo retto
Tenere la macchina con entrambe le mani
dall‘impugnatura
plementare
3
e dall‘impugnatura sup-
15
.
Mettere in funzione l‘apparecchio come descrit-
to nella sezione „Accensione e spegnimento“.
Posizionare l‘apparecchio con la parte anteriore
del banco sega
9
sul pezzo da lavorare.
Spostare il motore verso il basso e effettuare la
segatura con la pressione massima verso avanti,
mai verso dietro.
Angolatura del taglio fino a 45 °
Impostare l‘angolo e la line del taglio come
descritto.
Tenere la macchina con entrambe le mani
dall‘impugnatura
plementare
3
e dall‘impugnatura sup-
15
.
Mettere in funzione l‘apparecchio come descrit-
to nella sezione „Accensione e spegnimento“.
Posizionare l‘apparecchio con la parte anteriore
del banco sega
9
sul pezzo da lavorare.
Spostare il motore verso il basso e effettuare la
segatura con la pressione massima verso avanti,
mai verso dietro.
Taglio a immersione
In caso di „taglio in profondità“ eseguito con
un‘angolazione inclinata, fissare la lamina di
base della sega in modo che non si sposti lateralmente. Uno spostamento laterale può far inceppare la lama e provocare così un contraccolpo.
Impostare la profondità del taglio come de-
scritto sopra.
Posizionare l‘apparecchio sul pezzo da lavorare.
Evitare contraccolpi e collocare l‘angolo poste-
riore su un dispositivo bloccante (similmente a
come mostrato nella figura D, come indicato
nella sezione „sega con barra-guida“).
Mettere in funzione l‘apparecchio come descrit-
to nella sezione „Accensione e spegnimento“.
Tenere la macchina con entrambe le mani
dall‘impugnatura
plementare
Nota: la marcatura della larghezza di taglio
3
e dall‘impugnatura sup-
15
e ruotarla.
16
collocata sul lato della calotta protettiva mostra il
punto di taglio anteriore e posteriore di una lama da
165 mm, in caso di massima profondità di taglio.
Questo è valido sia per il taglio con la barra-guida
21
sia per il taglio senza barra-guida 21.
Segatura (con barre-guida)
Segatura ad angolo retto con guide
21
21
Posizionare le guide 21 con l‘elemento in gom-
mapiuma sul pezzo da lavorare.
Posizionare l‘apparecchio con la fessura 20 sulle
21
guide
.
Mettere in funzione l‘apparecchio come descrit-
to nella sezione „Accensione e spegnimento“.
Tenere la macchina con entrambe le mani
dall‘impugnatura
plementare
3
e dall‘impugnatura sup-
15
e ruotarla.
Angolatura del taglio fino a 45 °
Posizionare le guide 21 con l‘elemento in gom-
mapiuma sul pezzo da lavorare.
Posizionare l‘apparecchio con la fessura 20 sulle
21
guide
.
Impostare l‘angolo e la line del taglio come
descritto.
Tenere la macchina con entrambe le mani
dall‘impugnatura
plementare
3
e dall‘impugnatura sup-
15
.
Mettere in funzione l‘apparecchio come descrit-
to nella sezione „Accensione e spegnimento“.
Posizionare l‘apparecchio con la parte anteriore
del banco sega
9
sul pezzo da lavorare.
Spostare il motore verso il basso e effettuare la
segatura con la pressione massima verso avanti,
mai verso dietro.
25 IT/MT
Page 26

Uso / Manutenzione e pulizia / Garanzia
Segatura a immersione
con barre-guida
Posizionare le guide 21 con l‘elemento in gom-
mapiuma sul pezzo da lavorare.
Posizionare l‘apparecchio con la fessura 20 sulle
21
guide
I
sopra.
Posizionare il bordo posteriore (fin quanto pos-
sibile) su un supporto (vedi fig. D).
Mettere in funzione l‘apparecchio come descrit-
to nella sezione „Accensione e spegnimento“.
Tenere la macchina con entrambe le mani
dall‘impugnatura
plementare
Nota: la marcatura della larghezza di taglio
collocata sul lato della calotta protettiva mostra il
punto di taglio anteriore e posteriore di una lama da
165 mm, in caso di massima profondità di taglio.
Questo è valido sia per il taglio con la barra-guida
21
sia per il taglio senza barra-guida 21.
Non sono permessi altri utilizzi.
Manutenzione e pulizia
Prima di ogni lavoro con l‘apparecchio, spegnerlo
e staccare la spina di alimentazione.
L’apparecchio deve essere tenuto sempre pulito,
asciutto e privo di oli o grassi.
Utilizzare un panno asciutto per pulire le parti
esterne.
cavo di collegamento, far eseguire il lavoro dal
produttore o dal rappresentante del produttore per
evitare eventuali danni.
Nota: Potete ordinare i pezzi di ricambio non menzionati (per es. spazzole di carbone, interruttore)
presso il nostro call center.
.
mpostare la profondità del taglio come desc
3
e dall‘impugnatura sup-
15
e ruotarla.
PERICOLO DI LESIONI!
Se è necessario sostituire il
ritto
16
Garanzia
Questo apparecchio è garantito per tre
anni a partire dalla data di acquisto.
L’apparecchio è stato prodotto con cura
e debitamente collaudato prima della
consegna. Conservare lo scontrino come
prova d’acquisto. In caso di interventi in
garanzia, contattare telefonicamente il
proprio centro di assistenza. Solo in questo modo è possibile garantire una spedizione gratuita della merce.
La garanzia vale solo per i difetti di materiale o
fabbricazione, non per i danni da trasporto, parti
soggette a usura o danni a parti fragili come ad
es. interruttori o accumulatori. Il prodotto è destinato esclusivamente all’uso domestico e non a quello
commerciale.
La garanzia decade in caso di impiego improprio
o manomissione, uso della forza e interventi non
eseguiti dalla nostra filiale di assistenza autorizzata.
Questa garanzia non costituisce alcun limite ai diritti legali del consumatore.
Il periodo di garanzia non viene prolungato in caso
di un intervento in garanzia. Ciò vale anche per le
componenti sostituite e riparate. I danni e difetti
presenti già all’acquisto devono essere comunicati
immediatamente dopo il disimballaggio, e non oltre
due giorni dalla data di acquisto. Le riparazioni effettuate dopo la scadenza del periodo di garanzia
sono a pagamento.
IT
Assistenza Italia
Tel.: 02 36003201
e-mail: kompernass@lidl.it
IAN 104460
MT
Assistenza Malta
Tel.: 80062230
e-mail: kompernass@lidl.com.mt
26 IT/MT
IAN 104460
Page 27

Smaltimento / Traduzione dall‘originale dichiarazione di conformità / Produttore
Smaltimento
L’imballaggio è composto da materiali
ecologici che possono essere smaltiti
presso i siti di riciclaggio locali.
Non gettare gli utensili elettrici
nei rifiuti domestici!
In conformità alla direttiva europea 2012 / 19 / EU
sui rifiuti di apparecchiature elettriche ed elettroniche
e relativa trasposizione nel diritto nazionale, gli
utensili elettrici usati devono essere raccolti separatamente e riciclati in maniera compatibile con
l’ambiente.
É possibile reperire informazioni circa le modalità
di smaltimento dell‘apparecchio usurato presso
l‘amministrazione cittadina o comunale.
Traduzione dall‘originale
dichiarazione di conformità /
Produttore
Noi, KOMPERNASS HANDELS GMBH, responsabile per la documentazione: sig. Semi Uguzlu,
BURGSTRASSE 21, 44867 BOCHUM, GERMANY,
dichiarano con la presente che questo prodotto è
conforme con le seguenti norme, documenti normativi e direttive dell’Unione Europea:
Norme utilizzate ed armonizzate
EN 60745-1:2009+A11
EN 60745-2-5:2010
EN 55014-1:2006+A1+A2
EN 55014-2:1997+A1+A2
EN 61000-3-2:2006+A1+A2
EN 61000-3-3:2013
Marchio / Descrizione della macchina:
Sega ad immersione PTSS 1200 A1
Date of manufacture (DOM): 03–2015
Numero di serie: IAN 104460
Bochum, 31.03.2015
Semi Uguzlu
- Direttore del Reparto Qualità -
Si riservano modifiche tecniche ai fini di ulteriori
sviluppi.
Direttiva macchine
(2006 / 42 / EC)
Direttiva CE sulla bassa tensione
(2006 / 95 / EC)
Compatibilità elettromagnetica
(2004 / 108 / EC)
RoHS Direttiva
(2011 / 65 / EU)
27 IT/MT
Page 28

28
Page 29

Table of contents
Introduction
Intended use ........................................................................................................................................ Page 30
Features ...............................................................................................................................................Page 30
Scope of delivery ................................................................................................................................ Page 30
Technical Data ....................................................................................................................................Page 30
General power tool safety warnings
1. Work area safety............................................................................................................................Page 31
2. Electrical safety ............................................................................................................................... Page 31
3. Personal safety ................................................................................................................................ Page 32
4. Power tool use and care ................................................................................................................ Page 32
5. Service ............................................................................................................................................. Page 32
Safety notices specific to circular saws
Safety notices specific to all saws ...................................................................................................... Page 33
Additional safety notices for all saws ................................................................................................Page 33
Original accessories / tools ................................................................................................................ Page 34
Start-up
Installing / replacing the saw blade ................................................................................................... Page 35
Connecting the saw dust extraction ................................................................................................... Page 35
Checking the guard function .............................................................................................................. Page 35
Operation
Switching on and off ........................................................................................................................... Page 35
Adjusting the cutting depth (plunge depth) ....................................................................................... Page 35
Adjusting the cutting angle (mitre square) ......................................................................................... Page 35
Note the cutting line ............................................................................................................................ Page 35
Connecting the guide track ................................................................................................................Page 36
Eccentric screws ..................................................................................................................................Page 36
Cutting (without guide track) .............................................................................................................. Page 36
Cutting (with guide track) ................................................................................................................... Page 37
Plunge cuts with guide track ............................................................................................................... Page 37
Maintenance and Cleaning .............................................................................................. Page 37
Warranty ......................................................................................................................................... Page 37
Disposal ............................................................................................................................................ Page 38
Translation of the original declaration of conformity /
Manufacturer ............................................................................................................................... Page 38
29 GB/MT
Page 30

Introduction
Plunge Saw PTSS 1200 A1
Introduction
We congratulate you on the purchase of your new
device. You have chosen a high quality product. The
instructions for use are part of the product. They
contain important information concerning safety,
use and disposal. Before using the product, please
familiarise yourself with all of the safety information
and instructions for use. Only use the unit as de
and for the specified applications. If you pass the
product on to anyone else, please ensure that you
also pass on all the documentation with it.
Intended use
The plunge saw (hereafter referred to as “device“
or “tool“) is suitable for placing long or cross cuts,
or plunge cuts in firmly secured solid wood, particle
board, plastic and lightweight construction materials.
The use on ferrous metals is prohibited. The device
may be used with the included guide tracks – solely
for the cutting techniques specified. Any other uses,
and / or modifications to the tool are considered
improper use and may result in serious hazards.
Not for commercial applications.
Features
1
Switch lock
2
ON / OFF switch
3
Handle
4
Socket head wrench (small)
5
Socket head wrench (large)
6
Motor
7
Chip discharge adapter
8
Micro-adjustment screw for 0 ° cutting angle
8 a
Micro-adjustment screw for 45 ° cutting angle
9
Saw stand
9 a
Cut line mark
10
Eccentric screw 2 x
11
Angle adjustment wheel 2 x
12
Depth adjustment
scribed
13
Depth scale
14
Saw blade
14 a
Clamping screw / washer
14 b
Assembly cut-out
15
Additional handle
16
Cutting width marker
17
Chip discharge (swivel)
18
Blade change locking lever
19
Spindle lock
20
Notch for guide rail
21
Guide rail
22
Set screws
23
Fastener
Scope of delivery
1 Plunge saw
1 Saw blade 165 mm / 24 teeth (installed)
2 Guide tracks
1 Fastener
1 Chip discharge adapter
2 Socket head wrench
1 Set of instructions for use
Technical Data
Device: Plunge Saw PTSS 1200 A1
Rated voltage: 230 V∼, 50 Hz
Rated power input: 1200 W
Idle speed: n₀ 5200 rpm
Saw blade holder: ø 20 mm
Saw blade: 165 mm
Blade thickness: 1.4 mm
Tooth thickness: 2.6 mm
max. cutting depth: 56 mm at 90 °
mitre square
42 mm at 45 °
mitre square
With guide track
minus 5 mm
Protection class: II /
Accessories: guide track 2 x
700 mm x 180 mm
30 GB/MT
Page 31

Noise and vibration data:
Measured sound value determined according to
EN 60745. The A-rated noise level of the power
tool is typically:
Sound pressure level: 90.43 dB(A)
Sound power level: 101.43 dB(A)
Uncertainty K: 3 dB
Wear ear protection!
Evaluated acceleration, typically:
Hand / arm vibration a
Uncertainty K = 1.5 m / s
: 2.582 m / s
h,W
2
2
The vibration level specified in
these instructions was measured in accordance with
an EN 60745 standardised measurement process
and can be used to compare equipment. The vibration emission value specified can also serve as a
preliminary assessment of the exposure.
The vibration level will change according to the application of the electrical tool an in some cases may
exceed the value specified in these instructions. Regularly using the electric tool in such a way may
make it easy to underestimate the vibration.
Note: If you wish to make an accurate assessment
of the vibration loads experienced during a particular period of working, you should also take into account the intervening periods of time when the device
is switched off or is running but is not actually in use.
This can result in a much lower vibration load over
the whole of the period of working.
General power tool
safety warnings
Read all safety
warnings and all instructions.
Failure to follow the warnings and instructions may result in electric shock, fire and / or
serious injury.
Save all warnings and instructions for
future reference!
The term “power tool” in the warnings refers to your
mains-operated (corded) power tool or battery-operated (cordless) power tool.
1. Work area safety
a) Keep work area clean and well lit.
Cluttered or dark areas invite accidents.
b) D
o not operate power tools in explosive
atmospheres, such as in the presence
of flammable liquids, gases or dust.
Power tools create sparks which may ignite the
dust or fumes.
c) Keep children and bystanders away
while operating a power tool. Distractio
ns
can cause you to lose control.
2. Electrical safety
a) Power tool plugs must match the outlet.
Never modify the plug in any way. Do
not use any adapter plugs with earthed
(grounded) power tools. Unmodified plug
and matching outlets will reduce risk of electric
shock.
b) Avoid body contact with earthed or
grounded surfaces, such as pipes,
radiators, ranges and refrigerators.
There is an increased risk of electric shock if
your body is earthed or grounded.
c) Do not expose power tools to rain or
wet conditions. Water entering a power tool
will increase the risk of electric shock.
d) Do not abuse the cord. Never use the
cord for carrying, pulling or unplugging
the power tool. Keep cord away from
heat, oil, sharp edges or moving parts.
Damaged or entangled cords increase the risk
of electric shock.
e)
When operating a power tool outdo
use an extension cord suitable for outdoor use. Use of a cord suitable for outdoor
use reduces the risk of electric shock.
f) If operating a power tool in a damp
location is unavoidable, use a residual
ors,
s
31 GB/MT
Page 32

General power tool safety warnings
current device (RCD) protected supply.
Use of an RCD reduces the risk of electric shock.
3. Personal safety
a) Stay alert, watch what you are doing
and use common sense when operating a power tool. Do not use a power
tool while you are tired or under the
influence of drugs, alcohol or medication. A moment of inattention while operating
power tools may result in serious personal injury.
b) Use personal protective equipment.
Always wear eye protection. Protective
equipment such as dust mask, non-skid safety
shoes, hard hat, or hearing protection used for
appropriate conditions will reduce personal injuries.
c) Prevent unintentional starting. Ensure
the switch is in the off-position before
connecting to power source and / or
battery pack, picking up or carrying
the tool. Carrying power tools with your fing
o
n the switch or energising power tools that hav
the switch on invites accidents.
d) Remove any adjusting key or wrench
before turning the power tool on. A
wrench or a key left attached to a rotating part
of the power tool may result in personal injury.
e) Do not overreach. Keep proper foot-
ing and balance at all times. This enables
better control of the power tool in unexpected
situations.
f) Dress properly. Do not wear loose
clothing or jewellery. Keep your hair,
clothing and gloves away from moving parts. Loose clothes, jewellery or long
hair can be caught in moving parts.
g) If devices are provided for the connec-
tion of dust extraction and collection
facilities, ensure these are connected
and properly used. Use of dust collection
can reduce dust-related hazards.
er
4. Power tool use and care
a) Do not force the power tool. Use the
correct power tool for your applica
The correct power tool will do the job better
and safer at the rate for which it was designed.
b) Do not use the power tool if the switch
does not turn it on and off. Any power
tool that cannot be controlled with the switch is
dangerous and must be repaired.
c) Disconnect the plug from the power
source and / or the battery pack from
the power tool before making any adjustments, changing accessories, or
storing power tools. Such preventive safety
measures reduce the risk of starting the power
tool accidentally.
d) Store idle power tools out of the reach
of children and do not allow persons
unfamiliar with the power tool or these
instructions to operate the power tool.
Power tools are dangerous in the hands of untrained users.
e) Maintain power tools. Check for mis-
e
alignment or binding of moving parts,
breakage of parts and any other condition that may affect the power tool’s
operation. If damaged, have the power
tool repaired before use. Many accidents
are caused by poorly maintained power tools.
f) Keep cutting tools sharp and clean.
Properly maintained cutting tools with sharp
cutting edges are less likely to bind and are
easier to control.
g) Use the power tool, accessories and
tool bits etc. in accordance with these
instructions, taking into account the
working conditions and the work to
be performed. Use of the power tool for
operations different from those intended could
result in a hazardous situation.
5. Service
tion.
32 GB/MT
a) Have your power tool serviced by a
qualified repair person using only
iden-
Page 33

tical replacement parts. This will ensure
that the safety of the power tool is maintained.
Safety notices specific
to circular saws
Safety notices specific
to all saws
Sawing process
a)
DANGER: Keep your hands out of
the cutting area and away from the
saw blade. Keep your second hand on the
additional handle or on the engine housing. If
you hold the saw with both hands, they cannot
be injured by the saw blade.
b) Do not reach underneath the work pi-
ece. The guard will not protect you from the sa
blade under the work piece.
c) Adjust the cutting depth to the thick-
ness of the work piece. Less than the full
width of a tooth should be visible from under
the work piece.
d) Never hold the work piece with your
hand or lay it over a leg. Secure the
work piece on a stable fixture. It is im-
portant to fix the work piece safely, to minimise
the danger of contact with the body, jamming
of the saw blade or loss of control.
e) Only hold the power tool by the insu-
lated handles when undertaking work
where the tool may strike hidden pow
lines or the tool‘s power cord. Contact
with a live wire could cause metal parts of the
power tool to become live and lead to electric
shock.
f) When cutting along the way always
use a fence or a straight edge guide.
That improves the precision of the cut and minimises the possibility that the saw blade jams.
g) Always use saw blades of the correct
size and with matching mounting hole
(e.g. star-shaped or round). Saw blades
not matching the attachments of the saw run
untrue and lead to loss of control.
h) Never use damaged or incorrect saw
blade washers or bolts. The saw blade
er
washers and screws were specifically developed
for your saw, for optimal performance and operating safety.
Additional safety notices
for all saws
Kickback– causes and related safety notices
- Kickback is a sudden reaction if the saw blade
catches, jams or is misaligned and the uncontrolled saw lifts out of the work piece and in the
direction of the operator;
- if the saw blade becomes caught or jammed in
the closing sawing gap, it seizes and the power
of the motor kicks the saw back toward the
operator;
- if the saw blade is distorted or misaligned in the
w
saw gap, the teeth of the rear blade edge can
jam in the surface of the work piece, causing
the saw blade to move out of the saw gap and
the saw to kick back toward the operator.
Kickback is the result of misuse or incorrect use of the
saw. It can be avoided by taking the in the following
described precautions.
a) Hold the saw with both hands and
bring your arms into a position that
allows you to absorb the forces of kickback. Always stand to the side of the
saw blade, never bring the saw blade
into a line with your body. During a kick-
back the saw can jump backwards, however,
the operator can master the forces of the kickback with suitable preventive measures.
b) Should the saw blade jam, or you stop
the work, switch the saw off and hold
it still in the work piece, until the saw
blade has come to a standstill. Never
attempt to remove the saw from the
work piece or to pull it backwards, as
long as the saw blade moves, as otherwise a kickback could occur. Find out
and rectify the reason for the jamming of the
saw blade.
c) If you want to restart a saw that is
stuck in the work piece, centre the saw
33 GB/MT
Page 34

Safety notices specific to circular saws
blade in the saw gap and check that the
teeth are not stuck in the work piece.
If the saw blade jams, it can move out of the
work piece or cause kickback if the saw is restarted.
d) Support big boards to reduce the risk
of a kickback due to a jamming saw
blade. Big boards can bend through due to
their own weight. Boards must be supported
at both ends, both near the saw gap as well
as near at the edge.
e) Do not use blunt or damaged saw
blades. Saw blades with blunt or misaligned
teeth cause greater friction, jamming of the
blade and kickback due to the saw gap being
too tight.
f) Tighten the blade depth and blade
angle before making your cut. If the ad-
justments change during cutting, the saw blade
can jam and cause a kickback.
g) Take particular care when cutting into
existing walls or other areas which
cannot be inspected. The saw blade can
jam when cutting into hidden objects, causing
kickback.
Guard functionality
a) Before every use check that the safety
cover closes without problems. Do not
use the saw, if the safety cover does
not move freely and does not close instantly. Never fix or tie back the safety
cover in the opened position. If the saw
is dropped accidentally, the safety cover can
be bent. Be sure it moves freely and does not
touch the saw blade or other parts at any angle
or depth.
b) Check the functionality of the guard
spring. Have the device maintained
prior to use if the guard and spring do
not work properly. Damaged parts, sticky
deposits or masses of wood shavings lead to
delayed operation of the guard.
c) When “plunge cutting“ at angles other
than right angles, secure the base plate
of the saw to prevent it from sliding
sideways. Lateral movement can lead to
jamming of the saw blade and therewith to
kickback.
d) Do not put the saw down on the bench
or on the floor without the guard covering the saw blade. An unprotected saw
blade moves the saw against the direction of
the cut, and cuts everything that is in the way.
Please keep in mind that the saw runs on.
Additional instructions:
Do not use grinding discs.
Only use saw blade diameters corresponding
with the markings on the saw.
DANGER DUE TO DUST!
When working on wood for extended periods
and particularly when working on materials
which generate dust which is dangerous to the
health, be sure to connect it to a suitable dust
extractor.
Wear safety gloves!
Wear a dust mask!
Wear protective glasses!
Always wear ear protection!
Avoid overheating the tips of the saw teeth.
When cutting plastic, avoid melting the plastic.
TOXIC VAPOURS! Wor-
king with harmful / noxious dusts represents a
risk to the health of the person operating the
device and to anyone near the work area.
Do not work on materials containing asbestos.
Asbestos is considered carcinogenic.
Original accessories / tools
Use only the accessories and attachments de-
tailed in the operating instructions, or those which
are compatible with the device.
Only use the original guide tracks.
34 GB/MT
Page 35

Start-up
Operation
Installing / replacing
the saw blade
Pull the mains plug out of the mains socket before
you carry out any task on the device.
1. Activate the switch lock
6
unit
forward.
2. Release the locking lever
1
lock
. The motor unit will lock into place.
3. The clamping screw / washer
in the cut-out
14 b
4. Push the spindle lock
14 a
5
.
head wrench
washer
5. Remove the saw blade
6.
Install the saw blade 14 in the respective revers
1
and push the motor
18
. Release the switch
14 a
is now located
.
19
and use the socket
to undo the clamping screw /
14
.
order.
The direction of rotation of the saw blade and
device must match.
Connecting the saw
dust extraction
Switching on and off
Switching on:
Slide the switch lock 1 up and keep in position.
Activate the ON / OFF switch 2. Once the ma-
chine has started, release the start lockout
Switching off:
Release the ON / OFF switch 2.
Adjusting the cutting depth
(plunge depth)
Loosen the screw on the depth adjustment 12
and slide the stopper to the desired cutting
e
depth shown on the depth scale
- without guide track see marking A.
- with guide track see marking B.
Tighten the screw for the depth adjustment 12.
Note: adjust the cutting depth to the thickness
of the work piece. No more than one tooth
depth should protrude below the work piece.
Adjusting the cutting angle
(mitre square)
1
.
13
:
Optionally attach the chip discharge adapter for
the dust extraction
7
to the chip discharge 17.
Connect an approved dust- and chip extraction
system.
Checking the guard function
Note: for this process, place the baseplate at the
edge of a firm surface so the saw blade
lowered.
Lower the plunge saw.
Check if the saw blade 14 rubs against the
guard and if it independently returns to the
starting position.
14
can be
Loosen both adjustment wheels for the cutting
11
angle
.
Slide the motor to the desired cutting angle.
Tighten the adjustment wheels 11.
Note: if the cutting angle adjustment for 0 ° or 45 °
moved, they can be readjusted with the micro-adjust-
8
ment screws
Note the cutting line
and
8 a
.
The saw stand 9 is embossed with 0 ° / 45 °
cutting line markings
9 a
.
Align the tool with the respective cutting angles
using the 0 ° resp. 45 ° cutting line marks
9 a
The slants are reference points.
.
35 GB/MT
Page 36

Operation
Connecting the guide track
Cutting (without guide track)
Perpendicular cuts
Hold the tool by the handles 3 and 15 with
both hands.
9
Switch on the device as described under “Swit-
ching on and off“.
9 a
Start the tool down on the work piece at the
front of the saw stand
Move the motor downward and cut, applying
steady forward pressure, never backwards.
9
.
The guide track 21 is used to make straight cuts.
To connect 2 guide tracks, slide the fastener 23
into the notch of the guide tracks. Tighten the set
22
screw
with the included hex key.
4 2223
Note: guide tracks 21 feature a chipping guard
(black rubber lip). The chipping guard must be adjusted before making the first cut. Place the guide
track on a work piece. Set to a cutting depth of approx. 10 mm. Switch on the plunge saw and steadily
guide it in the direction of the cut, pushing slightly.
Eccentric screws
The eccentric screws 10 are intended for adjusting
accuracy of fit of the saw table
10
9
to the fence 21.
the
Tighten the eccentric screws 10 to minimize the
clearance between the plunge saw and the
21
fence
.
Mitre cuts to 45 °
Set the cutting angle and cut line as specified.
Hold the tool by the handles 3 and 15 with
both hands.
Switch on the device as described under “Swit-
ching on and off“. Start the tool down on the
work piece at the front of the saw stand
9
.
Move the motor downward and cut, applying
steady forward pressure, never backwards.
Plunge cuts
When “plunge cutting“ at angles other than a
right angle, secure the base plate of the saw
from sliding sideways. Lateral movement can
cause the saw blade to jam, hence kickback.
Set the desired plunge depth as specified above
Start the tool down on the work piece.
Prevent kickback and place the back edge
against a stopper (similar to Figure D referenced
in section “Plunge saws with fence“).
Switch on the device as described under “Swit-
ching on and off“.
Hold the tool by the handles, 3 and 15, with
both hands and swivel it.
Note: The cutting width marker
16
on the side of
the guard indicates the front and back cutting points
of a 165 mm saw blade at maximum cutting depth.
This applies to plunge cuts with fence
plunge cuts without fence
21
.
21
as well as
.
36 GB/MT
Page 37

Cutting (with guide track)
21
Maintenance and Cleaning
Perpendicular cuts with guide track
21
Place the guide track 21 with expanded rubber
elements onto the work piece.
Place the tool with the groove 20 onto the guide
21
track
.
Switch on the device as described under “Swit-
ching on and off“.
Hold the tool by the handles, 3 and 15, with
both hands and swivel it.
Mitre cuts to 45 °
Place the guide track 21 with expanded rubber
elements onto the work piece.
Place the tool with the groove 20 onto the guide
21
track
.
Set the cutting angle and cut line as specified.
Hold the tool by the handles 3 and 15 with
both hands.
Switch on the device as described under “Swit-
ching on and off“. Start the tool down on the
work piece at the front of the saw stand
9
.
Move the motor downward and cut, applying
steady forward pressure, never backwards.
Plunge cuts with guide track
Place the guide track 21 with expanded rubber
elements onto the work piece.
Place the tool with the groove 20 onto the guide
21
track
.
Set the desired plunge depth as specified above.
Place the rear edge (if possible) against a stop
(see Fig. D).
Switch on the device as described under “Swit-
ching on and off“.
Hold the tool by the handles, 3 and 15, with
both hands and swivel it.
Note: the cutting width marker
16
on the side of the
guard indicates the front and back cutting points of
a 165 mm saw blade at maximum cutting depth. This
applies to plunge cuts with fence 21 as well as
cuts without fence
21
.
plunge
Any other applications are prohibited.
RISK OF INJURY! Switch the
device off and pull the plug out of the mains socket
before carrying out any work on the device.
The device must always be kept clean, dry and
free of oil or grease.
Use a dry cloth to clean the housing.
If the connection cable needs to
be replaced, this repair must be performed by the
manufacturer or a representative to prevent safety
hazards.
Note: Spare parts not listed (e.g. carbon brushes,
switches) can be ordered through our call centre.
Warranty
The warranty for this appliance is for 3
years from the date of purchase. The appliance has been manufactured with care
and meticulously examined before delivery. Please retain your receipt as proof
of purchase. In the event of a warranty
claim, please make contact by telephone
with our Service Department. Only in this
way can a post-free despatch for your
goods be assured.
The warranty covers only claims for material and
maufacturing defects, but not for transport damage,
for wearing parts or for damage to fragile components, e.g. buttons or batteries. This product is for private use only and is not intended for commercial use.
The warranty is void in the case of abusive and improper handling, use of force and internal tampering
not carried out by our authorized service branch. Your
statutory rights are not restricted in any way by this
warranty.
The warranty period will not be extended by repairs
made unter warranty. This applies also to replaced
and repaired parts. Any damage and defects extant
on purchase must be reported immediately after
37 GB/MT
Page 38

unpacking the appliance, at the latest, two days after
the purchase date. Repairs made after the expiration
of the warranty period are subject to payment.
Translation of the original
declaration of conformity /
Manufacturer
GB
Service Great Britain
Tel.: 0871 5000 720
(0.10 GBP/Min.)
e-mail: kompernass@lidl.co.uk
IAN 104460
MT
Service Malta
Tel.: 80062230
e-mail: kompernass@lidl.com.mt
IAN 104460
Disposal
The packaging is made of environmentally friendly materials, which may be
disposed of through your local recycling
facilities.
Do not dispose of power
tools in household waste!
According to European Directive 2012 / 19 /EU,
used power tools must be collected and recycled in
an environmentally friendly manner.
Contact your local refuse disposal authority for more
details on how to dispose of your worn-out tools.
We, KOMPERNASS HANDELS GMBH, the person
responsible for documents: Mr Semi Uguzlu, BURGSTRASSE 21, 44867 BOCHUM, GERMANY, hereby
declare that this product complies with the following
standards, normative documents and EU directives:
Machinery Directive
(2006 / 42 / EC)
EU Low Voltage Directive
(2006 / 95 / EC)
Electromagnetic Compatibility
(2004 / 108 / EC)
RoHS Directive
(2011 / 65 / EU)
applicable harmonised standards
EN 60745-1:2009+A11
EN 60745-2-5:2010
EN 55014-1:2006+A1+A2
EN 55014-2:1997+A1+A2
EN 61000-3-2:2006+A1+A2
EN 61000-3-3:2013
Type / Description of product:
Plunge Saw PTSS 1200 A1
Date of manufacture (DOM): 03–2015
Serial number: IAN 104460
Bochum, 31.03.2015
38 GB/MT
Semi Uguzlu
- Quality Manager -
We reserve the right to make technical modifications
in the course of product development.
Page 39

Inhaltsverzeichnis… /… / Translation of the original declaration of conformity / Manufacturer
Einleitung
Bestimmungsgemäßer Gebrauch ....................................................................................................... Seite 40
Ausstattung .......................................................................................................................................... Seite 40
Lieferumfang ........................................................................................................................................ Seite 40
Technische Daten ................................................................................................................................ Seite 40
Allgemeine Sicherheitshinweise für Elektrowerkzeuge
1. Arbeitsplatz-Sicherheit .................................................................................................................... Seite 41
2. Elektrische Sicherheit ...................................................................................................................... Seite 41
3. Sicherheit von Personen ................................................................................................................. Seite 42
4. Verwendung und Behandlung des Elektrowerkzeugs .................................................................. Seite 42
5. Service ............................................................................................................................................. Seite 43
Gerätespezifische Sicherheitshinweise für Handkreissägen
Sicherheitshinweise für alle Sägen ..................................................................................................... Seite 43
Weitere Sicherheitshinweise für alle Sägen ...................................................................................... Seite 44
Originalzubehör / -zusatzgeräte ........................................................................................................ Seite 45
Inbetriebnahme
Sägeblatt montieren / wechseln ......................................................................................................... Seite 45
Spanabsaugung anschließen ............................................................................................................. Seite 46
Funktion der Schutzhaube prüfen ......................................................................................................Seite 46
Bedienung
Ein- und ausschalten ............................................................................................................................ Seite 46
Schnitt-Tiefe einstellen (Tauchtiefe) ..................................................................................................... Seite 46
Schnitt-Winkel einstellen (Gehrungswinkel) ....................................................................................... Seite 46
Schnittlinie beachten ........................................................................................................................... Seite 46
Führungsschiene verbinden ................................................................................................................ Seite 46
Exzenterschrauben .............................................................................................................................. Seite 47
Sägen (ohne Führungsschiene) .......................................................................................................... Seite 47
Sägen (mit Führungsschiene) .............................................................................................................Seite 47
Tauchsägen mit Führungsschiene ....................................................................................................... Seite 48
Wartung und Reinigung ..................................................................................................... Seite 48
Garantie ........................................................................................................................................... Seite 48
Entsorgung ..................................................................................................................................... Seite 49
Original-EG-Konformitätserklärung / Hersteller ............................................ Seite 50
39 DE/AT/CH
Page 40

Einleitung
Tauchsäge PTSS 1200 A1
Einleitung
Wir beglückwünschen Sie zum Kauf Ihres neuen Gerätes. Sie haben sich damit für ein hochwertiges Produkt entschieden. Die Bedienungsanleitung ist Teil
dieses Produkts. Sie enthält wichtige Hinweise für
Sicherheit, Gebrauch und Entsorgung. Machen Sie
sich vor der Benutzung
und Sicherheitshinw
Produkt nur wie beschrieben und für die angegebenen Einsatzbereiche. Händigen Sie alle Unterlagen bei Weitergabe des Produkts an Dritte mit aus.
Bestimmungsgemäßer Gebrauch
Die Tauchsäge (nachfolgend „Gerät“ oder „Maschine“ genannt) ist zum Sägen von Längs- und
Querschnitten und Tauchschnitten bei fester Auflage
in Vollholz, Spanplatten, Kunststoff und Leichtbaustoffen geeignet. Das Bearbeiten von Eisenmetallen
ist nicht zulässig. Das Gerät kann wahlweise mit den
mitgelieferten Führungsschienen – ausschließlich für
die dazu beschriebenen Schnitttechniken – benutzt
werden. Jede andere Verwendung oder Verände
der Maschine gilt als nicht bestimmungsgemäß und
birgt erhebliche Unfallgefahren. Nicht zum gewerblichen Gebrauch.
Ausstattung
1
Einschaltsperre
2
EIN- / AUS-Schalter
3
Handgriff
4
Innensechskantschlüssel (klein)
5
Innensechskantschlüssel (groß)
6
Motoreinheit
7
Spanauswurfadapter
8
Feinjustierschrauben für 0 °-Schnittwinkel
8 a
Feinjustierschraube für 45 °-Schnittwinkel
9
Sägetisch
9 a
Schnittlinien-Markierung
10
Exzenterschraube (2 x)
des Produkts mit allen Bedien-
eisen vertraut. Benutzen Sie das
rung
11
Einstellrad für Schnittwinkeleinstellung (2 x)
12
Schnitttiefenverstellung
13
Schnitttiefenskala
14
Sägeblatt
14 a
Spannschraube / Unterlegscheibe
14 b
Montageausschnitt
15
Zusatzhandgriff
16
Schnittbreitemarkierung
17
Spanauswurf (drehbar)
18
Festellhebel für Sägeblattwechsel
19
Spindelarretierung
20
Nut für Führungsschiene
21
Führungsschiene
22
Madenschrauben
23
Verbindungselement
Lieferumfang
1 Tauchsäge
1 Sägeblatt 165 mm / 24 Zähne (montiert)
2 Führungsschienen
1 Verbindungselement
1 Spanauswurfadapter
2 Innensechskantschlüssel
1 Bedienungsanleitung
Technische Daten
Gerät: Tauchsäge PTSS 1200 A1
Nennspannung: 230 V∼, 50 Hz
Nennaufnahme: 1200 W
Leerlaufdrehzahl: n₀ 5200 min-¹
Sägeblattaufnahme: ø 20 mm
Sägeblatt: 165 mm
Stammblattdicke: 1,4 mm
Zahnstärke: 2,6 mm
max. Schnitttiefe: 56 mm bei 90 °
Gehrungswinkel
42 mm bei 45 °
Gehrungswinkel
Mit Führungssschiene
minus 5 mm
Schutzklasse: II /
Zubehör: Führungsschiene 2 x
700 mm x 180 mm
40 DE/AT/CH
Page 41

Geräusch- und Vibrationsinformationen:
Messwert für Geräusch ermittelt entsprechend
EN 60745. Der A-bewertete Geräuschpegel des
Elektrowerkzeugs beträgt typischerweise:
Schalldruckpegel: 90,43 dB(A)
Schallleistungspegel: 101,43 dB(A)
Unsicherheit K: 3 dB
Gehörschutz tragen!
Bewertete Beschleunigung, typischerweise:
Hand- / Armvibration a
Unsicherheit K = 1,5 m / s
: 2,582 m / s
h,W
2
2
Der in diesen Anweisungen
angegebene Schwingungspegel ist entsprechend
einem in EN 60745 genormten Messverfahren gemessen worden und kann für den Gerätevergleich
verwendet werden. Der angegebene Schwingungsemissionswert kann auch zu einer einleitenden Einschätzung der Aussetzung verwendet werden.
Der Schwingungspegel wird sich entsprechend dem
Einsatz des Elektrowerkzeugs verändern und kann in
manchen Fällen über dem in diesen Anweisungen
angegebenen Wert liegen. Die Schwingungsbelast
ung
könnte unterschätzt werden, wenn das Elektrowerkzeug regelmäßig in solcher Weise verwendet wird.
Bewahren Sie alle Sicherheitshinweise
und Anweisungen für die Zukunft auf!
Der in den Sicherheitshinweisen verwendete Begriff
„Elektrowerkzeug“ bezieht sich auf netzbetriebene
Elektrowerk
zeuge (mit Netzkabel) und auf akkube-
triebene Elektrowerkzeuge (ohne Netzkabel).
1. Arbeitsplatz-Sicherheit
a) Halten Sie Ihren Arbeitsbereich sauber
und gut beleuchtet. Unordnung und unbeleuch-
tete Arbeitsbereiche können zu Unfällen führen.
b) Arbeiten Sie mit dem Elektrowerk-
zeug nicht in explosionsgefährdeter
Umgebung, in der sich brennbare Flüssigkeiten, Gase oder Stäube befinden.
Elektrowerkzeuge erzeugen Funken, die den
Staub oder die Dämpfe entzünden können.
c) Halten Sie Kinder und andere Personen
während der Benutzung des Elektrowerkzeugs fern. Bei Ablenkung können
Sie die Kontrolle über das Gerät verlieren.
2. Elektrische Sicherheit
Hinweis: Für eine genaue Abschätzung der
Schwingungsbelastung während eines bestimmten
Arbeitszeitraumes sollten auch die Zeiten berücksichtigt werden, in denen das Gerät abgeschaltet
ist oder zwar läuft, aber nicht tatsächlich im Einsatz
ist. Dies kann die Schwingungsbelastung über den
gesamten Arbeitszeitraum deutlich reduzieren.
Allgemeine Sicherheitshinweise
für Elektrowerkzeuge
Lesen Sie alle
Sicherheitshinweise und Anweisungen. Versäumnisse bei der Einhal-
tung der Sicherheitshinweise und Anweisungen
können elektrischen Schlag, Brand und / oder
schwere Verletzungen verursachen.
a) Der Anschlussstecker des Elektrowerk-
zeuges muss in die Steckdose passen.
Der Stecker darf in keiner Weise verändert werden. Verwenden Sie keine
Adapterstecker gemeinsam mit
schutzgeerdeten Elektrowerkzeugen.
Unveränderte Stecker und passende Steckdosen
verringern das Risiko eines elektrischen Schlages.
b) Vermeiden Sie Körperkontakt mit ge-
erdeten Oberflächen, wie von Rohren,
Heizungen, Herden und Kühlschränken.
Es besteht ein erhöhtes Risiko durch elektrischen
Schlag, wenn Ihr Körper geerdet ist.
c) Halten Sie Elektrowerkzeuge von Re-
gen oder Nässe fern. Das Eindringen von
Wasser in ein Elektrogerät erhöht das Risiko
eines elektrischen Schlages.
d) Zweckentfremden Sie das Kabel nicht,
um das Elektrowerkzeug zu tragen,
aufzuhängen oder um den Stecker aus
41 DE/AT/CH
Page 42

Allgemeine Sicherheitshinweise für Elektrowerkzeuge
der Steckdose zu ziehen. Halten Sie
das Kabel fern von Hitze, Öl, scharfen
Kanten oder sich bewegenden Geräteteilen. Beschädigte oder verwickelte Kabel
erhöhen das Risiko eines elektrischen Schlages.
e) Wenn Sie mit einem Elektrowerkzeug
im Freien arbeiten, verwenden Sie nur
Verlängerungskabel, die auch für den
Außenbereich zugelassen sind. Die
Anwendung eines für den Außenbereich
geeigneten Verlängerungskabels verringert
das Risiko eines elektrischen Schlages.
f) Wenn der Betrieb des Elektrowerk-
zeuges in feuchter Umgebung nicht
vermeidbar ist, verwenden Sie einen
Fehlerstromschutzschalter. Der Einsatz
eines Fehlerstromschutzschalters vermindert
das Risiko eines elektrischen Schlages.
3. Sicherheit von Personen
a)
Seien Sie stets aufmerksam, achten Sie
darauf, was Sie tun und gehen Sie mit
Vernunft an die Arbeit mit einem Elek
trowerkzeug. Benutzen Sie kein Elektrowerkzeug, wenn Sie müde sind oder
unter dem Einfluss von Drogen, Alkohol oder Medikamenten stehen. Ein
Moment der Unachtsamkeit beim Gebrauch
des Elektrowerkzeuges kann zu ernsthaften
Verletzungen führen.
b)
Tragen Sie persönliche Schutzausrüstung
und immer eine Schutzbrille. Das Tragen
persönlicher Schutzausrüstung wie Staubmask
rutschfeste Sicherheitsschuhe, Schutzhelm oder
Gehörschutz, je nach Art und Einsatz des
Elektrowerkzeuges, verringert das Risiko von
Verletzungen.
c) Vermeiden Sie eine unbeabsichtigte
Inbetriebnahme. Vergewissern Sie sich,
dass das Elektrowerkzeug ausgeschaltet ist, bevor Sie es an die Stromversorgung anschließen, es aufnehmen
oder tragen. Wenn Sie beim Tragen des
Elektrowerkzeuges den Finger am Schalter ha
oder das Gerät bereits eingeschaltet an die
-
ben
Stromversorgung anschließen, kann dies zu
Unfällen führen.
d) Entfernen Sie Einstellwerkzeuge oder
Schraubenschlüssel, bevor Sie das
Elektrowerkzeug einschalten. Ein Werk-
zeug oder Schlüssel, der sich in einem drehenden
Geräteteil befindet, kann zu Verletzungen führen.
e) Vermeiden Sie eine abnormale Körper-
haltung. Sorgen Sie für einen sicheren
Stand und halten Sie jederzeit das
Gleichgewicht. Dadurch können Sie das
Elektrowerkzeug in unerwarteten Situationen
besser kontrollieren.
f) Tragen Sie geeignete Kleidung. Tragen
Sie keine weite Kleidung oder Schmuck.
Halten Sie Haare, Kleidung und Handschuhe fern von sich bewegenden
Teilen. Lockere Kleidung, Schmuck oder lange
Haare können von sich bewegenden Teilen
erfasst werden.
g) Wenn Staubabsaug- und -auffangein-
richtungen montiert werden können,
vergewissern Sie sich, dass diese
angeschlossen sind und richtig verwendet werden. Die Verwendung einer
Staubabsaugung kann Gefährdungen durch
Staub verringern.
4. Verwendung und Behandlung
des Elektrowerkzeugs
a) Überlasten Sie das Gerät nicht. Ver-
wenden Sie für Ihre Arbeit das dafür
e,
bestimmte Elektrowerkzeug. Mit dem
passenden Elektrowerkzeug arbeiten Sie besser
und sicherer im angegebenen Leistungsbereich.
b) Benutzen Sie kein Elektrowerkzeug,
dessen Schalter defekt ist. Ein Elektrowerk-
zeug, das sich nicht mehr ein- oder ausschalten
lässt, ist gefährlich und muss repariert werden.
c) Ziehen Sie den Stecker aus der Steck-
dose, bevor Sie Geräteeinstellungen
vornehmen, Zubehörteile wechseln
oder das Gerät weglegen. Diese Vorsichts-
maßnahme verhindert den unbeabsichtigten
Start des Elektrowerkzeuges.
42 DE/AT/CH
Page 43

d) Bewahren Sie unbenutzte Elektrowerk-
zeuge außerhalb der Reichweite von
Kindern auf. Lassen Sie Personen das
Gerät nicht benutzen, die mit diesem
nicht vertraut sind oder diese Anweisungen nicht gelesen haben. Elektrowerk-
zeuge sind gefährlich, wenn sie von unerfahrenen
Personen benutzt werden.
e) Pflegen Sie Elektrowerkzeuge mit
Sorgfalt. Kontrollieren Sie, ob bewegliche Teile einwandfrei funktionieren
und nicht klemmen, ob Teile gebrochen
oder so beschädigt sind, dass die Funktion des Elektrowerkzeuges beeinträchtigt ist. Lassen Sie beschädigte Teile vor
dem Einsatz des Gerätes reparieren.
Viele Unfälle haben ihre Ursache in schlecht
gewarteten Elektrowerkzeugen.
f) Halten Sie Schneidwerkzeuge scharf
und sauber. Sorgfältig gepflegte Schneid-
werkzeuge mit scharfen Schneidkanten verklemmen sich weniger und sind leichter zu führen.
g) Verwenden Sie Elektrowerkzeug,
Zubehör, Einsatzwerkzeuge usw.
entsprechend diesen Anweisungen.
Berücksichtigen Sie dabei die Arbeitsbedingungen und die auszuführende
Tätigkeit. Der Gebrauch von Elektrowerkzeu-
gen für andere als die vorgesehenen Anwendungen kann zu gefährlichen Situationen führen.
5. Service
a) Lassen Sie Ihr Elektrowerkzeug nur von
qualifiziertem Fachpersonal und nur
mit Original-Ersatzteilen reparieren.
Damit wird sichergestellt, dass die Sicherheit
des Elektrowerkzeugs erhalten bleibt.
Gerätespezifische Sicherheits-
hinweise für Handkreissägen
Sicherheitshinweise
für alle Sägen
Sägeverfahren
a)
GEFAHR: Kommen Sie mit Ihren
Händen nicht in den Sägebereich und
an das Sägeblatt. Halten Sie mit Ihrer zwei-
ten Hand den Zusatzgriff oder das Motorge
Wenn beide Hände die Säge halten, können
diese vom Sägeblatt nicht verletzt werden.
b) Greifen Sie nicht unter das Werkstück.
Die Schutzhaube kann Sie unter dem Werkstück
nicht vor dem Sägeblatt schützen.
c) Passen Sie die Schnitt-Tiefe an die Dicke
des Werkstücks an. Es sollte weniger als
eine volle Zahnhöhe unter dem Werkstück sichtbar sein.
d) Halten Sie das zu sägende Werkstück
niemals in der Hand oder über dem
Bein fest. Sichern Sie das Werkstück an
einer stabilen Aufnahme. Es ist wichtig, das
Werkstück gut zu befestigen, um die Gefahr
von Körperkontakt, Klemmen des Sägeblattes
oder Verlust der Kontrolle zu minimieren.
e) Fassen Sie das Elektrowerkzeug nur an
den isolierten Griffflächen an, wenn
Sie Arbeiten ausführen, bei denen das
Einsatzwerkzeug verborgene Stromleitungen oder das eigene Netzkabel
treffen kann. Kontakt mit einer spannungs-
führenden Leitung setzt auch die Metallteile des
Elektrowerkzeugs unter Spannung und führt zu
einem elektrischen Schlag.
f) Verwenden Sie beim Längsschneiden
immer einen Anschlag oder eine gerade Kantenführung. Dies verbessert die
Schnittgenauigkeit und verringert die Möglichkeit, dass das Sägeblatt klemmt.
g) Verwenden Sie immer Sägeblätter in
der richtigen Größe und mit passender
Aufnahmebohrung (z.B. sternförmig
oder rund). Sägeblätter, die nicht zu den
Montageteilen der Säge passen, laufen unrund
und führen zum Verlust der Kontrolle.
häuse.
43 DE/AT/CH
Page 44

Gerätespezifische Sicherheitshinweise für Handkreissägen Gerätespezifische Sicherheitshinweise für Handkreissägen / Inbetriebnahme
h) Verwenden Sie niemals beschädigte
oder falsche Sägeblatt-Unterlegscheiben oder -schrauben. Die Sägeblatt-Unter-
legscheiben und -schrauben wurden speziell
für Ihre Säge konstruiert, für optimale Leistung
und Betriebssicherheit.
Weitere Sicherheitshinweise
für alle Sägen
Rückschlag – Ursachen und entsprechende
Sicherheitshinweise
- Ein Rückschlag ist die plötzliche Reaktion infolge
eines hakenden, klemmenden oder falsch ausgerichteten Sägeblattes, die dazu führt, dass
eine unkontrollierte Säge abhebt und sich aus
dem Werkstück heraus in Richtung der Bedienperson bewegt;
-
wenn sich das Sägeblatt in dem sich schließende
Sägespalt verhakt oder verklemmt, blockiert es,
und die Motorkraft schlägt das Gerät in Richtung der Bedienperson zurück;
- wird das Sägeblatt im Sägeschnitt verdreht oder
falsch ausgerichtet, können sich die Zähne der
hinteren Sägeblattkante in der Oberfläche des
Werkstücks verhaken, wodurch sich das Sägeblatt aus dem Sägespalt herausbewegt und die
Säge in Richtung der Bedienperson zurückspringt.
Ein Rückschlag ist die Folge eines falschen oder
fehlerhaften Gebrauchs der Säge. Er kann durch
geeignete Vorsichtsmaßnahmen, wie nachfolgend
beschrieben, verhindert werden.
a) Halten Sie die Säge mit beiden Händen
fest und bringen Sie Ihre Arme in eine
Stellung, in der Sie die Rückschlagk
abfangen können. Halten Sie sich im
seitlich des Sägeblattes, nie das Sägeblatt in eine Linie mit Ihrem Körper bringen. Bei einem Rückschlag kann die
rückwärts springen, jedoch kann die Bedienperson durch geeignete Vorsichtsmaßnahmen
die Rückschlagkräfte beherrschen.
b) Falls das Sägeblatt verklemmt oder
Sie die Arbeit unterbrechen, schalten
Sie die Säge aus und halten Sie sie im
44 DE/AT/CH
räfte
mer
Kreissäge
Werkstoff ruhig, bis das Sägeblatt zum
Stillstand gekommen ist. Versuchen Sie
nie, die Säge aus dem Werkstück zu
entfernen oder sie rückwärts zu ziehen,
solange das Sägeblatt sich bewegt,
sonst kann ein Rückschlag erfolgen.
Ermitteln und beheben Sie die Ursache für das
Verklemmen des Sägeblattes.
c) Wenn Sie eine Säge, die im Werkstück
steckt, wieder starten wollen, zentrieren Sie das Sägeblatt im Sägespalt und
überprüfen Sie, ob die Sägezähne nicht
im Werkstück verhakt sind. Klemmt das
Sägeblatt, kann es sich aus dem Werkstück
heraus bewegen oder einen Rückschlag verursachen, wenn die Säge erneut gestartet wird.
d) Stützen Sie große Platten ab, um das
Risiko eines Rückschlags durch ein
klemmendes Sägeblatt zu vermindern.
n
Große Platten können sich unter ihrem Eigengewicht durchbiegen. Platten müssen auf beiden
Seiten abgestützt werden, sowohl in der Nähe
des Sägespalts als auch an der Kante.
e) Verwenden Sie keine stumpfen oder
beschädigten Sägeblätter. Sägeblätter
mit stumpfen oder falsch ausgerichteten Zähnen
verursachen durch einen zu engen Sägespalt
eine erhöhte Reibung, Klemmen des Sägeblattes
und Rückschlag.
f) Ziehen Sie vor dem Sägen die Schnitt-
Tiefen- und Schnitt-Winkeleinstellungen
fest. Wenn sich während des Sägens die Ein-
stellungen verändern, kann sich das Sägeblatt
verklemmen und ein Rückschlag auftreten.
g) Seien Sie besonders vorsichtig beim
Sägen in bestehende Wände oder andere nicht einsehbare Bereiche. Das
eintauchende Sägeblatt kann beim Sägen in
verborgene Objekte blockieren und einen
Rückschlag verursachen.
Funktion der Schutzhaube
a) Überprüfen Sie vor jeder Benutzung, ob
die Schutzhaube einwandfrei schließt.
Verwenden Sie die Säge nicht, wenn
die Schutzhaube nicht frei beweglich
ist und sich nicht sofort schließt. Klemmen oder binden Sie die Schutzhaube
Page 45

Gerätespezifische Sicherheitshinweise für Handkreissägen / Inbetriebnahme
niemals in geöffneter Position fest. S
ollte
die Säge unbeabsichtigt zu Boden fallen, kann
die Schutzhaube verbogen werden. Stelle
n Sie
sicher, dass sie sich frei bewegt und bei allen
Schnitt-Winkeln und -Tiefen weder Sägeblatt
noch andere Teile berührt.
b) Überprüfen Sie die Funktion der Feder
für die Schutzhaube. Lassen Sie das
Gerät vor dem Gebrauch warten,
wenn Schutzhaube und Feder nicht
einwandfrei arbeiten. Beschädigte Teile,
klebrige Ablagerungen oder Anhäufungen von
Spänen lassen die Schutzhaube verzögert
arbeiten.
c) Sichern Sie beim „Tauchschnitt“; der
nicht rechtwinklig ausgeführt wird, die
Grundplatte der Säge gegen seitliches
Verschieben. Ein seitliches Verschieben kann
zum Klemmen des Sägeblattes und damit zum
Rückschlag führen.
d) Legen Sie die Säge nicht auf der Werk-
bank oder dem Boden ab, ohne dass
die Schutzhaube das Sägeblatt be
deckt.
Ein ungeschütztes, nachlaufendes Sägeblatt
bewegt die Säge entgegen der Schnittrichtung
und sägt, was ihm im Weg ist. Beachten Sie
dabei die Nachlaufzeit der Säge.
Ergänzende Anweisungen:
Verwenden Sie keine Schleifscheiben.
Verwenden Sie nur Sägeblätter mit Durchmessern
entsprechend den Aufschriften auf der Säge.
GEFÄHRDUNG
DURCH STAUB! Schließen Sie bei längerem
Bearbeiten von Holz und insbesondere wenn
Materialien bearbeitet werden, bei denen gesundheitsgefährdende Stäube entstehen, das
Gerät an eine geeignete externe Staubabsaugvorrichtung an.
Tragen Sie Schutzhandschuhe!
Tragen Sie eine Staubschutzmaske!
Tragen Sie eine Schutzbrille!
Tragen Sie immer einen
Gehörschutz!
Vermeiden Sie ein Überhitzen der Sägezahn-
spitzen.
Vermeiden Sie beim Sägen von Kunststoff ein
Schmelzen des Kunststoffs.
GIFTIGE DÄMPFE! Die
durch die Bearbeitung entstehenden schädlichen /
giftigen Stäube stellen eine Gesundheitsgefährdung für die Bedienperson oder in der Nähe
befindliche Personen dar.
Asbesthaltiges Material darf nicht bearbeitet
werden. Asbest gilt als krebserregend.
Originalzubehör / -zusatzgeräte
Benutzen Sie nur Zubehör und Zusatzgeräte, die
in der Bedienungsanleitung angegeben sind bzw.
deren Aufnahme mit dem Gerät kompatibel ist.
Es dürfen nur die Original-Führungsschienen
verwendet werden.
Inbetriebnahme
Sägeblatt montieren / wechseln
Ziehen Sie vor allen Arbeiten am Gerät den Netzstecker aus der Steckdose.
1.
Betätigen Sie die Einschaltsperre 1 und drücke
Sie die Motoreinheit
2. Öffnen Sie den Feststellhebel
6
nach vorne.
18
. Lassen Sie die
Einschaltsperre 1 los. Die Motoreinheit rastet ein.
3. Die Spannschraube / Unterlegscheibe
findet sich nun im Ausschnitt
14 b
4. Drücken Sie die Spindelarretierung
nen Sie mit dem Innensechskantschlüssel
Spannschraube / Unterlegscheibe
5. Sägeblatt
6. Einbau des Sägeblattes
14
abnehmen.
14
entsprechend in
14 a
be-
.
19
und öff-
5
14 a
.
umgekehrter Reihenfolge wie beschrieben
vornehmen.
n
die
45 DE/AT/CH
Page 46

Inbetriebnahme / Bedienung Bedienung
- ohne Führungsschiene siehe Markierung A.
Drehrichtung von Sägeblatt und Maschine
müssen übereinstimmen.
Spanabsaugung anschließen
Stecken Sie wahlweise den Spanauswurfadapter
zur Staubabsaugung 7 auf den Spanauswurf 17.
Schließen Sie eine zugelassene Staub- und
Spanabsaugung an.
Funktion der
Schutzhaube prüfen
Hinweis: Positionieren Sie die Bodenplatte für die-
sen Vorgang am Rande einer festen Auflage, sodass
das Sägeblatt
Senken Sie die Tauchsäge ab.
Prüfen Sie, ob das Sägeblatt 14 an der Schutz-
haube schleift und ob es sich selbstständig wied
in die Ausgangsposition bewegt.
Bedienung
Ein- und ausschalten
Einschalten:
Schieben Sie die Einschaltsperre 1 nach oben
und halten diese in Position.
Betätigen Sie den EIN- / AUS-Schalter 2.
Nachdem die Maschine angelaufen ist, können
Sie die Einschaltsperre
14
abgesenkt werden kann.
1
wieder loslassen.
er
- mit Führungsschiene siehe Markierung B.
Ziehen Sie die Schraube der Schnitttiefenver-
12
stellung
wieder fest.
Hinweis: Passen Sie die Schnitttiefe an die
Dicke des Werkstücks an. Es sollte max. eine
Zahnhöhe unter dem Werkstück sichtbar sein.
Schnitt-Winkel einstellen
(Gehrungswinkel)
Lösen Sie die beiden Einstellräder für den Schnitt-
11
winkel
Schwenken Sie den Motor in den gewünschten
Schnittwinkel.
Ziehen Sie die Einstellräder 11 wieder fest.
Hinweis: Sollte sich die Schnittwinkeleinstellung
für 0 ° bzw. 45 ° verstellt haben, können Sie diese
mit den Feinjustierschrauben
nachjustieren.
Schnittlinie beachten
Auf dem Sägetisch 9 sind 0 ° / 45 °Schnittli-
nien-Markierungen
Richten Sie das Gerät entsprechend des einge-
stellten Schnittwinkels an der 0 ° bzw. 45 °
Schnittlinien-Markierungen
Bezugspunkte hierzu sind die Schrägflächen.
.
8
8 a
und
wieder
9 a
eingeprägt.
9 a
aus.
Ausschalten:
Lassen Sie den EIN- / AUS-Schalter 2 los.
Schnitt-Tiefe einstellen
(Tauchtiefe)
Lösen Sie die Schraube der Schnitttiefenverstel-
12
lung
und schieben Sie den Anschlag bis zur
gewünschten Schnitttiefe an der Schnitttiefen-
13
skala
46 DE/AT/CH
:
9
9 a
Führungsschiene verbinden
Mit der Führungsschiene 21 können Sie gerade
Schnitte durchführen.
Page 47

Bedienung
Um 2 Führungsschienen zu verbinden, schieben
Sie das Verbindungselement
23
in die Nut der
Führungsschienen. Ziehen Sie die Madenschrau-
22
ben
mit beigelegtem Innensechskantschlüssel
fest.
4 2223
Hinweis: Führungsschienen 21 besitzen einen
Spanreißschutz (schwarze Gummilippe). Der Spanreißschutz muss vor dem ersten Schnitt angepasst
werden. Legen Sie die Führungsschiene auf ein Werkstück. Stellen Sie eine Schnitttiefe von ca. 10 mm ein.
Schalten Sie die Tauchsäge ein und führen Sie diese
gleichmäßig und mit leichtem Schub in Schnittrichtung.
Exzenterschrauben
10
Die Exzenterschrauben 10 sind zur Einstellung der
Passgenauigkeit des Sägetisches
rungsschiene
21
vorgesehen.
9
an die Füh-
Ziehen Sie die Exzenterschrauben 10 an, um
das Spiel zwischen Tauchsäge und Führungs-
21
schiene
Sägen (ohne Führungsschiene)
zu minimieren.
Rechtwinkeliges Sägen
Halten Sie die Maschine mit beiden Händen an
den Griffen
3
und 15 fest.
Gerät – wie unter „Ein- und ausschalten“ be-
schrieben – einschalten.
Setzen Sie das Gerät mit dem vorderen Teil des
Sägetisches
9
auf das Werkstück.
Schwenken Sie den Motor nach unten und sägen
Sie mit mäßigem Druck nach vorne – niemals
nach hinten.
Gehrungsschnitte bis 45 °
Stellen Sie Schnittwinkel und Schnittlinie wie
beschrieben ein.
Halten Sie die Maschine mit beiden Händen
an den Griffen
3
und 15 fest.
Gerät – wie unter „Ein- und ausschalten“ be-
schrieben – einschalten. Setzen Sie das Gerät
mit dem vorderen Teil des Sägetisches
9
auf
das Werkstück.
Schwenken Sie den Motor nach unten und sägen
Sie mit mäßigem Druck nach vorne – niemals
nach hinten.
Tauchschnitte
Sichern Sie beim „Tauchschnitt“, der nicht recht-
winklig ausgeführt wird, die Grundplatte der
Säge gegen seitliches Verschieben. Ein seitliches
Verschieben kann zum Klemmen des Sägeblattes
und damit zum Rückschlag führen.
Stellen Sie die gewünschte Tauchtiefe wie oben
beschrieben ein.
Setzen Sie das Gerät auf das Werkstück.
Vermeiden Sie einen Rückschlag und legen Sie
die hintere Kante an einen Anschlag an (analog
zur Abbildung D, auf die im Kapitel „Tauchsägen
mit Führungsschiene“ verwiesen wird).
Gerät – wie unter „Ein- und ausschalten“ be-
schrieben – einschalten.
Halten Sie die Maschine mit beiden Händen
an den Griffen
3
und 15 fest und schwenken
Sie sie.
Hinweis: Die Schnittbreitemarkierung
16
an der
Seite der Schutzhaube zeigt den vorderen und
hinteren Schnittpunkt eines 165 mm-Sägeblattes,
bei maximaler Schnitttiefe. Dies gilt sowohl für
Tauchschnitte mit Führungsschiene
Tauchschnitte ohne Führungsschiene
Sägen (mit Führungsschiene)
21
als auch für
21
.
Rechtwinkeliges Sägen mit Führungsschiene
21
Setzen Sie die Führungsschiene 21 mit den
Moosgummielementen auf das Werkstück.
Setzen Sie das Gerät mit der Nut 20 auf die
Führungsschiene
21
.
21
47 DE/AT/CH
Page 48

Gerät – wie unter „Ein- und ausschalten“ be-
schrieben – einschalten.
Halten Sie die Maschine mit beiden Händen
an den Griffen
3
und 15 fest und schwenken
Sie sie.
Wartung und Reinigung
VERLETZUNGSGEFAHR!
Schalten Sie vor allen Arbeiten am Gerät das Gerät
aus und ziehen Sie den Netzstecker.
Gehrungsschnitte bis 45 °
Setzen Sie die Führungsschiene 21 mit den
Moosgummielementen auf das Werkstück.
Setzen Sie das Gerät mit der Nut 20 auf die
Führungsschiene
21
.
Stellen Sie Schnittwinkel und Schnittlinie wie
beschrieben ein.
Halten Sie die Maschine mit beiden Händen
an den Griffen
3
und 15 fest.
Gerät – wie unter „Ein- und ausschalten“ be-
schrieben – einschalten. Setzen Sie das Gerät
mit dem vorderen Teil des Sägetisches
9
auf
das Werkstück.
Schwenken Sie den Motor nach unten und sägen
Sie mit mäßigem Druck nach vorne – niemals
nach hinten.
Tauchsägen mit Führungsschiene
Setzen Sie die Führungsschiene 21 mit den
Moosgummielementen auf ihr Werkstück.
Setzen Sie das Gerät mit der Nut 20 auf die
Führungsschiene
21
.
Stellen Sie die gewünschte Tauchtiefe wie oben
beschrieben ein.
Legen Sie die hintere Kante (soweit wie möglich)
an einen Anschlag (siehe Abb. D) an.
Gerät – wie unter „Ein- und ausschalten“ be-
schrieben – einschalten.
Halten Sie die Maschine mit beiden Händen an
den Griffen 3 und 15 fest und schwenken Sie sie.
Hinweis: Die Schnittbreitemarkierung 16 an der
Seite der Schutzhaube zeigt den vorderen und
hinteren Schnittpunkt eines 165 mm-Sägeblattes,
bei maximaler Schnitttiefe. Dies gilt sowohl für
Tauchschnitte mit Führungsschiene
Tauchschnitte ohne Führungsschiene
21
als auch für
21
.
Weitere Anwendungen sind nicht zulässig.
Das Gerät muss stets sauber, trocken und frei
von Öl oder Schmierfetten sein.
Verwenden Sie zum Reinigen des Gehäuses ein
trockenes Tuch.
Wenn ein Ersatz der Anschlussleitung erforderlich ist, dann ist dies vom Hersteller
oder seinem Vertreter auszuführen, um Sicherheitsgefährdungen zu vermeiden.
Hinweis: Nicht aufgeführte Ersatzteile (wie z.B.
Kohlebürsten, Schalter) können Sie über unsere
Callcenter bestellen.
Garantie
Sie erhalten auf dieses Gerät 3 Jahre Garantie ab Kaufdatum. Das Gerät wurde
sorgfältig produziert und vor Anlieferung
gewissenhaft geprüft. Bitte bewahren Sie
den Kassenbon als Nachweis für den Kauf
auf. Bitte setzen Sie sich im Garantiefall mit
Ihrer Servicestelle telefonisch in Verbin
dung.
Nur so kann eine kostenlose Einsendung
Ihrer Ware gewährleistet werden.
Die Garantieleistung gilt nur für Material- oder Fabrikationsfehler, nicht aber für Transportschäden,
Verschleißteile oder für Beschädigungen an zerbrechlichen Teilen, z. B. Schalter oder Akkus. Das
Produkt ist lediglich für den privaten und nicht für
den gewerblichen Gebrauch bestimmt.
Bei missbräuchlicher und unsachgemäßer Behandlung, Gewaltanwendung und bei Eingriffen, die nicht
von unserer autorisierten Service-Niederlassung
vorgenommen wurden, erlischt die Garantie. Ihre
gesetzlichen Rechte werden durch diese Garantie
nicht eingeschränkt.
48 DE/AT/CH
Page 49

Garantie / Entsorgung
Die Garantiezeit wird durch die Gewährleistung nicht
verlängert. Dies gilt auch für ersetzte und reparierte
Teile. Eventuell schon beim Kauf vorhandene Schäden
und Mängel müssen sofort nach dem Auspacken
gemeldet werden, spätestens aber zwei Tage nach
Kaufdatum. Nach Ablauf der Garantiezeit anfallende
Reparaturen sind kostenpflichtig.
DE
Service Deutschland
Tel.: 0800 5435 111
E-mail: kompernass@lidl.de
IAN 104460
AT
Service Österreich
Tel.: 0820 201 222
(0,15 EUR/Min.)
E-mail: kompernass@lidl.at
IAN 104460
CH
Service Schweiz
Tel.: 0842 665566
(0,08 CHF/Min., Mobilfunk
max. 0,40 CHF/Min.)
E-mail: kompernass@lidl.ch
Möglichkeiten zur Entsorgung des ausgedienten
Gerätes erfahren Sie bei Ihrer Gemeinde- oder
Stadtverwaltung.
IAN 104460
Entsorgung
Die Verpackung besteht aus umweltfreundlichen Materialien, die Sie über die örtlichen Recyclingstellen entsorgen können.
Werfen Sie Elektrowerkzeuge
nicht in den Hausmüll!
Gemäß Europäischer Richtlinie 2012 / 19 / EU
müssen verbrauchte Elektrowerkzeuge getrennt
gesammelt und einer umweltgerechten Wiederverwertung zugeführt werden.
49 DE/AT/CH
Page 50

Original-EG-Konformitätserklärung / Hersteller
Original-EG-Konformitätserklä-
rung / Hersteller
Wir, KOMPERNASS HANDELS GMBH, Dokumente
verantwortlicher: Herr Semi Uguzlu, BURGSTRASSE 21
44867 BOCHUM, DEUTSCHLAND, erklären hiermit, dass dieses Produkt mit den folgenden Normen,
normativen Dokumenten und EG-Richtlinien übereinstimmt:
Maschinenrichtlinie
(2006 / 42 / EC)
EG-Niederspannungsrichtlinie
(2006 / 95 / EC)
Elektromagnetische Verträglichkeit
(2004 / 108 / EC)
RoHS Richtlinie
(2011 / 65 / EU)
angewandte harmonisierte Normen
EN 60745-1:2009+A11
EN 60745-2-5:2010
EN 55014-1:2006+A1+A2
EN 55014-2:1997+A1+A2
EN 61000-3-2:2006+A1+A2
EN 61000-3-3:2013
n-
,
Typ / Gerätebezeichnung:
Tauchsäge PTSS 1200 A1
Herstellungsjahr: 03–2015
Seriennummer: IAN 104460
Bochum, 31.03.2015
Semi Uguzlu
- Qualitätsmanager -
Technische Änderungen im Sinne der Weiterentwicklung sind vorbehalten.
50 DE/AT/CH
Page 51

KOMPERNASS HANDELS GMBH
BURGSTRASSE 21
44867 BOCHUM
GERMANY
Estado de las informaciones · Versione delle
informazioni · Last Information Update
Stand der Informationen: 03 / 2015
Ident.-No.: PTSS1200A1032015-ES / IT
IAN 104460
 Loading...