

■Assembling the Rack
The installation described below should be made by
qualified service personnel or system installers.
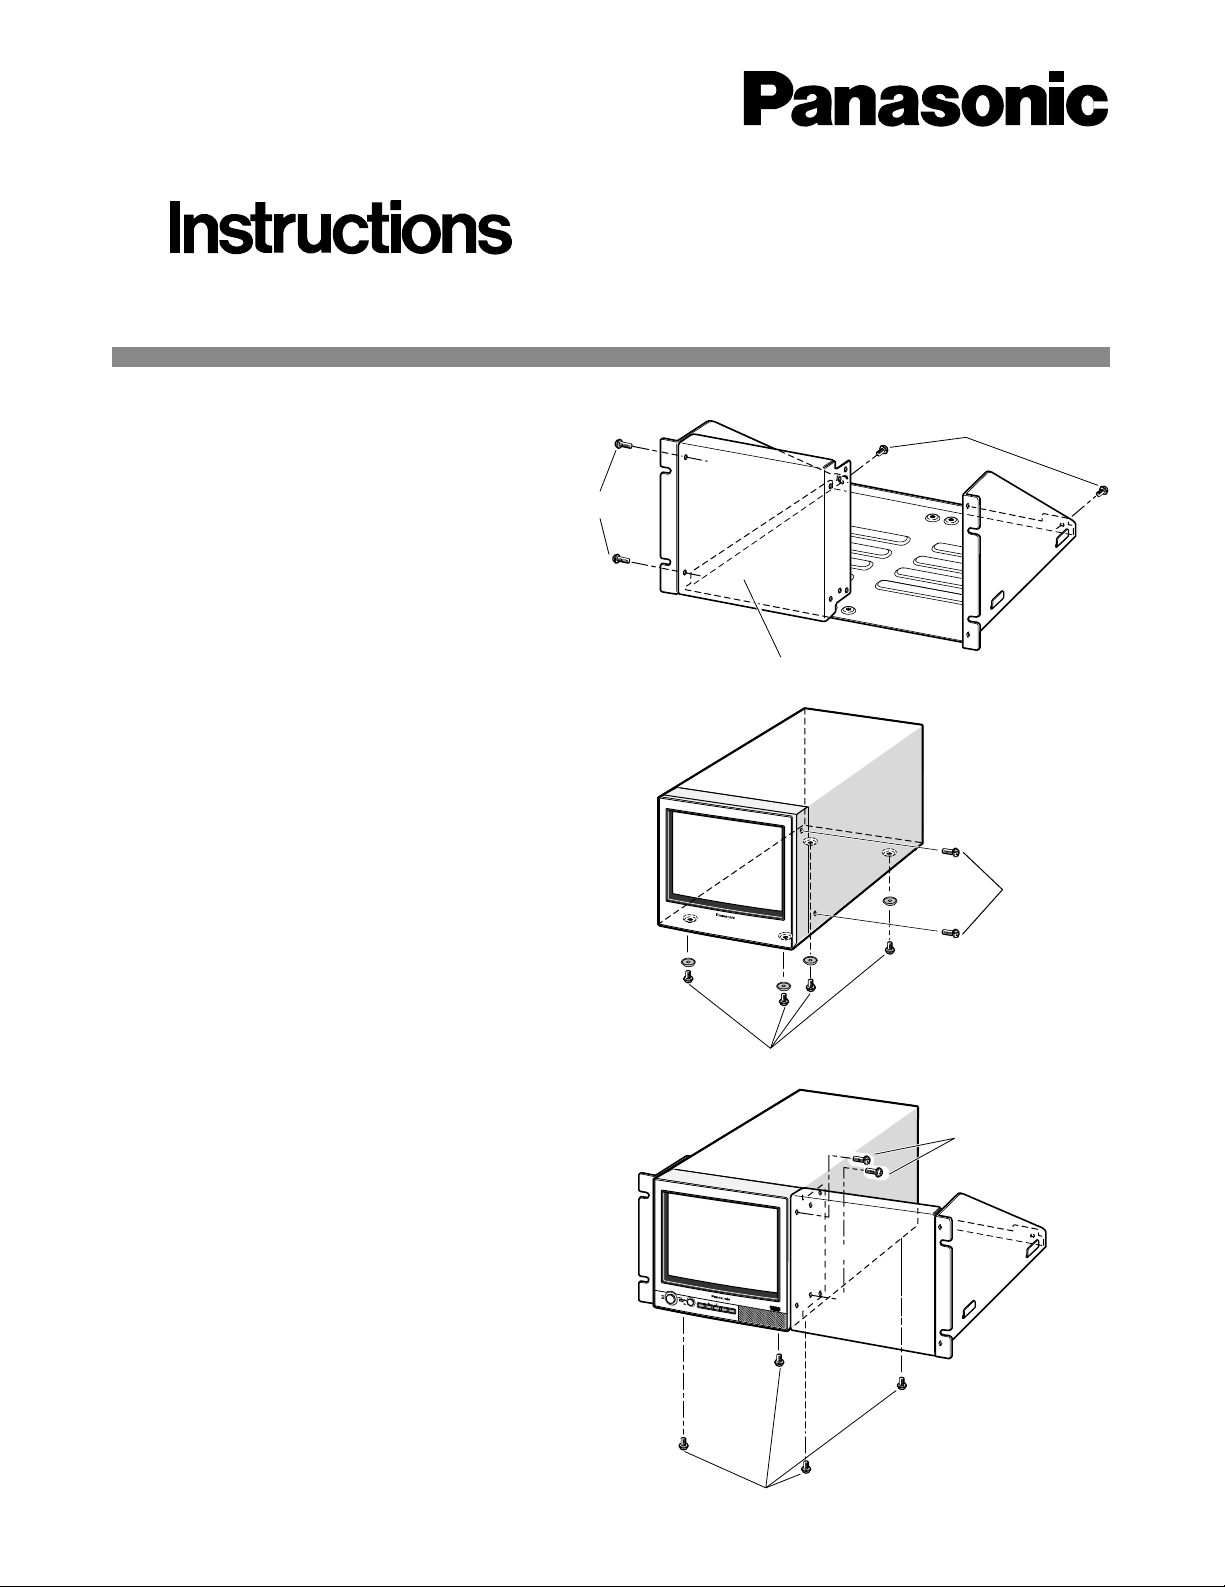
1. In case of mounting the monitor on the right side.
Before attempting to connect or install this product,
please read these instructions carefully and save this manual for future use.
Rack Mount Bracket
Model No.
WV -Q52AE
Illustrations as shown below are examples mounting the
monitor on the left side.
2. Remove the four rubber feet by removing the four
screws on the bottom and the screw-(A) from the
WV-CM1020 Video Monitor.
M4x6
M3x8
Blank panel
A
B
Remove rubber feet.
Screw-(A)
O
N
A
B
O
F
F
P
O
W
E
R
IN
PU
T
M
E
N
U
–+
AU
D
IO
Video Monitor WV-CM
(M3x8)
(M3x8)
3. When mounting the monitor on the rack mount chassis, fix the monitor to the blank panel with M3x8
screws. Use four M3x8 screws to fix the monitor on
the chassis.
Note: In case of mounting two monitors, it is unneces-
sary mounting to the blank panel.
O
N
A
B
O
F
F
POWER INPUT
MENU
– +
AUDIO
Video
Monitor
WV-CM
Nut (not provided)
Rack mount screws
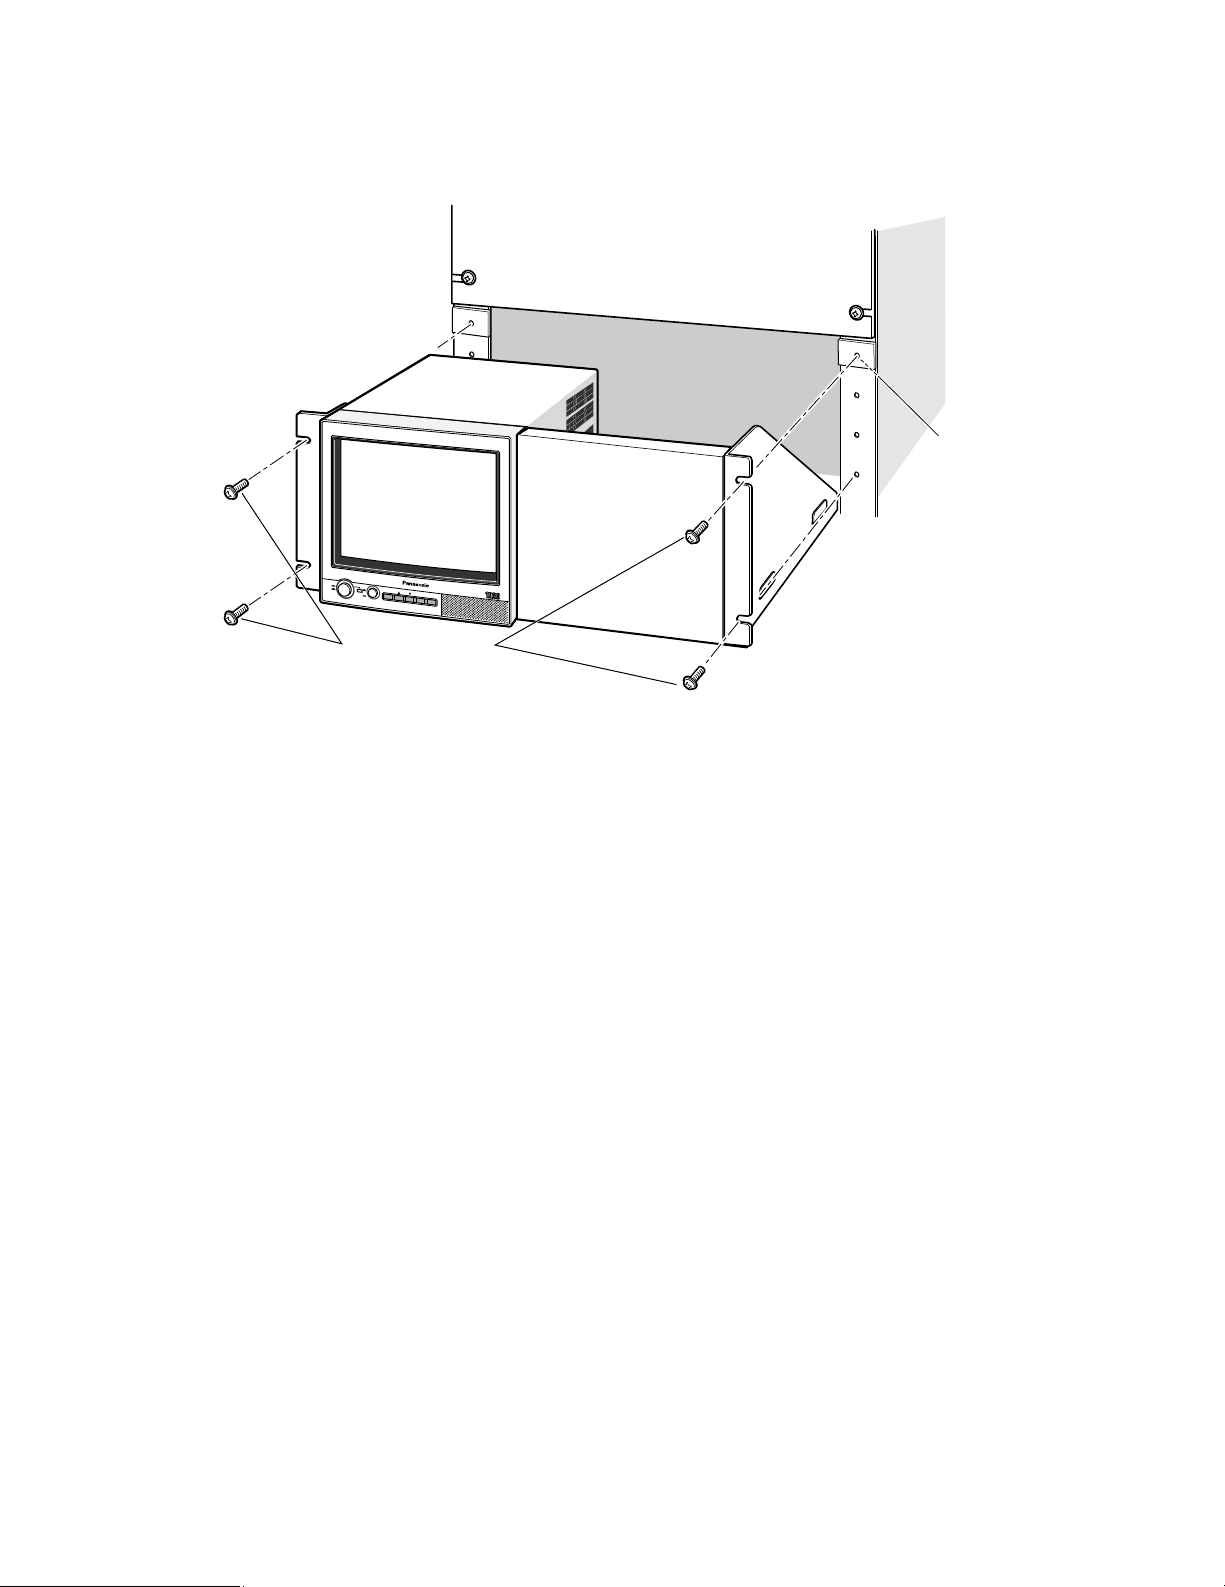
■Monitor Installing on the Rack
Install the rack mount chassis with monitor on the rack using four screws.
■Specifications
Dimensions: 480(W) x 221(H) x 308(D) mm
[18-7/8”(W) x 8-11/16”(H) x 12-1/8”(D)]
Weight: 2.7 kg (6 lbs)
Weight and dimension indicated are approximate.
Specifications are subject to change without notice.
■Standard Accessories
Screws for M4x6 ................................................... 2 pcs.
Screws for M3x8 ................................................... 8 pcs.
NM1099-0 YWV8QA5298AN Printed in Japan
N 19
Matsushita Electric Industrial Co., Ltd.
Central P.O. Box 288, Osaka 530-91, Japan
Cautions:
• Do not block the ventilation opening or slots in the cover to prevent the appliance from overheating.
Always keep the temperature in the rack within +50°C (122°F).
• Secure the rear of the appliance to the rack by using additional mounting bracket (procured locally), if the rack is sub-
ject to vibration.
 Loading...