

Panasonic WV-Q175E, WV-Q175 Operating Instructions Manual
Before attempting to connect or operate this product,
please read these instructions carefully and save this manual for future use.
The model number is abbreviated in some descriptions in this manual.
Operating Instructions
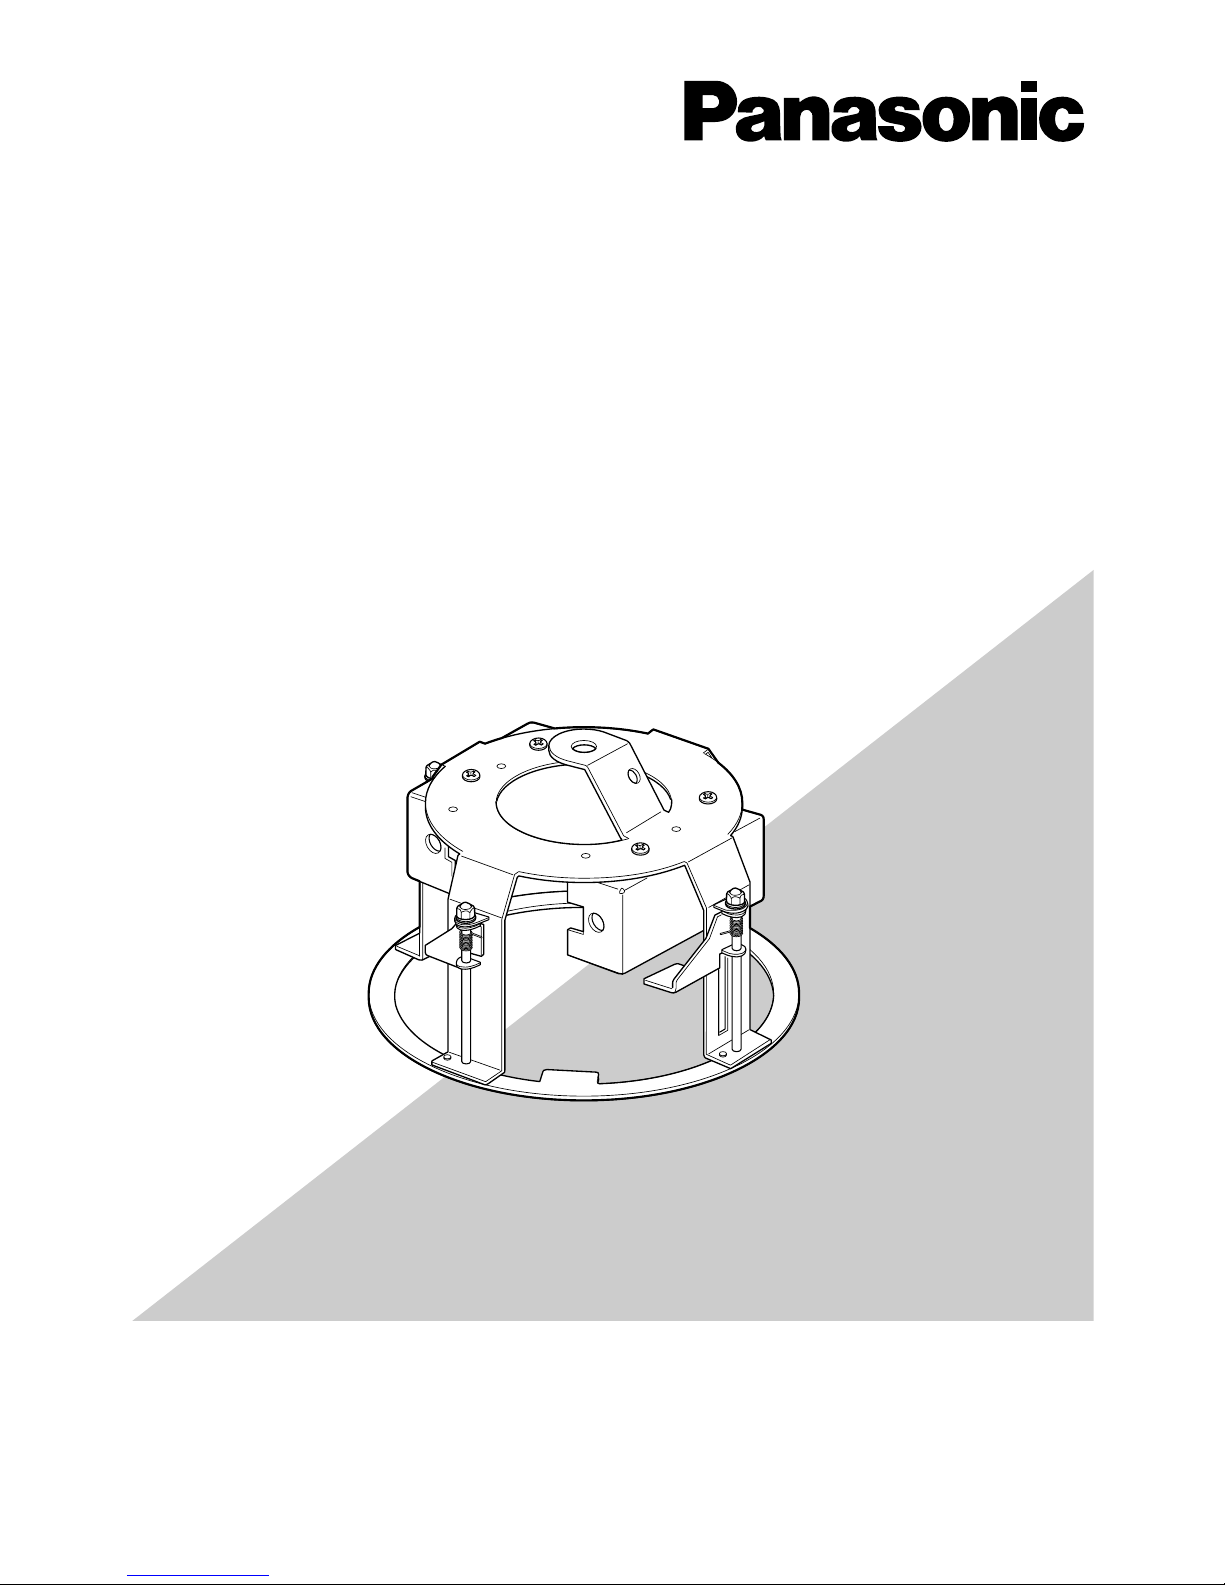
Ceiling Mount Bracket
Model No. WV-Q175
WV-Q175E

2
CONTENTS
Preface ..........................................................................................................................................3
Precautions ...................................................................................................................................3
Major operating controls and their functions .................................................................................5
Installations ...................................................................................................................................5
Specifications ..............................................................................................................................10
Standard accessories ..................................................................................................................11
3
• Refer installation work to the dealer.
Installation work requires technique and experiences. Failure to observe this may cause
fire, electric shock, injury, or damage to the product.
• Be sure to consult the dealer.
• Use only the specified camera.
Failure to observe this may cause a fall of an inappropriate camera resulting in injury or
accidents.
• Refer to the catalog or the operating instructions of the camera for supported cameras.
• Select an installation area.
If a selected area is too weak to support the total weight, a fall of the product may occur
resulting in injury.
• Installation work shall be started after sufficient reinforcement.
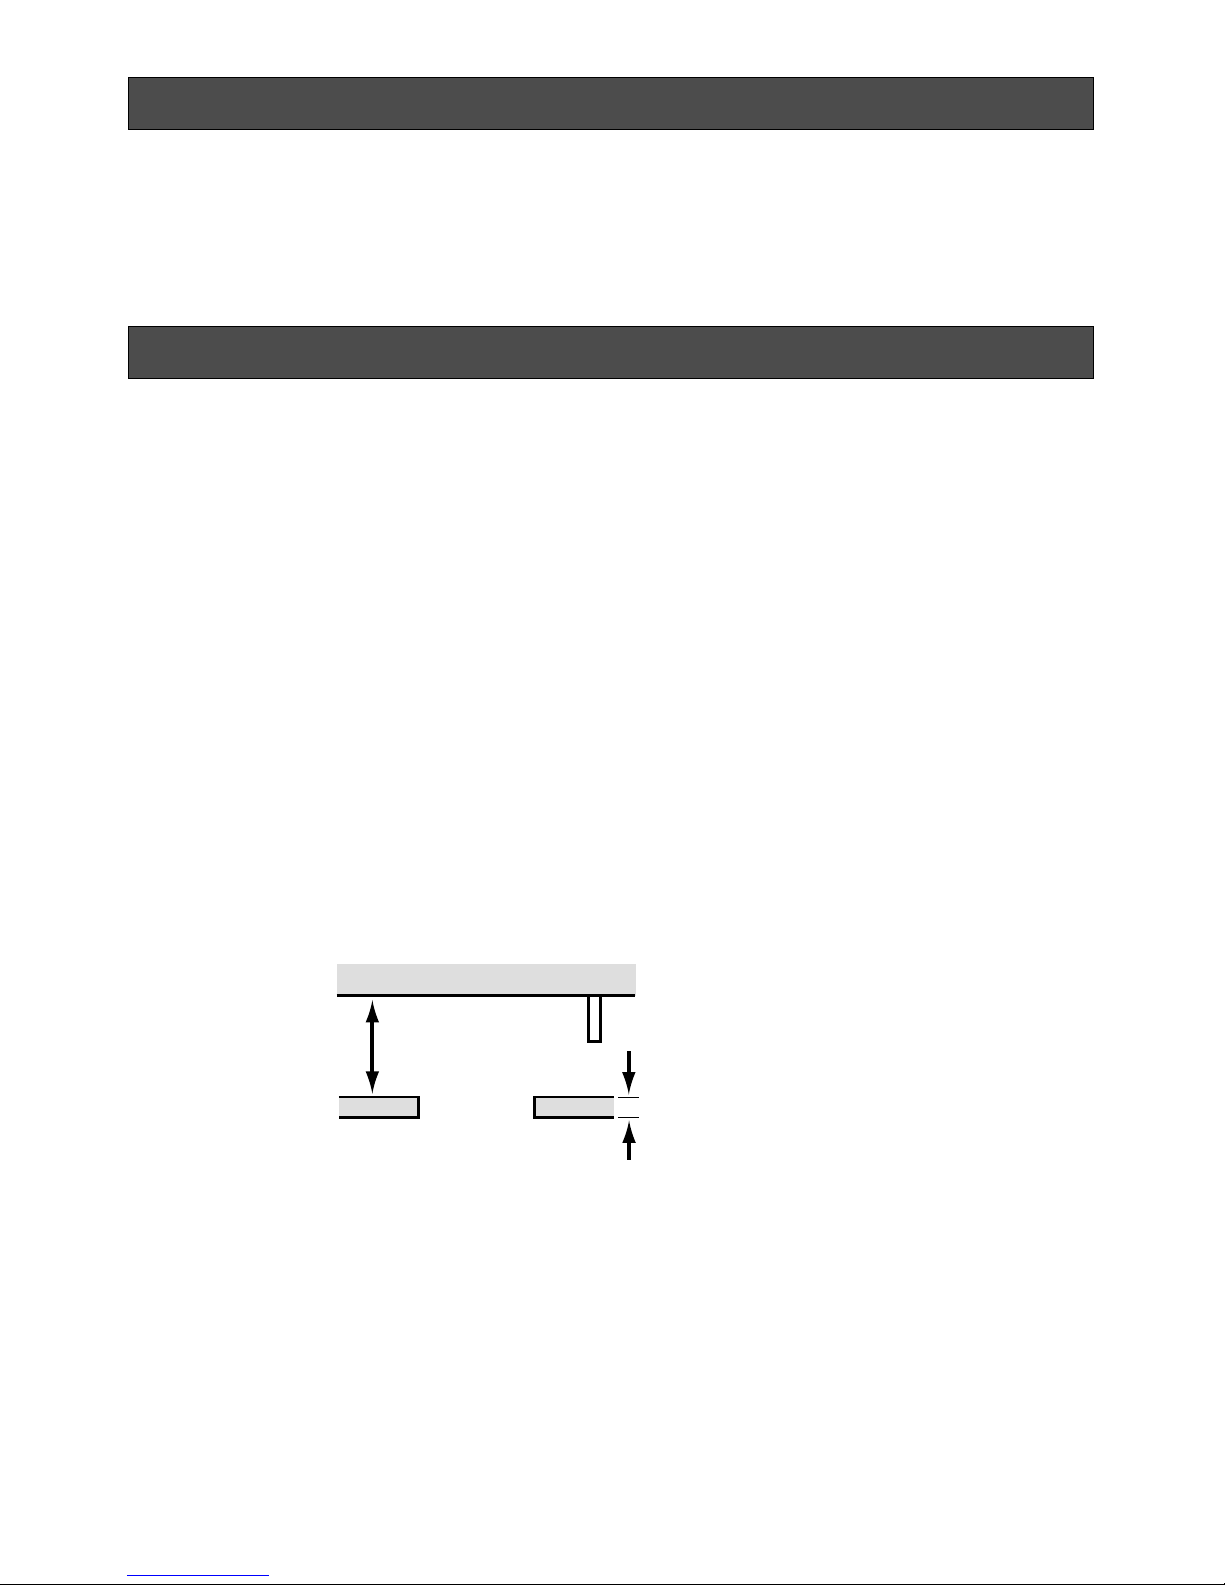
• The installation area shall have 210 mm {8-1/4 inches} or more space behind the ceiling.
• The thickness of the ceiling board for installation can range from 9 mm to 40 mm {3/8
inches to 1-9/16 inches}.
• Avoid installing this bracket in the locations where salt damage occurs or corrosive
gas is produced.
Otherwise, the mounting portions will deteriorate and accidents such as a fall of the camera
may occur.
• The screws and fixation mechanisms shall be tightened securely.
Failure to observe this may cause a fall of the camera resulting in injury.
• Periodic inspections shall be conducted.
Rust on the metal parts or screws may cause a fall of the product resulting in injury.
• Consult the dealer for the inspections.
210 mm {8-1/4 inches}
or more
Ceiling board: from 9 mm to 40 mm
{3/8 inches to 1-9/16 inches}
Precautions
Preface
This ceiling embedded bracket is exclusively designed to mount a color CCTV camera or a network camera. Refer to the catalog or the operating instructions of the camera for supported
cameras.
This bracket is an embedded type to reduce the exposed portion of the camera body.

4
• Do not rub the edges of metal parts with your hand.
Failure to observe this may cause injury.
• Make sure that the installation area is strong enough to hold the total weight of the camera
assembly before installation.
• The camera and the ceiling mount bracket should be fixed using the provided fixing
screws, and make sure that the both of them are fixed firmly.
• When the ceiling mount bracket is not necessary anymore, remove from the ceiling.
• Avoid installing in the following locations.
• Locations where it may get wet from rain or water splash (not only outdoor)
• Locations where a chemical agent is used such as a swimming pool
• Locations subject to steam and oil smoke such as a kitchen
• Locations where radiation or x-ray emissions are produced
• Locations where it may be damaged by briny air such as seashores
• Locations where the temperature is not within the ambient temperature of the camera in
use and this product
• Locations subject to vibrations (This product is not designed for on-vehicle use.)
• Locations where the temperature may rapidly change such as the peripheral areas of
the air outlets of air conditioners or doors facing outside. (In case of installing the camera in such locations, the dome cover may become foggy or condensation may be
caused on the cover.)
• The screws and bolts must be tightened with an appropriate tightening torque according to
the material and strength of the installation area. After tightening the screws or bolts, perform visual check to ensure tightening is enough and there is no backlash.
 Loading...