

Panasonic WJ-RT416K, WJ-RT416V, WJ-RT416VK, WJ-RT416/G, WJ-RT416K/G Network Operating Instructions
...
Digital Disk Recorder
Network Operating Instructions
Model No. WJ-RT416 Series
E
R
R
O
R
SEQ
U
EN
C
E
S
E
T
UP
ESC
SEARCH
CO
P
Y
ST
O
P
PLA
Y
PA
U
S
E
RE
C
R
EC STOP
S
E
T
H
D
D
1
2
3
1
2
3
4
5
6
7
8
9
1
0/0
11
1
2
1
3
1
4
15
16
4
5
6
A
LAR
M
M
U
L
T
I
S
C
R
E
E
N
T
IME
R
A
LA
R
M
R
E
S
E
T
O
PER
A
TE
REV
FWD
SK
I
P
Digital Disk Recorder
WJ-
RT
4
16
Before attempting to connect or operate this product,
please read these instructions carefully and save this manual for future use.
The model number is abbreviated in some descriptions in this manual.
WJ-RT416 is shown above.
This manual covers the models: WJ-RT416K, WJ-RT416V, WJ-RT416VK, WJ-RT416/G, WJ-RT416K/G, WJ-RT416V/G
and WJ-RT416VK/G.

2
CONTENTS
Limitation of Liability ................................................................ 3
Disclaimer of Warranty ............................................................ 3
Preface .................................................................................... 4
Monitoring software ............................................................... 4
Web browser ......................................................................... 4
About These Operating Instructions ...................................... 5
System Requirements for a PC ............................................. 5
Trademarks and Registered Trademarks .............................. 6
Abbreviations ......................................................................... 6
MPEG-4 Visual patent portfolio license ................................. 6
Operation using the Monitoring Software ................................ 7
Installation ............................................................................. 7
Uninstallation of the monitoring software .............................. 7
Start the RT4Client ................................................................ 8
Operation window .................................................................. 8
Image display area ................................................................ 8
Area selection buttons ........................................................... 8
Multi-screen selection buttons ............................................... 8
Status display area ................................................................ 8
Error/alarm display area ........................................................ 9
Recorder control buttons ....................................................... 9
System control buttons .......................................................... 9
Time and date display area ................................................... 10
Recorder information display area ........................................ 10
Settings relating to the connection with the recorder ............... 12
Configure the Network Settings ............................................... 13
Configure the network settings of the recorder ..................... 13
Configure the network settings of a PC ................................. 13
Monitor Live Images ................................................................ 16
Switch the image display area between a 1-screen
and a multi-screen ................................................................. 17
Check the status of the camera ............................................. 17
Temporarily change color of text displayed in the
image display area ................................................................ 18
Control the cameras .............................................................. 18
Disconnect the connection with camera ................................ 18
Login to the recorder ................................................................ 19
Play recorded images on the recorder ..................................... 20
Play recorded images from the search result window
displayed after searching with the designated search filters
(List Search Playback) .......................................................... 20
Play recorded images from the search result window
displayed after searching by designating the start time of
recording (Time & Date Search Playback) ............................ 22
Stop playback ........................................................................ 23
Control panel ........................................................................... 25
Display the control panel ....................................................... 25
Close the control panel .......................................................... 25
Save the image currently being displayed on the PC ............ 25
Capture the images currently being displayed ...................... 26
Muting audio .......................................................................... 26
Display images from the camera on a full screen ................. 26
Control the cameras .............................................................. 27
Operations during playback ................................................... 29
Other available operations when displaying live images ......... 30
Frame display ........................................................................ 30
Sequential display ................................................................. 32
Favorite Display ..................................................................... 33
Map display ........................................................................... 34
Recorder operation .................................................................. 35
Configuration of the settings of the recorder
System Setup (Setup – System Setup) ................................. 35
Recording/Event Setup (Setup – Recording/Event Setup) .... 36
Communication Setup (Setup – Communication Setup) ....... 36
Check of each log of the recorder (Log) ................................ 40
Check of the system information and disk information of the
recorder (Information) ............................................................ 41
Start/stop of the manual recording using this software
(Manual Rec. Control) ........................................................... 41
Determination whether to enable or disable the alarm
output from the AUDIO IN/ALARM OUT terminal on the
rear of the recorder (Alarm Output Control) .......................... 42
Reboot of the recorder (Maintenance – Reboot) ................... 42
Download/upload of the setup data from/to the recorder
Setup Data Download/Upload (Maintenance – Setup Data
Download/Upload) ................................................................. 43
Download/upload of the language data from/to the recorder
Language Data Download/Upload (Maintenance – Language
Data Download/Upload) ........................................................ 44
Download/upload of the mail template (Maintenance - Mail
Template Download/ Upload) ................................................ 45
Upload web data to the recorder ........................................... 46
Firmware update of the recorder Firmware Update
(Maintenance – Firmware Update) ........................................ 46
Download recorded images from the recorder ...................... 47
Remote Talk .......................................................................... 48
Configure the settings of the monitoring software
(Monitor System Config) .......................................................... 49
Recorder Setup (Monitor System Config –
Recorder Setup) .................................................................... 49
My Favorite Display Setup (Monitor System Config –
My Favorite Display Setup) ................................................... 51
Sequential Display Setup (Monitor System
Config – Sequential Display Setup) ....................................... 52
Map Setup (Monitoring System Config – Map Setup) ........... 53
Advanced Setup (Monitoring System Config – Advanced
Setup) .................................................................................... 55
Monitor System Version ........................................................ 56
Language .............................................................................. 56
Playback downloaded recorded images using the
RT4Viewer ............................................................................... 57
Start the RT4Viewer .............................................................. 57
Playback downloaded recorded images ................................ 59
Search and play .................................................................... 60
Alteration check ..................................................................... 61
Convert the file format ........................................................... 62
Operation using the Web Browser ........................................... 63
Configure the Network Settings ............................................. 63
Configure the network settings of the recorder ..................... 63
Configure the network settings of a PC ................................. 63
Display the operation window ................................................. 64
Operation window .................................................................. 66
Image display area ................................................................ 66
Area selection buttons ........................................................... 66
Multi-screen selection buttons ............................................... 66
Login Control ......................................................................... 66
Language .............................................................................. 66
Monitor Live Images ................................................................ 67
Switch the image display area between a 1-screen
and a multi-screen ................................................................. 69
Temporarily change color of text displayed in the
image display area ................................................................ 69
Control the cameras .............................................................. 69
Disconnect the connection with camera ................................ 70
Login to the recorder ................................................................ 72
Play recorded images on the recorder ..................................... 73
Play recorded images from a result list displayed after
searching with the designated search filters (List Search
Playback) ............................................................................... 73
Play recorded images from the search result window
displayed after searching by designating the start time of
recording (Time & Date Search Playback) ............................ 75
Operations during playback ................................................... 76
Stop playback ........................................................................ 77
Download recorded images from the recorder ...................... 78
Language .............................................................................. 80
Notification by E-Mail ............................................................... 81
Alarm Mail Notification ........................................................... 81
Edit the contents of the mail .................................................. 81
Troubleshooting ....................................................................... 82
When using a PC on which Windows XP Service Pack2
(SP2) is installed ................................................................... 86

3
Limitation of Liability
Disclaimer of Warranty
THIS PUBLICATION IS PROVIDED "AS IS" WITHOUT WARRANTY OF ANY KIND, EITHER EXPRESS OR
IMPLIED, INCLUDING BUT NOT LIMITED TO, THE IMPLIED WARRANTIES OF MERCHANTABILITY, FITNESS
FOR ANY PARTICULAR PURPOSE, OR NON-INFRINGEMENT OF THE THIRD PARTY’S RIGHT.
THIS PUBLICATION COULD INCLUDE TECHNICAL INACCURACIES OR TYPOGRAPHICAL ERRORS.
CHANGES ARE ADDED TO THE INFORMATION HEREIN, AT ANY TIME, FOR THE IMPROVEMENTS OF THIS
PUBLICATION AND/OR THE CORRESPONDING PRODUCT (S).
IN NO EVENT SHALL Panasonic Corporation BE LIABLE TO ANY PARTY OR ANY PERSON, EXCEPT FOR CERTAIN WARRANTY PROGRAM OFFERED BY THE LOCAL DEALER OF PANASONIC, FOR THE CASES INCLUDING BUT NOT LIMITED TO BELOW:
(1) ANY DAMAGE AND LOSS, INCLUDING WITHOUT LIMITATION, DIRECT OR INDIRECT, SPECIAL, CONSE-
QUENTIAL OR EXEMPLARY, ARISING OUT OF OR RELATING TO THE PRODUCT;
(2) PERSONAL INJURY OR ANY DAMAGE CAUSED BY INAPPROPRIATE USE OR NEGLIGENT OPERATION
OF THE USER;
(3) UNAUTHORIZED DISASSEMBLE, REPAIR OR MODIFICATION OF THE PRODUCT BY THE USER;
(4) ANY PROBLEM, CONSEQUENTIAL INCONVENIENCE, OR LOSS OR DAMAGE, ARISING OUT OF THE SYS-
TEM COMBINED BY THE DEVICES OF THIRD PARTY.

4
Preface
The Digital Disk Recorder WJ-RT416 is designed for use within a surveillance system. The digital disk recorder is a
recording device using a hard disk drive to record pictures of surveillance cameras instead of using videotapes so
that pictures recorded by repeated overwriting will not experience deterioration of the recorded picture quality.
Up to 16 cameras can be connected directly with this unit and it is possible to record images from them. It is also
possible to display images from multiple cameras (multi-screen), to display images from a camera to camera
sequentially (sequential display), and to operate the connected cameras using the recorder.
Configuration of the settings of the recorder can be made using the monitoring software, and operation of the
recorder can be made using the monitoring software and a web browser.
The following models are described as "WJ-RT416" in these operating instructions.
• WJ-RT416K: No built-in HDD is provided
• WJ-RT416: Built-in HDD x1
• WJ-RT416VK: Built-in DVD drive x1, no built-in HDD is provided
• WJ-RT416V: Built-in DVD drive x1, built-in HDD x1
Monitoring software
The monitoring software consists of the following.
RT4Client
The principal functions of the monitoring software can be operated using the RT4Client. To use the monitoring software, start the RT4Client first.
The following are the functions of the RT4Client.
• Displaying of live images from the cameras (normal display, frame display, sequential display)
• Control of the cameras (setup, operation)
• Playback of recorded images on the recorder
• Configuration of the settings of the recorder
• Operation of the recorder
• Reception of an event occurrence notification from the recorder and displaying of images recorded by the alarm
recording
• Download of recorded images on the recorder
• Download of data from the recorder (log, language file, setup data, etc.)
• Upload of data to the recorder (language file, firmware, setup data, etc.)
• Remote talk
RT4Viewer
Recorded images downloaded on the HDD of the PC can be played using the RT4Viewer. The RT4Viewer can start
using the interface of the RT4Client.
The functions of the RT4Viewer:
• Playback of downloaded recorded images
• Alteration check of data
• File conversion to Windows Media format
Web browser
The following are available functions using a web browser.
• Displaying live images from the cameras
• Control of the cameras (panning/tilting, zooming, focusing, moving the camera to the preset position, etc.)
• Playback of recorded images on the recorder
• Download of recorded images on the recorder

5
About These Operating Instructions
There are 2 sets of operating instructions for the WJ-RT416 as follows.
• Network Operating Instructions (PDF) (this document)
• Installation Guide (book)
These "Network Operating Instructions" contain descriptions of how to configure the required settings to operate the
recorder and descriptions for how to operate the recorder using a PC via a network (operating a web browser or the
monitoring software).
Refer to the "Installation Guide" for descriptions about installation/connection, and descriptions of how to operate the
recorder using the buttons on the front panel of the recorder.
Adobe®Reader®is required to read these operating instructions (PDF) on the provided CD-ROM. When the Adobe
®
Reader is not installed on the PC, download the latest Adobe®Reader from the Adobe web site and install it.
The illustrations of the setup menus in these operating instructions are of the NTSC model.
System Requirements for a PC
It is recommended to install this software on a PC that meets the following system requirements. If installing on a PC
that does not meet the following system requirements, it may cause problems such as slow imaging or the software
becomes inoperable.
OS Microsoft®Windows®XP Professional SP2*
Microsoft®Windows®XP Home Edition SP2*
*: Tested and confirmed full compatibility with the English edition. Full compatibility
with other language editions cannot be guaranteed.
Computer IBM PC/AT Compatible
CPU Pentium®4 3.0 GHz or faster
Memory 512 MB or more
Graphic memory 256 MB or more
Display driver Overlay compatible
Monitor 1 024 x 768 pixels or more, 24-bit True color or better
Network Interface 10/100 Mbps Network interface card must be installed
Web browser Microsoft®Internet Explorer®6.0 SP2
Plug-in Microsoft®Windows Media®Player 9 Series or later
Others DirectX®8.0a or later
CD-ROM Drive: It is necessary to read the operating instructions and use the software on the provided CD-ROM.
Adobe®Reader®: It is necessary to read the operating instructions on the provided
CD-ROM.
Notes:
• When the graphic memory is less than 32 MB, the monitoring software can access only four camera channels
concurrently. (When the graphic memory is less than 64 MB, the monitoring software can access only six camera
channels concurrently.)
• When the overlay control is not enabled for the display driver, the monitoring software may not start.
• The monitoring software may not start depending on the version of the display driver. In this case, upgrade the
display driver to the latest version.

6
Trademarks and Registered Trademarks
• Adobe and Reader are either registered trademarks or trademarks of Adobe Systems Incorporated in the United
States and/or other countries.
• Microsoft, Windows, Windows Media, Windows Media Player and DirectX are either registered trademarks or
trademarks of Microsoft Corporation in the United States and/or other countries.
• Intel and Pentium are trademarks of Intel Corporation.
• Other names of companies and products contained in these operating instructions may be trademarks or registered trademarks of their respective owners.
• DVD is trademark of DVD Format/Logo Licensing Corporation.
Abbreviations
The following abbreviations are used in these operating instructions.
Microsoft®Windows®XP Professional SP2 and Microsoft®Windows®XP Home Edition SP2 are described as
Windows XP.
MPEG-4 Visual patent portfolio license
This product is licensed under the MPEG-4 Visual patent portfolio license for the personal and non-commercial use
of a consumer for (i) encoding video in compliance with the MPEG-4 Visual Standard ("MPEG-4 Video") and/or (ii)
decoding MPEG-4 Video that was encoded by a consumer engaged in a personal and non-commercial activity
and/or was obtained from a video provider licensed by MPEG LA to provide MPEG-4 Video. No license is granted or
shall be implied for any other use. Additional information including that relating to promotional, internal and commercial uses and licensing may be obtained from MPEG LA, LLC.
See http://www.mpegla.com.

7
Operation using the Monitoring Software
Installation
Step 1
Insert the provided CD-ROM into the CD-ROM drive of the PC.
Step 2
Double-click "Setup.exe" on the CD-ROM.
→ The install program will be launched and the wizard will be displayed.
Step 3
Install the software by following instructions displayed on the monitor.
Select the display language and the television system for "Language Type" in the process of the installation.
When starting installation after selecting the standard installation, a new folder will be created. (The directory path is
"C:\Program Files\Panasonic\RT4 Monitoring Software".) When the installation is completed, the program will be
added to the "Start" menu. The shortcut icon will also be created on the desktop.
Important:
When using Windows®XP Professional or Home Edition SP2, the "Windows Security Alert" window may be possible to be displayed.
In this case, click the "Unblock" button on the displayed "Windows Security Alert" window. When clicked the
"Block" button accidentally, do the following.
1. Click [Security Center] on the "Control Panel".
2. Click the [Exceptions] tab.
3. Check if the checkbox of the monitoring software is checked or not.
When the checkbox is checked, click the [OK] button.
Other applications and the security level may not be affected by these operations.
When this software is installed or started up, the user shall have "administrative" privileges.
Uninstallation of the monitoring software
Step 1
Open "Add or Remove Programs" in "Control Panel".
→ The "Add or Remove Programs" window will be displayed.
Step 2
Select "RT4 Monitoring Software", and then click the [Change/Remove] button.
The uninstall program will be launched and the wizard will be displayed.
8
Start the RT4Client
Step 1
Select "RT4Client" from the "Start" menu ("Start" - "All Programs" - "Panasonic" - "RT4 Monitoring Software" "RT4Client") or double-click the shortcut icon of the RT4Client on the desktop.
→ The monitoring software will start and the operation window will be displayed.
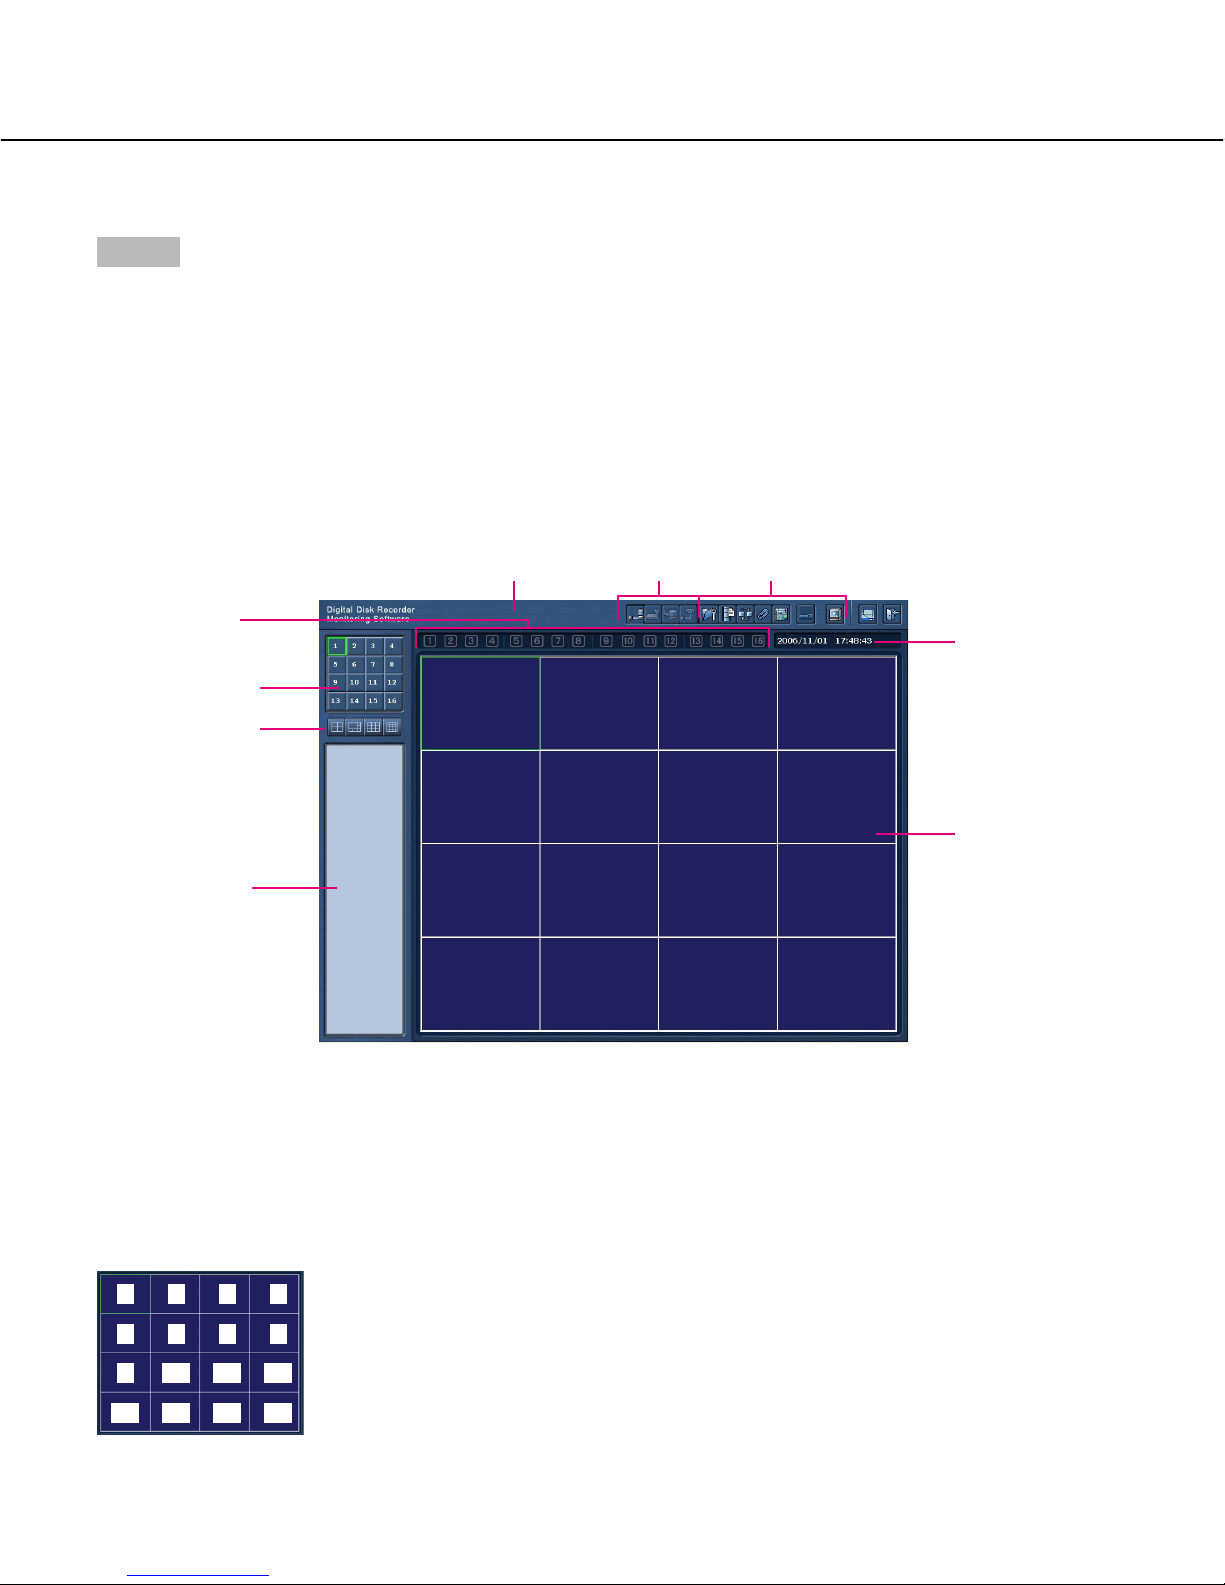
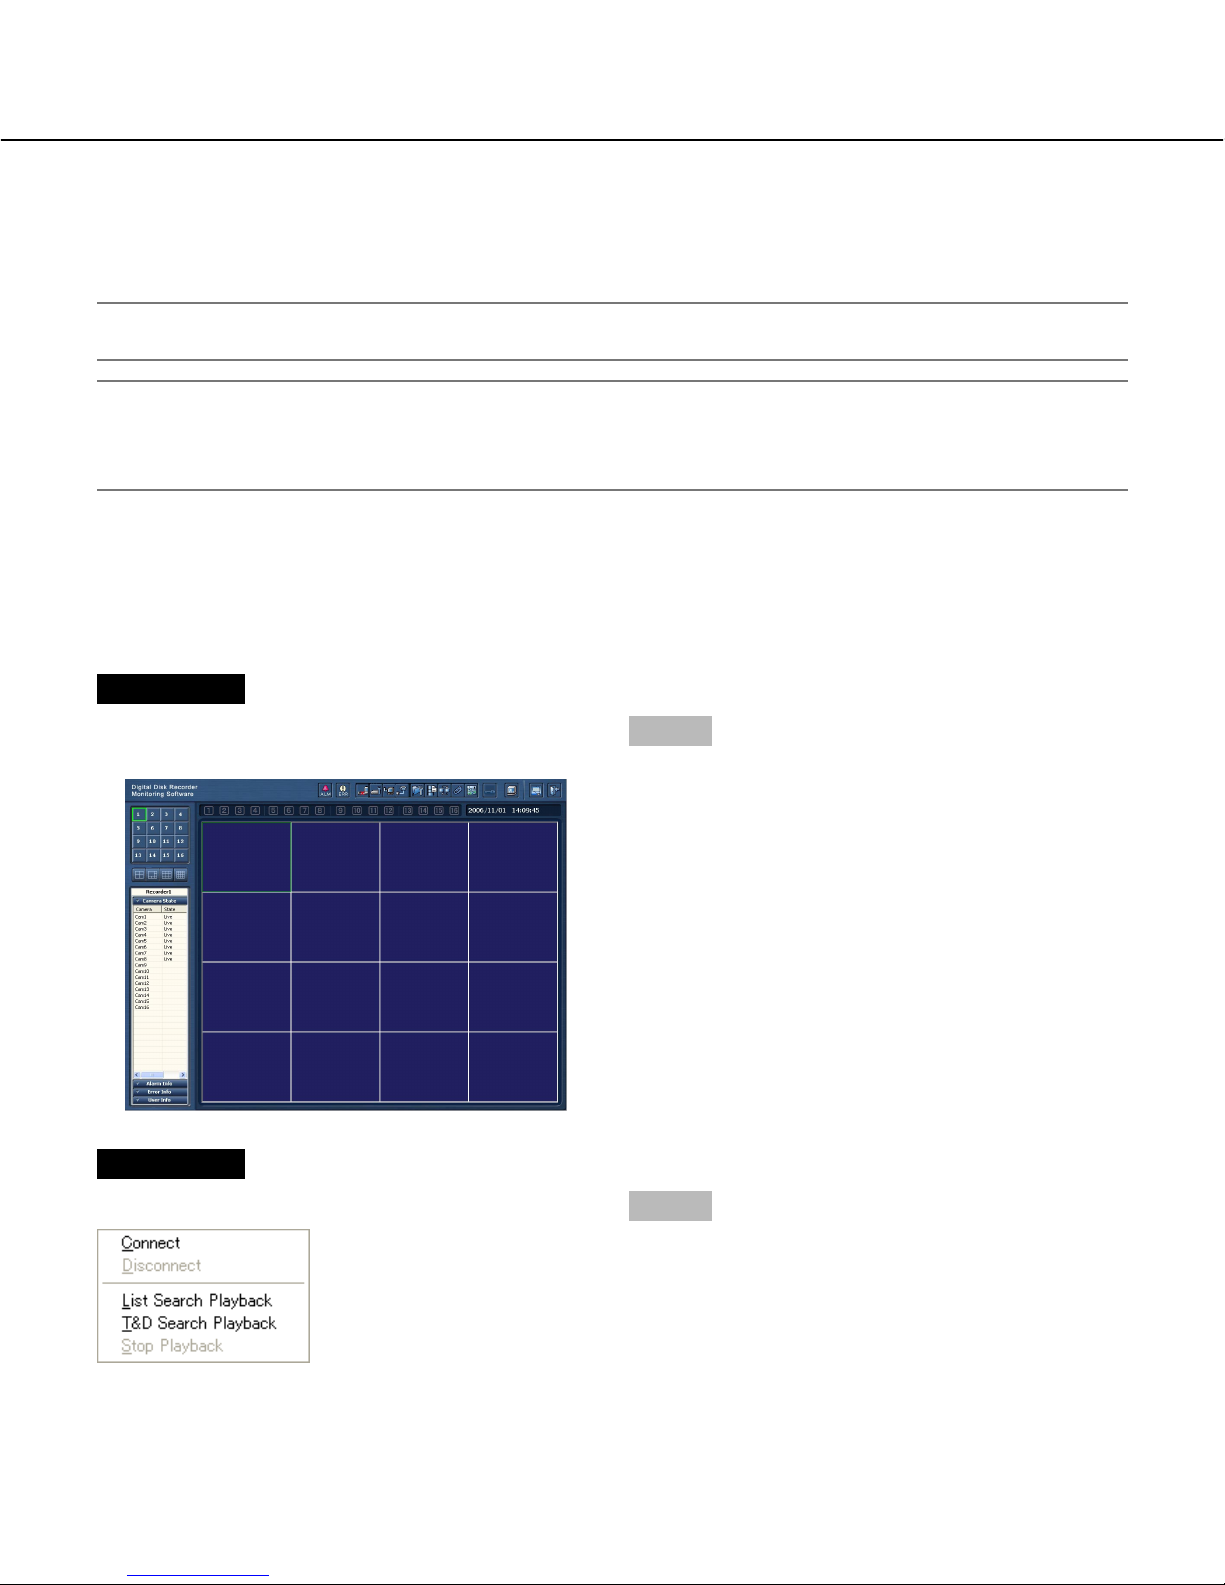
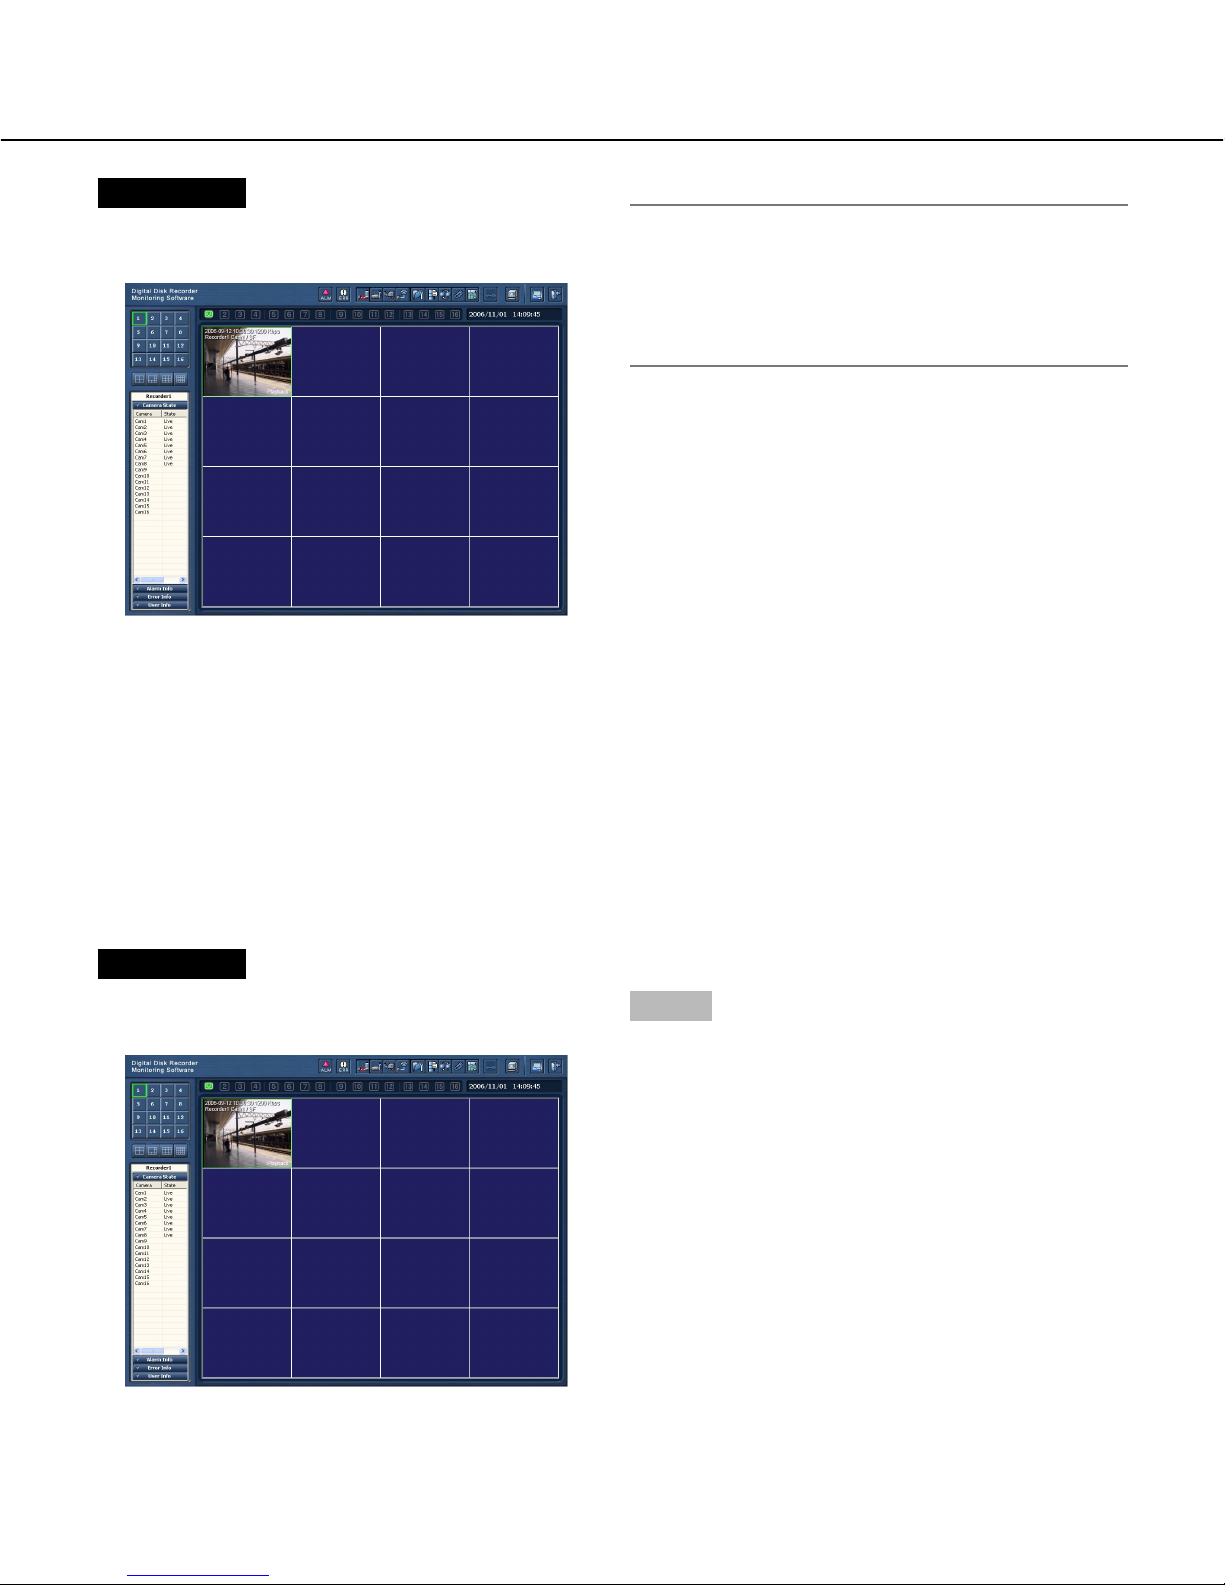
Operation window
When starting the monitoring software, the operation window will be displayed.
Image display area
Live images from the cameras and recorded images on
the recorder will be displayed in this area. The area
number is assigned as shown in the illustration below.
The selected area will be displayed with a yellow frame.
Area selection buttons
The clicked area will be displayed on a 1-screen.
(☞ page 17)
Multi-screen selection buttons
Click the desired multi-screen selection button. The
selected multi-screen will be displayed in the image display area.
Status display area
The status icons will be displayed to indicate the statuses of each area. Refer to page 17 for further information
about the status icons.
Time and date display
area
Multi-screen selection
buttons
Image display area
Recorder control buttons System control buttons
Area selection buttons
Recorder information
display area
Status display area
Error/alarm display area
1 2 3 4
5 6 7 8
9 10 11 12
13 14 15 16
9
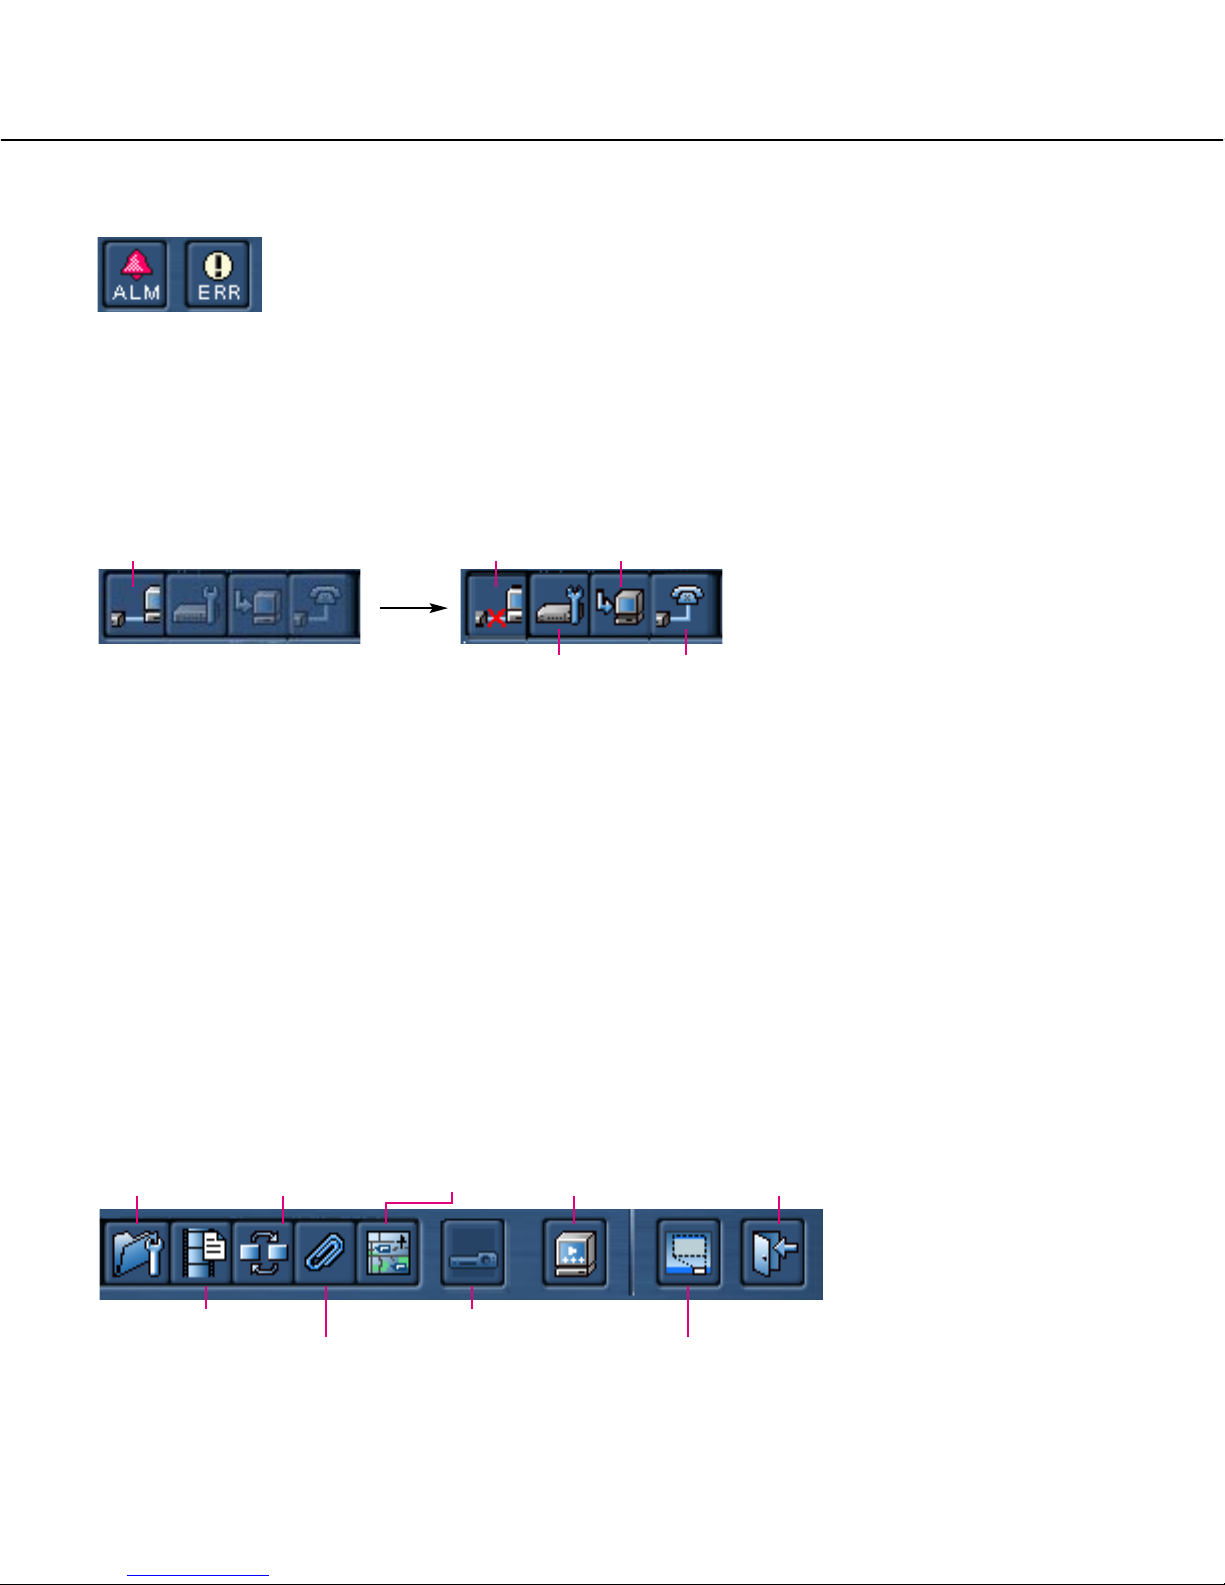
Error/alarm display area
The status of the current login recorder will be displayed with the error status icons and the alarm status icon.
When the [ALM] icon is clicked, the alarm will be reset, and the displayed icon will disappear.
Refer to the operating instructions of the recorder for further information about the alarm reset.
Recorder control buttons
Login/logout the recorder, operation of the recorder, download of recorded images and remote talk between the PC
and the recorder can be made using these buttons.
Some operations cannot be made if logged in the recorder not as "Manager". Refer to the installation guide for further information about the operation restriction differences between the user levels. Refer to page 19 for how to log
in the recorder.
The following are available using the recorder control buttons.
• Login/logout (☞ page 19)
• Configurations of the recorder (☞ page 35)
• Download of recorded images (☞ page 47)
• Remote talk (start/end) (☞ page 48)
System control buttons
Starting of each function of the monitoring software, displaying of the setup menu, etc. can be made using these buttons.
The following are available using the system control buttons.
• Configuration of the settings of the monitoring software (☞ page 49)
• Frame display (Function to display only I-Frame of MPEG-4 stream) (☞ page 30)
• Sequential display (Function to display images from a camera to camera sequentially at the interval set in
advance) (☞ page 32)
Monitor System Setup Sequential Display Map RT4Viewer Exit
Frame Display
My Favorite Display
Control Panel
Minimize
Login Logout Data Download
Recorder Config. Remote Talk
10
• Favorite display (Function to display images from the camera registered as a favorite in advance) (☞ page 33)
• Map display (Function to display images from the camera by clicking the camera icon on the map) (☞ page 34)
• Control panel (☞ page 25)
• RT4Viewer (☞ page 57)
The viewer software (RT4Viewer) that can play recorded images downloaded onto the PC will start
• Minimize
This software will be minimized to the system tray.
• Exiting of the software
This software will be closed.
Time and date display area
Time and date of the PC will be displayed.
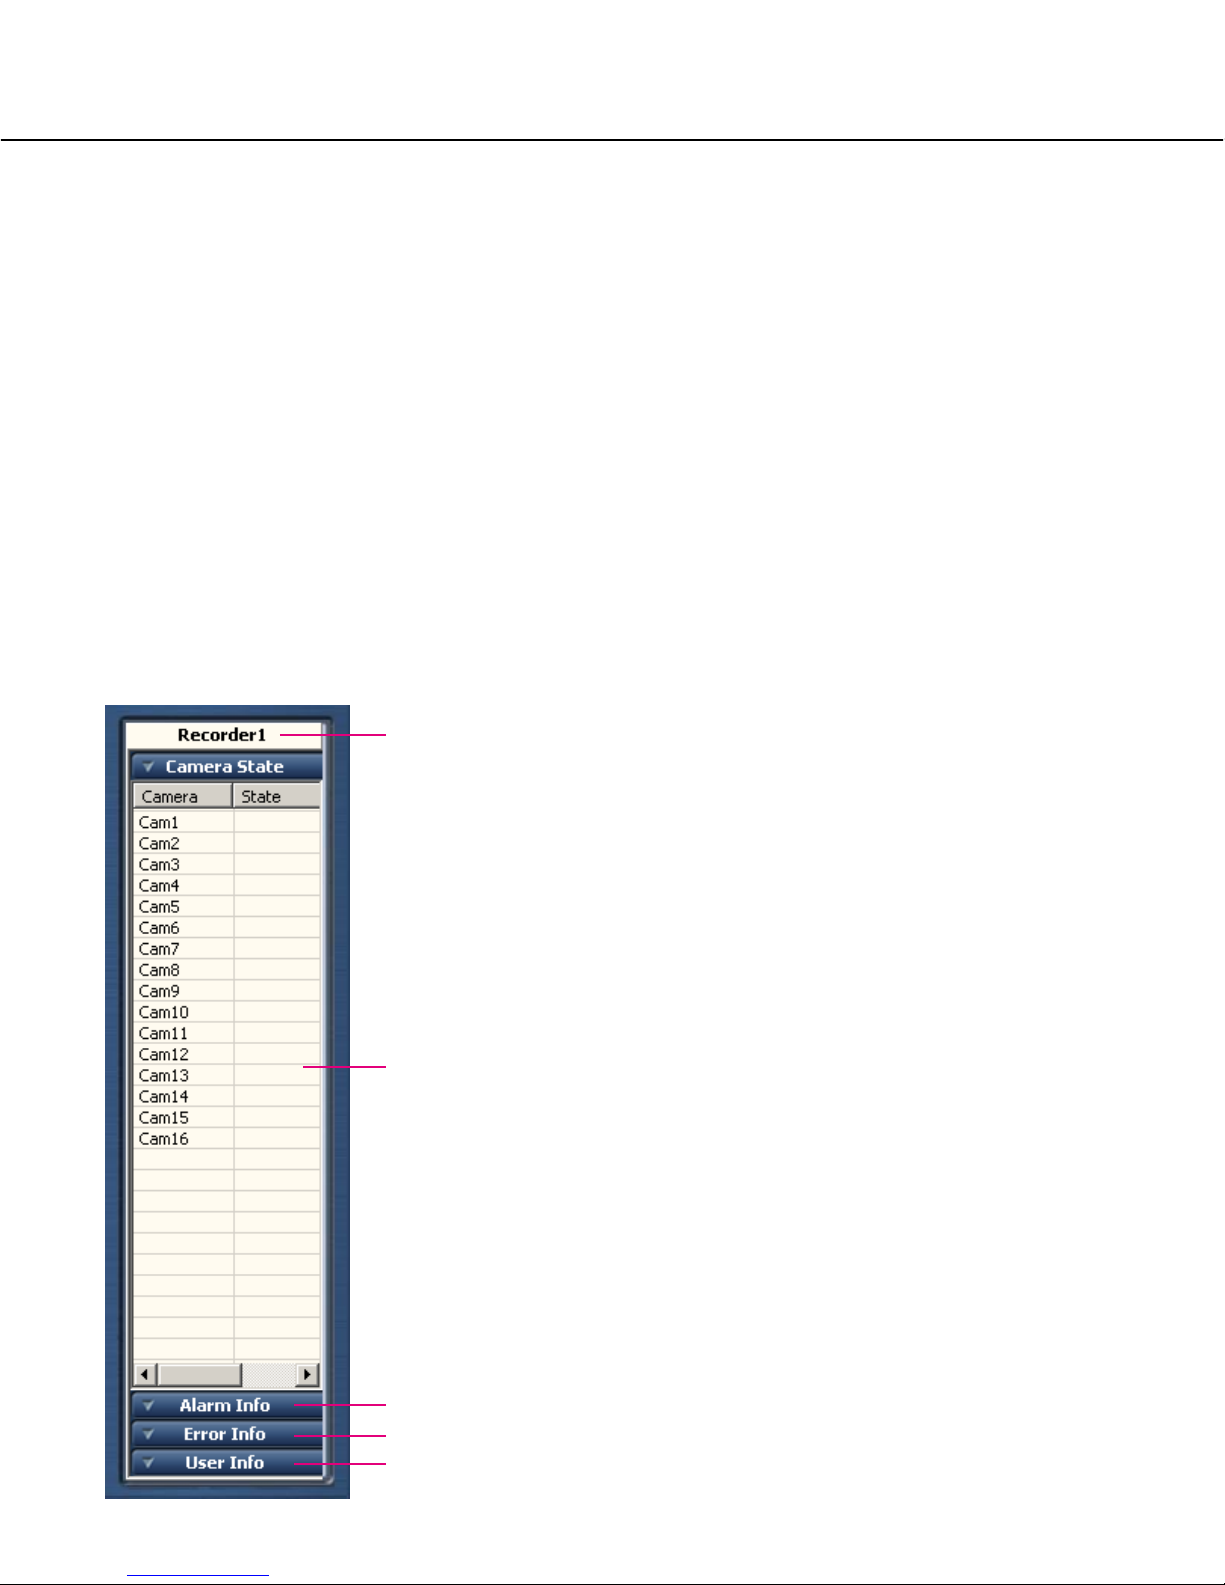
Recorder information display area
When logging in the recorder, the following recorder information will be displayed. Information of only one of the following (except the recorder name) can be displayed simultaneously. When the information title is clicked, the
respective information will be displayed.
Recorder name
Name of the current login recorder will be displayed.
Camera State
The status of the camera connected to the current login
recorder will be displayed.
• Camera (camera name)
• State (camera status)
Blank: No signal
Live: The recorder is not in the process of recording,
or not connected to a network.
Manual: The recorder is in the process of the manu-
al recording.
Timer: The recorder is in the process of the timer
recording.
Alarm: The recorder is in the process of the alarm
recording.
Monitor: The recorder is on a network.
Manual + Monitor: The recorder is in the process of
the manual recording and is also on a network.
Timer + Monitor: The recorder is in the process of
the timer recording and is also on a network.
Alarm + Monitor: The recorder is in the process of
the alarm recording and is also on a network.
Recorder name
Camera State
Alarm Info
Error Info
User Info

11
Alarm Info
History of alarm occurrences (occurred after logging in
the recorder only) of the current login recorder will be
displayed.
The display style is the same as the display style of the
alarm log of the recorder.
Error Info
History of error occurrences (occurred after logging in
the recorder only) of the current login recorder will be
displayed.
The display style is the same as the display style of the
error log of the recorder.
User Info
User information of users who is currently accessing the
recorder will be displayed.
• IP Address
• Type
Monitor: User is monitoring live images.
Control: User is being logged in the recorder using
the monitoring software.
Backup: User is downloading recorded images from
the recorder.
Talk: User is transmitting/receiving audio to/from the
recorder.
Frame: User is displaying images with the frame
display.
Netplay: User is playing recorded images on the
recorder.
• User name
• Login time
12
Settings relating to the connection with the recorder
Before operating on the operation window, configure the network settings between the PC and the recorder.
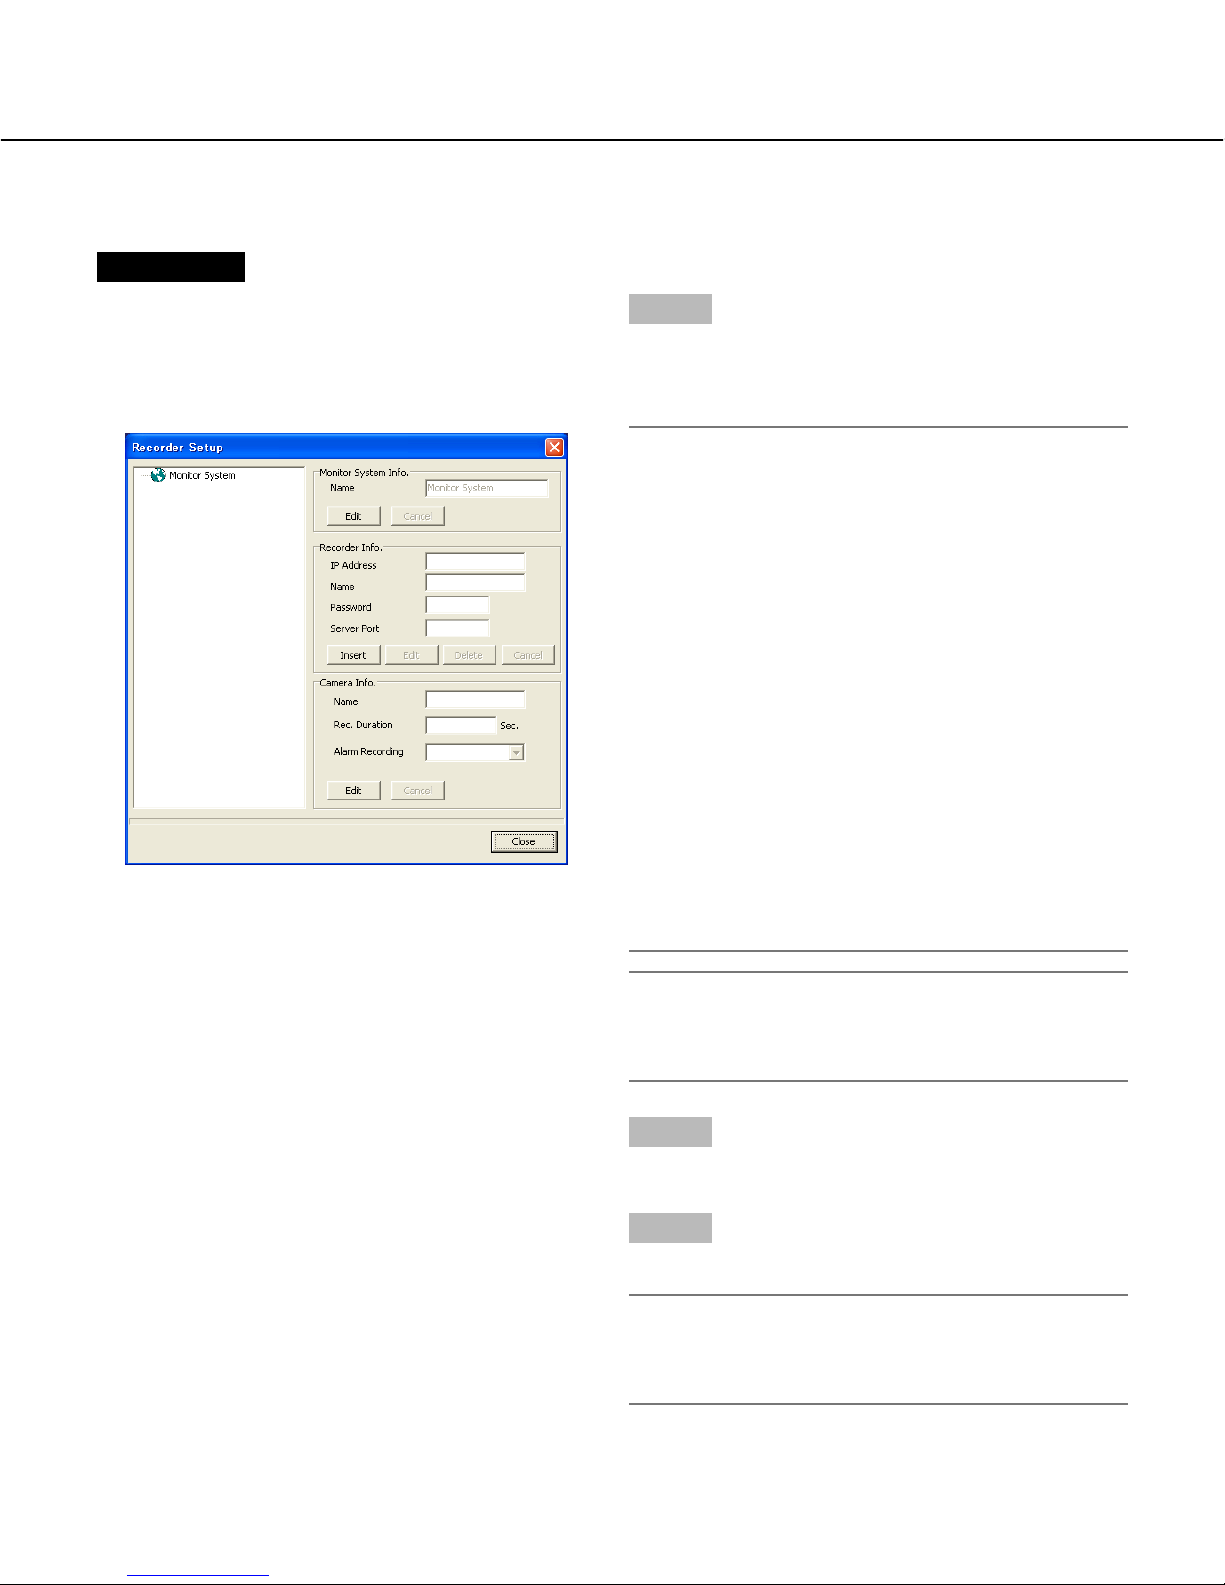
Screenshot 1
Click the [Monitor System Setup] button.
The pop-up menu will be displayed.
Select "Recorder Setup" under "Monitor System
Config".
The "Recorder Setup" window will be displayed.
Step 1
Click the [Insert] button in the "Recorder Info." section,
and then register the recorder information.
The password is arbitrary.
Important:
• Operable functions of the recorder vary depending
on the user level. Depending on the settings of the
recorder, it is possible to restrict users to monitor
images from the cameras by setting the password of
the user level "Viewer" or "Operator".
By setting the password of the user level "Viewer", it
is possible to restrict users to operate the cameras.
(Users whose user level is "Manager" can configure
the settings of the cameras.)
The default password is different according to the
user level as follows.
Manager1: 12345678
Operator1: 123456
Viewer1: 1234
• To enhance the security, change the password
before running the recorder. It is recommended to
change the password periodically. Refer to page 70
of the installation guide for how to change the password.
Notes:
• The default of "Server Port" of the recorder is
"2000", and of "IP Address" is "192.168.0.250".
• Up to 12 characters can be entered for "Name".
Step 2
Click the [OK] button.
Step 3
Click the [Close] button.
Note:
Refer to the installation guide of the recorder for further information about the connection works of the
recorder and the PC.
13
Configure the Network Settings
With the following network environment, it is not necessary to configure the network settings. It is possible to configure the settings or operate the recorder using the monitoring software after completing the connection.
IP Address: 192.168.0.2 - 192.168.0.249, 192.168.0.251 - 192.168.0.254
Subnet Mask: 255.255.255.0
Gateway Address: 192.168.0.1
When the network settings are different from the settings above, configure the network settings of the recorder and
the PC.
Configure the network settings of the recorder
Use the buttons on the front panel of the recorder to conform the network settings to the network environment of the
PC.
Refer to the installation guide of the recorder for further information about the network settings (The "Configure the
network settings [Network Setup]" section under the "Configure the settings relating to communication with other
devices [Communication Setup]" chapter in the descriptions of "Setup Menu").
Configure the network settings of a PC
Change the TCP/IP setting of the PC to conform to the settings of the recorder.
It is required to set the IP address of the PC to "192.168.0.XX (a number from 2 to 254 except 250)" to access the
recorder.
Screenshot 1
Start just after the PC is started up.
Important:
Log in to the PC as an administrator.
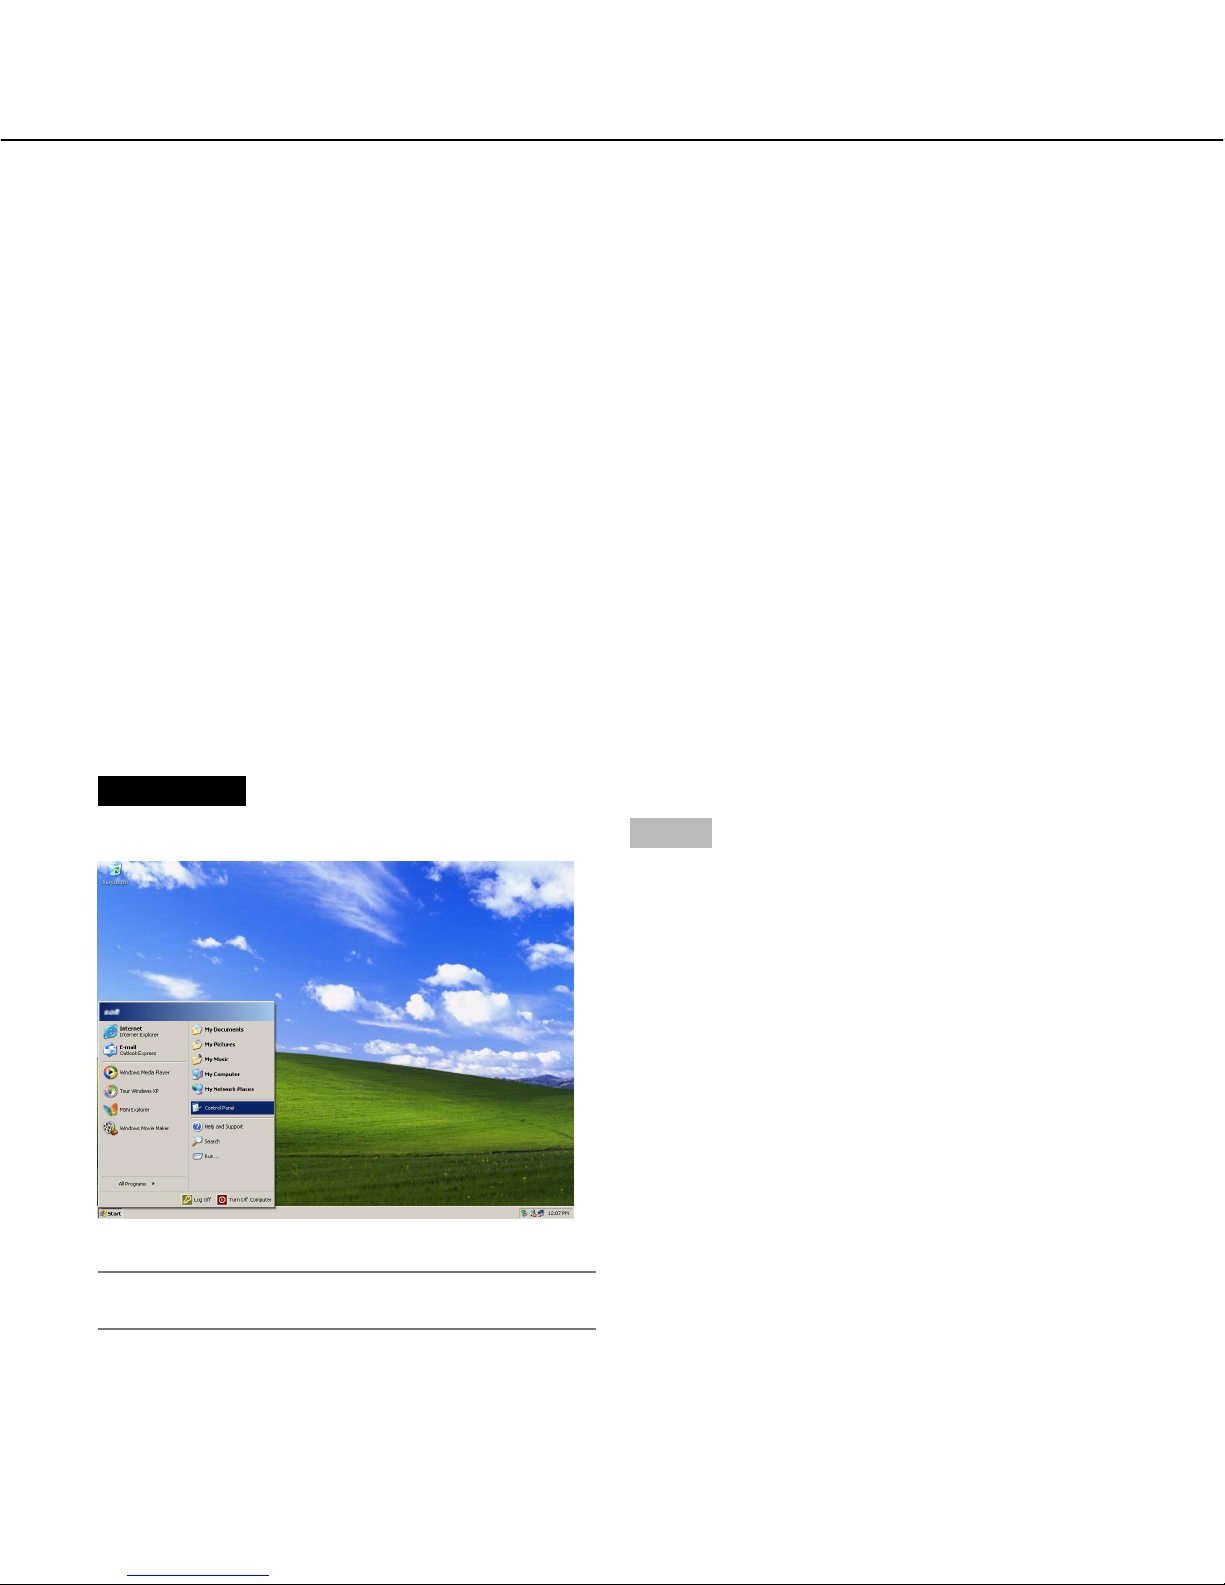
Step 1
On the taskbar, click "Start", and then click the "Control
Panel".
14
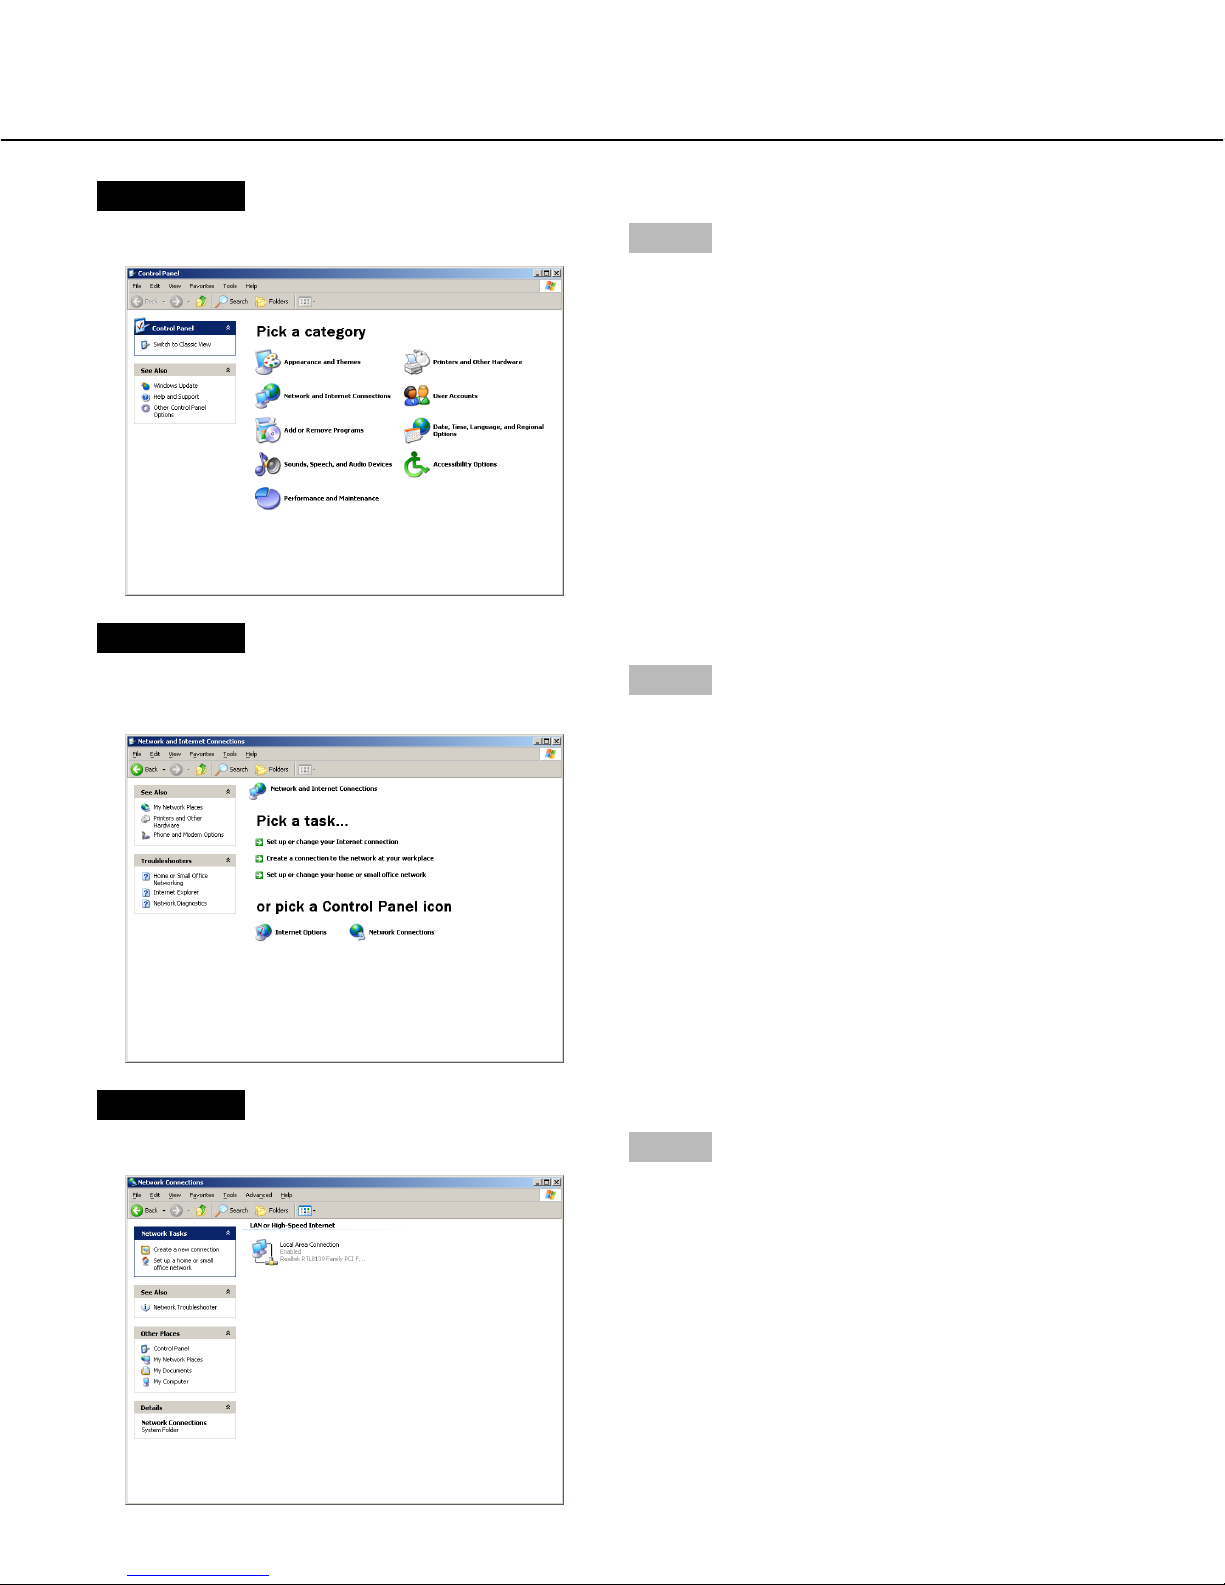
Screenshot 2
The control panel will be displayed.
Step 2
Click the "Network and Internet Connections" icon.
Screenshot 3
The "Network and Internet Connections" window will be
displayed.
Step 3
Click "Network Connections".
Screenshot 4
The "Network Connections" window will be displayed.
Step 4
Double click "Local Area Connection".
15
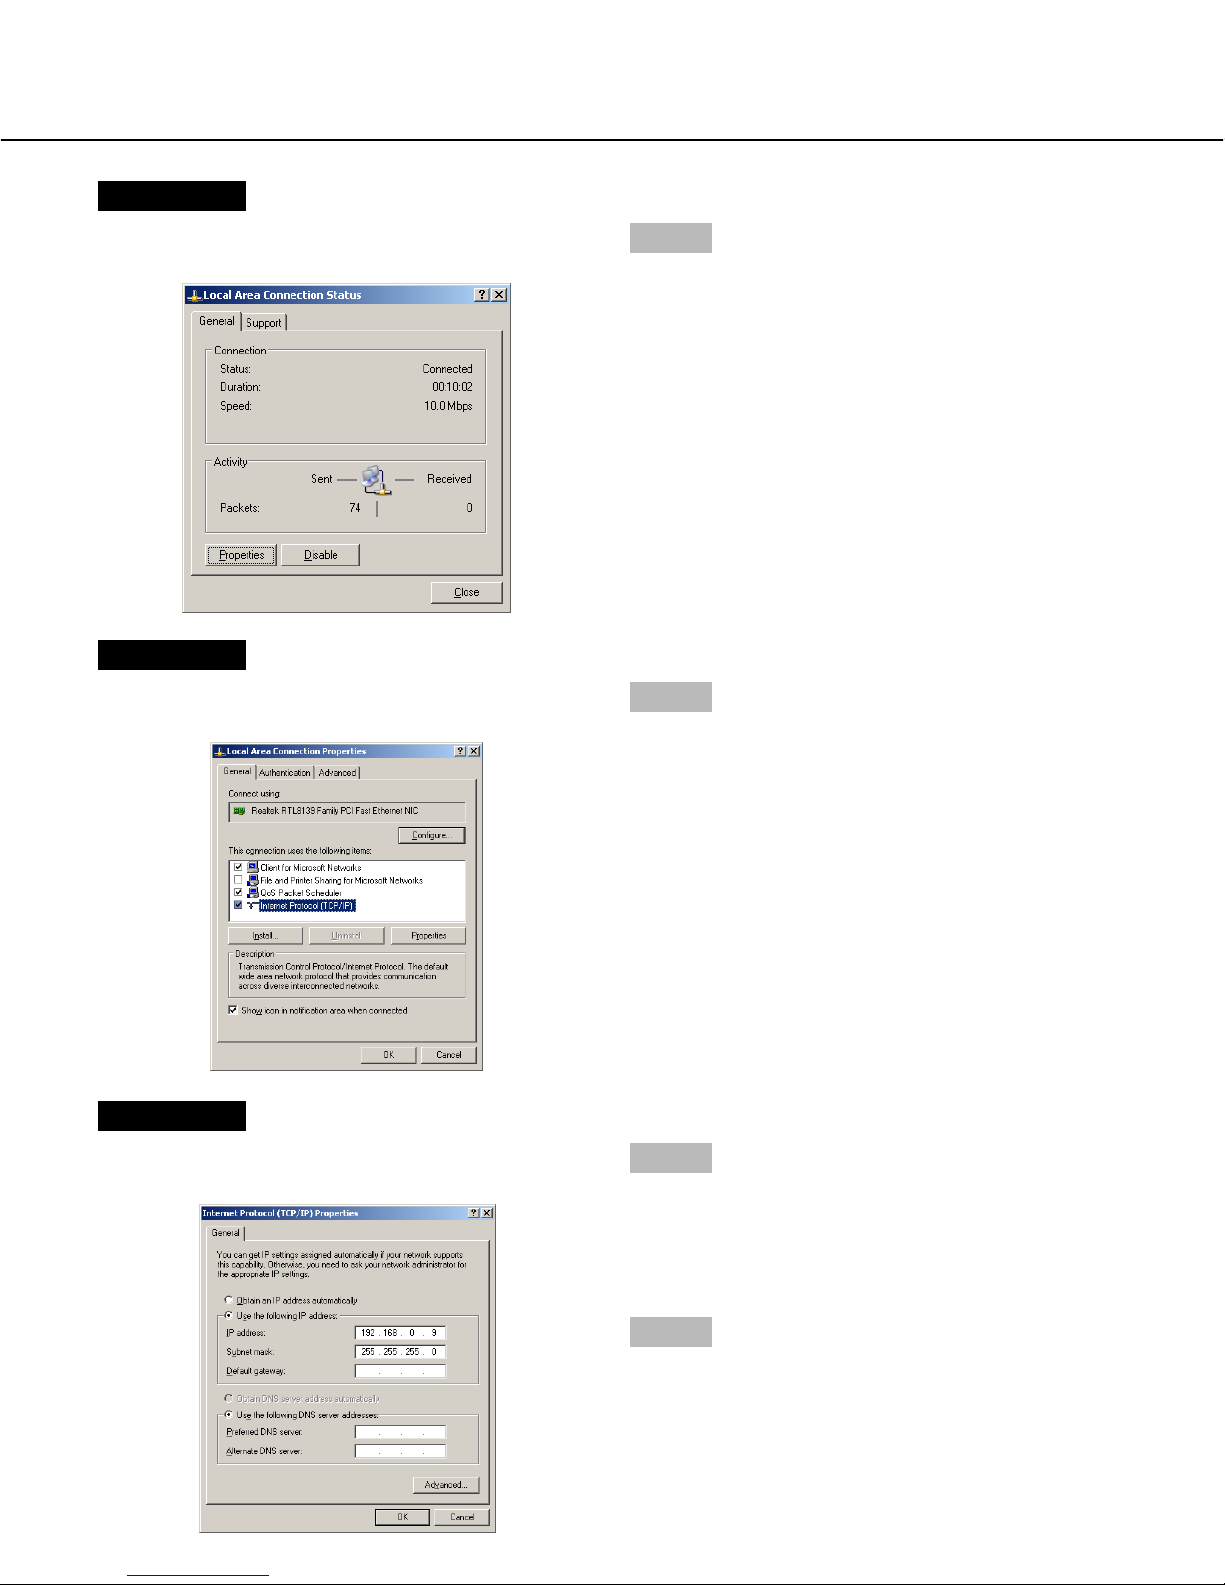
Screenshot 5
The "Local Area Connection Status" window will be displayed.
Step 5
Click "Properties".
Screenshot 6
The "Local Area Connection Properties" window will be
displayed.
Step 6
Click "Internet Protocol (TCP/IP)", and then click
"Properties".
Screenshot 7
The "Properties" window of "Internet Protocol (TCP/IP)"
will be displayed.
Step 7
Click "Use the following IP address" and enter the IP
address and the subnet mask as follows;
• IP Address: 192.168.0.9
• Subnet Mask: 255.255.255.0
Step 8
Click the "OK" button and close the window.
16
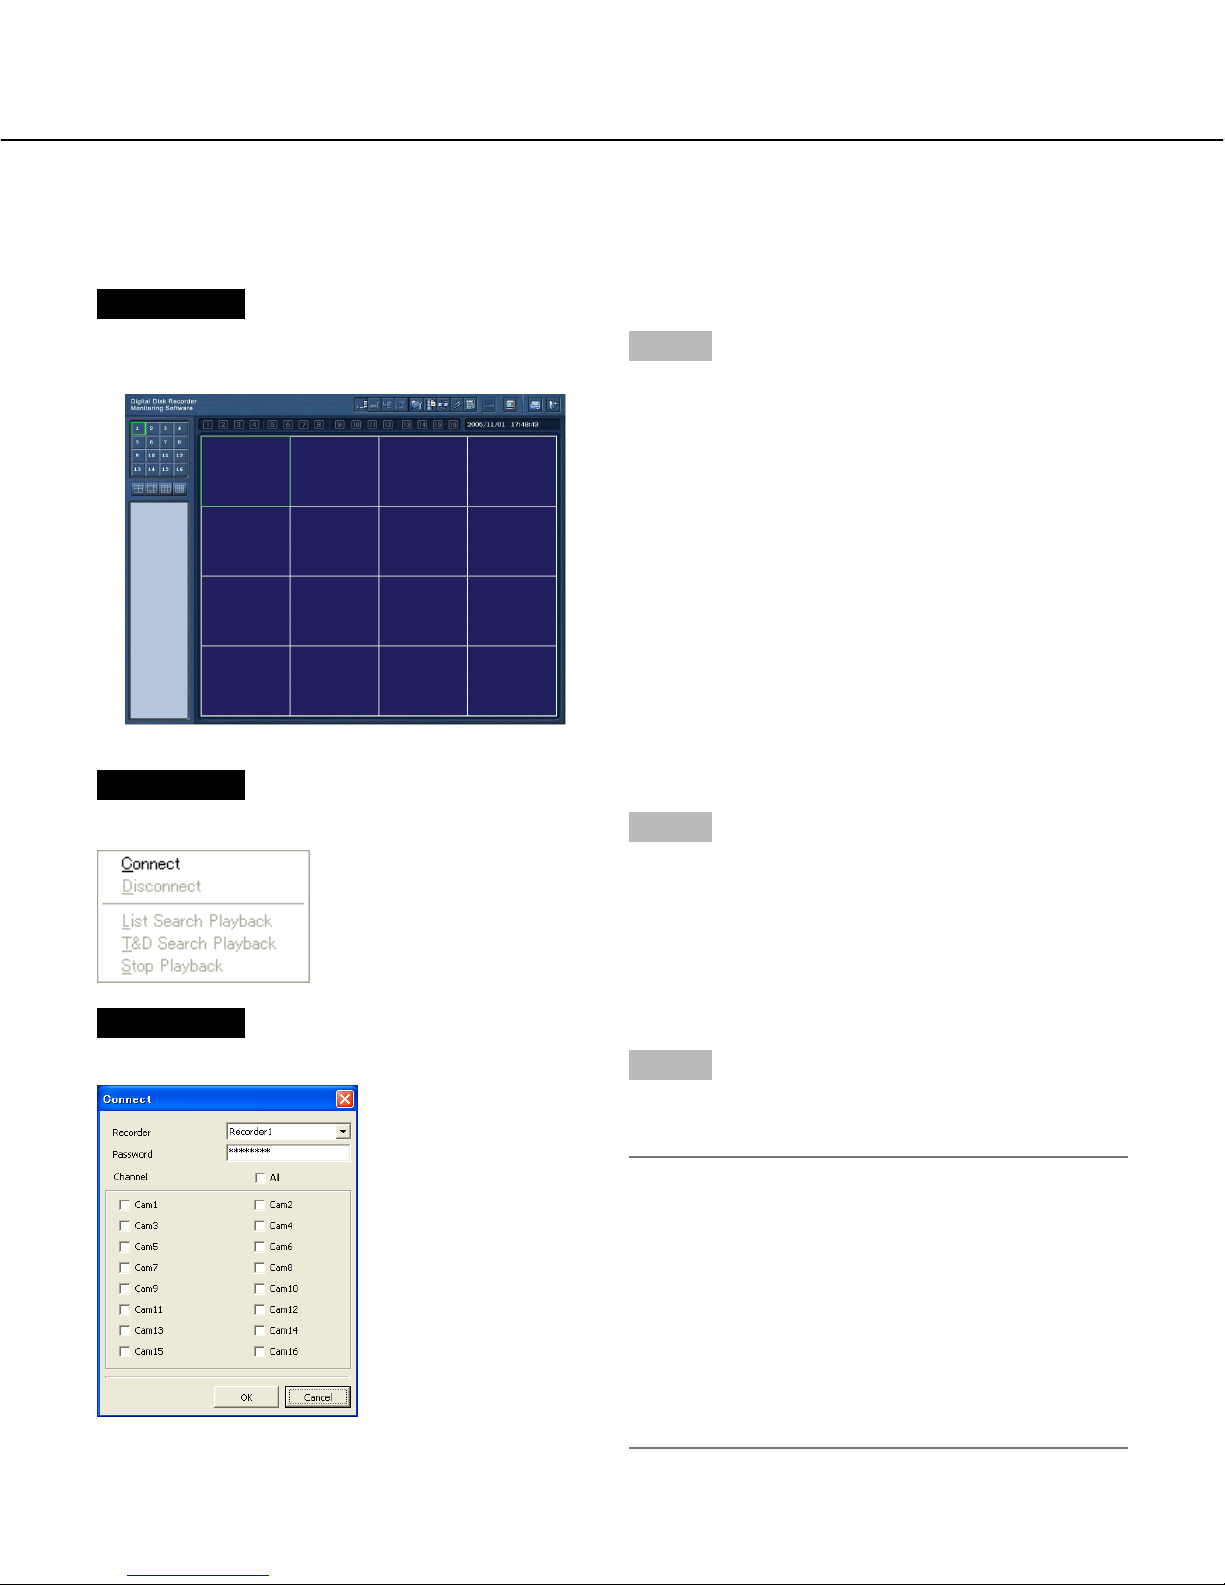
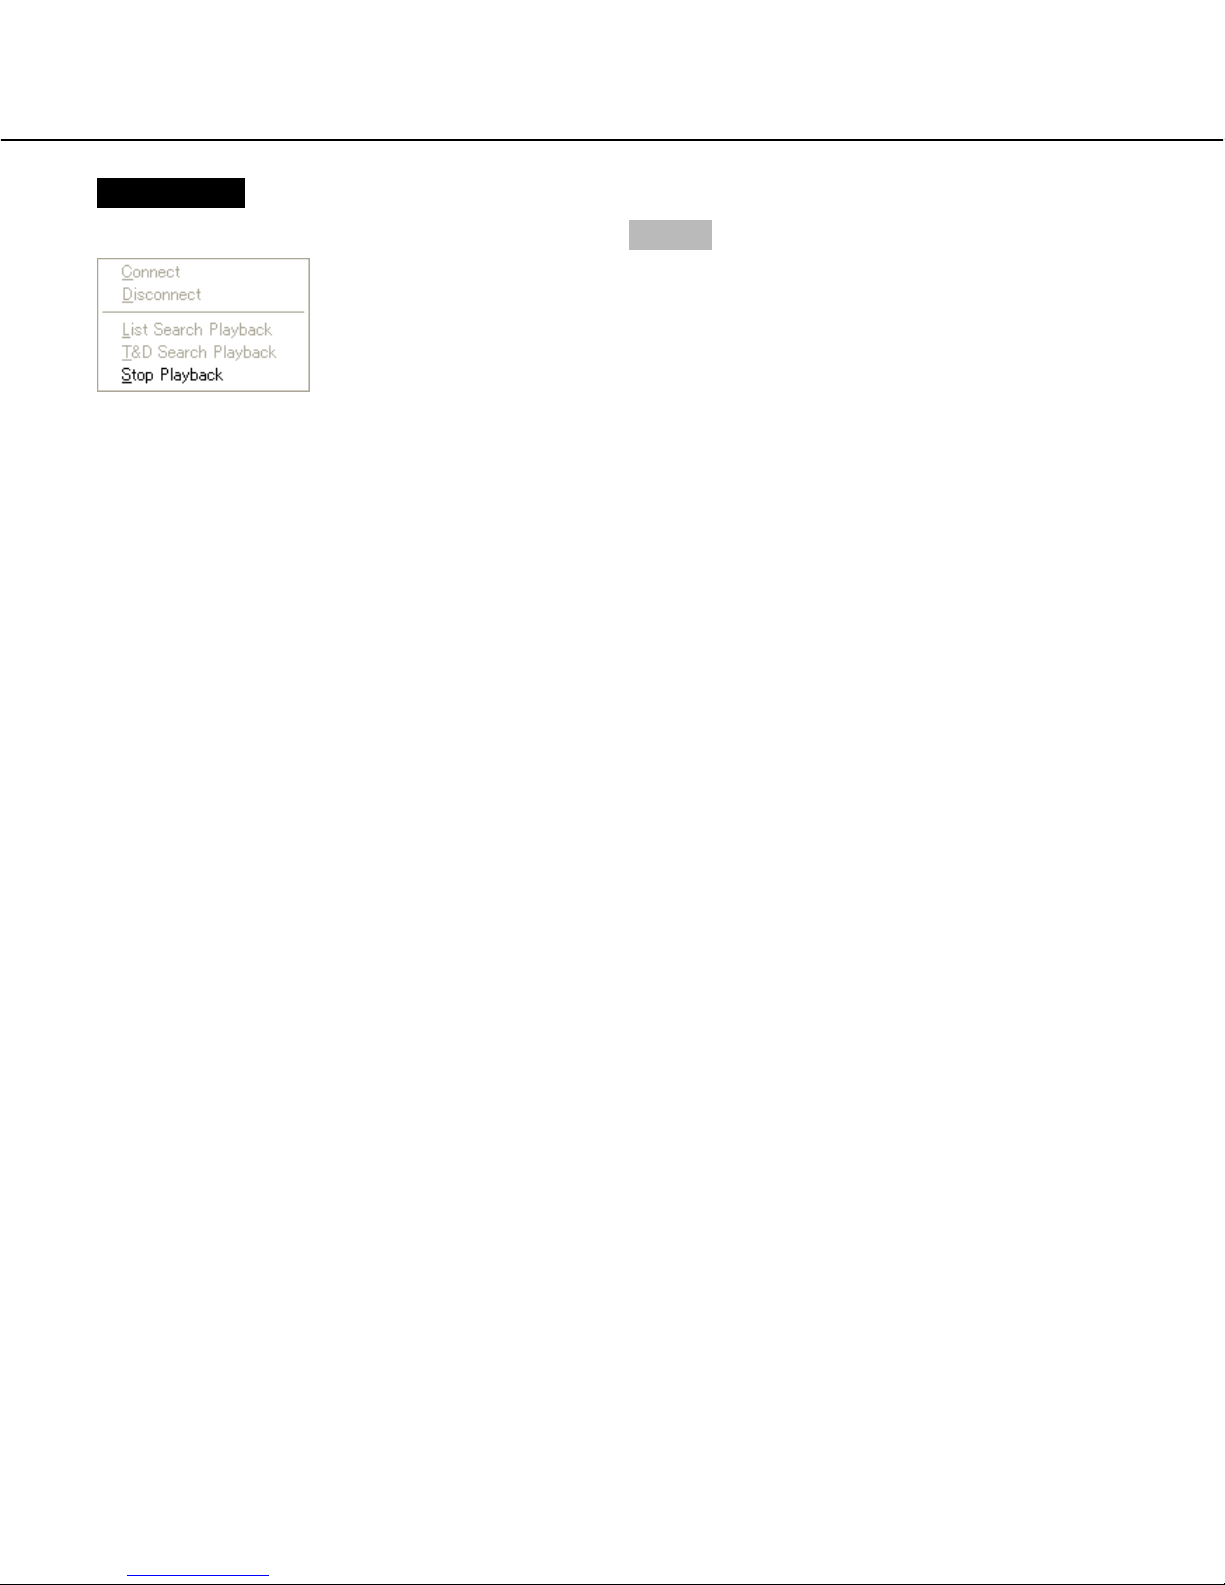
Monitor Live Images
Screenshot 3
The "Connect" window will be displayed.
Step 3
Select the recorder to access and the desired camera
channel.
Notes:
• Only the recorders registered in advance can be
selected on the "Connect" window. Refer to page 12
for further information.
• The password registered when registered the
recorder will be entered automatically.
• When displaying images from 5 or more camera
channels of the same recorder, or when displaying
recorded images in an area on a multi-screen, only
I-frame will be displayed in all areas on a multiscreen and audio may not be heard.
It is possible to display live images on a 1-screen or a multi-screen in the image display area.
To monitor live images from the cameras, select the desired camera connected to the recorder first.
Screenshot 1
Start operation when the operation window is being displayed.
Step 1
Right-click on a blank area in the image display area.
Screenshot 2
The pop-up menu will be displayed.
Step 2
Select "Connect".
17
Switch the image display area between a 1-screen and a multi-screen
Display images on a 1-screen in the image display area
Click the desired area selection button.
→ The selected area will be displayed on a 1-screen in the image display area. The image display area will be
switched to a 1-screen by clicking one of the area selection buttons when a multi-screen is displayed in the image
display area.
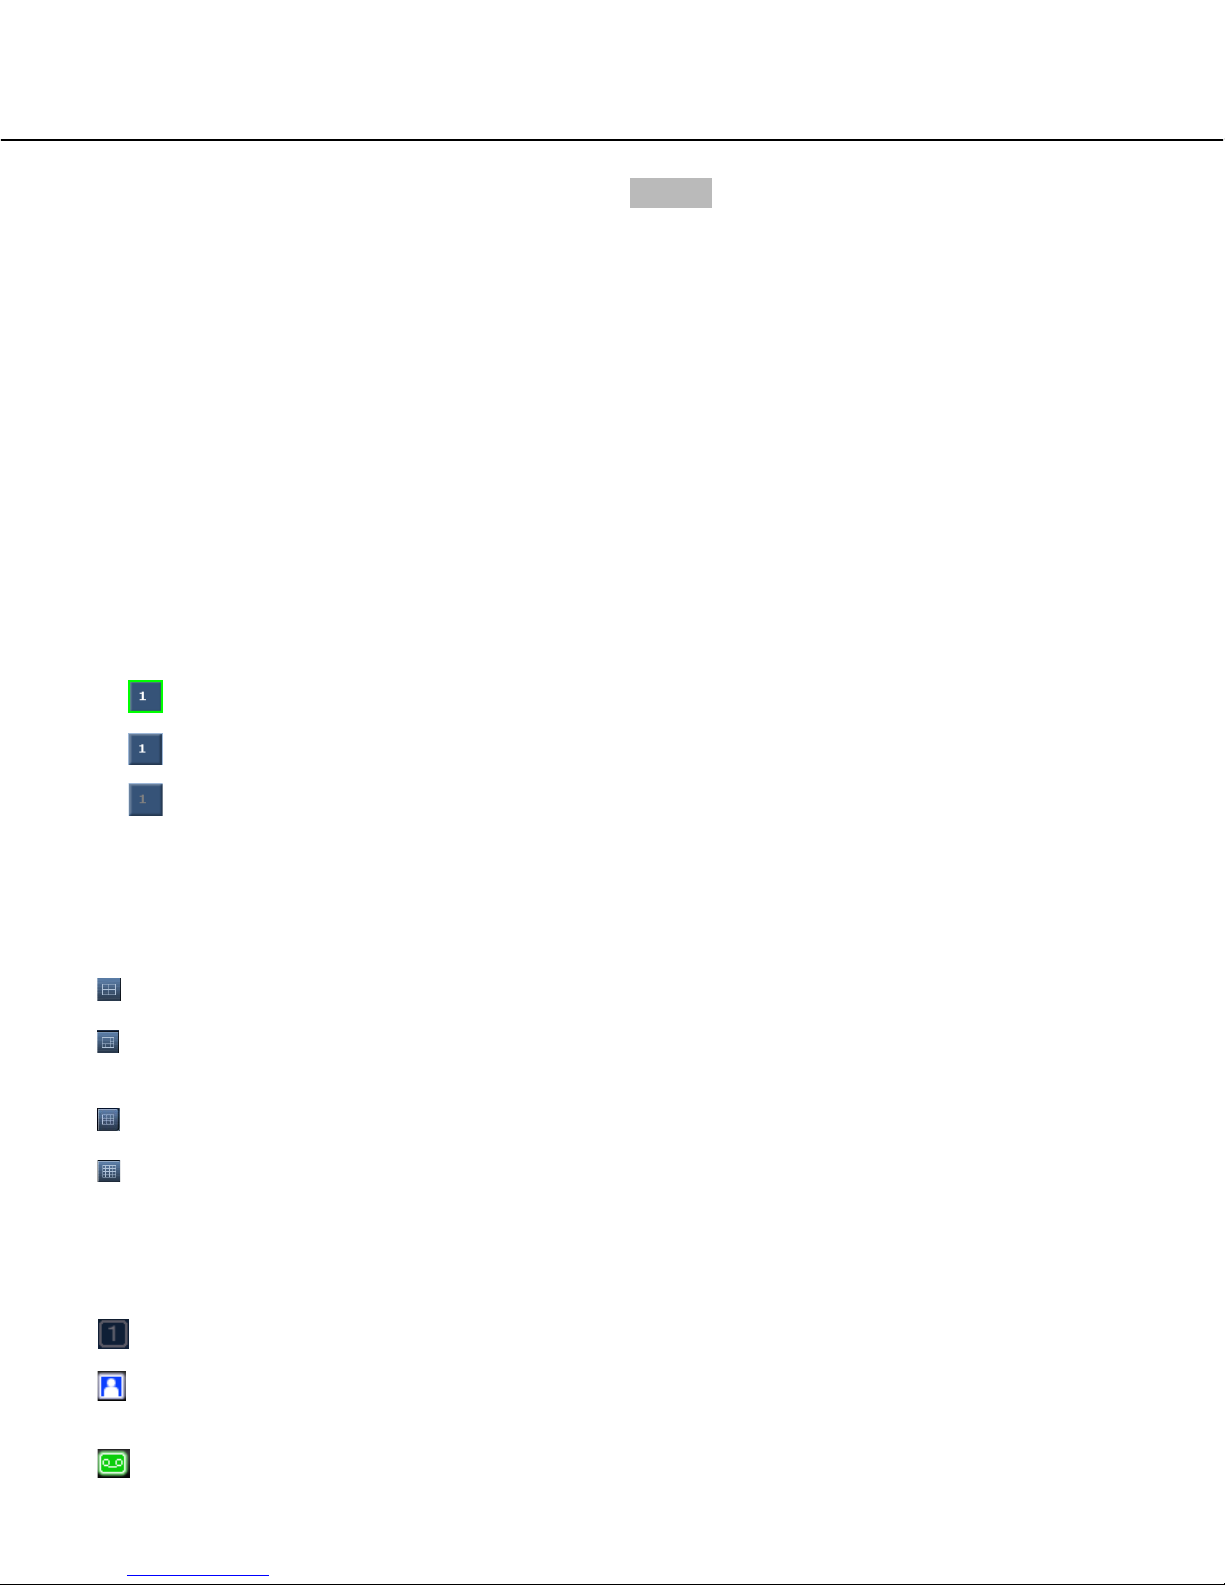
The area selection buttons will change as follows to indicate the current status.
(a) : This area is displayed in the image display area and currently selected.
(b) : This area is displayed in the image display area and currently not selected.
(c) : This area is not displayed in the image display area, or currently being used for the sequential display.
Display images on a multi-screen in the image display area
Click the desired multi-screen selection button.
→ The selected multi-screen will be displayed in the image display area.
(4-screen): Each time this button is clicked, the displayed area will change as follows.
1 - 4 → 5 - 8 → 9 - 12 → 13 - 16 → 1 - 4 → ···
(6-screen): Each time this button is clicked, the displayed area will change as follows.
1 - 6 → 7 - 12 → 1 - 6 → 7 - 12···
(9-screen): Areas 1 - 9 will be displayed in the image display area.
(16-screen): Areas 1 - 16 will be displayed in the image display area.
Check the status of the camera
The status of the camera respective to the area can be check with the displayed icon.
(No icon): Displaying of live images or playback of recorded images are available in this area.
: Live images from the camera are being displayed in this area. When this icon is blinking, images in the
sequential display are being displayed in this area.
: Recorded images are being played in this area.
Step 4
Click the [OK] button.
→ The connection status window will be displayed.
When the connection is established, images from the
selected camera will be displayed in the selected
area in the image display area.

18
Screenshot 1
Start operation when the operation window is being displayed.
Step 1
Right-click on the displayed image that is from the camera to be disconnected.
Screenshot 2
The pop-up menu will be displayed.
Step 2
Select "Disconnect".
→ The connection with the selected camera will be dis-
connected.
: The camera respective to this area is in the alarm status.
: Live images or recorded images currently being displayed are being saved. When this icon is blinking, images
are being recorded by the alarm recording. Refer to pages 49 and 50 for further information about the alarm
recording.
Temporarily change color of text displayed in the image display area
When right-clicking on the text displayed on the image display area, the pop-up menu will be displayed.
Select "White", "Magenta" or "Bright Green" to change the color of the text temporarily.
Control the cameras
The camera from which images are being displayed in the image display area can be controlled using the control
panel (☞ page 25). When displaying images on a 1-screen or on a 4-screen, it is also possible to pan/tilt the camera
by clicking on the image displayed in the image display area. Refer to page 27 for further information.
Disconnect the connection with camera

19
Login to the recorder
To perform playback of images recorded on the recorder, download, operation of the recorder (display of each log,
display of information, manual recording operation, alarm output terminal control), it is necessary to log in to the
recorder as "Manager (Manager1 - Manager4)".
To perform recorder operation (setting configurations, maintenance) or to use the remote talk function, it is necessary to log in as "Manager1".
Log in to the recorder as follows.
Screenshot 1
Click the [Login] button.
→ The "Login" window will be displayed.
Important:
Depending of the firewall setting of Windows XP
SP2, recorder information may sometimes not be
displayed. Refer to page 7 for further information.
Step 1
Select the desired recorder and enter the password of
the user level "Manager".
Note:
Only the recorders registered in advance can be
selected on the "Login" window. Refer to page 12 for
further information.
Step 2
Click the [OK] button.
→ The connection status window will be displayed.
When the connection is established, the recorder
information (☞ page 10) will be displayed on the left
side of the operation window.
The [Login] button on the operation window will
also change to the [Logout] button . Click this button to log out of the recorder.
20
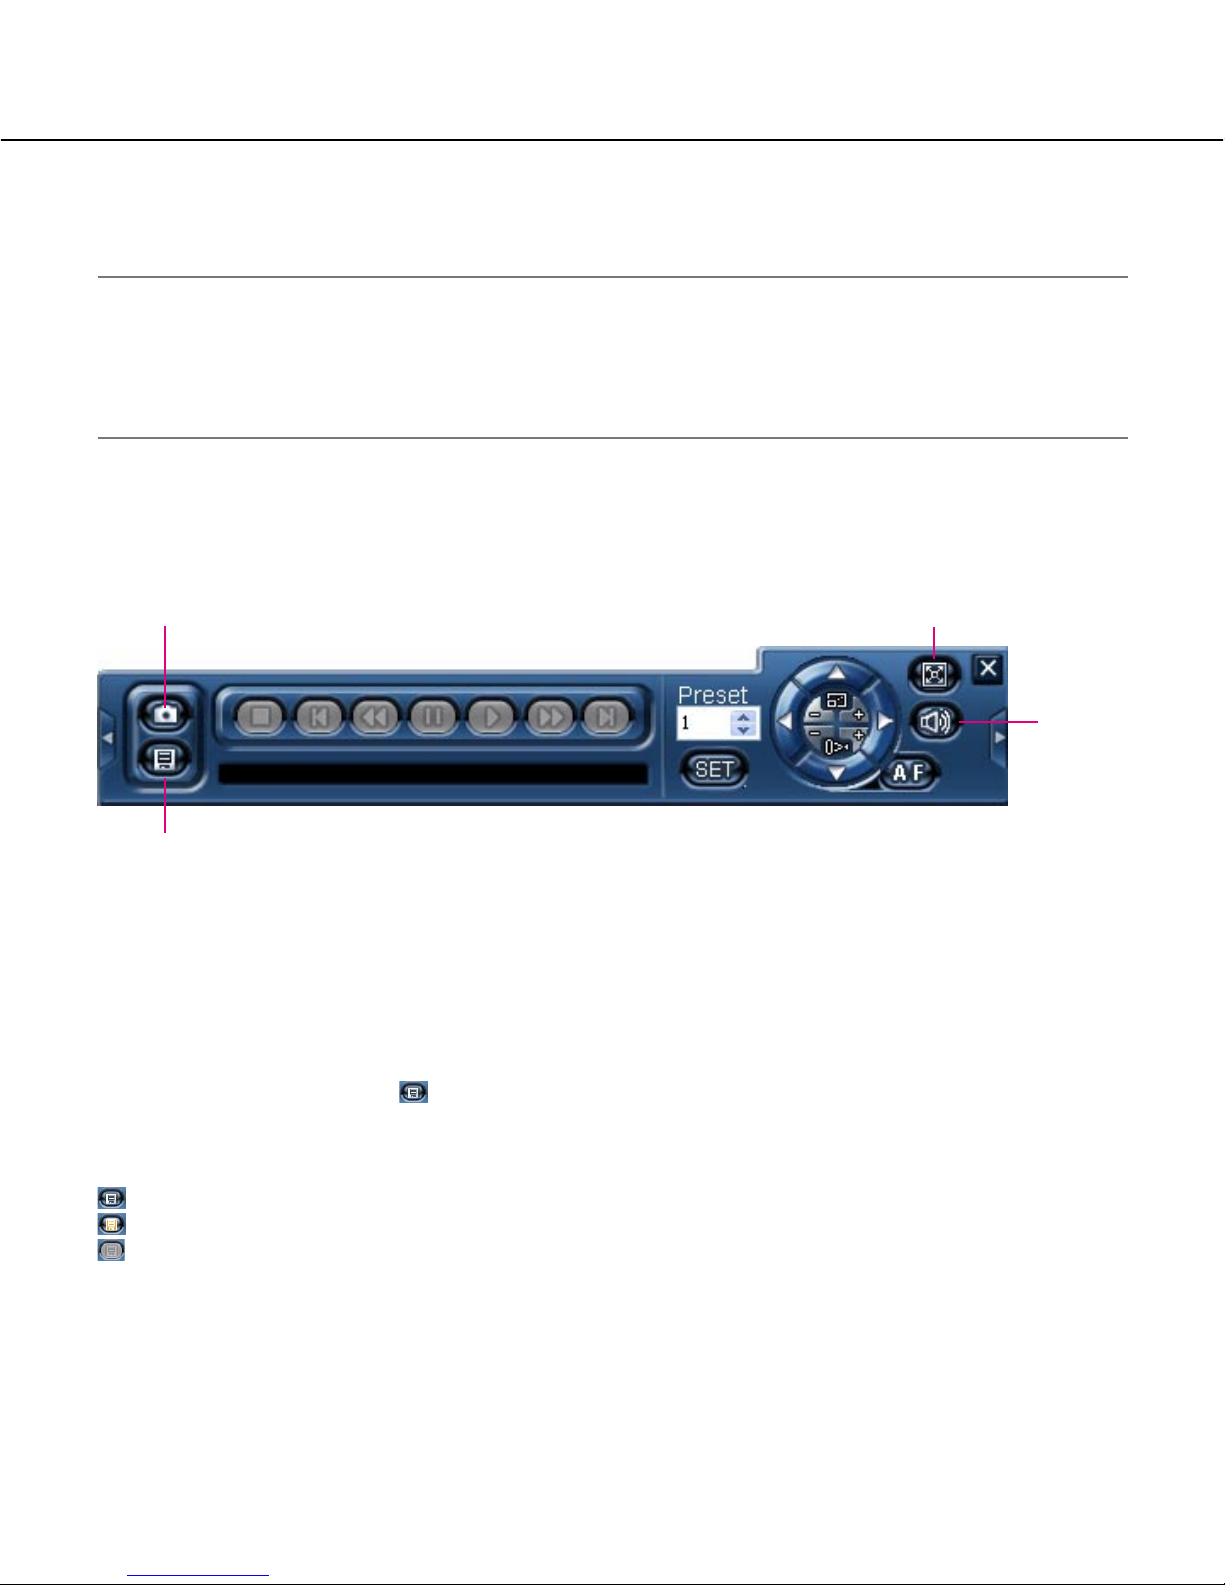
Screenshot 2
The pop-up menu will be displayed.
Step 2
Select "List Search Playback".
Play recorded images on the recorder
Recorded images can be played from the search result window. It is possible to search recorded images to be
played by designating multiple search filters (List Search) or by designating the start time and date of recording
(Time & Date Search).
To play recorded images, log in the recorder as "Manager". Refer to page 19 for how to log in the recorder.
Important:
It is impossible to play recorded image which is currently being played or copied on the recorder.
Note:
When displaying images from 5 or more camera channels of the same recorder, or when displaying recorded
images in an area on a multi-screen, only I-frame will be displayed on a multi-screen (audio may not be heard
when displaying live images).
Play recorded images from the search result window displayed after searching with
the designated search filters (List Search Playback)
Screenshot 1
Start operation when the operation window is being displayed.
Step 1
Right-click on a blank area in the image display area.
21
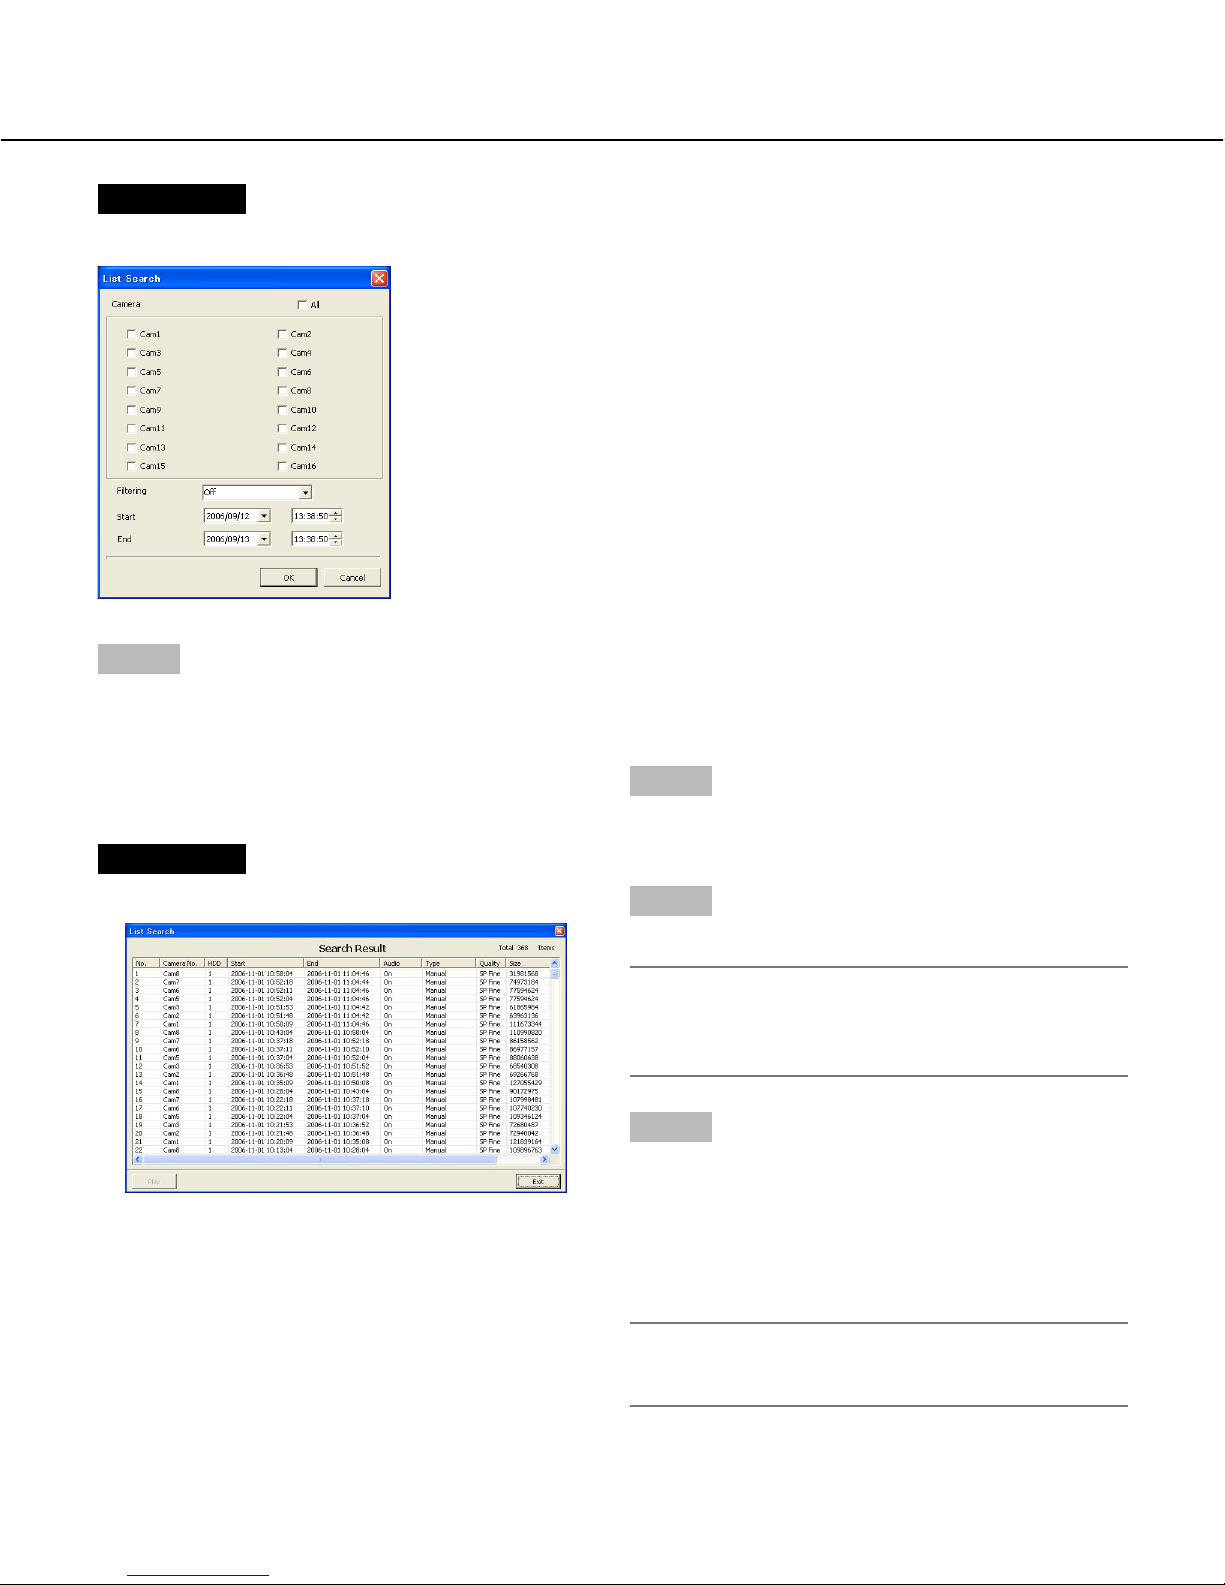
Screenshot 3
The "List Search" window will be displayed.
Step 3
Set the desired search filter.
Camera
Check the radio button of the desired camera channel to
be searched.
Filtering
Off: Searches without filtering
Manual: Searches for only images recorded by the
manual recording
Timer: Searches for only images recorded by the
timer recording
Alarm: Searches for only images recorded by the
alarm recording (triggered by a terminal
input, VMD and a command alarm reception)
Terminal: Searches for only images recorded by the
alarm recording triggered by a terminal input
VMD: Searches for only images recorded by the
alarm recording triggered by VMD
Com: Searches for only images recorded by the
alarm recording triggered by a command
alarm reception
Start/End
Designate the time period to be searched by entering
the start and end time and date.
Step 4
When the search filters are set, click the [OK] button.
Screenshot 4
The search result window will be displayed.
Step 5
Select the desired recorded images to be played.
Note:
It is possible to select multiple search results by
clicking them while pressing the [Ctrl] key on the
keyboard.
Step 6
Click the [Play] button.
→ Playback of the selected recorded images will start in
the area selected in step 1.
Refer to page 29 for how to perform playback operations using the control panel.
Note:
The latest 5 000 recorded images will be displayed
in the list form.
22
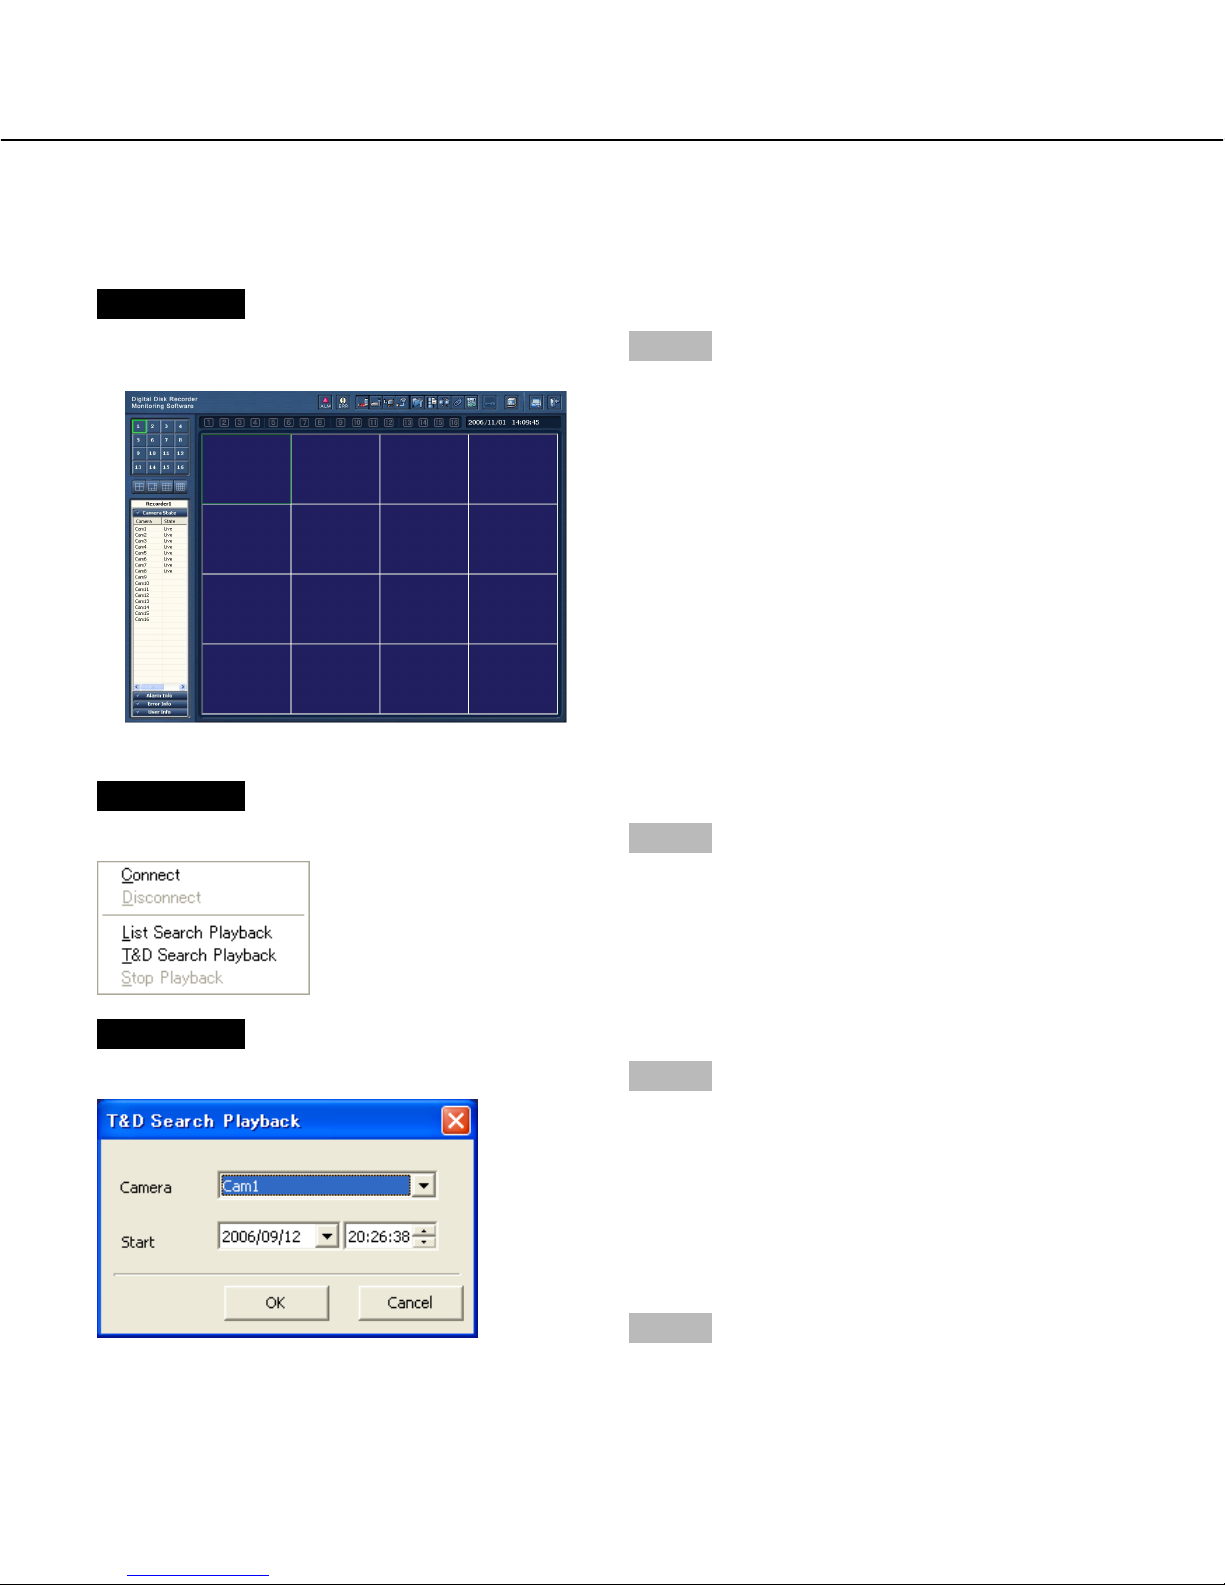
Screenshot 3
The "T&D Search Playback" window will be displayed.
Step 3
Set the following items.
Camera
Select the desired camera to be searched.
Start
Enter the start time and date for the search.
Step 4
When completing the settings, click the [OK] button.
Play recorded images from the search result window displayed after searching by
designating the start time of recording (Time & Date Search Playback)
Screenshot 1
Start operation when the operation window is being displayed.
Step 1
Right-click on a blank area in the image display area.
Screenshot 2
The pop-up menu will be displayed.
Step 2
Select "T&D Search Playback".
23
Screenshot 4
Playback of images recorded in the designated time and
date will start in the area selected in step 1.
Notes:
• When no recorded image was found at the designated time and date, playback will start from the next
record.
• When there is no recorded image at all, playback will
not start.
Operations during playback can be made using the control panel. Refer to page 29 for further information.
Stop playback
When playback is stopped, the connection with the recorder will also be disconnected.
Screenshot 1
Start operation when the operation window is being displayed.
Step 1
Right-click on the area where recorded images are
being played.
24
Screenshot 2
The pop-up menu will be displayed.
Step 2
Select "Stop Playback".
→ Playback will stop and the connection with the
recorder will be disconnected.
25
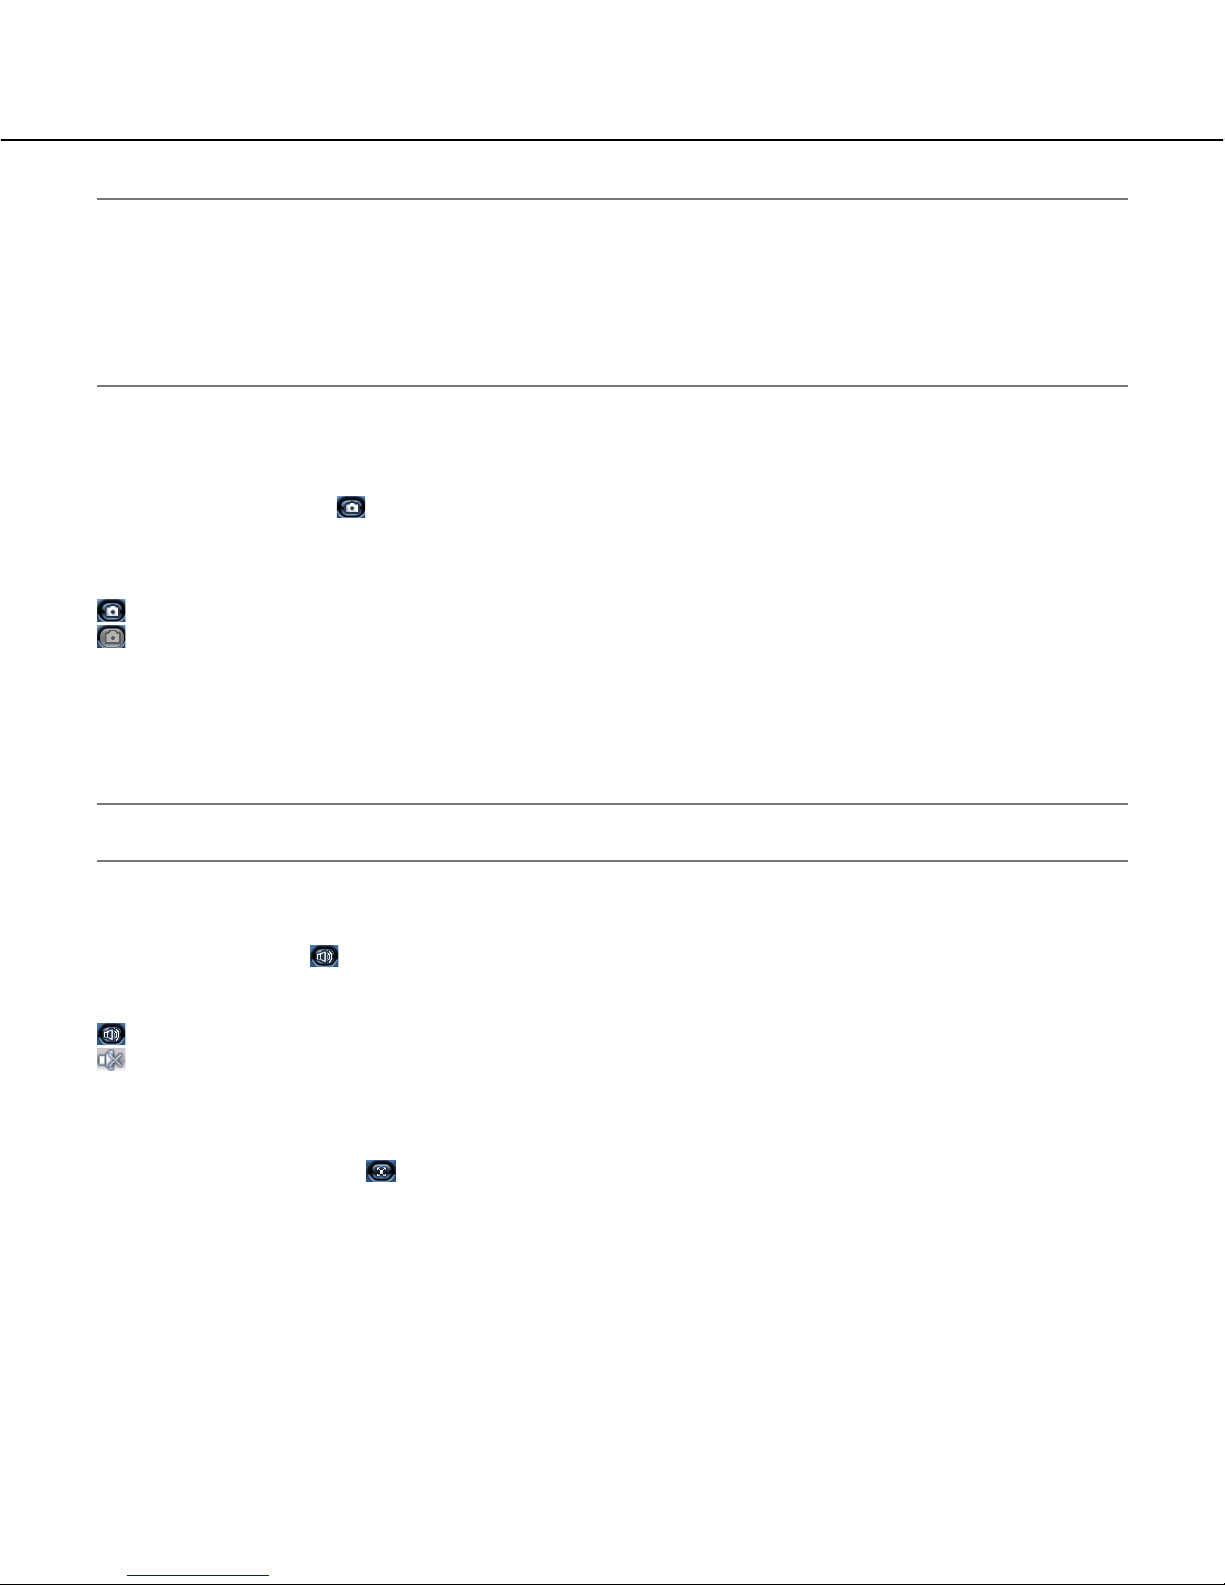
Control panel
Control of the camera such as panning/tilting, saving an image, image capturing and operation of the setup menu of
the camera can be made using the control panel. Operation during playback of recorded images can also be made
using the control panel.
Note:
The following operations can be made both when displaying live images and when playing recorded images.
• Saving an image on the PC
• Capturing of images from the camera
• Muting audio
• Displaying of images from the camera on a full screen
Display the control panel
When the [Control Panel] button is clicked, the control panel will be displayed.
When displaying on a full screen, right-click on the screen and select "Control Panel" from the pop-up menu.
Close the control panel
Click the [×] button at the right top of the control panel or click on somewhere out of the selected area.
→ The control panel will be closed.
Save the image currently being displayed on the PC
Click the [Real Time Save] button .
→ The image currently displayed will be saved.
The [Real Time Save] button will change as follows to indicate the current status.
: The [Real Time Save] button is operable.
: In the process of saving of the image.
: The [Real Time Save] button is inoperable.
The saved image will be stored the "Mpeg" folder in the directory selected in the "Choose Directory" section on the
"Advanced Setup" window.
The "Advanced Setup" window can be displayed by selecting "Advanced Setup" under "Monitor System Config" from
the pop-up menu displayed when the [Monitor System Setup] button is clicked.
Capture
Real Time Save
Full Screen
Mute
26
Notes:
• When the file size of the saved image is more than 500 MB, the file will be automatically divided into several files.
• It is impossible to save the image while playback is being stopped or paused.
• When this software starts the alarm recording during saving a file, the file saving will be cancelled automatically
and the file saving will be resumed after the alarm recording is complete.
• Depending on the timing to start saving images, the first several seconds of the saved image may not be played
on the RT4Viewer.
Capture the images currently being displayed
When the [Capture] button is clicked, the image currently being displayed will be captured as a still picture and
saved.
The [Capture] button will change as follows to indicate the current status.
: The [Capture] button is operable.
: The [Capture] button is inoperable.
The captured image will be stored the "Picture" folder in the directory selected in the "Choose Directory" section on
the "Advanced Setup" window.
The "Advanced Setup" window can be displayed by selecting "Advanced Setup" under "Monitor System Config" from
the pop-up menu displayed when the [Monitor System Setup] button is clicked.
Note:
It is impossible to capture the recorded image when playback is being stopped.
Muting audio
When the [Mute] button is clicked, audio will be muted.
The [Mute] button will change as follows to indicate the current status.
: Audio is not muted.
: Audio is being muted.
Display images from the camera on a full screen
When the [Full Screen] button is clicked, the images currently being displayed will be displayed on a full screen.
When clicking the [Full Screen] button while displaying images on a 4-screen the 4-screen will be enlarged to fit to
the screen. When clicking the [Full Screen] button while displaying images on a 1-screen or on a multi-screen except
4-screen, the selected area will be displayed on a 1-screen and be enlarged to fit to the screen.
To return to the previous size, click the [Full Screen] button again or press the [Esc] button on the keyboard.

27
Control the cameras
It is possible to operate the camera while displaying images.
Note:
To control the camera, configure the settings such as the communication type between the camera and the
recorder, protocol, etc. Refer to the installation guide of the recorder for how to configure the required settings of
the recorder.
Refer to the operating instructions of the camera for how to configure the required settings of the camera.
Depending on the models of the connected cameras, it may be impossible to control the camera or some functions may be not available.
Panning/tilting, zooming, focusing, preset position operation
Click the buttons on the right side of the control panel to control the camera.
Panning/tilting: Moves the camera horizontally (AB)/vertically (CD)
Zooming: Zooms in/out of images (+: TELE, –: WIDE)
Focusing: Adjusts the focus (+: FAR, –: NEAR)
AF: Adjusts the focus automatically
Preset position: Moves the camera to the preset position registered in advance
Notes:
• When "Home" is selected for "Preset position", the camera will move to the home position (only when controlling
Panasonic’s camera). Refer to the operating instructions of the camera for how to configure the related settings.
• It is also possible to pan/tilt the camera by clicking on the image displayed in the image display area (only when
displaying images from Panasonic's camera on a 1-screen or on a 4-screen). The camera moves to position the
clicked point as the center point of its image.
ZoomingPreset position
Focusing
CDAB
 Loading...