

Panasonic UltraHD DP-UB320 Operating Instructions Manual
Operating Instructions
Firmware updates
Panasonic is constantly improving the unit’s firmware to ensure that
our customers are enjoying the latest technology.
Panasonic recommends updating your firmware as soon as you are
notified.
For details, refer to “Firmware updates” (> 13) or
http://panasonic.jp/support/global/cs/ (This site is in English only.)
GA
TM
Blu-ray Disc
Model No. DP-UB320
Player
Thank you for purchasing this product.
Please read these instructions carefully before using this product, and save this manual for future use.
TQBS0244

Precautions
WARNING
Unit
To reduce the risk of fire, electric shock or product damage,
≥ Do not expose this unit to rain, moisture, dripping or
splashing.
≥ Do not place objects filled with liquids, such as vases, on
this unit.
≥ Use the recommended accessories.
≥ Do not remove covers.
≥ Do not repair this unit by yourself. Refer servicing to
qualified service personnel.
≥ Do not let metal objects fall inside this unit.
≥ Do not place heavy items on this unit.
AC mains lead
To reduce the risk of fire, electric shock or product damage,
≥ Ensure that the power supply voltage corresponds to the
voltage printed on this unit.
≥ Insert the mains plug fully into the socket outlet.
≥ Do not pull, bend, or place heavy items on the lead.
≥ Do not handle the plug with wet hands.
≥ Hold onto the mains plug body when disconnecting the
plug.
≥ Do not use a damaged mains plug or socket outlet.
The mains plug is the disconnecting device.
Install this unit so that the mains plug can be unplugged from
the socket outlet immediately.
CAUTION
Unit
≥ This unit utilizes a laser. Use of controls or adjustments or
performance of procedures other than those specified
herein may result in hazardous radiation exposure.
≥ Do not place sources of naked flames, such as lighted
candles, on this unit.
≥ This unit may receive radio interference caused by mobile
telephones during use. If such interference occurs, please
increase separation between this unit and the mobile
telephone.
≥ This unit is intended for use in moderate and tropical
climates.
≥ Some portions of this unit may become hot during use.
When moving or cleaning this unit, disconnect the AC
mains lead and wait for 3 minutes or longer.
Batteries
Mishandling of batteries can cause electrolyte leakage and
may cause a fire.
≥ Danger of explosion if battery is incorrectly replaced.
Replace only with the type recommended by the
manufacturer.
≥ When disposing of the batteries, please contact your local
authorities or dealer and ask for the correct method of
disposal.
≥ Do not mix old and new batteries or different types at the
same time.
≥ Do not heat or expose to flame.
≥ Do not leave the battery(ies) in a car exposed to direct
sunlight for a long period of time with doors and windows
closed.
≥ Do not take apart or short circuit.
≥ Do not recharge alkaline or manganese batteries.
≥ Do not use batteries if the covering has been peeled off.
Remove batteries if you do not intend to use the remote
control for a long period of time. Store in a cool, dark place.
Placement
Place this unit on an even surface.
To reduce the risk of fire, electric shock or product damage,
≥ Do not install or place this unit in a bookcase, built-in
cabinet or in another confined space. Ensure this unit is
well ventilated.
≥ Do not obstruct this unit’s ventilation openings with
newspapers, tablecloths, curtains, and similar items.
≥ Do not place the unit on amplifiers/receivers or equipment
that may become hot. The heat can damage the unit.
≥ Do not expose this unit to direct sunlight, high
temperatures, high humidity, and excessive vibration.
- 2 -

Restriction on use of
unauthorized copied content
This unit adopts the following technology for copyright protection.
Cinavia Notice
This product uses Cinavia technology to limit the use of
unauthorized copies of some commercially-produced film and
videos and their soundtracks. When a prohibited use of an
unauthorized copy is detected, a message will be displayed and
playback or copying will be interrupted.
More information about Cinavia technology is provided at the
Cinavia Online Consumer Information Center at
http://www.cinavia.com. To request additional information about
Cinavia by mail, send a postcard with your mailing address to:
Cinavia Consumer Information Center, P.O. Box 86851, San
Diego, CA, 92138, USA.
To dispose or transfer this
unit
The unit may keep the user settings information in the unit. If
you discard this unit either by disposal or transfer, then follow
the procedure to return all the settings to the factory presets
to delete the user settings. (> 29, “To return all settings to the
factory preset.”)
≥ The operation history may be recorded in the memory of
this unit.
- 3 -

Table of contents
Precautions . . . . . . . . . . . . . . . . . 2
Getting started
Accessories . . . . . . . . . . . . . . . . . 5
Unit and media care . . . . . . . . . . . 5
Playable media. . . . . . . . . . . . . . . 6
Control reference guide . . . . . . . . 8
Connecting to a TV . . . . . . . . . . 10
Connecting to
an amplifier/receiver . . . . . . . . . 11
Connecting to the network . . . . . 12
Settings . . . . . . . . . . . . . . . . . . . 13
Playback
HOME menu . . . . . . . . . . . . . . . 14
Playback. . . . . . . . . . . . . . . . . . . 14
Enjoying Network Service . . . . . 18
Home Network feature . . . . . . . . 19
VIERA Link . . . . . . . . . . . . . . . . . 20
Option menu. . . . . . . . . . . . . . . . 21
To enjoy Ultra HD Blu-ray Disc featured with
High Dynamic Range (HDR)
If you see a message about High Dynamic
Range (HDR) compatible issue while an Ultra
HD Blu-ray Disc is played back, please check
your TV settings as follows.
An example of the message:
“This player is not connected to a High Dynamic
Range (HDR) compatible TV.”
1) When you use a Panasonic TV that is
compatible with 4K/High Dynamic Range
(HDR) and was released in 2015 or later,
enable the HDR setting of the TV. (This
setting may not be available depending on
the TV. Refer to the operating instructions of
the TV for details.)
2) If you use a TV not from Panasonic,
compatible with 4K and High Dynamic Range
(HDR), please refer to the operating
instructions of the TV.
3) When you play a High Dynamic Range (HDR)
disc on a TV without High Dynamic Range
(HDR) capability, the disc can be played back
(in non-HDR quality) even if the message
appears.
Reference
Setup menu . . . . . . . . . . . . . . . . 24
Troubleshooting guide . . . . . . . . 29
Specifications . . . . . . . . . . . . . . . 34
Licenses . . . . . . . . . . . . . . . . . . . 36
- 4 -
Getting started
R6/LR6, AA
(Alkaline or manganese batteries)
DO
DO NOT
Getting started
Accessories
Check the supplied accessories before using this
unit.
1 Remote control
(N2QAYB001185)
2 Batteries for remote control
2 AC mains lead*
1HDMI Cable
* See page 10 for more information.
≥ Product numbers are provided in these operating
instructions correct as of April 2018.
These may be subject to change.
≥ Do not use AC mains lead with other equipment.
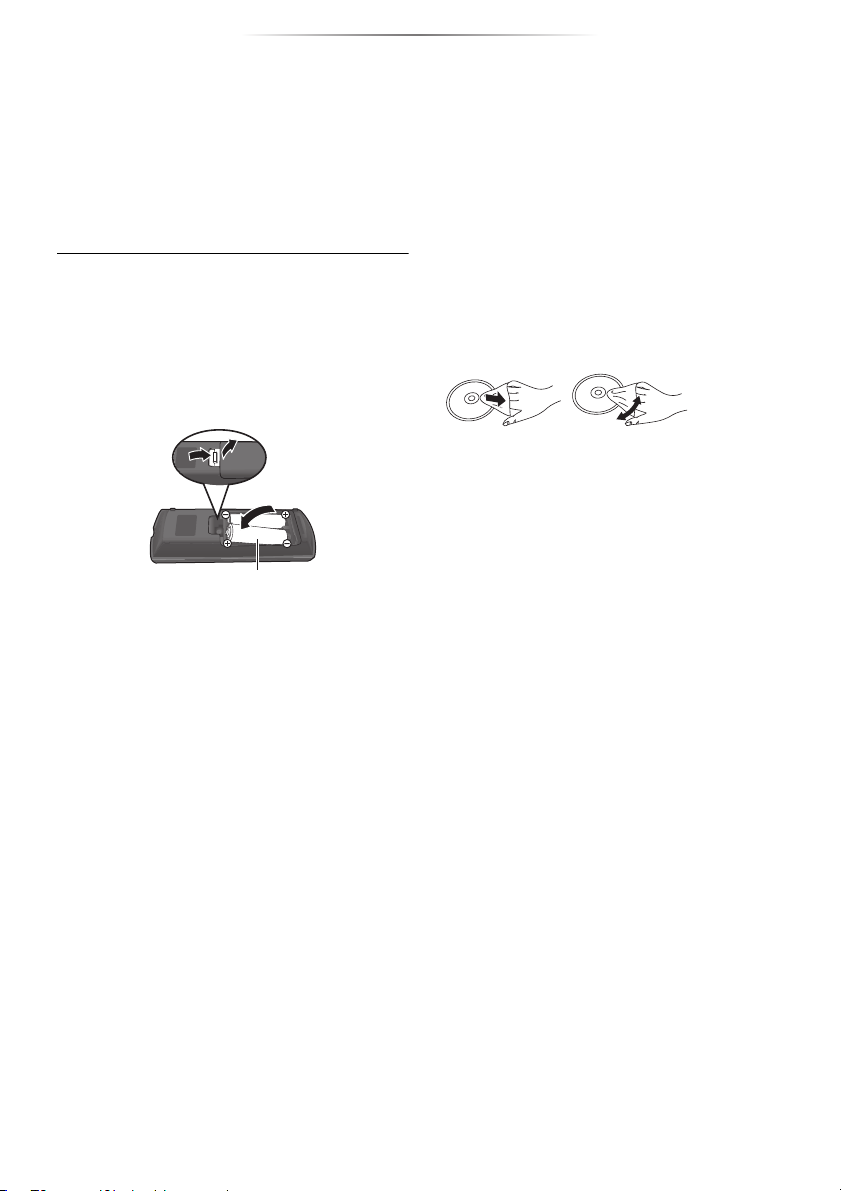
∫ Using the remote control
Insert the batteries to the terminal so that it (i
and j) matches those in the remote control.
Point it at the remote control signal sensor on this
unit. (> 9)
Unit and media care
∫ Clean this unit with a soft, dry
cloth
≥ Never use alcohol, paint thinner or benzine to
clean this unit.
≥ Before using chemically treated cloth, carefully
read the instructions that came with the cloth.
∫ This unit’s lens
Use the lens cleaner (not supplied) to clean the
unit’s lens.
∫ Clean discs
Wipe with a damp cloth and then wipe dry with a
dry cloth.
∫ Disc handling precautions
≥ Handle discs by the edges to avoid inadvertent
scratches or fingerprints on the disc.
≥ Do not attach labels or stickers to discs.
≥ Do not use disc cleaning sprays, benzine,
thinner, static electricity prevention liquids or
any other solvent.
≥ Do not use the following discs:
– Discs with exposed adhesive from removed
stickers or labels (rented discs, etc.).
– Discs that are badly warped or cracked.
– Irregularly shaped discs, such as heart
shapes.
- 5 -
Getting started
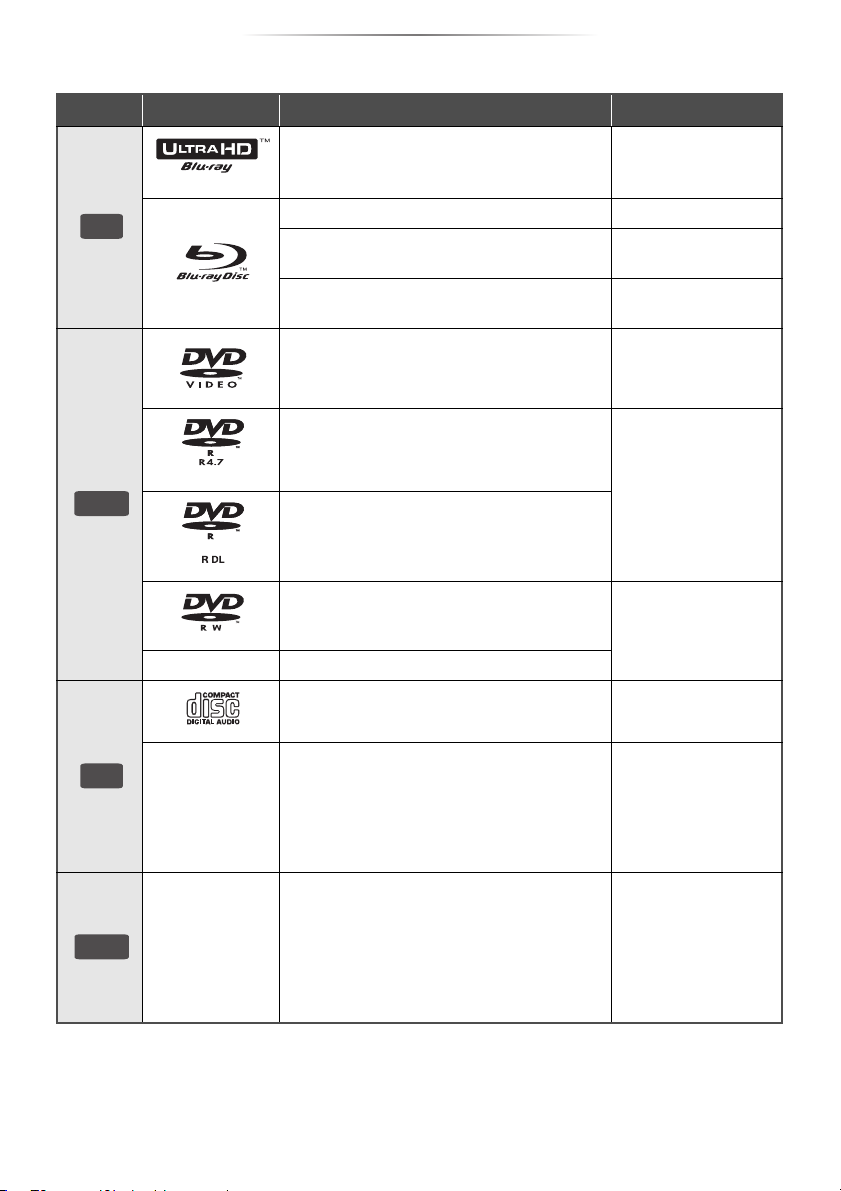
Playable media
Device Media markings Device types Contents format
BD
DVD
Ultra HD Blu-ray*1*
BD-Video Video
BD-RE
BD-RE DL
BD-R
BD-R DL
DVD-Video Video
DVD-R
DVD-R DL
DVD-RW
— +R/+RW/+R DL
Music CD Music [CD-DA]
2
Video
Video,
JPEG, MPO
Video, MKV,
JPEG, MPO
Video, AVCHD, MKV,
JPEG, MPO,
AAC, AIFF, ALAC,
DSD (DFF, DSF),
FLAC, MP3, WAV,
WMA
Video, AVCHD
MKV,
CD
—
USB
≥ See pages 7 and 34 for more information on the types of content that can be played.
*1
See “Enjoying Ultra HD Blu-ray” (> 16)
*2
Unless otherwise indicated, BD-Video content includes Ultra HD Blu-ray content in these operating instructions.
—
CD-R
CD-RW
USB devices
(up to 4 TB)
JPEG, MPO,
AAC, AIFF, ALAC,
FLAC, MP3,
Music [CD-DA], WAV,
WMA
AVCHD, AVCHD 3D,
MKV, MP4, MPEG2,
JPEG, MPO,
AAC, AIFF, ALAC,
DSD (DFF, DSF),
FLAC, MP3, WAV,
WMA
- 6 -
Getting started
∫ Types of discs that cannot be
played by this unit
Any other disc that is not specifically
supported or previously described.
≥ DVD-RAM
≥ Super Audio CD
≥ Photo CD
≥ DVD-Audio
≥ Video CD and Super Video CD
≥ HD DVD
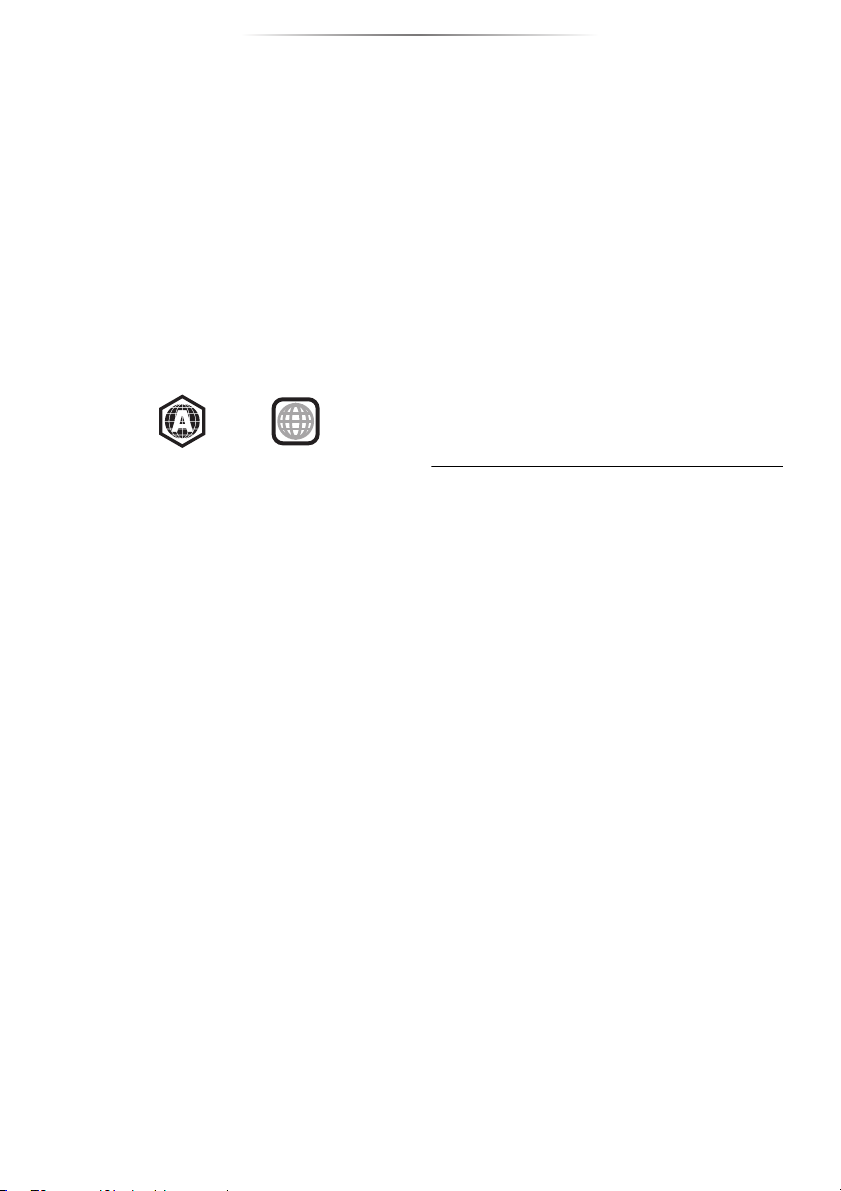
∫ Region management information
The unit can play back BD-Video/DVD-Video
discs of the following regions codes, including
“ALL”:
Example: BD-Video DVD-Video
3
∫ Finalize
Any DVD-R/RW/R DL, +R/+RW/+R DL and
CD-R/RW that are recorded by a recorder need to
be finalized by the recorder to play on this unit.
Please refer to the recorder’s instructions.
∫ BD-Video
This unit supports high bit rate audio (Dolby®
Digital Plus, Dolby
Resolution Audio
adopted in BD-Video.
®
TrueHD, DTS-HD High
TM
and DTS-HD Master AudioTM)
∫ USB device
≥ Connect a USB device while the Home screen
is displayed.
≥ This unit does not guarantee connection with all
USB devices.
≥ This unit does not support USB device
charging.
≥ FAT12, FAT16, FAT32, and NTFS file systems
are supported.
≥ This unit supports USB 2.0 High Speed.
≥ This unit supports an HDD formatted in FAT32
and NTFS. If the HDD is not recognized, the
power to the HDD may not be supplied. Supply
power from an external source.
∫ BD-RE, BD-R
This unit may not correctly play back the audio
portion of a video recorded to a disc in multiple
languages with a Blu-ray disc recorder.
≥ It may not be possible to play the above media in some
cases due to the type of media, the condition of the
recording, the recording method, and how the files were
created.
≥ The producers of the disc can control how discs are
played, so you may not always be able to control play as
described in these operating instructions. Read the disc’s
instructions carefully.
∫ 3D
3D videos and 3D still pictures can be played
back when this unit is connected to a 3D
compatible TV using a High Speed HDMI Cable.
∫ Music CD
Operation and sound quality of CDs that do not
comply with CD-DA specifications (copy control
CDs, etc.) cannot be guaranteed to work.
- 7 -
Getting started
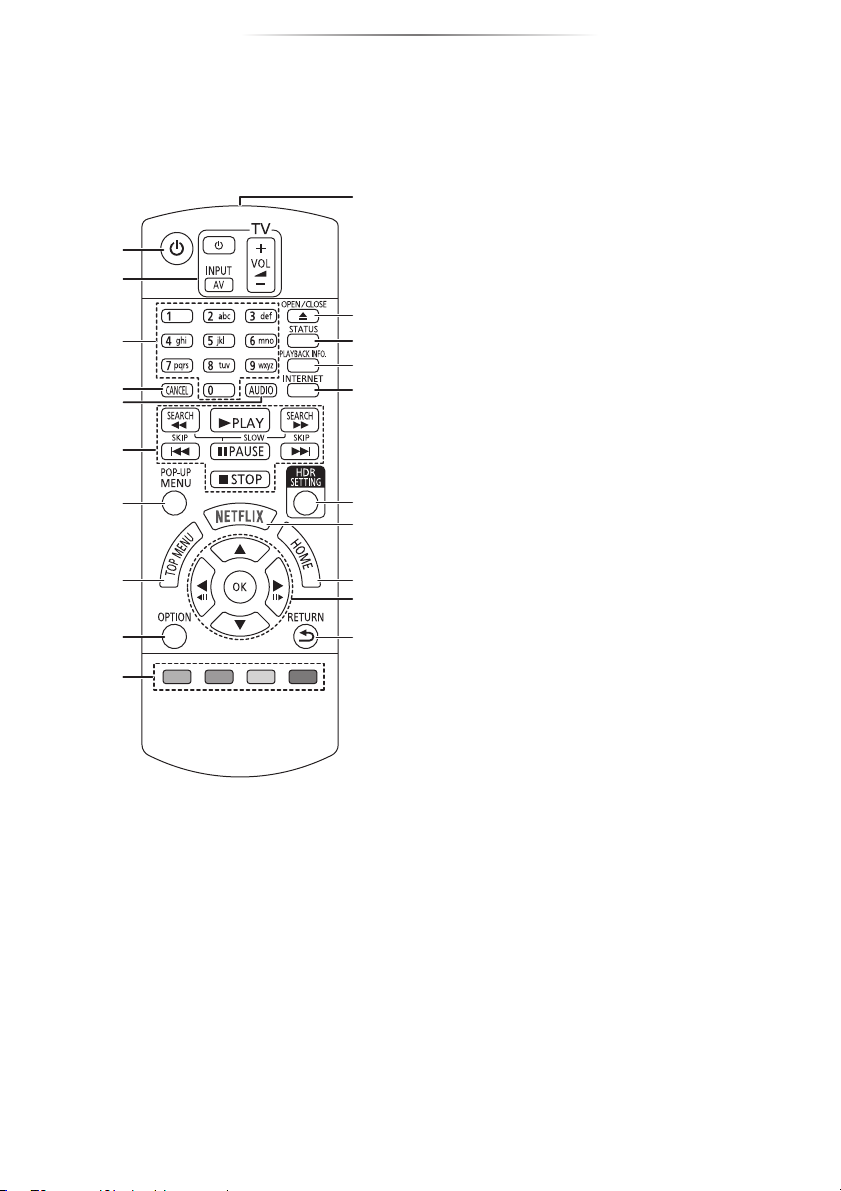
Control reference guide
∫ Remote control
When other Panasonic devices respond to the
remote control of the unit, change the remote
control code. (> 28)
11
1
2
12
3
4
5
6
7
8
9
10
13
14
15
16
17
18
19
20
1 Turn the unit on and off
2 TV operation buttons
You can operate the Panasonic TV using this
unit’s remote control. Some buttons may not
work depending on the TV.
3 Select title numbers, etc./Enter numbers or
characters
4 Cancel
Clear the currently selected character.
(when entering a password for “Ratings” in
the Setup menu, for example)
5 Change soundtrack (> 15)
6 Basic playback control buttons (> 14)
7 Show Pop-up menu (> 15)
8 Show Top menu (> 15)
9 Show Option menu (> 21)
10 Coloured buttons (red, green, yellow, blue)
Used for various purposes depending on the
screen
11 Transmit the remote control signal
12 Open or close the disc tray (> 9)
13 Show the status messages (> 15)
14 Show “Playback Information Window” (> 15)
15 Show the Home screen of the Network
Service (> 18)
16 Show “HDR Setting” (> 15)
17 Show NETFLIX screen (> 18)
18 Show HOME menu (> 14)
19 [3, 4, 2, 1] : Move the highlight for
selection
[OK] : Confirm the selection
(2;)(;1) : Frame-by-frame (> 15)
20 Return to previous screen
- 8 -

∫ Front
31 2 4
Getting started
5
6
1
1 Disc tray
2 USB port ( DC 5 V 500 mA)
This port supports USB 2.0 High Speed.
3 Remote control signal sensor
Distance: Within approx. 7 m
Angle: Approx. 20e up and down, 30e left and
right
4 POWER LED
When the unit is turned on, the LED flashes
first, and then lights up.
If the LED keeps flashing, there may be an
error. (> 33)
5 Open or close the disc tray
6 Standby/on switch (Í/I) (> 13)
3 42
Press to switch the unit from on to standby
mode or vice versa. In standby mode, the unit
is still consuming a small amount of power.
CAUTION
Do not place objects in front of the unit. The disc tray may collide with objects when it is opened, and
this may cause malfunction.
≥ When inserting a media item, ensure that it is facing the correct way, which is the right side facing up.
≥ If you connect a Panasonic product with a USB connection cable, the setup screen may be displayed on the connected
equipment. For details, refer to the instructions for the connected equipment.
∫ Rear
1 AC IN ( ) terminal (> 10)
2 Cooling fan
3 HDMI AV OUT terminal (> 10)
4 LAN port (> 12)
Class II equipment (The construction of the product is
double-insulated.)
- 9 -
Getting started
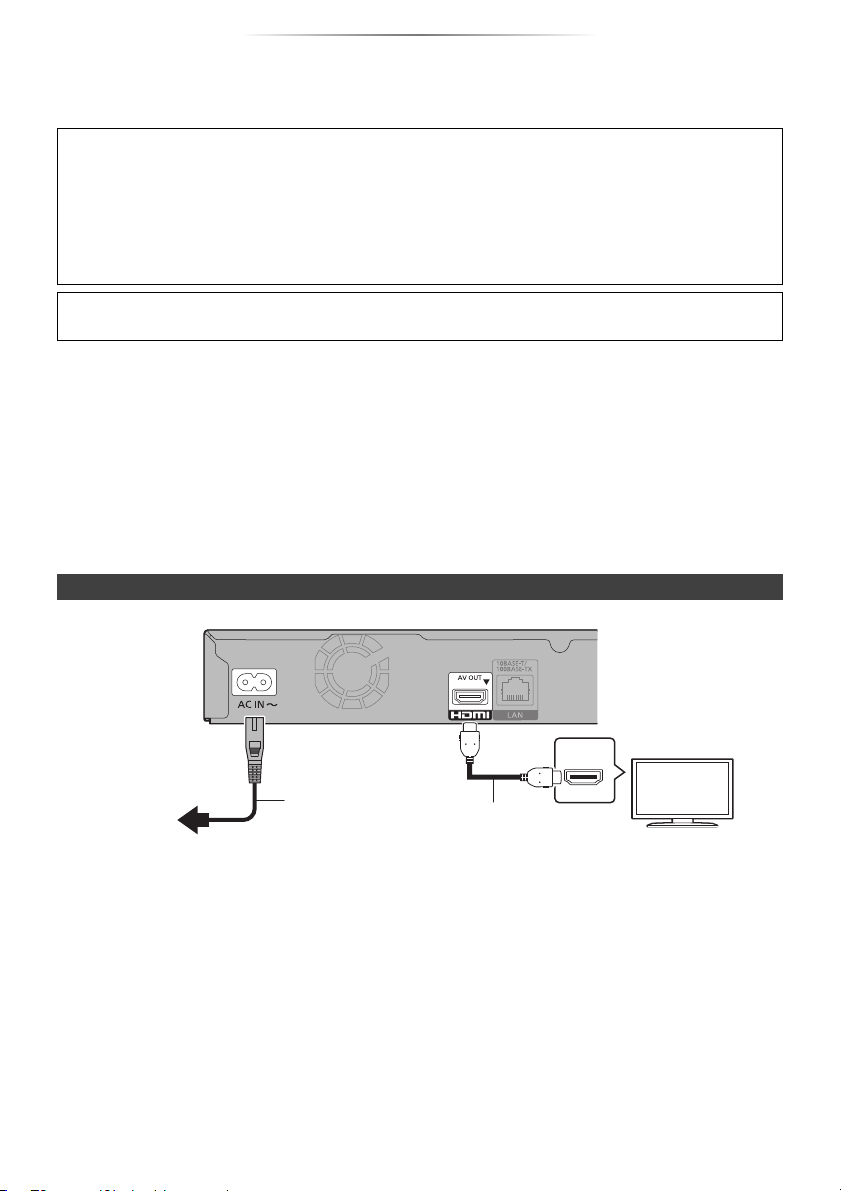
HDMI IN
To a household
mains socket
AC mains lead
(supplied)
HDMI cable
(supplied)
Connecting to a TV
4K images can be played back when this unit is connected to 4K compatible TV.
≥ Before making any connections, please disconnect all the units from AC power.
(Connect the AC mains lead after making all connections.)
≥ Use the High Speed HDMI cables. Non-HDMI-compliant cables cannot be utilized.
≥ The HDMI-compliant cable is supplied with this unit.
≥ This unit consumes a small amount of AC power (> 34) even when turned off in standby mode. For
the purpose of energy conservation, the unit should be disconnected if you will not be using it for
extended period of time.
AC mains lead with a label is for Thailand.
AC mains lead without a label is for areas other than Thailand.
∫ Enjoying 4K output
≥ To enjoy images in 4K (50p/60p), you need an HDMI cable that supports 18 Gbps.
A High Speed HDMI-compliant cable that supports 18 Gbps is supplied with this unit.
Part number : K1HY19YY0048
≥ If you connect this unit to a 4K-compatible TV and perform “Easy Settings”, 4K (50p/60p) will
be automatically selected. (> 13, 28)
≥ To view Ultra HD Blu-ray content in 4K/HDR format, connect to the HDMI terminal of a device that
supports HDCP2.2, 4K (50p/60p) 4:4:4, and HDR signals that meet Ultra HD Blu-ray standards.
Enjoying video and audio with a 4K-compatible TV
- 10 -
Getting started
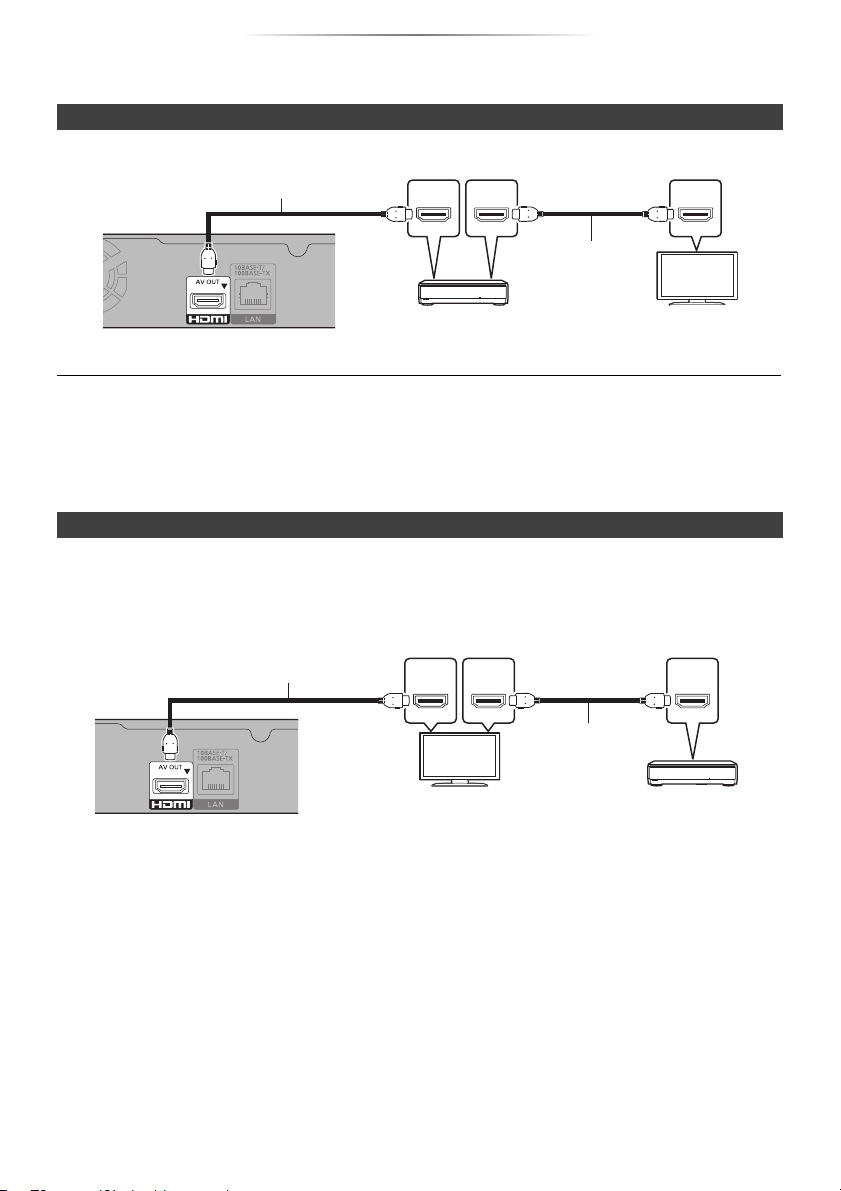
Amplifier/receiver
(4K-compatible)
HDMI cable
(18 Gbps)
HDMI cable
(supplied)
HDMI OUT
(ARC)
HDMI IN
(ARC)
HDMI IN
Amplifier/receiver
HDMI cable
HDMI cable
(supplied)
Connecting to an amplifier/receiver
Enjoying video with a 4K-compatible TV and audio with a 4K-compatible amplifier
HDMI IN
HDMI OUT
(ARC)
HDMI IN
(ARC)
≥ About ARC:
When using the TV or amplifier/receiver that does not have the indication of “(ARC)” (non-ARC-compatible) on the HDMI
terminal, the amplifier/receiver and TV must also be connected using an optical digital cable or coaxial cable in order to
enjoy the TV’s sound through the amplifier/receiver.
Connecting an amplifier to a 4K-compatible TV
3D or 4K images can be played back when this unit is connected to a 3D or 4K compatible TV.
≥ This connection only supports up to 5.1ch.
≥ To connect a TV and amplifier with an HDMI cable, connecting terminals on both the TV and amplifier
must be ARC-compatible. (> above, “About ARC”)
- 11 -
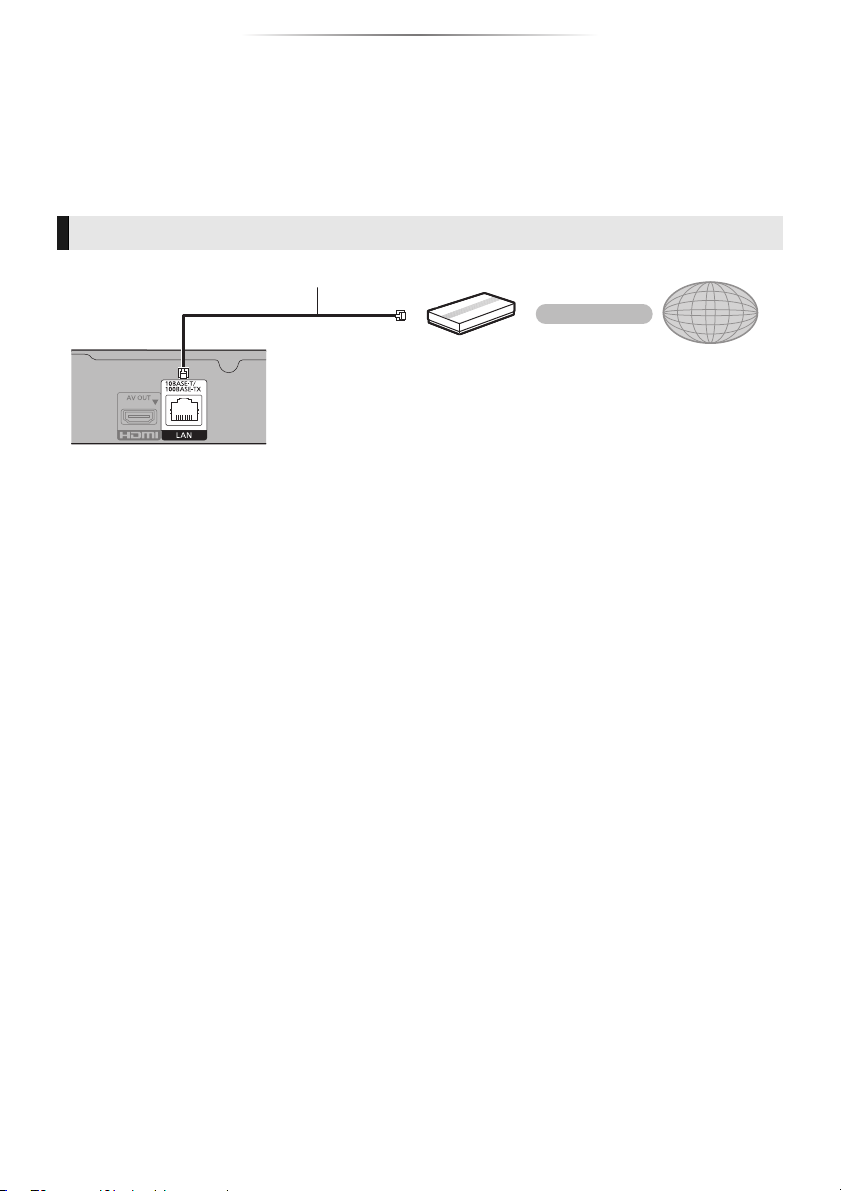
Getting started
Broadband router, etc.
Internet
LAN Cable
Connecting to the network
The following services can be used when this unit is connected to broadband.
≥ Firmware can be updated (> 13)
≥ You can enjoy BD-Live/Network Service (> 16, 18)
≥ You can access other devices (Home Network) (> 19)
For details about connection method, refer to the instructions supplied with the connected equipment.
LAN cable connection
≥ Use category 5 or above straight LAN cables (STP) when connecting to peripheral devices.
≥ Inserting any cable other than a LAN cable in the LAN port can damage the unit.
- 12 -
 Loading...