


Operating Instructions
LCD Television
Model No.
TX-32A400E
Contents
For more detailed instructions, refer to the
Operating Instructions on the CD-ROM.
To view the Operating Instructions on the CD-ROM,
you need a computer equipped with a CD-ROM
drive, and Adobe® Reader® (Version 8.0 or later is
recommended) installed on your computer.
Depending on the operating system or settings on your
computer, the Operating Instructions may not start
automatically.
In this case, open the PDF le under the “MANUAL”
folder manually to view the instructions.
Thank you for purchasing this Panasonic product.
Please read these instructions carefully before operating this product and retain them for
future reference.
The images shown in this manual are for illustrative purposes only.
Please refer to Pan European Guarantee Card if you need to contact your local Panasonic
dealer for assistance.
English
Safety Precautions ................................................. 2
Maintenance ...........................................................3
Quick Start Guide
Accessories / Options ...........................................4
Identifying Controls ...............................................6
Basic Connection ................................................... 8
Auto Setup ............................................................ 10
How to Use Menu Functions ............................... 12
Specications ....................................................... 18
Licence .................................................................. 19
Be Sure to Read

English
Be Sure to Read
Safety Precautions
Warning
Handling the mains plug and lead
● Insert the mains plug fully into the socket outlet. (If the mains plug is loose, it could generate heat and cause
re.)
● Ensure that the mains plug is easily accessible.
● Do not touch the mains plug with a wet hand. This may cause electrical shock.
● Do not use any mains lead other than that provided with this TV. This may cause re or electrical shock.
● Do not damage the mains lead, damaged lead may cause re or electrical shock.
• Do not move the TV with the lead plugged into a socket outlet.
• Do not place a heavy object on the lead or place the lead near a high temperature object.
• Do not twist the lead, bend it excessively or stretch it.
• Do not pull on the lead. Hold onto the mains plug body when disconnecting the plug.
• Do not use a damaged mains plug or socket outlet.
• Ensure the TV does not crush the mains lead.
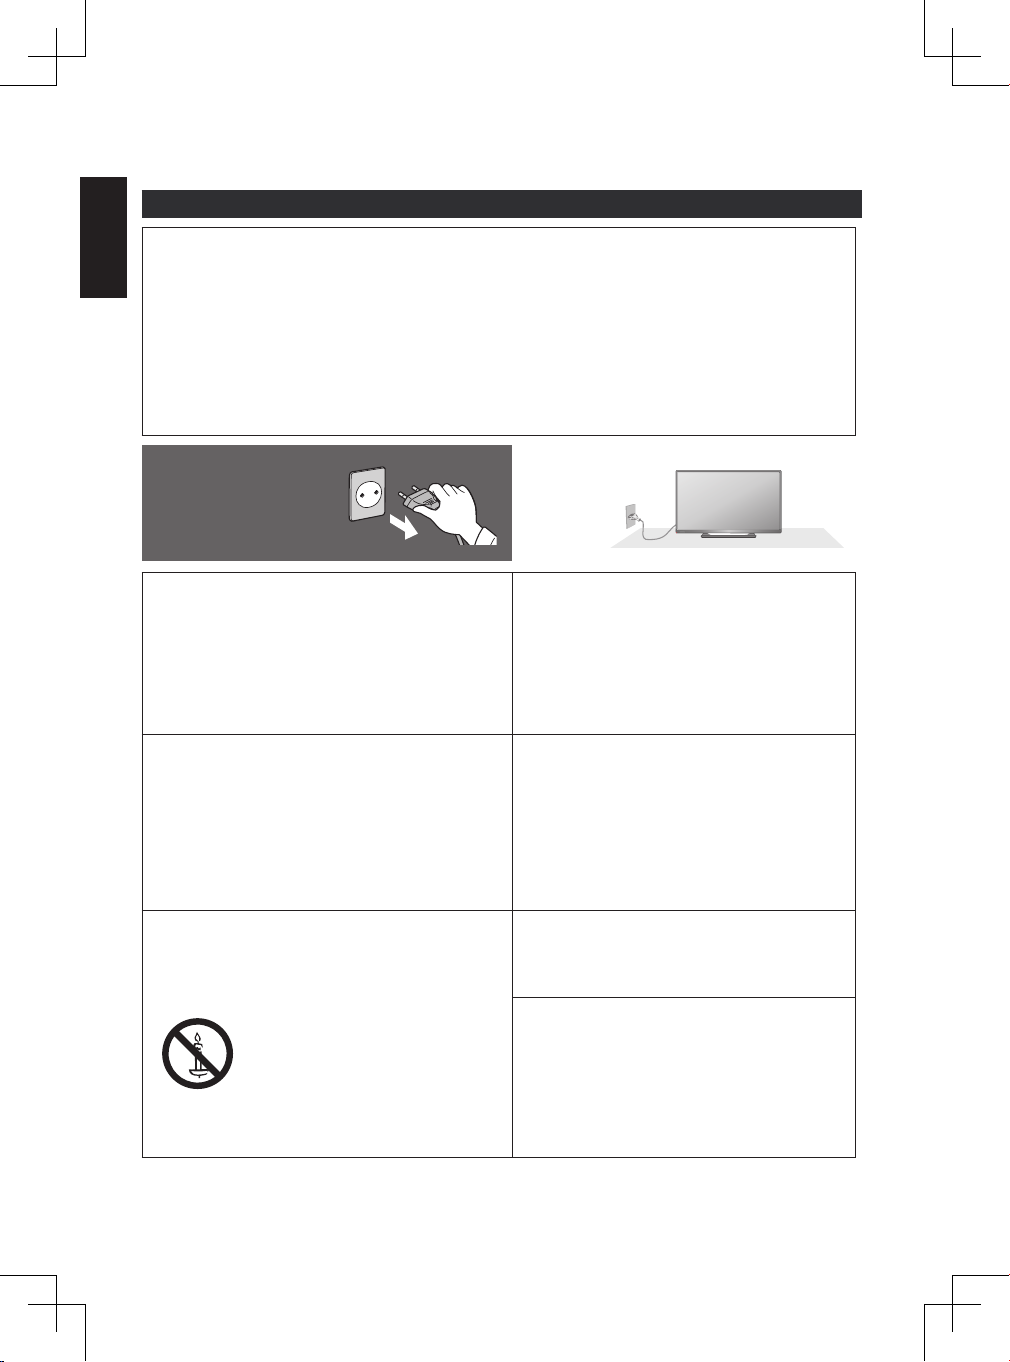
If you nd any
abnormality, remove the
mains plug immediately!
Power source / Installation
● This TV is designed for:
• AC 220-240 V, 50/60 Hz
• Table-top use
Do not remove covers and NEVER modify the
TV yourself
● High voltage components may cause serious electrical
shock, do not remove the rear cover as live parts are
accessible when it is removed.
● There are no user serviceable parts inside.
● Have the TV checked, adjusted or repaired at your
local Panasonic dealer.
AC 220-240 V
50/60 Hz
Do not expose to rain or excessive
moisture
● To prevent damage which might result in electric
shock or re, do not expose this TV to rain or
excessive moisture.
● This TV must not be exposed to dripping or
splashing water and objects lled with liquid, such
as vases, must not be placed on top of or above
the TV.
Do not place the TV on sloped or unstable
surfaces, and ensure that the TV does not
hang over the edge of the base
● The TV may fall or tip over.
Do not expose the TV to direct sunlight and
other sources of heat
● Avoid exposing the TV to direct sunlight and other
sources of heat.
To prevent the spread of
re, keep candles or other
open ames away from
this product at all times
2
Do not place foreign objects inside the TV
● Do not allow any objects to drop into the TV
through the air vents as re or electric shock may
result.
Use only original dedicated base /
mounting equipment
● Using an unapproved base or other xtures may
make the TV unstable, risking injury. Be sure to
ask your local Panasonic dealer to perform the
setup or installation.
● Use approved bases (p. 5)
English
Caution
10
10 10 10
When cleaning the TV, remove the mains plug
● Cleaning an energised TV may cause electric shock.
Remove the mains plug from the wall socket
when the TV is not in use for a prolonged
period of time
● This TV will still consume some power even in the Off
mode, as long as the mains plug is still connected.
Do not expose your ears to excessive volume
from the headphones
● Irreversible damage can be caused.
Do not apply strong force or impact to the
display panel
● This may cause damage resulting in injury.
Maintenance
First, remove the mains plug from the socket outlet.
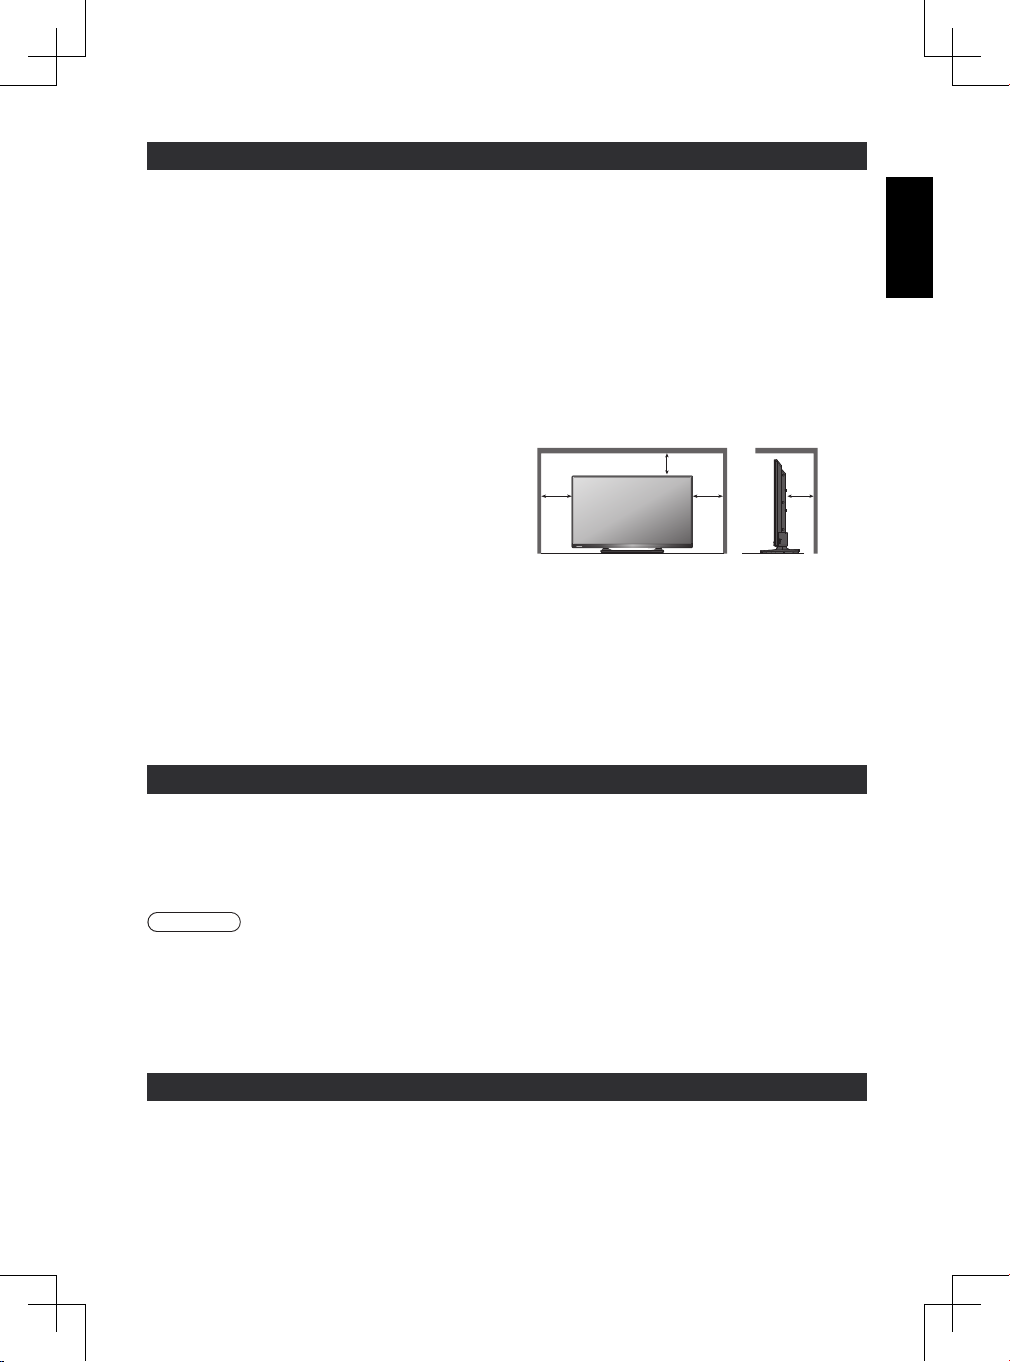
Do not block the rear air vents
● Adequate ventilation is essential to prevent failure
of electronic components.
● Ventilation should not be impeded by covering
the ventilation openings with items such as
newspapers, table cloths and curtains.
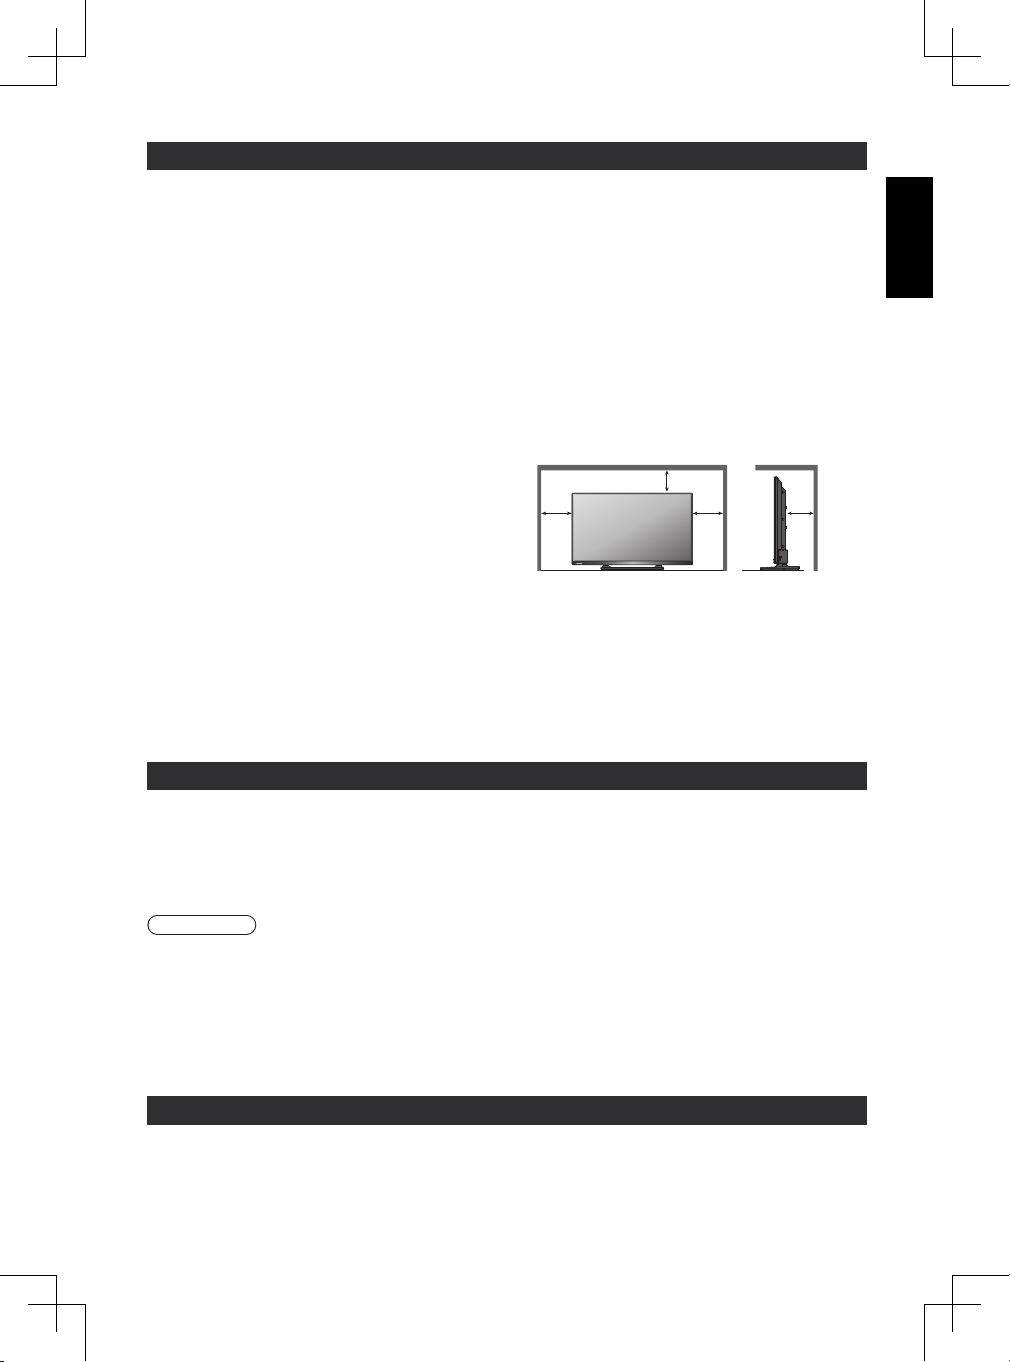
● We recommend that a gap of at least 10 cm is
left all around this TV even when placed inside a
cabinet or between shelves.
● When using the base, keep the space between
the TV and the surface where the TV is set.
● If base is not used, ensure the vents in the
bottom of the TV are not blocked.
Minimum distance
(cm)
Display panel, Cabinet, Base
Regular care:
Gently wipe the surface of the display panel, cabinet, or
base by using a soft cloth to clean the dirt or ngerprints.
Caution
● Do not use a hard cloth or rub the surface too hard, otherwise this may cause scratches on the surface.
● Take care not to subject the TV’s surfaces to water or detergent. Liquid inside the TV could lead to product failure.
● Take care not to subject the surfaces to insect repellent, solvent, thinner or other volatile substances. This may
degrade surface quality or cause peeling of the paint.
● The surface of the display panel is specially treated and may be easily damaged. Take care not to tap or scratch
the surface with your ngernail or other hard objects.
● Do not allow the cabinet and base to make contact with a rubber or PVC substance for a long time. This may
degrade surface quality.
Mains plug
Wipe the mains plug with a dry cloth at regular intervals. Moisture and dust may lead to re or electrical shock.
For stubborn dirt:
First clean the dust on the surface. Dampen a soft cloth
with clean water or diluted neutral detergent (1 part
detergent to 100 parts water). Wring the cloth and wipe
the surface. Finally, wipe away all the moisture.
3
English
MEDIA
PLAYER INPUT
TV AV
MENU TEXT STTL GUIDE
EXIT
OK
OPTION
BACK/
RETURN
ASPECT
MUTE
STILL
LAST VIEW
TV
jkl
tuv
abc
mno
wxyz
def
ghi
pqrs
Quick Start Guide
Accessories / Options
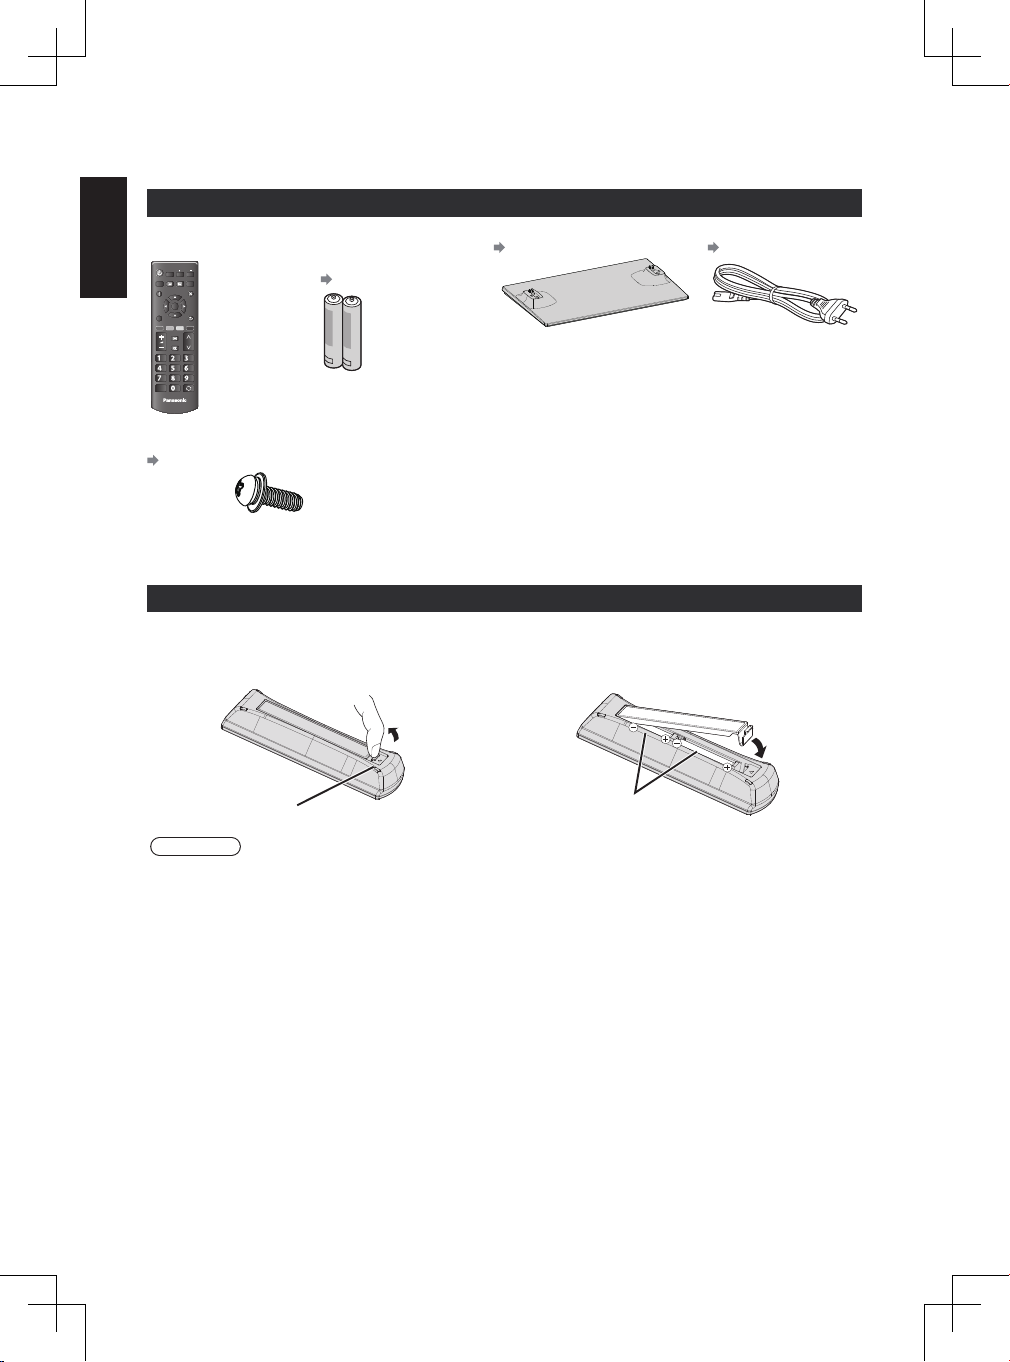
Standard accessories
Remote Control
● N2QAYB000816
Batteries for the Remote
Control (2)
AA)
● (R6
(p. 4)
Base
(p. 5)
Mains Lead
(p. 8)
Assembly screw for
Operating Instructions Pan European Guarantee Card
base (4)
(p. 5)
M4 × 16 mm
● Accessories may not be placed all together. Take care not to throw them away unintentionally.
● This product contains possibly dangerous parts (such as plastic bags), that can be breathed in or swallowed by
young children accidentally. Keep these parts out of reach of young children.
Installing / removing remote’s batteries
1 Remove the battery compartment cover. 2 Insert two R6AA batteries (1.5V) according to “+” and
“-” polarity markings inside the battery compartment,
then close the battery compartment cover.
Pull open
Hook
Note the correct
polarity (+ or -)
Caution
● Incorrect installation may cause battery leakage and corrosion, resulting in damage to the remote control.
● Do not mix old and new batteries.
● Replace only with same or equivalent type. Do not mix different battery types (such as alkaline and manganese
batteries).
● Do not use rechargeable (Ni-Cd) batteries.
● Do not burn or break up batteries.
● Do not expose batteries to excessive heat such as sunshine, re or the like.
● Make sure you dispose of batteries correctly.
● Ensure batteries are replaced correctly, there is danger of explosion and re if battery is reversed.
● Do not disassemble or modify the remote control.
Close
4
English
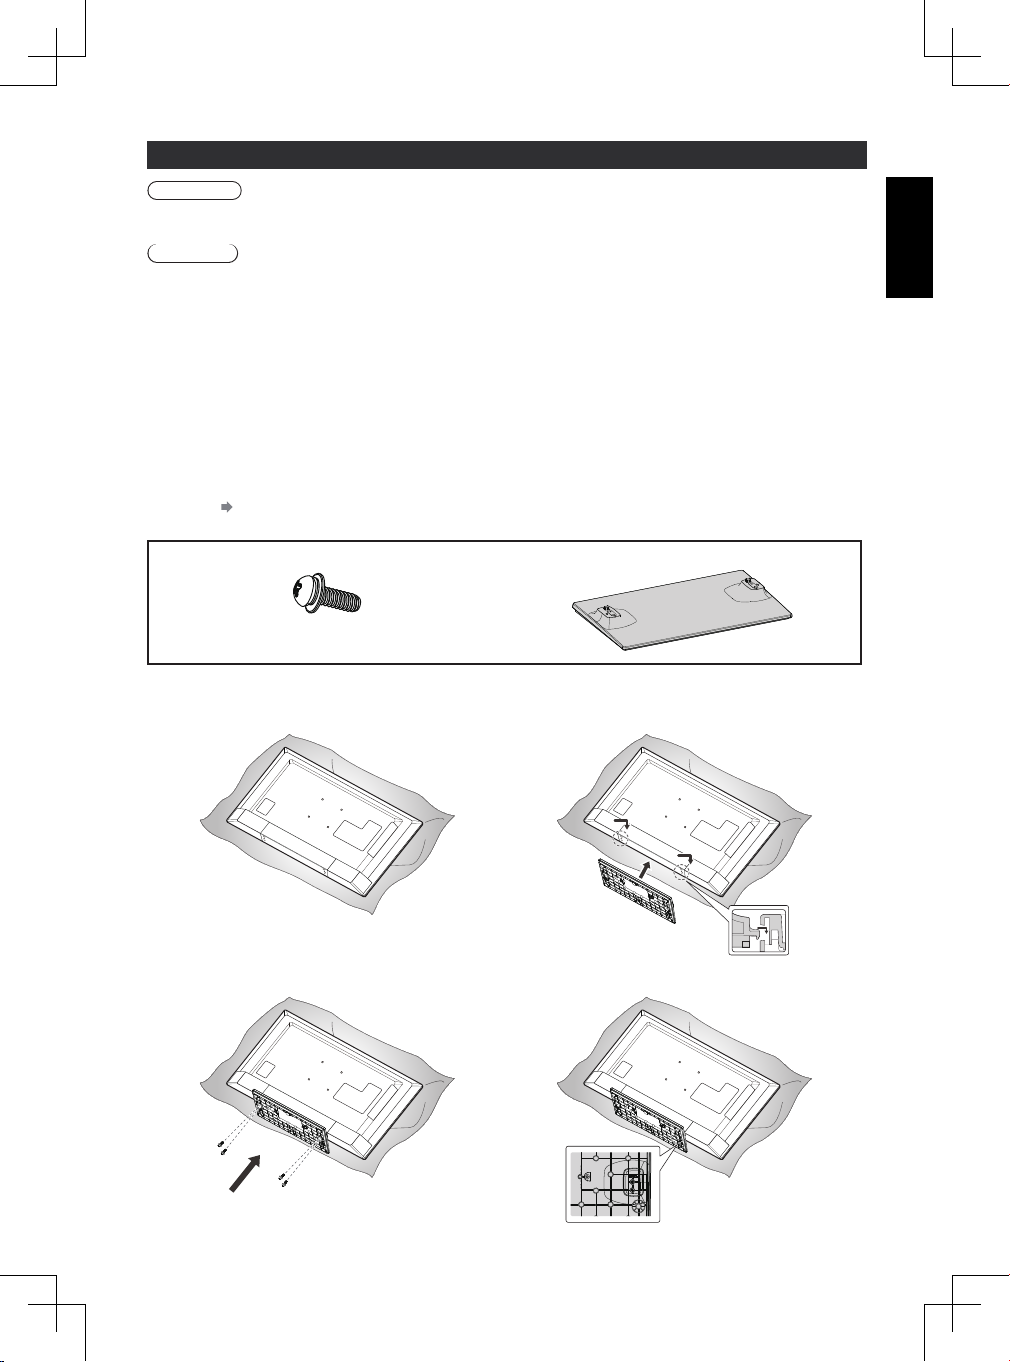
Attaching / removing the base
Warning
Do not disassemble or modify the base.
● Otherwise the TV may fall over and become damaged, and personal injury may result.
Caution
Do not use any base other than the one provided with this TV.
● Otherwise the TV may fall over and become damaged, and personal injury may result.
Do not use the base if it becomes warped or physically damaged.
● If you use the base while it is physically damaged, personal injury may result. Contact your local Panasonic dealer
immediately.
During set-up, make sure that all screws are securely tightened.
● If insufcient care is taken to ensure screws are properly tightened during assembly, the base will not be strong
enough to support the TV, and it might fall over and become damaged, and personal injury may result.
Ensure that the TV does not fall over.
● If the TV is knocked or children climb onto the base with the TV installed, the TV may fall over and personal injury
may result.
Two or more people are required to install and remove the TV.
● If two or more people are not present, the TV may be dropped, and personal injury may result.
When removing the base from the TV, do not remove the base by the methods other than the specied
procedure.
● Otherwise the TV and / or base may fall over and become damaged, and personal injury may result.
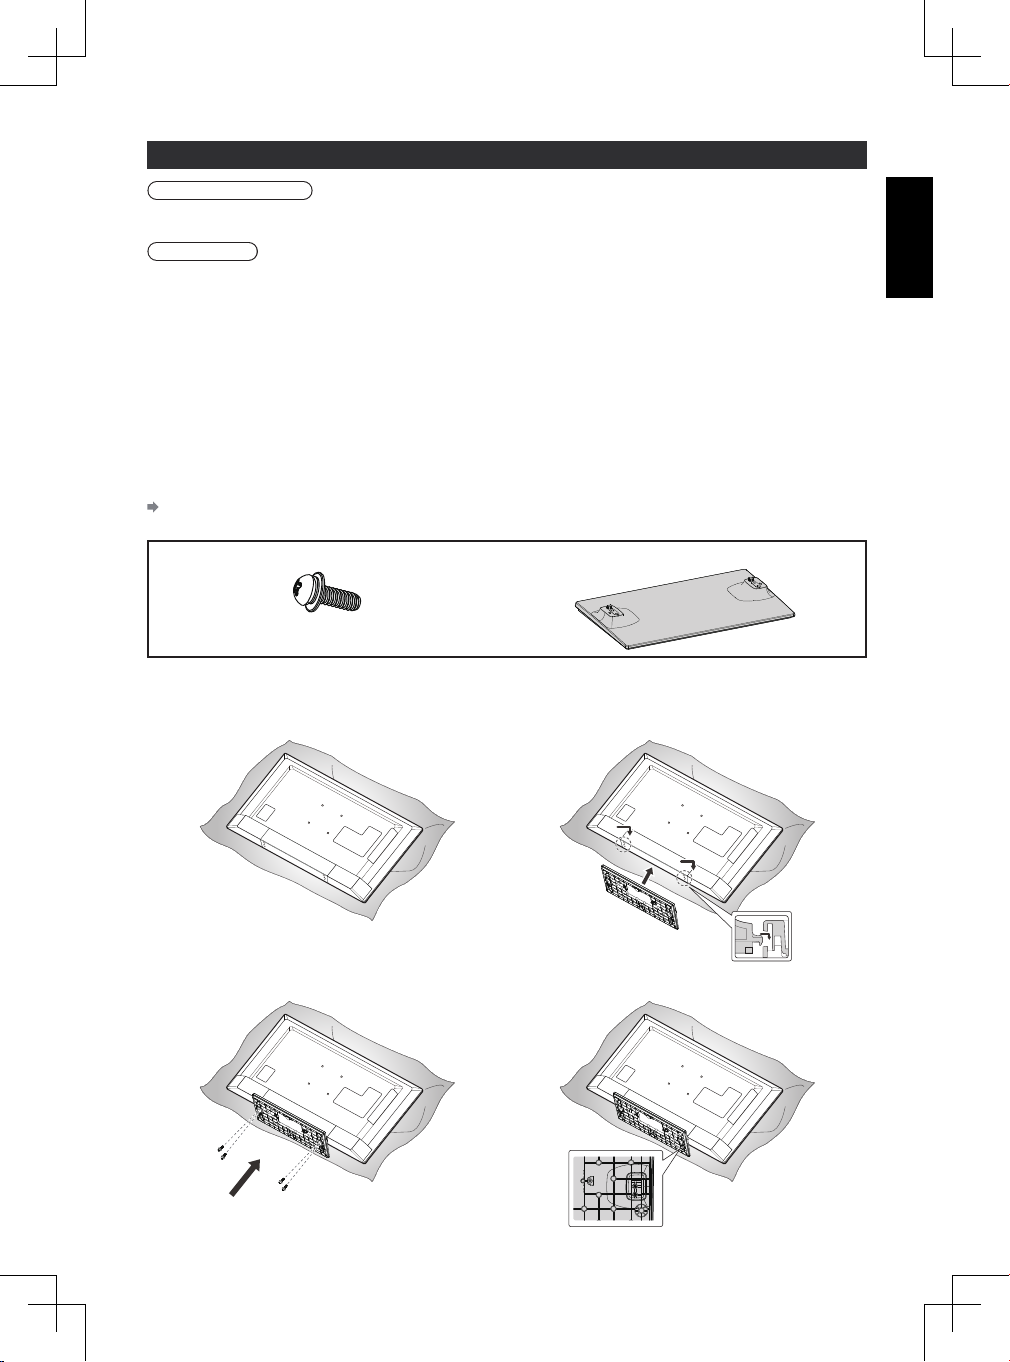
(see below)
Assembly screws for base (4) Base
M4 × 16 mm
1 Place the TV screen face-down on a cushioned, clean
surface to protect the screen from damages and
scratches.
3 Use the assembly screws for base to fasten the base
securely to the TV.
2 Insert the base hook into the bottom hole of the TV.
● Please remove the mylar of base before installing.
4 Please be sure to fasten assembly screws with screw
driver.
5
English
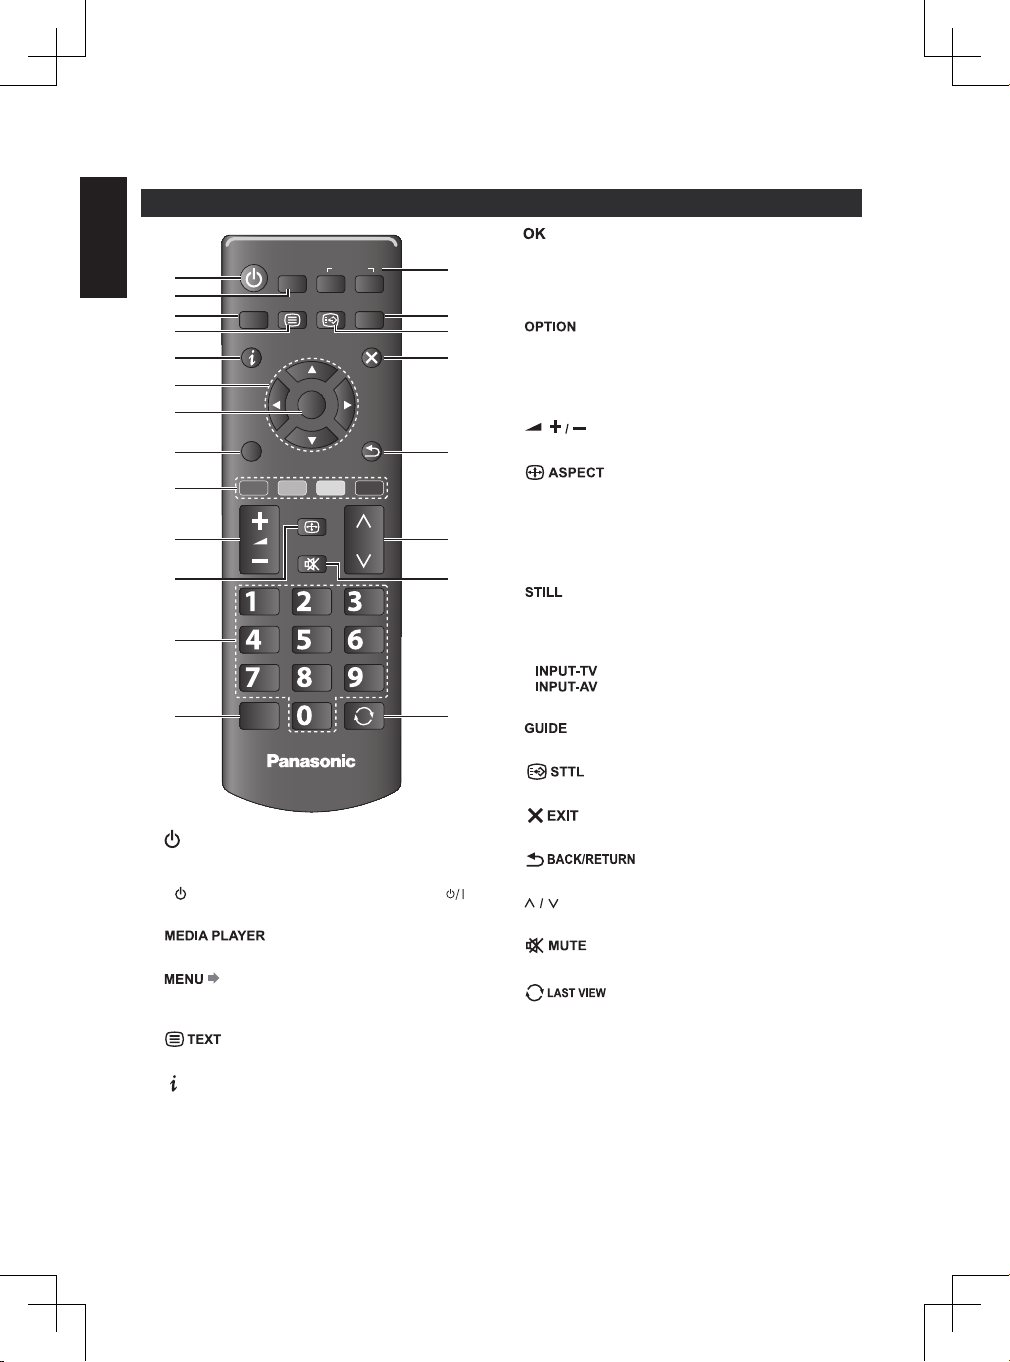
Identifying Controls
Remote Control
7
MEDIA
1
2
3
4
PLAYER INPUT
TV AV
MENU TEXT STTL GUIDE
EXIT
5
6
7
OPTION
OK
BACK/
RETURN
8
9
ASPECT
10
MUTE
11
abc
def
12
13
ghi
pqrs
STILL
TV
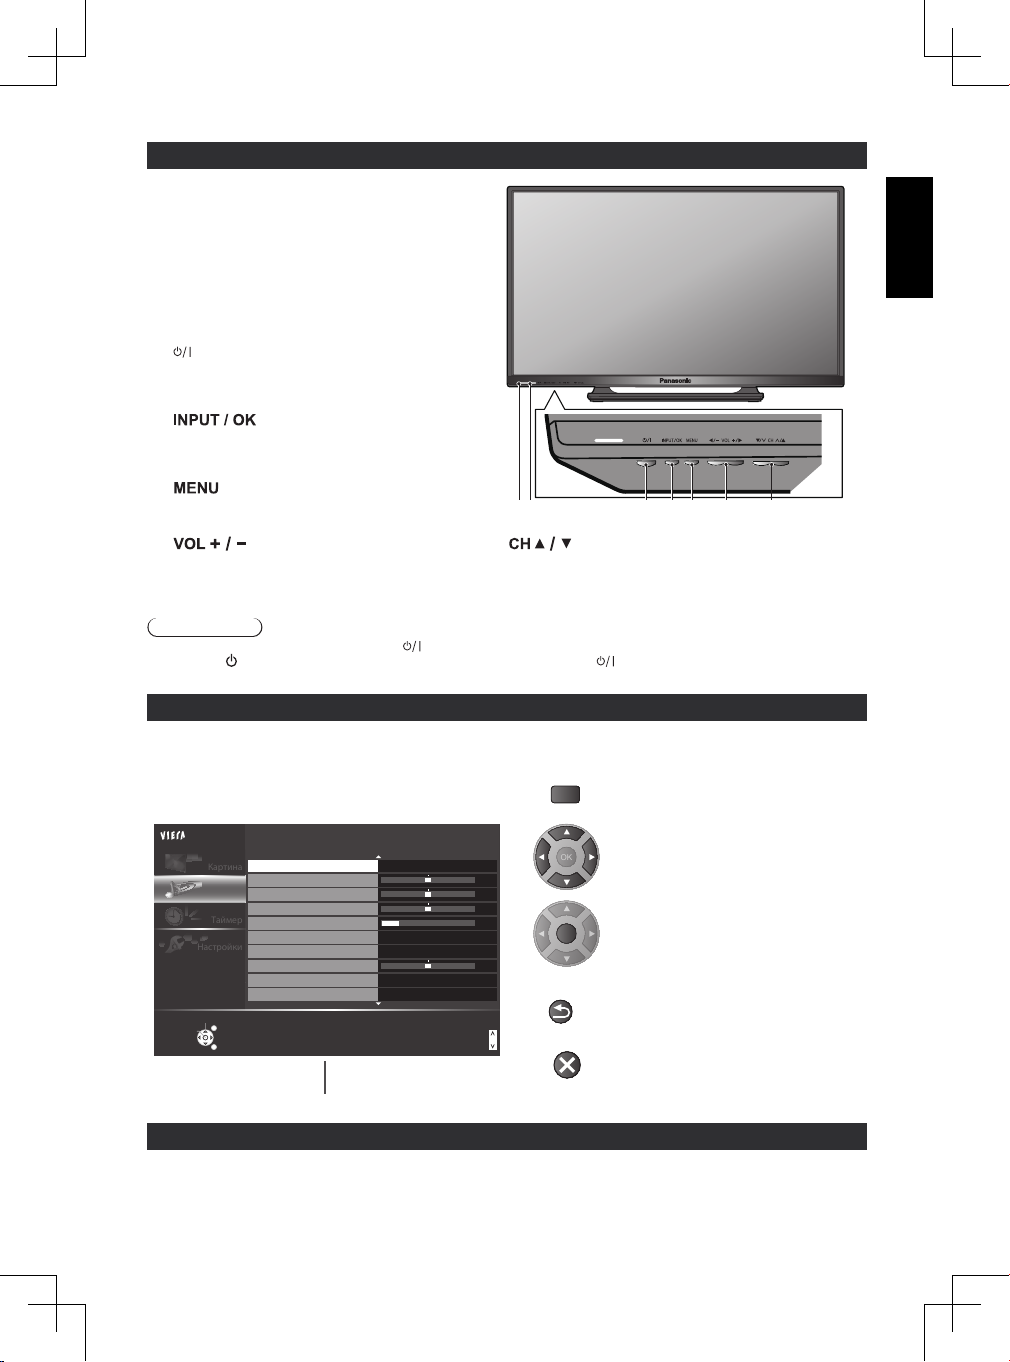
1 Standby On / Off switch
● Switches TV on or off standby.
● If you cannot turn the TV power on by pressing
button of the remote control, please press
(POWER) button on the bottom of the TV.
2
● Switches to USB device viewing / listening mode.
3
4
5
6 Cursor buttons
(p. 12)
● Press to access [Picture], [Sound], [Timer], and
[Setup].
● Switches to teletext mode.
(Information)
● Displays channel and programme information.
● Makes selections and adjustments.
jkl
tuv
mno
wxyz
LAST VIEW
14
15
8
16
17
9 Coloured buttons (red-green-yellow-blue)
10
18
11
12 Numeric buttons
19
20
13
14 Input mode selection
21
15
16
17
18
19
20
21
● Conrms selections and choices.
● Press after selecting channel positions to quickly
change channel.
● Displays the Channel List.
● Easy optional setting for viewing, sound, etc.
● Used for the selection, navigation and operation of
various functions.
(Volume up / Volume down)
● Changes volume.
● Changes aspect ratio.
● Changes channel and teletext pages.
● Sets characters.
● When in Standby mode, switches TV on.
● Freezes / unfreezes the picture.
● Holds the current teletext page (teletext mode).
●
● - Switches to AV input mode from
[Input Selection] list.
● Displays TV guide.
● Displays subtitles.
● Returns to the normal viewing screen.
● Returns to the previous menu / page.
● Selects channel in sequence.
● Switches sound mute on or off.
● Switches to previously viewed channel.
- Switches Antenna / Cable mode.
(Channel up / Channel down)
6

English
Indicator / Control panel
42
1 5 763
MENU
1/2
Mode
Sound
Bass
Treble
Balance
Headphone Volume
Surround
Auto Gain Control
Volume CorrectionVolume Correction
Preferred Audio 1 French
Speaker Distance to Wall
Music
0
0
0
20
O
O
0
Over 30cm
Main Menu
Picture
Sound
Timer
Setup
Change
Select
RETURN
Page up
Page down
OK
BACK/
RETURN
EXIT
1 Remote control signal receiver
● Do not place any objects between the TV remote
control signal receiver and remote control.
2 Power indicator
Red: Standby
Green: On
● The LED blinks when the TV receives a command
from the remote control.
3
(POWER)
● Switches TV on or off.
● To completely turn off the TV, please remove the
mains lead from the wall socket.
4
● Selects an input source.
● Conrms and enters a selection on the On-Screen
Display Menu.
5
● Opens or closes the On-Screen Display Menu.
Bottom side
6
● Changes volume.
● Adjusts the value of the selected item on the
On-Screen Display Menu.
7
● Changes channels.
● Selects item on the On-Screen Display Menu.
Note
● If the TV is turned off by (POWER) button on the bottom of the TV, you cannot switch TV power on by button of
the remote control. Please press
(POWER) button again on the bottom of the TV to turn the TV on.
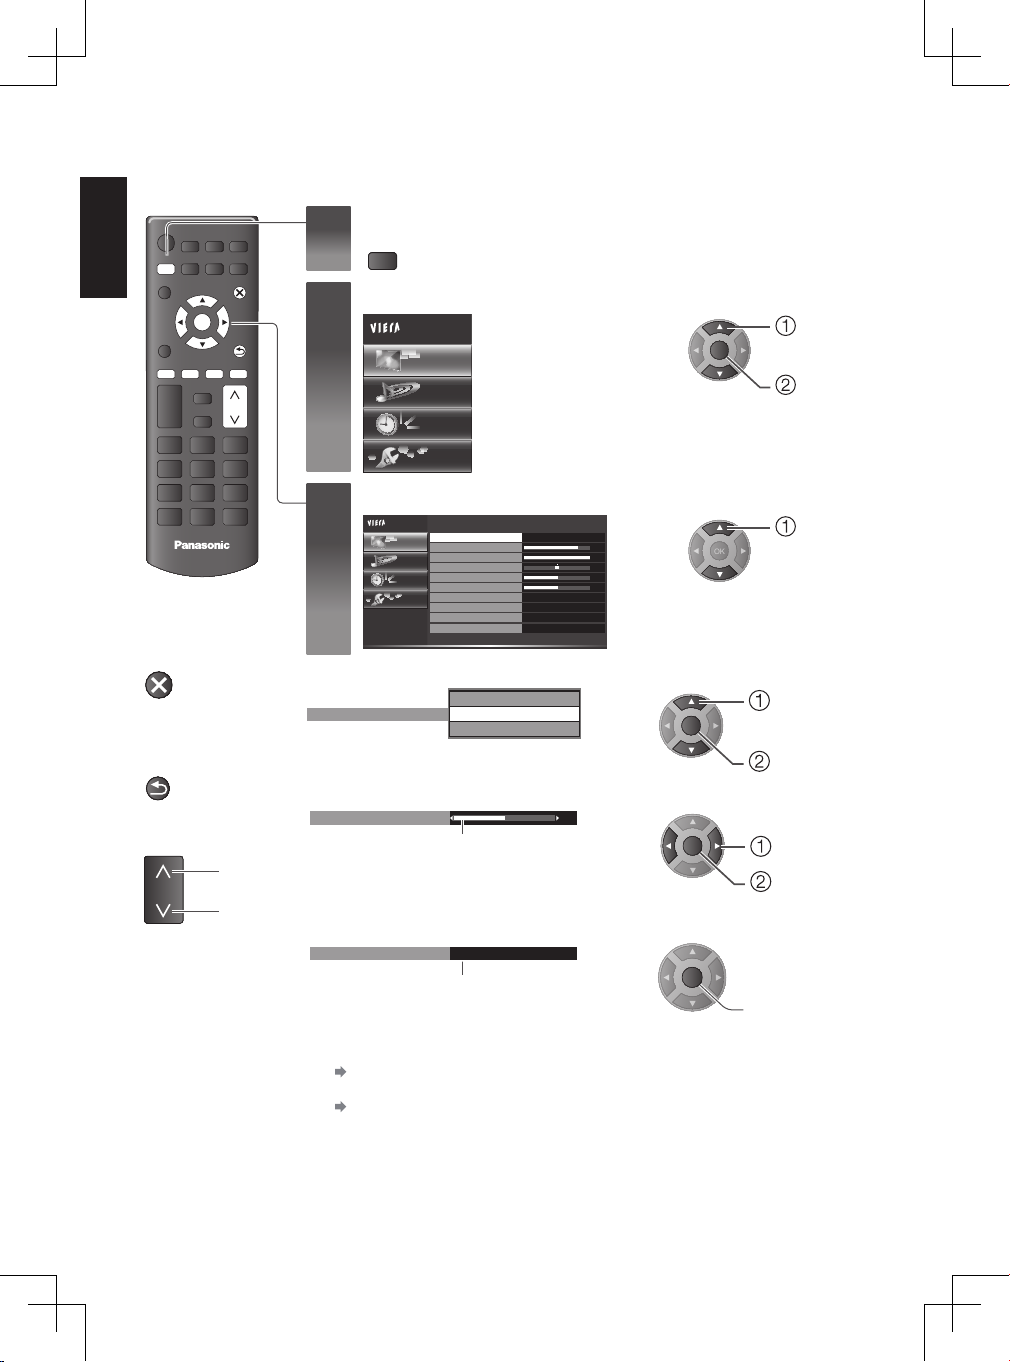
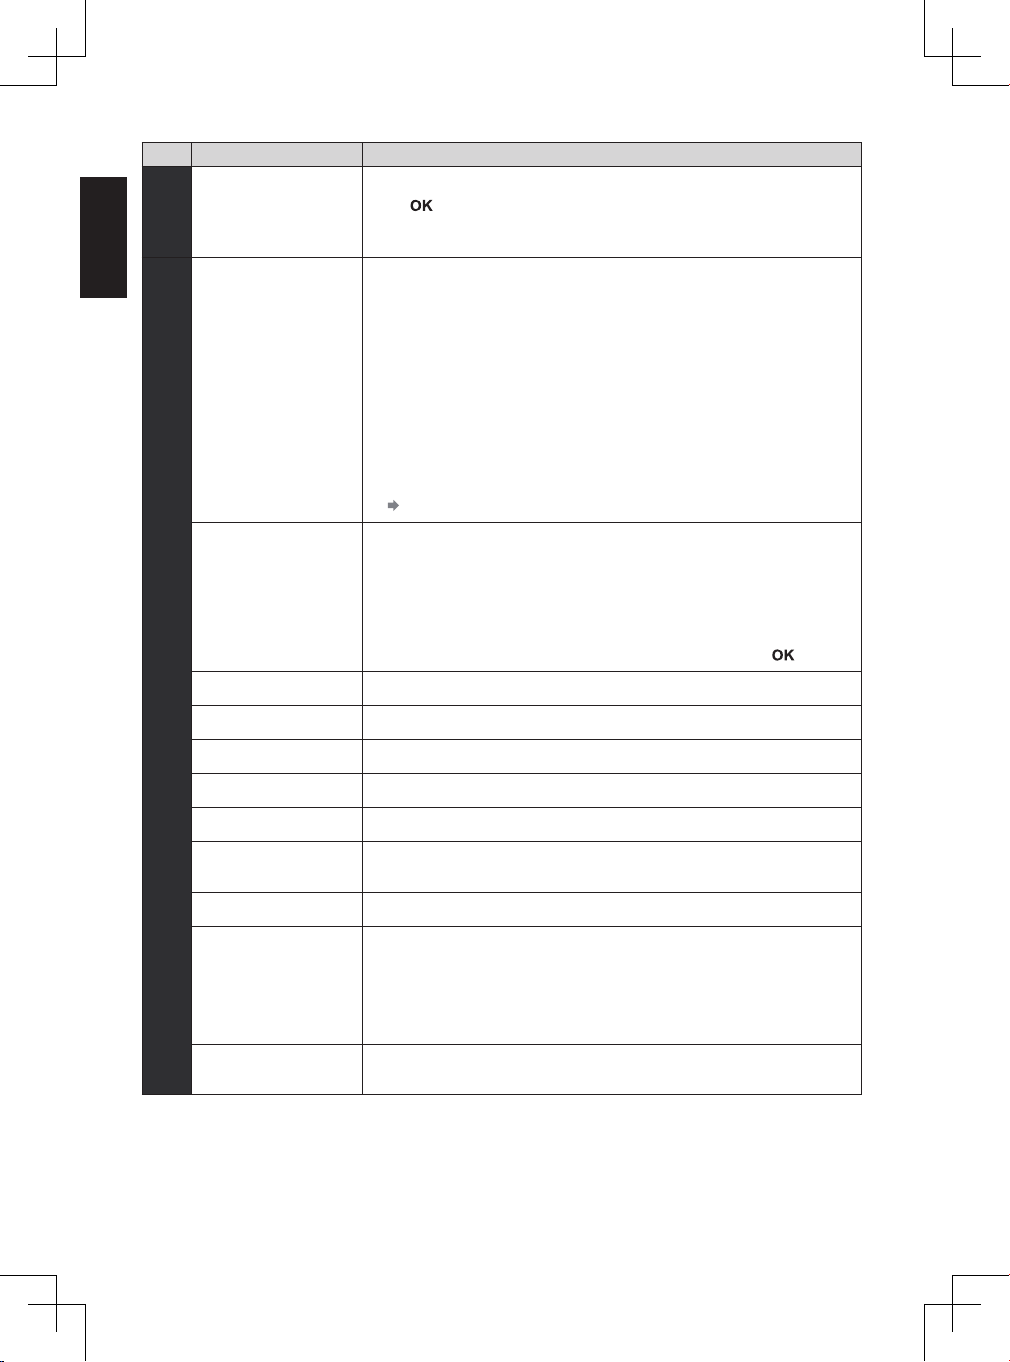
Using the On-Screen Displays - Operation guide
Many features available on this TV can be accessed via the On-Screen Display menu.
Operation guide How to use remote control
Operation guide will help you to operate by using the
remote control.
Example: [Sound]
OK
● Open the main menu
● Move the cursor / select from a
range of options / select the menu
item (up and down only) / adjust
levels (left and right only)
● Access the menu / store settings
after adjustments have been made
or options have been set
Operation guide
Auto power standby function
The TV will automatically go into Standby mode in the following conditions:
• [Off Timer] is active in the [Timer]. (p. 16)
• No operation is performed for the period selected in [Auto Standby]. (p. 16)
● Return to the previous menu
● Exit the menu system and return to
the normal viewing screen
7
English
7
8
9
1
4
3
65
2
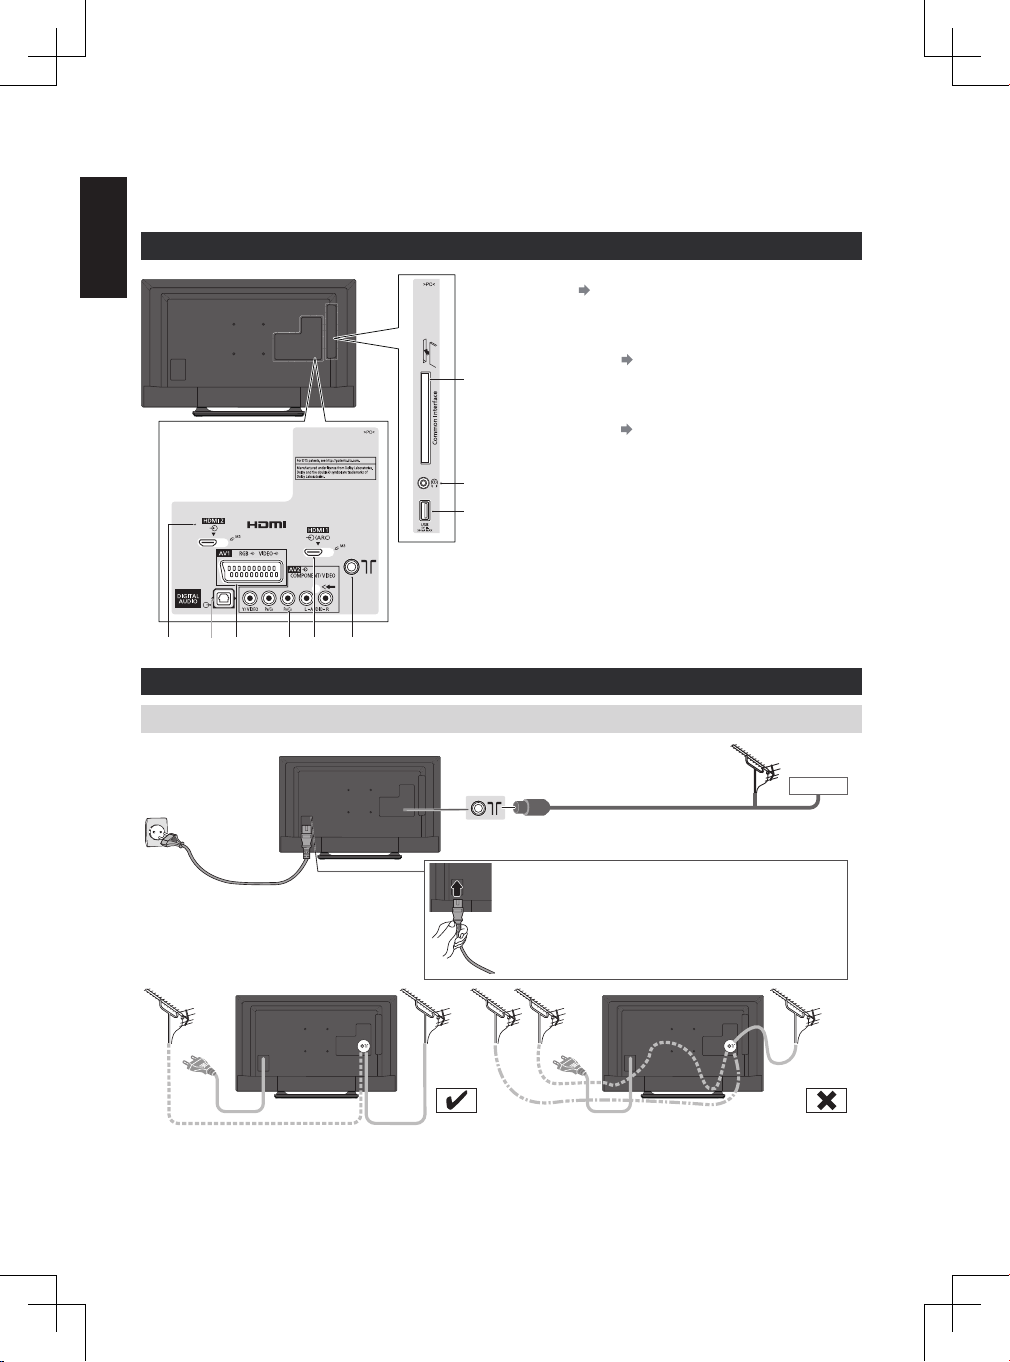
Basic Connection
External equipment and cables shown are not supplied with this TV.
Please ensure that the unit is disconnected from the mains socket before attaching or disconnecting any leads.
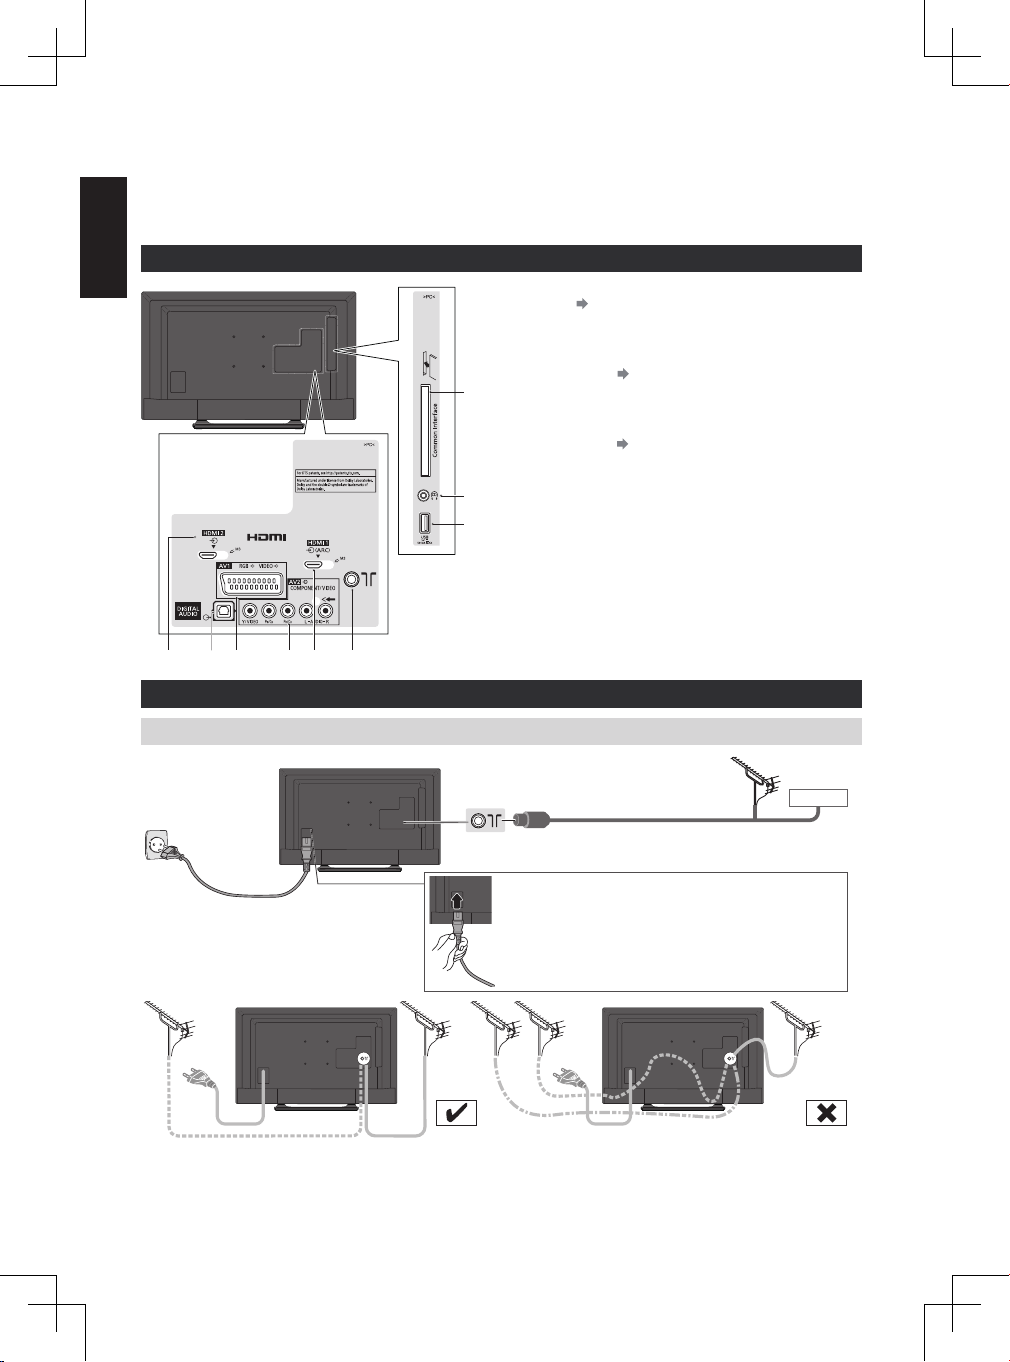
Terminals
1 HDMI 2 (p. 9)
2 DIGITAL AUDIO
Connections
Mains lead and aerial
Mains lead
AC 220-240 V
50/60 Hz
3 AV 1 (SCART)
4 AV 2 (COMPONENT / VIDEO)
5 HDMI 1 (ARC)
6 Terrestrial terminal (see below)
7 CI slot
8 Headphone jack
9 USB port
Antenna, Cable
Mains Lead
Insert the mains plug (supplied) rmly into
place.
● When disconnecting the mains lead,
be absolutely sure to disconnect the mains plug
at the socket outlet rst.
(p. 9)
(p. 9)
Terrestrial aerial
Cable
RF cable
If the antenna is placed in the wrong location, interference might happen.
8
English
Note
● Do not put the Coaxial cable close to the mains lead to avoid noise.
● Do not place the Coaxial cable under the TV.
● To obtain optimum quality picture and sound, an Aerial, the correct cable (75 Ω coaxial) and the correct terminating
plug are required.
● If a communal Aerial system is used, you may require the correct connection cable and plug between the wall Aerial
socket and the TV.
● Your local Television Service Centre or dealer may be able to assist you in obtaining the correct Aerial system for
your particular area and the accessories required.
● Any matters regarding Aerial installation, upgrading of existing systems or accessories required, and the costs
incurred, are the responsibility of you, the customer.
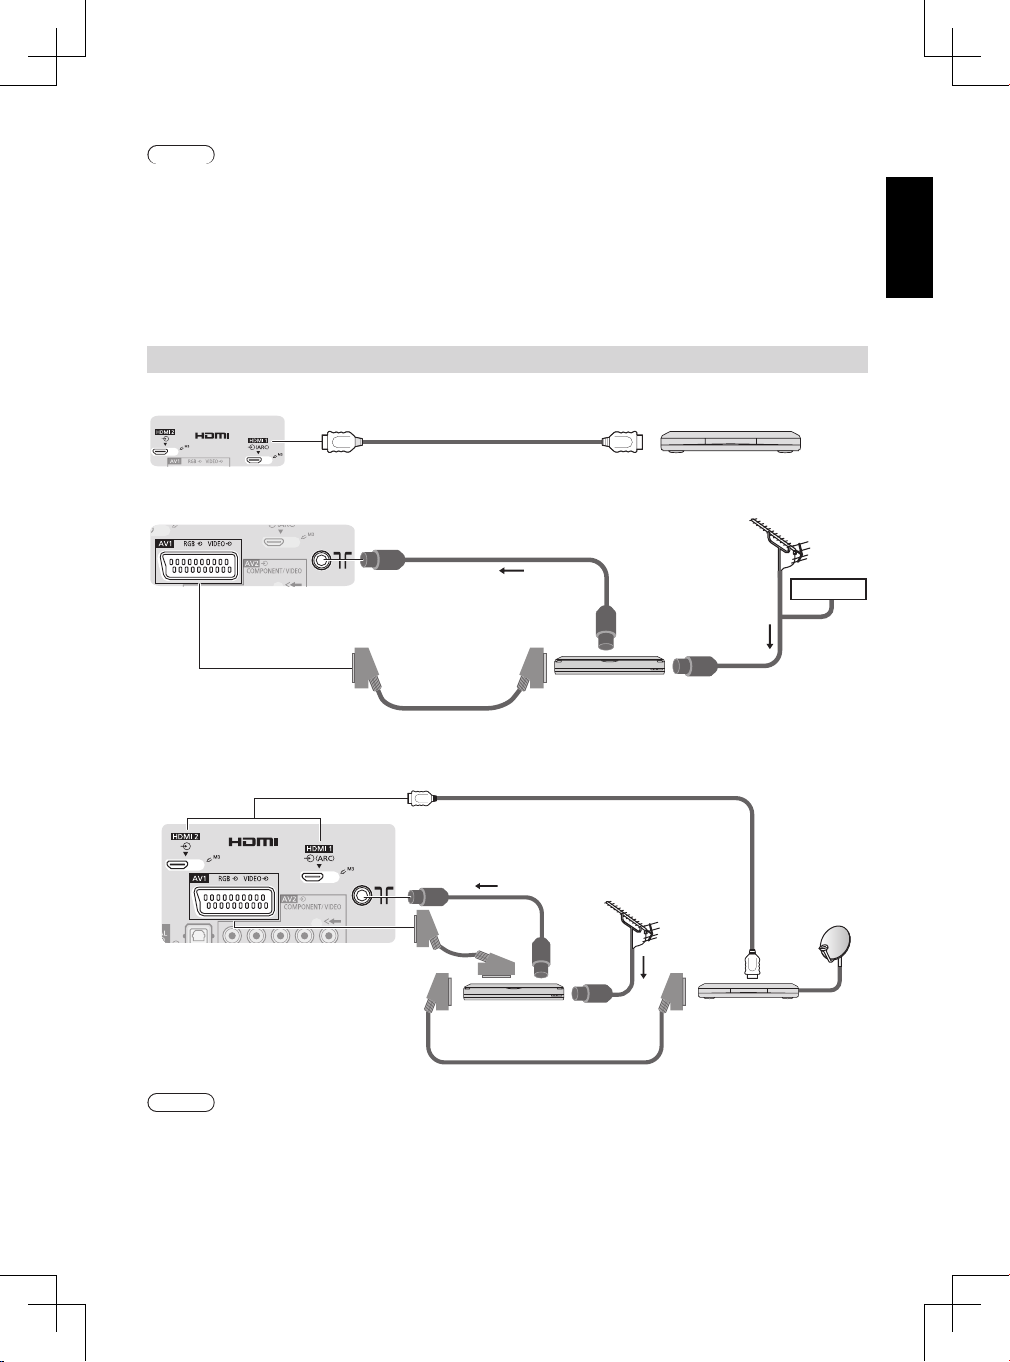
AV devices
Player
TV
HDMI cable
DVD Recorder / VCR
TV
RF cable
Player
Terrestrial aerial
Cable
RF cable
SCART cable
DVD Recorder / VCR
DVD Recorder / VCR and Set top box
HDMI cable
TV
Terrestrial
aerial
Set top box
SCART cable
RF cable
RF cable
DVD Recorder / VCR
SCART cable
Note
● Please also read the manual of the equipment being connected.
● Keep the TV away from electronic equipment (video equipment, etc.) or equipment with an infrared sensor.
Otherwise, distortion of image / sound may occur or operation of other equipment may be interfered.
● When using a SCART or HDMI cable, use the fully wired one.
● Check the type of terminals and cable plugs are correct when connecting.
9

English
Automatic Channel Search
Status : Scanning...
Analogue : 1
Digital : 0
EXIT
RETURN
Scan 2%
Auto Setup
Search and store TV channels automatically.
● These steps are not necessary if the setup has been completed by your local dealer.
● Please complete connections (p. 8, 9) and settings (if necessary) of the connected equipment before starting
Auto Setup. For details of settings for the connected equipment, read the manual of the equipment.
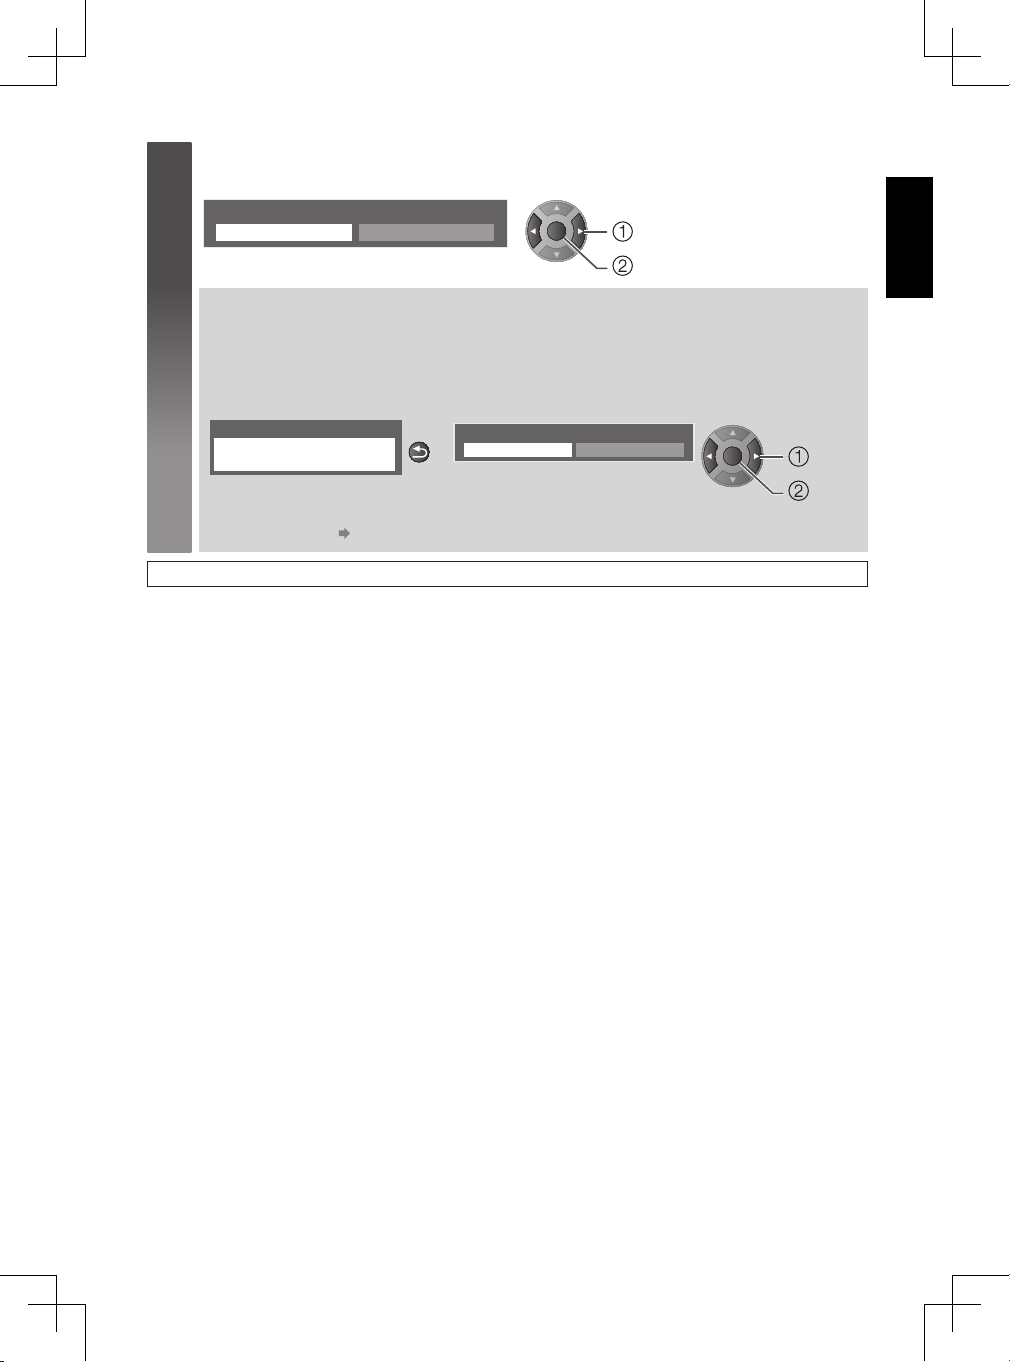
Plug the TV into mains socket and switch On
1
Select the language
2
Sprache
Deutsch
English
Français
Italiano
Español
Português
Nederlands
Select your country
3
Country
Netherlands
OK
BACK/
RETURN
● Depending on the country you select, select your Region or store the Child
Lock- PIN number (“0000” cannot be stored) by following the on screen
instructions.(Only for France, Italy and Belgium)
● Takes a few seconds to be displayed.
● If the red LED shows on the TV, press the Standby On / Off
switch on the remote control.
Belgium
Spain
Croatia
Poland
Slovenia
Greece
Malta
Others
Dansk
Svenska
Norsk
Suomi
Türkçe
Еλληνικά
Czech
Finland
Italy
Norway
Hungary
Turkey
Estonia
Andorra
Polski
Čeština
Magyar
Slovenčina
Български
Română
Srpski
Hrvatski
Slovenščina
Latviešu
eesti keel
Lietuvių
Denmark
France
Luxembourg
Sweden
Portugal
Slovakia
Lithuania
Romania
OK
OK
select
store
select
access
TV
10
Select [Antenna] and start tuning
4
Auto Tuning
Antenna
OK
Cable
Auto Tuning starts
● Auto Setup will start to search for TV channels and store them.
The stored channels and sorted channel order vary depending on the country,
area, broadcasting system and conditions of signal reception.
Auto Setup screen varies depending on the country you select.
select
access
English
Select [Home]
BACK/
RETURN
5
Select [Home] viewing environment to use in your home environment.
Please select your viewing environment.
Home Shop
OK
change
conrm
[Shop] viewing environment (for shop display only)
[Shop] viewing environment is the demonstration mode to explain main features of this TV.
Select [Home] viewing environment to use in your home environment.
● You can return to viewing environment selection screen at the stage of [Shop] conrmation screen.
1 Return to viewing environment selection
screen
Shop
You have selected shop mode
To change viewing environment later on, you will need to initialise all settings by accessing
[Shipping Condition]. [Shipping Condition] (p. 17)
Please select your viewing environment.
2 Select [Home]
Home Shop
OK
Auto Setup is now complete and your TV is ready for viewing.
If tuning has failed, check the connection of the RF cable, and then, follow the on screen instructions.
change
conrm
11
English
EXIT
BACK/
RETURN
MENU
OK
How to Use Menu Functions
Various menus allow you to make settings for the picture, sound, and other functions.
Display the menu
MENU
EXIT
OK
BACK/
RETURN
TV
To return to TV at
any time
To return to the
previous screen
To change menu
pages
up
down
1
Select the menu
2
Main Menu
Select the item
3
Choose from among alternatives
Colour Balance
Adjust using the slide bar
Sharpness 50
Go to the next screen
Main Menu
Picture
Sound
Timer
Setup
● Displays the functions that can be set
(varies according to the input signal)
Picture
Sound
Timer
Setup
Picture
Viewing Mode
Backlight
Contrast
Brightness
Colour
Sharpness
Colour Balance
P-NR
16:9 Overscan
Reset to Defaults
Cool
Normal
Warm
Normal
Normal
O
On
100
Moved
75
0
50
50
select
OK
access
select
select
OK
store
OK
adjust
conrm
12
Child Lock Access
Displays the next screen
To reset the settings
● Picture or sound settings only
[Reset to Defaults] in the [Picture] (p. 14) or [Sound] (p. 15)
● To initialise all settings
[Shipping Condition] (p. 17)
OK
access
English
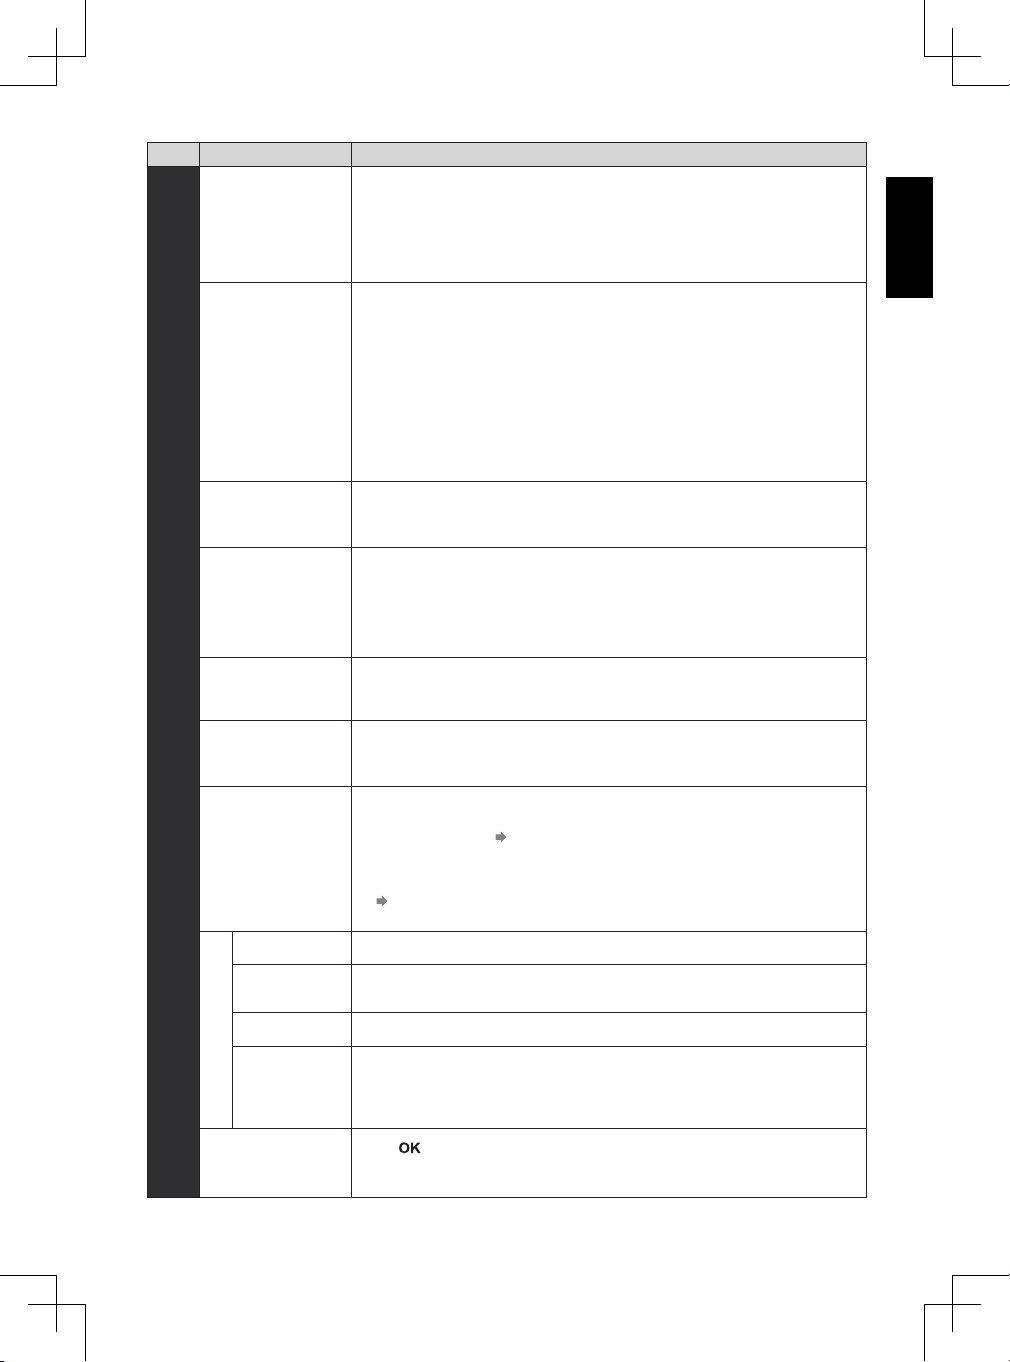
Menu list
Menu
Item Adjustments / Congurations (alternatives)
Selects your favourite picture mode for each input.
[Dynamic] / [Normal] / [Cinema] / [True Cinema] / [Game]
[Dynamic]:
Improves contrast and sharpness for viewing in a bright room.
[Normal]:
Normal use for viewing in a normal lighting condition.
[Cinema]:
Improves the performance of contrast, black and colour reproduction for
watching movies in a darkened room.
Viewing Mode
[True Cinema]:
Reproduces the original image quality precisely without any revision.
[Game]:
Provides suitable images for fast response signal when playing games.
● Not valid on TV mode
● To display a continuous record of time spent using [Game] mode
[Playing Time Display] (p. 17)
In each viewing mode, [Contrast], [Brightness], [Colour], [Sharpness], [Tint],
[Colour Balance], [P-NR], and [3D-COMB] can be adjusted and stored for each
input.
Backlight, Contrast,
Brightness, Colour,
Sharpness
Tint
Picture
Colour Balance
P-NR
3D-COMB
Colour Matrix
AV Colour System
16:9 Overscan
Increases or decreases the levels of these options according to your personal
preference.
Adjusts the picture hue to suit your taste.
● For NTSC signal reception
Sets the overall colour tone of the picture.
[Cool] / [Normal] / [Warm]
Picture Noise Reduction
Reduces unwanted picture noise and icker noise in the contoured parts of a
picture. [Off] / [Min] / [Mid] / [Max]
Makes still or slow moving pictures more vivid. [Off] / [On]
● Occasionally, while viewing still or slow moving pictures, colour patterning
may be seen. Set to [On] to display sharper and more accurate colours.
● For PAL / NTSC signal reception in TV mode or from composite
Selects image resolution of component-connected or HDMI-connected devices.
● Only for HDMI / YPbPr input source
● Only used with 480p or 576p video signal
Selects optional colour system based on video signals in AV mode:
[Auto] / [PAL] / [SECAM] / [M.NTSC] / [NTSC]
● For AV input source only.
Selects the screen area displaying the image. [Off] / [On]
[On]:
Enlarges the image to hide the edge of the image.
[Off]:
Displays the image in the original size.
● Sets to [On] if noise is generated on the edge of the screen.
● This function is available when aspect is set to [16:9].
● This function can be memorised separately for SD (Standard denition) and
HD (High denition) signals.
13
English
Menu
Picture
Reset to Defaults
Item Adjustments / Congurations (alternatives)
Press
input to the default settings.
button to reset the current Picture [Viewing Mode] of the selected
Selects your favourite sound mode. [Music] / [Speech] / [User]
● The selected mode affects all input signals.
[Music]:
Improves sound quality for watching music videos, etc.
[Speech]:
Improves sound quality for watching news, drama, etc.
Mode
Equaliser
Sound
Bass Adjusts level to enhance or minimise lower, deeper sound output.
Treble Adjusts level to enhance or minimise sharper, higher sound output.
Balance Adjusts volume level of right and left speakers.
Headphone Volume Adjusts the volume of the headphones.
Surround Surround sound settings. [Off] / [On]
● Common sound settings are applied for [Music] and [Speech] mode but
[Bass] and [Treble] settings are applied for each mode independently.
[User]:
Adjusts the sounds manually by using the equaliser to suit your favourite
sound quality.
● For the [User] mode, [Equaliser] will appear on the [Sound] instead of
[Bass] and [Treble]. Select [Equaliser] and adjust the frequency.
[Equaliser] (see below)
Adjusts the frequency level to suit your favourite sound quality.
● This function is available when [Mode] is set to [User].
● Select the frequency and change the frequency level by using the cursor
button.
● To enhance the bass sound, raise the level of the lower frequency.
To enhance the treble sound, raise the level of the higher frequency.
● To reset the levels of each frequency to the default settings, select
[Reset to Defaults] by using the cursor button, and then press
button.
Auto Gain Control
Volume Correction Adjusts the volume of individual channel or input mode.
Speaker Distance
to Wall
Preferred Audio 1
Preferred Audio 2
Automatically regulates large sound level differences between channels and
inputs. [Off] / [On]
Compensates for the low frequency sound due to the distance between the
speakers and the wall. [Over 30cm] / [Up to 30cm]
● If the back space between the TV and wall is over 30 cm, [Over 30cm] is
recommended.
● If the back space between the TV and wall is within 30 cm, [Up to 30cm] is
recommended.
Selects the rst and second preferred language for DVB multi audio
(depending on the broadcaster).
14
English
Menu
MPX
SPDIF Selection
MPEG Optical Level
HDMI 1 Input(HDMI)
HDMI 2 Input(HDMI)
Sound
SPDIF Delay
Downmix Mode
Type
Visually Impaired
Reset to Defaults
Item Adjustments / Congurations (alternatives)
Selects multiplex sound mode (if available)
[Stereo]: Use this normally.
[Mono]: When stereo signal cannot be received.
[M1] / [M2]: Available while mono signal is transmitted.
● For Analogue mode
SPDIF: A standard audio transfer le format
Selects the initial setting for digital audio output signal from DIGITAL AUDIO and
HDMI 1 (ARC) (ARC function) terminals.
[Auto] / [PCM]
[Auto]: Dolby Digital Plus, Dolby Digital and HE-AAC multi-channel are output
as Dolby Digital Bitstream. MPEG is output as [PCM]. DTS is output as
DTS for video contents of [Media Player].
[PCM]: Digital output signal is xed to [PCM].
● ARC (Audio Return Channel) : A function of digital audio output using HDMI
cable
Adjusts the audio level output from DIGITAL AUDIO terminal as the initial setting.
[-12] / [-10] / [-8] / [-6] / [-4] / [-2] / [0] (dB)
● Normally, [PCM] sound is larger comparing with the other types of audio track.
Selects to t the input signal. [Digital] / [Analogue]
[Digital]: When sound is carried via the HDMI cable connection.
[Analogue]: When sound is not carried via the HDMI-DVI adaptor cable
● For HDMI input only
Adjusts the delay time of the sound output from DIGITAL AUDIO and
HDMI 1 (ARC) (ARC function) terminals, if the sound does not synchronise the
image.
Selects the output mode for listening to compressed music.
[Surround] / [Stereo] / [Dual1] / [Dual2]
● For DVB mode
Narration settings for impaired users (only available in some countries).
[Normal] / [Hearing Impaired] / [Visually Impaired]
● [Hearing Impaired]
● Set to [Visually Impaired] to activate the narration sound track when available
on the broadcast.
● [Visually Impaired] appears after you have selected this option.
● For DVB mode
Speaker Narration sound track is output to the TV speakers. [Off] / [On]
Headphone
Volume Adjusts the volume of the narration sound track.
Pan and Fade
Narration sound track is output to the headphone. [Off] / [On]
● Connect a headphone before selecting this option.
Sets the audio pan and fade effect. [Off] / [On]
[Off] : Main Audio programme
[On] : Controls the level of the Main Audio Programme and controls the pan of
Press
[Headphone Volume], [Surround], [MPEG Optical Level], [Type], and
[Visually Impaired] to the default settings.
connection.
[Preferred Subtitle Type] (p. 17)
(see below).
the Associated Audio Programme
button to reset the current [Bass], [Treble], [Balance],
15
English
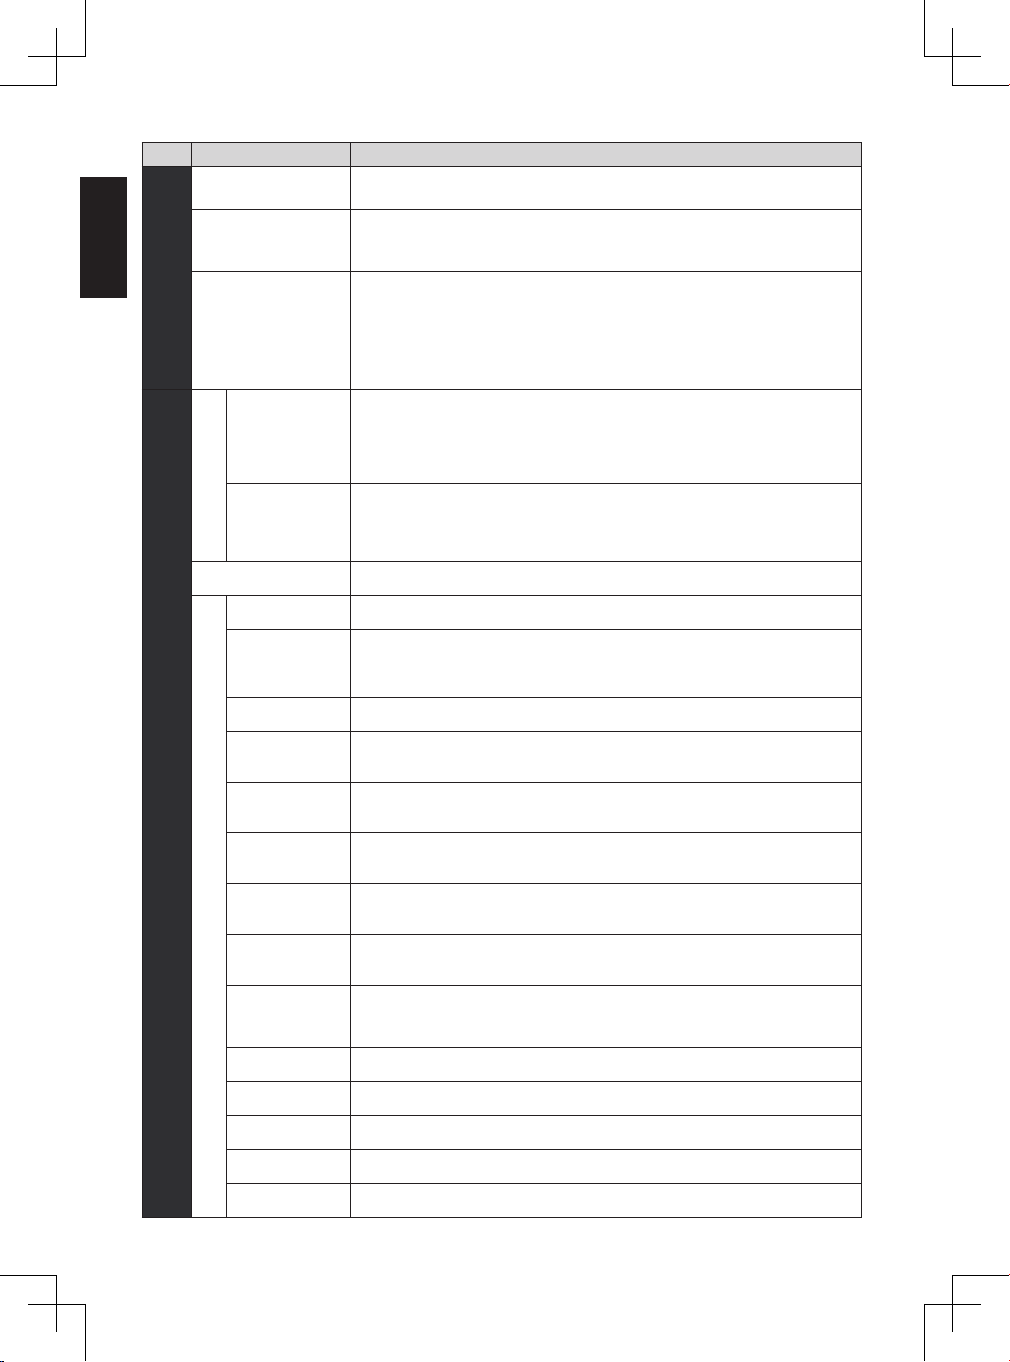
Menu
Timer
Item Adjustments / Congurations (alternatives)
Off Timer
Time zone
Auto Standby
Link Settings
CEC
Power off Link
Child Lock Locks a channel / AV input to prevent access to it.
TV Selection Selects the type of signal you want to tune. [Antenna] / [Cable]
Automatic
Channel
Search
Scan Adds newly found channels while keeping existing channels.
Sets the time until the TV automatically goes to Standby mode.
[Off] / [15] / [30] / [45] / [60] / [75] / [90] (minutes)
Adjusts the time data.
● The time data will be corrected based on GMT.
● Set to [Auto] to adjust the time automatically according to your area.
Automatically turns the TV to Standby mode for energy saving when no
operation is performed for 4 hours. [Off] / [2 hours] / [4 hours]
● Automatic input switching with the connected equipment affects this function
and time-count will be reset.
● The notication message will appear 3 minutes before going into Standby
mode.
When set to [On], the TV will automatically switch to the appropriate HDMI
input whenever an HDMI connected equipment is initially turned on and the
Play mode is selected. [Off] / [On]
● The HDMI CEC feature of connected HDMI CEC-compatible device must be
turned on.
When set to [On], all HDMI connected equipment will be turned off
automatically by turning off the TV. [Off] / [On]
● A Panasonic DVD Recorder will not turn off if it is still in the Rec mode.
● The TV remains on even if all the HDMI connected equipment are turned off.
Automatically searches for the receivable channels.
Setup
16
Analogue
Manual Tuning
Tuning Menu ( Antenna / Cable )
DVB-T Signal
Condition
DVB-T Manual
Tuning
DVB-C Signal
Condition
DVB-C Manual
Tuning
Favourite
Network Select
Favourites Edit Creates a list of favourite channels.
Skip Skips unwanted channels.
Sort Sorts channels.
Channel List Edit Edits channels.
Clear block Clears the channel lists.
Searches for the analogue channels manually.
Checks the DVB-T signal condition.
Searches for the DVB-T channels manually.
Checks the DVB-C signal condition.
Searches for the DVB-C channels manually.
Selects your favourite network for each broadcasters
(only available in some countries).
● For DVB mode

English
Menu
Language Changes language for on-screen displays.
Item Adjustments / Congurations (alternatives)
Display Settings
Setup
Preferred Teletext
Teletext Character
Set
Preferred Subtitles 1
Preferred Subtitles 2
Preferred Subtitle
Type
Input Labels
Banner Display
Timeout
Playing Time
Display
Radio Mode
Selects the preferred language for DVB teletext service (depending on the
broadcaster).
Selects teletext language. [West] / [East1] / [East2]
[West]: English, French, German, Greek, Italian, Spanish, Swedish, Turkish,
etc.
[East1]: Czech, English, Estonian, Lettish, Rumanian, Russian, Ukrainian,
etc.
[East2]: Czech, Hungarian, Lettish, Polish, Rumanian, etc.
Selects the rst and second preferred language for DVB subtitles (depending
on the broadcaster).
Selects the preferred subtitle type. [Normal] / [Hearing Impaired]
● [Hearing Impaired] provides aids in understanding and enjoyment with
DVB subtitles (depending on the broadcaster).
● [
Preferred Subtitles 1]
Accesses the input labels list to select the label of each input mode or set to
skip unconnected one for easier identication and selection in [TV Selection],
[Input Selection] or banner.
● To skip the input mode, select [Skip].
Sets how long the Information banner stays on screen.
[0 (No display)] / [1] / [2] / [3] / [4] / [5] / [6] / [7] / [8] / [9] / [10] (seconds)
Sets to [On] to display a continuous record of time spent using [Game] mode
in the top right of the screen every 30 minutes. [Off] / [On]
● This function is available when [Viewing Mode] is set to [Game].
Sets the timer for turning off the screen automatically when a radio channel
is selected [Off] / [5] / [10] / [15] / [20] (seconds)
● The sound is active even if the screen turns off. This function is effective
in reducing power consumption when listening to a radio channel.
● Press any buttons except Standby, Volume Up / Down and Sound Mute
buttons to turn the screen on.
● Not valid on Analogue mode
/ [
Preferred Subtitles 2
] are given priority.
Shipping Condition Resets all settings to the original condition.
Common Interface Sets to watch encrypted channels, etc.
System Menu
System Update Downloads new software to this TV.
Software Licence Displays the software licence information.
Demo Settings ● For [Shop] viewing environment.
System Information Displays the system information of this TV.
Power Save
● A different menu will be displayed in the mode of [Media Player].
● Only available items can be selected.
Reduces brightness of picture to economise on power consumption.
[Off] / [On]
17
English
Specications
Product che
Supplier
Model ID
Panasonic Corporation
TX-32A400E
Energy efciency class
Visible screen size(diagonal)
On mode average power
consumption
Annual energy consumption*1
Standby power consumption*2
Off mode power consumption
Screen resolution
*1: Energy consumption XYZ kWh per year, based on the power consumption of the television operating 4 hours per day
for 365 days. The actual energy consumption will depend on how the television is used.
*2: When the TV is turned off with the remote control and no function is active.
For the information of rated power consumption, refer to the label on the TV back cover.
A+
80 cm / 31.5 inches (diagonal)
30 W
44 kWh
0.3 W
0.3 W
1,366 (W) × 768 (H)
18

English
Licence
Even if no special notation has been made of company or product trademarks, these trademarks have been fully
respected.
This product incorporates the following software:
(1) the software licensed under the GNU General Public License, Version 2.0 (GPL V2.0) and/or,
(2) open sourced software other than the software licensed under the GPL.
The software categorized as (1) - (2) are distributed in the hope that it will be useful, but WITHOUT ANY
WARRANTY, without even the implied warranty of MERCHANTABILITY or FITNESS FOR A PARTICULAR
PURPOSE. Please refer to the detailed terms and conditions thereof shown in the “Software Licence” menu on
this product.
At least three (3) years from delivery of this product, Panasonic Corporation will give to any third party who
contacts us at the contact information provided below, for a charge no more than our cost of physically performing
source code distribution, a complete machine-readable copy of the corresponding source code covered under
GPL V2.0 or the other licenses with the obligation to do so, as well as the respective copyright notice thereof.
Contact Information:cdrequest@unipf.jp
The source code and the copyright notice are also available for free in our website below.
http://www.unipf.jp/dl/DTV13ET/
DVB ● DVB and the DVB logos are trademarks of the DVB Project.
Dolby
● Manufactured under license from Dolby Laboratories. Dolby and the double-D symbol
are trademarks of Dolby Laboratories.
HDMI
● HDMI, the HDMI logo, and High-Denition Multimedia Interface are trademarks or
registered trademarks of HDMI Licensing LLC in United States and other countries.
HD TV
● The “HD TV” Logo is a trademark of DIGITALEUROPE.
DTS
● Manufactured under license under U.S. Patent Nos: 5,956,674; 5,974,380; 6,487,535
& other U.S. and worldwide patents issued & pending. DTS, the Symbol, & DTS and
the Symbol together are registered trademarks & DTS 2.0+Digital Out is a trademark of
DTS, Inc. Product includes software. © DTS, Inc. All Rights Reserved.
Notice for DVB functions
● This TV is designed to meet the standards (as of August, 2013) of DVB-T (MPEG2 and MPEG4-AVC(H.264))
digital terrestrial services and DVB-C (MPEG2 and MPEG4-AVC(H.264)) digital cable services.
Consult your local dealer for availability of DVB-T services in your area.
Consult your cable service provider for availability of DVB-C services with this TV.
● This TV may not work correctly with the signal which does not meet the standards of DVB-T or DVB-C.
● Not all the features are available depending on the country, area, broadcaster, service provider.
● Not all CI modules work properly with this TV. Consult your service provider about the available CI module.
● This TV may not work correctly with CI module that is not approved by the service provider.
● Additional fees may be charged depending on the service provider.
● The compatibility with future services is not guaranteed.
● Check the latest information on the available services at the following website. (English only)
http://panasonic.jp/support/global/cs/tv/
19

Information for Users on Collection and Disposal of Old Equipment and used
Web Site: http://panasonic.net
Batteries
These symbols on the products, packaging, and/or accompanying documents mean that used
electrical and electronic products and batteries should not be mixed with general household waste.
For proper treatment, recovery and recycling of old products and used batteries, please take them to
applicable collection points, in accordance with your national legislation and the Directives 2002/96/
EC and 2006/66/EC.
By disposing of these products and batteries correctly, you will help to save valuable resources and
prevent any potential negative effects on human health and the environment which could otherwise
arise from inappropriate waste handling.
For more information about collection and recycling of old products and batteries, please contact
your local municipality, your waste disposal service or the point of sale where you purchased the
items. Penalties may be applicable for incorrect disposal of this waste, in accordance with national
legislation.
For business users in the European Union
If you wish to discard electrical and electronic equipment, please contact your dealer or supplier for
further information.
[Information on Disposal in other Countries outside the European Union]
These symbols are only valid in the European Union. If you wish to discard these items, please
contact your local authorities or dealer and ask for the correct method of disposal.
Note for the battery symbol (bottom two symbol examples) :
This symbol might be used in combination with a chemical symbol. In this case it complies with the
requirement set by the Directive for the chemical involved.
Declaration of Conformity (DoC)
Authorized Representative :
Panasonic Testing Centre
Panasonic Marketing Europe GmbH
Winsbergring 15, 22525 Hamburg, Germany
Customer’s Record
The model number and serial number of this product may be found on its rear panel. You should note this serial number
in the space provided below and retain this book, plus your purchase receipt, as a permanent record of your purchase
to aid in identication in the event of theft or loss, and for Warranty Service purposes.
Model Number Serial Number
Инструкции за работа
Телевизор с течни кристали
Модел No.
TX-32A400E
Съдържание
За подробни инструкции вижте Ръководството
за експлоатация на приложения CD-ROM.
За да можете да разгледате Ръководството
за експлоатация на CD-ROM, трябва да имате
компютър с четец за CD-ROM и инсталиран
Adobe® Reader® (версия 8.0 или по-нова се
препоръчва) на компютъра.
В зависимост от операционната система или
настройките на вашия компютър, Ръководството за
експлоатация може да не се отвори автоматично.
В такъв случай отворете файла с формат PDF
в папката “РЪКОВОДСТВО”, за да разгледате
инструкциите.
Благодарим ви, че закупихте този продукт на Panasonic.
Моля, прочетете настоящото ръководство внимателно преди да използвате
продукта и го запазете за справка в бъдеще.
Изображенията в ръководството служат само за илюстрация на примерите.
Ако имате нужда от помощ от местния дистрибутор на Panasonic, прегледайте
Паневропейската гаранционна карта.
Български
Задължително прочетете
Предпазни мерки .................................................. 2
Поддръжка ............................................................. 3
Кратко ръководство
Аксесоари / Опции ................................................ 4
Идентифициране на управлението ................... 6
Основни връзки .................................................... 8
Автоматични настройки ....................................10
Как се използват функциите на менюто .........12
Спецификации ....................................................18
Лиценз ..................................................................19
Български
Задължително прочетете
Предпазни мерки
Предупреждение
Боравене с щепсела и кабела на захранването
● Вкарайте щепсела докрай в контакта. (Ако щепселът е хлабав, той може да се нагрее и да причини пожар.)
● Осигурете си лeceн дocтъп дo кoнтaктa нa зaxpaнващия кaбeл.
● Не докосвайте захранващия щепсел с мокра ръка. Това може да причини токов удар.
● Не използвайте захранващи кабели, които не са доставени с този телевизор. Това може да причини пожар или
токов удар.
● Не повреждайте захранващия кабел. Повреденият кабел може да причини пожар или токов удар.
• Не местете телевизора, когато кабелът е включен в контакт.
• Не поставяйте тежки предмети върху кабела и не поставяйте кабела близо до предмети с висока температура.
• Не усуквайте кабела, не го прегъвайте прекомерно и не го опъвайте.
• Не дърпайте кабела. Хващайте корпуса на щепсела, когато изключвате щепсела от захранването.
• Не ползвайте повреден щепсел или контакт.
• Внимавайте телевизорът да не смачка захранващия кабел.
Ако откриете някаква
нередност, веднага
извадете щепсела!
Захранване / Инсталация
● Този телевизор е проектиран за:
• Променлив ток (АС) 220-240 V, 50/60 Hz
• Настолна употреба
Не отстранявайте капаците и НИКОГА не
модифицирайте телевизора сами
● Компонентите под високо напрежение могат да
причинят сериозен токов удар. Не махайте задния
капак на телевизора, тъй като може да се стигне до
контакт с части под напрежение.
● Вътре няма части, които да могат да бъдат поправени
от потребителя.
● Дайте телевизора за проверка, настройка или поправка
при местния дилър на Panasonic.
Променлив ток (AC)
220-240 V
50/60 Hz
Не излагайте на дъжд или на прекомерна
влага
● За да предотвратите повреда, която може да
причини удар от електрически ток или пожар,
не излагайте телевизора на дъжд или прекомерна
влага.
● Не слагайте на уреда съдове с течности, като напр.
вази и не излагайте телевизора на капеща или
течаща вода.
Не поставяйте телевизора на наклонени
или нестабилни повърхности; уверете се,
че телевизорът не виси от края на основата
● Телевизорът може да падне или да се прекатури
Не излагайте телевизора на пряка слънчева
светлина и други източници на светлина
● Избягвайте излагането на телевизора на пряка
слънчева светлина и други източници на топлина.
За да се предотврати
пожар, никога не дръжте
свещи или други
източници на открит
пламък близо до този
продукт
2
Не поставяйте чужди тела в телевизора
● Не позволявайте в телевизора да попадат каквито
и да било предмети през въздушните отвори, тъй
като това може да причини пожар или токов удар.
Използвайте само специалните оригинални
подставки / уреди за закрепване
● Използването на неодобрени стойки или други
фиксиращи приспособления може да доведе до
нестабилност на апарата и риск от нараняване.
Помолете своя местен дилър на Panasonic да
извърши настройката или инсталацията.
● Използвайте одобрени основи (стр. 5).
Български
Внимание
10
10 10 10
Огато почиствате телевизора, извадете
щепсела от контакта
● Почистването на телевизор с включено захранване
може да причини токов удар.
Ако не използвате телевизора продължително
време, изключете щепсела от контакта
● Този телевизор продължава да консумира известно
количество електричество дори и в изключен режим,
ако щепсела е свързан към контакт.
Не излагайте Вашия слух на прекомерно силен
звук от слушалките
● Можете да си причините трайно увреждане на слуха.
Не прилагайте голяма сила или физическо
въздействие върху екранния панел
● Това може да причини повреди, които да доведат до
нараняване.
Поддръжка
Не блокирайте задните въздушни отвори
● Адекватната вентилация е от съществено
значение, за да се предотврати повреждането на
електронните компоненти.
● Вентилацията не трябва да се затруднява като
вентилационните отвори се покриват с предмети
като вестници, покривки за маса и завеси.
● Препоръчваме да се остави разстояние от поне
10 cм навсякъде около телевизора дори ако той
е поставен в шкаф или между рафтове.
● При използване на поставката, спазвайте
разстоянието между телевизора и повърхността,
на която той е поставен.
● Ако не се използва поставка, уверете се че
отворите на дъното на телевизора не са блокирани.
Минимално разстояние
(cм)
Първо отстранете захранващия кабел от контакта.
Екранен панел, Корпус, основа
Редовна грижа:
Внимателно избърсвайте повърхността на екранния
панел, корпуса и основата с мека кърпа, за да отстраните
замърсяванията и отпечатъците.
Внимание
● Не използвайте твърда кърпа и не търкайте повърхността твърде силно, в противен случай може да надраскате
повърхността.
● Погрижете се да не излагате повърхностите на телевизора на вода и почистващи препарати. Проникването на
течност в телевизора може да причини повреда.
● Погрижете се да не излагате повърхностите на препарати против насекоми, разтворители, разредители и други
летливи вещества. Това може да наруши качеството на повърхността или да доведе до обелване на боята.
● Повърхността на екранния панел е специално третирана и може лесно да бъде увредена. Внимавайте да не
почуквате или драскате повърхността с нокти или други твърди предмети.
● Не допускайте продължителен контакт на корпуса и основата с гума или материали от PVC. Това може да наруши
качеството на повърхността.
Захранващ кабел
Редовно забърсвайте захранващия кабел със суха кърпа. Влага и прах могат да доведат до пожар или токов удар.
За упорити замърсявания:
Първо почистете праха от повърхността. Навлажнете мека
кърпа с чиста вода или разреден неутрален почистващ
препарат (1 част препарат в 100 части вода). Изцедете
кърпата и избършете повърхността. Накрая забършете
влагата.
3

Български
MEDIA
PLAYER INPUT
TV AV
MENU TEXT STTL GUIDE
EXIT
OK
OPTION
BACK/
RETURN
ASPECT
MUTE
STILL
LAST VIEW
TV
jkl
tuv
abc
mno
wxyz
def
ghi
pqrs
Кратко ръководство
Аксесоари / Опции
Стандартни аксесоари
Дистанционно
управление
● N2QAYB000816
Батерии за
дистанционното
управление (2)
● (R6AA)
(стр. 4)
Основа
(стр. 5)
Захранващ кабел
(стр. 8)
Монтажен болт за
основата (4)
Инструкции за работа Паневропейска гаранция
(стр. 5)
M4 × 16 mm
● Аксесоарите може да не са поставени на едно място. Погрижете се да не ги изхвърлите неволно.
● Този продукт съдържа части (например найлонови торбички), които представляват потенциална опасност за малки
деца, тъй като могат да бъдат погълнати или вдишани. Дръжте тези части на място, недостъпно за малки деца.
Поставяне / изваждане на батериите на дистанционното управление
1 Отстранете капака на отделението за батерии. 2 Поставете две батерии тип R6AA (1,5V) като
спазите маркировката за поляритет “+” и “-”
в отделението за батериите, след което затворете
капака на отделението за батерии.
Дръпнете,
за да отворите
Кука
Обърнете внимание на
правилния поляритет (+ или -)
Внимание
● Неправилното инсталиране може да причини теч на батерията и корозия, водещи до повреда на дистанционното
управление.
● He смесвайте стари и нови батерии.
● Подменете само със същия или с еквивалентен тип. He смесвайте различни видове батерии (например алкални
и манганови батерии).
● He използвайте презареждащи се батерии (Ni-Cd).
● He горете и не чупете батериите.
● He излагайте батериите на висока температура, например на директна слънчева светлина, огън или други
подобни.
● Уверете се, че изхвърляте батериите по правилния начин.
● Уверете се, че батериите са сменени правилно, тъй като съществува опасност от експлозия или пожар, ако са
поставени в обърнато положение.
● Не разглобявайте и не променяйте дистанционното управление.
Затворете
4
Български
Поставяне / отстраняване на поставката
Предупреждение
Не разглобявайте или модифицирайте поставката.
● В противен случай телевизорът може да падне и да се повреди, и да причини нараняване на човек.
Внимание
Не използвайте друга поставка освен тази, която е предоставена с този телевизор.
● В противен случай телевизорът може да падне и да се повреди, и да причини нараняване на човек.
Не използвайте поставката, ако тя се огъне или повреди физически.
● Използването на физически повредена поставка може да причини нараняване. Незабавно се свържете с местния
дилър на Panasonic.
При поставяне се уверете, че всички винтове са здраво затегнати.
● Ако не бъде обърнато внимание на правилното затягане на винтовете по време на сглобяването, поставката
няма да бъде достатъчно здрава, за да издържи телевизора и той може да падне, да се повреди или да причини
нараняване.
Уверете се, че телевизорът няма да падне
● Ако телевизорът бъде съборен или деца се качат на поставката при вече монтиран телевизор, той може да падне
и да причини нараняване.
Необходими са най-малко двама души за монтиране и сваляне на телевизора.
● Ако не присъстват двама или повече души, телевизорът може да бъде изпуснат и да причини нараняване.
При отстраняване на поставката от телевизора следвайте единствено указанията, описани процедурата.
(вижте по-долу)
● В противен случай телевизорът и/или поставката може да падне и да се повреди, а може и да се нараните.
Монтажни болтове за основата (4) Основа
M4 × 16 mm
1 Поставете телевизора с екрана надолу върху мека
и чиста повърхност, за да предпазите екрана от
нараняване и надраскване.
3 Използвайте монтажните болтове за основата, за да я
закрепите здраво към телевизора.
2 Вкарайте куката на основата в долния отвор на
телевизора.
● Моля, отстранете фолиото от основата, преди да
извършите монтажа.
4 Задължително затегнете монтажните болтове
с отвертка.
5

Български
Идентифициране на управлението
Дистанционно управление
7
MEDIA
1
2
3
4
PLAYER INPUT
TV AV
MENU TEXT STTL GUIDE
EXIT
5
6
7
OPTION
OK
BACK/
RETURN
8
9
ASPECT
10
MUTE
11
abc
def
12
13
ghi
pqrs
STILL
TV
1 Ключ за Вкл. / Изкл. на режим на готовност
● Поставя в или извежда телевизора от режим на
готовност.
● Ако не можете да включите телевизора като
натиснете бутона
натиснете бутона
в долната част на телевизора.
2
● Превключва в режим за преглед на / слушане от
USB устройство
3
4
5
6 Курсорни бутони
(стр. 12)
● Натиснете за достъп до [Картина], [Звук], [Таймер],
и [Настройки].
● Превключва в режим на телетекст.
(Информация)
● Показва информация за канала и програмата.
● Служат за избор и настройка.
на дистанционното управление,
(МОЩНОСТ) разположен
jkl
tuv
mno
wxyz
LAST VIEW
14
15
16
17
18
19
20
21
● Потвърждава избора.
● Натиснете, след като сте избрали позиция, за да
можете бързо да смените канала.
● Показва списъка с канали.
8
● Лесни допълнителни настройки за гледане, звук и др.
9 Цветни бутони (червен-зелен-жълт-син)
● Използват се за избор, навигация и изпълнение на
различни функции.
10
11
12 Бутони с цифри
13
14 Бутони за избор на входен режим
15
16
17
18
19
20
21
(Усилване / намаляване на звука)
● Променя силата на звука.
● Променя съотношението на картината.
● Сменя каналите и телетекст страниците.
● Настройва знаците.
● Включва телевизора, когато същият е в режим на
готовност.
● Спира / възобновява картината.
● Задържа текущата телетекст страница (в режим
телетекст).
●
●
от списъка [Избор на вход].
● Показва екранният справочник.
● Показва субтитри.
● Връща се към телевизионния екран.
● Връща към предходното меню / страница.
● Избира канал в определена последователност.
● Изключва или включва звука.
● Превключва на предишния гледан канал.
- Превключва режима Антена / Кабел.
- Превключва между AV входните режими
(Канал нагоре / Канал надолу)
6
Български
Индикатор / Контролен панел
42
1 5 763
MENU
1/2
Режим на звука
Бас
Тембър
Баланс
Слyшaлки
Съраунд
Авт. контрол усилване
Сила на звукаСила на звука
Избрано аудио 1 Френски
Отстояние
Музика
0
0
0
20
Изкл.
Изкл.
0
Над 30см
Основно меню
Картина
Звук
Звук
Таймер
Настройки
Смяна
Избери
Връщане
Прелисти нагоре
Прелисти надолу
OK
BACK/
RETURN
EXIT
1 Приемник на телевизора за сигнала от
дистанционното управление
● Не слагайте никакви предмети между
дистанционното управление и сензора за
дистанционното управление.
2 Индикатор на захранването
Червено: Режим на готовност
Зелено: Вкл.
● Светодиодът примигва, когато телевизорът
получи команда от дистанционното управление.
(МОЩНОСТ)
3
● Включва и изключва телевизора.
● За пълно изключване на телевизора, извадете
щепсела от контакта.
4
● Избира източник на входен сигнал.
● Потвърждава и въвежда избор от екранното
меню.
5
● Отваря и затваря екранното меню.
Долна страна
6
● Променя силата на звука.
● Регулира стойността на избрания елемент от
екранното меню.
7
● Сменя каналите.
● Избира елемент от екранното меню.
Забележка
● Ако телевизорът е изключен от бутона (МОЩНОСТ) отдолу на телевизора, не можете да включите телевизора
от бутона
за да включите телевизора.
на дистанционното управление. Натиснете отново бутона (МОЩНОСТ) отдолу на телевизора,
Използване на екранните дисплеи – Указания за работа
Екранното меню осигурява достъп до много от функциите на този телевизор.
Указания за работа Как се използва дистанционното управление
Указанията за работа ще ви помогнат да боравите
с телевизора чрез дистанционното управление.
Пример: [Звук]
OK
● Отворете основното меню
● Преместете курсора / изберете
измежду опциите / изберете елемент
от менюто (само нагоре и надолу) /
настройте нивата (само наляво
и надясно)
● Влезте в менюто / запазете
зададените настройки и опции
● Върнете се към предходното меню
● Излезте от менюто и се върнете
към екрана за гледане на телевизия
Указания за работа
Функция авто готовност на захранването
Телевизорът автоматично ще превключи към режим на готовност при следните условия:
• [Автомат. изключване] е активен в [Таймер]. (стр. 16)
• Не е извършено никакво действие за избрания период в [Автом. стендбай]. (стр. 16)
7
Български
7
8
9
1
4
3
65
2
Основни връзки
Показаните външни устройства и кабели не се доставят с този телевизор.
Моля, уверете се, че телевизорът е изключен от захранващия контакт, преди да свързвате или откачвате кабели или
оборудване.
Терминали
1 HDMI 2 (стр. 9)
2 DIGITAL AUDIO
Връзки
Захранващ кабел и ефирна антена
Захранващ кабел
Променлив ток
(AC) 220-240 V
50/60 Hz
3 AV 1 (SCART)
4 AV 2 (COMPONENT / VIDEO)
5 HDMI 1 (ARC)
6 Терминал за наземна връзка (вижте по-долу)
7 CI гнездо
8 Жак за слушалки
9 USB порт
(стр. 9)
(стр. 9)
Антена, кабел
RF кабел
Захранващ кабел
Вкарайте захранващия кабел (доставя се
в комплекта) стабилно на място.
● Преди да откачите захранващия кабел
от телевизора задължително изключете
щепсела от контакта.
Антена
Кабел
Ако антената е поставена на неподходящо място, може да има смущения.
8

Български
Забележка
● Не поставяйте коаксиалния кабел в близост до захранващия кабел, за да избегнете смущения.
● Не поставяйте коаксиалния кабел под телевизора.
● За да осигурите оптимално качество на звука и картината, използвайте подходяща антена, кабел
(75 Ω коаксиален) и конектор.
● Ако използвате обща телевизионна антена, може да има нужда от подходящ кабел и конектори за връзка между
контакта за антената и телевизора.
● Вашият сервиз или магазин може да ви помогне с избора на антена и необходимите устройства, подходящи за
вашата област.
● Клиентът носи пълната отговорност за всички обстоятелства, свързани с инсталирането на антената,
модернизацията на устройствата и необходимите допълнения и за възникналите разходи.
AV устройства
Плейър
Телевизор
HDMI кабел
DVD записващо Устройство / VCR
Телевизор
RF кабел
Плейър
Антена
Кабел
RF кабел
SCART кабел
DVD записващо
Устройство / VCR
DVD записващо устройство / видеокасетофон и цифров приемник
HDMI кабел
Телевизор
Антена
и кабелен приемник
Сателитен
SCART кабел
RF кабел
RF кабел
DVD записващо
Устройство / VCR
SCART кабел
Забележка
● Прочетете и упътването към устройството, което свързвате.
● Дръжте телевизора далече от електронно оборудване (видео оборудване и други) или уреди с инфрачервен
сензор. В противен случай може да се получи изкривяване на картината / звука или да се влоши работата на друго
оборудване.
● Когато използвате SCART или HDMI кабел, използвайте напълно опроводен кабел.
● При свързване проверете дали типът на терминалите и кабелните конектори е подходящ.
9

Български
Автоматични настройки
Статус : Сканиране...
Аналогови канали : 1
Цифрови канали : 0
Край
Връщане
Сканиране 2%
Автоматични настройки
Автоматично търсене и запаметяване на телевизионни канали.
● Тези действия не са необходими, ако телевизорът е бил настроен от вашия дилър.
● Моля, свържете (стр. 8, 9) и настройте (ако е необходимо) свързаното устройство преди да стартирате
“Автоматични настройки”. Моля, прочетете ръководството за работа на свързаното устройство за повече
информация относно настройките.
Свържете телевизора със захранването
1
TV
и го включете
Изберете език
2
Sprache
Dеutsch
English
Français
Italiano
Español
Português
Nederlands
Изберете държава
3
Държава
Испания
Холандия
OK
BACK/
RETURN
Хърватия
Словения
● В зависимост от държавата, която изберете, изберете региона си или
съхранете PIN кода Детска защита (“0000” не може да бъде съхранено),
като следвате инструкциите на екрана.
Изберете [Антена] и пуснете настройването
4
Автоматични настройки
Започва автоматичната настройка
● Необходими са няколко секунди да се включи екранът
● Ако на телевизора свети червен LED диод dioda, натиснете
ключа на режима готовност на дистанционното управление.
Белгия
Полша
Гърция
Малта
Други
Dansk
Svenska
Norsk
Suomi
Türkçe
Еλληνικά
Чешки
Финландия
Италия
Норвегия
Унгария
Турция
Естония
Андора
Polski
Čeština
Magyar
Slovenčina
Български
Română
Srpski
Hrvatski
Slovenščina
Latviešu
eesti keel
Lietuvių
Дания
Франция
Люксембург
Швеция
Португалия
Словакия
Литва
Romania
Антена
Кабел
OK
OK
OK
Избери
Съхрани
Избери
Достъп
Избери
Достъп
10
● Започва процесът “Автоматични настройки”, който ще открие и запази каналите.
Съхранените канали и подредбата им са различни в различните държави,
райони, системи на излъчване и условия на приемане на сигнала.
Екранът за автоматични настройки е различен в зависимост от държавата,
която изберете.
 Loading...