

Panasonic TH-103PF9EK, TH-103PF9UK, TH-103PF9WK, TH-103PF9CK Service Manual
(
How to exchange the panel
)
Model : TH--
Model : TH
CS Promotion Center
Panasonic AVC Networks Company
TH--
TH
TH--
TH
TH--
TH
103PF9EK
103PF9EK
103PF9UK
103PF9UK
103PF9WK
103PF9WK
103PF9CK
103PF9CK
Introduction (1)
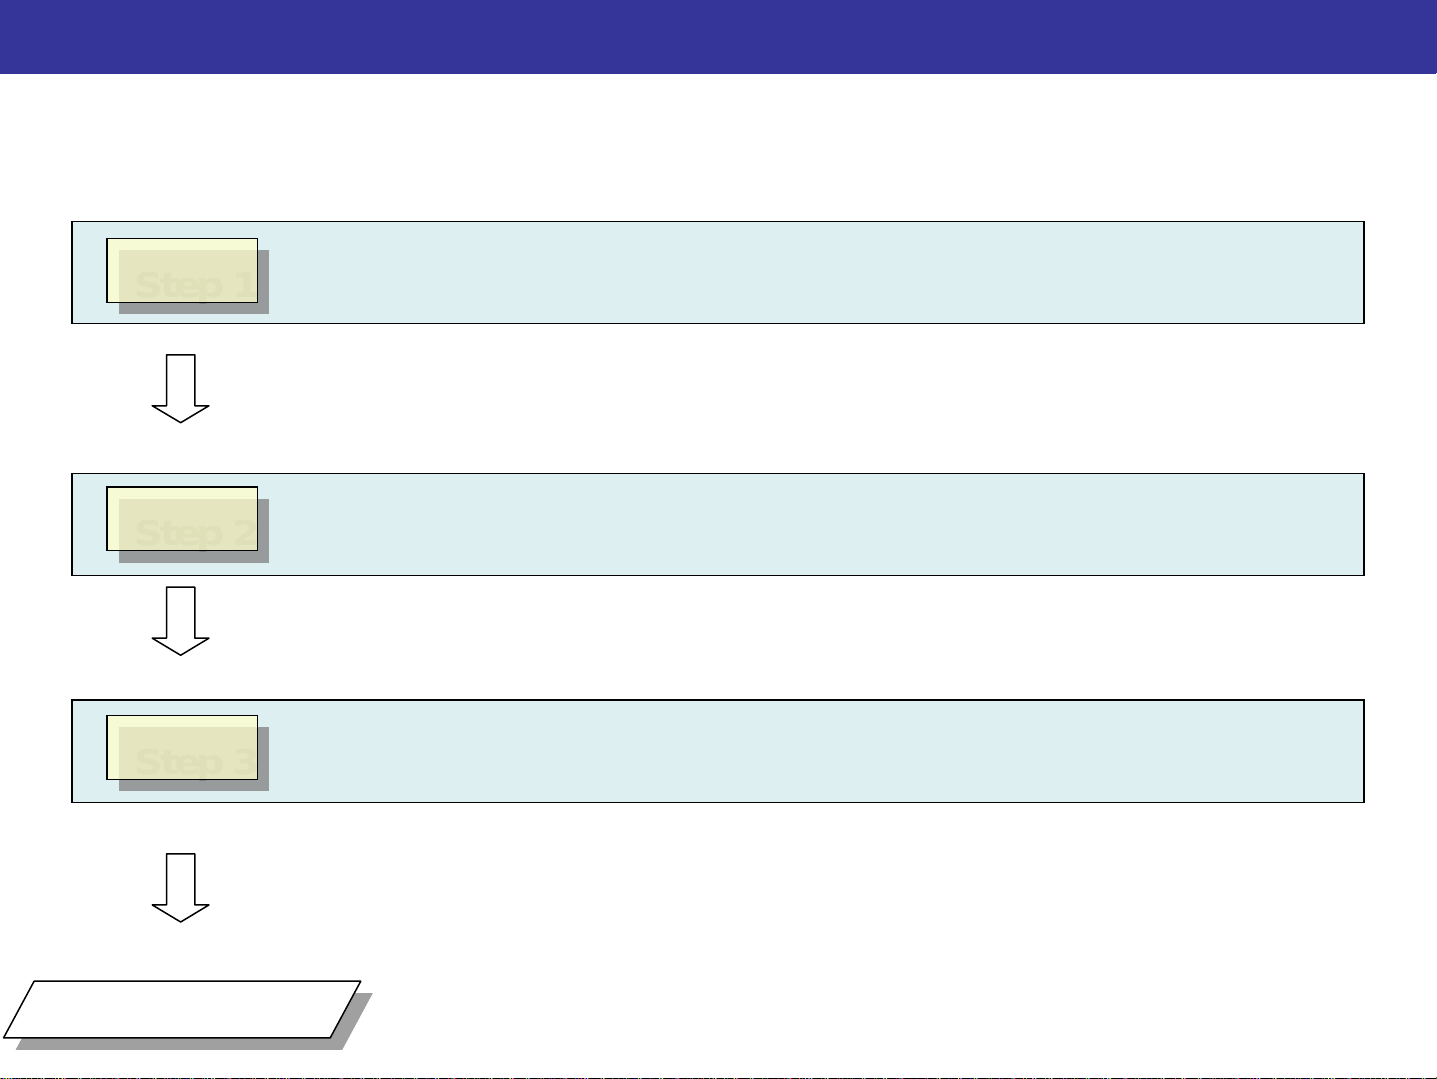
<How to exchange the panel>
The procedure for exchange the panel is as follows.
Step 1
Step 1
Step 1
Step 2
Step 2
Step 2
Preparation for exchange the panel
Preparation for exchange the panel
It’s necessary to prepare the replacement panel, lift or crane and stand
before exchange the panel.
Move the panel to the stand
Move the panel to the stand
You have to set the panel on the stand.
Step 3
Step 3
Step 3
Next page
Replace the escutcheon
Replace the escutcheon
Replacement panel has dummy escutcheon.
You have to exchange the original escutcheon of defective panel to that of
replacement panel.
Introduction (2)
From provirus page
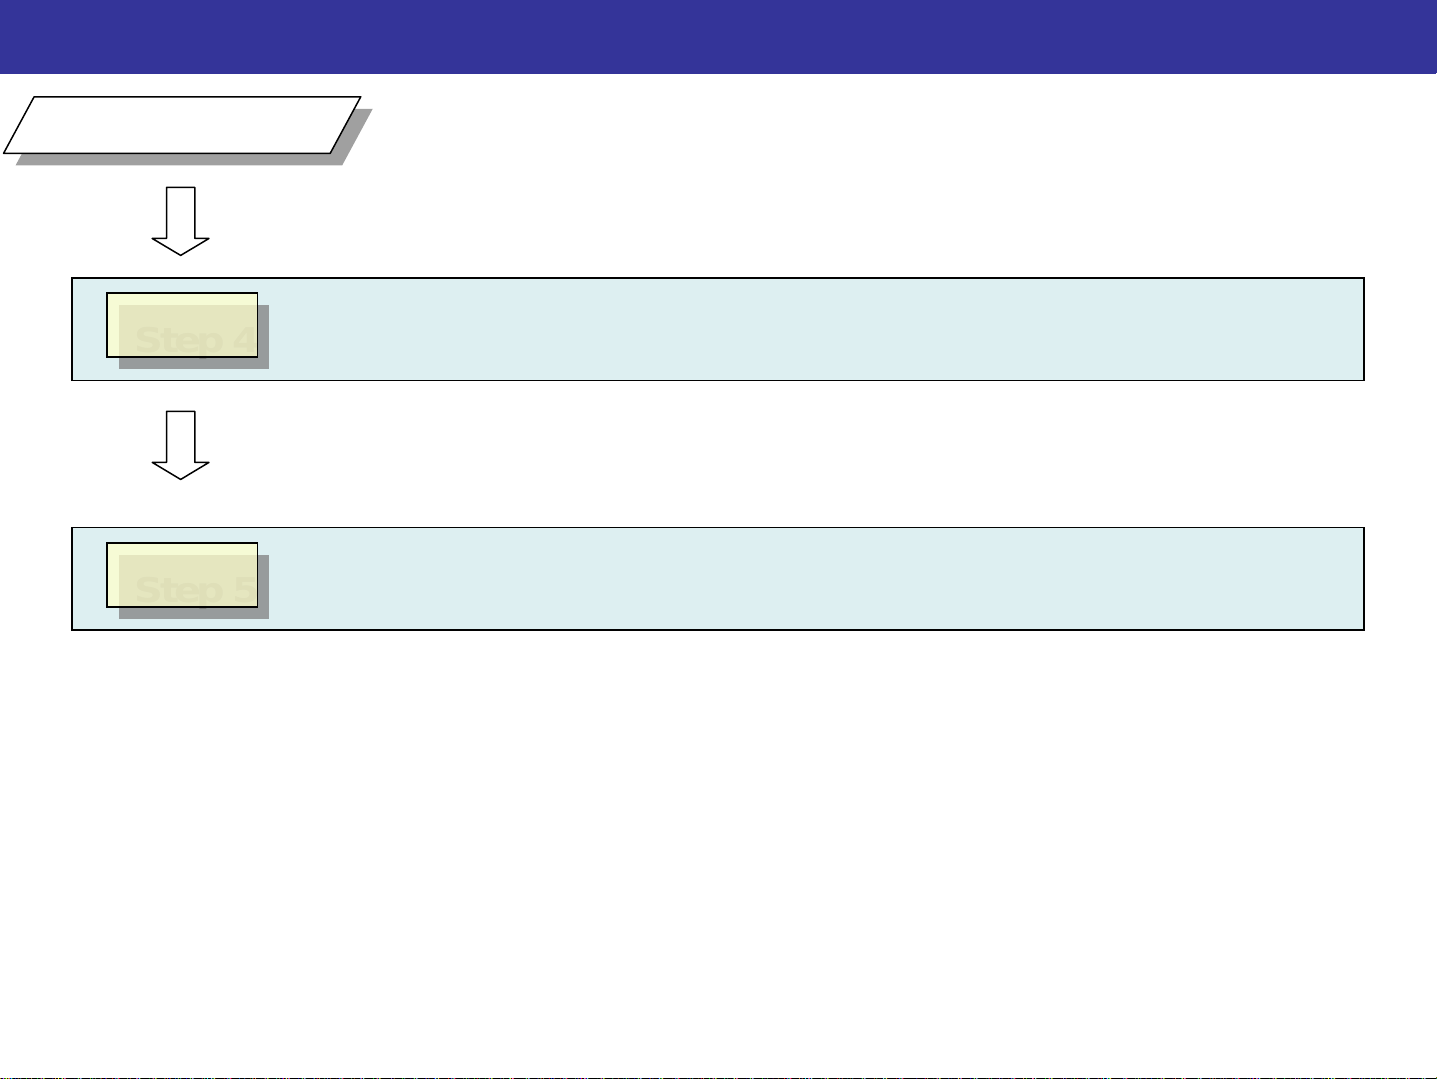
Step 4
Step 4
Step 4
Step 5
Step 5
Step 5
Replacement of the PCB
Replacement of the PCB
Only panel drive PCBs are on the replacement panel.
You have to replace PCBs of defective panel to replacement panel.
Adjustment of the voltage and waveform
Adjustment of the voltage and waveform
Drive voltage of the panel is varied according to the panel itself.
You have to adjust the voltage and correct the waveform.

Step 1
Step 1
Step 1
Preparation for exchange the panel
Preparation for exchange the panel
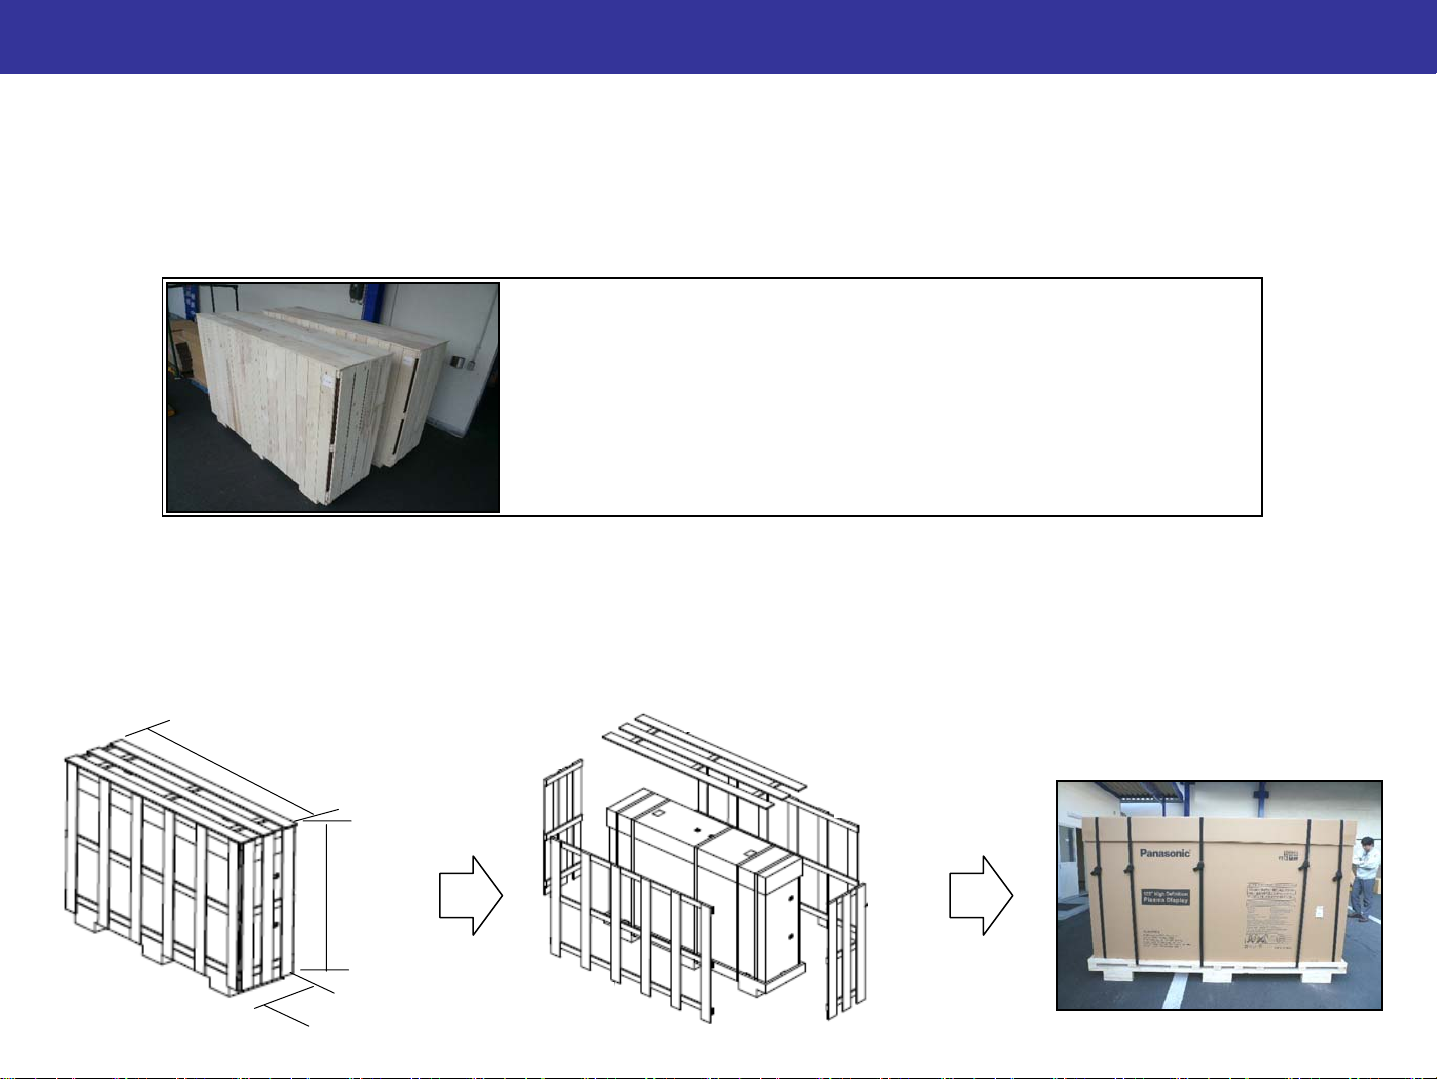
1-1-1. Replacement panel
<Shipping condition>
The replacement panel is shipped in carton box with wooden frame to keep
transportation quality.
Weight total : 440kg approx.
(Panel and carton box
(Wooden frame
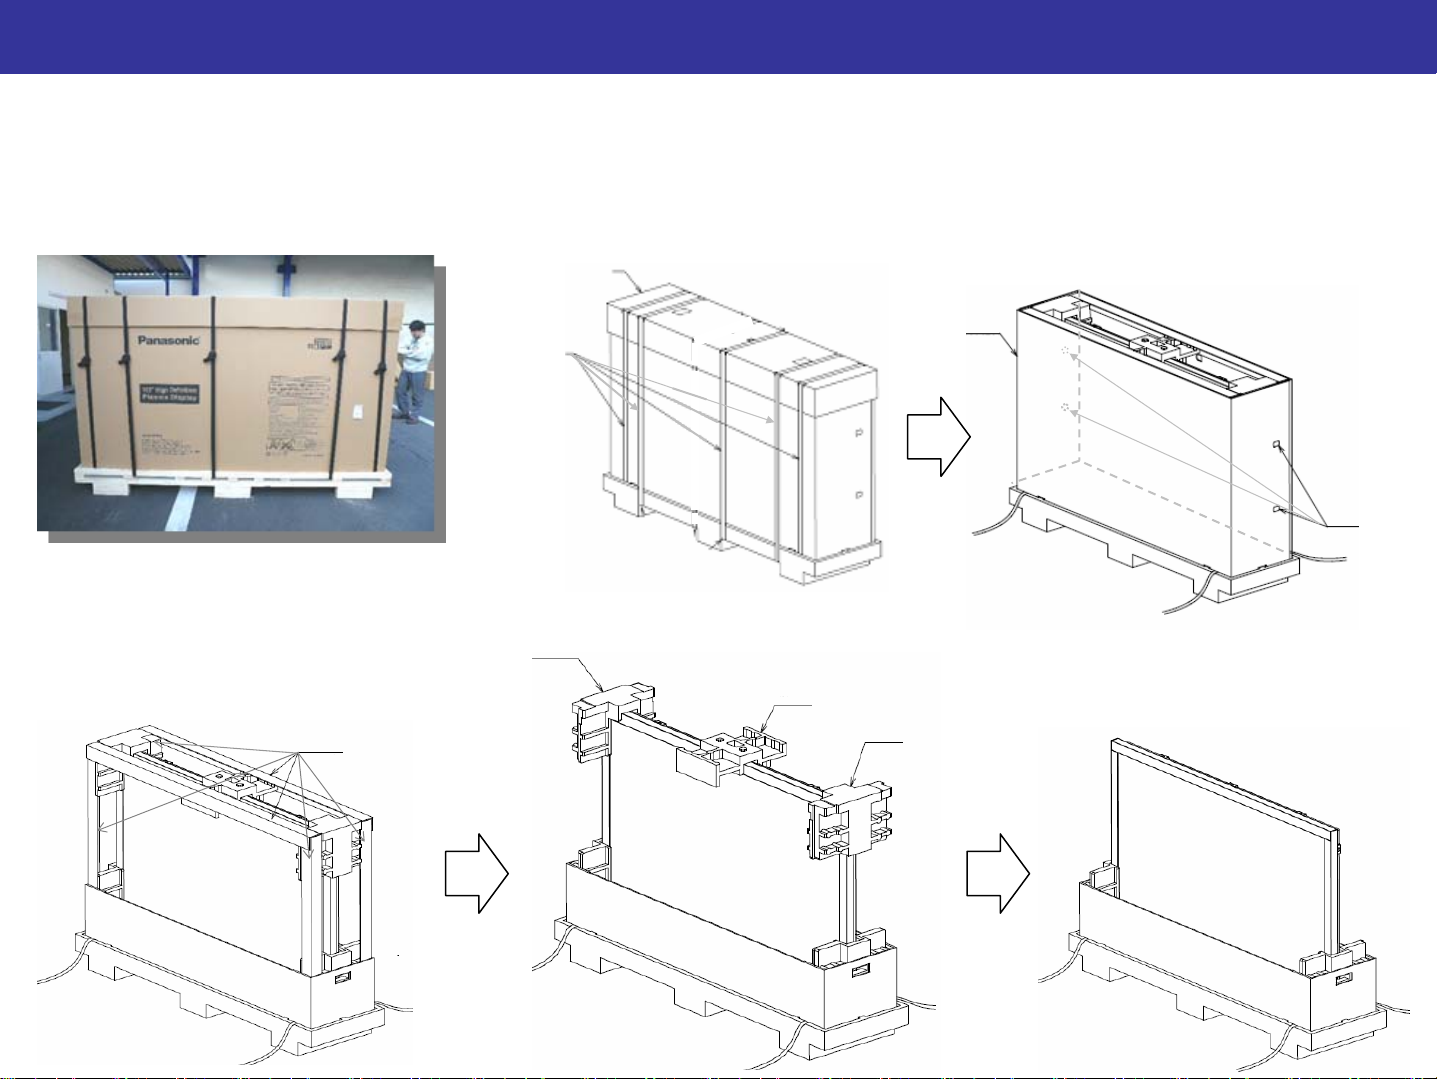
<Disassembly of wooden frame>
How to disassemble wooden frame is as follows.
2694mm
1792
mm
: 313kg)
: 132kg)
750
mm
1-1-2. Replacement panel
<Disassembly of carton box>
How to unpack carton box is as follows.
1. Remove the band 2. Remove the joint and carton
Top
L-shape paper tube
Total x6
Band x 5
4. Remove protection material 5. Unwrap protection bag 3. Remove L-shape paper tube
Protection R
Carton
Joint
x4
Protection C
Protection L
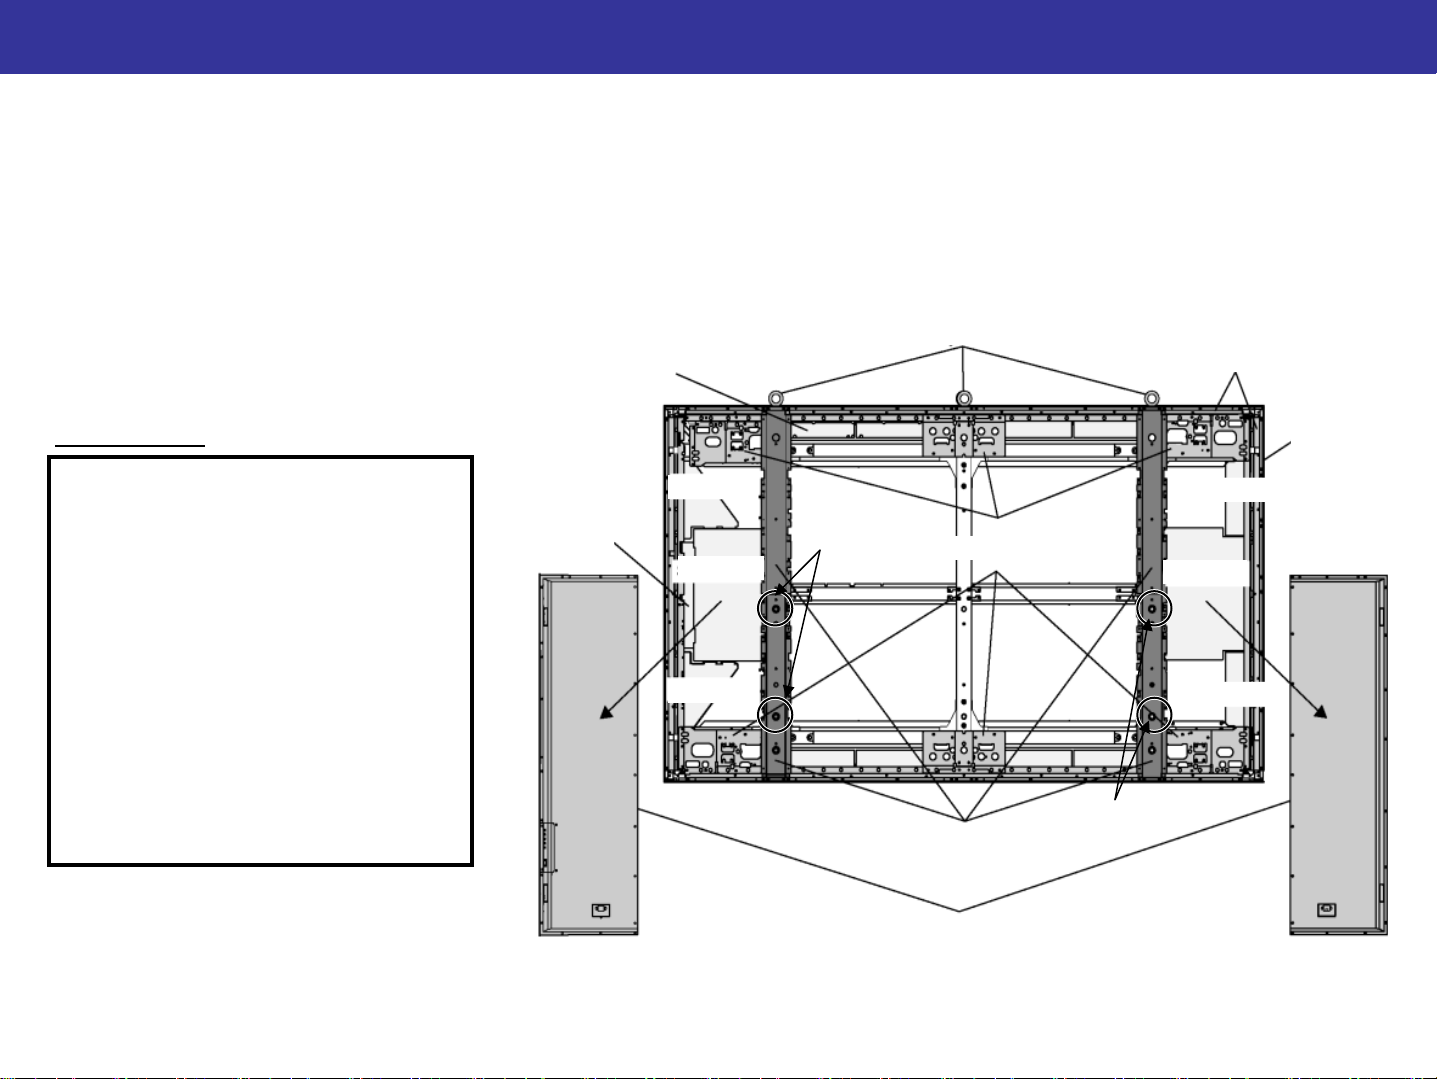
1-1-3. Replacement panel
<Structure>
The replacement panel is included the following parts.
Please confirm below parts list and figure.
C1 to CZ Board
Eyebolt
Reinforcement Angle
Parts List
1. Dummy Escutcheon
2. 3 eye bolts
3. 12 pcs of C boards
4. SU,SM,SD,SC board
5. SS2,SS,SS3 board
6. Reinforcement angle
7. Rear cover angle
8. Rear cover
9. Hook
SM Board
SU Board
SC Board
SD Board
Hook
Dummy
Escutcheon
SS2 Board
Reinforcement Angle
SS Board
SS3 Board
Hook
Rear Cover Angle
Rear Cover (L), (R)
(Back view)
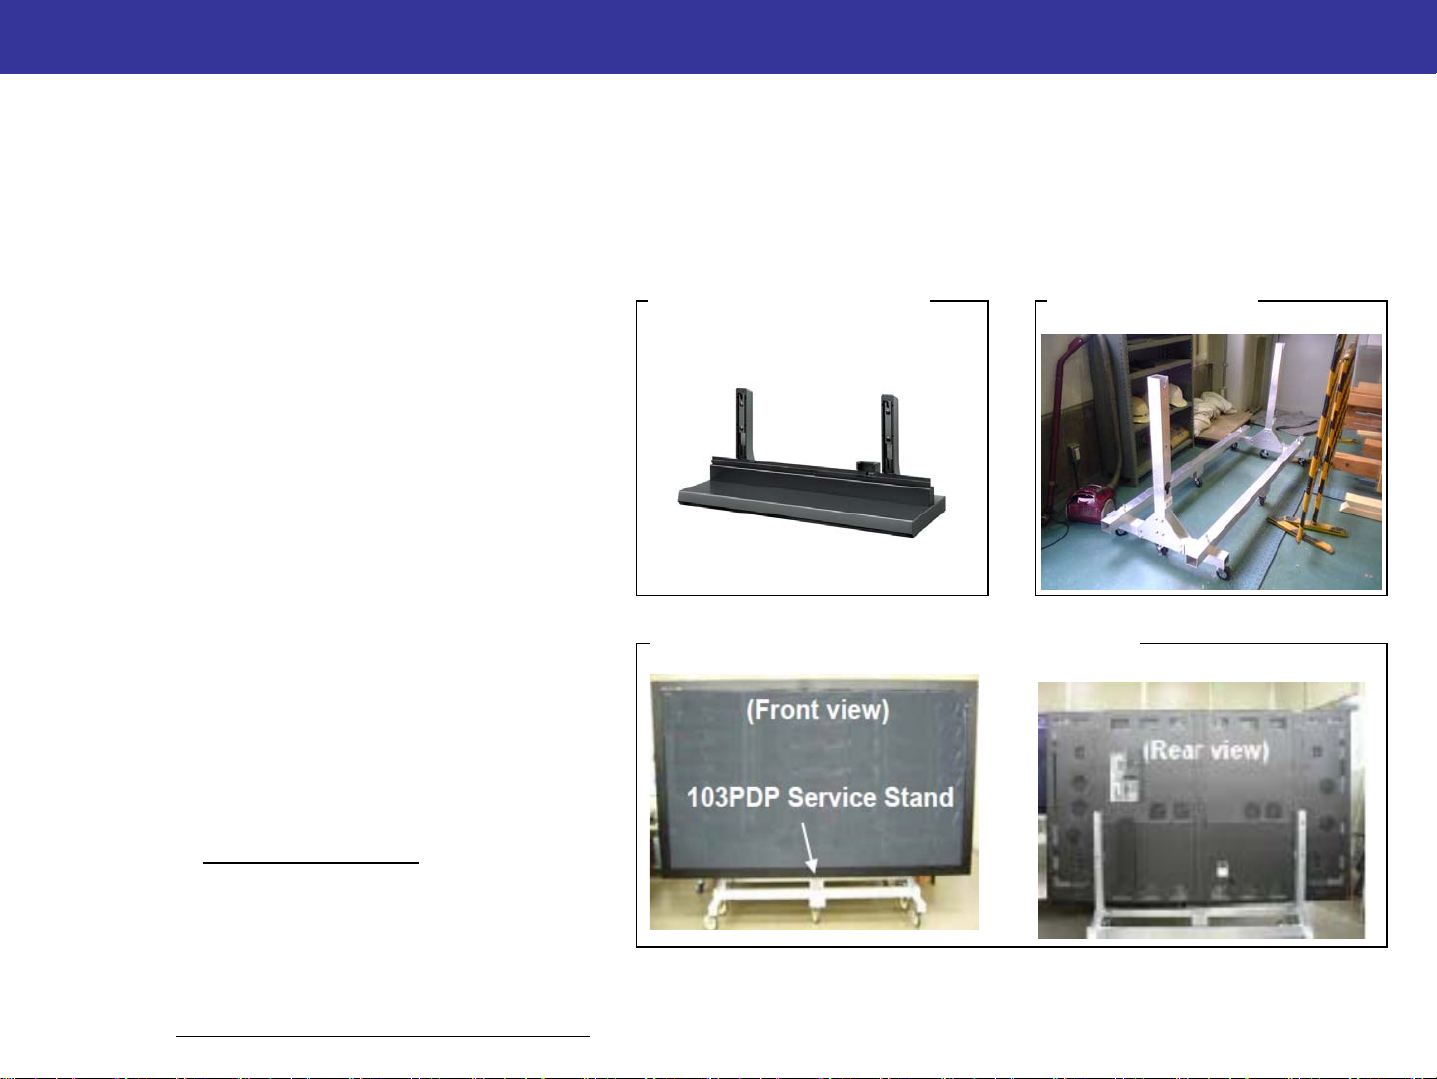
1-2-1. Preparation of the stand
When exchange the panel, you need 2pcs of stand. One for defective panel, the other
for replacement panel.
<Stand>
There are 2 kind of stands which are
merchandise stand and service stand.
The basic structure of both stands
are the same.
<Service stand>
You can buy the service stand by
service part’s route.
The part number is as follows.
TZSC09028T
(Merchandise stand)
(After setting the panel to the stand)
(Service stand)
More detail of service stand,
please refer to the QSM/ Service Hint
on TSN. (Order No. ITD0610075BE
)
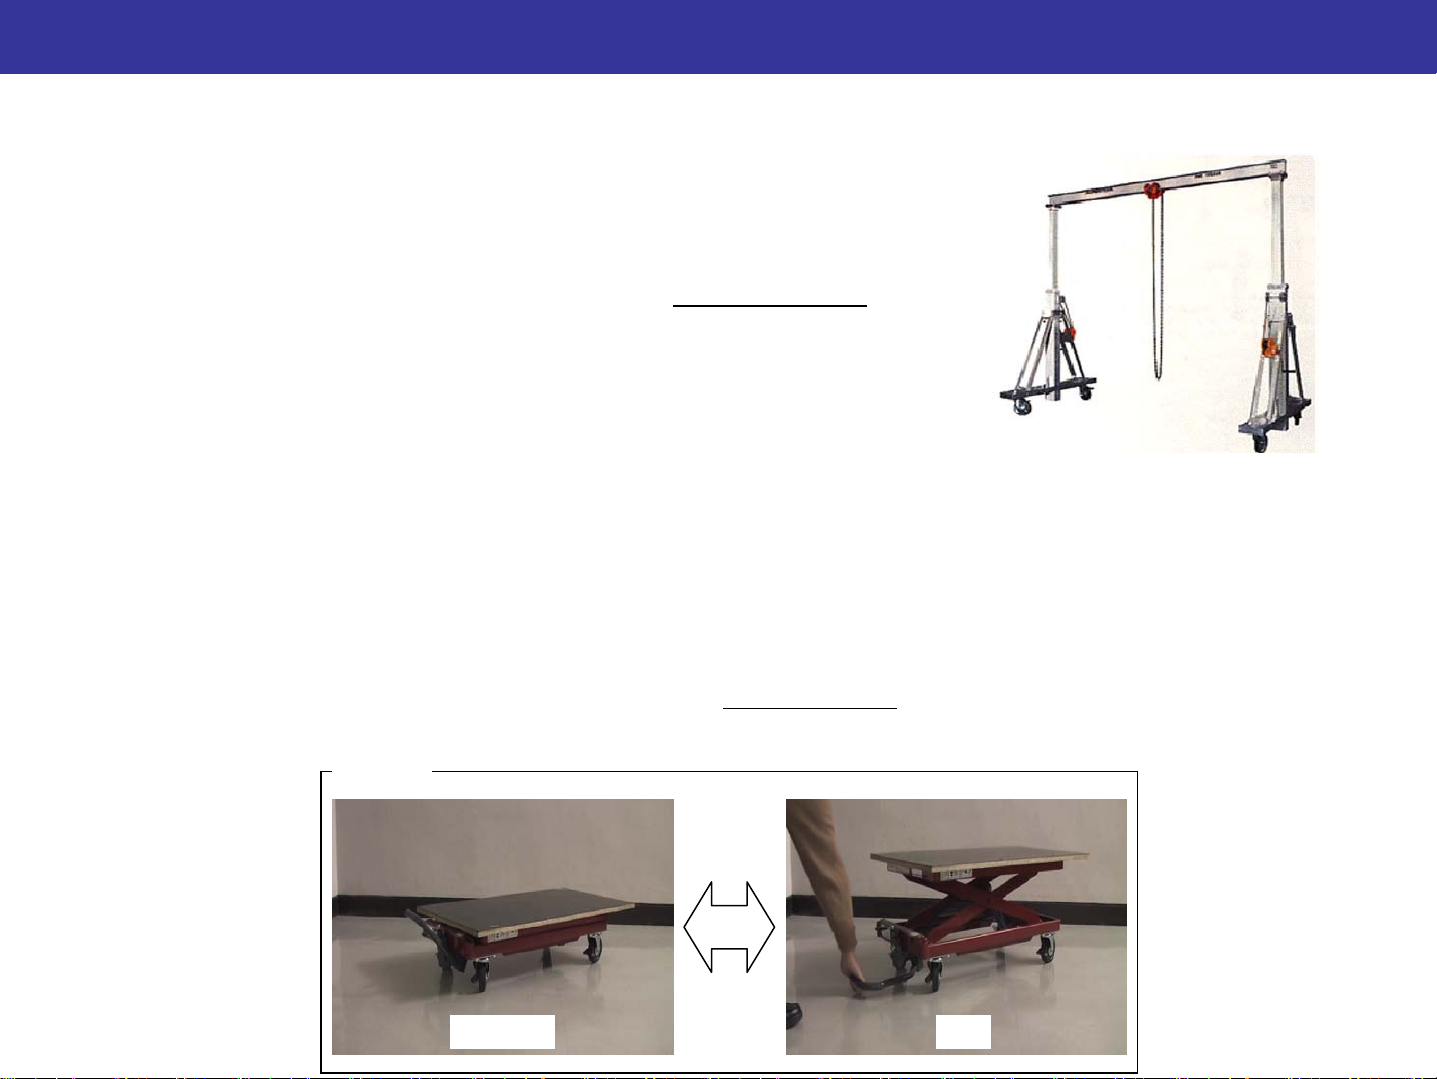
1-2-2. Preparation of the lift, crane and jack
<Lift and crane>
When move the panel, you should use the lift or crane.
The maximum lifting load of lift or crane needs twice of panel
weight (The panel weight is about 200kg). Please
prepare the lift or crane that the ability is Over 500kg
.
<Jack>
When remove and set the escutcheon, you should use the jack for your safety and
preventing from panel damage. Please prepare the jack like the following photo.
The maximum loading weight of jack needs Over 50kg
about 50kg.)
(Jack)
. (The weight of escutcheon is
DOWN UP

Step 2
Step 2
Step 2
Move the panel to the stand
Move the panel to the stand
2-1. Movement of the panel
When you exchange the panel, you should put the panel on the stand.
<Preparation>
Necessary quantity of service stand is different for each installation condition.
The preparation for moving the panel is as follows.
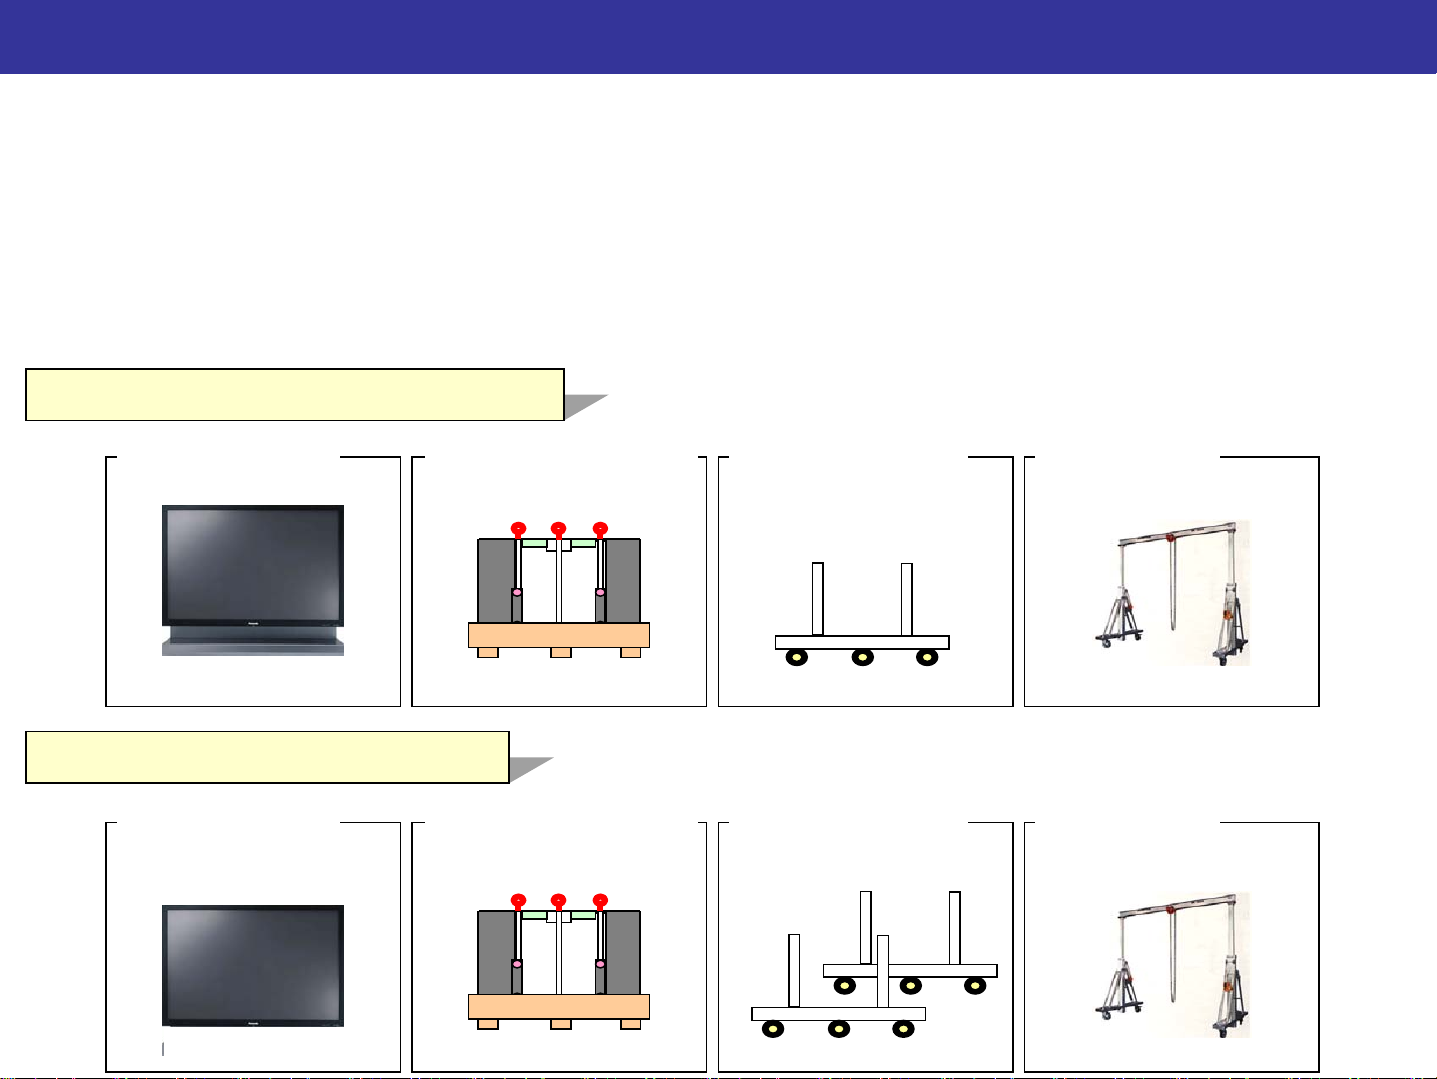
Customer use merchandise stand
(Defective panel) (Service stand x1) (Lift or Crane)
w/ merchandise stand
Customer mount wall hanging
(Replacement panel)
(Replacement panel)
(Service stand x2) (Lift or Crane)(Defective panel)

2-2-1. How to move the panel
<Procedure (1)>
In case of merchandise stand
1. Move the defective panel from merchandise stand to service stand.
Defective
plasma Panel
Defective
plasma panel
w/ Merchandise stand Merchandise stand Service stand Service stand
Defective
plasma panel
2. Set the replacement panel to customer’s stand.
Replacement
plasma panel
Replacement
plasma panel
Merchandise stand
Replacement
plasma panel
Merchandise stand
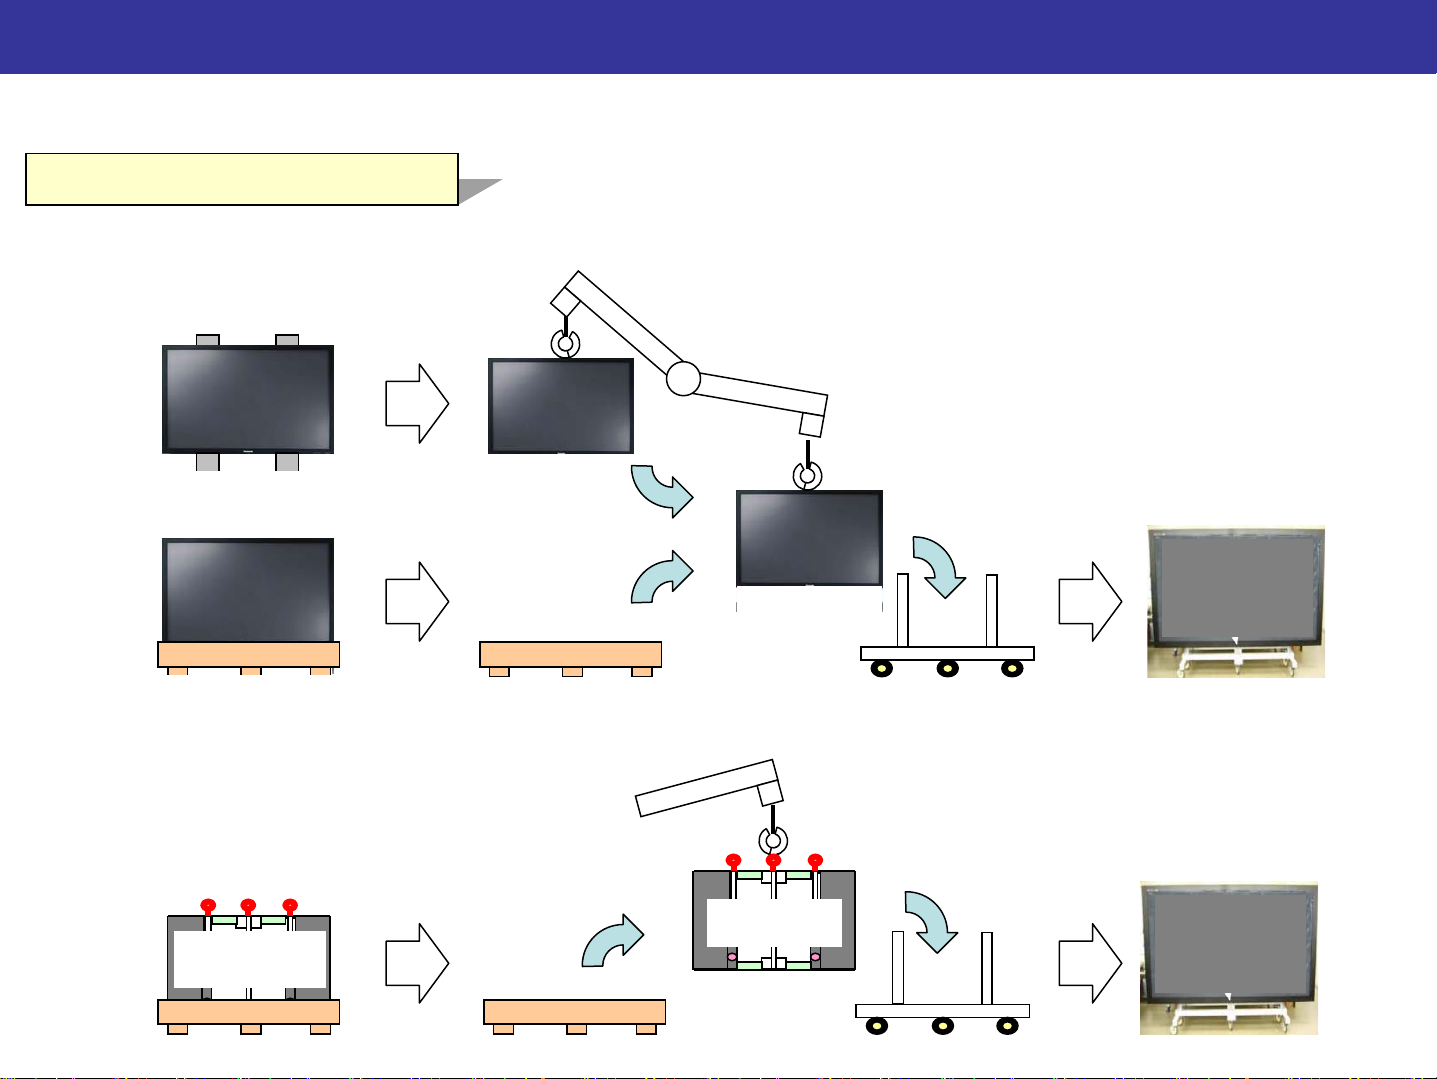
2-2-2. How to move the panel
<Procedure (2)>
In the case of wall hanging
1. Move and set the defected panel to service stand 1.
Defective
plasma panel
Defective
plasma Panel
(Wall hanging)
Defected
plasma panel
(After picking up)
2. Set the replacement panel to service stand 2.
Replacement
plasma panel
Defective
plasma Panel
Replacement
plasma panel
Defective
plasma panel
Service stand 1 Service stand 1
Replacement
plasma panel
Service stand 2
Service stand 2

2-2-3. How to move the panel
<Final condition>
After moving the panel, each panel are completed to set to the stand.
The initial and final condition in Step 2 are as follows.
In the case of merchandise stand In the case of wall hanging
(Initial condition) (Initial condition)
Defective
panel
Merchandise stand
Replacement
panel
Defective
panel
On wall
(Final condition) (Final condition)
Defective
panel
Service stand
Replacement
panel
Merchandise stand
Defective
panel
Service stand 1
Replacement
panel
Replacement
panel
Service stand 2
 Loading...