How it Works
Log In / Sign Up
Buy Points
How it Works
FAQ
Contact Us
Questions and Suggestions
Users
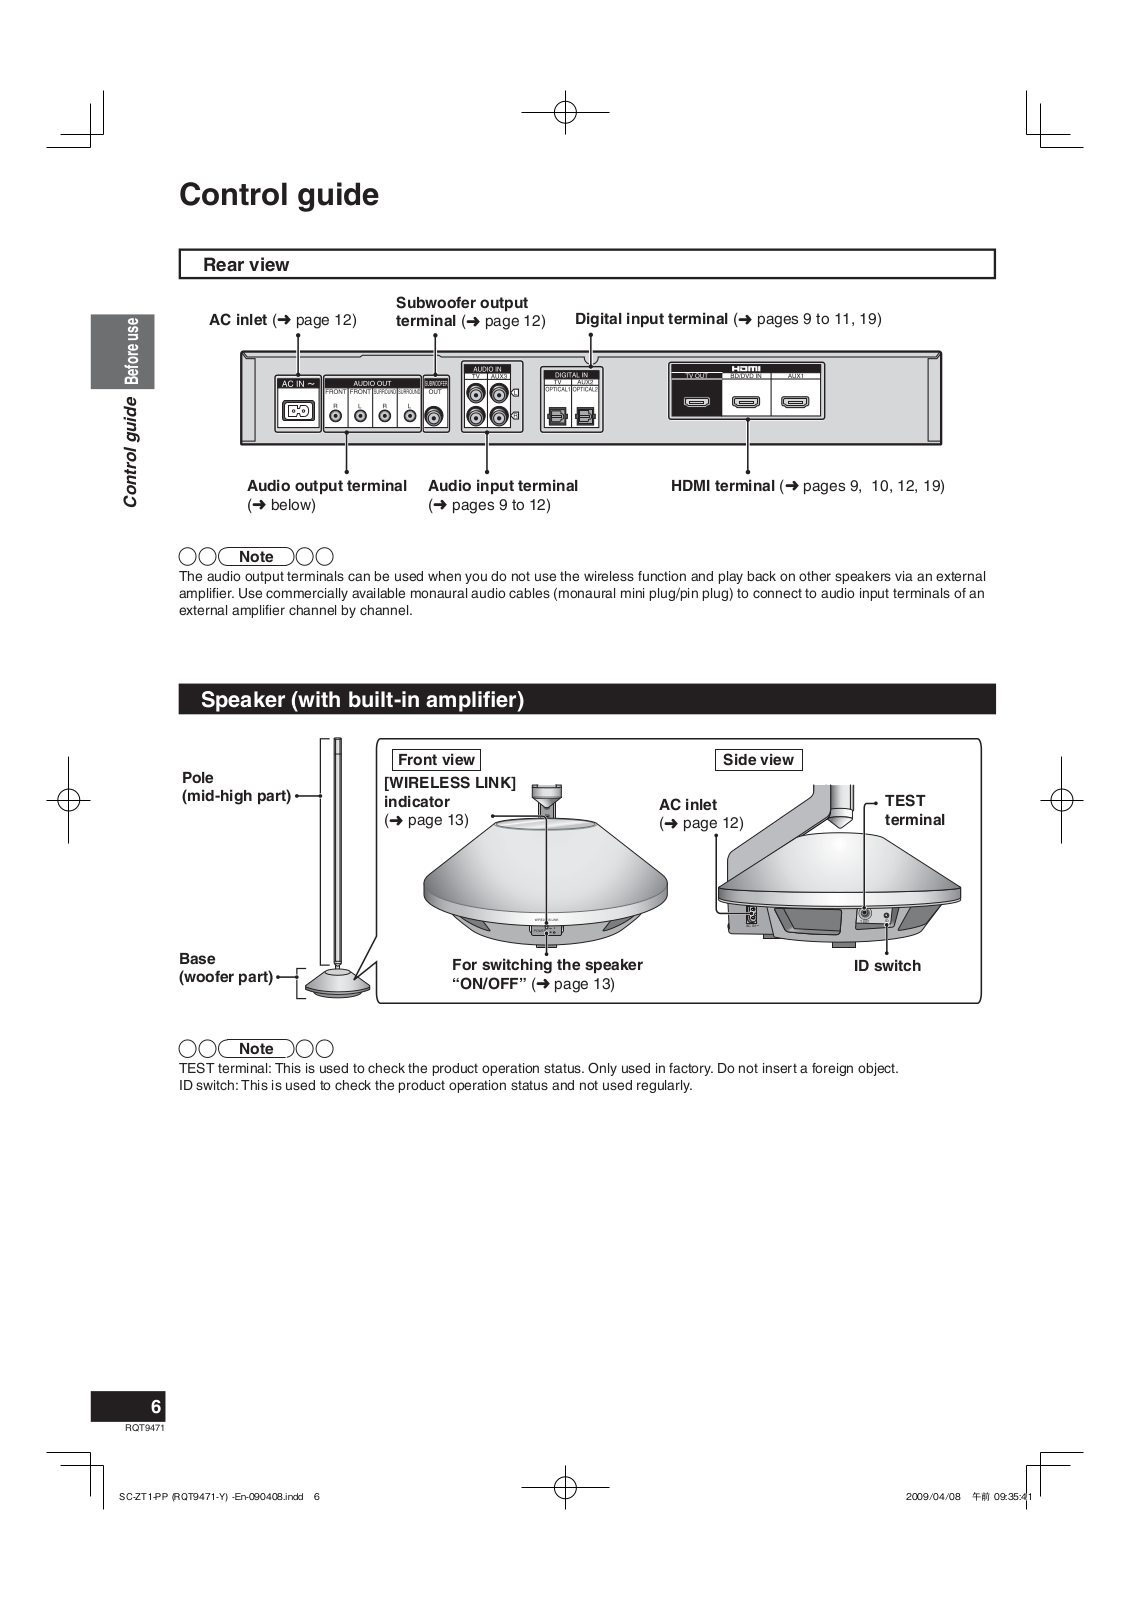
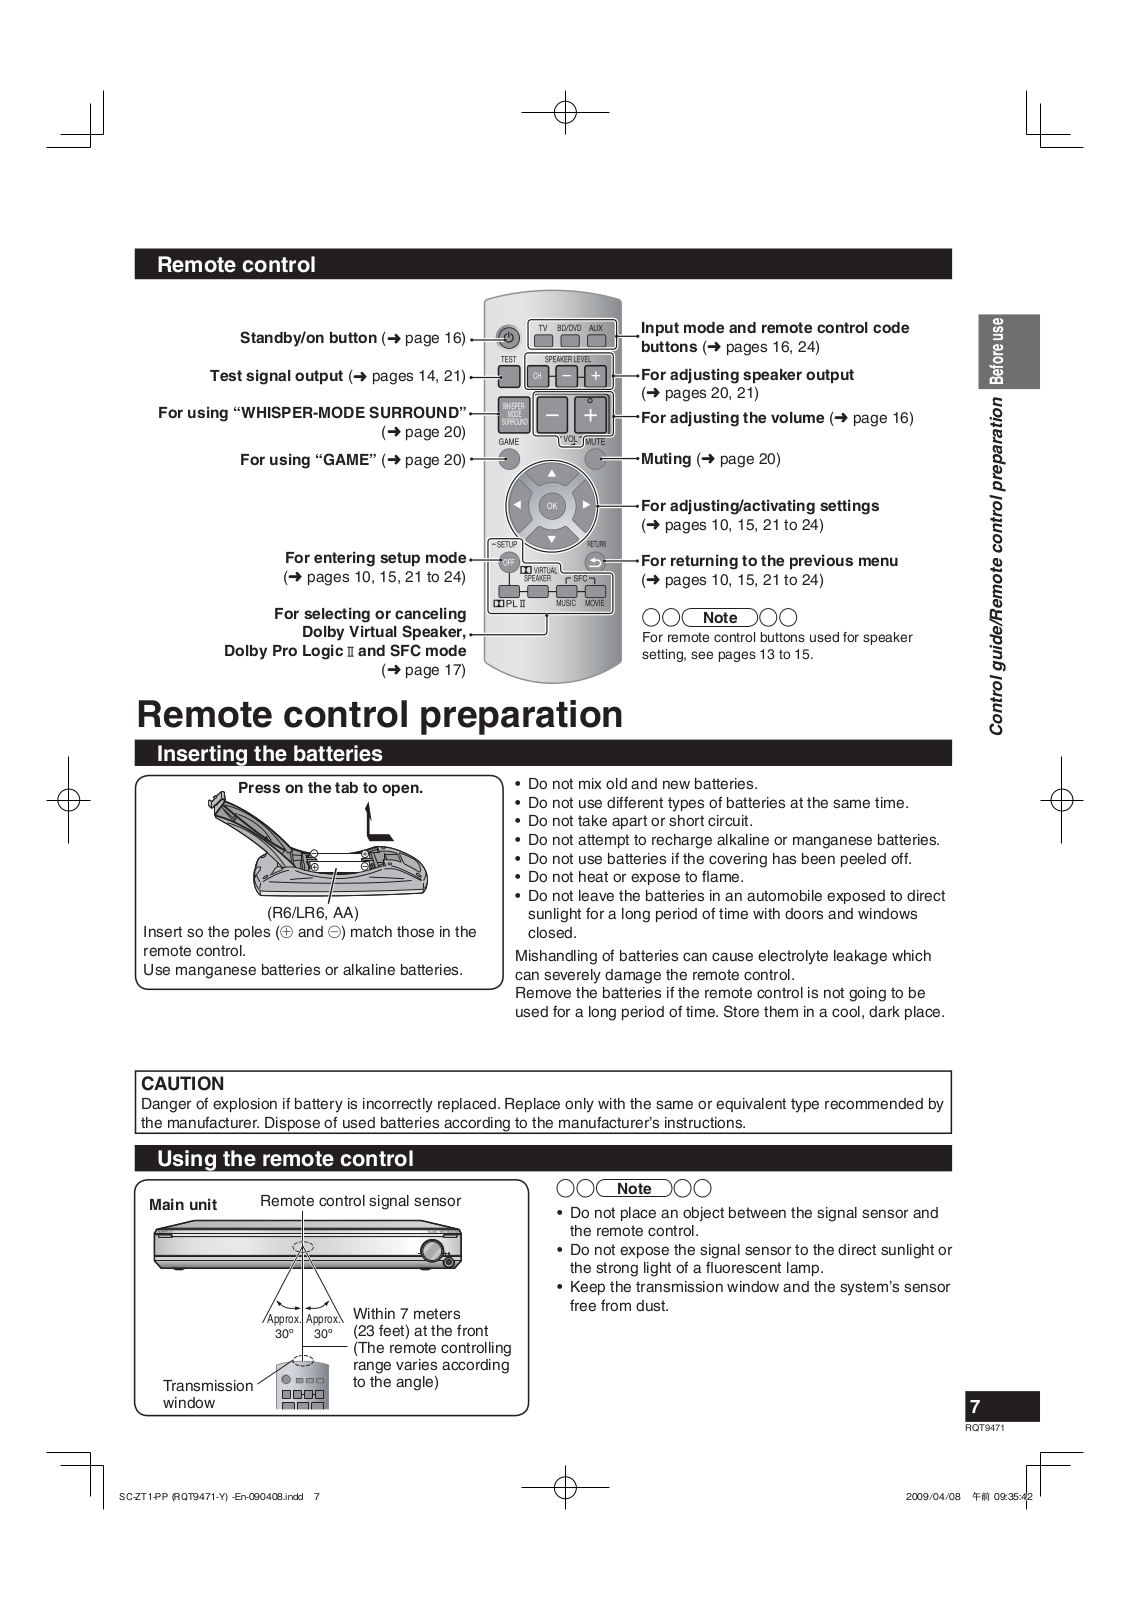
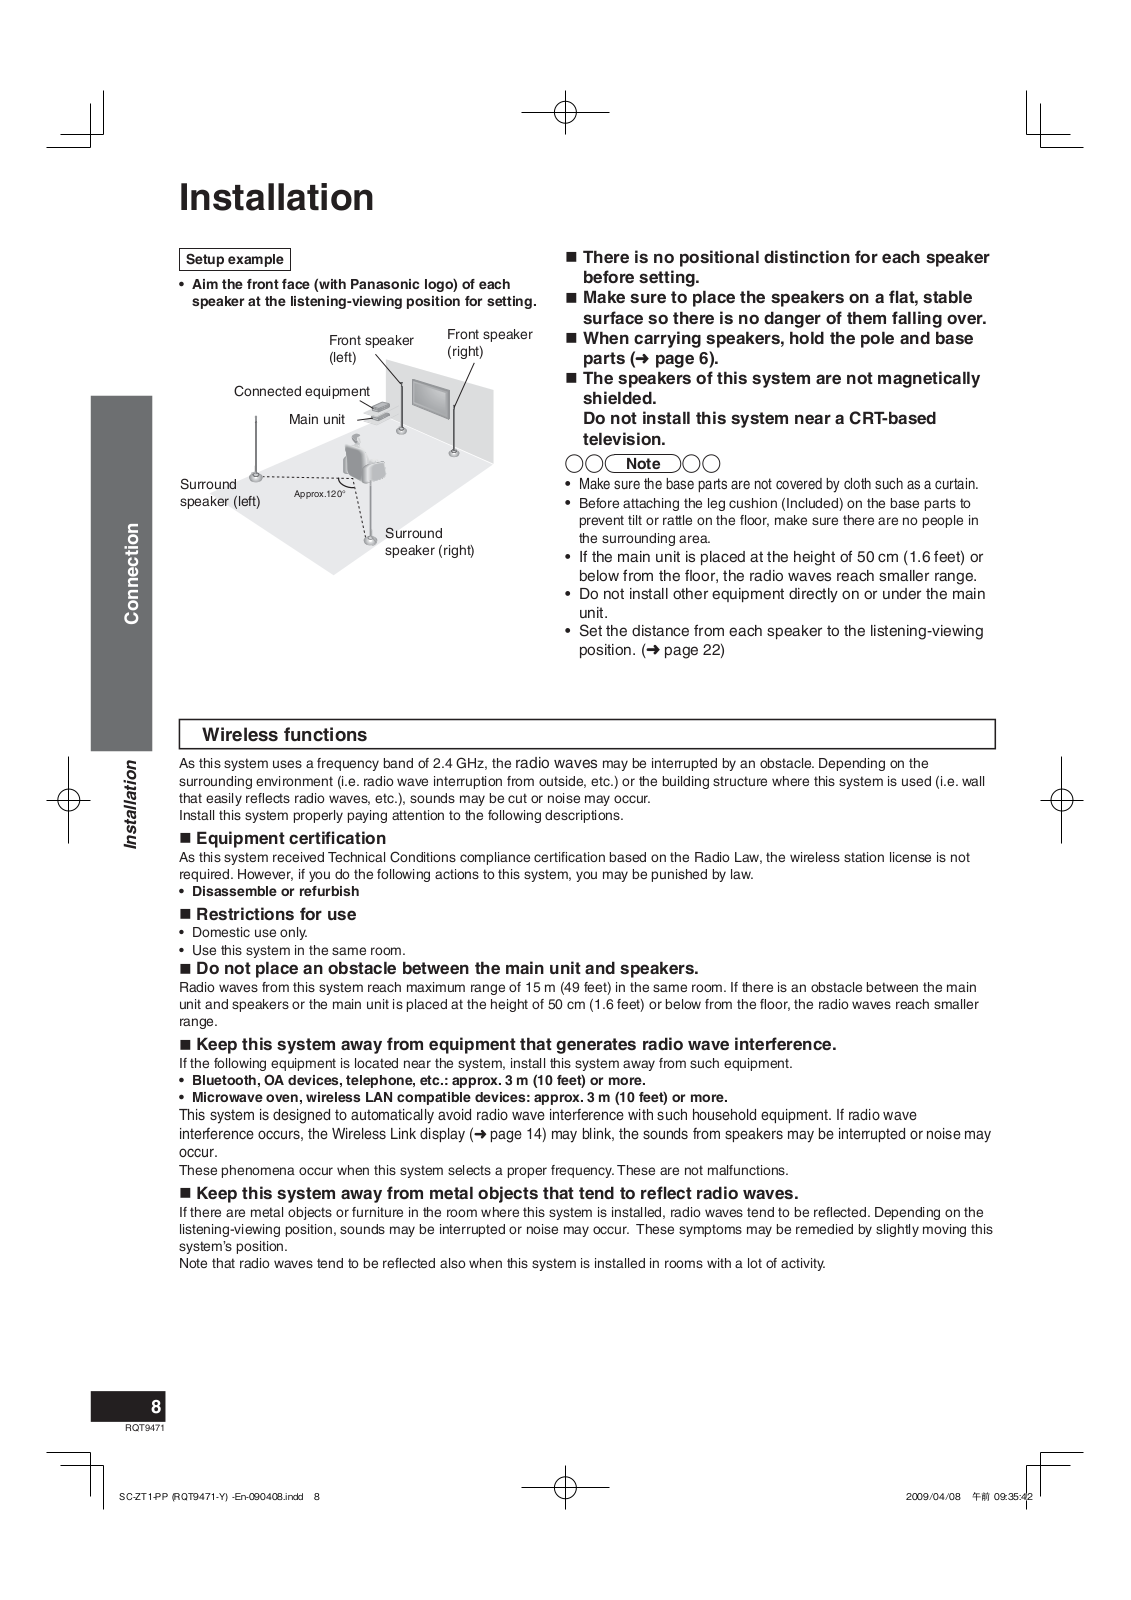
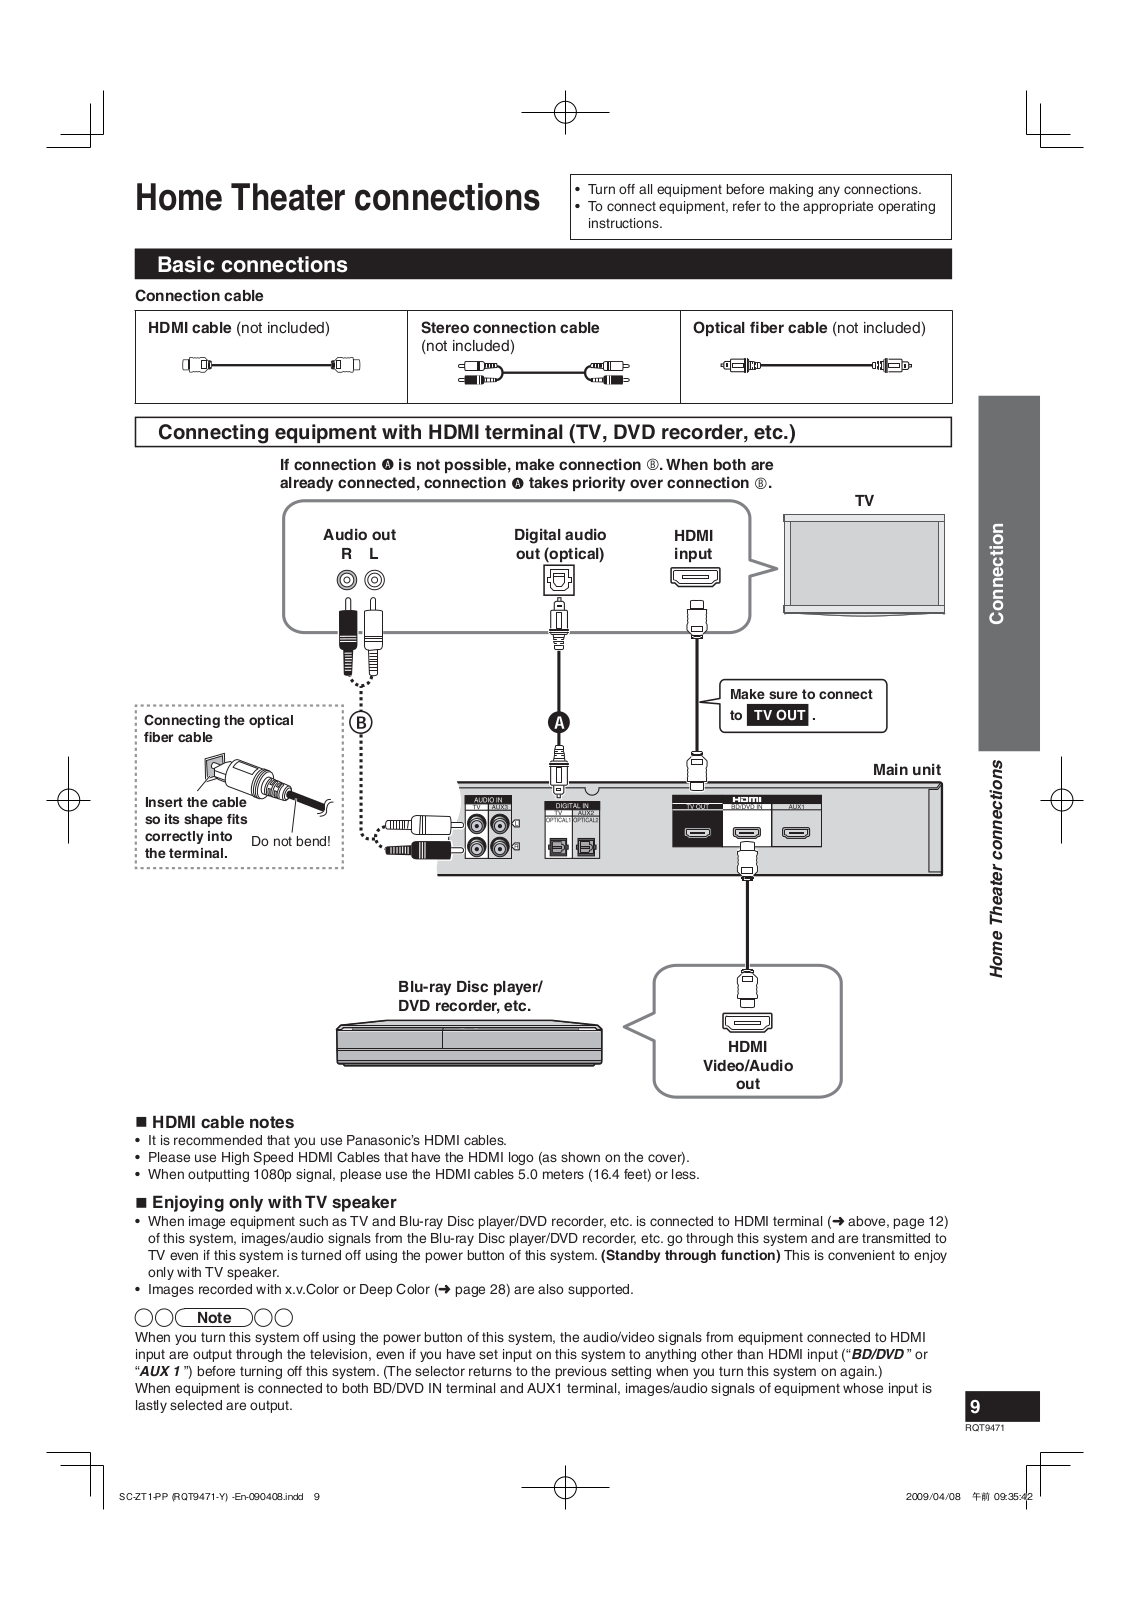
Panasonic
Loading...
S
ST2700
ST2-DC6V-F
ST2-DC9V-F
ST2-L2-DC3V-F
ST2-L2-DC5V-F
ST2-L2-DC6V-F
ST2-L2-DC9V-F
ST4-A1-J02V
5
ST4-C11
4
ST50
ST50D
2
ST50K
2
ST50M
2
ST50P
2
ST50T
ST60
4
ST60D
ST60M
ST610L
STAV-3770
STC700A
STC700DE
STG30E
STG30L
STG30LE
STG470
STG470L
STG90
STGT350
STGT550
3
STGT650
3
STHD-350
STHD-550
STILETTO 2
STK470-080
Strada CN-GP50N
Strada CN-NVD905U
5
Strada CY-RC50KU
2
Strata Se
Strata VIe
Studio System 300
STX301L
STX302L
STX830L
STX901L
STX902LA
STX933L
STX990
STX999L
SU-600
SU-7
2
SU-75
SU-77
SU-79
SU-7P
SU-810
SU-A600MK2
2
SU-A600MK3
SU-A700
SU-A700MK2
3
SU-A700MK3
2
SU-A707
3
SU-A800D
SU-A800DM2
SU-A800MK2
SU-A808
3
SU-A808E-K
SU-A900D
SU-A900DM2
2
SU-A900MK2
SU-A909
SU-Bi-polar
SU-C1000
3
SU-C1010
4
SU-C2000
2
SU-C3000
SU C500
su-c700
2
SU-C700EG
SU-CH40
2
SU-CH7
2
SU-CH80
2
SU-G30
2
SU-HTB500PP
2
SU-HTB550PH
SU-HTB570EB
SU-HTB570EG
SU-HTB770
SU-HTB880EB
SU-HTB880EG
SU-HTB880GN
SU-HTB880PP
SU-MA10
SU-MED640E
SU-MED640P
SU-R1000
SU-R1EB
SU-R1EG
SU-V300
SU ZT1
Loading...
Loading...
Nothing found
SU ZT1
User Manual
32 pgs
1.47 Mb
0
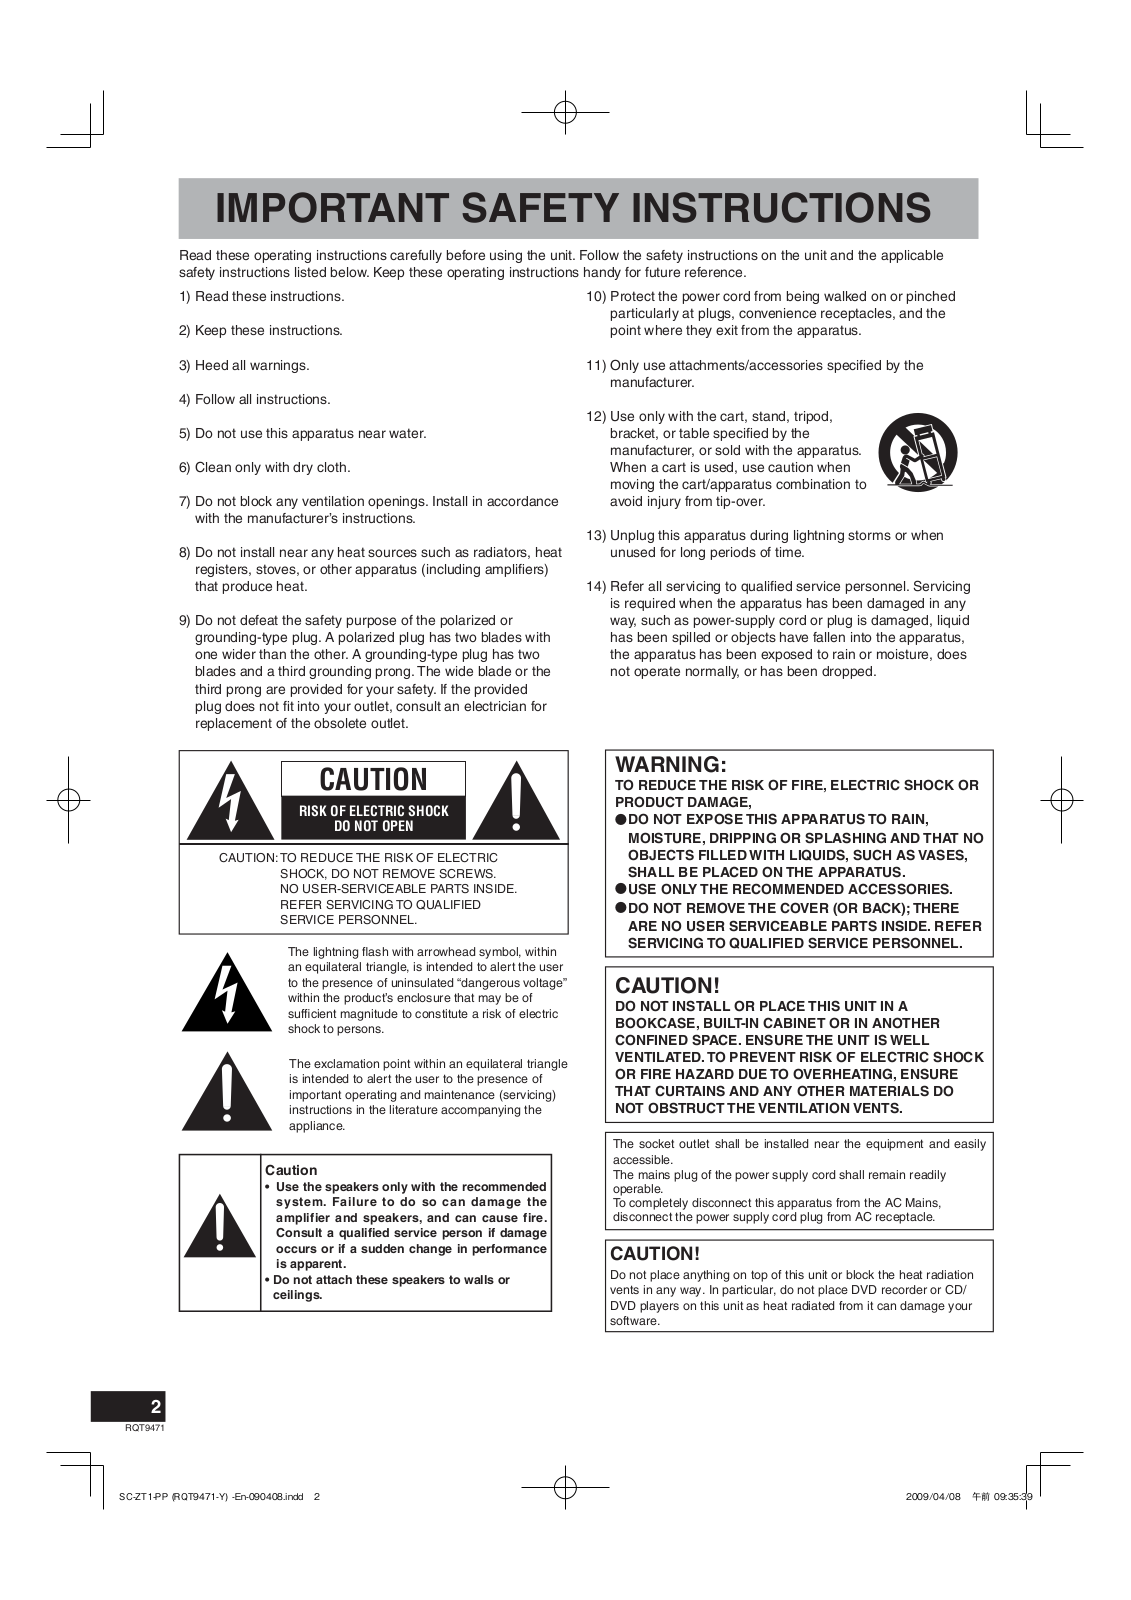
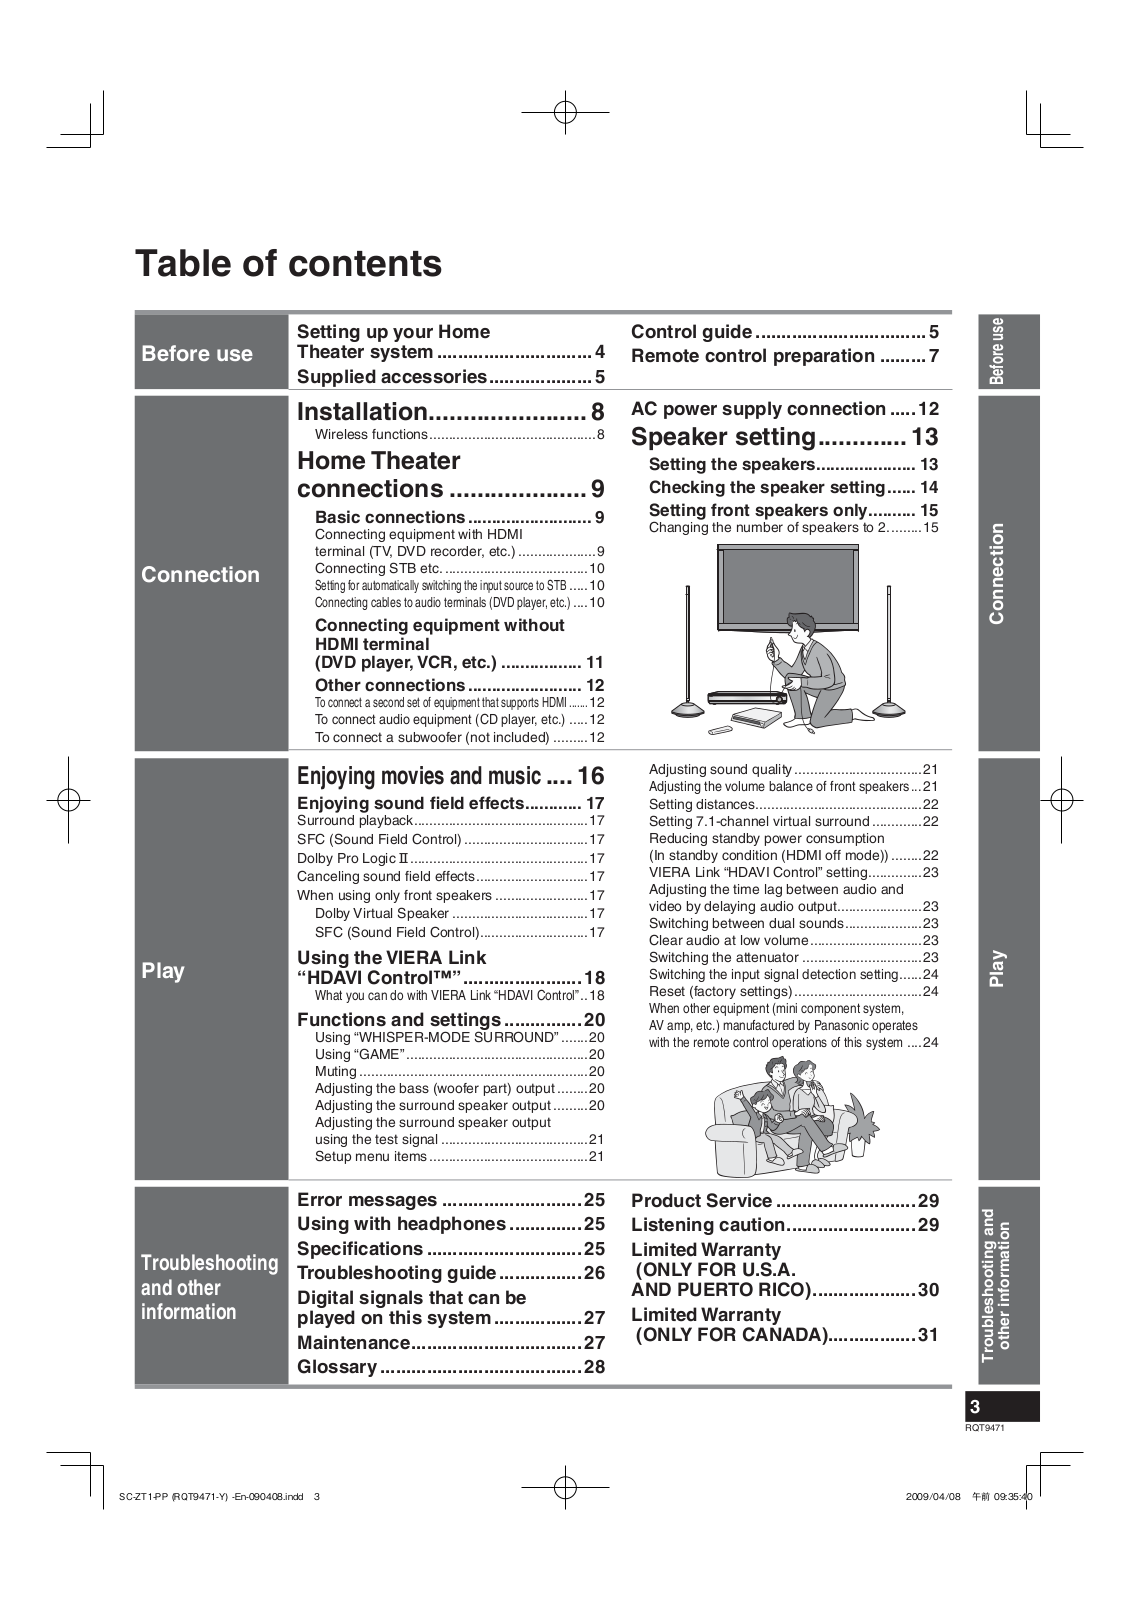
Table of contents
Loading...
Panasonic SB ZT1, SU ZT1 User Manual
...
Panasonic User Manual
Download
Specifications and Main Features
Frequently Asked Questions
User Manual
Download
Loading...
+
22
hidden pages
Unhide
You need points to download manuals.
1 point = 1 manual.
You can buy points or you can get point for every manual you upload.
Buy points
Upload your manuals
 Loading...