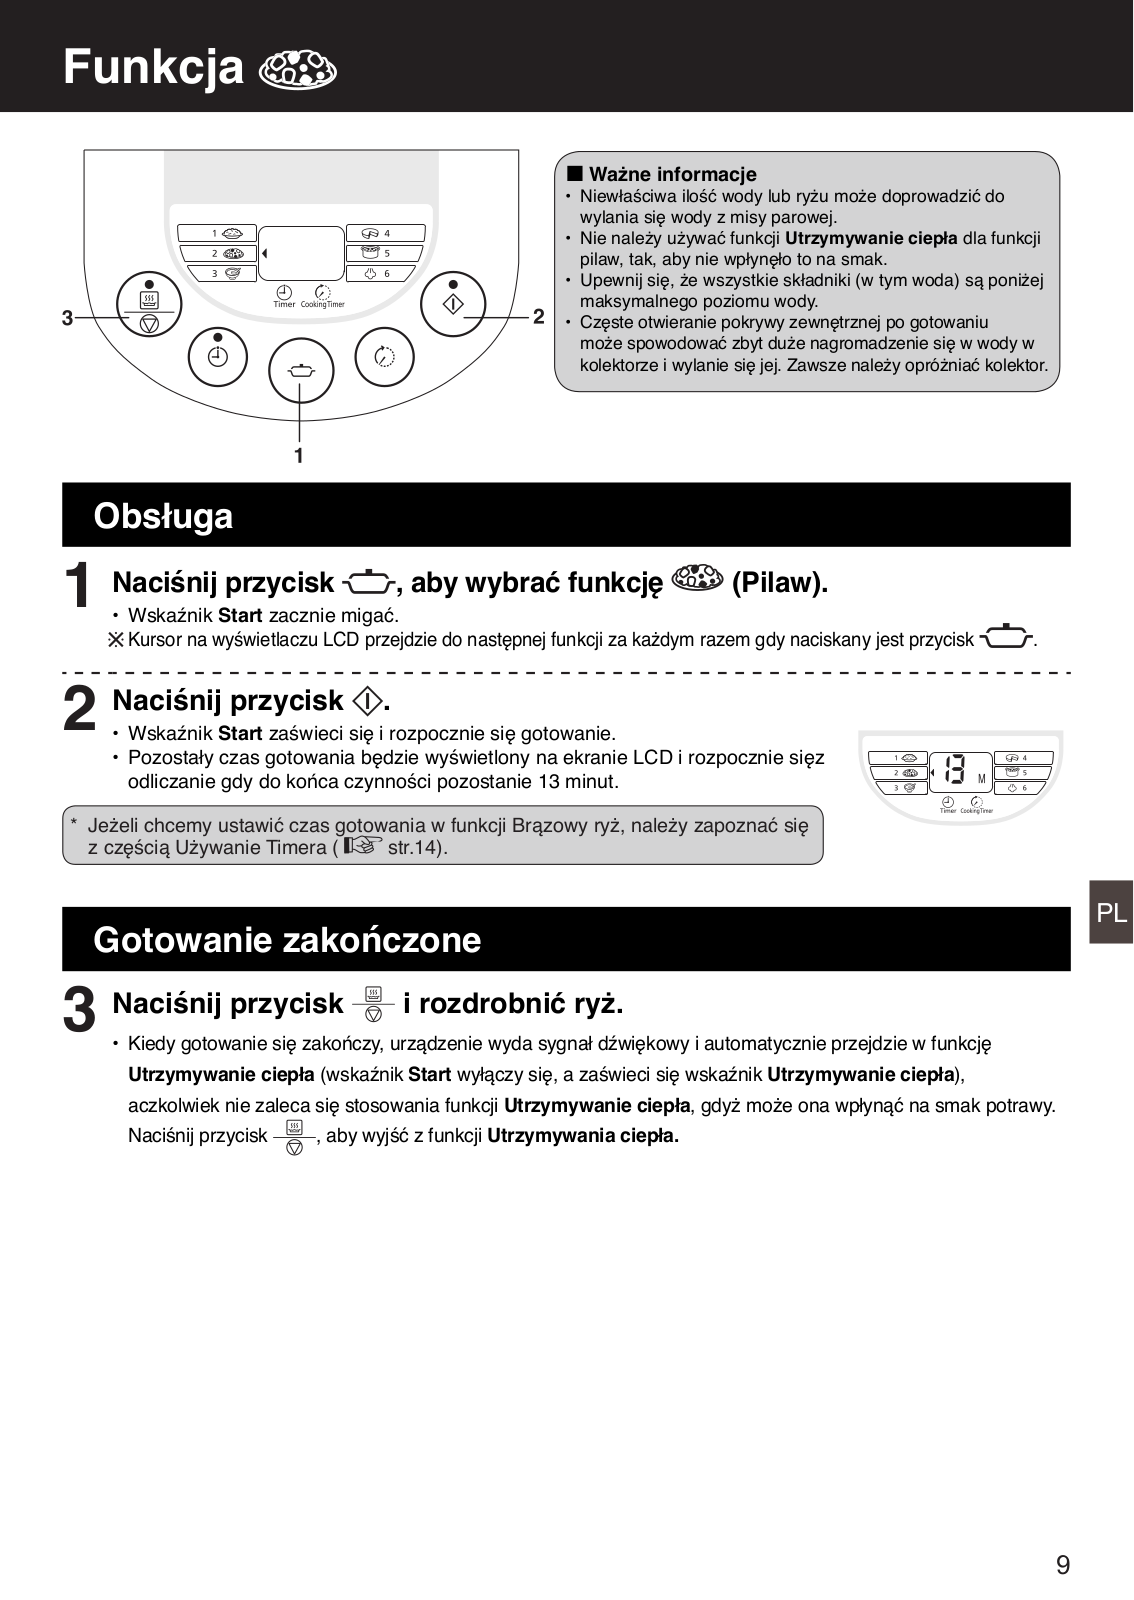
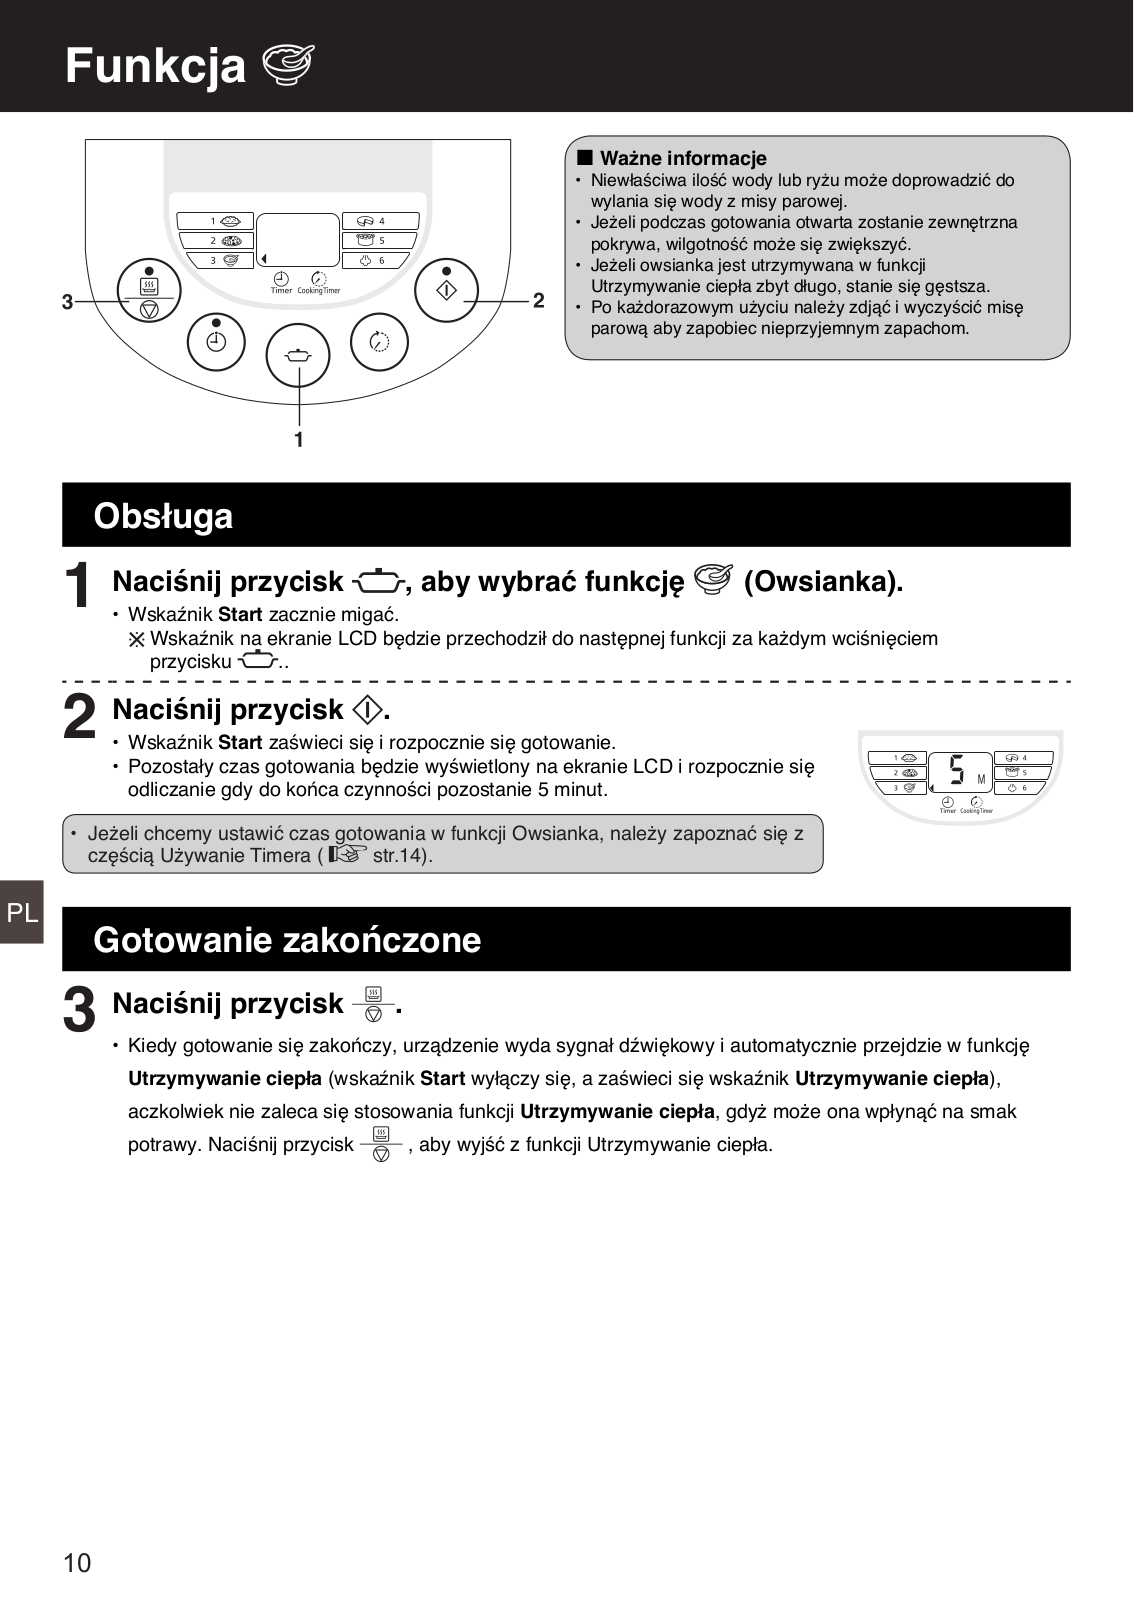
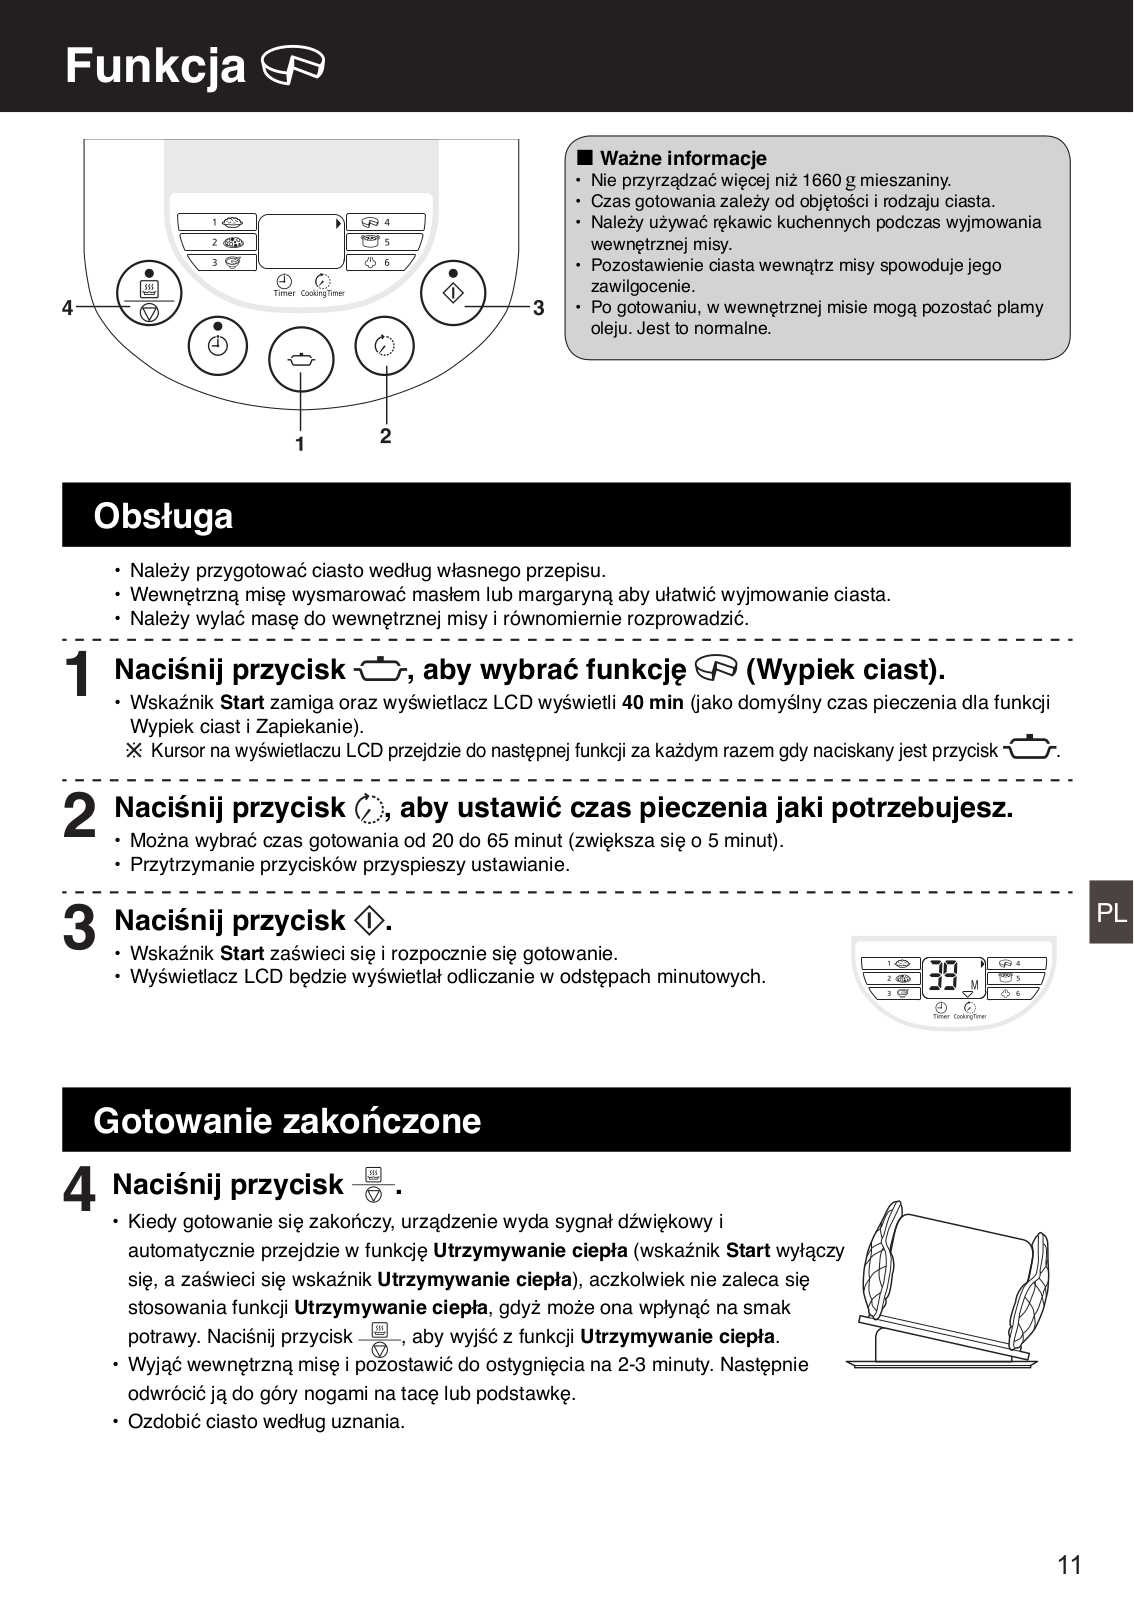
How it Works
Log In / Sign Up
Buy Points
How it Works
FAQ
Contact Us
Questions and Suggestions
Users
Panasonic
Loading...
S
SR-RE181
SR-SAT102
2
SR-SAT182
3
SR-SH
SR-SH103
SR-SH10RN
2
SR-SH10XP
4
SR-SH15PA
3
SR-SH15PS
4
SR-SH15PW
2
SR-SH15RP
5
SR-SH15XP
4
SR-SH183
SR-SH18RP
5
SR-SH18XP
3
SR-SJ10PRO
SR-SJ18P
3
SR-SJ1OP
SR-SPX103
2
SR-SPX108
SR-SPX183
2
SR-SPX188
SR-SSS105
2
SR-SSS185
SR-SX103
SR-SX183
SR-TE10N
4
SR-TE10NVO
SR-TE15N
4
SR-TE15NVO
SR-TE15PS
3
Sr-te15pw
2
SR-TE18N
5
SR-TEG10
9
SR-TEG18
6
SR-TEJ10
SR-TEJ18
Sr-tel18
3
sr-tem10
sr-tem18
Sr-tmb10
5
SR-TMB18
SR-TMG10
SR-TMG18
SR-TMH10
5
SR-TMH102NTW
SR-TMH10ATW
SR-TMH18
5
SR-TMH182HTW
SR-TMH18 LTW
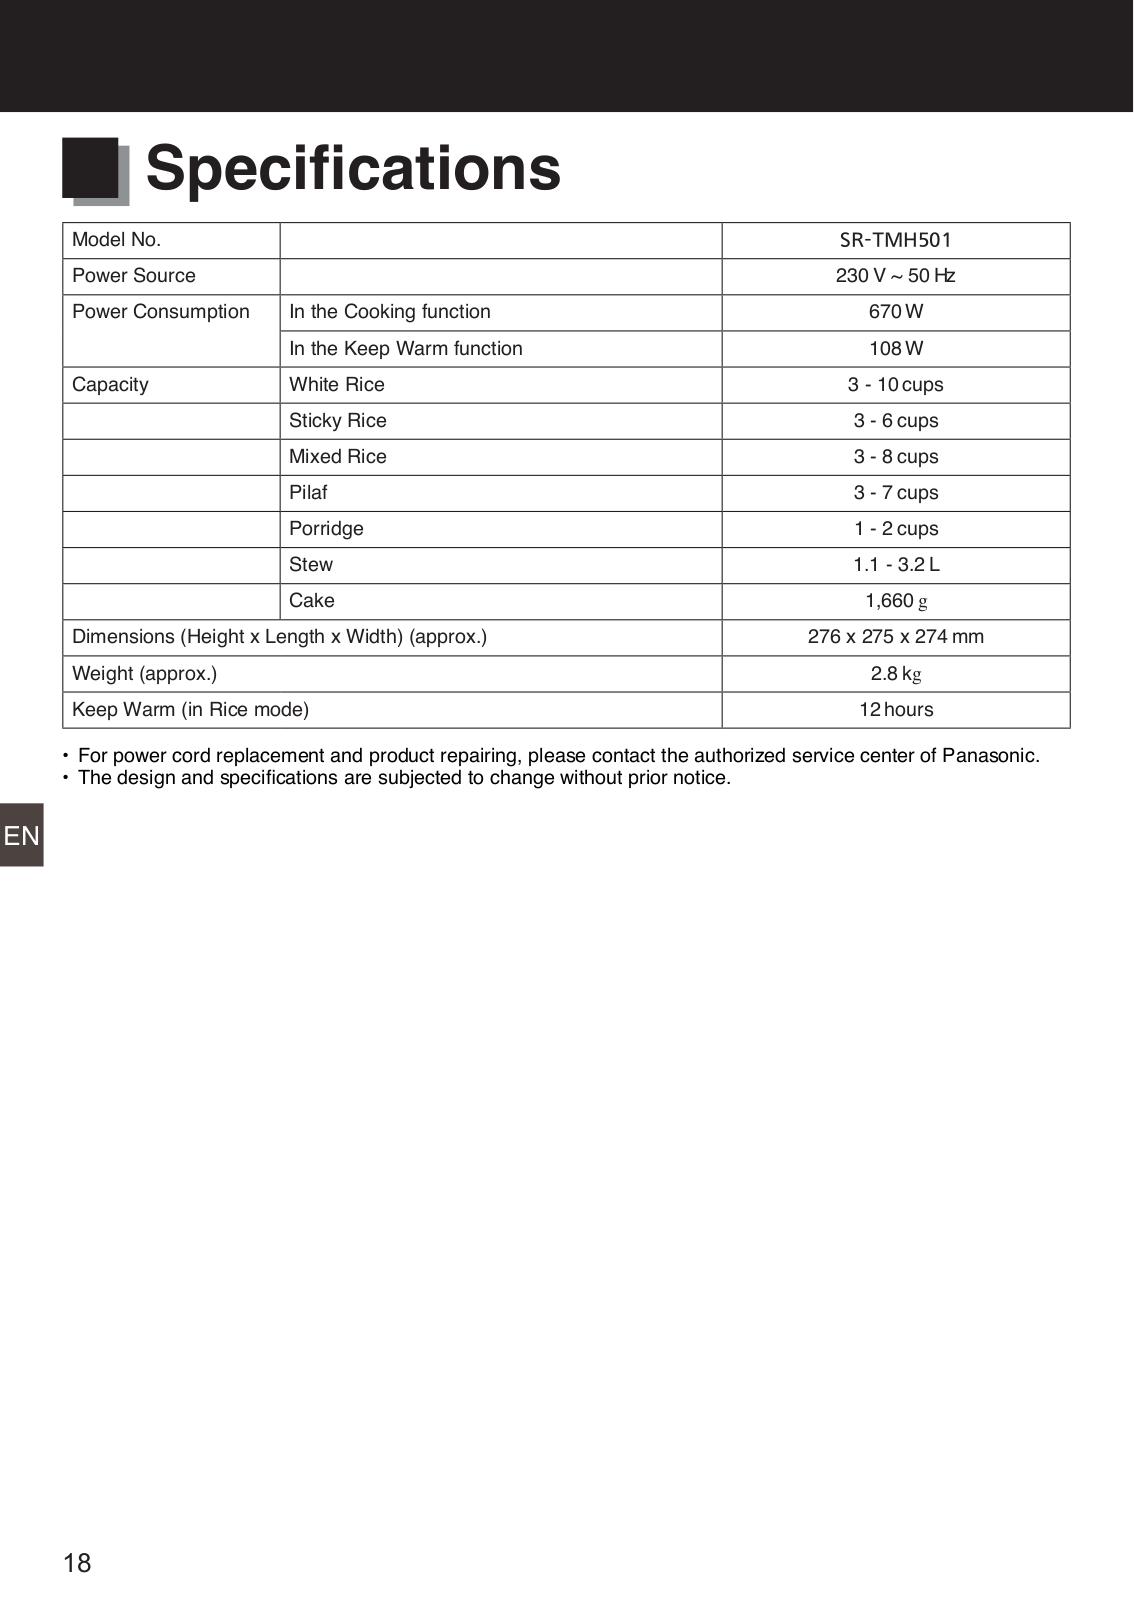
SR-TMH501
3
SR-TMJ181
4
SR-TMJ181 BTW
SR-TMJ501
4
SR-TML500
SR-TML510
SR-TML510LTQ
SR-TMS520
SR-TMX530
8
SR-TMZ540
SR-TMZ540KTQ
SR-TMZ550
SR-TP184
2
SR-UH36N
5
SR-W06N
2
Sr-w06na
4
Sr-w06pa
2
Sr-w06pc
5
Sr-w06pd
2
Sr-w06sxp
3
SR-W10FGE
Sr-w10na
3
SR-W10NAWVA
2
Sr-w10sxn
3
Sr-w10sxp
3
Sr-w15fp
3
Sr-w15fsp
2
Sr-w15pc
3
SR-W18FDP
Sr-w18fsp
2
SR-W18FSPW
SR-W18FSXP
Sr-w18fxp
2
SR-W18GS
2
SR-W18HSN
Sr-w18hsxp
2
Sr-w18na
2
Sr-w18pa
2
Sr-w18pb
4
SR-W18PB-S
SR-W18SXP
SR-W22FG
SR-W22GS
SR-Y18FG
sr-y22fgj
sr-yb05
Sr-ybo5
sr-zc075
SR-ZE105
3
SR-ZE105WST
Loading...
Loading...
Nothing found
SR-TMH501
Operating Instructions
145 pgs
52.21 Mb
0
User Manual [ro]
19 pgs
1.42 Mb
0
User Manual [sk]
19 pgs
1.86 Mb
0
Table of contents
Loading...
Panasonic SR-TMH501 Operating Instructions
...
Panasonic Operating Instructions
Download
Specifications and Main Features
Frequently Asked Questions
User Manual
Download
Loading...
+
hidden pages
Unhide
You need points to download manuals.
1 point = 1 manual.
You can buy points or you can get point for every manual you upload.
Buy points
Upload your manuals