

Page 1
Page 2
Safety Precautions
Please be sure to follow these instructions.
In order to prevent accidents or injury to the user, other people, and damage to property, please follow the
instructions below.
■
The rust prevention paper located between the inner pan and the cast heater must be removed before using.
■ The following chart indicates the degree of damage caused by wrong operation.
Before Use
WARNING
CAUTION
■ Classification of instructions that need to be strictly followed uses the following
Indicates hazard that may cause death or severe injury.
:
Indicates hazard that may cause human injuries or property damage.
:
symbols to distinguish the instruction types.
These symbols mean prohibited.
These symbols mean requirement that must be followed.
WARNING
Plug in tightly.
Do not use a damage plug or warped
outlet.
Do not plug or unplug the
appliance with wet hands.
Do not use wet hands.
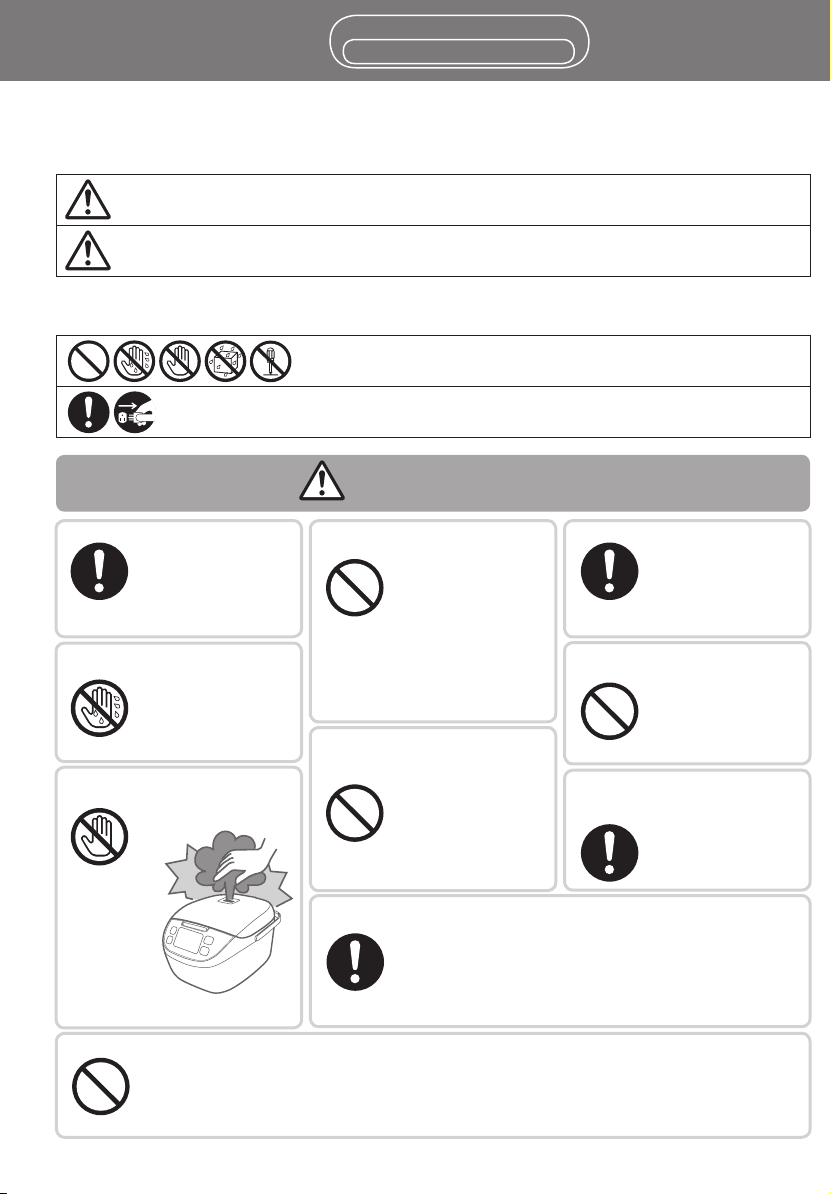
Do not place your hands or face
over or near the steam vent.
Do not touch.
(Improper plugging may
cause electric shock or fire
due to heat generation.)
(It may result in electric
shock.)
Do not damage the power cord or
the power plug.
Prohibited
(The damaged power cord could result in
electric shock or fire.)
If the power cord or the power plug is
damaged, consult your nearest retailer or
service center for repair.
Do not insert metal objects such
as pins and needles, or any other
foreign objects in the exhaust
Prohibited
The following is prohibited:
disassembling, bringing
near hot surface, bending,
twisting, pulling, placing
heavy objects on top or
tying up in a bundle.
outlets, or any other
portion of the unit.
Especially clips, wires or
any metal objects.
(It may result in electric
shock or malfunction.)
Clean the power plug regularly.
Unplug the power plug, and wipe with the
clean cloth.
Do not operate the appliance with a
damaged power cord or power plug.
Prohibited
Make sure the voltage supplied to
the appliance is the same as your
local supply. (240V AC only)
(A soiled power plug may
cause insufficient insulation
due to the moisture, and
may result in fire.)
(It may result in electric
shock or fire.)
(It may cause electric
shock or fire.)
This appliance is not intended for use by persons (including children)
with reduced physical, sensory or mental capabilities, or lack of
(It may cause burning injuries.)
Do not use the appliance if the power cord or power plug is damaged or the power plug is loosely connected
to the power outlet.
(It may result in electric shock, or fire due to short circuit.)
experience and knowledge, unless they have been given
supervision or instruction concerning use of the appliance
by a person responsible for their safety.
Children should be supervised to ensure that they do not play with the
appliance.
2
Page 3
WARNING
Do not immerse the appliance in water or other
liquid.
(It may result in electric shock.)
If water leaks inside the appliance, please consult
your nearest retailer or service center.
Do not wet.
CAUTION
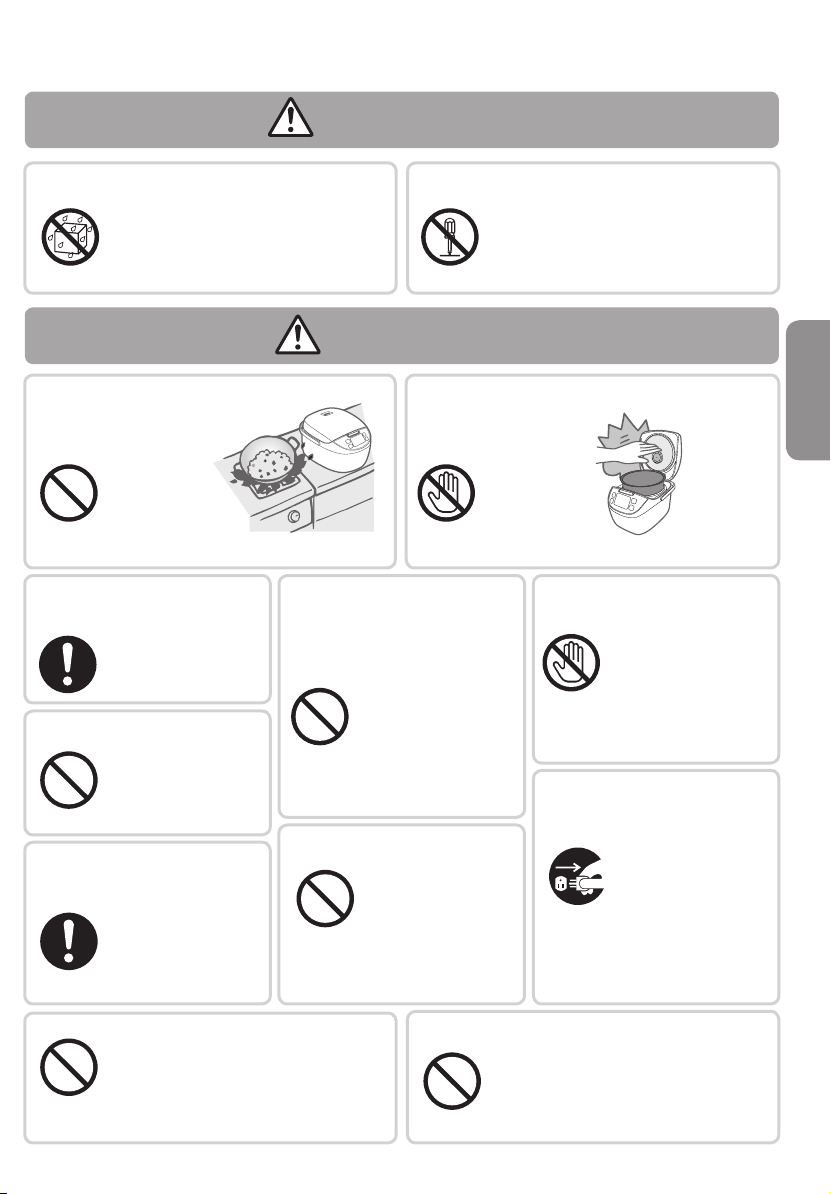
Do not operate the appliance near water or fire.
(It may result in electric shock or fire.)
Make sure the appliance is
completely cool before touching
or cleaning it.
(To avoid burning injuries.)
Do not open the outer lid while
cooking.
(It may cause burning
injuries.)
Prohibited
Be sure to grasp the power plug
itself to disconnect it.
Do not pull the power cord.
(Also firmly grasp the
appliance body before
unplugging it.)
(It may result in electric
shock or electrocution.)
Do not place the appliance on
an unstable surface or on a
carpet, electric carpet, table
cloths (ethylene plastic) or other
object that cannot resist high
temperature.
Prohibited
Do not substitute the inner pan
with other container.
Prohibited
Do not attempt to disassemble any of the parts or
repair them by yourself.
(It may result in electric shock or fire.)
The appliance must be repaired only by the
authorized service center.
Do not disassemble.
The appliance becomes hot when in use, especially
the outer lid’s inner surface and inner pan.
Do not directly touch them
with your hands.
Do not touch.Prohibited
(It may result in burning injuries.)
Do not touch the hook button
when the appliance is being
carried or moved.
(If the outer lid is
accidentally open, it may
result in burning injuries.)
(It may be overturned
during use and result in
fire.)
Do not touch.
Always disconnect the appliance
from the power supply outlet
before taking the inner pan out or
when the appliance is not in use.
(It may result in electric
(It may result in higher
temperature and burning
injuries.)
Unplug
shock.)
Do not touch
the outer lid’s
inner surface
and inner pan.
Before use
Do not place the appliance near a wall or furniture.
(The steam may result in color changes or
deformation of nearby objects.)
Watch out for the steam coming out of the
Prohibited
appliance.
Do not use other than the provided cord set and do
not use the cord set for other appliances.
(It may result in electric shock or fire.)
Prohibited
3
Page 4
安全注意事項
確保遵循這些說明。
請
為防止對使用者及他人造成傷害或造成機件故障,請遵從以下指示說明。
■ 使用前,須把置於內鍋和電熱板之間的防鏽紙拿開。
■ 下圖表示由於錯誤操作引起的危害的等級。
使用前
警告 :
注意 :
■ 須嚴格遵守的指示分類使用以下標誌區分指示類型。
插緊。
(松動可造成觸電,產
生的熱量可能會導致
火災。)
請勿使用老舊或鬆動的插頭。
請勿用潮濕的手插或拔插頭。
(可能會造成觸電。)
請勿用濕手。
請勿以手或臉觸及噴氣孔。
請勿觸摸。
此標誌表示[可能造成傷亡]。
此標誌表示[可能造成傷害或機件故障]。
此標誌表示 禁止。
此標誌表示 必須遵守。
警告
請勿損壞插頭或電線。
以下為禁止項目︰
拆卸,放置在溫度高的
地方,彎曲,拉扯,壓
禁止
(若電線受損,則可能會造成觸電或
火災。)
若電線或電源插頭損壞,請諮詢附近
零售商或服務中心並進行維修。
請勿將金屬物件例如髮夾鐵
釘或任何其他物件塞入噴氣
孔或任何其他部位。
禁止
以重物或扎成一捆。
尤其是夾子鐵絲或任何
金屬物件。
(可能會造成觸電或機件
故障。 )
經常清理電源插頭。
(骯髒的電源插頭可能
會因潮濕而導致絕緣不
足,可能會導致火災。)
拔出電源插頭,用乾淨的布抹。
請勿用破損的電線或插頭操
作任何電器。
(可能會造成觸電或火
災。)
禁止
請確定使用的電流與當地的
電流相同。(交流電僅 240 伏)
(使用連接插頭,可能會
造成觸電或火災。)
該設備並非設計供以下人群(包括兒童)使用:身體、感官或精
神方面有障礙的人士或缺乏經驗及知識的人士,除非負責
他們安全的人員已就本機的使用予以監督或指導。
(可能會造成燙傷。)
如果電線或插頭損壞,或插頭鬆動,請勿使用本裝置。
(可能會造成觸電或火災。)
禁止
須監督不讓兒童玩弄該設備。
4
Page 5

警告
請勿使用電子鍋的任何零件浸濕水或其它液體。
(可能會造成觸電)
如有水滲入電子鍋內,請詢問製造商。
請勿弄溼。
請勿靠近水或火邊火邊操作此電子鍋。 電子鍋在使用中會發熱,尤其是外蓋的內表面和
禁止
確保電子鍋完全冷卻後方可觸
摸或清洗。
蒸煮時,請勿打開外蓋。
禁止
(可能會
造成觸電或火災。
(避免燙傷。)
(可能會造成燙傷。)
)
請勿將電子鍋放置在不平穩的表
面或毛毯、電毛毯、桌布 (乙烯
塑料) 或其他不能抗高溫的物品
上進行使用。
禁止
請勿將其他的鍋、壺放進內鍋。
請勿自行拆修電器。
請勿拆解。
注意
內鍋。
請勿直接用手觸摸它們。
請勿觸摸。
(使用時可能會翻倒造成
火災。)
(可能會造成觸電或火災)
該設備必須送交經授權的服務中心進行維
修。
請勿觸摸外
蓋的內表面
及內鍋。
(可能會造成燙傷。)
移動電子鍋時請勿按鍋蓋開關
按鈕。
(若外蓋被打開,可能會
造成燙傷。)
請勿觸摸。
將內鍋取出前或未在使用電子鍋
時,請確保已將設備從電源插座
上拔出。
使用前
拔插頭時請抓住插頭,切勿抓住
電線拔。
(並抓住電子鍋拔插頭。)
(可能會造成觸電或電
擊。)
請勿將電子鍋放置在牆邊或傢俱旁。 請勿使用本電子鍋隨附電線以外的其他電線,也
(蒸氣可能會造成變色或變形。)
小心電子鍋蒸氣。 (可能會造成觸電或火災。)
禁止
禁止
(可能會產生高溫而導致
燙傷。)
拔插頭
勿使用其他電子鍋的電線。
禁止
(可能會造成觸電。)
5
Page 6

Usage Precautions / Parts Names and Functions
使用注意事項 / 零件名稱及功能
Before use / Before cooking
使用前
/
蒸煮前
Usage Precautions
使用注意事項
Avoiding damages to the appliance.
避免損壞電子鍋。
Do not cover the outer lid with a cloth.
»
The outer lid may deform, crack or discolor
which will result in malfunction.
Do not place the appliance in direct sunlight.
»
Do not use the inner pan for other applications.
»
Always keep the surface of the inner pan, cast heater, and
»
temperature sensor clean and dry.
Otherwise it may result in malfunction.
Do not use the inner pan
»
directly on open fl
electric burner, or in a
heated oven.
請勿在外蓋上蓋以抹布。
»
外蓋可能變形扭曲或變色造成故障。
»
請避免將電子鍋置於陽光直射處。
»
請勿將內鍋作其他用途使用。
»
保持內鍋表面‵電熱板和溫度感應器潔淨乾燥。
否則可能會造成機件故障。
請勿將內鍋直接用於明火‵電爐或加熱爐上。
»
ame,
Foreign matters
外來原因
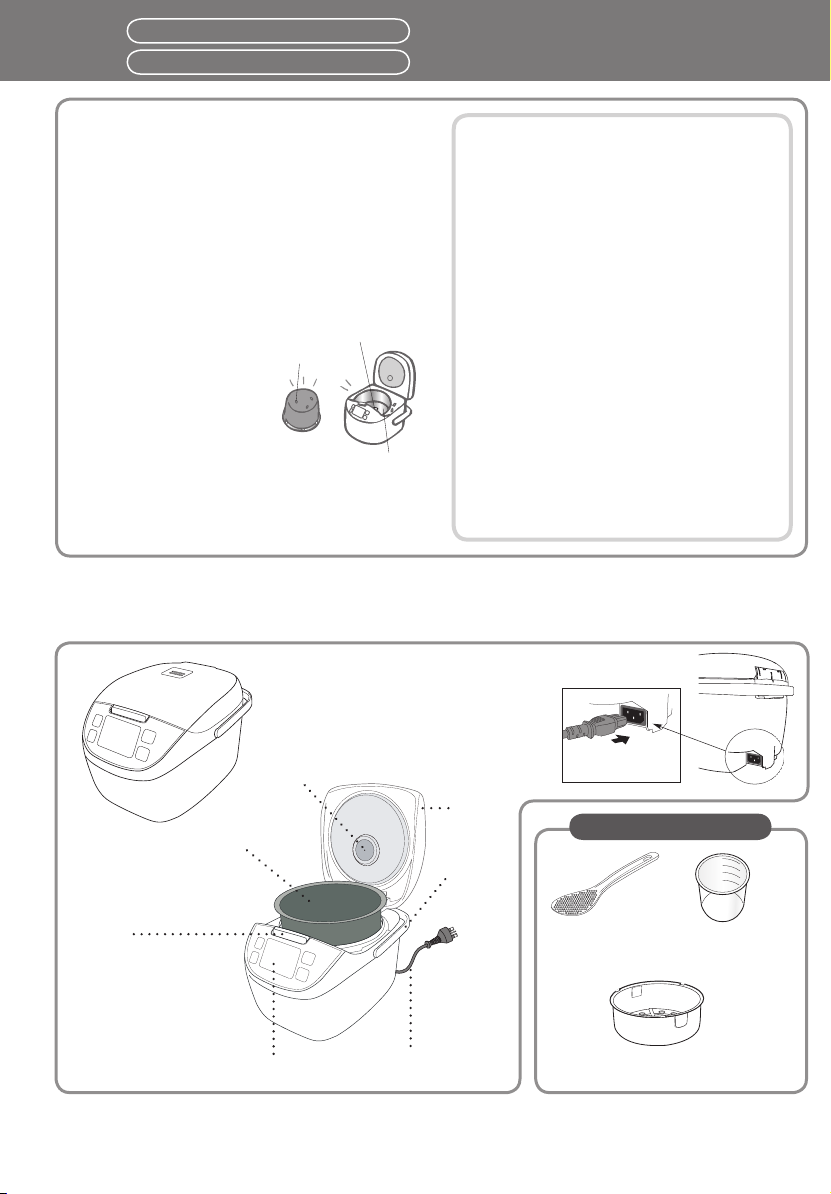
Parts Names and Functions
零件名稱及功能
Steam vent
噴氣孔
Inner pan
內鍋
Avoiding damages to the inner pan.
避免損壞內鍋。
Do not leave the rice scoop or any other objects
»
inside the inner pan.
The inner pan should be cleaned immediately after
»
cooking with seasonings or condiments.
Do not use the inner pan as mixing bowl.
»
Do not use metal utensils that can scratch or crack
»
the inner pan.
The coated surface of the inner pan may gradually
»
Temperature sensor
溫度感應器
Cast heater
電熱板
When using the rice cooker, insert the power
connector as far as it can go into the inlet at
the back of the main body.
使用電子鍋時,儘量將電線纜插入鍋體後
面的插孔。
WARNING : Loose connection will cause an
electrical spark.
警告: 連接鬆動會引起電火花。
wear away, so use with care.
Do not tap or rub the inner surface of the inner pan.
»
Clean only with a sponge.
(Do not use scotch brite or scouring pad.)
請勿將飯勺子或任何其他物件丟在內鍋里。
»
加調味料煮後,務必即刻清洗內鍋。
»
請勿將內鍋用作攪拌碗。
»
請勿使用金屬器物以避免內鍋產生刮痕或裂痕。
»
內鍋的外表塗層會慢慢撥離,請小心使用。
»
請勿敲打或磨刷內鍋的內表層。僅用海綿清洗。
»
(請勿使用研磨刷或百潔布。)
Outer lid
外蓋
Handle
把手
Power connector
電線纜
Accessories / 附件
Hook button
Press the hook button
ü
to open the outer lid.
開關按鈕
按開關按鈕,打開外蓋。
ü
6
Control panel
控制面板
Cord set
電線
Rice scoop (1)
飯勺子 (1)
Measuring cup (1) (Approx. 180ml)
量米杯 (1) (約 180 毫升)
Steaming basket (1)
蒸籠 (1)
Page 7
Usage Precautions / Parts Names and Functions
使用注意事項 / 零件名稱及功能
Before use / Before cooking
使用前
/
蒸煮前
Usage Precautions
使用注意事項
Avoiding damages to the appliance.
避免損壞電子鍋。
Do not cover the outer lid with a cloth.
»
The outer lid may deform, crack or discolor
which will result in malfunction.
Do not place the appliance in direct sunlight.
»
Do not use the inner pan for other applications.
»
Always keep the surface of the inner pan, cast heater, and
»
temperature sensor clean and dry.
Otherwise it may result in malfunction.
Do not use the inner pan
»
directly on open fl
electric burner, or in a
heated oven.
請勿在外蓋上蓋以抹布。
»
外蓋可能變形扭曲或變色造成故障。
»
請避免將電子鍋置於陽光直射處。
»
請勿將內鍋作其他用途使用。
»
保持內鍋表面‵電熱板和溫度感應器潔淨乾燥。
否則可能會造成機件故障。
請勿將內鍋直接用於明火‵電爐或加熱爐上。
»
ame,
Foreign matters
外來原因
Parts Names and Functions
零件名稱及功能
Steam vent
噴氣孔
Inner pan
內鍋
Avoiding damages to the inner pan.
避免損壞內鍋。
Do not leave the rice scoop or any other objects
»
inside the inner pan.
The inner pan should be cleaned immediately after
»
cooking with seasonings or condiments.
Do not use the inner pan as mixing bowl.
»
Do not use metal utensils that can scratch or crack
»
the inner pan.
The coated surface of the inner pan may gradually
»
Temperature sensor
溫度感應器
Cast heater
電熱板
When using the rice cooker, insert the power
connector as far as it can go into the inlet at
the back of the main body.
使用電子鍋時,儘量將電線纜插入鍋體後
面的插孔。
WARNING : Loose connection will cause an
electrical spark.
警告: 連接鬆動會引起電火花。
wear away, so use with care.
Do not tap or rub the inner surface of the inner pan.
»
Clean only with a sponge.
(Do not use scotch brite or scouring pad.)
請勿將飯勺子或任何其他物件丟在內鍋里。
»
加調味料煮後,務必即刻清洗內鍋。
»
請勿將內鍋用作攪拌碗。
»
請勿使用金屬器物以避免內鍋產生刮痕或裂痕。
»
內鍋的外表塗層會慢慢撥離,請小心使用。
»
請勿敲打或磨刷內鍋的內表層。僅用海綿清洗。
»
(請勿使用研磨刷或百潔布。)
Outer lid
外蓋
Handle
把手
Power connector
電線纜
Accessories / 附件
Hook button
Press the hook button
ü
to open the outer lid.
開關按鈕
按開關按鈕,打開外蓋。
ü
6
Control panel
控制面板
Cord set
電線
Rice scoop (1)
飯勺子 (1)
Measuring cup (1) (Approx. 180ml)
量米杯 (1) (約 180 毫升)
Steaming basket (1)
蒸籠 (1)
Page 8
Part Names and Functions
零件名稱及功能
Before cooking
蒸煮前
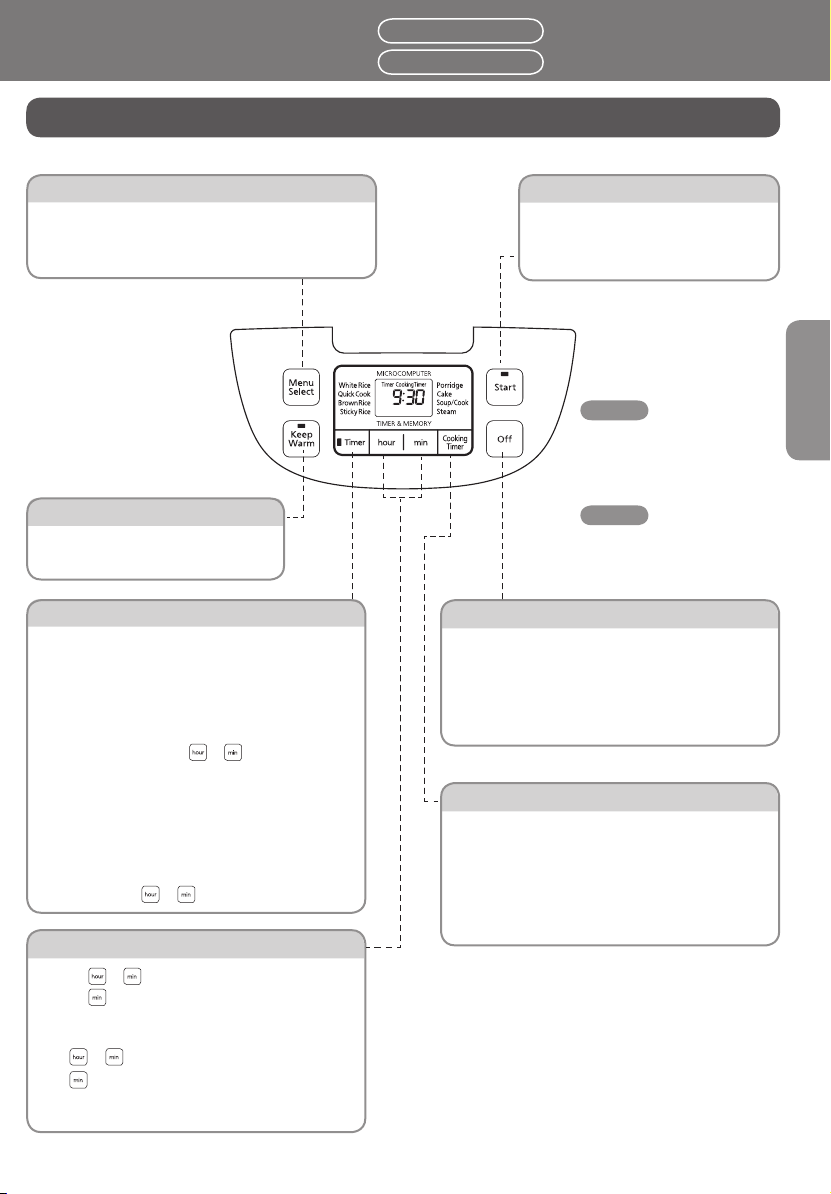
Control Panel / 控制面板
Menu Select Key / 菜單選擇按鈕 Start Key / 開始按鈕
You can select between White Rice, Quick Cook, Brown
»
Rice, Sticky Rice, Porridge, Cake, Soup/Cook, and Steam.
您可在選擇白米、快速蒸煮、糙米、糯米、稀飯、蛋糕、
»
煲湯/蒸煮和蒸。
Press this key when start cooking or when
»
complete the timer setting.
開始蒸煮或完成定時器設定時,按此按
»
鈕。
Before use
使用前
Keep Warm Key / 保溫按鈕
Press this key to enter Keep Warm mode.
»
按此按鈕進入保溫模式。
»
Timer Key / 定時器按鈕
»
Press this key to start timer setting.
»
For White Rice, Sticky Rice, and Porridge, the timer can
be pre-set between 1 hour and 23 hours 50 minutes.
For Brown Rice, the timer can be pre-set between 3 hours
and 23 hours 50 minutes.
(The timer cannot be adjustable in Quick Cook, Cake,
Soup/Cook and Steam.)
To adjust the time, press
»
»
按此按鈕開始定時器設定。
»
對於白米、糯米和稀饭,定時器可以預設為 1 小時至 23 小
時 50 分鐘之間。
對於糙米,定時器可以預設為 3 小時至 23 小時 50 分鐘之
間。
(定時器不可在快速蒸煮、蛋糕、煲湯/蒸煮和蒸模式下調節
時間。)
»
要調節時間,按
or key.
或 按鈕。
hour/min Key / 小時/分鐘按鈕
Press or to set the clock or timer.
»
Press key to set cooking timer. (Only in Cake, Soup/
»
Cook or Steam)
*Keeping this key pressed will make setting faster.
按
或 設定定時器。
»
按鈕設定蒸煮定時器。(僅適用於蛋糕、煲湯/蒸煮
按
»
或蒸模式)
*按住此按鈕可快速設定。
資訊
The Start and Off Key’s
upper protruding part is in
consideration of the vision
impaired.
開始和關閉按鈕的上部突出
部分考慮到視野不便。
Information
Off Key / 關閉按鈕
Press this key to turn the rice cooker off.
»
Press this key to abort the malfunction or the unwanted
»
setting from any operation setting modes.
按此按鈕關閉電子鍋。
»
按此按鈕中止任何操作設定模式下不正確的或不需要的
»
設定。
Cooking Timer Key / 蒸煮定時器按鈕
»
Press this key to set cooking timer.
»
Cooking timer can only be set in Cake, Soup/Cook or
Steam.
*Keeping this key pressed will make setting faster.
按此按鈕設定蒸煮定時器。
»
蒸煮時間僅可在蛋糕、煲湯/蒸煮或蒸模式下設定。
»
*按住此按鈕可快速設定。
7
Page 9

Parts Names and Functions
零件名稱及功能
Before cooking
蒸煮前
Setting the Clock / 設定時鐘
Example: When adjusting from 7:00 AM to 8:30 AM.
例如:要從上午 7 點調節至上午 8 點 30 分時。
1 Insert the Power Plug.
插入電源插頭。
2 Press or for more than one second.
(Release your finger from the key when you hear a beep.)
The values for hour and minute in the display will start flashing.
按 或 一秒鐘以上。
(聽到嗶地一聲響時,將手指從按鈕上鬆開。)
顯示屏上的小時和分鐘值將開始閃爍。
3 Press to display 8, and to display 30.
(When the display stops flashing, or when press key, clock setting is
complete.)
按 以顯示 8,然後按 以顯示 30。
(當顯示屏停止閃爍或按 按鈕時,時間設定完成。)
* Time cannot be set while the rice cooker is operating in cooking or warming function.
* Keeping the key pressed will make setting faster.
* This clock displays time in a 24-hour format. 12 o’clock midnight is set as 0:00, and 12 o’clock
noon is set as 12:00.
* 當電子鍋在蒸煮或保溫功能模式下運行時不能設定時間。
* 按住此按鈕可快速設定。
* 此時鐘以 24 小時制顯示時間。 午夜 12 點設定為 0:00,中午 12 點設定為 12:00。
Lithium Battery / 鋰電池
Battery Replacement
If the new lithium battery is needed, please contact your nearest service center.
■ The life span of the battery is around 5 years.
(At 20°C room temperature and plugged in 12 hours each day.)
■ When unplugged and the battery is consumed, the following will happen:
The display becomes vague or disappear.
•
Memory of preset time is lost.
•
■ When plugged, the timer can be used again. (the timer resetting is required)
更換電池
如果需要新的鋰電池,請聯絡您最近的服務中心。
■ 電池的使用壽命約為 5 年。 (以室溫在 20 攝氏度時,每天插電 12 小時計。)
■ 拔掉電源插頭後,如果電池電量已耗盡,將出現以下現象:
• 顯示內容模糊或消失。
• 預設時間的記憶丟失。
■ 插電後,定時器可再次使用。(需要重設定時器)
8
Page 10

Attaching or removing each part / Using the water level scale
連接或拆除每個部分 / 使用水位刻度
Attaching or removing each part
連接或拆除每個部分
Outer lid
外蓋
Preparations
準備事項
Inner pan
內鍋
Handle
把手
Steam vent / 噴氣孔
Attaching the steam vent (A P.15)
裝上噴氣孔 (A 第 15 頁)
Cord set
電線
Using the water level scale
使用水位刻度
Add water according to the following table.
根據以下表格加水。
W
Rice amount (Cup)
米量 (杯)
0.5 - - - - - - 0.6 0.6
1
1.5 - - - - - - - 1.2
2
3
4
5
6
7 - 7 - - - - - -
8 - 8 - - - - - -
9 - 9 - - - - - -
10 - 10 - - - - - -
w Fill water by referencing the water level scale on the side of the inner pan with “CUP”.
The amount of water can be adjusted according to kind of rice and personal taste.
ww Fill water by referencing the water level scale on the side of the inner pan with “L”.
Note •
Cooking new-crop rice may result in some bubbles spilling from the steam vent.
Please try to reduce water level to overcome this problem.
• It is not recommended to cook less than 2 cups for SR-DE183.
• Cooking small quantities of rice may cause the cooked rice harder than normal
and leave scorched rice at the bottom of the rice cooker.
SR-DE103 SR-DE183 SR-DE103 SR-DE183 SR-DE103 SR-DE183 SR-DE103 SR-DE183
White rice
1
2
3
4
5
-
w
w
/白米
-
2
3 3
4
5
6
Brown ricew/糙米
1 (+80 ml)
1 (+80 毫升)
2 (+40 ml)
2 (+40 毫升)
-
-
-
ater level (CUP)/水位 (杯)
w
-
2 (+90 ml)
2 (+90 毫升)
3 (+90 ml)
3 (+90 毫升)
4 (+90 ml)
4 (+90 毫升)
5 (+90 ml)
5 (+90 毫升)
6 (+90 ml)
6 (+90 毫升)
Sticky ricew/糯米
180 ml
180 毫升
1 (+90 ml)
1 (+90 毫升)
2 (+60 ml)
2 (+60 毫升)
-
-
-
w 參考內鍋壁上標 “CUP” 字眼的水位刻度加水。
可根據個人口味和米的種類調節水量。
ww 參考內鍋壁上標 “L” 字眼的水位刻度加水。
註: •
蒸煮新米時,噴氣孔中會出現氣泡。請試著降低 水位以避免此問題。
• 使用 SR-DE183 電子鍋蒸煮時,加入的水建議不少於兩杯水。
• 與正常蒸煮量相比,蒸煮少量米飯時米飯可能會變得稍硬,並且
鍋底會燒糊。
w
-
-
2 (+90 ml)
2 (+90 毫升)
3
4
4 (+270 ml)
4 (+270 毫升)
Porridgeww/稀饭
0.8
1.4 (+180 ml)
-
1.4 (+180 毫升)
-
-
-
-
ww
0.8
-
-
-
-
How to use
如何使用
CAUTION
w Using the steaming basket to steam while cooking white rice.
- The maximum rice amount is shown in the table.
- When cooking the rice using “White Rice” mode, set the
steaming basket in the rice cooker before start.
- Do not open the outer lid while cooking. (Cooking
result may not be satisfactory.)
注意
w 使用蒸籠蒸煮白米時 。
- 最大的用米量已顯示在表中。
- 使用「White Rice」(白米) 模式蒸煮米飯時,蒸煮前
請安裝蒸籠。
- 蒸煮時,請勿打開外蓋。(蒸煮效果可能不理想。)
Model型號Rice Amount (cup)
米量 (杯)
SR-DE103 1
SR-DE183 5
9
Page 11

Washing Rice and Adjusting the Water Level
清洗米並調節水位
Preparations
準備事項
Washing Rice and Adjusting the Water Level
清洗米並調節水位
Measure rice with the measuring cup provided.
Please see the specifications in P.22 for the amount of rice that
»
1
2
3
4
can be cooked at a time.
使用量米杯量米。
請查看規格第.22 頁關於一次可蒸煮的米量 。
»
Rinse the rice.
Wash it thoroughly (Otherwise the rice may be burnt at the
»
bottom or smell like rice bran.)
清洗米
徹底清洗 (否則米可能會燒糊,或有米麩氣味。)
»
Adjust water level for the menu of your choice.
Adjust water level on a flat surface. (Check the left and the
»
right sides of the water level scales and adjust it.)
Adjust the amount of water according to the softness you prefer.
»
(The water may spill out while cooking if you put too much in.)
To prevent boiling milk-like water to spill out while cooking,
»
please adjust water according to the water level scale in the
inner pan only.
根據您選擇的菜單調節水位。
在水平表面調節水位。(查看左右兩邊的水位刻度進行調節。)
»
根據您喜好的柔軟度調節水量。(若加水過多,水可能在蒸煮時
»
溢出。)
要避免蒸煮時,米湯濺出來,請僅根據內鍋水位刻度來調節水
»
位。
Make sure the steam vent is properly assembled.
Dry off the water on the outside of the inner pan.
確保噴氣孔已正確安裝。
擦干內鍋外壁的水。
Good example
良好範例
1 Wash the rice quickly with plenty
of water, dispose the water
immediately afterwards.
(The rice absorbs water easily
at first.)
用大量的水快速清洗米,然後立刻
倒水。
(因爲第一次加水後米容易吸收。)
Example : When cooking 6 cups of white rice.
例如:蒸煮 6 杯白米時。
Add water up to
the water level scale
of 6 cups.
加水至 6 杯米的水位
刻度。
Bad example
失敗範例
2 Repeat step 1 to clean out
the bran until the water is
clear.
重複步驟 1 以清洗乾淨米
麩,直到水變清。
Level the rice.
把米撫平。
Put the inner pan into the main body and close the
outer lid.
On closing the outer lid, please make sure there is a clicking
»
5
sound.
將內鍋放入鍋體並蓋上外蓋。
蓋上外蓋時,請確保發出滴答聲。
»
Insert the power plug.
插入電源插頭。
6
10
Make sure the inner pan is directly
in contact with the cast heater.
Keep turning it slightly 2-3 times
until it fits.
確保內鍋直接接觸電熱板。
稍微旋轉 2-3 次直到合適為止。
Power plug
電源插頭
Page 12

White Rice, Brown Rice, and Sticky Rice
白米‵糙米及糯米
Cooking Modes
蒸煮模式
Cooking White Rice, Brown Rice, and Sticky Rice
蒸煮白米‵糙米及糯米
1
2
Press to point ; to White Rice, Brown Rice, or
Sticky Rice.
1
按
按鈕,; 指向 White Rice (白米)、Brown Rice
(糙米) 或 Sticky Rice (糯米)。
At the beginning, ; will point at the “White Rice”.
開始時,; 會指向 “White Rice”。
The “Start” lamp blinks.
w
「Start」 燈亮。
w
Press to start cooking.
2
按
開始蒸煮。
Stir and loosen the rice immediately after buzzer sounds.
蜂鳴器響後 , 請立即攪鬆米飯。
Rice cooker will switch automatically to Keep Warm mode.
3
For better performance, please stir and loosen the rice
immediately after the beep sounds and keep the rice warm for a
few minutes.
電子鍋將自動切換至保溫模式。
為了口感更佳,在嗶聲響起後,請立即攪鬆米飯,並保溫幾分鐘。
If you do not want to keep the rice warm, press
the power plug.
若您不想將飯保溫,按
並拔掉電源插頭。
and remove
When using “White Rice” mode
當使用「White Rice」模式時。
The display window will look like this when pressing to
select “White Rice”.
按 並將其設定為「White Rice」時,顯示屏將顯示如此。
Light turns on.
燈亮。
After water runs dry, the remaining time to finish will be
»
shown (9 minutes).
The remaining time to finish for “Brown Rice” mode is 13
•
minutes.
水煮干後,將顯示結束的剩餘時間 ( 9 分鐘)。
•
結束「Brown Rice」模式的剩餘時間為 13 分鐘。
•
Light turns on.
燈亮。
How to use
如何使用
11
Page 13

Quick Cook / Porridge / Cake / Soup/Cook / Steam
快速蒸煮 / 稀飯 / 蛋糕 / 煲湯/蒸煮 / 蒸
Cooking white rice in [Quick Cook] mode. / 在 [Quick Cook] (快速蒸煮) 模式蒸煮白米。
Cooking Modes
蒸煮模式
Press to point ; to [Quick Cook].
1
Press .
2
[Quick Cook] mode can be used only for white rice.
Note
Cooking Porridge with [Porridge] mode. / 在 [Porridge] (稀飯) 模式下煮粥。
1
2
Note
Baking cake with [Cake] mode. / 在 [Cake] (蛋糕) 模式下烘焙蛋糕。
•
With [Quick Cook] mode rice may be slightly harder than normal and burnt at the bottom.
•
➞ For better performance, please add some more water.
➞ For better performance, please stir and loosen the rice immediately after the beep sounds and keep the rice warm for
a few minutes.
➞ During rice cooking, if you encounter a water overflow problem, please switch to the White Rice mode instead.
w Timer is not applicable to this mode.
[Quick Cook] (快速蒸煮) 模式僅可用於蒸煮白米。
•
註
Press to point : to [Porridge].
Press .
註
[Quick Cook] (快速蒸煮) 模式下的飯可能比一般蒸煮的飯稍硬,底部有燒糊。
•
➞ 為了效果更佳,請再多加一點水。
➞ 為了口感更佳,在嗶聲響起後,請立即攪鬆米飯,並保溫幾分鐘。
➞ 蒸煮期間,若有水溢出,請切換到 “White Rice”(白米)模式。
w 此模式下不適用定時器。
Opening the outer lid at the time of cooking may increase the condensation of moisture.
•
The different kinds and amount of rice may lead boiling milk-like water to spill out through the steam vent.
•
If using too much water, it may cause water overflow.
•
The long duration of Keep Warm mode may thicken the porridge.
•
蒸煮時打開外蓋可能增加凝結的水氣。
•
不同種類和分量的米可能導致米湯從噴氣孔溢出。
•
若加入太多水,可造成水溢出。
•
持續處於保溫模式會使粥變濃。
•
按 按鈕,; 指向 [Quick Cook] (快速蒸煮)。
1
按 。
2
按 按鈕,: 指向 [Porridge] (稀飯)。
1
按 。
2
Press to point : to [Cake].
1
Press or to set the baking time.
2
(Keeping the key pressed will make setting
faster.)
Press .
3
Baking time can be set from 20 minutes up to 65 minutes.
Press
or to adjust time. With each pressing, time will
increase 5 minutes.
烘焙時間可從 20 分鐘設定至 65 分鐘。
按
或 按鈕來調節時間。每按一次按鈕,時間增加
5 分鐘。
Before baking, coat the inner pan with butter for non-stick baking.
■ The amount of dough (including other ingredients inside the dough) should not
exceed 500g. (The cake won’t be baked properly if the amount exceed 500g)
■ It’s recommended to stop Keep Warm mode immediately after baking is done,
otherwise the cake will become wet.
■ After baking is done, do not leave it in the inner pan because cake will become wet.
■ Please wear the gloves while taking out the inner pan.
■ After baking, some smells and oil stains may remain in the inner pan.
This is normal.
12
按 按鈕,: 指向 [Cake] (蛋糕)。
1
按 或 按鈕來設定烘焙時間。
2
(按住此按鈕可快速設定。)
按 。
3
When time is set at 40 minutes
(the remaining time will countdown
in 1 minute step).
時間設定為 40 分鐘時 (剩餘時間以
1 分鐘為量度倒數計時)。
烘焙前,在內鍋塗一層牛油,不會粘鍋。
■
麵團量 (包括麵團中的其他配料) 不應超過 500 克。
(若超過 500 克,則不能恰當烘焙)
■
建議烘焙結束後立刻退出保溫模式;否則,蛋糕會變潮。
■
烘焙結束後,請勿將其留在內鍋,否則蛋糕會變潮。
■
取出內鍋時,請戴手套。
■
烘焙後,氣味和油污可能殘留在內鍋。這很正常 。
Page 14

Cooking soup with [Soup/Cook] mode. / 在 [Soup/Cook] (煲湯/蒸煮) 模式下湯。
Press to point : to [Soup/Cook].
1
Press or to set the
2
(Keeping the key pressed will make setting
faster.)
Press .
3
The cooking time can be set from 1 hour up to 12 hours.
•
Press or to adjust time. With each pressing, time will increase 30 minutes.
•
If the amount of ingredients exceed the maximum water level scale, it may cause water to
•
overflow.
Soup/Cook function cooks with high temperature and not suited for cooking for long hours.
•
蒸煮時間可從 1 小時設定至 12 小時。
•
按 或 按鈕來調節時間。每按一次按鈕,時間增加 30 分鐘。
•
若成分量超過最大的水位刻度,可導致水溢出。
•
煲湯/蒸煮功能需要在高溫下進行,但時間不宜過久。
•
Steaming food with [Steam] mode. / 在 [Steam] (蒸) 模式蒸煮食物。
1
Press to point : to [Steam].
Press or to set the
2
steaming time.
(Keeping the key pressed will
make setting faster.)
Press .
3
Steaming time can be set from 1 minute up to 60 minutes.
•
Press or to adjust time. With each pressing, time will increase 1 minute.
•
Add water to the inner pan as shown in the right table. The water will never dry out even if
•
the maximum steaming time has been chosen (60 minutes). Place the ingredients into the
steaming basket, and then place the steaming basket into the inner pan.
In addition to the setting time, please allow some extra time required for the water to start
•
boiling. The time shown in the display window will decrease once the water starts boiling.
After steaming has just finished, the steaming basket will be very hot. Beware of your
•
hand getting burnt.
When reaching the pre-set time or the water is completely dried out, steam mode stops,
•
and automatically switches to Keep Warm mode.
蒸時間可從 1 分鐘設定至 60 分鐘。
•
按 或 按鈕來調節時間。每按一次按鈕,時間增加 1 分鐘。
•
如右表所示,往內鍋加水。水不會蒸干,即使選擇最大蒸煮時間 (60 分鐘)。
•
將所有成分放入蒸籠,然後將蒸籠放入內鍋。
除設定蒸時間外,請預留額外的時間讓水煮沸。水煮沸時,顯示屏上的時間才開始減少。
•
蒸完成後,蒸籠很燙。小心燙傷手。
•
達到預設時間時或水完全蒸乾,蒸模式停止,自動切換至保溫。
•
cooking time.
1
2
3
按 按鈕,: 指向 [Steam]
(蒸)。
按 或 按鈕來設定蒸時
間。
(按住此按鈕可快速設定。)
按 。
按 按鈕,: 指向 [Soup/Cook] (煲湯/蒸煮)。
1
按 或 按鈕來設定蒸煮時間。
2
(按住此按鈕可快速設定。)
按 。
3
When time is set at 1 hour.
時間設定為 1 小時。
The time is set at 10 minutes
時間設定為 10 分鐘
Steaming basket
(accessory)
蒸籠
(附件)
Model
型號
SR-DE103
SR-DE183
Water amount (cup)
水量 (杯)
3 cups (approx 540 ml)
3 杯 (約 540 毫升)
4 cups (approx 720 ml)
4 杯 (約 720 毫升)
How to use
如何使用
13
Page 15

Keep Warm / Automatically cook rice for mealtime
保溫 / 在進餐時間自動完成煮飯
Cooking Modes / Setting The Timer to Cook Rice
蒸煮模式 / 設定煮飯定時器
The mode automatically switches to “Keep Warm” once the cooking is done.
蒸煮結束後,此模式自動切換至 「
Keep Warm
」(保溫)。
Up to 23 hours of elapsed time in Keep Warm mode is displayed.
ü
( “0 h” is displayed when the elapsed time is less than 1 hour.)
The display will switch to the current time after 24 hours.
ü
The display will indicate “U14” after 96 hours, and Keep Warm
ü
mode will be turned off automatically. (A P.21)
保溫模式下可顯示長達 23 小時的保溫時間。
ü
(當流逝時間少於 1 小時,顯示為「0 h」。)
24 小時後,顯示屏將自動切換至目前時間。
ü
過了 96 小時後,顯示面板將顯示「U14」,並自動關閉保溫模
ü
式。(A 第 21 頁)
Stir and loosen rice as soon as it is cooked.
蒸煮後,立刻攪鬆米飯。
To keep rice warm in a good condition / 在良好的條件下將飯保溫
Wash rice thoroughly to remove rice
ü
bran.
Loosen rice immediately after it’s cooked.
ü
Do not keep rice scoop inside the inner
ü
pan during Keep Warm mode.
徹底清洗米以去除米麩。
ü
蒸煮立刻攪鬆飯。
ü
在保溫模式下,請勿將飯
ü
勺子放在內鍋中。
Turning off Keep Warm mode.
關閉保溫模式。
Leaving the power plug on while in “Off” mode would consume approximately 0.5W.
ü
處於[關閉]模式,插上電源插座將消耗約 0.5 瓦的電力。
ü
Using the Keep Warm mode again
再次使用保溫模式。
Important Information / 重要資訊
It’s recommended not to use the Keep Warm mode for longer than 12 hours.
ü
Please use the Keep Warm mode only for white rice. Do not warm sticky rice, brown
ü
rice or mixed rice to prevent undesired odor or spoilage.
Rice may become smelly, discolor, and dry if too little amount is being kept warm.
ü
建議使用保溫模式不要超過 12 小時。
ü
請僅在蒸煮白米時,使用保溫模式。請勿保溫糯米‵糙米或混合米以避免不好的氣味
ü
和腐壞。
保溫飯量太少,米飯可能會難聞、變色和變乾。
ü
The longer Keep Warm period, the more rice discolor and dry it may result in
保溫的時間越長,可能導致米飯變色及變乾的程度越高
Press
按
Press
按
A unplug the power plug
A 拔掉電源插頭。
Automatically cook rice for mealtime / 在進餐時間自動完成煮飯
Example : Set the Timer to finish cooking at 8 o’clock. / 例如 : 將蒸煮定時器設定為 8 點鐘完成。
Select the cooking mode of your choice.
選擇您的蒸煮模式。
Flashing
閃爍
1
Press .
按 按鈕。
Flashing
閃爍
Press and to set time to finish cooking.
2
With each pressing, the key will increase 1 hour and the key will
•
increase 10 minutes.
按 和 按鈕設定蒸煮完成時間。
每按一次 按鈕可増加 1 小時並且每按一次 按鈕可増加 10 分鐘。ü
Press . A Complete setting.
3
按 按鈕。 A 完成設定。
To cancel this function while
it’s operating
操作時,取消此功能
14
A Press .
A 按 按鈕。
Flashing
閃爍
Example : Plan to eat rice at 8 o’clock
例如 : 計劃 8 點鐘吃飯。
Light turns on
燈亮
Important Information / 重要資訊
If setting timer is less than 1 hour (for White Rice, Sticky Rice or Porridge) and 3 hours (for
ü
Brown Rice) rice cooker will start immediately.
Rice may be slightly soft or overcooked when cooking with the timer.
ü
When cooking with the timer, the display doesn’t show the remaining time.
ü
如果設定定時器少於 1 小時(白米,糯米或稀飯)或 3 小時(糙米),電子鍋會立即開始蒸煮。
ü
使用預設定時器煮飯時,米飯可能稍軟或煮得太久。
ü
使用預設時間煮飯,顯示器不會顯示剩餘時間直到煮飯結束。
ü
Flashing
閃爍
Light turns off
燈熄
Page 16

Parts that need to be cleaned after every use
每次使用後都需清洗的零件
Cleaning
清洗
Parts that need to be cleaned after every use
每次使用後都需清洗的零件
Important Information / 重要資訊
The rice cooker may be still hot soon after cooking. Unplug and cool down the rice cooker before cleaning.
ü
Do not clean with benzine, thinner, polish powder, metal scrubber, or nylon brush.
ü
Please do not use dishwasher.
ü
蒸煮後不久,電子鍋仍然很燙。清洗前,拔掉電源插頭,等待其冷卻。
ü
請勿使用汽油‵稀釋劑‵拋光粉‵金屬刷或尼龍刷。
ü
請勿使用洗碗機。
ü
Steam vent / 噴氣孔
Removing the steam vent
拆除噴氣孔
Pull out as direction show.
ü
如所示方向將其拉出。
ü
Attaching the steam vent
裝上噴氣孔
Push in as direction show.
ü
如所示方向將其推進。
ü
Important Information / 重要資訊
Residue that may remain in the steam vent could cause malfunctions. Please keep the area clean.
ü
Setting the steam vent incorrectly does not prevent the rice cooker from cooking rice, but may result
ü
in the rice being unevenly cooked.
殘留在噴氣孔中的殘渣可能會導致機器故障,請保持此區域乾淨清潔。
ü
噴氣孔裝嵌不當,不會妨礙電子鍋的煮飯功能,但可能會造成米飯蒸煮不均。
ü
Inner pan / 內鍋
Use the diluted dish detergent, sponge and water to clean it. Dry the external surface of the
ü
inner pan.
Color change or stripe may occur on fluorine coating, but it is not harmful to health and
ü
usage of this inner pan.
The collision between the external surface of the inner pan and the cast heater may show
ü
some scratching marks on the coating depending on the frequency of use. It will not affect
the cooking efficiency.
使用器皿專用稀釋清潔劑、海綿和水清洗它。將內鍋的外表面擦乾。
ü
氟塗層上可能會出現變色或條紋,但這對健康及內鍋的使用沒有危害。
ü
視乎使用的頻密度,內鍋外表面與電熱板間的碰撞可能會導致塗層上出現刮痕。 這不會影
ü
響炊煮效果。
Temperature sensor and Cast heater / 溫度感應器和電熱板
Wipe with a damp cloth. If an object has become stuck, lightly polish it off using the sand paper
(of about #600)
用濕布擦。若物體變粘,用沙紙輕輕擦掉即可 (約 #600)。
Important Information / 重要資訊
If it is used when unclean, rice may be burnt or not be cooked properly.
若使用時未清潔乾淨,飯可能燒糊或蒸煮不當。
The Main body and Outer lid
鍋體和外蓋
Wipe with a damp cloth.
用濕布擦。
Steam vent’s fitted parts and
the outer lid’s inner surface
噴氣孔的套合部分及外蓋的內表面
Wipe well with a damp cloth. Also, in the
same manner, use a damp cloth to wipe the
rubber seal.
用濕布用力擦。用同樣的方式,使用濕布擦
橡膠套。
Upper frame / 上支架
Wipe with well-wrung cloth.
擰乾布擦拭。
How to use
如何使用
Important Information / 重要資訊
Do not pour water directly on the upper frame.
請勿直接將水倒在上支架上。
15
Page 17

American baked rice / Futomaki sushi
美國稻米 / 太卷壽司
Recipes
食譜
American baked rice
Ingredients
3 cups Jasmine rice
150 g.
Sliced chicken sausage
150 g. Diced chicken
1
⁄4 cup Chopped onions
50 g. Raisin
1 tbsp Spicy ketchup
1 tsp Salt
30 g. Butter
100 g. Diced pineapple
1
⁄2 cup Tomato ketchup
1 tbsp Sugar
1 tbsp Pepper
Method
1. Wash jasmine rice by stirring with hand in water. Pour jasmine
rice into the inner pan, and then add water to level 3 CUP.
2. Fill the rest of ingredients into the inner pan. Mix them
thoroughly, and close the outer lid. Press Menu Select key to
select White Rice mode. Afterwards, press Start key. Wait until
you hear the beep sounds indicating that cooking is done.
3. Ready to be served.
Note : for 5-6 persons
Futomaki sushi
Ingredients
1
2
⁄2 cups Jasmine rice
1⁄2 cup Kiew Ngoo sticky rice
1⁄4 cup + 2 tbsp Vinegar
1⁄4 cup + 2 tbsp Sugar
1 tsp Salt
6 sheets Nori seaweed
12 sticks Imitation crab meat
1⁄2 cup Sliced omelet
1⁄2 Carrot (horizontally sliced)
1⁄2 Japanese cucumber
(horizontally sliced)
Mayonnaise
Rolling mat
美國稻米
配料
3 杯 香米
150 克 雞肉腸片
150 克 雞丁
1
⁄4 量杯 碎洋蔥
50 克 葡萄乾
1 湯匙 辣味番茄醬
1 茶匙 鹽
30 克 牛油
100 克 菠蘿丁
1
⁄2 量杯 番茄醬
1 湯匙 糖
1 湯匙 辣椒
方法
1. 用手在水中攪動香米進行清洗。 將香米倒入內鍋,然後加水至
3 杯處的水位刻度線。
. 將剩餘配料加入內鍋。 徹底拌勻,然後蓋上外蓋。 按 “Menu
2
Select”(菜單選擇)按鈕,選擇 “White Rice”(白米)模式。
然後,按 “Start”(開始)按鈕。等聽到嗶嗶聲響時,表示蒸
煮完成。
. 即可食用。
3
註: 5-6 人份量
太卷壽司
配料
1
2
⁄2 量杯 香米
1⁄2 量杯 Kiew Ngoo 糯米
1⁄4 量杯 + 2 湯匙 醋
1⁄4 量杯 + 2 湯匙 糖
1 茶匙 鹽
6 片 海苔
12 條 蟹柳
1⁄2 量杯 煎蛋捲切片
1⁄2 胡蘿蔔(橫向切片)
1⁄2 日本黃瓜(橫向切片)
蛋黃醬
壽司卷席
Method
1. Mix vinegar, salt and sugar thoroughly.
2. Wash both types of rice by stirring with hand in water, and then
pour them into the inner pan.
3. Add water to the level 3 CUP and close the outer lid.
Press Menu Select key to select White Rice mode.
Afterwards, press Start key. Wait until you hear the beep sounds
indicating that cooking is done. Open the outer lid and pour the
mix of vinegar, salt and sugar you prepared into the rice. Then,
blend them thoroughly. Afterwards, leave rice cool down for 10
minutes.
4. Put Nori seaweed on the rolling mat. Thoroughly spread
prepared rice onto the sheet of Nori seaweed and press rice on
the sheet of Nori seaweed firmly. Spread mayonnaise thoroughly
and put the imitation crab meat, sliced omelet, carrot, Japanese
cucumber on the Nori seaweed layer. Then, roll them firmly and
cut them into pieces (approximately 3 cm per piece).
5. Ready to be served with Japanese soy sauce, ginger preserves
and wasabi.
Note : for 6-7 persons
Note : tsp = teaspoon
w
tbsp = tablespoon
16
方法
1. 將醋、鹽和糖徹底拌勻。
2. 用手在水中攪動兩種米進行清洗,然後將米倒入內鍋。
. 加水至 3 杯處的水位刻度線,然後蓋上外蓋。
3
按 “Menu Select”(菜單選擇)按鈕,選擇 “White Rice”
(白米)模式。 然
響時,表示蒸煮完成。 打開外蓋,將攪拌好的醋、鹽和糖倒入
飯中。 然後,徹底拌勻。接著,讓飯冷卻 10 分鐘。
. 將海苔放到壽司卷席上。將煮好的米飯全部鋪在海苔上,然後
4
用力壓緊。 塗滿一層蛋黃醬,在海苔層上鋪上蟹柳﹑煎蛋捲切
片﹑胡蘿蔔﹑日本黃瓜。 然後緊緊地卷起來,切成小卷(每卷
大概 3 厘米)
. 即可佐以日本醬油﹑薑蜜餞和芥末食用。
5
註: 6-7 人份量
後,按 “Start”(開始)按鈕。 等聽到嗶嗶聲
Page 18

Cereal porridge / Chicken soup with gourd and pickled lemon
穀物粥 / 青瓜醃檸檬雞湯
Recipes
食譜
Cereal porridge
Ingredients
1⁄2 cup Jasmine rice
3
150 g. (
⁄4 cup)
Chopped chicken
1
50 g. (
⁄3 cup) Diced carrot
1
25 g. (
⁄4 cup)
Japanese soybean
1 tbsp Sauce
1
25 g. (
⁄4 cup)
Boiled Job’s tears
1
50 g. (
⁄3 cup) Sliced raw corn
1
25 g. (
⁄4 cup)
Boiled lotus seed
2 tbsp Light soy sauce
1 cube Stock cube
1 tbsp Fried garlic
Pound ingredients used in salted chicken
2 roots Coriander root
10 Peppercorns
2 petals Garlic
2 tsp Light soy sauce
Method
1. Wash jasmine rice by stirring with hand in water. Pour jasmine
rice into the inner pan, and then add water to level 0.6 L.
2. Mix chopped chicken with pound ingredients used in salted
chicken. Form into a round shape, and then put it into the inner
pan.
3. Add the rest of ingredients except fried garlic into the inner pan.
Mix them thoroughly, and close the outer lid. Press Menu Select
k
ey to select Porridge mode. Afterwards, press Start key. Wait
until you hear the beep sounds indicating that cooking is done.
Spread fried garlic on top, and it is ready to be served.
Note : for 3-4 persons
Chicken soup with gourd and pickled lemon
Ingredients
6-7 Chicken legs
5 Shiitake mushroom
immersed in Water
1⁄4 cup Pickled lemon juice
1
⁄2 Sliced green gourd
1 cube Stock cube
穀物粥
配料
1⁄2 量杯 香米
150 克 (
50 克 (
25 克 (
1 湯匙 醬汁
25 克 (
50 克 (
25 克 (
方法
1. 用手在水中攪動香米進行清洗。 將香米倒入內鍋,然後加水至
0.6 升處的水位刻度線。
. 將雞塊和用於鹽焗雞肉的配料(搗碎)混合均勻。 做成圓形,
2
然後放入內鍋。
. 將剩餘配料(除了炸好的蒜末)加入內鍋。 徹底拌勻,然
3
後蓋上外蓋。 按 “Menu Select”(菜單選擇)按鈕,選擇
“Porridge”(稀飯)模式。 然後,按 “Start”(開始)按鈕。
等聽到嗶嗶聲響時,表示蒸煮完成。 在上面撒點炸好的蒜末,
即可食用。
註: 3-4 人份量
青瓜醃檸檬雞湯
配料
6-7 雞腿
5 用水浸泡的香菇
3
⁄4 量杯) 雞塊
1
⁄3 量杯) 胡蘿蔔丁
1
⁄4 量杯)
日本大豆
1
⁄4 量杯) 煮好的薏仁
1
⁄3 量杯) 切好的生玉米
1
⁄4 量杯) 煮好的蓮子
2 湯匙 生抽
1 塊 湯塊
1 湯匙 炸好的蒜末
用於鹽焗雞肉的配料(搗碎)
2 根 香菜根
10 胡椒子
2 瓣 大蒜
2 茶匙 生抽
1⁄4 量杯 醃檸檬汁
1
⁄2 青瓜片
1 塊 湯塊
How to use
如何使用
Method
1. Add water to the level 3 CUP of the inner pan.
2. Place the chicken legs, as well as the other ingredients into the
inner pan. Mix them thoroughly, and close the outer lid. Press
Menu Select key to select Soup/Cook mode. Afterwards, set
cooking timer to 1.30 hrs, and press Start key. Wait until you
hear the beep sounds indicating that cooking is done. Ready to
be served.
Note : for 5-7 persons
方法
1. 往內鍋加水至 3 杯處的水位刻度線。
2. 請將雞腿和其他配料放入內鍋。 徹底拌勻,蓋上外蓋。 按
“Menu Select”(菜單選擇)按鈕,選擇 “Soup/Cook”(煲
湯/蒸煮)模式。 然後將蒸煮時間設定為 1 小時 30 分鐘,並按
下 “Start”(開始)按鈕。 等聽到嗶嗶聲響時,表示蒸煮完成。
即可食用。
註: 5-7 人份量
17
Page 19

Masaman curry with chicken / Spaghetti
香味濃郁的淡咖哩雞 / 義大利麵
Recipes
食譜
Masaman curry with chicken
Ingredients
8 Small chicken legs
50 g. Masaman curry paste
1 cup Thick coconut cream
1 cup Thin coconut cream
50 g. Potato
50 g. Onion
1
⁄4 cup Roast peanut
1 cube Stock cube
1 tbsp Tamarind paste
1
1
⁄2 tbsp Palm sugar
2-3 Bay leaf
1⁄4 cup Roast cardamom
Note : In case the bay leaf and
cardamom are not available,
they are not required.
Method
1. Pour thick coconut cream, masaman curry paste into the inner
pan. Mix them thoroughly, and close the outer lid. Press Menu
Select key to select Steam mode. Afterwards, set cooking timer
to 15 min, and press Start key to make separation of oil from
the boiling of coconut cream. When you hear the beep sounds,
press Off key, and then open the outer lid.
2. Add the rest of ingredients into the inner pan. Mix them
thoroughly, and close the outer lid. Press Menu Select key to
select Soup/Cook mode. Afterwards, set cooking timer to 1
hour, and press Start key. Wait until you hear the beep sounds
indicating that cooking is done.
3. Ready to be served.
Note : for 4-5 persons
Spaghetti
Ingredients
125 g. Raw spaghetti
1
1
⁄2 cups Water
2 Diced tomato
1 Diced onion
3⁄4 cup Tomato puree
2 tbsp Sugar
1⁄2 tsp Salt
1⁄4 cup Vegetable oil
2 tsp Chopped garlic
2 tbsp Butter
1 1⁄2 cups Chicken mince
香味濃郁的淡咖哩雞
配料
8 小雞腿
50 克 香味濃郁的淡咖哩醬
1 杯 濃椰奶
1 杯 淡椰奶
50 克 馬鈴薯
50 克 洋蔥
1
⁄4 量杯 烤花生
1 塊 湯塊
1 湯匙 羅望子醬
1
1
⁄2 湯匙 棕櫚糖
2-3 月桂葉
1⁄4 量杯 烤豆蔻
註: 月桂葉和豆蔻不是必需
配菜。
方法
1.
將濃椰奶、香味濃郁的淡咖哩醬倒入內鍋。 徹底拌勻,蓋上外蓋。
按 “Menu Select”(菜單選擇)按鈕,選擇 “Steam”(蒸)模式。
然後,將烹調時間設定為 15 分鐘 並按下 “Start”(開始)按鈕,從
煮沸的椰奶中分離出油。 當聽到嗶嗶聲響時,按下 “Off”(關閉)
按鈕,然後打開外蓋。
2. 將剩餘配料加入內鍋。徹底拌勻,然後蓋上外蓋。 按 “Menu
Select”(菜單選擇)按鈕,選擇 “Soup/Cook”(煲湯/蒸煮)
模式。 然後將蒸煮時間設定為 1 小時,並按下 “Start”(開始)
按鈕。 等聽到嗶嗶聲響時,表示蒸煮完成。
. 即可食用。
3
註: 4-5 人份量
義大利麵
配料
125 克 生義大利麵
1
1
⁄2 量杯 水
2 蕃茄丁
1 洋蔥丁
3⁄4 量杯 番茄醬
2 湯匙 糖
1⁄2 茶匙 鹽
1⁄4 量杯 植物油
2 茶匙 蒜茸
2 湯匙 牛油
1 1⁄2 量杯 雞肉餡
Method
1. Place all the ingredients into the inner pan. Mix them thoroughly,
and close the outer lid.
2. Press Menu Select key to select White Rice mode, and then
press Start key. Wait until you hear the beep sounds indicating
that cooking is done.
3. Ready to be served.
Note : for 5-6 persons
18
方法
1. 將所有配料放入內鍋。 徹底拌勻,然後蓋上外蓋。
按 “Menu Select”(菜單選擇)按鈕,選擇 “White Rice”(白米)
2.
模式,然後按下 “Start”(開始)按鈕。 等聽到嗶嗶聲響時,表示
蒸煮完成。
3. 即可食用。
註: 5-6 人份量
Page 20

Casseroled prawns with glass noodles / Banana cake
砂鍋粉絲蝦堡 / 香蕉蛋糕
Recipes
食譜
Casseroled prawns with glass noodles
Ingredients
4-6 prawns
2 tbsp Vegetable oil
5 cloves Chopped garlic
500 g.
7 slices Sliced ginger
10 Peppercorns
1 tbsp Dark soy sauce
Large green prawn peeled
2 tbsp Oyster sauce
2 tbsp Seasoning sauce
2 tbsp Sesame oil
Glass noodle soaked in water
2 tbsp Light soy sauce
2 tbsp Sugar
1⁄2 cup Water
2
stalks of celery Sliced celery
Method
1. Spread vegetable oil on the inner pan, put peppercorns and
chopped garlic into fragments, and then add sliced gingers, large
green prawn peeled into the inner pan.
2. Mix glass noodles (drained) with sesame oil, oyster sauce, light
soy sauce, dark soy sauce, seasoning sauce, sugar, and water
thoroughly in the mixing bowl. Then, pour them into the inner
pan, and close the outer lid. Press Menu Select key to select
Steam mode, set steaming time to 15 minutes, and then press
Start key. Wait until you hear the beep sounds indicating that
cooking is done. Afterwards, open the outer lid, add sliced celery,
and mix them thoroughly.
3. Ready to be served
Note : for 4-5 persons
Banana cake
Ingredients
125 g. Plain flour
1
⁄2 tsp Sodium bicarbonate
125 g. Butter
90 g. Sugar
2 Eggs
125 g. Mashed banana
1
1
⁄2 tbsp Milk
1
⁄2 tbsp Cocoa powder
砂鍋粉絲蝦煲
配料
4-6 只 剝殼的鮮蝦
2 湯匙 植物油
5 丁香粉 蒜茸
500 克
用水浸泡的粉絲
7 片 姜片
10 胡椒子
1 湯匙 老抽
2 湯匙 蠔油
2 湯匙 調味醬
2 湯匙 芝麻油
2 湯匙 生抽
2 湯匙 糖
1⁄2 量杯 水
2 根芹菜
芹菜絲
方法
1. 在內鍋上塗上一層植物油,放入胡椒子和切碎的蒜茸,然後把
姜片、剝殼的鮮蝦放入內鍋。
. 將混合攪拌粉絲 (濾干後的) 和芝麻油﹑蠔油﹑生抽﹑老抽﹑調
2
味醬﹑糖和水攪拌均勻。然後將它們倒入內鍋,蓋上外蓋。
按 “Menu Select”(菜單選擇)按鈕,選擇 “Steam” ( 蒸 ) 模
式, 設定時間為 15 分鐘,然後按 “Start”(開始)按鈕。 等
聽到嗶嗶聲響時,表示蒸煮完成。 然後,打開外蓋,放入芹菜
絲拌勻。
. 即可食用。
3
註: 4-5 人份量
香蕉蛋糕
配料
125 克 普通麵粉
1
⁄2 茶匙 小蘇打
125 克 牛油
90 克 糖
2 雞蛋
125 克 香蕉泥
1
1
⁄2 湯匙 牛奶
1
⁄2 湯匙 可可粉
How to use
如何使用
Method
1. Sift plain flour and sodium bicarbonate.
2. Mix cocoa powder with a small amount of warm water until it has been
dissolved.
3. Whisk butter and sugar at highest speed for approximately
8 minutes. Add eggs one by one, and whisk ingredients until it has creamy.
Afterwards, add mashed banana and milk. Whisk ingredients thoroughly with
low speed for 2 minutes.
4. Add half amount of sifted flour and mix them thoroughly. Then, add the rest
and mix them thoroughly. Afterwards, add cocoa powder and mix them
thoroughly again.
5.
Spread butter on the inner pan, add ingredients into it, and then close the outer
lid.
6. Press Menu Select key to select Cake mode. Set cooking timer to 40 minutes
(SR-DE183) 30 minutes (SR-DE103). Then press Start key. Afterwards, wait
until you hear the beep sounds indicating that cooking is done.
7. Lift the inner pan off and leave it cool down for approximately 2 minutes.
(The Off key should be pressed, and the plug must be disconnected before
lifting the inner pan off.)
8. Overturn the inner pan on the grate, leave the cake to cool down. Then, it is
ready to be served.
方法
1. 過篩普通麵粉和小蘇打。
2. 在可可粉中加入少量溫水直到完全融化 。
3. 用最快的速度攪打牛油和糖約 8 分鐘,直到企身。 逐個打入雞
蛋,攪動配料直到成為忌廉狀。 然後加入香蕉泥和牛奶。用低
速徹底拌勻配料 2 分鐘。
4. 加入半份過篩後的麵粉,徹底拌勻。然後加入剩餘的麵粉,徹底
拌勻。最後,加入可可粉,再徹底拌勻。
5. 在內鍋上塗上一層牛油,放入配料,然後蓋上外蓋。
6. 按 “Menu Select”(菜單選擇)按鈕,選擇 “Cake”(蛋糕)模
式。 將蒸煮時間設定為 40 分鐘(SR-DE183)或 30 分鐘
(SR-DE103)。 然後按下 “Start”(開始)按鈕。 之後,等聽
到嗶嗶聲響時, 表示蒸煮完成。
7. 取出內鍋,將其冷卻約 2 分鐘。(取出內鍋前必需先按下 “Off”
(關閉) 按鈕並且拔下插頭。)
8. 將內鍋翻轉放置在格柵上,讓蛋糕冷卻。 然後即可食用。
19
Page 21

Caramel custard
焦糖布甸
Recipes
食譜
Caramel custard
Ingredients
2 Eggs
38 g.
187 g.
1
(3 tbsp + 1
⁄2 tsp) Sugar
3
(
⁄4 cup + 2 tbsp) Evaporated milk
3 cups A cup that is not taller than 6 cm.
Method
1.
Add sugar and water to a small saucepan, gently bring to the boil and cook until
the sugar has caramelised. Add a small amount of water to the caramelised
sugar and mix it so it has consistencey of honey, remove from heat.
2. Add the caramelised sugar to each of the 3 cups so it is approx
3. Add 3 cups of water into
outer lid.
4. Press Menu Select key to select Steam mode. Set cooking timer to 10
minutes, and press Start key (In order to boil water). Then wait until you hear
the beep sounds indicating that cooking is done. Open the outer lid.
5. Mix eggs, sugar and evaporated milk with a whisk, once combined strain the
mixture through a sieve. Gently pour the mixture into the 3 cups that have
the caramel already added to them leaving a small gap at the top of the cup.
Cover each cup with cling wrap. Close the outer lid.
6. Press Menu Select key to select Steam mode. Set cooking timer to 20
minutes, and then press Start key. Wait until you hear the beep sounds
indicating that cooking is done.
7. Leave it cool down, then put it into the refrigerator and serve when chilled.
Note : If it is already cooked, its texture is soft, not liquid. In case it is not cooked,
you can set the additional time.
When its texture is rough, reduce the steaming time.
: The steaming time varies depending on the amount and cup used in
steaming.
Ingredient used in Caramelised sugar
1 cup Sugar
1 tbsp Water
1
the
inner pan. Add the steaming basket. Close the
⁄2 cm deep.
焦糖布甸
配料
2 雞蛋
38 克
187 克
3 杯子
1
(3 湯匙 + 1
(
⁄2
3
茶匙) 糖
⁄4
量杯 + 2 湯匙) 無糖煉乳
每杯不高於 6 厘米。
方法
1.
將糖和水放入深平底鍋內,慢慢煮沸直至變成焦糖。然後加少許
水,調勻糖的甜度,從熱源處移開。
2.
將焦糖倒入 3 個杯子中,每杯大約
3.
往內鍋中倒入 3 杯子水。蓋上外蓋。
4.
按 “Menu Select”(菜單選擇)按鈕,選擇 “Steam”(蒸)模
式。 將蒸煮時間設置為 10 分鐘,然後按下 “Start”(開始)按
鈕(以便燒開水)。 等聽到嗶嗶聲響時,表示蒸煮完成。 打開
外蓋。
5.
用攪拌機拌勻雞蛋、糖和無糖煉乳,並用漏勺過濾。然後慢慢倒
入裝有焦糖的
且將這
6.
按 “Menu Select”(菜單選擇)按鈕,選擇 “Steam”(蒸)模
式。 將蒸煮時間設置為 20 分鐘,然後按下 “Start”(開始)按
鈕。 等到聽到嗶嗶聲響時,則表示蒸煮完成。
7.
等到其冷卻後,放入冰箱,冷凍後即可享用。
煮好時,其質地較軟,而非液態。如果沒有煮好,您可以再設
註:
定一段時間。
如果質地變得粗糙,則可以減少蒸煮時間。
: 蒸煮的時間取決於配料量和蒸煮時使用的
3
個杯子中,並於杯子的上方保留一定的空間,而
3
個杯子用保鮮膜密封。蓋上外蓋。
用於熬焦糖的配料
1 杯 糖
1 湯匙 水
1
⁄2
釐米深即可。
杯子
。
20
Page 22

Troubleshooting / When the display shows as follows
矯正問題措施 / 如下所示
Troubleshooting / 矯正問題措施
Rice was
飯
未熟 (半熟)
Too soft太軟Boiling milk-like water over
flowed
水溢出
● ● ● ●
●
Problem
Items to be checked
檢查事項
Amount of rice and water level was wrong.
水米比例錯誤。
Did not rinse rice.
未清洗米。
The bottom of the inner pan was not smooth.
內鍋底部不平。
There were some foreign objects on the outside of the inner
pan or on the temperature sensor.
內鍋外或溫度感應器上有異物。
The outer lid was not closed properly.
外蓋未蓋好。
Cooked rice with oil.
用油蒸煮。
Did not stir the rice after cooking finished.
蒸煮後疏鬆米飯。
Warmed rice over 12 hrs or too little rice to be warmed.
保溫超過 12 小時或保溫飯量太少。
Warmed rice with rice scoop or other similar rice utensil inside.
米飯與飯勺子或類似的器具一起保溫。
Warmed cold rice.
熱冷飯。
Did not fully clean inner pan.
未徹底清洗內鍋。
Unplugged or pushed key while cooking.
蒸煮時拔掉電源插頭或按下 按鈕。
The key was not correctly pressed.
按 按鈕不當。
問題
Too hard太硬Not cooked (half-cooked)
● ● ● ● ●
● ● ●
● ● ● ● ● ●
● ● ● ● ● ●
● ● ● ● ●
● ● ●
● ● ● ● ●
Troubleshooting
矯正問題措施
Please check the following items.
請檢查以下事項。
Key functions were disabled.
按鈕功能無效。
During Rice Warming
保溫期間
The rice at the bottom of the
cooker was terribly burnt.
鍋底飯焦。
Smelly rice
飯難聞
● ● ●
●
●
● ●
Discolored rice
飯變色
Dry rice
飯太干
蒸煮時有聲音
ü
ü
ü
ü
Unplug or unfit the plug with the socket.
拔掉電源插頭或插頭插入插座不當。
電力調節導致蒸煮時發出滴答聲。
若在蒸煮時
,
聽到[砰砰]聲
,
可能是因為內鍋底部未完全擦乾而造成的。內鍋和電熱板間的水蒸氣導致電子鍋蒸煮時發出[砰砰]聲。
Sounds were produced
during cooking
ü
ü
Clicking sounds are produced during cooking due to power adjustments.
A popping sound was heard during cooking and is caused by the bottom of the inner pan not being completely
dry. Steam is then produced between the inner pan and cast heater base creating a popping sound.
When you have problems
您有疑問時
When the display shows as follows
如下所示
Display
顯示
~
Following continuous 96 hours under “Keep Warm” mode, the power supply will automatically
cut off. Please press
在[保溫]模式下持續保溫 96 小時,電源將自動關閉。請首先按
Contact the authorized service centers for repair.
到授權服務中心維修。
Problems and Troubleshooting
問題與矯正問題措施
key first.
按鈕。
21
Page 23

Specifications
規格
Model No. / 型號 SR-DE103 SR-DE183
Rated Voltage / 額定電壓 240 V ~ 50 Hz / 240 伏 ~ 50 赫茲
Power Consumption
(Approx.) /
功率消耗
(約)
Cooking Capacity
( ) is the amount
of rice that can be
cooked at one time
(Cup) /
烹煮量
( ) 是烹煮一次的飯量。
(杯)
Size (Approx.) /
外形尺寸 (約)
Weight (Approx.) / 重量 (約)
When the rice cooker is in “Off” mode, the power consumption is about 0.5 W.
»
(*1) Reference from water level scale.
»
Please contact dealers or authorized service centers for replacement of control unit or repair.
Note: These specifications are subjected to change without prior notice.
電子鍋處於[關閉]模式時,電力消耗為 0.5 瓦。
»
(*1) 參考水位刻度
»
請聯絡零售商或授權服務中心更換控制器或維修。
註︰更改這些規格,恕不提前通知。
(*1)
(*1)
(*1)
(*1)
/ 稀飯
/ 白米
(*2)
/ 快速蒸煮
(*1)
/ 糙米
/ 糯米
(*1)
(*1)
(*1)
White Rice
Quick Cook
Brown Rice
Sticky Rice
Porridge
Cake / 蛋糕
Soup/Cook / 煲湯/蒸煮
Steam / 蒸
(*1) Time indicated in the table is used for reference when cooking at 240 V, 20°C room temperature, and average rice amount (half of its
»
maximum capacity).
Cooking time may be changed slightly if different voltage, room temperature, water temperature, water level, rice amount and quality are
applied.
(*2) Quick cook, rice cooked within 15 minutes. (Under Panasonic test method) Rice 1 cup for SR-DE103 / Rice 2 cups for SR-DE183.
“
Õ” indicates modes that are not recommended.
»
“—” indicates modes that cannot be used.
(*1) 表中顯示時間用於在電壓 240 伏,室溫 20 攝氏度情況下,平均米量 (最多米量的一半) 蒸煮時間的參考。
»
若電壓‵室溫‵水溫‵水位‵米量和品質不同,蒸煮時間可能變更。
(*2) 快速蒸煮時,時間在 15 分鐘內。(Panasonic 測試方式下) 1 杯米 (SR-DE103) / 2 杯米 (SR-DE183)
Õ” 表示不建議的模式。
»
“
“—” 表示此模式不可用。
22
Rice Cooking / 煮米飯 750 W / 750 瓦
Cake Baking / 烘焙蛋糕 775 W / 775 瓦
Keep Warm / 保溫 75.3 W / 75.3 瓦 87.5 W / 87.5 瓦
White Rice / 白米
Quick Cook / 快速蒸煮
Brown Rice / 糙米
Sticky Rice / 糯米
Porridge / 稀飯
Soup/Cook / 煲湯/蒸煮 0.4 ~ 1.8 L
Cake / 蛋糕
Width / 寬 260 mm / 260 毫米
Length / 長 351 mm / 351 毫米
Height / 高 197 mm / 197 毫米 245 mm / 245 毫米
Approximate time for cooking /
蒸煮的大致時間
(*2)
Approx 40 min / 約 40 分鐘
Approx 15 min / 約 15 分鐘
Approx 120 min / 約 120 分鐘
Approx 40 min / 約 40 分鐘
Approx 60 min / 約 60 分鐘
Approx 20-65 min / 約 20-65 分鐘
Approx 1-12 hrs / 約 1 -12 小時
Approx 1-60 min / 約 1-60 分鐘
0.18 ~ 1.0 L / 0.18 ~ 1.0 升
(1 ~ 5) / (1 ~ 5)
0.18 ~ 1.0 L / 0.18 ~ 1.0 升
(1 ~ 5) / (1 ~ 5)
0.18 ~ 0.54 L / 0.18 ~ 0.54 升
(1 ~ 3) / (1 ~ 3)
0.18 ~ 0.54 L / 0.18 ~ 0.54 升
(1 ~ 3) / (1 ~ 3)
0.09 ~ 0.18 L / 0.09 ~ 0.18 升
(1/2 ~ 1) / (1/2 ~ 1)
*1
/ 0.4 ~ 1.8 升
g / 2.9 千克 3.2 kg / 3.2 千克
2.9 k
Using the Keep Warm mode /
使用保溫模式
ô ô
ô
Õ ô
Õ ô
Õ ô
Õ
Õ
Õ
0.36 ~ 1.8 L / 0.36 ~ 1.8 升
(2 ~ 10) / (2 ~ 10)
0.36 ~ 1.8 L / 0.36 ~ 1.8 升
(2 ~ 10) / (2 ~ 10)
0.36 ~ 1.08 L / 0.36 ~ 1.08 升
(2 ~ 6) / (2 ~ 6)
0.54 ~ 1.08 L / 0.54 ~ 1.08 升
(3 ~ 6) / (3 ~ 6)
0.09 ~ 0.36 L / 0.09 ~ 0.36 升
(1/2 ~ 2) / (1/2 ~ 2)
*1
500
0.7 ~ 3.2 L*1 / 0.7 ~ 3.2 升
g / 500 克
Usage of Timer /
定時器的使用
—
—
—
—
*1
Page 24

Home Appliance 12 Month Warranty from Date of Purchase
1. Subject to the conditions of this warranty Panasonic or it’s Authorised Service Centre will perform necessary
service on the product without charge for parts or labour , if in the opinion of Panasonic, the product is found to be
faulty within the warranty period. For Line Communications products (i.e. Cordless Phones, etc) the genuine
battery(s) has a 3 month warranty.
2. This warranty only a
pplies to Panasonic products purchased in Australia and sold by Panasonic Australia or its
Authorised Distributors or Dealers and only where the products are used and serviced within Australia or it's
territories. Warranty cover only a
pplies to service carried out by a Panasonic Authorised S ervice Centre and only
if valid proof of purchase is presented when warranty service is requested.
3. This warranty only applies if the product has been installed and used in accordance with the ma
nufacturer’s
recommendations (as noted in the operating instructions) under normal use and reasonable care (in the opinion of
Panasonic). The warranty covers normal domestic use only (also Clip & Trim Professional use) and does not
cover dama
ge, malfunction or failure resulting from use of incorrect voltages, inc orrect installation, accident,
misuse, neglect, build-up of dirt or dust, abuse, maladjustment of customer controls, mains supply problems,
thunderstorm activity, infestation by insects or vermin, tampering or repair by unauthorised persons (including
unauthorised alterations), exposure to ab
normally corrosive conditions or any foreign object or matter having
entered the product.
4. This warranty does not cover the following items unless the fault or defect existed at the time of purchase:
(a) Cabinet Parts (b) Microwave Oven cook plates.
(c) User replaceable Batteries (d) Kneader mounting shaft unit and
from wear and tear in normal use Heads, Cutters, Foils, Blades a
nd other accessories.
(e) Noise or vibration that is considered normal
5. To claim warranty service, wh
en required, you should:
Tele
phone Panasonic’s Customer Care Centre on 132600 or visit our website referred to below and use the
Service Centre Locator for the name/address of the nearest Authorised Service Centre.
Send or take the product to a Panasonic Authorised Service Centre together with your proof of purchase
receipt as a proof of purchase date. Please note that freight a
nd insurance to and / or from your nearest
Authorised Service Centre must be arranged by you.
6. The warranties hereby conferred do not extend to, a
nd exclude, any costs associated with the installation, de installation or re-installation of a product, including costs related to the mounting, de-mounting or remounting of
any scre
en, (and any other ancillary activities), delivery, handling, freighting, transportation or insurance of the
product or any part thereof or replacement of and do not extend to , and exclu
de, any damage or loss occurring
by reason of, during, associated with, or related to such installation, de-installation, re-installation or transit.
Panasonic Authorised Service Centres are located in major metropolitan areas and most regional centres of
Australia, however, coverage wi
ll vary dependant on product. For advice on exact Authorised Service Centre
locations for your product, please telephone our Customer Care Centre on 13
2600 or visit our website and use the
Service Centre Locator.
In addition to your rights under this warranty, Panasonic products come with consumer g
uarantees that cannot be
exclu
ded under the Australian Consumer Law. If there is a major failure with the product, you can reject the product
and elect to have a refund or to have the product replaced or if you wish you may elect to ke
ep the goods and be
compensated for the drop in value of the goods. You are also entitled to have the product repaired or replaced if the
product fails to be of acceptable quality and the failure does not amo
unt to a major failure.
If there is a major failure in regard to the product which cannot be remedied th
en you must notify us within a
reasonable period by contacting the Panasonic Customer Care Centre. If the failure in the product is not a m ajor
failure then Panasonic may choose to repair or replace the product and wi
ll do so in a reasonable period of time from
receiving notice from you.
If you require assistance regarding warranty conditions or any other enquiries, please visit the
Panasonic Australia website
www.panasonic.com.au or contact by phone on 132 600
If phoning in, please ensure you have your operating instructions available.
Panasonic Warranty
Panasonic Australia Pty. Limited
ACN 001 592 187 ABN 83 001 592 187
1 Innovation Road, Macquarie Park NSW 2113
www.pa
nasonic.com.au
PRO-031-F01 Issue: 5.0 01-01-2011
THIS WARRANTY CARD AND THE PURCHASE DOCKET (OR SIMILAR PROOF OF PURCHASE)
SHOULD BE RETAINED BY THE CUSTOMER AT ALL TIMES
�
�
Page 25

12
Panasonic Home Appliances (Thailand) Co., Ltd.
Web site : http://panasonic.net
 Loading...