

Panasonic SB-M01 User Manual
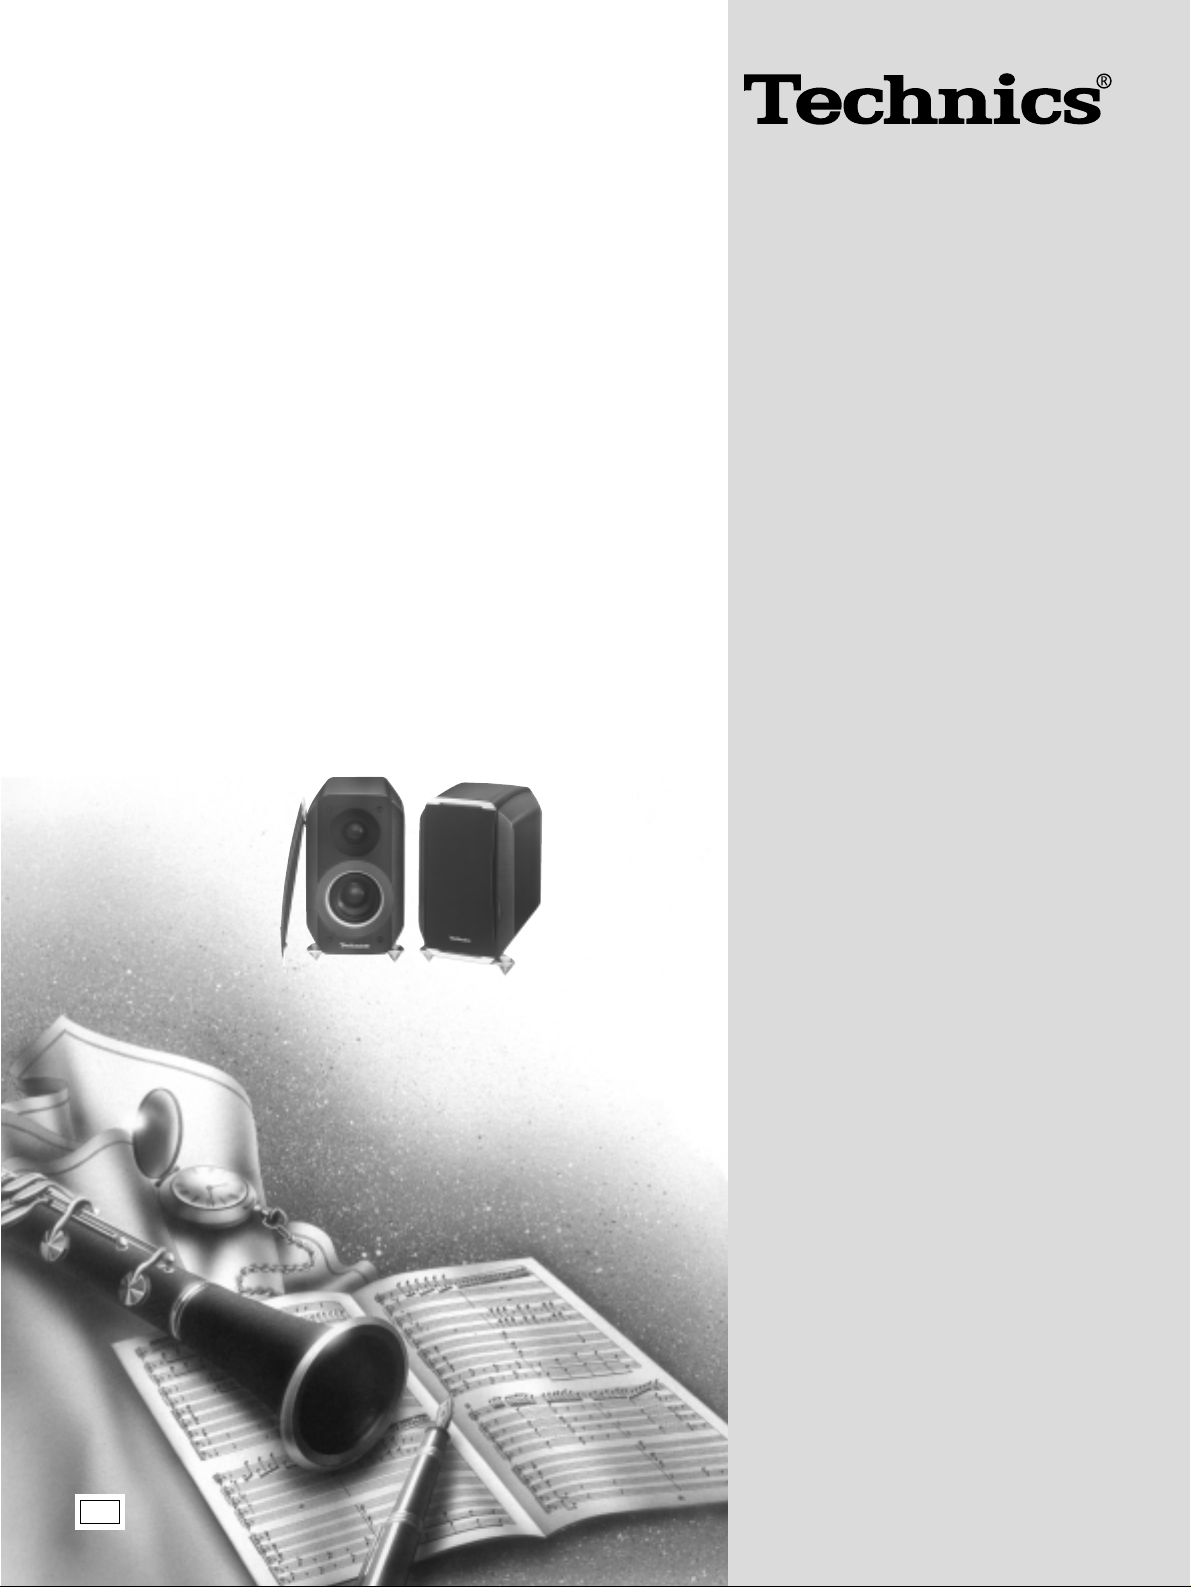
Speaker System
SB-M01
Operating Instructions
Instrucciones de funcionamiento
Mode d’emploi
Bruksanvisning
Bedienungsanleitung
Istruzioni per l’uso
Gebruiksaanwijzing
Betjeningsvejledning
Návod k obsluze
Инструкция по эксплуатации
Instrukcja obsługe
Before connecting, operating or adjusting this product,
please read these instructions completely.
Please save this manual.
Antes de conectar, operar o ajustar este producto,
sírvase leer estas instrucciones completamente.
Guarde este manual.
Avant de raccorder, faire fonctionner ou régler
l’appareil, lire attentivement tout ce mode d’emploi.
Conserver ce manuel.
Läs denna bruksanvisning helt innan du ansluter,
använder eller justerar denna produkt. Spara denna
bruksanvisning.
Bitte lesen Sie diese Bedienungsanleitung vor dem
Anschließen, Inbetriebnehmen oder Einstellen dieses
Gerätes vollständig durch.
Diese Anleitung bitte aufbewahren.
Prima di collegare, far funzionare o regolare l’apparecchio, leggere completamente queste istruzioni.
Conservare questo manuale.
Gelieve deze gebruiksaanwijzing volledig door te
lezen alvorens dit product aan te sluiten, te bedienen
of af te stellen. Bewaar deze gebruiksaanwijzing.
E
Læs venligst hele denne betjeningsvejledning, før du
tilslutter, betjener eller indstiller dette apparat. Gem
vejledningen til senere brug.
Dříve než začnete jakékoli zapojování, operace nebo
nastavování tohoto výrobku, prostudujte si prosím
celý tento návod. Uschovejte si prosím tento návod
k obsluze.
Перед подключением, работой или регулировкой
данного аппарата прочтите, пожалуйста, эту
инструкцию полностью.
Сохраните, пожалуйста, эту инструкцию.
Przed uruchomieniem sprzętu prosimy o dokładne
zapoznanie się z treścią niniejszej instrukcji. Prosimy
o zachowanie niniejszej instrukcji obsłrugi.
Niniejsza instrukcja zostaìa opracowana na podstawie oryginalnej publikacji firmy MATSUSHITA
ELECTRIC INDUSTRIAL CO., LTD.
RQT4659-E
1
Dear customer
Kära kund
Thank you for purchasing this product.
For optimum performance and safety, please read these instructions
carefully.
Marking sign is located on bottom of the unit.
Please check and identify the supplied accessories.
Use numbers indicated in parentheses when asking for replacement
parts
Contents
Characteristics .............................................................................. 4
Location ......................................................................................... 4
Attaching the aluminum stand..................................................... 6
Connections .................................................................................. 6
Notes .............................................................................................. 8
Maintenance .................................................................................. 8
Technical specifications............................................................. 22
Estimado cliente
Muchísimas gracias por haber adquirido este aparato.
Lea con atención estas instrucciones para obtener las máximas
prestaciones y seguridad.
La marca de seguridad se encuentra en la parte inferior de la
unidad.
Verifique e identifique los accesorios suministrados.
Índice
Características .............................................................................. 4
Ubicación ....................................................................................... 4
Colocación de la base de aluminio ............................................. 6
Conexiones .................................................................................... 6
Notas .............................................................................................. 8
Mantenimiento ............................................................................... 8
Especificaciones técnicas ......................................................... 22
Tack för valet av denna apparat.
Läs lgenom bruksanvisningen noga för bästa resultat och för säkerhets
skull.
Märkskylten är placerad på apparatens undersida.
Kontrollera och identifiera de medföljande tillbehören.
Innehåll
Karaktäristik .................................................................................. 5
Placering ........................................................................................ 5
Att fästa aluminumstället ............................................................. 7
Anslutningar .................................................................................. 7
Anmärkningar ................................................................................ 9
Underhåll ....................................................................................... 9
Tekniska data .............................................................................. 22
Sehr geehrter Kunde
Wir möchten Ihnen dafür danken, daß Sie sich für diese Anlage
entschieden haben.
Für optimale Leistung und Sicherheit lesen Sie bitte diese Bedienungsanleitung aufmerksam durch.
Das Markierungszeichen befindet sich an der Unterseite des
Produkts.
Bitte das mitgelieferte Zubehör auf Vollständigkeit überprüfen.
Inhalt
Merkmale ..................................................................................... 10
Aufstellung .................................................................................. 10
Anbringen des Aluminiumständers .......................................... 12
Anschlüsse .................................................................................. 12
Hinweise ...................................................................................... 14
Pflege und Instandhaltung ......................................................... 14
Technische Daten........................................................................ 22
Cher client
Nous vous remercions pour votre achat de cet appareil.
Pour en obtenir des performances idéales et pour votre sécurité,
veuillez lire attentivement le présent manuel.
Le symbole d’avertissement se trouve sur le fond de l’appareil.
Cocher les accessoires pour vérifier qu’ils sont bien tous dans
l’emballage.
Table des matières
Caractéristiques ............................................................................ 5
Positionnement ............................................................................. 5
Fixation du support en aluminium .............................................. 7
Raccordements ............................................................................. 7
Remarques..................................................................................... 9
Entretien ........................................................................................ 9
Données techniques ................................................................... 22
Accessories
Accesorios
Accessoires
Tillbehör
Zubehör
Accessori
Accessoires
Tilbehør
Příslušenství
Принадлежности
Wyposażenie
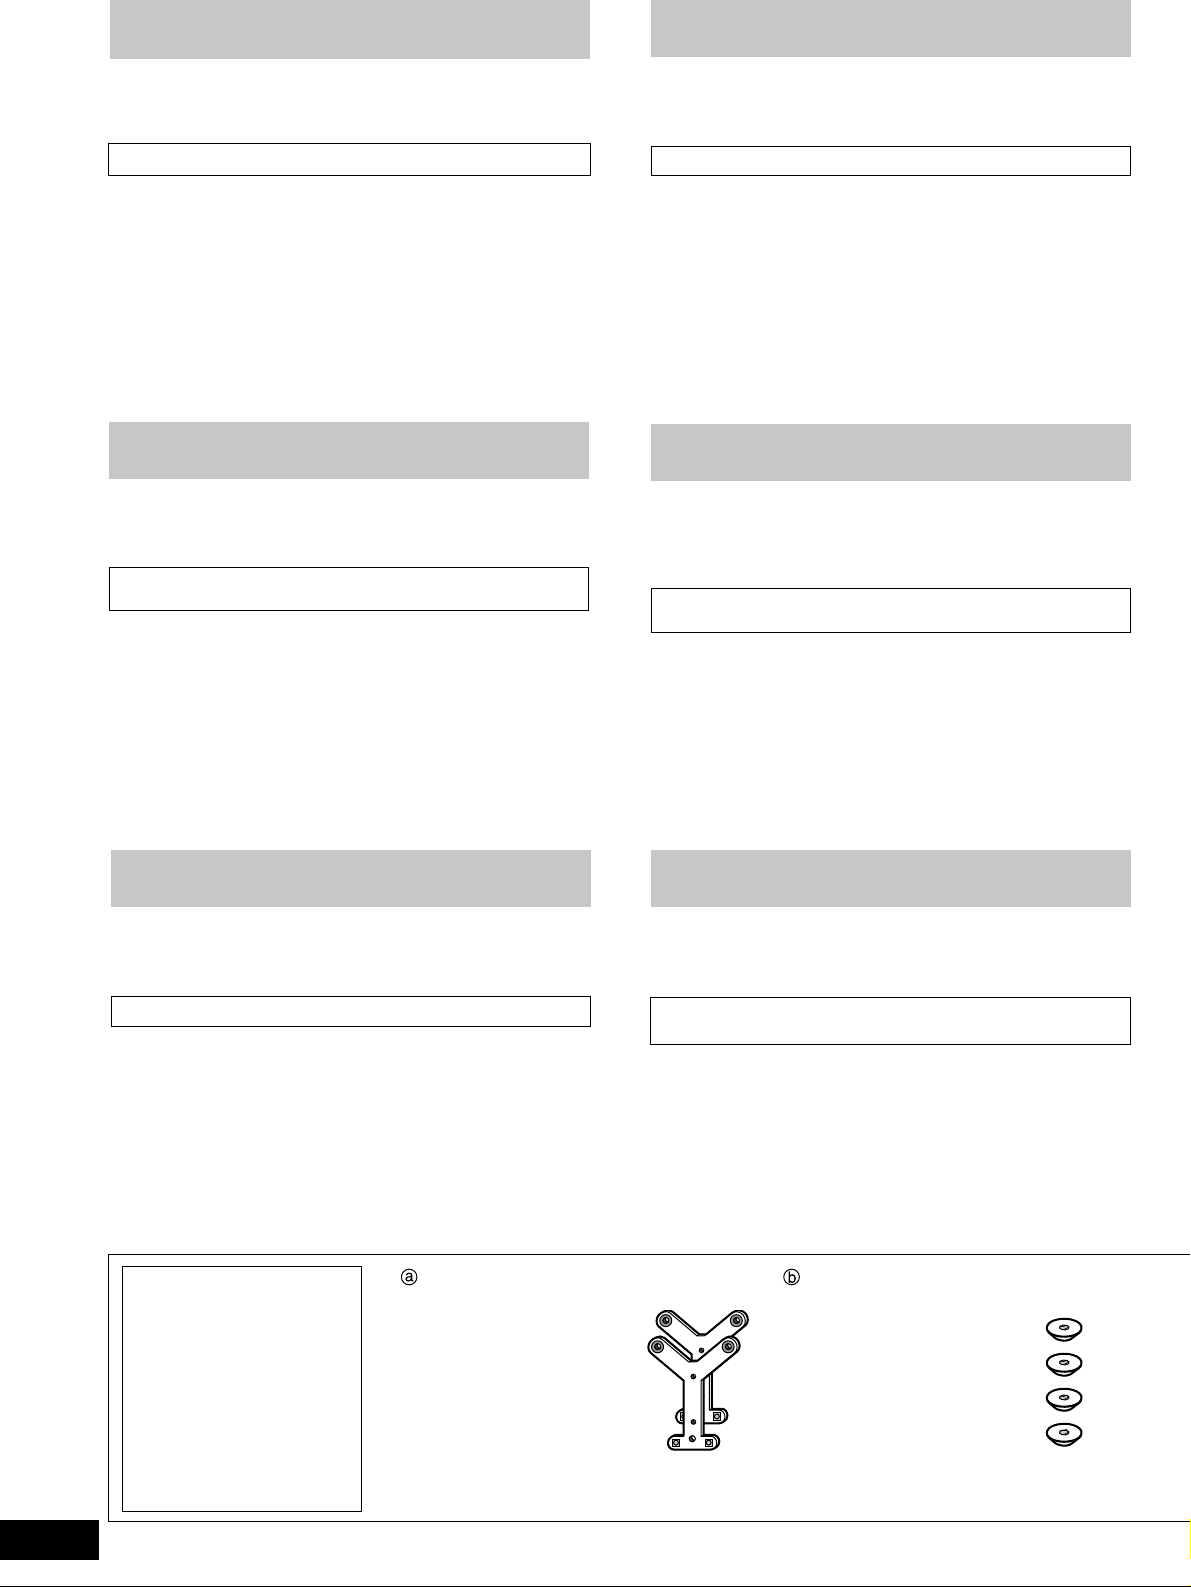
(RFA1138-S) (RGG0157-N)
Aluminium stand ............... 2 Insulator cap ....................... 4
Base de aluminio .............. 2 Tapa de aislador ................. 4
Support en aluminium ...... 2 Capuchon isolant ............... 4
Aluminiumställ .................. 2 Hatt för isoleringsfot ........... 4
Aluminiumständer ............. 2 Isolatorkappe...................... 4
Supporto in alluminio ........ 2 Tappo isolante .................... 4
Aluminiumstaander ........... 2 Isolatorkap.......................... 4
Aluminiumsfod .................. 2 Spike-underlag ................... 4
Hliníkové šasi .................... 2 Tlumicí průchodky .............. 4
Алюминиевая подставка 2
Stojak aluminiowy............. 2 Nakładka izolacyjna ........... 4
Caro cliente
La ringraziamo dell’acquisto di questo prodotto.
Per ottenerne le prestazioni migliori e per la sua sicurezza, legga
attentamente queste istruzioni.
Il marchio di avvertimento si trova sul pannello inferiore
dell’apparecchio.
Verificare e identificare gli accessori in dotazione.
Sommario
Caratteristiche ............................................................................. 10
Collocazione ................................................................................ 10
Modo di attaccare il supporto in alluminio ............................... 12
Connessioni ................................................................................ 12
Note .............................................................................................. 14
Manutenzione .............................................................................. 14
Dati tecnici ................................................................................... 22
Колпачок изолятора ......... 4
2

Geachte klant
Уважаемый покупатель
Hartelijk dank voor de aankoop van dit product.
Gelieve deze gebruiksaanwijzing aandachtig door le lezen voor een
optimale prestatie en een veilig gebruik van het systeem.
Het kenteken bevindt zich op de onderzijde van het apparaat.
Controleer en identificeer de bijgeleverde accessoires.
Inhoud
Kenmerken................................................................................... 11
Opstelling .................................................................................... 11
Bevestigen van de aluminiumstandaard .................................. 13
Aansluitingen .............................................................................. 13
Opmerkingen ............................................................................... 15
Onderhoud ................................................................................... 15
Technische gegevens ................................................................. 23
Kære kunde
Tak fordi du har købt dette apparat.
For at få fuldt udbytte af apparatet og af hensyn til din sikkerhed, bør
du læse denne betjeningsvejledning omhyggeligt.
Mærkepladen sidder på undersiden af apparatet.
Kontrollér venligst at du har modtaget det viste tilbehør sammen med
apparatet.
Indholdsfortegnelse
Særlige egenskaber .................................................................... 11
Opstilling ..................................................................................... 11
Montering af aluminiumsfod ...................................................... 13
Tilslutning .................................................................................... 13
Praktiske oplysninger ................................................................. 15
Vedligeholdelse ........................................................................... 15
Tekniske specifikationer ............................................................ 23
Благодарим Вас за то, что Вы приобрели эту систему.
Чтобы получить оптимальное качество работы системы и
обеспечить безопасность, пожалуйста, внимательно прочитайте
эту инструкцию.
„hak mapknpobkn pacgojoÒeh ha hnÒheØ gahejn aggapata.
Ljr Poccnn
“YctahobjehhsØ gponÎbolntejem b goprlke g. 2 ct. 5
Ielepajvhofo „akoha PI “O Îaqnte gpab gotpe°ntejeØ” cpok cjyÒ°s nÎlejnr pabeh 7 folam c lats gponÎbolctba gpn ycjobnn, ≠to nÎlejne ncgojvÎyetcr b
ctpofom cootbetctbnn c hactorqeØ nhctpykuneØ go ˙kcgjyataunn n gpnmehnmsmn texhn≠ecknmn ctahlaptamn.”
Акустическая система
Мацушита Электрик Индастриал Ко., Лтд.
Сделано в Испании
Пример маркировки: ХХ8АХХХХХХ
Элементы кода: 3-ий символ – год изготовления
Расположение маркировки:
Проверьте и идентифицируйте наличие этих принадлежностей.
(8 – 1998 г., 9 – 1999 г., 0 – 2000 г., ...);
4-ый символ – месяц изготовления
(А – январь, В – февраль, ..., L – декабрь)
Задняя или нижняя панель устройства
Содержание
Технические характеристики .................................................16
Выбор места установки динамиков..................................... 16
Присоединение алюминиевой подставки ..........................
Подсоединение динамиков.................................................... 18
Примечания ...............................................................................20
Уход за динамиками ............................................................... 20
Texничecкиe xapaкmepиcmики ............................................. 23
18
Vážený zákazníku
Děkujeme za zakoupení tohoto výrobku.
Abyste jej mohl optimálním způsobem a bezpečně používat, přečtěte
si prosím pozorně tento návod.
Oznaçení je umístêno na spodní stranê jednotky.
Zkontrolujte si prosím a identifikujte dodávané příslušenství.
Obsah
Základní charakteristika ............................................................. 16
Umístění soustav ........................................................................ 16
Upevnění hliníkového šasi.......................................................... 18
Připojení .......................................................................................18
Poznámky .................................................................................... 20
Údržba .......................................................................................... 20
Technické údaje .......................................................................... 23
(RGG0158A-N) (RGG0158B-N) (XTS4+20FN)
Insulator ............................. 4 Insulator ........................... 2 Screws ............................. 4
Aislador ............................. 4 Aislador ............................ 2 Tornillos ........................... 4
Isolant ................................4 Isolant .............................. 2 Vis ................................... 4
Isoleringsfot ....................... 4 Isoleringsfot ..................... 2 Skruvar ............................ 4
Isolator ............................... 4 Isolator ............................. 2 Schrauben ....................... 4
Isolante ..............................4 Isolante ............................ 2 Viti ................................... 4
Isolator ............................... 4 Isolator ............................. 2 Schroeven ....................... 4
Spikes med langt gevind ... 4 Spikes med kort gevind ... 2 Skruer .............................. 4
Tlumicí nožky ................... 4 Tlumicí nožky .................. 2 Šrouby ............................. 4
Изолятор .......................... 4 Изолятор........................ 2 Винты ............................. 4
Izolator............................... 4 Izolator ............................. 2 Wkręty ............................. 4
Drogi Kliencie
Dziękujemy Ci za zakupienie tego produktu.
Aby zapewnić optymalną pracę urządzenia i bezpieczną obsługę,
prosimy o uważne prezeczytanie niniejszej instrukcji obsługi.
Symbol znakujàcy jest umieszczony na spodzie urzàdzenia.
Prosimy o sprawdzenie i zidentyfikowanie wyposażenia urządzenia.
Spis treści
Właściwości ................................................................................. 17
Ustawienie ................................................................................... 17
Mocowanie aluminiowych stojaków ......................................... 19
Połączenia ................................................................................... 19
Uwagi ........................................................................................... 21
Konserwacja................................................................................ 21
Dane techniczne ......................................................................... 23
3

Characteristics
Características
ENGLISH
ESPAÑOL FRANÇAIS
SVENSKA
Small diameter (8 cm), long stroke unit
•Low stiffness enables a minimum resonance of 80 Hz.
•High linearity enables music input of 100 W.
•Powerful magnetic circuits enable control of vibration even at
high amplitude levels.
Bass sounds are produced clearly at both high and low power.
High performance dome tweeter
The magnet is made from high flux, low distortion neodymium.
Greater clarity of high frequency sounds is achieved.
High grade network
The high-grade electrolytic condensers use non-etched aluminum
boxes and OFC cords.
Current loss is reduced enabling faithful playback.
Location
In order to obtain the best acoustic effects possible, we suggest that
you follow the guidelines below as closely as possible.
Place the speaker on a flat, level and secure base.
Face the rear of the speaker toward a wide, solid wall surface.
There is a bass reflex on the rear of the speaker, so place the speaker
so that there is a space of approximately 5 cm between it and the
wall.
Hang a thick curtain or similar material on the wall toward which the speaker is facing.
If the surface facing the speaker is a solid wall or window, hanging a
curtain will prevent sound reflection or resonance from occurring.
Don’t place the speaker too close to a record player.
The speaker may cause the record player to vibrate or howling (a
high-pitched whining sound) may occur. This can be prevented by
keeping sufficient distance between the speaker and the record player,
or by placing some felt underneath the record player.
If color irregularities appear in TV pictures, move the
speaker further away from the TV.
This unit is designed so that it should not cause irregular coloring in
TVs, but it may occur with some types of TVs. If it does occur, switch
the TV off for 15 to 30 minutes. The TV’s demagnetizing function should
correct the problem. If the problem persists, move the speakers further
away from the TV.
Note that a magnetic object near the speakers can cause irregular
coloring in the TV due to the interaction between the speakers and
the object.
Placement notes
Avoid locations such as described below.
•In direct sunlight
•Near heating appliances or other sources of heat
•Where the humidity is high
Unidad de diámetro pequeño (8 cm) y carrera larga
•La baja rigidez permite una resonancia mínima de 80 Hz.
•La alta linealidad permite una entrada musical de 100 W.
•Los potentes circuitos magnéticos permiten controlar la
vibración incluso con altos niveles de amplitud.
Los sonidos graves se producen claramente con potencia alta y baja.
Altavoz de agudos de domo de alto rendimiento
El imán es de neodimio, de flujo alto y distorsión baja.
Se logran sonidos de alta frecuencia mucho más claros.
Red de alta calidad
Los condensadores electrolíticos de alta calidad utilizan cajas
de aluminio sin grabar y cables libres de óxido.
La pérdida de corriente ha sido reducida y la reproducción resulta
más fiel.
Ubicación
Para obtener el mejor efecto acústico posible, sugerimos que se sigan
las instrucciones indicadas a continuación.
Colocar el altavoz en un lugar plano, nivelado y seguro.
La parte trasera del altavoz debe quedar hacia una pared
grande y sólida.
En la parte trasera del altavoz existe un altavoz de reflejo de graves,
por lo tanto se debe dejar una separación de 5 cm aproximadamente
entre el altavoz y la pared.
Colgar una cortina gruesa o un material similar en la pared
hacia la que mira el altavoz.
Si la superficie hacia la que mira el altavoz es una pared sólida o una
ventana, colgando una cortina se impedirán las reflexiones del sonido
o la resonancia.
No colocar el altavoz muy cerca de un tocadiscos.
El altavoz puede hacer que el tocadiscos vibre o produzca aullidos
(un sonido de alta frecuencia). Se debe evitar esto manteniendo
suficiente distancia entre el altavoz y el tocadiscos, o colocando un
paño de fieltro debajo del tocadiscos.
Si el altavoz produce irregularidades en los colores del
televisor, alejarlo del televisor.
Este aparato ha sido diseñado para que no cause colores irregulares
en la imagen de los televisores, pero es posible que éstos ocurran
con algunos tipos de televisor. En este caso, apague el televisor
durante un periodo de 15 a 30 minutos. La función de desmagnetización del televisor deberá corregir el problema. Si éste persiste,
separe más los altavoces del televisor.
Tenga en cuenta que un objeto magnético cerca de los altavoces
puede causar colores irregulares en la imagen del televisor debido a
la interacción entre los altavoces y el objeto.
Notas respecto a la ubicación
Evitar ubicaciones como las indicadas a continuación.
•Expuesto a los rayos solares
•Próximo a dispositivos de calefacción y otras fuentes de calor
•Donde la humedad sea excesiva
4

Caractéristiques
Karaktäristik
Appareil de petit diamètre (8 cm), longue course
•La faible rigidité permet une résonance minimale de 80 Hz.
•La haute linéarité permet une entrée musicale de 100 W.
•Les circuits magnétiques puissants permettent de maîtriser les
vibrations même à des niveaux d’amplitude élevés.
Les graves sont reproduits en toute netteté tant à puissance élevée
qu’à faible puissance.
Tweeter à dôme hautes performances
L’aimant est fabriqué en néodyme à haut flux et faible distorsion.
Ceci permet d’obtenir une plus grande clarté des hautes fréquences.
Réseau haute qualité
Les condenseurs électrolytiques haute qualité utilisent des
caissons en aluminium non gravé et des cordons en cuivre sans
oxyde.
Les pertes de courant sont réduites dans l’optique de la fidélité de
lecture.
Positionnement
Afin d’obtenir les meilleurs effets acoustiques possibles, nous vous
recommandons de suivre les instructions ci-après aussi fidèlement
que possible.
Placer l’enceinte sur une surface ferme, plane et horizontale.
Enhet med liten diameter (8 cm), och lång slaglängd
•Låg styvhet ger en minsta resonans på 80 Hz.
•Hög linjäritet ger en inkommande musikeffekt på 100 W.
•Kraftiga magnetkretsar ger vibrationskontroll även vid höga
amplituder.
Basljud produceras klart och tydligt både vid hög och låg effekt.
Högpresterande domformat diskantelement (tweeter)
Magneten är tillverkad av neodymium för hög strömhastighet och
låg distorsion.
Högfrekventa ljud får större klarhet.
Högklassigt nätverk
De högklassiga elektrolytiska kondensatorerna är tillverkade av
aluminiumlådor och kablar av oxidfri koppar (OFC).
Strömförluster minskas och möjliggör verklighetstrogen avspelning.
Placering
För att erhålla bästa möjliga återgivning föreslår vi att du följer
riktlinjerna nedan.
Placera högtalarna på en platt, stabil och säker plats.
Rikta högtalarna baksida mot en vid solid väggyta.
Det finns ett basreflexelement på baksidan av högtalaren, så placera
högtalaren minst 5 cm ut från väggen.
ENGLISH
ESPAÑOL
FRANÇAIS
SVENSKA
Disposer l’arrière de l’enceinte face à un grand mur en
dur.
Un haut-parleur bass-reflex se trouve à l’arrière de l’enceinte ; il faut
donc laisser un espace d’environ 5 cm entre l’enceinte et le mur.
Suspendre au mur vers lequel les haut-parleurs de
l’enceinte sont dirigés un rideau épais ou un matériau
équivalent.
Si l’enceinte se trouve face à un mur en dur ou à une fenêtre, le
rideau permettra d’éviter la formation de réflexions sonores ou de
résonances inopportunes.
Ne pas placer l’enceinte trop près d’un tourne-disque.
L’enceinte risque de provoquer des vibrations ou des sifflements (sons
hautes fréquences). On peut éviter ces phénomènes en laissant une
distance suffisante entre l’enceinte et le tourne-disque, ou en plaçant
du feutre sous le tourne-disque.
Si les couleurs de l’image du téléviseur sont irrégulières,
éloigner davantage l’enceinte du téléviseur.
L’appareil est conçu de façon à ne pas provoquer d’irrégularités de
couleur sur l’image du téléviseur, mais il peut en provoquer sur certains
types de téléviseur. Dans ce cas, mettre le téléviseur hors tension
pendant 15 à 30 minutes. La fonction de démagnétisation du téléviseur
devrait corriger le problème. Si le problème persiste, éloigner
davantage l’enceinte du téléviseur.
Noter qu’un objet magnétique situé à proximité des enceintes peut
provoquer des irrégularités de couleur sur l’image du téléviseur du
fait de l’interaction entre l’enceintes et l’objet en question.
Häng en tjock gardin eller liknande material på väggen
mot vilken högtalaren är riktad.
Om ytan som högtalaren är riktad emot är en solid vägg eller ett fönster
så kommer en gardin att förhindra att ljudet reflekteras och att resonans
uppstår.
Placera inte högtalaren för nära skivspelaren.
Högtalaren kan få skivspelaren att vibrera och ett humm (högt tjutande
ljud) kan uppstå. Detta kan undvikas genom att hålla tillräckligt stort
avstånd mellan högtalaren och skivspelaren, eller genom att placera
skivspelaren på ett filtunderlag.
Om missfärgningar av TV-bilden uppstår, flytta högtalaren
längre bort från TV:n.
Enheten är konstruerad för att inte orsaka missfärgningar på TVapparater, men det kan förekomma på vissa typer av TV-apparater.
Stäng i så fall av TV:n i ungefär 15 till 30 minuter. TV-apparatens
avmagnetiseringsfunktion bör åtgärda problemet. Flytta högtalarna
längre bort från TV:n om problemet skulle kvarstå.
Observera att magnetiska föremål, som förvaras i närheten av
högtalarna, kan orsaka missfärgningar på TV:n på grund av
interaktionen mellan högtalarna och föremålet.
Anmärkningar för placering
Undvik platser som beskrivs nedan.
•I direkt solljus
•I närheten av värmekällor eller andra källor som genererar värme
•Där luftfuktigheten är hög
Remarques concernant le positionnement
Eviter de placer l’appareil aux endroits suivants.
•Sous les rayons directs du soleil
•A proximité d’appareils de chauffage ou d’autres sources de chaleur
•Dans des endroits très humides
5
Attaching the aluminum stand (included)
Colocación de la base de aluminio (incluida)
ENGLISH
ESPAÑOL FRANÇAIS
SVENSKA
Front
Parte delantera
Avant
Framsida
See pages 2 and 3 for details about the parts ( – ).
The speakers will sit steadier and better acoustic effects will be
achieved if the stand is fitted.
Attach the insulators ( and ) to the stand.
Do not attach insulator if you want to face the speakers upward and bring the sound closer to the listening position.
Attach the stand to the base of the speaker.
(Lay the speaker on cloth to avoid scratches.)
R L
A
L
R
B
Consultar las páginas 2 y 3 para tener detalles de las piezas ( – ).
Si se coloca la base, los altavoces quedarán instalados de forma
más estable y mejorarán los efectos acústicos.
Colocar los aisladores ( y ) en la base.
No ponga el aislador si desea colocar los altavoces hacia
arriba y acercar más el sonido la posición de escucha.
Colocar la base en la parte inferior del altavoz.
(Poner el altavoz encima de un paño para impedir que se raye.)
Lift the speaker when moving it to avoid scratching floor surfaces.
Connections
•Before making the connections, switch OFF the power to the ampli-
fier.
•Check that a speaker with an impedance of 6 Ω can be connected
to the speaker terminals of the amplifier.
•Be sure to connect only positive (+) wires to positive (+) terminals,
and negative (–) wires to negative (–) terminals.
Amplifier (not included)
Right speaker
Left speaker
Speaker cables (not included)
Connecting the speaker cable to the speaker
Strip the outer covering from end of the cable to a length of approximately 15 mm and twist the center wire.
Turn the speaker terminal knob to the left until the hole ( ) is
visible.
Insert the center wire into the hole, and then turn the knob to the
right to secure the cable.
If using a commercially-available 4-mm plug cable ( )
Fully tighten the speaker terminal knob, and then insert the end of the
plug cable into the top of the knob.
CAUTION
To prevent damage to circuitry, never short-circuit positive (+) and
negative (–) speaker wires.
E
Nota
Levantar el altavoz al trasladarlo de sitio para impedir rayar la superficie
del suelo.
Conexiones
•Antes de realizar las conexiones, desconectar la alimentación del
amplificador.
•Verificar que se puede conectar un altavoz de una impedancia de
6 Ω en los terminales de altavoces del amplificador.
•Asegurarse de conectar sólo los cables positivos (+) en los
terminales (+) y los cables negativos (–) en los terminales (–).
Amplificador (opcional)
Altavoz derecho
Altavoz izquierdo
Cables de altavoces (opcional)
Conexión de un cable de altavoz a un altavoz
Pelar el extremo del cable aproximadamente unos 15 mm y
retorcer el conductor central.
Girar la perilla del terminal del altavoz hacia la izquierda hasta
que el orificio ( ) quede a la vista.
Insertar el conductor central en el orificio, y luego girar la perilla
hacia la derecha para asegurarlo.
Si usa un cable con enchufe de 4 mm de venta en
comercios ( )
Apretar bien la perilla del terminal del altavoz, y luego insertar el
extremo del cable con enchufe en la parte de arriba de la perilla.
PRECAUCIÓN
Para no dañar el circuito, nunca se debe permitir que los conductores
de altavoces positivo (+) y negativo (–) hagan cortocircuito.
E
6
Fixation du support en aluminium (fourni)
Att fästa aluminiumstället (medföljer)
15
mm
Pour le détail des pièces, voir pages 2 et 3 ( – ).
Les enceintes seront plus stables et elles donneront de meilleurs
effets acoustiques si le support est fixé.
Fixer les isolants ( et ) au support.
L’isolant ne sera pas nécessaire si l’on veut diriger l’enceinte
légèrement vers le haut et rapprocher le son de la position
d’écoute.
Fixer le support à la base de l’enceinte.
(Poser l’enceinte sur un chiffon pour éviter les rayures.)
Soulever l’enceinte quand on la déplace pour éviter que la surface
du plancher ne la raye.
NO!
NO!
NON!
NEJ!
Se sidorna 2 och 3 för detaljerad information om delarna ( – ).
Högtalarna sitter stadigare och ger bättre akustisk effekt om stället
monteras.
Fäst isoleringsfötterna ( och ) på stället.
Fäst inte isoleringsfot om du vill rikta högtalarna uppåt och
föra ljudet närmare lyssningspositionen.
Fäst stället på högtalarens undersida.
(Lägg högtalaren på ett tygstycke för att undvika repor.)
Observera
Lyft högtalaren när den flyttas för att undvika repskador på golvet.
ENGLISH
ESPAÑOL
FRANÇAIS
SVENSKA
Raccordements
•Avant d’effectuer les raccordements, mettre l’amplificateur hors ten-
sion.
•S’assurer qu’une enceinte d’une impédance de 6 Ω peut bien être
raccordée aux bornes d’enceinte de l’amplificateur.
•Veiller à raccorder seulement des câbles positifs (+) aux bornes
positives (+), et des câbles négatifs (–) aux bornes négatives (–).
Amplificateur (non fourni)
Enceinte droite
Enceinte gauche
Câbles d’enceinte (non fournis)
Raccordement du câble d’enceinte à l’enceinte
Dénuder l’extrémité du câble sur une longueur d’environ 15 mm
et torsader l’âme du câble.
Tourner le bouton de la borne d’enceinte vers la gauche jusqu’à
ce que l’orifice ( ) devienne visible.
Insérer l’âme du câble dans l’orifice, puis tourner le bouton vers
la droite afin de fixer le câble.
Si on utilise un câble à fiche de 4 mm vendu dans le commerce (
Serrer à fond le bouton de la borne d’enceinte, puis insérer l’extrémité
du câble à fiche dans la partie supérieure du bouton.
PRECAUTION
Pour éviter d’endommager les circuits électriques, ne jamais courtcircuiter les câbles d’enceinte positifs (+) et négatifs (–).
)
E
Anslutningar
•Innan du utför anslutningarna, slå av (OFF) strömmen till
förstärkaren.
•Kontrollera att högtalare med en impedans på minst 6 ohm kan
anslutas till högtalaruttagen på förstärkaren.
•Se till att du ansluter endast plus- (+) ledningar till plus- (+) uttag,
och minus- (–) ledningar till minus- (–) uttag.
Förstärkare (Extra tillbehör)
Höger högtalare
Vänster högtalare
Högtalarsladdar (Extra tillbehör)
Anslutning av högtalarsladd till högtalare
Avlägsna ungefär 15 mm av höljet på sladden och tvinna
ledningen.
Vrid högtalaruttagets knopp åt vänster tills du kan se ett hål ( ).
Stoppa in ledningen i hålet och vrid knoppen åt höger för att
fästa den.
Om du använder den i handeln tillgängliga 4 mm
kontaktkabeln (
Dra åt högtalaruttagets knopp helt och hållet och sät sedan in änden
på kontaktkabeln uppe på knoppen.
VARNING
För att inte skada kretsarna, kortslut aldrig plus- (+) och minus- (–)
ledningarna på högtalarsladdarna..
E
)
7

Notes
Notas
ENGLISH
ESPAÑOL FRANÇAIS
SVENSKA
Speaker impedance and allowed input
Impedance: 6 Ω
Input power: 50 W (DIN)
CAUTION
The only receivers or amplifiers you should connect to these speakers
are those whose rated output does not exceed the above figures.
Using a receiver or amp with higher ratings than listed above can
cause abnormal sounds to occur because of excessive input, damage
to the receiver or speakers, and fire. If equipment is damaged in any
way or unexpected trouble occurs during playback, unplug the system
from its outlet and call a serviceman for help.
Notes with regard to excessive input
Be sure to reduce the volume on the receiver (or amplifier) when the
signal input exceeds the rated allowable input to avoid damage to
circuitry or other malfunctions.
Other notes
Do not touch the diaphragms.
To do so might cause distortion.
Keep magnetized items away
Magnetized cards, bank cards, commuter passes, etc., can be
damaged if allowed too near speaker magnets. Clocks may also be
effected.
Protection circuitry
This unit incorporates speaker protection circuitry to protect the
speaker from damage caused by excessive input or abnormal
signals; when excess input is detected, input is automatically
interrupted.
If sound is interrupted...
1. Reduce the volume of the receiver (or amplifier).
2. Check the sound source and connections for any problems.
If there is no problem, the protection circuitry will reset in a few
minutes.
After the protection circuit is reset...
Take care not to increase the receiver’s volume too high.
Impedancia del altavoz y potencia de entrada
permitida
Impedancia: 6 Ω
Potencia de entrada: 50 W (DIN)
ADVERTENCIA
Los únicos receptores o amplificadores que Ud. deberá conectar a
estos altavoces son aquellos cuya salida nominal no exceda las cifras
de arriba.
Al usar un receptor o un amplificador con características nominales
superiores a las indicadas arriba se pueden producir ruidos anormales
debido a la entrada excesiva, el receptor o los altavoces se pueden
estropear, y además se puede producir un incendio. Si el equipo es
dañado de alguna manera o un problema inespera-do ocurre durante
la reproducción, desenchufe el sistema y llame a su distribuidor para
que envíen una persona que le ayude.
Notas con respecto a una entrada excesiva
Asegurarse de reducir el volumen del receptor (o amplificador) cuando
la señal de entrada exceda la entrada nominal permitida para evitar
dañar la circuitería u otras fallas.
Otras notas
No tocar los diafragmas, de lo contrario se ocasionarán distorsiones.
Alejamiento de objetos magnetizados
Las tarjetas magnetizadas, las tarjetas de bancos, los pases de
viajeros, etc., pueden estropearse si se dejan demasiado cerca de
los imanes de los altavoces. Los relojes también pueden ser afectados.
Circuitería de protección
Este aparato incorpora una circuitería de protección de altavoces para
proteger el altavoz de daños causados por una entrada excesiva o
señales anormales; cuando una entrada excesiva es detectada, la
entrada es automáticamente interrumpida.
Si el sonido se interrumpe...
1. Reducir el volumen del receptor (o amplificador).
2. Verificar si hay problemas en la fuente de sonido y las conexiones.
Si no hay problemas, la circuitería de protección se reajustará en
unos pocos minutos.
Después de que el circuito de protección sea reajustado...
Cuidarse de no incrementar demasiado el volumen del receptor.
Maintenance
To clean this unit, wipe with a soft, dry cloth.
If the surfaces are extremely dirty, use a soft cloth dipped in a soapand-water solution or a weak detergent solution.
•Never use alcohol, paint thinner, or benzine to clean this unit.
•Before using chemically impregnated cloth, read the instructions
that came with the cloth carefully.
Mantenimiento
Utilizar un paño suave y seco para limplar este aparato.
Si las superficies están extremadamente sucias, utilizar un paño suave
humedecido en una solución de agua y jabón o en una solución de
detergente suave.
•Para limpiar este aparato no utilizar nunca alcohol, diluyente de
pintura o bencina.
•Antes de utilizar un paño impregnado químicamente, leer con
atención las instrucciones suministradas con él.
8
 Loading...