

Panasonic nu-hx100 Operation Manual
NU-HX100S
COUNTERTOP INDUCTION OVEN (CIO)
QUICK START GUIDE
SET UP YOUR NEW COUNTERTOP INDUCTION OVEN IN 3 QUICK STEPS
Remove oven from box
1
Place on a countertop—allow 6" of space
on the top of the oven, 4" on the left and
the other side being open.
Remove all paper and packaging from
interior of oven
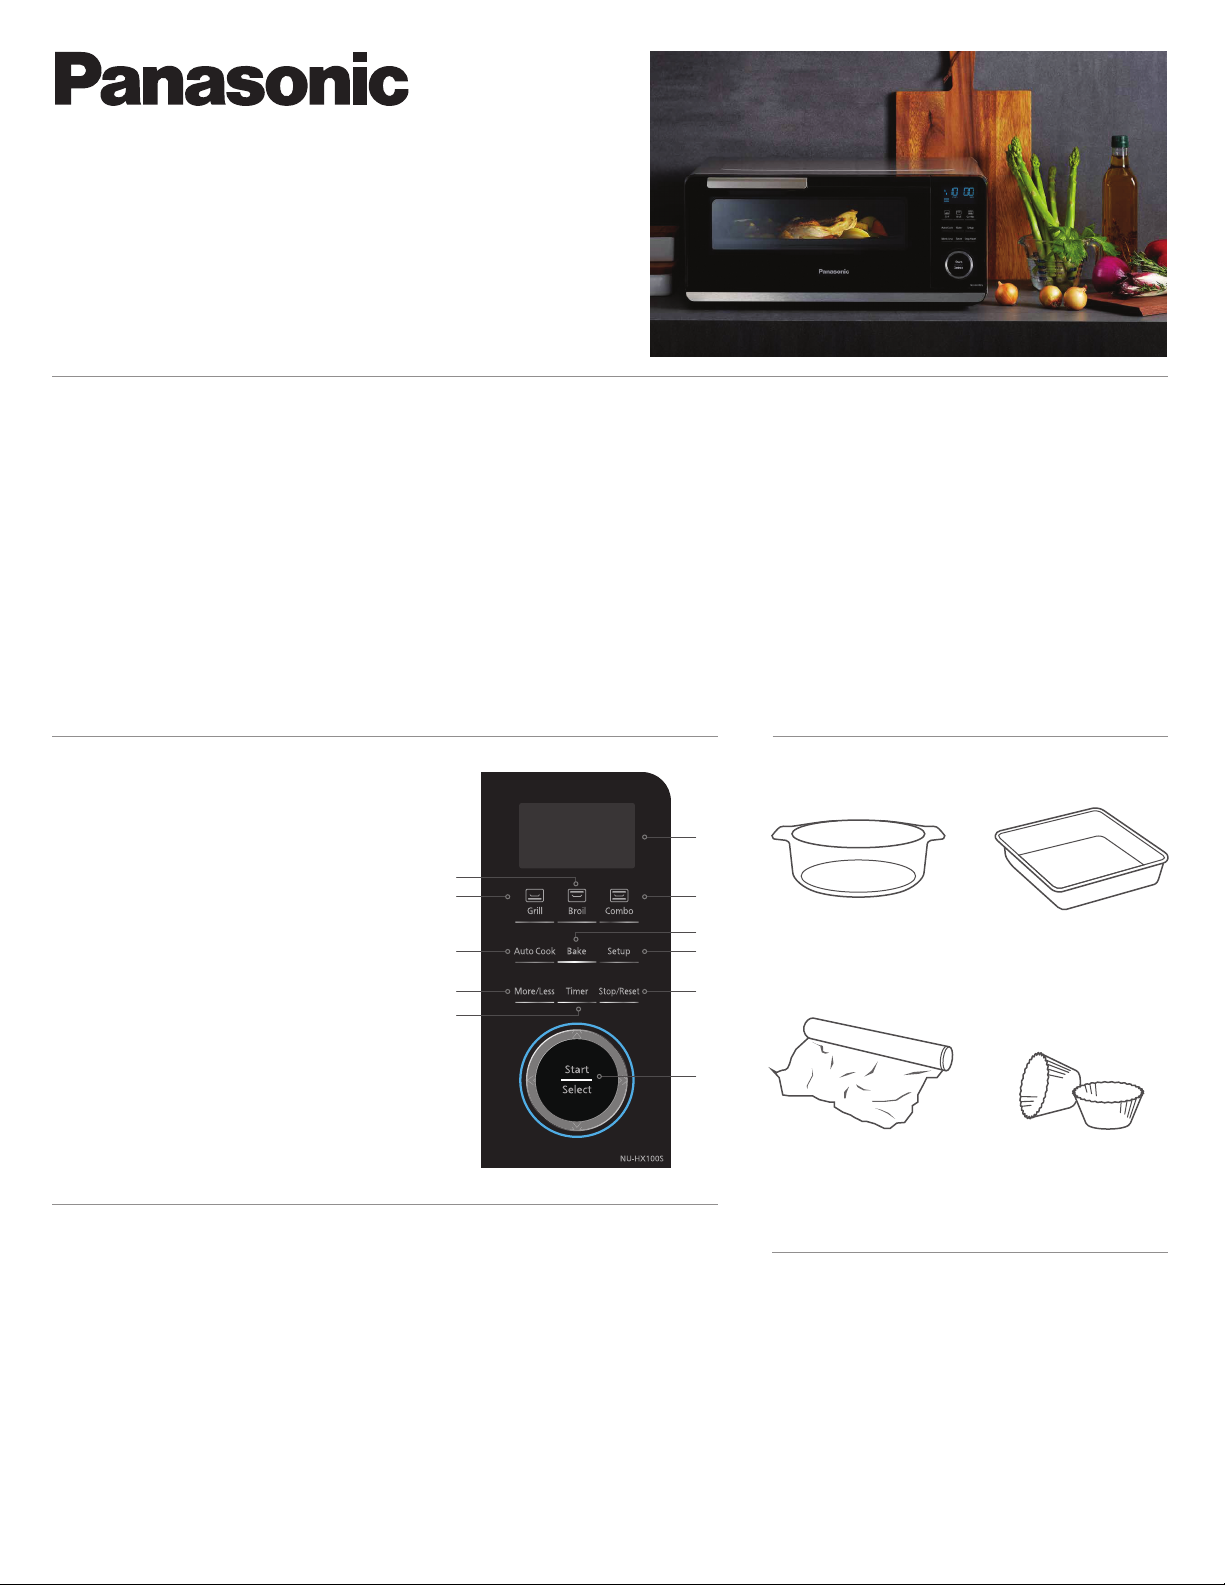
CONTROL PANEL PARTS AND FUNCTIONS
1 Display Window (See page 10 in Owner’s Manual)
2 Grill (pages 15–16)
3 Broil (page 17)
4 Combo (pages 18–19)
5 Auto Cook (pages 22–25)
6 Bake (page 20)
7 Setup (pages 12–13)
8 More/Less (page 22)
9 Timer (page 21)
10 Stop/Reset
11 Start/Select Dial
CLEANING TIPS
BEFORE CLEANING: Unplug oven at wall outlet.
2
3
2
5
8
9
Place Grill Pan in oven
3
1
4
6
7
10
11
Heat resistant oven
glassware/ceramic
Household aluminum foil
*Only use in Bake mode. Check heat-resistant temperature of silica
gel container before baking.
Plug oven into a grounded dedicated
15 AMP or 20 AMP, 120 VOLT, 60 Hz wall
outlet
“WELCOME” should display on screen
APPROVED COOKWARE
Aluminum and other
metal containers
Use together with Grill Plate.
Meal containers with resin
handles cannot be used.
High-heat
silicone containers*
INTERIOR WALLS: Always wipe down oven interior after use. Clean with a damp cloth or paper towel. Do not use harsh detergents or abrasives.
GRILL PAN: After using, remove Grill Pan and clean with a mild detergent or dishwasher. Do not use abrasive cleaners.
DRIP TR
When oven interior is soiled, add ½ cup (4 FL oz) water into Grill Pan and place in oven. Then preheat oven at 450 F. After preheating, let oven fully cool down.
Wipe with a damp cloth.
Any fat and grease that builds up on the ceiling and walls of oven will begin to “SMOKE” if not cleaned properly. The smoke will disappear after a few minutes.
AY: Remove the plastic tray and wash in warm soapy water. Do not use a dishwasher to clean the drip tray.
-
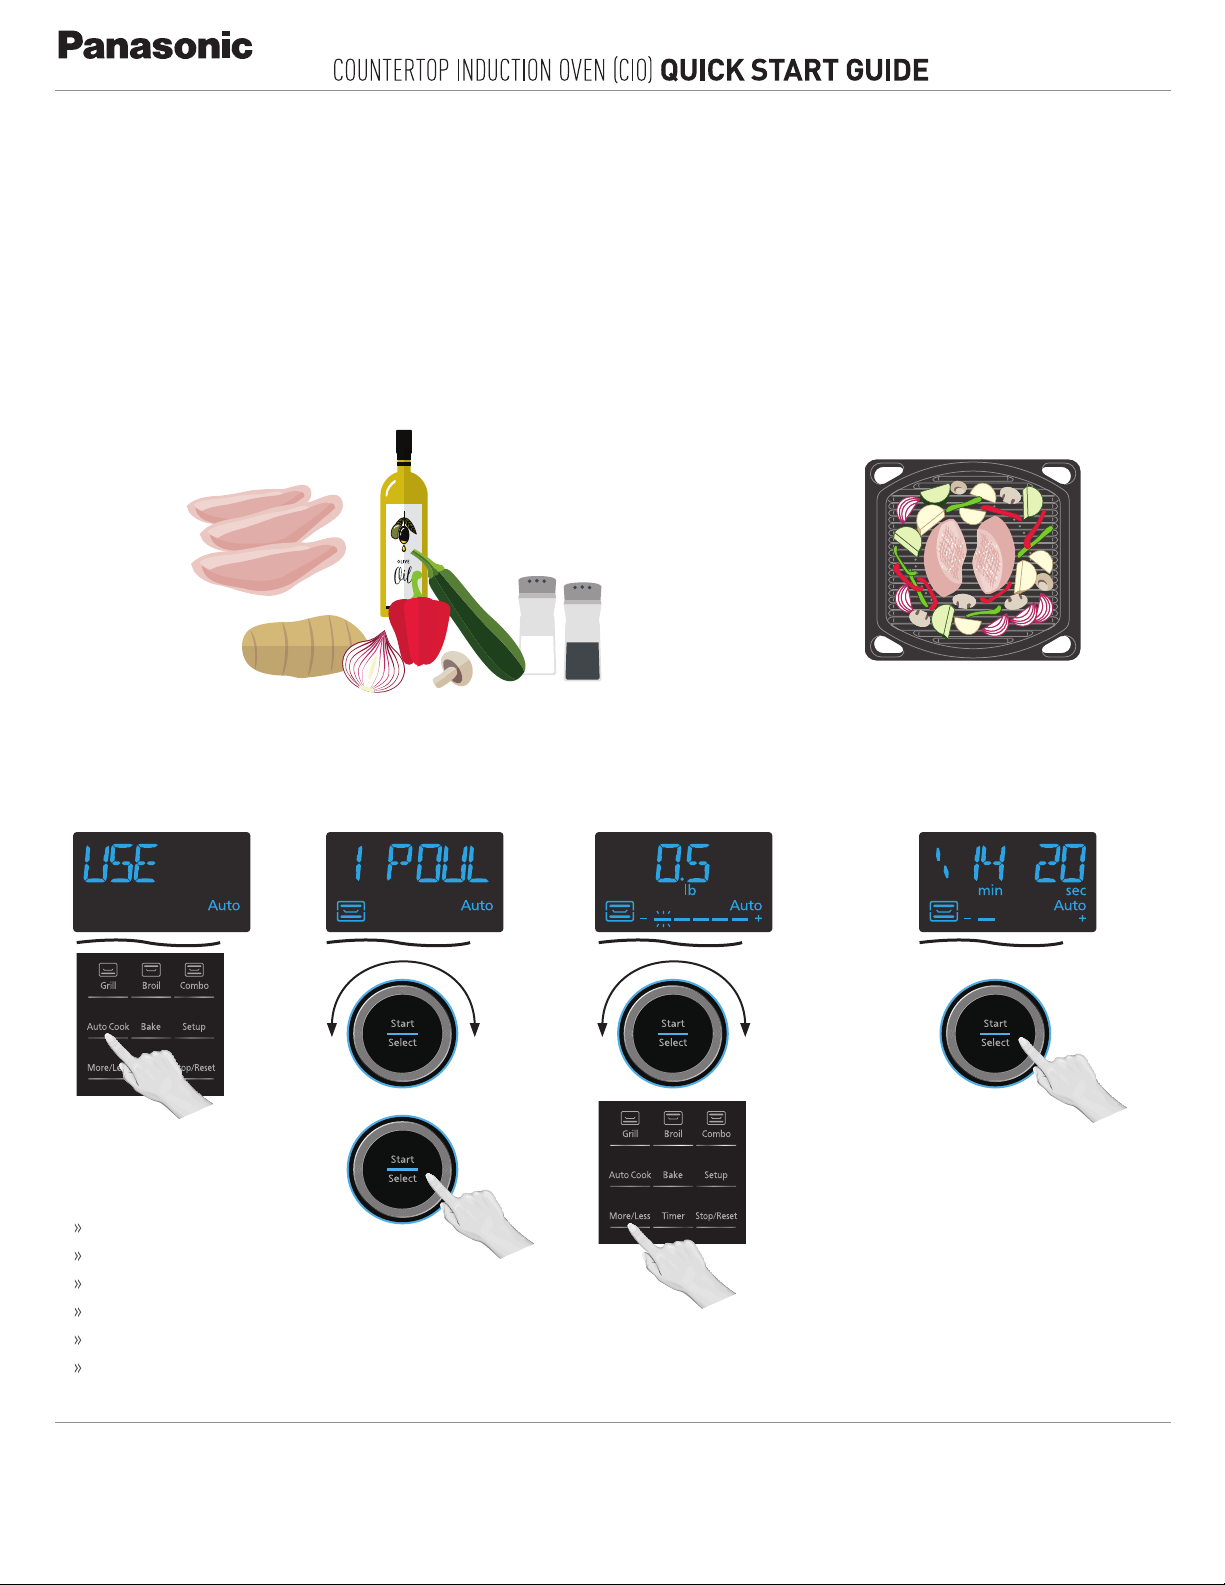
EASY 3
Follow these simple steps to create a chicken dinner the whole family will enjoy.
To substitute another protein, refer to Cooking Chart (pages 26–30) in the Owner’s Manual.
For videos, photos and nutritional information visit: www.panasonic.com/CIO
STEP PROCESS
—Get a fresh, delicious meal on the table in under 30 minutes!
NU-HX100S
CUT & PREP
1
0.5 lb Chicken breast with skin (per person—The CIO can cook up to 4 pieces)
*Make slashes on skinless side
1 Red bell pepper
8 Mushrooms
½ Zucchini
½ Potato
½ Onion
1 tsp Salt
1 tsp Pepper
1 tbsp Olive oil
3
COOK
Select “Auto Cook” on
control panel keypad
Choose Poultry setting,
by turning dial
Gather ingredients.
Cut all vegetables roughly ¾” – 1” pieces.
Toss vegetables with salt, pepper & olive oil
Season chicken with salt & pepper
Adjust weight by turning dial
2
PLACE
Arrange chicken on center of Grill Pan, skin
side up with vegetables around the chicken.
Place Grill Pan into CIO.
Press Start/Select on the dial to
begin cooking
AUTO COOK SETTINGS
(pages 23–25 in the Owner’s Manual)
1. Poultry with vegetables
2. Fish with vegetables
3. Fish
4. Frozen Pizza
5. Toast
6. Bagel
Panasonic Consumer Electronics Company,
Division of Panasonic Corporation of North America
Two Riverfront Plaza
Newark, New Jersey 07102
Panasonic Appliances Microwave Oven (Shanghai) Co., Ltd.
shop.panasonic.com/support
Press Start/Sele
confirm
ct on the dial to
Cooking time will range from
14–29 minutes
After cooking, verify food is done to
your liking. Adjust time using “Add
Time” feature
More/Less allows to adjust cooking
volume or thickness of the food.
Press once, then turn dial to select
Please reference enclosed Owner’s Manual and Cookbook
for additional features, operating instructions, and recipes.
F0420BV00AP
 Loading...