

Page 1
Panasonic”
Operating Instructions
Commercial Microwave Oven
Model NE-1064T
Panaconlc
!
' Honuw
PWSfTMiliU
POINCItl
irm
IS-, ©J
OOMU
MMKTITY
STMT j
^ • i
STOP'
Rfsn
t- 0 J
iS-i'- # )
I,:: @ ]
BFIT~1
0 I
t- © I
Before operating this oven, piease read these instructions completely.
Page 2

TABLE OF CONTENTS
PRECAUTIONS TO AVOID POSSIBLE EXPOSURE TO EXCESSIVE
MICROWAVE ENERGY...................................................................................3
IMPORTANT SAFETY INSTRUCTIONS..........................................................3
Installation and Grounding Instructions.............................................................4
How Does the Microwave Work?......................................................................5
Safety Statements.............................................................................................6
Outline Diagram ...............................................................................................T
How to Operate
Before Operating............................................................................................8
Heating
A. Manual Single Stage Heating.......................................................................................9
B. Manual 2 or 3 Stage Heating........................................................................................9
C. Programmed Heating..................................................................................................10
Programming
A. Programming Memory Pads for Single Stage Heating.................................................11
B. Programming Memory Pads for 2 or 3 Stage Heating
C. Programming the Double Quantity Pad for Multiple Portion Heating
Other Features
A. To Activate Program Lock...........................................................................................14
B. To Release Program Lock
C. To Read Program List.................................................................................................15
D. To Select Beep Tone Options.....................................................................................16
E. To Read the Cycle Counter.........................................................................................16
Self Diagnostics Failure Code Explanation
Care of Your Microwave Oven
..........................................................................................
...................................................
........................................................................
Technical Specifications..................................................................................19
.................................................
.........................
12
13
14
.17
17
Owner's Record
Model No. Serial No.
The serial number of this product may
be found on the side of the oven.
Dealer's Name
Dealer's Address
Date of Purchase
Toll Free
Service Information
To locate a convenient service agent call
1-888-350-9590
Chef support;
201-348-7305
-2
Page 3

Your microwave oven is a cooking device and you should use as much care as you use with a stove or any
other cooking device.
When using this electric appliance, basic safety
precautions should be followed, including the
following:
WARNING—To reduce the risk of burns, eiectric
shock, fire, injury to persons or exposure to
excessive microwave energy:
1. Read all instructions before using the appliance.
2. Read and follow the specific “PRECAUTIONS
TO AVOID POSSIBLE EXPOSURE TO
EXCESSIVE MICROWAVE ENERGY,” found at
the bottom of this page.
3. This oven must be grounded. Connect it only to
properly grounded outlet. See “GROUNDING
INSTRUCTIONS” found on page 4.
4. Locate or install this appliance only in
accordance with instructions provided.
5. Some items such as whole eggs and sealed
containers—for example, closed glass jars—may
explode and should not be heated in this oven.
6. Use this appliance only for its intended use as
described in the manual. Do not use corrosive
chemicals or vapors in this appliance. This type
of oven is specifically designed to heat, cook, or
dry food. It is not designed for industrial or
laboratory use.
7. Do not leave children alone — Children should
not be left alone or unattended in an area where
appliance is in use. They should never be allowed
to sit or stand on any part of this appliance.
Do not allow children to use this appliance, unless
closely supervised by an adult.
8. Do not operate this oven if it has a damaged cord
or plug, iif it is not working properly, or if it has
been damaged or dropped.
9. This oven should be serviced only by qualified
service personnel. Contact the nearest
authorized service agent for examination, repair
or adjustment.
10. Do not cover or block any openings on this oven.
11. Do not store this oven outdoors. Do not use this
oven near water — for example, near a kitchen
sink, in a wet basement, or near a swimming
pool, and the like.
12. Do not immerse the cord or piug in water.
13. Keep the cord away from heated surfaces.
14. Do not let the cord hang over edge of the table or
counter.
15. When cleaning the surfaces of the door and the
oven that come together, use only mild, non
abrasive soaps or detergents applied with a
sponge or soft cloth.
16. To reduce the risk of fire in the oven cavity:
(a) Do not overcook food. Carefully attend
appliance if paper, plastic, or other
combustible materials are placed inside the
oven to facilitate cooking.
(b) Remove wire twist-ties from paper or plastic
bags before placing bag in oven.
(c) If materials inside the oven should ignite, keep
oven door closed, turn oven off, and
disconnect the power cord, or shut off power at
the fuse or circuit breaker panel.
(d) Do not use the cavity for storage purposes.
Do not leave paper products, cooking utensils,
or food in the cavity when not in use.
SAVE THESE INSTRUCTIONS
For proper yse o1 your oven read nranaining safeiy cautions and q^erating rrretaictioins.
PRECAUTIONS TO AVOID POSSIBLE
EXPOSURE TO EXCESSIVE
MICROWAVE ENERGY
(a) Do not attempt to operate this oven with the
door open since open-door operation can
result in harmful exposure to microwave
energy. It is important not to defeat or tamper
with the safety interlocks.
(b) Do not place any object between the oven
front face and the door, or allow soil or cleaner
residue to accumulate on sealing surfaces.
(c) Do not operate the oven if it is damaged. It Is
particularly important that the oven door close
properly and that there is no damage to the:
(1) door (bent)
(2) hinges and latches (broken or loosened)
(3) door seals and sealing surfaces.
(d) The oven should not be adjusted or repaired by
anyone except properly qualified service personnel.
-3
Page 4

Examine Your Oven
Unpack oven, remove all packing material, and examine the
oven for any damage such as dents, broken door latches or
cracks in the door. Notify dealer immediately if oven is
damaged. DO NOT install if oven is damaged.
Remove Protective Plastic Film
If a plastic film has been wrapped around the oven to protect
the painted finish from scratching during shipping, please
remove this plastic film prior to using the oven. (However, all
ovens do not have plastic film wrapping.)
Wiring Requirements
I.The oven must be plugged into at least a 15 AMP 120
VOLT, 60 Hz GROUNDED OUTLET,
Where a standard two-prong outlet is encountered, it is the
personal responsibility and obligation of the user to have it
replaced with a properly grounded three-prong
outlet (Fig, 1).
Fig. 1
Placement of Oven
1 Oven must be placed on a flat, stable surface. For proper
operation, the oven must have sufficient airflow. Allow
3-inches of space on both sides of the oven and 1 -inch of
space on top of oven.
a DO NOT block air vents. If they are blocked during
operation, the oven may overheat. If the oven overheats,
a thermal safety device will turn the oven off. The oven
will remain inoperable until it has cooled,
b. DO NOT place oven near a hot damp surface such as a
gas or electric range.
c- DO NOT operate oven when room humidity is too high.
Grounding Instructions
This appliance must be grounded. In the event of an electrical
short circuit, grounding reduces the risk of electric shock by
providing an escape wire for the electric current- This
appliance Is equipped with a cord having a grounding wire
with a grounding plug. The plug must be plugged into an
outlet that is properly installed and grounded
WARNING—Improper use of the grounding plug can result in
a risk of electric shock.
Consult a qualified electrician or service person if the
grounding instructions are not completely understood, or if
doubt exists as to whether the appliance is properly
grounded.
If it IS necessary to use an extension cord, use only a three
wire extension cord that has a three blade grounding plug,
and a three slot receptacle that will accept the plug on the
appliance. The marked rating of the extension cord should be
equal to or greater than the electrical rating of the appliance.
2. The oven must be on a SEPARATE CIRCUIT. No other
appliance should share the circuit with the microwave oven.
If it does, the branch circuit fuse may blow, or the circuit
breaker may trip or the food may cook slower than the
times recommended in this manual.
3. The VOLTAGE used must be the same as specified on this
microwave oven (120 V). Using a higher voltage is
dangerous and may result in a fire or other accident
causing oven damage. Using a lower voltage will cause
slow heating. Panasonic is NOT responsible tor damage
resulting from the use of the oven with other than specified
voltage.
4-
Page 5
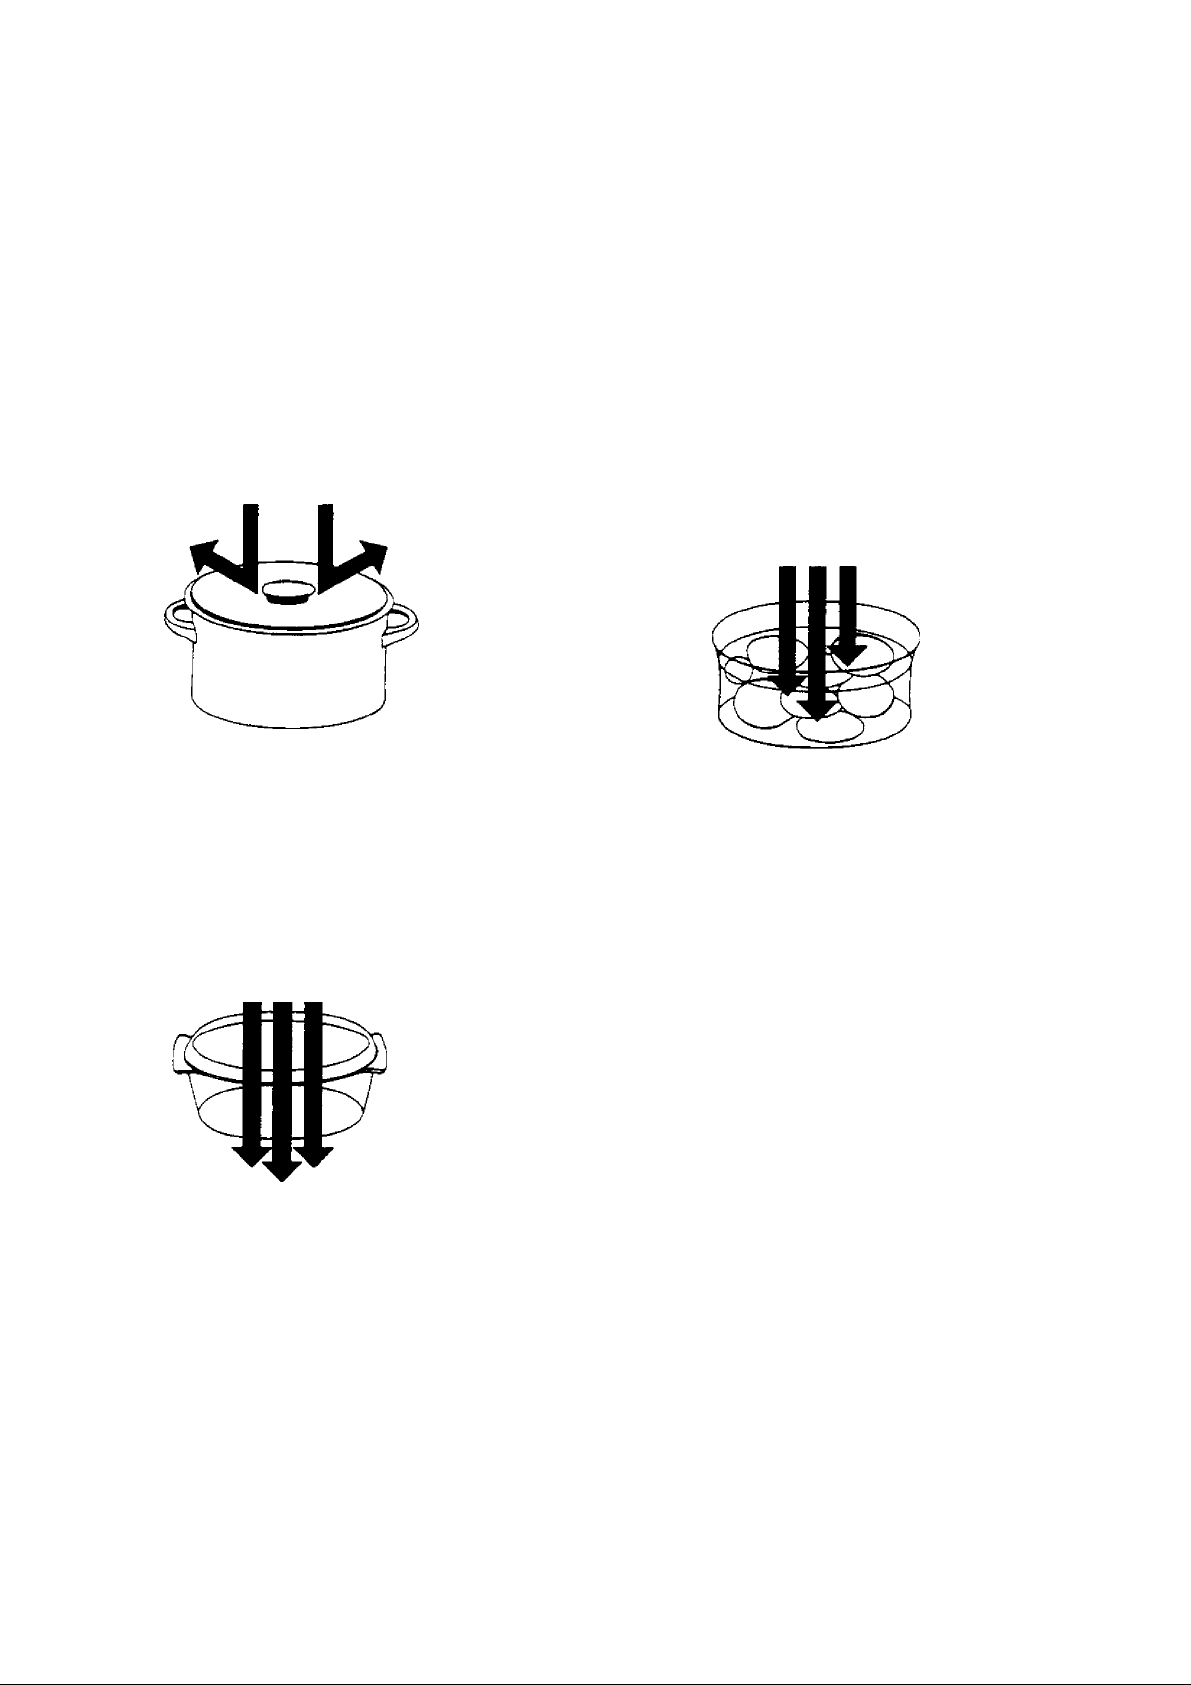
Microwaves are a form of high frequency radio
waves similar to those used by a radio including
AM, FM and CB. They are. however, much shorter
than radio waves; approximately five inches long.
Electricity is converted into microwave energy by
the magnetron tube. From the magnetron tube,
microwave energy is transmitted and absorbed.
Reflection
Microwaves are reflected by metal just as a ball is
bounced off a wall. A combination of stationary
(interior walis) and rotating antenna, located
underneath the bottom shelf assure that the
microwaves are well distributed within the oven
cavity to produce even heating or cooking of foods.
Absorption
During heating, microwaves will be absorbed by
food. They penetrate to a depth of about % to 1 'A
inches. Microwave energy excites the molecules in
the food (especially water, fat and sugar
molecules), and causes them to vibrate at a rate of
2,450,000,000 times per second. This vibration
causes friction, and heat is produced just as you
will feel heat produced if you vigorously rub your
hands together. The internal heating of larger foods
is done by conduction. The heat which is produced
by friction travels by conduction to the center of the
food. Foods also continue to heat by conduction
during standing time.
Because microwaves dissipate, much like sunlight
as it reaches the Earth’s surface, they are not
stored in food.
Transmission
Microwaves pass through some materials such as
paper, glass and plastic much like sunlight shining
through a window. Because these substances do
not absorb or reflect the microwave energy, they
are ideal materials for microwave oven heating
containers.
Radio Interference
1. Operation of the microwave oven may cause
interference to your radio,TV or similar equipment.
2. When there is interference, it may be reduced or
eliminated by taking the following measures;
a. Clean door and sealing surfaces of the oven.
(See Care of Your Microwave Oven found on
page 17.)
b. Place the radio, TV, etc. away from the
microwave oven as far as possible.
c. Use a properly installed antenna, to obtain
stronger signal reception.
5-
Page 6

General Use
1. Do NOT tamper with or make any adjustments or
repairs to door, control panel housing, safety
interlock switches or any other part of the oven.
Do NOT remove outer panel from oven. Repairs
should only be done by a qualified service person.
2. Do NOT operate the oven if empty. The
microwave energy will reflect continuously
throughout the oven if no food or water is present
to absorb energy.
3. If a fire occurs in the oven, turn the timer to the
“0” position or press Stop/Reset Time Pad and
LEAVE DOOR CLOSED.
Disconnect the power cord, or shut off power at
the fuse or circuit breaker panel.
4. Do NOT dry clothes, newspapers or other
materials in oven. They may catch fire,
5. Do NOT use recycled paper products, as they
may contain impurities which may cause sparks
and/or fires when used.
6. Do NOT use newspapers or paper bags for
heating.
7. Do NOT hit or strike control panel. Damage to
controls may occur.
8. POT HOLDERS should always be used when
removing items from the oven. Heat is transferred
from the hot food to the heating container.
9. Do NOT store flammable materials next to, on
top of, or in the oven. It could be a fire hazard.
Utensils
Use only containers and materials specified by their
manufacturers to be for microwave use.
1. METAL CONTAINERS or dishes with metallic
trims should not be used. Arcing may occur.
2. METAL TWIST-TIES may not be used in the
microwave oven.
3. Do NOT use SEALED JARS or NARROW NECK
bottles for cooking or reheating. They may shatter.
4. Do NOT use CONVENTIONAL THERMOMETERS
in the microwave oven. They may cause arcing.
5. Remove PLASTIC STORE WRAPS, before
heating in the oven.
6. When using foil, skewers, warming rack or
utensils made of metal in the oven allow at least
one inch of space between metal material and
interior oven walls. If arcing (sparking) occurs
remove metal material (skewers, etc.) and/or
transfer to a nonmetallic container.
Food
1. HEATING TIMES given in the cooking guide
are APPROXIMATE. Factors that may affect
heating are: starting temperature, altitude,
volume, size, and shape of foods and utensils
used. As you become familiar with the oven,
you will be able to adjust for these factors.
2. It is better to UNDERHEAT RATHER THAN
OVERHEAT foods. If food is underheated, it
can always be returned to the oven for further
heating. If food is overheated, nothing can be
done. Always start with minimum heating times.
3. SMALL QUANTITIES of food or foods with
LOW MOISTURE content can burn, dry out or
catch on fire if heated too long.
4. Microwave popcorn which pops in its own
package is available. Each brand of microwave
popcorn recommends that their popcorn be
used in microwave ovens listed at a specific
wattage. For example: “Use in a microwave
oven 600 watts or greater”, or 'Tested in
microwaves of 450 to 1000 watts, “ Follow
popcorn manufacturer’s directions and use a
brand suitable for at least a 650 watts
microwave oven.
5. Do not attempt to deep fat fry in your microwave
oven.
6. Do not boil eggs in their shell in a microwave
oven. Pressure will build up and the eggs will
explode.
7. Potatoes, apples, egg yolks, whole acorn
squash and sausages are examples of foods
with nonporous skins. These types of foods
must be pierced before cooking, to prevent
bursting.
8. Liquids can become “superheated” in a
microwave, and when the container is moved in
any way, the superheated liquids can
“explode” out of the container. “Superheated”
water is hotter than boiling water, EVEN
THOUGH IT DOES NOT APPEAR TO BUBBLE.
To reduce the possibility of this occurrence:
Always make sure that liquids are stirred
vigorously before heating to assure that the
liquid is mixed with air. NEVER HEAT LIQUIDS
FOR AN EXCESSIVE LENGTH OF TIME.
9. Heat only 1 frozen dinner or entree in the oven
at a time. If dinner or entree is heated in a foil
tray, leave at least 1 inch of space between foil
tray and oven walls.
10. Do not use paper towels or cloths which contain
a synthetic fiber woven into them, such as
nylon. The synthetic fiber may cause the towel
or cloth to ignite.
11. Do not use the oven for any reason other than
the preparation of food.
12. Your oven is equipped with a protective device
designed to turn the unit off in the event of
overheating. The oven will automatically reset
itself after it has cooled, (approx. 30-60 min.)
6-
Page 7

‘ '■ 'V^ '
t^WS»A№5*!rSi>jn>Ifflii^llt''r8fr«iiS:¥«l
(1)
(3)
(5)-tiSSSilir
ww
LEVEL
M
JO pnoo i 2 5
H M .H m m
Pft6Smi£Nij
E
Einn
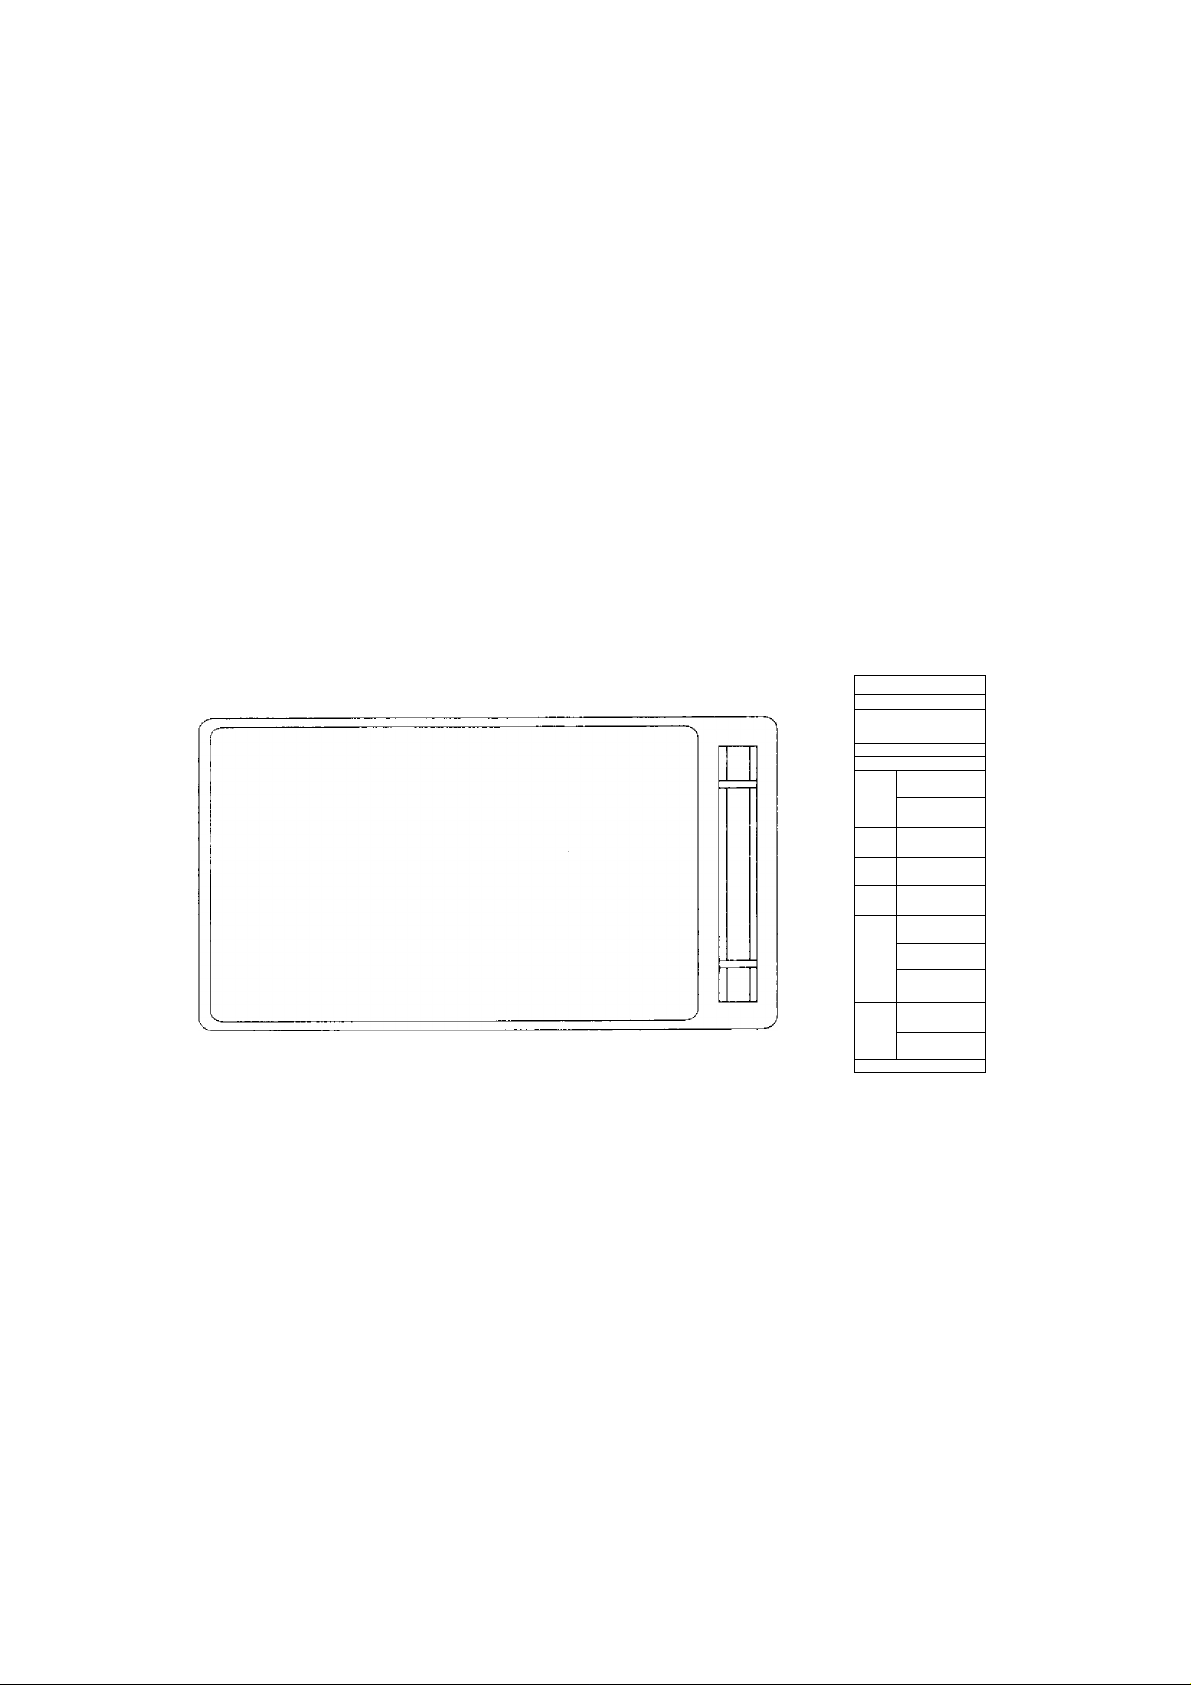
(1) Digital Display Window (see below)
(2) Memory Pads
(3) Power Level Selector Pad
(4) Stop/Reset Time Pad
(5) Double Quantity Pad (x 2)
(6) Start Pad
(7) Control Panel
(8) Door Safety Lock System
(9) Oven Window
(10) Oven Lamp
(11) Splash Guard/Light Diffuser
Digital Display
Window indicator
Locations
A - Program Change Indicator
B - Double Quantity (x2) Heating Indicator
C - Memory Pad Number and Heating Time
Display (min. sec.) - each indicator 0-9
D - Stage Heating Indicator - 3 maximum
PROG
X2
W88
HI M.HI MED LOW DEF HOLD
POWER LEVEL
E - Power Level Indicator
HI (HIGH)
M. HI (MEDIUM HIGH)
MED (MEIMUM)
LOW
DEF (DEFROST)
HOLD (Power OFF)
-7-
STAGE
Page 8

^»ii
.. . .
Before Operating
Make sure the oven is connected to a properly grounded electrical outlet.
When the door is closed, the display is still blank. When the door is opened, the display shows “0”.
For the detail operation, see the page on each feature.
This oven is preset at the factory for the following:
1, Memory Pads preset to High Power at the indicated heating times for single stage heating.
1- 10 sec.
2- 20 sec.
3- 30 sec.
4- 45 sec.
5 - 1 min.
The Double Quantity Pad (x2) preset to automatically double the programmed time of each Memory Pad.
Example; press
2. Program Unlock.
3. Cycle counter set to “0” on all pads.
6- 1 min. 30 sec.
7- 2 min.
8- 2 min. 30 sec.
9- 3 min.
0-3 min. 30 sec.
DOUBLE ^
QUAmiTY
- 2 mins.
To set the power level:
Select power level before programming the cooking time.
1 time
Press
POWER
LEVEL
______
4 times..................LOW
2 times
3 times
5 times
To set the cooking time: ®
You can set up to 99 minutes 99 seconds.
Example 1: To set 15 minutes 45 seconds
...................
.................
............... , MEDIUM
.................
..........
HIGH
MEDIUM HIGH
DEFROST
Display Window
P''®ss [B-:' ® ^ (1
Example 2; To set 85 minutes 30 seconds
Press ^
When you press the START Pad, the display shows
1 hour 25 minutes instead of 85 minutes 30 seconds.
When selected cooking time is over an hour, the display
shows hours and minutes, but the oven works for your
setting time.
Display:
The display will go blank (when the door is closed):
• at more than 1 minute interruption.
• at more than 1 minute after completion of heating
and removing food.
The display will flash “0”:
• continuously if food is not removed.
I
IH PS
Oven Light:
Oven light will be turned on, when;
• you open the door.
• heating starts.
Oven light will be turned off, when:
• you close the door (no heating).
• heating finishes.
8-
Page 9

How to Opinale
HEATING
Open the door and place food in the oven cavity. Close the door, “0” must be showing in the display window.
A. Manual Single Stage Heating:
This feature gives the user maximum flexibility to set the oven to desired heating time and power level.
Ideal for menus that require various heating requirements.
Example: To heat for 2 minutes at High Power
Display Window
1.
"power"
[level,
I-- (
^■!
r
3.
START
4. Beep tone will sound.
: j
3-- c .
•Press the Power Level Selector Pad one time.
•Press the Memory Pads 2, 0 and 0.
•Press the START Pad.
Heating will start.
The time on digital display will
count down.
•All heating will stop.
When opening the door, the
display will stop blinking.
2 OD
/ SS
B. Manual 2 or 3 Stage Heating:
This feature allows you to set to begin heating at one power level then shift automatically to a different
power level after the designated amount of heating time.
Example: To heat for 2 minutes at Defrost Power for 2nd stage heating
For Stage 1 cooking
1. Follow steps 1 and 2 above.
For Stage 2 cooking
1.
POWER
LEVEL
•Press the Power Level Selector
Pad 3 times. Indicator will change
each time the pad is pressed. DEF
is now displayed. Stage 2 is
blinking.
Display Window
.n:
u
2.
START
4. Beep tone will sound. •All heating will stop.
(See page 16) When opening the door, the display
NOTE: will stop blinking.
For a 3 stage heating cycle, select a power level again and set the cooking time (steps 1 and 2 above).
SPECIAL NOTE: For both single and 2 or 3 stage heating.
1. While heating, one touch on the STOP/RESET Pad stops the oven. You can restart by pressing the START
Pad or a second touch on the STOP/RESET Pad will cancel the selected program.
2. One touch on the STOP/RESET Pad, before the heating cycle is started, will cancel the selected program.
i
]IE3
•Press the Memory Pads 2, 0 and 0.
•Press the START Pad.
The total time for both stages will be
displayed. The Active Stage “1” and
the Power Level “HI" blinks. The oven
lamp will be turned on. Heating will
start.
•The total time will display and count
down.
•When oven shifts to the next stage, a
single beep tone will sound. The
Active Stage “2” and the Power Level
“DEP blink.
2 00
u nn
1 uu
J 55
I
0:
9-
Page 10

C. Programmed Heating:
Example: 1 stage; Memory Pad 9 to heat for 3 minutes at HIGH Power
2.
START •Press the START Pad.
•Press the Memory Pad 9.
In Program Lock Mode oven will
start without pressing START Pad. See page 14,
Heating will start.
The time on digital display will
count down.
Display Window
iSS
3. Beeptone will sound,
(See page 16}
Example: 2 stage; Memory Pad 3 (to heat for 3 minutes at HIGH and 2 minutes at DEFROST)
See page 12 to program Memory Pad.
See page 14 to activate Program Lock.
1.
2.
START
3. Beep tone will sound.
(See page 16)
To Select Multipe Portion Heating:
The Double Quantity Pad (x2) is factory set to automatically double the programmed time for multiple
portion heating.
•All heating will stop.
When opening the door, the display
will stop blinking.
•Press the Memory Pad 3.
In Program Lock Mode oven will
start without pressing START
Pad. See page 14.
•Press the START Pad.
The total time for both stages
will be displayed. The time on
digital display will count down.
Heating will start.
•When the oven shifts to the next stage,
a single beep tone will sound.
•All heating will stop.
When opening the door, the display
will stop blinking.
Display Window
V 5S
/ S3
n
U
n' \
u
Example: Memory Pad 5
DOUBLE
1.
QUANTITY
. (XZ)
2-
3. Follow steps 2 and 3 above.
Display Window
•Press the DOUBLE QUANTITY
Pad.
•Press the Memory Pad 5.
In Program Lock Mode oven will
start without pressing START
Pad. See page 14.
<?0D
-10
Page 11

How to Operate
'"i. .•-s s „•... ,r% ..!.
Programming
— DO NOT OPEN THE DOOR —
The display window MUST be blank before programming can begin. If any indicator light is
illuminated in the digital Display Window; close the door, press STOP/RESET Pad and
wait 1 minute until the Display goes blank,
A. Programming Memory Pads for Single Stage Heating:
Example: To program 30 seconds at Medium Power for Memory Pad Number 5
1.
PROG
3.4.POWER
LEVEL
•Press the PROG Pad.
NOTE:
•If no PROG Indicator appeared
on display, “Program Lock” should
be cancelled. (See page 14.)
•Do not keep pressing PROG Pad
for more than 30 seconds, or a
false failure code may result.
•Press the Memory Pad 5.
The pad number and the previously
selected time and power level will
appear in the display.
•The pad number and Stage
Heating Indicator will appear
in the display again.
•Press the Power Level Selector
Pad 2 times. The Memory Pad
display will go out.
Display Window
Display Window
^PQG
___
; 00
5.
Tm i
PROG
•Press Memory Pads 3 and 0.
•Press the PROG Pad again. You
have completed programming
the selected Memory Pad for
single stage heating and double
heating time for multiple portion
heating automatically.
•2 seconds later, the time and
power level setting for single
stage will appear in the display.
•2 seconds later, Double Quantity
Heating Indicator and then the
double heating time will appear
in the display.
•2 seconds later, the display
will go blank.
Memory Pad 5 is now programmed
for heating - 30 seconds at MED Power
n
U
n
u
nn
uu
-11 -
Page 12

igi
¡ill
NOTE: • Program the remaining Memory Pads as desired by repeating steps 1-5. You may insert up to 10
memory Programs.
• When the PROG indicator is biinking, the program can be cancelled and/or the Pad erased by
pressing the STOP/RESET Pad.
B. Programming Memory Pads for 2 or 3 Stage Heating:
Example: To program for 2 minutes at DEFROST for 2 stage heating using Memory Pad Number 5
1. Complete Steps 1 to 4 on page 11.
POWER
2.
LEVEL
3.
4.
(J
PROG
i:pTn •Press the Memory Pads 2, 0 and 0.
•Press the Power Level Selector Pad
3 times. DEF indicator light will light.
•Press the PROG Pad again. You have
completed programming the Selected
Memory Pad for 2 stage heating and
double heating time for multiple portion
heating automatically.
•2 seconds later, the display will confirm
your programming.
Display Window
»9 QC
5n
iu I
' z
acF
1 z
«HOC
nn
uy
8
DEF
'
2
Moe
5
nwa I
J U
MCI
2
fflOG
p
XI
PROG
nh
uy
OEP
I
\ ^
•Total time for 2 stage programming.
•After all of your programming has been
completed, the display will go blank.
NOTE: • Program the remaining pads as desired by repeating the steps above.
DO NOT OPEN THE OVEN DOOR during programming.
• For a.3 stage heating cycle, select a further power level and set the desired heating time between
steps 3 and 4 above.
-12
" s
X2 IH40G '
hn
I ' /
I
I
i
uy
xi P«oc
nn
uu _
____ _____ __ ___ __ ___ __ ___ __ _
MED
2
OEf
Page 13

'•I' ■'' '*
C. Programming the Double Quantity Pad — For multiple portion heating;
Your oven is factory set to automaticaliy double the programmed time for multiple portion heating — this is
the correct setting for heating multiple portions of most small foods items. No further programming of the
time is necessary for these food items.
The time required to heat multiple portions of some large platters and most bulk food loads is slightly less
than double that of a single portion.
This model incorporates a Multiple Portion Heating Custom Program feature that allows you to customize
the heating time and/or power level for multiple portions of your menu items.
For example, if Memory Pad 3 is set for 6 minutes at DEFROST, 12 minutes at DEFROST is set for double
quantity heating automatically. However, if your own tests have determined that the correct heating times
required is less (only 10 minutes 30 seconds at DEFROST) for two portions, the “Multiple Portion Heating
Custom Program” feature can be programmed for 10 minutes 30 seconds at DEFROST.
Example: To program 30 seconds at HIGH Power on Memory Pad Number 2 (display must be blank)
1.
rDOUBLE”
2.
QUANTITY
POWER
4.
PROG
LEVEL
•Press the PROG Pad.
NOTE:
•If no PROG Indicator appeared on
display, “Program Lock” should be
cancelled (see page 14).
•Do not keep pressing PROG Pad for
more than 30 seconds, or a false
failure code may result.
•Press DOUBLE QUANTITY (x2) Pad.
•Press the Memory Pad 2.
The pad number and the previously
selected time and power level for
multiple portion heating will briefly
appear in the display.
•The pad number and Stage Heating
Indicator will reappear in the display.
•Press the Power Level Selector Pad
once. The Memory Pad display will
go out.
Display Window
40
n
5.
6.
ZTDiEJ
•Press the Memory Pads 3, 0.
•Press the PROG Pad again. You
U
have completed programming the
PROG
selected Memory Pad for multiple
portion heating.
•2 seconds later, the setting for single
30
stage heating will appear in the display.
•2 seconds later, the display will go blank.
NOTE: • Program the remaining Memory Pad as desired by repeating steps 1-6 above. (You may insert up to
10 memory programs.)
DO NOT OPEN THE OVEN DOOR during programming.
• When the PROG indicator is blinking, the program can be cancelled and/or the pad erased by
pressing STOP/RESET Pad.
-13-
Page 14

MowtoOp^te
Other Features
A. To Activate Program Lock:
This procedure “Locks” the control panel Memory Pads into their programmed heating times and power
levels. DO NOT OPEN THE DOOR. The Display Window must be blank before the Display Window
Program Lock feature can be activated.
1.
PROG
NOTE: «Do not press PROG Pad for longer than 30 seconds continuously, or false failure code may result.
• In “Program Lock"
a. To activate preset programs, open door will display “0".
b. The oven is started by pressing the desired Memory pad. There is no need to press the START
pad.
c. The interrupt feature is deactivated—opening the door cancels the remaining time on the
program.
d. The oven cannot be programmed until the program lock feature is deactivated.
•Press and hold in the PROG Pad
until the display shows “P” and “L”.
(for 6 seconds)
•Program Lock feature is now
activated.
B. To Release Program Lock:
This procedure deactivates “Program Lock” and activates all other features. Oven reverts to a 2 touch
operating mode (Memory Pad plus START Pad).
DO NOT OPEN THE DOOR. The Display Window must be blank before the Release
Program Lock feature can be activated.
1.
STOP/
RESET
PROG
•Press the STOP/RESET Pad and
while pressing this pad, press the
PROG Pad until the display shows
“P” (for 6 seconds).
Display Window
IP M
•Program Lock Feature is deactivated,
oven is now in "Program Unlock" mode.
NOTE; *Do not press PROG Pad for longer than 30 seconds continuously, or false failure code may result.
•In “Program Unlock”
a. Repeat and interrupt features are operational.
b. Memory Pads can be programmed.
c. Tone loudness control is operational.
14-
Page 15

How to C^seiate
C. To Read Program List:
Allows you to review all currently programmed Pad Number, heating time and power level for each stage.
1. Open the door.
Display Window
2. f STOP/
3.
[ RESET
+
START
•While pressing the STOP/RESET Pad,
press and hold in the START Pad.
The B^ep Tone setting will show in the
display window,
Example: Stage Indicator 1: Beep tone is ON
Stage. Indicator 2: Beep tone is OFF.
2 seconds later, the Program Lock
setting will show in the display
window.
Program Lock : “P L"
Program Unlock: “P"
•Press the Memory Pad you desired
to read program.
Example: The Memory Pad Number 5.
Display window will display:
Program Memory Pad
Number 5, first stage heating
time and power level currently
programmed on Memory Pad.
I ^
bEEP
D
1
U
1
L
n
u
2 seconds later the same
information will be displayed
for the 2nd and 3rd stage
heating.
•After all settings have been
displayed, the Pad Number and
the Stage Heating Indicator will
appear in the display again.
NOTE: •If you want to go to another program, press the Memory Pad you desire in order to read program,
while the information of Memory Pad is being displayed.
•If you want to show the Multiple Portion Heating (x 2) program, press the DOUBLE QUANTITY
Pad before pressing the Memory Pad.
-15-
Page 16

to
D. To Select Beep Tone Options:
The Beep Tone can be set, ON or OFF.
1. Open the door.
n i
U I
_Z
____
I
2.
PROG
lET
IE
4.
PROG
E. To Read the Cycle Counter:
•Press the PROG Pad. The display will
not change.
•Press the Memory Pad.
•Repeat pressing of 0 Pad. Select “OFF” ^
of Beep Tone.
Stage Indicator 1 = ON
Stage Indicator 2 = OFF
•Press the PROG Pad again. You have
completed programming the beep tone.
•2 seconds later, "0" will appear in the
display
•Close door 2 secobds later, the
display window wili go blank.
n
U
bEEf
bEEP
bE EP
n
u
The oven can display the total number of times the oven has been operated cumuiativeiy. Great for
analyzing usage of the oven and traffic flow at the location.
1. Open the door.
2.
STOP/
RESET
POWER
LEVEL
•While pressing STOP/RESET Pad, press
Power Level Selector Pad. The display
shows the total cumulative number of
times the oven has been used.
Example;
• 9999 means, the oven has been
used 999900 times.
• 0020 means the oven has been
used 2000 times.
• If the total cumulative number
of times less than 100 times, the
display will not be changed.
•2 seconds later, “0” will appear in the
display window.
uuuu
IJJJ
n
u
I I
u
-16-
Page 17

Dis^ni^cs Failure Code Esqsiafialiiif«
This oven monitors its operation and displays a Failure Code in the display window when a problem occurs.
What to do when a failure code appears:
CODE
F01 ’Overcooked food
’Temperature of exhaust air too high.
F33-34
F44
NOTE: Above codes shown in display do not indicate all the possible failures on the unit.
’Defective sensor circuit ’ Unplug the oven and wait more than 10
’When a pad was pressed for more
than 30 seconds
’Defective pad or control circuit
CAUSE WHAT TO DO
’Press STOP/RESET Pad to stop beep.
’Unplug oven and wait at least 30 minutes
before reconnecting.
’Wait for oven to cool down and reset.
’If a flame is present, do not open oven door.
’If normal operation does not resume, call the
service agent with information of failure code.
seconds before reconnecting.
’ If normal operation does not resume, call the
service agent with the information of failure
code.
Care of Your Microwave Oven
1. Unplug the oven before cleaning.
2. Keep the inside of the oven clean. When food
spatters or spilled liquids adhere to oven walls, wipe
with a damp paper towel. Mild detergent may tie
used if the oven gets very dirty. The use of harsh
detergent or abrasives is not recommended. The air
intake splash guard/lighl diffuser can be removed
for cleaning by removing the center plugs from the
two plastic rivets. The top is held by two tabs.
Wash in warm dishwater and replace.
3. The outside oven surfaces should be cleaned with
a damp paper towel. To prevent damage to the
operating parts inside the oven, water should not
be allowed to seep into the ventilation openings.
4. If the Control Panel becomes wet, clean with a soft,
dry cloth. Do not use harsh detergents or abrasives
on Control Panel. When cleaning the Control
Panel, leave oven door open to prevent oven from
accidentally turning on. After cleaning, touch
STOP/RESET Pad to clear display window.
5. If steam accumulates inside or around the outside
6. Clean off the grease and dust on bottom surfaces
7. Cleaning inside the oven outer panel and inside the
of the oven door, wipe with a soft paper towel. This
may occur when the microwave oven is operated
under high humidity conditions and in no way
indicates malfunction of the unit.
often. Use warm detergent solution,
oven base should be performed only by qualified
service personnel after taking precautions to drain
all stored voltage potential. The bottom is
accessible by removing the center section of the
base and the power and sensor control areas are
within the outer wrap around housing. Avoid using
liquids and cleaning solutions in these areas. Use a
dry soft bristle brush or a cloth. Replace all parts—
Do not connect the oven to the electricity supply if
any parts are not reassembled.
17
Page 18

Notes
18-
Page 19

Tedinical Sf^ificafions
Power Source 120V, 60 Hz, single phase
•NE-1064T
Required Power
Output*
Frequency
Outer Dimensions
(H xWxD)
Cavity Dimensions
(H X W X D)
Net Weight
Shipping Weight
Timer
13.4A 1500W
1000 w
2,450 MHz
12”x20'i"x 14Г
(306mm X 510mm x 360mm)
8'A”x13"x13”
(205mm x 330mm x 330mm)
Approx. 34 lbs. (15.4 kg)
Approx. 39 lbs. (17.7 kg)
99 min 99 sec (Digital) x 10 Memory Pads with Double Quantity
(x2) Pad
*IEC 705-88 Test Procedure
Specifications subject to change without notice
Front View
23/4' в7/еГ
Side View
12*
Side view with Open Door
-19-
Page 20

PANASONIC CONSUMER ELECTONIC COMPANY
COMPANY, DIVISION OF MATSUSHITA
ELECTRIC CORPORATION OF AMERICA
One Panasonic Way, 4A-4, Secaucus, NJ 07094
(201) 348-5377
T00036P20AP
Printed in Taiwan
 Loading...