

Page 1
INSTRUCTION MANUAL
c
or
c
r
or
Photoelectric Sensor
Digital Laser Sensor Amplifier
LS-400 Series
Thank you very much for using SUNX products. Please read this Instruction Manual
carefully and thoroughly for the correct and optimum use of this product.
Kindly keep this manual in a convenient place for quick reference.
٨
Never use this product as a sensing device for personnel protection.
In case of using sensing devices for personnel protection, use
٨
products which meet standards, such as OSHA, ANSI or IEC etc.,
for personnel protection applicable in each region or country.
٨
WARNING
1
SPECIFICATIONS
Model
No.
Item LS-401P-C2LS-401P
Power consumption
Output
(Output1, Output2)
Short-circuit protection
External input
(Note 2)
Response time
Sensitivity
setting
Fine sensitivity adjustment function
Timer function
Interference prevention
function
Ambient temperature
Material
Weight
Notes: 1)
2)
3)
2
MOUNTING
How to mount the amplifier
ԘԙFit the rear part of the mounting section of the amplifier
on a 35mm width DIN rail.
Press down the rear part of the mounting section of
the unit on the 35mm width DIN rail and fit the front
part of the mounting section to the DIN rail.
How to remove the amplifier
ԘԙPush the amplifier forward.
Lift up the front part of the amplifier to remove it.
Take care that if the front part is lifted without pushing the
Note:
amplifier forward, the hook on the rear portion of the
mounting section is likely to break.
How to mount the sensor head
ԘԙInsert the sensor head connector into the inlet until it
clicks.
Fit the cover to the connector.
Use of control or adjustment or performance of procedures
other than those specified in this instruction manual may result
in hazardous rediation expose.
NPN Output
PNP Output
Normal operation: 950mW or less (current consumption 40mA or less at 24V supply voltage)
ECO mode: 780mW or less (current consumption 33mA or less at 24V supply voltage)
<NPN output type>
NPN open-collector transistor
Maximum sink current: 100mA (Note 1)
Residual voltage: 1.5V or less
ޓ[at 100mA (Note 1) sink current]
<NPN output type>
NPN non-contact input
Signal condition
Input impedance: 10kǡapprox
Normal mode
Window compa-
rator mode
50mA max. if 5 to 8 units are connected in cascade, and 25mA max. if 9 to 16 units are connected in cascade.
External input is not incorporated with the connector type LS-401(P).
The cable is not supplied as an accessory for connector type LS-401(P). Be sure to use
the optional quick-connection cables given below.
Main cable (4-core): CN-74-C1 (cable length 1m), CN-74-C2 (cable length 2m)
Sub cable (2-core): CN-72-C1 (cable length 1m), CN-72-C2 (cable length 2m)
CN-72-C5 (cable length 5m)
Manual adjustment
Incorporated with variable ON-delay/OFF-delay/ONE-SHOT timer, switchable either effective or ineffective (Timer period: 1ms㨪9999ms approx.)
Incorporated [Up to four sensor heads can be mounted adjacently (However,
in H-SP mode, the interference prevention function cannot be operated)]
-10 to +55 (If 4 to 7 units are mounted closely: -10 to +50, if 8 to 16 units are mounted
closely: -10 to +45) (No dew condensation or icing allowed), Storage: -20 to +70
12 to 24V DCr10% Ripple P-P 10% or lessSupply voltage
<PNP output type>
PNP open-collector transistor
Applied voltage: 30V DC or less
(between output and 0V)
Light-ON or Dark-ON, selectable with jog switchOutput operation
High: +5 to +V DC or open
Low㧦0 to 2V DC (source current 0.5mA)
H-SP: 80Ǵs or less, FAST: 150Ǵs or less, STD: 500Ǵs or less,
U-LG: 4ms or less, selectable with jog switch
Enclosure: Heat-resistant ABS, Transparent cover: Polycarbonate,
Mode key switch: Acrylic, Jog switch: ABS
CN-74-C5 (cable length 5m)
4 digit (green) + 4 digit (red) LED displayDigital display
2-level teaching / Limit teaching / Full-auto teaching /
Teaching (1, 2, 3 level) / Manual adjustment
Teaching (1, 2, 3 level) / Manual adjustmentHysteresis mode
35 to 85% RH, Storage: 35 to 85% RHAmbient humidity
Maximum source current: 100mA (Note 1)
Applied voltage: 30V DC or less
(between output and +V)
Residual voltage: 1.5V or less
ޓ[at 100mA (Note 1) source current]
Incorporated
<PNP
PNP non-contact input
Signal condition
High: +4 to +V DC (sink current 3mA or less)
Low㧦0 to 0.6V DC, or open
Input impedance: 10kǡ
Five-level settingsDifferential mode
Incorporated
CableType Connector type Cable type
LS-401-C2LS-401
output type>
65g approx.15g approx.
ԙ
35mm width DIN rail
Ԙ
ԙ
ԙ
Ԙ
Cover
approx
Ԙ
Sensor head
connector
3
CAUTIONS
٨
Make sure that the power supply is off while wiring.
٨
Verify that the supply voltage variation is within the rating.
٨
Take care that if a voltage exceeding the rated range is applied, or if an AC power
supply is directly connected, the sensor may get burnt or damaged.
٨
In case noise generating equipment (switching regulator, inverter motor, etc.) is used in the vicinity
of this product, connect the frame ground (F.G.) terminal of the equipment to an actual ground.
٨
The ultra long distance (U-LG) mode is more likely to be affected by extraneous noise since the
sensitivity of that is higher than the other modes. Make sure to check the environment before use.
٨
If power is supplied from a commercial switching regulator, ensure that the frame
ground (F.G.) terminal of the power supply is connected to an actual ground.
٨
Do not use during the initial transient time (0.5 sec.) after the power supply is switched on.
٨
Take care that short-circuit of the load or wrong wiring may burn or damage the sensor.
٨
Do not run the wires together with high-voltage lines or power lines or put them in
the same raceway. This can cause malfunction due to induction.
٨
Make sure to use the optional quick-connection cable for the connector type LS-401(P).
٨
Extension up to total 100m is possible with 0.3mm2, or more, cable. However, in
order to reduce noise, make the wiring as short as possible.
٨
This sensor is suitable for indoor use only.
٨
Avoid dust, dirt, and steam.
٨
Take care that the product does not come in direct contact with water, oil, grease,
or organic solvents, such as, thinner, etc.
٨
This sensor cannot be used in an environment containing inflammable or explosive gases.
٨
Never disassemble or modify the sensor.
4
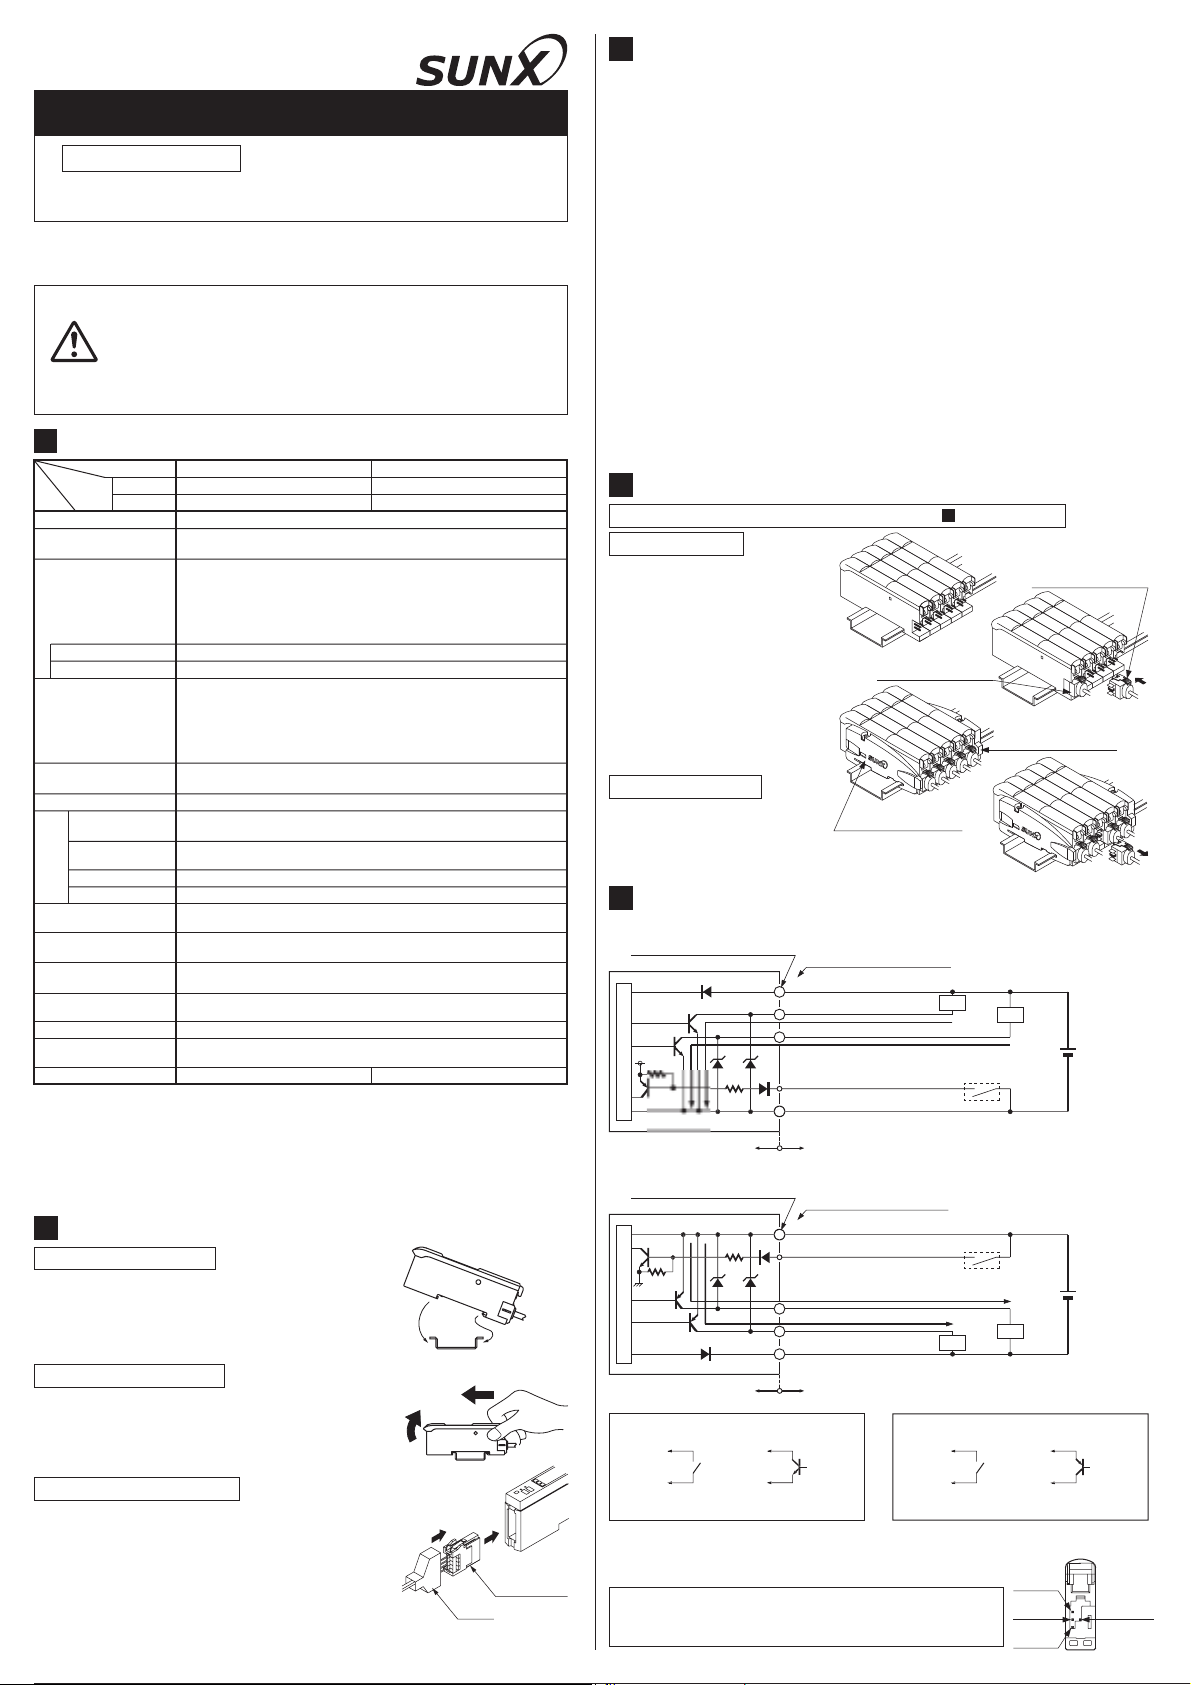
CASCADING CONNECTOR TYPE LS-401 (P)
For mounting and removing the amplifier, refer to ' MOUNTING'.
2
Cascading method
Ԙ
Mount each amplifier one by
one to 35mm width DIN rail
Sub cable
(CN-72-Cغ) (optional)
and set the amplifiers to
contact each other.
ԙ
Insert the connector of quickconnection cable into the
connector of the amplifier.
Ԛ
Mount the optional end plates
Main cable
(CN-74-Cغ) (optional)
(MS-DIN-E) at both the ends
to hold the amplifiers between
their flat sides.
ԛ
Tighten the screws to fix the
End plate
(MS-DIN-E) (optional)
end plates (MS-DIN-E).
Dismantling method
ԘԙPressing the projection at the top
of the quick-connection cable,
pull out the connector.
Remove the amplifier.
5
I/O CIRCUIT DIAGRAM
End plate
(MS-DIN-E) (optional)
٨ NPN output type
Terminal No. of connector type
D1
Tr1
Tr2
Z
5V
Sensor circuit
D2
Cable type / Color code of
quick-connection cable
(Brown) + V (Note 1)
1
(Black) Output 1
2
(White) Output 2
4
Z
D1
(Pink) External input (Note 2)
(Blue) 0 V (Note 1)
3
Users' circuitInternal circuit
Load
100mA max. (Note 3)
100mA max.Note3
*1
Load
㧗
12㨪24V DC
r10%
㧙
٨ PNP output type
Terminal No. of connector type
0V
Tr3
Sensor circuit
*1
Non-voltage contact or NPN transistor open
ollector
High㧦5V to +V, or open
Low㧦0 to 2V
Notes: 1)
The quick-connection sub cable does not have +V (brown) and 0V
(blue). The power is supplied from the connector of the main cable.
2)
External input is not incorporated with the connector type LS-401(P).
50mA max. if 5 to 8 units are connected in cascade, and 25mA max. if 9 to 16 units are connected in cascade.
3)
Symbols㨯㨯㨯 D1, D2:Reverse supply polarity protection diode
D3
Tr4
D2
D1, ZD2, ZD3, ZD4:Surge absorption zener diode
Z
r1, Tr2:NPN output transistor
T
r3, Tr4:PNP output transistor
T
Cable type / Color code of
quick-connection cable
(Brown) + V (Note 1)
1
(Pink) External input (Note 2)
D4
2
(Black) Output 1
4
(White) Output 2
3
(Blue) 0V (Note 1)
Users' circuitInternal circuit
*2
100mA max. (Note 3)
100mA max. (Note 3)
Load
*2
Non-voltage contact or PNP transistor open
ollecto
High㧦4V to +V
Low㧦0 to 0.6V, or open
㧗
㧙
Load
Layout of terminals of
connector type LS-401 (P)
Ԙ㧗V
ԙ
Output 1
Ԛ0V
12㨪24V DC
r10%
ԛ
Output 2
Page 2
6
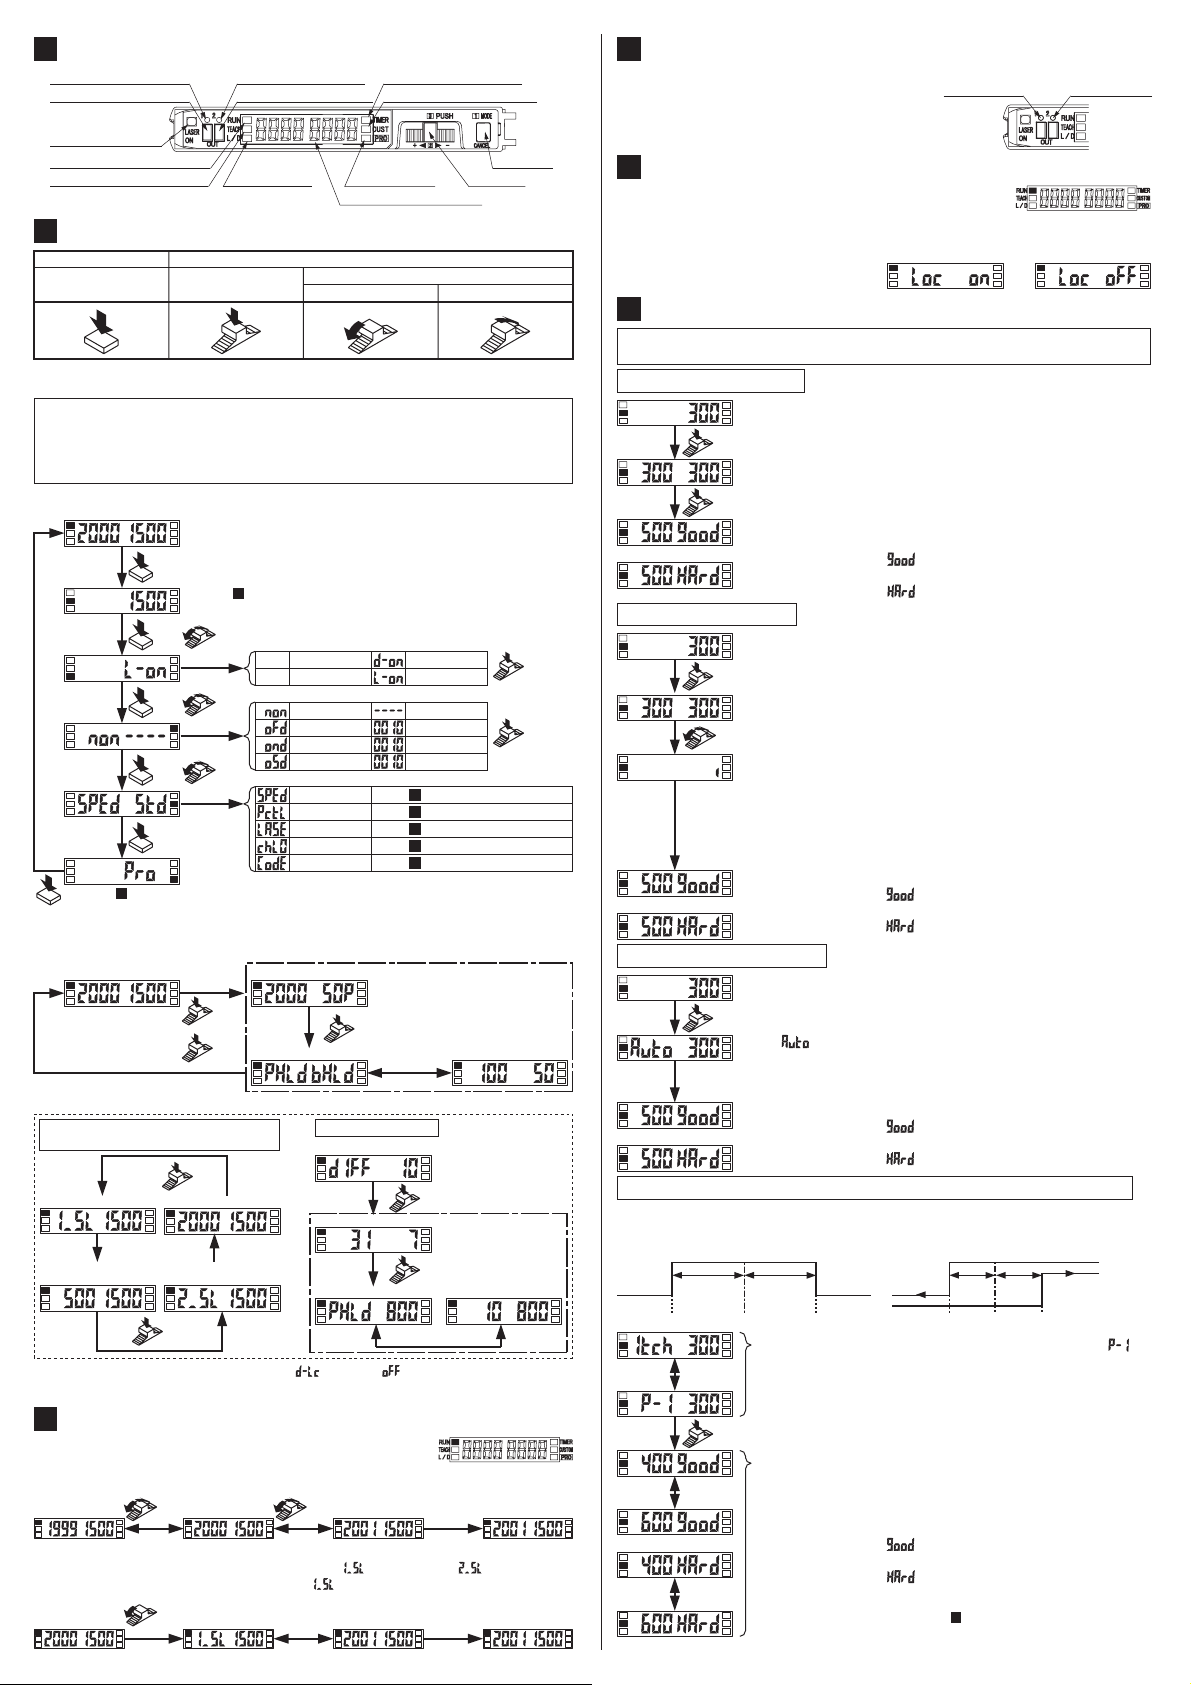
PART DESCRIPTION
Select 1 indicator (Yellow)
Output 1 operation indicator (Orange)
Laser emission indicator
(Green)
MODE indicator / RUN (Green)
MODE indicator / TEACH (Yellow)
7
OPERATION PROCEDURE
MODE key
Press Press
1
When Jog switch is pressed, the setting is confirmed.
2
Cancellation is possible by pressing MODE key during setting.
٨
Be sure to set each item after selecting the output 1 or the output 2.
٨
The items that can be set in the output 1 and the output 2 respectively are only ԘThreshold value,
ԙOutput operation, ԚTimer operation and Timer period, and ԛDetection mode. The items other than
Select 2 indicator (Yellow)
Output 2 operation indicator (Orange)
MODE indicator /
L/D ON (Yellow)
MODE indicator /
PRO (Yellow)
Digital display (Green, Red)
Jog switch
'+' side '-' side
MODE indicator / TIMER (Yellow)
MODE indicator / CUSTOM (Yellow)
MODE key
Jog switch
Turn
those are common. (However, in case of setting with the direct code, a combination of the output1/2 can
be set only for output operation. The items other than output operation are valid only for the output 1.)
٨
Procedures for switching the NAVI mode
RUN mode
TEACH
mode
L/D
mode
TIMER
mode
CUSTOM
mode
PRO
mode
12
Refer to ' PRO MODE'.
Press
Refer to '٨Procedures for switching the display in RUN mode'.
Press
Press
Press
Press
Press
11
Refer to ' TEACHING MODE'.
Turn
Turn
Turn
No display
No display
No timer
OFF delay
ON delay
ONE-SHOT delay
Response time selection
M.G.S.
Emission halt
Data bank loading
Code setting
Dark ON
Light ON
㧙
Timer period
Timer period
Timer period
12
Refer to ' PRO MODE / PRO1 mode setting'.
12
Refer to ' PRO MODE / PRO1 mode setting'.
12
Refer to ' PRO MODE / PRO1 mode setting'.
12
Refer to ' PRO MODE / PRO3 mode setting'.
12
Refer to ' PRO MODE / PRO5 mode setting'.
㧦Confirmed
㧦Confirmed
٨ Procedures for switching the display in RUN mode
Threshold value
Displayed only in Window comparator mode or Hysteresis mode and Differential mode.
*
In Window comparator mode or Hysteresis
mode
Automatic
Threshold
value 1
Note: Can be displayed if the display switching ' ޓ' is set to ' ' to enable the display switching
Incident light
intensity
Incident light
intensity
Threshold value 2
Automatic
Incident light
intensity
Press
in PRO2 of PRO mode.
Press
Press
Press
Threshold value
Peak value Bottom value
Incident light
intensity
Incident light
intensity
Incident light intensity
Press
Blinking
by turns
In Differential mode
Differential value of incident light intensity
Threshold value
Incident light intensity
Incident light intensity
Blinking by turns
Incident light intensity
Press
Press
Hold value
(Note)
(Note)
Incident light
intensity
9
OUTPUT SWITCHING
٨
Press the MODE key for more than 2 seconds when in
NAVI mode. If Output 1 has been selected, the Select
Select 1 indicator
(Yellow)
Select 2 indicator
(Yellow)
1 indicator (yellow) lights up. If the output 2 is being
selected, the Select 2 indicator (yellow) lights up.
10
KEYLOCK FUNCTION
٨ If the jog switch and MODE key are press down
simultaneously for more than 3 seconds when the MODE
indicator / RUN (green) is on, the key operation is locked.
Press down for more than 3 seconds
again to unlock the key.
11
TEACHING MODE
<Key locked> <Key unlocked>
When teaching in Window comparator mode or Hysteresis mode, a setting has to be made in PRO6
beforehand. In case of 1-level teaching, a shift value (the initial value is 100 digit or 15%) has to be set as well.
In case of 2-level teaching
Ԙ Press the MODE key once to select 'TEACH mode'. Press
Press
the jog switch in the object present condition.
ԙ Press the jog switch in the object absent condition. The
Press
MODE indicator / TEACH (green) blinks.
Ԛ A threshold is set between Ԙandԙ.
or
In case stable sensing is possible:
' ' is displayed in the red digital display.
In case stable sensing is not possible:
' ' is displayed in the red digital display.
In case of Limit-teaching
Ԙ Press the MODE key once to select 'TEACH mode'. Press
Press
the jog switch in the object absent condition.
ԙ The MODE indicator / TEACH (green) blinks.
Turn
Ԛ Turn the jog switch to '+' or '-' side.
Turn to '+' side: The threshold level is shifted to a value
approx. 15% higher (low sensitivity) than that set at Ԙ. (Note 1)
Automatic
Turn to '-' side: The threshold level is shifted to a value approx.
15% lower (high sensitivity) than that set at Ԙ. (Note 1)
Note:
The approx. 15% amount of shift is an initial value. The amount of Shift can be
changed in a range of approx. 5% to 200% (increment of 1%) in PRO mode.
ԛ In case stable sensing is possible:
or
In case stable sensing is not possible:
' ' is displayed in the red digital display.
' ' is displayed in the red digital display.
In case of Full-auto teaching
Ԙ Press the MODE key once to select 'TEACH mode'.
Press
Run the workpiece on the line and hold down the jog switch.
ԙ ' ' is displayed on the green digital display and when the
workpiece passed through, release the jog switch.
Automatic
The MODE indicator / TEACH (green) blinks.
Ԛ In case stable sensing is possible:
or
In case stable sensing is not possible:
' ' is displayed in the red digital display.
' ' is displayed in the red digital display.
In case of 1-level teaching in Window comparator mode or Hysteresis mode
٨ This is the method to set the shift value to the desired value and set the threshold
range by using the single-point teaching.
<Window Comparator mode>
Set to desired value
1_SL P-1 2_SL 1_SL 2_SLP-1
Set to desired value
<Hysteresis mode>
Set to de-
Set to de-
sired value
sired value
Ԙ Press the MODE key once to select 'TEACH mode'. ' ' is
Blinking
by turns
displayed on the green digital display.
Press the jog switch in the object present condition.
8
THRESHOLD VALUE FINE ADJUSTMENT FUNCTION
٨
The threshold can be fine-adjusted when the MODE indicator
RUN (green) lights up.
/
Turn the jog switch to either '+' (left) or '-' (right) to increase / decrease the threshold value.
Turn Turn
When you turn the jog switch to '+' or '-' in Window comparator mode or Hysteresis mode, the
threshold will increase or decrease after the output 1 ' ' or the output 2 ' ' is displayed.
If you turn the jog switch to '+' when the output 1 ' ' is displayed, the following will be displayed.
Turn to '+'
Change
Automatic
AutomaticAutomatic
Confirmed
Confirmed
Or
Blinking
by turns
Blinking
by turns
Press
The threshold value (1_SL) that has been calculated by
ԙ
subtracting the shift value (100) from the incident light intensity
and the threshold value (2_SL) that has been calculated by
adding the shift value (100) to the incident light intensity are
alternatively blinks on the green digital display. (Note 1) (Note 2)
In case stable sensing is possible:
In case stable sensing is not possible:
' ' is displayed in the red digital display.
' ' is displayed in the red digital display.
Notes 1):
The shift value of 100 digit is an initial value. The shift value can be
set in PRO mode. Furthermore, 'digit' or 'percent' can be selected.
For setting method, refer to ' PRO MODE /PRO6 mode setting'.
2):
If the value after setting exceeds the maximum (minimum), the
maximum (minimum) sensitivity will be set.
12
Page 3

In case of 2-level teaching in Window Comparator mode or Hysteresis mode
٨ This method is to set the threshold range by using the 2-point teaching (P-1, P-2).
<Window comparator mode><Hysteresis mode>
1_SL
P-1
2_SL
P-2
1_SL
P-1
2_SL
P-2
Ԙ Press the MODE key once to select 'TEACH mode'. ' ޓޓ'
Blinking
by turns
Press
is displayed on the green digital display.
Press the jog switch in the object present condition for the
first point.
ԙ ' ' blinks on the green digital display.
Press the jog switch in the object present condition for the
second point.
Ԛ
The value of the first point (1_SL) and the second point (2_SL)
are alternatively blink on the green digital display. (Note)
In case stable sensing is possible:
' ' is displayed in the red digital display.
Blinking
by turns
Press
In case stable sensing is not possible:
Or
Blinking
by turns
' ' is displayed in the red digital display.
Note : If the value after setting exceeds the maximum (minimum), the
maximum (minimum) sensitivity will be set.
In case of 3-level teaching in Window comparator mode or Hysteresis mode
٨
This is the method to set the threshold range by setting the threshold (1_SL) of the
mid-point between 'A' and 'B' and the threshold (2_SL) of the mid-point between
'B' and 'C', using the 3-point teaching (P-1, P-2, P-3).
After teaching, P-1, P-2 and P-3 will be automatically relocated in ascending order:
٨
i.e. the lowest value is placed in 'A', the second lowest in 'B' and the highest in 'C'.
<Window comparator mode>
1_SL B CA 2_SL
<Hysteresis mode>
1_SL 2_SL
B CA
Ԙ Press the MODE key once to select 'TEACH mode'. ' ' is
Blinking
by turns
Press
displayed on the green digital display.
Press the jog switch in the object present condition.
ԙ ' ' blinks on the green digital display.
Or
Blinking
by turns
Blinking
by turns
Press
Press
Press the jog switch
second point.
Ԛ ' ' blinks on the green digital display.
Press the jog switch
third point.
ԛ
The threshold (1_SL) of the mid-point between 'A' and 'B'
and the threshold (2_SL) of the mid-point between 'B' and 'C'
blinks alternatively on the green digital display (Note)
n case stable sensing is possible:
I
' ' is displeyed in the red digital display.
In case stable sensing is not possible:
' ' is displayed in the red digital display.
Note: If the value after setting exceeds the maximum (minimum), the
maximum (minimum) sensitivity will be set.
in the object present condition for the
in the object present condition for the
Span adjustment in Differential mode
٨
If Differential mode is selected when in PRO mode, the maximum sensitivity will be set.
The span adjustment in Differential mode can be set as follows.
٨
The threshold can be set by using the threshold value fine adjustment function.
٨
For details, refer to ' THRESHOLD VALUE FINE ADJUSTMENT FUNCTION'.
Short span Long span
Incident light
intensity
8
Incident light
Tur n Tur n
intensity
Incident light
intensity
Incident light
intensity
Tur n
Incident light
Tur nTur n
intensity
12
PRO MODE
٨
When MODE indicator / PRO (yellow) lights up, PRO mode
can be set.
PRO1 mode setting
Response
Press
time
switching
function
Tur n
Hysteresis
function
Tur n
(Shift function)
Tur n
Tur n
(M.G.S. function)
Tur n
Emission
halt function
Notes: 1)
Display for laser amount can show the digit of max. 9,999 digits if ' ' for standard or ' ' for ultra long
distance is selected in the response time switching function ' ', but will display the digit of max. 4,000 digits
if ' ' for ultra high speed or ' ' for high speed is selected.
2)
This can be selected only if ' ' for ultra long distance (response time of 4ms or less) is selected in the
response time switching function ' '.
PRO2 mode setting
Tur n
PRO3 mode setting
Tur n
Display
Press
switching
function
Tur n
Display turning
function
Tur n
ECO mode
function
Tur n
Time period
holding function
Tur n
Present value
storage function
Tur n
Stored value
comparison function
Data bank
Press Press Press
loading
function
Tur n
Data bank saving function
Press
(Note1)
Tur n
Press
Tur n
Press
Tur n
Press
Press
Tur n
Press
Tur n
Press
Tur n
Press
Tur n
Press
Tur n
Press
Press
(1 unit only)
Tur n
Press
(1 unit only)
Tur n
(Ultra high speed) Response time: 80Ǵs or less
(High speed) Response time: 150Ǵs or less
(Standard) Response time: 500Ǵs or less
(Ultra long distance) Response time: 4 ms or less
Hysteresis: Small
Hysteresis: Standard
Hysteresis: Large
Shift amount: 15% approx. (default)
The shift amount can be set in a range of
about 5 to 200% (increment of 1%).
Turn
Sensitivity adjustment: High (Note 2)
Sensitivity adjustment: Rather high
Sensitivity adjustment: Rather low
Sensitivity adjustment: Low
Laser emission: ON
Laser emission: OFF
Digital display switching on
Digital display switching off
Digital display turning: OFF
Digital display turning: ON
ECO mode: OFF
ECO mode: ON
Hold: OFF
Hold: ON
Stored
value
Press
Tur n
Press
(All)
Tur n
Press
Tur n
Press
(All)
Tur n
Incident light intensity
Press
<Example>
For 1CH setting
Press
<Example>
For 1CH setting
Press
<Example>
For 1CH setting
Press
<Example>
For 1CH setting
Page 4

PRO4 mode setting
Press
(Copy function)
Tur n
Transmission change
To permit / Not to
permit function
Tur n
External input switch
setting function
Tur n
Tur n
Backup
function
Note: This indication is not shown on the connector type LS-401(P).
(Note)
(Note)
Press
Setting copy: OK
Press
Transmission enable
Transmission disable
Tur n
Press
Emission halt
Full-auto teaching
Limit teaching / plus side
Limit teaching / minus side
Tur n
Press
Backup: OFF
Backup: ON
Tur n
PRO5 mode setting
Press
Code setting
function
Tur n
(0-ADJ function)
Tur n
13
Reset
function
Tur n
CUSTOM
mode display
function
Tur n
Refer to ' LIST OF CODE SETTING' when using the code setting function.
Note:
Press
Press
Press
Press
Tur n
Tur n
(Note)
Turn: Code selecting
Press down: Confirmed
0-ADJ: OFF
0-ADJ: Set
Reset: OK
Response time
M.G.S.
Emission halt
Data bank loading
Code setting (Note)
PRO6 mode setting
٨ Output 1
Press
(Normal mode)
(Rising differential mode)
Tur n
(Trailing differential mode)
Tur n
Window comparator mode
Tur n
Tur n
Press
Tur n
Press
Tur n
Press
Press: Confirmed
Change by
increment
of 1 digit
Change by
increment
of 1 %
٨ Output 2
13
LIST OF CODE SETTING
Press
(Normal mode)
Turn
Turn
Green digital display Red digital display
٨ Green digital display
First digit Second digit Third digit Fourth digit
Direct
L/D switching
code
(Output 1, Output 2)
L-ON㨯L-ON
L-ON㨯D-ON
D-ON㨯L-ON
D-ON㨯D-ON
㧙
㧙
㧙
㧙
㧙
㧙
Direct
Timer operation Response time
code
Off
On delay
Off delay
One-shot delay
㧙
㧙
㧙
㧙
Direct
code
STD
H-SP
FAST
U-LG
㧙
㧙
㧙
㧙
㧙㧙
㧙㧙
Direct
Sensitivity setting
code
^^^^^^
^^^^
^^
^^^^^^^^
㧙
㧙
㧙
㧙
㧙
㧙
٨ Red digital display
First digit Second digit (Note) Third digit Fourth digit
Direct
Hyster-
code
esis
H-02
H-02
H-03
H-03
H-01
H-01
㧙
㧙
㧙
㧙
: The highlighted line indicates the default code (factory setting).
Connector type LS-401 (P) shows only ' '.
Note:
14
ERROR DISPLAY
Copy
lock
OFF
ON
OFF
ON
OFF
ON
㧙
㧙
㧙
㧙
Direct
code
External
Backup
input
Laser emis-
sion halt
Laser emis-
sion halt
Auto teaching
Auto teaching
Limit +
Limit +
㧙
Limit
Limit
㧙
ON
OFF
ON
OFF
ON
OFF
ON
OFF
Direct
code
Response time
M.G.S.
Data bank loading
Emission halt
D code
Direct
Detection modeCustom
code
Normal 2 output
Window comparator
Rising differential
Trailing differential
Hysteresis
㧙
㧙
㧙
㧙㧙㧙
㧙㧙㧙
Output 2 OFF
㧙
㧙
㧙
㧙
٨ Take the following actions in case of errors.
Description of error
Overcurrent has been applied due to
short-circuited load.
Disconnection error of sensor head.
Transmission error during connection.
15
OPTICAL COMMUNICATION
٨
When the collective data bank load / save function or copy function is used via optical communication, loading / saving or copy of the setting can be carried out only to the amplifiers (sub
units) connected on the right side of the amplifier (main unit), as shown in the figure below.
Turn off the power supply and check the
load.
Check the connection of sensor head.
Verify that there is no loose or clearance
between amplifiers.
ActionDisplay
However, if the amplifier (sub unit) is being connected (the indicator blinks), PRO mode is being set or the transmission enable / disable function is set to 'disable', loading / saving or copy
is not carried out. Furthermore, the sensing operation stops during optical communication.
Communication direction
Tur n
Hysteresis
mode
Press
Tur n
Press
Tur n
Press
Press: Confirmed
Main unit
Sub unit
SUNX Limited
Head Office
2431-1 Ushiyama-cho, Kasugai-shi, Aichi, 486-0901, Japan
Phone: +81-(0)568-33-7211 FAX: +81-(0)568-33-2631
Overseas Sales Dept.
Phone: +81-(0)568-33-7861 FAX: +81-(0)568-33-8591
http://www.sunx.co.jp/
PRINTED IN JAPAN
 Loading...