

Panasonic DVD-RV32EG User Manual
DVD/CD PLAYER
Operating Instructions
XY
DVD-RV32
Panasonic
Panasonic
DVD/ CD PLAYER
ONETOUCH
CINEMAMEMORY
DVD-RV32
BASS
DIALOGUE
ADVANCED
PLUS
CINEMA
ENHANCER
SURROUND
A
D
B
C
/I
Contents Page
192KHz/ 24bit AUDIO D/A CONVERTER
CHAP
TITLE
DVD
SLEEP
BASS
OPEN/CLOSE
A-B
QUICK
REPEAT
REPEAT
REPLAY
RANDOM
x200
Hi
-SPEEDSCAN
Warning and Precautions 2
Functions of the DVD-player 3
Function of the remote control
Connecting to TV 4
EASY SETUP 5
Basic play 6
Child lock password 7
Programme play 8
Repeat and resume functions 9
# $ % &
-functions
10
Home Theatre 11
Connecting an analogue amplifier
- a digital amplifier
- an amplifier with built-in decoder
- an active subwoofer
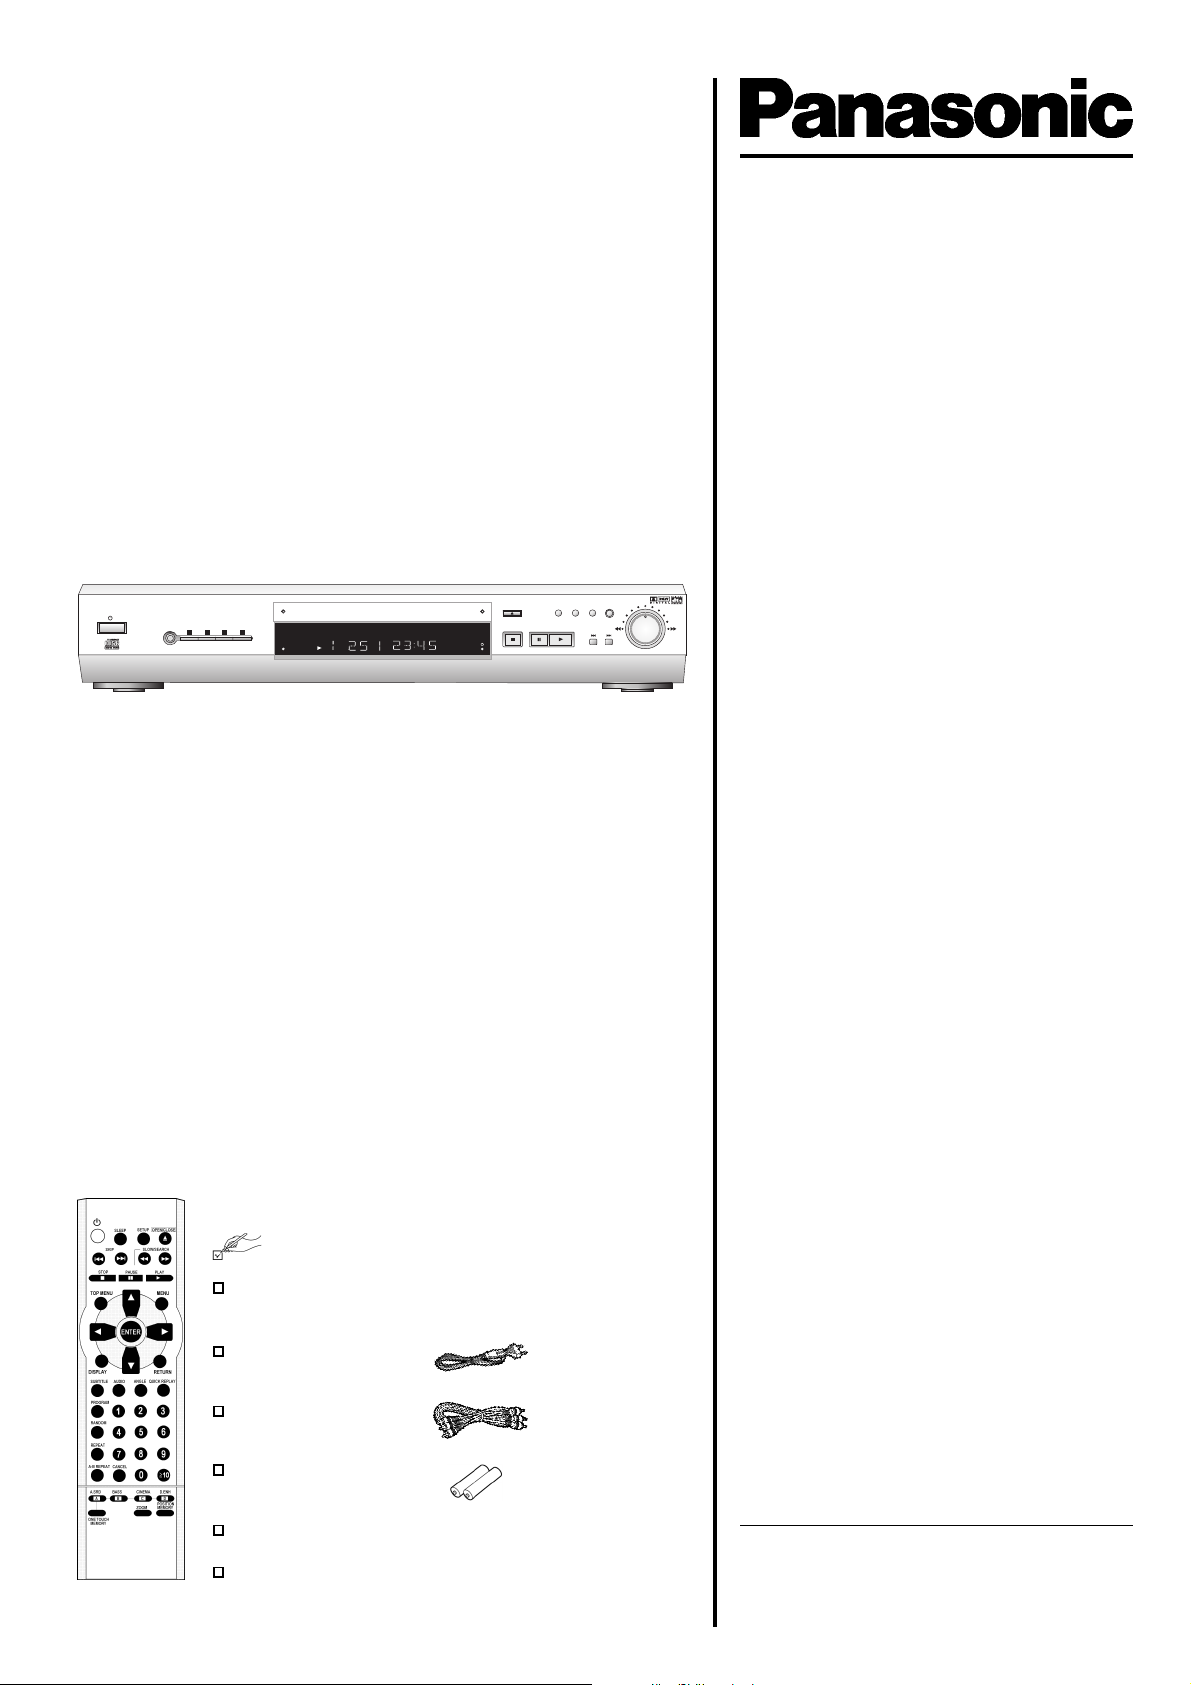
Included accessories
Remote Control
N2QAJB000050
AC Mains lead
RJA0043-1C
Audio/video cable
K2KA6CA00001
Remote Control Batteries
AA, UM3 or R6
Operating Instructions
Guarantee Card
Menus of the DVD-player 12
Using On-screen messages 13
Information about the player 14
Glossary
Troubleshooting 15
Language codes 16
Index
Specifications
Please read these instructions thoroughly before use.
Please keep this manual for future reference.
RQTD0003-2B
Warning and Precautions
Do not place the unit on amplifiers or
equipment that may become hot.
The heat can damage the unit.
Inside of product
WARNING!
TO REDUCE THE RISK OF FIRE, ELECTRIC SHOCK OR PRODUCT DAMAGE, DO NOT EXPOSE
THIS APPARATUS TO RAIN, MOISTURE, DRIPPING OR SPLASHING AND THAT NO OBJECTS
FILLED WITH LIQUIDS, SUCH AS VASES, SHALL BE PLACED ON THE APPARATUS.
CAUTION!
DO NOT INSTALL, OR PLACE THIS UNIT, IN A BOOKCASE, BUILT-IN CABINET OR IN
ANOTHER CONFINED SPACE. ENSURE THE UNIT IS WELL VENTILATED. TO PREVENT
RISK OF ELECTRIC SHOCK OR FIRE HAZARD DUE TO OVERHEATING, ENSURE THAT
CURTAINS AND ANY OTHER MATERIALS DO NOT OBSTRUCT THE VENTILATION VENTS.
DO NOT OBSTRUCT THE UNIT’S VENTILATION OPENINGS WITH NEWSPAPERS,
TABLECLOTHS, CURTAINS, AND SIMILAR ITEMS.
DO NOT PLACE SOURCES OF NAKED FLAMES, SUCH AS LIGHTED CANDLES, ON THE UNIT.
DISPOSE OF BATTERIES IN AN ENVIRONMENTALLY FRIENDLY MANNER.
THIS UNIT IS INTENDED FOR USE IN MODERATE CLIMATES.
Voltage
Do not use high voltage power sources. This can overload the unit and cause a fire. Do not
use a DC power sources. Check the source carefully when setting the unit up on a ship or
other place where DC is used.
AC mains lead protection
Ensure the AC mains lead is connected correctly and not damaged. Poor connection and
lead damage can cause fire or electric shock.
CLASS 1
LASER PRODUCT
Back of product, see page 4
Service
Do not attempt to repair this unit by yourself. If sound is interrupted, indicators fail to light,
smoke appears, or any other problem that is not covered in these instructions occurs,
disconnect the AC mains lead and contact your dealer or an authorized service center.
CAUTION!
THIS PRODUCT UTILIZES A LASER.
USE OF CONTROLS OR ADJUSTMENTS OR PERFORMANCE OF PROCEDURES OTHER
THAN THOSE SPECIFIED HEREIN MAY RESULT IN HAZARDOUS RADIATION EXPOSURE.
DO NOT OPEN COVERS AND DO NOT REPAIR YOURSELF. REFER SERVICING TO
QUALIFIED PERSONNEL.
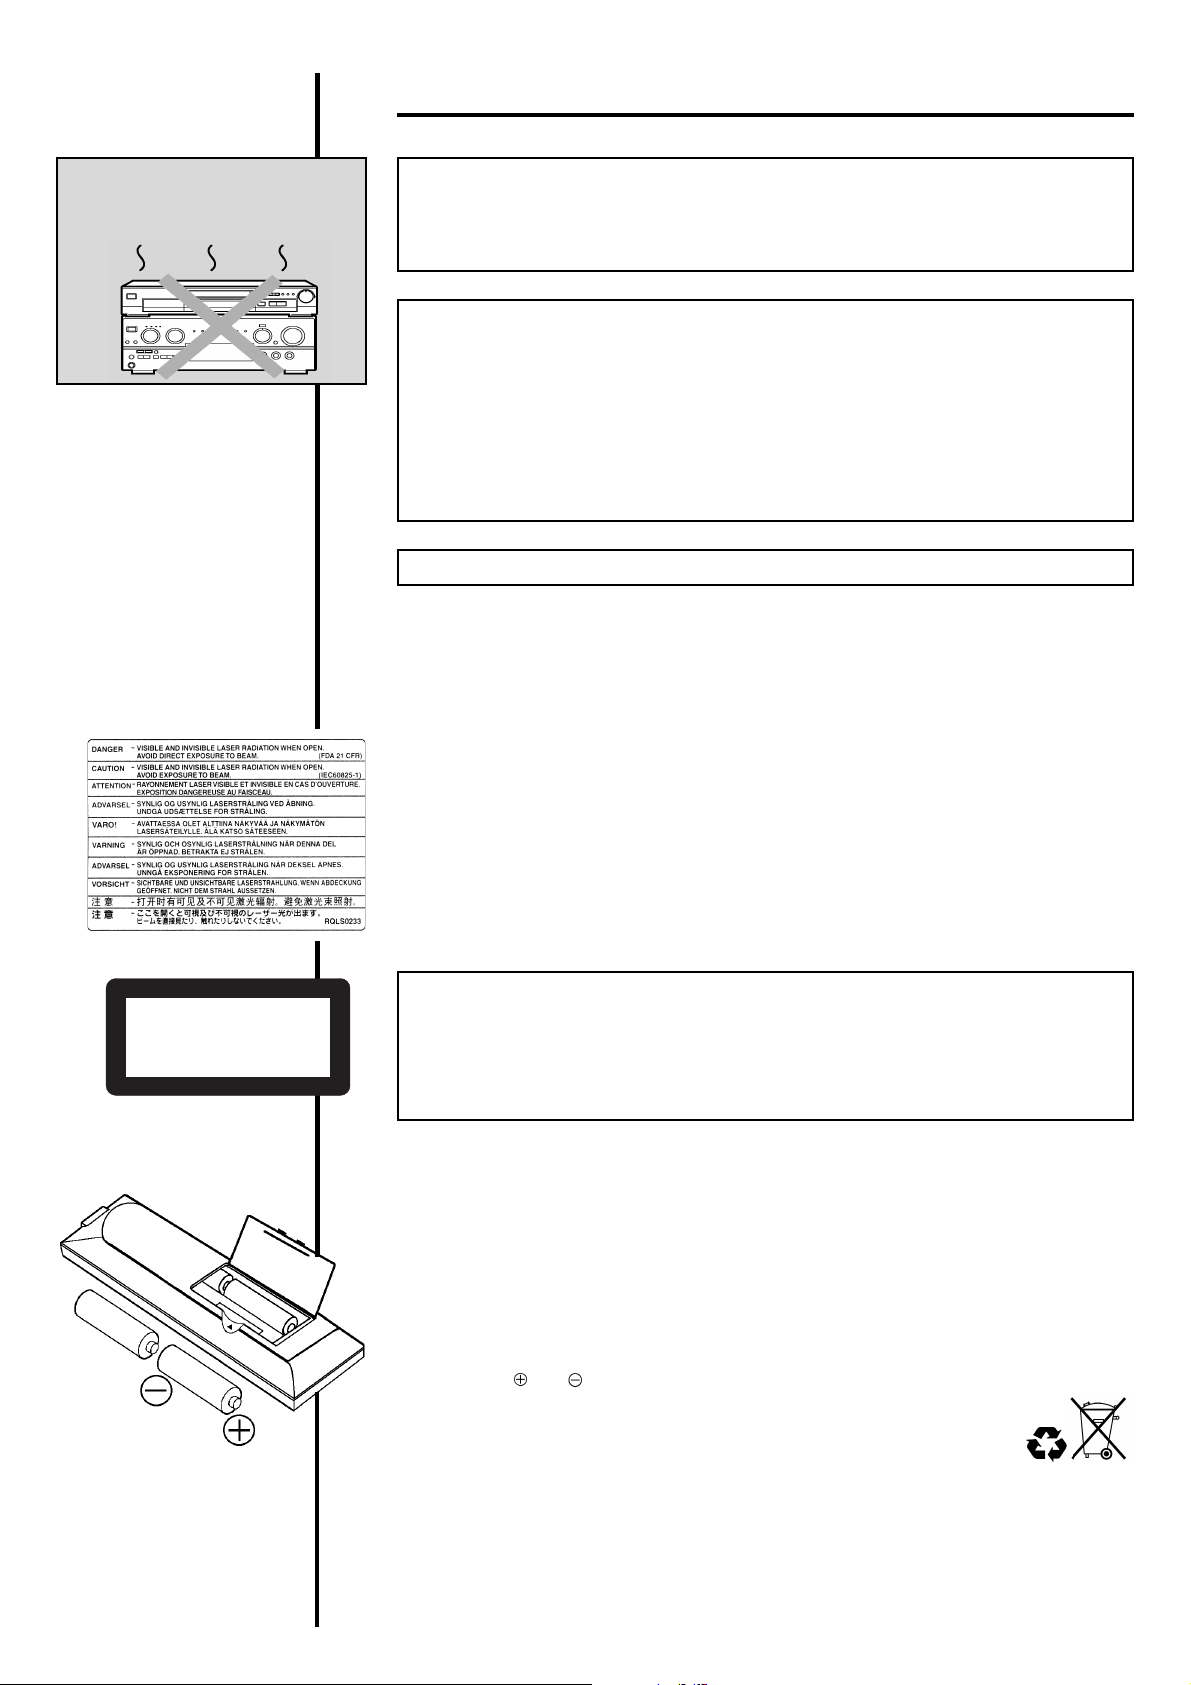
Instructions of inserting Remote Control Batteries:
The lifetime of the batteries is about 1 year, depending on the frequency of use.
Do not use one old and one new battery, or different types of batteries together
Only insert batteries which contain no toxic materials (such as lead, cadmium, mercury).
Do not use rechargeable type batteries.
If the remote control will not be used for a long time, remove the batteries.
Do not heat or short-circuit the batteries.
Remove spent batteries immediately and replace them with type AA, UM3 or R6.
Observe the and polarities when replacing the batteries.
Batteries, packaging and old equipment should not be disposed of as
domestic waste, but following local regulations.
2
RQTD0003-2B
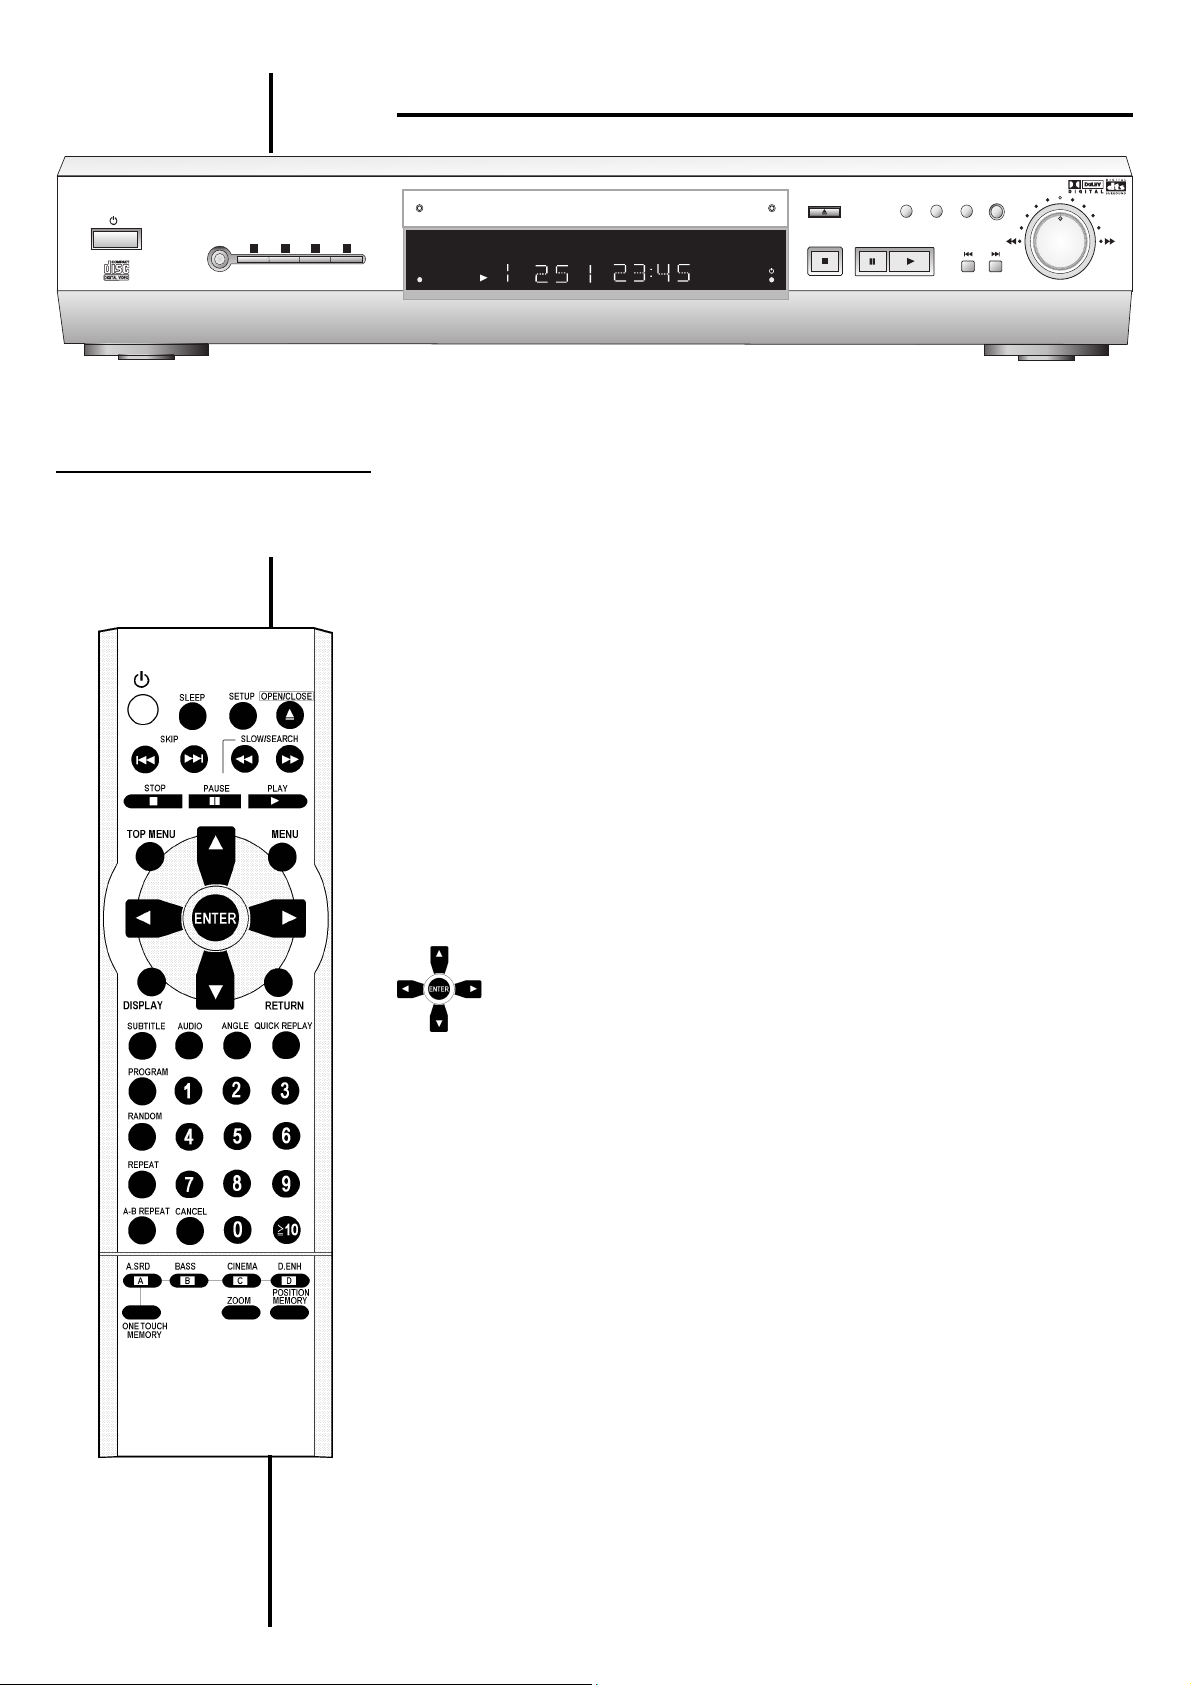
Functions of the DVD-player
Panasonic
Panasonic
/I
DVD / CD PLAYER
ADVANCED
ONETOUCH
SURROUND
CINEMAMEMORY
DVD-RV32
BASS
DIALOGUE
PLUS
CINEMA
A
ENHANCER
B
D
C
Standby indicator *
When the unit is connected to the AC mains
supply, this indicator lights up in standby mode
and goes out when the unit is turned on.
Standby/on switch
Press to switch the unit from on to standby
mode or vice versa. In standby mode, the unit
is still consuming a small amount of power.
**
*/I
**
192KHz / 24bit AUDIO D/A CONVERTER
OPEN/CLOSE
RANDOM
A-B
REPEAT
QUICK
REPEAT
REPLAY
CHAP
TITLE
SLEEP
DVD
All basic functions can be controlled on the DVD-player and with the remote control. Only
symbols of the remote control are used in this instruction book. You can change the initial
settings with the remote control. These settings are retained in memory until they are
changed, even if the unit is turned off.
Functions of the remote control
**
*
**
SLEEP Player switches off if you set a time
SETUP Call up the menus of the DVD-player
OPEN/CLOSE
SKIP
BB
B
BB
SLOW/SEARCH
STOP
PAUSE
PLAY
TOP MENU Call up the top menu of a DVD or MP3 menu
MENU Call up the menu of a DVD or MP3 menu
FF
F
FF
CC
C
CC
c
dd
d
dd
ee
e
ee
@@
@ A
@@
BASS
Switch the player on and off to standby mode
Open and close the disc tray
Skipping chapters or tracks
Slow-motion play, search fast forward and rewind
Stop play
Pause play
Start play
x 200
Hi
-SPEED SCAN
RQTD0003-2B
Cursor buttons
ENTER, to confirm a selection in a menu
DISPLAY Call up OSD-screens
RETURN Return from menu to play
SUBTITLE Language of subtitles
AUDIO Change audio
ANGLE Angles during play
QUICK REPLAY Replay of the last 7 sec. of a movie
PROGRAM Program play
RANDOM Random play
REPEAT Repeat play
A-B REPEAT Repeat marked sections
CANCEL Clear settings
0...9
(
(ADVANCED SURROUND)
A.SRD For a surround-like effect
BASS If you connected a subwoofer
CINEMA Enhances detail in dark scenes
D.ENH Increase the volume of the dialogue sound
#
f
$
f
%
f
&
(DIALOGUE ENHANCER)
f
Numbered buttons, to
enter a 2 digit number
ONE TOUCH MEMORY Reselect the settings in A.SRD, BASS, CINEMA,
ZOOM To zoom the picture
POSITION MEMORY Restart from the memorized position
(
D.ENH
3
Connecting to TV
Before connection
Disconnect the AC power supply cord.
Refer to the television’s operating instructions.
The following illustrations show the different ways to connect a DVD-player using a
scart cable or an S-video cable or an Audio/video cable to TV.
Note for all shown connections
Do not connect the unit through your video cassette recorder. Connect directly to the
TV, otherwise the picture may not be displayed correctly due to the copy guard.
Connecting to TV with 21-pin scart terminal
Back of the unit
AV input on TV
S-VIDEO input terminal
onTV
White/L
Red/R
AUDIO
OUT
VIDEO
OUT
S VIDEO
OUT
AV
AC IN
DIGITAL
AUDIO
OUT
21 pin scart cable
Connecting to TV with a S-VIDEO input terminal
DIGITAL
AUDIO
OUT
( PCM/
BITSTREAM )
OPTICAL
AUDIO
OU
L
R
T
VIDEO
OUT
SUBWOOFER
S VIDEO
OUT
Please connect
directly to TV
White/L
Red/R
Audio/video cable
S-video cable
CLASS 1
LASER PRODUCT
AC mains lead
AC IN
TV
White/L
Red/R
Red
4
White
Yellow/
video
Yellow
The S-VIDEO terminal achieves a more vivid picture than the VIDEO OUT terminal.
Connect stereo audio cable.
Connecting to TV with video input terminal
Connect the Audio/video cable (white/L, red/R, yellow/video) according to the colours/
markings of the video input terminals.
DIGITAL
AUDIO
OUT
( PCM/
BITSTREAM )
AUDIO
OU
L
T
R
OPTICAL
When connecting to the video input terminal, do not change the AV output (Scart) to
S-VIDEO, as this will cause the picture to be output incorrectly.
VIDEO
OUT
SUBWOOFER
S VIDEO
OUT
Please connect
directly to TV
White/L
Red/R
AC IN
Yellow/video
Audio/video cable
RQTD0003-2B
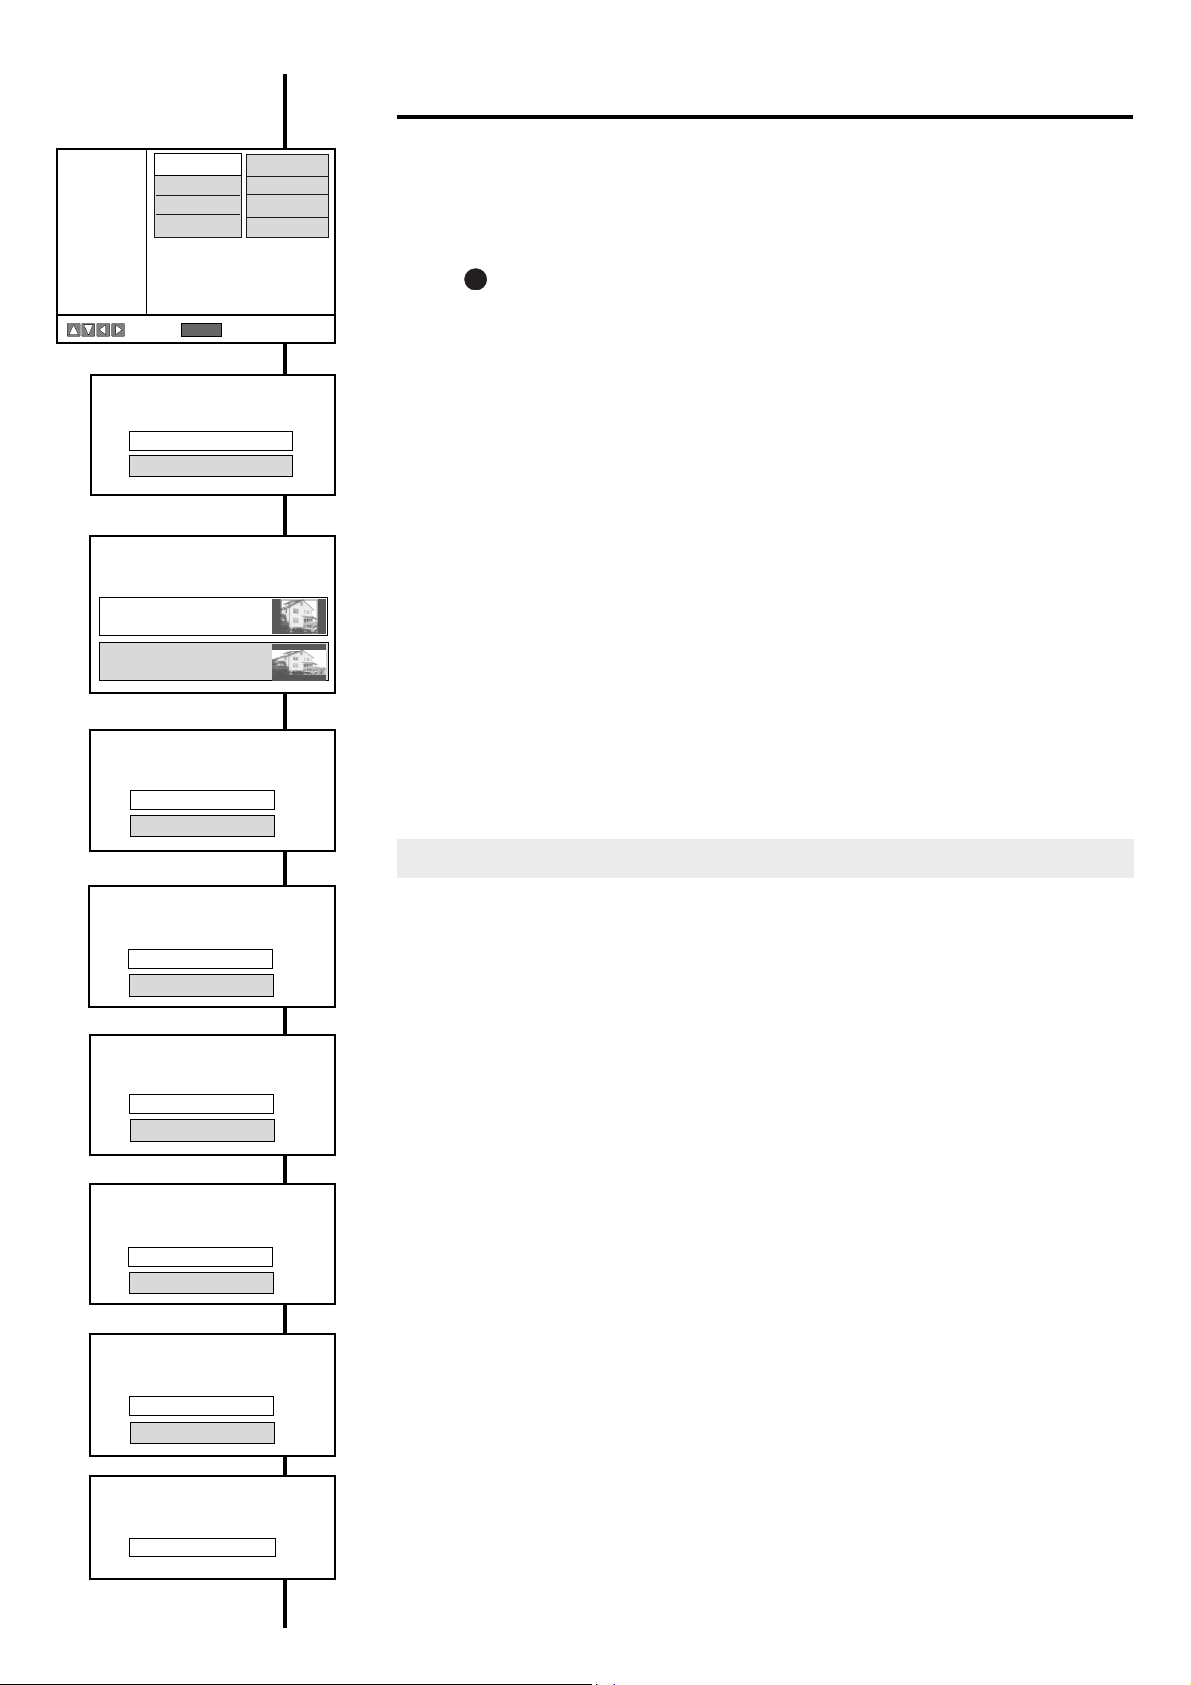
EASY SETUP
Panasonic
EASY SETUP
to select ENTER to access
English
Français
Español
Nederlands
Deutsch
Italiano
Svenska
Português
Please select your TV type
Normal (4:3)
Widescreen (16:9)
How do you want the widescreen picture
displayed on the normal (4:3) TV?
Pan&Scan style
(cut sides and fill screen)
Letterbox style
(black bands top and bottom)
After first plug in of AC mains, the EASY SETUP-screen will be invoked automatically.
Initial settings for the unit can be adjusted in an easy way as shown below.
l
Make the settings with the buttons of the remote contro
1
Select the desired language
ENTER
Press
to confirm the setting.
Press SETUP or RETURN to exit the screen.
.
.
2 TV screen formats: There are two types of TV format, 4:3 or 16:9. The 16:9 format corresponds
to Widescreen. When you select “Widescreen (16:9)“, the following setting “Pan&Scan / Letterbox“
will be skipped.
Select your setting .
Press ENTER to confirm the setting.
This may not work with some discs.
*
3 Pan&Scan: If you have a regular television (4:3 format) and wish to view 16:9 software in the Pan&Scan
style, if the disc supports this format. Expands the picture to fill the screen from top to bottom without
distortion. However, the edges of the picture are cut off.
Letterbox: If you have a regular television (4:3 format) and wish to view 16:9 software in the Letterbox
style. The whole picture is displayed, but black bands appear at the top and bottom of the screen.
Select your setting .
Press ENTER to confirm the setting.
Do you have a unit connected
to the OPTICAL output?
No
Ye s
Does the unit connected have
a built-in DTS decoder?
No
Ye s
Does the unit connected have
a built-in Dolby Digital decoder?
No
Ye s
Does the unit connected have
a built-in MPEG decoder?
No
Ye s
4 OPTICAL output
Select Yes if you have connected the player with an Optical digital audio cable to a digital amplifier
or an amplifier with a built-in decoder to the OPTICAL output.
Press ENTER to confirm the setting.
If you have selected "No" above, the next setting is “child lock password“.
5 DTS (Digital Theater Systems): Method of coding multi channel audio signals. Realistic sound
effects are possible
Select Yes when you connect the player to a unit with a built-in DTS decoder.
Press ENTER to confirm the setting.
.
6 Dolby Digital: Method of coding and compression of more channel audio signals, developed by
Dolby Laboratories. A large amount of audio information can be recorded on one disc. Dolby Digital
is used in cinemas, digital television programs, DVDs and video games around the world.
Select Yes when you connect the player to a unit with a built-in Dolby Digital decoder.
Press ENTER to confirm the setting.
7 MPEG Audio
Select Yes when you connect the player to a unit with a built-in MPEG decoder.
Press ENTER to confirm the setting.
Would you like to set a child lock
password now?
Please enter a 4-digit password
RQTD0003-2B
No
Ye s
- - - -
8 Child lock password: You can prevent the unwanted playback of DVDs.
If you select Yes, then a 4-digit password must be entered.
Press ENTER to access the setting.
9
Use the numbered buttons of the remote control to enter a 4-digit password.
Press ENTER to confirm the selection.
Your DVD player is now ready to use.
If you want to cancel EASY SETUP before it has finished, press the RETURN button.
5
 Loading...