

Panasonic DVD-CV36 Owner’s Manual

Panasonic
DVD/VIDEO CD/CD PLAYER
D
Operating Instructions
Model No. DVD-CV51
DVD-CV36
Fo_
Before connecting, operating or adlUStlng this product, please read
these instructions completely
Please keep th_smanual for future reference
The servicenter list and warranty can be found
I m
on pages 29 and 30.
I
• _ • _ • ._ ; "='_ rL_. •
RQT5896-P

Dear customer I able oI comenLs
Thank you for purchasing this product.
For optimum performance and safety, please read these instruc-
{o
o_
_3
tions carefully.
Operations in these Instructions are described mainly
with the remote control, but you can do the operations on
the main unit if the controls are the same.
Accessories
Please check and identify the supplied acces-
sohes. Use numbers indicated in parentheses
(Only for U.S.A.)
when asking for replacement parts.
To order accessories contact 1-800-332-
5368 or web site (http://
www.panasonic.com).
(Only for Canada)
To order accessories, call the dealer from
whom you have made your purchase.
[] Remote control ................................. 1
(N2QAJB000021) _
[] Batteries ....................................... 2
for remote control
[] AC power supply cord ........................... 1
(RJA0065-A) _
[] Audio/video cable ............................... 1
(VJA0788-D)
The included AC power supply cord is for use with this unit only.
Do not use it with other equipment.
The model number and serial number of this product can be
found on either the back or the bottom of the unit.
Please note them in the space provided below and keep for
future reference.
MODEL NUMBER
SERIAL NUMBER
Accessories .............................. 2
PRECAUTIONS ........................... 4
Disc information .......................... 5
The remote control ........................ 5
Connection to a television .................. 6
Selecting TV screen type ................... 7
Control reference guide .................... 8
Basic play ................................ 9
Sequential mode .................................... 10
Resume function .................................... 10
Skipping chapters or tracks ........................... 11
Frame-by-frame viewing .............................. 11
Fast forward and rewind-SEARCH ..................... It
Slow-motion play .................................... 11
Changing other discs during play ....................... 12
Changing the disc in the play position ................... 12
Starting play from a selected title or track ................ 12
Changing soundtracks, subtitle languages and
angles ................................ 13
Increasing your enjoyment of movies ........ 14
ADVANCED SURROUND _ ...................... 14
CINEMA .......................................... 14
(Bass Plus/Dialogue Enhancer ........... 19)
Changing the play sequence ............... 14
Random play ....................................... 14
Program play ....................................... 15
Repeat play ............................. 16
Repeat play/A-B repeat play ........................... 16
Using On-Screen Menu Icons ............... 17
Common procedures ................................ 17
Icons for disc information ............................. 18
Icons for disc type information ......................... 18
Icons for unit information ............................. 19
Changing initial settings ................... 20
Summary of initial settings ............................ 20
Common procedures ................................ 22
Entering a password ................................. 23
Digital output ....................................... 23
Home theater ............................ 24
Connecting an amplifier with a built-in decoder or a decoder-
amplifier combination ............................... 24
Connecting an analog amplifier or system component ...... 25
Connecting a digital amplifier or system component ........ 25
Connecting an active subwoofer (optional) ............... 25
Recording to MDs or cassette tapes .................... 25
RQT5896
Troubleshooting guide .................... 26
Product Service .......................... 27
Maintenance ............................. 27
Glossary ................................ 28
Disc handling ........................... 28
Servicenter List (Only for U.S.A.) ............ 29
Limited Warranty (Only for U.S.A.) ........... 30
Guia de referencia rapida en espafiol
(Spanish Quick Reference) ......................... 31
Specifications .................... Back cover
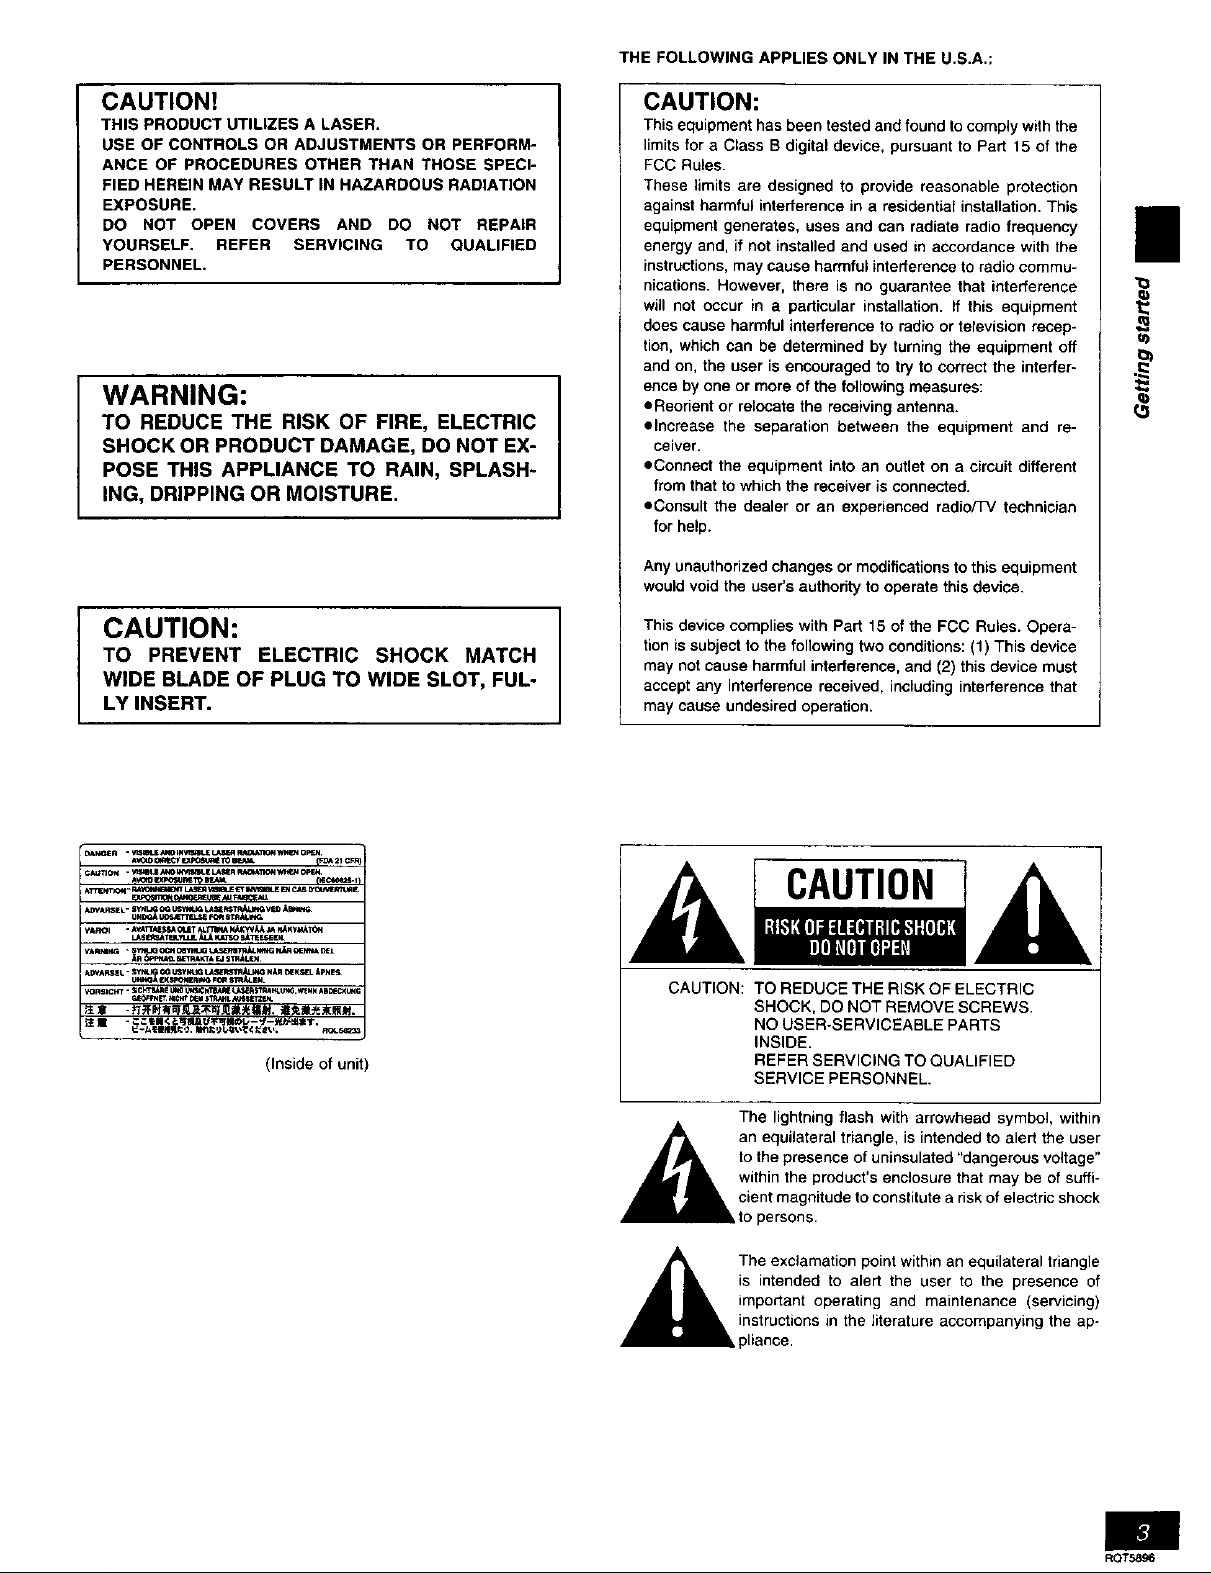
THE FOLLOWING APPLIES ONLY IN THE U,S,A,:
CAUTION!
THIS PRODUCT UTILIZES A LASER.
USE OF CONTROLS OR ADJUSTMENTS OR PERFORM-
ANCE OF PROCEDURES OTHER THAN THOSE SPECI-
FIED HEREIN MAY RESULT IN HAZARDOUS RADIATION
EXPOSURE.
DO NOT OPEN COVERS AND DO NOT REPAIR
YOURSELF, REFER SERVICING TO QUALIFIED
PERSONNEL.
WARNING:
TO REDUCE THE RISK OF FIRE, ELECTRIC
SHOCK OR PRODUCT DAMAGE, DO NOT EX-
POSE THIS APPLIANCE TO RAIN, SPLASH-
ING, DRIPPING OR MOISTURE.
CAUTION:
TO PREVENT ELECTRIC SHOCK MATCH
WIDE BLADE OF PLUG TO WIDE SLOT, FUL-
LY INSERT.
CAUTION:
This equipment has been tested and found to comply with the
limits for a Class B digital device, pursuant to Part 15 of the
FCC Ru_es.
These limits are designed to provide reasonable protection
against harmful interference in e residential installation. This
equipment generates, uses and can radiate radio frequency
energy and, if not installed and used in accordance with the
instructions, may cause harmful interference to radio commu-
nications. However, there is no guarantee that interference
will not occur in a particular installation, if this equipment
does cause harmful interference to radio or television recep-
tion, which can be determined by turning the equipment off
and on, the user is encouraged to try to correct the interfer-
ence by one or more of the following measures:
eReodent or relocate the receiving antenna.
elncrease the separation between the equipment and re-
ceiver.
eConnect the equipment into an outlet on a circuit different
from that to which the receiver is connected.
oConsult the dealer or an experienced radio/TV technician
for help.
Any unauthorized changes or modifications to this equipment
would void the user's authority to operate this device.
This device complies with Part 15 of the FCC Rules. Opera-
tion is subject to the following two conditions: (1) This device
may not cause harmful interference, and (2) this device must
accept any interference received, including interference that
may cause undesired operation.
II
u)
ATnEwr_- m LU_ "*_aJE ETm _ CAS _eOu_,_ f.
(Inside of unit)
CAUTION
CAUTION: TO REDUCE THE RISK OF ELECTRIC
A an equilateral triangle, is intended to alert the user
SHOCK, DO NOT REMOVE SCREWS.
NO USER-SERVICEABLE PARTS
INSIDE.
REFER SERVICING TO QUALIFIED
SERVICE PERSONNEL.
The lightning flash with arrowhead symbol, within
to the presence of, uninsulated "dangerous voltage"
within the products enclosure that may be of suffi-
cient magnitude to constitute a risk of electric shock
to persons.
The exclamation point within an equilateral triangle
is intended to alert the user to the presence of
important operating and maintenance (servicing)
instructions in the literature accompanying the ap-
ROT5896
i-,rir_lt.t/- u i IUI I,.
|
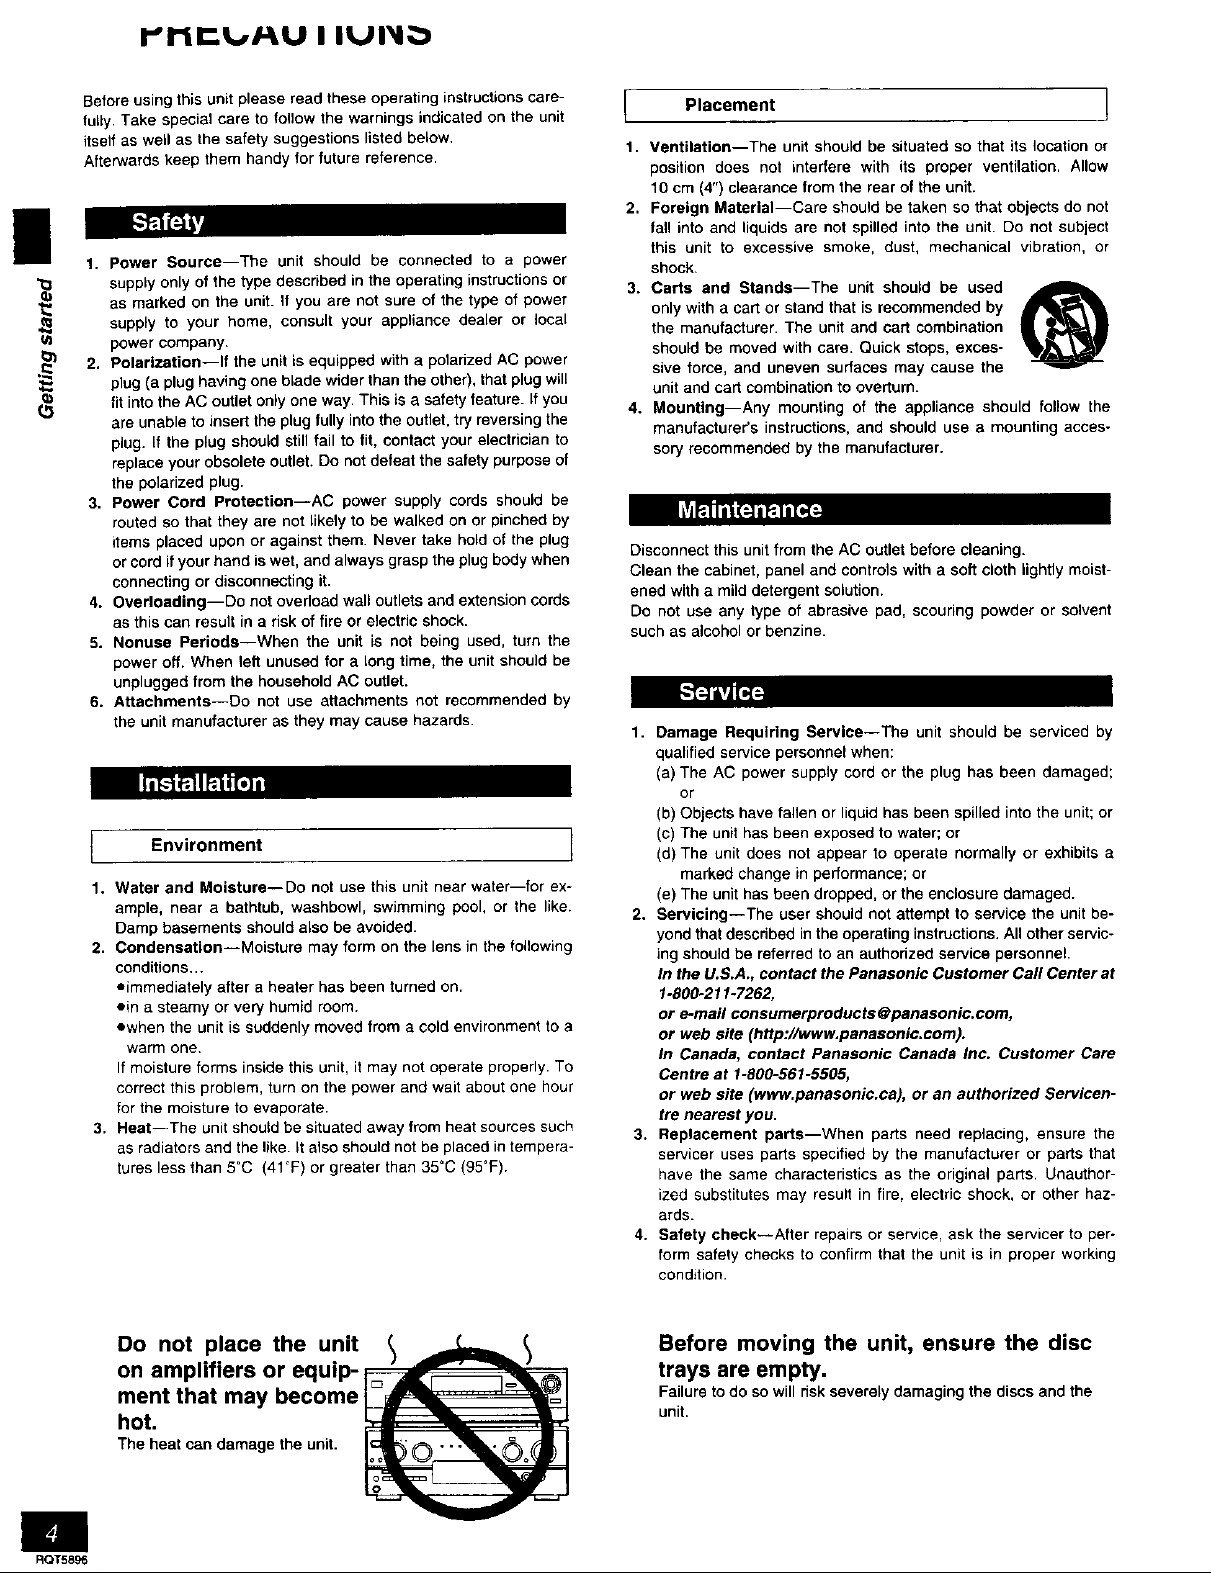
Before using this unit please read these operating instructions care-
fully. Take special care to follow the warnings indicated on the unit
itself as well as the safety suggestions listed below,
Afterwards keep them handy for future reference.
1. Power Source--The unit should be connected to a power
supply only of the type described in the operating instructions or
as marked on the unit. If you are not sure of the type of power
supply to your home, consult your appliance dealer or local
power company.
2. Polarization--If the unit is equipped with a poladzed AC power
plug (a plug having one blade wider than the other), that plug will
fit into the AC outlet only one way. This is a safety feature. If you
are unable to insert the plug fully into the outlet, try reversing the
plug. If the plug should still fail to fit, contact your electrician to
replace your obsolete outlet. Do not defeat the safety purpose of
the polarized plug.
3. Power Cord Protection--AC power supply cords should be
routed so that they are not likely to be walked on or pinched by
items placed upon or against them. Never take hold of the plug
or cord if your hand is wet, and always grasp the plug body when
connecting or disconnecting it.
4. Overloading--Do not ovedoad wall outlets and extension cords
as this can result in a hsk of fire or electric shock.
5. Nonuse Periods--When the unit is not being used, turn the
power off. When left unused for a tong time, the unit should be
unplugged from the household AC outlet.
6. Attachments--Do not use attachments not recommended by
the unit manufacturer as they may cause hazards.
Environment
t
1.
Water and Moisture--Do not use this unit near water--for ex-
ample, near a bathtub, washbowl, swimming pool, or the like.
Damp basements should also be avoided.
2. Condensation--Moisture may form on the lens in the following
conditions...
eimmediately after a heater has been turned on.
ein a steamy or very humid room.
ewhen the unit is suddenly moved from a cold environment to a
warm one.
If moisture forms inside this unit, it may not operate properly. To
correct this problem, turn on the power and wait about one hour
for the moisture to evaporate.
3. Heat--The unit shou{d be situated away from heat sources such
as radiators and the like. It also should not be placed in tempera-
tures less than 5°C (41°F) or greater than 35"C (95°F).
(3
oJ
Placement !
1.
Ventilation--The unit should be situated so that its location or
position does not interfere with its proper ventilation. Allow
10 cm (4") clearance from the rear of the unit.
2. Foreign Material--Care should be taken so that objects do not
fall into and liquids are not spilled into the unit. Do not subject
this unit to excessive smoke, dust, mechanical vibration, or
shock.
3. Carts and Stands--The unit should be used ._
only with a cart or stand that is recommended by
the manufacturer. The unit and cart combination
should be moved with care. Quick stops, exces-
sive force, and uneven surfaces may cause the
unit and cart combination to overturn.
4. Mounting--Any mounting of the appliance should follow the
manufacturer's instructions, and should use a mounting acces-
sory recommended by the manufacturer.
Disconnect this unit from the AC outlet before cleaning.
Clean the cabinet, panel and controls with a soft cloth lightly moist-
ened with a mild detergent solution.
Do not use any type of abrasive pad, scouring powder or solvent
such as alcohol or benzine.
1. Damage Requiring Service--The unit should be sewiced by
qualified service personnel when:
(a) The AC power supply cord or the plug has been damaged;
or
(b) Objects have fallen or liquid has been spilled into the unit; or
(o) The unit has been exposed to water; or
(d) The unit does not appear to operate normally or exhibits a
marked change in performance; or
(el The unit has been dropped, or the enclosure damaged.
2. Servicing--The user should not attempt to service the unit be-
yond that descdbed in the operating instructions. All other servic-
ing should be referred to an authorized service personnel.
In the U.S.A., contact the Panasonic Customer Call Center at
1.800-211-7262,
or e-mail consumerproducts@panasonic.com,
or web site (http://www.panasonic.com).
In Canada, contact Panasonic Canada Inc. Customer Cam
Centre at 1-800-561-5505,
or web site (www.panasonic.ca), or an authorized Servicen-
tre nearest you.
3. Replacement parts--When parts need replacing, ensure the
servicer uses parts specified by the manufacturer or parts that
have the same characteristics as the original parts. Unauthor-
ized substitutes may result in fire, electric shock, or other haz-
ards.
4. Safety check--After repairs or service, ask the servicer to per-
form safety checks to confirm that the unit is in proper working
condition.
ROT5896
Do not place the unit
on amplifiers or equip-
ment that may become
hot.
The heat can damage the unit,
Before moving the unit, ensure the disc
trays are empty.
Failure to do so will risk severely damaging the discs and the
unit.

Disc information The remote control
• Discs that can be played
Indication
Disc type Logo Region Video used in
number system instructions
OVD-Video NTSC
II
*Insert so the poles (+ and -) match those in the remote control.
i___1
Video CD {_]_]_ NTSC :'-_
Audio CD _]_
DIGITAL _qUJDIO
• Discs that cannot be played
DVD-Audio, PAL discs, DVD-ROM, DVD-R/DVD-RAM, CD-ROM,
VSD, CDV, CD*G, +RW, DVD-RW, CVD, SVCD, SACD, Divx Video
Discs, and Photo CD.
• DVDs that can be played
r"]rl _ This unit has a Dolby Digital decoder so you can play
• DO not use rechargeable type batteries.
Do not;
*mix old and new batteries.
• use different types at the same time.
*heat or expose to flame.
=take apart or short circuit.
*attempt to recharge alkaline or manganese batteries.
*use batteries if the covering has been peeled off.
Mishandling of batteries can cause electrolyte leakage which can
damage items the fluid contacts and may cause a fire.
If electrolyte leaks from the batteries, consult your dealer.
Wash thoroughly with water if electrolyte comes in contact with any
part of your body.
Remove if the remote control is not going to be used for a long peri-
od of time. Store in a cool, dark place.
Replace if the unit does not respond to the remote control even
when held close to the front panel.
Remote control signal sensor
o t G=T Au. DVDs with this mark.
D _G =TA L This unit does not have a DTS decoder. Connect this
[_ unit to equipment that has a DTS decoder to enjoy
SURROUND DVDs with this mark.
7 m (23 feet)
• Region Management Information (DVD only)
This unit responds to the Region Management Information recorded
on DVDs. This unit's region number is "1". You cannot play the disc
if the region number on the DVD does not correspond to the region
number on the unit.
You can playdiscswith [abelscontainingthe region number "1" and "ALL".
Read the disc's instructions carefully.
• Playing DVDs and Video CDs
The producer of the material can control how these discs ere
played. This means that you may not be able tocontrol play of a disc
with some operations described in these operating instructions.
Read the disc's instructions carefully.
Aim at the sensor, avoiding obstacles, at a maximum range of 7 m
(23 feet) directly in front of the unit.
*Keep the transmission window and the unit's sensor free from dust.
*Operation can be affected by strong light sources, such as direct
sunlight, and the glass doors on cabinets.
Do not;
*put heavy objects on the remote control.
*take the remote control apart.
*spill liquids onto the remote control.
MP3 playback
You can use this unit to play MP3 format audio recorded for personal use with a computer etc. onto CD-R or CD-RW. PIay may not be
possible in some cases due to the condition of the recording. Discs recorded using MP3 differ to CDs in the foil*wing ways.
*Structure of the disc (example)
*Program play, random play
You cannot use program play or random play.
*Display during play
"O
ul
Title Title
C'hapter (Track) ......
*Starting play from a selected chapter
Select the disc (-- page 12). While stopped, press the numbered
buttons and press [ENTER].
Example:Chapter23 [2] "*[3] .o [ENTER][Pressing[->10]is unnecessary)
• Repeat play
You can use chapter repeat, title repeat, or sequential (all discs) repeat.
II_t';'j_J
*Not compatible with multi-session recordings
If you record MP3 onto CD-R/CD-RW over a number of sessions, this unit can play only the recordings made in the first session.
*Recordings willnot necessarily be played inthe order you recorded them. The recordings will be reordered according to their titles:numbers in
numerical order first, upper case in alphabetical order next, and lower case in alphabetical order last.
elf you play an MP3 track that includes still picture data, it will take some time before the music starts playing and the elapsed time will not
be displayed during this time. Even after the track starts, the correct play time will not be displayed
*On-Screen Menu Icons for disc information during play
Total number of chapters
Current chapter Elapsed play time(display only, cannot be changed)
RAT5896
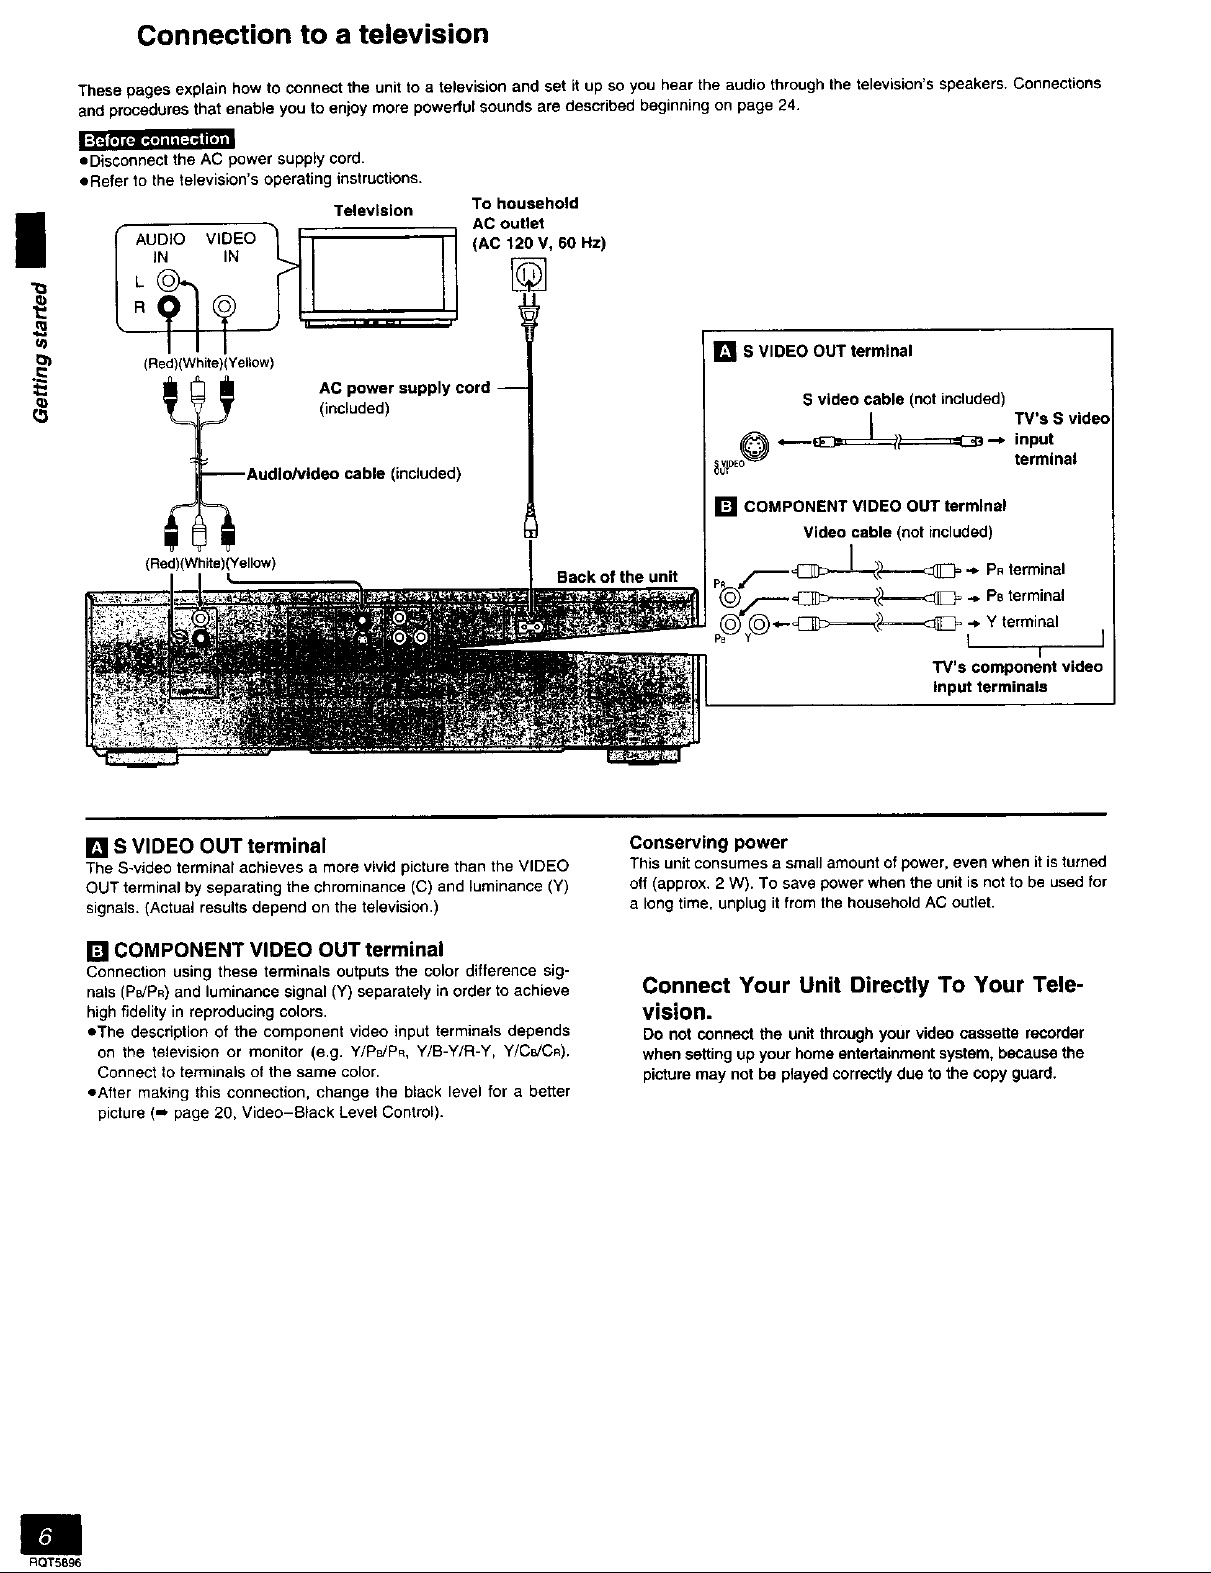
Connection to a television
These pages explain how to connect the unit to a television and set it up so you hear the audio through the television's speakers. Connections
and procedures that enable you to enjoy more powerful sounds are described beginning on page 24.
• Disconnect the AC power supply cord.
eRefer to the television's operating instructions.
Television To household
AC outlet
u)
(Red)(White)(Yellow)
AC power supply cord --(included)
"Audio/video cable (included)
(Red)(White)(Yellow)
[] S VIDEO OUT terminal
The S-video terminal achieves a more vivid picture than the VIDEO
OUT terminal by separating the chrominance (C) and luminance (Y)
signals. (Actual results depend on the television.)
Back of the unit
Conserving power
This unit consumes a small amount of power, even when it is turned
off (approx. 2 W). To save power when the unit is not to be used for
a long time, unplug it from the household AC outlet.
[] S VIDEO OUT terminal
S video cable (not included)
_ ,,-.-- _ .-_ input
_}DE terminal
[] COMPONENT VIDEO OUT terminal
Video cable (not included)
input terminals
TV's S vide€
PRterminal
PBterminal
rtl COMPONENT VIDEO OUT terminal
Connection using these terminals outputs the color difference sig-
nals (P_/PR) and luminance signal (Y) separately in order to achieve
high fidelity in reproducing colors.
eThe description of the component video input terminals depends
on the television or monitor (e.g. Y/PBJPR, Y/B-Y/R-Y, Y/CeJCR).
Connect to terminals of the same color.
sAlter making this connection, change the black level for a better
picture (-, page 20, Video-Black Level Control).
Connect Your Unit Directly To Your Tele-
vision.
Do not connect the unit through your video cassette recorder
when setting up your home entertainment system, because the
picture may not be played correctly due to the copy guard.
ROT5896
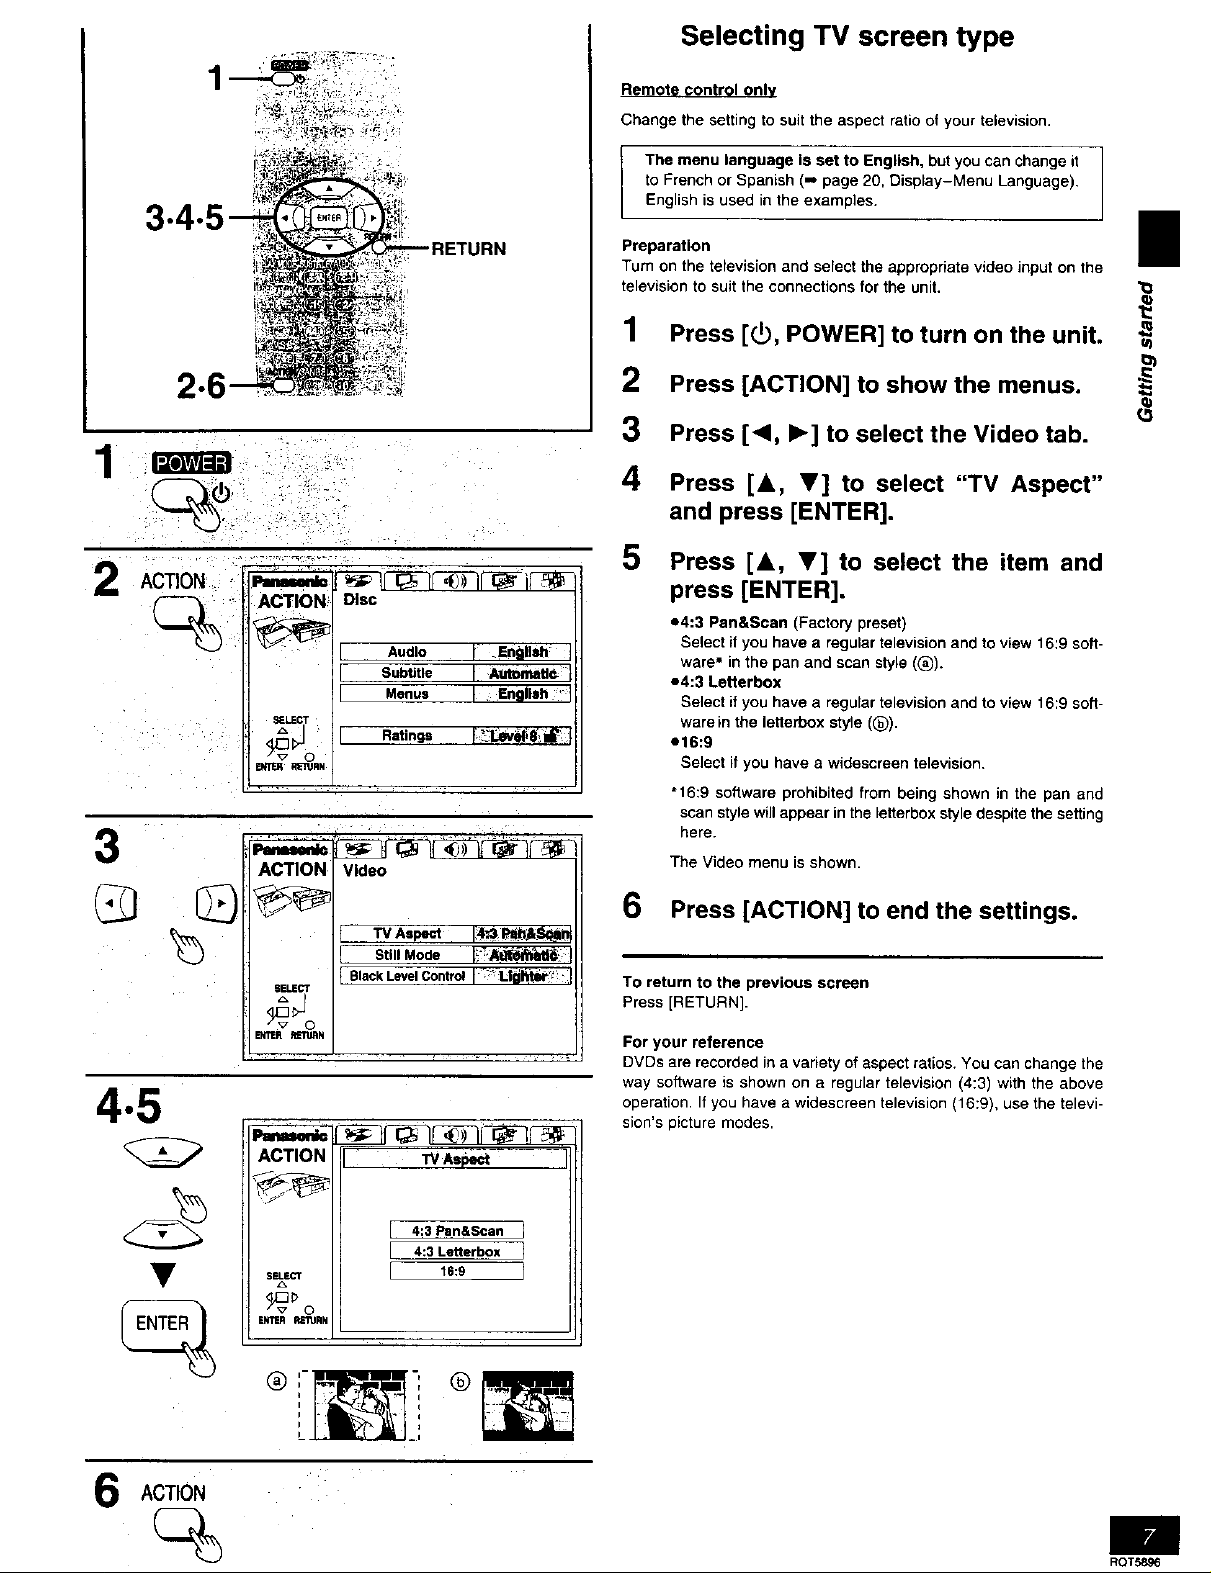
Selecting TV screen type
Remote control only
Change the setting to suit the aspect ratio of your television.
The menu language is set to English, but you can change it
to French or Spanish (,,, page 20, Display-Menu Language).
English is used in the examples.
3
Preparation E
Turn on the television and select the appropriate video input on the
television to suit the connections for the unit.
1 Press [_, POWER] to turn on the unit.
2 Press [ACTION] to show the menus.
3 Press [<, I_] to select the Video tab.
_o_:Jd
1
i 4 andPreSSpress[&' [ENTER].V]to select "TV Aspect"
2 Ac ,_0. • 5 Press [&, v] to select the item and
press [ENTER].
*4:3 Pan&Scan (Factory preset)
Select if you have a regular television and to view 16:9 soft-
waremin the pan and scan style ((_).
*4:3 Letterbox
Select if you have a regular television and to view 16:9 soft-
ware in the letterbox style ((_).
e16:9
Select if you have a widescreen television.
• 16:9 software prohibited from being shown in the pan and
scan style will appear in the leiterbox style despite the setting
here.
The Video menu is shown.
3
_J.F.CT
_m3nNJ
ACT1OI_
'1 Audio I .Englleh I
SubUtle I AI_aUr.
'1 Menus I English * I
n Ratings [__l.ev_ 8',i_ j
Video
©
4.5
SELECT
ENTER mN
ACTION
s_scT
INTER R_TlJRN
TV Aspe_ _ Plthjt "-_
I st.I Mode r!_'-_ I
t BlackLevelControlI :_l-lg I_t_' I
I w As_
4:3 Pan&Scan
4:3 Lenerbox
16:9
6 Press [ACTION] to end the settings.
To return to the previous screen
Press [RETURN].
For your reference
DVDs are recorded in a variety of aspect ratios. You can change the
way software is shown on a regular television (4:3) with the above
operation• If you have a widescreen television (16:9), use the televi-
sion's picture modes.
6
ACTION
RQT5896
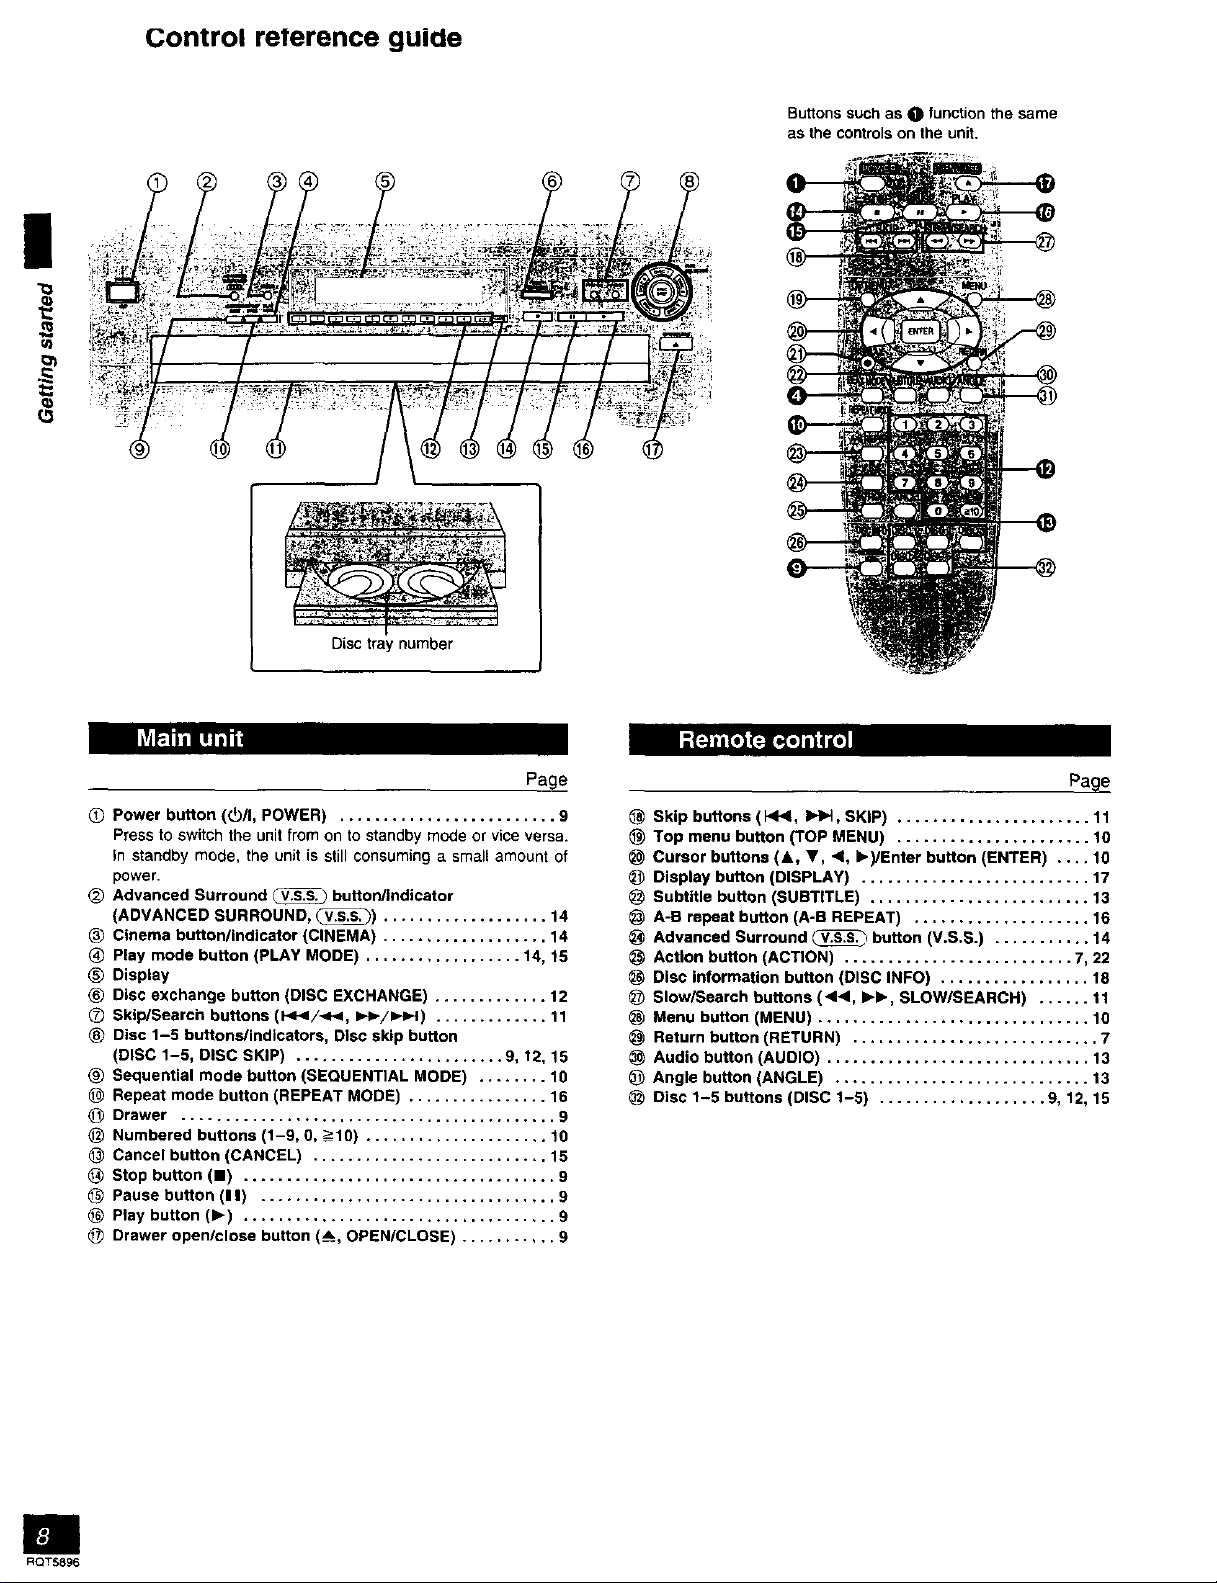
Control reterence guide
Buttons Such as 0 function the same
as the controls on the unit.
Disc tray number
Page
_) Power button (y/I, POWER) ......................... 9
Press to switch the unit from on to standby mode or vice versa.
In standby mode, the unit is still consuming a small amount of
power.
O Advanced Surround _ button/Indicator
(ADVANCED SURROUND, _) ................... 14
Cinema button/indicator (CINEMA) ................... 14
Play mode button (PLAY MODE) .................. 14, 15
_) Display
(_) Disc exchange button (DISC EXCHANGE) ............. 12
0 Skip/search buttons (141</-(_1, IH,-/I,_.t) ............. 11
® Disc 1-5 buttons/indicators, Disc skip button
(DISC 1-5, DISC SKIP) ........................ 9, 12, 15
(_) Sequential mode button (SEQUENTIAL MODE) ........ 10
Repeat mode button (REPEAT MODE) ................ 16
O Drawer ........................................... 9
_) Numbered buttons (1-9, 0, _->10) ..................... 10
Cancel button (CANCEL) ........................... 15
Stop button (11) .................................... 9
Pause button (11) .................................. 9
Play button (1_) .................................... 9
Drawer open/close button (_, OPEN/CLOSE) ........... 9
I; FJm't_ ['_II'_ I
Page
Skip buttons (1_1<1,I=,_l, SKIP) ...................... 11
Top menu button (TOP MENU) ...................... 10
Cursor buttons (A, Y, .<l, I_)/Enter button (ENTER) .... 10
Display button (DISPLAY) .......................... 17
Subtitle button (SUBTITLE) ......................... 13
A-B repeat button (A-B REPEAT) .................... 16
Advanced Surround _ button (V.S.S.) ........... 14
Action button (ACTION) .......................... 7, 22
Disc information button (DISC INFO) ................. 18
_) Slow/Search buttons (_1<1, I_1_, SLOW/SEARCH) ...... 11
_) Menu button (MENU) ............................... 10
Return button (RETURN) ............................ 7
Audio button (AUDIO) .............................. 13
Angle button (ANGLE) ............................. 13
Disc 1-5 buttons (DISC 1-5) ................... 9, 12, 15
RQT5896
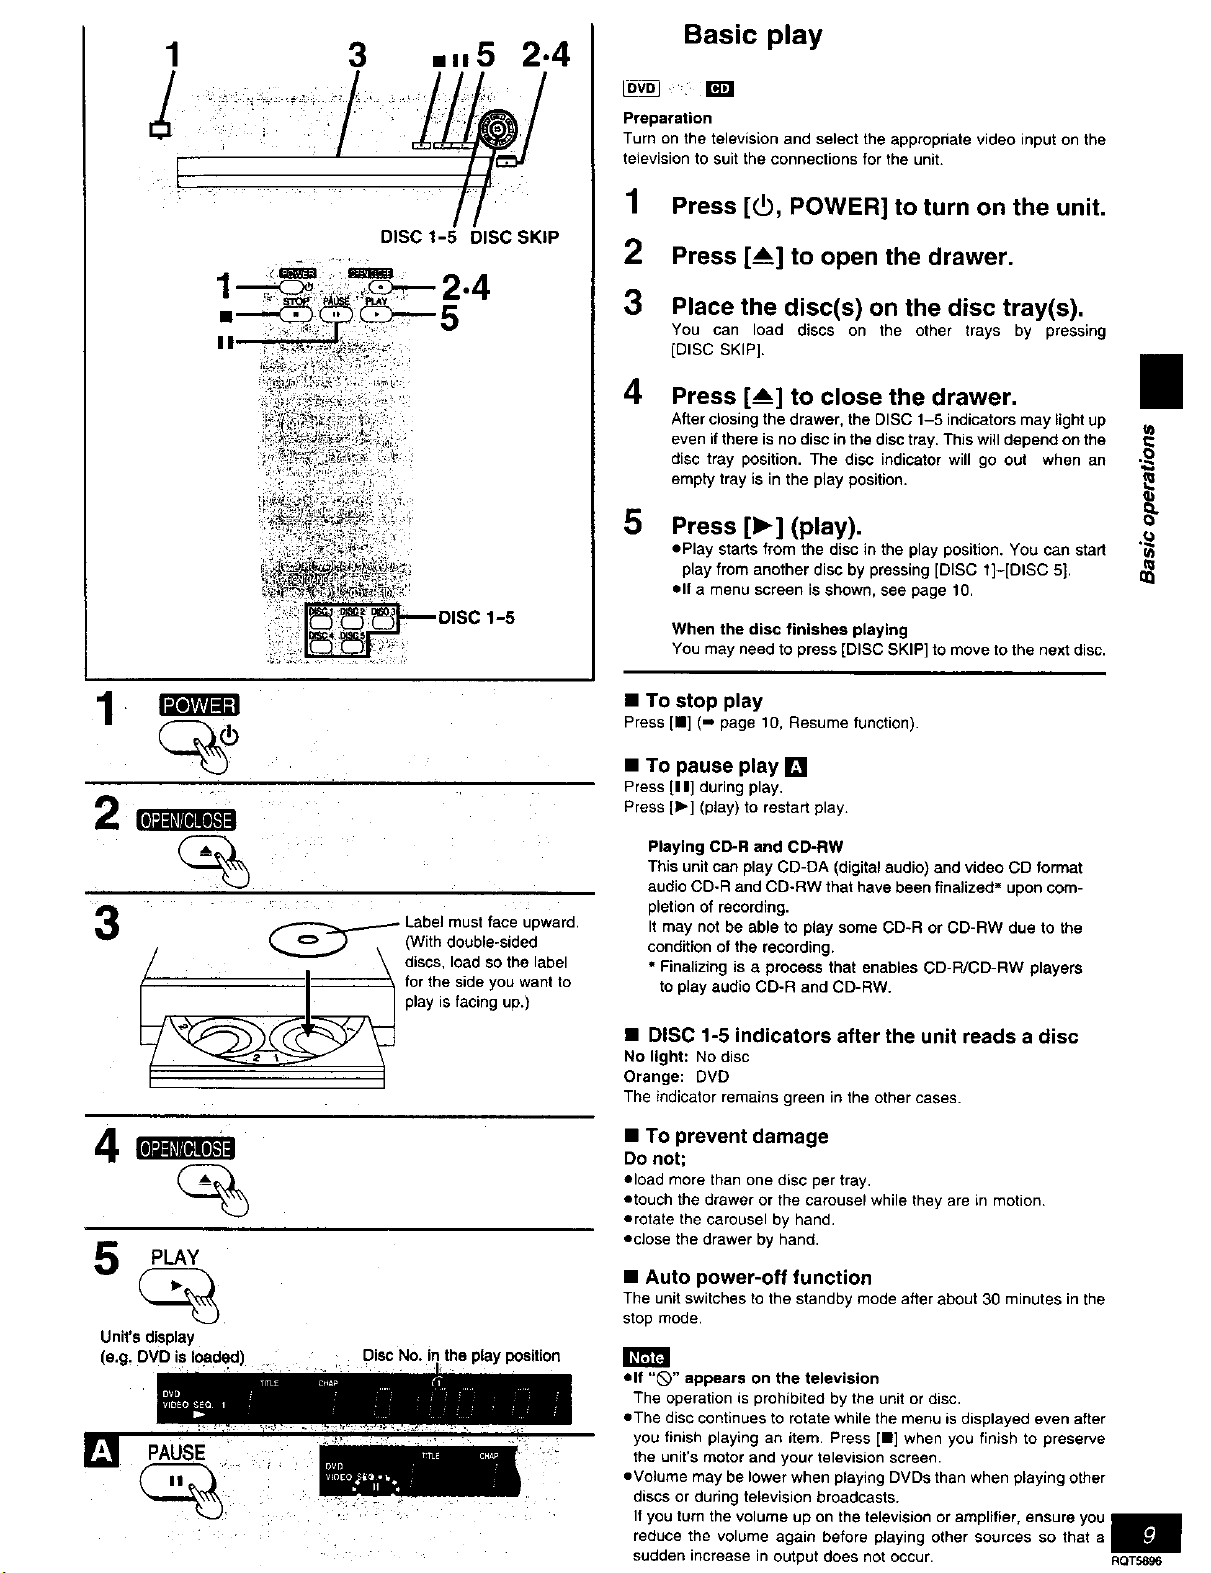
1 3 =.5 2"4
DISC 1-5 DISC SKIP
: 1-5
Basic play
Iov_ W
Preparation
Turn on the television and select the appropriate video input on the
tetevision to suit the connections for the unit.
1 Press [_, POWER] to turn on the unit.
2 Press [A] to open the drawer.
3 Place the disc(s) on the disc tray(s).
You can load discs on the other trays by pressing
(DISC SKIP].
4 Press [__] to close the drawer. •
After closing the drawer, the DISC 1-5 indicators may light up
even if there is no disc in the disc tray. This will depend on the
disc tray position. The disc indicator will go out when an
empty tray is in the play position.
5
Press [1_] (play).
ePlay starts from the disc in the play position. You can start
play from another disc by pressing [DISC 1]-[DISC 5].
oil a menu screen is shown, see page 10.
When the disc finishes playing
You may need to press [DISC SKIP] to move to the next disc.
.£
u)
u)
•
2 m •
i
_ Label must face upward,
// _ \ discs, load so the label
_-- --I_ for the side you want to
__ play is facing up.)
[ o ) (With double-sided
4m
PLAY
Unit's display
(e.g, I
Disc No. in the play position
• To stop play
Press[n] (-, page 10, Resume function).
• To pause play []
Press [I I] during play.
Press [Ib] (play) to restart play.
Playing CD-R and CD-RW
This unit can play CD-DA (digital audio) and video CD format
audio CD-R and CD-RW that have been finalized" upon com-
pletion of recording.
It may not be able to play some CD-R or CD-RW due to the
condition of the recording.
• Finalizing is a process that enables CD-PJCD-RW players
to play audio CD-R and CD-RW.
• DISC 1-5 indicators after the unit reads a disc
No light: Nodisc
Orange: DVD
The indicatorremains green in the other cases.
• To prevent damage
Do not;
eload more than one disc per tray.
otouch the drawer or the carousel while they are in motion.
erotate the carousel by hand.
eclose the drawer by hand.
• Auto power-off function
The unit switches to the standby mode after about 30 minutes in the
stop mode.
oft "_" appears on the television
The operation is prohibited by the unit or disc.
eThe disc continues to rotate while the menu is displayed even after
you finish playing an item. Press [11]when you finish to preserve
the unit's motor and your television screen•
eVolume may be lower when playing DVDs than when playing other
discs or during television broadcasts.
If you turn the volume up on the television or amplifier, ensure you
reduce the volume again before playing other sources so that a
sudden increase in output does not occur• RQT5896
n

Basic play
SEQUENTIAL
MODE PLAY MODE 1<<1/4<1, I_I_/IH_I
television
When a menu screen appears on the I
I
Press the numbered buttons to select an
item.
TO select a 2-digit number
Example: To select item 23, press [->_10],then [2] and [3],
Numbered buttons • I_
TO
A,
ENTER
a
•When playing DVOs, you can also use [&., V, "<, I_] to select
items. Press [ENTER] to confirm your selection.
Play of the selected item now begins.
Other buttons used to operate menus
Read the disc's instructions for further details about operation.
[b,tl_ ] or [IH_/IH,_I]: Shows the next menu.
[_1.<] or [1<1</.<<1]: Shows the previous menu.
[RETURN]: Shows the menu screen. [_S'_.']
[TOP MENU]: Shows the first menu screen.
[MENU]: Shows the menu screen.
[] DVD menus
DVDs can have several menus• The menu displayed when you
press [TOP MENU] may be different from the menu displayed when
you press [MENU] .
t:] l!FJ'lllm IIITF'FF'J
buttons
During play or while stopped
Press [SEQUENTIAL MODE].
SEQ
MODE
Each time you press the button:
SEQ. 1: Plays all discs (This mode is on whenever you turn the
L_SEQ. 2: Plays Video CDs and CDs only (The playback control
unit on.)
function on Video CDs is canceled.)
The disc's
top menu
N-
B
l
SEOUENTIAL
M00E
, Title 1 ,, Title 2 ,, Title 3 ,
i i I
Menu , Menu , Menu,
i l MENU I I
TOPMENU
For your reference
,,When you change sequential modes during play, the unit starts in
the mode you selected from the next disc.
If you press [I] during play, the unit remembers the position.
If you press [_'] (PLAY) while "D" is flashing, play restarts from the
position you stopped it.
To start play from a memorized position after switching the unit
to standby
Press [PLAY MODE] during play. (The message "Position memo-
rized" appears on the television.) Now when you press [1_] (PLAY)
after switching the unit to standby and back on, play starts from the
memorized position.
Even after you memorize a position by pressing [PLAY MODE], play
will start from the point you stopped play if you press [1_] (PLAY)
before switching the unit to standby.
Chapter Preview
If you are playing DVD. the illustrated message appears when you
pressed [1_} (PLAY) while "[>" is flashing.
Pressing [1_] (PLAY) while the message is displayed, the beginning
portions of each chapter up to the current one are played and full
play resumes from the point where you stopped play or you pressed
[PLAY MODE].
(Chapter Preview feature works only within a title.)
If you do not press [1_] (PLAY), the message disappears and play
starts from where you stopped it or you pressed [PLAY MODEl.
To cancel
Press [I 1until "_>" disappears from the unit's display.
B!
ROT5896
• The resume function does not work if the disc's play time is not
displayed•
eThe position is cleared when the disc is exchanged.
,,The position memorized when you press [I] is cleared if you
switch the unit to standby or it switches to standby automatically
(-, page 9, Auto power*off function).
 Loading...