

Panasonic DVD-CV35 User Manual
Panasonic
DVD/VIDEO CD/CD PLAYER
Operating Instructions
The photographs show OVO-CV40.
Model No DVD-CV40
DVD-CV35
; -Mim
VIDEO
QJJ
Before connecting, operating or adjusting this product, please read
these instructions completely.
Please keep this manual for future reference.
PRINTfO WITH
SOYINK
This manual was printed with $oy bssed ink. RQT5613-P
Dear customer
Thank you for purchasing this product.
For optimum performance and safety, please read these instructions
carefully.
Bl Marks used in these operating instructions
indicates features applicable to DVD only.
IV/cjo]i: Video CD only.
fBI: CD only.
■O
§
to
O)
c
£
O
(http:/Avww.panasonic.com).
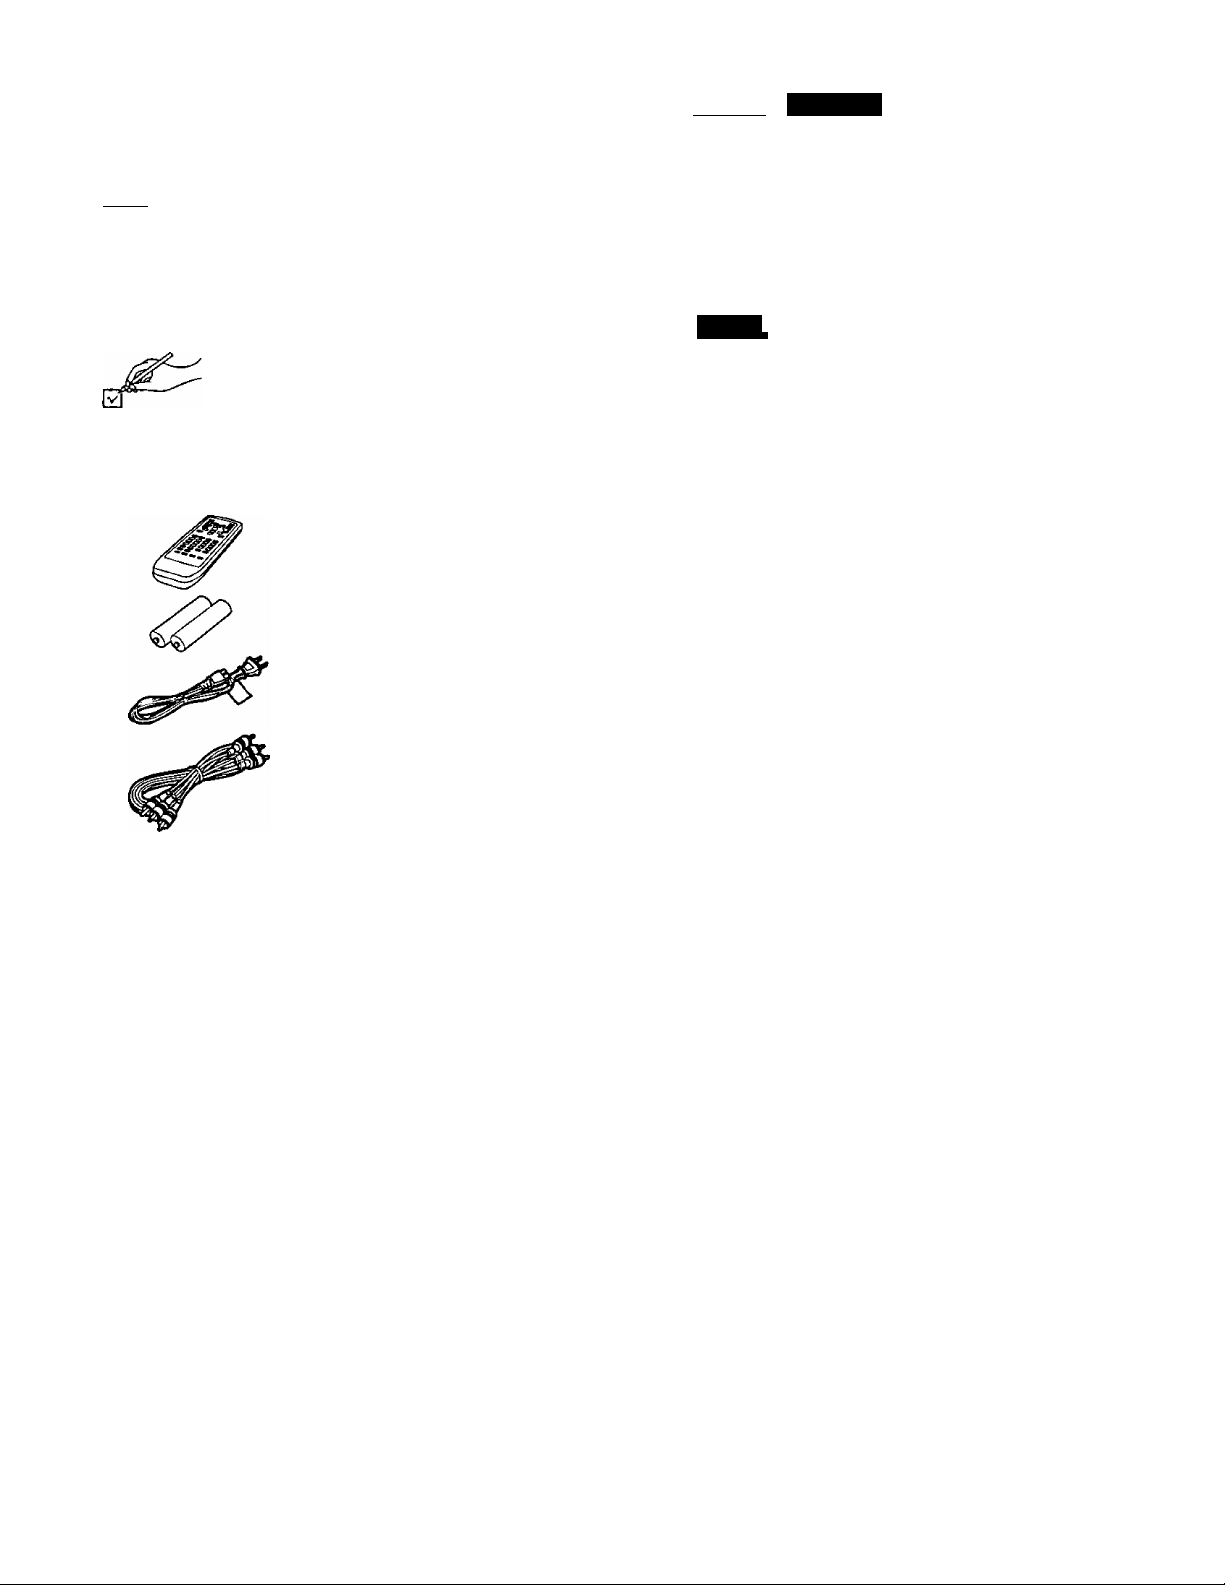
Accessories
Please check and identify the supplied accessories.
Use numbers indicated in parentheses when asking
for replacement parts.
To order accessories contact 1’800-332-5368 or web site
Q Remote control
(RAK-DV964WK)
....................................
Table of contents
©ggfliiB)
Accessories............................................................................................ 2
SAFETY INFORMATION
PRECAUTIONS..................................................................................... 4
Remote control preparations................................................................. 5
Control reference guide......................................................................... 6
Disc information..................................................................................... 8
Connection to a television
Basic
Basic play............................................................................................ 11
When a menu screen appears on the TV monitor .......................... 12
Stopping play................................................................................... 12
Skipping discs.................................................................................. 13
Other methods of play
Still picture (Pause)/Skipping chapters or tracks/
Frame advance (Frame reverse)................................................. 14
Slow-motion play/Rapid advance (Rapid reverse).......................... 15
1
Canceling playback control/Using menus to play
Stanted
......................................................................
.....................................................................
..........................................................................
............................
3
9
14
16
□ Batteries
for remote control
Q AC power supply cord
(RJA0065-A)
□ AudioArideo cable .............................1
(VJA0788-D)
Optional accessories
S video cable (■» page 9)
Optical digital audio cable (■» pages 34 and 35)
•The included AC power supply cord is for use with this unit only.
Do not use it with other equipment.
User memo:
DATE OF PURCHASE
DEALER NAME
DEALER ADDRESS _
TELEPHONE NUMBER.
The model number and serial number of this product can be
found on either the back or the bottom of the unit.
Please note them in the space provided below and keep for
future reference.
MODEL NUMBER
_______
_____________________________________
............................................
.........................
2
1
Advanced operations............................................................................17
Changing soundtrack language ...................................................... 17
Changing subtitle language............................................................. 18
Viewing from another angle............................................................. 18
Repeat play
Repeating sections between two specific points
(A-B repeat)................................................................................. 19
Changing picture quality for movie viewing......................................20
Raising dialogue volume
Reproducing an advanced Virtual Surround Sound (V.S.S.)
effect.............................................................................................21
Program play....................................................................................22
Random play
Using On-Screen Menu Icons..............................................................24
Common procedures........................................................................24
Detailed descriptions of each icon
Changing initial settings
Common procedures........................................................................27
1 Disc Languages..........................................................................28
2 Ratings........................................................................................29
3 Menu Language/4 On-Screen Messages/5 FL Display ... 30
9 Other Settings
How different kinds of software appear on your
television...........................................................................................32
Home theater........................................................................................33
Connecting an amplifier with a built-in decoder
Connecting audio equipment with digital audio input
terminals.......................................................................................35
Connecting audio equipment with 2-channel audio input
terminals........................................................................................35
Selecting digital output..................................................................36
.....................................................................................
..................................................................
....................................................................................
..................................................
.......................................................................
...............................................................................
COaBDsTiljasgfiaF
..............................
19
20
23
25
27
31
34
RQT5508
SERIAL NUMBER
_____________________________________
Troubleshooting Guide
Product Service
Before moving the unit.
Maintenance
Disc handling
Servicenter List
Specifications.....................
................
......................
....................
..................
Vsw (MlaeDos©
38
40
40
40
41
42
43

SAFETY INFORMATION
CAUTION!
THIS PRODUCT UTILIZES A LASER.
USE OF CONTROLS OR ADJUSTMENTS OR PERFORM
ANCE OF PROCEDURES OTHER THAN THOSE SPECI
FIED HEREIN MAY RESULT IN HAZARDOUS RADIATION
EXPOSURE.
DO NOT OPEN COVERS AND DO NOT REPAIR
YOURSELF. REFER SERVICING TO QUALIFIED
PERSONNEL
WARNING:
TO REDUCE THE RISK OF FIRE, ELECTRIC
SHOCK OR PRODUCT DAMAGE, DO NOT EX
POSE THIS APPLIANCE TO RAIN, SPLASH
ING, DRIPPING OR MOISTURE.
CAUTION:
TO PREVENT ELECTRIC SHOCK MATCH WIDE
BLADE OF PLUG TO WIDE SLOT, FULLY INSERT.
FCC NOTE:
This equipment has been tested and found to comply with the
limits for a Class B digital device, pursuant to Part 15 of the
FCC Rules. These limits are designed to provide reasonable
protection against harmful interference in a residential installa
tion. This equipment generates, uses and can radiate radio
frequency energy and, if not installed and used in accordance
with the instructions, may cause harmful interference to radio
communications. However, there is no guarantee that interfer
ence will not occur in a particular installation. If this equipment
does cause harmful interference to radio or television recep
tion, which can be determined by turning the equipment off
and on, the user is encouraged to try to correct the interfer
ence by one or more of the following measures:
• Reorient or relocate the receiving antenna.
• Increase the separation between the equipment and re
ceiver.
•Connect the equipment into an outlet on a circuit different
from that to which the receiver is connected.
•Consult the dealer or an experienced radio/TV technician for
help.
ItóEH BADWTHW WHEN OPEN
ÍWJGER
AVOID DIBECTEXPOSORE TO BEAM.
RADIATION LASER LORSQUE OUVERT,
[WJGBtS
ÉVITER TOUTE EXPOSITION AU FAISCEAU.
LASERSTHALING VED ABNING. NAR SIKKERHEDSAf BRÏDERE
ADVARSEL
ER DDE Af FUNmN UUDW UDSÆTTEISE FOR STRAlINTÎ.
AVAHAESSA JA SUOIAUlKmiS OHOmAESSA OUT ALTTIMA
VARO!
LASERSATEILYIU AL> KATSO SÀTEESEEH
VARNING
SPARREN AR URKOPPLAD BETHAKTA EJ STBAUH
laserstfAling nAr DEKSEL APNES OG sikkerhedsiAs
AOVARSE.
BRVTES.LNNGAEKSPONERINGEOR STrAlEN.____________
LASERSTRAHLUNG. WENN ABDECKUNG GEILET.
VORSICHT
NICHT DEM STRAHL AUSSETZEN.
ÛPPNADOO
CAUTION
RISK OF ELECTRIC SHOCK
A
CAUTION: TO REDUCE THE RISK OF ELECTRIC
The lightning flash with arrowhead symbol, within
an equilateral triangle, is intended to alert the user
to the presence of uninsulated “dangerous voltage”
within the product’s enclosure that may be of suffi
cient magnitude to constitute a risk of electric shock
A
A
to persons.
The exclamation point within an equilateral triangle
is intended to alert the user to the presence of
important operating and maintenance (servicing)
instructions in the literature accompanying the ap
pliance.
DO NOT OPEN
SHOCK, DO NOT REMOVE SCREWS.
NO USER-SERVICEABLE PARTS
INSIDE.
REFER SERVICING TO QUALIFIED
SERVICE PERSONNEL.
{Inside of product)
(Intérieur de l’appareil)
(Indersiden at apparatet)
(Tuotteen sisâllâ)
(Apparatens insida)
(Produktets innstde)
(Im Inneren des Gerätes)
A
■o
'S
a
V)
o>
c
Ê
Q>
o
FCC Caution: To assure continued compliance, follow the at
tached installation instructions and use only shielded cables
when connecting to other devices. Also, any changes or mod
ifications not expressly approved by the party responsible for
compliance could void the user’s authority to operate this
equipment.
RQT5508

PRECAUTIONS
Before using this unit please read these operating instructions care
fully. Take special care to follow the warnings indicated on the unit
itself as well as the safety suggestions listed below.
Afterwards keep them handy for future reference.
Power Source—The unit should be connected to a power supply
1.
•o
■ë
a
to
.c
£
<3
O)
Qi
only of the type described in the operating instructions or as
marked on the unit. If you are not sure of the type of power supply
to your home, consult your appliance dealer or local power com
pany.
2.
Polarization—If the unit is equipped with a polarized AC power
plug (a plug having one blade wider than the other), that plug will
fit into the AC outlet only one way. This is a safety feature. If you
are unable to insert the plug fully into the outlet, try reversing the
plug. If the plug should still fail to fit, contact your electrician to
replace your obsolete outlet. Do not defeat the safety purpose of
the polarized plug.
3.
Power Cord Protection—AC power supply cords should be
routed so that they are not likely to be walked on or pinched by
items placed upon or against them. Never take hold of the plug or
cord if your hand is wet, and always grasp the plug body when
connecting or disconnecting it.
4.
Overloading—Do not overload wall outlets and extension cords
as this can result in a risk of fire or electric shock.
5.
Nonuse Periods—When the unit is not being used, turn the
power off. When left unused for a long time, the unit should be
unplugged from the household AC outlet.
6.
Attachments—Do not use attachments not recommended by
the unit manufacturer as they may cause hazards.
UnlSlMIMsCD
Environment
1. Water and Moisture—Do not use this unit near water—for ex
ample, near a bathtub, washbowl, swimming pool, or the like.
Damp basements should also be avoided.
2. Condensation—Moisture may form on the lens in the following
conditions...
• immediately aftera heater has been turned on.
•in a steamy or very humid room.
•when the unit is suddenly moved from a cold environment to a
warm one.
If moisture forms inside this unit, it may not operate properly. To
correct this problem, turn on the power and wait about one hour
for the moisture to evaporate.
3. Heat—The unit should be situated away from heat sources such
as radiators and the like. It also should not be placed in tempera
tures less than 5 "C (41 ®F) or greater than 35 °C (95 '’F).
Placement
1. Ventilation—The unit should be situated so that its location or
position does not interfere with its proper ventilation. Allow
to cm (4") clearance from the rear of the unit.
2. Foreign Material—Care should be taken so that objects do not
fall into and liquids are not spilled into the unit. Do not subject this
unit to excessive smoke, dust, mechanical vibration, or shock.
3. Carts and Stands—The unit should be used only with a cart or
stand that is recommended by the manufacturer.
The unit and cart combination should be moved
with care. Quick stops, excessive force, and un
even surfaces may cause the unit and cart combi
nation to overturn.
4. Mounting—Any mounting of the appliance should follow the
manufacturer’s instructions, and should use a mounting accesso
ry recommended by the manufacturer.
BSMKúasEiñxas
Disconnect this unit from the AC outlet before cleaning.
Clean the cabinet, panel and controls with a soft cloth lightly moist
ened with a mild detergent solution.
Do not use any type of abrasive pad, scouring powder or solvent
such as alcohol or benzine.
Damage Requiring Service—The unit should be serviced by
qualified service personnel when:
(a) The AC power supply cord or the plug has been damaged: or
(b) Objects have fallen or liquid has been spilled into the unit; or
(c) The unit has been exposed to water; or
(d) The unit does not appear to operate normally or exhibits a
marked change in performance; or
(e) The unit has been dropped, or the enclosure damaged.
2.
Servicing—The user should not attempt to service the unit be
yond that described in the operating instructions. All other servic
ing should be referred to an authorized service personnel.
For the address of an authorized servicenter:
In the U.S.A., call 1-800-211-7262,
e-mail consumerproducts &panasonic,com,
or visit www.panasonic.com
In Canada, call 1-800-561-5505
or visit
3.
4.
www.panasonic.ca
Replacement parts—When parts need replacing, ensure the
servicer uses parts specified by the manufacturer or parts that
have the same characteristics as the original parts. Unauthorized
substitutes may result in fire, electric shock, or other hazards.
Safety check—After repairs or service, ask the servicer to per
form safety checks to confirm that the unit is in proper working
condition.
RQT5508

Remote control signal sensor
Remote control preparations
a asDsaiflfeffem
Use of batteries
•Align the poles {+ and —) properly when inserting the batteries.
• Do not mix old and new batteries or different types of batteries.
• Do not recharge ordinary dry cell batteries.
• Do not heat or disassemble the batteries. Do not allow them to con
tact flame or water.
• Remove the batteries if the unit is not to be used for a long time.
• Do not keep together with metallic objects such as necklaces.
• Do not use rechargeable type batteries.
• Do not use batteries if the covering has been peeled off.
Mishandling of batteries can cause electrolyte leakage which can
damage items the fluid contacts and may cause a fire.
If electrolyte leaks from the batteries, consult your dealer.
Wash thoroughly with water if electrolyte comes in contact with any
part of your body.
Operation notes
■O
&
(0
Ot
c
Ê
Q)
• Do not place obstacles between the remote control signal sensor
and remote control unit,
• Do not expose the remote control signal sensor to direct sunlight or
to the bright light of a fluorescent light.
•Take care to keep the remote control signal sensor and end of the
remote control unit free from the dust.
• If this system is installed in a rack with glass doors, the glass doors’
thickness or color might make it necessary to use the remote con
trol a shorter distance from the system.
To prevent damage
• Never place heavy items on top of the unit.
• Do not disassemble or reconstruct the unit.
• Do not spill water or other liquids info the unit.
RQT5508
■
Control reference guide
*0
§
a
to
£
o
O
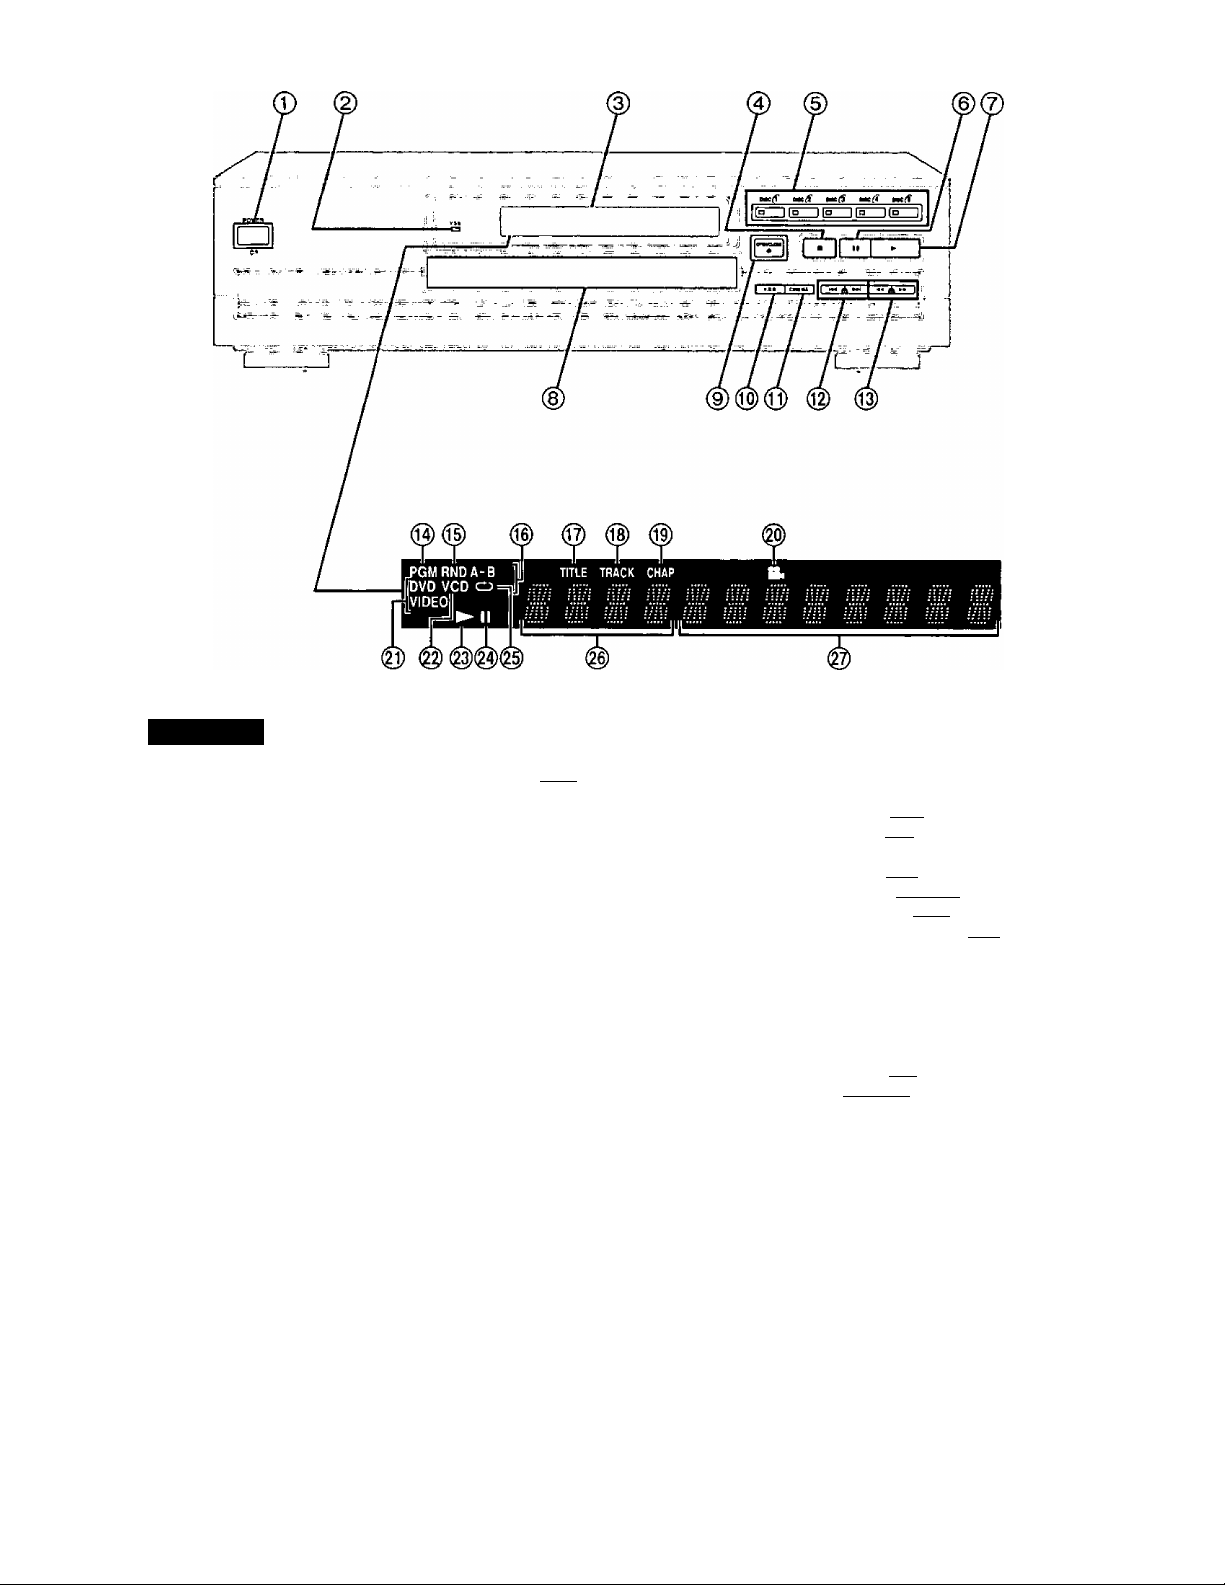
Main unit
_______________________________________________Page
Standby/on button (POWER, cb/l) .................................................11
©
Press to switch the unit from on to standby mode or vice versa.
In standby mode, the unit is still consuming a small amount of
power.
Virtual Surround Sound indicator (V.S.S.)
FL display
Stop button (■) ................................................................................12
Disc 1-5 buttons/!ndicators (DISC ({'-(§)...................................11,13
Pause button (II).........................................................................14
Play button (►) ..............................................................................11
©
Disc tray .........................................................................................11
Disc tray open/close button (A OPEN/CLOSE)
Virtual Surround Sound button (V.S.S.) .........................................21
Cinema button (CINEMA) ...............................................................20
Skip buttons (1^, ) .....................................................12,14
Search buttons (^-4, ►►) ..............................................................15
.....................................
.........................
11
21
Illuminates during program play. ISCT
Illuminates during random play, FTH
Illuminates during A-B repeat play.
Illuminates during play of a title. IdvdI
Illuminates during play of a track. MggI 1*1*1
Illuminates during play of a chapter. | dvd |
Illuminates when you can change the angle. I^vdI
Illuminates when the unit reads a DVD.
Illuminates when the unit reads a Video CD or CD.
illuminates during play.
Flashes when the RESUME function is ON.
Illuminates in the still picture (pause) mode.
Illuminates during repeat play.
Shows the Titte/chapter number |dvd|
Shows the Track number 1^551 Bl*l
Shows the elapsed play time from the start of the title/track
during play
RQT550e
I^i30u)5ii3®a^^
Page
SKIP ip^T.-^ARSH ^
_STOp_ . must .^. Ewy
,iQ_sllQ_ari
SU3nrL£ AKjt.E i
OCJCJC3-4^
GD CEl H S
GDBB@
raraniB
Disiii Discs "bscsi fl^scsfp ':i
C3 cn ra|iC3-T
0^4 mscs
■B-BACTION TOPE REPEAT MOPE I „
-®
C3. C3r—i—®
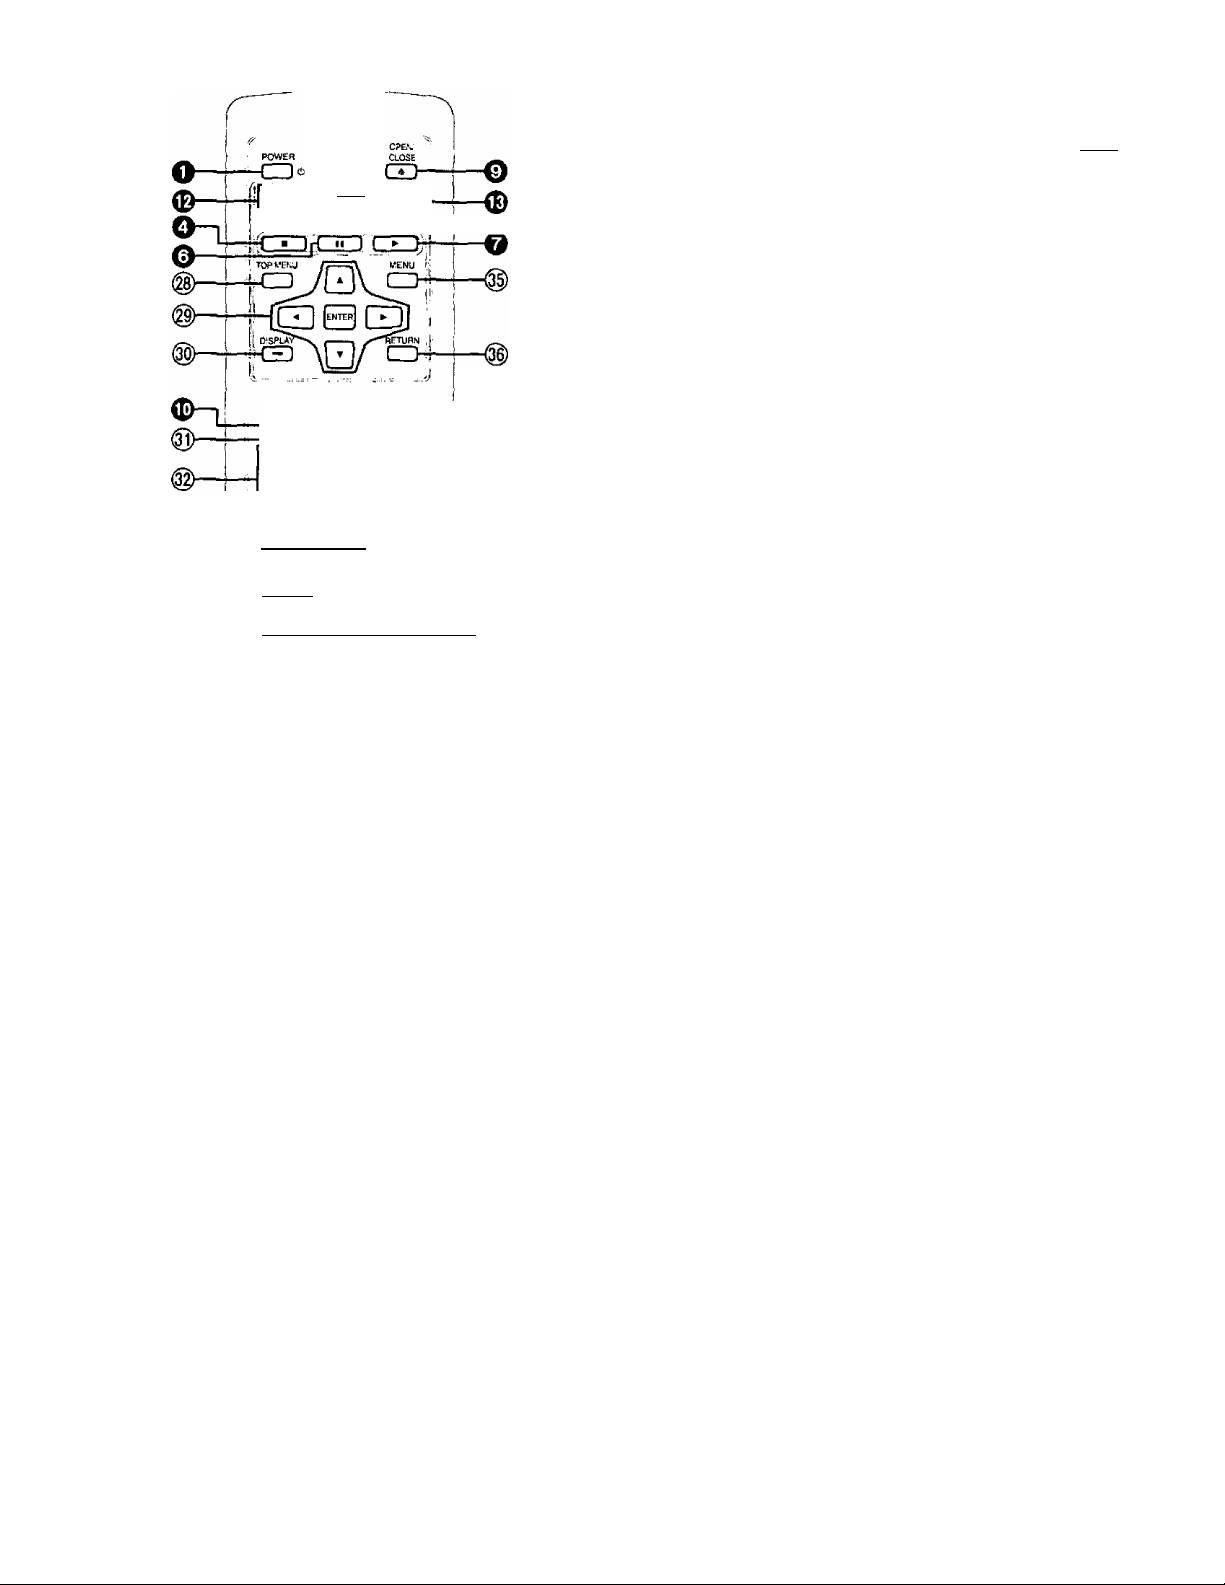
@ Top menu button (TOP MENU) .................................................12,16
® Cursor buttons (▲, ▼, ◄, ►)/
Enter button (ENTER) ...............................................................10,12
® Disptay button (DISPLAY)
® Subtitle button (SUBTITLE)
® Numeric buttons (1-9, 0, glO)
•To select a 2-digit number
Example; To select track 23
Press [aiO], then [2] and [3].
® Action button (ACTION) ....................................................................27
® Repeat mode button (REPEAT MODE)
® Menu button (MENU)...................................................................12,16
® Return button (RETURN) ..................................................................10
® Angle button (ANGLE)
® Audio button (AUDIO)........................................................................17
® Cancel button (CANCEL) ..................................................................23
® Disc skip button (Disc SKIP)
® Play mode button (PLAY MODE)
® A-B repeat button (A-B REPEAT) .....................................................19
................................................................
..............................................................
............................................................
............................................
.......................................................................
.......................................................
......................................................
11,13
22
24
18
12
19
■o
■S
2
CO
O)
c
£
(3
is
Buttons such as O function in exactly the same way
as the buttons on the main unit.
RQT5506
Disc information
Discs supported by this unit
0
DVD-Video
*0
Video CD
§
s
Ü)
Audio CD
?
£
o
O
For the purpose of these operating instructions, “DVD" stands for DVD-Video and “CD” stands for Audio CD,
nCOMWCT
[olDg(@
IDIGITAL VIDEO]
nCOMWKCT
(o]DS(@
□ICITAL AUDIO
pyo
video'
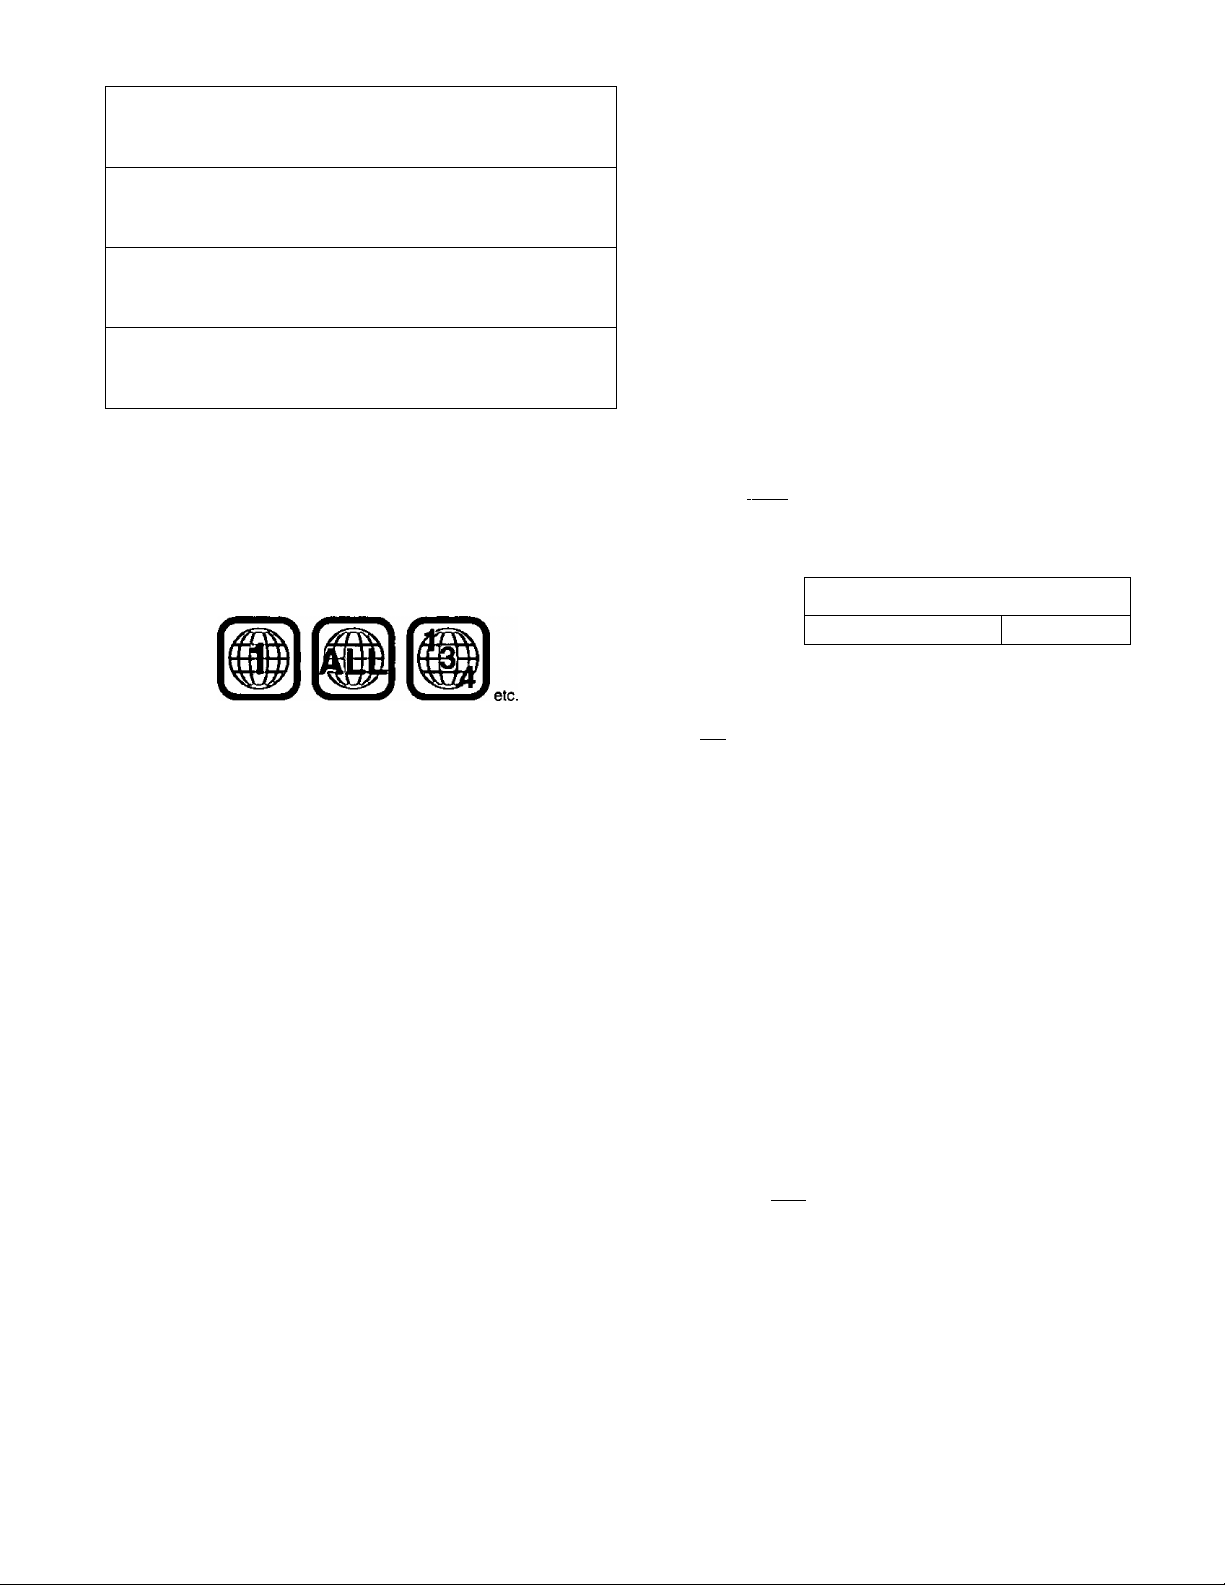
■ Region number supported by this player
Region numbers are allocated to DVD players and software accord
ing to where they are sold.
•The region number of this unit is "1".
•The unit will play DVDs marked with labels containing the region
number “1” or "ALL”.
Example:
3" (8 cm) disc/
5" (12 cm) disc
3" (8 cm) disc/
5" (12 cm) disc
3” (8 cm) disc/
5" (12 cm) disc
• Do not try to play Photo CD or CD-R.
(Data on the disc may be damaged.)
• DVD with region number other than “1" or “ALL”
• PAL discs
• DVD-ROM
• DVD-R
• DVD-RW
•CVD
• CDV
etc.
■ Terms used in these operating instructions
•Title/Chapter Id^vdI
DVDs are divided up into large sections, titles, and smaller sections,
chapters. The numbers allocated to these sections are called title
numbers and chapter numbers.
Discs not supported by this unit
• CD-G
•CD-RW
•DVD-RAM
•SVCD
•SACD
Example:
Chapter 1, Chapter 2, Chapter 3 Chapter 1, Chapter 2
• Divx Video Disc
• DVD-Audio
•DVD+RW
•CD-ROM
•VSD
Title 1 Title 2
■ Playing DVDs and Video CDs
The producer of the material can control how these discs are played.
This means that you may not be able to control play of a disc with
some operations described in these operating instructions. Read the
disc’s instructions carefully.
Example: •“0” appears when you press the skip buttons to move
to the next section.
• Resume, repeat play, and markers may not work during
play of interactive DVDs and menu play of Video CDs
with playback control,
• After showing the Karaoke menu, tracks are played
successively without returning to the menu (Video CD
with playback control).
•Track iH»i
Video CDs and CDs are divided up into sections called tracks, and
the numbers allocated to these sections are called track numbers.
Example:
Track 1, Track 2, Track 3, Track 4 , Track 5
•----------4-
'Playback control
If a Video CD has “playback control” written on its disc or jacket, it
means that particular scenes or information can be selected for
viewing interactively with the TV monitor using the menu screen.
This unit can play Video CDs with playback control.
Using menus to control play of a Video CD is called “menu play” in
these operating instructions.
Display during menu play of a Video CD with playback control
• Interactive DVD rovDl
An interactive DVD is DVD software which includes multiple angles,
multiple plot endings, etc. The elapsed play time of some of these
DVDs is not shown.
Display during play of an interactive DVD
DVD
VIDEO
---------
»H———4-------------4-
n /
f"/ f
-----------
U
•
RQT5508
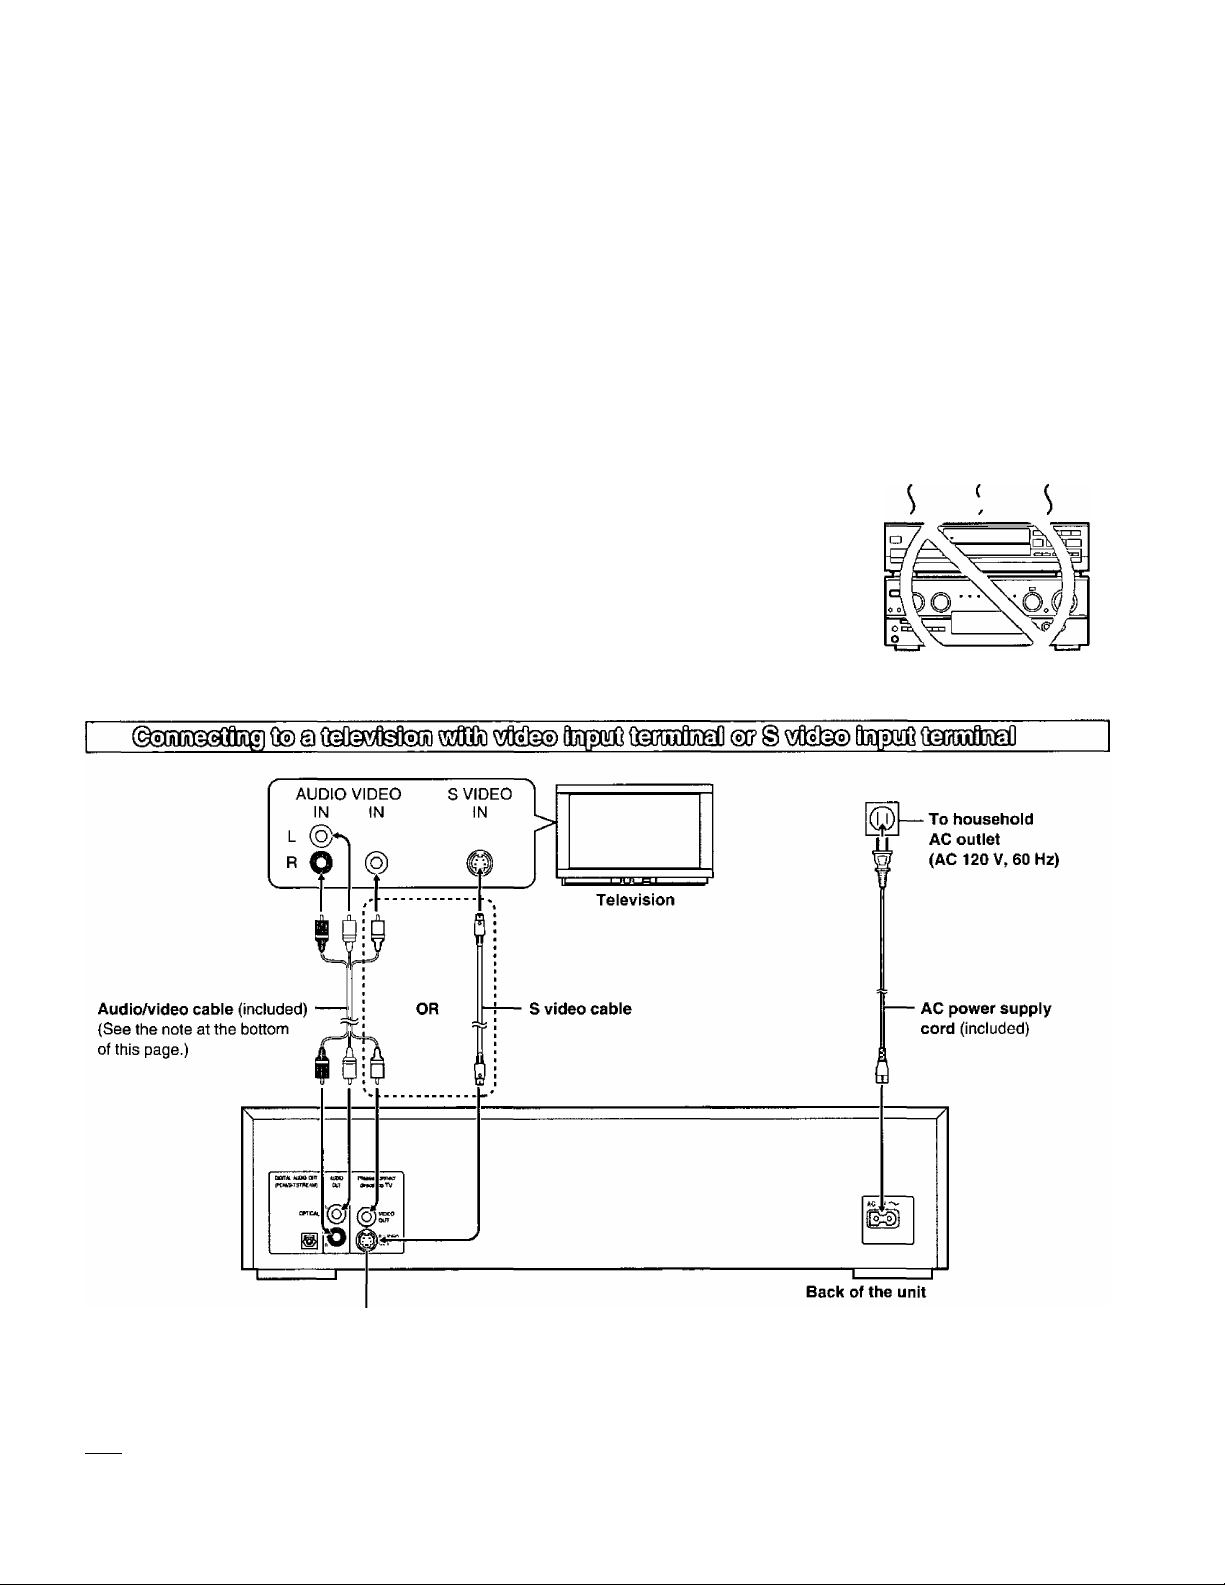
Connection to a television
• Ensure that this unit and other equipment to be connected are switched to the standby mode or oft and disconnect the AC power supply cord
before commencing connection,
• Do not block ventilation holes of any of the equipment and arrange them so that air can circulate freely.
• Read through the instructions before connecting other equipment.
• Ensure that you observe the color coding when connecting audio and video cables.
• See page 33 for information about how to upgrade your system with other audio/visual equipment.
• Peripheral equipment and optional cables sold separately unless othenwise indicated.
•TV volume may be lower when playing DVDs than during television broadcasts. Turn the volume up while playing DVDs and reduce it to the
previous level before switching the source back to television to avoid sudden changes in volume.
• When you have finished connection, select the appropriate screen type at the initial setting “6 TV Aspect” according to your television (4:3/16:9)
page 10). No changes are needed if you connect the unit to a conventional television (4:3).
• If the unit is connected to a switched outlet on an AV amplifier and the amplifier is turned off, the unit is effectively disconnected from the AC power
supply. We recommend that you connect the unit directly to an household AC outlet.
Conserving power
•The unit consumes approx, 2.0 W even when it is turned off with [POWER (I)/!]. To save power when the unit is not to be used for a long time,
unplug it from the household AC outlet.
■o
§
a
W)
O)
c
£
J'li
o
Connect Your Unit Directly To Your
Television.
If the unit is connected to the television through a video cassette
recorder, the picture may not be played correctly due to the
copy guard. So we strongly recommend you do not connect the
unit to your video cassette recorder when setting up your home
entertainment system.
• Connect to the television section if you connect the unit to a
combined television-video player.
Do not place the
unit on amplifiers or
other equipment
which may become
hot.
The heat can damage the unit.
S video output terminal
The S (separate) video output terminal achieves a clearer picture than the video output terminal by
separating the chrominance (C) and luminance (Y) signals before transmitting them to the
television. (Actual results depend on the television.)
IJBHI
• If your television is monaural, use a stereo-monaural audio cable instead of the supplied audio/video cable. The video part of the cable (yellow)
can still be used if required. .
^ Audio cable
To TV audio input terminal " ' " "
_
__
To the unit’s audio output terminal (white, “L”)
__
To the unit’s audio output terminal (red, “R")
RQT5508
■O
§
a
O)
O)
c
£
Q)
C3
Connection to a television
■ Before enjoying DVDA^ideo CD/CD
The menu language for this unit has been set to English, but you can
change the language to French or Spanish “3 Menu Language”,
page 30), English has been used in the examples shown.
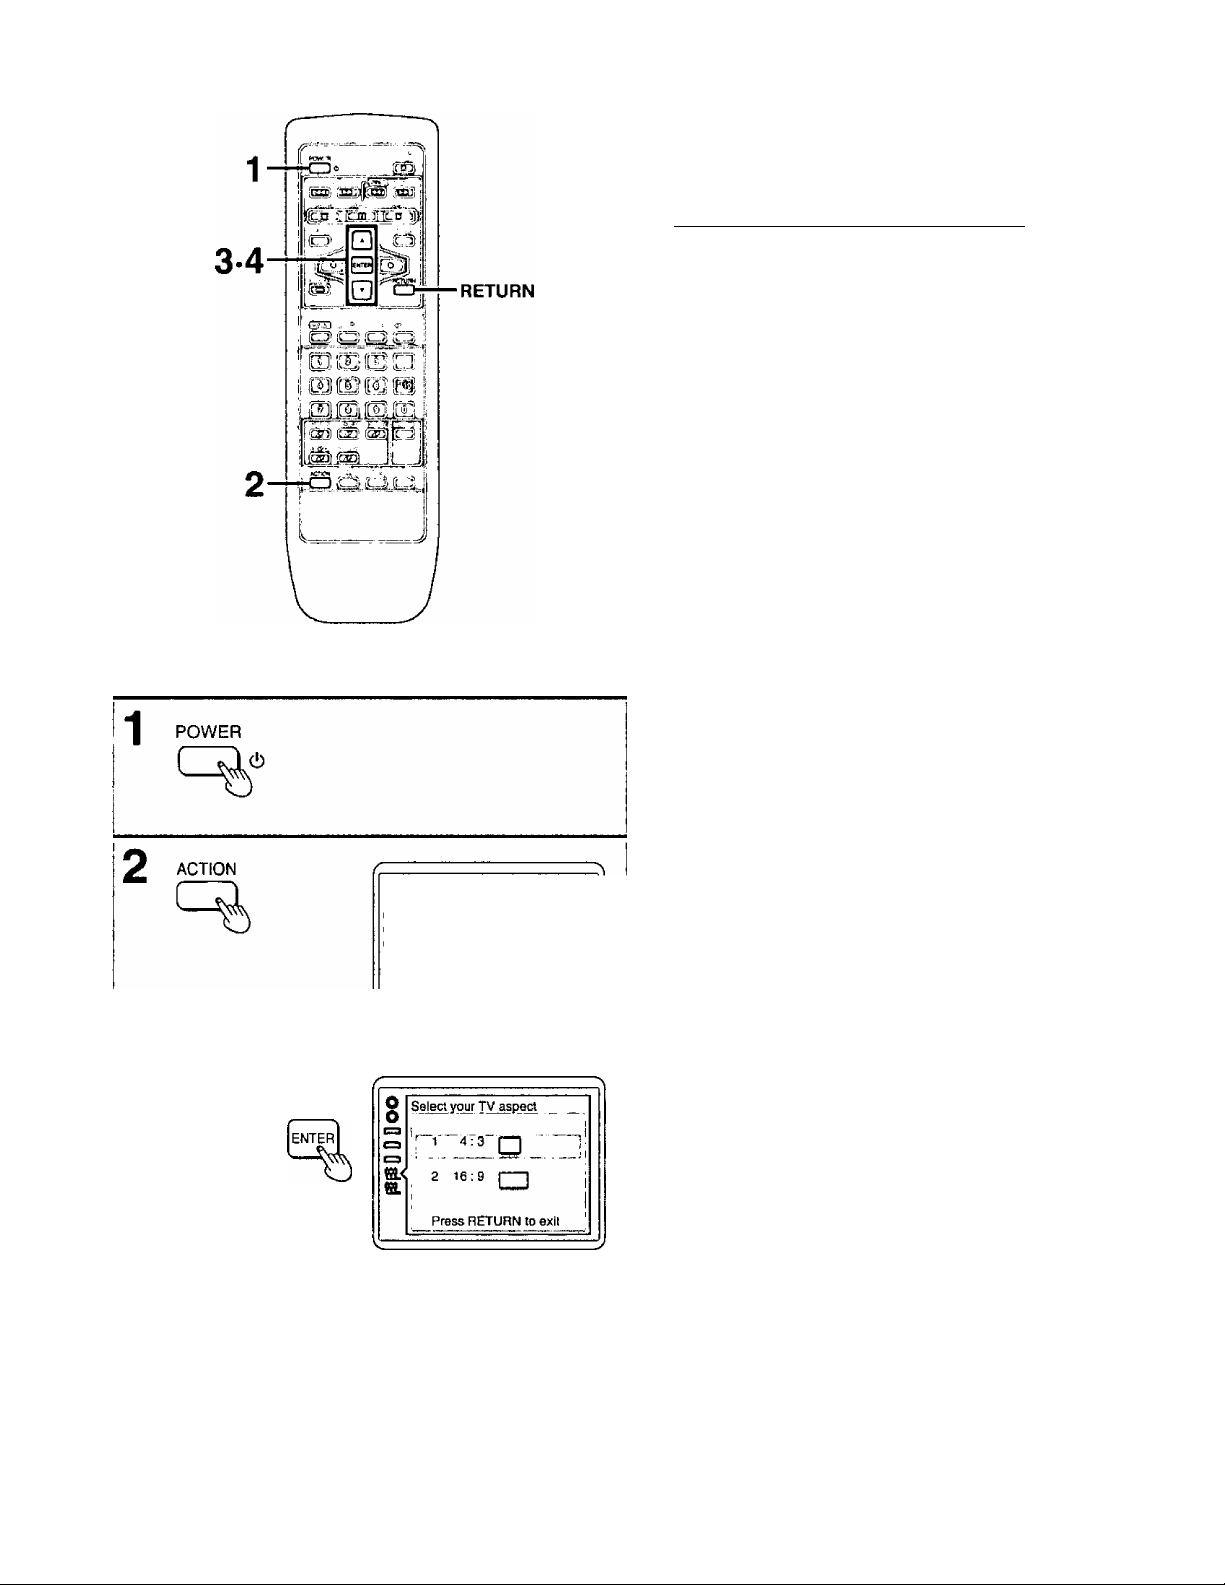
H*ij§g[t3Siaiit!jiro7^ aataaio lanaa
Select the TV aspect, conventional size screen (4:3) or widescreen
(16:9) according to your television.
Preparations
• Ensure connections to your television and audio equipment are
correct.
•Turn on your television and other equipment.
• Switch the video input mode on the television to suit the type of
connection you have made (e.g., VCR 2).
1 Press [POWER Cb] to switch on the
power.
2 Press [ACTION] in the stop mode.
The initial settings screen is displayed.
3 Press the cursor buttons [A, ▼] to
select “6 TV Aspect” and press
[ENTER].
0
0
O <£ DjicXanauaass.
O 2 Ratings Level 8i'
C3 3 Menu Language English
Q 4 On-Screen Messages
^3 5 FL Display Bright
(^ 6 TV Aspect 4-.3
t$L T Digital Audio Output
9 Other Settings
Press RETURN to exit
4 Press the cursor buttons [A, T] to
select a TV aspect and press
[ENTER].
1 4:3 (Factory preset)
Select when a conventional television is connected.
2 16:9
Select when a widescreen television is connected.
Setting is finished and the initial settings screen in step 2 is displayed.
To cancel during setup operation
Press [RETURN], (The previous screen is displayed.)
To exit the initial settings screen
Press [ACTION] or [RETURN],
For your reference
For further details on the images which appear on the TV screen, see
page 32.
RQT5508 I
0
'»►a
0

Basic play
Preparations
• Ensure connections to your television and audio equipment are
correct.
•Turn on your television and other equipment.
• Switch the video input mode on the television to suit the type of
connection you have made (e.g., VCR 2).
1
Press [POWER c!)/l] to switch on the power.
The disc indicator in the play position lights.
2
Press OPEN/CLOSE] to open the disc tray.
The disc indicator flashes.
Place the disc on the disc tray.
3
• Insert inside the guides.
• Do not toad more than one disc.
4
Press [A OPEN/CLOSE] to close the disc tray.
•The closed tray is in the play position (its disc indicator
lights).
• Some discs start playing automatically.
tf)
C
.o
2
I
tn
<2
CD
• Do not close the disc tray by hand.
To start play from the disc in the play position,
Press [►].
or
lOpenl
To start play from another disc,
Press [DISC 1-5] to select the disc.
t)
^
______
Label must face upward.
(With double-sided discs,
load so the label for the
side you want to play is
facing up.)
Close Reading
Example: To play disc 1, press [DISC 1 ].
Play begins.
* •
To load other trays
Press [DISC 1-5] to select another tray and press
[A OPEN/CLOSE] to open the tray.
• All the discs loaded in the disc trays will be played sequentially.
Pressing [DISC SKIP] may be necessary to proceed to the next disc
after play of DVDs and Video CDs with playback control.
• When a menu screen appears on the TV monitor, see page 12.
□iscd'
D I ~l I
RQT5508

Basic play
When a menu screen appears on the TV monitor
Press the cursor buttons [▲, T, ◄, ►]
and press [ENTER], or press the numeric
buttons, to select the item.
Play of the selected item now begins.
•The cursor buttons are not effective for selecting items on Video
CDs.
To select a 2'digit number using numeric buttons
Example: To select track 23
Press [s 10], then [2] and [3].
■ Other buttons used to operate menus
Read the disc’s instructions for further details about operation.
[ SKIP): Shows the next menu.
SKIP): Shows the previous menu.
[RETURN]: Shows the menu screen.
[TOP MENU); Shows the first menu screen. |dvd|
[MENU]: Shows the menu screen. |dvd|
•“NO PLA'y"’ is displayed on the FL display if you bad the following
kinds of discs:
•DVD for which play is prohibited by the initial settings “2 Ratings”
(• page 29).
•DVD with a region number other than “1 ” or “ALL” (■• page 8).
• If appears on the TV monitor when a button is pressed, the
operation is prohibited by the unit or disc.
B Stopping play
Press [■] during play.
•The unit records the point where [■] was pressed during play.
{“>” flashes on the unit’s FL display.)
To resume play from where you stopped
i
To clear the RESUME function
(RESUME function)
Press [►] while “t> ” is flashing on the FL display.
Play will resume from the point where [■] was pressed.
Press [■] again while is flashing on the FL display.
•The RESUME function works only with titles for which the elapsed
play time appears on the unit’s FL display during play.
•This feature remains active if the unit is switched to the standby
mode and then turned back ON, but is cleared if the AC power sup
ply cord is disconnected unless you were playing a disc on tray 1.
RQT550S
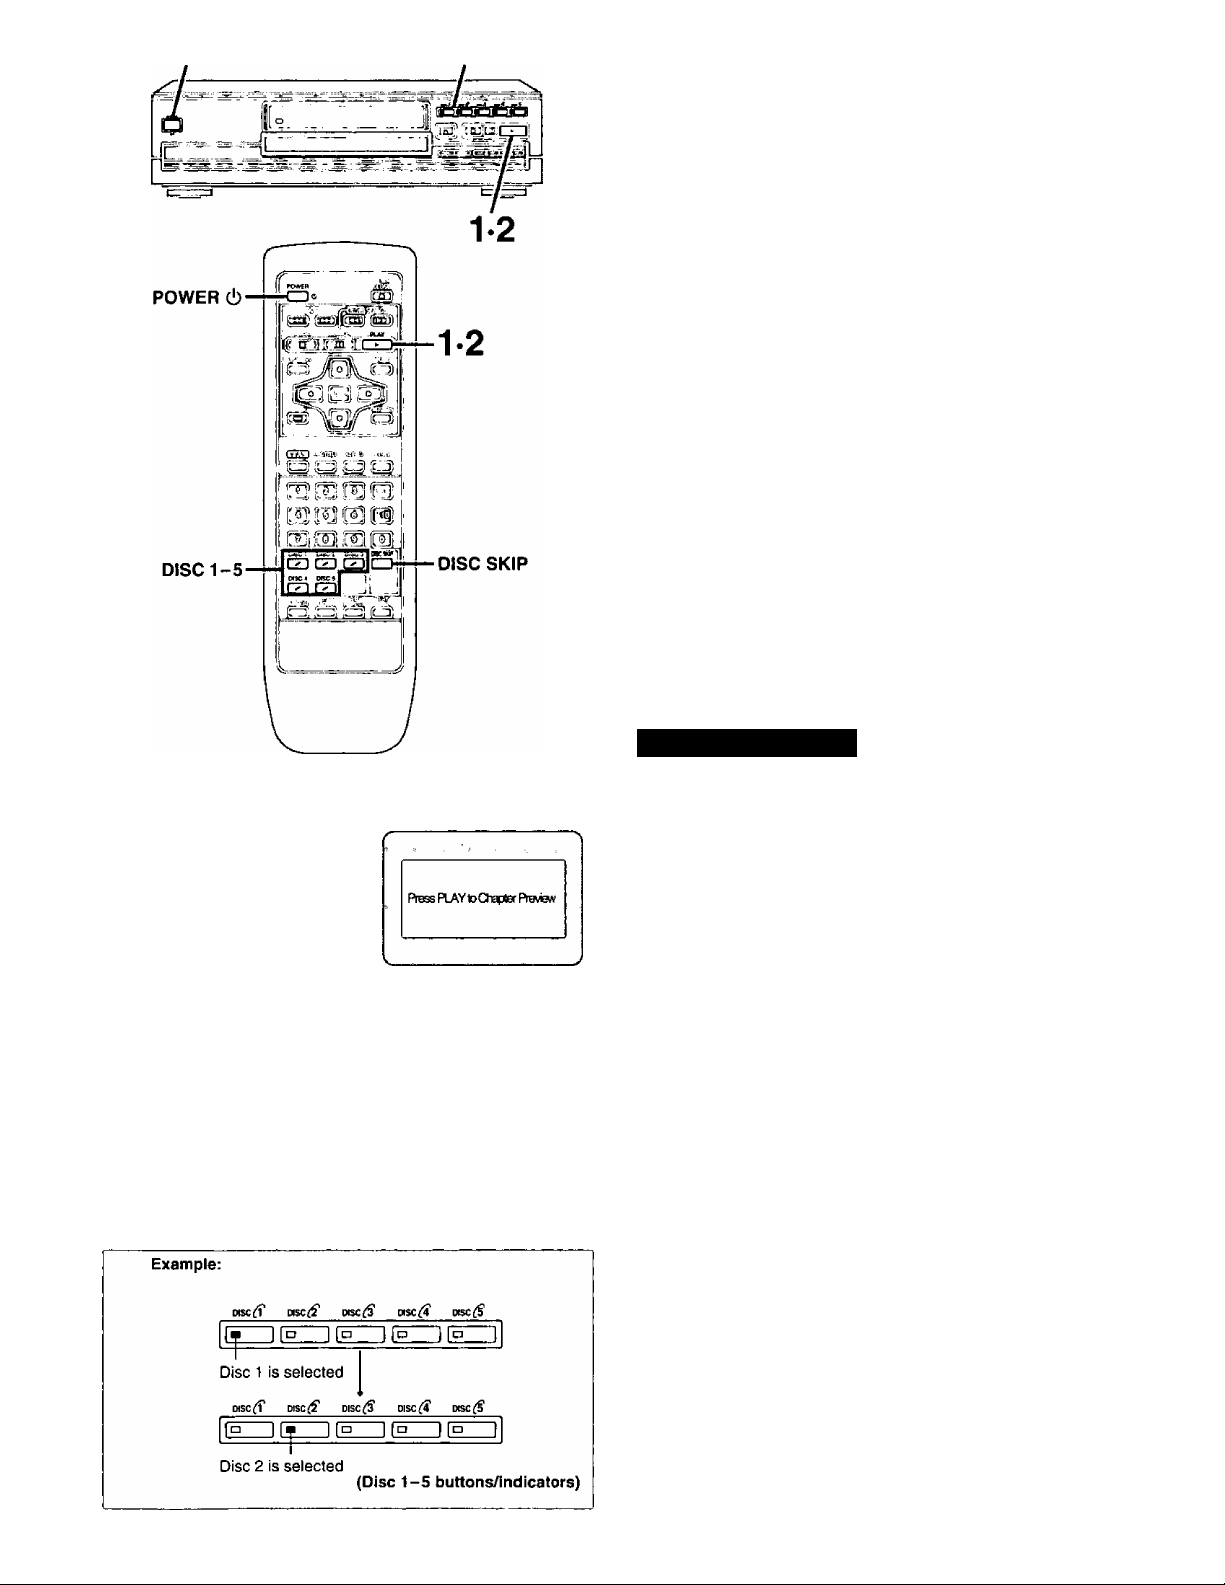
POWER (!j/I
Disc 1 -5 buttons/indicators
Basic play
Chapter preview function
DVD
This function plays the first few seconds of each chapter from the
beginning of the title up to the point where operation was stopped.
This makes it possible to review previous chapters.
1. Press [^] while "O” is flashing on the FL display.
(The message illustrated is briefly displayed.)
2. Press [^] again while the message is displayed on the
screen.
Normal play will commence from the point where operation was
stopped.
•Canceling the RESUME function will also clear the chapter preview
function.
•The chapter preview function may not work with some DVDs.
■ After operation
When the unit is not in use, remove the discs and press [POWER
c!)/l] to switch the unit to the standby mode.
The unit is automatically switched to the standby mode after approx,
30 minutes have elapsed in the stop mode.
(Auto power-off function)
V)
c
.o
iZ
5
0)
OQ
1
DISC SKIP
•The disc in the play position continues to rotate while the menu is
displayed even after the unit has finished playing a particular item.
Stop the unit when you finish viewing to preserve the unit’s motor
and your television screen.
B Skipping discs
Press [DISC SKIP] during play or in the
stop mode.
The next disc indicator lights.
• Each time you press the button, the next tray is selected.
B When you press [DISC SKIP]
During play
•The next tray is selected and play begins from the beginning of
the disc. The unit skips empty trays.
In the stop mode
•The next tray is selected even if it is not loaded. (If the disc on
the tray is an interactive DVD or a Video CD with playback con
trol, play begins.)
For your reference
•You can also use [DISC 1 -5) buttons to skip the discs. (Play begins
automatically.)
•When you press [DISC SKIP] during play of disc 5, play of disc 1 will
start.
RQT5508

► PLAY
Other methods of play
Features on the next few pages are accessed primarily by using the
remote control.
A Still picture (Pause)
Press [II PAUSE] during play.
To return to normal play
Press [► PLAY],
B Skipping chapters or tracks
V)
c
p
2
Q)
§
O)
.5
OQ
PAUSE
SKIP
T "¿T
Reverse Forward
Press [K4, SKIP] during play or
while paused.
Play position
twice
Chapter/track Chapter/track Chapter/track
[«◄]
• You can skip only within the disc currently in play.
I For your reference
! »When [ !◄◄, ►>! SKIP] is pressed during menu play of Video CDs
i with playback control, a menu screen may be recalled.
once once
twice
[►W]
c Frame advance (Frame reverse)
Press the cursor buttons [^, ^] while paused.
•The disc is advanced (reversed) by one frame each time the cursor
buttons [◄, ►] are pressed.
•When the cursor buttons [■<, ►] are held, consecutive frame ad
vance (reverse) is activated.
RQT5508
f
Reverse Fonvard
(DVD only)
To return to normal play
Press [► PLAY].
• For Video CDs, frame reverse is not an available function.
For your reference
• Pressing [I I PAUSE] also activates frame advance.
•Whether the pictures are advanced by a “Frame" or “Field” is
automatic, but you can change the initial settings to choose how the
picture is advanced (^ “1 Still Mode” in “9 Other Settings",
page 31).
 Loading...