

Page 1
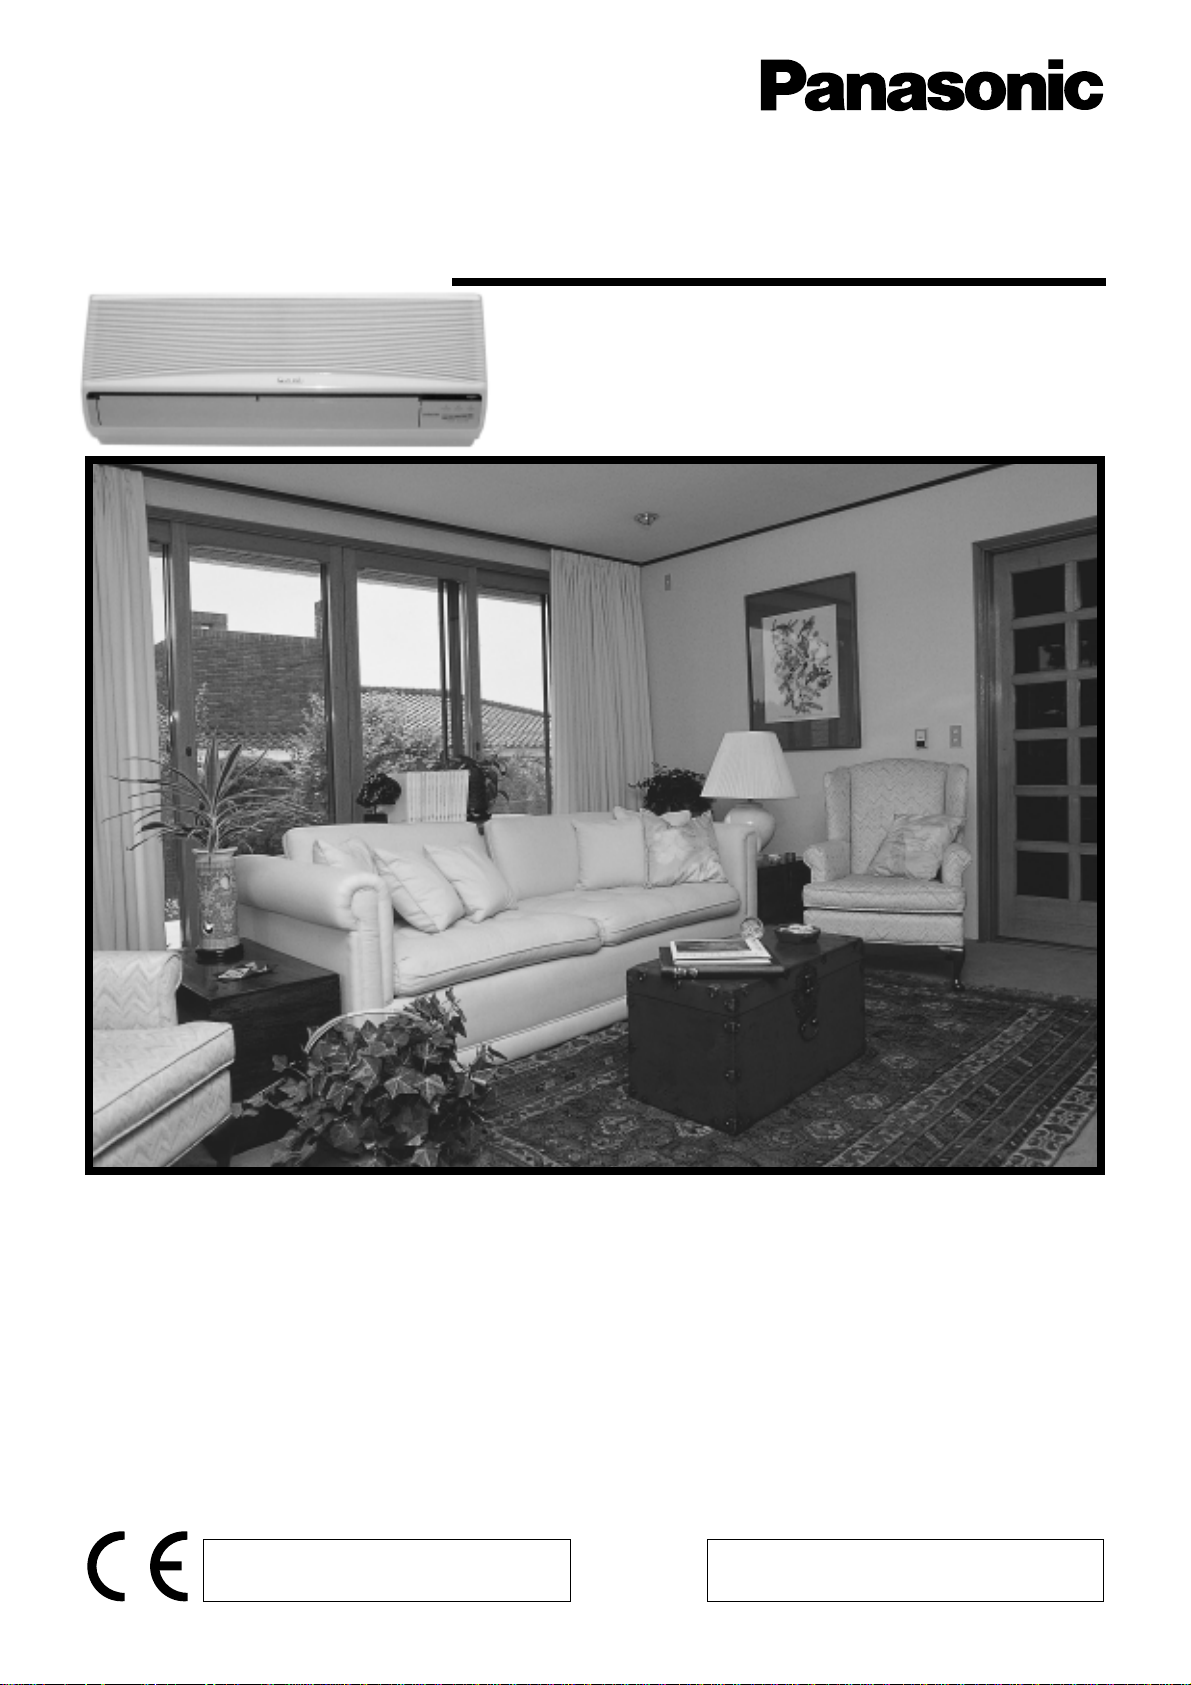
Room Air Conditioner
OPERATING INSTRUCTIONS
Indoor Outdoor
Model
CS-G95KE Model CU-G95KE
CS-G125KE CU-G125KE
Before using your air-conditioner, please
read this operating instructions carefully
and keep it for future reference.
MATSUSHITA INDUSTRIAL CORP.
NO. 2, JALAN SS8/1, SUNGEI WAY FREE TRADE ZONE,
SELANGOR, MALAYSIA
ENGLISH............P. 1 – P. 26
PORTUGUES.....P. 27 – P. 52
DEUTSCH .......... P. 53 – P. 78
FRANÇAIS .........P. 79 – P. 104
NEDERLANDS... P. 105 – P. 130
ITALIANO ........... P. 131 – P. 156
GREEK............... P. 157 – P. 182
ESPAÑOL........... P. 183 – P. 208
RUSSIAN............P. 209 – P. 237
or/and
ou/e
oder/und
ou/et
of/en
o/a
Þ/êáé
o/y
Ë/ËÎË F563167
MATSUSHITA AIR-CONDITIONING CORP.
LOT 2, PERSIARAN TENGKU AMPUAN, SECTION 21, SHAH ALAM
INDUSTRIAL SITE, SELANGOR, MALAYSIA
Page 2
Note
Please remember to record the following:
● Model Number
● Serial Number
● Dealer’s Name
● Date Purchased
Nota
Por favor, lembre-se de apontar o seguinte:
● Número de modelo
● Número de série
● Nome do distribuidor
● Data de compra
Anmerkund
Bitte notieren Sie die folganden Daten:
● Modellnummer
● Seriennummer
● Handle
● Verkaufedatum
Remarque
Veuiliaz ne pas oublier de noter:
● Le numéro de modéle
● Le numéro
● Le nom du revendeur
● La date d’achat
Opmerking
Vergeat a.u.b. niet het volgende te noteren:
● Modelnummer
● Serienummer
● Naam van de dealer
● Aankoopsdatum
Nota
Ricordatevi di registrare quanto segue:
● Modello
● Nr. di Serie
● Nome del rivenditore
● Data di acquisto
УзмеЯщуз
РбсбкблеЯуие нб кбфбгсЬшефе фб еоЮт:
● Бсйимьт МпнфЭлпх
● Бэощн Бсйимьт
● Пнпмб Бнфйрспуюрпх
● ЗмеспмзнЯб БгпсЬт
Anmerkung
Bitte notieren Sie die folgenden Daten:
● Modellnummer
● Seriennummer
● Händler
● Kaufdatum
F563167 Printed in Malaysia
Matsushita Electric Industrial Co., Ltd.
Osaka 542-8588, Japan
P0011-0
Page 3
BEFORE USE
Contents
Features and Accessories........................................2
Safety Precautions..............................................3 – 5
• Installation precautions
• Operation precautions
Name of Each Part for Inverter Aided Air Conditioner ......
Preparation (Indoor Unit • Remote Control) .....8 – 9
• Operating the remote control
• Inserting batteries
• Setting the clock
6 – 7
ENGLISH
HOW TO USE
WHEN
NECESSARY
Automatic • Heating • Cooling • Soft Dry • Fan.....
Adjusting Airflow Direction and Fan Speed .....
• To adjust fan speed
• To adjust the vertical airflow direction louvers
• To adjust the horizontal airflow direction louvers
10 – 11
12 – 13
Wide / Spot...............................................................13
Setting the Timers ...........................................14 – 15
Powerful • Sleep ......................................................16
• Powerful mode operation
• Sleep mode operation
Operation Hints .......................................................17
Care and Maintenance ....................................18 – 21
• Cleaning the indoor unit and remote control
• Cleaning the air filters (Once every 2 weeks)
• Cleaning the front panel (Must be remove before washing)
• Replacing the air purifying filters (Once every 3 months)
• Pre-season inspection
• When the air conditioner is not used for an extended
period of time
• Recommended inspection
Troubleshooting ..............................................22 – 23
Is There a Problem? ................................................24
Helpful Information .................................................25
• Remote control fails to function
• When there is a power failure
• Thunder and lightning
• Voltage fluctuation
▲
1
Page 4
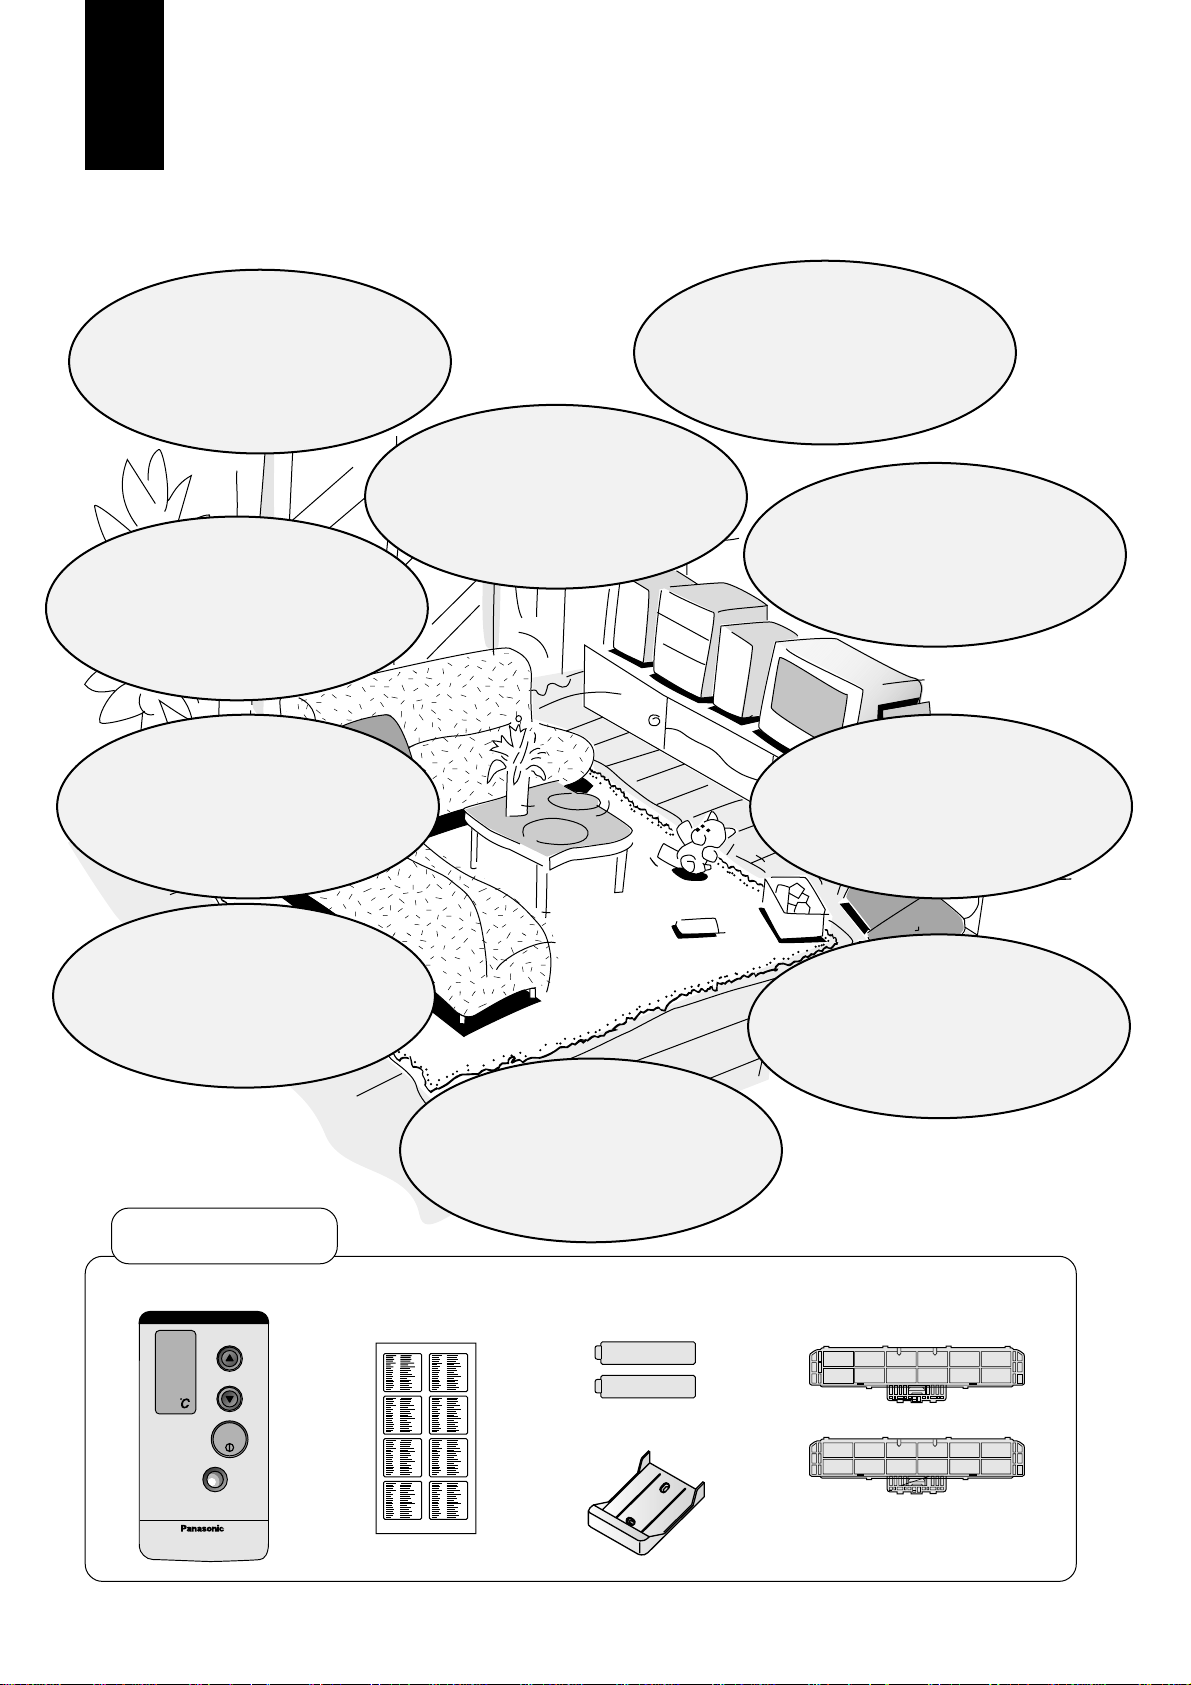
Features and Accessories
Cool, quiet, comfort from Panasonic Inverter Aided air conditioner.
Automatic Operation
Selects the optimum mode.
(page 10).
Catechin Air Purifying Filter
Filter that can trap dust, tobacco smoke
and tiny particles in the room. It can
also prevent the growth of bacteria
and viruses trapped in this filter.
(page 2,8 and 20).
Deodorizing Filter
Used to remove unpleasant odours and
deodorize the air in the room.
(page 2,8 and 20).
Front Panel
Can be removed for quick
and easy cleaning.
(page 19).
Vertical/Horizontal Air Swing
Auto swing for vertical and horizontal
airflow direction.
(page 12).
Voltage Fluctuation
Protection
Protects the unit when the power
supplying voltage is out of the
operational range.
(page 25).
Self-illuminating Button
For your convenience to
operate in the dark
(page 7).
Auto Restart Control
Automatically restarts the unit after
a power failure.
(page 11).
Powerful Mode
Reaches the desired room
temperature quickly (page 16).
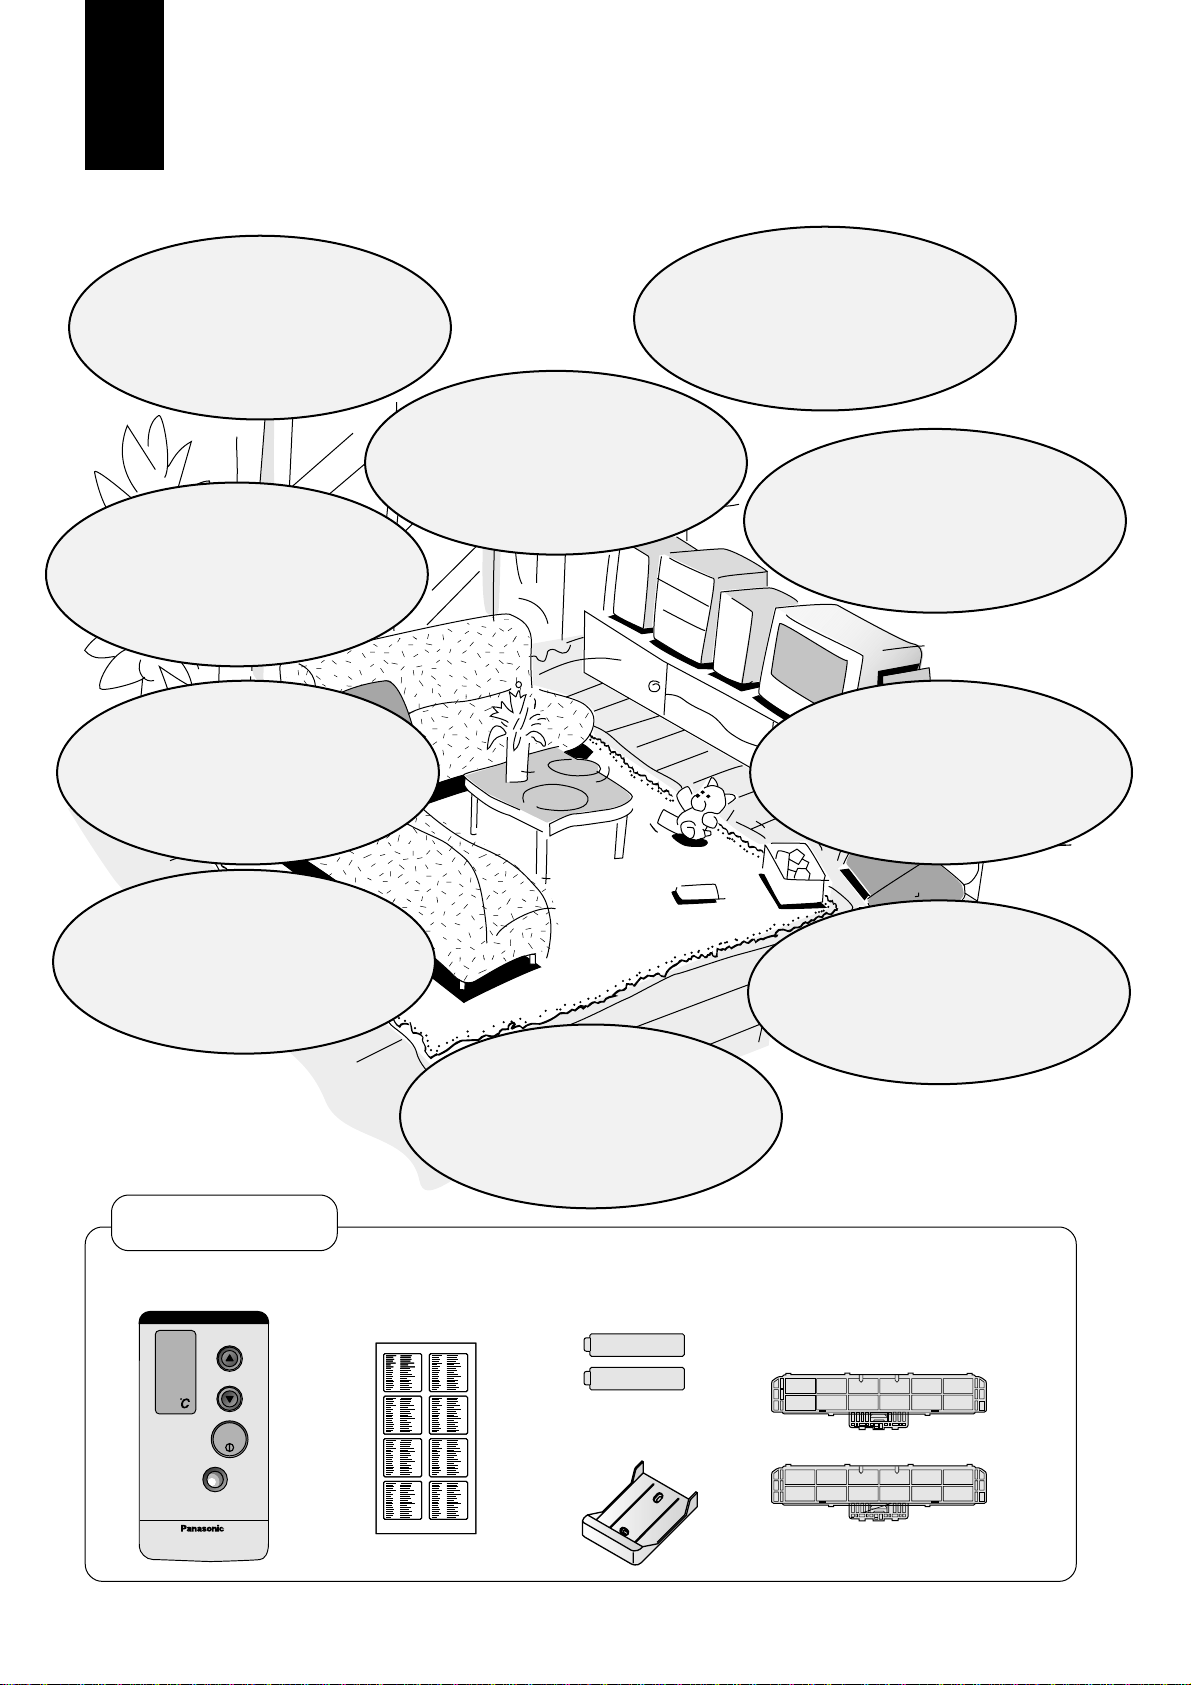
Accessories
Remote Control R03 Dry-cell
TEMP
OFF/ON
POWERFUL
INVERTER
Remote Control
Indication Label
batteries (2 pcs)
Remote Control Holder
Sleep Mode
Prevents the room from getting
too hot or too cold.
(page 16).
Air Purifying Filter
(Catechin Air Purifying Filter
and Deodorizing Filter)
▲
2
Page 5
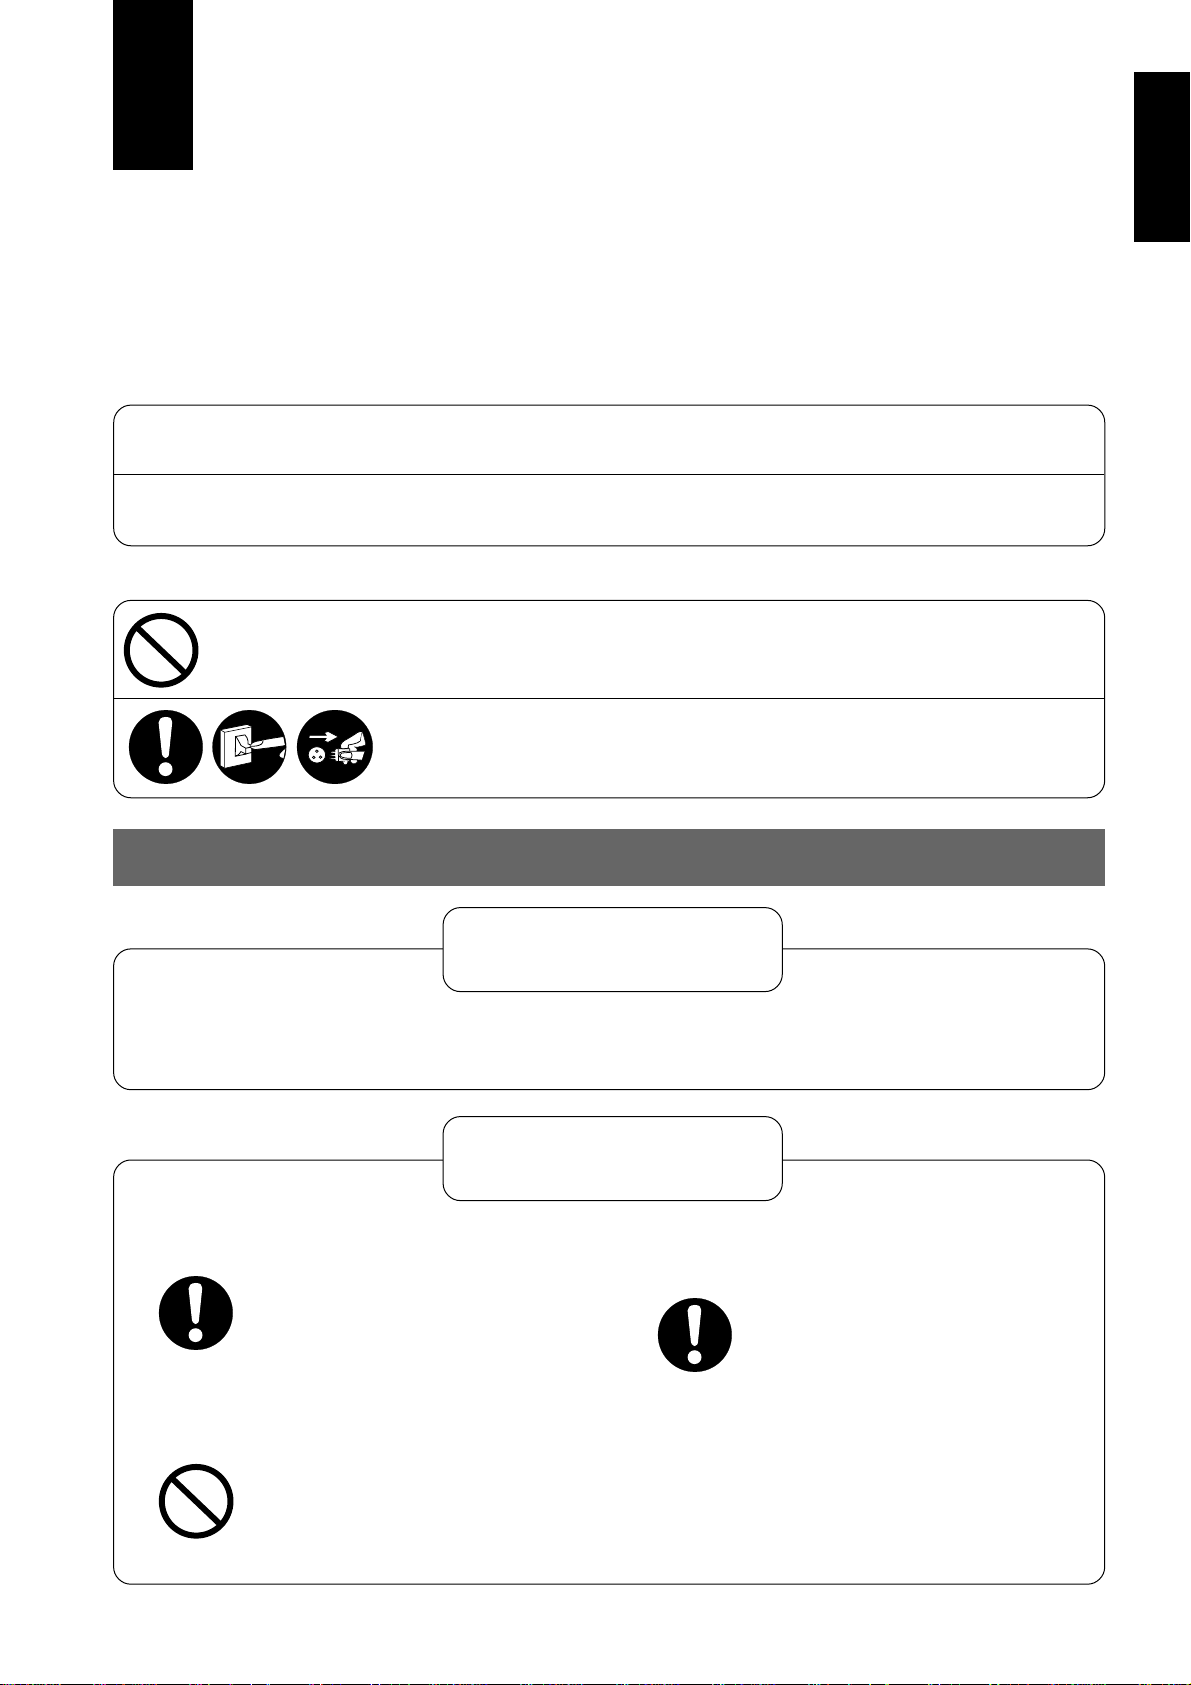
Safety Precautions
Before operating, please read the following “Safety Precautions” carefully.
To prevent personal injury, injury to others and property damage, the following instructions must be followed.
■ Incorrect operation due to ignoring of instructions will cause harm or damage, the seriousness of which is
classified as follows:
ENGLISH
!
Warning : This sign warns of death or serious injury.
!
Caution : This sign warns of injury or damage to property.
■ The instructions to be followed are classified by the following symbols:
This symbol (with a white background) denotes an action that is
PROHIBITED.
OFF
These symbols (with a black background) denotes an action that is
COMPULSORY.
Installation precautions
Warning
!
■ Do not install, remove and reinstall the unit yourself.
Improper installation will cause leakage, electric shock or fire. Please consult an authorized dealer or
specialist for the installation work.
!
■ This room air conditioner must be earthed.
Improper grounding could cause
electric shock.
■ Do not install the unit in a place where there
may be explosive gas leaks.
Gas leaks near the unit could cause
fires.
Caution
■ Ensure that drainage piping is connected
properly.
Otherwise, water will leak out.
▲
3
Page 6
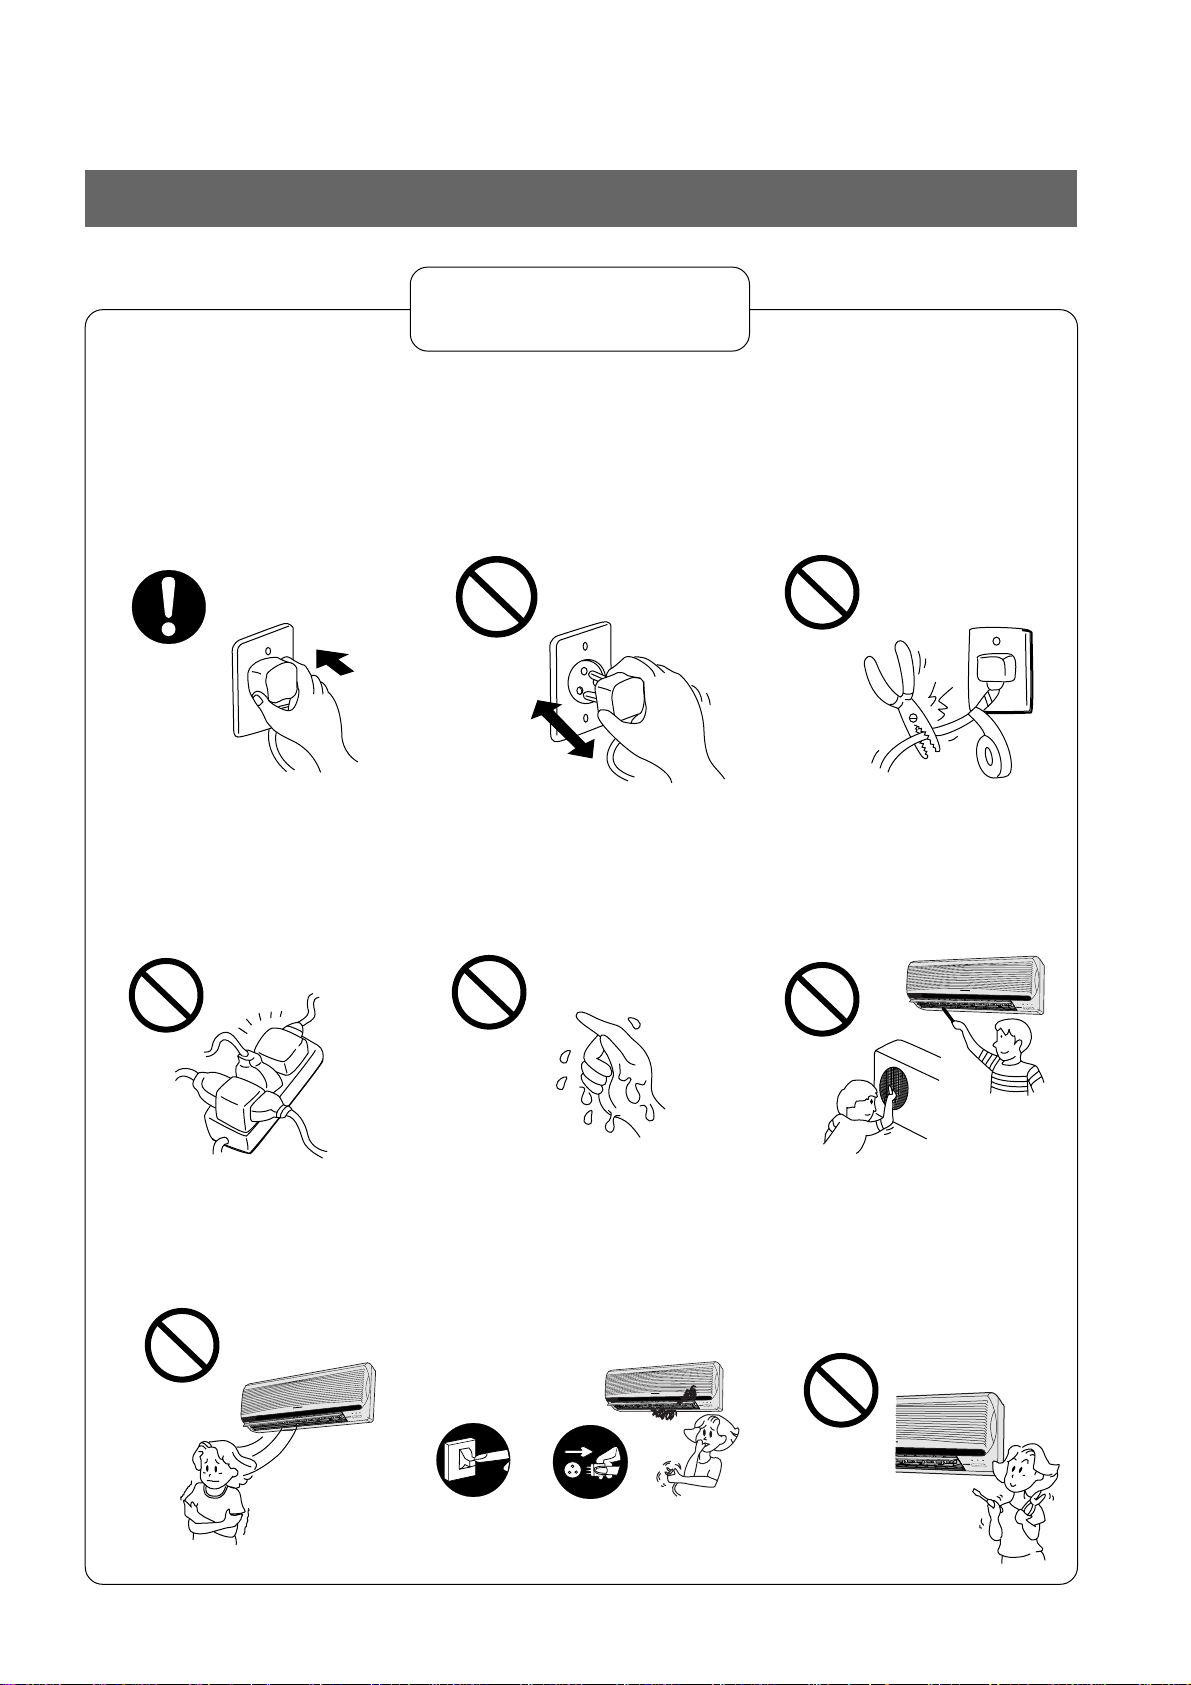
Operation precautions
P
O
W
ER
LOW
HIGH
S
LE
EP
TIM
ER
POW
ERFUL
POW
ER M
ONITOR
■ Insert the power plug
properly.
Heat generated by a loose
power plug could cause electric
shock or fire.
Electrical outlet and power plug
shall be easily accessible.
■ Do not modify the length of
the power cord or use an
extension cord.
It could cause electric shock or
fire.
!
Warning
■ Do not operate or stop the
unit by inserting or pulling
out the power plug.
It could cause electric shock or
fire.
■ Do not operate the unit with
wet hands.
It could cause an electric shock.
■ Do not damage the power
cord or use an unspecified
power cord.
A damaged/unspecified power
cord could cause electric shock
or fire.
■ Do not insert finger, sticks or
other objects into the units.
It could lead to physical injury
and cause damage to the units.
■ Do not be directly exposed to
the cold airstream for too
long.
It could lead to health problems.
L
FU
ER
W
PO
TIMER
SLEEP
ER
POW
HIGH
LOW
ONITOR
ER M
W
PO
▲
4
■ If there is a smell of burning,
stop the air conditioner and
disconnect the power supply.
Please consult an authorized
dealer or service center.
L
U
F
R
E
W
O
P
ER
SLEEPTIM
ER
POW
W
O
L
H
IG
H
R
O
IT
N
O
M
R
E
W
O
P
OFF
Switch off
the breaker.
Disconnect the
power plug.
■ Do not try to repair the unit
yourself.
It could lead to fire or cause an
electric shock. Please call an
authorized dealer or service
center.
P
O
W
E
R
F
U
L
POWER
SLEEP
TIMER
LOW
HIGH
P
O
W
E
R
M
O
N
ITO
R
Page 7
ENGLISH
POWER
LOW
HIGH
SLEEP TIMER
P
O
W
E
R
F
U
L
PO
W
ER
M
O
N
ITO
R
■ Do not remove the power
plug by pulling the cord.
Hold the plug when
disconnecting the plug from the
wall outlet.
■ Do not use for other
purposes.
Do not use for preservation
purposes. It will affect food
quality, animals or plants.
!
Caution
■ Switch off the power supply if
the unit is not going to be used
for a long period of time.
If dust accumulates on the plug,
it will generate heat and this
could cause a fire.
Switch off
the breaker.
Disconnect the
power plug.
■ Do not place combustor in
the path of the airflow from
the unit.
Incomplete combustion could
cause toxic gas (CO) poisoning.
OFF
■ When cleaning the unit, re-
move the plug.
This is to prevent injury due to
the rotating fan in the unit.
OFF
■ Ventilate the room regularly.
Since windows are kept closed,
it does good to open them
periodically to ventilate the
room.
■ Do not wash the unit with
water.
It could cause an electric shock.
W
PO
SLEEP TIMER
POWER
W
O
L
ER
W
PO
■ Inspect the unit for any
damage.
Ensure that the necessary
repairs are carried out.
FUL
ER
H
IG
H
R
ITO
N
O
M
■ Do not sit or place anything
on the outdoor unit.
You might fall off or the unit
might collapse.
5
▲
Page 8
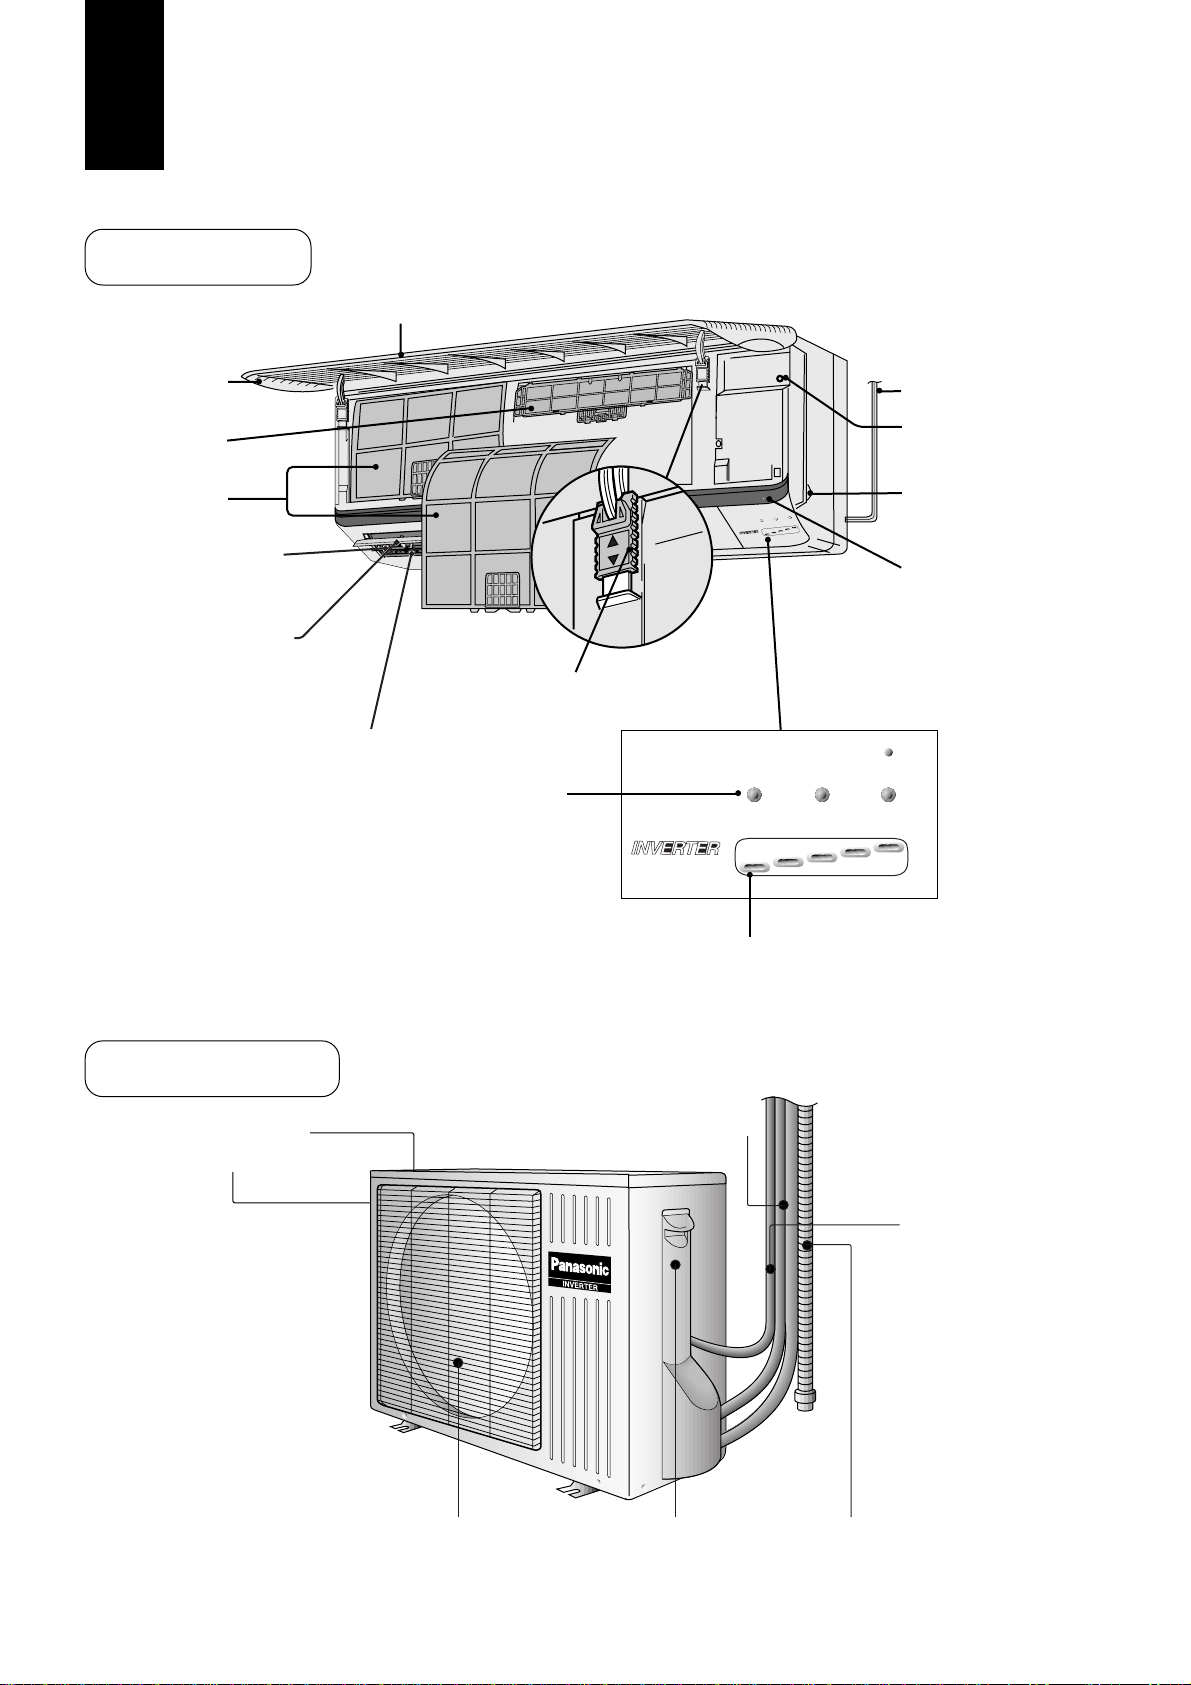
Name of Each Part for Inverter Aided Air Conditioner
Indoor unit
Air Intake Vent
Front Panel
Air Purifying Filter
Air Filters
Vertical Airflow
Direction Louver
Horizontal Airflow
Direction Louver
Air Outlet Vent
Operation Indication Lamps
• POWER - Green
• SLEEP - Orange
• TIMER - Orange
• POWERFUL - Orange
Tab for Front Panel
Power Supply Cord
Auto Operation Button
POWERFUL
SLEEP TIMER
POWER
HIGH
LOW
POWER MONITOR
Panel Opener
Signal Receptor
Receives signal from the
remote control.
(signal-received sound:
one short beep or one
long beep.)
POWERFUL
POWER
SLEEP TIMER
LOW
POWER MONITOR
HIGH
Power Monitor Lamps
• Lights up from LOW to HIGH to show
the compressor operating condition
• Light off when then compressor stops
Outdoor unit
Air Intake Vents
▲
6
(Side)
(Rear)
Air Outlet Vent
Piping
Ground Terminal
(inside cover)
Connecting Cable
Drain hose
Page 9
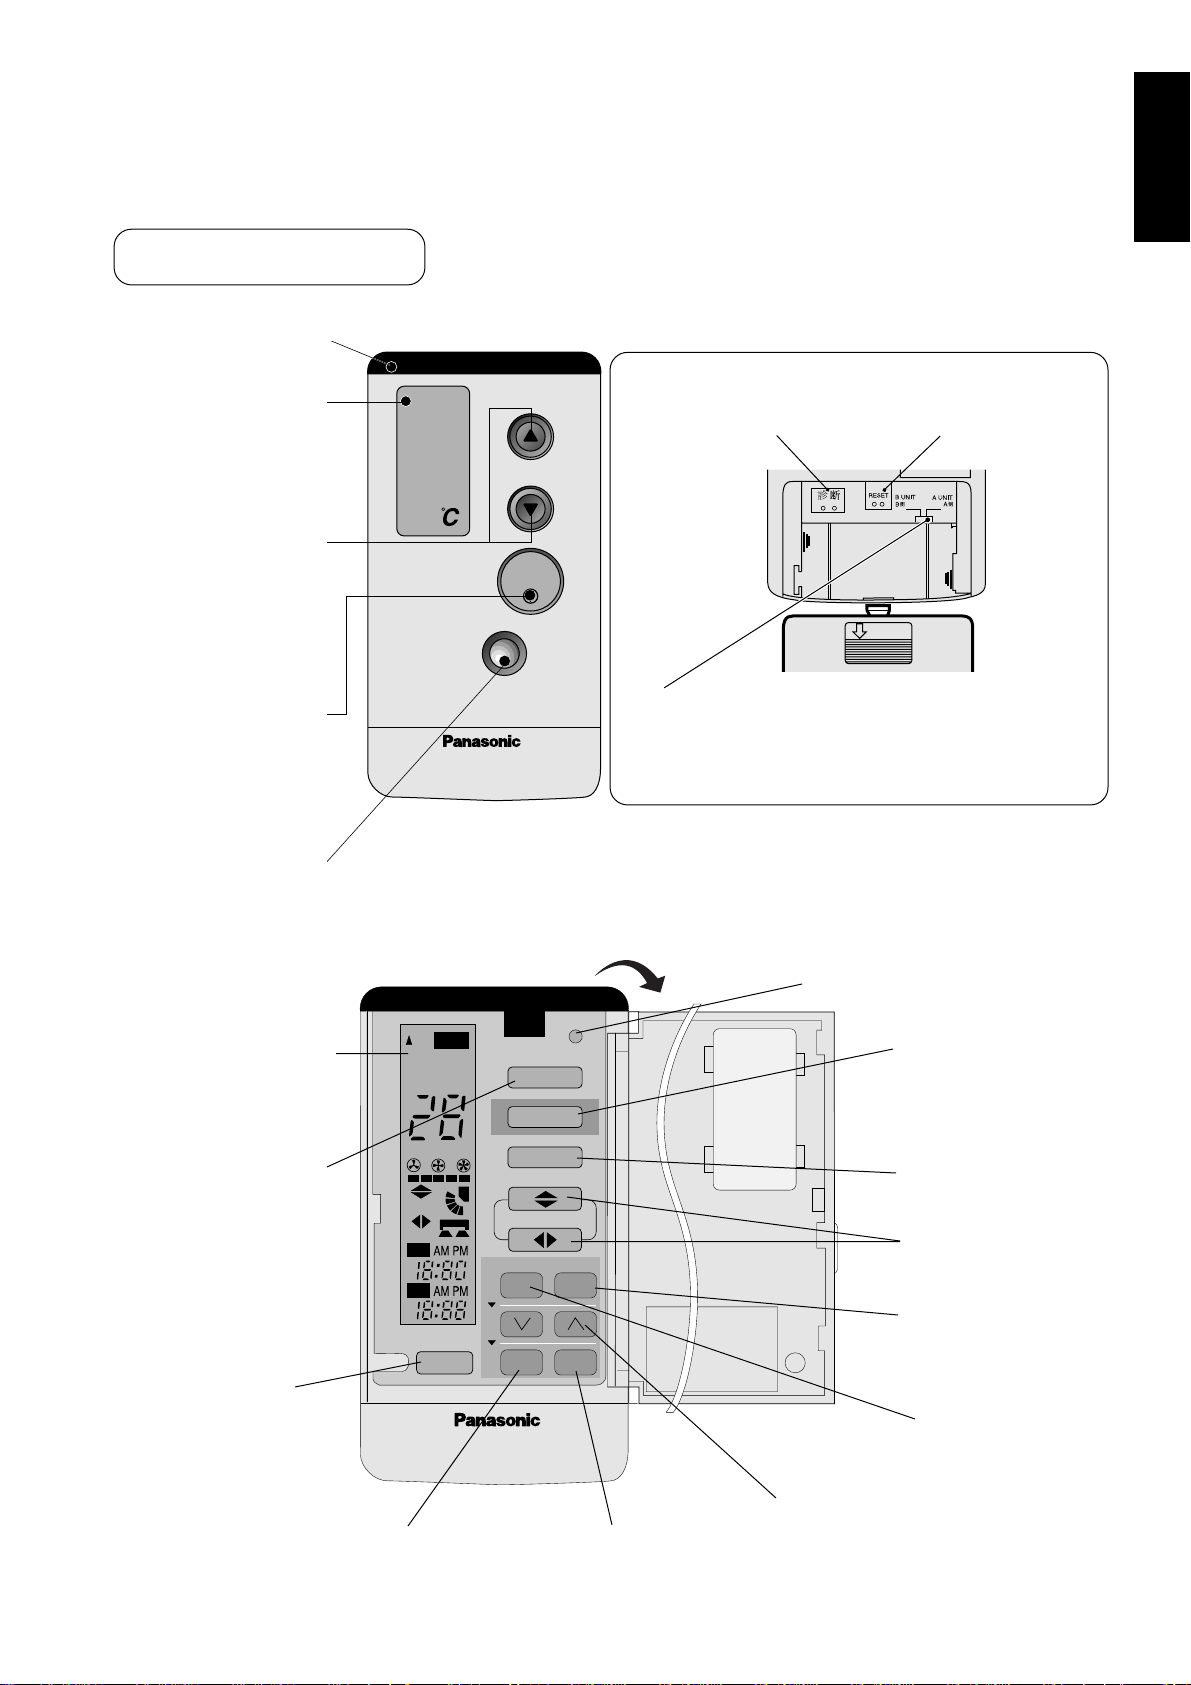
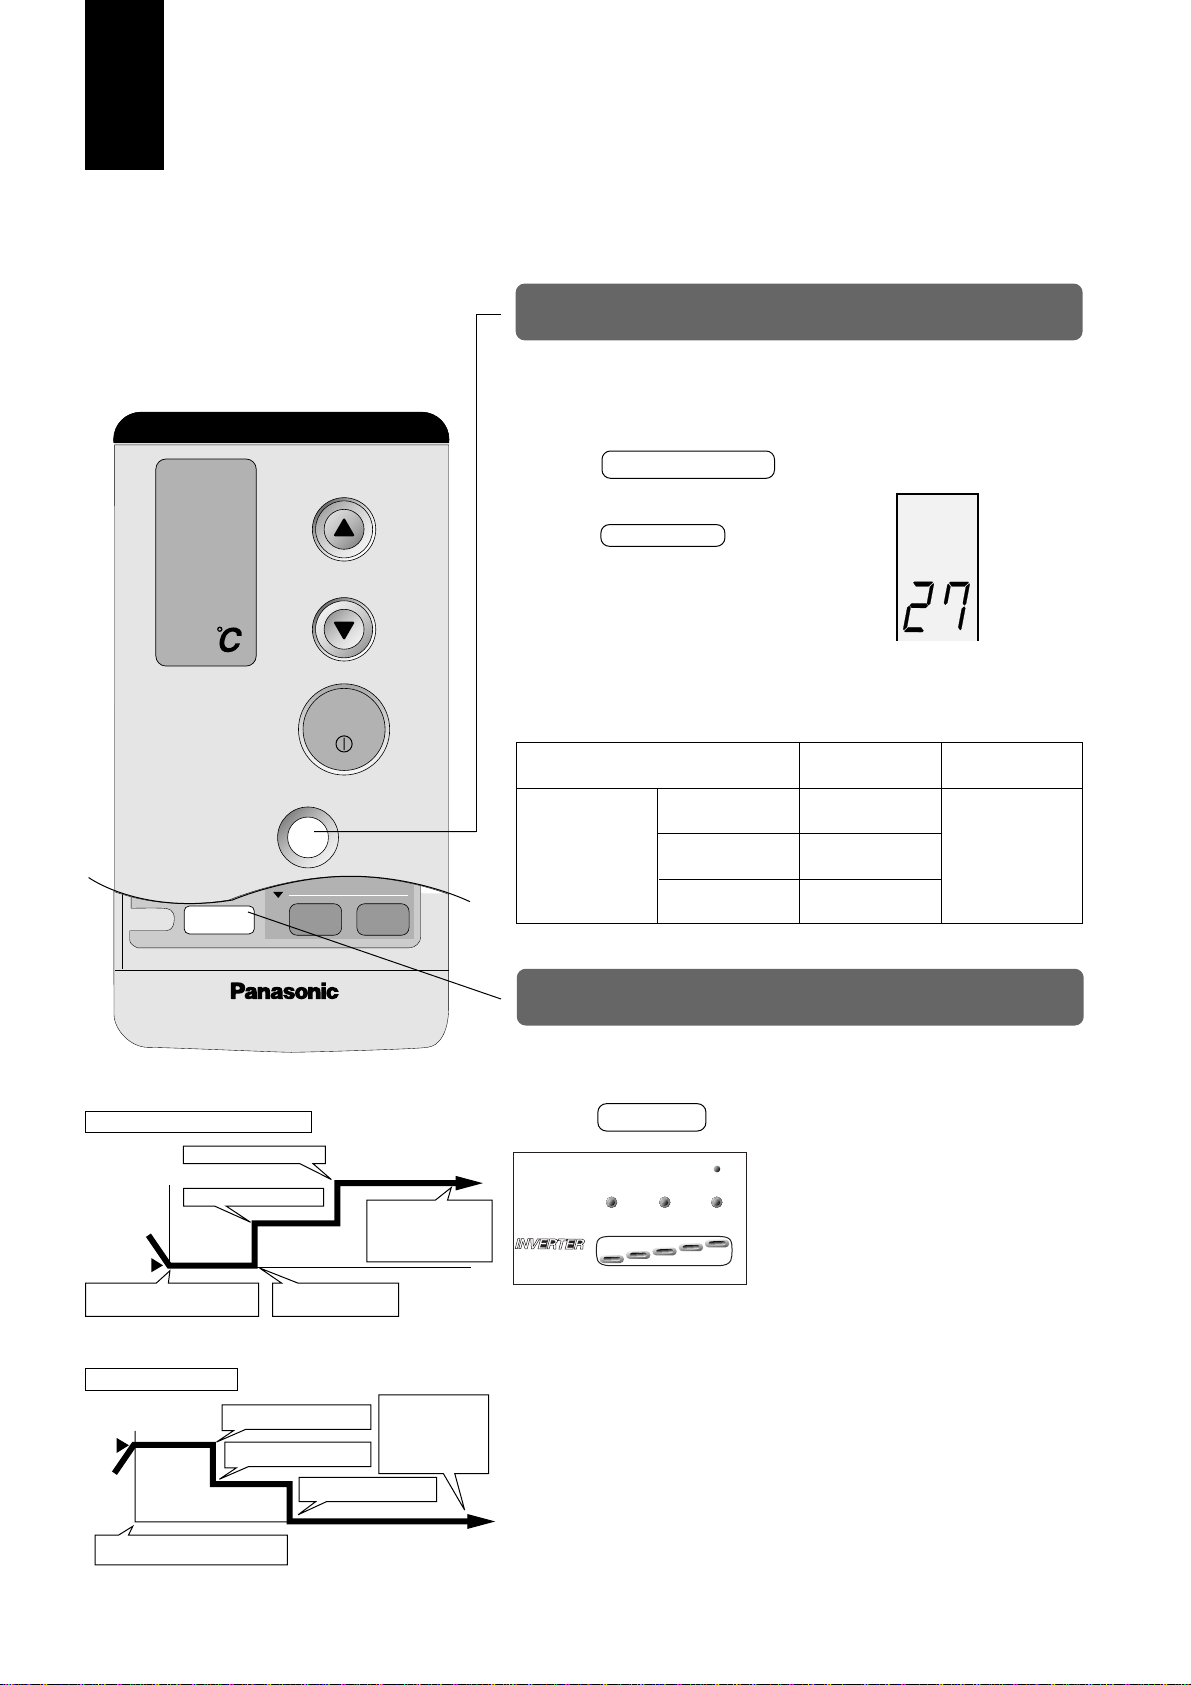
Remote control
ENGLISH
Signal Transmitter
Operation Display
Room Temperature
Setting Button
(Self-illuminating
Button)
OFF/ON Button
(Self-illuminating
Button)
POWERFUL Button
POWERFUL
INVERTER
TEMP
OFF/ON
When back cover is open
Diagnostic Terminals
To be used by the service
technician only.
Signal [B ↔ A] Switch
To be set to A.
When two units are installed in the same room.
Consult your dealer.
Reset points
OPEN
Operation Display
Operation Mode
Selection Button
Sleep Mode
Operation Button
Open the remote control door
CLOCK
AUTO
HEAT COOL
DRY FAN
WIDE SPOT
AUTO FAN
AUTO
AUTO
ON
OFF
SLEEP
MODE
WIDE/SPOT
FAN SPEED
AIR SWING
TIMER
1
ON OFF
2
3
CANCEL
SET
C
°
Clock Button
Wide/Spot
Operation Button
Fan Speed
Selection Button
Airflow Direction
Selection Button
OFF-TIMER Button
ON-TIMER Button
Time-Setting Button
Cancellation Button
Set Button
▲
7
Page 10
Preparation (Indoor Unit • Remote Control)
Indoor Unit
Insert the power supply plug into an
electrical outlet and open the front
1
panel.
POWER
LOW
POWERSLEEP TIMER
LOW
POWER
MONITOR
!
Warning
■ Ensure that the power supply
plug is securely inserted.
A loose plug may cause a fire or an electric
shock.
POWERFUL
SLEEP TIMER
HIGH
HIGH
POWER MONITOR
Hold the panel openers
and pull.
Remove the air filters and insert the
air purifying filters.
2
Air filters
Air purifying filters
Use under the following conditions:
DBT: Dry Bulb Temperature
WBT: Wet Bulb Temperature
COOLING
HEATING
Indoor
Outdoor
Indoor
Outdoor
WBT
WBT
WBT
WBT
POWERFUL
TIMER
SLEEP
POWER
HIGH
LOW
POWER MONITOR
Lift up slightly,
then pull down.
Insert the new
air purifying
filters. (Be sure
the “FRONT”
mark is facing
you).
DBT
DBT
DBT
DBT
Insert the air filters and close the front
panel.
3
Max. Temperature
32
23
43
26
30
–
24
18
POWERFUL
SLEEP TIMER
POWER
HIGH
LOW
POWER MONITOR
Min. Temperature
Unit in °C
16
11
16
11
2
–
–5
–6
Notes
• If the unit is not going to be used for an extended period of time, turn off the
Power Supply. If it is left at the ON position, approximately 2.8 W of electricity
will be used even if the indoor unit has been turned off with the remote control.
When standby mode is activated, approximately 35 W of electric power will be
consumed on the heat of compressor to warm up the room quickly. This mode
can be switched off if you do not require it. Please consult your dealer.
• If operation is stopped, then restarted immediately, the unit will resume
operation only after 3 minutes.
▲
8
3 min.
P
O
W
E
R
F
U
L
POWER
SLEEP
TIMER
L
O
W
H
IG
H
P
O
W
E
R
M
O
N
IT
O
R
Page 11
Remote control
PM
Operating the remote control
● The maximum distance at which signals can be
received is about 10 m.
● Aim the remote control at the signal receptor on
the room air conditioner when operating.
● Make sure that the signal path is not obstructed.
P
O
W
E
R
F
U
L
POWER
SLEEP
TIMER
LO
W
H
IG
H
P
O
W
E
R
M
O
N
IT
O
R
ENGLISH
Batteries
The batteries can be used for approximately one
year.
Observe the following when
replacing the batteries
● Replace the batteries with 2 new batteries of
the same type.
● Do not use rechargeble batteries (Ni-Cd),
because they are different from standard
dry-cell batteries in shape, dimensions and
performance.
● If the unit is not going to be used for an
extended period of time, remove the batteries
from the remote control.
Inserting batteries
(2 pcs R03 dry-cell batteries)
1 Gently press the place
marked OPEN and
slide the cover towards
you.
● Confirm that the display is flashing 12:00 PM. If the
display does not appear when the batteries are
inserted, remove them and re-insert.
2 Be sure that the e
and r directions are
correct.
Setting the clock
Press the Clock button.
1
Press or to set the current
time.
2
Press the Clock button.
3
Notes
● Do not throw or drop the remote control. Do not
let it get wet.
● Certain types of fluorescent lamps may affect
signal reception. Consult your dealer.
PM flashes and 12:00 lights up.
Press continuously for fast
PM
forwarding and for fast reversing.
AM or PM lights up.
PM
PM
● To prevent battery exhaustion , set the current time
(CLOCK) immediately.
▲
9
Page 12
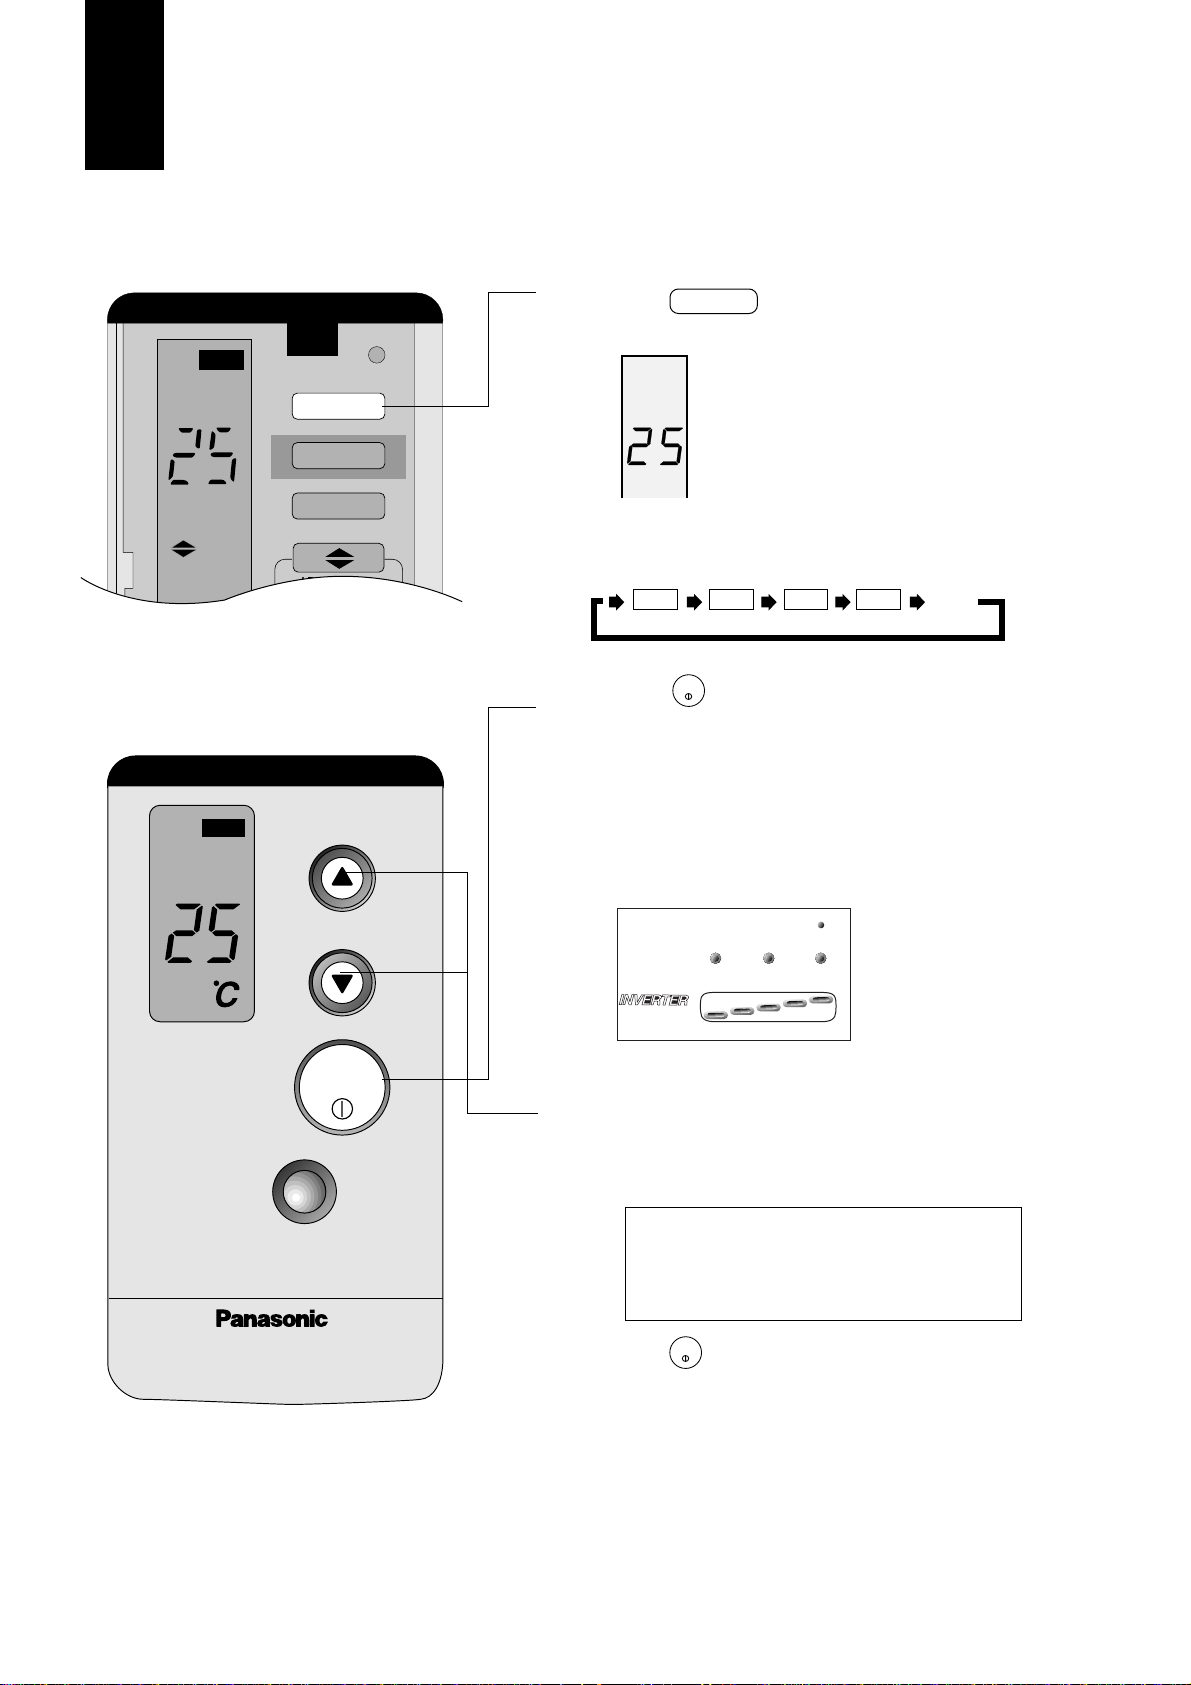
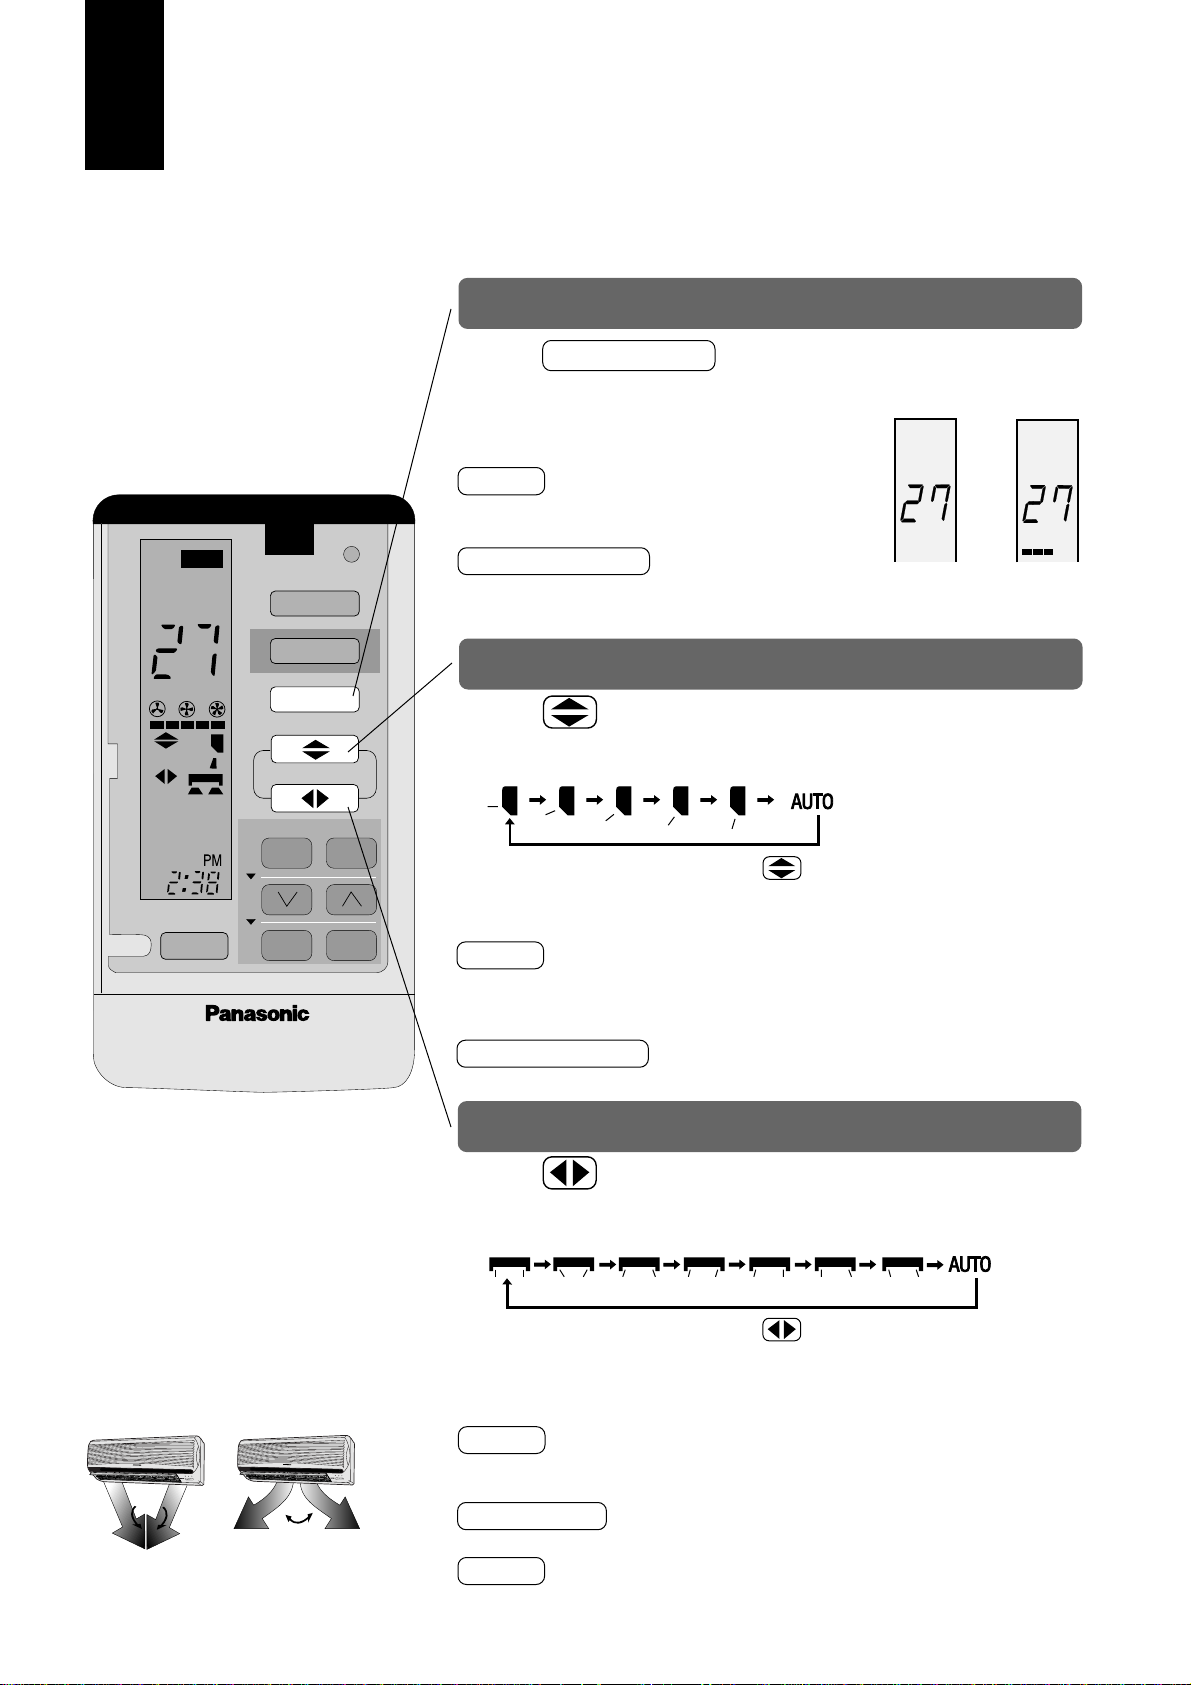
Automatic • Heating • Cooling • Soft Dry • Fan
POWER
LOW
HIGH
SLEEP TIMER
POWERFUL
POWER MONITOR
Press MODE to select the desired
operation
1
a
Display
▲
AUTO FAN
When pressed, the display changes in this order.
AUTO
AUTO FAN
CLOCK
MODE
WIDE/SPOT
FAN SPEED
AUTO
1
PM
2
AUTO
POWERFUL
AIR SWING
TIMER
ON OFF
TEMP
OFF/ON
COOLHEAT
OFF/ON
Press
2
The Power LED lights up. (LED blinks when the room
temperature is low at the start of heating or operation
mode is selected during Automatic Operation.)
The power monitor lamps light up to show the
compressor operating condition.
Button
DRY
FAN
a
To set the temperature
3
• Increases or decreases by 1°C when pressed.
• The temperature can be set between 16°C and
30°C. (Not adjustable during Fan Operation.)
10
▲
INVERTER
Recommended temperature:
Heating : 20 ~ 24°C
Cooling : 26 ~ 28°C
Soft Dry : Approx. room temperature
Press
OFF/ON
Button again to stop operation
(POWER LED lights off).
Page 13
13 14 15 16 17 18 19 20 21 22 23 24 25 26 27 28
36
35
34
33
32
31
30
29
28
27
26
25
24
23
22
21
19
18
17
16
Auto Restart Control
● If there is a power failure, operation will be automatically restarted under the previous operation mode
and airflow direction when power is resumed. (When the operation is not stopped by remote control).
● If you do not want the unit to restart automatically when power is resumed, switch off the power supply.
● If you do not require Auto Restart Control, consult your dealer.
● Auto Restart Control is not available when Timer or Sleep Mode is set.
ENGLISH
Automatic Operation
(Ex) Setting Temperature to 25°C
● At the start of the Automatic operation, Heating, Cooling or Soft Dry is
automatically selected according to the outdoor temperature, indoor
temperature and setting temperature.
● The operation mode changes every half hour, when necessary.
H
E
A
T
I
N
G
Indoor Temp.˚C
Outdoor Temp.˚C
S
O
F
T
D
R
Y
Heating Operation
● To warm up the room temperature upon your preference setting temperature.
● Heat is obtained from outdoor air to warm up the room. When the outdoor ambient air temperature falls,
the heating capacity of the unit might be reduced. We recommend that you use an additional heating
device when the outdoor ambient air temperature is low.
Cooling Operation
● To cool the room temperature upon your preference setting temperature.
C
O
O
L
I
N
G
Fan Operation
● Circulates air throughout the room.
● Purifies and deodorizes the air if the air purifying filter is used. Fan Operation is recommended during
seasons in which neither Heating nor Cooling is used.
Soft Dry Operation
● Dehumidifies while maintaining the setting temperature. The Soft Dry Operation is recommended during
the rainy season.
● If the room temperature exceeds the setting temperature, operation switches to Cooling.
● The fan speed is rather slow during Soft Dry Operation.
● The humidity may not decrease when the indoor temperature is lower than the setting temperature on the
remote control.
Notes
● See page 12 on how to adjust the fan speed and airflow direction.
● The Powerful and Sleep modes can be set during Automatic Operation.
11
▲
Page 14
Adjusting Airflow Direction and Fan Speed
COOL
AUTO FAN
COOL
h j k
Proper adjustment of airflow direction and fan speed increases
operation effectiveness.
To adjust fan speed
AUTO
AUTO FAN
AUTO
SLEEP
CLOCK
MODE
WIDE/SPOT
FAN SPEED
AIR SWING
TIMER
1
ON OFF
2
3
CANCEL
SET
Press FAN SPEED Button
● There are five stages of fan speed in addition to Auto Fan Speed.
Display Example
Auto Fan
Speed
Medium Fan
Speed
■ Auto Fan Speed Control
Heating
When the temperature of the discharge air increases,
the fan speed increases.
Cooling ● Soft Dry
Changes the fan speed to generate a cool breeze. The air starts to blow out
approximately 40 seconds after the start of Cooling or Soft Dry.
To adjust the vertical airflow direction louvers
Press Button
● There are five angles of vertical direction in addition to Auto Airflow
Direction.
The display changes when the button is pressed.
(The display indicates airflow direction.)
■ Auto Vertical Airflow Direction Control
Heating
When the discharge air temperature is low such as at starts of heating
operation, the air blows at horizontal level.
As the temperature rises, the hot air blows in a downwards direction.
Cooling ● Soft Dry
The louver swings up and down automatically.
▲
SPOT
12
To adjust the horizontal airflow direction louvers
Press Button
● There are seven positions of the horizontal airflow direction louvers
in additional to Auto Airflow Direction.
The display changes when the button is pressed.
(The display does not show the exact directions of airflow or the
exact louver angles.)
■ Auto Horizontal Airflow Direction Control
Heating
P
O
W
E
R
F
U
P
O
W
E
R
F
U
L
POWER
SLEEPTIMER
L
O
W
H
IG
H
P
O
W
E
R
M
O
N
IT
O
R
WIDE
L
POWER
SLEEP
TIMER
L
O
W
H
IG
H
P
O
W
E
R
M
O
N
IT
O
R
When air temperature is low, air is sent in WIDE. When temperature goes up,
air comes out in SPOT.
Cooling ● Fan
Louvers swing horizontally at a fixed speed.
Soft Dry
Louvers are fixed to WIDE.
Page 15
Louver adjustment range
Soft
Dry
Cooling,
Fan
About 30°
Heating
* Five stages of adjustments can be
made in this range.
About 30°
About 60°
ENGLISH
● The adjustment range is different for each operation i.e.
Heating, Cooling and Soft Dry. (Fig. at left)
● The angle indicated on the remote control is different from
that on the indoor unit.
● The louver angle automatically changes to prevent
condensation during Cooling and Soft Dry.
● When operation stops, the louver automatically closes.
Notes
● Do not adjust the vertical airflow direction louver downward during Cooling and Soft Dry. Drops of water
may condense on the air outlet vent and drip down.
● Use the remote control to change the vertical airflow direction louver. Using your hands to adjust the
direction may cause the louver to malfunction. If this happens, stop operation immediately and restart.
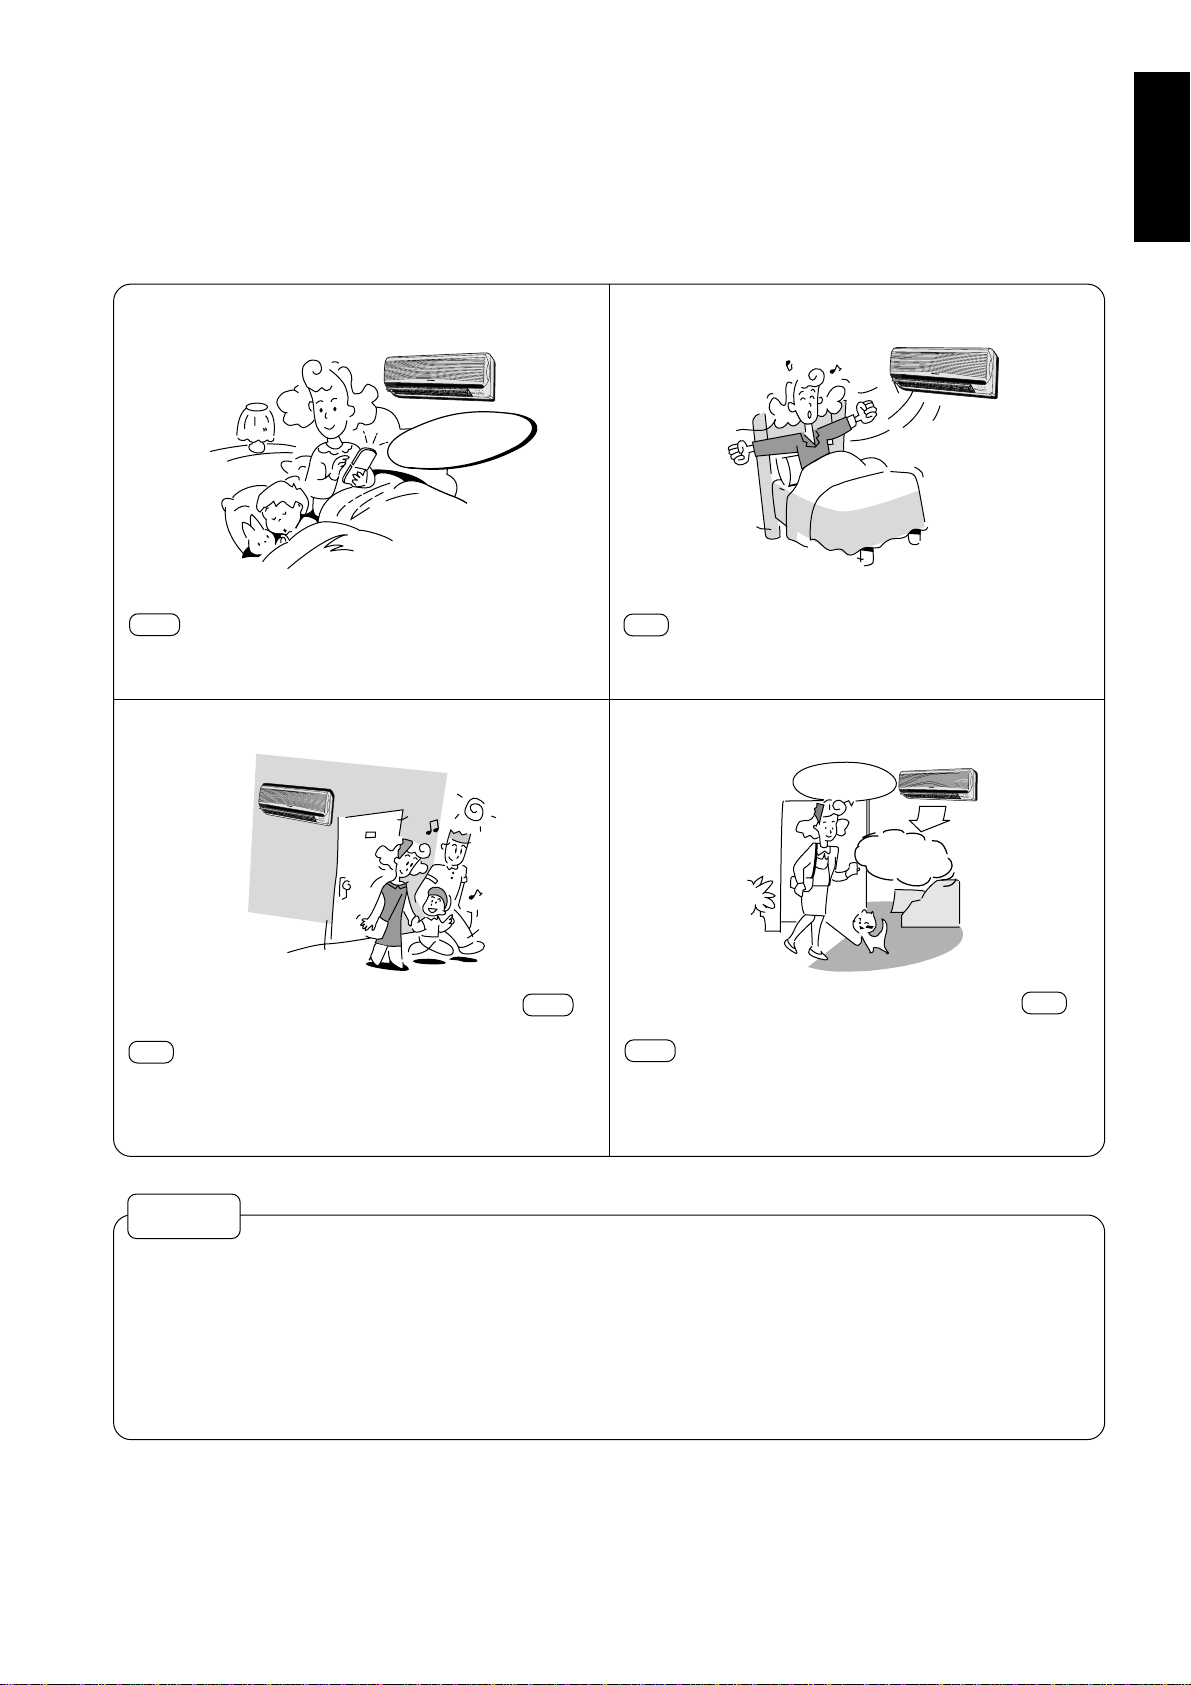
WIDE / SPOT
Convenient control of horizontal airflow direction.
■ Press WIDE/SPOT button to select WIDE or
SPOT airflow direction.
a
WIDE
Display
▲
AUTO FAN
When pressed, the display changes in this order.
SPOTWIDE
Horizontal Manual
Airflow Direction
AUTO
WIDE
AUTO FAN
AUTO
CLOCK
MODE
WIDE/SPOT
FAN SPEED
AIR SWING
SLEEP
TIMER
1
ON OFF
2
3
CANCEL
SET
P
O
W
E
R
F
U
L
POWER
SLEEPTIMER
L
O
W
H
IG
H
P
O
W
E
R
M
O
N
IT
O
R
WIDE
P
O
W
E
R
F
U
L
POWER
SLEEP
TIMER
L
O
W
H
IG
H
P
O
W
E
R
M
O
N
IT
O
R
SPOT
■ To cancel WIDE or SPOT, press .
13
▲
Page 16
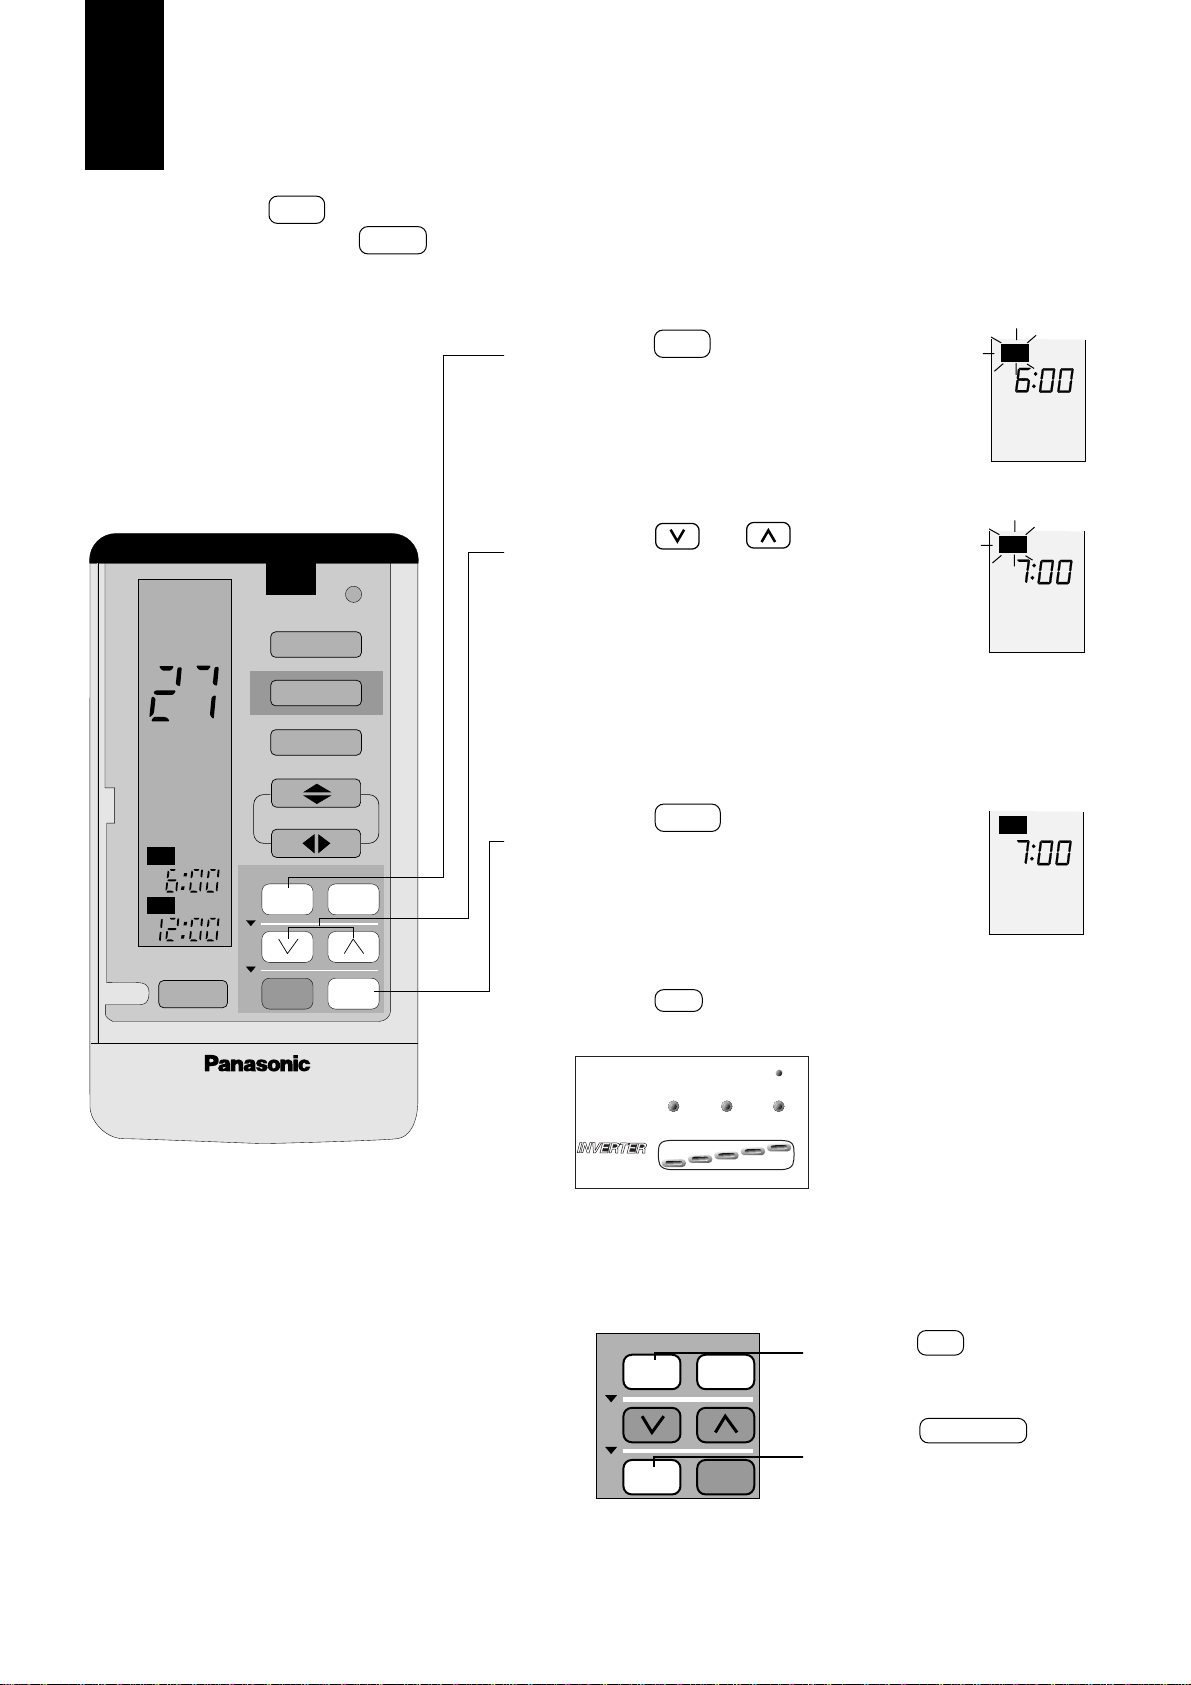
Setting the Timers
ON
AM
ON
AM
Set the ON to the time at which you want heating or cooling to
begin. Set the OFF to the desired stop time. Use both timers together for maximum comfort and efficiency.
Press ON Button
Display Ex: Set the ON timer for 7:00AM.
1
Press or to set the
CLOCK
COOL
MODE
WIDE/SPOT
time
2
● Increases or decreases by 10 minutes.
Press continuously to reach the desired
setting time quickly.
AUTO FAN
AUTO
ON
AM PM
OFF
AM PM
SLEEP
FAN SPEED
AIR SWING
TIMER
1
ON OFF
2
3
CANCEL
SET
Press SET Button
3
■ To set OFF-Timer
Press OFF and follow steps 2 and 3.
POWER
SLEEP TIMER
LOW
POWER MONITOR
■ To cancel the timer
(Ex) Cancel ON timer.
POWERFUL
HIGH
ON
AM
(TIMER LED on the indoor
unit lights up.)
▲
14
TIMER
1
ON OFF
2
3
CANCEL
SET
Press ON Button
1
Press CANCEL
Button
2
(TIMER LED on the indoor unit
lights off.)
Page 17
ENGLISH
● When you sleep
P
O
W
E
R
F
U
L
POWER
SLEEP
TIMER
L
O
W
H
IG
H
P
O
W
E
R
M
O
N
I
T
O
R
Setting OFF timer
Set the time at which you will go to sleep with the
OFF .
This prevent wasting of electricity.
● When going out
P
O
W
E
R
F
U
L
P
O
W
E
R
S
L
E
E
P
T
IM
E
R
LOW
HIGH
P
O
W
E
R
M
O
N
IT
O
R
● When you wake up
POWERFUL
PO
W
ER
SLEEPT
IM
ER
L
O
W
H
IG
H
POWER MONITOR
Set the time at which you will wake up with the
ON .
You can start the new day at a comfortable
temperature.
● When you return
I˙m back
Comfortable
temperature
P
O
W
E
R
F
U
L
POWER
SLEEPTIMER
L
O
W
H
I
G
H
P
O
W
E
R
M
O
N
IT
O
R
Set the time at which you will go out with the OFF .
Set the time at which you will come back with the
ON .
This will prevent the air conditioner from being left
on while you are out, and the temperature will be
pleasant when you return.
Set the time at which you will return with the ON .
Set the time at which you will go to sleep with the
OFF .
This will make the temperature pleasant when you
return, and it will prevent the air conditioner from
being left on.
Timer
● When the ON-Timer is set, operation will start before the actual set time. This is to allow the room
temperature to reach the setting temperature by the setting time (maximum of 45 minutes in advance).
● Once the ON-Timer is set, operation will start at the setting time everyday.
● The current time is not displayed when the timers are set.
● When both timers are used together the TIMER LED on the indoor unit remains lit even if the operation is
stopped by the OFF-Timer.
15
▲
Page 18
Powerful • Sleep
Powerful and Sleep modes are available for Automatic Operation,
Heating, Cooling and Soft Dry.
Powerful mode operation
• Used in winter to warm yourself quickly upon returninghome
(Heating + Powerful).
• Used in summer to cool yourself after a hot bath
(Cooling + Powerful).
Press POWERFUL during operation
■ To cancel
COOL
POWERFUL
Display
▲
TEMP
OFF/ON
Press POWERFUL again.
(The Powerful display on the remote
control disappears.)
Note
● The setting temperature and the fan speed changes
automatically in order to heat, cool or dehumidify the room
quickly.
POWERFUL
SLEEP
COOLING & SOFT DRY OPERATION
Approx. 0.5°C increase
TEMP.
Approx. 0.5°C increase
SETTING
TEMPERATURE
Sleep Operation button is
pressed
HEATING OPERATION
SETTING
TEMPERATURE
0 – 1 hour
TEMP.
0 – 1 hour
3
1 hour
Sleep shift operation
starts
Sleep shift operation starts
Approx. 2°C decrease
1 hour
CANCEL
SET
Approx. 8 hours after
sleep shift operation
starts, stops
automatically
Approx. 3°C decrease
TIME
Approx. 8 hours
after sleep shift
operation starts,
stops automatically
Automatic
Operation
Heating
Cooling
Soft Dry
Temperature
6°C higher
4°C lower
3°C lower
Fan Speed
Slightly stronger
Sleep mode operation
Prevents overheating and overcooling during sleep. Stops
automatically after 8 hours.
Press SLEEP during operation
POWERFUL
POWER
SLEEP TIMER
LOW
POWER MONITOR
■ To cancel
Press SLEEP again. (SLEEP LED on indoor unit lights off.)
Notes
● Air blows out gently during sleep.
● When used in conjunction with the Timer, the Timer has
priority.
(SLEEP LED on indoor unit lights
up.) Not displayed on remote control.
HIGH
Sleep Operation button is pressed
16
▲
TIME
Page 19
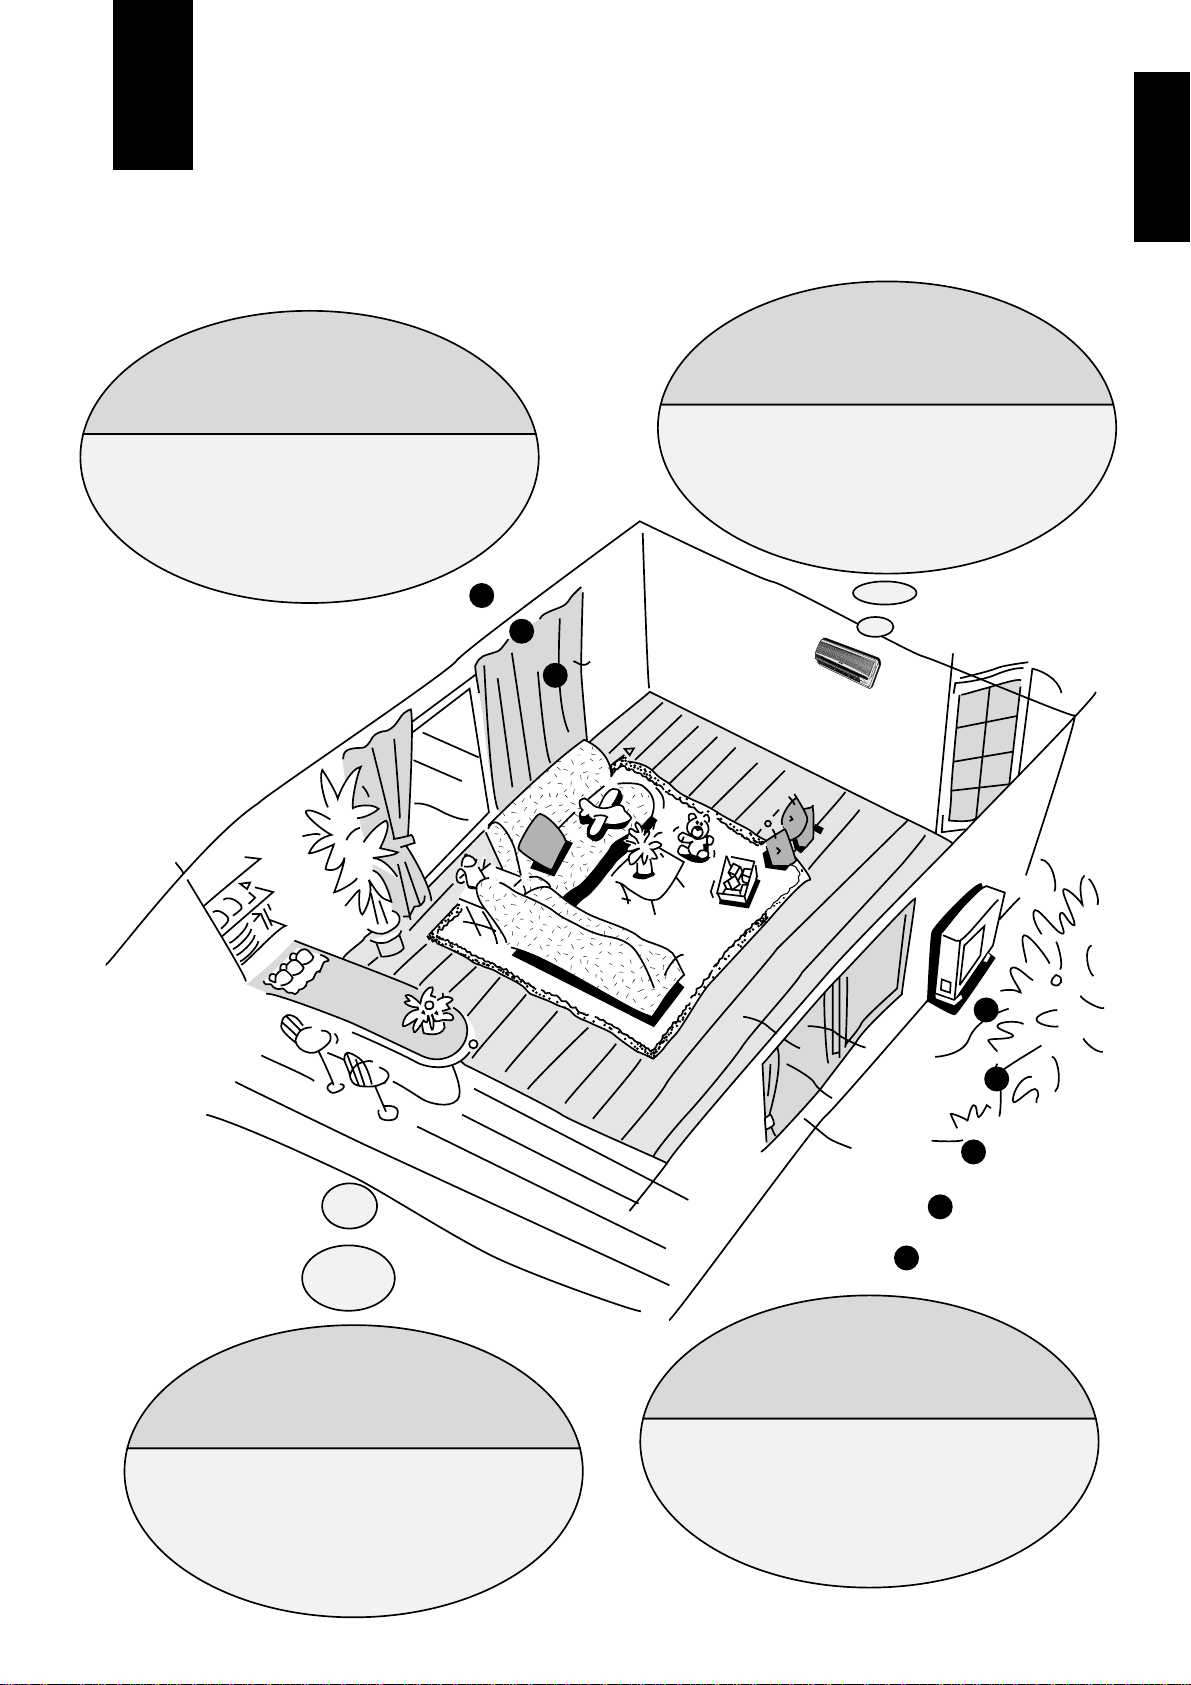
Operation Hints
Here are some useful tips for optimum performance and
cost-effective operation.
ENGLISH
Adjust your curtains
and blinds
Adjust curtains and blinds to prevent
sunlight from entering the room
directly as this may reduce the
cooling efficiency.
Do not overcool!
A difference of 6°C or less between the
outdoor and indoor temperatures
during cooling is ideal.
Anything cooler may harm
your health.
P
O
W
E
R
F
U
L
P
O
W
E
R
S
L
E
E
P
L
O
W
T
IM
E
R
P
O
W
E
R
H
M
IG
H
O
N
IT
O
R
Clean the filters!
A dirty air filter reduces heating and
cooling efficiency.
Clean the filters every 2 weeks.
Anything near the
outdoor unit?
Objects placed near the outdoor unit will
reduce heating and cooling efficiency.
17
▲
Page 20
Care and Maintenance
Regular cleaning and servicing will prolong the life of your air
conditioner.
!
Caution
■ Before cleaning the air conditioner, set the Power supply to OFF.
The high fan speed may cause injury.
■ Do not wash the unit with water.
Water may cause a short circuit or electric shock.
Cleaning the indoor unit and remote control
● Wipe gently with a soft, dry cloth.
● Do not clean with water hotter than 40°C, volatile liquids such as paint thinner, or polishing fluids.
(When using chemically treated cloth, refer to the instructions and precautions.)
● The front panel can be removed and cleaned with water.
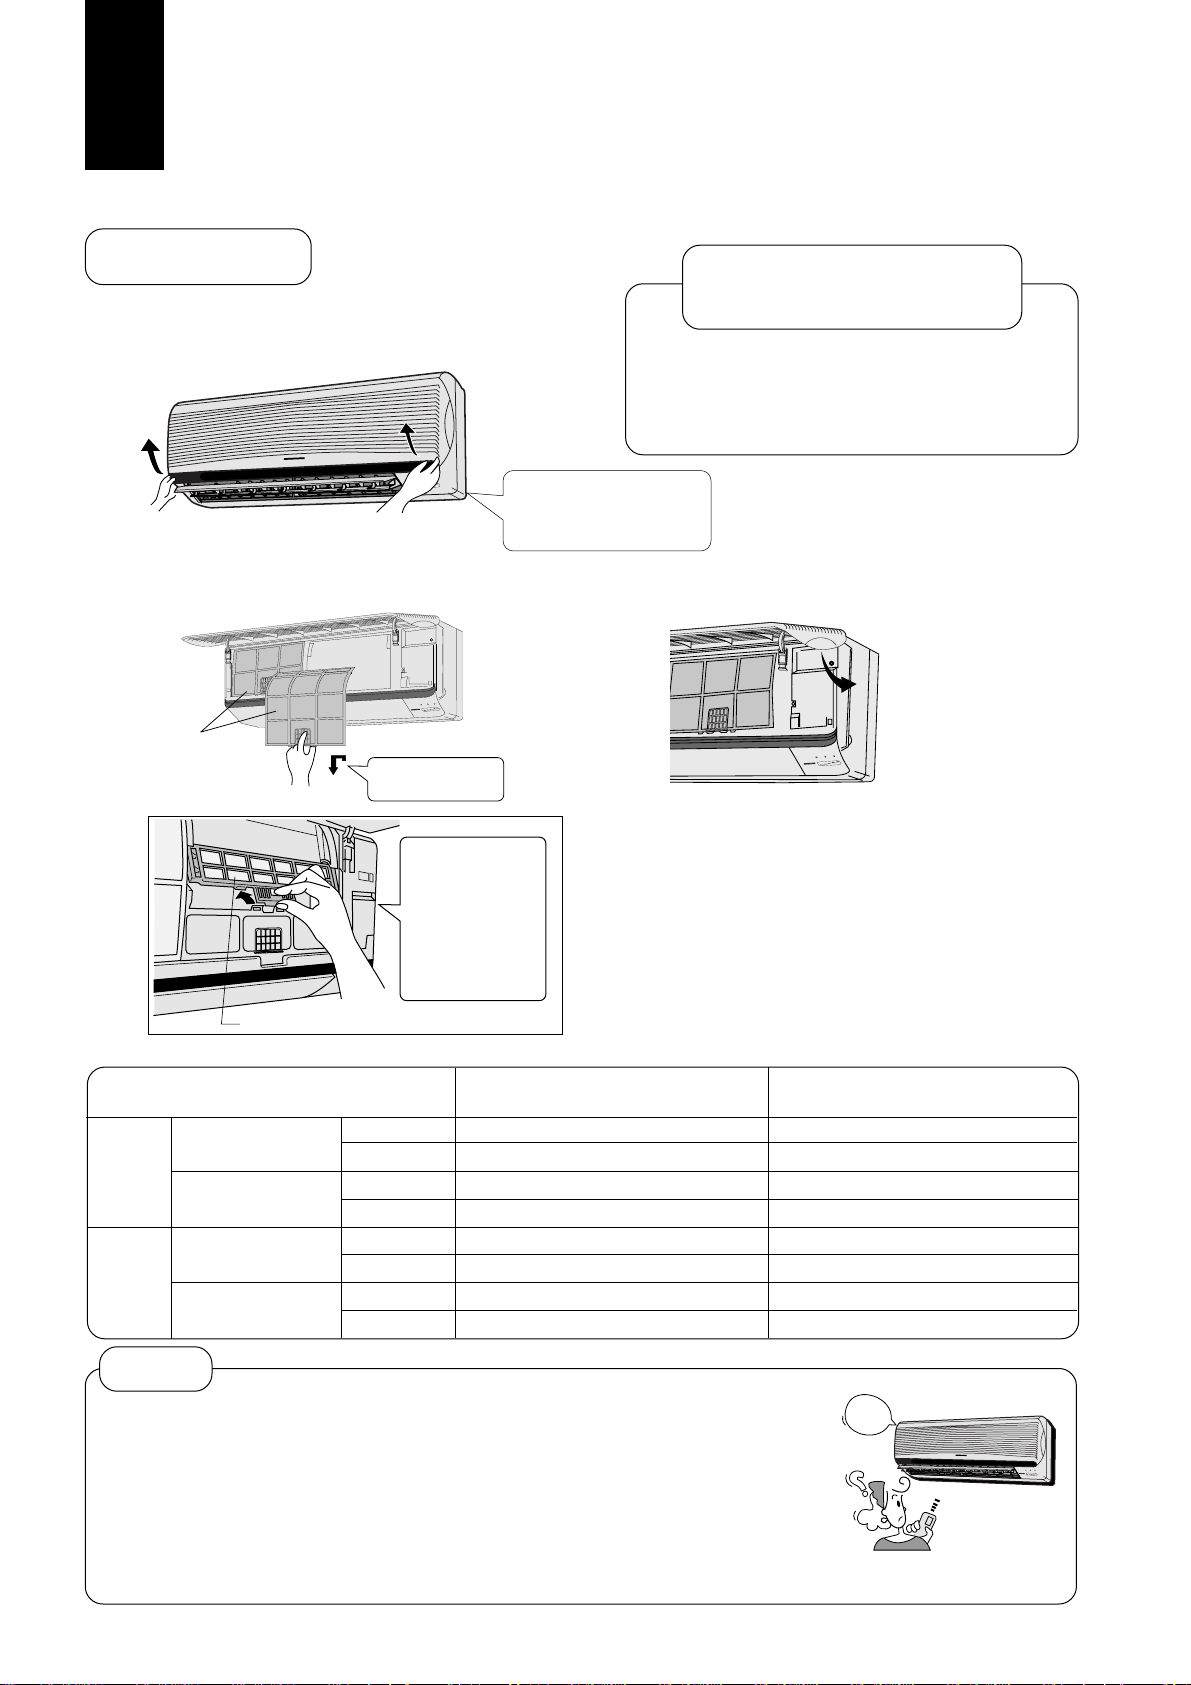
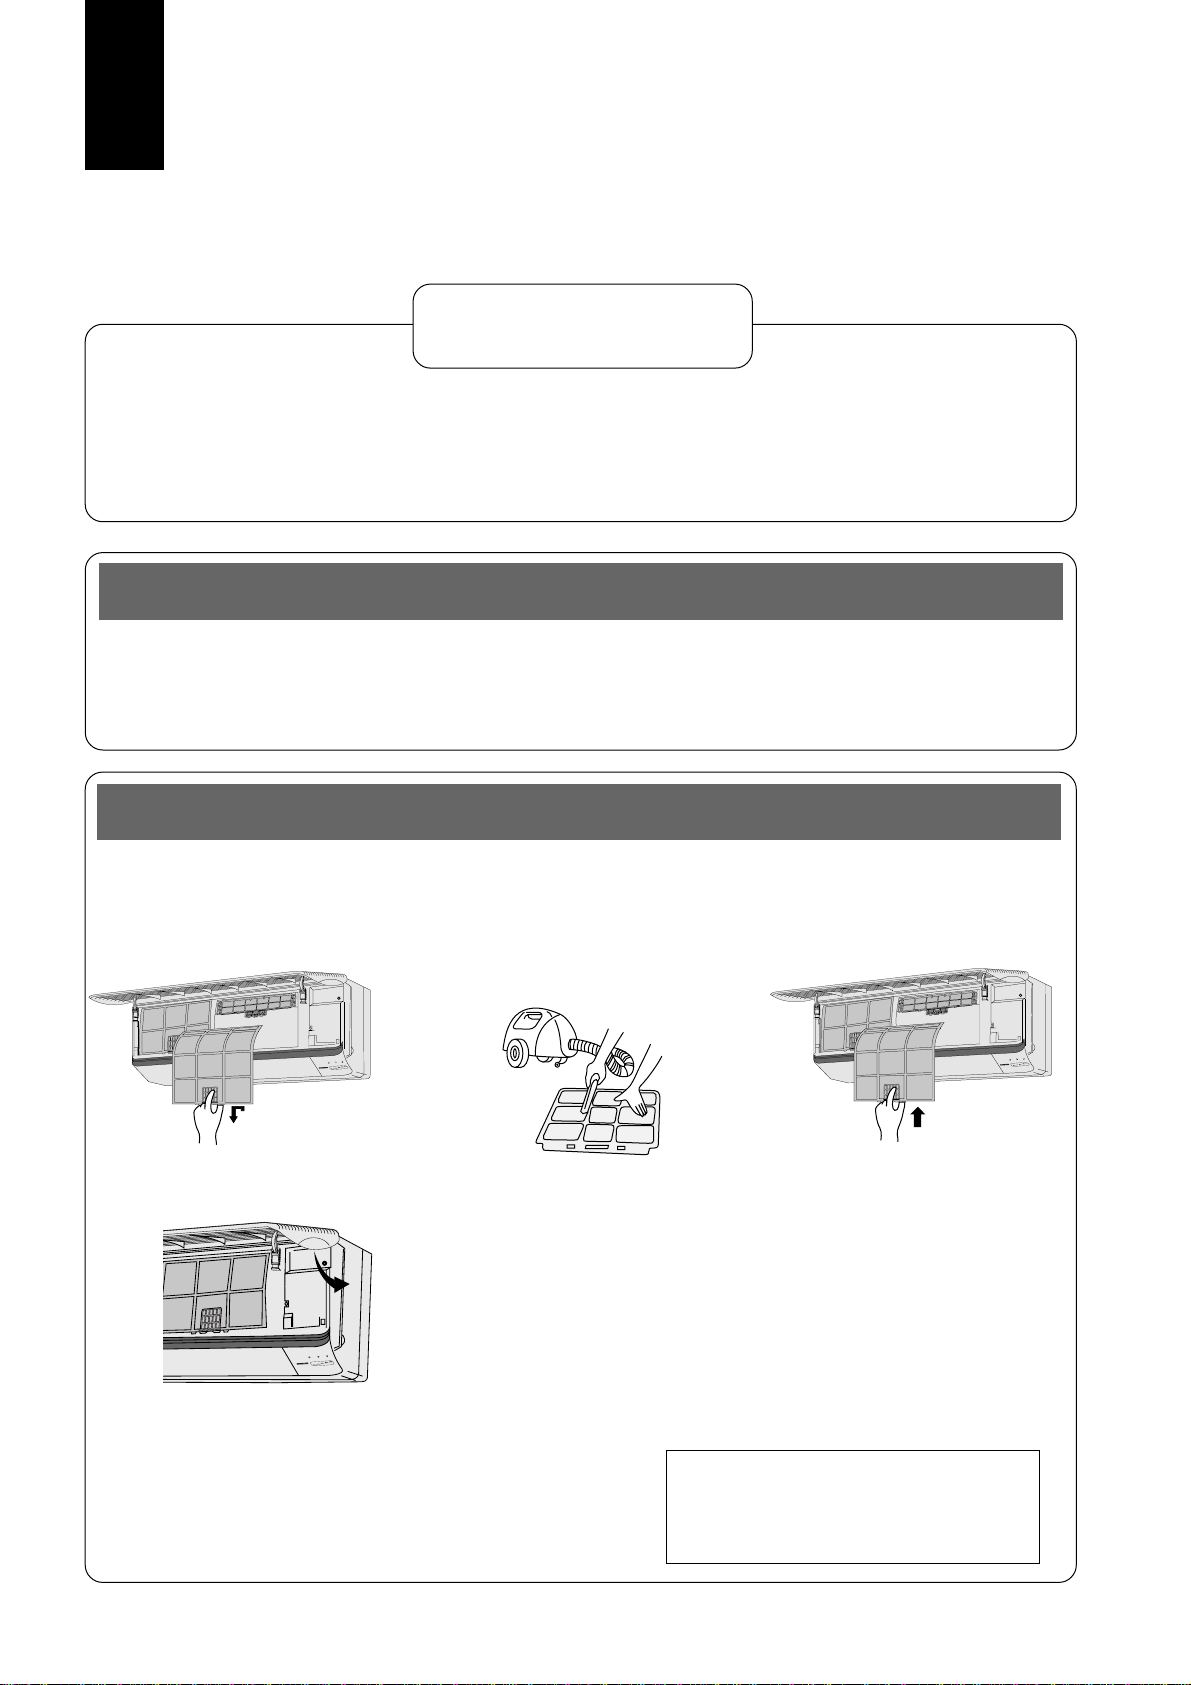
Cleaning the air filters (Once every 2 weeks)
Open the front panel and
remove the two air filters.
Hold the tab, lift up slightly,
12 3
then pull down.
Remove dirt using a
vacuum cleaner.
For heavy dirt, wash with
water and dry well
(away from direct sunlight)
before replacing.
Replace the air filter.
Be sure the “FRONT” mark
is facing you.
POWERFUL
TIMER
SLEEP
POWER
HIGH
LOW
POWER MONITOR
Close the front panel.
4
POWERFUL
SLEEP TIMER
POWER
HIGH
LOW
POWER MONITOR
Recommendation
If the unit is operated in a dusty environment, clean the
filters every two weeks. Continued use with dirty
filters reduces cooling and heating efficiency.
Damaged air filter
Consult the nearest authorized dealer.
Part No. CWD00240
POWERFUL
TIMER
SLEEP
POWER
HIGH
LOW
POWER MONITOR
▲
18
Page 21
Cleaning the front panel (Must be removed before washing)
ENGLISH
■ Stand on a flat surface when
removing the front panel.
■ Do not touch the indoor
■ Removing the front panel
Raise the front panel to its
full extent.
1
2
!
unit’s metal portions after
removing the front panel.
Slide the two tabs (left
and right) to the UNLOCK
position.
UNLOCK
Caution
LOCK
■ Do not leave water on the
panel after cleaning. Dry
thoroughly to prevent electric shock.
Raise up the front panel to a
position slightly higher than
3
horizontal and pull to
remove.
■ Cleaning the front panel
● Gently wash with water and a sponge. (Do not use a scrubbing brush or other hard cleaning aids.)
● Do not press the front panel too hard when washing. (Excess pressure may damage the panel.)
● When cleaning with kitchen cleaning fluids (neutral detergents), rinse thoroughly. (Do not use non-neutral
detergents.)
● Do not dry the front panel in direct sunlight. (Exposure to direct sunlight may discolor or disfigure the panel.)
■ Fixing the front panel
Raise the front panel
horizontally, match the
1
protruding portion on the
indoor unit to the fulcrum and
push into place.
Protruding portion
on indoor unit
Fulcrum
Slide the two tabs up to the LOCK position.
Note: If the tabs are left in the UNLOCK position, the front panel
2
will not close.
LOCK
UNLOCK
● If the panel does not close
completely, check the tab
positions and try again.
19
▲
Page 22
Care and Maintenance
Replacing the air purifying filters (Once every 3 months)
■ Replacing the air purifying filters
● Do not reuse dirty filters. Consult the nearest authorized dealer.
Air purifying filter No. CZ-SFD50N.
● These filters function effectively for no longer than three months.
● If the air conditioner operates with dirty filters:
• Air is not purified.
• Cooling and heating capacity decrease.
• Foul odours are emitted.
● Note:
Catechin is natural brown element. The filter is coated with catechin in order
to prevent the growth of bacteria and viruses.
■ Removing the air purifying filters
Raise the front panel to its
full extent.
1
POWERFUL
TIMER
SLEEP
POWER
W
LO
H
HIG
POWERSLEEPTIMER
HIGH
POWER MONITOR
LOW
POWER
MONITOR
Remove the two air filters. Hold the tabs of the air
23
Air filters
Lift up slightly,
then pull down.
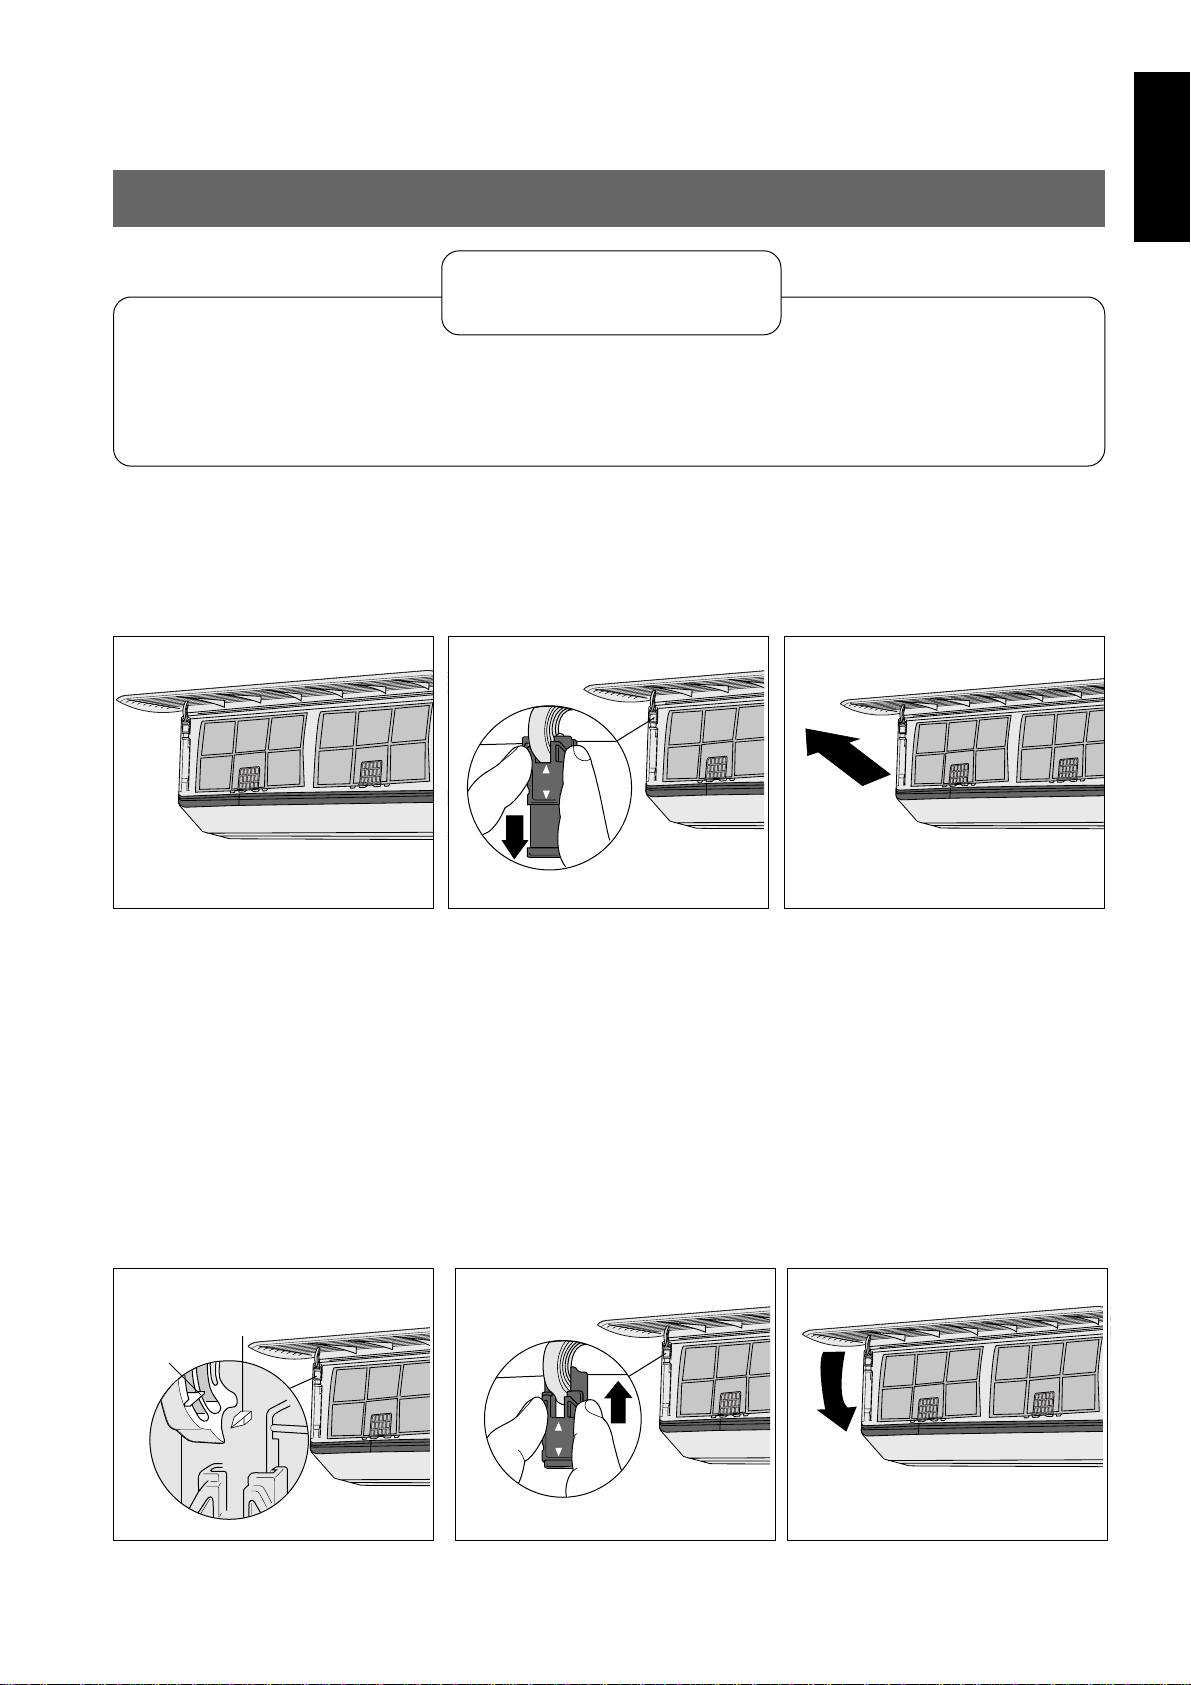
■ Re-installing the air purifying filters
Open the filter frame to insert
the new filters.
1
- Deodorizing Filter
(Black in colour)
- Catechin Air Purifying Filter
(Brown in colour)
Insert the new air purifying
filters. (Be sure the “FRONT”
23
mark is facing you).
purifying filters and pull.
POWERFUL
TIMER
SLEEP
POWER
HIGH
LOW
POWER MONITOR
Air purifying filters
Push until you hear a click.
● Close the front panel.
20
▲
Press here
Air purifying filters
Page 23
ENGLISH
!
Caution
■ Do not ignore a damaged installation rack.
A damaged rack may fall and cause injury. Consult an authorized dealer.
Pre-season inspection
■ Is the discharge air cold
(warm)?
Operation is normal if, 15
minutes after the start of
operation, the temperature
difference between the air
intake and outlet vents is 8°C
or above for cooling and 14°C
or above for heating.
INTAKE
POW
ERFUL
POW
ER
SLEEP
TIM
ER
L
O
W
H
IG
H
POW
ER MONITOR
OUTLET
■ Are the air intake or outlet
vents obstructed?
■ Are the remote control
batteries dead?
If the remote control display
flashes, replace the batteries.
(page 9)
When the air conditioner is not used for an extended period of time
To dry the internal parts of indoor unit, operate the unit for
2 ~ 3 hours using Fan operation.
1
Turn off the Power Supply and remove the power supply
plug.
2
Note : If the unit is not switched off by the remote
control, it will operate when you plug in
(because a Auto Restart Control is provided).
Remove the remote control batteries.
3
Recommended inspection
● The unit will become dirty after use over several seasons, reducing performance.
● Depending on the operation condition, a dirty unit may produce foul odours and dust may pollute the
dehumidifying drainage.
Seasonal inspections are recommended, in addition to regular cleaning. Consult an authorized dealer.
21
▲
Page 24
Troubleshooting
PO
W
ER
L
O
W
H
IG
H
SLEEP TIM
ER
POW
ERFUL
PO
W
ER MONITOR
P
O
W
E
R
L
O
W
H
IG
H
S
LE
E
P
TIM
E
R
POWERFUL
POWER MONITOR
PO
W
ER
LO
W
H
IG
H
SLEEPTIM
ER
POW
ERFUL
PO
W
ER M
ONITOR
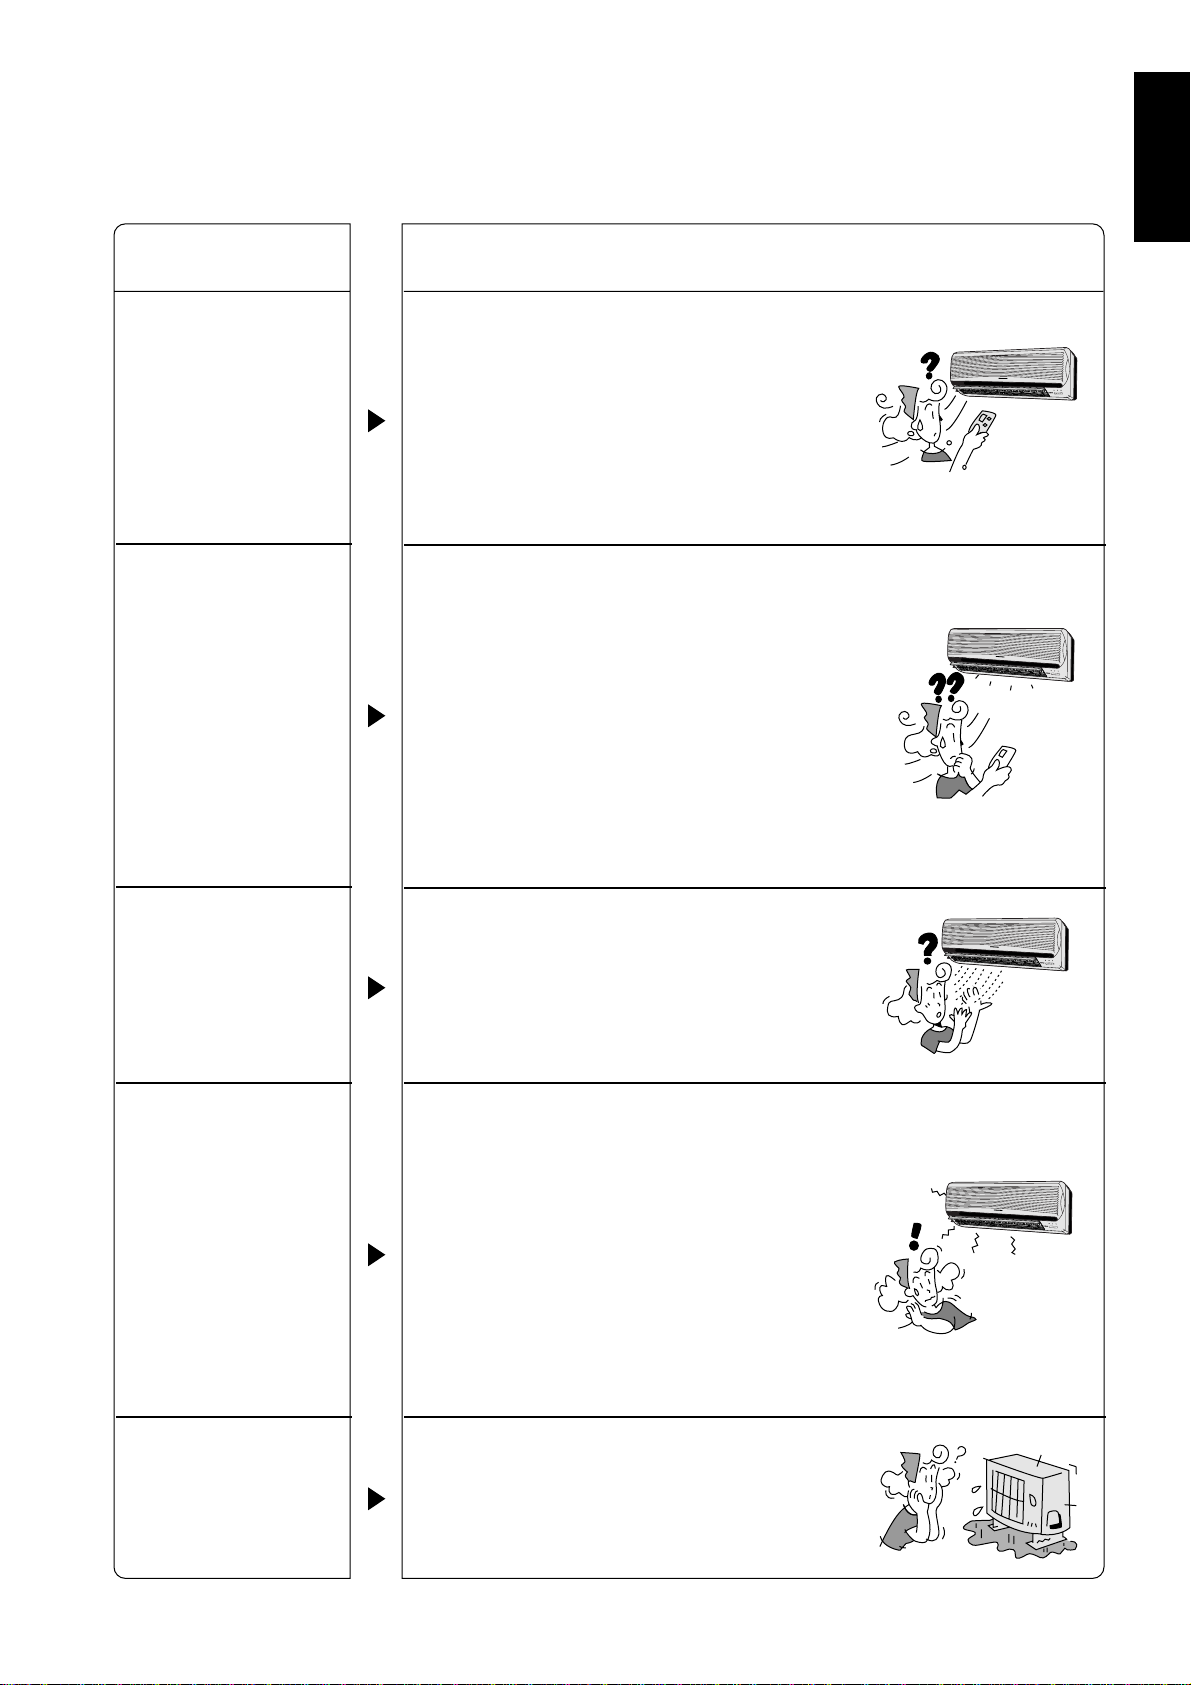
(Before calling your dealer, refer to the checklist)
Problem? Check
■ Has a circuit breaker been tripped or a fuse blown?
■ Is the power supply plug disconnected from the outlet?
■ Is the Timer being used correctly (page 14)?
The unit does
not operate
The unit does
not cool or heat
effectively
CHECK!
OFF
■ Has the temperature been set correctly (page 10)?
■ Are the air filters dirty (page 18)?
■ Are the air intake or outlet vents blocked?
■ Are all the windows and doors closed?
* Measure the temperature difference. Operation is normal if, 15 minutes
after the start of operation, the temperature difference between the air
intake and outlet vents is 8°C or above for cooling and 14°C or above for
heating.
OFF
The unit does
not receive
remote control
signals, or the
remote control
display is weak
or non-existent
22
▲
■ Is the signal switch set to “B” (page 7)?
■ Are the batteries weak (page 9)?
■ Have the batteries been inserted with the e and r poles in the correct
position?
B↔A
Page 25
ENGLISH
P
O
W
E
R
LOW
HIGH
S
LE
E
P
TIM
ER
P
O
W
E
R
F
U
L
P
O
W
E
R
M
O
N
IT
O
R
Problem?
Air is not
discharged
immediately
Operation
stops suddenly
Reason
● At Cooling • Soft Dry (auto Fan Speed)
Air will not be discharged for approximately 40
seconds. The unit is designed to prevent
tobacco, cooking and body odors from being
discharged together with the cool air.
● At Heating (POWER LED blinks)
This is to prevent cold air from blowing out.
Please wait.
● At Cooling • Soft Dry (auto Fan Speed)
The indoor fan repeatedly stops for 60 seconds
and operates for 30 seconds to check the indoor
temperature. Whenever the temperature reaches
the setting temperature, operation starts again.
● At Heating (POWER LED blinks)
When the outdoor temperature is low and
humidity is high, frost accumulates on the
outdoor unit. The POWER LED blinks when the
unit is melting the frost. (Please wait as
defrosting may take up to 10 minutes.)
POW
ERFUL
PO
W
ER
SLEEP
TIM
ER
LO
W
H
IG
H
POWER M
ONITOR
POWERFUL
PO
W
ER
SLEEPTIM
ER
L
O
W
H
IG
H
POWER MONITOR
Fog is blowing
out from the
unit
There is a noise
The outdoor
unit
gives off water
● This occurs when the airflow from the air
conditioner cools the room.
● A ‘passt’ sound is heard during defrosting
or when the air conditioner operation has
been stopped. This is caused by the
refrigerant inside the air conditioner flowing
in the opposite direction.
● The air conditioner will expand or contract
due to changes in temperature, causing a
cracking sound.
● The sound of water flowing is caused by the
refrigerant flowing inside the unit.
● When defrosting, the frost melts and
changes to water and steam.
POW
ERFUL
P
O
W
E
R
S
L
E
E
P
T
IM
E
R
LOW
HIGH
POW
ER M
O
NITOR
and steam
23
▲
Page 26
Call the dealer
H 2 3
H 2 7
H 2 8
immediately
Is There a Problem?
Call the dealer immediately if any of the following occurs.
Abnormal
noise during
operation.
Water leaking
from the
indoor unit.
A smell of
burning is
emitted.
Circuit
breaker
trips or
fuse blows
frequently.
Switches or
buttons not
functioning.
Water or
foreign
particles in the
remote
control.
Power supply
cord and plug
become
unusually
warm.
Turn off the Power Supply and remove the power supply plug.
■ The Timer LED blinks
and 3 characters are
displayed.
The display changes
in this order.
Example:
(Red)
POWERFUL
POWER
SLEEP
TIMER
LOW
POWER MONITOR
Timer
● Blinking indicates an abnormality. Check the
display and consult an authorized dealer.
● After checking the display, turn off the power
supply and remove the power supply plug.
● Depending on which 3 characters are
displayed, temporary operation may be
possible.
Characters allowing
temporary
operation
HIGH
● Temporary operation
1. Press the MODE button and select Heating or
Cooling.
2. Press the operation OFF/ON button
(‘beep! beep! beep! beep!’ sound is heard).
* Use this operation temporarily, until
repairs can be made.
Possible
temporary
operations
Cooling
Heating
Cooling
Description
of operation
Emergency
operation with
limited functions.
(The Timer LED
continues to blink.)
▲
24
Page 27
Helpful Information
Remote control fails to function
ENGLISH
If the remote control fails to function or has been
misplaced, carry out auto operation. Auto operation
settings are automatic; the temperature cannot be
adjusted.
POWERFUL
POWER
SLEEP
TIMER
LOW
HIGH
POWER MONITOR
Hold the two panel openers of the front
panel and pull. (Replace after operation
starts.)
When there is a power failure
■ Power failure during operation
Auto Restart Control
■ If there is a power failure, operation will be
automatically restarted under the previous
operation mode and airflow direction when the
power is resumed as the operation is not
stopped by remote control.
■ When the operation restarts, the outdoor unit
will operate only after 3~4 minutes.
Turn the Power Supply to ON
1
Press the Auto Operation button once.
The POWER LED blinks until
2
the operation mode is selected.
■ To cancel Auto
Operation
Press the Auto Operation
button again (POWER LED
lights off).
● Power failure after the Timer has
been set
The Timer setting is cancelled. (Main unit’s Timer
LED is extinguished.) Once power is restored,
reset the Timer.
(Ex)
Power failure after the ON-Timer has been set.
TIMER
1
ON OFF
1
AUTO OFF/ON
Press ON Button
2
Press SET Button
2
3
CANCEL
Thunder and lightning
This air conditioner is equipped with a built-in surge protective device. However, in order
to further protect your air conditioner from being damaged by abnormally strong lightning
activity, you may switch off the main power supply and unplug from power socket.
Voltage fluctuation
The outdoor unit stops operation frequently due to a fluctuation in the voltage. Consult your dealer.
SET
(Indoor unit’s Timer LED lights
up.)
PO
W
ERFU
L
PO
W
ER
SLEEP
TIM
ER
L
O
W
H
IG
H
POW
ER MO
NITOR
25
▲
Page 28

!
1) This appliance must be earthed.
2) If the supply cord is damaged or need to be replaced, it must be replaced by the manufacturer or its
service agent or a similarly qualified person in order to avoid a hazard.
3) Remove power plug or disconnect from the mains before servicing this appliance.
4) Do not repair by yourself.
In case of malfunction of this appliance, do not repair by yourself.
Contact to the sales dealer or service dealer for a repair.
5) Do not use in an explosive atmosphere.
Do not use this appliance in a potentially explosive atmosphere.
6) Turn off the power (Isolation from main power supply).
Pull off the power plug from the receptacle, or switch off the breaker, or switch off the power
disconnecting mean to isolate the equipment from the main power supply in case of an emergency.
Warning
!
DISCONNECT THE MAINS PLUG FROM THE SUPPLY SOCKET WHEN NOT IN USE, WHERE SUPPLY
CONNECTION IS VIA MAINS PLUG.
Airborne noise.
A-weighted sound pressure level of this appliance is less than 70dB (A) under the JIS C 9612 test conditions.
Maximum cooling operation
1 m from the unit
Caution
IMPORTANT
The wires in this mains lead are coloured in accordance with the following code:
Green and Yellow : Earth
Blue : Neutral
Brown : Live
“As the colours of the wires in the mains lead of this appliance may not correspond with the coloured markings identifying the terminals in your plug, proceed as follows:
The wire which is coloured green and yellow must be connected to the terminal in the plug which is marked
by the letter E or by safety earth symbol ! or coloured green or green and yellow.
The wire which is coloured blue must be connected to the terminal which is marked with letter N or coloured
black.
The wire which is coloured brown must be connected to the terminal which is marked with letter L or coloured red.”
26
▲
Page 29
Antes de
Utilizar
Como
Utilizar
índice
PORTUGUÊS
Características E Ascessórios...............................28
Cuidados de Segurança .................................29 – 31
• Cuidados de Instalação
• Cuidados de Funcionamento
Nome De Cada Um Dos Componentes Da Unidade De ar
Condicionado Com Inverter ......................................... 32 – 33
Preparação (Unidade Inverter • Unidade Exterior)..... 34 – 35
• Operação do controlo Remoto
• Instalar as pilhas
• Acertar o relógio
Automático • Aquecimento • Arrefecimento
Desumidificação Suave • Ventilador ........................... 36 – 37
Adjustar A Direcção Do Caudal De Ar E A Velocidade Do
Ventilador....................................................................... 38 – 39
• Ajuste da velocidade do ventilador
• Ajuste da persiana de direcção vertical do fluxo de ar
• Ajuste da persiana de direcção horizontal do fluxo de ar
Amplo / Localizado ............................................................... 39
Regular Os Temporizadores ........................................ 40 – 41
Se
Necessário
Modo Potente • Modo Sleep ................................................. 42
• Modo de funcionamento potente
• Modo de funcionamento de dormir
Sugestóes De Funcionamento............................................. 43
Cuidados E Manutenção .............................................. 44 – 47
• Limpeza Da Unidade Interior E Do Controlo Remoto
• Limpeza Dos Filtros Do Ar (Uma Vez De 2 Em 2 Semanas)
• Limpeza Do Painel Frontal (Deve Ser Retirado ANtes De Ser Lavado)
• Substituir Os Filtros Para Purificação Do Ar (De 3 em 3 meses)
• Inspecção Pré- Temporária
• Quando O A Condicionado Não é Utilizado Por Um Período De
Tempo Prolonggado
• Inspecção Recomendada
Detecção De Avarias................................................... 48 – 49
Existe Algum Problema?.............................................. 50
Informações Úteis ......................................................... 51
• O controlo remoto não funciona
• Quando Ocorre Uma Falta De Corrente
• Trovoadas
• Variações De Tensão
27
▲
Page 30
Características e Acessórios
Ar condicionado Panasonic Inverter: cómodo, silencioso e confortável
Operação Automática
Selecciona o modo óptimo
(página 36)
Filtro Purificador do Ar "CATECHIN"
Este filtro pode reter poeiras, fumo de tabaco
e partículas minúsculas em suspensão no ar da
sala. Previne também o desenvolvimento de
bactérias e viroses retidas por este filtro.
(página 28,34 e 46)
Painel Frontal
Pode ser retirado para uma
limpeza rápida e fácil
(página 45)
Oscilação vertical/horizontal
do deflector de ar
Oscilação automática do deflector
para a orientação vertical e
horizontal do fluxo de ar
(página 38)
Protecção contra as
flutuações da tensão eléctrica
Protege a unidade quando a tensão
da corrente excede os
limites normais
(página. 51)
Filtro Desodorizante
Anula odores indesejáveis e
desodoriza o ar da sala.
(página 28,34 e 46)
s de Ar em 4 Direcções
0 fluxo de ar pode ser dirigido
em 4 direcções
(página 37)
Modo Potente
Atinge rapidamente a
temperatura desejada
(página 42)
Acessórios
Controlo Remoto Pilhas secas
Etiqueta Bilingue
do Controlo Remoto
R03 (2)
Botão auto-iluminãvel
Para facilitar a sua
manipulação na escuridão.
(página. 33)
Rearme Automático
Repõe a unidade automaticamente em
marcha depois de um corte de energia
(página 42)
Filtros Purificador Do Ar
(Filtros Purificador do Ar
"Catechin" e Filtros Desodorizante)
▲
28
POWERFUL
INVERTER
TEMP
OFF/ON
Soporte del
controlo remoto
Page 31

Precauções de Segurança
Antes de operar esta unidade, leia com atenção as seguintes
“Precauções de Segurança”.
Siga as seguintes instruções para evitar causar danos pessoais ou danos na unidade.
■ A operação incorrecta devido ao não seguimento das instruções poderá provocar ferimentos ou danos, a
sua gravidade é classificada do seguinte modo:
PERIGO : Este símbolo alerta para perigo de morte ou ferimentos
!
!
CUIDADO : Este símbolo alerta para perigo de ferimentos ou danos
■ As instruções a seguir estão classificadas do seguinte modo:
Este símbolo (com fundo branco) alerta para uma acção proibida.
Estes símbolos (com fundo preto) alertam para a obrigatoriedade de
OFF
uma acção.
PORTUGUÊS
Precauções de instalação
PERIGO
!
■ Não instale, retire nem reinstale a unidade.
A instalação inadequada pode causar derrames, choques eléctricos ou um incêndio. Consulte por favor
um agente autorizado ou um especialista para levar a cabo os trabalhos de instalação.
CUIDADO
!
■ Esta unidade de ar condicionado deverá estar
ligada à terra.
Uma ligação à terra inadequada pode
provocar choques eléctricos.
■ Não instale a unidade em locais onde possam
ocorrer fugas de gás.
■ Certifique-se de que os tubos de drenagem
estão correctamente ligados.
Caso contrário haverá fugas de
água.
As fugas de gás próximas da unidade
podem provocar um incêndio.
29
▲
Page 32

Precauções de instalação
P
O
W
E
R
LOW
HIGH
S
LE
EP
TIM
ER
POW
ERFUL
POW
ER M
ONITOR
■
Introduza a ficha de
alimentação correctamente.
O calor gerado por uma ficha
solta pode provocar choque
eléctrico ou incêndio.
A tomada de electricidade e a
ficha devem estar acessíveis
facilmente.
■
Não altere o comprimento do
cabo de alimentação nem
utilize um cabo de extensão.
Pode provocar choque eléctrico
ou incêndio.
!
PERIGO
■
Não ligue ou desligue a unidade
introduzindo ou retirando a ficha
de alimentação.
Pode provocar choque eléctrico
ou incêndio.
■
Não toque na unidade com as
mãos molhadas.
Pode provocar choque eléctrico.
■ Não danifique o cordão
eléctrico nem use um de baixa
qualidade.
Um cordão eléctrico danificado
ou de baixa qualidade pode
provocar uma descarga eléctrica
ou um incêndio.
■
Não introduza os dedos,
paus ou outros objectos
dentro das unidades.
Pode provocar ferimentos
pessoais e danificar as
unidades.
■
Não se exponha durante
demasiado tempo em frente
da corrente de ar da unidade.
Poderá ficar com problemas de
saúde.
▲
30
■
■
Se sentir um cheiro a
queimado desligue a unidade
do ar condicionado e retire a
ficha da tornada de parede.
Consulte um agente autorizado ou
Não tente reparar a unidade.
Poderá apanhar um choque eléctrico
ou mesmo um provocar um incêndio.
Consulte um agente autorizado ou o
centro de reparações.
o centro de reparações.
L
U
F
R
E
W
O
P
ER
SLEEPTIM
ER
POW
W
O
L
H
IG
H
R
O
IT
N
O
M
R
E
W
O
L
FU
ER
W
PO
SLEEPTIMER
ER
POW
HIGH
LOW
ONITOR
ER M
POW
OFF
Desligue o
interruptor
Retire a ficha
da tomada.
P
P
O
W
E
R
F
U
L
POWER
SLEEP TIMER
LOW
HIGH
P
O
W
E
R
M
O
N
ITO
R
Page 33

PORTUGUÊS
■ Não retire a ficha da tomada
puxando pelo cabo de
alimentação da unidade.
Sempre que desejar retirar a ficha
da tomada de alimentação segure
na ficha com a mão.
■ Não utilize a unidade para
outros fins que não aqueles
para que foi concebida.
Não utilize para a conservação de
alimentos. Estará a afectar a
qualidade dos alimentos, animais
ou plantas.
!
CUIDADO
■ Se não for utilizar a unidade
durante um longo período de
tempo, desligue-a da tomada
de alimentação.
Se se acumularem poeiras na
ficha, gerar-se-á calor o que
poderá provocar um incêndio.
Desligue o
interruptor.
Retire a ficha
da tomada.
■ Não coloque nenhum
equipamento de combustão
em frente das saídas de ar da
unidade.
A combustão incompleta poderá
levar ao envenenamento por gás
tóxico. (CO - monóxido de carbono)
OFF
■ Quando limpar a unidade
retire a ficha da tomada de
alimentação.
Deste modo evitará magoarse ou
mesmo danificar o ventilador.
P
O
W
E
R
F
U
L
POWER
SLEEP
TIMER
LOW
HIGH
P
O
W
E
R
M
O
N
ITO
R
Desligado
■ Proceda à ventilação regular
da sala.
Como as janelas permanecem
fechadas, é bom abri-las de vez em
quando para arejar.
■
Não lave a unidade com água.
Poderá causar choques eléctricos.
■ Inspeccione a unidade para
detectar quaisquer danos.
Certifique-se de que são levadas a
cabo as devidas reparações.
L
FU
ER
W
PO
SLEEP TIMER
POWER
H
IG
H
W
O
L
R
ITO
N
O
M
ER
W
PO
■ Não se sente nem coloque
nenhum objecto em cima do
aparelho exterior.
Poderá cair ou fazer tombar o
aparelho.
31
▲
Page 34

Nome de cada um dos componentes da Unidade de Ar
Condicionado com Inverter
Unidade Interior
Entrada de ar
Painel frontal
Filtro
Purificador do Ar
Filtros de Ar
Saída de ar
Deflectores ar
horizontal para dirigir
o fluxo de ar
Deflectores ar vertical para
dirigir o fluxo de ar
Luzes de indicação da operação
• POWER : Verde
(Alimentação)
• SLEEP : Laranja
(Dormir)
• TIMER : Laranja
(Temporizador)
• POWERFUL : Laranja
(Potente)
Unidade Exterior
Patilha para o Painel Frontal
Luzes de monitorização
da alimentação
• Acendem-se da posição LOW
para HIGH para mostrar que o
compressor está a funcionar.
• Apagam-se quando o compressor pára.
POWERFUL
SLEEP TIMER
POWER
HIGH
LOW
POWER MONITOR
POWER
SLEEP TIMER
LOW
POWER MONITOR
Cabo de Alimentação
Botão de Operação Automática
Patilha de abertura do painel
Receptor de
Infravermelhos Recebe os sinais
do Controlo Remoto (Som
recebido: bip curto e bip longo).
POWERFUL
HIGH
▲
Orificios de
Entrada de Ar
32
(Trás)
(Lado)
Orificios de Saida de Ar
Tubagens
Terminal de Terra
(interior da caixa)
Cabo de
Ligação
Mangueira de Drenagem
Page 35

Controlo Remoto
PORTUGUÊS
Transmissor de
infravermelhos
Visor
Botão de
Programação da
Temperatura
(botão auto-iluminãvel)
Botão OFF/ON
(botão auto-iluminãvel)
Botão POWERFUL
POWERFUL
INVERTER
TEMP
OFF/ON
Quando a tampa traseira está aberta
Terminais de
diagnóstico
Só para uso do serviço
técnico.
Interruptor [B ↔ A] de sinal.
Para ajustar em A.
Quando há duas unidades instaladas na mesma sala.
Consulte o seu vendedor sobre o interruptor [B ↔ A].
Pontos de
Reinício
OPEN
Visor de Operação
Botão de Selecção
do Modo de Operação
Botão do modo
Sleep
Tampa do Controlo Remoto aberta
Botão do Relógio
CLOCK
AUTO
HEAT COOL
DRY FAN
WIDE SPOT
AUTO FAN
AUTO
AUTO
ON
OFF
SLEEP
MODE
WIDE/SPOT
FAN SPEED
AIR SWING
TIMER
1
ON OFF
2
3
CANCEL
SET
C
°
Botão de Ajuste da Hora
Wide/Spot
(amplollocalizado)
Botão de Selecção
da Velocidade do
Ventilador
Botão de Selecção
da Direcção do Fluxo
de Ar
Botão OFF TIMER
(desligar o
temporizador)
OBotão ON TIMER
(ligar o temporizador)
Botão de Cancelamento
Botão de Programação
do Temporizador
33
▲
Page 36

Preparação (Unidade Interior - Controlo Remoto)
Unidade Interior
Ligue a ficha de alimentação a uma
tomada de parede e abra o painel
1
frontal.
ERFUL
POW
SLEEP TIMER
POWER
LOW
HIGH
POWERSLEEPTIMER
NITOR
H
ER MO
IG
H
POW
LOW
POWER
MONITOR
Remova os filtros de ar é introduza os
filtros purificadores de ar.
2
Filtro de ar
Levante-o ligeiramente
e depois baixe-o
Segure as ranhuras
para abertura do
painel e puxe.
POWERFUL
SLEEP TIMER
ER
POW
HIGH
LOW
POWER MONITOR
!
PERIGO
■ Certifique-se de que a ficha de
alimentação está correctamente
ligada.
Uma ficha solta pode provocar um incêndio
ou choques eléctricos.
Introduza os filtros de ar e feche o
painel frontal
3
POWERFUL
SLEEP TIMER
POWER
HIGH
LOW
POWER MONITOR
Introduza os
novos filtros
purificadores de
ar. (Verifique
que a indicação
"FRONT" está
em frente de si)
Filtro de purificação do ar
Utilizar nas seguintes condições:
DBT: Temperatura de Bolbo Seco
WBT: Temperatura de Bolbo Húmido
Interior
DBT
WBT
DBT
Arrefecimento
Exterior
Interior
WBT
DBT
WBT
Aquecimento
Exterior
DBT
WBT
Temp° máxima
32
23
43
26
30
–
24
18
Notas
• No caso de que não vá utilizar a unidade durante um período prolongado, ponha o
aparelho da corrente em OFF. Se fica em ON gastará aproximadamente 2,8W de
electricidade mesmo quando a unidade de interior tenha sido apagada com o
comando à distância.
Quando está activado o modo standby, consumirá aproximadamente 35W de
energia eléctrica no calor do compressor necessário para aquecer a sala
rapidamente. Este modo pode desactivar-se se assim o deseja. Consulte o seu
concessionário.
• Se a operação for interrompida, e reiniciada imediatamente a seguir, a unidade só
será novamente colocada em funcionamento depois de decorridos 3 minutos.
Temp° mínima
16
11
16
11
2
–
–5
–6
3 minatos
Unidade em °C
P
O
W
E
R
F
U
L
POWER
SLEEP
TIMER
L
O
W
H
IG
H
P
O
W
E
R
M
O
N
IT
O
R
▲
34
Page 37

PM
Controlo Remoto
PM
PM
PM
Operação do Controlo Remoto
● A distância máxima a que os sinais podem ser
recebidos é de cerca de 10 m.
● Quando desejar operar o ar condicionado da sala
dirija o Controlo Remoto para o receptor de
infravermelhos.
● Certifique-se de que não existem obstáculos entre
o comando e o receptor de infravermelhos.
P
O
W
E
R
F
U
L
POWER
SLEEP
TIMER
LOW
HIG
H
P
O
W
E
R
M
O
N
IT
O
R
PORTUGUÊS
Pihas
As pilhas podem ser utilizadas durante
aproximadamente um ano. Quando as pilhas estão
fracas, se premir um botão o visor do Controlo
Remoto começa a piscar. Substitua imediatamente
as pilhas.
Ao substituir as pilhas tenha em
atenção os seguintes aspectos
● Substitua as pilhas por duas pilhas novas do
mesmo tipo.
● Não utilize baterias recarregáveis (Ni-Cd),
porque são diferentes em formato, dimensões e
performances das pilhas secas standard.
● Se a unidade não for utilizada durante um
longo período de tempo, retire as pilhas do
interior do Controlo Remoto.
Instalar as pihas
(2 pilhas secas R03)
1 Prima gentilmente no
local onde esta escrita a
palavra OPEN faça
deslizar a tampa na sua
direcção.
● Certifique-se de que o visor está a piscar às 12:00
PM. Se esta inscrição não aparecer no visor
quando são instaladas as pilhas, retire-as e volte a
introduzi-Ias no respectivo compartimento.
2 Certifique-se deque as polaridades r
e e estão correctas.
Acertar o relógio
Prima o botão CLOCK.
1
A indicação PM começa a piscar e
12:00 ilumina-se.
Prima ou para acertar a
hora.
2
Prima e mantenha premida a tecia
para avanço rápido e para
inversão rápida.
Prima o botão CLOCK.
3
A indicação PM ou AM acende-se.
Notas
● Não atire nem deixe cair o Controlo Remoto.
● Alguns tipos de lâmpadas fluorescentes podem
provocar interferências no sinal de recepção.
Consulte o seu representante.
● Para evitar que as pilhas se descarreguem, acerte
imediatamente a hora (CLOCK).
35
▲
Page 38

Automático • Aquecimento • Arrefecimento •
POWER
LOW
HIGH
SLEEP TIMER
POWERFUL
POWER MONITOR
Desumidificação Suave • Ventilador
Prima MODE para seleccionar o modo
de operação desejado.
CLOCK
AUTO
1
a
AUTO FAN
AUTO
PM
AUTO
MODE
WIDE/SPOT
FAN SPEED
AIR SWING
TIMER
1
ON OFF
2
TEMP
Visor
▲
AUTO FAN
Quando premido, o visor muda pela seguinte ordem:
COOLHEAT
Prima o botão
2
O LED de Alimentação acende-se. (0 LED pisca
quando a temperatura da sala for baixa no início da
operação de aquecimento ou se o modo de operação
for seleccionado durante a Operação Automática.)
As luzes do monitor de potência acendem-se para
mostrar a situação de funcionamento do compressor.
DRY
OFF/ON
FAN
a
▲
36
POWERFUL
INVERTER
OFF/ON
Para ajustar a temperatura.
• Aumenta ou diminui a temperatura de 1°C de cada
3
vez que é premido.
• A temperatura pode ser regulada entre os 16°C e
os 30°C. (Não regulável durante a Operação do
Ventilador.)
Temperatura recomendada
Aquecimento : 20 ~ 24°C
Arrefecimento : 26 ~ 28°C
Desumidific. Suave : Temp° aprox.
da sala
Prima novamente o botão
OFF/ON
para
interromper a operação (o LED de
Alimentação -POWER LED apaga-se).
Page 39

Controlo de Rearme Automático de Operação
● Se se der um corte de energia, a operação é automaticamente reiniciada no modo de operação e
direcção do caudal de ar anteriormente seleccionados quando a alimentação for reposta. (Quando a
operação não é interrompida pelo Controlo Remoto.)
● Se não desejar que a unidade retome o seu funcionamento automaticamente, assim que a alimentação
for reposta, desligue o interruptor de alimentação na parte interior da unidade ou o interruptor geral de
alimentação.
● Se não desejar que tenha início o Controlo de Rearme Automático, consulte o seu representante.
● O Controlo de Rearme Automático não está disponível se o Temporizador ou o Modo Sleep estiverem
seleccionados.
PORTUGUÊS
Operação Automática
● No início da Operação Automática, o Aquecimento, Arrefecimento ou
Desumidificação Rápida são o automaticamente seleccionados de
acordo com a temperatura exterior, a temperatura interior e a
temperatura regulada
● Se necessário, o modo de operação muda todas as meias horas.
(Ex) Ajuste Temperatura para 25°C
36
35
34
33
32
A
31
Q
30
29
U
28
E
27
C
26
I
25
M
24
23
E
22
N
21
T
19
O
18
Sala Temperatura ˚C
17
16
13 14 15 16 17 18 19 20 21 22 23 24 25 26 27 28
Exteri or Temperatura ˚C
Operação de Aquecimento
● Para subir a temperatura da sala de acordo com o ajuste que tenha escolhido.
● O calor para aquecer a sala é obtido a partir do ar exterior. Quando a temperatura ambiente do ar
exterior desce, a capacidade de aquecimento da unidade poderá ser mais reduzida. Recomendamos que
utilize um dispositivo de aquecimento adicional sempre que a temperatura ambiente exterior for
demasiado baixa.
Operação de Arrefecimento
● Para baixa a temperatura da sala de acordo com o ajuste que tenha escolhido.
Operação do Ventilador
● Faz circular o ar através da sala.
● Purifica e desodoriza o ar se for utilizado o filtro de purificação do ar. A Operação do Ventilador
érecomendada durante as estações em que não for utilizado nem o sistema de Aquecimento nem o
sistema de Arrefecimento.
A
D
R
E
R
S
E
U
F
M
E
.
C
I
S
M
U
E
A
N
V
T
E
O
Operação de Desumidificação Suave
● Desumídifica enquanto mantém a temperatura seleccionada. A Operação de Desumidificação Suave
érecomendável para a estação das chuvas.
● Se a temperatura da sala ultrapassar a temperatura regulada, a operação passa para o modo de
Arrefecimento.
● A velocidade do ventilador é bastante lenta durante a Operação de Desumidificação Suave.
● A humidade poderá não diminuir quando a temperatura interior for inferior à temperatura inicialmente
regulada no Controlo Remoto.
Notas
● Consulte a página 38 quanto à regulação da velocidade do ventilador e à direcção do caudal do ar.
● Os modos Powerful (Potente) e Sleep (Dormir) podem ser regulados durante a Operação Automática.
37
▲
Page 40

Ajustar a direcção do fluxo de ar e a
velocidade do ventilador
0 ajuste correcto da direcção do fluxo de ar e da velocidade do
ventilador aumentam a eficácia de operação da unidade.
Para ajustar a velocidade do ventilador
AUTO
AUTO FAN
AUTO
SLEEP
CLOCK
MODE
WIDE/SPOT
FAN SPEED
AIR SWING
TIMER
1
ON OFF
2
3
CANCEL
SET
Prima o botão FAN SPEED
● Existem 5 velocidades diferentes para além
da velocidade automática do ventilador.
■ Controlo de velocidade do
Exemplo de visualização
Velocidade
Automática do
Ventilador
COOL
Velocidade
Média do
Ventilador
COOL
ventilador automático
Aquecimento
Quando aumenta a temperatura de ar de descarga,
aumenta a velocidade do ventilador
AUTO FAN
h j k
Arrefecimento ● Desumidificação Suave
Mude a velocidade do ventilador para provocar uma corrente de ar frio. O ar
começa a soprar aproximadamente 40 segundos depois do arranque do
Arrefecimento ou da Secagem Suave.
Para ajustar os deflectores verticais de direccionamento do fluxo de ar
Prima o botão
● Existem 5 ângulos de direccionamento vertical para além da
Direcção Automática de Caudal de Ar.
O visor muda sempre que é premido o botão . (o visor indica a
direcção do caudal de ar.)
■
Controlo automático da direcção vertical do fluxo de ar
Aquecimento
Aquecimento – Quamdo a temperatura do fluxo de ar é baixa, no
momento de arranque do aparelho, o ar frio sopra em sentido horizontal.
Quando sobe a temperatura, o ar quente sopra para baixo.
Arrefecimento ● Desumidificação Suave
A grelha de direcção vertical deslocase para cima e para baixo
automaticamente.
–
▲
SPOT
38
Para ajustar os deflectores horizontais de direccionamento do fluxo de ar
Prima o botão
● Existem 7 posições de direccionamento para os deflectores
horizontais para além da Direcção Automática de Fluxo de Ar.
O visor muda sempre que é premido o botão (o visor não
indica as direcções exactas do fluxo de ar nem os ângulos exactos
dos deflectores.)
■ Controlo automático da direcção horizontal do
fluxo de ar.
P
O
W
E
R
F
U
L
POWER
SLEEPTIMER
L
O
W
H
IG
H
P
O
W
E
R
M
O
N
IT
O
R
P
O
W
E
R
F
U
L
POWER
SLEEP
TIMER
L
O
W
H
IG
H
P
O
W
E
R
M
O
N
IT
O
R
WIDE
Aquecimento
Quando a temperatura do ar é baixa, o fluxo de ar difunde-se-em WIDE
(difuso). Quando a temperatura sobe, o ar difunde-se em SPOT (concentrado)
Arrefecimento ● Ventilador
As persianas oscilam horizontalmente a uma velocidade estabelecida.
Desumidificação Suave
As persianas estão fixadas em WIDE
Page 41

Gama de ajuste dos deflectores
● A gama de ajuste é diferente para cada operação i.e.
Arrefecimento
Ventilador
Desum.
Suave
Aquecimento, Arrefecimento e Desumidificação Suave
(Figura à esquerda.)
● O ângulo indicado no Controlo Remoto é diferente do
AQUECIMENTO
Cerca de 30°
Cerca de 30°
ângulo indicado na unidade interior.
● O ângulo do deflector muda automaticamente para evitar
que se forme condensação durante os modos de
Arrefecimento e Desumidificação Suave.
● Quando a operação pára, os deflectores fecham-se
automaticamente.
Cerca de 60°
* Nesta gama podem ser efectuadas
cinco fases de ajuste.
Notas
● Não regule o deflector de direccionamento vertical do fluxo de ar para baixo durante a operação nos
modos de Arrefecimento e Desumidificação Suave. Podem formar-se gotas de condensação nas
tubagens de saída do ar eque podem pingar o chão.
● Utilize o Controlo Remoto para mudar o deflector de direccionamento vertical do fluxo de ar. Se o fizer
manualmente poderá fazer com eque este deixe de funcionar correctamente. Se isto acontecer,
interrompa imediatamente a operação e reinicie novamente.
PORTUGUÊS
Amplo / Localizado
Controlo correcto do direccionamento horizontal do fluxo de ar.
■ Prima o botão WIDE/SPOT para seleccionar
entre WIRE e SPOT o direccionamento do
fluxo de ar.
a
WIDE
Visor
▲
AUTO FAN
Ao premir este botão a visor muda pela ordem
SPOTWIDE
P
O
W
E
R
F
U
L
POWER
SLEEP
TIMER
L
O
W
H
IG
H
P
O
W
E
R
M
O
N
IT
O
R
Direcção Manual
Horizontal do
Fluxo de ar
P
O
W
E
R
F
U
L
POWER
SLEEPTIMER
L
O
W
H
IG
H
P
O
W
E
R
M
O
N
IT
O
R
AUTO
WIDE
AUTO FAN
AUTO
SLEEP
MODE
WIDE/SPOT
FAN SPEED
AIR SWING
TIMER
1
ON OFF
2
3
CANCEL
CLOCK
SET
WIDE
SPOT
■ Para cancelar WIDE ou SPOT, prima .
39
▲
Page 42

ON
AM
Regular os Temporizadores
ON
AM
Ajuste o ON para a hora em que deseja que comece o aquecimento
ou o arrefecimento. Ajuste o OFF para a hora de paragem
desejada. Utilize os dois temporizadores juntos para conseguir um
máximo de conforto e eficiência.
COOL
AUTO FAN
AUTO
ON
AM PM
OFF
AM PM
CLOCK
MODE
WIDE/SPOT
FAN SPEED
AIR SWING
TIMER
1
ON OFF
Prima o botão ON
Ex. de visor: Regule o temporizador de
1
início para 6:00 AM
Prima ou para
acertar a hora.
2
● Aumenta e diminui em passos de
10 minutos.
Prima continuamente para chegar
rapidamente à hora de programação
desejada.
Prima o botão SET
3
ON
AM
SLEEP
2
3
CANCEL
SET
■ Para acertar o temporizador de fim
(OFF)
Prima OFF e siga os passos 2 e 3.
POWERFUL
POWER
SLEEP TIMER
LOW
POWER MONITOR
(O LED do temporizador da
HIGH
unidade interior acende-se.)
■ Para cancelar o temporizador.
(Ex.) Cancelar o temporizador de início (ON).
TIMER
1
ON OFF
2
3
CANCEL
SET
Prima o botão ON
1
Prima o botão
CANCEL
2
(O LED do temporizador da
unidade interior acende-se.)
▲
40
Page 43

PORTUGUÊS
PO
W
ER
L
O
W
H
IG
H
SLEEPTIMER
POWERFUL
POWER MONITOR
● Quando for dormir
P
O
W
E
R
F
U
L
POWER
SLEEPTIMER
L
O
W
H
IG
H
P
O
W
E
R
M
O
N
IT
O
R
Acertar Desligado
Temporizador
Regule a hora a que vai dormir utilizando OFF .
Evita assim desperdiçar energia.
● Quando sair
P
O
W
E
R
F
U
L
P
O
W
E
R
S
L
E
E
P
T
IM
E
R
LOW
HIGH
P
O
W
E
R
M
O
N
IT
O
R
● Ao acordar
Regule a hora de acordar utilizando ON .
Começará o novo dia a uma temperatura
confortável.
● Ao regressar
Já voltei
Temperatura
confortável
P
O
W
E
R
F
U
L
POWER
SLEEPTIMER
L
O
W
H
IG
H
P
O
W
E
R
M
O
N
IT
O
R
Regule a hora a que vai sair utilizando OFF .
Regula a hora de regresso utilizando ON .
Evitará assim que a unidade de ar condicionado
permaneça ligada enquanto estiver fora, e a
temperatura estará confortável quando regressar.
Regule a hora de regresso utilizando ON .
Regula a hora a que irá dormir utilizando OFF .
Deste modo a temperatura estará confortável
quando regressar e evitará assim que a unidade
de ar condicionado permaneça ligada enquanto
estiver fora.
Temporizador
● Quando for regulado o temporizador de início (ON TIMER), a operação terá início antes da hora prevista.
Isto para que a temperatura da sala atinja a temperatura regulada na hora desejada (máximo 45 minutos
de antecedência).
● Depois de regulada a hora no temporizador de início (ON TIMER), a operação terá início todos os dias
àhora regulada.
● Quando os temporizadores estiverem regulados, a hora actual não será mostrada.
● Quando ambos os temporizadores forem utilizados em conjunto, o LED do Temporizador (TIMER) da
unidade interior mantém-se aceso mesmo que a operação seja interrompida pelo temporizador de fim
(OFF TIMER).
41
▲
Page 44

Modo Potente • Modo SLEEP
Os modos Potente e Sleep estão disponíveis para Operação
Automática, de Aquecimento, de Arrefecimento e de
Desumidificação Suave.
Modo Potente de Operação
• Utilizado durante o Inverno para aquecer rapidamente a sala
no regresso a casa (Aquecimento + Potente).
• Utilizado durante o Verão para arrefecer rapidamente a sala
a seguir a um banho quente (Arrefecimento + Potente).
Prima POWERFUL durante a operação.
OFF/ON
POWERFUL
3
SLEEP
OPERAÇÃO DE ARREFECIMENTO E DE
DESUMIDIFICAÇÃO SUAVE
Aumento de 0,51
TEMPERATURA
Aumento de 0,51
AJUSTE DA
TEMPERATURA
0 – 1 hora
Inicia-se a
Operação Sleep
CANCEL
1 hora
Inicia-Se operiodo de
funcionamento SLEEP
TEMP
SET
Pára automatica-mente
depois de decorridas
cerca de 8 horas.
HORA
■ Para cancelar
Prima novamente POWERFUL .
(A indicação Powerful desaparece
do visor do Controlo Remoto.)
COOL
POWERFUL
Display
▲
Nota
● A regulação da temperatura e a velocidade do ventilador
muda automaticamente de modo a aquecer, arrefecer ou
desumidificar rapidamente a sala.
Velocidade do
Ventilador
Ligeiramente
mais forte
Automático
Operação
Aquecimento
Arrefecimento
Desumidificação
Suave
Temperatura
6°C mais
4°C menos
3°C menos
Operação do Modo Sleep
Evita as temperaturas demasiado elevadas ou demasiado
baixas enquanto dorme. Pára automaticamente depois de
decorridas 8 horas.
Prima SLEEP durante a operação.
POWERFUL
POWER
LOW
POWER MONITOR
SLEEP TIMER
(O LED SLEEP da unidade interior
acende-se.) Não é visualizado no
HIGH
Controlo Remoto.
OPERAÇÃO DE AQUECIMENTO
TEMPERATURA
AJUSTE DA
TEMPERATURA
Inicia-se a
▲
42
0 – 1 hora
Inicia-Se operiodo de
funcionamento SLEEP
Diminuição de 2° C aprox.
1 hora
Operação Sleep
Pára automaticamente depois de
de-corridas cerca
de 8 horas.
Diminuição de 3° C aprox.
HORA
■ Para cancelar
Prima novamente SLEEP (O LED SLEEP da unidade
interior apaga-se.)
Notas
● Durante o modo SLEEP, é insuflado ligeiramente.
● Quando o modo SLEEP é utilizado juntamente com o
Temporizador, o Temporizador é prioritário.
Page 45

Sugestões para um Bom
Funcionamento
São dadas aqui algumas sugestões para uma performance óptima e
uma operação eficaz a nível do custo.
AJUSTE
CORTINAS E PERSIANAS
Ajuste a posição das cortinas e persianas
de modo a evitar que a luz do sol penetre
directamente na sala reduzindo
assim o efeito do
arrefecimento.
Não arrefeça
excessivamente!
Uma diferença de 6°C ou menos entre as
temperaturas exterior e interior no
modo de arrefecime to é ideal.
Uma temperatura mais baixa poderá
provocar problemas
de saúde.
P
O
W
E
R
F
U
L
P
O
W
E
R
S
L
E
E
P
L
O
W
T
I
M
E
R
P
O
W
E
R
H
M
I
G
H
O
N
IT
O
R
PORTUGUÊS
LIMPE OS FILTROS!
Um filtro sujo reduz a eficácia da
operação de arrefecimento e
de aquecimento. Limpe os filtros
todas as 2 semanas.
Algum objecto colocado
perto da unidade exterior?
Quaisquer objectos colocados perto da
unidade exterior poderão reduzir a
eficácia das operações de
aquecimento e de
arrefecimento.
43
▲
Page 46

Cuidados e Manutenção
A limpeza e a manutenção a intervalos regulares prolongarão a vida
do seu aparelho de ar condicionado.
!
CUIDADO
■ Antes de limpar a unidade de ar condicionado, coloque o Aparelho de
Alimentação na posição OFF.
A alta velocidade do ventilador pode provocar danos pessoais.
■ Não lave a unidade de ar condicionado com água.
A água poderá provocar um curto-circuito ou levar a uma descarga eléctrica.
Limpeza da unidade interior e do Controlo Remoto
● Limpe cuidadosamente com um pano suave e seco.
● Não utilize água a uma temperatura superior a 40°C, nem líquidos voláteis tais como dissolventes ou
produtos de polimento (Quando utilizar panos embebidos com produtos químicos, consulte sempre as
instruções e as precauções a tomar.)
● O painel frontal pode ser retirado e limpo com água.
Limpeza dos filters do ar (Uma vez de 2 em 2 semanas)
Abra o painel frontal e
retire os dois filtros do ar.
Segure na patilha, levante-a
1
ligeiramente e, em seguida,
puxe para baixo.
Retire as poeiras
utilizando um aspirador.
23
Se os filtros estiverem muito
sujos, lave-os com água e
seque-os bem (longe da luz
solar directa) antes de os
voltar a instalar.
Coloque novamente os
filtros de ar.
Certifique-se de que a
indicação “FRONT” está
dirigida para si.
POWERFUL
TIMER
SLEEP
POWER
HIGH
LOW
POWER MONITOR
Feche o painel frontal
4
POWERFUL
SLEEP TIMER
POWER
HIGH
LOW
POWER MONITOR
Recomendações
Se a unidade for operada num ambiente com poeiras, limpe
os filtros de duas em duas semanas. A utilização contínua
com filtros sujos reduz a eficácia das operações de
arrefecimento e de aquecimento.
▲
44
Filtros de ar danificados:
Consulte o seu representante
mais próximo.
Peça n°. CWD00240
POWERFUL
TIMER
SLEEP
POWER
HIGH
LOW
POWER MONITOR
Page 47

LImpeza do painel frontal (Deve ser retirado antes de ser lavado)
PORTUGUÊS
■ Permaneça numa superfície
nivelada, quando retirar o
painel frontal.
■ Remover o painel frontal
Levante inteiramente
o painel frontal.
1
23
!
■ Não toque nas peças
metálicas da unidade interior
depois de remover o painel
frontal.
Faça deslizar as duas
patilhas (esquerda e direita)
para a posição UNLOCK.
CUIDADO
LOCK
UNLOCK
■ Limpe bem o painel frontal
de modo a não deixar
quaisquer indícios de água.
Seque bem de modo a evitar
choques eléctricos.
Levante o painel frontal para
uma posição ligeiramente mais
elevada do que a linha horizontal e puxe para remover.
■ Limpeza do painel frontal
● Lave-o suavemente com água e uma esponja. (Não utilize uma escove de esfregar ou outros produtos de
limpeza duros).
● Não pressione o painel frontal com demasiada força quando o lave. (Uma pressão excessiva pode danificar
o painel.)
● Quando limpe a unidade com líquidos de limpeza de cozinha (detergentes neutros), enxagúe a mesma
totalmente. (Não utilize detergentes não neutros)
● Não seque o painel frontal à luz directa do sol. (A exposição directa ao sol pode descolorar ou desfigurar o
painel.
■ Fixação do painel frontal
Levante horizontalmente o
painel dianteiro, faça coincidir a
1
parte sobressaliente da unidade
de interior com o fulcro e
empurre para encaixá-lo.
Suporte da
unidade interior
Saliente
Deslize as duas linguetas até á posição LOCK.
Nota: Se as linguetas estão na posição UNLOCK, o painel frontal
2
não se fechará.
LOCK
UNLOCK
● Se o painel não fecha
completamente, comprove a
posição das linguetas e tente de
novo.
45
▲
Page 48

Substituir os filtros de purificação do ar
Mundança dos filtros purificadores de ar (De 3 em 3 meses)
■ Substituir os filtros de purificação do ar
● Não volte a utilizar filtros sujos. Consulte o seu representante mais próximo.
Filtro purificador do ar No. CZ-SFD50N.
● Estes filtros funcionam eficazmente durante um máximo de três meses.
● Se a unidade de ar condicionado estiver a operar com filtros sujos:
• O ar não é purificado.
• A capacidade de arrefecimento e de aquecimento diminui.
• São emitidos odores.
● Nota:
"Catechin" é um elemento natural castanho. O filtro é coberto por película de
"catechin" por forma a prevenir o desenvolvimento de bactérias e viroses.
■ Substituir os filtros de purificação do ar
Levante inteiramente o
painel frontal.
1
Retire os dois filtros de ar. Segure as patilhas dos filtros
2
purificadores de ar e puxe.
3
POWERFUL
TIMER
SLEEP
POWER
W
LO
H
HIG
POWERSLEEPTIMER
HIGH
POWER MONITOR
LOW
POWER
MONITOR
Filtros de ar
Levante ligeiramente
e. em seguida, puxe
para baixo
■ Substituir os filtros de purificação do ar
Abra o caixilho do filtro para
introduzir os novos filtros.
1
- Filtro Desodorizantes (Preto)
- Filtro De Catequina Purificadores
De Ar (Castanho)
Introduza os novos filtros
purificadores do ar.
2
(Certifique-se de que a
indicação “FRONT” está
virada para si.)
POWERFUL
TIMER
SLEEP
POWER
HIGH
LOW
POWER MONITOR
Filtros purificadores do ar
Empurre até ouvir um clique.
3
● Feche o painel frontal.
▲
46
Prima aqul
Filtros purificadores do ar
Page 49

!
CUIDADO
■ Não ignore uma placa de instalação danificada.
Uma placa de instalação danificada pode cair e provocar danos. Consulte um agente autorizado.
Inspecção temporária
PORTUGUÊS
■ O ar insuflado é frio (quente)?
Em operação normal, depois
de decorridos 15 minutos, a
diferença da temperatura entre
o ar aspirado e o ar insuflado
■ As zonas de entrada e de
saída de ar estão
obstruidos?
■ As pilhas do Controlo
Remoto estão gastas?
Se o visor do Controlo Remoto
começar a piscar, substitua as
pilhas (página. 35).
deverá ser de 8°C ou mais no
modo de arrefecimento e de 14°
C ou mais no modo de
aquecimento.
ENTRADA
POW
ERFUL
PO
W
ER
SLEEP
TIM
ER
L
O
W
H
IG
H
POW
ER MONITOR
SAíDA
Quando o Aparelho de Ar Condicionado não se Utiliza Durante Um
Longo Período de Tempo
Para secar e arejar as peças internas da unidade interior,
faça funcionar o aparelho de ar condicionado durante 2 ~ 3
1
horas utilizando o modo de ventilador.
Desligue o aparelho e retire a ficha.
2
Nota : Se não se desactivou a unidade com o controlo
remoto, começará a funcionar enquanto se ligue.
(pois fornece-se um controlo de auto
reactivação).
Retire as pilhas do controlo remoto.
3
Inspecção Recomendada
● A unidade ficará suja depois de usar-se durante várias estações, reduzindo o rendimeto.
● Dependendo da condição de funcionamento, uma unidade suja pode produzir maus cheiros e o pó pode
poluir a drenagem desumidificadora.
Recomendam-se as inspecções estacionais, além de una limpeza regular. Condulte com o seu
distribuidor autorizado.
47
▲
Page 50

Detecção de avarias
PO
W
E
R
L
O
W
H
IG
H
S
LE
E
P
TIM
E
R
POW
ERFUL
POWER MONITOR
PO
W
ER
L
O
W
H
IG
H
S
LEEP
TIM
ER
POW
ERFUL
PO
W
ER
M
ONITOR
(Antes de chamar o seu agente, consulte a lista de verificações.)
Problema ? Verificar
■ O disjuntor disparou ou queimou-se um fusível?
■ A ficha está desligada da tomada de parede?
■ Foi ligado o temporizador (página 40)?
A unidade não
funciona
A unidade não
faz frio
nem calor
COMPROVE!
POW
ERFUL
PO
W
ER
SLEEP TIM
ER
L
O
W
H
IG
H
PO
W
ER MONITOR
Apagado
Apagado
■ A temperatura foi seleccionada correctamente (pág. 36)?
■ Os filtros de ar estão sujos (pág. 44)?
■ As entradas e saídas de ar estão obstruidas?
■ As portas e janelas estão todas bem fechadas?
* Verifique a diferença de temperatura. O funcionamento é normal se 15
minutos após o início de funcionamento, a diferença de temperaturas
entre o ar aspirado e a insuflado for de 8°C ou mais em arrefecimento e
14°C ou mais em aquecimento.
A unidade não
recebe os sinais
do Controlo
Remoto ou o
visor do
Controlo
Remoto está
fraco ou não
afixa qualquer
indicação
▲
48
■ O interruptor de sinais está na posição “B” (página 33)?
■ As pilhas estão fracas (página 35)?
■ As pilhas foram instaladas com a polaridade correcta?
B↔A
Page 51

PO
W
ER
LO
W
H
IG
H
S
LEEP
TIM
ER
POW
ERFUL
POWER MONITOR
P
O
W
E
R
LOW
HIGH
S
LE
E
P
TIM
E
R
P
O
W
E
R
F
U
L
P
O
W
E
R
M
O
N
IT
O
R
Problema ?
O ar não
começa a
circular
imediatamente
A unidade
deixa de
funcionar de
repente
Razão
● No modo de arrefecimento o Desumidificação
moderada (velocidade de ventilação
automática) 0 ar só começa a circular após 40
segundos. A unidade foi concebida de modo a
evitar que os odores do tabaco, comida e
odores corporais sejam descarregados
juntamente com o ar frio.
● Em aquecimento (o indicador de alimentação
pisca) para evitar a circulação de ar frio.
Espere por favor.
● Em Arrefecimento * Desumidificação Suave
(velocidade de ventilação automática)
0 ventilador da unidade interior interrompe a
operação durante 60 segundos e funciona
durante 30 segundos, repetidamente, para
verificar a temperatura do ar. 0 funcionamento
contínuo recomeça quando for atingida a
temperatura regulada.
● Em Aquecimento (o indicador de alimentação
pisca). A unidade exterior congela quando a
temperatura do ar exterior é baixa e o ar tem
um elevado teor de humidade. 0 indicador de
alimentação pisca durante o tempo em que a
unidade está a derreter gelo. (Aguarde por
favor. 0 descongelamento pode durar cerca de
10 minutos.)
PORTUGUÊS
DEUTSCH
POWERFUL
PO
W
E
R
S
LEE
P
TIM
E
R
L
O
W
H
IG
H
POWER MONITOR
A unidade
parece
expelir neblina
A unidade
funciona
com ruído
A unidade
exterior liberta
água e vapor
● Isto acontece quando o caudal de ar da
unidade está a arrefecer a sala.
● A unidade emite um ruído sibilante durante o
descongelamento ou quando a unidade está
parada. Este ruído é provocado pela
circulação inversa do fluído de refrigeração no
interior da unidade.
● A unidade de ar condicionado expandese e
contrai-se, podendo emitir estalidos.
● O ruído de água em circulação é provocado
pela circulação do fluido de refrigeração no
interior da unidade
● Durante o descongelamento, o gelo
derrete-se, transformando-se em água e
vapor.
POW
ERFUL
P
O
W
E
R
S
L
E
E
P
T
IM
E
R
LOW
HIGH
POW
ER M
ONITO
R
▲
49
Page 52

Ligue imediatamente
H 2 3
H 2 7
H 2 8
Existe algum Problema?
para o seu agente
Se ocorrer alguma das seguintes situações, ligue imediatamente
para o seu agente
Ruídos
anormais
durante a
operação.
Água
derramada
pela unidade
interior.
Sente-se um
cheiro a
queimado.
Disjuntor
dispara
frequentemente
ou fusíveis
queimam-se
frequentemente.
Interruptores e
botões não
funcionam.
Água ou
partículas
estranhas no
comando 1 à
distância.
Cabo de
alimentação e
ficha aquecem
demasiado.
Desligue o Aparelho de Alimentação e retire a ficha da tomada de parede.
■ O LED do Temporizador
pisca e são mostrados
3 caracteres.
O visor muda pela
seguinte ordem.
Exemplo:
(Encarnado)
POWERFUL
POWER
SLEEP
TIMER
LOW
HIGH
POWER MONITOR
Temporizador
● A luz a piscar indica uma anomalia. Verifique o
visor e consulte um concessionário.
● Depois de verificar o visor, desligue o aparelho
de alimentação e retire a ficha da tomada.
● Consoante os três caracteres mostrados no
visor, poderá ser possível um funcionamento
temporário da unidade.
Caracteres que
permitem um
funcionamento
temporário
Operações
temporárias
possíveis
Arrefecimento
Aquecimento/
Arrefecimento
Description
of operation
Funcionamento
de emergência
com funções
reduzidas (O LED
do temporizador
continua a piscar.)
● Funcionamento temporário
1. Prima o botão MODE e seleccione
Arrefecimento ou Aquecimento.
2. Prima o botão de ligação ON/OFF (é escutado
um sinal sonoro bip! bip! bip! bip!).
* Utilize este funcionamento apenas
temporariamente até que seja feita a reparação
necessária.
▲
50
Page 53

Informação útil
O controlo remoto não funciona
Se o controlo remoto não funciona ou se se
extraviou, ponha em marcha o auto funcionamento.
Os ajustes do auto funcionamento são automáticos;
a temperatura não se pode ajustar.
POWERFUL
POWER
SLEEP
TIMER
LOW
HIGH
POWER MONITOR
Segure os dois elementos de abrir do painel
frontal e puxe os mesmos. (Volte a colocá-los
enquanto comece o funcionamento).
Gire o aparelho para a posição
1
ON
Aperte o botão de
2
funcionamento automático
OPOWER LED pisca até que se selecciona o
modo de funcionamento.
■
Para cancelar o
Funcionamento automático
Prima de novo o batão de
funcionamento automático (apaga-se o
POWER LED)
Quando surge um falho de corrente
■ Falho de corrente durante o
funcionamento
Controlo de Rearme Automático
■ No caso de que surja um falho eléctrico, o
aparelho retomará automaticamente o
funcionamento no modo de operação e na
direcção de fluxo de ar anteriores, uma vez
que a operação não foi interrompida com o
controlo remoto.
■ Quando se restabelece o funcionamento, a
unidade exterior começará a funcinar 3 ~ 4
minutos depois de ser reposta a alimentação
elèctrica.
● Falho eléctrico depois da
Programação do Temorizador
Em caso de falho eléctrico, a programação do
temporizador será cancelada. (Apaga-se o LED do
temporizador da unidade principal.) Assim que se
restabelecer a electricidade, reprograme o
temporizador.
(Ex) Falho eléctrico depois da programação do
temporizador.
TIMER
1
ON OFF
2
3
CANCEL
SET
PORTUGUÊS
DEUTSCH
AUTO OFF/ON
Prima ON Botão
1
Prima SET Botão
2
(Interior unidade temporizador
LED apaga-se)
Trovoadas
Este acondicionador de aire está equipado con un mecanismo protector incorporado de
subidas de tensión. Sin embargo, para protegerlo de daòos causados por una subida
anormalmente del flujo elëctrico, se puede apagar la fuente de alimentación y
desenchufarlo de la red.
POW
ERFU
L
PO
W
ER
SLEEP
TIM
ER
L
O
W
H
IG
H
POW
ER M
ONITOR
Flutuação da tensão
A unidade exterior deixa de funcionar frequentemente devido ás flutuações da tensão eléctrica. Consulte o
seu vendedor.
51
▲
Page 54

!
1) Este aparelho deve ser ligado à terra.
2) Se o cabo de alimentação for danificado ou necessitar de ser substituído, esse trabalho deverá ser
executado pelo fabricante ou pelos seus agentes de manutenção ou por um tècnico devidamente
habilitado, para evitar riscos.
3) Antes de qualquer trabalho de manutenção, retire a ficha da tomada de alimentação.
4) Não tente fazer quaisquer reparações neste aparelho.
No caso de ocorrer qualquer falha no aparelho, não tente fazer a sua reparação.
Contacte o vendedor ou os serviços técnicos do concessionário.
5) Não utilizar em atmosfera explosiva.
6) Não utilize o aparelho em qualquer local em que exista uma atmosfera potencialmente explosiva.
Desligue a alimentação.
Retire a ficha da tomada de parede, desligue o disjuntor ou desligue o interruptor genal para isolar o
equipamento da rede de alimentação, em caso de emergência.
PERIGO
!
SE ALIMENTAÇÃO DA UNIDADE FOR FEITA ATRAVÉS DE UMA TOMADA DE PAREDE, RETIRE A
FICHA DA TOMADA DE ALIMENTAÇÃO QUANDO A UNIDADE NÃO ESTIVER A SER UTILIZADA.
Ruído.
O valor na escala A desta unidade é inferior a 70 dB (A) de acordo com as condições de ensaio JIS C 9612,
a 1 m de distância e com a unidade ao seu regime máximo de arrefecimento.
Operação máxima de arrefecimento
1 m do aparelho
CUIDADO
IMPORTANTE
Os fios do cabo de alimentação têm as seguintes cores:
Verde e amarelo : Terra
Azul : Neutro
Castanho : Fase
“Uma vez que as cores dos fios do cabo de alimentação podem não coincidir com as cores que identificam
os terminais da sua ficha, proceda do seguinte modo:
O fio verde e amarelo deve ser ligado ao terminal marcado com a letra E, com o símbolo ! de terra ! ou de
cor verde ou verde e amarelo.
O fio azul deve ser ligado ao terminal identificado com a letra N ou marcado a preto.
O fio castanho deve ser ligado ao terminal identificado com a letra L ou marcado a encarnado.”
▲
52
Page 55

VOR DER
INBETRIEB-
NAHME
Inhalt
Merkmale und Zubehör...........................................54
Sicherheitshinweise........................................55 – 57
• Montagehinweise
• Wichtige Betriebshinweise
Bezeichnung der Geräteteile..........................58 – 59
Betriebsvorbereitungen (Innengerät • Fernbedienung)...
• Handhabung der Fernbedienung
• Einlegen der Batterien
• Einstellen der aktuellen Uhrzeit
60 – 61
DEUTSCH
BEDIENUNG
WEITERE
HINWEISE
Automatik • Heizen • Kühlen • Mildes Trocknen • Umluft....
Einstellen der Zuluftrichtung und der Ventilatordrehzahl ....
• Einstellen der Ventilatordrehzahl
Einstellen der Luftlenklamellen für die vertikale Zuluftrichtung
•
•
Einstellen der Luftlenklamellen für die horizontale Zuluftrichtung
62 – 63
64 – 65
Ausblaswinkel .........................................................65
Einstellen der Timerfunktionen......................66 – 67
Turbobetrieb • Nachtbetrieb ..................................68
• Turbobetrieb
• Nachtbetrieb
Betriebshinweise.....................................................69
Pflege und Wartung.........................................70 – 73
• Reinigen des Klimageräts und der Fernbedienung
• Reinigen der Grobstaubfilter
• Reinigen des Frontgitters
• Auswechseln der elektrostatisch wirkenden Feinfilter
(Sonderzubehör)
• Kontrollen vor Beginn der Heiz- bzw. Kühlsaison
• Längere Nichtbenutzung des Klimageräts
• Inspektionen
Störungssuche ................................................74 – 75
Nicht behebbare Störungen ...................................76
Wichtige Hinweise...................................................77
• Ausfall der Fernbedienung
• Maßnahme nach einem Stromausfall
• Maßnahmen bei Gewitter
• Spannungsschwankungen
53
▲
Page 56

Merkmale und Zubehör
Kühl und geräuscharm - Komfort durch Panasonic Inverter-Klimagerät.
Automatikbetrieb
Selbsttätige Einstellung der
optimalen Betriebsart
(Seite 62).
Abnehmbar für eine schnelle und
Catechin-Feinfilter
Dieser Luftfilter scheidet in der
Raumluft enthaltenen Staub, Tabakrauch
und kleinste Partikel ab. Darüber hinaus unterbindet
er das Wachstum von Krankheitserregern,
die im Filter abgeschieden werden.
(Seite 54,60 und 72).
Frontgitter
einfache Reinigung
(Seite 71).
Vertikaler und
horizontaler Air-Swing
Die vertikalen und die horizontalen
Luftlenklamellen sind mit einer
Schwenkautomatik ausgestattet
(Seite 64).
Schutz gegen
Spannungsschwankungen
Das Gerät wird geschützt, wenn die
Netzspannung nicht innerhalb des
Betriebsbereichs liegt
(Seite 77).
.
Desodorierender Filter
Dieser Luftfilter entfernt unangenehme
Gerüche und desodoriert die Raumluft.
(Seite 54,60 und 72).
Automatischer Wiederanlauf
Das Gerät läuft nach einem Stromausfall
von selbst wieder an
(Seite 63).
Sorgt dafür, daß der Raum nachts nicht zu
Zubehörteile
Fernbedienung Aufkleber für
Fernbedienung
Nachtbetrieb
stark erwärmt wird bzw. abkühlt
(Seite 68).
R03 Trockenbatterien
(2 Stück)
Leuchttaste
Einfachere Bedienung im Dunkeln.
(Seite 59).
Turbobetrieb
In dieser Betriebsart wird die gewünschte
Raumtemperatur schnell erreicht
(Seite 68).
Feinfilter
(Catechin-Feinfilter und
desodorierender Feinfilter)
▲
54
POWERFUL
INVERTER
TEMP
OFF/ON
Fernbedienungshalter
Page 57

Sicherheitshinweise
Bitte lesen Sie die folgenden Sicherheitshinweise vor der
Inbetriebnahme sorgfältig durch!
Eine unsachgemäße Bedienung infolge Mißachtung der Bedienungsanleitung kann zu Verletzungen und
Beschädigungen führen. Um dies zu vermeiden, sind die folgenden Hinweise unbedingt zu beachten.
■ Die Warnhinweise untergliedern sich entsprechend ihrer Wichtigkeit wie folgt:
Vorsicht :
!
Achtung :
!
■ Bei den folgenden Symbolen handelt es sich um Verbote bzw. Gebote:
OFF
Dieser Hinweise weist darauf hin, daß seine Nichtbeachtung zu schweren
Verletzungen oder gar zum Tod führen kann.
Dieser Hinweis weist darauf hin, daß seine Nichtbeachtung zu
Verletzungen oder zu Beschädigungen führen kann.
Dieses Symbol auf weißem Grund weist darauf hin, daß eine
bestimmte Tätigkeit NICHT durchgeführt werden darf.
Diese Symbole auf schwarzem Grund weisen darauf hin, daß
bestimmte Tätigkeiten durchgeführt werden MÜSSEN.
Montagehinweise
Vorsicht
!
DEUTSCH
■ Das Gerät darf nicht von Ihnen selbst installiert oder deinstalliert werden.
Eine unsachgemäße Installation kann elektrische Schläge oder Brände verursachen oder dazu führen,
daß Wasser aus dem Gerät tropft oder Kältemittel austritt. Bitte wenden Sie sich daher an einen
Fachhändler bzw. Fachinstallateur.
Achtung
!
■ Das Raumklimagerät muß geerdet werden.
Eine unsachgemäße Erdung kann
elektrische Schläge zur Folge
haben.
■ Das Gerät darf nicht an Orten installiert
werden, an denen brennbare Gase
entweichen können, oder gar in explosionsgefährdeten Bereichen.
Wenn sich in direkter Nähe des
Klimageräts brennbare Gase
ansammeln, könnten diese durch
das Gerät entzündet werden.
■ Die Kondensatleitung muß korrekt
angeschlossen sein.
Bei unsachgemäß angeschlossener
Kondensatleitung kann
Kondenswasser austreten.
55
▲
Page 58

Wichtige Betriebshinweise
P
O
W
E
R
LOW
HIGH
S
LEE
P
TIM
ER
POW
ERFUL
POW
ER MONITOR
POWER
LOW
HIGH
SLEEP TIMER
POWERFUL
POWER MONITOR
■ Den Stecker richtig in die
Steckdose stecken.
Ein nicht richtig eingesteckter
Stecker kann zu elektrischen
Schlägen führen und stellt eine
Brandgefahr dar.
Steckdose und Netzstecker
müssen leicht zugänglich sein.
■ Versuchen Sie nicht, das
Netzkabel zu kürzen oder zu
verlängern, und benutzen Sie
keinen Mehrfachstecker, um
noch weitere Geräte anzuschließen.
Die Folge könnten elektrische
Schläge sein oder eine starke
Wärmeentwicklung, die eine
Brandgefahr darstellen könnte.
!
Vorsicht
■ Das Klimagerät darf nicht
durch Einstecken und
Herausziehen des Steckers
ein- bzw. ausgeschaltet
werden.
Die Folge könnten elektrische
Schläge sein oder eine starke
Wärmeentwicklung, die eine
Brandgefahr darstellen könnte.
■ Das Klimagerät darf nicht mit
nassen oder feuchten
Händen bedient werden.
Das Bedienen des Geräts mit
feuchten Händen könnte zu
elektrischen Schlägen führen.
■ Das Netzkabel darf nicht
beschädigt, und es darf nur
das vorgeschriebene Netzkabel verwendet werden.
Die Verwendung eines beschädigten oder falschen Netzkabels kann zu elektrischen
Schlägen führen oder eine
Brandgefahr darstellen.
■ Weder die Finger noch
irgendwelche Gegenstände
in das Gerät stecken.
Sie könnten sich dabei
verletzen oder das Gerät
beschädigen.
■ Halten Sie sich nicht zu lange
in der kalten Zuluftströmung
auf.
Sie könnten sich unter Umständen erkälten.
▲
56
■ Bei Störungen (z. B.
verbrannter Geruch) ist das
Klimagerät auszuschalten
und die Stromzufuhr zu
unterbrechen.
Bitte wenden Sie sich an
Ihren Fachhändler oder
L
FU
ER
W
PO
SLEEPTIMER
ER
POW
HIGH
LOW
ONITOR
ER M
W
PO
Kundendienst.
OFF
Sicherungsautomaten öffnen.
Netzstecker
herausziehen.
■ Versuchen Sie nicht, das
Klimagerät selbst zu
reparieren.
Unsachgemäße Reparaturen
können elektrische Schläge
oder Feuer zur Folge haben.
Wenden Sie sich für Reparaturen bitte an Ihren Fachhändler oder an den Kundendienst.
L
U
F
R
E
W
O
P
ER
SLEEPTIM
ER
POW
W
O
L
H
IG
H
R
O
IT
N
O
M
R
E
W
O
P
Page 59

!
POWER
LOW
HIGH
SLEEP
TIMER
P
O
W
E
R
FU
L
P
O
W
E
R
M
O
N
IT
O
R
Achtung
■ Den Stecker nicht am
Netzkabel herausziehen.
Halten Sie den Stecker fest,
wenn Sie ihn aus der
Steckdose ziehen.
■ Das Klimagerät darf nicht
zweckentfremdet werden.
Verwenden Sie das Gerät nicht
zum Frischhalten von
Lebensmitteln oder zum Kühlen
von Pflanzen oder Tieren.
■ Unterbrechen Sie die Strom-
versorgung, wenn das Gerät
längere Zeit nicht benutzt
wird.
Auf dem Netzstecker kann sich
Staub ablagern, der zu einer
Hitzeentwicklung führen und
einen Brand verursachen kann.
Sicherungsautomaten öffnen.
OFF
Netzstecker
herausziehen.
■ Stellen Sie keine Verbren-
nungsgeräte im direkten
Zuluftstrom des Klimageräts
auf.
Durch unvollständige Verbrennung könnten giftige
Gase (Kohlenmonoxid) entstehen.
■ Zum Reinigen des Klima-
geräts ist der Stecker aus
der Steckdose zu ziehen.
Bei eingeschaltetem Gerät
könnte der schnell rotierende
Ventilator zu Verletzungen
führen.
AUS
■ Lüften Sie den Raum
regelmäßig.
Da die fenster während des
Betriebs geschlosson esin
mussen, solte diw Raumluft
regelmäßig erneuert werden
DEUTSCH
■ Das Klimagerät darf nicht mit
Wasser gereinigt werden.
Das Reinigen mit Wasser kann
zu elektrischen Schlägen
führen.
FUL
ER
W
PO
TIM
SLEEP
ER
W
O
P
W
LO
NITO
O
R M
E
W
PO
■ Kontrollieren Sie gelegent-
lich, ob irgendwelche
Geräteteile beschädigt sind.
Sorgen Sie dafür, daß die
erforderlichen Reparaturen
durchgeführt werden.
ER
H
HIG
R
■ Legen Sie nichts auf das
Außengerät, und steigen Sie
auch nicht auf das Gerät.
Das Gerät könnte umkippen
und Verletzungen verursachen,
oder es könnte beschädigt
werden.
57
▲
Page 60

Bezeichnung der Geräteteile
Innengerät
Lufteinlaß
Frontgitter
Feinfilter
Grobstaubfilter
Luftauslaß
Luftlenklamelle für
vertikale Zuluftrichtung
Luftlenklamelle für
horizontale Zuluftrichtung
Verriegelung für Frontgitter
Betriebs-LEDs
• POWER : Grün
(Betriebsanzeige)
• SLEEP : Orange
(Nachtbetrieb)
• TIMER : Orange
(Timerbetrieb)
• POWERFUL : Orange
(Turbobetrieb)
Netzkabel
Funktionstaste für Betrieb
ohne Fernbedienung
POWERFUL
SLEEP TIMER
POWER
HIGH
LOW
POWER MONITOR
Anfasser zum Öffnen des
Frontgitters
Signal-Empfangsteil
Empfängt die Signale von
der Fernbedienung
(Bei Signaleingang ertönt
ein kurzer oder ein langer
Piepton.)
POWERFUL
POWER
SLEEP TIMER
LOW
POWER MONITOR
HIGH
Leistungskontrollanzeige
• Anzeige der Kompressor-betriebsbedingung von LOW
(niedrig) bis HIGH (hoch).
• Die Anzeige ist bei stehendem Kompressor erloschen.
Außengerät
Luftansaugöffnungen
(Seite)
▲
58
(Rückseite)
Luftauslaß
Rohrleitungen
Anschlußkasten
Anschlußkabel
Kondensatleitung
Page 61

Fernbedienung
Sender
Anzeigefeld
Taste zum Einstellen
der Raumtemperatur
(leuchttaste)
POWERFUL
TEMP
OFF/ON
Bedienelemente bei geöffneter
Rückwand
Diagnosekontakte
Nur für den Kundendienst
bestimmt.
Rückstellkontakte
OPEN
DEUTSCH
Ein/Aus-Taste
(leuchttaste)
Taste für Turbobetrieb
Weitere Funktionen bei geöffnetem Fernbedienungsdeckel
Anzeigefeld
Betriebsarten-Wahltaste
Taste für Nachtbetrieb
INVERTER
AUTO
HEAT COOL
DRY FAN
WIDE SPOT
AUTO FAN
AUTO
AUTO
ON
OFF
SLEEP
1
2
3
CLOCK
MODE
WIDE/SPOT
FAN SPEED
AIR SWING
TIMER
ON OFF
CANCEL
SET
Schalter [B ↔ A]
Dieser Schalter ist bei der Auslieferung auf A eingestellt.
Der Schalter B ↔ A wird benötigt, wenn zwei oder mehr
Klimageräte in einem Raum installiert sind. Bitte wenden
Sie sich in diesem Fall an lhren Fachhändler.
Taste zum Einstellen der
Uhrzeit
Taste für breiten/
schmalen
Ausblaswinkel
Taste zum
C
°
Einstellen der
Ventilatordrehzahl
Tasten zum Einstellen
der Zuluftrichtung
Programmiertaste für
Ausschaltfunktion
Löschtaste
Programmiertaste
Programmiertaste für
Einschaltfunktion
Zeit- bzw. Timereinstelltasten
59
▲
Page 62

Betriebsvorbereitungen (Innengerät • Fernbedienung)
Innengerät
Stecken Sie den Netzstecker ein und
öffnen Sie das Frontgitter.
1
ERFUL
POW
SLEEP TIMER
POWER
LOW
HIGH
POWERSLEEPTIMER
H
ER MONITOR
HIG
POW
LOW
POWER
MONITOR
Nehmen Sie die Grobstaubfilter
heraus und setzen Sie die
2
Feinfilter ein.
POWERFUL
TIMER
SLEEP
POWER
LOW
POWER MONITOR
Grobstaubfilter
Leicht anheben, dann
nach unten ziehen
Fassen Sie das Frontgitter an
den Anfassern an und klappen
Sie es nach oben.
3
HIGH
!
Achtung
■ Achten Sie darauf, daß der Stecker
richtig eingesteckt ist.
Ein nicht richtig eingesteckter Stecker kann
zu elektrischen Schlägen führen und stellt
eine Brandgefahr dar.
Setzen Sie und die Grobstaubfilter
ein und Schließen Sie das Frontgitter.
POWERFUL
TIMER
SLEEP
POWER
HIGH
W
LO
POWER MONITOR
Setzen Sie die
neuen Feinfilter
ein. Achten Sie
darauf, daß der
Hinweis
“FRONT” nach
vorne zeigt.
Feinfilter
Betriebsbereiche:
ttr: Trockenkugeltemperatur
t
: Feuchtkugeltemperatur
f
Raum-
temperatur
Außen-
KÜHLEN
temperatur
Raum-
temperatur
Außen-
HEIZEN
temperatur
t
tr
t
f
t
tr
t
f
t
tr
t
f
t
tr
t
f
Höchst-temperatur ˚C
32
23
43
26
30
–
24
18
Hinweise
•
Wenn das Gerät längere Zeit nicht benutzt wird, schalten Sie es mit dem auszuschalten aus.
Solange der auszuschalten in der Stellung ON (EIN) verbleibt, werden etwa 2,8 W Strom
verbraucht, auch wenn das Klimagerät mit der Fernbedienung ausgeschaltet wurde. Wenn
der Standby-Betrieb aktiviert ist, der dafür sorgt, daß der Kompressor erwärmt wird, um ein
rasches Aufwärmen des Raums zu ermöglichen, werden etwa 35 W verbraucht. Falls der
Standby-Betrieb nicht benötigt wird, kann er abgeschaltet werden. Wenden Sie sich hierzu
bitte an Ihren Fachhändler.
•
Wenn das Gerät aus- und sofort wieder eingeschaltet wird, vergehen zum Schutz des
Kompressors 3 Minuten, bis es wieder anläuft.
Mindest-temperatur ˚C
16
11
16
11
2
–
–5
–6
3 Min
POWER
L
O
W
(˚C)
P
O
W
E
R
F
U
L
SLEEP
TIMER
H
IG
H
P
O
W
E
R
M
O
N
IT
O
R
▲
60
Page 63

Fernbedienung
Handhabung der Fernbedienung
● Der maximale Bedienungsabstand beträgt 10 m.
● Richten Sie die Fernbedienung zum Senden von
Signalen auf das Signal-Empfangsteil des Klimageräts.
● Zwischen der Fernbedienung und dem Klimagerät
dürfen sich keine Hindernisse befinden.
P
O
W
E
R
F
U
L
POWER
SLEEP
TIMER
L
O
W
H
IG
H
P
O
W
E
R
M
O
N
IT
O
R
Einlegen der Batterien
(Zwei R03 Trockenbatterien.)
Batterien
Die Betriebsdauer der Batterien beträgt etwa ein Jahr.
Beim Ersetzen der Batterien
ist folgendes zu beachten:
● Die Batterien sind jeweils durch zwei neue Batterien
des gleichen Typs zu ersetzen.
● Es sollten keine wiederaufladbaren Ni-Cd-Akkus
verwendet werden, weil diese sich von den üblichen
Trockenbatterien in Form, Größe und Leistung
unterscheiden.
● Die Batterien sind zu entfernen, wenn das Klimagerät
längere Zeit nicht benutzt wird.
Einstellen der aktuellen Uhrzeit
Drücken Sie die Taste zum Einstellen
der Uhrzeit.
1
“PM” (nachmittags) blinkt, und “12:00”
PM
erscheint in der Anzeige.
DEUTSCH
1 Drücken Sie leicht auf die
mit OPEN gekennzeichnete
Stelle und schieben Sie den
Batteriefachdeckel nach
unten weg.
2 Achten Sie auf die
richtige Polung
(+ bzw. -).
● Nach dem Einsetzen der Batterien erscheint
folgende blinkende Anzeige im Anzeigefeld: “12:00
PM”. Falls die Anzeige nicht erscheint, entfernen
Sie die Batterien und legen Sie sie erneut ein.
PM
● Um die Batterien nicht unnötig zu belasten, sollte
die aktuelle Uhrzeit umgehend eingestellt werden.
Drücken Sie die Taste bzw. ,
um die aktuelle Uhrzeit einzustellen.
2
Halten Sie die Taste gedrückt,
PM
um die Uhr schnell vorzustellen, bzw.
die Taste , um Sie schnell
zurückzustellen.
Drücken Sie die Taste zum Einstellen
der Uhrzeit.
3
Die Anzeige “PM” (nachmittags) bzw.
PM
“AM” (vormittags) blinkt nun nicht
mehr.
Hinweise
● Lassen Sie die Fernbedienung nicht fallen und
auch nicht naß werden.
● Manche fluoreszierende Lampen können den
Signalempfang beeinträchtigen. Wenden Sie
sich in diesem Fall bitte an Ihren Fachhändler.
61
▲
Page 64

Automatik • Heizen • Kühlen • Mildes Trocknen • Umluft
Drücken Sie die Taste MODE , um die
gewünschte Betriebsart einzustellen
CLOCK
AUTO
1
a
AUTO FAN
AUTO
PM
AUTO
MODE
WIDE/SPOT
FAN SPEED
AIR SWING
TIMER
1
ON OFF
2
TEMP
Anzeige
▲
AUTO FAN
Die Anzeige ändert sich jedesmal, wenn diese Taste
gedrückt wird, und zwar in folgender Reihenfolge.
COOLHEAT
DRY
Drücken Sie die Taste
2
Die LED POWER leuchtet auf. (Sie blinkt, wenn die
Raumtemperatur beim Einschalten des Heizbetriebs
niedrig ist bzw. während der Ermittlung der
geeigneten Betriebsart im Automatikbetrieb.)
Die Leistungskontrollanzeige zeigt die
Kompres-sorbetriebsbedingung an.
POWERFUL
POWER
SLEEP TIMER
LOW
POWER MONITOR
HIGH
FAN
OFF/ON
a
▲
POWERFUL
62
OFF/ON
INVERTER
Einstellen der Temperatur
• Die Solltemperatur kann in Schritten von jeweils 1
3
Grad zwischen 16 °C und 30 °C eingestellt werden
(dies gilt nicht für den Umluftbetrieb).
Empfohlene Temperaturbereiche:
Heizen : 20 ~ 24°C
Kühlen : 26 ~ 28°C
Mildes Trocknen : etwa Raumtemperatur
Drücken Sie die Taste
OFF/ON
erneut, um das
Gerät auszuschalten.
(Die POWER-LED erlischt).
Page 65

Automatischer Wiederanlauf nach einem Stromausfall
● Nach einem Stromausfall geht das Gerät automatisch wieder in Betrieb. Die zuvor eingestellte Betriebsart
sowie die Lamellenstellung werden übernommen, es sei denn, das Gerät wurde über die Fernbedienung
ausgeschaltet.
● Wenn Sie nicht möchten, daß das Gerät automatisch wieder anläuft, schalten Sie es mit dem
Netzschalter am Klimagerät ab, oder unterbrechen Sie die Stromzufuhr.
● Wenn Sie den automatischen Wiederanlauf generell deaktiviert haben möchten, wenden Sie sich bitte an
Ihren Händler.
● Der automatische Wiederanlauf steht bei programmiertem Timer und im Nachtbetrieb nicht zur
Verfügung.
DEUTSCH
Automatikbetrieb
● Beim Einschalten des Automatikbetriebs stellt das Klimagerät in
Abhängigkeit von der Außentemperatur, der Raumtemperatur und der
eingestellten Solltemperatur selbsttätig die Betriebsart Heizen, Kühlen
oder Mildes Trocknen ein.
● Die Betriebsarten können sich bei Bedarf in Abständen von 30 Minuten
ändern.
Solltemperatur 25°C (Beispiel)
36
35
34
33
32
31
30
H
29
28
E
27
I
26
25
Z
24
E
23
22
Raumtemperatur
N
21
19
18
17
16
13 14 15 16 17 18 19 20 21 22 23 24 25 26 27 28
Außentemperatur
T
R
M
O
I
C
L
K
D
N
E
E
S
N
Heizbetrieb
● Im Heizbetrieb wird der Raum entsprechend der von Ihnen eingestellten Temperatur geheizt.
● Die Wärme zur Beheizung des Raumes wird der Außenluft entnommen. Bei sinkenden
Außentemperaturen kann die Heizleistung des Geräts daher zurückgehen. Es empfiehlt sich, bei
niedrigen Außentemperaturen ein zusätzliches Heizgerät einzusetzen.
Kühlbetrieb
● Im Kühlbetrieb wird der Raum entsprechend der von Ihnen eingestellten Temperatur gekühlt.
Umluftbetrieb
● Im Umluftbetrieb wird die Luft im Raum umgewälzt.
● Zudem wird die Luft gefiltert und desodoriert, wenn der elektrostatisch wirkende Feinfilter verwendet wird.
K
Ü
H
L
E
N
Mildes Trocknen
● In der Betriebsart Mildes Trocknen wird die Luft getrocknet, wobei die Solltemperatur beibehalten wird.
Diese Betriebsart ist zu empfehlen, wenn die Luft durch starke Niederschläge sehr feucht geworden ist.
● Wenn die Raumtemperatur die Solltemperatur übersteigt, wird der Kühlbetrieb eingeschaltet.
● In der Betriebsart Mildes Trocknen läuft der Ventilator mit einer niedrigen Drehzahl.
● Wenn die Raumtemperatur geringer ist als die an der Fernbedienung eingestellte Solltemperatur, kann
es vorkommen, daß die in der Luft enthaltene Feuchtigkeit nicht verringert wird.
Hinweise
● Einstellen der Zuluftrichtung und der Ventilatordrehzahl siehe Seite 64.
● Der Turbo- und der Nachtbetrieb können während des Automatikbetriebs eingeschaltet werden.
63
▲
Page 66

COOL
AUTO FAN
COOL
h j k
Einstellen der Zuluftrichtung und der Ventilatordrehzahl
Durch eine korrekte Einstellung der Zuluftrichtung und der Ventilatordrehzahl kann die Effektivität des Klimageräts
gesteigert werden.
Einstellen der Ventilatordrehzahl
AUTO
AUTO FAN
AUTO
SLEEP
MODE
WIDE/SPOT
FAN SPEED
AIR SWING
TIMER
1
ON OFF
2
3
CANCEL
CLOCK
SET
Drücken Sie die Taste
FAN SPEED
Ventilatorautomatik Mittlere Drehzahl
Anzeige (Beispiel)
● Über die Ventilatorautomatik hinaus können
fünf verschiedene Ventilatordrehzahlen
eingestellt werden.
■ Ventilatorautomatik
Heizen
Die Ventilatordrehzahl erhöht sich mit der
temperature der ausgeblasenen Luft.
Kühlen ● Mildes Trocknen
Die Ventilatordrehzahl wird so verändert, daß der Eindruck eines angenehm
kühlen Lüftchens entsteht. Die Luft wird erst etwa 40 Sekunden nach Anlauf
der Betriebsarten Kühlen bzw. Mildes Trocknen ausgeblasen.
Einstellen der Luftlenklamellen für die vertikale Zuluftrichtung
Drücken Sie die Taste
● Über die Zuluftlenkautomatik hinaus kann die Lamelle fünf Stellungen
einnehmen.
Die Anzeige der Zuluftrichtung ändert sich jedesmal, wenn die Taste
gedrückt wird.
■ Vertikale Zuluftlenkautomatik
Heizen
Wenn die Temperatur der ausgeblasenen Luft zu Beginn des Heizbetriebs
noch nicht sehr warm ist, wird die Luft horizontal ausgeblasen.
Mit steigender Ausblastemperatur wird die Luft nach unten ausgeblasen.
Kühlen ● Mildes Trocknen
Die Luftlenklamelle schwenkt automatisch auf und ab.
SCHMAL
▲
64
Einstellen der Luftlenklamellen für die horizontale Zuluftrichtung
Drücken Sie die Taste
● Über die Zuluftlenkautomatik hinaus können die Lamellen für die
horizontale Zuluftrichtung 7 Stellungen einnehmen.
Die Anzeige der Zuluftrichtung ändert sich jedesmal, wenn die Taste
gedrückt wird. (Das Display zeigt die Luftrichtung und die
Lamellenstellungen nicht ganz exakt an).
■ Horizontale Zuluftlenkautomatik
Heizen
P
O
W
E
R
F
U
P
O
W
E
R
F
U
L
POWER
SLEEPTIMER
L
O
W
H
IG
H
P
O
W
E
R
M
O
N
IT
O
R
BREIT
L
POWER
SLEEP
TIMER
L
O
W
H
IG
H
P
O
W
E
R
M
O
N
IT
O
R
Bei niedriger Einblastemperatur wird die Luft in einem breiten Winkel
ausgeblasen. Bei höherer Einblastemperatur wird sie in einem schmalen
Winkel ausgeblasen.
Kühlen ● Umluft
Die Lamellen schwenken mit unveränderlicher Geschwindigkeit hin und her.
Mildes Trocknen
Die Lamellen sind auf einen breiten Ausblaswinkel eingestellt.
Page 67

Lamelleneinstellbereich
● Der Einstellbereich ändert sich entsprechend der jeweiligen
Trocknen
Kühlen, Umluft
Mildes
Betriebsart (Heizen, Kühlen und Mildes Trocknen, siehe
nebenstehende Abbildung).
● Der auf der Fernbedienung angezeigte Winkel entspricht
Etwa 30°
nicht exakt der tatsächlichen Lamellenstellung.
● Die Lamellenstellung ändert sich in den Betriebsarten
Heizen
Etwa 30°
Kühlen und Mildes Trocknen automatisch, um eine
Kondensatbildung zu vermeiden.
● Nach dem Ausschalten des Klimageräts schließt sich die
Lamelle automatisch.
Etwa 60°
* In diesem Bereich kann die Lamalle
in fünf Stufen verstellt werden.
Hinweise
● Die Luftlenklamelle für die vertikale Zuluftrichtung sollte in den Betriebsarten Kühlen und Mildes Trocknen
nicht nach unten gerichtet werden, weil sonst Wasser am Luftaustritt kondensieren und herabtropfen könnte.
● Zum Verstellen der Luftlenklamelle für die vertikale Zuluftrichtung ist die Fernbedienung zu verwenden.
Sie darf nicht mit der Hand direkt am Gerät verstellt werden, da es sonst zu Funktionsstörungen der
Lamelle kommen kann. Sollte dies dennoch der Fall sein, schalten Sie das Gerät aus und wieder ein.
DEUTSCH
AUSBLASWINKEL
Die Breite des horizontalen Ausblaswinkels kann nach Bedarf
eingestellt werden.
CLOCK
AUTO
WIDE
AUTO FAN
AUTO
SLEEP
MODE
WIDE/SPOT
FAN SPEED
AIR SWING
TIMER
1
ON OFF
2
3
CANCEL
SET
■ Drücken Sie die Taste WIDE/SPOT , um einen
breiten (WIDE) oder schmalen (SPOT)
Ausblaswinkel einzustellen.
a
WIDE
Anzeige
▲
AUTO FAN
Die Anzeige ändert sich jedesmal, wenn diese Taste
gedrückt wird, und zwar in folgender Reihenfolge.
SPOTWIDE
P
O
W
E
R
F
U
L
POWER
SLEEP
TIMER
L
O
W
H
IG
H
P
O
W
E
R
M
O
N
IT
O
R
Manuelle Einstellung
der Zuluftrichtung
P
O
W
E
R
F
U
L
POWER
SLEEPTIMER
L
O
W
H
IG
H
P
O
W
E
R
M
O
N
IT
O
R
BREIT (WIDE) SCHMAL (SPOT)
■ Um die Einstellung WIDE oder SPOT wieder
aufzuheben, drücken Sie die Taste
.
65
▲
Page 68

ON
AM
ON
AM
Einstellen der Timerfunktionen
Über ON läßt sich der Zeitpunkt programmieren, zu dem sich das Gerät im Heiz- bzw.
Kühlbetrieb einschalten soll. Über OFF wird entsprechend der Ausschaltzeitpunkt
programmiert. Um einen optimalen Komfort und einen effektiven Gerätebetrieb zu
ermöglichen, können beide Funktionen miteinander kombiniert werden.
COOL
AUTO FAN
AUTO
ON
AM PM
OFF
AM PM
CLOCK
MODE
WIDE/SPOT
FAN SPEED
AIR SWING
TIMER
1
ON OFF
Drücken Sie die Taste ON
Beispiel: Sie wollen als Einschaltzeitpunkt
1
7:00AM (vormittags) einstellen.
Drücken Sie bzw. ,
um den Zeitpunkt einzustellen
2
● Die Zeit läßt sich in Schritten von 10
Minuten vor- bzw. zurückstellen. Wenn
Sie die jeweilige Taste gedrückt halten,
wird die Zeit schneller verstellt.
Drücken Sie die Taste SET
3
ON
AM
SLEEP
2
3
CANCEL
SET
■ Einstellen des Ausschaltzeitpunkts
Drücken Sie die Taste OFF und führen Sie dann die
obigen Schritte 2 und 3 durch.
POWERFUL
POWER
SLEEP TIMER
LOW
POWER MONITOR
HIGH
(Die TIMER-LED am
Klimagerät leuchtet auf.)
■ Löschen der Timereinstellung
Beispiel: Einschalttimer
TIMER
1
ON OFF
2
3
CANCEL
SET
Drücken Sie die Taste
1
ON
Drücken Sie die Taste
2
CANCEL
(Die TIMER-LED am
Klimagerät erlischt.)
▲
66
Page 69

● Während der Nacht
● Wenn Sie aufstehen
P
O
W
E
R
F
U
L
POWER
SLEEP
TIMER
L
O
W
H
IG
H
P
O
W
E
R
M
O
N
IT
O
R
OFF-Timer einstellen
Stellen Sie die Uhrzeit, zu der Sie zu Bett gehen
möchten, mit OFF ein. Sie vergeuden dadurch
nachts keine unnötige Energie.
● Wenn Sie ausgehen
P
O
W
E
R
F
U
L
P
O
W
E
R
S
L
E
E
P
T
IM
E
R
LOW
HIGH
P
O
W
E
R
M
O
N
IT
O
R
POWERFUL
PO
W
ER
SLEEPTIMER
L
O
W
H
IG
H
POWER MONITOR
Stellen Sie die Uhrzeit, zu der Sie aufstehen, mit ON
ein. Auf diese Weise hat der Raum morgens bereits
die richtige Temperatur erreicht.
● Wenn Sie nach Hause kommen
Ich bin wieder da
Angenehme Temperatur
P
O
W
E
R
F
U
L
POWER
SLEEPTIMER
L
O
W
H
I
G
H
P
O
W
E
R
M
O
N
IT
O
R
DEUTSCH
Stellen Sie die Uhrzeit, zu der Sie das Haus verlassen wollen,
mit OFF ein und die Uhrzeit, zu der Sie zurückkommen, mit
eON . Auf diese Weise ist das Klimagerät während Ihrer
Abwesenheit ausgeschaltet, und Sie finden bei Ihrer Rückkehr
dennoch eine angenehme Raumtemperatur vor.
Stellen Sie die Uhrzeit, zu der Sie zurückkommen werden, mit
eON ein. Stellen Sie die Uhrzeit, zu der Sie zu Bett gehen
möchten, mit OFF ein. Auf diese Weise finden Sie bei Ihrer
Rückkehr eine angenehme Raumtemperatur vor, und das
Klimagerät wird über Nacht abgeschaltet.
Timerbetrieb
● Wenn der Einschaltzeitpunkt programmiert wurde, läuft das Gerät bis zu 45 Minuten vor der eingestellten
Uhrzeit an. Auf diese Weise wird gewährleistet, daß die gewünschte Raumtemperatur zur eingestellten
Uhrzeit erreicht wird.
● Wenn ein Einschaltzeitpunkt programmiert ist, geht das Gerät jeden Tag zur eingestellten Uhrzeit in
Betrieb.
● Die aktuelle Uhrzeit wird nicht angezeigt, wenn der Timer programmiert wurde.
● Wenn sowohl ein Ausschalt- als auch ein Einschaltzeitpunkt programmiert wurde, bleibt die TIMER-LED
am Klimagerät auch dann erleuchtet, wenn das Gerät durch den Ausschalttimer ausgeschaltet wird.
67
▲
Page 70

Turbobetrieb • Nachtbetrieb
COOL
POWERFUL
Turbo- und Nachtbetrieb stehen in den Betriebsarten Automatik,
Heizen, Kühlen und Mildes Trocknen zur Verfügung.
Turbobetrieb
• Im Winter ermöglicht der Turbobetrieb ein rasches
Aufheizen des Raumes (Heizbetrieb + Turbobetrieb).
• Im Sommer ermöglicht der Turbobetrieb ein rasches
Abkühlen des Raumes (Kühlbetrieb + Turbobetrieb).
Drücken Sie während des Betriebs die Taste POWERFUL
■ Beenden des Turbobetriebs
Drücken Sie erneut die Taste
TEMP
OFF/ON
POWERFUL .
(Die Anzeige POWERFUL auf der
Fernbedienung erlischt.)
Hinweis
● Die Solltemperatur und die Ventilatordrehzahl ändern sich
automatisch, so daß der Raum rasch aufgeheizt, abgekühlt
oder entfeuchtet wird.
Anzeige
▲
POWERFUL
SLEEP
KÜHLEN UND MILDES TROCKNEN
Temperaturerhöhung um ca.0,5°C
TEMPERATUR
Temperaturerhöhung um ca.0,5°C
TEMPERATUR
EINGESTELLTE
0 bis 1 Stunde
Nachtbetrieb wird eingeschaltet
HEIZBETRIEB
Beginn der
TEMPERATUR
0 bis 1 Stunde
TEMPERATUR
EINGESTELLTE
Nachtbetrieb wird eingeschaltet
68
▲
Temperaturverschiebung
Temperaturrückgang ca. 2°C
1 Stunde
3
CANCEL
1 Stunde
Beginn der
Temperaturverschiebung
Temperaturrückgang ca. 3°C
SET
Automatisches
Abschalten ca. 8
Stunden nach Beginn der
Temperaturverschiebung
Automatisches
Abschalten ca.
8 Stunden nach
Beginn der
Temperaturverschiebung
ZEIT
Automatik
Betrieb
Mildes Trocknen
Heizen
Kühlen
Temperatur
6°C höher
4°C niedriger
3°C niedriger
Ventilatordrehzahl
Etwas höher
Nachtbetrieb
Der Nachtbetrieb sorgt dafür, daß der Raum nicht zu stark
geheizt bzw. gekühlt wird, während Sie schlafen. Er endet
automatisch nach 8 Stunden.
Drücken Sie während des Betriebs die Taste SLEEP
POWERFUL
(Am Klimagerät leuchtet die
POWER
SLEEP TIMER
LOW
POWER MONITOR
HIGH
■ Beenden des Nachtbetriebs
Drücken Sie erneut die Taste SLEEP . Die SLEEP-LED
am Klimagerät erlischt.
Hinweise
● Die Ventilatordrehzahl wird während des Nachtbetriebs
verringert.
● Bei Verwendung des Timers und des Nachtbetriebs hat der
Timer Vorrang.
ZEIT
SLEEP-LED auf.)
Der Nachbetrieb wird nicht an
der Fernbedienung angezeigt.
Page 71

Betriebshinweise
Im folgenden finden Sie einige hilfreiche Tips, mit denen eine
optimale Leistung des Klimageräts gewährleistet und die
Betriebskosten niedrig gehalten werden.
Schließen Sie bei Bedarf
Vorhänge bzw. Jalousien!
Um zu verhindern, daß die Sonne direkt in den
Raum scheint und diesen aufheizt, sollten Sie Ihre
Vorhänge oder Rollos zuziehen, da sonst
die Kühlleistung verringert wird.
Kühlen Sie den Raum nicht zu
stark ab!
Ein Temperaturunterschied von maximal 6
°C zwischen Außen- und Innen- temperatur
ist beim Kühlen ideal. Zu kühle
Temperaturen sind ungesund.
P
O
W
E
R
F
U
L
P
O
W
E
R
S
L
E
E
P
L
O
W
T
IM
E
R
P
O
W
E
R
H
M
I
G
H
O
N
IT
O
R
DEUTSCH
Reinigen Sie regelmäßig die
Luftfilter!
Durch verschmutzte Filter verringert sich
die Heiz- bzw. Kühlleistung des
Klimageräts. Reinigen Sie die Filter etwa
alle 2 Wochen.
Wird die Luftzirkulation des
Außengeräts behindert?
Durch Gegenstände in unmittelbarer Nähe
des Außengeräts kann die Heiz- bzw.
Kühlleistung beeinträchtigt werden.
69
▲
Page 72

Pflege und Wartung
Durch eine regelmäßige Pflege und Wartung wird die Lebensdauer
des Klimageräts erhöht.
!
Vorsicht
■ Wenn Sie das Klimagerät reinigen wollen, stellen Sie zuvor den auszuschalten
auf OFF (AUS).
Der schnell rotierende Ventilator könnte ansonsten zu Verletzungen führen.
■ Waschen Sie das Gerät nicht mit Wasser.
Durch die Verwendung von Wasser kann es zu einem Kurzschluß oder zu Stromschlägen kommen.
Reinigen des Klimageräts und der Fernbedienung
● Wischen Sie das Klimagerät mit einem weichen, trockenen Tuch ab.
● Reinigen Sie das Klimagerät nie mit Lösungsmitteln wie Verdünner und Benzin oder mit Poliermitteln. Bei
Verwendung chemisch getränkter Tücher sind die entsprechenden Hinweise des Herstellers zu beachten.
● Das Frontgitter kann abgenommen und mit Wasser gereinigt werden. Das Wasser darf allerdings nicht
wärmer als 40 °C sein.
Reinigen der Grobstaubfilter
Öffnen Sie das Frontgitter
und entfernen Sie die
beiden Grobstaubfilter.
1
Fassen Sie sie hierzu an der
Lasche, heben Sie sie leicht
an und ziehen sie nach
unten weg.
Entfernen Sie den Staub
mit einem Staubsauger.
23
Stark verschmutzte Filter
können Sie mit Wasser
wa- schen. Lassen Sie sie
an- schließend gut trocknen
(nicht in der Sonne!).
Setzen Sie die trockenen
Filter wieder ein.
Achten Sie darauf, daß der
Hinweis “FRONT” nach
vorne zeigt.
POWERFUL
TIMER
SLEEP
POWER
HIGH
LOW
POWER MONITOR
Schlie Ben Sie das Frontgitter.
4
POWERFUL
SLEEP TIMER
POWER
HIGH
LOW
POWER MONITOR
Empfehlung
Wenn das Gerät in einer staubigen Umgebung eingesetzt
wird, sollten die Filter alle 2 Wochen gereinigt werden. Durch
den Betrieb mit verschmutzten Filtern wird die Kühl- bzw.
Heizleistung beeinträchtigt.
70
▲
Beschädigte Grobstaubfilter
Ersatzfilter erhalten Sie bei Ihrem
Klimageräte-Fachhändler unter der
Bestellnummer CWD00240
POWERFUL
TIMER
SLEEP
POWER
HIGH
LOW
POWER MONITOR
Page 73

Reinigen des Frontgitters
LOCK
UNLOCK
■ Das Frontgitter muß zum
Reinigen abgenommen
werden. Sorgen Sie beim
Abnehmen dafür, daß Sie
sicher stehen.
■ Nach Abnehmen des
Frontgitters nicht die
Metallteile des Klimageräts
berühren.
■ Abnehmen des Frontgitters
Öffnen Sie das Frontgitter bis
zum Anschlag.
1
Schieben Sie die beiden
Verriegelungen (rechts und
23
links) nach unten.
!
LOCK
UNLOCK
Vorsicht
■ Nach dem Reinigen des
Frontgitters ist dieses sorgfältig zu trocknen, bevor es
wieder eingesetzt wird, da es
sonst zu Stromschlägen
kommen könnte.
Klappen des Frontgitter
hoch, bis es leicht nach oben
gerichtet ist und ziehen Sie
es heraus.
DEUTSCH
■ Reinigen des Frontgitters
● Waschen Sie das Frontgitter vorsichtig mit Wasser und einem Schwamm. Verwenden Sie keine
Scheuerbürste oder sonstige harte Reinigungsmittel.
● Üben Sie beim Waschen keinen zu festen Druck auf das Frontgitter aus, da es sonst brechen könnte.
● Wenn Sie das Frontgitter mit Küchenreinigungsmitteln (nur neutrale Spülmittel!) reinigen, ist es anschließend
sorgfältig abzuspülen.
● Lassen Sie das Frontgitter nicht in der Sonne trocknen, da es sich sonst verziehen oder verfärben könnte.
■ Anbringen des Frontgitters
Halten Sie das Frontgitter
waagerecht, setzen Sie den
1
Zapfen auf den
vorspringenden Teil des
Klimageräts und drücken Sie
ihn ein.
Vorspringender Teil
des Klimageräts
Zapfen
Schieben Sie die beiden Verriegelungen nach oben, um das
Frontgitter zu sichern.
2
Hinweis: Solange die Verriegelungen sich nicht in dieser
Position befinden, kann das Frontgitter nicht
geschlossen werden.
●
Wenn das Frontgitter nicht richtig schließt,
sollten Sie die Stellung der Verriegelungen
kontrollieren, bevor sie erneut versuchen, das
Gitter zu schließen.
71
▲
Page 74

Pflege und Wartung
Auswechseln der Feinfilter (Sonderzubehör)
■ Hinweise zum Auswechseln der Feinfilter
● Die Feinfilter können nicht gereinigt und wiederverwendet werden. Neue Filter erhalten
Sie bei Ihrem Fachhändler unter der Bestellnummer
CZ-SFD50N.
● Die Wirkung der Feinfilter hält nur etwa 3 Monate an.
● Das Klimagerät sollte nicht mit verschmutzten Feinfiltern betrieben werden, da sonst die
Luft nicht gefiltert wird, die Heiz- bzw. Kühlleistung sinkt und schlechte Gerüche auftreten
können.
● Hinweis:
Catechin ist eine natürliche braune Substanz. Der Luftfilter ist mit Catechin beschichtet,
um das Wachstum von Krankheitserregern zu unterbinden.
■ Entnehmen der Feinfilter
Klappen sie das Frontgitter
bis zum Anschlag nach oben.
1
POWERFUL
SLEEP TIMER
POWER
W
LO
H
HIG
POWERSLEEPTIMER
HIGH
POWER MONITOR
LOW
POWER
MONITOR
Entfernen Sie die beiden
Grobstaubfilter.
2
Grobstaubfilter
Leicht anheben,
dann nach unten
ziehen
■ Wiedereinsetzen der Feinfilter
Öffnen Sie den Filterrahmen,
um die neuen Filtereinsätze
1
einzulegen.
- Desodorierender Feinfilter (Schwarz),
- Catechin-Feinfilter (Braun).
Setzen Sie die neuen
Feinfilter ein. Achten Sie
23
darauf, daß der Hinweis
“FRONT” nach vorne zeigt.
Fassen Sie die Feinfilter an
den Laschen an und ziehen
3
Sie sie heraus.
POWERFUL
TIMER
SLEEP
POWER
HIGH
LOW
POWER MONITOR
Feinfilter
Drücken Sie den Feinfilter
ein, bis er einrastet.
Hier drücken
• Schließen Sie das Frontgitter.
72
▲
Feinfilter
Page 75

!
Vorsicht
■ Achten Sie auf ein eventuell beschädigtes Montagegestell.
Es könnte umfallen und zu Verletzungen führen. Wenden Sie sich an einen Fachhändler.
Kontrollen vor Beginn der Heiz- bzw. Kühlsaison
■ Ist die ausgeblasene Luft im
Kühlbetrieb kalt (bzw. warm
im Heizbetrieb)?
Wenn 15 Minuten nach der
Inbetriebnahme der Temperaturunterschied zwischen Luftansaug
und Luftaustritt mindestens 8 °C
(Kühlbetrieb) bzw. 14°C
(Heizbetrieb) beträgt, arbeitet das
Klimagerät normal.
ANSAUG
POW
ERFUL
POW
ER
SLEEP
TIM
ER
L
O
W
H
IG
H
POW
ER MONITOR
AUSTRITT
■ Sind Lufteintritt und
Luftaustritt blockiert?
■ Sind die Batterien der
Fernbedienung erschöpft?
Wenn die Anzeige der
Fernbedienung blinkt, ersetzen
Sie die Batterien (siehe Seite 61).
Längere Nichtbenutzung des Klimageräts
Lassen Sie das Klimagerät 2 bis 3 Stunden lang im
Umluftbetrieb laufen, um die Einbauteile zu trocknen.
1
DEUTSCH
Schalten Sie das Klimagerät aus und auszuschalten den
auszuschalten aus der Steckdose.
2
Hinweis: Wenn das Klimagerät nicht mit Hilfe der
Fernbedienung ausgeschaltet wurde, geht es
beim Einstecken des Netzsteckers aufgrund
der Wiedereinschaltautomatik sofort in
Betrieb.
Nehmen Sie die Batterien aus der Fernbedienung.
3
Inspektionen
● Das Gerät kann nach mehrjährigem Gebrauch verschmutzen, wodurch die Leistung vermindert wird.
● Bei bestimmten Betriebsbedingungen kann ein verschmutztes Gerät auch unangenehme Gerüche
verursachen, und der Kondensatschlauch kann durch Staubablagerung verstopft werden.
Neben einer regelmäßigen Reinigung werden jährliche Inspektionen empfohlen. Fragen Sie hierzu Ihren
Fachhändler.
73
▲
Page 76

Störungssuche
PO
W
ER
L
O
W
H
IG
H
SLEEP TIM
E
R
POW
ERFUL
PO
W
ER MONITOR
(Bevor Sie den Kundendienst rufen, sollten Sie die Checklisten auf den folgenden Seiten durchgehen.)
Problem ? Krontrollen
■ Hat der Sicherungsautomat ausgelöst?
■ Wurde der Netzstecker gezogen?
■ Wurde der Timer falsch eingestellt (Seite 66)?
Das Klimagerät
läuft nicht
Das Klimagerät
kühlt bzw. heizt
nicht richtig
BITTE
KONTROLLIEREN
AUS
AUS
■ Wurde die Temperatur richtig eingestellt (Seite 62)?
■ Sind die Filter verschmutzt (Seite 70)?
■ Sind die Luftein- oder -auslässe des Außengeräts zugestellt?
■ Stehen irgendwelche Fenster oder Türen offen?
* Messen Sie die Temperaturdifferenz zwischen Luftansaug und
Luftaustritt. Wenn der Temperaturunterschied 15 Minuten nach der
Inbetriebnahme mindestens 8 °C (Kühlbetrieb) bzw. 14 °C (Heizbetrieb)
beträgt, arbeitet das Klimagerät normal.
POWERFUL
P
O
W
E
R
S
LEE
P
TIM
E
R
L
O
W
H
IG
H
POWER MONITOR
POW
ERFUL
PO
W
ER
SLEEPTIM
ER
L
O
W
H
IG
H
POW
ER MO
NITO
R
Das Klimagerät
enthält keine
Signale von der
Fernbedienung,
oder die
Anzeige der
Fernbedienung
ist zu schwach
bzw. nicht
sichtbar
74
▲
■ Steht der Schalter für den Signalempfangskanal auf “B” (Seite 59)?
■ Sind die Batterien zu schwach (Seite 61)?
■ Wurden die Batterien nicht polrichtig eingelegt?
B↔A
Page 77

P
O
W
E
R
LOW
HIGH
SLE
E
P
TIM
E
R
P
O
W
E
R
F
U
L
P
O
W
E
R
M
O
N
IT
O
R
Problem?
Die Luft wird
nicht sofort
ausgeblasen
Das Klimagerät
bleibt plötzlich
stehen
Ursache
● Betriebsart Kühlen bzw. Mildes Trocknen
(Ventilatorautomatik):
Nach dem Einschalten des Geräts wird für etwa
40 Sekunden keine Luft ausgeblasen. Dadurch
wird verhindert, daß unangenehme Gerüche in
den Raum geblasen werden.
● Betriebsart Heizen (die POWER-LED blinkt):
Die Luft wird zunächst erwärmt, bevor sie in den
Raum geblasen wird.
● Betriebsart Kühlen bzw. Mildes Trocknen
(Ventilatorautomatik):
Der Ventilator bleibt wiederholt 60 Sekunden lang
stehen und läuft dann wieder 30 Sekunden lang,
wobei die Raumtemperatur gemessen wird.
Sobald die Temperatur den Sollwert erreicht,
geht das Gerät wieder in Betrieb.
● Betriebsart Heizen (die POWER-LED blinkt):
Bei niedrigen Außentemperaturen und hoher
Luftfeuchte bildet sich Eis am Außengerät. Wenn
die POWER-LED blinkt, wird dieses Eis gerade
abgetaut. Der Abtauvorgang kann bis zu 10
Minuten dauern.
POW
ERFUL
PO
W
ER
SLEEP
TIM
ER
LO
W
H
IG
H
POWER M
ONITOR
DEUTSCH
POWERFUL
PO
W
ER
SLEEPTIM
ER
L
O
W
H
IG
H
POWER MONITOR
Aus dem
Klimagerät tritt
Nebel aus
Geräusche aus
dem Klimagerät
Aus dem
Außengerät tritt
W asser und
Dampf aus
● Dies kann vorkommen, wenn das Gerät
kühle Luft in einen warmen Raum bläst.
● Während der Abtauphase oder nach dem
Ausschalten des Geräts kann es zu
Zischgeräuschen kommen, die dadurch
entstehen, daß das im Klimagerät enthaltene
Kältemittel in die entgegengesetzte
Richtung geleitet wird.
● Aufgrund der Temperaturunterschiede
kommt es zu Knackgeräuschen, die dadurch
entstehen, daß sich das Klimagerät
ausdehnt oder zusammenzieht.
● Das Geräusch von fließendem Wasser
stammt vom Kältemittel, welches das
Klimagerät durchströmt.
● Wasser und Dampf entstehen beim Abtauen
des Eises.
P
O
W
E
R
LOW
PO
75
PO
W
ERFUL
S
L
E
E
P
T
IM
E
R
HIGH
W
ER M
O
NITOR
▲
Page 78

Nicht behebbare Störungen
H 2 7
H 2 8
Wenden Sie sich in folgenden Fällen bitte direkt an Ihren Händler.
Schalter oder
Ungewöhnlich
laute
Betriebsgeräusche.
Wasser tropft
aus dem
Innengerät.
ordn ungsgemäß.
die Fernbedienung
Tasten
funktionieren
nicht
Wasser oder
ähnliches ist
versehentlich in
gelangt.
Netzkabel und
Stecker werden
ungewöhnlich
warm.
Ein verbrannter
Geruch kommt
aus dem Gerät.
Der
Sicherungsautomat
löst häufig aus.
Schalten Sie das Gerät mit dem auszuschalten aus auszuschalten den
Netzstecker.
Die TIMER-LED blinkt, und
■
es wird eine aus 3 Zeichen
bestehende Fehlermeldung
ange- zeigt.
Wenn diese Taste
gedrückt wird, und zwar
in folgender Reihenfolge.
Beispiel:
(rot)
● Die blinkende LED weist auf eine Störung hin.
Lesen Sie die Fehlermeldung auf dem Display
ab und wenden Sie sich an Ihren Fachhändler.
● Nach dem Ablesen der Fehlermeldung schalten
Sie das Gerät mit dem auszuschalten aus und
ziehen Sie den Netzstecker.
● Je nachdem, welche Fehlermeldung erscheint,
besteht die Möglichkeit, das Gerät
vorüber- gehend weiter zu betreiben.
Fehlermeldung,
die einen
vorübergehen-
den Betrieb zuläßt
H 2 3
Mögliche
Betriebsarten
Kühlen
Heizen
Kühlen
Hinweis
Notbetrieb mit
begrenzten
Funktionen
(die TIMER-LED
blinkt weiter)
▲
76
Timerbetrieb
POWERFUL
POWER
SLEEP
TIMER
LOW
HIGH
POWER MONITOR
●Vorübergehender Betrieb
1. Drücken Sie die Taste MODE und wählen Sie
Heizen oder Kühlen.
2. Drücken Sie die Ein/Aus-Taste (OFF/ON).
Es ertönt ein vierfacher Piepton.
* Bei Erscheinen der o.g. Fehlermeldungen
kann das Gerät bis zur Reparatur durch den
Kundendienst eingeschränkt benutzt werden.
Page 79

Wichtige Hinweise
Ausfall der Fernbedienung
Wenn die Fernbedienung ausgefallen oder
unauffindbar ist, kann das Klimagerät ohne
Fernbedienung im Automatikbetrieb betrieben
werden, wobei jedoch die Temperatur nicht
eingestellt werden kann. Hierzu ist zunächst das
Frontgitter zu öffnen.
Stellen Sie den auszuschalten
1
auf ON (EIN)
Drücken Sie die Taste für den
Betrieb ohne Fernbedienung
(AUTO OFF/ON)
2
Die POWER-LED blinkt, bis
das Gerät die geeignete
Betriebsart eingestellt hat.
POWERFUL
POWER
SLEEP TIMER
LOW
HIGH
POWER MONITOR
■ Ausschalten des Betriebs ohne
Fernbedienung
Fassen Sie das Frontgitter an den Anfassern
an und klappen Sie es nach oben.
Drücken Sie erneut die Taste für den Betrieb
ohne Fernbedienung. Die POWER-LED erlischt.
Maßnahme nach einem Stromausfall
■ Stromausfall während des
Betriebs
Automatischer Wiederanlauf
■ Nach einem Stromausfall läuft das Klimagerät
bei Rückkehr des Netzstromes automatisch
mit den vorherigen Einstellungen wieder an,
es sei denn, das Gerät wurde zuvor mit der
Fernbedienung abgeschaltet.
■ Im Falle eines Wiederanlaufs geht das Gerät
erst nach Ablauf von 3~4 Minuten in Betrieb.
●Stromausfall bei
programmiertem Timer
Bei einem Stromausfall bleiben die vorgenommenen
Timereinstellungen nur in der Fernbedienung erhalten,
da diese ihren Strom aus Batterien bezieht. Die
TIMER-LED am Klimagerät erlischt. Zur Übertragung
der vor dem Stromausfall programmierten Einschaltzeit
an das Klimagerät ist beispielsweise folgendermaßen
vorzugehen.
TIMER
1
ON OFF
AUTO OFF/ON
Drücken Sie die Taste ON
1
DEUTSCH
2
Drücken Sie die Taste SET
2
3
CANCEL
Schutz bei Gewitter
Dieses Klimagerät ist mit einem eigenen Überspannungsschutz versehen. Um Ihr
Klimagerät darüber hinaus jedoch gegen häufige und starke Blitzeinschläge zu
schützen, sollten Sie die Stromversorgung unterbrechen und den Stecker aus der
Steckdose ziehen.
Spannungsschwankungen
Wenn das Außengerät aufgrund von Spannungsschwankungen häufig stehen bleibt, wenden Sie sich bitte
an Ihren Fachhändler.
SET
(Die TIMER-LED am Klimagerät leuchtet auf.)
PO
W
ER
L
O
POW
ERFUL
SLEEP
TIM
ER
W
H
IG
H
POW
ER MONITOR
77
▲
Page 80

! W ARHINWEISE
1) Bei Beschädigung des Netzkabels muß das Kabel gegen ein Spezialkabel ausgetauscht werden, das Sie über
Ihren Kundendienst beziehen können.
2) Wenn das Netzkabel dieses Gerätes schadhaft ist oder ausgetauscht werden soll, muß der Austausch durch den
Hersteller oder dessen Kundendienstvertreter bzw. durch einen entsprechend qualifizierten Fachmann erfolgen, um
Gefahren zu vermeiden.
3) Reparaturen:
Im Falle einer Störung des Geräts wenden Sie sich bitte an Ihren Händler oder einen Kundendienstfachmann.
Führen Sie auf keinen Fall Reparaturen selbst aus!
4) Das Gerät darf nicht in Umgebungen betrieben werden, in denen explosive Gasgemische auftreten können.
5) Im Notfall ist die Stromzufuhr zum Gerät wie folgt zu unterbrechen: Ziehen Sie den Netzstecker aus der Steckdose
oder betätigen Sie den Sicherungsautomaten bzw. einen anderen, eventuell vorhandenen Trennschalter.
! ACHTUNG
FALLS DIE STROMVERSORGUNG ÜBER EINE NETZSTECKDOSE ERFOLGT, MUSS DER NETZSTECKER BEI
NICHTVERWENDUNG DES KLIMAGERÄTS AUS DER STECKDOSE GEZOGEN WERDEN.
Schallpegel:
Der A-bewertete Schalldruckpegel dieses Geräts beträgt entsprechend den Prüfbedingungen nach JIS C 9612 weniger
als 70 dB(A). Dabei gelten folgende Meßbedingungen:
Das Gerät arbeitet bei maximaler Kühlleistung,
die Meßentfernung vom Gerät beträgt 1 m.
HINWEIS
Der maximale Schalldruckpegel beträgt 70 dB(A) oder weniger gemäß “Maschinenlärm-lnformationsverordnung
3. GSGV, 18. Januar 1991”.
BESCHEINIGUNG
Es wird bestätigt, daß der im Gerät enthaltene Druckbehälter einer Druckprüfung nach §9 der
Druckbehälterverordnung und vom Sachkundigen einer Abnahmeprüfung unterzogen wurde. Dichtheit und
ordnungsgemäßer Zustand der Kälteanlage gemäß VGB 20 wurden ebenfalls überprüft (siehe Typenschild).
Das Ergebnis der Prüfungen entsprach den gestellten Forderungen.
Produktionsleiter Sachkundiger
(H.S.LIM) (S.T.YEO)
78
▲
Page 81

AVANT
D’UTILISER
L’APPAREIL
Sommaire
Pièces et accessoires .............................................80
Mode d’emploi .................................................81 – 83
• Précautions d’installation
• Précautions de fonctionnement
Désignation des composants du climatiseur à air pulsé à inverseur..........
Préparation (Appareil intérieur • Télécommande) ........................
• Utiliser la télécommande
• Insérer les piles
• Régler l’horloge
Automatique • Chauffage • Refroidissement • Séchage doux • Ventilateur ............
84 – 85
86 – 87
88 – 89
FRANÇAIS
UTILISATION
DE
L’APPAREIL
SI
NÉCESSAIRE
Régler la direction d’air et la vitesse du ventilateur ............................
•
Pour régler la vitesse du ventilateur
•
Pour ajuster le volet de direction verticale du courant d’air
•
Pour régler les volets de direction horizontale du courant d’air
90 – 91
Wide (Diffus) / Spot (Ponctuel)...............................91
Réglage des minuteries..................................92 – 93
En Puissance • Sommeil.........................................94
• Mode de fonctionnement en Puissance
• Fonctionnement en mode Sommeil
Conseils d’utilisation ..............................................95
Soin et Entretien..............................................96 – 99
• Nettoyer l’appareil intérieur et la télécommande
• Nettoyer les filtres à air (une fois toutes les deux
semaines)
• Nettoyer le panneau avant (doit être retiré avant le
nettoyage)
• Remplacer les filtres purificateurs d’air
[Éléments en option] (une fois tous les trois mois)
• Inspection avant terme
• Lorsque le climatisateur n’est pas utilisé pendant une
période prolongée
• Inspection recommandée
Résolution de problèmes
............................... 100 – 101
Y a-t-il un problème?.............................................102
Information utile ....................................................103
• La télécommande s’arrête de fonctionner
• En cas de panne de courant
• Tonnerre et éclairs
• Variations du voltage
79
▲
Page 82

Pièces et accessoires
Fraîcheur, silence et confort grâce au climatiseur Panasonic à air
pulsé à inverseur.
Fonctionnement automatique
Sélectionne le mode de
fonctionnement optimal
(page 88).
Filtre catechin purificateur d'air
C'est un filtre qui peut retenir la
poussiëre, la fumèe de cigarettes
etles petites particules.optimal
(page 80,86 et 98).
Filtre dèsodorisant
Il est utlispour supprimer les
mauvaises odeurs et dèsodoriser
l'air de la piëce.
(page 80,86 et 98).
Panneau avant
Peut être retiré pour un
nettoyage rapide et facile
(page 97).
Diffusion verticale/
horizontale de l’air
Des volets automatiques assurent
la diffusion verticale et horizontale
du souffle d’air
(page 90).
Protection des variations du voltage
Protège l’appareil si le voltage fourni est
hors de la zone de fonctionnement
(page 103).
Touche illumineen
Pour faciliter l’utilisation dans la pènombre
(page 85).
Contrôle de remise en marche
automatique
Remet automatiquement en marche
l’appareil après une panne de courant
(page 89).
Accessoires
Télécommande Étiquette pour la
télécommande
TEMP
OFF/ON
POWERFUL
INVERTER
Mode de fonctionnement
en puissance
Atteint rapidement la
température de pièce désirée
(page 94).
Piles R03 (2 pcs)
Support de la
tèlècommande
Mode de fonctionnement Sommeil
Évite que la pièce ne devienne trop
chaude ou trop froide
(page 94).
Filtres Purificateurs D’Air
(Filtres Purificateurs D'Air A La
Catechine Et Filters Desodorisants)
▲
80
Page 83

Mode d’emploi
Avant la mise en marche, veuillez lire attentivement le Mode
d’emploi qui suit.
Une utilisation incorrecte résultant du non-respect des instructions qui suivent peut entraîner des blessures ou
des dégâts dont la gravité vous est signalée comme suit:
■ Une utilisation incorrecte due à l’ignorance des instructions peut causer des blessures ou des dommages. La
gravité desquels est classée comme suit:
!
Avertissement : Ce signe indique le danger de mort ou de blessures sérieuses.
Attention
!
■ Les instructions à suivre sont classées par les symboles suivants:
OFF
Précautions d’installation
: Ce signe indique le danger de blessure ou d’endommagement de
votre habitation.
Ce symbole (avec un fond blanc) indique une action interdite.
Ces symboles (avec un fond noir) indiquent une action qui est nécessaire.
Avertissement
!
■ N’installez pas, ne déplacez pas et ne réinstallez pas l’appareil vous-même.
Une installation incorrecte peut causer fuites, électrocution ou feu. Veuillez consulter un vendeur agréé
ou un spécialiste pour le travail d'installation.
FRANÇAIS
!
■ Ce climatiseur doit être branché à une prise
de terre.
Une prise de terre inappropriée
peut causer une électrocution.
■ Ne pas installer l’appareil dans un endroit où
il peut y avoir des fuites de gaz toxiques.
Des fuites de gaz près de l’appareil
peuvent provoquer des feux.
Attention
■ Vous assurer que la tuyauterie est connectée
correctement.
Sinon, de l’eau fuira.
81
▲
Page 84

Précautions de fonctionnement
P
O
W
ER
LOW
HIGH
S
LE
EP
TIM
ER
POW
ERFUL
POW
ER M
ONITOR
■ Insérez la prise de courant
correctement.
La chaleur générée par une
prise qui n’est pas correctement
branchée peut provoquer une
électrocution ou un feu.
La fiche et la prise électriques
doivent être facilement
accessibles.
■ Ne modifiez pas la longueur
du câble électrique et
n’utilisez pas de rallonge
électrique.
Ceci pourrait provoquer une
électrocution ou un feu.
!
Avertissement
■ Ne mettez pas en marche et
n’arrêtez pas l’appareil en
branchant et débranchant la
prise.
Cela pourrait provoquer une
électrocution ou un feu.
■ Ne touchez pas l’appareil
avec des mains humides.
Ceci pourrait provoquer une
électrocution.
■ N’endommagez pas le câble
électrique et n’utilisez pas un
câble inapproprié.
Un câble électrique
endommagé ou inapproprié
pourrait provoquer une
électrocution ou un feu.
■ Ne pas insérer vos doigts,
des tiges ou d’autres objets
dans l’appareil.
Ceci pourrait provoquer des
blessures graves et
endommager votre appareil.
■ Ne vous exposez pas au
courant d’air froid pendant
un long moment.
Ceci pourrait altérer votre
santé.
L
FU
ER
W
PO
SLEEPTIMER
ER
POW
HIGH
LOW
NITOR
O
ER M
W
PO
▲
82
■ S’il y a une odeur de brûlé,
arrêtez l’appareil et
débranchez le câble
électrique.
Veuillez consulter un vendeur
agréé ou un centre de service.
L
U
F
R
E
W
O
P
ER
SLEEPTIM
ER
POW
W
O
L
H
IG
H
R
O
IT
N
O
M
R
E
W
O
P
OFF
Débranchez la prise.Mettez
l’interrupteur
principal sur arrêt.
■ N’essayez pas de réparer
l’appareil vous-même.
Ceci pourrait provoquer un feu
ou une électrocution. Veuillez
appeler un vendeur agréé ou
une station technique.
P
O
W
E
R
F
U
L
POWER
SLEEP TIMER
LOW
HIGH
P
O
W
E
R
M
O
N
ITO
R
Page 85

!
POWER
LOW
HIGH
SLEEP
TIMER
P
O
W
E
R
F
U
L
P
O
W
E
R
M
O
N
ITO
R
Attention
■ Ne débranchez pas la prise en
tirant sur le câble électrique.
Veuillez tenir la prise lorsque
vous la débranchez.
■ Ne pas utiliser à d’autres fins.
Ne pas utiliser pour conserver.
Ceci affectera la qualité des
aliments, les animaux et les
plantes.
■ Mettre l’interrupteur principal
sur Arrêt si l’appareil ne doit
pas être utilisé pendant une
longue période.
Si de la poussière s’accumule
sur la prise, ceci provoquera une
hausse de chaleur et un feu.
Mettre l’interrupteur
principal sur Arrêt.
OFF
Débranchez
la prise mâle.
■ Ne placez pas de
combusteurs sur le chemin
du courant d’air venant de
l’appareil.
Une combustion incomplète
pourrait provoquer une accumulation de gaz toxique (CO).
■ Lorsque vous nettoyez
l’appareil, veuillez débrancher la prise.
Ceci pour éviter toute blessure
due au ventilateur de l’appareil.
FRANÇAIS
Arrêt
■ Aérez la pièce régulièrement.
Etant donné que les fenêtres
restent fermees, il est bon
d'ouvrir de façon périodique
pour aérer la piéce.
■ Ne lavez pas l’appareil avec
de l’eau.
Ceci provoquerait une
électrocution.
FUL
ER
W
PO
SLEEP TIMER
POWER
H
IG
H
W
O
L
R
ITO
N
O
M
ER
W
PO
■ Inspectez l’appareil de temps
en temps à la recherche
d’anomalies.
Vous assurer que les
réparations nécessaires sont
menées à bien.
■ Ne pas s’asseoir ou placer
quoi que ce soit sur l’appareil
d’extérieur.
Vous pourriez tomber ou
l’appareil pourrait se casser.
83
▲
Page 86

Désignation des composants du climatiseur à air pulsé à inverseur
Appareil d’intérieur
Volet de prise d’air
Panneau avant
Filtres
purificateurs d’air
Filtres à air
Volet de sortie d’air
Volet de direction
verticale de l’air
Volet de direction
horizontale de l’air
Onglet du panneau avant
Témoins lumineux de
fonctionnement
• POWER : Vert
(Électricité)
• SLEEP : Surpuissance
(Sommeil)
• TIMER : Surpuissance
(Minuterie)
• POWERFUL : Surpuissance
(Puissance)
Câble électrique
d’arrivée du courant
Bouton de fonctionnement
automatique
POWERFUL
SLEEP TIMER
POWER
HIGH
LOW
POWER MONITOR
Ouvreur du panneau
Récepteur du signal
Reçoit des signaux de
la télécommande.
(“Bip” de réception du
signal: un “bip” court
ou un “bip” long.)
POWERFUL
POWER
SLEEP TIMER
LOW
POWER MONITOR
HIGH
Témoins Lumineux
• S’allume de LOW (bas) à HIGH (haut)
pour montrer les conditions de
fonctionnement du compresseur.
•
S’éteint lorsque le compresseur s’arrête.
Appareil d’extérieur
Prise d’air Volets
(Côté)
Volet de sortie d’air
▲
84
(Arrière)
Tuyauterie
Borne de sol
(couvercle interne)
Câble de connexion
Tuyau d’évacuation
Page 87

Télécommande
Transmetteur de
signaux
Affichage du mode
de fonctionnement
Touche de réglage
de la température
de la pièce
(touche illumineen)
Touche d’ Arrêt/
Mise en marche
(touche illumineen)
Touche POWERFUL
POWERFUL
INVERTER
TEMP
OFF/ON
Lorsque le couvercle arrière est ouvert
Bornes de
diagnostic
Utilisation réservée au
technicien.
Touche de signal [B ↔ A]
A placer sur A.
Lorsque deux appareils sont installés dans la même pièce.
Consultez votre revendeur au sujet du commutateur
[B ↔ A].
Points de réglage
initial
OPEN
FRANÇAIS
Touche de sélection
du mode de
fonctionnement
Touche de
sélection du mode
de fonctionnement
Touche du mode
Sommeil
Ouvrez le couvercle de la télécommande
Touche de réglage de l’heure
CLOCK
AUTO
HEAT COOL
DRY FAN
WIDE SPOT
AUTO FAN
AUTO
AUTO
ON
OFF
SLEEP
MODE
WIDE/SPOT
FAN SPEED
AIR SWING
TIMER
1
ON OFF
2
3
CANCEL
SET
C
°
Touche de
commande Diffus/
Ponctuel
Touche de mise en
marche de la minuterie
Touche de sélection
de la direction de l’air
Touche de
fonctionnement en
puissance
Touche de sélection
de la vitesse du
ventilateur
Touche d’annulation
Touche de réglage
Touche de l’horloge
85
▲
Page 88

Préparation (Appareil d’intérieur • Télécommande)
Appareil d’intérieur
Insérez la prise mâle dans une prise
femelle et ouvrez le panneau avant.
1
ERFUL
POW
SLEEP TIMER
POWER
LOW
HIGH
POWERSLEEPTIMER
ONITOR
ER M
HIGH
POW
LOW
POWER
MONITOR
!
Avertissement
■ Vous assurer que la prise est bien
branchée.
Une prise mal branchée peut provoquer un
feu ou une électrocution.
Maintenir les ouvreurs
de panneau et tirer.
Retirez les filtres à air et insérez les
filtres purificateurs d’air.
2
Filtres à air
Soulever légèrement,
puis tirer vers le bas.
Insérer les
nouveaux filtres
purificateurs d’air.
(Vous assurer que
la marque “FRONT”
vous fait face)
Filtres purificateurs d’air
A utiliser dans les conditions suivantes:
DBT: Température de lampe sèche
WBT: Température de lampe humide
Intérieur
Exterieur
REFROIDISSEMENT
Intérieur
CHAUFFAGE
Exterieur
DBT
WBT
DBT
WBT
DBT
WBT
DBT
WBT
Installez les filtres à air et Refermez le
panneau avant.
3
POWERFUL
SLEEP TIMER
POWER
HIGH
LOW
POWER MONITOR
POWERFUL
SLEEP TIMER
POWER
HIGH
LOW
POWER MONITOR
(en °C)
Température Max.
32
23
43
26
30
–
24
18
Température Min.
16
11
16
11
2
–
–5
–6
Notes
• Si l’appareil ne va pas être utilisé pendant une période de temps prolongée,
mettre climatiseur sur Arrêt. Si l’interrupteur reste sur Marche, environ 2,8 W
d’électricité seront utilisés même si l’appareil principal a été mis sur arrêt.
Lorsque le mode de veille est activé, le compresseur consomme environ 35
watts d’électricité pour réchauffer rapidement la pièce. Ce mode peut être
désactivé si vous n’en avez pas besoin. Consultez votre revendeur.
• Si le fonctionnement est interrompu, l’appareil recommencera à fonctionner
seulement après trois minutes.
▲
86
3 Min
P
O
W
E
R
F
U
L
POWER
SLEEP
TIMER
L
O
W
H
IG
H
P
O
W
E
R
M
O
N
IT
O
R
Page 89

Télécommande
Utiliser la télécommande
● La distance maximale à laquelle les signaux
peuvent être reçus est d’environ 10m.
● Diriger la télécommande vers le récepteur de
signaux sur le climatiseur lorsque vous l’utilisez.
● Veuillez vous assurer que le chemin du signal n’est
pas obstrué.
P
O
W
E
R
F
U
L
POWER
SLEEP
TIMER
LO
W
H
IG
H
P
O
W
E
R
M
O
N
IT
O
R
Piles
Les piles peuvent être utilisées pendant
approximativement un an.
Suivez cette procédure lorsque
vous remplacez les piles
● Remplacer les piles avec 2 nouvelles piles du
même type.
● Ne pas utiliser de piles rechargeables, (Ni-Cd),
parce qu’elles sont différentes des piles standard
dans leur forme, dimension et performance.
● Si l’appareil ne doit pas être utilisé pendant
longtemps, retirer les piles de la
télécommande.
FRANÇAIS
Insérer les piles
(2 piles R03)
1 Appuyer doucement sur
l’endroit marqué OPEN et
glisser le couvercle vers vous.
● Vérifier que l’affichage clignote sur 12:00 PM. Si
l’affichage ne montre rien lorsque les piles sont
insérées, les retirer et les replacer correctement.
PM
2 Vous assurer que
les directions e et r
sont respectées.
Régler l’horloge
Appuyer sur la touche Horloge.
1
Appuyer sur ou pour régler
l’heure.
2
Appuyer sur la touche Horloge.
3
Notes
● Ne pas jeter ou faire tomber la télécommande.
Ne pas la mouiller.
● Certains types de lampes fluorescentes
peuvent affecter la réception du signal. Consulter votre vendeur.
PM clignote et 12:00 brille.
PM
Appuyer sur continuellement
PM
pour accélérer l’avancée et pour
le recul.
AM ou PM s’allument.
PM
● Pour éviter l’épuisement des piles, régler l’heure
immédiatement (horloge).
87
▲
Page 90

Automatique • Chauffage • Refroidissement • Séchage doux • Ventilateur
POWER
LOW
HIGH
SLEEP TIMER
POWERFUL
POWER MONITOR
Appuyer sur MODE pour sélectionner le
mode de fonctionnement désiré
CLOCK
AUTO
1
a
AUTO FAN
AUTO
PM
AUTO
MODE
WIDE/SPOT
FAN SPEED
AIR SWING
TIMER
1
ON OFF
2
TEMP
Affichage
▲
AUTO FAN
Lorsque vous appuyez, l’affichage change dans cet
ordre.
COOLHEAT
DRY
Appuyer sur la touche
Le Témoin lumineux du courant s’allume. Le témoin
2
lumineux clignote lorsque la température de la pièce
est basse au début du chauffage ou lorsque le mode
de fonctionnement est sélectionné durant le
fonctionnement automatique.
Les lampes du moniteur d’électricité s’allument pour
montrer le mode de fonctionnement du compresseur.
FAN
OFF/ON
a
88
▲
POWERFUL
INVERTER
OFF/ON
Pour régler la température
• Augmente ou diminue d’1°C si vous appuyez
3
dessus.
• La température peut être réglée entre 16°C et
30°C. (Pas de réglage pendant l’utilisation du
ventilateur)
Température recommandée:
Chauffage : 20 ~ 24°C
Refroidissement : 26 ~ 28°C
Séchage doux : Environ, température
de la piéce
Appuyez à nouveau sur la touche
interrompre le fonctionnement.
(Le Témoin lumineux s’éteint).
OFF/ON
pour
Page 91

Contrôle de remise en marche automatique
● En cas de panne de courant, le climatiseur redémarre automatiquement suivant le dernier mode de
fonctionnement activé et avec la même direction du souffle d’air. (Si le climatiseur n’a pas été stoppé au
moyen de la télécommande.)
● Si vous ne voulez pas que l’appareil se remette en marche automatiquement lorsque le courant revient,
mettre l’interrupteur sur Arrêt sur l’appareil d’intérieur ou à la prise de courant.
● Si vous ne nécessitez pas un Contrôle de remise en marche automatique, consultez votre vendeur.
● Le contrôle de remise en marche n’est pas disponible lorsque la minuterie ou le Mode Sommeil sont en
marche.
Fonctionnement automatique
● Au début du Fonctionnement Automatique, Chauffage, Refroidissement
ou Séchage Doux sont automatiquement sélectionnés suivant la
température extérieure, intérieure et celle sélectionnée.
● Le mode de fonctionnement change chaque demi-heure, si nécessaire.
Régler la Température à 25°C
36
35
34
33
32
31
C
30
29
28
27
26
25
24
23
22
21
19
18
Température de la pièce
17
16
13 14 15 16 17 18 19 20 21 22 23 24 25 26 27 28
Température Extérieure
S
H
É
A
U
F
F
A
G
E
D
C
O
H
U
A
X
G
E
Chauffage
● Pour réchauffer la température ambiante en fonction de la température de référence que vous avez définie.
● C'est la chaleur de I'air extérieur qui réchauffe la pièce. Lorsque la température de l'air extérieur ambiant
diminue, la capacité de chauffe de l'appareil peut diminuer elle aussi. Nous conseillons l'utilisation d'un
appareil de chauffage supplémentaire lorsque la température de l'air extérieur ambiant est basse.
Refroidissement
● Pour rafraîchir la température ambiante en fonction de la température de référence que vous avez définie.
Utilisation du ventilateur
FRANÇAIS
R
E
F
R
O
I
D
I
S
S
E
M
E
N
T
● Fait circuler l'air à travers la pièce.
● Purifie et désodorise la piece. L'utilisation du ventilateur est recommandée pendant les saisons lor
desquelles ni le chauffage ni le refroidisseur ne sont utilisés.
Utilisation du séchage doux
● Déshumidifie tout en maintenant la température désirée. L’utilisation du séchage doux est recommandée
pendant la saison des pluies.
● Si la température de la pièce excède la température sélectionnée, l’appareil se met en mode de
refroidissement.
● La vitesse du ventilateur est plutôt lente durant l’utilisation du séchage doux.
● L’humidité peut rester la même si la température intérieure est plus basse que la température
sélectionnée par la télécommande.
Notes
● Voir la page 90 pour régler la vitesse du ventilateur et la direction du courant d’air.
● Le mode de fonctionnement en Puissance et Sommeil peuvent être réglés pendant l’utilisation
automatique.
89
▲
Page 92

Régler la direction d’air et la vitesse du ventilateur
Un réglage correct de la direction du courant d’air et de la vitesse du
ventilateur augmente l’efficacité de l’appareil.
AUTO
AUTO FAN
AUTO
SLEEP
CLOCK
MODE
WIDE/SPOT
FAN SPEED
AIR SWING
TIMER
1
ON OFF
2
3
CANCEL
SET
Pour régler la vitesse du
Appuyez sur la touche FAN SPEED
● Il y a cinq niveaux de vitesse du ventilateur en
plus de la vitesse automatique du ventilateur.
■
Contrôle automatique de la vitesse du ventilateur
ventilateur
Exemple d’affichage
Vitesse
automatique
du ventilateur
COOL
Vitesse
moyenne
du ventilateur
COOL
Chauffage
Lorsque la témperature de la sortie d’air augmente,
la vitesse du ventilateur augmente aussi.
Refroidissement ● Séchage doux
Les changements de la vitesse du ventilateur génèrent une brise fraîche. L’air
commence à souffler environ 40 secondes après le commencement du
Refroidissement et du Séchage doux.
AUTO FAN
h j k
Pour ajuster le volet de direction verticale du courant d’air
Appuyez sur la touche
● Il y a cinq angles de direction verticale pour la direction
automatique du courant d’air.
L’affichage change lorsque la touche est utilisée. (L’affichage
indique la direction du courant d’air.)
■
Contrôle automatique de la direction verticale du souffle d’air
Chauffage
Lorsque la tempèrature de l’air diffusè est faible, notamment au dèmarrage du
chauffage, l’air froid est soufflÈ horizontalement.
Au fur et à mesure que la tempèrature augmente, l’air chaud est soufflè vers le bas
Refroidissement ● Séchage doux
Le volet pivote vers le haut et le bas automatiquement.
▲
DIFFUS
90
Pour régler les volets de direction horizontale du courant d’air
Appuyez sur la touche
● Outre la direction automatique du courant d’air, les volets de
direction horizontale du courant d’air peuvent être réglés sur sept positions.
L’appui de la touche
direction exacte du courant d’air ou l’angle exact des volets.)
■
Contrôle automatique de la direction horizontale du souffle d’air
Chauffage
P
O
W
E
R
F
U
P
O
W
E
R
F
U
L
POWER
SLEEPTIMER
L
O
W
H
IG
H
P
O
W
E
R
M
O
N
IT
O
R
L
POWER
SLEEP
TIMER
L
O
W
H
IG
H
P
O
W
E
R
M
O
N
IT
O
R
Lorsque la température est basse, l’air est envoyé en mode WIDE. Lorsque la
température remonte, l’air est envoyé en mode SPOT.
Refroidissement ● Ventilateur
PONCTUEL
Les volets pivotent horizontalement à vitesse fixe.
Séchage doux
Les volets sont fixes sur WIDE.
modifie l’affichage. (Celui-ci n’indique pas la
Page 93

Fourchette de réglage du volet
● La fourchette de réglage est différente pour chaque mode,
Refroidissement,
Ventilateur
Séchage
doux
c’est-à-dire chauffage, refroidissement et séchage doux.
(Fig. de gauche)
● L’angle indiqué par la télécommande est différent de celui
Chauffage
Environ 30°
Environ 30°
de l’appareil d’intérieur.
● L’angle du volet change automatiquement pour éviter toute
condensation pendant le refroidissement et le séchage
doux.
● Lorsque l’appareil est arrêté, le volet se ferme
automatiquement.
Environ 60°
* Cinq niveaux du réglage peuvent être
sélectionnés dans cette fourchette.
Notes
● Ne dirigez pas le volet de la direction verticale du courant d’air vers le bas pendant le refroidissement et
le séchage. Des gouttes d’eau peuvent se condenser sur le volet de sortie d’air et tomber.
● Utilisez la télécommande pour modifier la position du volet de direction verticale du courant d’air. Utiliser
vos mains lors du réglage de la direction peut provoquer un mauvais fonctionnement du volet. Si cela
arrive, arrêtez l’appareil et remettez en marche immédiatement.
FRANÇAIS
WIDE (DIFFUS) / SPOT (PONCTUEL)
Contrôle aisé de la direction horizontale du souffle d’air.
■ Appuyez sur la touche WIDE/SPOT pour
sélectionner la direction du souffle d’air WIDE
ou SPOT.
a
WIDE
Affichage
▲
AUTO FAN
Lorsque vous appuyez, l’affichage change dans cet ordre.
SPOTWIDE
P
O
W
E
R
F
U
L
POWER
SLEEP
TIMER
L
O
W
H
IG
H
P
O
W
E
R
M
O
N
IT
O
R
Direction horizontale
manuelle du
souffle d’air
P
O
W
E
R
F
U
L
POWER
SLEEPTIMER
L
O
W
H
IG
H
P
O
W
E
R
M
O
N
IT
O
R
AUTO
WIDE
AUTO FAN
AUTO
SLEEP
MODE
WIDE/SPOT
FAN SPEED
AIR SWING
TIMER
1
ON OFF
2
3
CANCEL
CLOCK
SET
DIFFUS
PONCTUEL
■ Pour désactiver WIDE ou SPOT, appuyez
sur
.
91
▲
Page 94

Réglage des minuteries
Régler la MINUTERIE-MARCHE ON sur l’heure à laquelle vous voulez que le
chauffage ou le refroidissement débute. Régler la MINUTERIE-ARRÊT OFF
sur l’heure d’arrêt choisie. Utilisez les deux touches ensemble pour un maximum de confort et d’efficacité.
COOL
AUTO FAN
AUTO
ON
AM PM
OFF
AM PM
CLOCK
MODE
WIDE/SPOT
FAN SPEED
AIR SWING
TIMER
1
ON OFF
Appuyez sur la touche ON
Affichage Ex: Réglez la minuterie-marche
1
(ON-Timer) pour 7:00AM.
Appuyez sur ou sur
pour régler l’heure.
2
● Augmente ou diminue de 10 minutes.
Appuyez constamment pour atteindre
l’heure désirée.
Appuyez sur la touche SET
3
ON
ON
ON
AM
AM
AM
SLEEP
2
3
CANCEL
SET
■ Pour régler la minuterie-Arrêt
Appuyez sur la Minuterie-Arrêt OFF et suivez les pas
2 et 3.
POWERFUL
(Le témoin lumineux de la
POWER
LOW
POWER MONITOR
SLEEP TIMER
HIGH
minuterie sur l’appareil
intérieur s’allume.)
■ Pour annuler la minuterie
(Ex) Annuler la Minuterie-Marche (ON-Timer).
TIMER
1
ON OFF
2
3
CANCEL
SET
Appuyez sur la
1
touche ON
Appuyez sur la touche
2
CANCEL
(Le témoin lumineux de la
minuterie sur l’appareil
intérieur s’éteint.)
▲
92
Page 95

● Lorsque vous dormez
PO
W
ER
L
O
W
H
IG
H
S
LE
EPTIM
ER
POWERFUL
POWER MONITOR
P
O
W
E
R
F
U
L
POWER
SLEEPTIMER
L
O
W
H
IG
H
P
O
W
E
R
M
O
N
IT
O
R
Réglage de la minuterie
Réglez l’heure à laquelle vous irez au lit avec la
touche OFF . Ceci empêche le gaspillage de
l’électricité.
● Lorsque vous vous réveillez
FRANÇAIS
Réglez l’heure à laquelle vous vous réveillerez
avec la touche ON . Vous pouvez commencer
une nouvelle journée à une température
confortable.
● Lorsque vous sortez
P
O
W
E
R
F
U
L
P
O
W
E
R
S
L
E
E
P
T
IM
E
R
LOW
HIGH
P
O
W
E
R
M
O
N
IT
O
R
● Lorsque vous rentrez
Je suis de retour
P
O
W
E
R
F
U
L
POWER
SLEEPTIMER
L
O
W
H
I
G
H
P
O
W
E
R
M
O
N
IT
O
R
Température confortable
Réglez l’heure à laquelle vous allez sortir en
utilisant la touche OFF . Réglez l’heure à laquelle
vous allez rentrer en utilisant la touche ON . Ceci
empêchera le climatiseur de rester en marche
lorsque vous êtes à l’extérieur, et la température
sera plaisante quand vous reviendrez.
Réglez l’heure à laquelle vous rentrerez en utilisant
la touche ON .
Réglez l’heure à laquelle vous vous coucherez en
utilisant la touche OFF . Ceci mettra une
température plaisante pour votre retour et cela
évitera de laisser le climatiseur en marche.
Minuterie
● Lorsque la MINUTERIE-MARCHE (ON-Timer) est réglée, la mise en marche commencera avant le
moment sélectionné. Ceci pour permettre à la température de la pièce d’atteindre la température
sélectionnée au moment désiré. (Maximum de 45 minutes en avance)
● Une fois que la MINUTERIE-MARCHE (ON-Timer) est réglée la mise en marche se fera au même
moment chaque jour.
● L’heure n’est pas affichée lorsque les minuteries sont réglées.
● Lorsque les deux minuteries sont utilisées en même temps, le témoin lumineux de la minuterie de
l’appareil d’intérieur reste allumé même si le fonctionnement est arrêté par la MINUTERIE-ARRÊT (OFFTimer) .
▲
93
Page 96

En Puissance • Sommeil
Les modes de fonctionnement en Puissance et Sommeil sont
disponibles pendant l’opération automatique, le Chauffage, le
Refroidissement et le Séchage Doux.
Mode de fonctionnement en Puissance
• Utilisé en hiver pour vous réchauffer rapidement quand vous
rentrez à la maison (Chauffage et en Puissance).
• Utilisé en été pour vous rafraîchir après un bain chaud
(Refroidissement et en Puissance).
Appuyez sur POWERFUL pendant le fonctionnement
■ Pour annuler
TEMP
OFF/ON
Appuyez sur POWERFUL à nouveau.
(L’affichage EN PUISSANCE disparaît sur la télécommande.)
Note
● La température sélectionnée et la vitesse du ventilateur
changent automatiquement afin de réchauffer, refroidir, ou
déshumidifier la pièce rapidement.
Fonctionnement
Température
COOL
POWERFUL
Vitesse du
ventilateur
Affichage
▲
POWERFUL
3
SLEEP
FONCTIONNEMENT DU REFROIDISSEMENT
ET DU SÉCHAGE DOUX
Augmentation d’environ 0,5°C
TEMPÉRATURE
Augmentation d’environ 0,5°C
TEMPÉRATURE
RÉGLAGE DE LA
La touche d’enclenchement du
mode Sommeil est enfoncée.
CHAUFFAGE FONCTIONNEMENT
TEMPÉRATURE
RÉGLAGE DE LA
La touche d’enclenchement du
mode Sommeil est enfoncée.
0 – 1 heure
TEMPÉRATURE
0 – 1 heure
Le mode Sommeil s’enclenche.
1 heure
CANCEL
1 heure
Le mode Sommeil
s’enclenche.
Diminution d’environ 2°C
Diminution d’environ 3°C
SET
Environ 8 heures aprés
I’enclenchement du
mode Sommeil, s’arrête
automatiquement.
L’HEURE
Environ 8 heures
aprés
I’enclenchement du
mode
Sommeil, s’arrête
automatiquement.
L’HEURE
6°C plus haut
4°C plus bas
3°C plus bas
Un peu plus fort
Automatique
Chauffage
Refroidissement
Séchage Doux
Fonctionnement en mode Sommeil
Évite de trop importants chauffage et refroidissement pendant
votre sommeil. S’arrête automatiquement après 8 heures.
Appuyez sur SLEEP pendant le fonctionnement
POWERFUL
(Le témoin lumineux du mode
POWER
SLEEP TIMER
LOW
POWER MONITOR
HIGH
■ Pour annuler
Appuyez sur SLEEP à nouveau. (Le témoin lumineux du
mode Sommeil s’éteint sur l’appareil d’intérieur.) (off.)
Notes
● L’air souffle doucement pendant votre sommeil.
● Lorsqu’il est utilisé avec la minuterie, la minuterie a priorité.
Sommeil s’allume sur l’appareil
d’intérieur.) N’est pas affiché
sur la télécommande.
▲
94
Page 97

Conseils d’utilisation
Voilà quelques conseils utiles pour une performance optimale de
votre appareil et un rapport qualité-prix intéressant.
Réglez vos rideaux et volets
Réglez vos rideaux et volets afin d’éviter que
la lumière du soleil n’entre dans la pièce
directement comme ceci pourrait réduire
l’efficacité de refroidissement.
Ne refroidissez pas trop
puissamment!
Une différence de 6°C ou moins entre les
températures extérieure et intérieure
pendant le refroidissement est idéale.
Une différence plus importante pourrait
altérer votre santé.
P
O
W
E
R
F
U
L
P
O
W
E
R
S
L
E
E
P
L
O
W
T
IM
E
R
P
O
W
E
R
H
M
IG
H
O
N
IT
O
R
FRANÇAIS
Nettoyez les filtres!
Un filtre à air sale réduit l’efficacité du
chauffage et du refroidissement. Nettoyez
les filtres tous les quinze jours.
Quelque chose près de
l’appareil extérieur?
Des objets placés près de l’appareil extérieur
réduiront l’efficacité du chauffage et du
refroidissement.
95
▲
Page 98

Soin et Entretien
Un nettoyage et un entretien réguliers prolongeront la vie de votre
climatiseur.
!
Attention
■ Avant de nettoyer le climatiseur, mettez climatiseur principal sur Arrêt.
Une vitesse trop importante du ventilateur peut causer des blessures.
■ Ne lavez pas l’appareil avec de l’eau.
De l’eau pourrait causer un court-circuit.
Nettoyer l’appareil interieur et la télécommande
● Essuyer doucement avec un chiffon doux et sec.
● Ne nettoyer pas avec de l’eau plus chaude que 40°C, des liquides volatiles comme un décapant, ou des
produits pour polir. (Lorsque vous utilisez un chiffon traité avec des produits chimiques, vous reporter aux
instructions et précautions.)
● Le panneau avant peut être retiré et nettoyé avec de l’eau.
Nettoyer les filtres à air (une fois toutes les deux semaines)
Ouvrir le panneau avant et
retirer les deux filtres à
air.
1
Maintenir les languettes,
soulever légèrement, puis
tirer vers le bas.
Retirer la saleté en
utilisant un aspirateur.
23
POWERFUL
TIMER
SLEEP
POWER
HIGH
LOW
POWER MONITOR
Pour une saleté importante,
nettoyer avec de l’eau et
bien sécher (hors de la
lumière du soleil) avant de
replacer.
Replacer les filtres à air.
Vous assurer que la marque
“FRONT” vous fait face.
POWERFUL
TIMER
SLEEP
POWER
HIGH
LOW
POWER MONITOR
Fermer le panneau.
4
POWERFUL
SLEEP TIMER
POWER
HIGH
LOW
POWER MONITOR
Recommandation
Si l’appareil est utilisé dans un environnement poussiéreux,
nettoyer les filtres tous les quinze jours. Une utilisation
continue de l’appareil avec des filtres à air sales réduit
l’efficacité du refroidissement et du chauffage.
96
▲
Filtre à air endommagé
Consulter le vendeur autorisé le
plus proche.
Partie No. CWD00240
Page 99

Nettoyer le panneau avant (doit être retiré avant le nettoyage)
LOCK
UNLOCK
■ Vous placer sur une surface
nivelée lorsque vous retirez
le panneau avant.
■ Retirer le panneau avant
Soulever le panneau avant
autant que possible.
1
2
!
■ Ne touchez pas les parties
en métal de l’appareil
d’intérieur après avoir retiré
le panneau avant.
Glisser les deux languettes
(gauche et droite) vers la
position de déverrouillage.
Attention
LOCK
UNLOCK
■ Ne laissez pas d’eau sur le
panneau après le nettoyage.
Séchez complètement pour
éviter une électrocution.
Régler le panneau avant à
une position un peu plus
3
haute que l’horizontale et
tirer pour retirer.
FRANÇAIS
■ Nettoyer le panneau avant
● Laver légèrement avec de l’eau et une éponge. (Ne pas utiliser une brosse ou d’autres matériaux.)
● Ne pas appuyer sur le panneau avant trop fort pendant le nettoyage. (Une pression excessive pourrait
endommager le panneau.)
● Si vous nettoyez avec des détergents de cuisine (détergents neutres), rincez totalement. (Ne pas utiliser de
détergents non neutres.)
● Ne pas sécher le panneau avant à la lumière du soleil. (Une exposition directe à la lumière du soleil peut
décolorer ou défigurer le panneau.)
■ Fixer le panneau avant
Maintenir le panneau avant
parallèle au sol, faire corres-
1
pondre la projection de
l’appareil d’intérieur avec le
pivot et pousser pour insérer.
Projection sur l’appareil
d’intérieur
Pivot
Glisser les deux languettes vers le haut jusqu’à la position de
verrouillage.
2
Note: Si les languettes sont laissées sur la position de
déverrouillage, le panneau avant ne fermera pas.
● Si le panneau ne ferme pas
complètement, vérifier les
positions des languettes et
essayez encore.
97
▲
Page 100

Soin et Entretien
Remplacer les filtres purificateurs d’air (une fois tous les trois mois)
■ Remplacer les filtres purificateurs d’air
● Ne pas réutiliser des filtres sales. Consulter votre vendeur le plus proche
Filtres purificateurs d’air CZ-SFD50N.
● Ces filtres fonctionnent efficacement pendant seulement trois mois.
● Si le climatiseur fonctionne en utilisant des filtres sales:
• L’air n’est pas purifié.
• La capacité de refroidissement et de chauffage diminue.
• Des odeurs nauséabondes sont émises.
● Note:
Le catechin est un èlèment naturellement brun. Le filtre est traitavec du
catechin pour èviter le dèveloppement de bactèries et virus.
■ Retirer les filtres purificateurs d’air
Soulever le panneau avant le
plus haut possible.
1
POWERFUL
SLEEP TIMER
POWER
W
LO
H
HIG
POWERSLEEPTIMER
HIGH
POWER MONITOR
LOW
POWER
MONITOR
Retirer les deux filtres à air.
23
Filtres à air
Soulever légèrement, puis tirer
vers le bas.
■ Réinstaller les filtres purificateurs d’air
Ouvrir le cadre du filtre pour
insérer les nouveaux filtres.
1
- Les nouveaux filtre désodorisants
(De couleur noire)
- Les nouveaux filtre purificateurs
d’air à la catéchine
(De couleur marron)
Insérer les nouveaux filtres
purificateurs d’air. (Vous
2
assurer que la marque
“FRONT” vous fait face)
Maintenir les languettes des
filtres purificateurs d’air et
tirer.
POWERFUL
TIMER
SLEEP
POWER
HIGH
LOW
POWER MONITOR
Filtres purificateurs d’air
Pousser jusqu’au “clic”.
3
Appuyer ici
● Fermer le panneau avant.
98
▲
Filtres purificateurs d’air
 Loading...