

Panasonic KX TGP-500, B08, KX TPA-50 User Manual

PANASONIC KX TGP-500
B08 & KX TPA-50
DOT (DIGITAL OFFICE
TECHNOLOGY)
TM
USER GUIDE

/OVERVIEW OF THE KX TGP-500 AND TPA-50 CORDLESS IP PHONES 2
WHAT’S INSIDE
OVERVIEW OF THE KX TGP-500 AND TPA-50 CORDLESS IP PHONES 3
SETTING UP THE KX TGP-500 BASE UNIT 4
CONNECTING ADDITIONAL KX TPA-50 HANDSETS 5
CONNECTING KC TGP-500 AND KX TPA-50 TO YOUR DOT SERVICE 6
USING YOUR PANASONIC KX TGP 500 & TPA 50 PHONES 7
SETTING UP THE PHONEBOOK AND CONTACT LIST 10
Version 1.0
© Telstra Corporation Limited (ABN 33 051 775 556) 2013. All rights reserved.
This work is copyright. Apart from any use as permitted under the Copyright Act 1968, information contained within this manual
cannot be used for any other purpose other than the purpose for which it was released. No part of this publication may be
reproduced, stored in a retrieval system , or t ransmitt ed in any form or by any means, elect ronic, m echanical , photoc opying,
recording or otherwise, without the written permission of Telstra Corporation Limited.
Words mentioned in this book that are known to be trademarks, whether registered or unregistered, have been capitalised or
use initial capitals. Terms identified as trademarks include Cisco®, Microsoft®, Microsoft PC®, Apple®, AirPort®, Mac®,
Linksys®, Panasonic®
/OVERVIEW OF THE KX TGP-500 AND TPA-50 CORDLESS IP PHONES 3
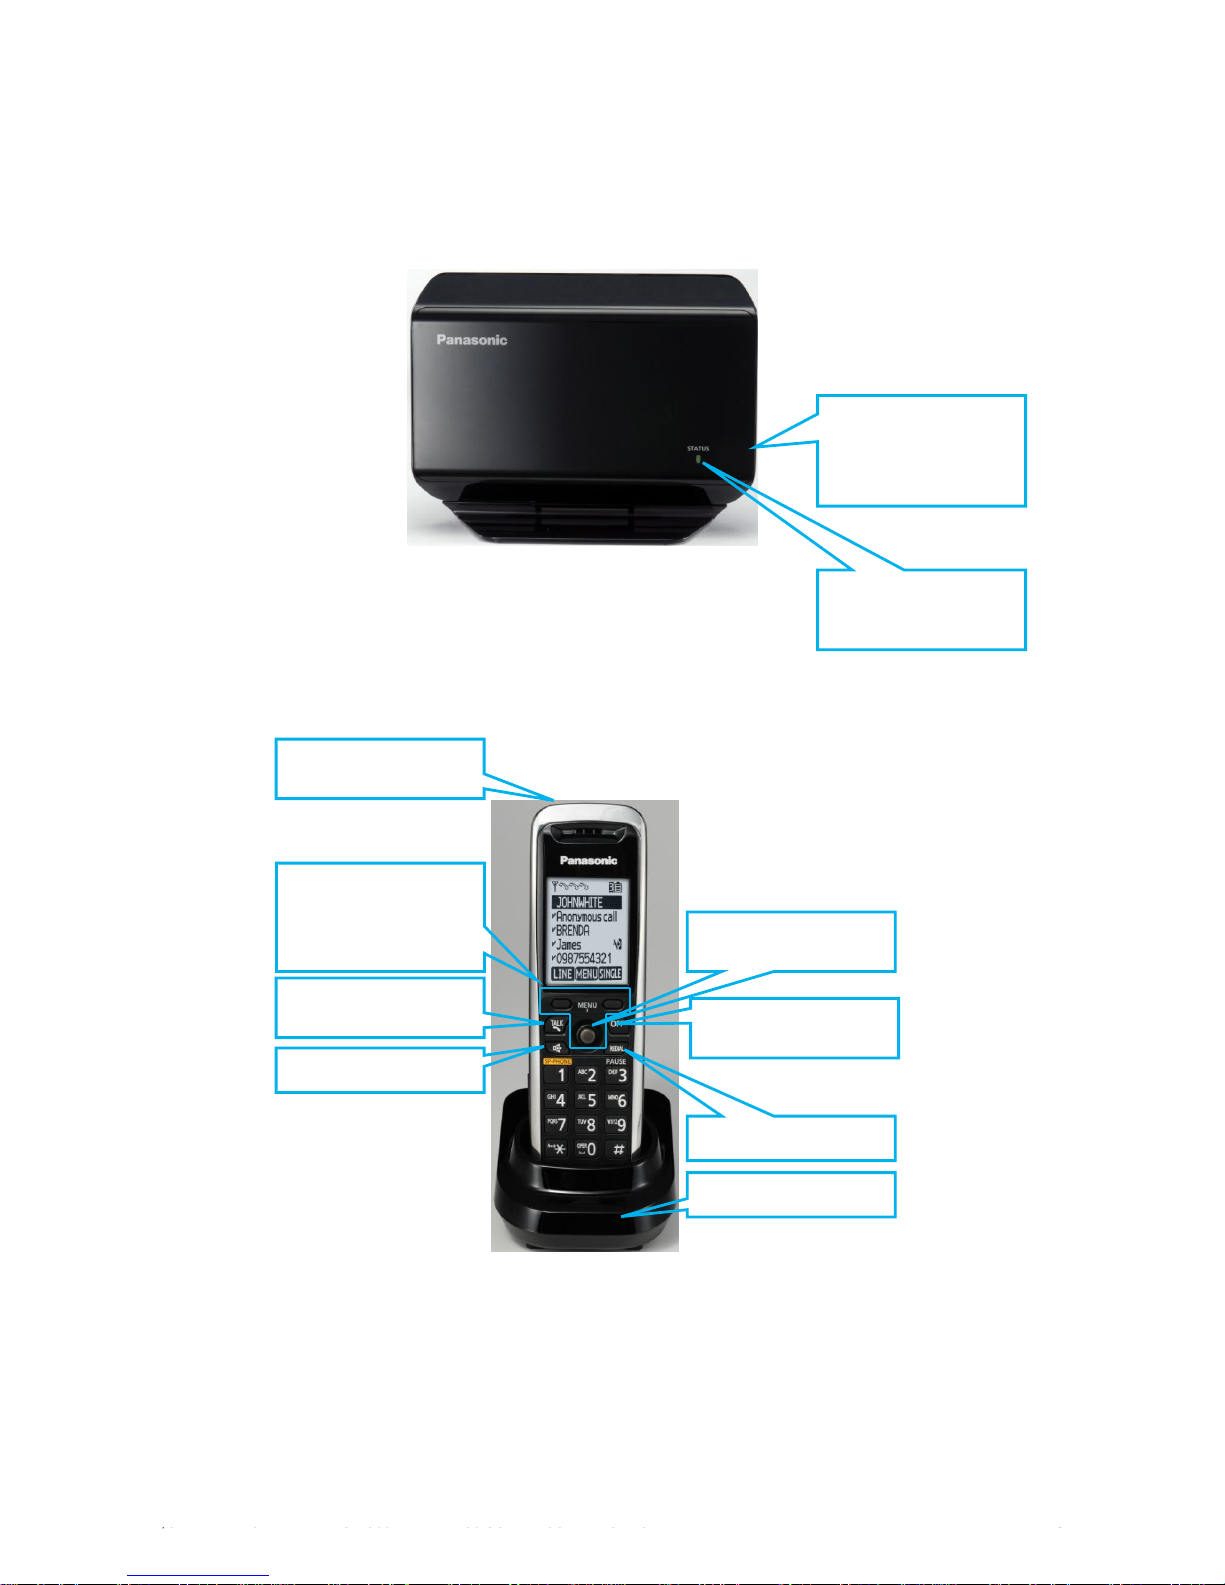
OVERVIEW OF THE KX TGP-500 AND TPA-50
CORDLESS IP PHONES
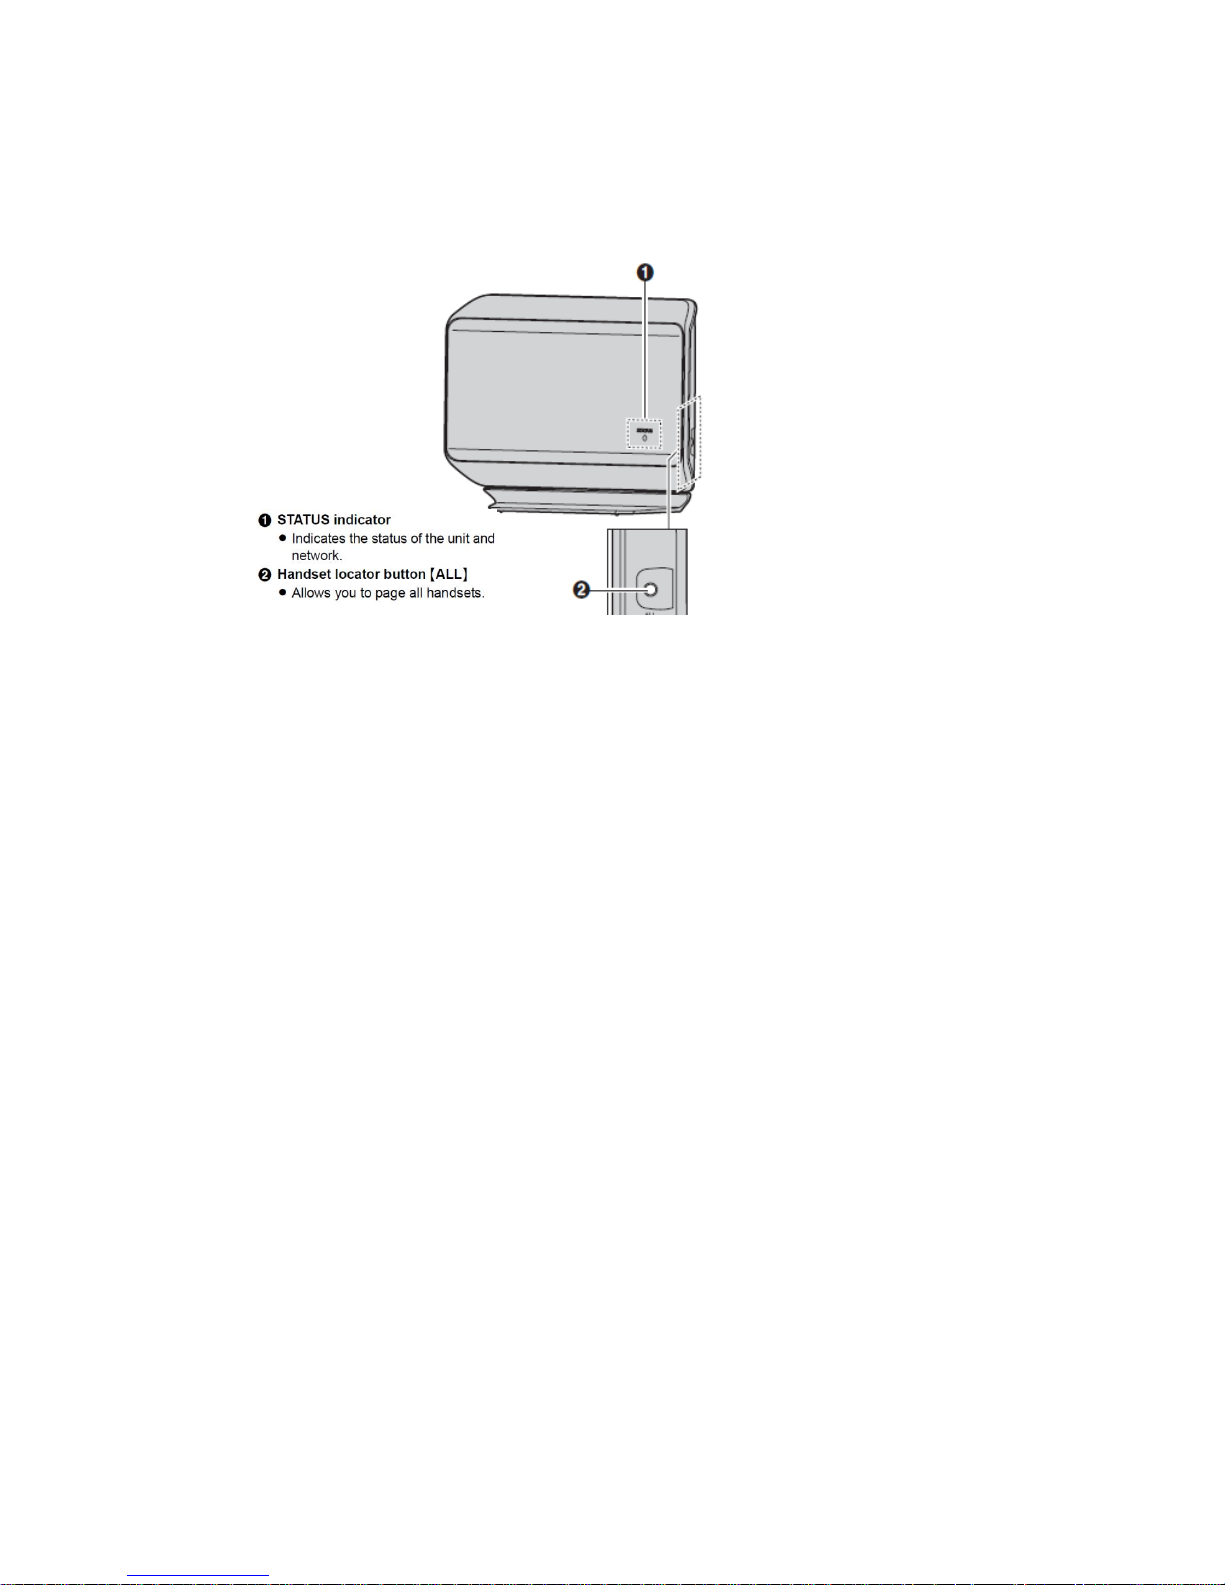
Status Indicator (Provides
status on the base station
Handset Locator button
(ALL). To page and
connect additional
handsets.
MessageBank, Ringer and
Charge Indicator
Softkey tabs will appear
on the screen and relate
to the function you are
performing
TALK button to answer
calls
Speaker/Handsfree
OFF button to end calls,
or exit Menu
Navigation button and
Menu Button
Redial
Charging Cradle
Figure 1 Panasonic KX TGP-500
Figure 2 Panasonic KX TPA-50

/ SETTING UP THE KX TGP-500 BASE UNIT 4
SETTING UP THE KX TGP-500 BASE UNIT
Figure 3 above describes how to connect the TGP-500 base unit to the power supply and your DOT
gateway/router
Figure 3 Back Panel Panasonic KX TGP-500
/CONNETING ADDITIONAL KX TPA-50 HANDSETS 5
CONNETING ADDITIONAL KX TPA-50 HANDSETS
The base unit (KX TGP-500) is supplied with one handset that is already paired. Additional handsets (KX TPA-50)
will need to be paired before use with the base unit.
1. On the Handset, press Menu and dial #
2. Dial the code 1 3 0
3. On the base unit Press and hold the ALL button for at least 4 seconds until the STATUS indicator flashes
in red
4. On the KX TPA-50 handset, press the OK and wait until the message “Enter Base PIN” is displayed
5. Dial the base unit PIN (“0000”), and press OK and wait until a long beep sounds.
A successfully connected handset will display a number greater than 1 next to the battery meter located on the top
right corner of the screen. The handset supplied with the KX TGP-500 base unit is by default set to number 1.
Subsequent handset will be allocated a next number in the sequence. You can connect up to a maximum of 6
handsets to a base unit.
Figure 4 Panasonic KX TGP-500
 Loading...