

Ozito DETAIL SANDER, RANDOM ORBITAL SANDER, DSR-2100 Instruction Manual
DETAIL
SANDER
125W
INSTRUCTION MANUAL
SPECIFICATIONS
Motor: 125W
No Load Spead: 14,000 opm
Paper Fitment: Hook and
Loop
Power Cord: 2m SAA
Weight: 1.02kg
DSR-2100
WHAT’S IN THE BOX
Detail Sander
Sandpaper Sheet
Dust Bag
ozito.com.au
ONLINE MANUAL
Scan this QR Code with your
mobile device to take you to
the online manual.
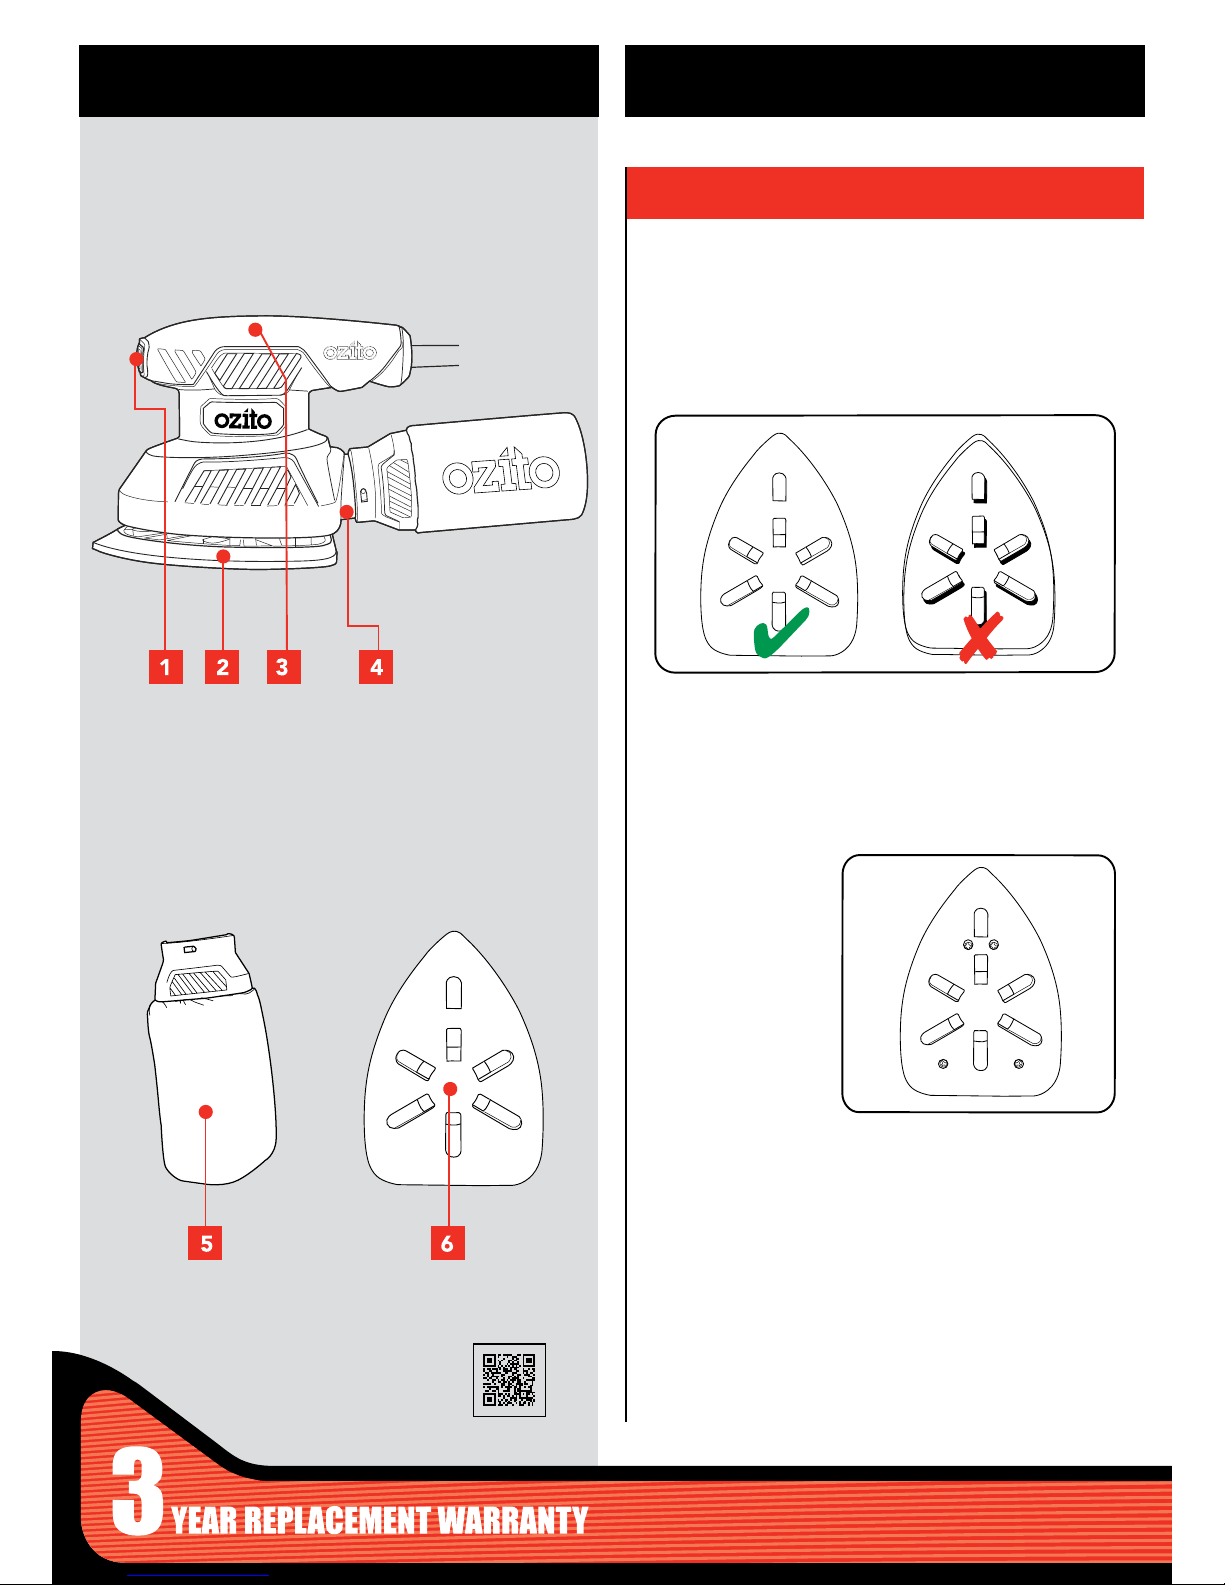
KNOW YOUR PRODUCT
1. HOOK AND LOOP SANDING SHEET
1. When placing the sheet, align the holes on the sanding sheet with
the holes on the sanding pad.
5. Dust Bag 6. Hook & Loop Sanding Sheet
ACCESSORIES
1 On/Off Switch
2 Hook & Loop Backing Pad
3 Soft Grip
4 Dust Bag Adaptor
DETAIL SANDER
SETUP & PREPARATION
2. Replace the sanding sheet when it is worn.
3. Replace hook &
loop backing pad
when worn (see
maintenance section).
Ensure the tool is disconnected from the power supply before
performing any of the following operations.
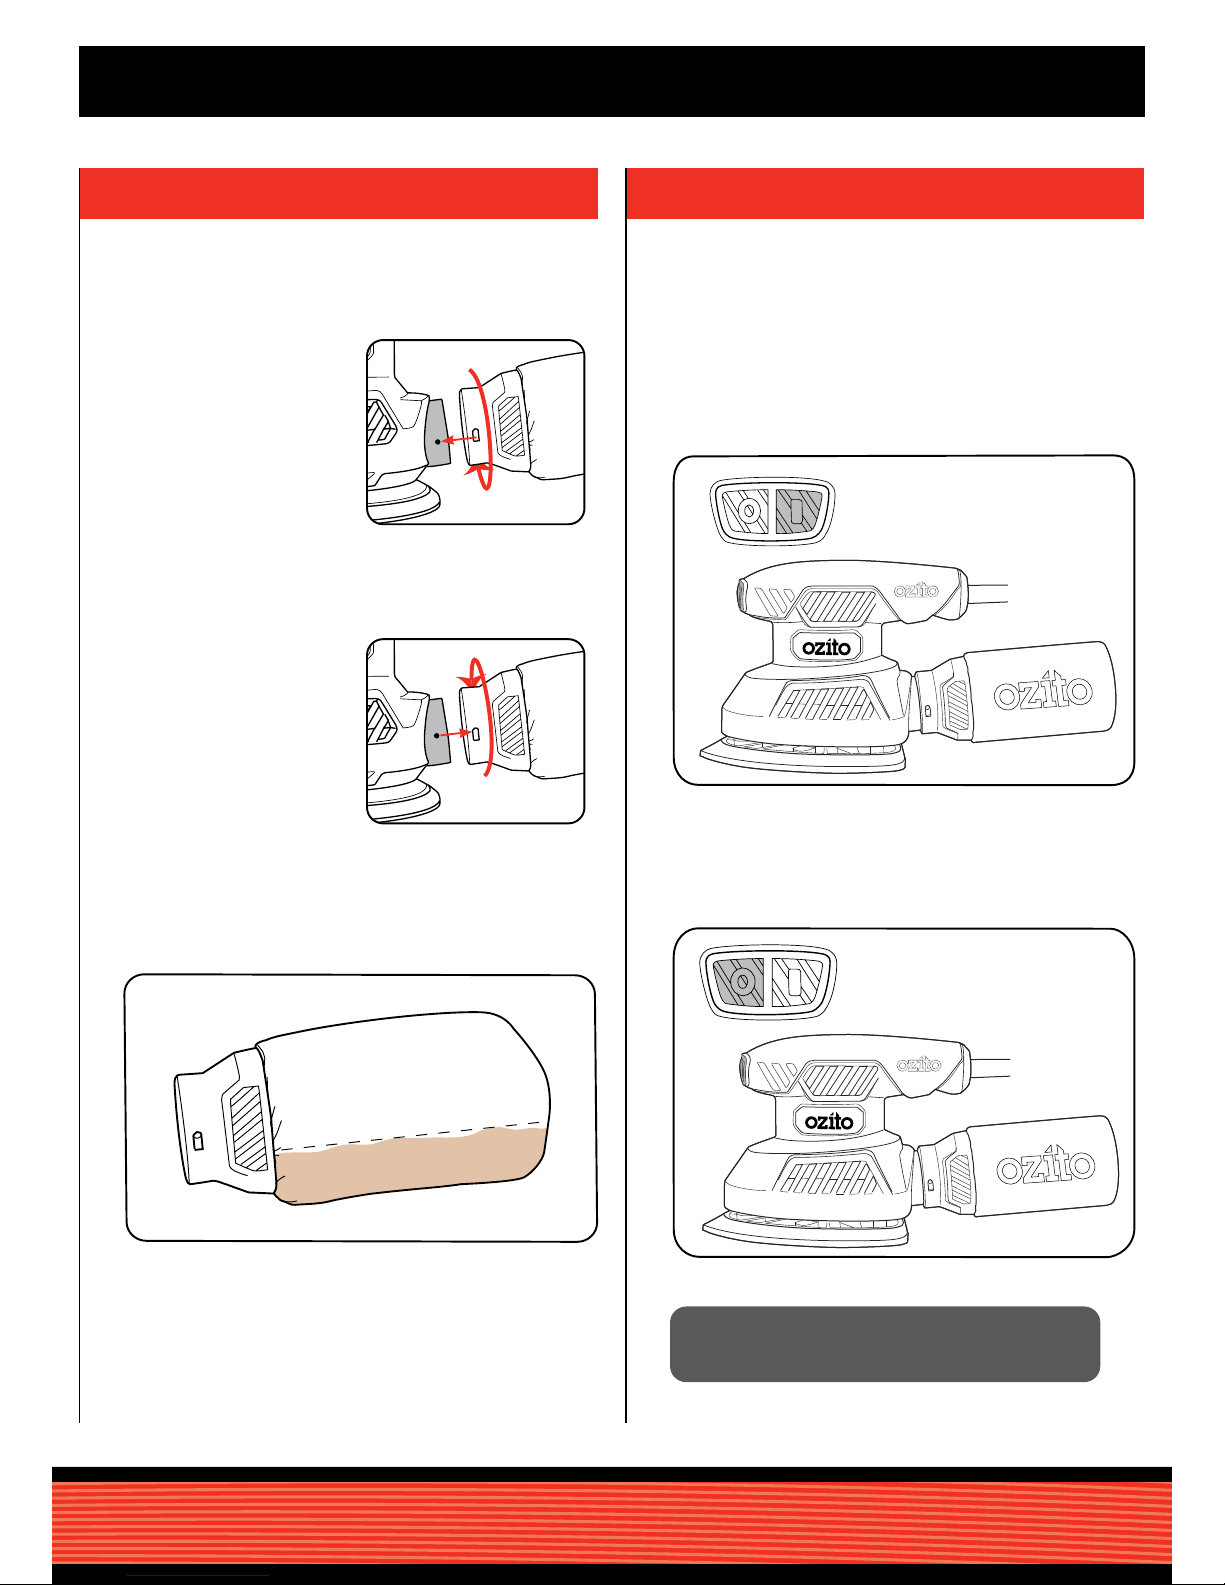
2. DUST BAG 3. ON/OFF SWITCH
2. To turn on, press the on/off switch to the “I” position.
3. To turn off, depress the on/off switch to the “0” position.
2. To remove, pull
the dust bag away
from the extraction
port.
1. Push the dust
bag onto the dust
extraction port.
CAUTION: GUIDE THE CORD DURING SANDING TO
PREVENT IT BEING CAUGHT ON THE WORKPIECE,
OR OTHER OBJECTS.
OPERATION
1/3
The tool is recommended for use with a residual current
device with a rated residual current of 30mA or less.
1. Connect the tool to the mains power supply.
2. Empty dust bag when it becomes
1
/3 full for optimum dust extraction.
Install
Remove
Empty
 Loading...