

Oregon Scientific Starck PSM06A, Starck PS-M06, Starck PS-M06U User Manual

Full Weather Station with Radio-Controlled
Clock, Projection and AM/FM Radio
(Model #: PS-M06 / PS-M06U)
User Manual
PS M06 English Cover 7/1/03, 1:52 AM1

1
EN
TABLE OF CONTENTS
About this guide ........................................................ 2
Product overview ....................................................... 3
Getting started .......................................................... 8
Batteries ............................................................... 8
AC power adapter ................................................ 8
Switch between modes ......................................... 9
Change settings .................................................... 9
Remote unit setup ...................................................... 9
Clock ...................................................................... 10
Alarm ...................................................................... 11
Calendar ................................................................. 12
Moon phase ............................................................ 13
Barometer ............................................................... 13
Weather forecast ..................................................... 15
Temperature & humidity ........................................... 15
Radio ...................................................................... 18
Backlight ................................................................. 19
Projector ................................................................. 20
Reset system ........................................................... 21
Safety and care ....................................................... 21
Warnings ................................................................. 22
Troubleshooting ....................................................... 23
Specifications .......................................................... 25
Additional resources ................................................ 28
PS M06 English R19 7/16/03, 1:05 PM1

2
EN
In this box, you will find:
• Main unit
• Remote sensor
• Batteries
• AC/DC power adapter
ABOUT THIS GUIDE
Congratulations on your selection of the Philippe Starck
with Oregon Scientific Full Weather Station with
Radio-Controlled Projection Clock and AM/FM Radio
(PS-M06 / PS-M06U). This powerful device bundles
time keeping, alarm, indoor and wireless outdoor
temperature and humidity monitoring, weather
forecasting, projection, and digital-tuned AM/FM radio
into a single tool you can use from the convenience of
your home.
Keep this manual handy as you use your new product. It
contains practical step-by-step instructions, as well as
technical specifications and warnings you should know.
PS M06 English R19 7/16/03, 1:05 PM2
3
EN
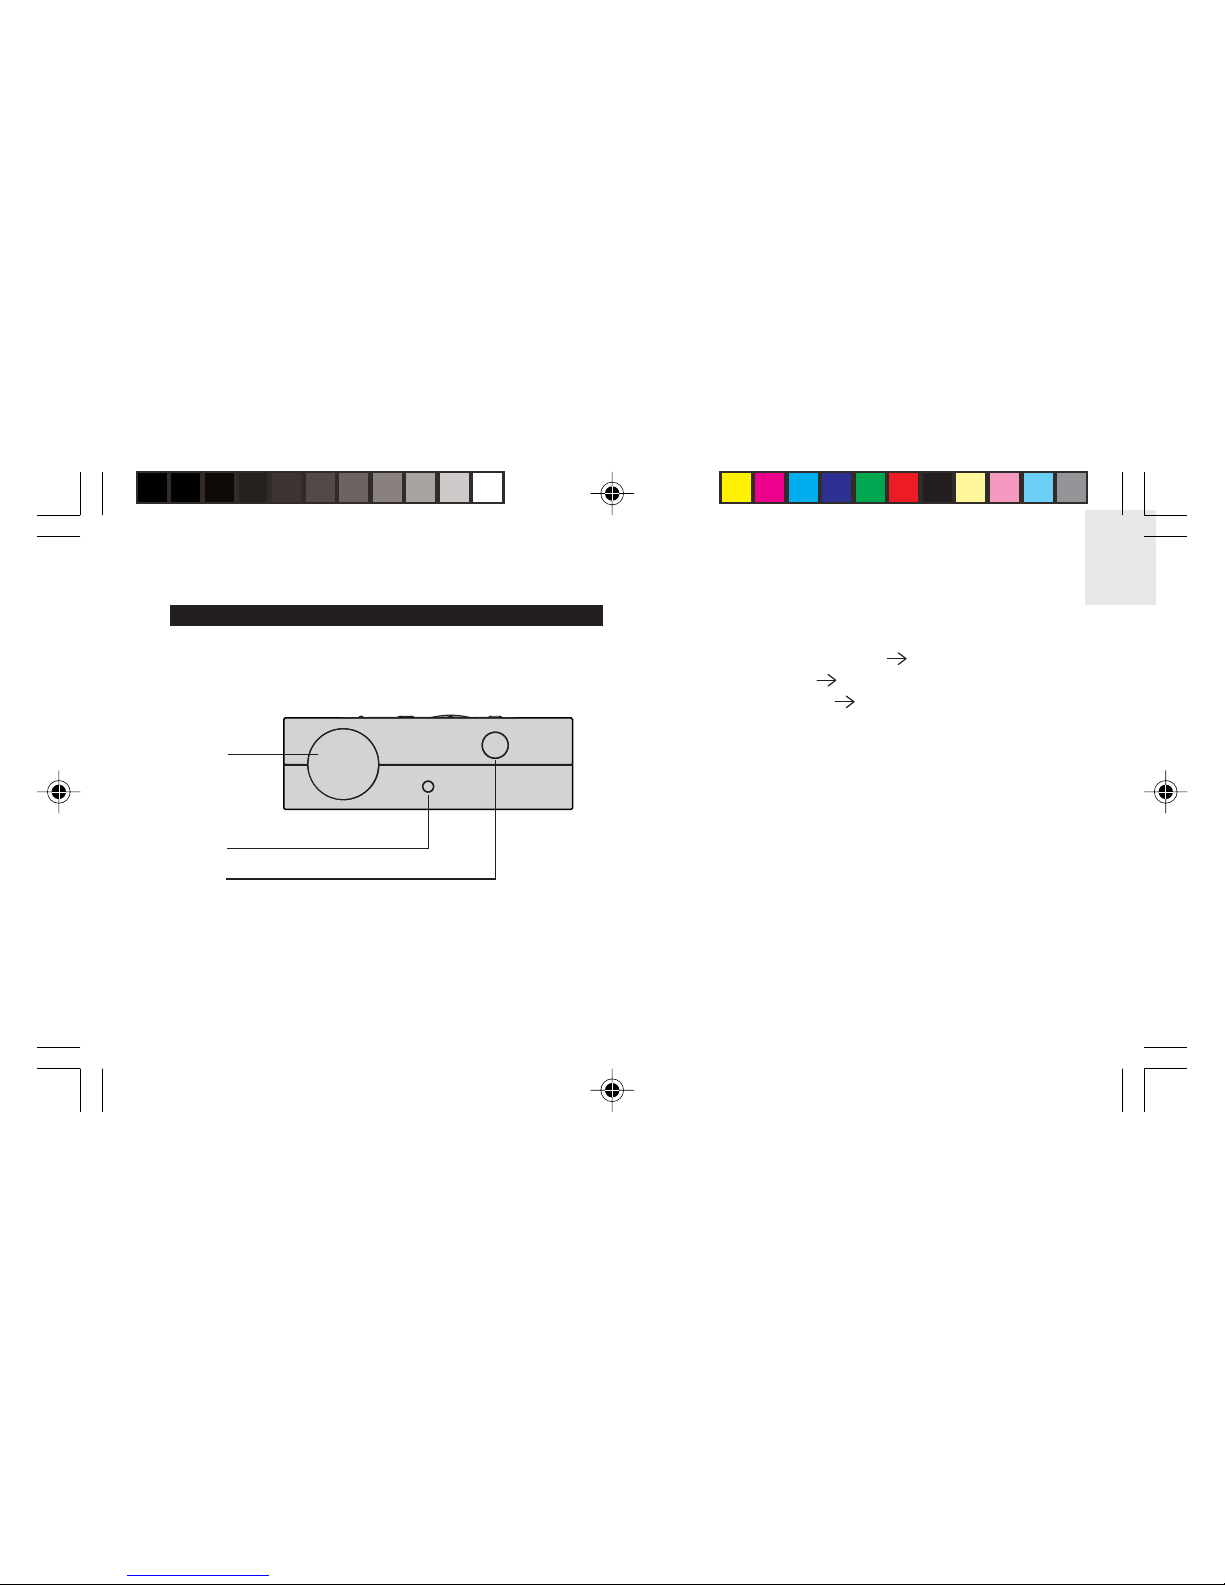
PRODUCT OVERVIEW
TOP VIEW
DESCRIPTIONS
1. Snooze / Light button (
12, 19, 20, 21)
2. Light sensor (
19)
3. Projection lens (
20)
2
1
3
PS M06 English R19 7/16/03, 1:05 PM3

4
EN
LCD DISPLAY
DESCRIPTIONS
1. Low battery icon (
8)
2. Clock (
10)
3. Barometer (
13)
4. Weather forecast (
15)
5. Moon phase (
13)
6. Calendar (
12)
7. Temperature and humidity (
15)
8. Alarm (
11)
9. Radio (
18)
1
2
3
4
5
6
7
8
9
PS M06 English R19 7/16/03, 1:05 PM4
5
EN
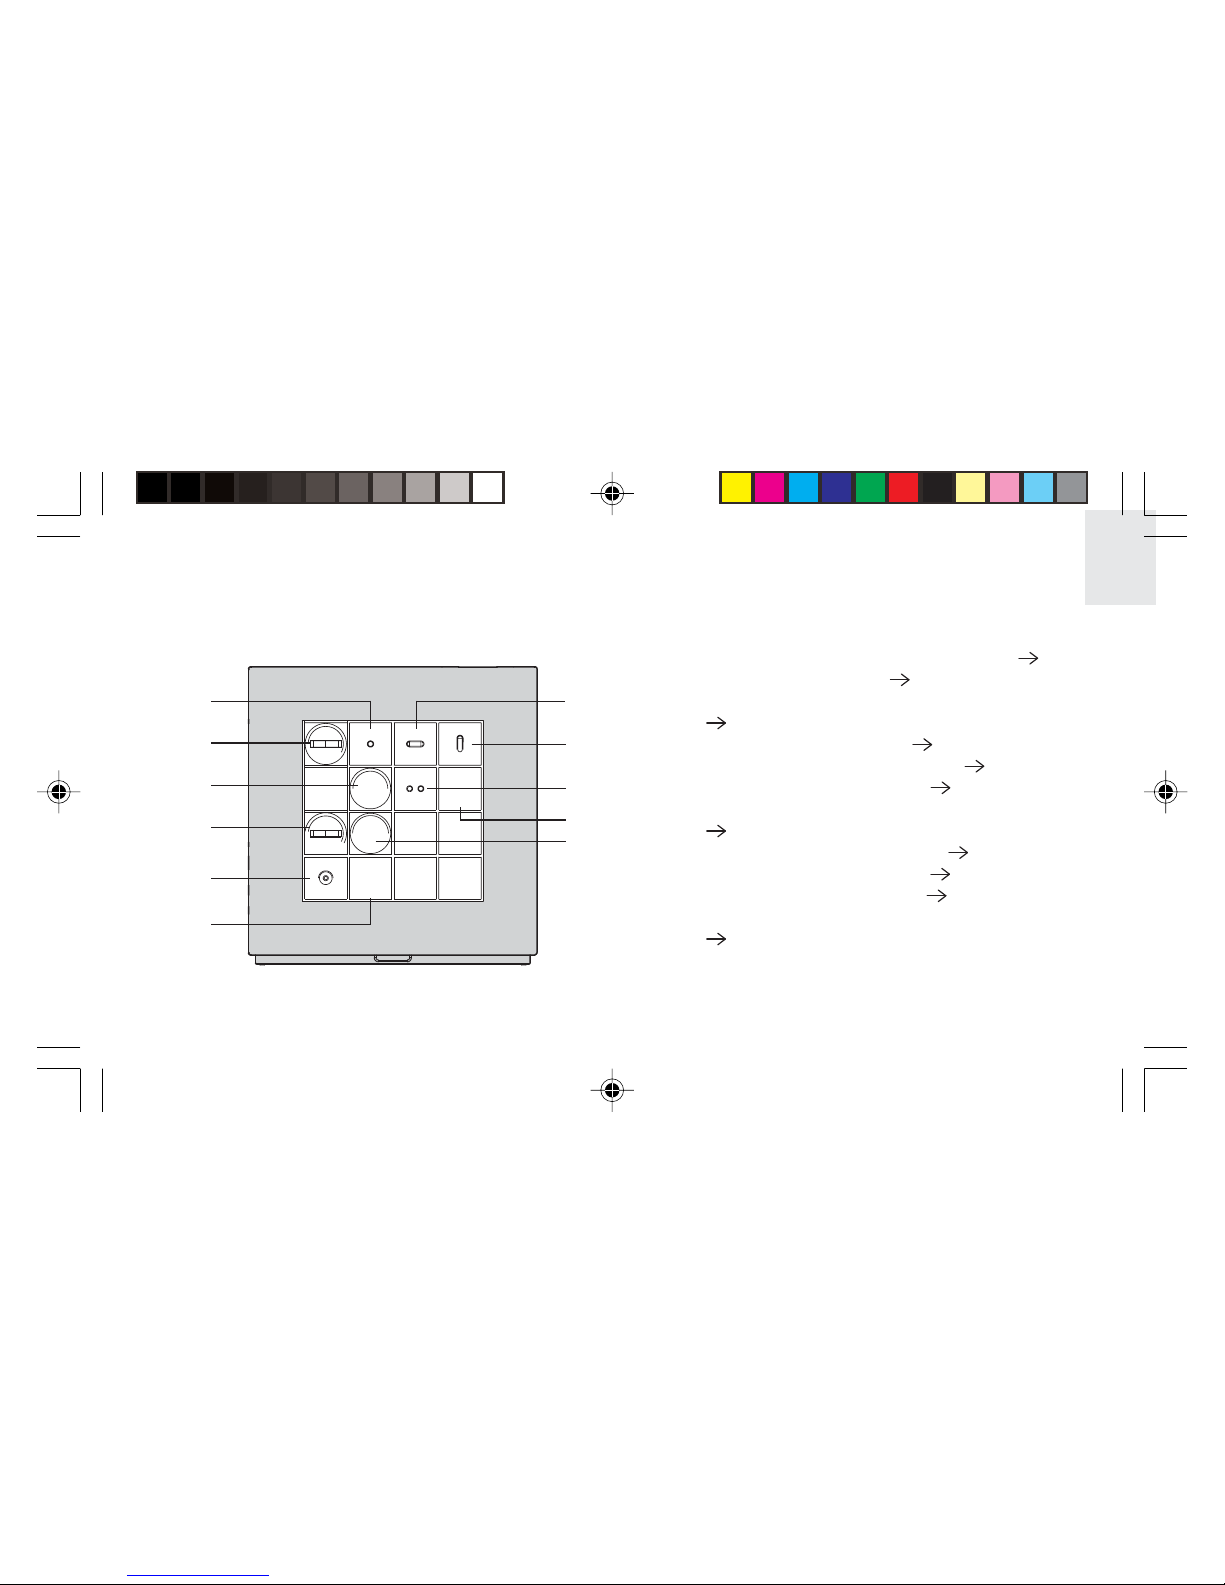
BUTTON DESCRIPTIONS
1. Select - switch modes / change settings (
9)
2. Focus - focus projector (
21)
3. Up - increase setting / activate auto-synch
(
11)
4. Rotation - rotate projector (
20)
5. Alarm -activate / deactivate alarm (
12)
6. Channel - switch remote unit (
16)
7. Radio - turn radio or radio alarm on/off
(
12, 18)
8. Station - select a preset station (
18)
9. Tuning - select AM/FM band (
18)
10. Sleep - activate Sleep Timer (
19)
11. Down - decrease setting / deactivate auto-synch
(
11)
BACK VIEW
ALARM
SELECT
UP
DOWN
CHANNEL
ROTATION
FOCUS RADIO STATION
TUNING SLEEP
1
2
3
4
10
8
11
9
5
6
7
PS M06 English R19 7/16/03, 1:05 PM5
6
EN
DC 7.5V
BOTTOM AND SIDE VIEW
DESCRIPTIONS
1. Battery compartment (
8)
2. Backlight switch (
19)
3. Reset button (
8, 21)
4. Light sensitivity knob (
20)
5. Headphone jack (
19)
6. DC power input jack (
8)
7. Antenna (
18)
AC power adapter not shown.
NOTE
3
1
4
2
6
5
7
PS M06 English R19 7/16/03, 1:05 PM6
7
EN
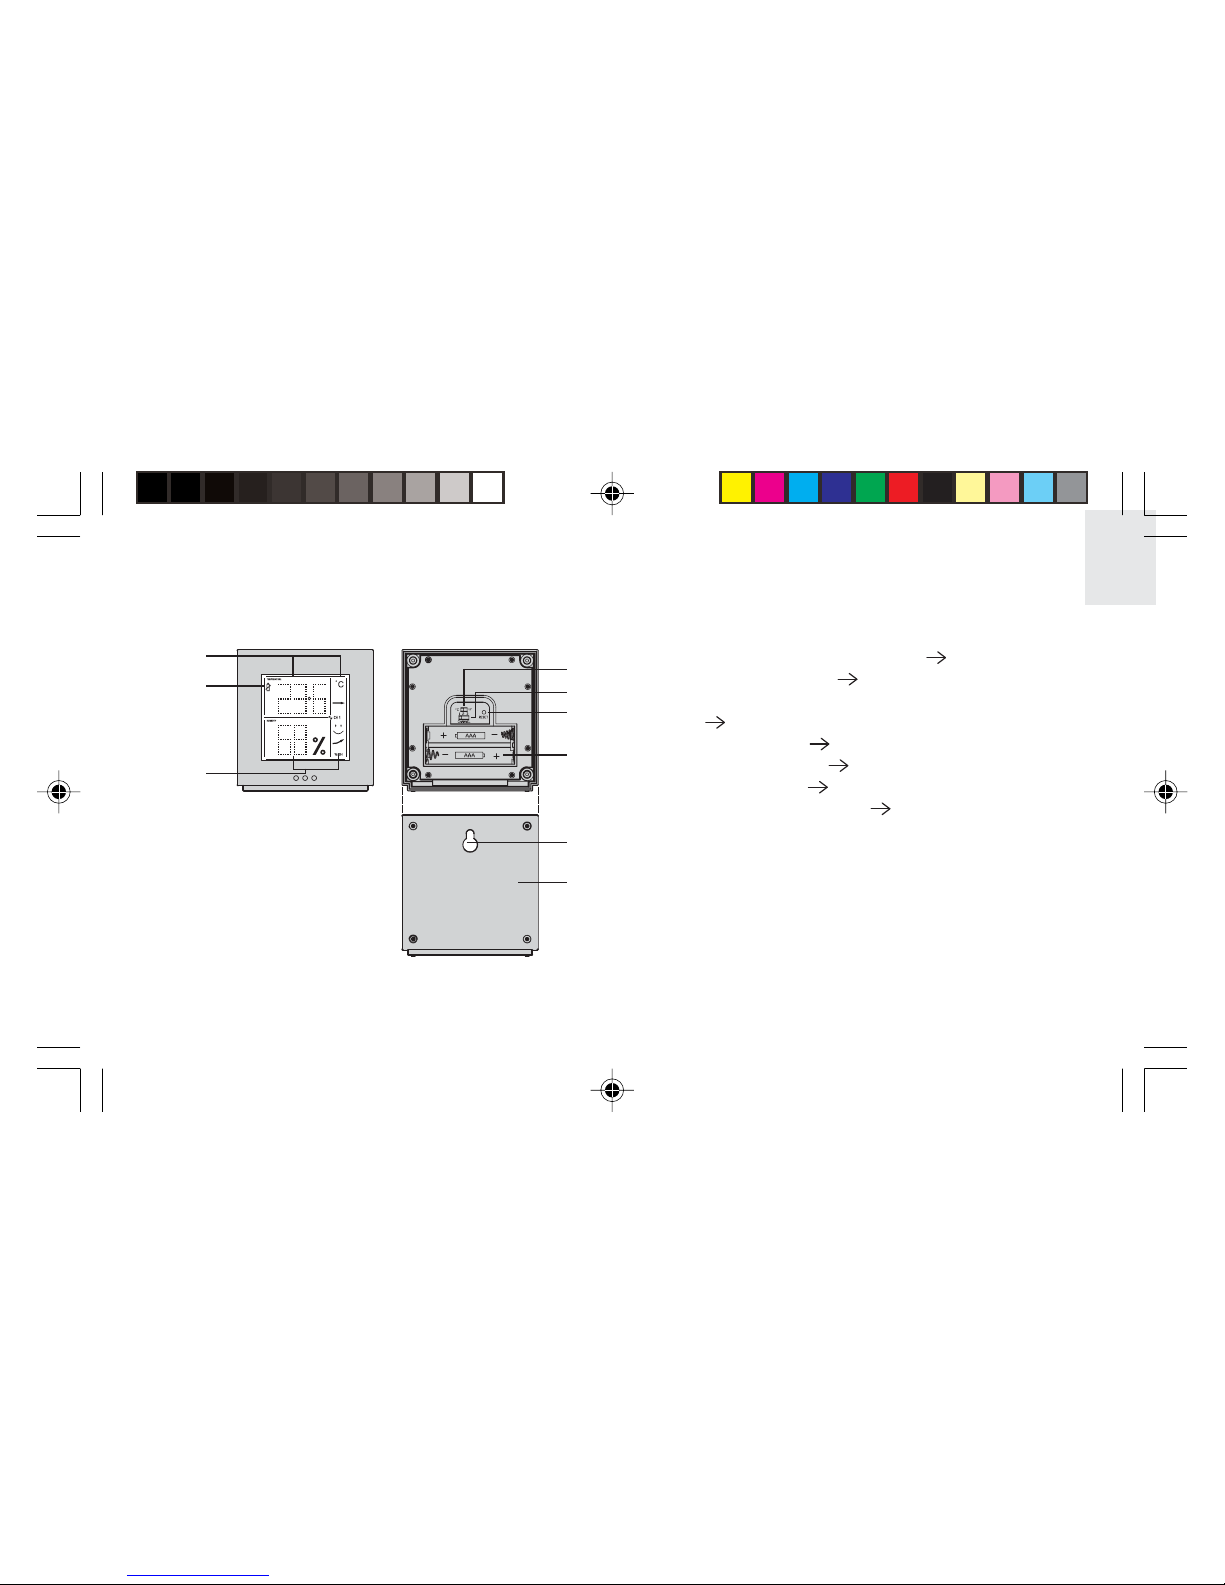
REMOTE UNIT DESCRIPTIONS
1. Temperature / Trend display (
15, 17)
2. Low battery icon (
8)
3. Humidity / Trend / Comfort Level display
(
15, 17)
4. °C/°F switch (
9)
5. Channel switch (
9)
6. Reset button (
8, 21)
7. Battery compartment (
8)
8. Wall-mount hole
9. Battery compartment lid
1
2
5
3
4
6
7
8
9
PS M06 English R19 7/16/03, 1:05 PM7

8
EN
GETTING STARTED
BATTERIES
Batteries for the remote and main units are supplied
with this product. Replace them whenever the low
battery signal (
) displays. Remove the battery
compartment lid on the bottom of the main unit, and
insert the batteries. Use a small Phillips screwdriver to
remove the remote unit compartment lid. Be sure to
match the correct polarity, as shown in the battery
compartment. Before you close the lid, press the
RESET button with the point of a blunt object (such as
a ball point pen).
Insert the batteries in the remote unit before
you set up the main unit. Do not use rechargeable
batteries.
AC POWER ADAPTER
An AC power adapter is supplied for use with the main
unit. You must connect the power adapter if you wish to
use the continuous projection or backlight features. It is
also recommended for use with the Radio. The jack is
located on the side of the unit.
If the AC power becomes unavailable, the unit
will automatically switch to battery power.
NOTE
NOTE
PS M06 English R19 7/16/03, 1:05 PM8
 Loading...