

Oregon Scientific ST275 GSL Original Instruction Manual
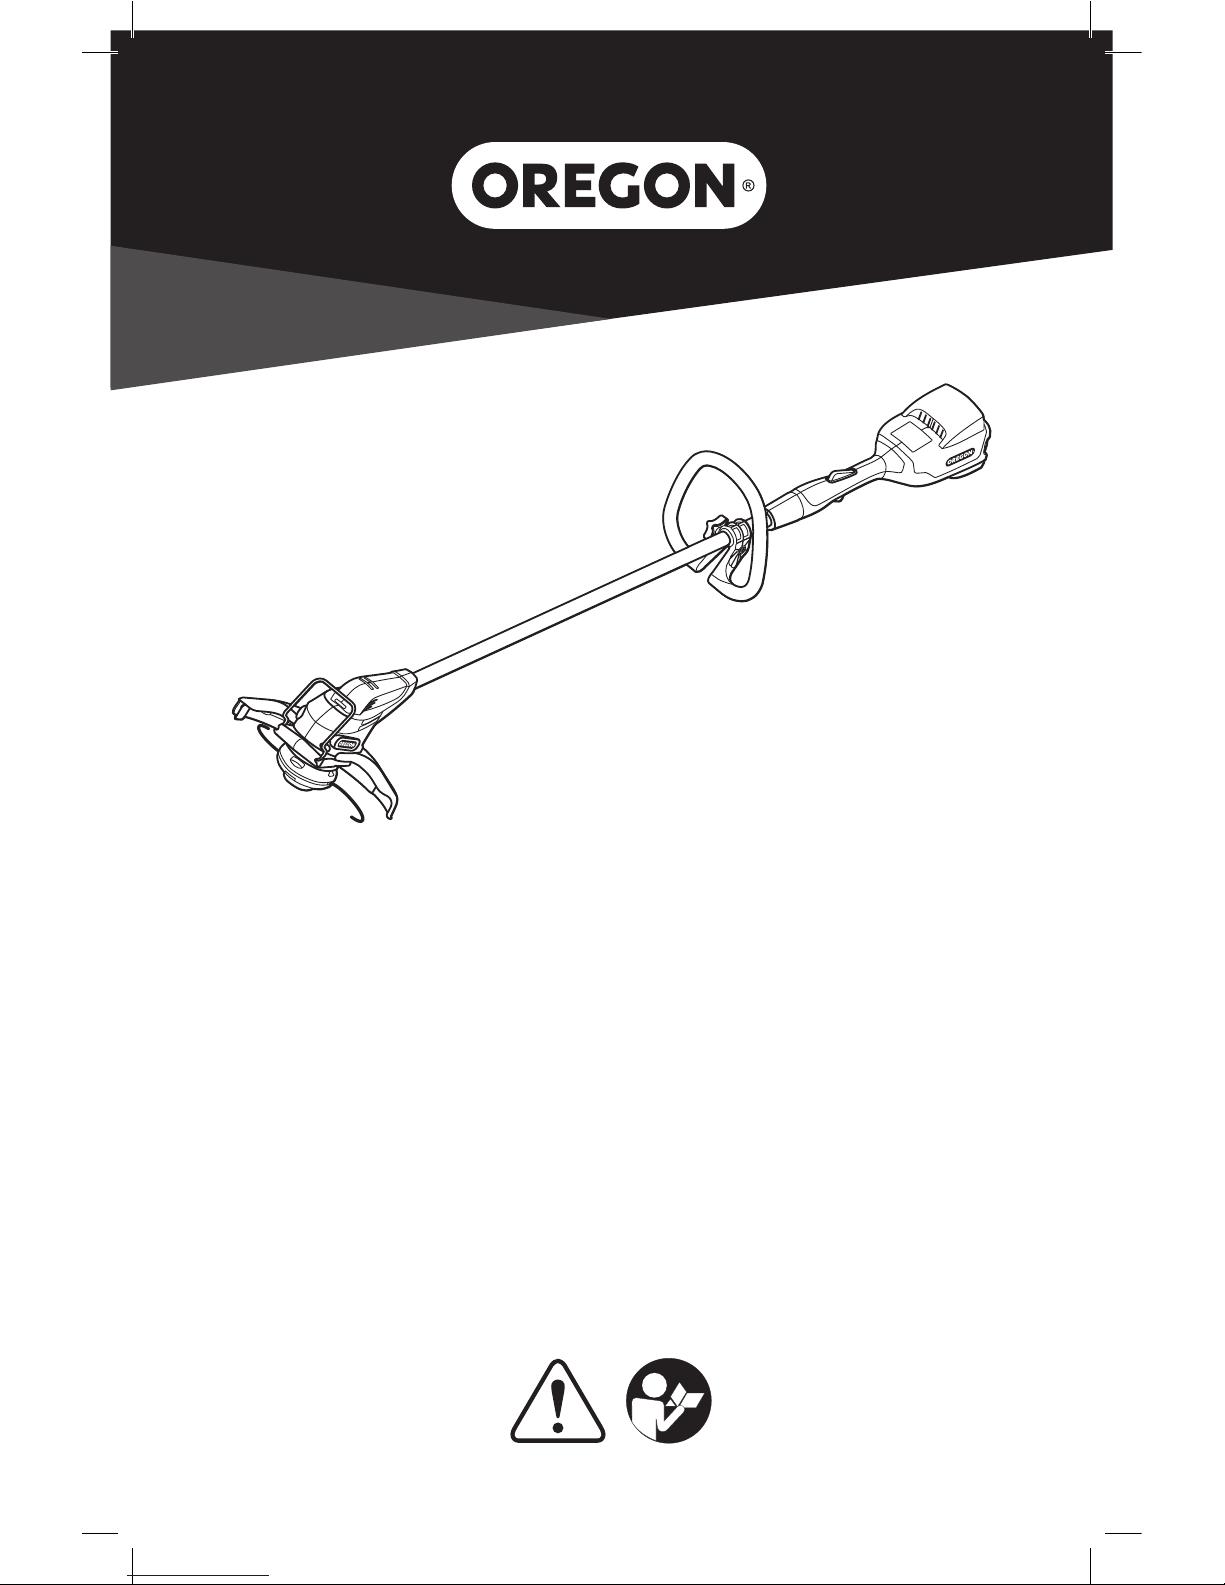
Original Instruction Manual
Trimmer/Edger Model ST275 GSL
Manuel d’Instructions Original
Taille-Bordure/Coupe-Bordure
Modèle ST275 GSL
Manual de Instrucciones Original
Podadora/Bordeadora
Modelo ST275 GSL


English . . . . . . . . . . . . . . . . . . . . . . . . . . . . . . . . . . . . . . . . . . . . . . . . . . 4
WARNING: Read and understand all safety warnings and all instructions.
Failure to follow the warnings and instructions may result in electric shock, fire and/or serious injury.
Save all warnings and instructions for future reference.
This instruction manual contains translations of a manual drafted in English and are provided to assist those
who do not speak English as their first language. Being a technical writing, some terms may not have a like or
equivalent meaning as translated. Therefore, you should not rely on this translation, and should cross-reference
the English version, where relying on the translated instructions could result in harm to your person or property.
Français. . . . . . . . . . . . . . . . . . . . . . . . . . . . . . . . . . . . . . . . . . . . . . . . . 32
AVERTISSEMENT : Prenez connaissance de tous les avertissements et consignes de sécurité.
L’inobservation de ces avertissements et consignes comporte des risques d’électrocution, d’incendie et/ou
de lésions graves. Rangez ces consignes et avertissements en lieu sûr afin de pouvoir les consulter
ultérieurement.
Ce manuel d’utilisation contient plusieurs traductions d’un document rédigé en anglais. Ces traductions visent
à aider les utilisateurs dont l’anglais n’est pas la langue maternelle. Comme il s’agit d’un document technique,
certains termes sont susceptibles de prendre une signification différente après traduction. Par conséquent,
vous ne devez pas vous fier aveuglément à cette traduction. Reportez-vous à la version anglaise si vous
percevez que le respect des consignes traduites pourrait occasionner des dommages matériels ou des lésions
corporelles.
Español. . . . . . . . . . . . . . . . . . . . . . . . . . . . . . . . . . . . . . . . . . . . . . . . . 60
ADVERTENCIA: Lea y entienda todas las advertencias de seguridad e instrucciones.
El incumplimiento de las advertencias e instrucciones puede dar lugar a descargas eléctricas, incendios o
lesiones graves. Guarde todas las advertencias e instrucciones para referencia futura.
Este manual de instrucciones contiene traducciones de un manual redactado en inglés y se ofrece para ayudar
a aquellos que no hablan inglés como primer idioma. Al tratarse de un texto técnico, algunos términos pueden
no tener un significado similar o equivalente en la traducción. Por lo tanto, no debe confiar en esta traducción, y
debería ir consultando la versión inglesa en aquellos puntos donde la confianza en las instrucciones traducidas
pueda causar daños a su persona o a la propiedad.

4
Trimmer/Edger Model ST275-GSL
Table of Contents
Table of Contents
Symbols and Labels . . . . . . . . . . . . . . . . . . . . . . . . . . . . . . . . . . . . . . . . . . .5
Trimmer/Edger Names and Terms. . . . . . . . . . . . . . . . . . . . . . . . . . . . . . . . . . .6
Product Identification . . . . . . . . . . . . . . . . . . . . . . . . . . . . . . . . . . . . . . . . . .7
Safety Rules . . . . . . . . . . . . . . . . . . . . . . . . . . . . . . . . . . . . . . . . . . . . . . . .8
General Power Tool Safety Warnings . . . . . . . . . . . . . . . . . . . . . . . . . . . .8
Work Area Safety . . . . . . . . . . . . . . . . . . . . . . . . . . . . . . . . . . . . . . . .8
Electrical Safety . . . . . . . . . . . . . . . . . . . . . . . . . . . . . . . . . . . . . . . . .8
Personal Safety . . . . . . . . . . . . . . . . . . . . . . . . . . . . . . . . . . . . . . . . .9
Power Tool Use and Care. . . . . . . . . . . . . . . . . . . . . . . . . . . . . . . . . . .10
Battery Tool Use and Care . . . . . . . . . . . . . . . . . . . . . . . . . . . . . . . . . .10
Service . . . . . . . . . . . . . . . . . . . . . . . . . . . . . . . . . . . . . . . . . . . . . .10
Trimmer/Edger Safety Warnings . . . . . . . . . . . . . . . . . . . . . . . . . . . . . . 11
Storage, Transporting, and Disposal . . . . . . . . . . . . . . . . . . . . . . . . . . . .11
Battery Safety . . . . . . . . . . . . . . . . . . . . . . . . . . . . . . . . . . . . . . . . .12
Charger Safety . . . . . . . . . . . . . . . . . . . . . . . . . . . . . . . . . . . . . . . . .13
Unpacking and Assembly . . . . . . . . . . . . . . . . . . . . . . . . . . . . . . . . . . . . . . . 14
Unpacking . . . . . . . . . . . . . . . . . . . . . . . . . . . . . . . . . . . . . . . . . . . .14
Assembly . . . . . . . . . . . . . . . . . . . . . . . . . . . . . . . . . . . . . . . . . . . . 14
Operating the Trimmer/Edger . . . . . . . . . . . . . . . . . . . . . . . . . . . . . . . . . . . . 16
Battery Pack and Charger . . . . . . . . . . . . . . . . . . . . . . . . . . . . . . . . . . 16
General Operation . . . . . . . . . . . . . . . . . . . . . . . . . . . . . . . . . . . . . . . 18
Trimming. . . . . . . . . . . . . . . . . . . . . . . . . . . . . . . . . . . . . . . . . . . . .19
Edging . . . . . . . . . . . . . . . . . . . . . . . . . . . . . . . . . . . . . . . . . . . . . . 20
Maintenance and Cleaning . . . . . . . . . . . . . . . . . . . . . . . . . . . . . . . . . . . . . . 21
Trimmer/Edger . . . . . . . . . . . . . . . . . . . . . . . . . . . . . . . . . . . . . . . . . 21
Opening the Gator® Speedload™ (GSL) . . . . . . . . . . . . . . . . . . . . . . . . . .22
Closing the GSL Head. . . . . . . . . . . . . . . . . . . . . . . . . . . . . . . . . . . . .22
Replacing the Gator® Speedload™ (GSL) . . . . . . . . . . . . . . . . . . . . . . . . .23
Removing and Replacing the Gator® Speedload™ (GSL) Head . . . . . . . . . . . . 24
Sharpening the Line Cutting Blade . . . . . . . . . . . . . . . . . . . . . . . . . . . . .25
Correcting Grass Bind . . . . . . . . . . . . . . . . . . . . . . . . . . . . . . . . . . . . .25
Battery Pack . . . . . . . . . . . . . . . . . . . . . . . . . . . . . . . . . . . . . . . . . . 26
Charger . . . . . . . . . . . . . . . . . . . . . . . . . . . . . . . . . . . . . . . . . . . . .26
Troubleshooting. . . . . . . . . . . . . . . . . . . . . . . . . . . . . . . . . . . . . . . . . . . . .27
Specifications and Components . . . . . . . . . . . . . . . . . . . . . . . . . . . . . . . . . . . 29
Warranty and Service . . . . . . . . . . . . . . . . . . . . . . . . . . . . . . . . . . . . . . . . . 30
© Blount, Inc. Pricing and specifications subject to change without notice. All rights reserved. Oregon® is a registered trademark of Blount,
Inc. in the United States and/or in other countries.
5
Trimmer/Edger Model ST275-GSL
Symbols and Labels
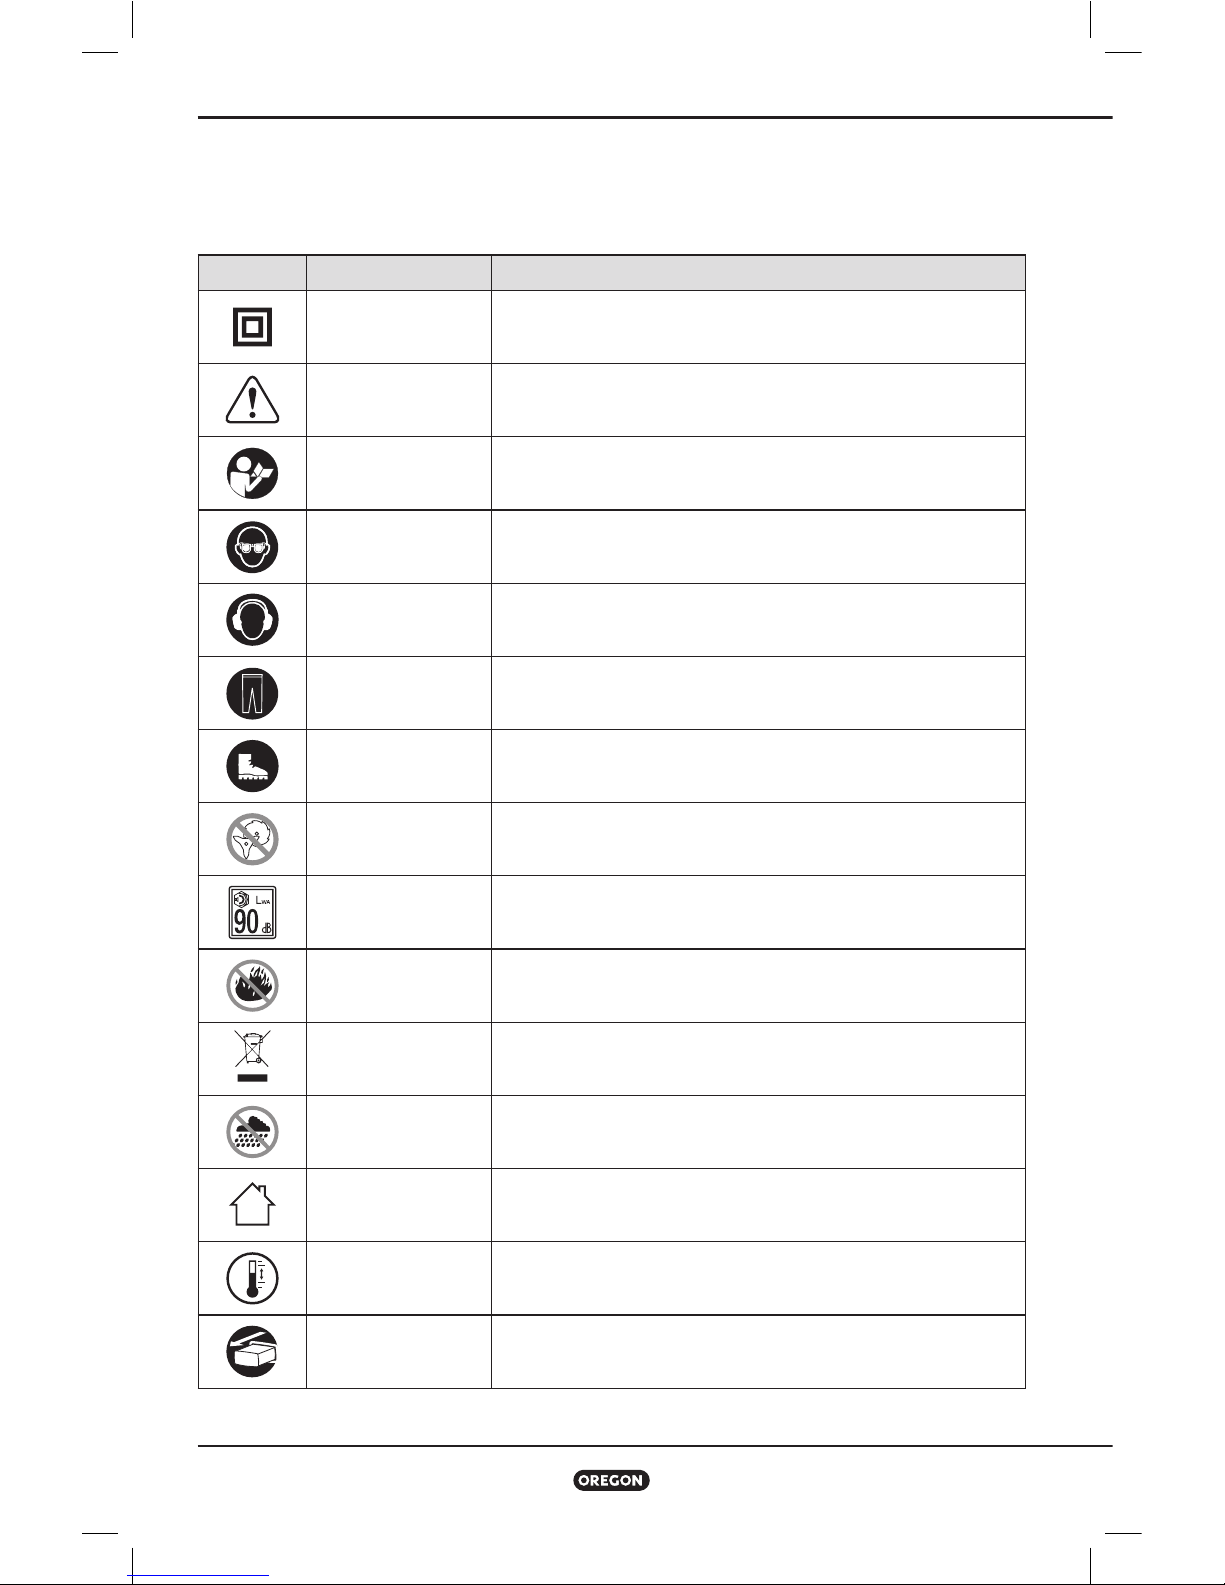
Symbols and Labels
These symbols and labels appear on the trimmer/edger, battery, and charger.
SYMBOL NAME EXPLANATION
Class II
Construction
Designated double insulated construction tools
Safety Alert
Symbol
Indicates that the text that follows explains a danger, warning, or
caution.
Read Instructions
The original instruction manual contains important safety and
operating information. Read and follow the instructions carefully.
Wear Eye
Protection
Wear eye protection when operating the trimmer/edger.
Wear Hearing
Protection
Wear hearing protection when operating the trimmer/edger.
Wear Long Pants Wear long pants when operating the trimmer/edger.
Wear Foot
Protection
Wear appropriate closed-toe work boots when operating the
trimmer/edger.
No Cutting Blade Do not install metal or plastic cutting blades.
Sound Power Sound power level is 90 dB.
Do Not Incinerate Do not dispose in flames.
Do Not Dispose
Do not throw in the household waste. Take to an authorized
recycler.
Do Not Expose to
Rain
Do not operate the charger in wet conditions.
Indoor Use Only Intended for indoor use only.
Operating
Temperature
Only use the battery pack at a temperature between 32°F to 104°F
(0°C and 40°C).
Remove Battery Remove the battery before performing any maintenance.

6
Trimmer/Edger Model ST275-GSL
Trimmer/Edger Names and Terms
Trimmer/Edger Names and Terms
Bystander safety zone: A ft ( m) circle
around the operator that must remain free from
tripping hazards, bystanders, children, and pets.
Cutting speed: The trimmer/edger has a
variable cutting speed. Press the throttle
trigger more firmly for faster cutting speed. To
get the most cutting time out of each charge,
use only the minimum cutting speed necessary
to cut the material.
Edging: The process of using the trimmer/
edger to maintain a clean line between lawn
and sidewalk, pavement, flower bed, or other
object.
Edging guide: The metal component extending
from the trimmer that helps control the
position of the trimmer head during edging.
Front handle: The support handle toward the
middle of the shaft.
Grass wrap protector: The plastic cover
between the trimmer head and the guard that
helps prevent grass bind.
Guard: The barrier between the trimmer head
and the operator.
Line cutting blade: The blade on the bottom
of the guard that limits the length of the
trimmer line.
Motor housing: The plastic cover at the end
of the shaft that holds the guard and trimmer
head.
Powerhead: The assembly at the end of the
shaft holding the battery pack.
Rear handle: The support handle, located at
or toward the rear of the trimmer/edger, where
the throttle trigger is located.
Shaft: The long portion between the
powerhead and the motor housing.
Spindle: The part protruding from the motor
housing that connects the trimmer head to the
trimmer/edger.
Throttle trigger: A device that controls the
speed of the head.
Trimmer head: The rotating assembly at the
end of the shaft, below the guard.
Trimming: The process of using the trimmer/
edger to cut grass or weeds to a manageable
height.
Trigger lock-out: A movable stop that
prevents the unintentional activation of the
trimmer/edger until manually actuated.
Wear parts: Parts such as the trimmer head
and trimmer line that wear during use and can
be replaced by the user.

7
Trimmer/Edger Model ST275-GSL
Product Identification
Product Identification
Know the Trimmer/Edger
DANGER: Use of blade attachments on the trimmer/edger may result in
serious personal injury. Do not attach metal or plastic cutting blades to the trimmer/
edger. Use nylon trimmer line only.
NOTE: See “Unpacking” for a list of included items.
TRIMMER MOTOR HOUSING
EDGING GUIDE
LINE CUTTING BLADE
SPINDLE
TRIMMER HEAD HOUSING
TRIMMER HEAD
RELEASE TABS
NUT
TRIMMER LINE
GRASS WRAP
PROTECTOR
TRIMMER HEAD COVER
PRODUCT NAME PLATE
BATTERY
PACK
BATTERY
PORT
BATTERY
RELEASE
TRIGGER LOCK-OUT THROTTLE TRIGGER
FRONT HANDLE
FRONT HANDLE
CLAMPING SCREW
SHAFT
GUARD
REAR HANDLE
8
Trimmer/Edger Model ST275-GSL
Safety Rules
Introduction
This trimmer/edger is designed for regular maintenance trimming of grass and weeds using
flexible nylon trimmer line. It is not designed to clear heavy brush or for use with any metal cutting
attachments. Any other use other than stated is not recommended. This product has been designed
in accordance with the state of the art safety technology of the time. However, even with this
technology, it is recognized that residual risk, such as thrown objects, still exist. The operator is
directed to closely read, understand, and follow all safety precautions to reduce potential injury
from these risks.
Safety Rules
General Power Tool Safety Warnings
WARNING: Read and understand all safety warnings and all instructions.
Failure to follow the warnings and instructions may result in electric shock, fire and/
or serious injury.
Save all warnings and instructions for future reference. The term “Power Tool” in the warnings
refers to your mains-operated (corded) power tool or battery operated (cordless) power tool.
Work Area Safety
• Keep work area clean and well lit.
Cluttered or dark areas invite accidents.
• Do not operate power tools in explosive
atmospheres, such as in the presence of
flammable liquids, gases or dust. Power
tools create sparks which may ignite the dust
or fumes.
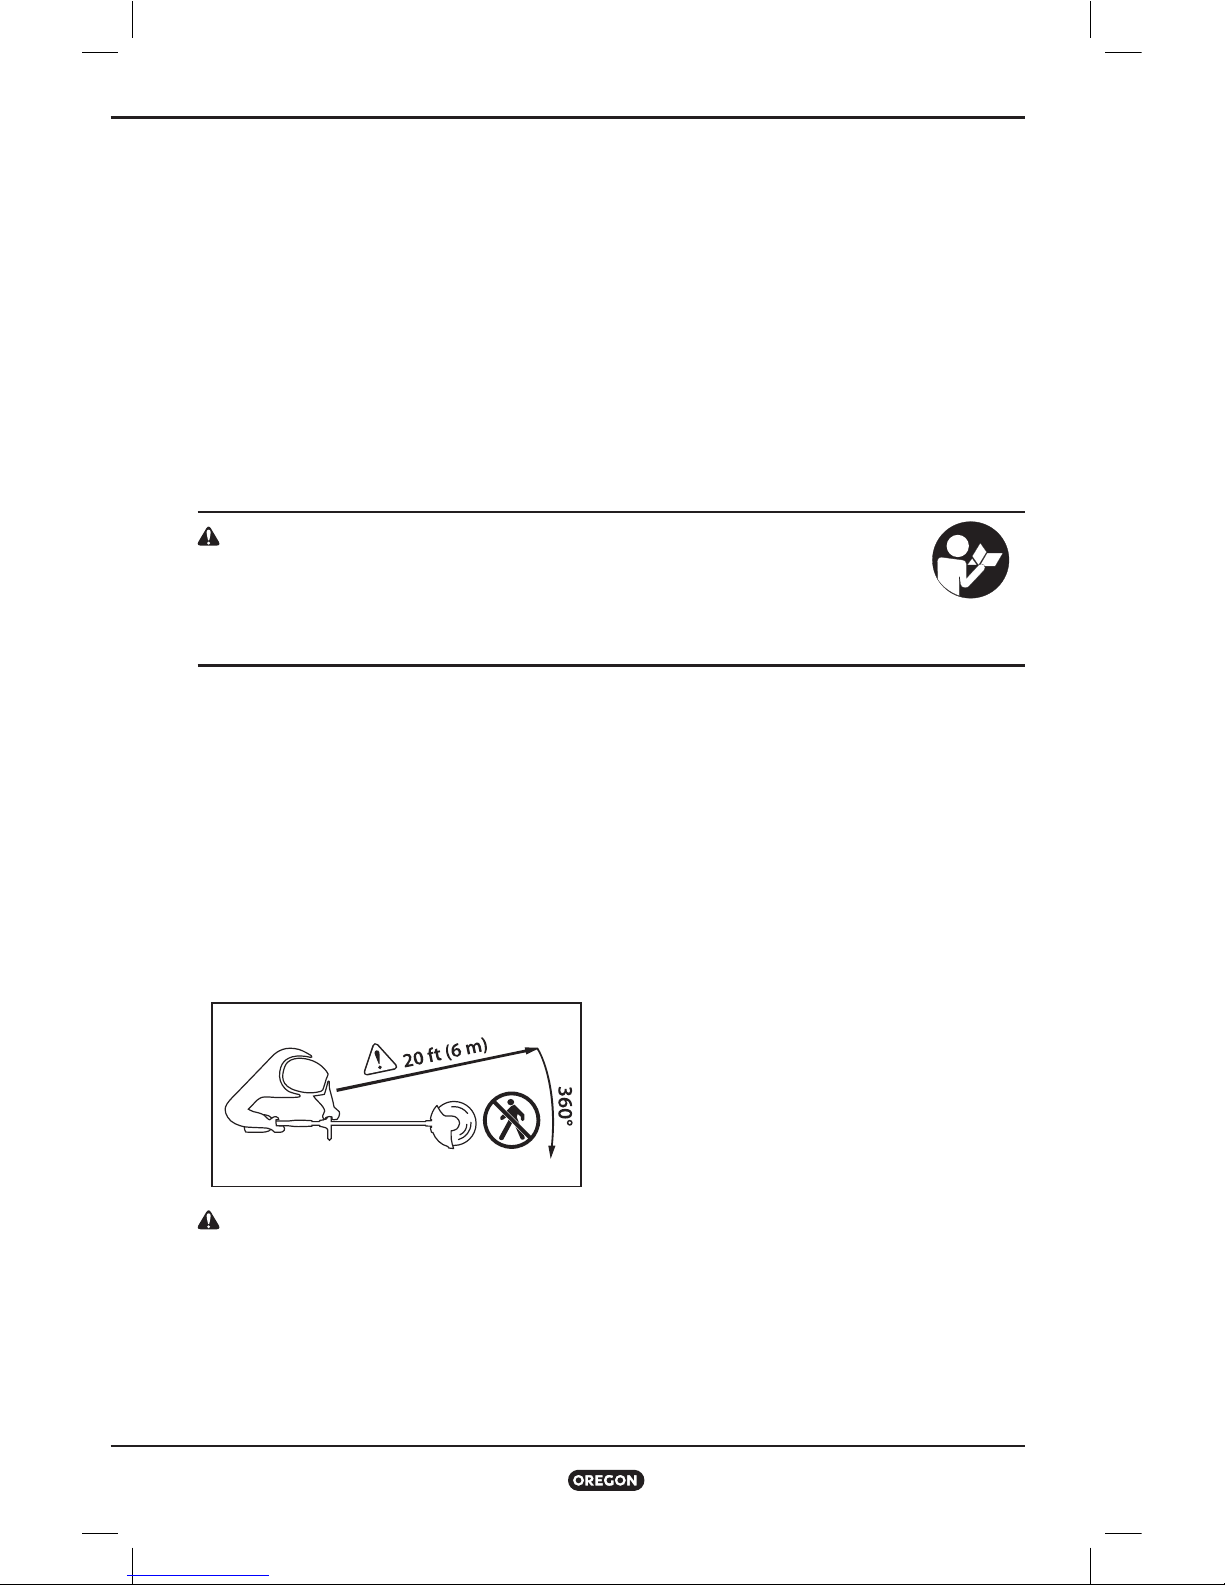
• Keep children and bystanders away while
operating a power tool (Fig. ). Distractions
can cause you to lose control.
CAUTION: Establish a bystander safety
zone of 20 ft (6 m) prior to operation of this
equipment. Bystander safety zone is a ft
( m) circle around the operator that must
remain free from bystanders, children, and
pets.
Electrical Safety
• Power tool plugs must match the outlet.
Never modify the plug in any way. Do
not use any adapter plugs with earthed
(grounded) power tools. Unmodified plugs
and matching outlets will reduce risk of
electric shock.
• Avoid body contact with earthed or
grounded surfaces such as pipes,
radiators, ranges and refrigerators. There
is an increased risk of electric shock if your
body is earthed or grounded.
• Do not expose power tools to rain or wet
conditions. Water entering a power tool will
increase the risk of electric shock.
• Do not abuse the cord. Never use the cord
for carrying, pulling or unplugging the
power tool. Keep cord away from heat, oil,
sharp edges or moving parts. Damaged or
entangled cords increase the risk of electric
shock.
• Hold the power tool by insulated gripping
surfaces only, because the trimmer
may contact hidden wiring. Power tools
contacting a “live” wire may make exposed
metal parts of the power tool “live” and could
give the operator an electric shock.
FIG. 1
9
Trimmer/Edger Model ST275-GSL
Safety Rules
Personal Safety
• Stay alert, watch what you are
doing and use common sense when
operating a power tool. Do not use
a power tool while you are tired or
under the influence of drugs, alcohol or
medication. A moment of inattention while
operating power tools may result in serious
personal injury.
• Use personal protective equipment.
Always wear eye protection. Protective
equipment such as dust mask, non-skid safety
shoes, hard hat, or hearing protection used for
appropriate conditions will reduce personal
injuries.
• Use personal protective equipment.
Always wear long pants and foot
protection.
• Prevent unintentional starting. Ensure
the switch is in the off-position before
connecting to power source and/or
battery pack, picking up or carrying the
tool. Carrying power tools with your finger on
the switch or energizing power tools that have
the switch on invites accidents.
• Remove any adjusting key or wrench
before turning the power tool on. A wrench
or a key left attached to a rotating part of the
power tool may result in personal injury.
• Do not overreach. Keep proper footing and
balance at all times (Fig. ). This enables
better control of the power tool in unexpected
situations.
• Dress properly. Do not wear loose clothing
or jewelry. Keep your hair, clothing and
gloves away from moving parts. Loose
clothes, jewelry or long hair can be caught in
moving parts.
• If devices are provided for the connection
of dust extraction and collection facilities,
ensure these are connected and properly
used. Use of dust collection can reduce dust-
related hazards.
• Prolonged use of power tools has been
reported to cause vascular, muscular, or
neurological disorders (such as vibration
white finger or Raynaud’s syndrome).
To reduce the risk of injury, follow these
instructions:
– Wear gloves and keep hands and body
warm.
– Maintain a firm grip on the trimmer/
edger, but do not use prolonged,
excessive pressure.
– Take frequent breaks.
The vibration in normal use can differ from
the values stated in the “Specifications and
Components” table depending on the material
being cut, maintenance of the cutting system,
and other factors.
FIG. 2

10
Trimmer/Edger Model ST275-GSL
Safety Rules
Power Tool Use and Care
• Do not force the power tool. Use the
correct power tool for your application.
The correct power tool will do the job
better and safer at the rate for which it was
designed.
• Do not use the power tool if the switch
does not turn it on and off. Any power tool
that cannot be controlled with the switch is
dangerous and must be repaired.
• Disconnect the plug from the power
source and/or the battery pack from
the power tool before making any
adjustments, changing accessories, or
storing power tools. Such preventive safety
measures reduce the risk of starting the
power tool accidentally.
• Store idle power tools out of the reach
of children and do not allow persons
unfamiliar with the power tool or these
instructions to operate the power tool.
Power tools are dangerous in the hands of
untrained users.
• Maintain power tools. Check for
misalignment or binding of moving
parts, breakage of parts and any other
condition that may affect the power tool’s
operation. If damaged, have the power
tool repaired before use. Many accidents
are caused by poorly maintained power tools.
• Keep cutting tools sharp and clean.
Properly maintained cutting tools with sharp
cutting edges are less likely to bind and are
easier to control.
• Use the power tool, accessories and
tool bits etc. in accordance with these
instructions, taking into account the
working conditions and the work to
be performed. Use of the power tool for
operations different from those intended could
result in a hazardous situation.
Battery Tool Use and Care
• Recharge only with the charger specified
by the manufacturer. A charger that is
suitable for one type of battery pack may
create a risk of fire when used with another
battery pack.
• Use power tools only with specifically
designated battery packs. Use of any other
battery packs may create a risk of injury and
fire.
• When battery pack is not in use, keep it
away from other metal objects, like paper
clips, coins, keys, nails, screws or other
small metal objects, that can make a
connection from one terminal to another.
Shorting the battery terminals together may
cause burns or a fire.
• Under abusive conditions, liquid may be
ejected from the battery; avoid contact. If
contact accidentally occurs, flush with water.
If liquid contacts eyes, additionally seek
medical help. Liquid ejected from the battery
may cause irritation or burns.
Service
Have your power tool serviced by a
qualified repair person using only identical
replacement parts. This will ensure that the
safety of the power tool is maintained.
11
Trimmer/Edger Model ST275-GSL
Safety Rules
Trimmer/Edger Safety Warnings
WARNING: Contact with moving trimmer
line can cause serious personal injury. Avoid
contact with the rotating trimmer line.
WARNING: The use of the trimmer/
edger without the proper guard or handle
provided may result in serious personal
injury. Only use with handle and guard properly
assembled to trimmer/edger.
CAUTION: Contact with moving parts
can cause injury. Avoid contact with the
rotating trimmer head.
CAUTION: The line cutting blade on
bottom of the guard is sharp. Do not grasp
the line cutting blade when picking up or
holding the trimmer/edger.
Other than the wear parts identified in this
manual, the trimmer/edger has no user
serviceable parts. Service and repair work
requires special training. See “Warranty and
Service” for contact information.
Storage, Transporting, and
Disposal
Storing the Trimmer/Edger
• Remove the battery pack from the trimmer/
edger.
• Clean the trimmer/edger thoroughly.
• Store in a dry place.
• Keep out of reach of children or pets.
Storing the Battery Pack
When storing the battery pack longer than nine
months, follow these guidelines:
• Remove the battery pack from the trimmer/
edger or charger.
• Store in a cool, dry place.
• Keep out of reach of children or pets.
• To prolong battery life, never store battery
packs in a completely discharged condition
(with no indicator lights lit) (Fig. ).
• Store at a temperature between -°F to °F
(-°C to °C).
FIG. 3
INDICATOR LIGHTS

12
Trimmer/Edger Model ST275-GSL
Safety Rules
Storing the Charger
• Remove battery pack from the charger.
• Disconnect charger from power source.
• Store in a dry place.
• Keep out of reach of children or pets.
See “Maintenance and Cleaning” for more
information.
Transporting the Trimmer/Edger
Prepare the trimmer/edger as described in
“Storage, Transporting and Disposal” before
shipping.
Transporting the Battery Pack
Observe national regulations when shipping
lithium ion batteries. Special package labelling
may be required.
Trimmer/Edger and Charger Disposal
The Oregon® product is designed and
manufactured with high quality materials
and components which can be recycled and
reused. Please dispose of this equipment in
an environmentally correct manner at a local
community waste collection/recycling center.
Battery Pack Disposal
Do not dispose of battery pack in household
garbage or incinerate. Local waste
management and recycling agencies have
information on proper recycling or disposal
instructions. Battery packs can be collected in
the United States or Canada through
Rechargeable Battery Recycling Corporation.
Oregon® has already paid the costs involved to
recycle battery packs. Return end of life battery
packs to participating retailer or recycling
center. Return locations and more information
can be found at www.callrecycle.org or
--BATTERY.
Battery Safety
WARNING: Improper battery care
can cause the battery to leak hazardous
chemicals, overheat, emit smoke, burst,
flare, explode, and/or ignite. Follow these
safety rules.
CAUTION: Do not dispose of the
battery pack in the household waste or
fire. Lithium ion battery packs should be
recycled by a local authorized recycler.
IMPORTANT: Exposure to excessive heat
can cause a loss in performance and/or
service life. Do not expose battery pack to
excessive heat, such as the interior of a
vehicle in hot weather.
• Do not attempt to recharge a non-
rechargeable battery pack.
• Do not disassemble or modify the battery
pack. This can damage safety features.
• Do not connect the positive (+) and negative
(-) terminals with metal objects or store the
battery pack with metal objects such as coins
or screws. This can cause short-circuiting and
generate enough heat to cause burns.
• Do not incinerate the battery pack or expose
to excessive heat. This can melt insulation or
damage safety features.
• Do not use, charge, or store near heat higher
than °F (°C). This can cause overheating
and internal short-circuiting.
• Do not expose to extremely wet conditions.
This can damage safety features, cause
extremely high current and voltage charging,
and lead to abnormal chemical reactions.
Use only the charger specifically designed
for the battery pack, and follow the safety
precautions described in “Charger Safety”.
Using another charger can damage safety
features, cause extremely high current and
voltage charging, and lead to abnormal
chemical reactions.

13
Trimmer/Edger Model ST275-GSL
Safety Rules
• Do not use Oregon® branded battery packs in
non-Oregon® branded tools.
• Do not strike, pierce, or throw the battery
pack, and do not use a damaged or deformed
battery pack.
• If recharging fails, do not attempt to recharge.
• If the battery pack gives off an odour,
generates heat, or is discolored, deformed, or
abnormal in any way during use, recharging,
or storage, immediately remove from the
trimmer/edger or charger.
• Any liquid leaking from the battery is
corrosive, can damage eyes and skin, and may
be toxic if swallowed.
Charger Safety
IMPORTANT SAFETY INSTRUCTIONS
WARNING: Risk of electric shock. When
used outdoors, install only to a covered
“Class A” GFCI protected receptacle
that is weatherproof with the power unit
connected to the receptacle. If one is not
provided, contact a qualified electrician
for proper installation. Ensure that the
power unit and cord do not interfere with
completely closing the receptacle cover.
IMPORTANT: This appliance is not intended
for use by persons (including children)
with reduced physical, sensory or mental
capabilities, or lack of knowledge, unless
they have been given supervision or
instruction by a person responsible for
their safety. Children should be supervised
to ensure that they do not play with the
appliances.
IMPORTANT: Use this charger only with the
supplied power cord, making sure that the
input plug correctly mates to the output
receptacle.
When using electrical products, basic
precautions should always be practiced
including the following:
• Read and follow all safety instructions
before use. Read and follow all instructions
that are on the product or provided with the
product.
• Save these instructions.
• Do not use an extension cord.
• Damaged or entangled cords increase
the risk of electric shock. Do not abuse the
cord. Never use the cord for carrying, pulling
or unplugging the power tool. Keep cord away
from heat, oil, sharp edges or moving parts.
• Do not expose the charger to rain.
For indoor use only.
• Do not use within m ( ft) of a pool.
• Do not use in a bathroom.
14
Trimmer/Edger Model ST275-GSL
Unpacking and Assembly
Unpacking and Assembly
Unpacking
What’s in the box?
The trimmer/edger requires some assembly
before use. These items ship with the trimmer/
edger:
• Trimmer/Edger
• Front handle
• Front handle adjustment knob
• Guard with two () attachment screws
• Charger and power cord (if so equipped)
• Battery (if so equipped)
After removing the trimmer/edger from the box,
inspect it carefully to ensure no damage has
occurred during shipping and that no parts are
missing. If any parts are damaged or missing,
do not use the trimmer/edger. Contact Oregon®
Cordless Tool System to obtain replacement
parts at ...
Assembly
DANGER: To avoid serious personal
injury, do not operate the trimmer/
edger without the front handle and guard
attached.
WARNING: A battery operated tool with
the battery pack inserted is always on and
can start accidentally. Remove the battery
pack from the trimmer/edger before
attaching the guard and front handle.
15
Trimmer/Edger Model ST275-GSL
Unpacking and Assembly
Attaching the Front Handle
The front handle fits on the shaft at a
comfortable distance between the rear handle
and the trimmer motor housing (Fig. ).
• Grip the front handle near the clamping
point ().
• Snap the front handle onto the shaft so that
the clamp is nearest the rear handle ().
• Insert the front handle adjustment knob
through the hole on the front handle () and
tighten.
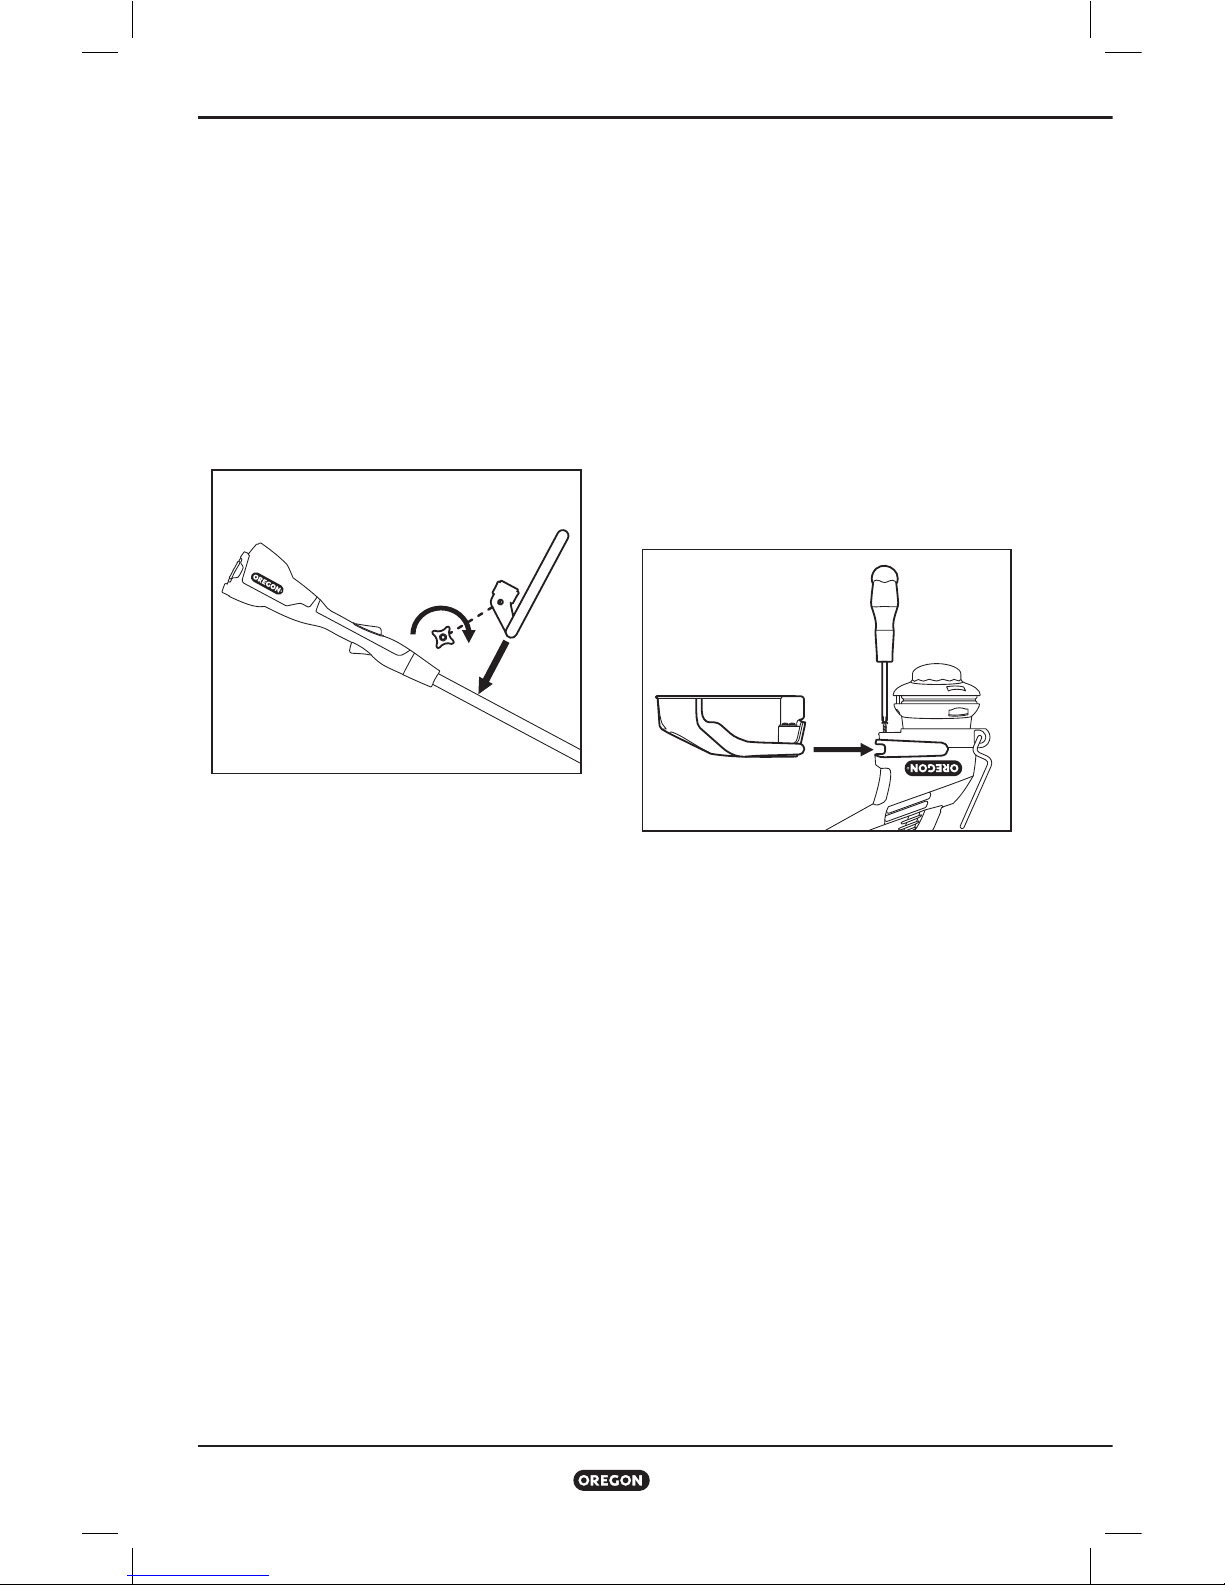
Attaching the Guard
The guard fits onto the slot on the trimmer
motor housing (Fig. ).
• Turn the trimmer/edger upside down.
• Slide the guard onto the trimmer until it snaps
into place ().
• Tighten the screws on the housing () until
fully seated to hold the guard in place.
• Make sure that the line cutting blade ()
is attached to the guard to insure that the
trimmer/edger functions correctly.
IMPORTANT: Install the screws to make
sure the guard stays in place.
(2)
(1)
(3)
FIG. 4
FIG. 5
(1)
(2)
(3)
16
Trimmer/Edger Model ST275-GSL
Operating the Trimmer/Edger
Operating the Trimmer/Edger
Battery Pack and Charger
WARNING: To reduce the risk of shock,
do not charge the battery pack in the rain.
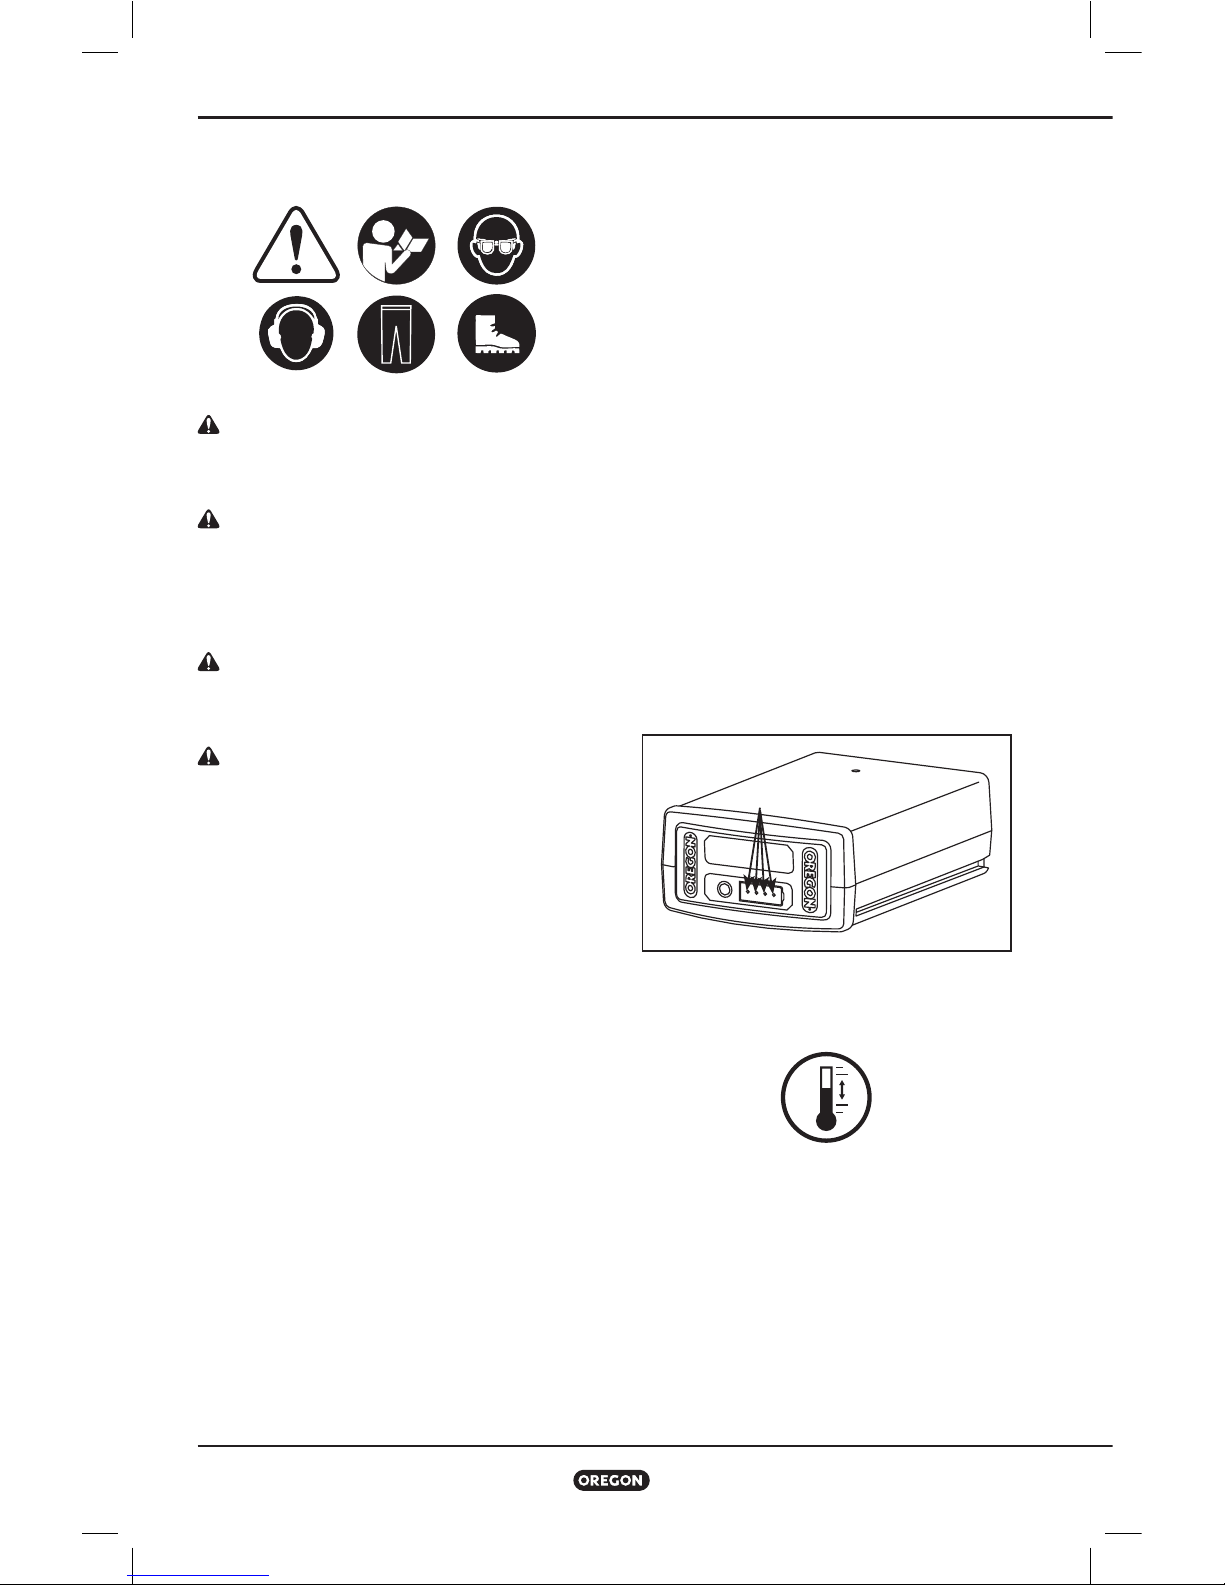
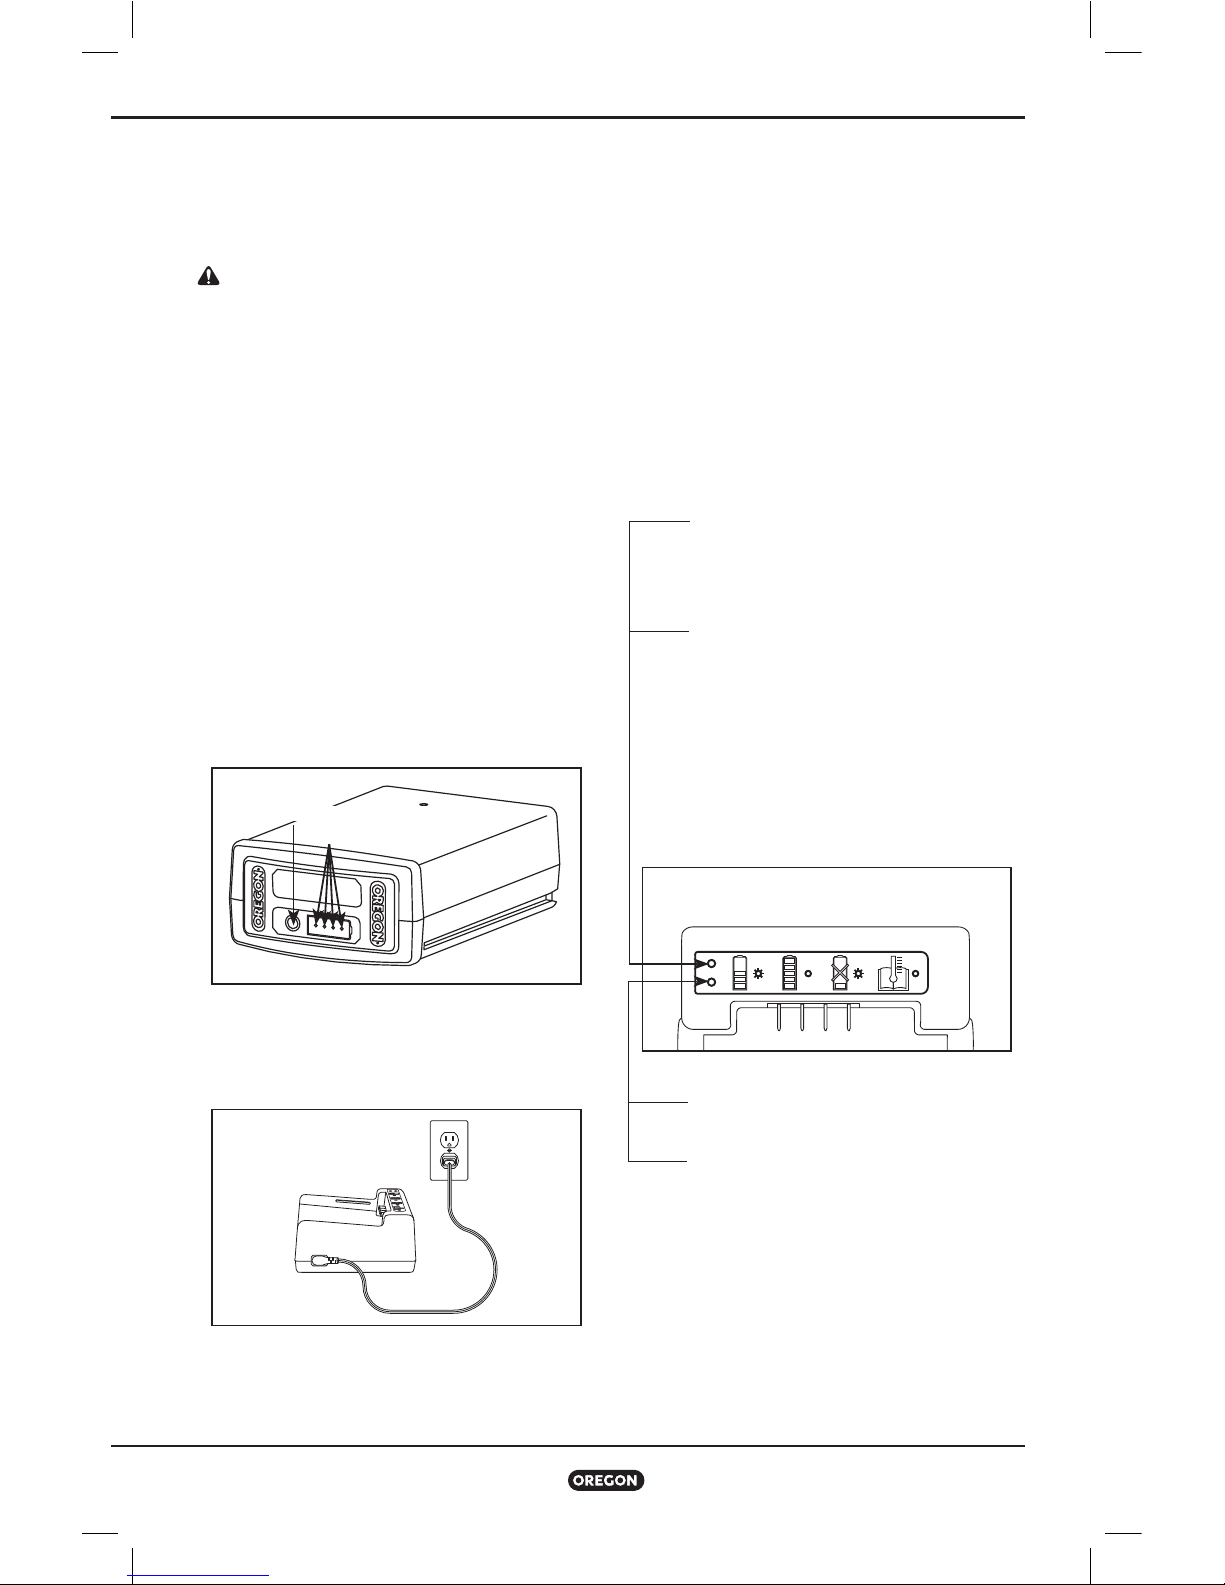
Battery Pack LED Charge-Level Indicator
The lithium ion battery pack is equipped with an
LED charge-level indicator. To test the charge
level of the battery pack, press the indicator
button on the battery pack’s face (Fig. ).
No lights: recharge.
One steady green light:
less than charged.
Charge battery pack before use.
Two steady green lights:
– charged.
Three steady green lights:
– charged.
Four steady green lights:
– charged.
Connecting the Charger
If the charger includes a separate power cord,
connect the charger cord to the charger and to
the proper electrical outlet (Fig. ).
Only use the cord set that was supplied with
the charger. At first use, verify that the plug
type matches the receptacle.
Charger LED Charge-State Indicator
The battery charger is equipped with an LED
charge-state indicator that indicates the state
of charging as well as conditions that may
delay or prevent charging (Fig. ).
Note: Until a battery pack is inserted, no lights
will be visible.
Blinking orange light: a fault condition
exists. There are several potential
causes. See “Troubleshooting” in this
manual.
Steady orange light: the battery pack
temperature is beyond the acceptable
range (°F/°C to °F /°C). Allow
the battery pack to reach the
acceptable temperature range before
charging. The pack may be left on the
charger as the temperature adjusts.
Charging will begin when the proper
temperature is reached.
Blinking green light: battery pack is
charging.
Steady green light: battery pack is
ready for use.
FIG. 6
INDICATOR LIGHTS
INDICATOR BUTTON
FIG. 7
FIG. 8
17
Trimmer/Edger Model ST275-GSL
Operating the Trimmer/Edger
Charging the Battery Pack
WARNING: Failure to follow proper
charging procedures may cause excessive
voltage, excessive current flow, loss
of control during charging, leakage of
hazardous chemicals, heat generation,
bursting, or fire. Follow these charging
instructions.
With the charger cord connected to the charger
and plugged into an electrical outlet, align the
grooves in the battery with the rails on the
charger and slide the battery pack onto the
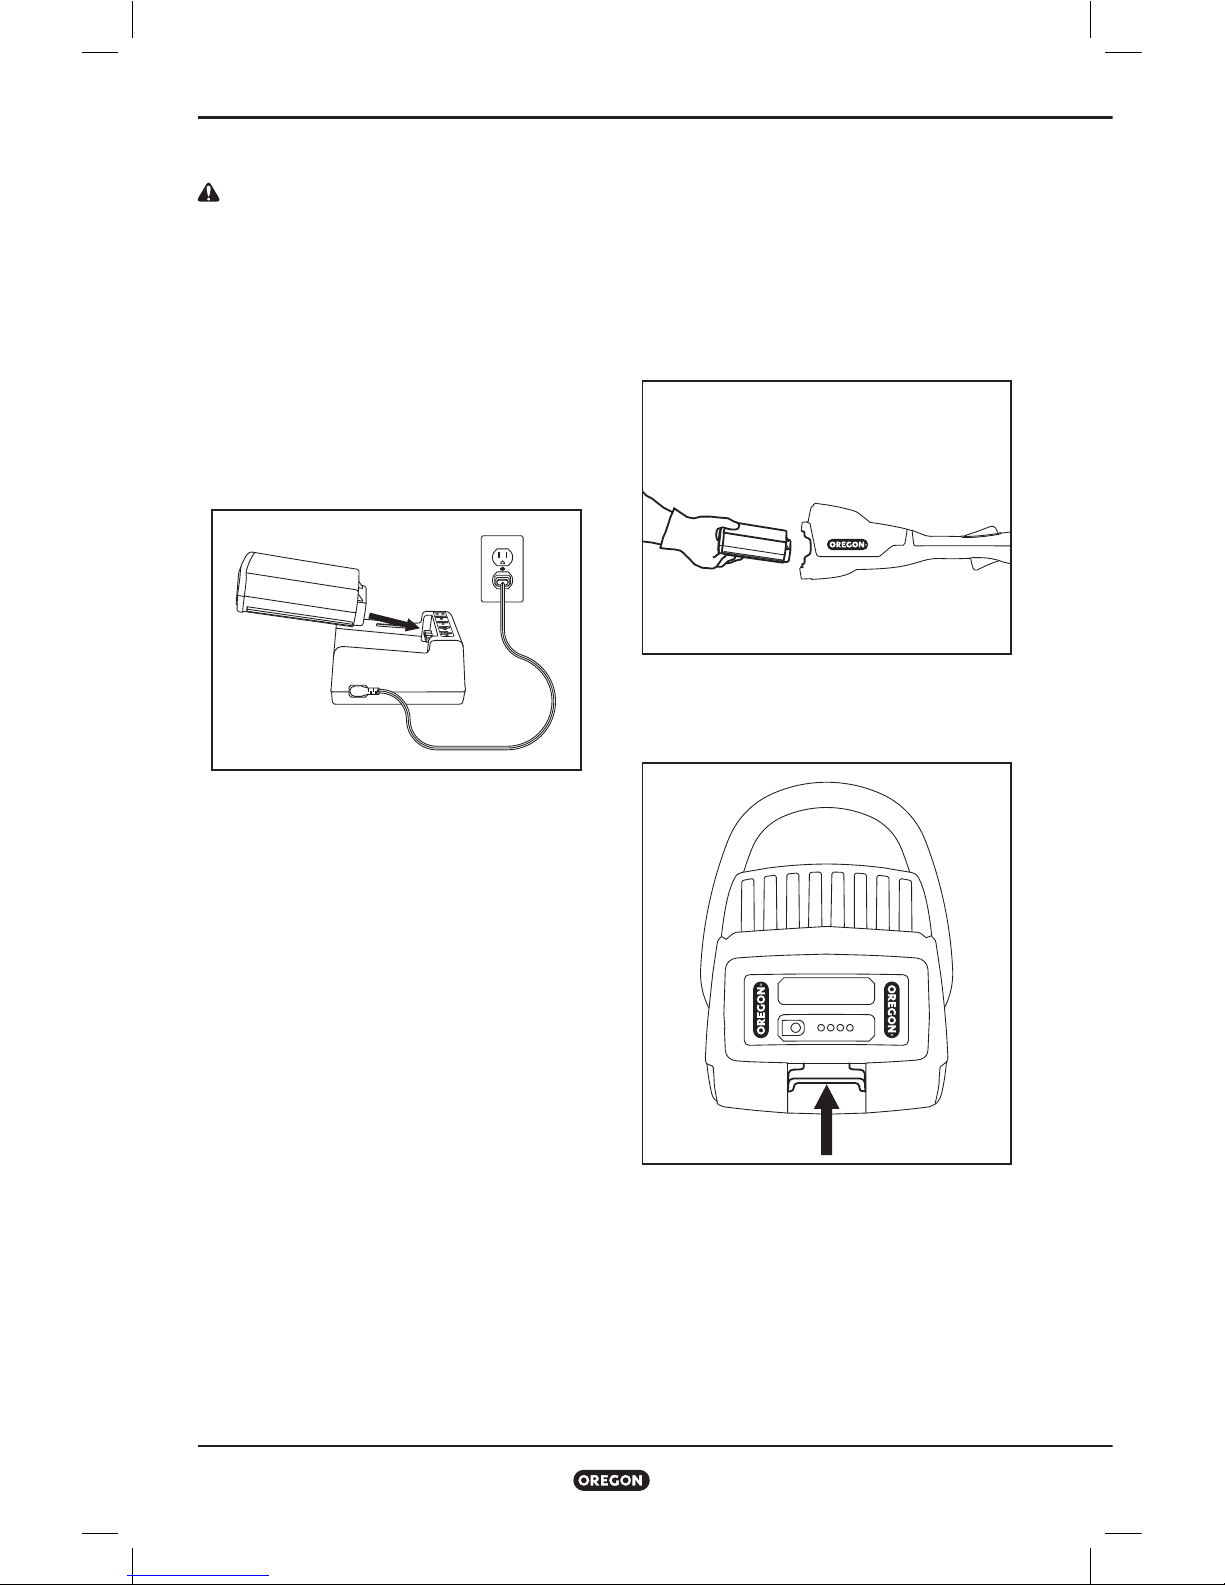
charger until fully seated (Fig. ).
Check the charge-state indicator for charging
conditions.
Inserting and Releasing the Battery Pack
Only use the Oregon® brand battery packs
specified in these operating instructions.
Align the groove in the battery with the rails
inside the battery port. Firmly insert the battery
pack into the trimmer/edger’s battery port,
pressing forward until it clicks as it locks into
place (Fig. ).
To remove the battery pack, lift up on the
battery release, grasp the sides of the battery
pack, and remove it (Fig. ).
FIG. 9
FIG. 10
FIG. 11
18
Trimmer/Edger Model ST275-GSL
Operating the Trimmer/Edger
General Operation
CAUTION: To reduce the risk of injury,
always wear proper eye and ear protection,
long pants, and foot protection.
IMPORTANT: Use care around structures,
trees, and bushes to avoid damaging paint
or bark.
Operating Temperature
This trimmer/edger is designed to operate
within a temperature range of °F to °F
(°C to °C).
IMPORTANT: The trimmer/edger is
equipped with a temperature sensor
that stops the motor to prevent thermal
overload damage. If the trimmer/edger
stops working suddenly, it might be too
hot to continue running. Allow the tool
to cool before continued operation. See
“Troubleshooting” for more information.
Grip
The front handle on the trimmer/edger handle
is adjustable. You can move the handle forward
or backward along the shaft until it is in a
comfortable position for trimming, clearing, or
edging.
Loosen the adjustment knob until the front
handle slides along the shaft, move the handle
to a comfortable position, and then tighten the
adjustment knob (Fig. ).
When using the trimmer/edger, grip both the
front and rear handles firmly.
Footing
Stand or walk with both feet on solid ground.
Do not overreach.
Stopping the Trimmer/Edger
Release the throttle trigger to stop the
trimmer/edger.
Starting the Trimmer/Edger
Grasp the front and rear handles firmly.
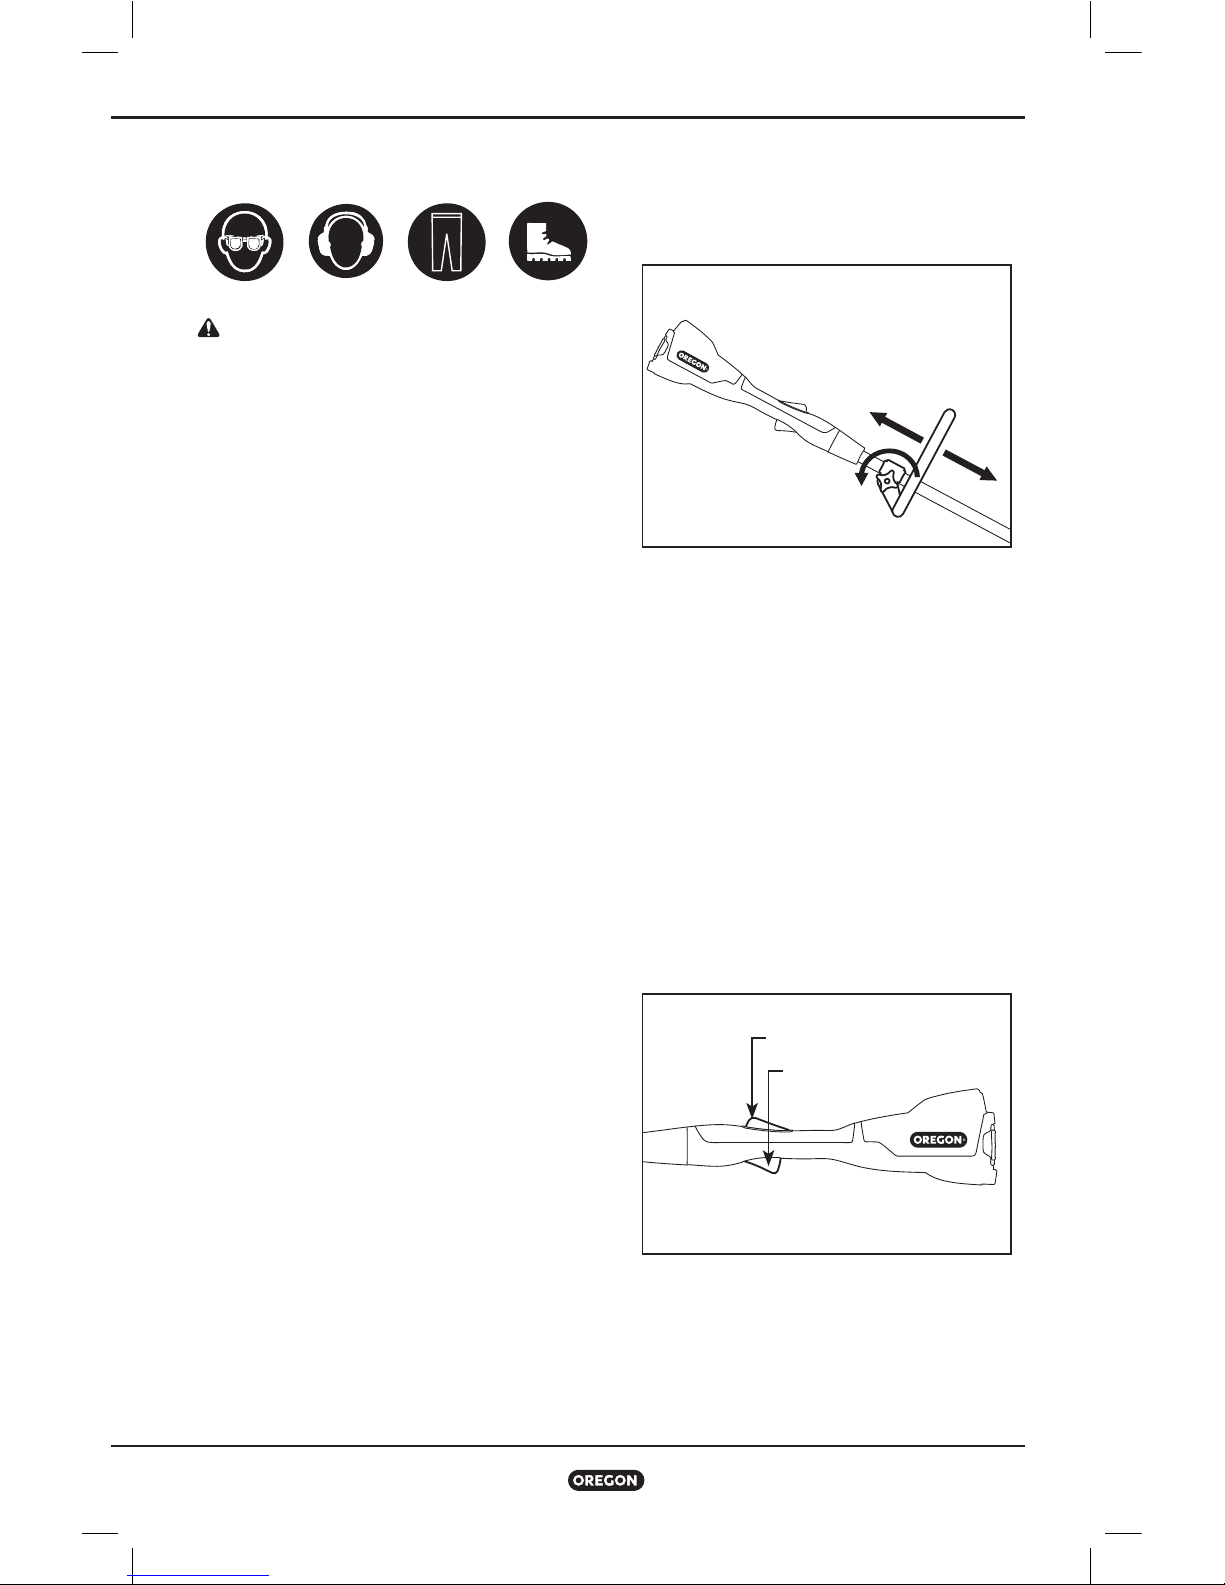
Squeeze the trigger lock-out (), then squeeze
the throttle trigger () until the trimmer head
moves at the desired speed (Fig. ).
FIG. 12
(1) TRIGGER LOCK-OUT
(2) THROTTLE TRIGGER
FIG. 13
19
Trimmer/Edger Model ST275-GSL
Operating the Trimmer/Edger
Controlling Trimmer Head Speed
The throttle trigger controls the speed at which
the trimmer head turns. Squeeze the throttle
trigger more firmly for faster cutting speed.
Use the lowest pressure required to cut the
material. This helps to maximize the amount of
cutting time per battery charge and reduces the
number of charging operations required.
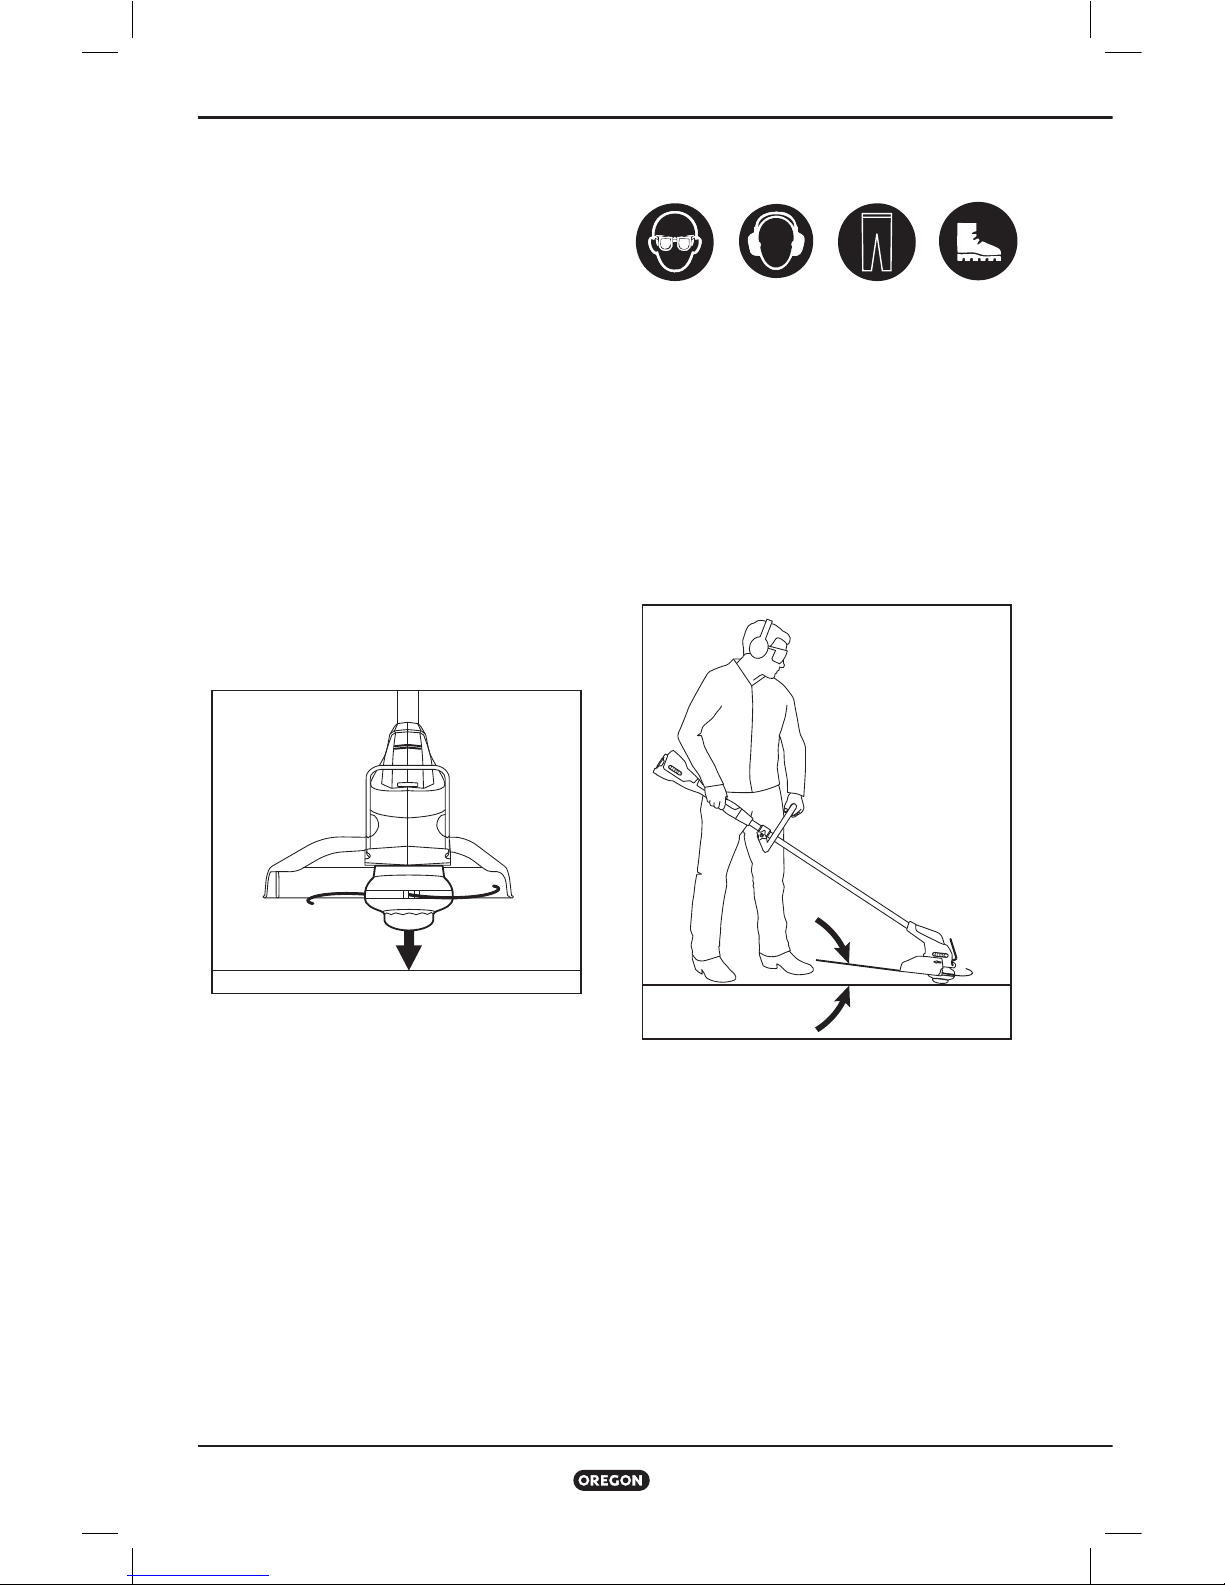
Advancing Trimmer Line
The GSL disk lasts longer than typical trimmer
lines. However, the trimmer line will wear down
over time. Advance the line by bumping the
head against the ground to get more line out of
the disk.
With the motor running and the trimmer head
turning, bump the trimmer head on the ground
(Fig. ). More trimmer line comes out of the
disk, and excess trimmer line is cut off by the
line cutting blade on the bottom of the guard.
If the trimmer line does not come out, the disk
may be empty. Turn off the trimmer/edger and
replace the disk as described in “Replacing the
GSL Disk”.
Trimming
Trimming cuts grass and weeds that are
close to walls, fences, and other areas too
small to reach with a lawn mower, down to a
manageable height but not down to soil level.
Assume proper grip and stance, then start the
trimmer. Squeeze the throttle trigger until the
trimmer head achieves the minimum speed
necessary to cut the grass or weeds.
Angle the trimmer head slightly toward the
direction of the cut (Fig. ).
Push the trimmer head slowly from the side
into the grass or weeds to be cut, and move
the trimmer head back and forth so that the
end of the trimmer line contacts the material
to be cut.
Do not allow the trimmer line to touch the
ground.
FIG. 14
FIG. 15
5–10°
20
Trimmer/Edger Model ST275-GSL
Operating the Trimmer/Edger
Edging
CAUTION: To reduce the risk of injury,
keep the guard between the operator and
the trimmer head.
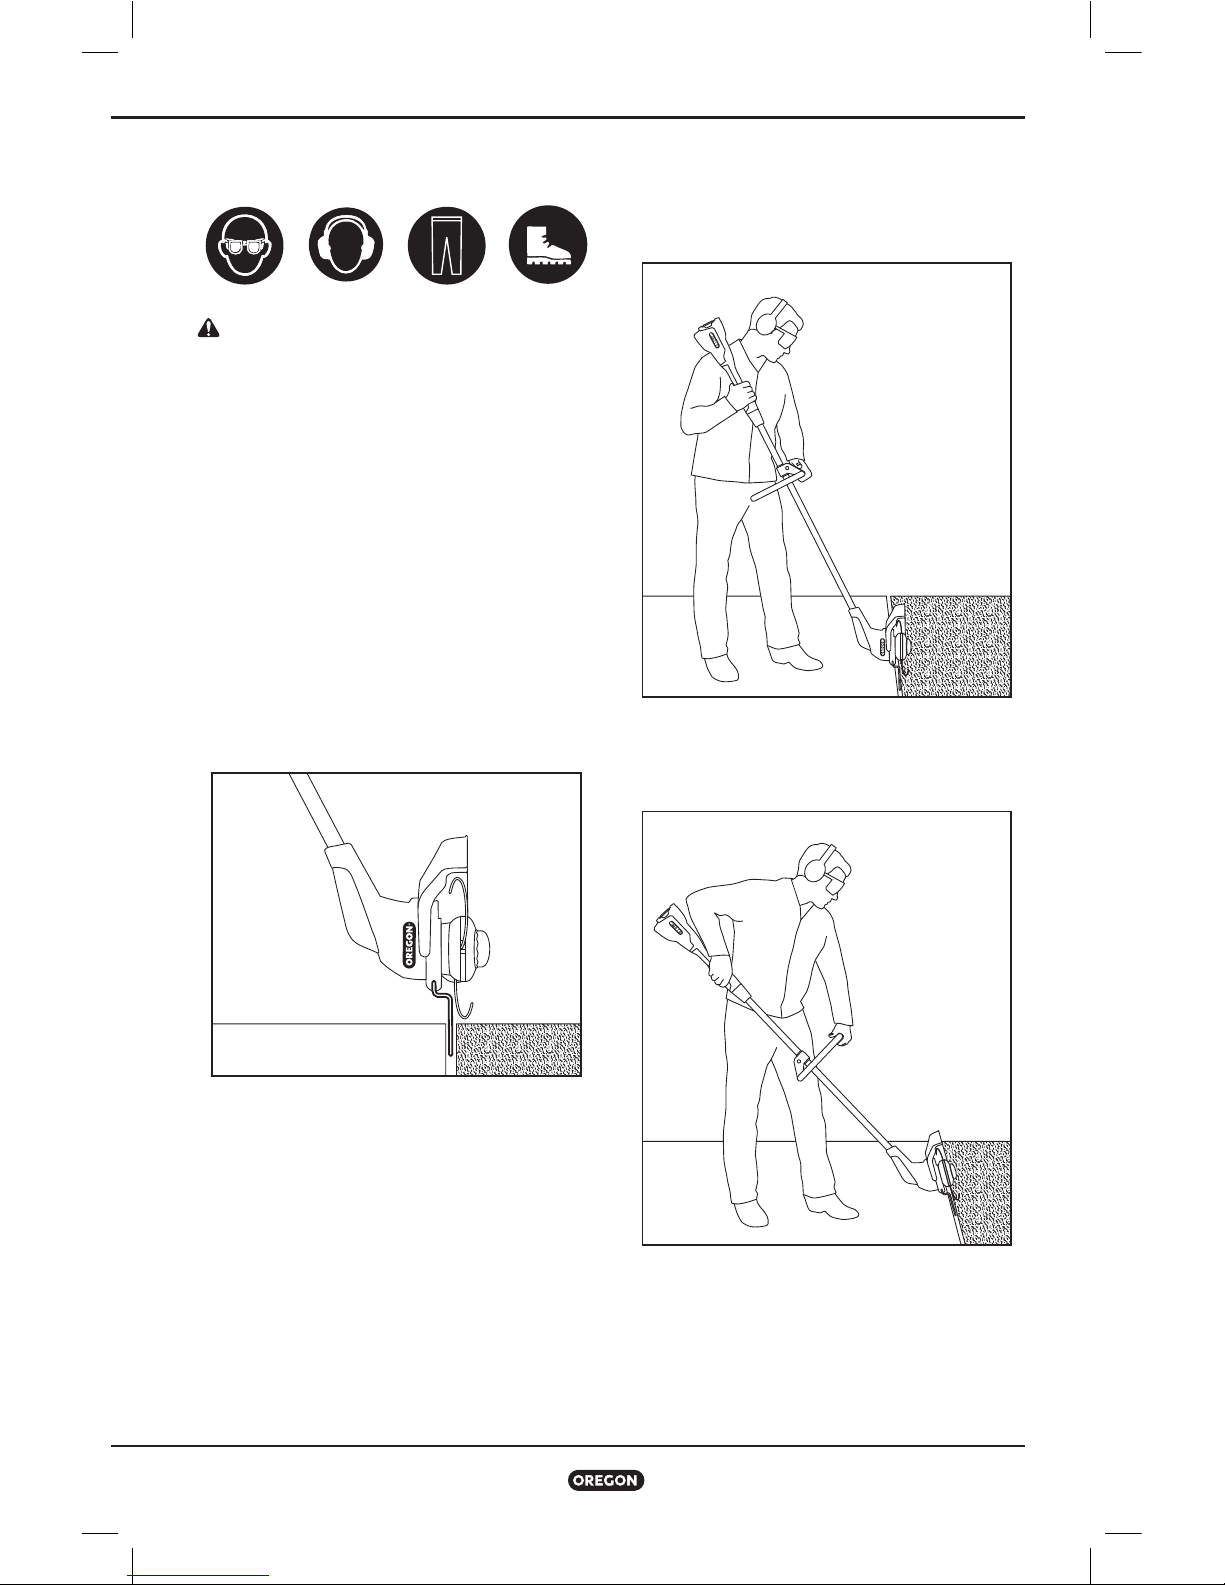
Edging maintains an existing border between
a lawn and another object such as a sidewalk,
pavement, or flower bed. The trimmer/edger is
not designed for creating a new hard edge, but
is useful for keeping an existing edge clean.
Keep hands away from the throttle trigger, then
move the edging guard so that it extends from
the trimmer and clicks into place.
Approach the lawn with the trimmer turned so
that the bottom of the trimmer head is pointed
toward the side of the lawn and the edging
guide is pointed toward the ground. Position the
edge guide along the edge of the lawn (Fig. ).
In tight spaces, such as against a fence or other
barrier, it is acceptable to reverse grip on the
rear handle and hold the trimmer/edger in a
more vertical position (Fig. ).
For extended periods of edging, it is acceptable
to rotate the front handle (Fig. ). This may
provide a more comfortable grip.
FIG. 16
FIG. 17
FIG. 18

21
Trimmer/Edger Model ST275-GSL
Maintenance and Cleaning
Maintenance and Cleaning
Trimmer/Edger
WARNING: Failure to identify and
replace damaged or worn parts can
cause serious personal injury. Inspect
the trimmer/edger regularly. Regular
inspection is the first step to proper
maintenance. Follow the guidelines below
to maximize safety and satisfaction. Have
any damaged or excessively worn parts
replaced immediately.
WARNING: A battery operated tool
with the battery pack inserted is always
on and can start accidentally. Remove
the battery pack from the trimmer/edger
before inspecting, cleaning, or performing
maintenance.
CAUTION: When cleaning the trimmer/
edger, do not immerse in water or other
liquids.
Inspect the Trimmer Head
• Make sure the trimmer head is free of cracks
or other damage. If it is damaged, replace
it. Serious personal injury can result if a
damaged trimmer head breaks during use.
• Check that the trimmer head rotates freely
and that the trimmer line advances. If the
trimmer head fails to rotate freely, see
“Correcting Grass Bind”.
• If the trimmer line gets stuck or is tangled,
open the GSL head and check the disk.
Replace or reinstall the disk as needed.
• Inspect the grass wrap protector to make
sure t is not cracked, broken, or loose. If it is
damaged, replace it.
Inspect the Handles
WARNING: Serious personal injury can
result if a damaged handle breaks during
use. Make sure that both the front and rear
handles are clean, dry, and are free of cracks or
other damage.
Inspect Battery Port
Make sure the battery port is clean, dry, and
free of debris. Debris in the battery port can
prevent a good electrical connection between
the battery pack and the trimmer/edger.
Clean the Trimmer/Edger
• Wipe dust, leaves, and clippings from the
trimmer/edger.
• Clear the air vents to ensure proper airflow
and prevent overheating.
• Remove grass or weeds wound around the
shaft and trimmer head.
• Wipe the trimmer motor housing with a clean
cloth moistened with mild soap and water.
• Never use harsh cleaners or solvents.
IMPORTANT: Keep the vents clear and
remove debris wrapped around the trimmer
head to help prevent overheating.
22
Trimmer/Edger Model ST275-GSL
Maintenance and Cleaning
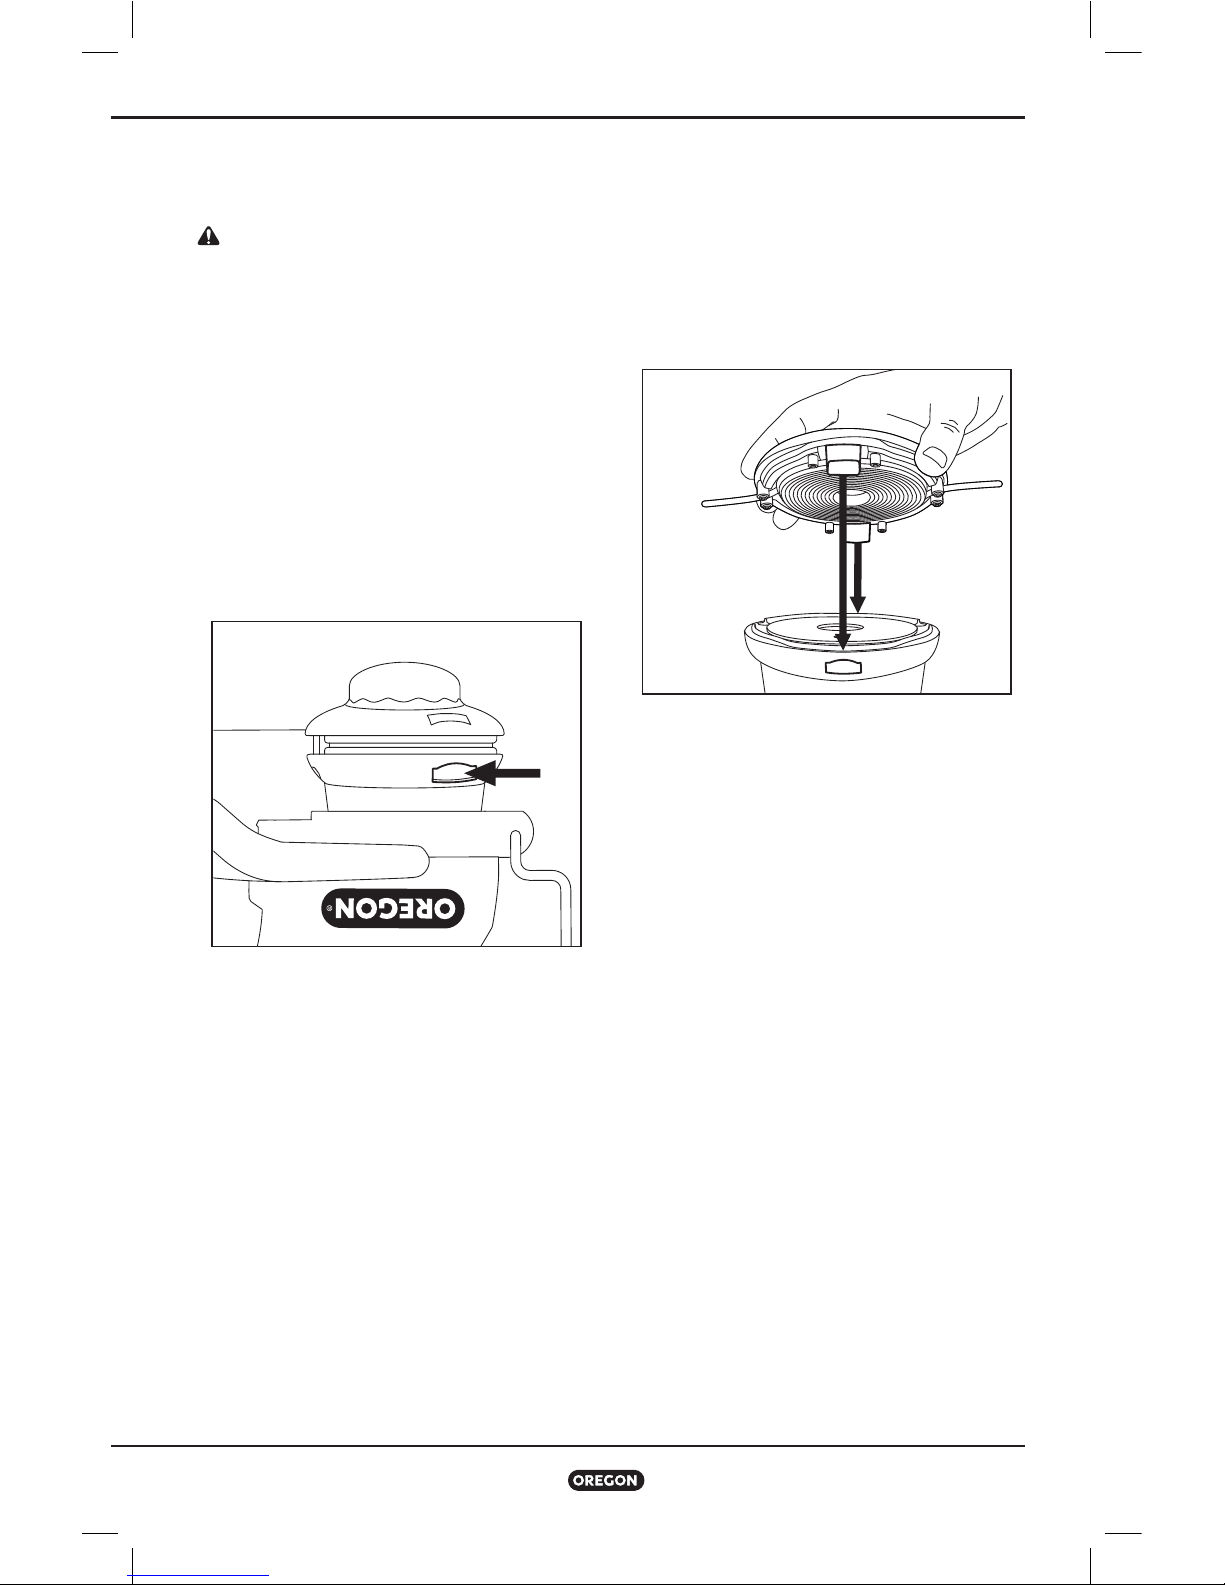
Opening the Gator® Speedload™
(GSL)
WARNING: A battery operated tool
with the battery pack inserted is always
on and can start accidentally. Remove
the battery pack from the trimmer/edger
before inspecting, cleaning, or performing
maintenance.
If you detect a problem with the operation of
the GSL Cutting System and need to inspect
the disk or head, follow these steps to open the
GSL head:
• Remove the battery, then place the trimmer/
edger upside down.
• Press the GSL head to release the bottom
part of the base (Fig. ).
Closing the GSL Head
• Check the disk and clear any blockage or
replace the disk. See “Replacing the Gator®
SpeedLoad™ (GSL)”.
• Remove clippings, dirt, and debris.
• Place GSL head back onto the base and press
firmly until it clicks into place (Fig. ).
FIG. 19
FIG. 20
23
Trimmer/Edger Model ST275-GSL
Maintenance and Cleaning
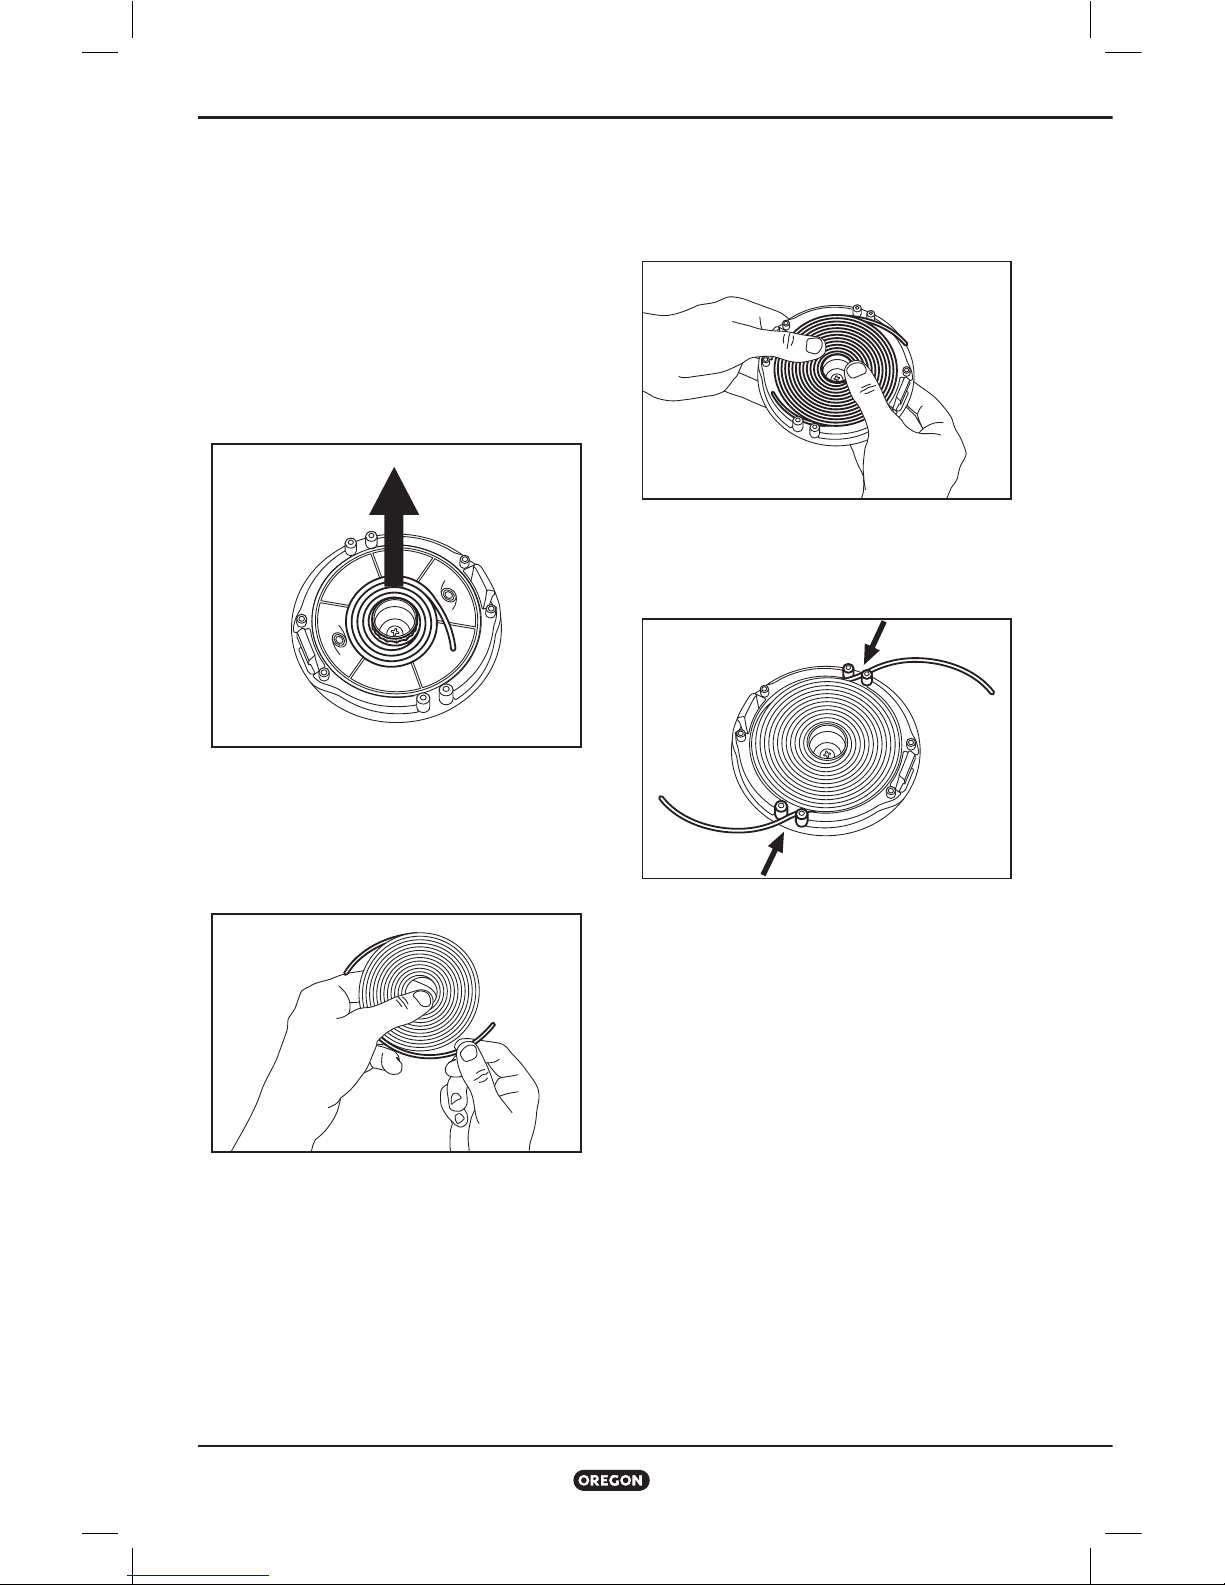
Replacing the Gator® Speedload™
(GSL)
The trimmer/edger is equipped with the
innovative GSL Cutting System. The GSL head
contains a disk of trimmer line that is prewound and self-contained. The GSL disk lasts
longer than typical trimmer line. Removing and
replacing a disk is simple.
• Pull the head off the base. Pull out the spent
disk and discard it (Fig. ).
• Peel two separate pieces of trimmer line from
opposite sides of the disk. Make sure each
piece is pulled away to create a small gap
between the peeled trimmer lines and the disk
(Fig. ).
• Place the disk inside the head by lining the
disk’s centre hole with the hole in the centre
of the head. Press the disk firmly into place
(Fig. ).
• Make sure the ends of the trimmer line pieces
fit through the two sets of pegs in the head
(Fig. ).
• Place GSL head back onto the base and press
firmly until it clicks into place.
The innovative tongue-and-groove disk
eliminates the need for threading of trimmer
line. Disks last longer than traditional trimming
lines.
FIG. 21
FIG. 22
FIG. 23
FIG. 24
24
Trimmer/Edger Model ST275-GSL
Maintenance and Cleaning
Removing and Replacing the Gator®
Speedload™ (GSL) Head
If the GSL head is cracked or broken, it should
be removed and replaced. If there is a build-up
of clippings or debris between the head and the
guard, it is easier to clean the trimmer/edger if
the head is removed first.
• Remove the battery, then place the trimmer/
edger upside down.
• Follow the instructions in “Opening The GSL
Head.”
• Use a straight-blade screwdriver to restrain
the spindle and rotate the trimmer base
counter-clockwise to loosen the center nut
(Fig. ).
• Pull out the GSL base.
• Remove the grass wrap protector from the
trimmer head (Fig. ).
• Insert the new grass wrap protector.
• To attach a new GSL head, slide the nut into
the center opening of the GSL head (Fig. ).
• Place the GSL head inside the trimmer
housing.
• Tighten the nut securely (Fig. ).
• Follow the instructions in “Loading a New GSL
Disk” to place a new disk of trimmer line into
the trimmer/edger.
• Close the head.
FIG. 25
FIG. 26
FIG. 27
FIG. 28
25
Trimmer/Edger Model ST275-GSL
Maintenance and Cleaning
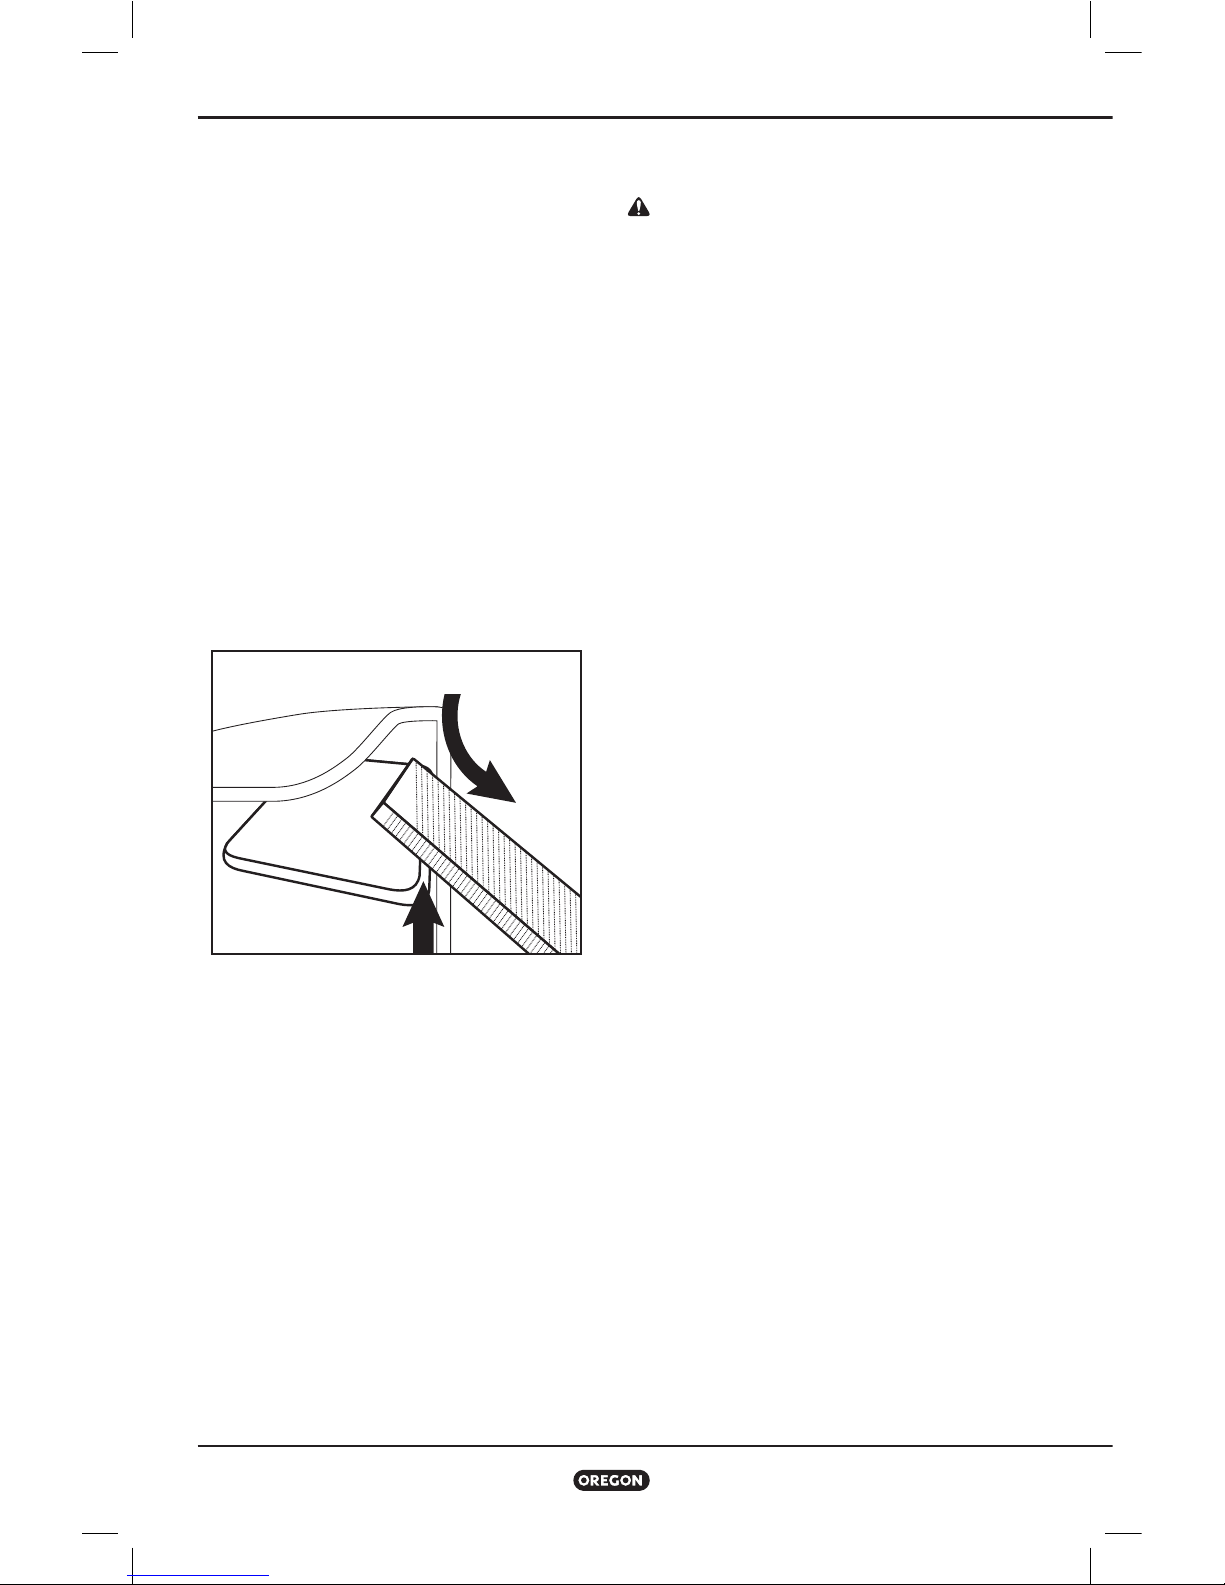
Sharpening the Line Cutting Blade
It is recommended that an Oregon® Service
Dealer sharpen the line cutting blade, but it can
also be sharpened by the operator.
Line cutting blade sharpening requires a flat
file.
After collecting the file, wear gloves and eye
protection and remove the battery.
• Lay the trimmer on its side with the line
cutting blade on top and face the bottom of
the trimmer head (Fig. ).
• Place the file against the cutting edge of the
line cutting blade ().
• Push the file down and to the right, removing
material from the cutting edge ().
• Repeat until the line cutting blade is sharp.
Correcting Grass Bind
CAUTION: A battery operated tool with
the battery pack inserted is always on and
can start accidentally. Always remove the
battery before correcting grass bind to
avoid accidental activation of the trimmer
head.
Certain types and lengths of grass can
sometimes be caught between the trimmer
head and the spindle. When this happens, the
grass quickly winds around the shaft clogging
the space between the shaft and the trimmer
head and slowing or stopping the trimmer head
rotation. This condition is called grass bind. The
trimmer/edger is equipped with a grass wrap
protector shroud between the trimmer head
and the spindle to help minimize grass bind, but
the condition can still occasionally occur.
To correct grass bind:
• Remove the battery.
• Remove the trimmer head.
• Clean all grass or weeds from the spindle. If
necessary, cut the grass or weeds free.
• Once the spindle is cleared, replace the
trimmer head.
(1)
(2)
FIG. 29

26
Trimmer/Edger Model ST275-GSL
Maintenance and Cleaning
Battery Pack
WARNING: There are no user
serviceable parts inside the battery pack.
Do not disassemble.
Lithium ion batteries have a finite operating
life. If the amount of cutting time per charge
decreases noticeably, the battery pack is at the
end of its useful life and should be replaced.
• Make sure the battery pack, including the
contacts, is clean, dry, and has no signs of
puncture, impact, or other damage. Broken
batteries can cause fires or emit hazardous
chemicals.
• Clean dirty contacts with a soft, dry cloth. Dirt
or oil can cause a poor electrical connection
resulting in loss of power.
Charger
• Unplug the charger from the electrical outlet.
• Clean dirty contacts with a soft, dry cloth.

27
Trimmer/Edger Model ST275-GSL
Troubleshooting
Troubleshooting
Use this table to see possible solutions for possible problems with the trimmer/edger. If these
suggestions do not solve the problem, see “Warranty and Service”.
SYMPTOM POSSIBLE CAUSE RECOMMENDED ACTIONS
Motor does
not run or runs
intermittently
Battery discharged Recharge. See “Battery Pack and Charger”.
Trigger lock-out not
pressed
Press the trigger lock-out before squeezing the
throttle trigger. See “General Operation”.
Battery pack not fully
inserted
Press the battery pack into the battery port until it
clicks into place.
Battery contacts dirty
Remove the battery pack, remove debris from the
battery port, and then clean the contacts with a
clean, dry cloth.
Battery pack cold
Allow the battery pack to warm to the minimum
operating temperature of 32°F (0°C).
Motor runs, but
trimmer head does
not move
Grass wound between
shaft and trimmer head
See “Correcting Grass Bind”.
Trimmer/Edger
does not cut
properly
Grass wound between
shaft and trimmer head
See “Correcting Grass Bind”.
GSL disk empty See “Replacing the GSL Disk”.
Trimmer line
does not feed
GSL disk empty See “Replacing the GSL Disk”.
Trimmer line tangled Remove the GSL disk. See “Replacing the GSL Disk”.
Trimmer line wears
out quickly
Higher cutting speed than
necessary
Apply less pressure to the throttle trigger.
Improper cutting
technique
Avoid forcing the trimmer head against hard surfaces.
Slowly move the trimmer head in until the edge of the
trimmer line strikes the grass or weeds.
Trimmer/Edger
vibrates excessively
during use
GSL head damaged
See “Removing and Replacing the Gator®
SpeedLoad™ (GSL) Head”.
GSL head not attached
properly
Remove the GSL head and reinstall, making sure
the nut is securely tightened. See “Removing and
Replacing the Gator® SpeedLoad™ (GSL) Head”.
Line cutting blade is dull See “Sharpening the Line Cutting Blade”.
End of trimmer line
is frayed, ragged, or
unevenly cut
Line cutting blade is dull See “Sharpening the Line Cutting Blade”.
 Loading...