

Page 1
IM-HEM-7280T-E-03-02/2017
5344802-4C
Automatic Upper Arm Blood Pressure Monitor
MIT5s Connect (HEM-7280T-E)
Instruction Manual
Page 2
Page 3
N
Q
P
R
T
W
V
X
Y
Z
U
S
O
A
G
D
C
B
E
F
J
HI
GH
K
M
L
AE
AD
AC
H
AB
H
AA
Page 4
Contents
Thank you for purchasing the OMRON MIT5s Connect Automatic Upper Arm Blood
Pressure Monitor.
Your new blood pressure monitor uses the oscillometric method of blood pressure
measurement. This means the monitor detects your blood movement through your brachial
artery and converts the movements into a digital reading. An oscillometric monitor does not
need a stethoscope so the monitor is simple to use.
Intended Use
This device is a digital monitor intended for use in measuring blood pressure and pulse rate in
adult patient population who can understand this instruction manual with the arm
circumference range printed on the arm cuff. The device detects the appearance of irregular
heartbeats during measurement and gives a warning signal with the measurement result.
Important Safety Information ........................1
1. Know Your Device ....................................4
2. Preparation................................................7
2.1 Battery Installation..................................7
2.3 Setting the Date and Time Manually
....10
2.2 Using this device with a Smartphone
1.1 Display Symbols.....................................5
1.2 Before Taking a Measurement...............6
3. Using the Device..................................... 12
3.1 Applying the Arm Cuff ..........................12
3.2 How to Sit Correctly .............................13
3.3 Taking a Measurement ........................14
3.4 Using the Memory Function .................16
3.5 Turning “OFF” the Bluetooth
®
...............23
4. Error Messages and Troubleshooting .... 25
4.1 Error Messages ................................... 25
4.2 Troubleshooting................................... 27
5. Maintenance and Storage ......................29
6. Optional Parts..........................................
31
5.1 Maintenance........................................ 29
5.2 Storage................................................ 30
6.1 Optional Medical Accessories.............
.
31
7. Specifications .........................................32
8. Warranty ..................................................35
9. Some Useful Information about Blood
Pressure ..................................................36
Please read this instruction manual thoroughly before using the device.
Please keep for future reference. For specific information about your own
blood pressure, CONSULT YOUR PHYSICIAN.
.....8
Page 5
1
EN
Important Safety Information
Warning: Indicates a potentially hazardous situation which, if not avoided, could result in death or
serious injury.
(General Usage)
DO NOT adjust medication based on measurement results from this blood pressure monitor. Take medication as
prescribed by your physician. Only a physician is qualified to diagnose and treat High Blood Pressure.
Consult your physician before using the device for any of the following conditions: common arrhythmias such as
atrial or ventricular premature beats or atrial fibrillation, arterial sclerosis, poor perfusion, diabetes, pregnancy,
pre-eclampsia, renal diseases.
Note that PATIENT motion, trembling, shivering may affect the measurement reading.
Do not use the device on the injured arm or the arm under medical treatment.
Do not apply the arm cuff on the arm while on an intravenous drip or blood transfusion.
Consult your physician before using the device on the arm with an arterio-venous (A-V) shunt.
Do not use the device with other medical electrical (ME) equipment simultaneously.
Do not use the device in the area of HF surgical equipment, MRI, or CT scanner, or in an oxygen rich environment.
The air tube or the AC adapter cable may cause accidental strangulation in infants.
Contains small parts that may cause a choking hazard if swallowed.
(Data Transmission)
Do not use this product on aircraft or in hospitals and remove the battery and AC adapter from the unit. This
product emits radio frequencies (RF) in the 2.4 GHz band, use of this product in locations where RF is restricted is
not recommended.
(AC Adapter (optional) Usage)
Do not use the AC adapter if the device or the power cord is damaged. Turn off the power and unplug the power
cord immediately.
Plug the AC adapter into the appropriate voltage outlet. Do not use in a multi-outlet plug.
Never plug in or unplug the power cord from the electric outlet with wet hands.
Page 6
Important Safety Information
2
Caution: Indicates a potentially hazardous situation which, if not avoided, may result in minor or
moderate injury to the user or patient or damage to the equipment or other property.
(General Usage)
Always consult your physician. Self-diagnosis of measurement results and self-treatment are dangerous.
Consult your physician before using the device for any of the following conditions:
• If you have had a mastectomy.
• Do not take measurements more than necessary. It may cause bruising due to blood flow interference.
• People with severe blood flow problems or blood disorders as cuff inflation can cause bruising.
Remove the arm cuff if it does not start deflating during the measurement.
Do not use this device on infants or persons who cannot express their intentions.
Do not use the device for any purpose other than measuring blood pressure.
Use only the approved arm cuff for this device. Use of other arm cuffs may result in incorrect measurement results.
Do not use a mobile phone or other devices that emit electromagnetic fields near the device except when in use
for wireless communications. This may result in incorrect operation of the device.
Do not disassemble the monitor or arm cuff. This may cause an inaccurate reading.
Do not use in a location with moisture, or a location where water may splash on the device. This may damage the
device.
Do not use the device in a moving vehicle.
Read “If your systolic pressure is more than 210 mmHg” (page 14) of this instruction manual, if your systolic
pressure is known to be more than 210 mmHg. Inflating to a higher pressure than necessary may result in bruising
where the cuff is applied.
(AC Adapter (optional) Usage)
Fully insert the power plug into the outlet.
When disconnecting the power plug from the outlet, do not pull the power cord. Be sure to pull from the power plug
safely.
When handling the power cord, take care not to do the following:
Do not damage. Do not break it.
Do not tamper with it. Do not forcibly bend or pull.
Do not twist. Do not bundle during use.
Do not pinch. Do not place under heavy objects.
Page 7
Important Safety Information
EN
3
Wipe the dust off from the power plug.
Unplug monitor when not in use.
Disconnect the power plug before cleaning.
Use only an OMRON AC adapter designed for this device. Use of unsupported adapters may damage and/or may
be hazardous to the device.
(Battery Usage)
Do not insert the batteries with their polarities incorrectly aligned.
Use only 4 “AA” alkaline or manganese batteries with this device. Do not use other types of batteries. Do not use
new and used batteries together.
Remove the batteries if the device will not be used for three months or more.
General Precautions
• Do not forcibly crease the arm cuff or the air tube excessively.
• Do not press the air tube while taking a measurement.
• To unplug the air plug, pull on the air plug at the connection with the monitor, not the tube itself.
• Do not drop the monitor or subject device to strong shocks or vibrations.
• Do not inflate the arm cuff when it is not wrapped around your arm.
• Do not use the device outside the specified environment. It may cause an inaccurate reading.
• Read and follow the “Important information regarding Electro Magnetic Compatibility (EMC)” in the
“7. Specifications”.
• Read and follow the “Correct Disposal of This Product” in “7. Specifications” when disposing of the device and any
used accessories or optional parts.
Page 8
4
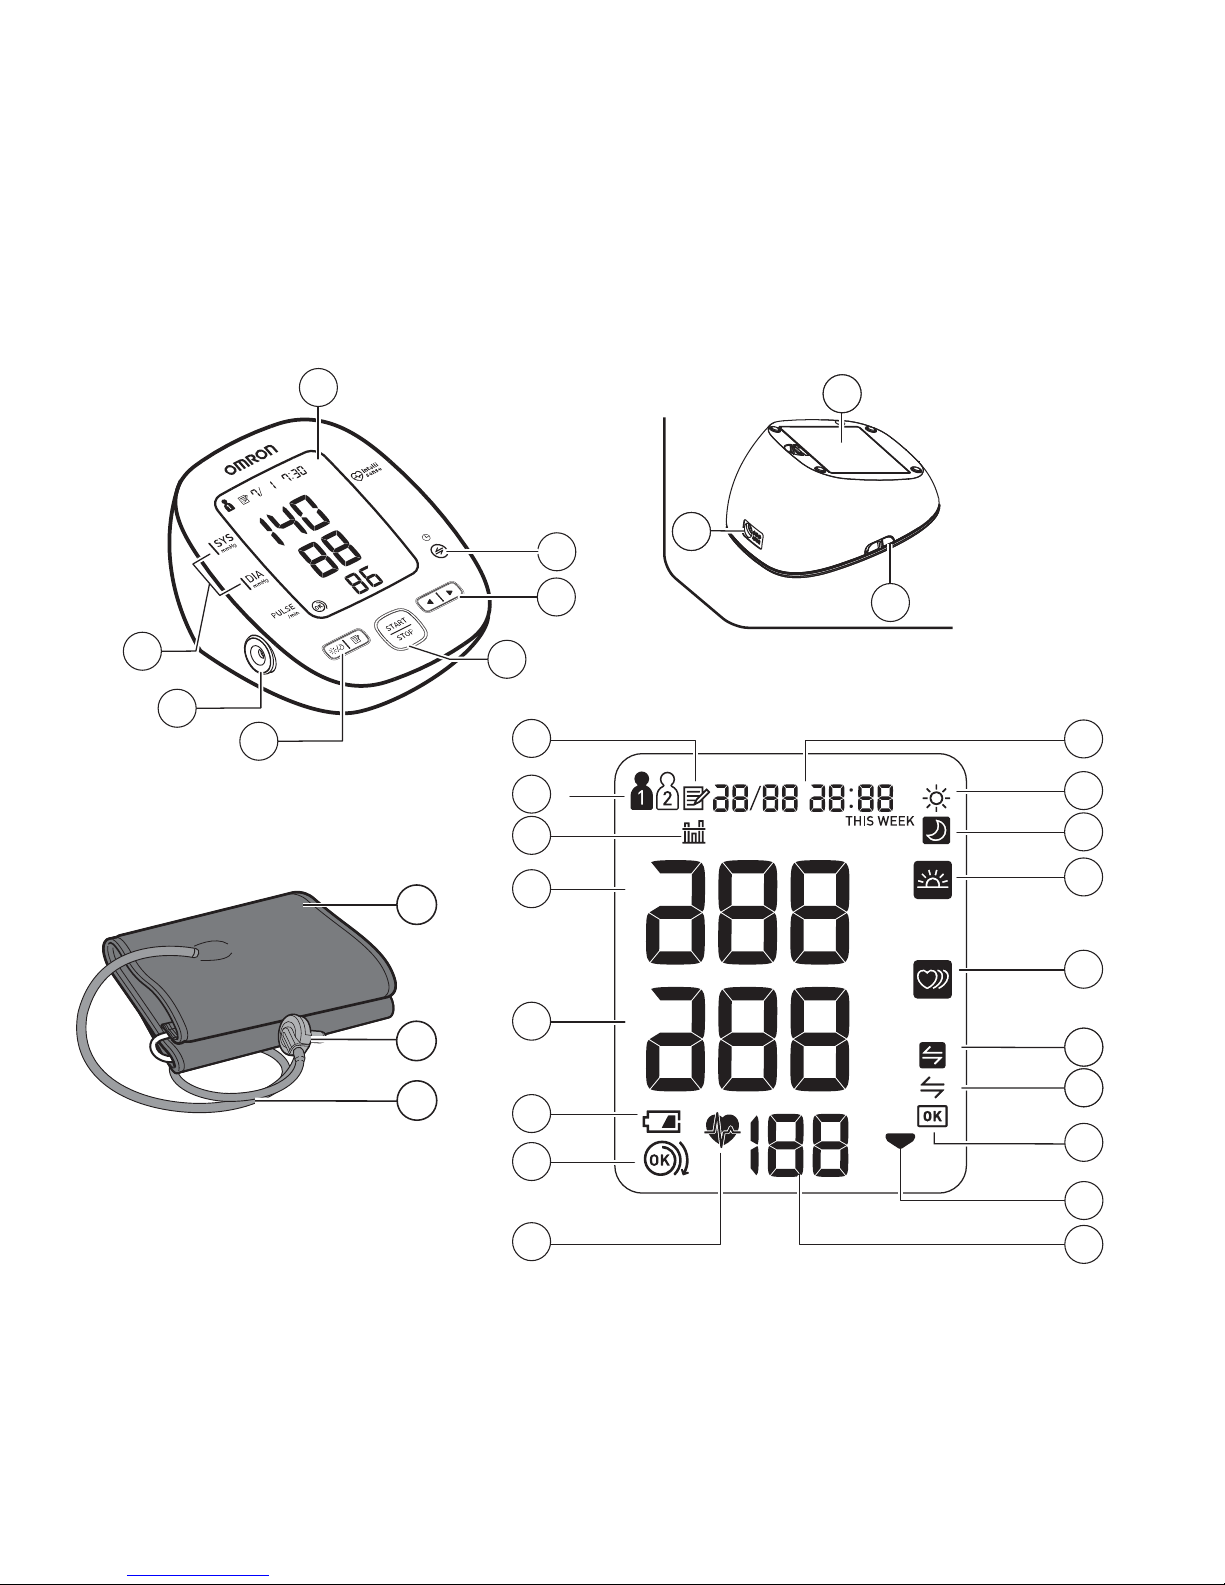
1. Know Your Device
Monitor
Display
Connection button
Up/Down buttons
START/STOP button
(Blue lamp lights when be pressed)
Blood pressure level indicator
(colour)
Air jack
Memory/Weekly average button
Battery compartment
AC adapter jack
(For optional AC adapter)
USER ID selection switch
Arm cuff
Arm cuff (Arm circumference 22-42cm)
Air plug
Air tube
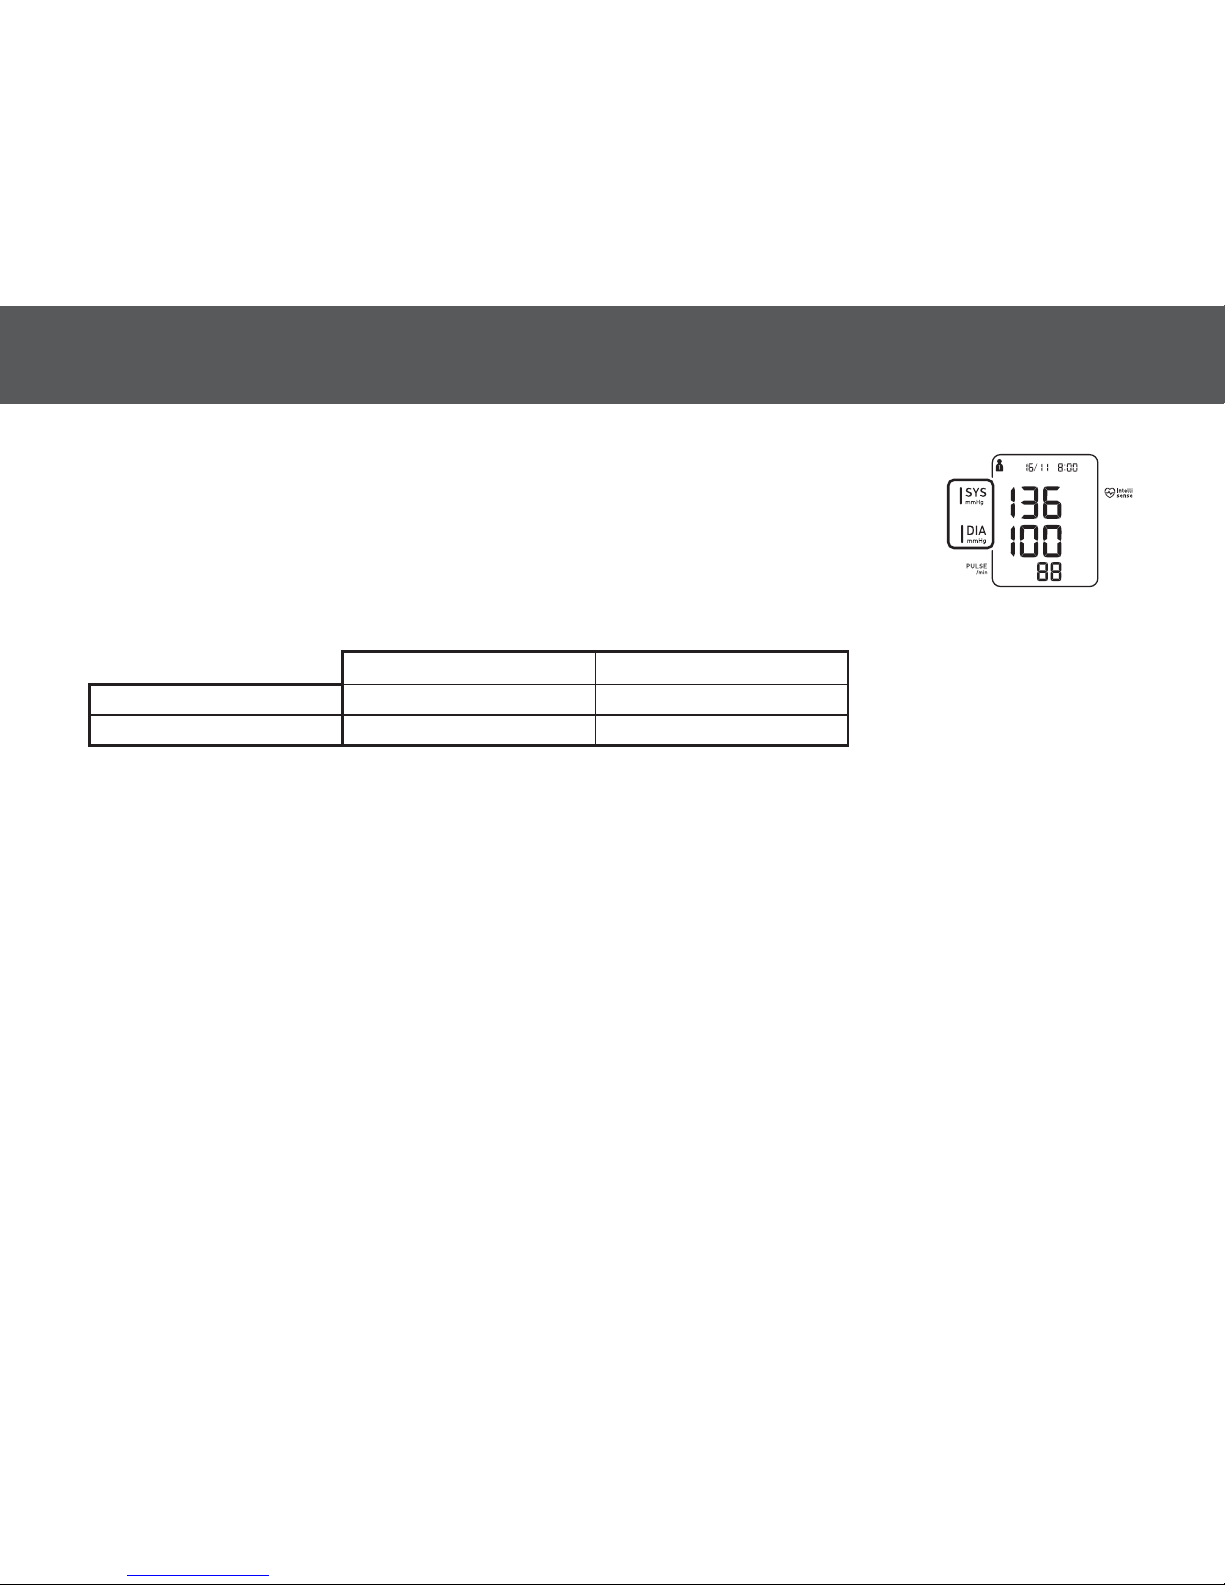
Display
Memory symbol
USER ID symbol
Average value symbol
Systolic blood pressure
Diastolic blood pressure
Battery symbol (low/depleted)
Cuff wrap guide symbol
Heartbeat symbol
(Flashes during measurement)
Date/Time display
Morning average symbol
Evening average symbol
Morning hypertension symbol
Irregular heartbeat symbol
SYNC symbol
Connection symbol
OK symbol
Deflation symbol
Pulse display / Memory number
Open the rear cover page to read the following:
The letter identifiers on the rear cover page correspond to those in the body of this page.
A
BCDEF
G
H
IJK
L
M
N
O
P
Q
R
S
T
U
V
W
X
YZAA
AB
AC
AD
AE
Page 9
1. Know Your Device
EN
5
1.1
Display Symbols
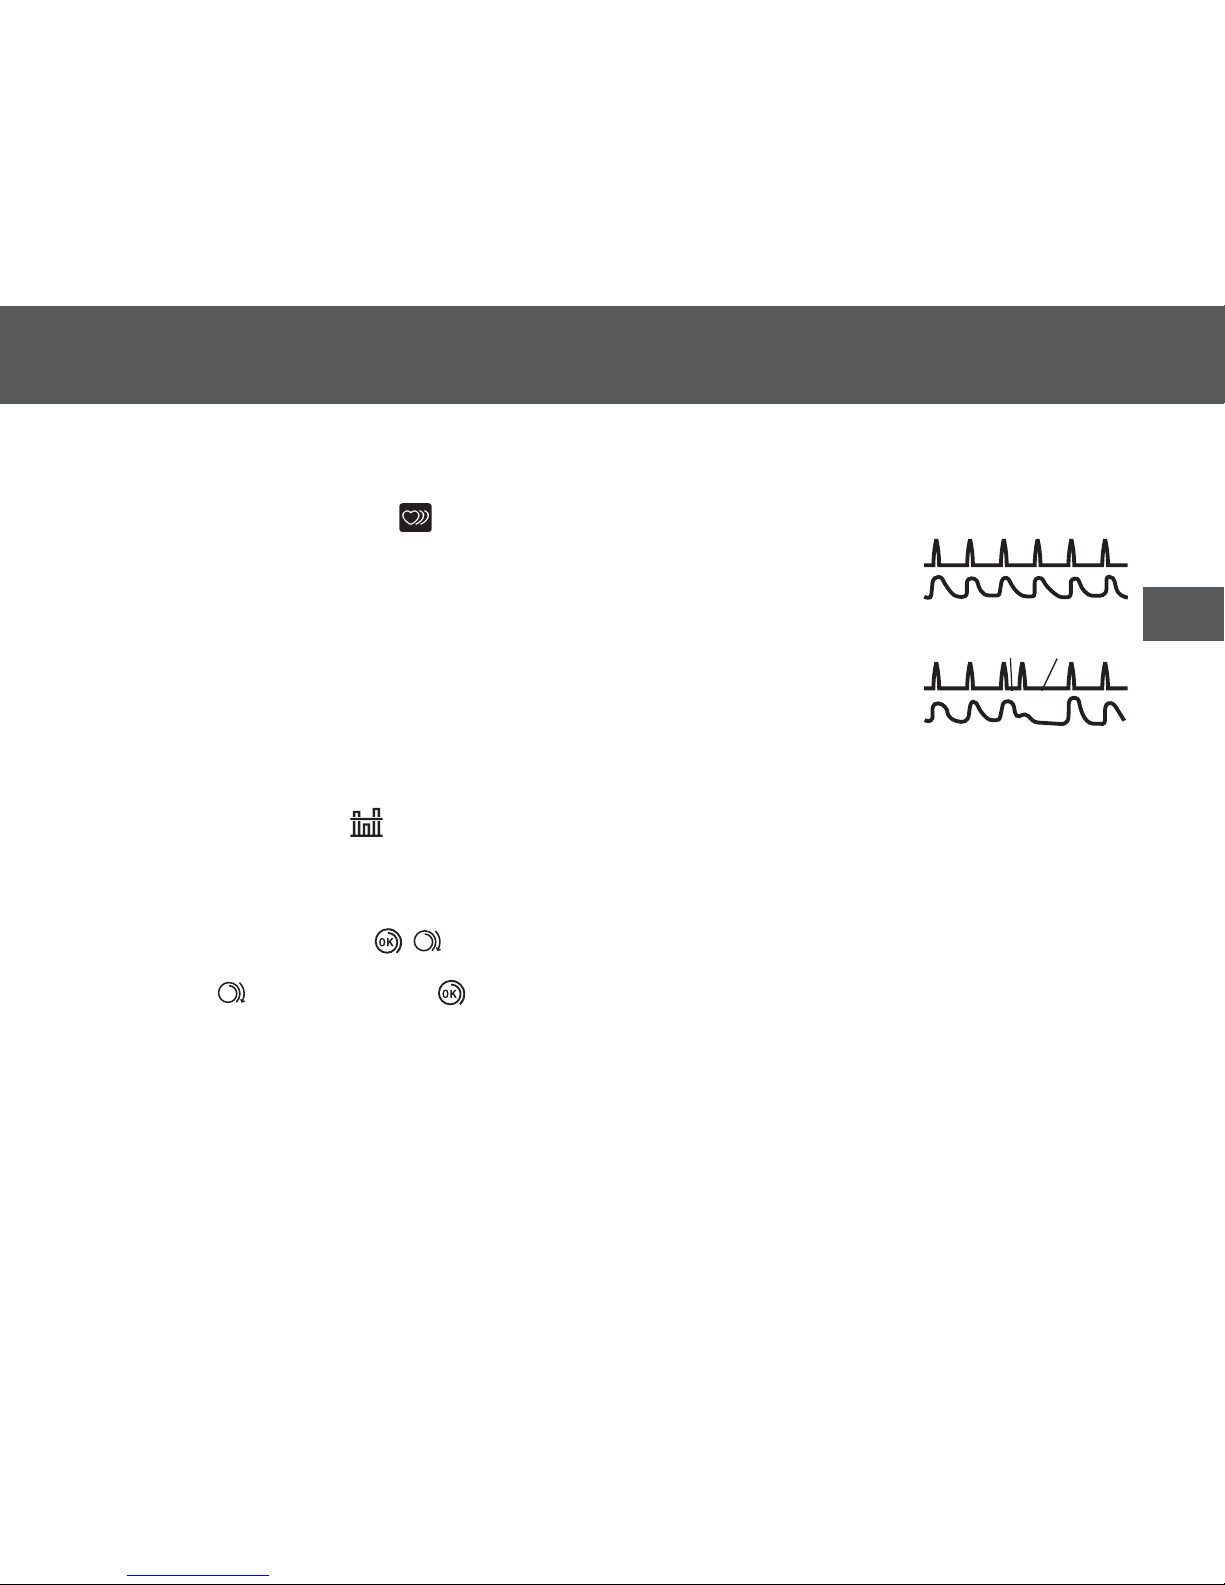
Irregular Heartbeat Symbol ( )
When the monitor detects an irregular rhythm two or more times during the
measurement, the irregular heartbeat symbol will appear on the display with
the measurement values.
An irregular heartbeat rhythm is defined as a rhythm that is 25% less or 25%
more than the average rhythm detected while the monitor is measuring the
systolic and diastolic blood pressure.
If the irregular heartbeat symbol displays with your measurement results, we
recommend you consult your physician. Follow the directions of your
physician.
Average Value Symbol ( )
The average value symbol is displayed when you press and hold the Memory button for more than 3 seconds. The
most recent average value appears on the display screen.
Cuff Wrap Guide Symbol ( / )
If the cuff was wrapped too loosely, it may cause unreliable results. If the wrapping of cuff is too loose, the cuff wrap
guide symbol appears. Otherwise appears. This is the function which is used as an aid in determining if the
cuff is wrapped snugly enough.
Normal Heartbeat
Irregular Heartbeat
Pulse
Blood pressure
Blood pressure
Short
Long
Pulse
Page 10
1. Know Your Device
6
Blood Pressure Level Indicator (Colour)
If your Systolic Blood Pressure is 135 mmHg or above and/or the Diastolic Blood Pressure
is 85 mmHg or above, the blood pressure level indicator (colour) will light in “orange” when
the measurement result is displayed. If the measurements are within the standard range,
no light will appear.
2013 ESH/ESC Guidelines for the management of arterial hypertension
Definitions of hypertension by office and home blood pressure levels
1.2
Before Taking a Measurement
To help ensure an accurate reading, follow these directions:
1. Avoid bathing, drinking alcohol or caffeine, smoking, exercising and eating for 30 minutes before taking a
measurement. Rest for at least 15 minutes before taking the measurement.
2. Stress raises blood pressure. Avoid taking measurements during stressful times.
3. Measurements should be taken in a quiet place.
4. Remove tight-fitting clothing from your arm.
5. Sit on a chair with your feet flat on the floor. Rest your arm on a table so that the arm cuff is at the same level as
your heart.
6. Remain still and do not talk during the measurement.
7. Keep a record of your blood pressure and pulse readings for your physician. A single measurement does not
provide an accurate indication of your true blood pressure. You need to take and record several readings over a
period of time. Try to measure your blood pressure at the same time each day for consistency.
Office Home
Systolic Blood Pressure ≥ 140 mmHg ≥ 135 mmHg
Diastolic Blood Pressure ≥ 90 mmHg ≥ 85 mmHg
Page 11
7
EN
2. Preparation
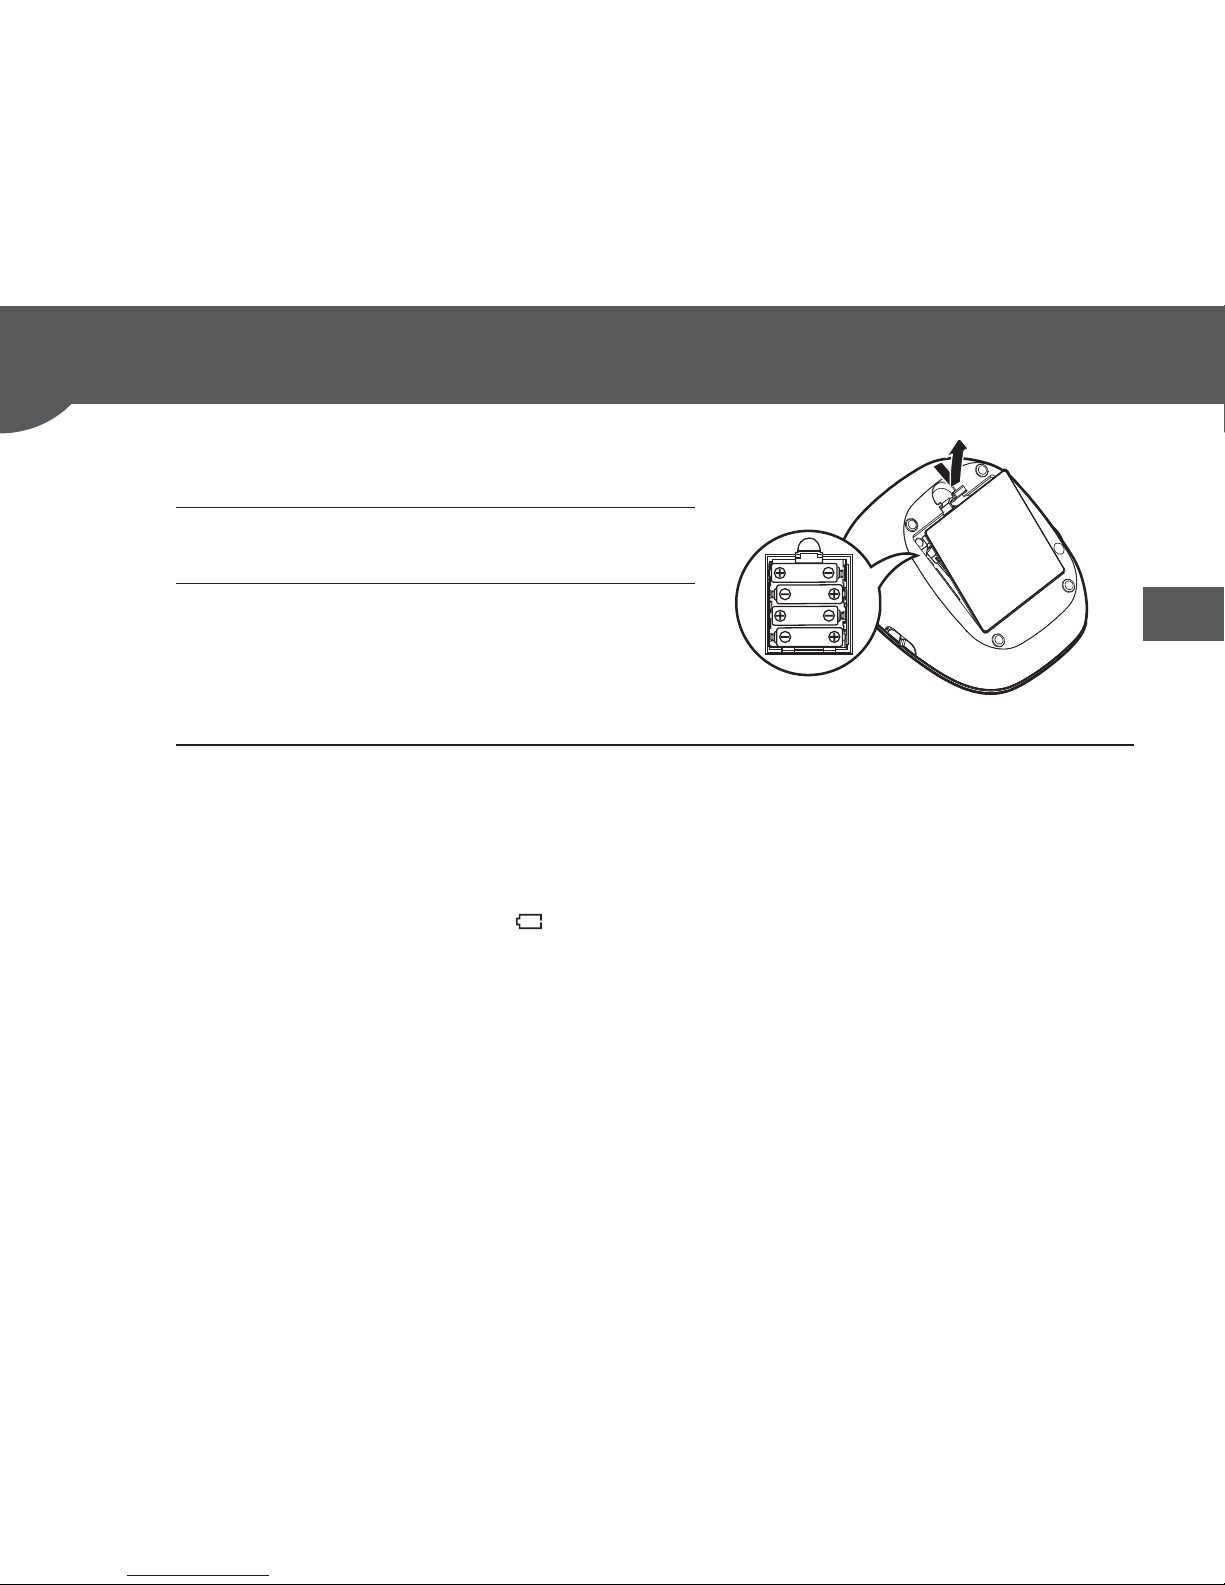
2.1
Battery Installation
1. Remove the battery cover.
2. Insert 4 “AA” batteries as
indicated in the battery
compartment.
3. Replace the battery cover.
Notes:
• Please keep the batteries in your device all the time when you use an optional AC adapter.
• When the depleted battery symbol ( ) appears on the display, turn the monitor off, then replace all
batteries at the same time. Long life alkaline batteries are recommended.
• The measurement values continue to be stored in memory even after the batteries are replaced.
• The supplied batteries may have a shorter life.
• Dispose of the device, components and optional accessories according to applicable local regulations.
Unlawful disposal may cause environmental pollution.
Page 12
2. Preparation
8
2.2
Using this device with a Smartphone
To begin using the OMRON connect app for the first time, please visit
www.omronconnect.com/setup
for the initial set-up instructions.
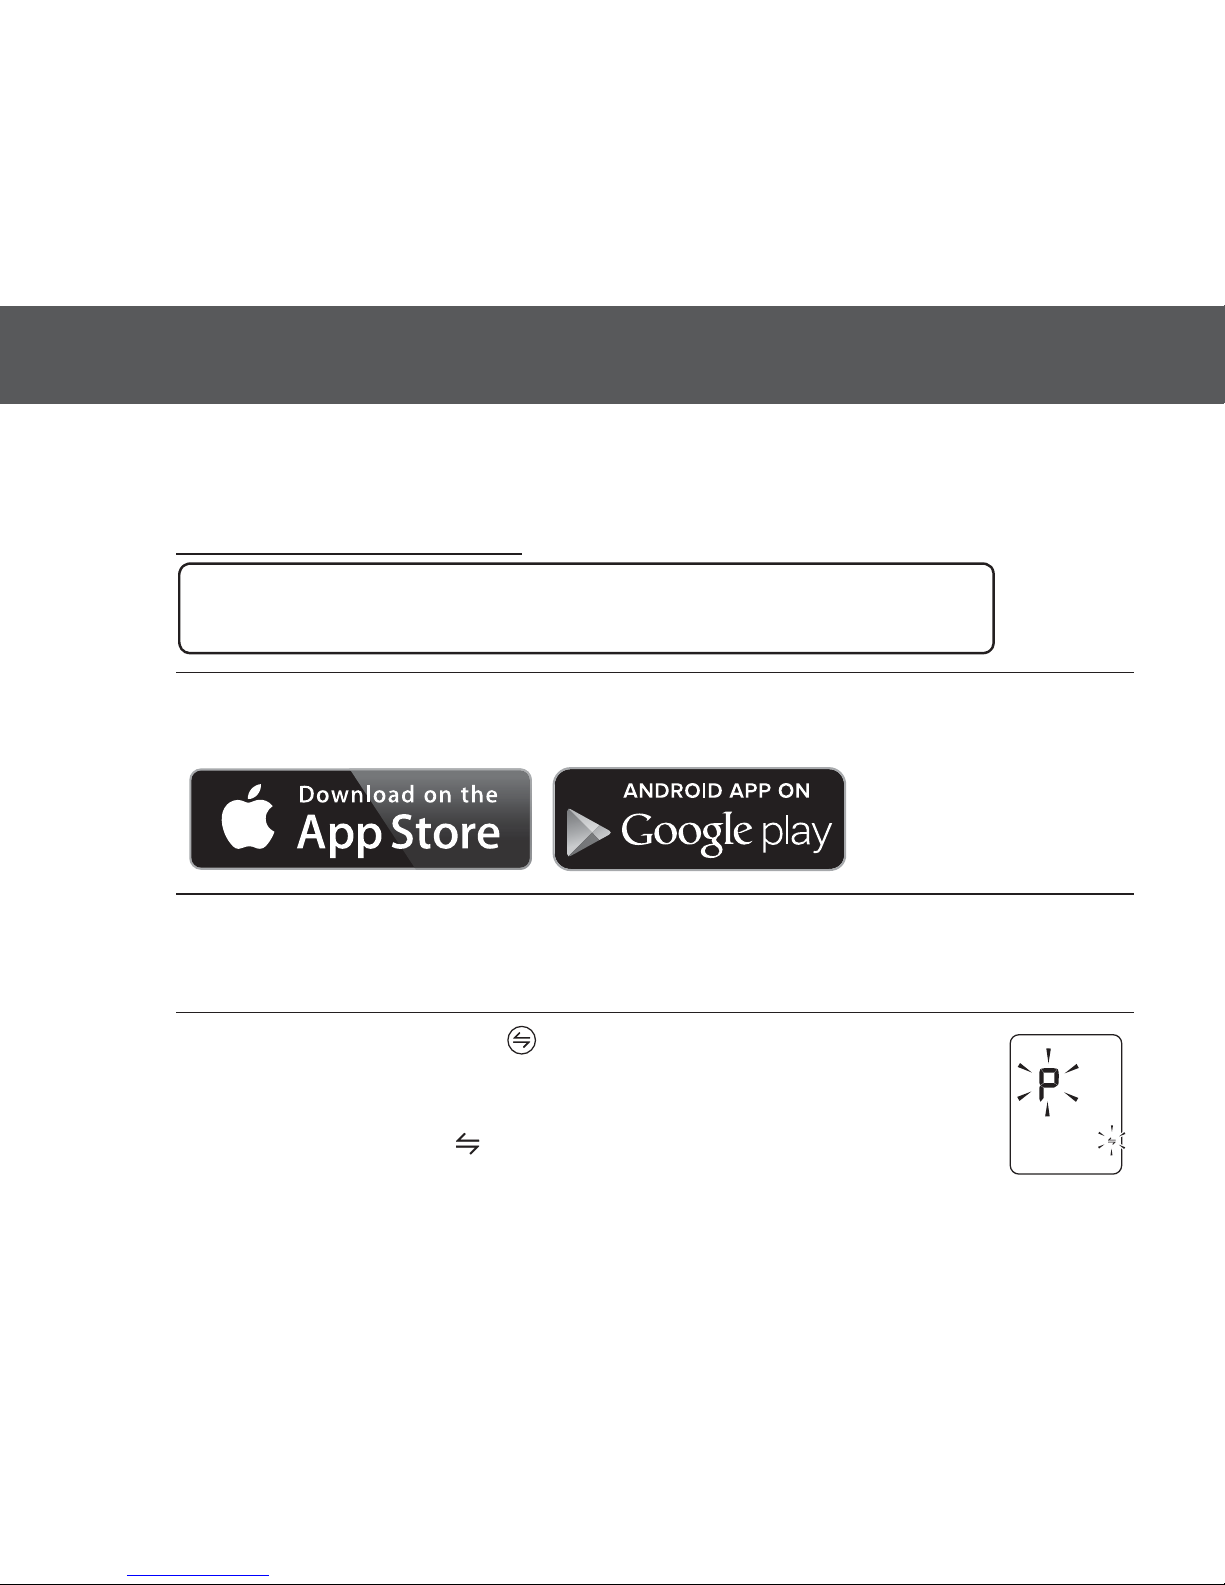
1. Download and install the free “OMRON connect” app on
your smartphone.
2. Open the App on your smartphone and follow the set-up
and pairing instructions.
3. Press and hold the connection button for
more than 2 seconds.
The connection symbol ( ) and the “P” flashes on the device’s display.
List of Compatible Smartphones at: www.omronconnect.com/devices
For details and more information, visit: www.omronconnect.com
Page 13
2. Preparation
EN
9
4. Continue the pairing instructions shown in the
OMRON connect app, while the connection
symbol is flashing on the device’s display.
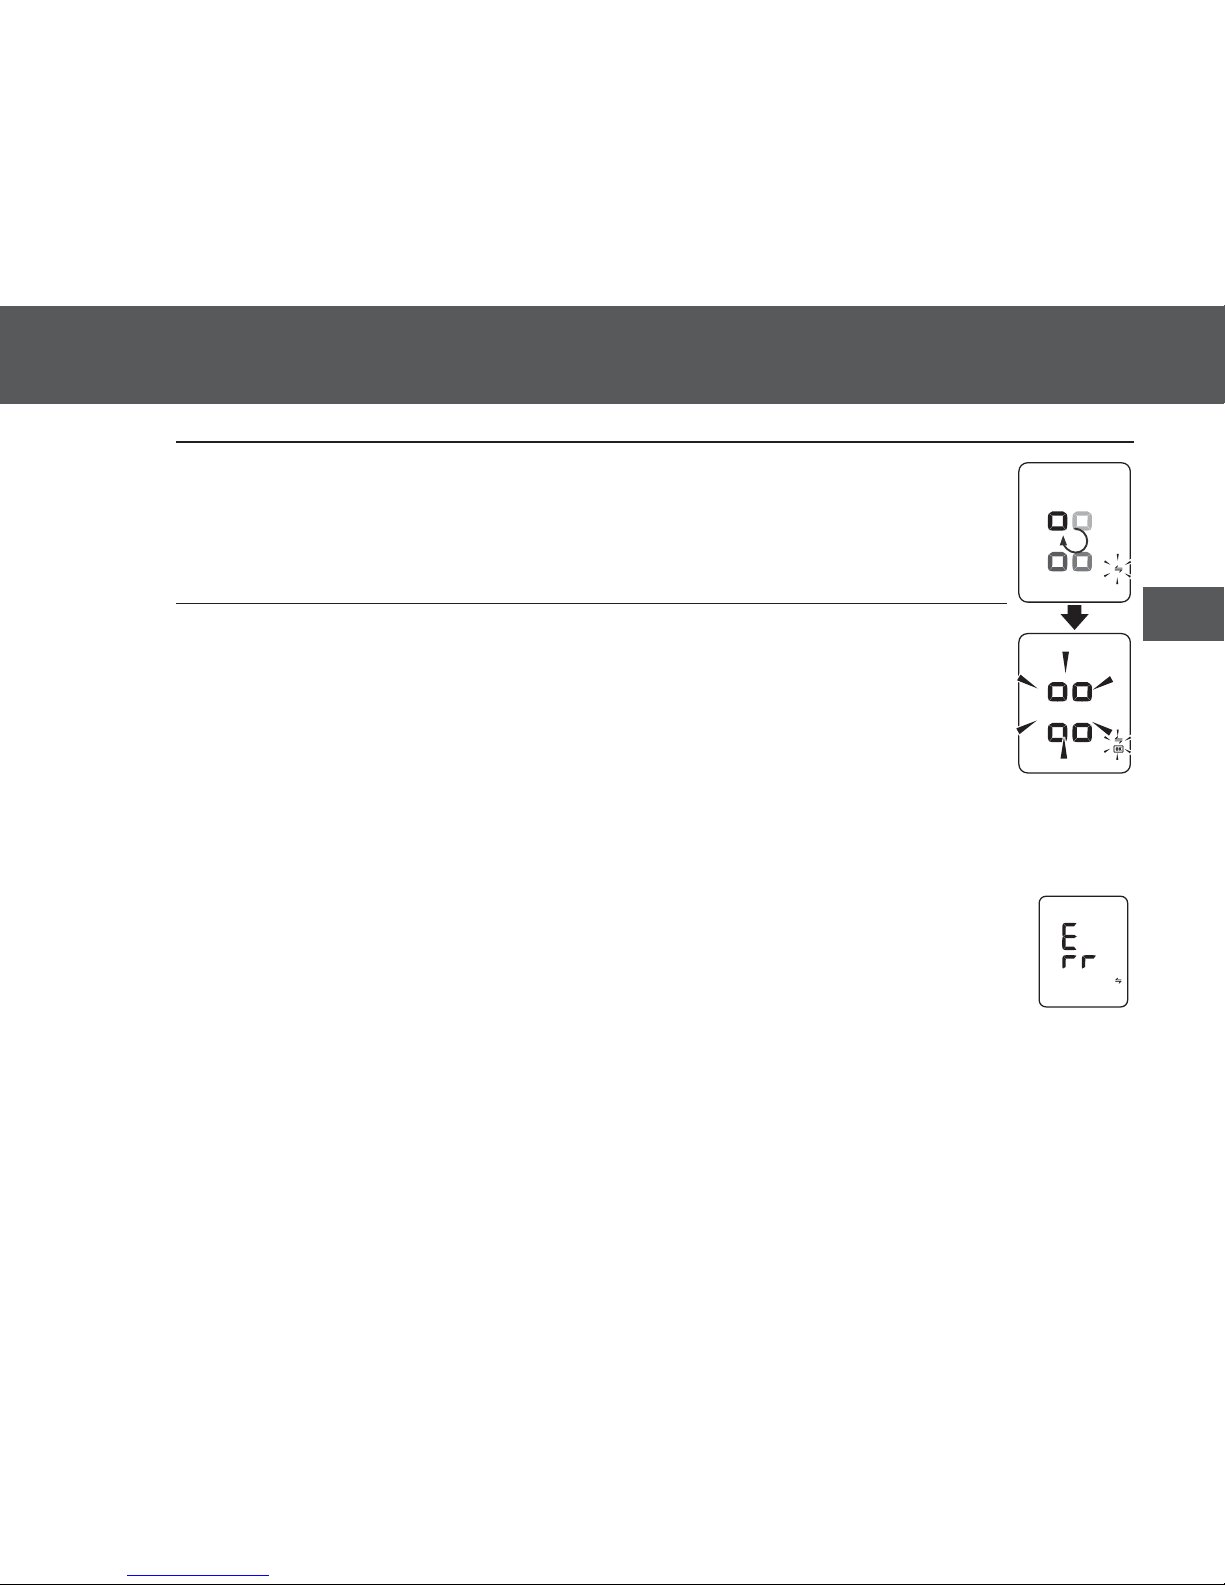
5.
Confirm if the device is connected successfully.
When the device is connected successfully to the smartphone, the “OK”
symbol and the symbols on the right will flash on the display.
The monitor will automatically turn off without any operations.
The date and time setting of your device will automatically sync with your smartphone
when paired.
When “Err” appears, refer to “Connection failure” in section 4.2 for further
details.
Notes:
* This device can pair to multiple smartphones to support the USER ID function. Section 3.3
• Any readings previously saved in the blood pressure monitor’s memory will automatically be transferred to
the app after successful completion of the pairing process.
Page 14
2. Preparation
10
2.3
Setting the Date and Time Manually
The date and time will be automatically set when paired with your smartphone. To set
manually, follow the instructions below.
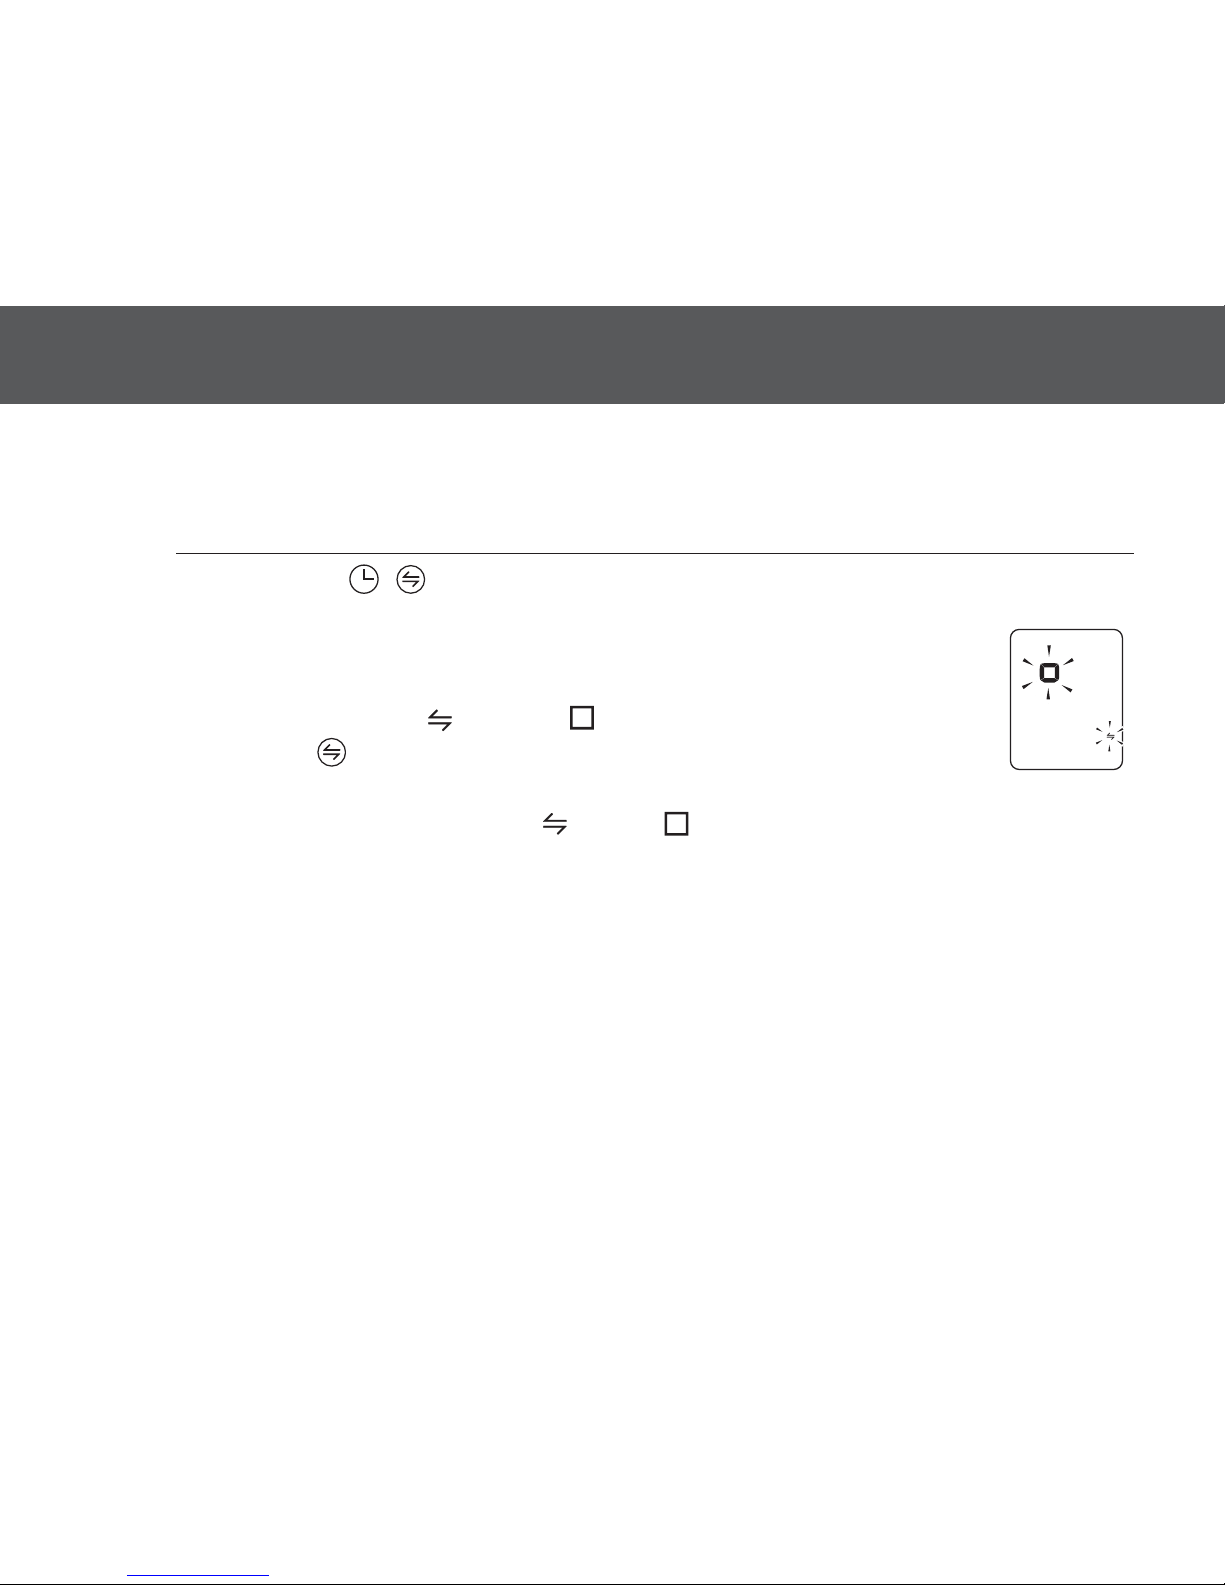
1. Press the connection button.
1If the device has not been paired with a smartphone, the year flashes
on the Date/Time display.
2If the device has been paired with a smartphone already, the
connection symbol ( ) and the “ ” flash on the device’s display. Then
press the connection button again, and the year flashes on the
Date/Time display.
Note: When the connection symbol ( ) and the “ ” flashes on the device’s display, you can now
transfer the data, refer to page 20 for further details on “TO TRANSFER THE DATA”.
Page 15

2. Preparation
EN
11
2. Push or button to change the year.
Push button to confirm the year, once confirmed the month starts flashing. Repeat
the same steps to change the month, day, hour, and minute.
3. Press the START/STOP button to turn the monitor off.
Year
Month
Day
Hour
Minute
Change Confirm
Change Confirm
Change Confirm
Change Confirm
Change Confirm
: Forward
: Back
Page 16

12
3. Using the Device
3.1
Applying the Arm Cuff
Remove tight-fitting clothing or tight rolled up sleeve from your left upper arm.
Do not place the arm cuff over thick clothes.
1. Insert the air plug into the air jack securely.
2. Apply the arm cuff to your left upper arm.
The bottom edge of the arm cuff should be 1 to 2 cm above the elbow.
Air tube
is on the inside of your arm and aligned with your middle finger.
3. Secure closed with the fabric fastener.
Notes:
• When you take a measurement on the right arm, the air tube will be at the side of your elbow. Be careful
not to rest your arm on the air tube. ---
• The blood pressure can differ between the right arm and the left arm, and the measured blood pressure
values can be different. OMRON recommends to always use the same arm for measurement. If the
values between both arms differ substantially, please check with your physician which arm to use for your
measurements.
Open both the front and rear covers to read the following:
The letter identifiers on the cover pages correspond to those in the body of this page.
L
F
aMb
Page 17

3. Using the Device
EN
13
3.2
How to Sit Correctly
To take a measurement, you need to be relaxed and comfortably seated, under
comfortable room temperature. Avoid bathing, drinking alcohol or caffeine, smoking,
exercising or eating 30 minutes before taking a measurement.
• Sit on a chair with your feet flat on the floor.
• Sit upright with your back straight. ---
• Sit with your back and arm being supported.
• The arm cuff should be placed on your arm at the same level as your heart. ---
c
d
Page 18

3. Using the Device
14
3.3
Taking a Measurement
Check if the date and time are correct on the display before taking the measurement. If the date
and time settings are necessary, refer to “Setting the Date and Time Manually” (page 10).
Notes:
• To stop a measurement, press the START/STOP button once to deflate the arm cuff.
• Remain still and quiet while taking a measurement.
The monitor is designed to take measurements and store the measurement values in
the memory for 2 people using USER ID 1 and USER ID 2.
1. Select your USER ID (1 or 2).
Push the switch up or down to select USER ID.
2. Press the START/STOP button.
The arm cuff starts to inflate automatically.
START
INFLATE
DEFLATE
COMPLETE
Cuff Wrap Guide Symbol
If your systolic pressure is
more than 210 mmHg
After the arm cuff starts to inflate, press and
hold the START/STOP button until the
monitor inflates 30 to 40 mmHg higher than
your expected systolic pressure.
Notes:
• The monitor will not inflate above 299 mmHg.
Inflating to a higher pressure than
necessary may result in bruising where
the arm cuff is applied.
Page 19

3. Using the Device
EN
15
3. Remove the arm cuff.
4. Press the START/STOP button to turn the monitor off.
The monitor automatically stores the measurement result in its memory.
It will automatically turn off after 2 minutes without any operations.
Note: Wait 2-3 minutes before taking another measurement. Waiting between measurements allows the
arteries to return to the condition prior to taking a measurement.
Using the Guest Mode
The monitor stores measurement values for 2 users in the memory. The guest mode
can be used to take a single measurement for another user. No measurement values
are stored in the memory when the guest mode is selected.
1. Press and hold the START/STOP
button for more than 3 seconds.
The USER ID symbol and the Date/Time display will disappear.
2. Release the START/STOP button when the Date/Time
display turns off.
The arm cuff will start to inflate automatically.
DO NOT adjust medication based on measurement results from this blood pressure monitor. Take medication
as prescribed by your physician. Only a physician is qualified to diagnose and treat High Blood Pressure.
This monitor is not intended to be a diagnostic device.
Always consult your physician. Self-diagnosis of measurement results and self-treatment are dangerous.
Read “If your systolic pressure is more than 210 mmHg” (page 14) of this instruction manual, if your
systolic pressure is known to be more than 210 mmHg. Inflating to a higher pressure than necessary
may result in bruising where the cuff is applied.
Page 20

3. Using the Device
16
3.4
Using the Memory Function
The monitor automatically stores the results up to 100 sets for each user (1 and 2).
It can also calculate an average value based on the last 3 measurement values taken
within 10 minutes.
Notes:
• If there are only 2 measurement values in the memory for that period, the average will be based on these
2 values.
• If there is 1 measurement value in the memory for that period, this is displayed as the average.
• If the memory is full, the monitor will delete the oldest value.
• When the SYNC symbol appears on the display, transfer the data
before the measurement values are
deleted. Refer to “Using this device with a Smartphone” (page 8).
Flashing: 80 sets of measurement results for either user have been stored.
Lit: 100 sets of measurement results for either user have been stored.
• When viewing the measurement value taken without setting the date and time, “-/ - -:--” is displayed
instead of the date and time.
To View the Measurement Values Stored in Memory
1. Select your USER ID (1 or 2).
2. Press the button.
The Memory number appears for a second before the
pulse rate is displayed. The newest set is numbered “1”.
Note: The cuff wrap guide result appears on the display with the
measurement values.
3. Press the or button to view the values stored in the
memory.
: To view the older values
: To view the more recent values
Page 21

3. Using the Device
EN
17
To View the Average Value
1. Select your USER ID (1 or 2).
2. Press and hold the button for more
than 3 seconds.
Notes:
• If the previous measurement was taken without setting the date and time,
the average value is not calculated.
• If there are no measurement values stored in the memory, the screen to the
right is displayed.
To View the Weekly Average Value
The monitor calculates and displays weekly averages for the measurements taken in
the morning and evening within 8 weeks for each user.
Note: The week begins Sunday at 2:00.
1. Select your USER ID (1 or 2).
Page 22

3. Using the Device
18
2. Press the button.
The morning average for “THIS WEEK” appears on the display.
Note: The morning hypertension symbol ( ) appears if the morning weekly average is
135/85 mmHg or above.
Press the button again, and the evening average for “THIS WEEK”
appears on the display.
Press the or button to display the previous weeks.
Note: If there are no measurement values stored in the memory, the
screen to the right is displayed.
This week
Morning average
Last week
Morning average
7 weeks ago
Morning average
Continue to
press...
This week
Evening average
Last week
Evening average
7 weeks ago
Evening average
2 weeks ago
Morning average
2 weeks ago
Evening average
Page 23

3. Using the Device
EN
19
Morning Weekly Average
This is the average for the
measurements taken during the morning
(4:00 - 11:59) between Sunday and
Saturday. An average for each day is
calculated for up to three measurements
taken within 10 minutes of the first
measurement of the morning.
Evening Weekly Average
This is the average for the
measurements taken during the evening
(19:00 - 1:59) between Sunday and
Saturday. An average for each day is
calculated for up to three measurements
taken within 10 minutes of the last
measurement of the evening.
First measurement of
the morning
Within 10 minutes
11: 59
4:00
Measurements of the morning
Up to 3 measurements
Morning Blood Pressure
Measurement
Measurement
Measurement
Measurement
Measurement
Measurement
Sunday Monday Tuesday Wednesday Thursday Friday Saturday
Measurements of the evening
Last measurement of
the evening
Within 10 minutes
1:59
19:00
Up to 3 measurements
Evening Blood Pressure
Measurement
Measurement
Measurement
Measurement
Measurement
Measurement
Sunday Monday Tuesday Wednesday Thursday Friday Saturday
Page 24

3. Using the Device
20
TO TRANSFER THE DATA
After the measurement is complete, you can transfer the data (measurement results
of blood pressure and pulse rate).
Notes:
• The stored data can be transferred all at once.
• The date and time settings of your smartphone will sync with the device when transferred.
*Sync occurs if the time between smartphone and device differs more than 10 minutes.
1. Open the OMRON connect app on your smartphone.
2.
Pull down to refresh the screen of the OMRON connect
app and the data transfer starts.
* If the data transfer is not starting, refer to “Connection failure. Data cannot be sent.”
in section 4, “Error Messages and Troubleshooting”.
3. Confirm with your device if the
measurement data is transferred
successfully.
If the display on the right is shown, the data is transferred successfully.
When “Err” appears, refer to “Data cannot be sent.” in section
4.2 for more detail.
Page 25

3. Using the Device
EN
21
TO DELETE ALL RESULTS AND SETTINGS
To delete all the information stored in your monitor, follow the instructions below. Make sure that the
monitor’s power has been off.
1. While holding the button down,
press the START/STOP button for
more than 5 seconds.
2. Release the button and START/STOP
button when “CLr” appears on the display.
The “CLr” will appear on the display when your monitor has been
initial setting.
3. Press the START/STOP button to turn the monitor off.
Note:
• Initial setting of the monitor will not delete the information in the app.
• The monitor will automatically turn off after 2 minutes.
Page 26

3. Using the Device
22
To Delete All the Values Stored in Memory
The values stored in the memory are deleted by USER ID.
1. Select your USER ID (1 or 2).
2. Press the Memory button, while the memory symbol ( )
appears.
3. While holding the button down,
press the START/STOP button for
more than 3 seconds.
Note: You cannot partially delete the values stored in the
memory. All values for the user you select will be
deleted.
Page 27

3. Using the Device
EN
23
3.5
Turning “OFF” the Bluetooth
®
Turn off the Bluetooth® of the monitor in the following areas where use of wireless
equipment is prohibited.
• On aircraft • In hospitals •While abroad
Make sure that the power has been off before starting the instructions below.
1. Press and hold the connection button for more than
10 seconds.
2. Release the button when “OFF”
appears on the display.
3. Press the START/STOP button to turn the monitor off.
Note: The monitor will automatically turn off after 2 minutes.
Page 28

3. Using the Device
24
To turn “ON” the Bluetooth
®
Make sure that the power has been off before starting the instructions below.
1. Press and hold the connection button for more than
10 seconds.
2. Release the button when “ON”
appears on the display.
3. Press the START/STOP button to turn the monitor off.
Note: The monitor will automatically turn off after 2 minutes.
Page 29

25
EN
4.
Error Messages and Troubleshooting
4.1
Error Messages
Display Cause Solution
Irregular heartbeats are detected.
Remove the arm cuff. Wait 2-3 minutes and
then take another measurement.
Repeat the steps in section 3.3. If this error
continues to appear, contact your physician.
Arm cuff is applied too loosely.
Apply the arm cuff tighter.
Refer to section 3.1.
The batteries are low.
You should replace the batteries with new
ones ahead of time.
Refer to section 2.1.
The batteries are exhausted.
You should replace the batteries with new
ones at once.
Refer to section 2.1.
Communication failed.
Refer to “Data cannot be sent.” in section 4.2.
Page 30

4. Error Messages and Troubleshooting
26
Air plug is disconnected.
Insert the air plug securely.
Refer to section 3.1.
Arm cuff is applied too loosely.
Apply the arm cuff tighter.
Refer to section 3.1.
Air is leaking from the arm cuff.
Replace the arm cuff with a new one.
Refer to section 6.1.
Movement during measurement and the arm
cuff has not been inflated sufficiently.
Repeat measurement. Remain still and do not
talk during measurement.
Refer to section 3.3.
If “E2” appears repeatedly, inflate the arm cuff
manually until it is 30 to 40 mmHg above your
previous measurement result.
Refer to section 3.3.
The arm cuff was inflated exceeding the
maximum allowable pressure, and then
deflated automatically when inflating the arm
cuff manually.
Do not touch the arm cuff and/or bend the air
tube while taking a measurement. Do not
inflate the arm cuff more than necessary.
Refer to section 3.3.
Movement during measurement.
Repeat measurement. Remain still and do not
talk during measurement.
Refer to section 3.3.
Clothing is interfering with the arm cuff.
Remove any clothing interfering with the arm
cuff.
Refer to section 3.1.
Device error.
Contact your OMRON retail outlet or
distributor.
Display Cause Solution
Page 31

4. Error Messages and Troubleshooting
EN
27
4.2
Troubleshooting
Problem Cause Solution
The measurement result is extremely
high (or low).
Arm cuff is applied too loosely.
Apply the arm cuff tighter.
Refer to section 3.1.
Movement or talking during
measurement.
Remain still and do not talk during
measurement.
Refer to section 3.3.
Clothing is interfering with the arm
cuff.
Remove any clothing interfering
with the arm cuff.
Refer to section 3.1.
Arm cuff pressure does not rise.
The air connector is not securely
connected into the air jack.
Make sure that the air tube is
connected securely.
Refer to section 3.1.
Air is leaking from the arm cuff.
Replace the arm cuff with a new
one.
Refer to section 6.1.
Arm cuff deflates too soon. The arm cuff is loose.
Apply the arm cuff correctly so that
it is firmly wrapped around the arm.
Refer to section 3.1.
Cannot measure or the results are
too low or too high.
The arm cuff has not been inflated
sufficiently.
Inflate the arm cuff so that it is 30 to
40 mmHg above your previous
measurement result.
Refer to section 3.3.
Page 32

4. Error Messages and Troubleshooting
28
Nothing happens when you press the
buttons.
The batteries are empty.
Replace the batteries with new
ones.
Refer to section 2.1.
The batteries have been inserted
incorrectly.
Insert the batteries with the correct
(+/-) polarity.
Refer to section 2.1.
Connection failure.
Data cannot be sent.
The destination device is too far away from the monitor. After checking
that there are no sources of interference nearby, move the device to a
distance within 16 ft. (5 m) of the monitor.
The Bluetooth
®
function on the destination device is turned off. Turn on
the Bluetooth
®
function and try sending the data again.
The Bluetooth
®
function on the monitor is not turned on. Press the
button, turn on the Bluetooth
®
function and try sending the data again.
Pairing (registering) has not been completed. Perform pairing
(registration).
Refer to “Using this device with a Smartphone” in section 2.2.
The blood pressure monitor is not ready, follow the step in section 2.3
“Setting the Date and Time Manually”.
The application on the destination device is not ready. Check the
application then try sending the data again.
Refer to “Using this device with a Smartphone” in section 2.2.
If the Err symbol still lights after checking the application, contact
customer service.
Other problems.
• Press the START/STOP button and repeat measurement.
• Replace the batteries with new ones.
If the problem continues, contact your OMRON retail outlet or distributor.
Problem Cause Solution
Page 33

29
EN
5.
Maintenance and Storage
5.1
Maintenance
To protect your device from damage, please observe the following:
• Store the device and the components in a clean, safe location.
• Do not use any abrasive or volatile cleaners.
• Do not wash the device and any components or immerse them in water.
• Do not use petrol, thinners or similar solvents to clean the device.
• Use a soft and dry cloth, or a soft and moistened cloth and neutral soap to clean on the monitor and the
arm cuff.
• Changes or modification not approved by the manufacturer will void the user warranty. Do not
disassemble or attempt to repair the device or components. Consult your OMRON retail outlet or
distributor.
Calibration and Service
• The accuracy of this device has been carefully tested and is designed for a long service life.
• It is generally recommended to have the device inspected every 2 years to ensure correct functioning and
accuracy. Please consult your OMRON retail outlet or distributor.
Page 34

5. Maintenance and Storage
30
5.2
Storage
Keep the device in its storage case when not in use.
1. Unplug the air plug from the air jack.
2. Gently fold the air tube into the arm
cuff.
Note: Do not bend or crease the air tube excessively.
3. Place the monitor and the arm cuff in the
storage case.
Do not store the device in the following situations:
• If the device is wet.
• Locations exposed to extreme temperatures, humidity, direct sunlight, dust or
corrosive vapours such as bleach.
• Locations exposed to vibrations, shocks or where it will be at an angle.
Page 35

31
EN
6. Optional Parts
6.1
Optional Medical Accessories
(within the scope of EC Medical Device Directive 93/42/EEC)
Using the Optional AC Adapter
1. Insert the AC adapter plug
into the AC adapter jack on
the rear side of the monitor.
2. Plug the AC adapter into an
electrical outlet.
To disconnect the AC adapter, unplug the AC adapter from the electrical outlet first,
and then remove the AC adapter plug from the monitor.
Arm cuff
Arm circumference
22-42 cm
Small arm cuff
Arm circumference
17-22 cm
AC adapter
HEM-RML31
CS2 Small Cuff
(HEM-CS24)
AC ADAPTER-S
(60240HW5SW)
AC ADAPTER-UK
(60240H7000SW)
Page 36

32
7. Specifications
Product category Electronic Sphygmomanometers
Product description Automatic Upper Arm Blood Pressure Monitor
Model (code) MIT5s Connect (HEM-7280T-E)
Display LCD digital display
Measurement method Oscillometric method
Transmission method Bluetooth Version 4.0 (Low Energy support)
Wireless communication Frequency range: 2.4GHz (2400 - 2483.5 MHz)
Modulation: GFSK
Effective radiated power: <20 dBm
Measurement range Pressure: 0 to 299 mmHg
Pulse: 40 to 180 beats / min.
Accuracy Pressure: ±3mmHg
Pulse: ± 5% of display reading
Inflation Fuzzy-logic controlled by electric pump
Deflation Automatic pressure release valve
Memory 100 measurements with date and time for each user (1 and 2)
Rating DC6V 4W
Power source 4 “AA” batteries 1.5V or AC adapter
(AC ADAPTER-S, INPUT AC100-240V 50/60Hz 0.12A
AC ADAPTER-UK, INPUT AC100-240V 50/60Hz 15VA)
Battery life Approximately 1000 measurements
(using new alkaline batteries, operating temperature and humidity 23°C,
65% RH, cuff circumference 25 cm, max pressure170 mmHg)
Applied part
Protection against electric shock Internally powered ME equipment (When using only the batteries)
= Class II ME equipment (Optional AC adapter)
Operating temperature / humidity / air pressure +10°C to +40°C / 15% to 85% RH / 700 to 1060 hPa
Storage temperature / humidity / air pressure -20°C to +60°C / 10% to 95% RH / 700 to 1060 hPa
IP classification IP 20
Weight Monitor: Approximately 364 g without batteries
Arm cuff: Approximately 170 g
Outer dimensions Monitor: Approximately 114 (w) mm × 85 (h) mm × 139 (l) mm
Arm cuff: Approximately 145 mm × 594 mm
Cuff circumference 22 to 42 cm
Cuff / Tube material Nylon, polyester, polyvinyl chloride
Package contents Monitor, arm cuff, instruction manual, storage case, battery set,
blood pressure pass, setup instructions
= Type BF
Page 37

7. Specifications
EN
33
Notes:
• These specifications are subject to change without notice.
• In the clinical validation study, the 5th phase was used on 85 subjects for determination of diastolic blood
pressure.
• This device has not been validated for use on pregnant patients.
• IP classification is degrees of protection provided by IEC 60529.
• This device fulfils the provisions of EC directive 93/42/EEC (Medical Device Directive).
• This device is designed according to the European Standard EN1060, Non-invasive
sphygmomanometers Part 1: General Requirements and Part 3: Supplementary
requirements for electromechanical blood pressure measuring systems.
• This OMRON device is produced under the strict quality system of OMRON HEALTHCARE
Co., Ltd., Japan. The core component for OMRON devices, which is the Pressure Sensor, is
produced in Japan.
This Product operates in the unlicensed ISM band at 2.4GHz. In case this Product is used
around the other wireless devices including microwave and wireless LAN, which operate same
frequency band of this Product, there is a possibility that interference occurs between this
Product and such other devices. If such interference occurs, please stop the operation of other
devices or relocate this Product before using this Product or do not use this Product around the
other wireless devices.
The Bluetooth
®
Smart word mark and logos are registered trademarks owned by Bluetooth SIG,
Inc. and any use of such marks by OMRON HEALTHCARE Co., Ltd. is under license. Other
trademarks and trade names are those of their respective owners.
Apple and the Apple logo are trademarks of Apple Inc., registered in the U.S. and other countries.
App Store is a service mark of Apple Inc.
Android and Google Play are both trademarks of Google Inc.
Page 38

7. Specifications
34
Hereby, OMRON HEALTHCARE Co., Ltd., declares that the radio equipment type MIT5s connect (HEM-7280T-E) is
in compliance with Directive 2014/53/EU.
The full text of the EU declaration of conformity is available at the following internet address:
www.omron-healthcare.com
Important information regarding Electro Magnetic Compatibility (EMC)
With the increased number of electronic devices such as PC’s and mobile (cellular) telephones, medical devices in
use may be susceptible to electromagnetic interference from other devices. Electromagnetic interference may result
in incorrect operation of the medical device and create a potentially unsafe situation.
Medical devices should also not interfere with other devices.
In order to regulate the requirements for EMC (Electro Magnetic Compatibility) with the aim to prevent unsafe product
situations, the EN60601-1-2:2007 standard has been implemented. This standard defines the levels of immunity to
electromagnetic interferences as well as maximum levels of electromagnetic emissions for medical devices.
This medical device manufactured by OMRON HEALTHCARE conforms to this EN60601-1-2:2007 standard for
both immunity and emissions.
Nevertheless, special precautions need to be observed:
• Do not use mobile (cellular) telephones and other devices, which generate strong electrical or electromagnetic
fields, near the medical device. This may result in incorrect operation of the device and create a potentially unsafe
situation. Recommendation is to keep a minimum distance of 7 m. Verify correct operation of the device in case
the distance is shorter.
Further documentation in accordance with EN60601-1-2:2007 is available at OMRON HEALTHCARE EUROPE at
the address mentioned in this instruction manual.
Documentation is also available at www.omron-healthcare.com
.
Correct Disposal of This Product
(Waste Electrical & Electronic Equipment)
This marking shown on the product or its literature, indicates that it should not be disposed of, with other
household wastes at the end of its working life. To prevent possible harm to the environment or human
health from uncontrolled waste disposal, please separate this from other types of wastes and recycle it
responsibly to promote the sustainable reuse of material resources.
Household users should contact either the retailer where they purchased this product, or their local government
office, for details of where and how they can take this item for environmentally safe recycling.
Business users should contact their supplier and check the terms and conditions of the purchase contract. This
product should not be mixed with other commercial wastes for disposal.
Page 39

35
EN
8. Warranty
Thank you for buying an OMRON product. This product is constructed of high quality materials and great care has
been taken in its manufacturing. It is designed to give you a high level of comfort, provided that it is properly operated
and maintained as described in the instruction manual.
This product is guaranteed by OMRON for a period of 2 years after the date of purchase. The proper construction,
workmanship and materials of this product is guaranteed by OMRON. During this period of guarantee OMRON will,
without charge for labour or parts, repair or replace the defect product or any defective parts.
The guarantee does not cover any of the following:
a. Transport costs and risks of transport.
b. Costs for repairs and / or defects resulting from repairs done by unauthorised persons.
c. Periodic check-ups and maintenance.
d. Failure or wear of optional parts or other attachments other than the main device itself, unless explicitly guaranteed
above.
e. Costs arising due to non-acceptance of a claim (those will be charged for).
f. Damages of any kind including personal caused accidentally or from misuse.
g. Calibration service is not included within the guarantee.
h. Optional parts have a one (1) year warranty from date of purchase. Optional parts include, but are not limited to the
following items: Cuff and Cuff Tube, AC Adapter.
Should guarantee service be required please apply to the dealer whom the product was purchased from or an
authorised OMRON distributor. For the address refer to the product packaging / literature or to your specialised
retailer.
If you have difficulties in finding OMRON customer services, contact us for information.
www.omron-healthcare.com
Repair or replacement under the guarantee does not give rise to any extension or renewal of the guarantee period.
The guarantee will be granted only if the complete product is returned together with the original invoice / cash ticket
issued to the consumer by the retailer.
Page 40

36
9.
Some Useful Information about Blood Pressure
What is Blood Pressure?
Blood pressure is a measure of the force of blood flowing against the walls of the arteries. Arterial blood
pressure is constantly changing during the course of the heart’s cycle.
The highest pressure in the cycle is called the Systolic Blood Pressure; the lowest is the Diastolic Blood
Pressure. Both pressures, the Systolic and Diastolic, are necessary to enable a physician to evaluate
the status of a patient’s blood pressure.
What is Arrhythmia?
Arrhythmia is a condition where the heartbeat rhythm is abnormal due to flaws in the bio-electrical system
that drives the heartbeat. Typical symptoms are skipped heartbeats, premature contraction, an
abnormally rapid (tachycardia) or slow (bradycardia) pulse.
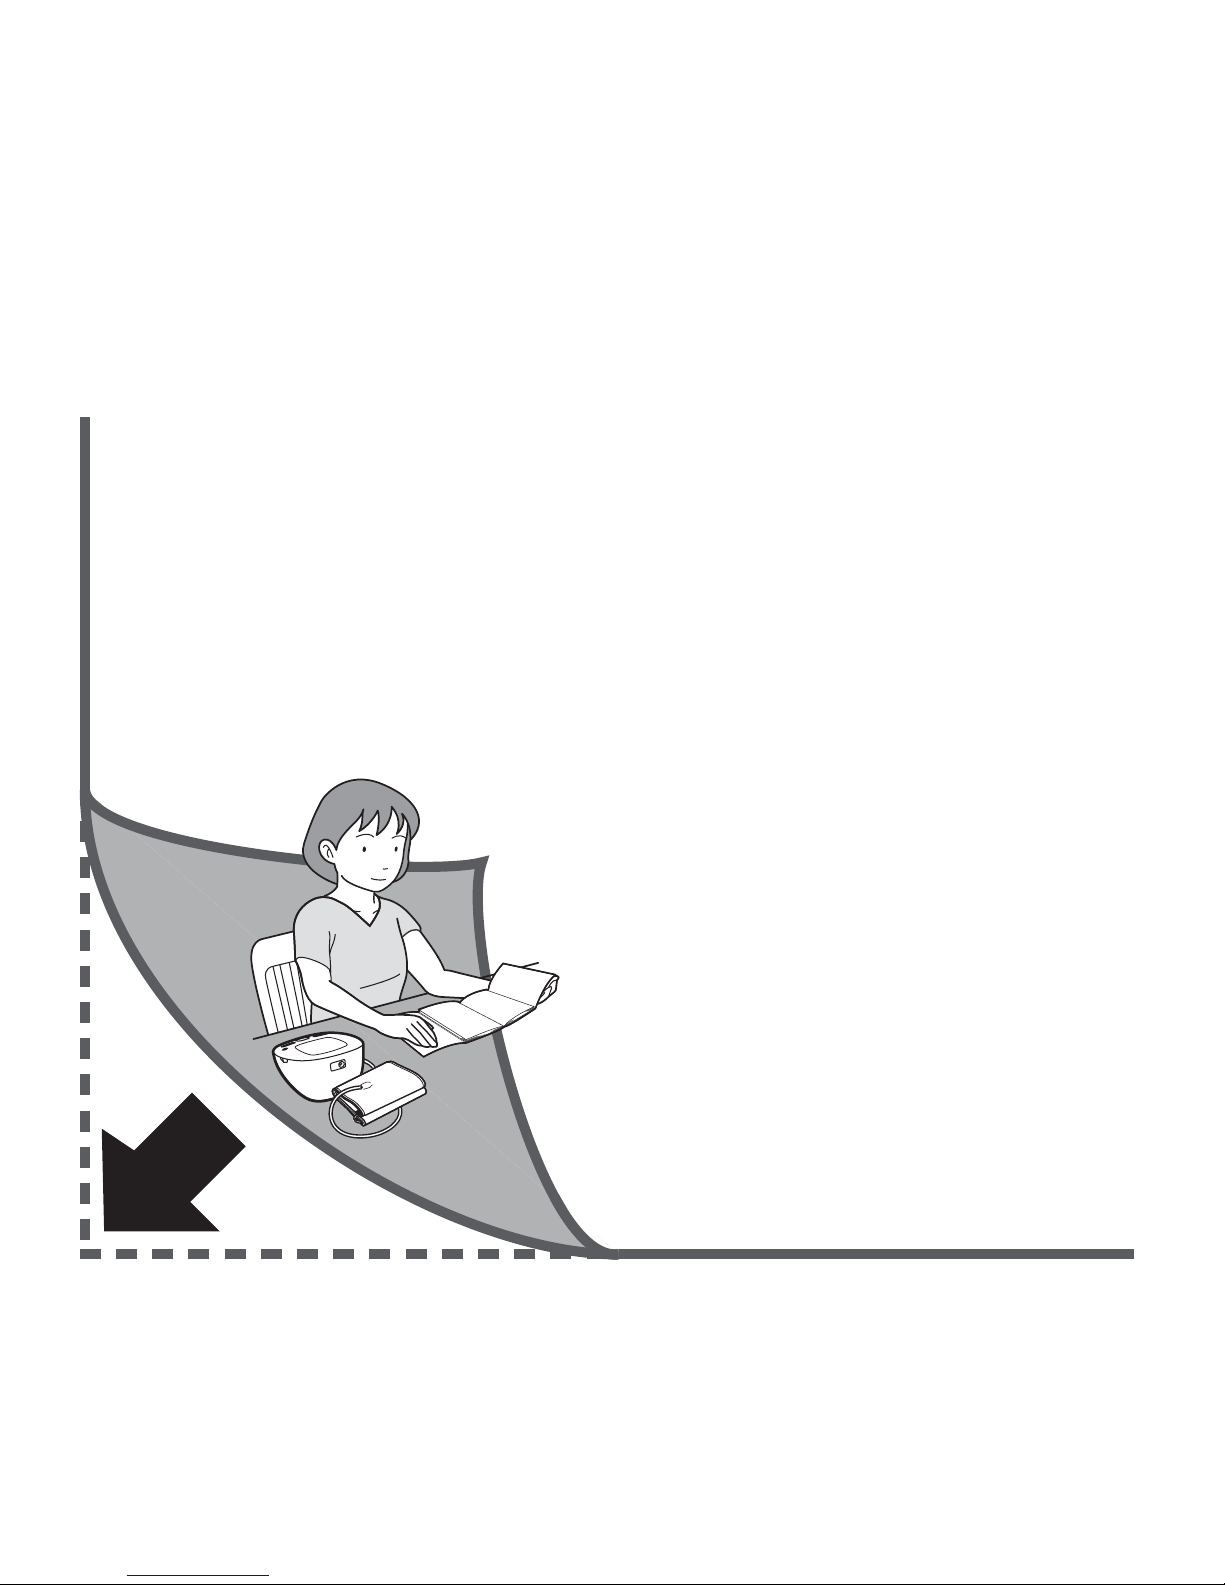
Why is it a Good Thing to measure Blood Pressure at Home?
Many factors such as physical activity, anxiety, or the time of
day, can influence your blood pressure. A single
measurement may not be sufficient for an accurate
diagnosis. Thus it is best to try and measure your blood
pressure at the same time each day, to get an accurate
indication of any changes in blood pressure. Blood pressure
is typically low in the morning and increases from afternoon
to evening. It is lower in the summer and higher in the winter.
How is Hypertension related to Stroke?
Hypertension (high blood pressure) is the key risk factor for Stroke.
It is estimated that amongst hypertensive patients, effective treatment would prevent 1 in 4
haemorrhagic strokes (bleeding around the brain).
Hypertension guidelines have endorsed the use of Home Blood Pressure Monitoring in addition to the
measurements in physicians’ offices to help manage hypertension effectively.
References to above medical claims are available upon request.
Example: fluctuation within a day (male, 35 years old)
mmHg
200
150
100
50
61218 24
Upper curve: systolic blood pressure
Lower curve: diastolic blood pressure
Time of day
Page 41

Page 42

1 2
c
d
a
F
L
M
b
Page 43

Contenu de l’emballage :
Packungsinhalt:
Il pacchetto include:
El paquete incluye:
Комплект поставки содержит:
Paketin içindekiler:
Inhoud van de verpakking:
:ﻰﻠﻋ ةوﺑﻌﻟا يوﺗﺣﺗ
Automatic
Upper Arm
Blood Pressure Monitor
MIT5s Connect (HEM-7280T-E)
Instruction Manual
Package includes:
Page 44

No.28 VSIP II, Street 2, Vietnam-Singapore Industrial Park II,
Binh Duong Industry-Services-Urban Complex,
Hoa Phu Ward, Thu Dau Mot City,
Binh Duong Province,
Vietnam
Subsidiaries
Succursales
Niederlassungen
Consociate
Empresas filiales
Dochterondernemingen
Филиалы
Yan Kuruluşlar
 Loading...