

Page 1

INSTRUCTION MANUAL
Strapless Heart Rate Monitor
Model: HR-500U
ENGLISH
Page 2

2
CONTENTS
Introduction ................................................................................3
Important safety information .....................................................4
Heart rate zones ..........................................................................5
Know your unit ..........................................................................6
Charging .....................................................................................9
Initial activation .......................................................................10
Settings mode ........................................................................... 11
Wearing the unit .......................................................................15
Workout mode ..........................................................................16
Last workout summary ............................................................19
Transferring data ......................................................................20
Deleting the memory and settings ............................................21
Care and maintenance ..............................................................23
Troubleshooting tips ................................................................24
Specications ...........................................................................25
Fcc statement ...........................................................................26
Limited warranty ......................................................................28
Page 3
3
INTRODUCTION
Thank you for purchasing the OMRON® HR-500U Strapless Heart
Rate Monitor.
Fill-in for future reference
DATE PURCHASED: ________
• Staple your purchase receipt here
• Register your product online at
www.register-omron.com
Features
The HR-500U is a wrist worn heart rate monitor designed for
walking and jogging. In addition to displaying your continuous
heart rate, it shows your intensity level relative to one of four
color-coded training zones.
Your Heart Rate Monitor comes with the following components:
Heart Rate Monitor Watch
Rechargeable Lithium-ion Battery (installed)
Wristband
USB Cable
Instruction Manual
Free access to online tness dashboard at www.omrontness.com
Please read this instruction manual thoroughly before using the unit.
Please keep for future reference.
Page 4
4
IMPORTANT SAFETY INFORMATION
To assure the correct use of the product basic safety
measures should always be followed including the
warnings and cautions listed in this instruction manual.
SAFETY SYMBOLS USED IN THIS INSTRUCTION MANUAL
WARNING
Indicates a potentially hazardous situation which, if not avoided,
could result in death or serious injury.
CAUTION
Indicates a potentially hazardous situation which, if not avoided,
may result in minor or moderate injury to the user or patient or
damage to the equipment or other property.
OPERATING THE DEVICE
Consult your physician or healthcare provider before beginning
a weight reduction or exercise program.
Do not look directly at the green LED on the back of the unit.
Doing so may cause damage to your eyes.
The unit is splash-proof and may be used in rain. However, do not
immerse it in water, charge it near water or run water over it.
Do not use a damaged USB cable.
This unit is intended to be used to measure your heart rate
during exercise such as running or walking. Do not use it
for any other purpose.
Do not throw the unit into re. The battery may explode.
When disposing the product, remove the battery and follow
the local regulations on environmental protection.
CARE AND MAINTENANCE
Do not disassemble or modify the unit. Changes or modications not
approved by Omron Healthcare will void the user warranty.
Do not subject the unit to strong mechanical shocks such as
dropping or stepping on the unit.
Page 5
5
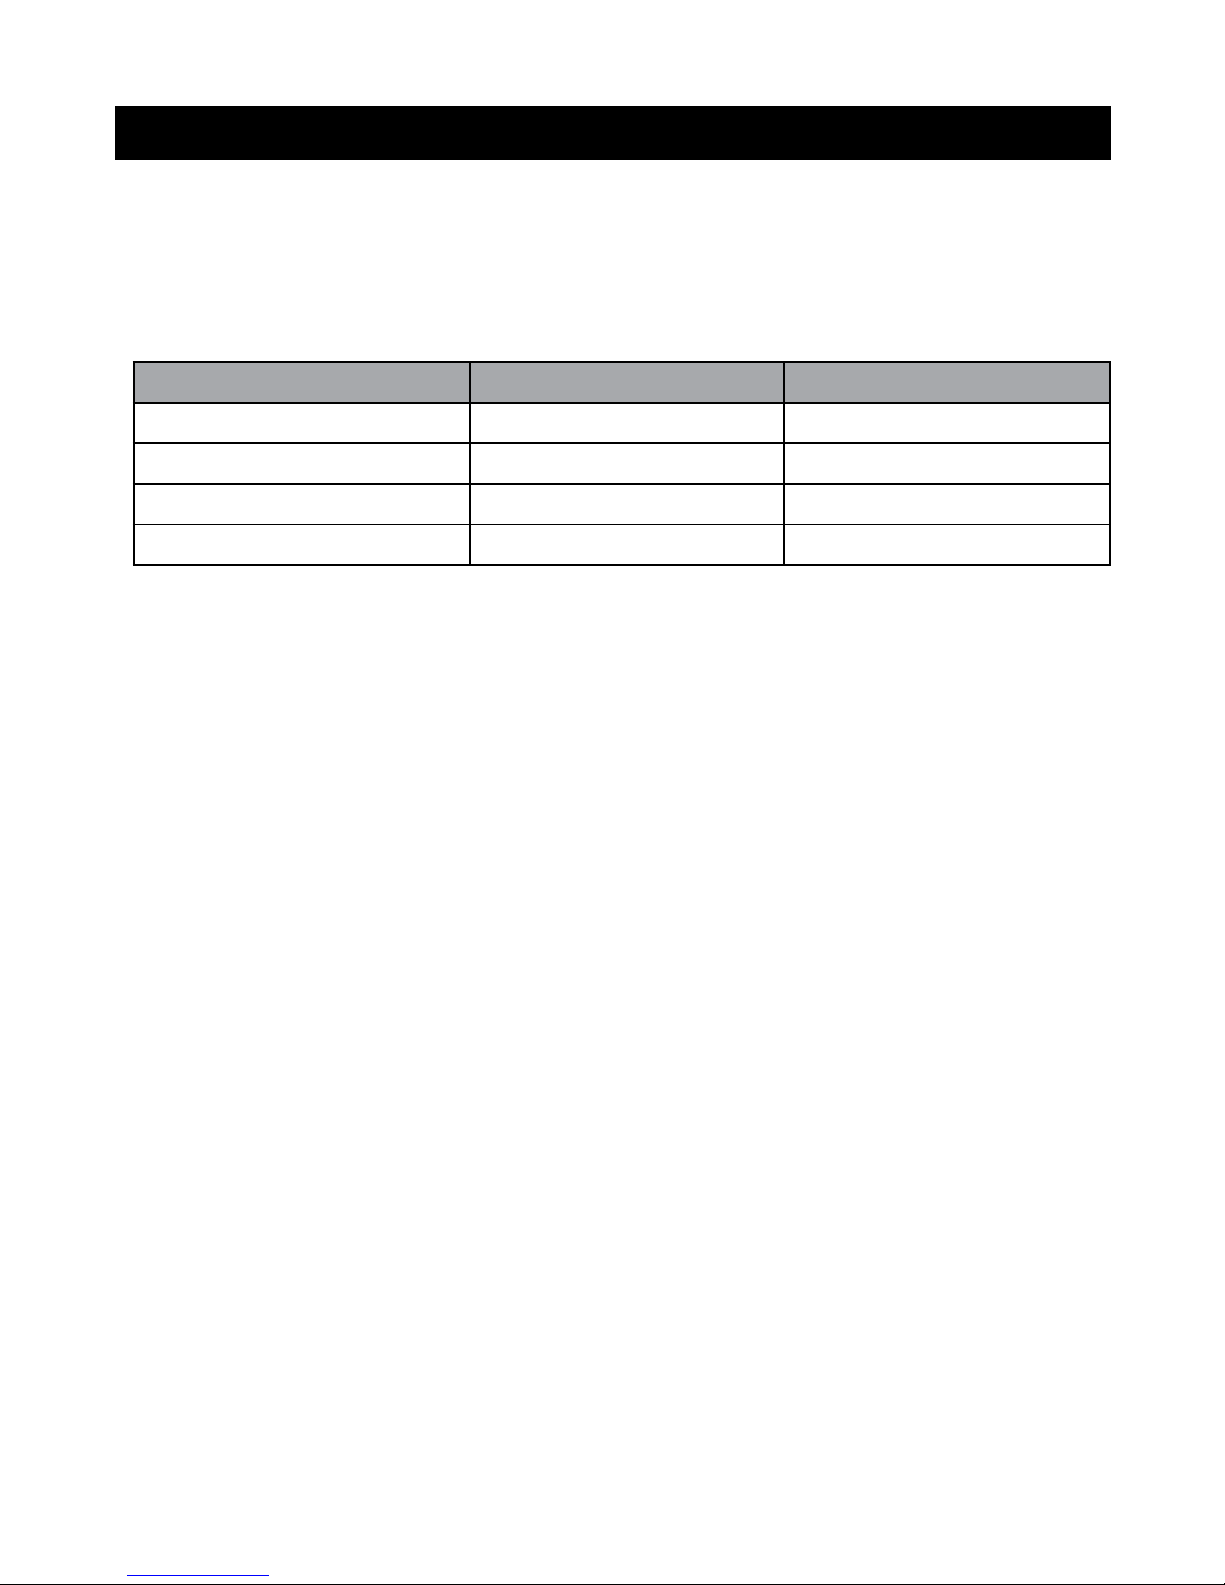
HEART RATE ZONES
We have dened four training zones to help you exercise at the
most efcient and effective intensity to achieve your tness
goals. The training zones are calculated as a percentage of your
maximum heart rate.
Maximum heart rate (%) Training zone color Workout objectives
85% and up Red Power & Speed
67.5% to 85% Yel low Cardio Fitness
50% to 67.5% Green Fat Burn & Endurance
Up to 50% Blue Warm-Up & Cool Down
NOTE:
Always warm up sufciently before increasing your workout intensity.
Page 6
6
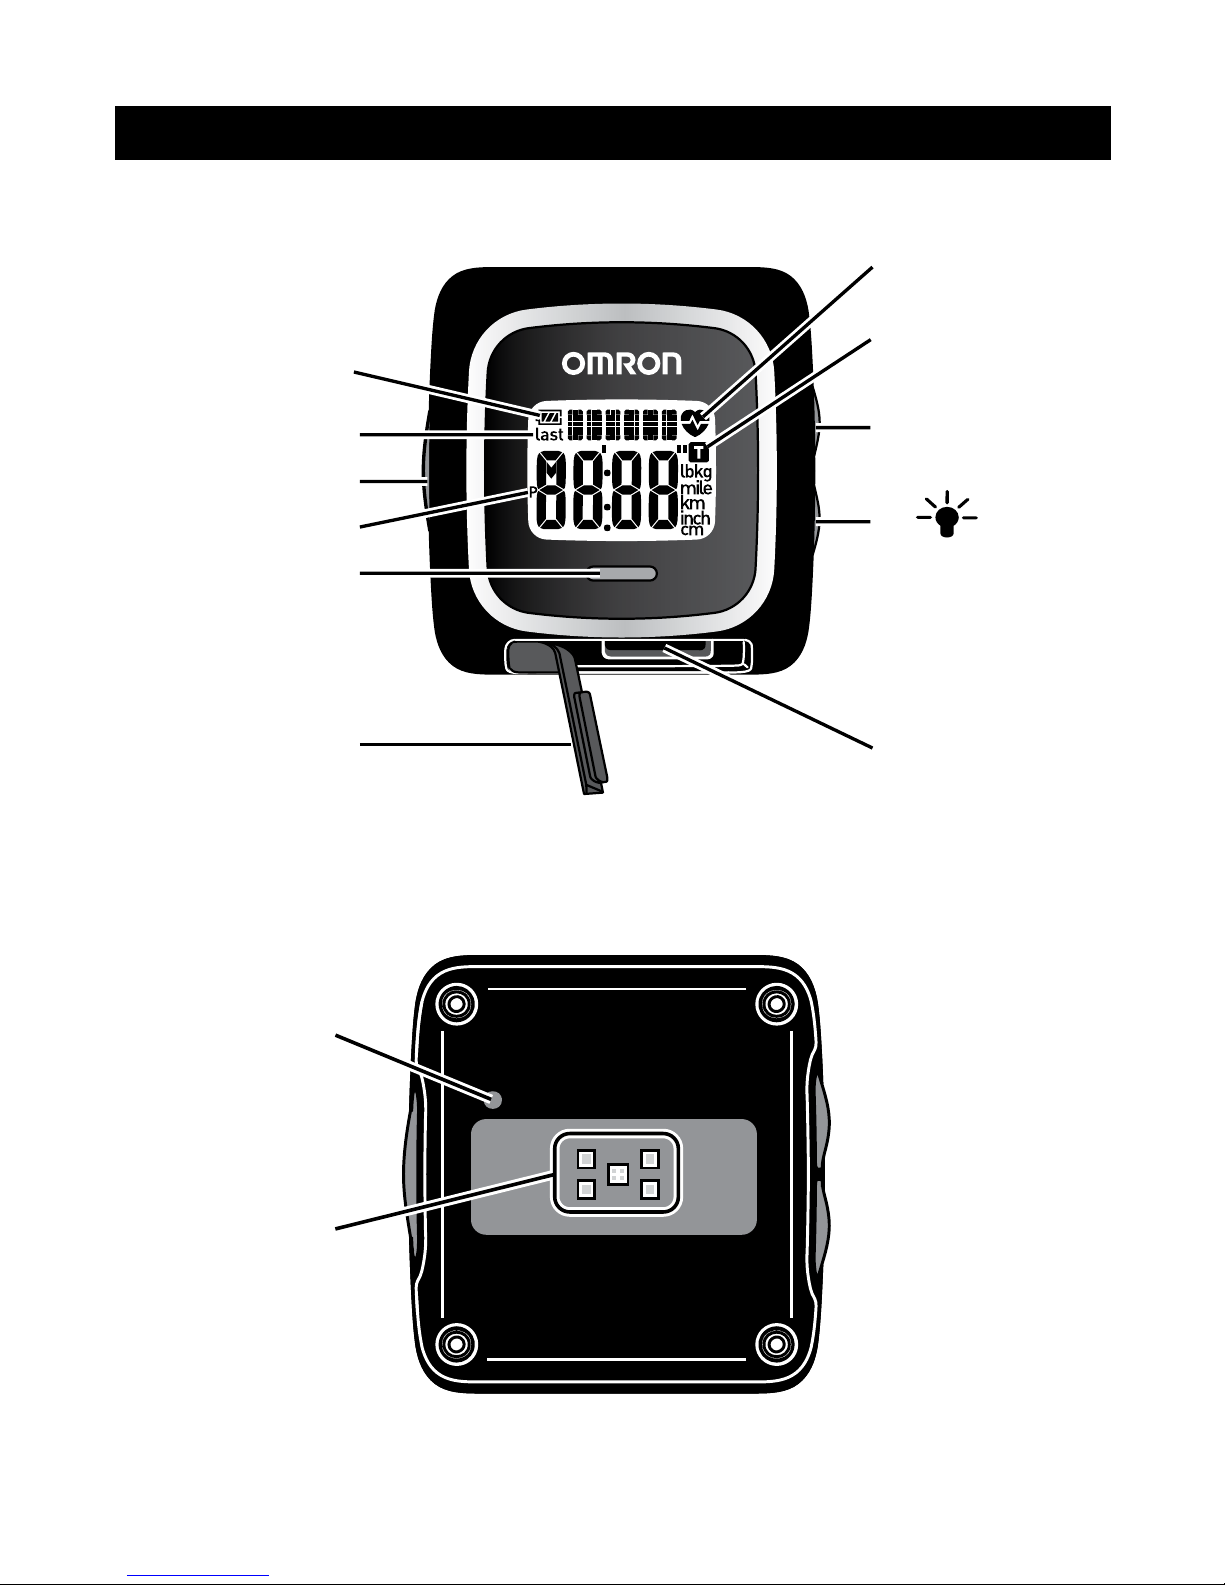
KNOW YOUR UNIT
Main unit
1
11
10
9
8
7
2
3
5
6
4
Back of main unit
12
13
Page 7
7
KNOW YOUR UNIT
1 Battery symbol
Shows the battery level and blinks when charging.
2
Last workout indicator
Shown when viewing the results of your last workout.
3 ENTER/START button
• Activate the unit for use by pressing and holding for 3 seconds.
• During setup, press to accept a setting value.
• Enter workout mode by pressing and holding for 3 seconds.
• While in workout mode press to start, pause, and un-pause the
timer/measurement.
• Exit workout mode and save by pressing and holding for 3 seconds.
4
PM symbol
Displayed when the time shown is PM.
5 Zone indicator
Shows your current training zone with a color coded light.
(Refer to “HEART RATE ZONES”.)
6 Port cover
Open this cover when charging the unit.
7 Micro USB port
8
BACKLIGHT/DOWN button
• In watch and workout mode press to turn on the backlight (5 sec.).
• In setup mode press to decrease the value of a setting.
9 UP button
• In watch mode press to view and scroll through the results of
your last workout.
• In workout mode press to scroll through heart rate, calories
burned, distance, pace, clock, and timer.
• In settings mode press to increase a value.
Page 8
8
KNOW YOUR UNIT
10
Memory/Transfer indicator
• Displayed continuously when memory is almost full indicating
that it is time to transfer workout data to the online dashboard.
When memory is full, the oldest workout data will be erased to
make room for new workouts.
11
Heart Rate symbol
Shown when the unit is displaying your heart rate.
12 Reset button
Press to reset the unit.
13 Optical sensor
The optical sensor projects a green light to measure your heart rate.
WARNING
Do not look directly at the green LED on the back of the unit. Doing
so may cause damage to your eyes.
Page 9
9
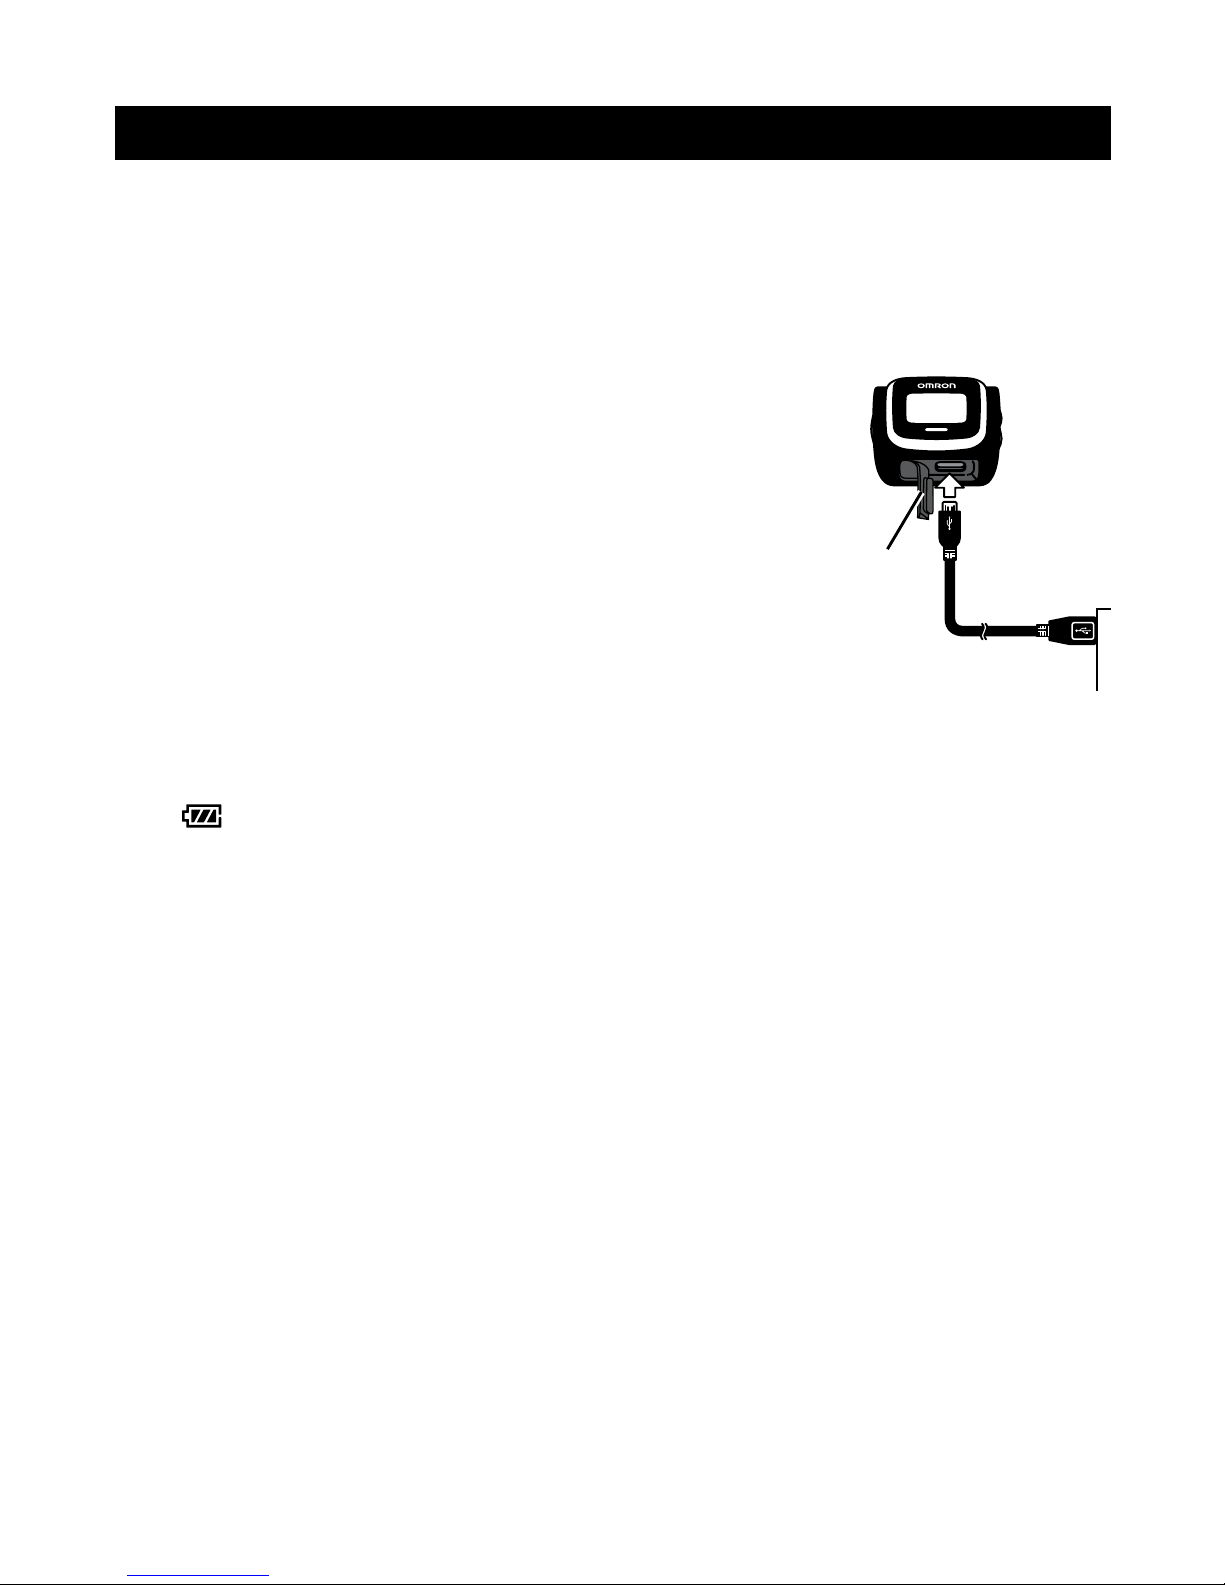
CHARGING
Fully charge the unit before use for the rst time after purchase, if the
unit has not been charged for a long time, or when the battery power
becomes low.
(Charging takes up to 2.5 hours.)
1. Open the port cover and connect the
USB cable.
1
2
Port cover
2. Connect the other end of the cable to the USB port on
a computer.
will ash while charging and will be displayed continuously
when the unit is fully charged.
NOTES:
• Disconnect the USB cable and securely close the port cover before
using the unit.
• Grip the USB cable by the connector when disconnecting the unit.
• It is normal for the unit to become warm to the touch during charging.
* If the battery power is drained completely, restart the unit and make
necessary settings again. (Refer to "INITIAL ACTIVATION" and
"SETTINGS MODE".) Memory will not be deleted.
* Charge the battery in a location with an ambient temperature of
32°F to 104°F.
Page 10

10
INITIAL ACTIVATION
When using the unit for the rst time, turn it on as follows:
1. Press and hold the ENTER button for at least
3 seconds.
The display will show .
After activation, the unit will automatically enter
"Settings Mode".
NOTE:
The screen display will remain on after the unit has been activated.
Page 11

11
SETTINGS MODE
Button functions
Press the UP button to increase the setting value
by 1. Press and hold the UP button to increase
values faster.
Press the DOWN button to decrease the setting
value by 1. Press and hold the DOWN button to
decrease values faster.
Press the ENTER button to accept the setting
value and move to the next setting.
1. Set a region code (AREA).
Setting range: 1 to 4
By selecting a region code, you set the time & date format and the
units. Refer to the following table to select a code:
U.S.A.’s region code is 1.
Region
code
Region
Time
display
Date display
Body weight
unit
Height and
walking stride unit
Distance unit
1 U.S.A. 12-hour Month/day Pounds Feet/inches Miles
2
Latin America,
Europe, Asia
24-hour Day/month Kilograms Centimeters Kilometers
3 Japan 24-hour Month/day Kilograms Centimeters Kilometers
4 UK 12-hour Day/month Pounds Feet/inches Miles
Page 12

12
SETTINGS MODE
2. Set the date.
Set the year (YEAR), month (MONTH), and
day (DAY).
• Setting range:
January 1, 2012, to December 31, 2040
3. Set the clock.
Set the hour (HOUR) and minutes (MINUTE).
• Setting range:
12:00 to 11:59 and
12:00 PM to 11:59 PM
(12-hour time format)
NOTE:
The
mark is displayed when the time shown
is PM.
4. Set your body weight (WEIGHT).
Setting range: 22 lb to 300 lb
5. Set your height (HEIGHT).
Setting range: 3’4” to 6’6”
6. Set your walking stride (WALK STRIDE).
Setting range: 12'' to 48''.
7. Set your jogging stride (JOG STRIDE).
Setting range: 12'' to 99''
Page 13

13
SETTINGS MODE
Walking stride and jogging stride
• The values that ash when being set for the rst time are
reference values calculated from the height that you set.
You can set the stride based on your own gait and physique to
increase the accuracy of the distance and pace calculations.
• To calculate a more accurate stride gure, measure one stride
(from toe to toe) after walking 10 paces or running.
•
To calculate distance, the unit automatically detects whether you are walking
or running and then multiplies the appropriate stride by the number of paces.
8. Set your gender (SEX).
Setting range: F (female) or M (male)
9. Set your age (AGE).
Setting range: 18 to 79 years old
NOTE:
Update your age every birthday.
10. Set the maximum heart rate (HR MAX).
Setting range: 100 to 240 beats/min
The displayed value is calculated from the age you set based on a
standard formula:
Maximum heart rate (HR MAX) = 220 - age
* Maximum heart rate is used to calculate the training zones. The
formula provides an estimate of the heart rate you potentially
could achieve under maximum physical exertion. Attempting to
achieve your actual maximum heart rate should ONLY be done
under the guidance of a trained medical/tness professional.
(Refer to “HEART RATE ZONES”.)
11. Settings are complete.
Page 14

14
SETTINGS MODE
The current time will be displayed.
NOTES:
• If no setting is made for more than ve minutes, the display will
disappear.
• If the settings are not correct, the measurements for calories,
pace, distance, and the training zones will not be accurate.
Changing settings
1. Press and hold the ENTER and DOWN buttons
at the same time for 3 seconds.
The display will show the region code. Congure
settings as desired by following the process
described in “SETTINGS MODE”, starting
with step 1.
NOTE:
If no setting is made for more than ve minutes, your changes
are not applied and the display will return to the watch mode.
Page 15

15
WEARING THE UNIT
1. Put the wristband on the main unit.
Gently stretch the square hole of the wristband over the face of the
main unit. The ring can be positioned to the top or bottom.
Feed the rounded end of the wristband through the ring with the
black side facing out.
Ring
Face
2. Wear the unit just like a watch.
Leave a space the width of a nger between the wristband and the
wrist joint.
3
1
2
A space the width
of a nger
Wrist joint
Page 16

16
WORKOUT MODE
In workout mode you can monitor your heart rate, count calories
burned, and measure your time, distance & pace. All data will be
recorded for viewing after the workout and on the web dashboard.
Starting a workout
1. Enter workout mode by holding the ENTER
button for 3 seconds.
2. Waitfor10secondswhilethesensorveries
thepropert&placementbydetectingyour
heart rate.
The screen will display "READY" and the zone
indicator will begin ashing once your heart rate
is detected and the workout is ready to begin.
If a heart rate is not found the display will show
“ADJUST” and “FIT”. Tighten the wristband so
that the back of the unit is in continuous contact
with the skin on your arm. Then press and hold
the ENTER button for 3 seconds.
3. Press the enter button once, and begin your
workout.
Page 17

17
WORKOUT MODE
The unit will contiguously display your current stats and record
them for later viewing.
Zone indicator
The zone indicator will change colors and the rate of ashing to
correspond with your current training zone. (Refer to “HEART
RATE ZONES”.)
Screen display during your workout
You can cycle through the display screens by pressing the UP button:
Heart rate ( )
Calories burned (KCAL)
Distance (MILE)
Pace (PACE)
Clock (CLOCK)
Timer (TIMER)
Page 18

18
WORKOUT MODE
Pausing a workout
1. Press the ENTER button.
Measurement will pause. While paused, the
unit will alternately show “PAUSE” and the
display screen. (Only the heart rate and clock
will be updated.)
Resuming a workout
1. Press the ENTER button.
The “PAUSE” display will disappear, and measurement will resume.
Ending a workout
1. Press and hold the ENTER button for
3 seconds.
After “STOP” is shown, the current time will be
displayed.
Page 19

19
LAST WORKOUT SUMMARY
You can view the results of your last workout.
1. Press the UP button.
The screen will show the average heart rate.
2. Press the UP button to cycle the display.
The display will change as follows:
Average heart rate (AVG
)
Peak heart rate (MAX
)
Calories burned (KCAL)
Measurement (exercise) time (TIME)
Distance (MILE)
Pace (PACE)
NOTE:
If the workout lasts less than 1 minute, data will not be recorded
for future reference.
Page 20

20
TRANSFERRING DATA
To track and view all of your past workouts you will need to transfer
the recorded data from the device to the web dashboard.
To use the web software for the rst time, please visit
www.omrontness.com and sign-up to get started.
Memory/Transfer indicator
The symbol is continuously displayed when 8 hours of data has
been stored in the memory indicating that you should transfer data
soon. When the memory is full (10 hours of data), the unit will
begin to delete the oldest data to make room for new workouts.
Page 21

21
DELETING THE MEMORY AND SETTINGS
Erasing The Memory
Use the following procedure to erase all workout data:
1. Press and hold the UP and DOWN buttons at
the same time for 3 seconds.
2. Select “YES” with the UP or DOWN button.
NOTE:
Select "NO" with the UP or DOWN button to cancel the operation.
3. Press the ENTER button.
All measurement records will be erased.
Page 22

22
DELETING THE MEMORY AND SETTINGS
Erasing the memory and all settings
Use the following procedure to erase all workout data and user
settings (factory reset):
1. Press and hold the ENTER, UP, and DOWN
buttons at the same time for at least 3 seconds.
2. Select “YES” with the UP or DOWN button.
NOTE:
Select "NO" with the UP or DOWN button to cancel the operation.
3. Press the ENTER button.
The screen display will turn off, indicating that all set values
and measured values have been erased. To use the unit again,
you must turn it on and congure settings. (Refer to “INITIAL
ACTIVATION” and “SETTINGS MODE”.)
Page 23

23
CARE AND MAINTENANCE
To keep the unit in the best condition and protect the unit from
damage follow the directions listed below:
CAUTION
Do not disassemble or modify the unit.
Changes or modications not approved by Omron Healthcare will
void the user warranty.
Clean the unit with a soft dry cloth. If dirt remains
on the unit, clean with a soft cloth slightly dampened
with water. Do not use any abrasive cleaners.
Do not submerge the unit in water.
Do not allow any water or liquid to get into the unit.
Clean the wristband by hand washing with warm water. If the
wristband is not clean, soak in a solution of warm water and a mild
dishwashing soap. Rinse thoroughly with water and allow to air dry.
Do not dry in direct sunlight.
Store the unit in a clean, safe location.
Do not expose to water, direct sunlight, humidity, temperatures below
32°F or higher than 104°F.
Store the unit out of the reach of children.
Do not subject the unit to strong shocks, such as dropping the
unitontheoor.
Charge the battery at least once every two months.
The service life of the battery may decrease if the unit is not used for
an extended period of time.
Use the unit consistent with the instruction provided in this manual.
* Exercise care concerning liquid leaking out of the battery and
abnormal heat generation.
* Exercise care to avoid cutting yourself on sharp corners or other edges.
* For more information about how to dispose of the used battery, and
unit, consult the guidelines of your city, county or state.
Page 24

24
TROUBLESHOOTING TIPS
Issue Cause Solution
I can’t charge
the battery.
The connected computer is not
on, or the USB-AC adapter is
not connected.
Start up the connected computer
or connect the USB-AC adapter.
(Refer to "CHARGING".)
The dedicated USB connector
is not connected properly.
Insert the connector properly.
Room temperature is 32°F
or less, or 104°F or more.
Charge the battery in a location where
the room temperature is higher than
32°F but lower than 104°F.
The battery’s service life is over. The battery cannot be replaced.
Please dispose of the unit properly.
The screen
is blank.
The unit has not been
turned on.
Press and hold the ENTER
button for at least 3 seconds.
(Refer to "INITIAL ACTIVATION".)
There is no battery power
remaining.
Recharge the battery.
(Refer to "CHARGING".)
I can’t start
measurement.
The wristband is too loose. Fasten the wristband securely around
your wrist. (Refer to “WEARING
THE UNIT”.)
The actual distance
and measurement
display don’t
agree.
The walking stride and
jogging stride settings
are incorrect.
Recongure the walking stride
and jogging stride settings.
(Refer to “SETTINGS MODE”.)
The screen is
showing an error.
An error has occurred. Press the reset switch with a pin or
similarly sharp-ended tool and then
press and hold the ENTER button for
3 seconds to turn on the unit. (Pressing
the reset switch will not cause settings
to be erased.)
Communication error. Check the display on your PC and
follow the instruction provided.
Or plug in the USB Connector once
more and try again.
NOTE:
If the error still occurs after trying the
above, contact Omron Healthcare's
Customer Service.
Page 25

25
SPECIFICATIONS
Product name OMRON Strapless Heart Rate Monitor
Model number HR-500U (HBE-910U-Z)
Built-in battery Rechargeable lithium-ion battery (100 mAh)
Charging time Approx. 2.5 hours (when charging from a computer’s USB port)
Operating time Approx. 8 days (after being fully charged, with 1 hour of use per day)
Water resistance Splash-proof (IPX4)
Display Workout time
0 min. 0 sec. to 59 min. 59 sec. (unit: seconds)
1 hr. 0 min. to 9 hr. 59 min. (unit: minutes)
Heart rate 30 to 240 beats/min.
Distance 0.0 to 99.99 miles / 0.0 to 99.99 km
Pace 0 min. 0 sec./mile to 59 min. 59 sec./mile
1 hr. 0 min./mile to 9 hr. 59 min./mile
0 min. 0 sec./km to 59 min. 59 sec./km
1 hr. 0 min./km. to 9 hr. 59 min./km
Clock 12:00 to 11:59 and 12:00 PM to 11:59 PM / 0:00 to 23:59
Calories burned
0 to 9,999 kcal
Memory 10 hours of measurement data
(Including measured start time and date, measurement stop time and date,
heart rate every 5 seconds and pace every 1 minute during measurement)
Settings Date January 1, 2012, to December 31, 2040
Clock
12:00 to 11:59 and 12:00 PM to 11:59 PM / 0:00 to 23:59
Body weight 22 lb to 300 lb / 10 to 136 kg
Height 3'4'' to 6'6'' / 100 to 199 cm
Walking stride 12'' to 48'' / 30 to 120 cm
Jogging stride 12'' to 99'' / 30 to 250 cm
Gender F: Female, M: Male
Age 18 to 79 years old
Max. heart rate 100 to 240 beats/min.
Operating
temperature
and humidity
14°F to 104°F (-10°C to 40°C), 30% to 85% RH
Dimensions Heart Rate Monitor Watch: 1 11/16'' (L) × 1 5/8'' (W) × 3/4'' (H)
Wristband: 11 1/4'' (L) × 1 9/16'' (W)
Weig ht Approx. 1.2 oz (including wristband)
For ages 18 to 79
Contents Heart Rate Monitor Watch, Rechargeable Lithium-ion Battery
(installed), Wristband, dedicated USB cable, and Instruction manual
* Specications are subject to change without prior notice.
Page 26

26
FCC STATEMENT
NOTE:
POTENTIAL FOR RADIO/TELEVISION INTERFERENCE
(for U.S.A. only)
This product has been tested and found to comply with the limits for a
Class B digital device, pursuant to part 15 of the FCC rules.
These limits are designed to provide reasonable protection against
harmful interference in a residential installation. The product
generates, uses, and can radiate radio frequency energy and, if not
installed and used in accordance with the instructions, may cause
harmful interference to radio communications.
However, there is no guarantee that interference will not occur in a
particular installation. If the product does cause harmful interference
to radio or television reception, which can be determined by turning
the product on and off, the user is encouraged to try to correct the
interference by one or more of the following measures:
• Reorient or relocate the receiving antenna.
• Increase the separation between the product and the receiver.
• Connect the product into an outlet on a circuit different from that
to which the receiver is connected.
• Consult the dealer or an experienced radio/TV technician for help.
POTENTIAL FOR RADIO/TELEVISION INTERFERENCE
(for Canada only)
This digital apparatus does not exceed the Class B limits for
radio noise emissions from digital apparatus as set out in the
interference-causing equipment standard entitled “Digital
Apparatus”, ICES-003 of the Canadian Department of
Communications.
Page 27

27
Cet appareil numérique respecte les limites de bruits radioeléctriques
applicables aux appareils numériques de Clase B prescrites dans la
norme sur le materiel brouilleur:
“Appareils Numériques”, ICES-003 édictée par le minister des
communications.
Changes or modications not expressly approved by the party
responsible for compliance could void the user’s authority to
operate the equipment.
Page 28

28
LIMITED WARRANTY
Your OMRON HR-500U Strapless Heart Rate Monitor, excluding
the wristband, is warranted to be free from defects in materials and
workmanship appearing within 1 year from the date of purchase,
when used in accordance with the instructions provided with the unit.
The above warranty extends only to the original retail purchaser.
We will, at our option, repair or replace without charge any Heart
Rate Monitor covered by the above warranty.
Repair or replacement is our only responsibility and your only remedy
under the above warranty.
To obtain warranty service contact Omron Healthcare's Customer Service
by calling 1-800-634-4350 for the address of the inspection center and
the return shipping and handling fee. Information for warranty service is
available on our website at www.omronhealthcare.com.
Enclose the Proof of Purchase. Include a letter, with your name, address,
phone number, and description of the specic problem. Pack the product
carefully to prevent damage in transit. Because of possible loss in transit,
we recommend insuring the product with return receipt requested.
THE FOREGOING IS THE SOLE WARRANTY PROVIDED
BY OMRON IN CONNECTION WITH THIS PRODUCT,
AND OMRON HEREBY DISCLAIMS ANY OTHER
WARRANTY, EXPRESS OR IMPLIED, INCLUDING
IMPLIED WARRANTY OF MERCHANTABILITY AND
FITNESS FOR A PARTICULAR PURPOSE. IMPLIED
WARRANTY AND OTHER TERMS THAT MAY BE
IMPOSED BY LAW, IF ANY, ARE LIMITED IN DURATION
TO THE PERIOD OF THE ABOVE EXPRESS WARRANTY.
Page 29

29
OMRON SHALL NOT BE LIABLE FOR LOSS OF USE OR
ANY OTHER SPECIAL, INCIDENTAL, CONSEQUENTIAL
OR INDIRECT COSTS, EXPENSES OR DAMAGES.
This warranty provides you with specic legal rights, and you may
have other rights that vary by jurisdiction. Because of special local
requirements, some of the above limitations and exclusions may not
apply to you.
FOR CUSTOMER SERVICE
Visit our web site at: www.omronhealthcare.com
Call toll free: 1-800-634-4350
Page 30

30
Manufactured for:
OMRON HEALTHCARE Co., Ltd.
Distributed by:
OMRON HEALTHCARE, INC.
1925 West Field Court
Lake Forest, IL 60045 U.S.A.
www.omronhealthcare.com
© 2012 OMRON HEALTHCARE, INC.
Made in China
HBE-910U-Z
1883223-7B
 Loading...