

Page 1
INSTRUCTION MANUAL
Heart Rate Monitor
Model HR-100CAN
MODE
TIME
SET
ST/SP
English
Page 2

TABLE OF CONTENTS
2
Before Using the Monitor
Introduction ..........................................................3
Components and Functions ..................................4
Your Personal Data
Maximum Heart Rate ......................................5
Training Zones .................................................6
Operating Instructions
Control Buttons....................................................7
Selecting the Operating Mode .............................7
Basic Setting Instructions ....................................8
Setting the Time and Date
...................................8
Displaying the Date .............................................9
Setting the Alarm .................................................9
Setting the Heart Rate Limits ............................10
Using the Backlight Feature ..............................10
Using the Stopwatch Feature .............................11
The Transmitter..................................................11
The Receiver......................................................12
Water Resistance................................................12
Effective Range..................................................12
Troubleshooting .................................................12
Care and Maintenance
Battery Installation .............................................13
Caring for your Monitor.....................................13
Specifications
.....................................................14
Warranty Information .........................................15
Page 3
INTRODUCTION
3
Thank you for purchasing the Omron HR-100CAN
Heart Rate Monitor.
Fill-in for future reference
DATE PURCHASED: ________________
Staple your purchase receipt here.
The heart rate monitor can help ensure you recei ve
the maximum benefit from your e
xercise program.
You can increase the effectiveness of your exercise
program by monitoring and quantifying your results
every step of the way.
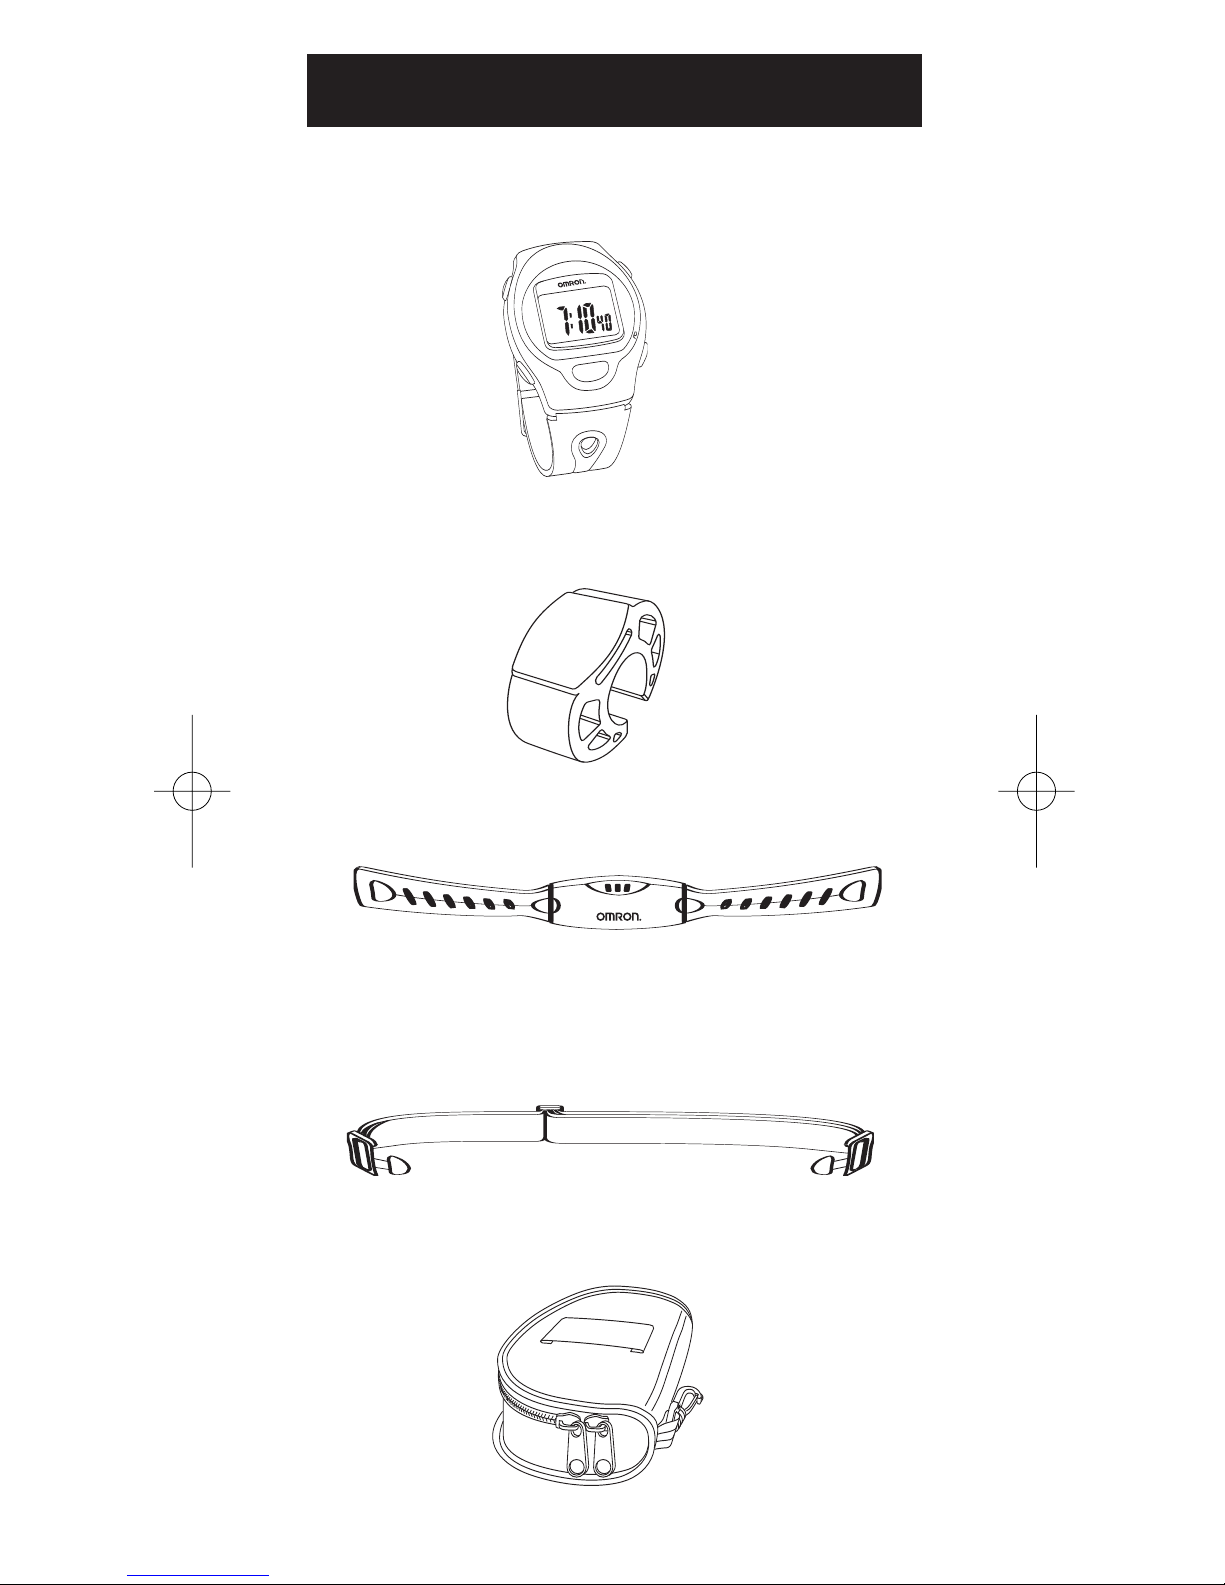
Your HR-100CAN comes with the
following components:
• Wrist Receiver Monitor
• Receiver Mounting Bracket
• Transmitter
• Transmitter Strap
• 2 Lithium CR2032 Batteries
(1 Receiver, 1 Transmitter - installed)
• Storage Case
• Instruction Manual
Read all the information in the instruction book before
using the unit.
WARNING
The signals used by this monitor may interfere with
a pacemaker or other implanted devices. Consult the
manufacturer of the implant device and your physician
before using this monitor.
SAVE THESE INSTRUCTIONS
Page 4
COMPONENTS
4
WRIST RECEIVER MONITOR
Sets the operating modes and heart rate limits.
RECEIVER MOUNTING BRACKET
Attaches the monitor to your bike or e
x
ercise machine.
TRANSMITTER
Counts your heartbeat and sends the data to the recei ver.
TRANSMITTER STRAP
Adjustable strap attaches to the transmitter for a
comfortable f
it.
ST
ORAGE CASE
Compact case holds all components.
MODE
TIME
SET
ST/SP
Page 5
YOUR PERSONAL DATA
5
MAXIMUM HEART RATE
It is important you know your maximum heart rate
(MHR) training zone, upper heart rate limit and
lower heart rate limit before you be
gin. They help
you achieve the maximum health benefits out of
your workout. MHR is expressed in beats per minute.
Use the following formula to estimate your MHR:
220 - age = MHR
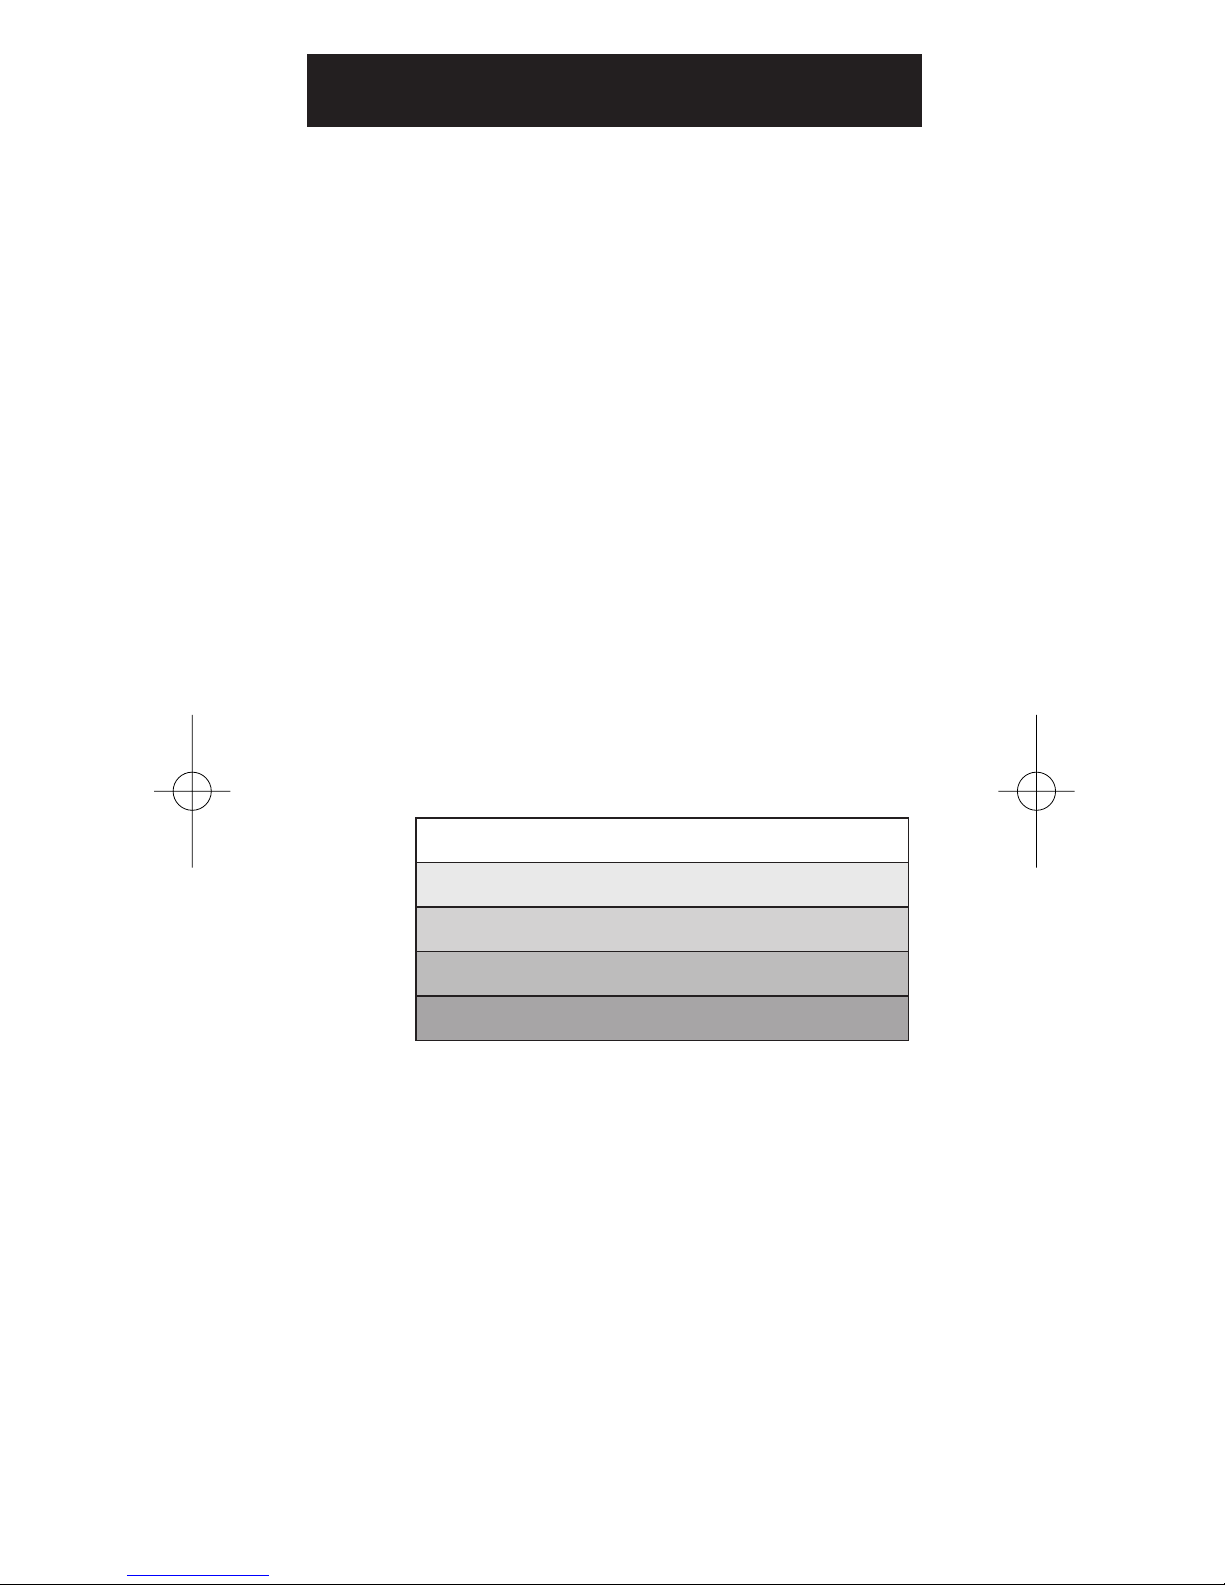
There are several training zones that produce specific
results in your fitness program. The most common
zones range between 50% to 80% of your MHR.
This is where you achieve cardiovascular benefits,
burn fat, and become more physically fit. When
setting your watch, the lowest % of the zone you
choose becomes your lower heart rate limit and the
highest % becomes the upper heart rate limit.
50%
60%
70%
80%
90%
100%
Calculate the lower and upper heart rate limits by
multiplying your MHR by the percentages for the
selected training zone.
For example:
40-year-old man training for Weight Management.
His Lower Heart Rate Limit (220-40) x 60% = 108
His Upper Heart Rate Limit (220-40) x 70% = 126
30-year-old woman training for Aerobic Zone.
Her Lower Heart Rate Limit (220-30) x 70% = 133
Her Upper Heart Rate Limit (220-30) x 80% = 152
Moderate Activity
Weight Management Zone
Aerobic Zone
Anaerobic Threshold Zone
Red Line Zone (maximum capacity)
Page 6

PERSONAL DATA
6
Determining your individual training zone is a critical
step in the process toward a safe and efficient training.
Start slowly. Select the training zone most suitable for
your needs. Exercise regularly for 20 to 30 minutes,
three to four times a week for a healthier cardio vascular
system. Gradually step up your training zone as you
become more physically fit.
TRAINING ZONES
• The Weight Management zone has the
lowest training intensity.
This zone is good for
beginners and those who want to strengthen their
cardiovascular systems.
• The Aerobic zone increases strength and endurance.
It works within the body’
s oxygen intake capability,
burns more calories and can last longer .
• The Anaerobic Threshold zone generates speed
and power
. It works at or above the body’s oxygen
intake capability, builds more muscle and cannot
be maintained for a long time.
WARNING
Consult your physician or healthcare provider to help
you determine your maximum heart rate, upper and
lower limits, the exercise frequency and duration
appropriate for you and your specific goals.
Page 7

CONTROL BUTTONS
7
USE IN THE WATER
Press the MODE button to toggle between the
following operating modes:
Time of Day
Alarm
Stopwatch
Press the TIME/❤ button to toggle between the
operating modes and the Heart Rate Display.
1.
Backlight Button
2. MODE Button
3. SET Button
4. ST/SP Stopwatch Button
5. Time/❤ Heart Rate Button
The Control Buttons on the Wrist Recei
ver Monitor
are used to select and set the operating modes, add
your personal data, and use the features of the
heart rate monitor.
SELECTING THE
OPERATING MODE
Press MODE Button
TIME OF DAY
Press MODE Button
ALARM
Press MODE Button
STOP
WATCH
Heart Rate
Display
Press TIME/❤
Button
Page 8

BASIC SETTING
INSTRUCTIONS
8
1. Press and hold the MODE button to enter the
setting mode.
2. Pr
ess the SET button to adjust the blinking digits.
Press and hold the SET button to increase the
digits faster.
3. Pr
ess the MODE button to go to the ne xt setting
option or exit the setting mode.
NOTE: If no button is pressed the monitor will
automatically exit the setting mode after 60 seconds.
SETTING THE TIME
AND DATE
Press the MODE button to select the
Time of Day operating mode.
1. Press and hold the MODE b utton.
12/24 hr blinking
2. Press the SET button to choose the
12-hour AM/PM or 24-hour universal
clock. Press the MODE button.
Hour
blinking
3. Press the SET button to adjust the
hour. Press the MODE button.
Minutes blinking
4. Press the SET button to adjust the
minutes. Press the MODE button.
Month blinking
5. Press the SET button to change the
month. Press the MODE button.
Date
blinking
6. Press the SET button to change the
date. Press the MODE button.
Day blinking
7. Press the SET button to change the
day. Press the MODE button to exit the setting
mode. The date and
time is set.
Page 9

DISPLAYING THE DATE
9
1. Press the MODE button to select the Time of Day
operating mode.
2. Press the SET button to display the date.
3. Press the MODE button to return to the
Time of Day.
NOTE: If no button is pressed the monitor will
return to the
Time of Day after 10 seconds.
SETTING THE ALARM
Press the MODE button to select the
Alarm operating mode.
1. Press and hold the MODE b utton.
Hour
blinking
2. Press the SET button to adjust the
hour. Press the MODE button.
Minutes blinking
3. Press the SET button to adjust the minutes. Press
the MODE button to exit the setting mode. The
Alarm time is set.
ACTIVATING THE ALARM
1. Press the SET button to turn the alarm on or of f.
When the alarm is activ
ated, the alarm will go off at
the set time every day. Press any button to stop the
alarm signal.
ON
OFF
Page 10

SETTING THE
HEART RATE LIMITS
10
The Heart Rate Limits help you determine if you are
exercising within your training zone. When you go
above or below your limits, an indicator will flash
to warn you.
Press the TIME/
❤ button to select the
Heart Rate display.
SETTING THE HEART RATE LIMITS
1. Press and hold the MODE b utton.
Lo
wer Limit blinking
2. Press the SET button to enter your training zone
lower limit. Press the MODE button.
Upper Limit blinking
NOTE: The upper limit must be greater than the
lower limit. The monitor will automatically adjust
the upper limit r
ange based on the data entered.
3. Press the SET button to enter your training zone
upper limit. Press the MODE button to exit the
setting mode. The training zone limits are set.
SETTING THE HEART RATE ALERT
1. Press and hold the TIME/
❤ button to turn the alert
indicator on or off.
2. Press the TIME/
❤ button. The alert indicator is set.
ON
OFF
USING THE
BACKLIGHT FEATURE
Press the
Backlight button.
The screen will illuminate for approximately
5 seconds.
Page 11

11
USING THE
STOPWATCH FEATURE
1. Press the MODE button to select
the Stopwatch operating mode.
2. Press the ST/SP button to start the stopw atch.
3. Press the ST/SP button to stop the stopw atch.
4. Press and hold the SET b utton to reset
the stopwatch.
THE TRANSMITTER
The transmitter counts your heartbeat and sends the
data to the receiver.
ATTACHING THE TRANSMITTER
Attach the strap to the transmitter by inserting the
strap clip through the backside of the corresponding
shaped hole on the transmitter. Gently push do
wn
to secure.
1. Moisten the conductive pads on the backside of
the transmitter with water or a conductive gel to
ensure a solid contact.
2. Strap the transmitter across your chest. Adjust the
strap until the transmitter sits snugly belo w your
pectoral muscles for an accurate heart rate signal.
CONDUCTIVE PADS
Page 12

EFFECTIVE RANGE
12
THE RECEIVER
The Wrist Receiver Monitor can be worn on your
left or right wrist. You can also choose to attach the
monitor to your bike or exercise machine by using
the mounting bracket.
The HR-100CAN is water-resistant and can be
worn swimming or diving up to approximately
30 meters (98 feet).
Note: Set the unit prior to using in the water or
exposing to e
xcessive water. Activating or changing
the settings while in water or e xposed to heavy
rainstorms may damage the unit.
The Transmitter and Wrist Receiver Monitor should
be worn or mounted within 50 centimeters (20 inches)
from each other
.
Note: If no signal is sent from the transmitter to the
receiver for 15 minutes the monitor will display the
pr
evious mode.
WATER RESISTANCE
TROUBLESHOOTING
If the signals become unsteady re-adjust the position
of the transmitter strap and make sure the distance
between the transmitter and receiver is within the
effective range.
Make sure the low battery indicator light is not
displayed on the receiver.
The transmitter battery may need to be replaced.
Page 13

13
BATTERY INSTALLATION
The Wrist Receiver Monitor uses a CR2032, 3V
Lithium battery. When the battery is running low
the low-battery indicator will light up. To assure the
water resistance take the monitor to a local jewelry
store for battery replacement. Improper replacement
will void the warranty.
The Transmitter uses a CR2032, 3V Lithium battery.
If the heart rate signals become unsteady or stop
your transmitter battery may need replacing.
To change the Transmitter battery:
1. Open the transmitter battery lid with a coin by
turning counterclockwise.
2. Remove the old battery.
3. Insert the new battery with the positive side
facing up. DO NOT touch the contacts.
4. Replace the battery lid.
CARING FOR YOUR MONITOR
To keep your heart rate monitor in the best condition
and protect the unit from damage follo w these directions:
• Clean the monitor with a soft dry cloth. Do not use
any abrasive or volatile cleaners.
• Always thoroughly dry off any moisture on the
components before storing.
• Store your monitor in the original carrying case.
• Do not subject the monitor to e xtreme hot or cold
temperatures, humidity and direct sunlight.
• Do not excessively twist or bend the conductive
pads on the transmitter belt.
• Do not subject the transmitter or recei ver to strong
shocks, such as dropping on the floor.
• Use the unit consistent with the instruction pro vided
in this manual.
Page 14

SPECIFICATIONS
14
Model: HR-100CAN
Real Time Clock: 12/24 hour with
hour/minute/second
Stopwatch: 00:00:00 to 29:59:59
(hrs:min:sec)
Heart Rate
Measur
ement: 30 - 240bpm
Upper Limit: 80 - 240bpm
Lower Limit: 30 - 220bpm
Chest Size: 74 cm to 140 cm (29 in to 55 in)
Weight: Wrist Receiver) approx. 40 g
(including battery)
Chestbelt (Transmitter) -
approx. 68 g (including battery)
Power: Wrist Receiver, 1 ps CR 2032
3V battery
Transmitter, 1 pc CR 2032
3V battery
Operating
Temperature: -10ºC to +50ºC (14ºF to 122ºF)
Storage Temperature: -20ºC to +60ºC (-4ºF to 140ºF)
Water Resistance: not actuating keys to 30 meters
(98 feet)
Page 15

15
WARRANTY INFORMATION
LIMITED WARRANTIES
Your HR-100CAN Heart Rate Monitor, excluding the
batteries, is warranted to be free from defects in
materials and workmanship appearing within 1 year,
from date of purchase when used in accordance with the
instructions provided with the unit. The above warranties
extend only to the original retail purchaser.
We will, at our option, repair or replace without char ge any
monitor or monitor cuff covered by the above warranties.
Repair or replacement is our only responsibility and your
only remedy under the above warranties.
To obtain warranty service ship the unit with all of the
components to:
Omron Healthcare, Canada
Attn: Repair Department
5500 North Service Road
Burlington, Ontario L7L 6W6
Enclose the Proof of Purchase. Include $5.00 (Canadian
Funds) for the return shipping and handling. Include
a letter, with your name, address, phone number , and
description of the specific problem. Pack the product
carefully to prevent damage in transit. Because of possible
loss in transit, we recommend insuring the product with
return receipt requested.
ALL IMPLIED WARRANTIES, INCLUDING BUT
NOT LIMITED TO THE IMPLIED WARRANTIES OF
MERCHANTABILITY AND FITNESS FOR PARTICULAR
PURPOSE, ARE LIMITED TO THE DURATION OF
THE APPLICABLE WRITTEN WARRANTY ABOVE.
Some provinces do not allow limitations on how long an
implied warranty lasts, so the above limitation may not
apply to you.
OMRON SHALL NOT BE LIABLE FOR LOSS OF USE
OR ANY OTHER INCIDENTAL, CONSEQUENTIAL
OR INDIRECT COSTS, EXPENSES OR DAMAGES.
Some provinces do not allow the exclusion or limitation
of incidental or consequential damages, so the abo ve
exclusions may not apply to you.
This warranty gives you specific legal rights, and you may
also have other rights which may v ary from province to
province.
FOR CUSTOMER SERVICE
Visit our web site at: www .omronhealthcare.com
Call toll free: 1-800-634-4350
Page 16

Manufactured by: Omron
Distributed by:
Omron Healthcare, Canada
5500 North Service Road
Burlington, Ontario L7L 6W6 Canada
www.omronhealthcare.com
© 11/2004 Omron Healthcare, Inc.
HR100CANINST Rev
 Loading...