

Page 1
Made in China
Manufactured for:
Omron
300 Lakeview Parkway
Vernon Hills, Illinois 60061
Copyright © 3/2001 OMRON HEALTHCARE, INC.
www.omronhealthcare.com
HEM-712CINST Rev A
INSTRUCTION MANUAL
Automatic Inflation
Blood Pressure Monitor
MODEL HEM-712C
RE
A
M
D
EA
Y
TO
S
U
DE
R
E
PLA
BA
TT
DIGITAL BLO
R
EIN
FLA
TIN
CE
ER
IES
R
E
FLATIN
G
G
D
IA
S
T
O
L
IC
m
P
U
L
S
E
/m
OD PRESSURE MONITOR
HEM-712C
SYSTOLIC mmHg
m
H
g
in
START
O
N
/O
FF
Page 2
3
2
page
Introduction . . . . . . . . . . . . . . . . . . . . . . . . . . . . . . . . . . . . . . . . . . . . . . . . . . . . . . . . . . . .2
Know Your Unit . . . . . . . . . . . . . . . . . . . . . . . . . . . . . . . . . . . . . . . . . . . . . . . . . . . . . . . . .3
Quick Reference Guide . . . . . . . . . . . . . . . . . . . . . . . . . . . . . . . . . . . . . . . . . . . . . . . . . . .3
Battery Installation/Replacement . . . . . . . . . . . . . . . . . . . . . . . . . . . . . . . . . . . . . . . . . . . .4
How to Apply the Arm Cuff . . . . . . . . . . . . . . . . . . . . . . . . . . . . . . . . . . . . . . . . . . . . . .4-5
How to Take a Reading . . . . . . . . . . . . . . . . . . . . . . . . . . . . . . . . . . . . . . . . . . . . . . . . . . .6
How to Use the AC Adapter . . . . . . . . . . . . . . . . . . . . . . . . . . . . . . . . . . . . . . . . . . . . . . . .7
Care and Maintenance . . . . . . . . . . . . . . . . . . . . . . . . . . . . . . . . . . . . . . . . . . . . . . . . . . . .7
Error Indicators . . . . . . . . . . . . . . . . . . . . . . . . . . . . . . . . . . . . . . . . . . . . . . . . . . . . . . . . .8
Specifications . . . . . . . . . . . . . . . . . . . . . . . . . . . . . . . . . . . . . . . . . . . . . . . . . . . . . . . . . . .9
Caution . . . . . . . . . . . . . . . . . . . . . . . . . . . . . . . . . . . . . . . . . . . . . . . . . . . . . . . . . . . . . . .10
TwoYear Limited Warranty . . . . . . . . . . . . . . . . . . . . . . . . . . . . . . . . . . . . . . . . . . . . . . .11
TABLE OF CONTENTS
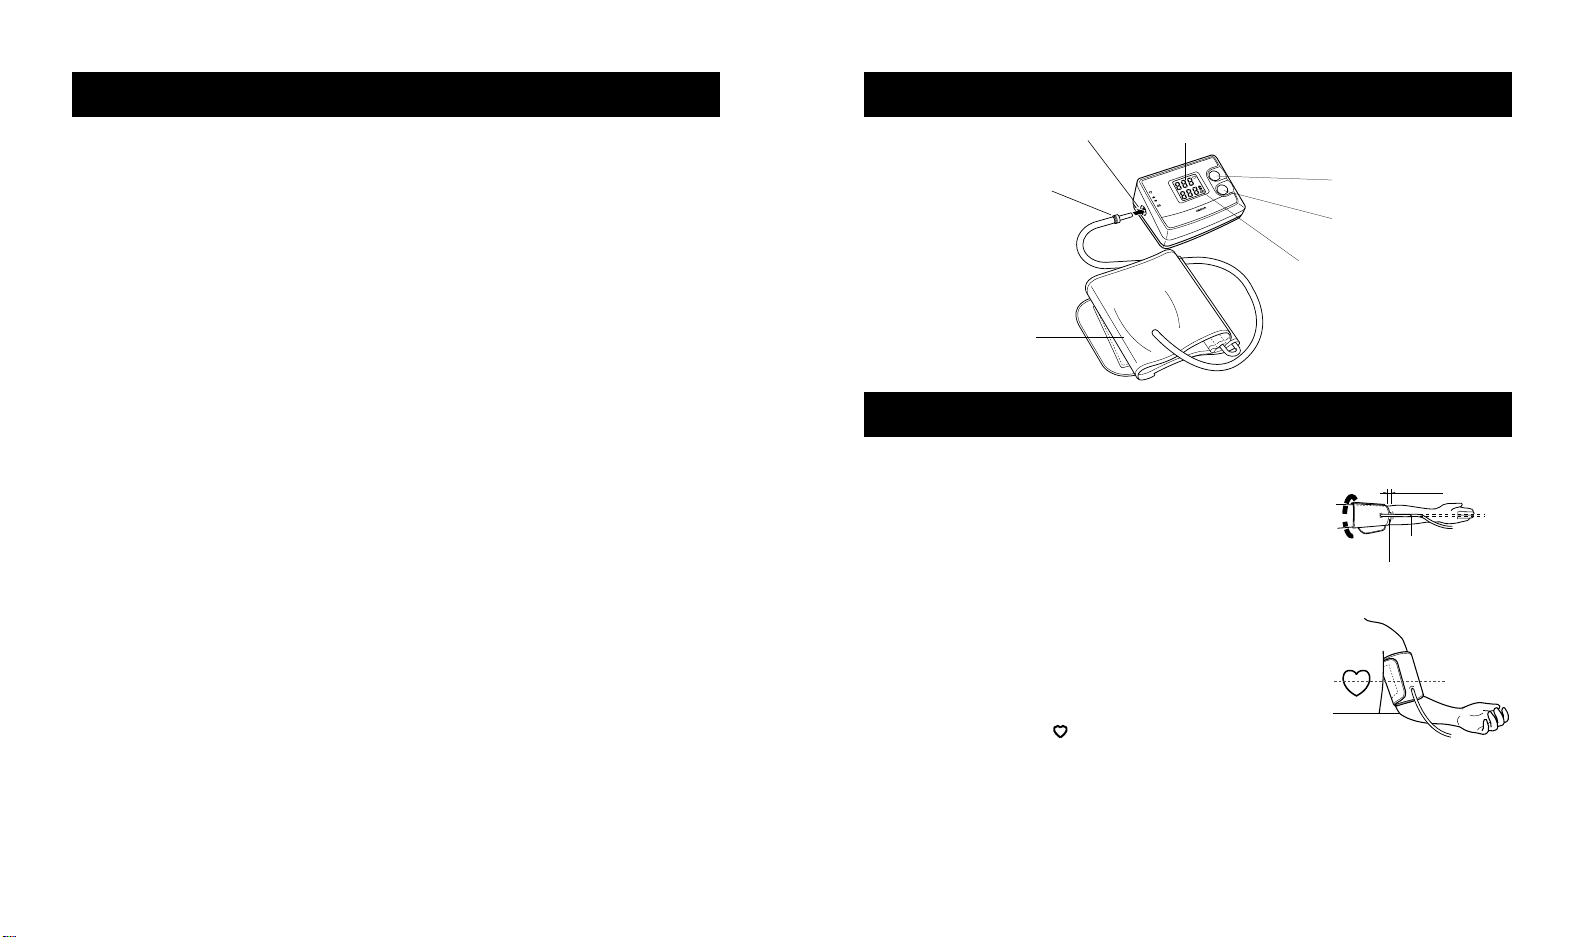
Air Jack
Air Plug
Systolic Blood Pressure Display
Diastolic Blood
Pressure/Pulse Display
Arm Cuff
START Button
ON/OFF Button
Introduction
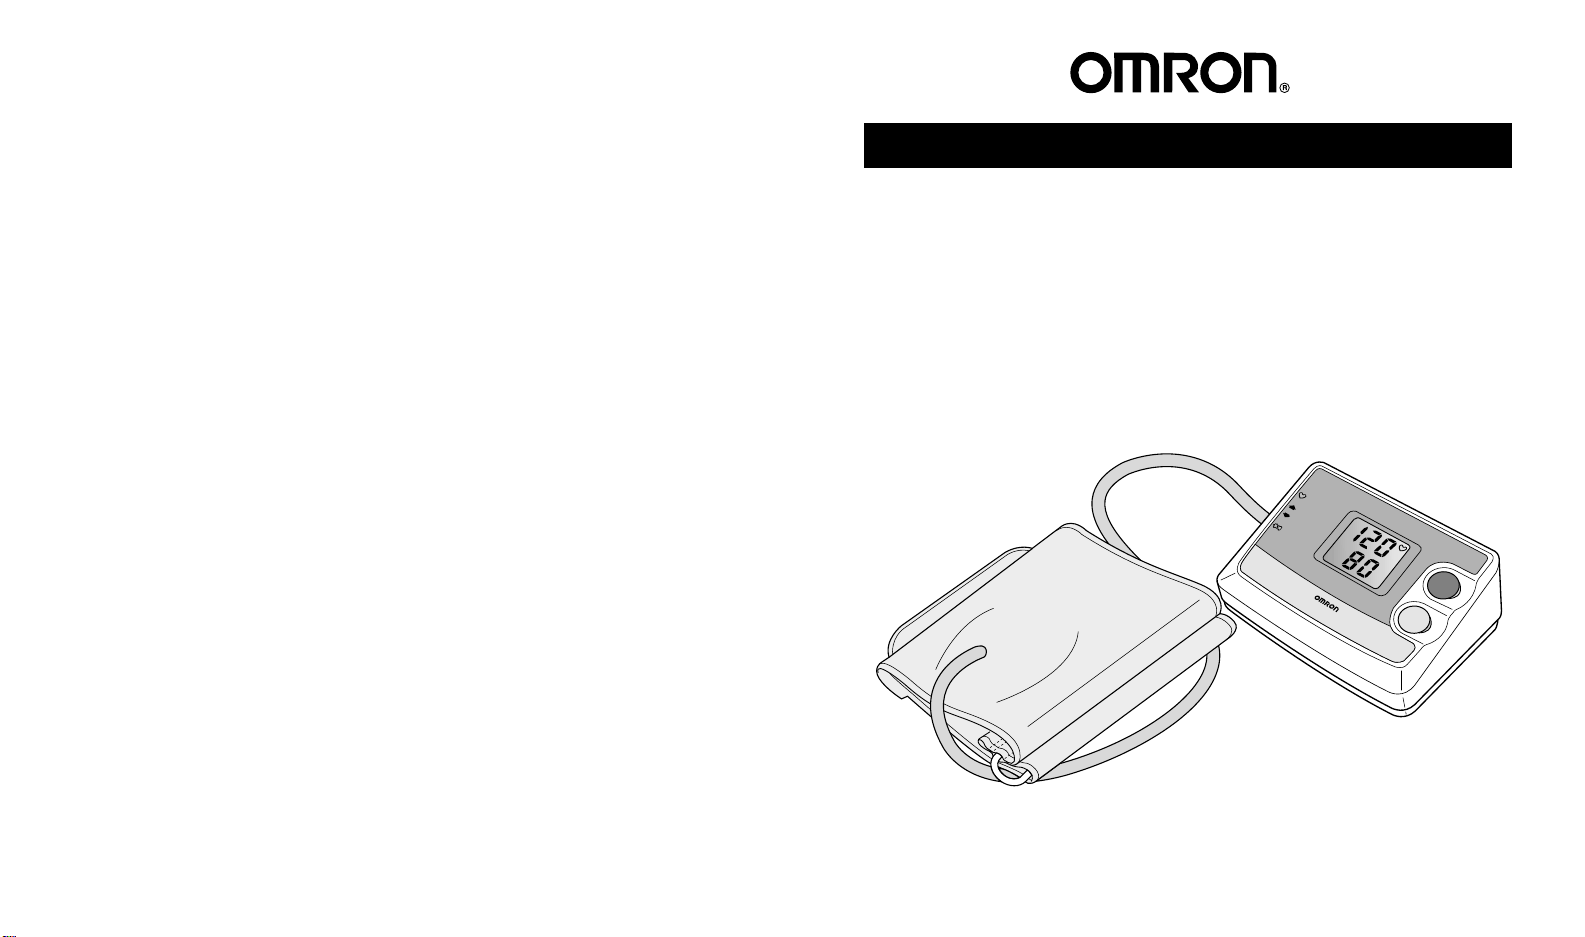
Thank you for purchasing the Omron HEM-712C Automatic Inflation Blood Pressure
Monitor. This completely automatic instrument quickly measures your blood pressure
and pulse rate and displays them on an extra large digital panel.
Your new HEM-712C uses the oscillometric method of blood pressure measurement.
This means the monitor detects your blood's movement through your brachial artery
and converts the movements into a digital reading. An oscillometric monitor does not
need a stethoscope so the monitor is simple to use. The cuff fills with air at the push of
a button and automatically deflates when the measurement is complete. Error indicators
alert you to incorrect procedures and an automatic power-off function conserves the batteries:
Please read this instruction manual thoroughly before using the
Omron HEM-712C Automatic Inflation Blood Pressure Monitor.
For specific information on your own blood pressure,
CONTACT YOUR PHYSICIAN.
KNOW YOUR UNIT
QUICK REFERENCE GUIDE
1. Eating, smoking, and exercising within 30 minutes before taking
a measurement may affect your blood pressure. To take a baseline
blood pressure, rest for at least 5 to 10 minutes before taking a reading.
2. Remove tight-fitting clothing from your upper arm.
3. Sit in a chair with your feet flat on the floor and place your
arm on a table so that the cuff is at the same level as your heart.
4. Put your arm through the cuff loop making sure that the bottom edge
of the cuff is approximately 1/2'' above the elbow and that the
Green Marker on the cuff is above brachial artery.
5. Pull the end of the cuff so that the entire cuff is evenly tightened
around your arm and press the hook material firmly against the pile
side of the cuff.
6. Press the ON/OFF button.
7. After the Heart Symbol ( ) appears on the digital panel, press
the Start button, and remain still until the measurement is complete.
8. When measurement is complete, the monitor displays your blood
pressure and pulse rate, and automatically deflates the cuff.
9. Wait 2-3 minutes before taking another blood pressure measurement.
You may require more rest time between readings depending
on your individual physiological characteristics.
Bottom Edge
1/2 Inch
Cuff Tube
Green Marker
F
F
O
/
N
O
g
H
m
m
IC
L
O
T
S
Y
S
O
T
Y
D
A
E
E
R
R
U
S
A
G
E
N
M
I
T
A
L
F
N
I
E
R
G
N
I
T
A
L
F
E
D
E
C
A
L
P
E
E
I
R
R
E
T
T
A
B
T
R
A
ST
S
PULSE/min
DIASTOLIC mmHg
R
O
T
I
N
O
M
E
R
U
S
S
E
R
C
P
2
1
D
7
-
O
M
O
E
L
H
B
L
A
IT
G
I
D
Page 3

5
4
1. Slide the battery cover off in
the direction of the arrow.
2. Install or replace four "AA" size batteies
so + (positive) and - (negative) polarities
match the polarities of the battery
compartment as indicated.
3. Replace the battery cover
Note:
• If the Low Battery Indicator appears on the display,
replace all four batteries. Long-life alkaline batteries
are recommended.
• Remove the batteries if the monitor will not be used
for an extended period of time.
BATTERY INSTALLATION/REPLACEMENT
Low Battery
Indicator
Smooth Cloth
D-Ring
Pile Side Material
Sewn Hook Material
Bottom Edge
1/2 Inch
Green Marker
Cuff Tube
3. Sit in a chair with your feet flat on the floor and
place your arm on a table so that the cuff is at
the same level as your heart.
4. Put your arm through the cuff loop. The bottom
of the cuff should be approximately 1/2'' above the
elbow. The Green Marker on the cuff should lie
over the brachial artery on the inside of the arm.
Tube should run down center of arm approximately
even with the middle finger.
5. Pull the cuff so that the top and bottom edges
are tightened evenly round your arm.
6. When he cuff is positioned correctly, press the
sewn hook material FIRMLY against the pile
side of the cuff.
7. Make certain the cuff fits snugly around your arm.
The cuff should make good contact with your skin.
You should be able to fit one finger between the
cuff and your arm.
8. Relax your arm and turn your palm upward.
9. Be sure there are no kinks in the air tubing.
HOW TO APPLY THE ARM CUFF
1. If the cuff is assembled correctly, the hook material
will be on the outside of the cuff loop and the metal
D-ring will not touch your skin.
2. If the cuff is not assembled, pass the end of the
cuff furthest from the tubing through the metal
D-ring to form a loop. The smooth cloth should
be on the inside of the cuff loop.
HOW TO APPLY THE ARM CUFF
Page 4

7
6
HOW TO TAKE A READING
1. Press the ON/OFF button.
a) All display symbols appear for approximately
one second. This is the initial display test.
b) When the monitor completes the necessary
preparations before measurement, the Heart
symbol ( ) appears in the upper right
hand corner of screen.
2. By pressing the START button the unit
automatically inflates the cuff to 170 mmHg.
a) If during your measurement the monitor
determines that a higher pressure value is
required, it will momentarily stop deflation
and automatically increase the pressure
value by 40 mmHg.
b) To set inflation level manually higher than
170 mmHg, press and hold the START
button until the desired pressure value
is reached. Do not inflate higher than
280 mmHg.
3. When the correct pressure value is reached,
the cuff starts to deflate automatically. As the
cuff deflates, decreasing numbers appear on
the display. The Heart symbol ( ) flashes
at every heartbeat.
4. When the measurement is complete, the
Heart symbol( ) stops flashing and your
blood pressure and pulse rate are displayed
alternately. Results will be displayed until you
turn the unit off. The unit will automatically
shut off in approximately 5 minutes.
Initial LCD Test
SYSTOLIC
mmHg
DIASTOLIC
mmHg
PULSE/min
Ready to Measure
Indicated
Value Drops
Measuring
Blood Pressure
Reading Display
Pulse Reading
Display
REMEMBER TO KEEPA RECORD OF YOUR BLOOD PRESSURE
AND PULSE MEASUREMENTS.
HOW TO USE THE AC ADAPTER
1. When using AC power, use only the exclusive Omron AC adapter (HEM-ADPT1). To
order an Omron AC adapter contact Omron Healthcare, Inc. at 1-800-634-4350. Tell the
phone representative you want to order model number HEM-ADPT1.
2. Insert the AC adapter cord into the jack on the back side of the monitor.
3. Insert the AC adapter plug into
a 120V AC outlet (50-60 cycles).
4. To remove the AC adapter,
disconnect the adapter plug
from the AC outlet first and
then disconnect the cord from the
monitor's jack. To avoid possible
damage to the monitor, use only
the exclusive AC adapter (HEM-ADPT1).
Other adapters may vary in output voltage and polarities.
Note: The monitor is designed not to draw power from the batteries
when the AC adapter is in use.
CARE AND MAINTENANCE
To protect your monitor from damage, please observe the following:
Failure to follow these directions will void warranty.
Do not subject your monitor to extreme temperatures, humidity,
or direct sunlight.
Do not fold the cuff and tubing tightly.
Do not inflate the monitor over 280 mmHg.
Do not disassemble the monitor.
Do not subject the monitor to strong shocks, such as dropping it on the floor.
Do not clean the monitor with volatile liquids.
THE MONIT
OR SHOULD BE CLEANED WITH A SOFT, DRY CLOTH ONLY.
SYSTOLIC
DIASTOLIC
PULSE/min
SYSTOLIC
DIASTOLIC
PULSE/min
SYSTOLIC
DIASTOLIC
PULSE/min
mmHg
mmHg
mmHg
mmHg
mmHg
mmHg
SYSTOLIC
mmHg
DIASTOLIC
mmHg
PULSE/min
SYSTOLIC
mmHg
DIASTOLIC
mmHg
PULSE/min
Page 5

Model: HEM 712C
Display: Digital LCD
Measurement Range: Pressure: 0-280mmHg
Pulse: 40-200/minute
Accuracy: Pressure: ±3 mmHg
or 2% of the reading
Pulse: ±5% of reading
Inflation: Automatic by
electric pump
Deflation:
Automatic pressure
release valve
Rapid Pressure Release: Automatic exhaust valve
Pressure Detection: Capacitance
pressure sensor
Measurement Method: Oscillometric method
Pulse wave Detection: Capacitance
pressuresensor
Power Source: 4 “AA” batteries
(not included)
AC Adapter
Battery Life: Approx. 300 uses
when used once a
day for 2 minutes
(alkaline battery)
Operating Temperature /
Humidity:
50°F to 104°F
(10°C to 40°C)
30-85% RH maximum
Storage Temperature /
Humidity:
-4°F to140°F
(-20°C to 60°C)
10-95% RH maximum
Console Weight w/
batteries:
Approx. 13 oz (380g)
with batteries
Outer Dimensions:
Approx.
4 1/4" (l) x 5" (w) x 2
1/2"(h)
(107mm x 128mm x 63mm)
Cuff Dimensions:
Approx.
5 1/2"(w) x 18 7/8"(l)
(140mm x 480mm)
Arm Circumference:
9" to 13" (220mm -320mm)
Accessories: Cuff, Instruction manual
UPC Code 0 73796 07122 6
Except for batteries, NO USER
SERVICEABLE PARTS IN THE
CONSOLE (MAIN UNIT).
NOTE: These specifications,
to improve performance, are
subject to change without notice.
8
ERROR INDICATORS
If you continue to experience difficulty obtaining a reading, call
OMRON HEALTHCARE CUSTOMER SERVICE TOLL FREE 1-800-634-4350.
Please tell the representative you have a Omron Model HEM-712C Automatic Inflation
Blood Pressure Monitor.
Error Symbol Cause Correction
Cuff under-inflated.
Carefully read and
repeat in steps listed
under “How To Take
A Reading.”
Batteries have
run down.
Replace all four
“AA”batteries.
Wait 2-3 minutes and
take another measurement.
Repeat steps listed
under “How To
Take A Reading”
but manually inflate
the cuff 40 mmHg
higher than the
previous inflation value.
Movement during
Measurement.
No pulse or blood
pressure reading
due to very weak
artery pulse.
Cuff over-inflated
(more than 300mmHg).
SPECIFICATIONS
9
Page 6

11
10
LIMITED TWO YEAR WARRANTY
Your HEM-712C Automatic Inflation Blood Pressure Monitor is warranted to be free from
manufacturing defects for a period of two years under normal use. This warranty extends
only to the original retail purchaser.
Should repair be needed within the warranty period, ship the unit prepaid and insured (for
tracking purposes) to Omron Healthcare, Inc., 300 Lakeview Parkway, Vernon Hills, IL
60061, Attn: Repair Dept., together with $5.00 for return shipping and insurance. Be sure
to include the model number of your unit and your phone number on any correspondence.
We will either repair or replace (at our option) free of charge any parts necessary to correct
defects in the materials or workmanship.
The above warranty is complete and exclusive. The warrantor expressly disclaims liability
for incidental, special, or consequential damages of any nature. (Some states do not allow
the exclusion or limitation of incidental or consequential damages, so the above warranty
may not apply to you.)
Any implied warranties arising by the operation of law shall be limited in duration to the
term of this warranty. (Some states do not allow limitations on how long an implied warranty
lasts, so the above limitation may not apply to you.)
This warranty gives you specific legal rights and you may have other rights which vary from
state to state. As a condition to operation of your warranty, the enclosed registration card
must be completed and sent to us within 10 days from the date of purchase.
For Customer Service
Call Toll Free
1-800-634-4350
CAUTION
NOTE:
POTENTIAL FOR RADIO/TELEVISION INTERFERENCE (for U.S.A. only)
This product has been tested and found to comply with the limits for a Class B
digital device, pursuant to part 15 of the FCC rules.These limits are designed to
provide reasonable protection against harmful interference in a residential installation.
The product generates, uses, and can radiate radio frequency energy and, if not
installed and used in accordance with the instructions, may cause harmful interference
to radio communications. However, there is no guarantee that interference will not
occur in a particular installation. If the product does cause harmful interference to
radio or television reception, which can be determined by turning the product on
and off, the user is encouraged to try to correct the interference by one or more
of the following measures:
• Reorient or relocate the receiving antenna.
• Increase the separation between the product and receiver.
• Connect the product into an outlet on a circuit different from
that to which the receiver is connected.
• Consult the dealer or an experienced radio/TV technician for help.
POTENTIAL FOR RADIO/TELEVISION INTERFERENCE (for Canada only)
This digital apparatus does not exceed the Class B limits for radio noise emissions
from digital apparatus as set out in the interference-causing equipment standard
entitled "Digital Apparatus", ICES-003 of the Canadian Department of Communications.
Cet appareil numérique respecte les limites de bruits radioeléctriques
applicables aux appareils numériques de Classe B prescrites dans la
norme sur le matériel brouilleur: "Appareils Numériques", NMB-003
èdictée parle ministre des communications.
 Loading...