

Olympus X-825 User Manual
DIGITAL CAMERA
FE-290/X-825
Instruction
Manual
( Thank you for purchasing an Olympus digital camera. Before you start to use your new camera, please
read these instructions carefully to enjoy optimum performance and a longer service life. Keep this manual
in a safe place for future reference.
( We recommend that you take test shots to get accustomed to your camera before taking important
photographs.
( In the interest of continually improving products, Olympus reserves the right to update or modify
information contained in this manual.
( The screen and camera illustrations shown in this manual were produced during the development stages
and may differ from the actual product.
Quick Start Guide
Get started using your
camera right away.
Button operations
Menu operations
Printing pictures
Using OLYMPUS Master
Getting to know your
camera better
Appendix

Contents
Quick Start Guide
Button operations
Menu operations
Printing pictures
Using OLYMPUS Master
Getting to know your camera
better
Appendix
P. 3
P. 11
P. 16
P. 27
P. 33
P. 40
P. 48
Test out the functions of the camera
buttons by following along with the
illustrations.
Learn about the menus that control
the functions and settings for basic
operation.
Learn how to print pictures you have
taken.
Learn how to transfer and save
pictures to a computer.
Find out more about camera
operations and how to take better
pictures.
Read about convenient functions and
safety precautions to use your camera
more effectively.
2
EN
Quick Start Guide
Gather these items (box contents)
Digital Camera Strap Lithium Ion Battery
Battery Charger
(LI-40C)
Items not shown: Instruction Manual (this manual), warranty card. Contents may vary
depending on purchase location.
USB Cable AV Cable OLYMPUS Master 2
(LI-42B)
CD-ROM
Attach the strap
Quick Start Guide
( Pull the strap tight so that it does not come loose.
EN
3
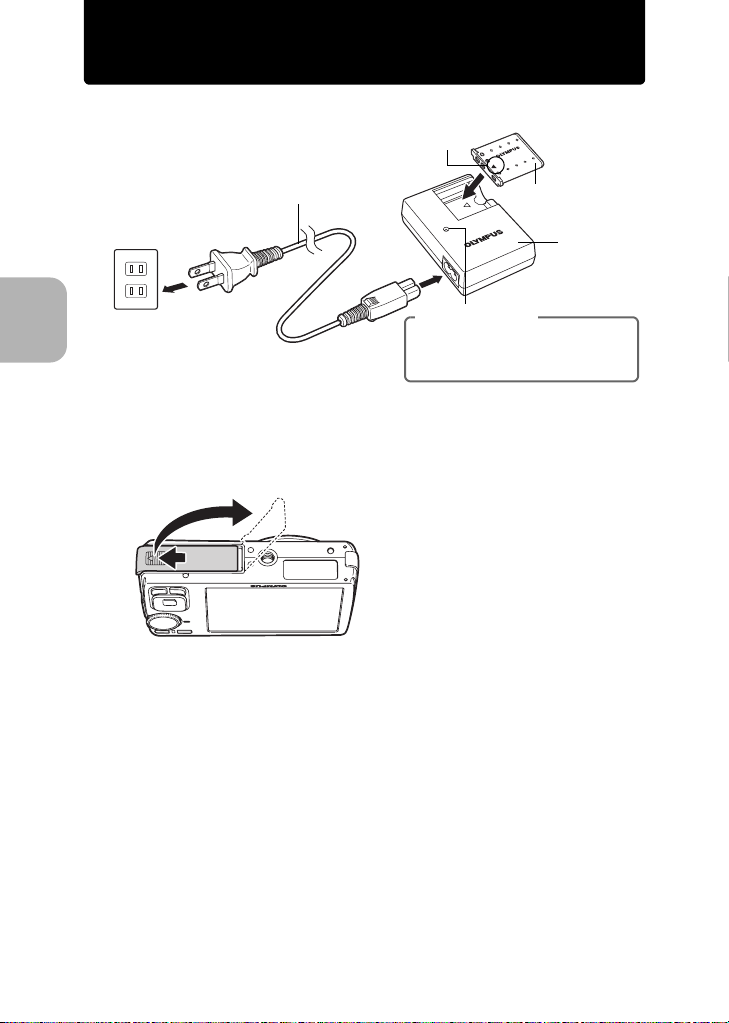
Prepare the camera
a. Charge the battery.
W
Power Cable
Lithium Ion Battery
1
AC Wall
Outlet
2
Charging Indicator
Red light on: Charging
Light off: Charging complete
(Charging time: Approx. 5 hours)
( Battery comes partially charged.
b. Insert the battery and the xD-Picture Card (optional) into the
camera.
Quick Start Guide
1
2
3
Battery
Charger
4
EN
3
Prepare the camera
(Insert the battery by putting in
the marked side first, with
the B marks toward the end of
the camera, the C marks
toward the center of the
camera.
If you insert the battery incorrectly,
you may not be able to remove it. Do
not use force. Contact authorized
distributors/service centers.
Damage to the battery exterior
(scratches, etc.) may produce heat
or an explosion.
Battery lock knob
(To remove the battery, press the battery lock knob
in the direction of the arrow.
Notch
Contact area
(Orient the card, and insert the card straight
in. Insert the card until it clicks into place.
4
(To remove the card, push the card all the
way in, release slowly, grasp the card and
remove it.
5
6
( With this camera, you can take pictures without inserting the optional xD-
Picture Card™ (hereinafter referred to as “the card”). If you take pictures
without inserting the card, the pictures will be stored in the internal memory.
For details on the card, please refer to “The card” (P. 50).
Quick Start Guide
EN
5
Turn the camera on
TIME
----
.--.-- --:--
Y / M /
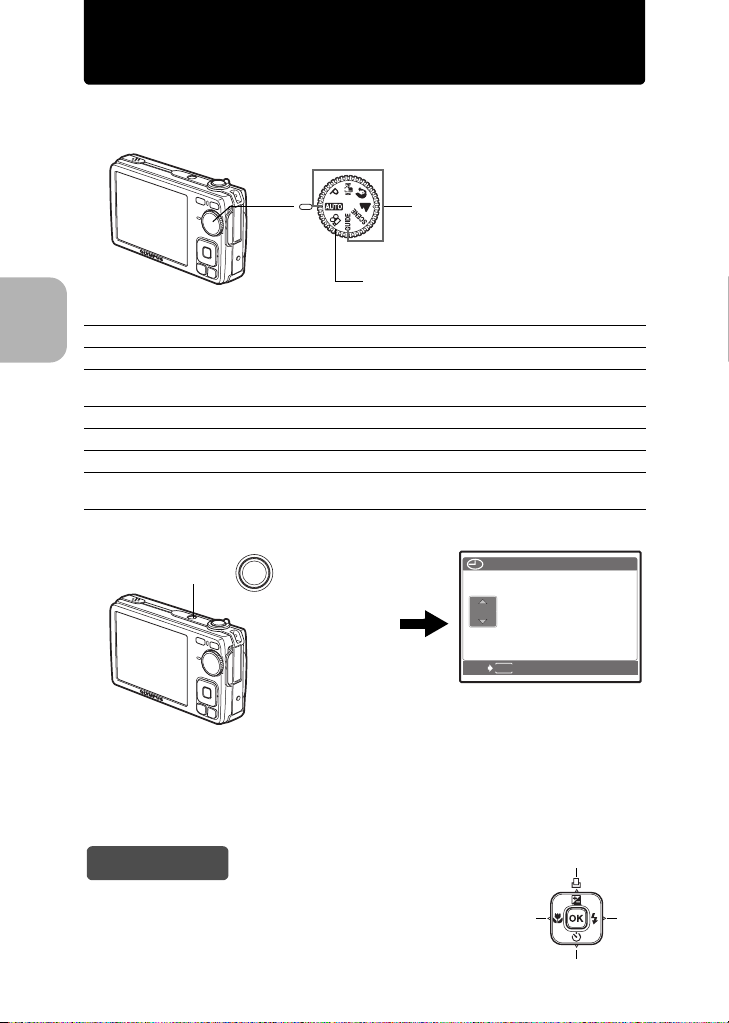
This explains how to turn on the camera in shooting mode.
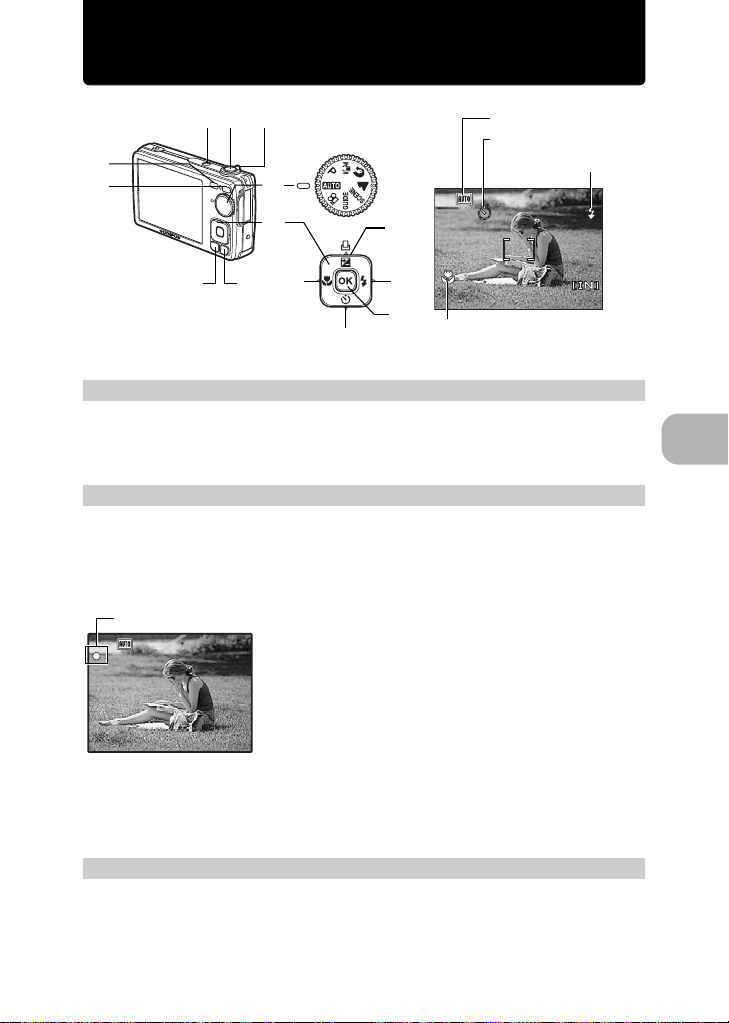
a. Set the mode dial to h.
When shooting still pictures
When shooting movies
Still picture shooting modes
h The camera determines the optimum settings for shooting pictures.
P The camera automatically sets the optimum aperture value and shutter speed.
h This function reduces the blur incurred by a moving subject, or camera shake when
B Suitable for taking pictures of people.
E Suitable for taking pictures of a landscape.
f Select from 11 available scene modes, according to the shooting conditions.
R Use the shooting guide displayed on the screen to shoot pictures according to the
Quick Start Guide
b. Press the o button.
taking pictures.
situation.
o
o button
( To turn off the camera, press the o button once again.
Hint
The directions of the arrow pad is indicated with ONXY in the
supplied instruction manual.
6
EN
TIME
DMY
----
.--.-- --:--
MENU
CANCEL
( This screen is
displayed if the date
and time are not set.
X
O
N
Y/M/
D
Y

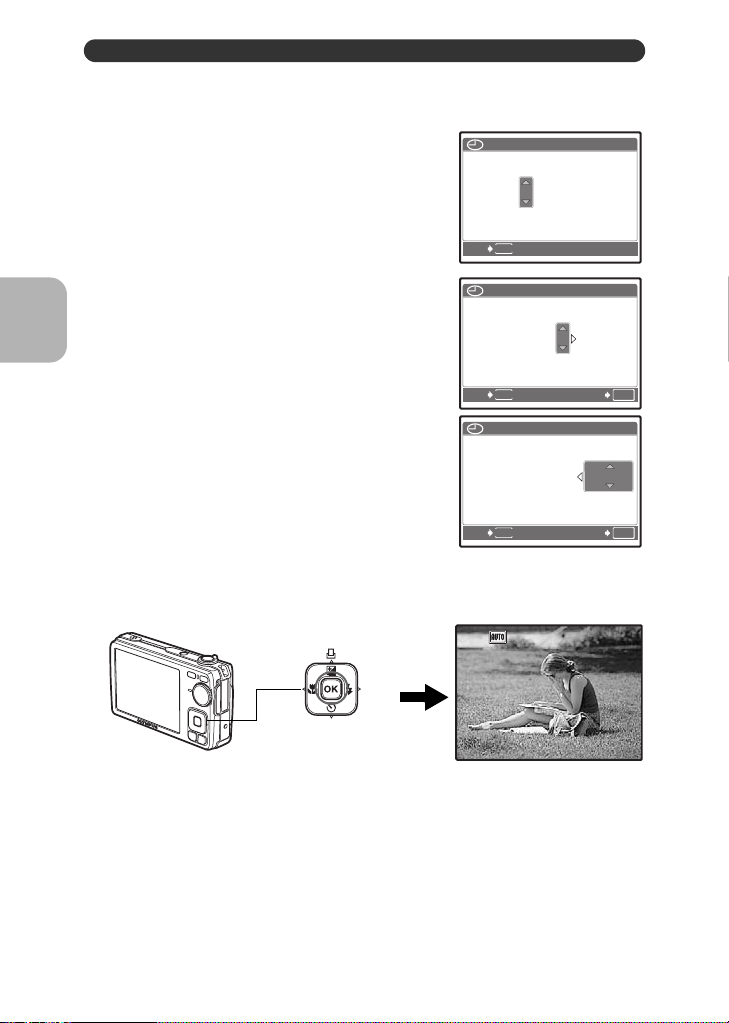
Set the date and time
TIME
----
.--.-- --:--
Y / M /
2007
.--.-- --:--
TIME
Y / M /
2007
.-- --:--
TIME
Y / M /
About the date and time setting screen
Y-M-D
Hour
Minute
D
Date formats (Y-M-D, M-D-Y, D-M-Y)
.--.-- --:--
----
MENU
CANCEL
TIME
DMY
Y/M/
Cancels the setting
a. Press the OF/< and NY buttons to select [Y].
• The first two digits of the year are fixed.
OF/< button
NY button
b. Press the Y# button.
Y# button
c. Press the OF/< and NY buttons to
select [M].
2007
.--.-- --:--
MENU
CANCEL
2007
.
MENU
CANCEL
DMY
DMY
1212.-- --:--
TIME
TIME
Y/M/
Y/M/
Quick Start Guide
D
D
EN
7
Set the date and time
2007
--:--
TIME
Y / M /
2007
30
TIME
Y / M /
2007
30
TIME
Y / M /
3072
2304
IN
d. Press the Y# button.
e. Press the OF/< and NY buttons to
select [D].
f. Press the Y# button.
g. Press the OF/< and NY buttons to
select the hours and minutes.
• The time is displayed in the 24-hour format.
2007
.
MENU
CANCEL
2007
.
1212.
1212.
TIME
DMY
1010 --:--
TIME
DMY
1010
1212:
Y/M/
D
Y/M/
30
D
h. Press the Y# button.
i. Press the OF/< and NY buttons to
Quick Start Guide
j. After all settings have been set, press H.
8
EN
MENU
CANCEL
select [Y/M/D].
2007
.
1212.
MENU
CANCEL
• For a more accurate setting, press H when the time signal hits 00 seconds.
H button
HQHQ3072
DMY
1010
TIME
1212:
[ ]
2304
×
OK
SET
Y/M/
SET
D
OK
[
]
IN
30
44
Take a picture
3072
2304
IN
1/1000
F2.7
3072
2304
IN
1/1000
F2.7
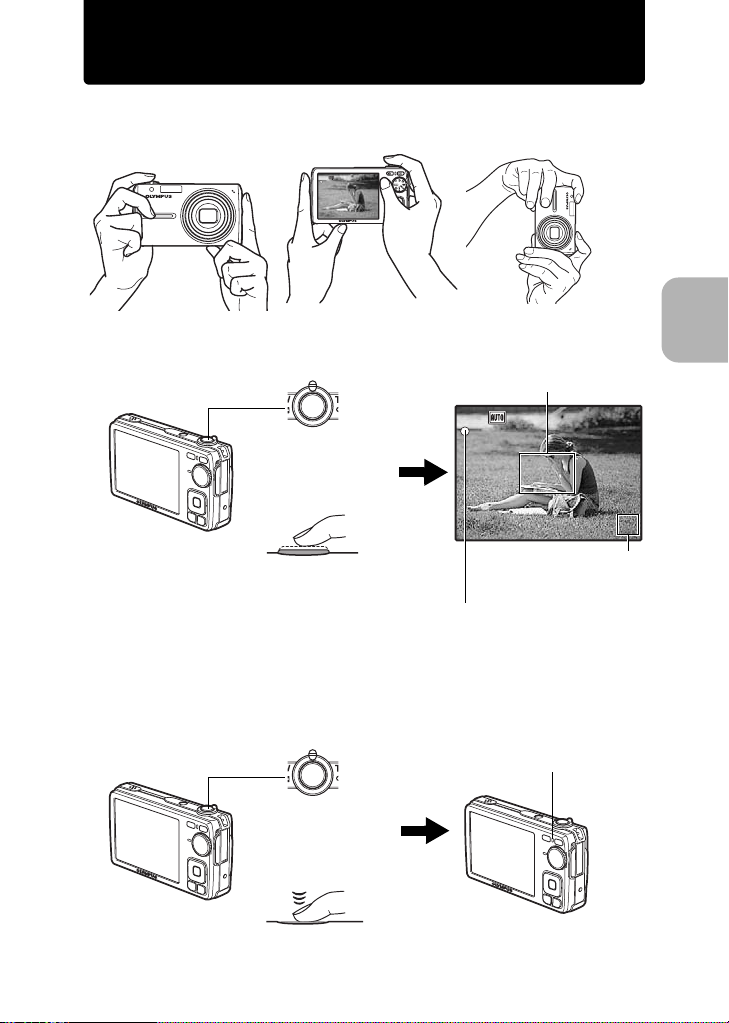
a. Hold the camera.
Horizontal grip Vertical grip
HQHQ3072
1/1000
F2.7
[ ]
[
]
IN
2304
×
44
b. Focus.
c. Shoot.
Shutter Button
(Press Halfway)
Shutter Button
(Press
Completely)
Place this mark over
your subject.
1/1000
F2.7
[ ]
[
HQHQ3072
×
2304
The number of pictures
that can be taken is
displayed.
When the focus and exposure are
locked, the green lamp lights up, and
the shutter speed and aperture value
are displayed.
The card access lamp blinks.
IN
44
Quick Start Guide
]
EN
9
Review your pictures
12
40
ISO 400
100
0001
0.0
3072
2304
HQ
1/1000
F2.7
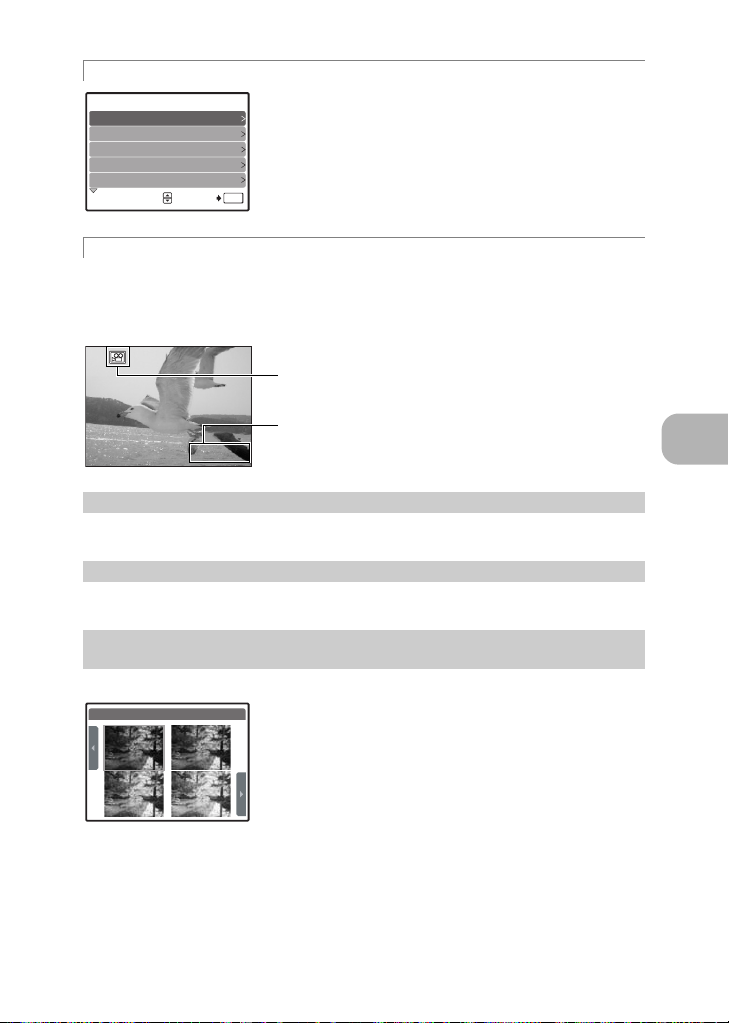
a. Press the q button.
q button
1/1000
MENU
F2.7
’0707.
1212.
1010 12
100
YES
NO
Arrow pad
Displays the next image
Displays the previous image
Erase pictures
a. Press the X& and Y# buttons to display the picture you want
to erase.
Quick Start Guide
b. Press the /S button.
ERASE
/S button
BACK
3072
ISO 400
-
SET
2304
×
0001
[IN]
[IN]
HQ
0.0
:
40
1
OK
c. Press the OF/< button, select [YES], and press H.
OF/< button
10
EN
H button
BACK
ERASE
MENU
YES
NO
SET
[IN]
OK
Button operations
3072
2304
HQ
3072
2304
IN
1/1000
F2.7
12
d
3
4
b
o button Turning the camera on and off
1
Power on: Camera turns on in shooting mode.
Shutter button Shooting pictures/movies
2
• Lens extends
• Monitor turns on
5
6
9
c
8
a
7
0
Shooting mode
Self-timer
3072
HQ
Macro mode
×
2304
Flash mode
44
Shooting still pictures
Set the mode dial to a setting other than n, and lightly press the shutter button (halfway).
The green lamp lights when the focus and exposure are locked (focus lock), and the shutter
speed and aperture value are displayed (only when the mode dial is set to h, P, h).
Now press the shutter button all the way (completely) to shoot a picture.
Green lamp
1/1000
[ ]
HQHQ3072
×
F2.7
2304
Locking the focus and then composing the shot (focus
lock)
Compose your picture with the focus locked, and then
completely press the shutter button to shoot a picture.
• When the green lamp blinks, the focus is not adjusted
properly. Try locking the focus again.
[
]
IN
44
Button operations
Recording movies
Set the mode dial to n, and lightly press the shutter button to lock the focus, and then press
the shutter button completely to start recording. Press the shutter button again to stop
recording.
K button (Shooting) Selecting shooting mode/Turning the camera on
3
Shooting mode is selected.
This function is used to set the camera to turn on in shooting mode when K is pressed with
the camera off.
g “K/q Turning on the camera with the K or q button” (P. 25)
EN
11

q button (Playback) Selecting playback mode/Turning the camera on
4
The last picture taken is displayed.
• Press the arrow pad to view other pictures.
• Use the zoom lever to switch between close-up playback and index display.
•Press H to delete the information display shown for 3 seconds during single-frame
playback.
This function is used to set the camera to turn on in playback mode when q is pressed with
the camera off.
g “K/q Turning on the camera with the K or q button” (P. 25)
g Movie playback “MOVIE PLAY Playing back movies” (P. 21)
Mode dial Switching shooting modes
5
Set the mode dial to the desired shooting mode.
•Press H to delete the mode information display shown for 3 seconds when the mode dial
is set to modes other than f or R.
h Shooting pictures with automatic settings
The camera determines the optimum settings for shooting pictures. [CAMERA MENU]
settings such as ISO sensitivity cannot be changed.
P Set the optimum aperture value and shutter speed
The camera automatically sets the optimum aperture value and shutter speed for the
brightness of the subject. [CAMERA MENU] settings such as ISO sensitivity can be
changed.
h Shooting pictures using digital image stabilization
This function reduces the blur incurred by a moving subject, or camera shake when taking
pictures.
Button operations
Shooting pictures according to the situation
B E
Use PORTRAIT and LANDSCAPE to shoot pictures with the optimal settings.
f Shooting pictures by selecting a scene mode according to the
situation
Select from 11 available scene modes, according to the shooting conditions.
Press H to set.
M NIGHT+PORTRAIT / j SPORT /N INDOOR /W CANDLE
/R SELF PORTRAIT /S SUNSET /X FIREWORKS /P BEHIND GLASS
/V CUISINE /d DOCUMENTS /i AUCTION
• The scene selection screen displays sample images and
the shooting mode to best suit the situation.
• To switch to a different scene mode after a scene mode has
been selected, press m to select [SCENE] from the top
menu and display the scene selection screen.
• By switching to another scene, most settings will be
OK
changed to the default settings of each scene.
12
EN
1
NIGHT+PORTRAIT
MENU
SETBACK
R Follow the shooting guide for setting
00:36
0.0
0.3
1.0
0.7
SHOOTING GUIDE
Brightening subject.
1
2
Shooting into backlight.
Blurring background.
3
Adjusting area in focus.
4
Shooting subject in motion.
5
SET
Follow the shooting guide displayed on the screen to set the
1/3
target items.
•Press m to display the shooting guide again.
• To change the setting without using the shooting guide, set
the shooting mode to another one.
• The content set using the shooting guide will change to the
default setting by pressing m or changing the mode
OK
using the mode dial.
n Recording movies
Audio is recorded with the movie.
• During audio recording, only the digital zoom can be used. To record the movie with the
optical zoom, set [R] (movie) to [OFF].
g “R (movie) Recording movies with or without sound” (P. 19)
This lights red during movie recording.
The remaining recording time is displayed. When
00:36
00:36
Arrow pad (ONXY)
6
Use the arrow pad to select scenes, items on the menus, and to play back pictures.
H button
7
This button is used to confirm your selection.
OF/< button Changing picture brightness (Exposure compensation)/
8
Shooting mode: Changing picture brightness
F
0.0
+0.3
the remaining recording time reaches 0, recording
stops.
Printing pictures
Press OF/< in shooting mode, choose the preferred
brightness with XY, and press H.
• Adjustable from -2.0 EV to +2.0 EV
Button operations
+0.7
+1.0
Playback mode: Printing pictures
Display a picture to print out in playback mode, connect the camera to the printer, and then
press OF/< to print the picture.
g “Direct printing (PictBridge)” (P. 27)
EN
13

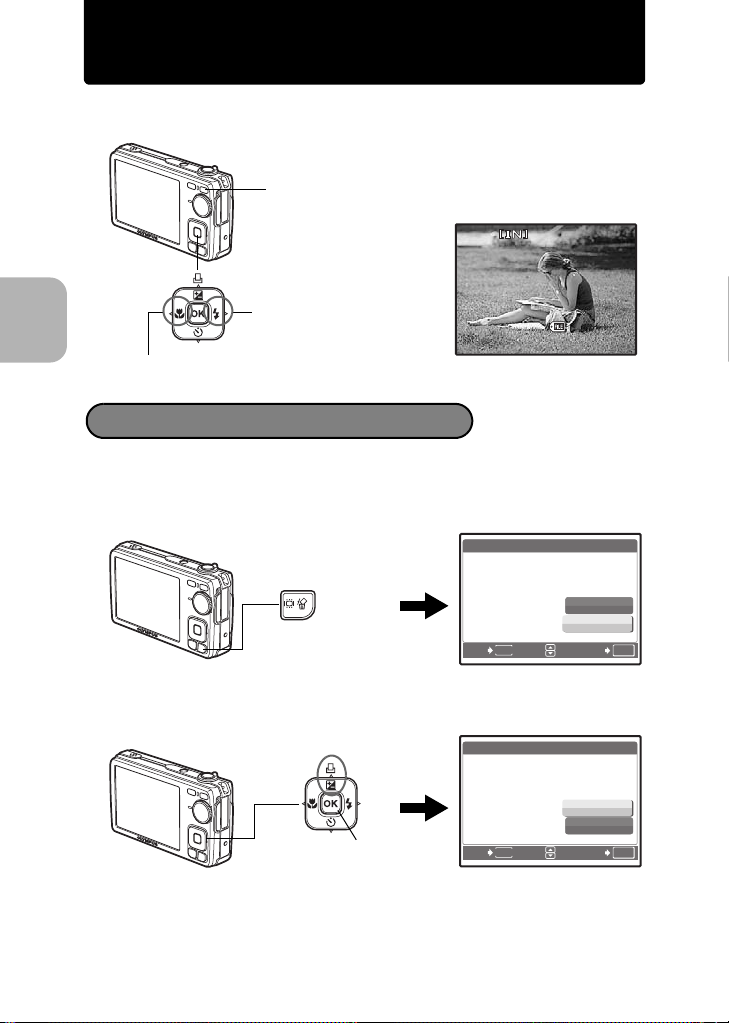
X& button Shooting pictures close to the subject (Macro mode)
9
Press X& in shooting mode to select the macro mode. Press H for setting.
OFF Macro off Cancels macro mode.
& Macro on This mode lets you shoot from as close as 20 cm/7.9 in. (when
% Super macro This mode lets you shoot from as close as 5 cm/2.0 in. to your
NY button Self-timer shooting
0
Press NY in shooting mode to select on or off for the self-timer.
Press H for setting.
OFF Self-timer off Cancel the self-timer.
Y Self-timer on Set the self-timer.
• After setting the self-timer, press the shutter button completely. Then, the self-timer lamp
lights for approximately 10 seconds, blinks for approximately 2 seconds, and the shutter is
released.
• To cancel the self-timer, press NY.
• Self-timer shooting is automatically canceled after one shot.
Y# button Flash shooting
a
Press Y# in shooting mode to select the flash mode.
Press H for setting.
AUTO Flash auto The flash fires automatically in low light or backlight conditions.
! Red-eye This emits pre-flashes for red-eye reduction.
Button operations
# Fill-in The flash fires regardless of the available light.
$ Flash off The flash does not fire.
the zoom is set for the zoom-out angle) and as close as 35 cm/
13.8 in. (when the zoom is set for the zoom-in angle) to your
subject.
subject.
The zoom position is fixed automatically and cannot be changed.
b
m button Displaying the top menu
Displays the top menu.
/S button Increasing the brightness of the monitor (Backlight boost)/
c
Erasing pictures
Increasing the brightness of the monitor (Backlight boost)
The monitor lights brighter when is pressed in shooting mode. If there is no operation for
10 seconds, it dims back to the original brightness.
• When [BRIGHT] is selected in [], the monitor brightness does not change.
S Erasing pictures
In playback mode, select the picture you want to erase, and press S.
• Once erased, pictures cannot be restored. Check each picture before erasing to avoid
accidentally erasing pictures you want to keep.
g “0 Protecting pictures” (P. 21)
14
EN
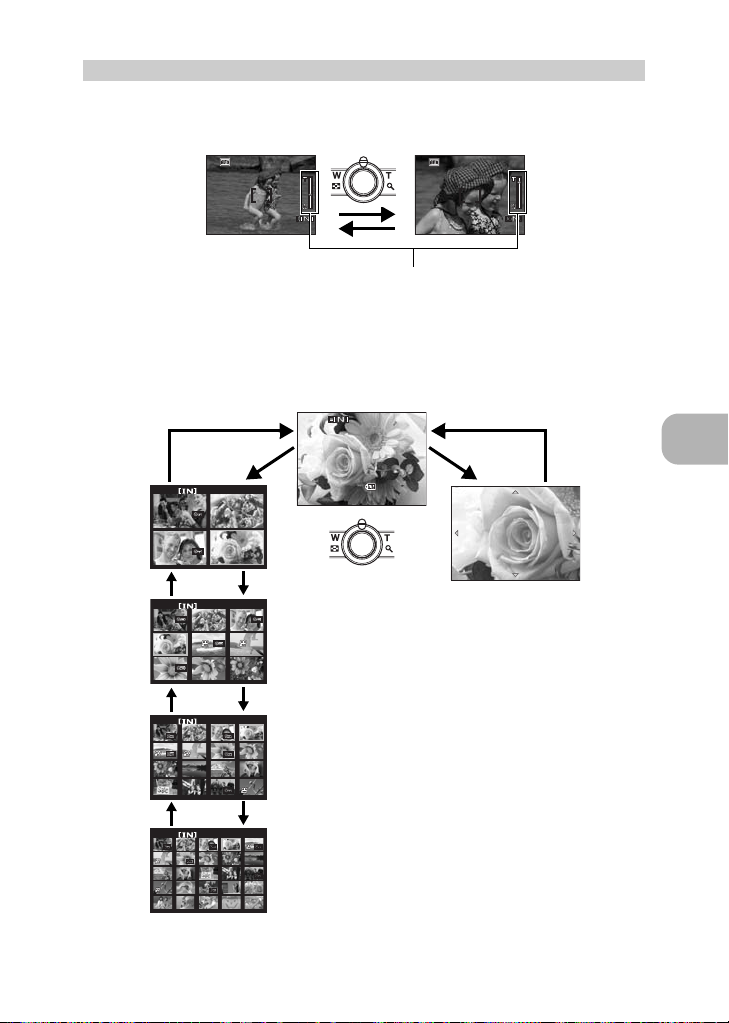
Zoom lever Zooming while shooting/Close-up playback
3072
2304
HQ
3072
2304
HQ
12
30
ISO 400
100
0004
HQ
0.0
3072
2304
1/1000
F2.7
d
Shooting mode: Zooming in on your subject
Optical zoom: 4×
Digital zoom: 4× (optical zoom × digital zoom: Max. 16×)
Zoom out:
Turn the zoom
lever to the Wside.
3072
2304
3072
2304
HQ
×
44
HQ
×
Zoom in:
Turn the zoom
lever to the Tside.
44
The white area is the optical zoom area. The red area is the digital
zoom area. When the slider enters the red area, the digital zoom
activates and the image is further enlarged.
Playback mode: Switching the picture display
Single-frame playback
• Use the arrow pad to browse pictures.
3072
1/1000
F2.7
Zoom bar
T
21
3 4
T
4
7
T
T
W
Index display
• Use the arrow pad to select a
21
3
5
8
picture for playback, and
6
press H to play back the
single-frame of the picture
9
selected.
W
W
’0707.
ISO 400
1212.
1010 12
100
HQ
2304
×
0.0
TW
:
30
-
0004
4
Close-up playback
• Turn and hold the zoom lever to
the T-side to incrementally zoom
in (up to 10 times the original
size), and to the W-side to zoom
out.
• Press the arrow pad during closeup playback to scroll the picture in
the indicated direction.
• When returning to the singleframe playback, press H.
W
Button operations
EN
15
Menu operations
RESET
SILENT
MODE
SETUP
SCENE
IMAGE
QUALITY
CAMERA
MENU
SETUP
RESET
SILENT
MODE
SETUP
SCENE
IMAGE
QUALITY
CAMERA
MENU
K button (Shooting mode)
q button (Playback mode)
H
m button
Arrow pad (ONXY)
About the menus
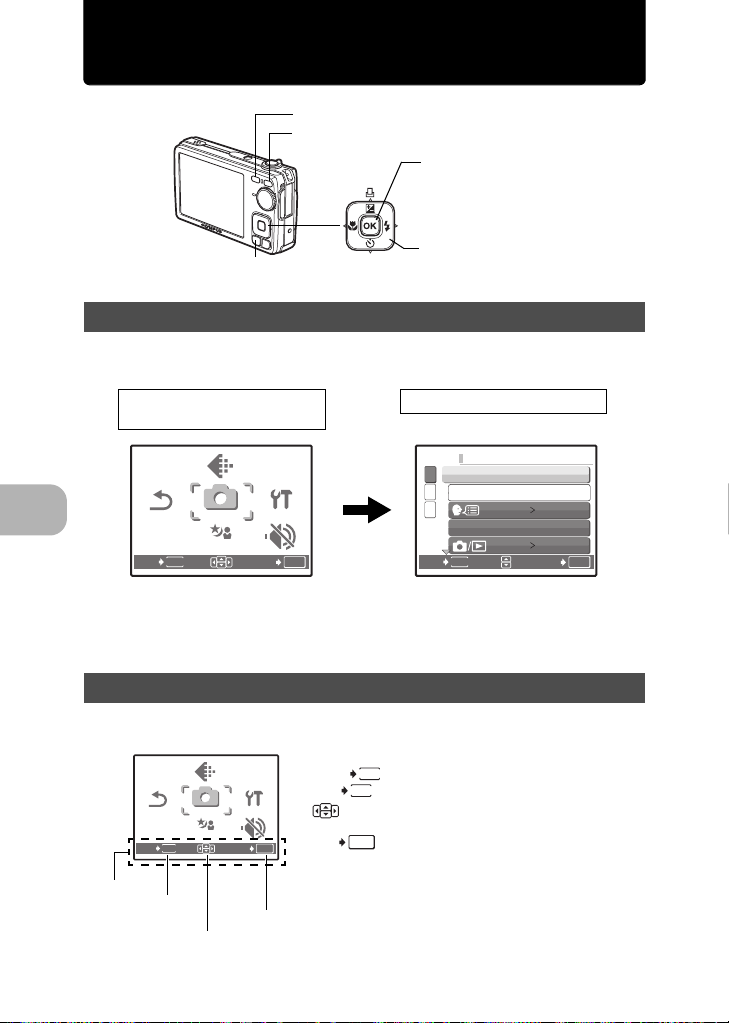
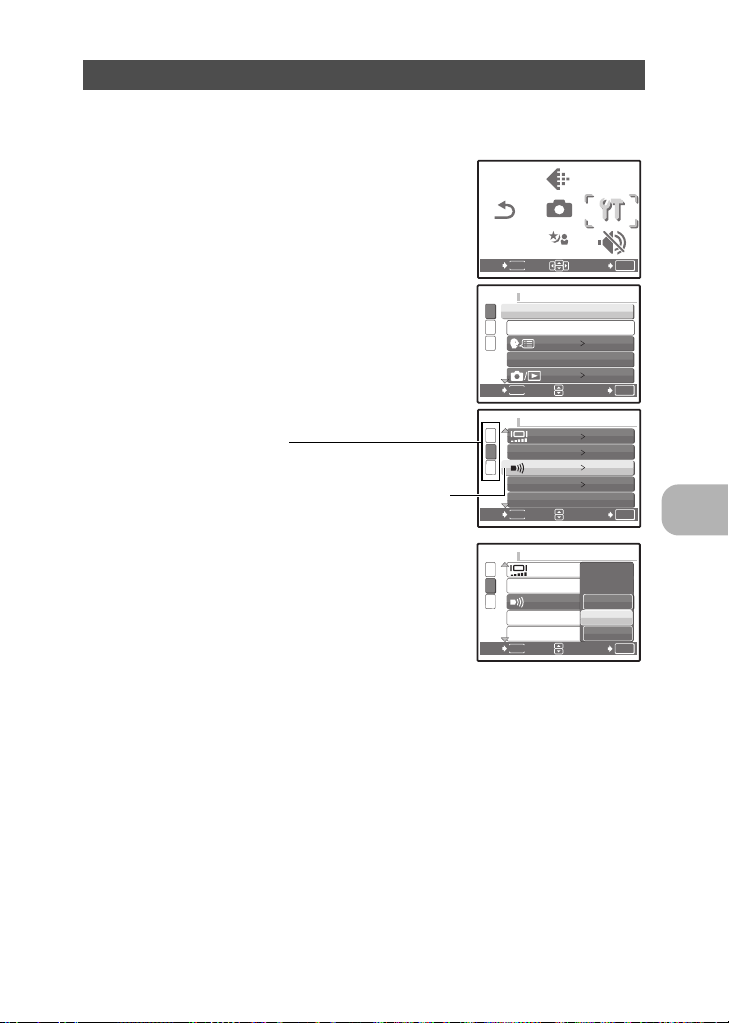
Press m to display the top menu on the monitor.
• The contents displayed on the top menu differ according to the mode.
Top menu
(Still picture shooting mode)
IMAGE
IMAGE
QUALITY
QUALITY
CAMERA
CAMERA
RESET
EXIT
SCENE
MENU
MENU
MENU
SETUPSETUP
SILENT
MODE
SET
OK
SETUP menu items
1
MEMORY FORMAT
2
BACKUP
3
PIXEL MAPPING
MENU
BACK
ENGLISH
NO
OK
SET
• Select [CAMERA MENU], [PLAYBACK MENU] or [SETUP] and press H. The screen for
selecting the menu item is then displayed.
• When the mode dial is set to R and the settings are made by following the shooting
guide, press m to display the shooting guide screen.
Menu operations
Operation guide
During menu operations, the buttons and their respective functions are displayed at the
bottom of the screen. Follow these guides to navigate the menus.
IMAGE
RESET
EXIT
MENU
IMAGE
QUALITY
QUALITY
CAMERA
CAMERA
MENU
MENU
SCENE
SETUPSETUP
SILENT
MODE
SET
OK
BACK
EXIT
SET
MENU
: Moves back one menu.
MENU
: Exits the menu.
: Press the arrow pad (ONXY) to select an
item.
: Sets the selected item.
OK
16
EN
Operation
guide
m
button
Arrow pad
(ONXY)
H
Using the menus
RESET
SILENT
MODE
SETUP
IMAGE
QUALITY
CAMERA
MENU
SCENE
SETUP
SETUP
SETUP
This explains how to use the menus with the [8] (warning sound) setting as an example.
1 Set the mode dial to a setting other than R.
2 Press m to display the top menu. Press Y
to select [SETUP], and press H.
•[8] is on a menu in [SETUP].
RESET
EXIT
MENU
IMAGE
IMAGE
QUALITY
QUALITY
CAMERA
CAMERA
MENU
MENU
SCENE
SETUP
SETUP
SILENT
MODE
SET
OK
3 Press ON to select [8], and press H.
• Unavailable settings cannot be selected.
• Press X on this screen to move the cursor to the page
display. Press ON to change the page. To return to the
item selection screen, press Y or H.
1
MEMORY FORMAT
2
BACKUP
3
PIXEL MAPPING
MENU
BACK
ENGLISH
NO
OK
SET
Page display:
This mark is displayed when there are more
menu items on the next page.
The selected item is displayed
in a different color.
4 Press ON to select [OFF], [LOW] or [HIGH],
and press H.
• The menu item is set and the previous menu is displayed.
Press m repeatedly to exit the menu.
• To cancel any changes and continue operating the menus,
press m without pressing H.
1
2
BEEP
3
SHUTTER SOUND
VOLUME
MENU
BACK
1
2
BEEP
3
SHUTTER SOUND
VOLUME
MENU
BACK
NORMAL
LOW
LOW
LOW
SET
OFF
LOW
HIGH
SET
OK
OK
EN
17
Menu operations

Shooting mode menu K
RESET
SILENT
MODE
SETUP
SCENE
IMAGE
QUALITY
CAMERA
MENU
4
1
IMAGE
IMAGE
QUALITY
QUALITY
CAMERA
2
RESET
EXIT
MENU
CAMERA
MENU
MENU
SCENE
SETUPSETUP
SILENT
MODE
SET
5
OK
3
• Some functions are not available according to the selected mode.
g “Functions available in shooting modes and scenes” (P. 47)
g “SETUP menus” (P. 24)
• The factory default settings are displayed in gray ( ).
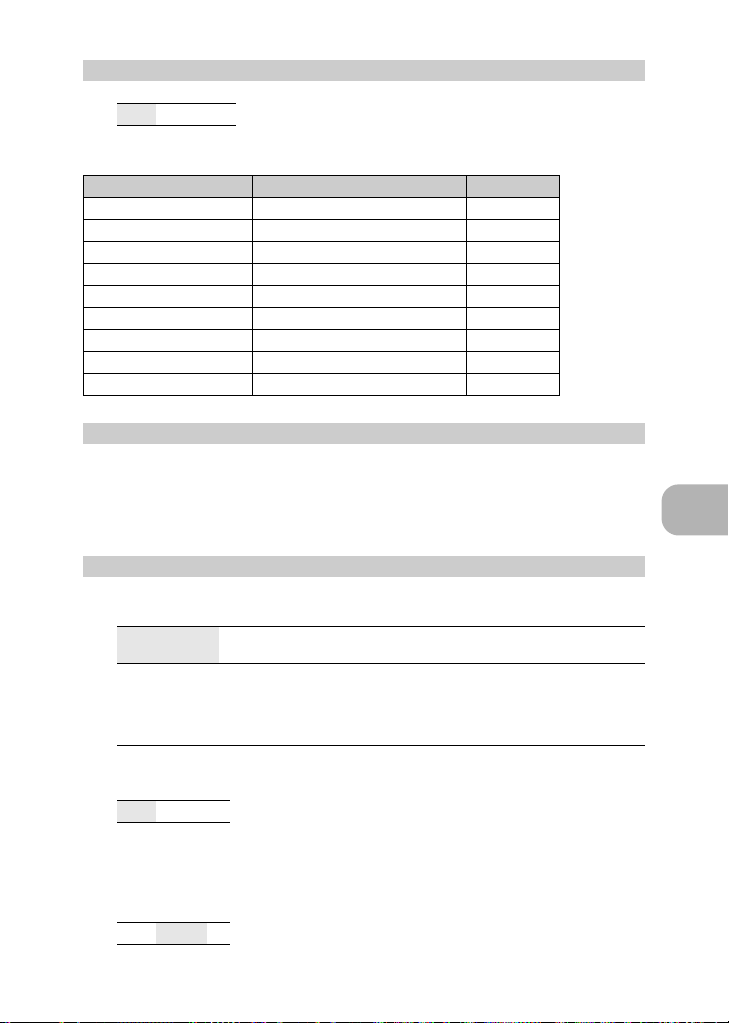
IMAGE QUALITY Changing the image quality
1
Still picture image quality and their applications
Image quality/Image size Compression Application
SHQ 3072 × 2304 Low
HQ 3072 × 2304 Standard
SQ1 2048 × 1536 Standard
SQ2 640 × 480 Standard
Menu operations
16:9 1920 × 1080 Standard
compression
compression
compression
compression
compression
Movie image quality
Image quality/Image size
SHQ 640 × 480
HQ 320 × 240
4 CAMERA MENU
ISO
R (still picture)
R (movie)
PANORAMA
* An Olympus xD-Picture Card
is required.
• This is useful for printing large images
on full-size paper.
• This is useful for performing computer
image processing, such as contrast
adjustment and red-eye correction.
• This is useful for A4 (11.7×8.5 in.)/
postcard-size prints.
• This is useful for computer editing such
as rotating or adding text to a picture.
• This is useful for sending as e-mail
attachments.
• This is useful for expressing the
broadness of a subject such as
landscapes and for viewing pictures on
a wide-screen television.
• [PANORAMA] cannot be set.
*
18
EN
RESET Changing the shooting functions back to default settings
2
NO /YES
Restore shooting functions back to default settings.
Functions for returning the settings to the original when the reset function is
executed
Function Factory default setting Ref. Page
#
& OFF P. 14
F 0.0 P. 13
Y OFF P. 14
IMAGE QUALITY HQ P. 18
f
ISO AUTO P. 19
R (still picture) OFF P. 19
R (movie) ON P. 19
3
f (Scene) Shooting pictures by selecting a scene according to the situation
The scene selection screen displays sample images and the shooting mode to best suit the
situation. This can be set only when the mode dial is set to f.
• By switching to another scene, most settings will be changed to the default settings of each
scene.
g “f Shooting pictures by selecting a scene mode according to the situation” (P. 12)
CAMERA MENU
4
ISO
.................................................................................................. Changing the ISO sensitivity
AUTO Sensitivity is automatically adjusted according to the conditions of the
64/100/200/400/
800
AUTO P. 14
M NIGHT+PORTRAIT P. 12
subject.
A low value lowers the sensitivity for daylight shooting of clear, sharp
pictures. The higher the value, the better the camera’s light sensitivity
and ability to shoot with a fast shutter speed and in low light conditions.
However, high sensitivity introduces noise into the resulting picture,
which may give it a grainy appearance.
Menu operations
R (still picture) ...............................................................Recording sound with still pictures
OFF /ON
When activated [ON], the camera will record about 4 seconds of
audio after the picture is taken.
When recording, aim the camera microphone at the source of the
sound you want to record.
R (movie) ................................................................ Recording movies with or without sound
OFF
/ON
When [ON] (sound is recorded) is selected, the optical zoom
cannot be used during movie recording. Only the digital zoom can
be used.
EN
19
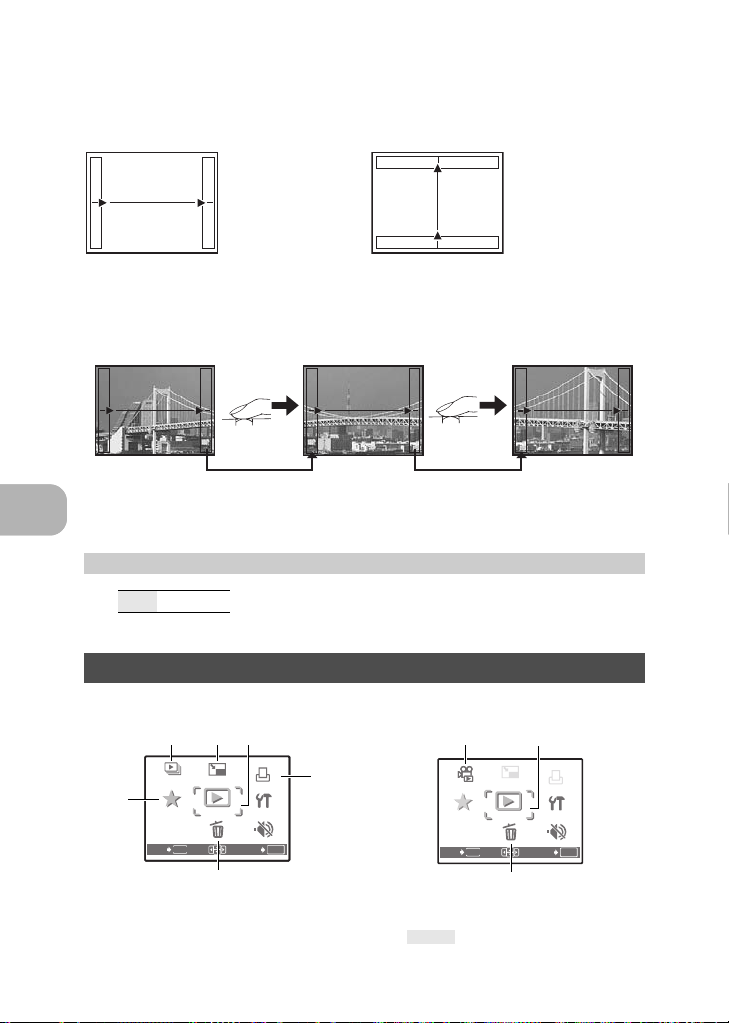
PANORAMA............................................................................... Creating a panoramic picture
ERASE
SETUP
MOVIE
PLAY
PLAYBACK
MENU
PRINT
ORDER
SILENT
MODE
RESIZE
MY
FAVORITE
RESIZE
ERASE
SETUP
PRINT
ORDER
SILENT
MODE
MY
FAVORITE
SLIDESHOW
PLAYBACK
MENU
Panorama shooting lets you create a panoramic picture, using the OLYMPUS Master
software on the provided CD-ROM. An Olympus xD-Picture Card is required for panorama
shooting.
Y: The next picture is
connected at the right
edge.
X: The next picture is
connected at the left
edge.
Connects pictures from left to right Connects pictures from bottom to top
Use the arrow pad to specify at which edge you want to connect the pictures; and then
compose your shots so that the edges of the pictures overlap. The part of the previous
picture where it will be joined to the next picture does not remain in the frame. You have to
remember what the part in the frame looked like and take the next picture so it overlaps.
•Press H to exit.
• Panorama shooting is possible for up to 10 pictures. The warning mark (g) is displayed
after 10 pictures have been taken.
SILENT MODE Muting operational sounds
5
OFF /ON
This function allows you to mute operational sounds during
shooting and playback (e.g. warning beeps, shutter sounds, etc.).
O: The next picture is
connected at the top.
N: The next picture is
connected at the
bottom.
Menu operations
20
EN
Playback mode menu q
When a still picture is selected When a movie is selected
41 3 2
SLIDE-
SHOW
MY
5
FAVORITE
MENU
EXIT
RESIZE
RESIZE
PLAYBACK
MENU
ERASE
ERASE
PRINT
PRINT
ORDER
ORDER
SETUP
SETUP
SILENT
SILENT
MODE
MODE
SET
7*
OK
* A card is required.
MOVIE
FAVORITE
EXIT
6
g “SETUP menus” (P. 24)
g “SILENT MODE Muting operational sounds” (P. 20)
• The factory default settings are displayed in gray ( ).
PLAY
MY
MENU
RESIZE
PLAYBACK
MENU
ERASE
ERASE
6
3
SET
PRINT
ORDER
SETUP
SETUP
SILENT
SILENT
MODE
MODE
OK
SLIDESHOW Playing back pictures automatically
12:30
'07. 12.10
10 0 - 0 0 04
IN
00
00
00
36
12
30
100
0004
HQ
00
05
00
36
1
Press H to start the slideshow.
• Only the first frame of each movie is displayed.
• To cancel the slideshow, press H or m.
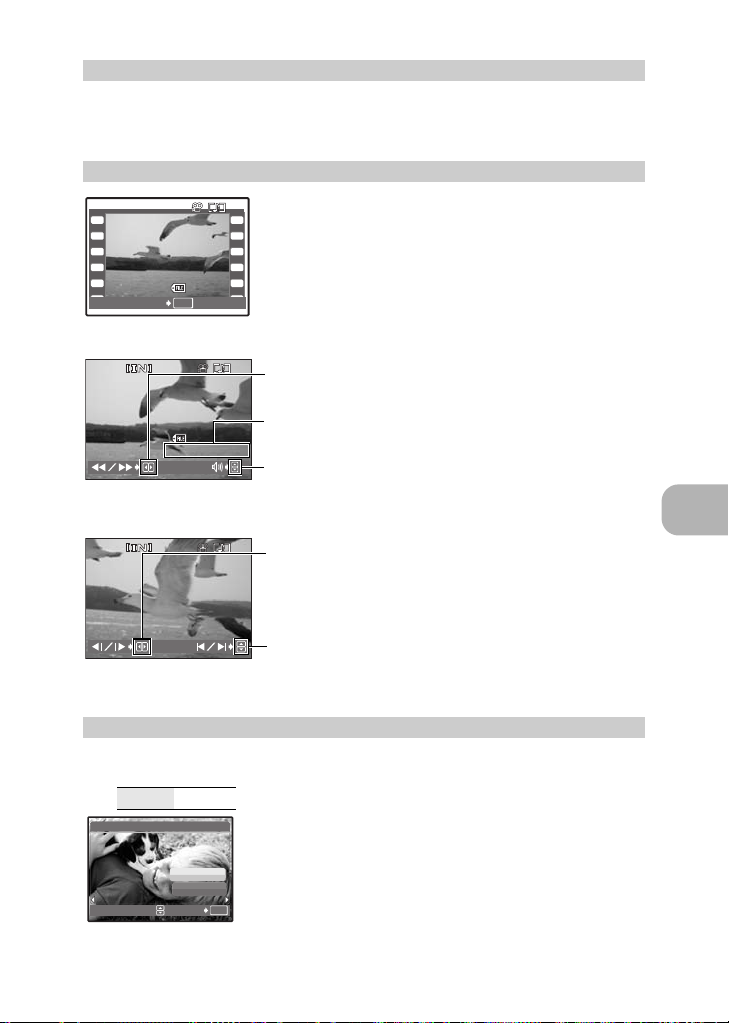
MOVIE PLAY Playing back movies
2
[
]
IN
Select [MOVIE PLAY] from the top menu, and press H to play
back the movie. Another option is to select a picture with the
movie icon (n) and press H to play back the movie.
100-0004
OK
12:30
4
'07.12.10
MOVIE PLAY
Operations during movie playback
Y : Fast forwards playback when pressed and held.
HQ
X : Rewinds playback when pressed and held.
Playing time/Total recording time
:
30
0004
:
36
O : Increases the volume.
’0707.
00
1212.
32320×24240
1010 12
100
:
00
-
/
00
N : Reduces the volume.
•Press H to pause the playback.
Operations during pause
Y : Plays when pressed and held.
X : Plays the movie in reverse when pressed and held.
:
00
:
05
/
00
36
O : Displays the first frame.
N : Displays the last frame.
• To resume the movie, press H.
• To cancel the playback of the movie in the middle of it or during pause, press m.
PLAYBACK MENU
3
.................................................................................................................. Protecting pictures
0
OFF /ON
0
OFF
ON
EXIT
Protected pictures cannot be erased using [ERASE], [SEL.
IMAGE] or [ALL ERASE], but they are all erased by formatting.
• Select the picture with XY, and protect it by selecting [ON]
[IN]
with ON. You can protect several frames in succession.
When a picture is protected, 9 will be displayed on the
monitor.
OK
Menu operations
EN
21
 Loading...