Page 1

The name "LEXT" is formed from the words "Laser" and "Next," and means "next-generation 3D confocal laser microscopes".
CONFOCAL LASER SCANNING
MICROSCOPE
OLS3100
TM
NEW
Page 2

Greater simplicity with higher precision:
The next step in the evolution of three dimensional
laser confocal metrology.
1
LEXT minimizes manual operation, improving ease of use for everyone.
Even a first-time user can operate the system like an expert, and obtain fast reliable measurement results.
The system features not only improved functionality, but also an even higher level of measurement performance.
Constantly evolving toward greater simplicity and higher precision,
LEXT meets a diverse range of needs in fine surface profile measurement.
Page 3

2
Welcome to the world of LEXT 3D
Page 4

Automatic operation achieves speedy, high-precision output.
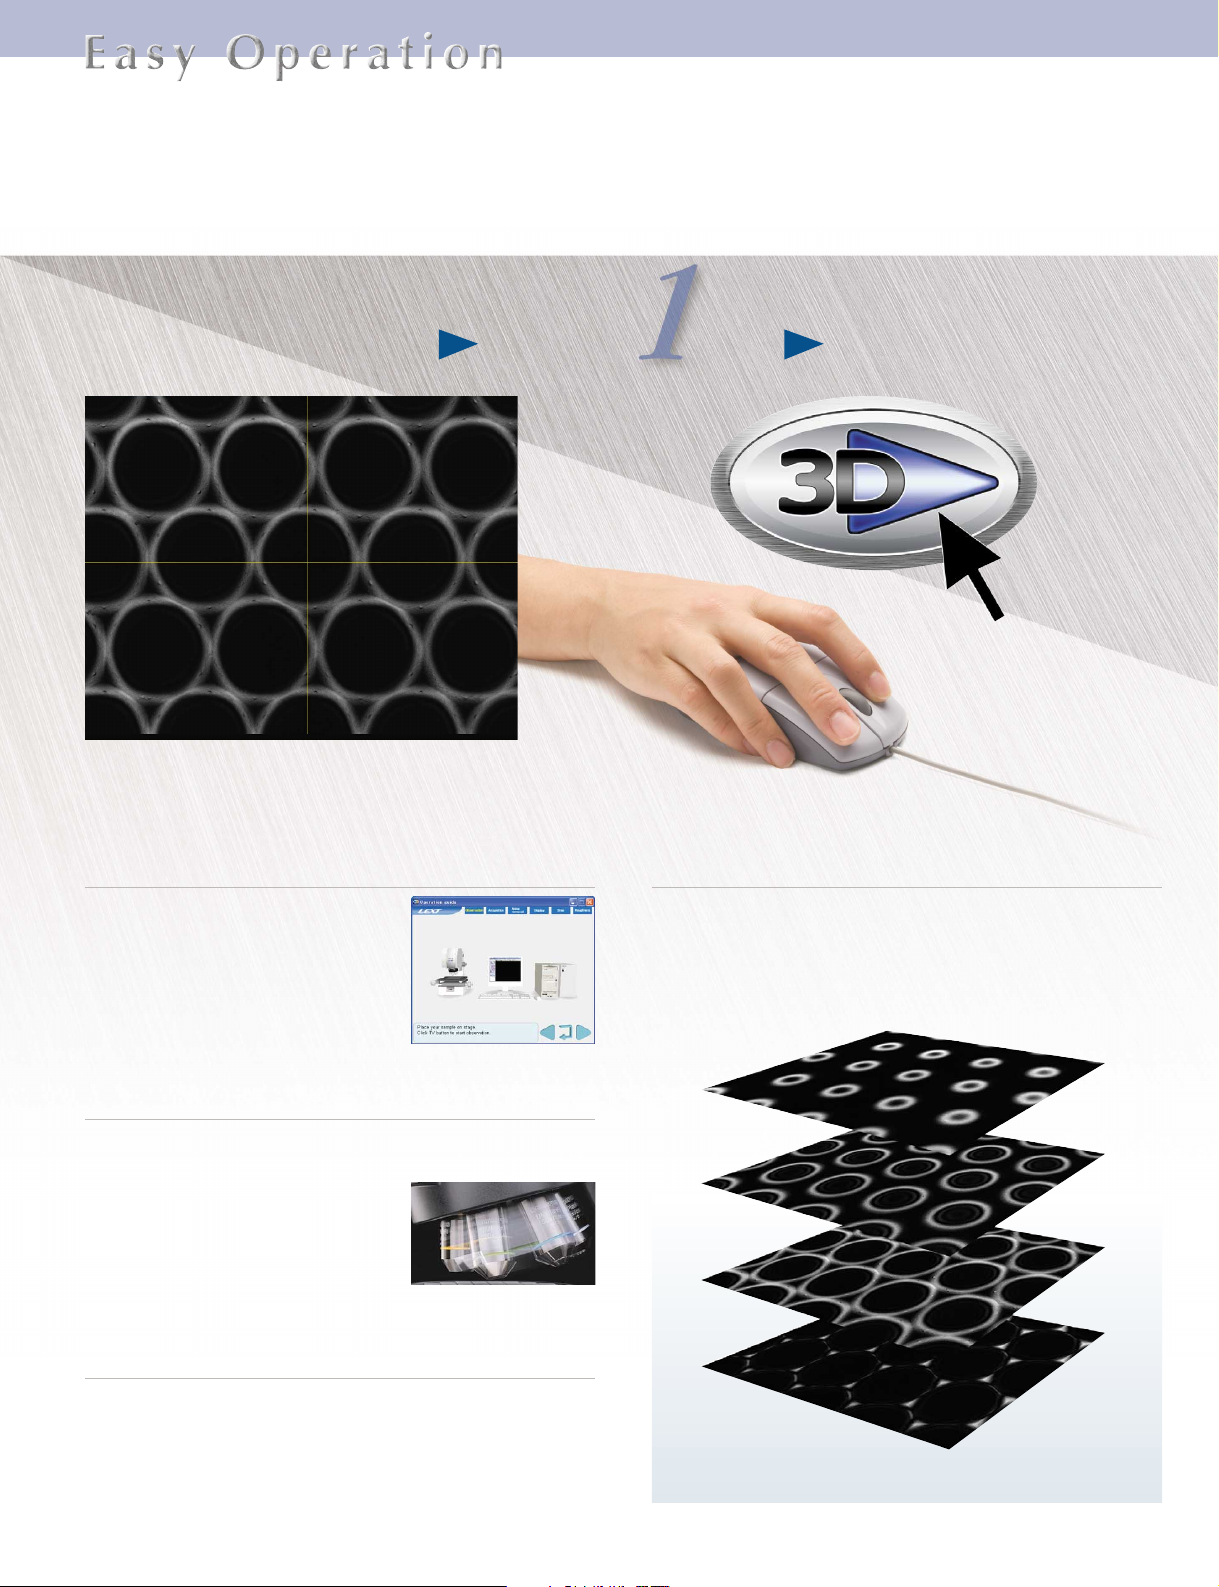
Position and
magnification settings
New, Operation Navigator feature is an online wizard
that guides the user in the operation of the LEXT
The operation navigator provides
animations to guide the user through
each step of microscopic observation.
You can complete a series of steps by
simply operating the mouse in the same
way as shown in the animations
appearing on the screen.
The motorized, high-speed revolving nosepiece ensures
the safe and speedy microscopic inspections
Motorized switching between magnifications helps the user to
increase work efficiency and to keep the specimen safe; an
automatic retracting function prevents an objective lens from
coming contact with a specimen. It also
offers excellent parfocality of all
objective lenses and an automatic light
intensity adjusting function keeps
brightness levels unchanged after
magnification switching.
High-speed automatic focusing and one-push gain
enable the user to complete preparations for 3D image
capturing quickly and easily
The speed of the automatic focusing function has been made
three times faster so that the user can reach an image or a point
on an image in an instant. Additionally, one-push gain allows the
user to adjust brightness optimally and to complete preparations
for 3D image capturing with ease.
Click
3D image capturing with one click automatically
detecting upper and lower limits
With LEXT, 3D image capturing is performed by just one click of
the “3D capture button.” Upper- and lower-limit settings or other
cumbersome preparations are unnecessary. A beginner can
obtain a 3D image of the best quality easily. For experienced
users, this automated 3D image capturing feature lightens their
work load and contributes greatly to increasing their work
efficiency.
3
Page 5

Auto Fine View does it all automatically
The brightness and contrast of a captured image are automatically adjusted. Image conditioning is typically a manual process
requiring an experienced operator. Using the auto fine view
function of LEXT, anybody can acquire ideal, high-quality 3D
images without special training.
Introducing the user to a new 3D world
by providing a variety of image presentation
patterns, high precision measurement and
advanced analytical techniques
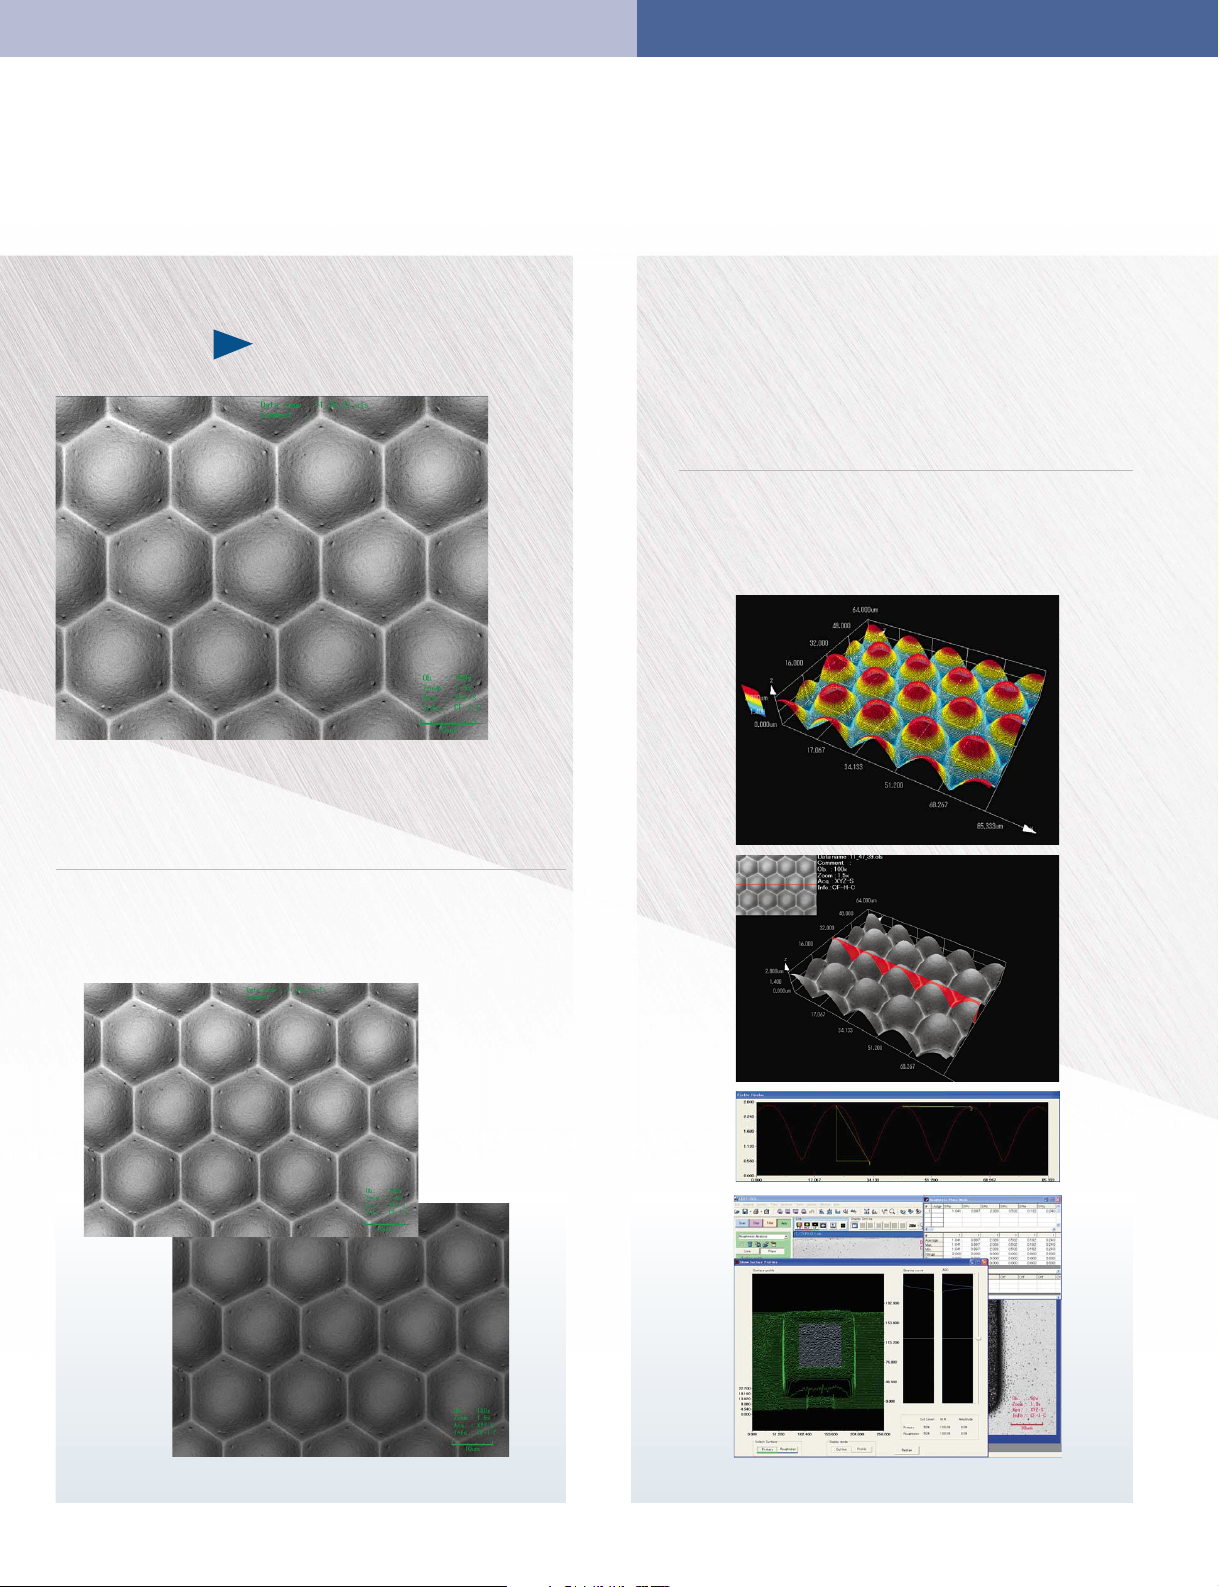
A captured image is rendered to an ideal 3D image by
using LEXT’s display capabilities. High precise
measurement, high repeatability, and advanced analytical
techniques related to roughness and particle analyses
provide the user with a new dimension of microscopic
observation.
Welcome to the world of LEXT 3D
Display, measurement and
analysis
Image
capturing
Wired frame
Microlens
Image intensity
profile
Step height
measurement
Surface
roughness
analysis
After auto
processing
Before
processing
4
Wafer bump
Page 6

Powerful 3D display facilitates measurement and analysis.
● Adjustable 3D image
The angle of a 3D image can be now changed freely
with the mouse by grabbing the image. In addition,
the 3D image can be scaled up or down in 100 steps
using the mouse wheel. This is done using a unique
algorithm to prevent the quality of the enlarged image
from deteriorating. The background color can now
also be changed to improve the observation and
contrast of the specimen.
● 3D measurement
Step height, line width and the distance between two
points can now be measured on the 3D image.
Allowing measurement conditions to be recognized
intuitively.
Display
Measurement
Step height measurement
Line width measurement
Distance between two points measurement
5
Filamentation electrode
Page 7

● A variety of 3D image presentation patterns
A variety of 3D image presentation patterns are provided,
including surface texture, real color, wired frame, etc. A 3D image
can be rendered to make it more visually effective.
● Surface roughness analysis
Non-contact surface roughness measurement can be gathered
using the small laser spot. Further minute roughness analysis can
be made using the unique ROI function. Roughness can also be
made along a single line much like conventional roughness
gauges.
Welcome to the world of LEXT 3D
Analysis
Toner film
Surface
Surface 1
Corny layer cells
Reverse face of a Si wafer
Texture
Surface 2
Wired frame
Texture
Real color (brightfield observation)
Stud bump
Surface
Perspective
Balance perspective
Surface roughness
analysis
Light guide plate (for LCD)
6
Page 8

7
Versatile observation methods to handle a wide range of applic
● Brightfield observation
Color information can be obtained from brightfield (color)
observation. Therefore, brightfield observation can be used
effectively to observe a flaw on a color filter or to locate the
position of an area of corrosion on metal.
● DIC (Differential Interference Contrast) observation
In DIC observation, it is possible to observe a scratch or flaw as
small as a few nanometers in height that could not be observed in
a brightfield observation.
● Laser confocal
Observation with a much higher level of resolution impracticable
with conventional microscopes is now possible through a
combination of a 408 nm laser and confocal optics.
● Laser confocal DIC
Microscopic unevenness on a surface can be observed in three
dimensions in real time, which is impossible with conventional
laser microscopes. Observation of surface conditions with the
level of dimensional reality comparable to that of an SEM has
been made fully possible, opening up a new dimension in surface
profile observation.
Display
Laser printer toner
Reverse face of a wafer
Circuits patterns on wafer
Polymeric film
Non confocal image
Confocal image
Page 9

8
ations.
Welcome to the world of LEXT 3D
● Real-time distance measurement
A distance can be measured in real time by using image intensity
profile. A distance can be measured in live observation.
● Particle analysis
Particles can be automatically separated using the separator
function, threshold values can be set, and the range of detection
can be specified. Automatic measurement of all particles can be
made using various particle measurement parameters, and
measured data can be statistically processed to support
advanced particle analyses.
● Split screen display
An image observed in one observation mode and the same image
observed in another observation mode can be displayed
simultaneously during live observation. A target point can be
located easily by observing a microscopic image with color
information and a high-resolution LSM (Laser Scanning
Microscope) image simultaneously. By using this two-screen
display function, the quality of a specimen can be checked by
comparing it with a reference specimen in live observation, and
whether it is acceptable or not can be determined.
Measurement
Analysis
Stud bump
Test patterns (Chromium)
Corny layer cells
Page 10

9
World-class resolution and precision.
Objective lens
Circular confocal
pinhole
LED light
CCD
Photomultiplier
Laser
● World’s highest level of resolution
The optical system designed exclusively for use with 408-nm
laser light (violet opt system) prevents the occurrence of
aberrations associated with the use of a short-wavelength light
source, and brings the highest performance out of the 408-nm
light source. Such a high level of resolution has been made
possible by the confocal optical system having an optimized
circular pinhole and the highspeed XY scanner with the
MEMS technology of Olympus.
With the world's highest-level
planar resolution, a line or space
of 0.12 µm can be resolved.
Additionally, the 0.01 µm height
resolution supports the user in
undertaking measurements of
microscopic surface profiles.
Basic concept of a light path in the violet opt system
Basic concept of the two-dimensional scanner
Multiple points
at peak
intensity
Intensity
Height
MEMS scanner
Incident light
Scan pattern
0.12 µm line and space 14,400x
● Further advanced, the world’s highest level of
repeatability
Advanced optical techniques of Olympus accumulated over
years have made possible the planar measurement
repeatability of 3σ = 0.02 µm and the height measurement
repeatability of 3σ = 0.04 + 0.002L mm (L = measured length
in µm). A guide with high performance in terms of straightness
and a high-precision linear scale are used for Z-axis scanning.
These parts combined with the further advanced CFO search
function contribute to very high level of repeatability. The high
degree of reliability makes it possible for LEXT to meet the
highly demanding needs of diverse fields of research and
industry.
● Measurements that can be trusted
Highly reliable data can be provided based on the strict
traceability system that is linked with the JCSS (Japan
Calibration Service System).
JCSS Japan Calibration Service System
Block Gauge
OLYMPUS
Stabilized He-Ne Laser
Calibration standard
Calibration block
LEXT (OLS3100)
Traceability chart
Japan (NMIJ/AIST)
CFO search function
The original I-Z curve is
drawn based on the upper,
high-luminance points, and
maximum luminance values
are calculated with high
accuracy by using an
advanced formula. The high
repeatability of LEXT is
made possible through the
height data being obtained
in this process.
Page 11

10
● Objective lens designed exclusively for LEXT
Confocal Laser Scanning Microscope
An apochromatic objective lens exclusively for Confocal Laser
Scanning Microscope, which enables to improve the optical
performance with a 408-nm laser light, was developed. This
special objective lens developed with the world-class optical
technology of Olympus has made possible the highest level of
observational clarity and measurement accuracy at high
magnifications.
● ROI (Region of Interest) noise filter
Areas can be specified on the screen, and different filtering
operations can be performed for each area. An ideal 3D image
can be obtained.
● 5-step sensitivity switching function
LEXT allows sensitivity to be set at each Z position (note) and an
image to be captured by switching from one level of sensitivity to
another. In the case of a specimen with multi-structure patterns
and holes, varying reflectances pose a difficulty in measuring the
height. Using this sensitivity switching function, it is possible to
obtain information on optimal height and luminance for such
types of specimen.
Note: Sensitivity can be set for a maximum of five Z positions.
Welcome to the world of LEXT 3D
Enhanced mode ON
Enhanced mode OFF
PCB (Printed Circuit Board)
● Enhanced mode to capture clear images of
specimens with different reflectances
In the case of a conventional laser microscope, it is difficult to turn
specimens with different reflectances into an image, such as the
surface of a printed circuit board or copper wiring board, or an
inclined plane with weak reflection. LEXT equipped with the
enhanced mode allows such specimens to be turned into clear
images.
Sensitivity setting 5
Sensitivity setting 4
Sensitivity setting 3
Sensitivity setting 2
Sensitivity setting 1
Simulations
Before processing
After processing
Camel hair
Page 12

Full range of measurement/analysis functions to meet virtually
Laser confocal 3D image Laser confocal DIC image
Laser confocal 3D image Particle analysis
Spherocrystal of polyamide resin
Foam (fluoro rubber)
The image shown below is a three-dimensional image of a spherocrystal of an injection molded polyamide resin (PA66) product
observed using the N-ARC method. Such a spiral-shaped higher-order structure is observed in the spherocrystal growth process
after injection molding, although it is of rare occurrence. LEXT with the DIC capability can capture a minute level difference of
several nanometers as a clear 3D image, as shown in the image to the left.
Foam made by being injected with tiny air bubbles has outstanding properties—they are heat-insulating, flexible and shockabsorbing. Therefore, such foam is widely used as the material of wet suits, as packing and weather strips, and as the material to
make many other products. The size of air bubbles and how uniformly the air bubbles are distributed have a great influence on the
merchantability of a foam product. The image on the left is a 3D image of a cross section cut through a piece of fluoro rubber
foam in a cooled condition. By processing this image, data on the volume and area of this foam can be obtained. This type of data
can be provided so that the user can use the data to identify defects in foam products, to improve production conditions, and for
other purposes.
11
Page 13

any requirement.
Laser confocal 3D image Cross-section measurement
Data: Courtesy of NISSAN ARC, Ltd.
3D image in real color Line roughness analysis
Solder (after ion etching)
Paper applied with an adhesive (sticky note)
Welcome to the world of LEXT 3D
Because solder is very soft, years of experience and know-how are required to make specimen preparations before observing the
composition of solder under a microscope. Polished surface techniques using the ion etching method have made considerable
progress in recent years. The image shown below is the surface of solder processed with the ion etching method. This image
shows that the tin (Sn) layer (white part) is made smoother by using the ion etching method. An SEM requires vapor deposition,
whereas LEXT does not require pretreatment. Therefore, by using LEXT a specimen can be observed in its actual state.
Sticky notes are widely used for the convenient feature of applying, peeling and applying again. Minute spherical adhesives are
distributed where an adhesive is applied to a sticky note, as shown in the image below. The way they are distributed, the
thickness of an adhesive, etc., are thought to determine the ease of use (merchantability) of sticky notes. Using LEXT, such
adhesives and paper (fiber) can be observed and measured without pretreatment in a noncontact manner.
12
Page 14

Models to respond to individual needs.
● Stitching (Tiling) function to allow the user to make
measurements over a wider area
LEXT is equipped with the tiling function for integrating a multiple
of images into a single image. An observational area up to 12.8
mm x 12.8 mm can be viewed as one image. Measurement can
also be made by viewing a tiled image. Furthermore, work
efficiency can be increased considerably by specifying the image
capturing method as a recipe setting.
Measured image
Motorized stage/OLS30-CS150AS
● Consecutive measurement of multiple points
Registered positions on a specimen can be automatically and
consecutively captured under the same conditions. This makes it
possible to automate the taking of measurements.
Recipe setting screen
Consecutive setting screen
Stitched (Tiled)
image
Configuration with a motorized stage
Confocal laser scanning microscope for 300-mm
wafer observation/OLS3000-300
This product may not be available in your area.
Please consult your Olympus dealer.
13
Page 15

279
177
464
494
559
520 (–620)
680
700
700 520
580 800
(Unit: mm)
(Unit: mm)
349.5
350 170
353
417 176
406~456
190
415
■ Monitor *
LEXT unit dimensions LEXT configuration dimensions
■ Control unit
■ PC *
14
Welcome to the world of LEXT 3D
Specifications
Laser scan Universal
Observation method Laser Laser, Laser confocal DIC, Brightfield, DIC
Microscope stand Illumination Laser 408 nm LD laser, Class 2
White light — White LED illumination
Z stage Vertical movement/Maximum height of specimen 70 mm/100 mm
Z revolving nosepiece Stroke/Resolution/Repeatability 10 mm/0.01 µm/3 σ =0.04+0.002L µm
Objective lens 5x, 10x, 20x, 50x, 100x
Total magnification 120x–14400x
Field of view 2560x2560–21x21 µm
Optical zoom 1x–6x
Stage * Manual stage/Motorized stage 100x100 mm/150x100 mm
Frame memory Intensity/Height 1024x1024x12 bit/1024x1024x16 bit
AF Laser reflection type
Dimensions 464(W)x559(D)x620(H) mm
Weight 56.9 kg 57.5 kg
*300 mm x 300 mm stage is optional upon special order basis.
* PC & monitor have slightly different dimensions dependent on the area of region.
Page 16

Specifications are subject to change without any obligation on the part of the manufacturer.
•OLYMPUS CORPORATION has obtained ISO9001/ISO14001.
Printed in Japan M1619E-0107B
 Loading...