

Page 1

INSTRUCTIONS
Page 2

Table of contents
Description of controls
..................................................
3
Before you begin
Loading the batteries ............................................. 6
Checking the batteries .......................................... 7
Attaching the strap
.................................................
8
Loading the film
....................................................
9
Unloading
the
film ................................................
12
Simple point & shoot photography
How to take pictures
...........................................
14
Auto flash photography
(1)Taking pictures in low light
............................
20
(2)Taking backlit subjects
....................................
23
Advanced shooting techniques
Macro photography
............................................
24
Focus lock
............................................................
25
Selftimer
...............................................................
28
Continuous mode ................................................. 30
Auto-zoom mode .................................................. 31
Pre-focus mode .................................................... 33
AUTO-S flash photography
...................................
35
Flash OFF ............................................................. 37
FILL-IN flash ........................................................ 38
MULTI flash ......................................................... 39
Night scene flash photography
................................
41
How to use the soft case (optional)
...............................
43
Care and storage
.........................................................
44
Questions and answers
...............................................
46
Specifications
.............................................................
47
1
Page 3
Thank you for purchasing the OLYMPUS Infinity Zoom 76. Please read th is instruction manual carefully before
using the camera. This camera wil l not operate unless the batteries are loaded and th e power switch is set to ON.
Before taking important pictures, it is recommended that you shoot a roll of fi lm j ust to familiarize yourself wi th the
camera's features.
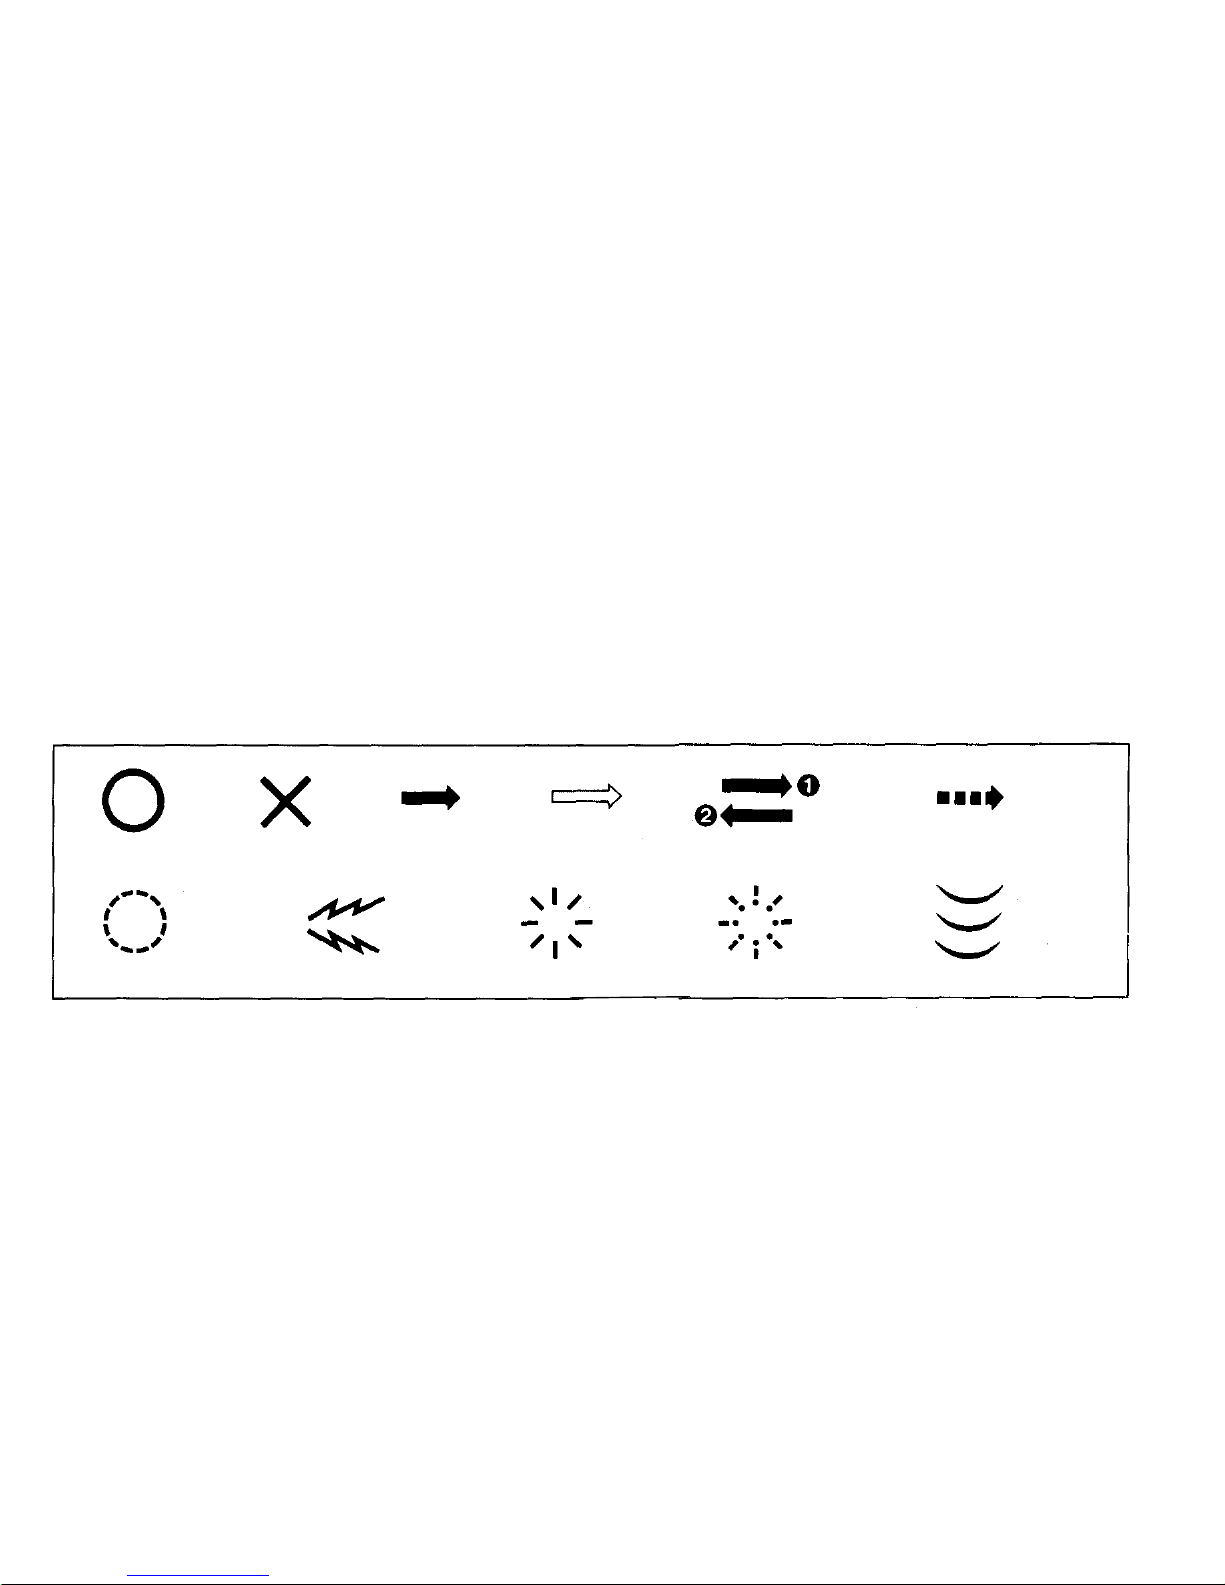
Symbols used in this manual
2
Correct
Incorrect
Operation
Order
Operation order
Automatic operation
Attention
Operation sound
Lamp on
Lamp blinking
Press lightly
Page 4
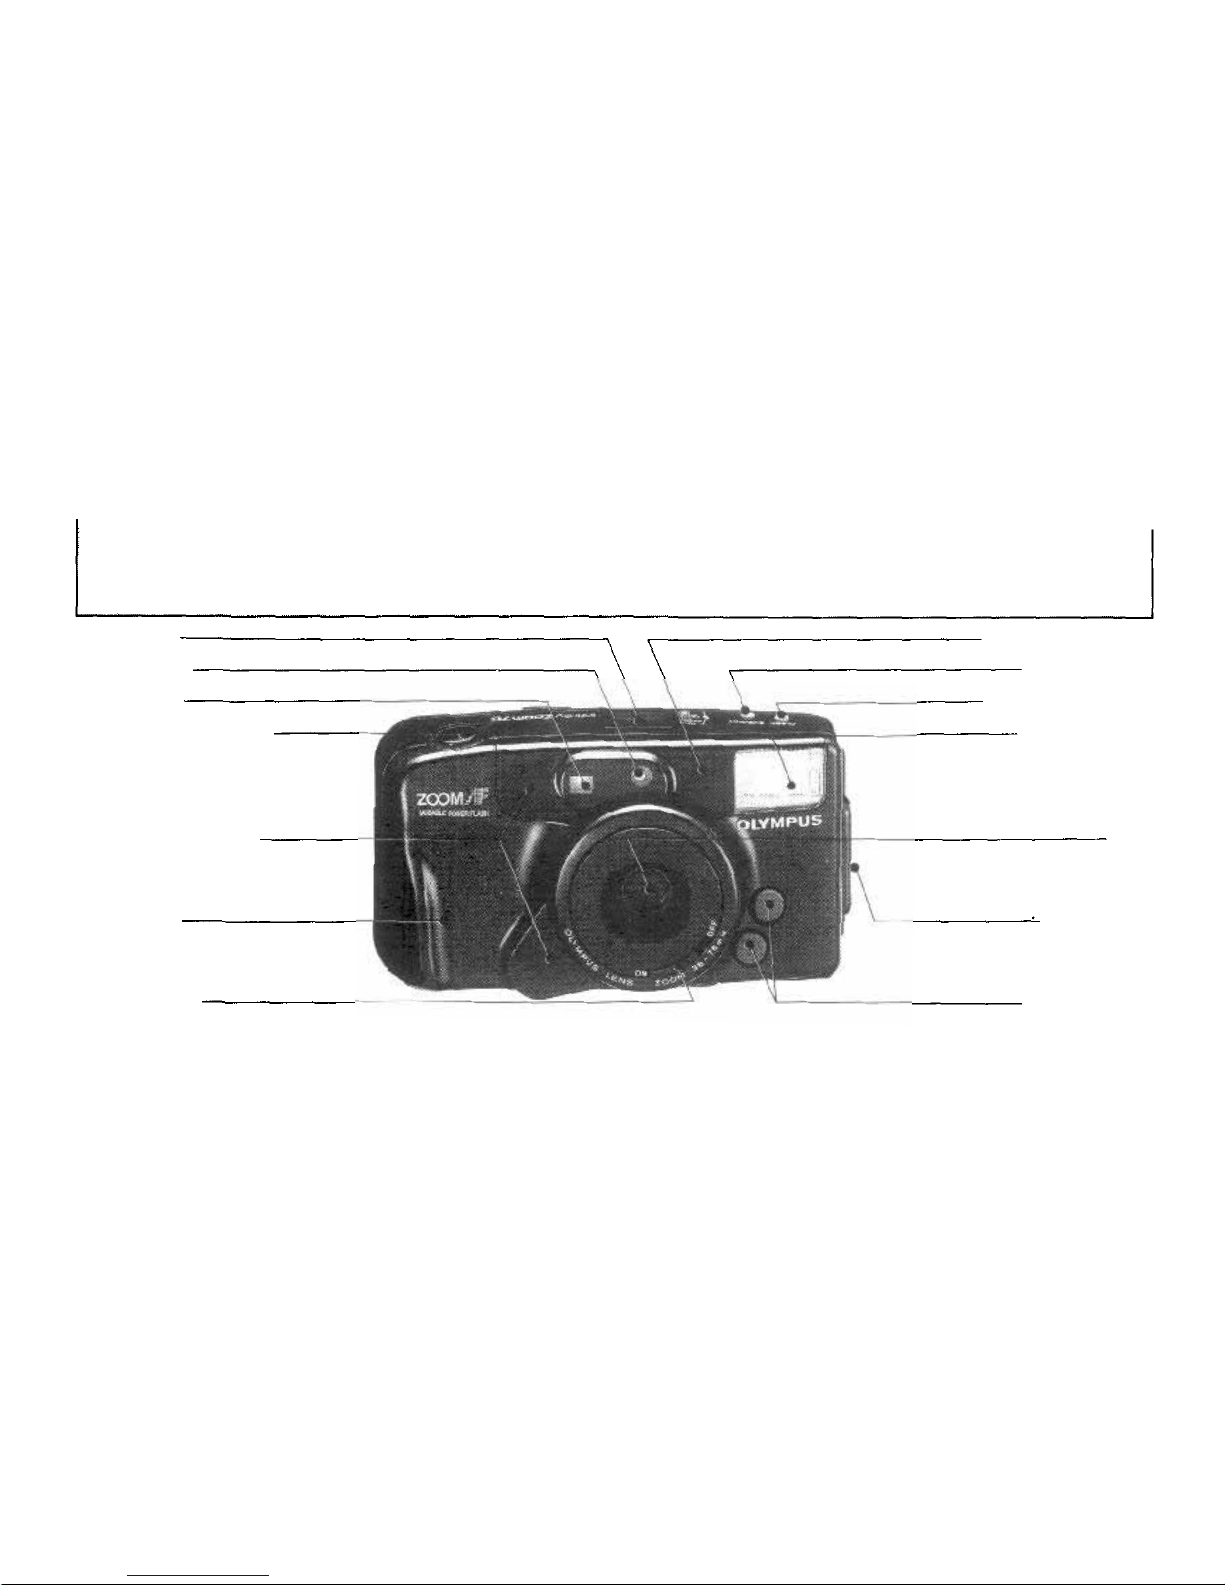
Description of controls
LCD panel
Light sensor
Viewfinder
Shutter release b u t t o n
Autofocus windows
Steady grip
Power switch
Zoom buttons
Strap eyelet
Lens
Flash reflector
Flash mode button
Subject button
Selftimer indicator
3
Page 5
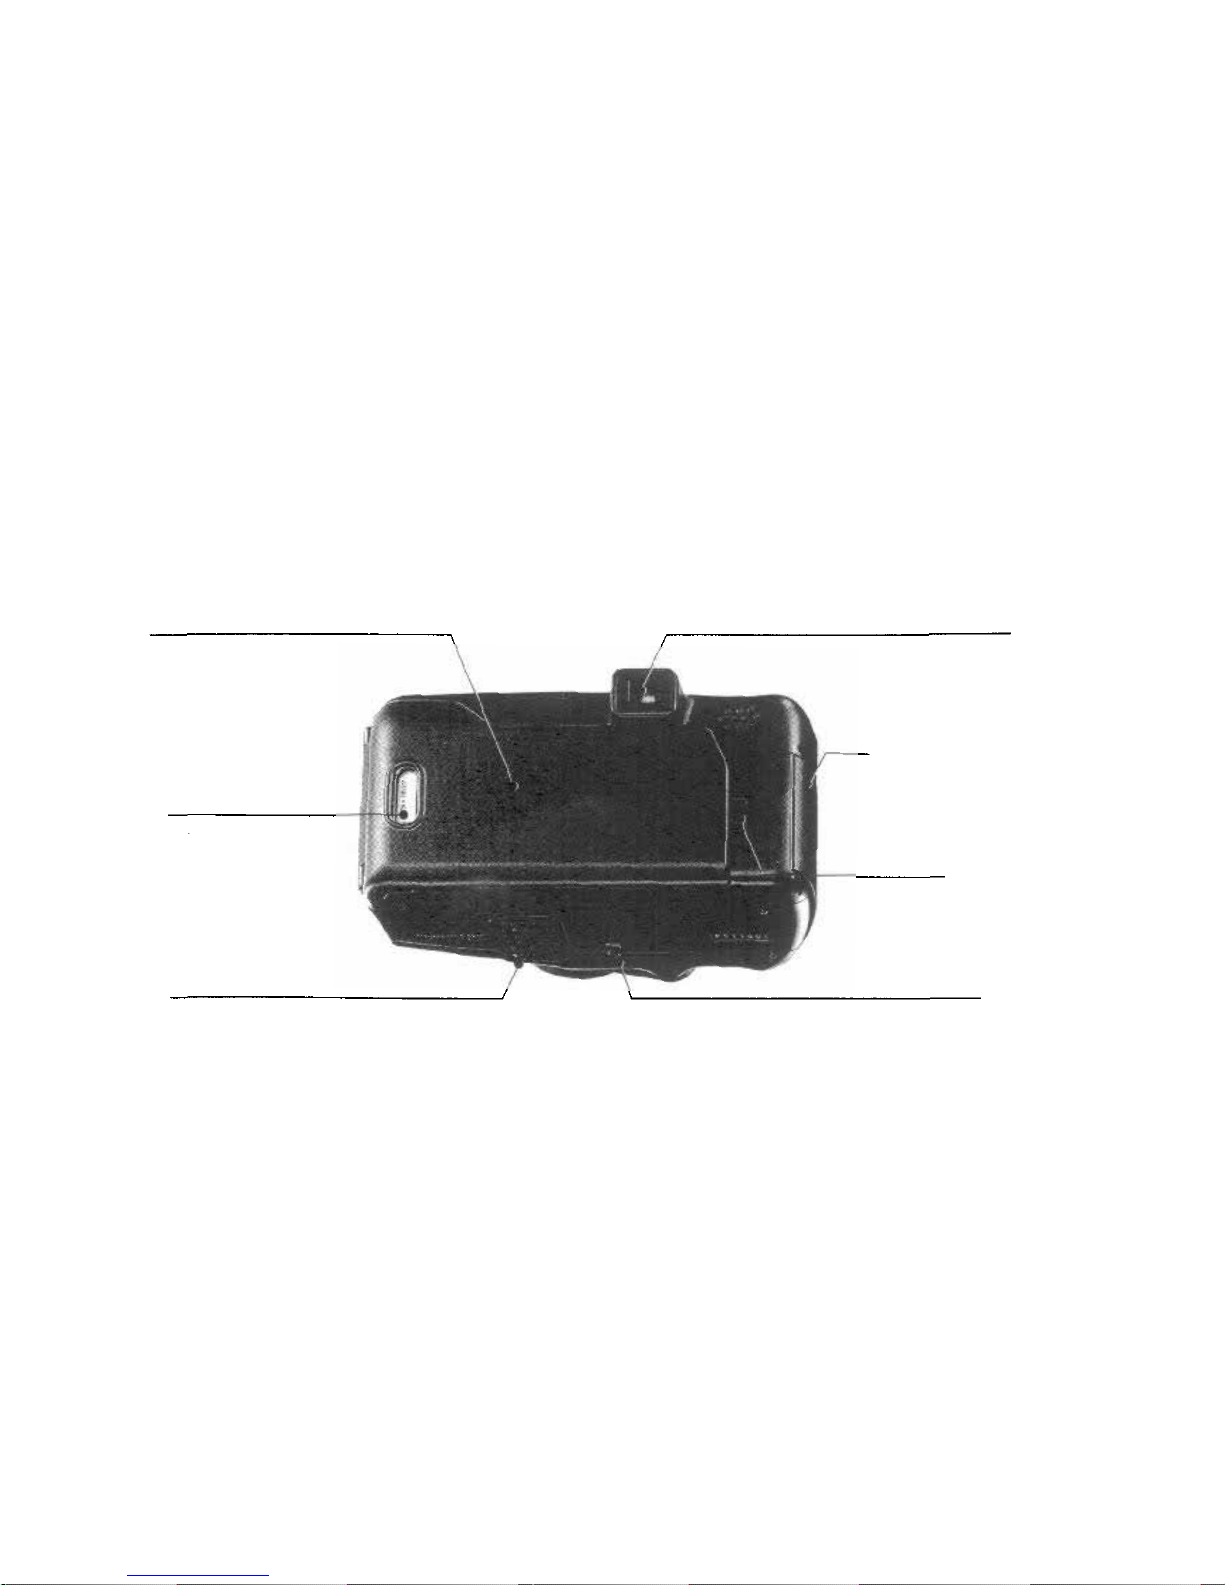
Back cover
Film window
Tripod socket
Viewfinder
Battery compartment cover
Back cover release
Rewind button
4
Page 6
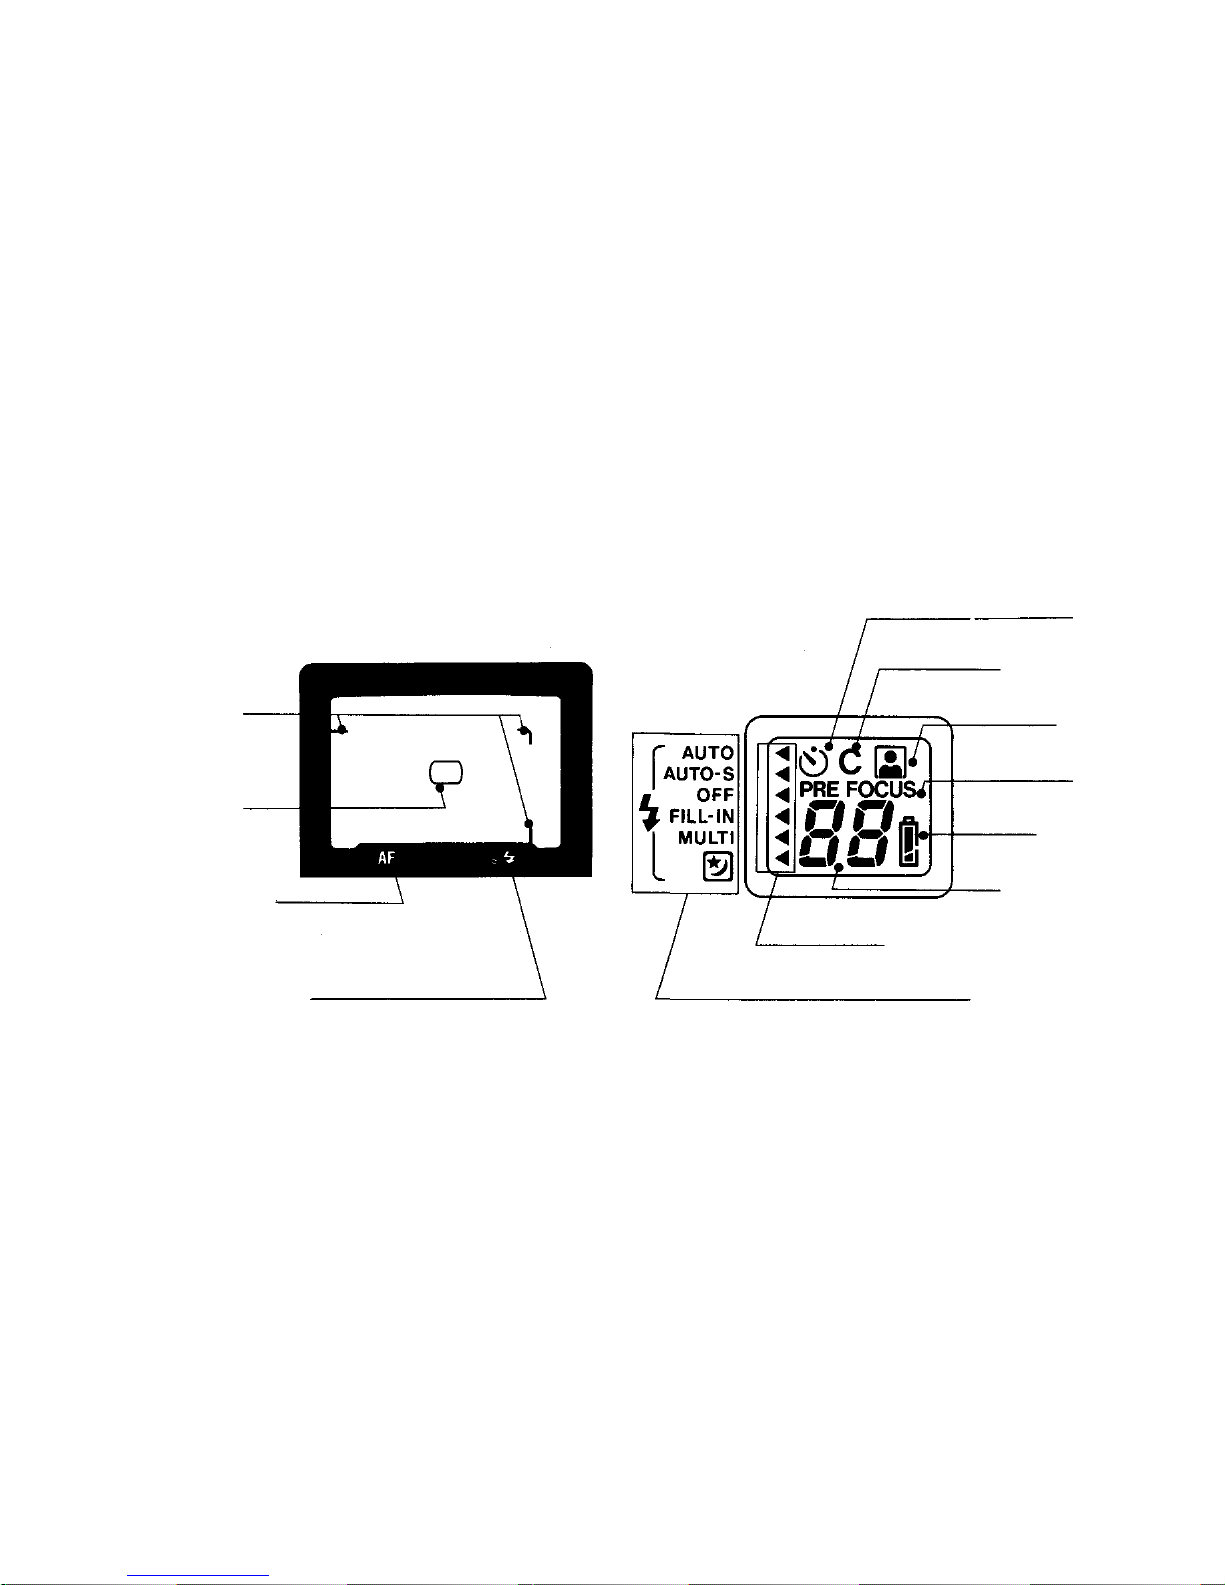
Viewfinder display
LCD panel
Close-up
correction marks
Autofocus frame
AF indicator (green)
Flash indicator (orange)
Selftimer
Continuous mode
Auto-zoom
Pre-focus
Battery check
indicator
Exposure counter
Flash mode selection indicator
Flash mode indicator
5
Page 7
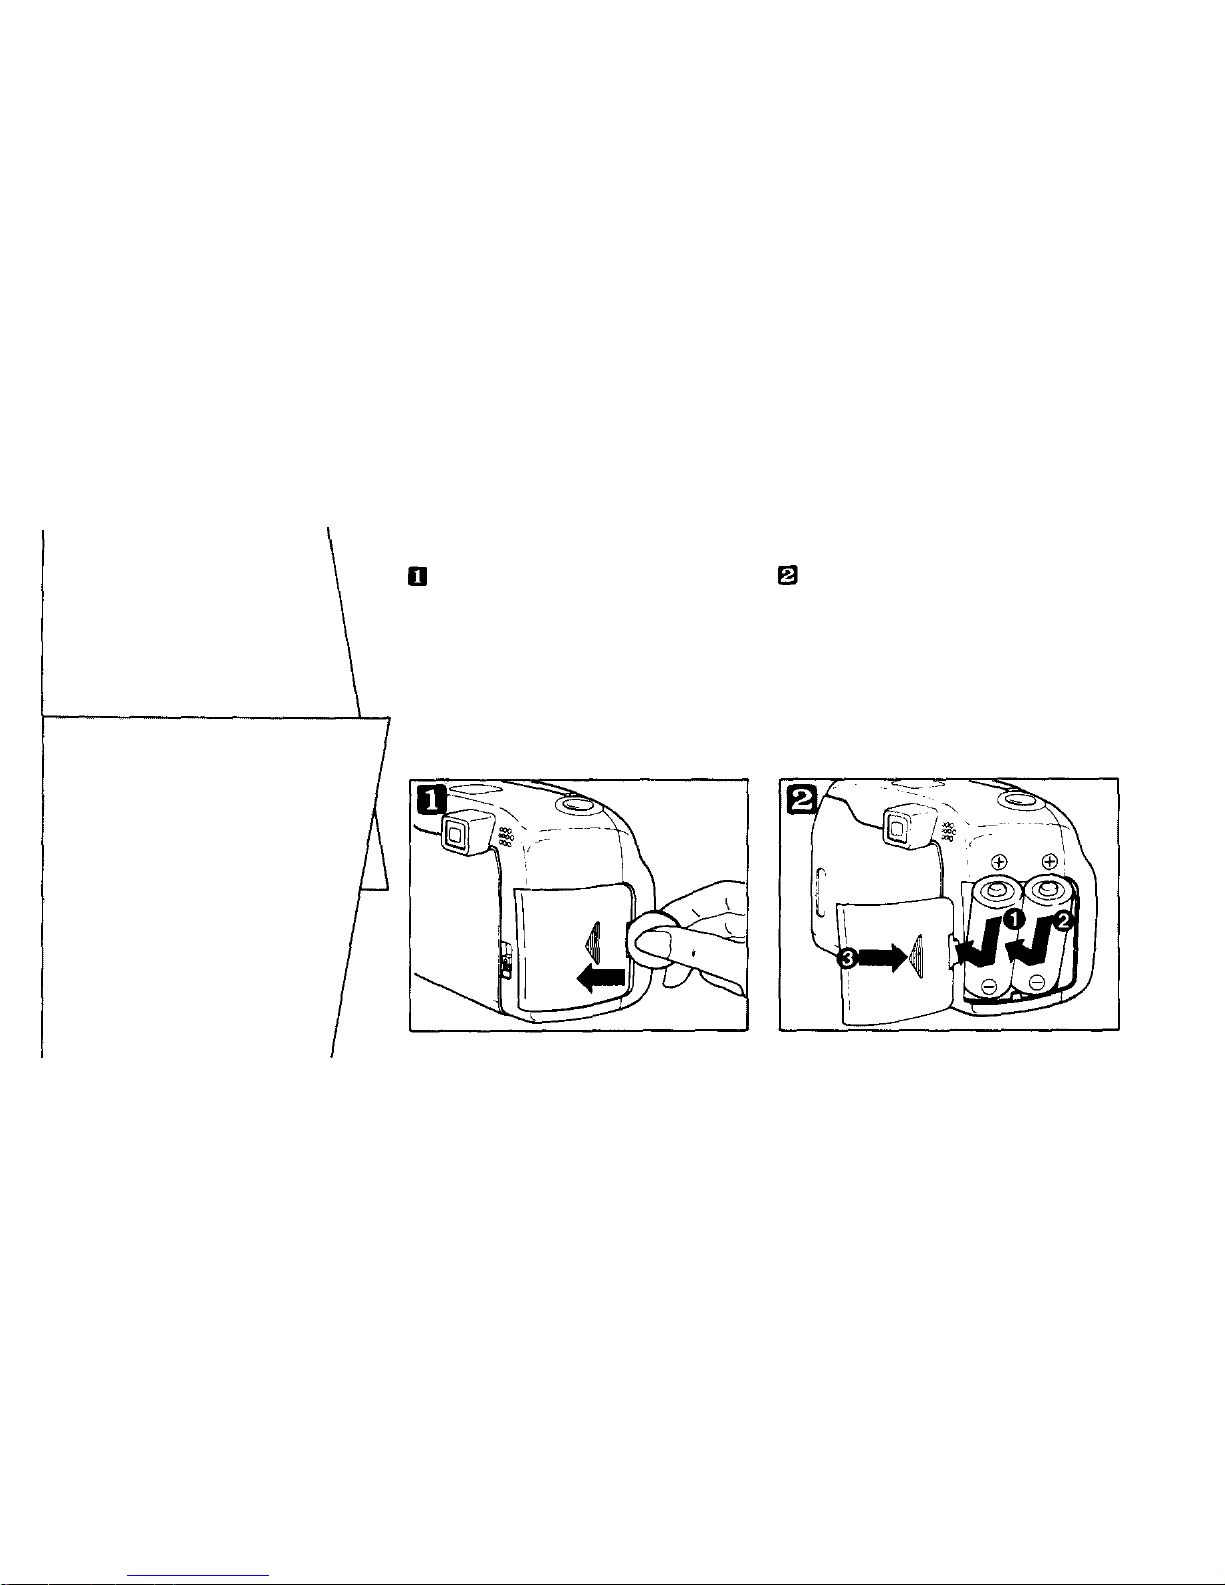
Insert a coin i nto the groove of th e
battery cover on the side of the grip
and open the cover.
Insert two 3V lithium batteries as
shown and replace the cover.
Use Panasonic CR123A, Duracell
DL123A, or equivalent.
* Do not mix different types of batteries or
new and old batteries at t he same time.
* Remov e batteries if yo u do not plan to use
the camera for an extended period of time
(more than a year).
Before you
begin···
Loading the
batteries
6
Page 8
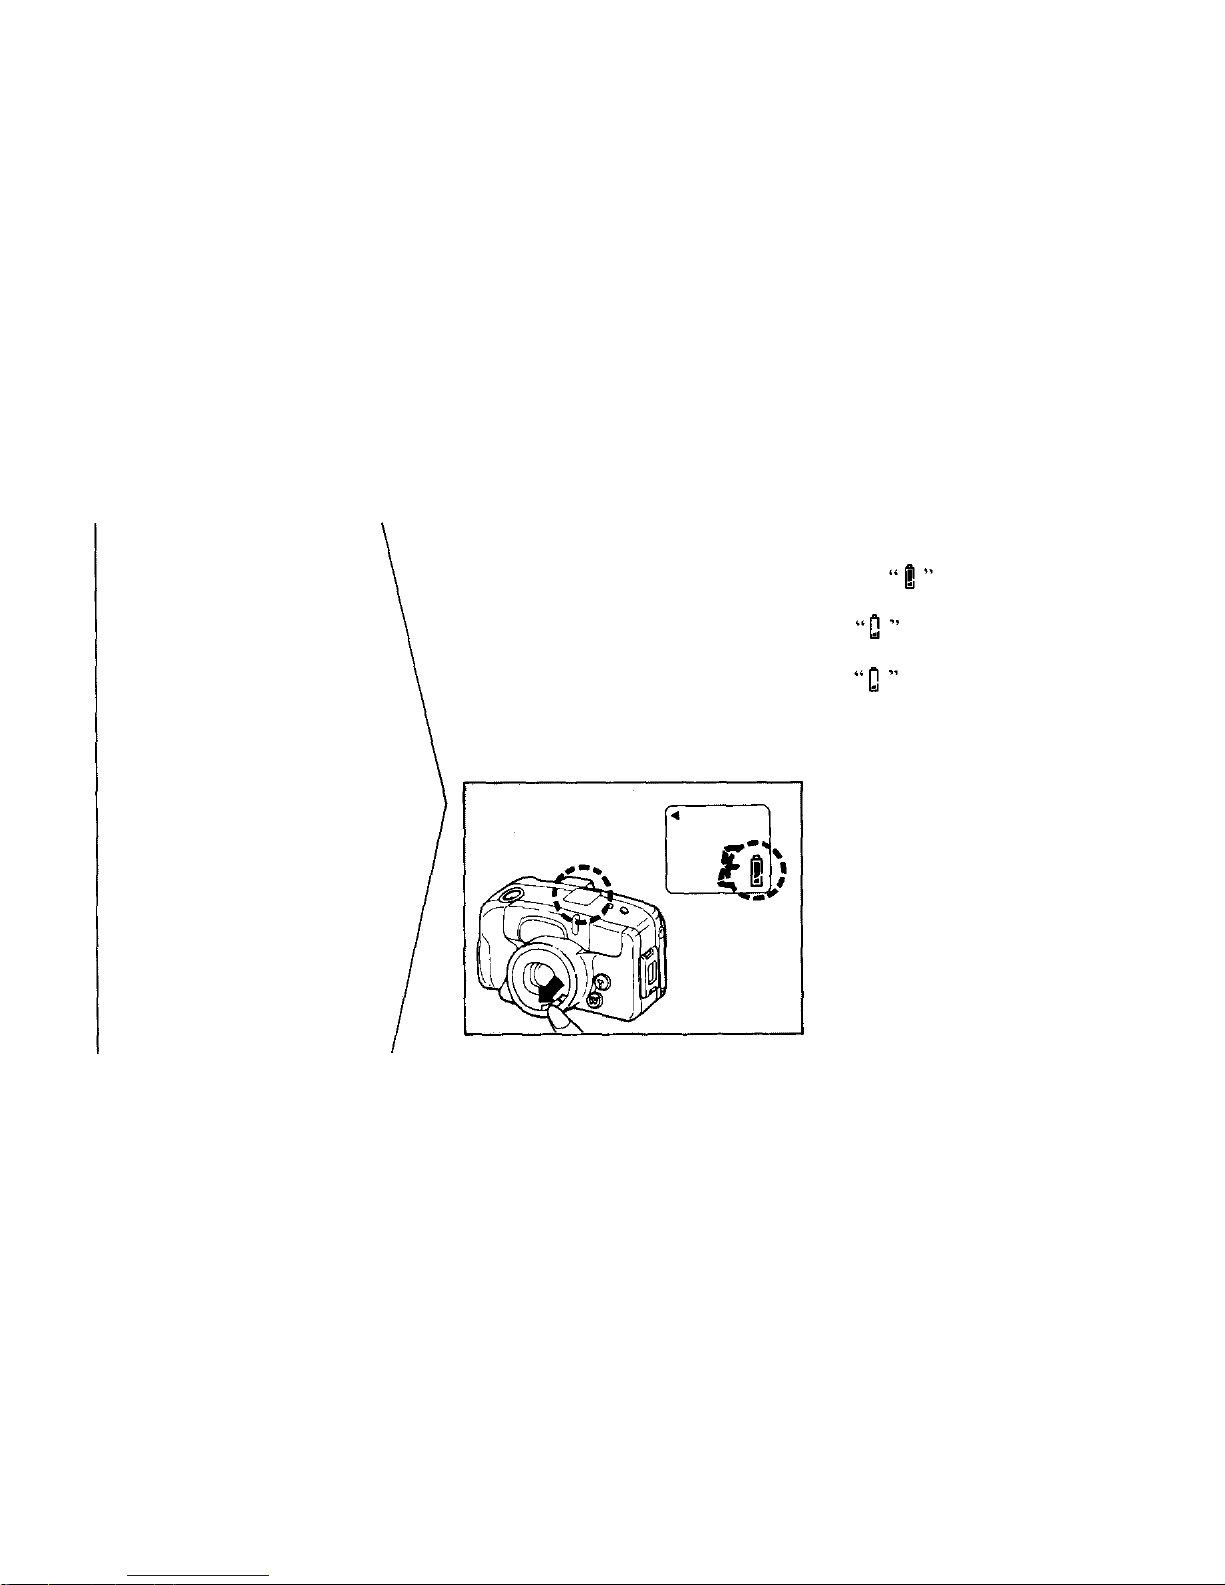
Set the power switch to ON to check
the batteries. The battery check
indicator will be displayed for 12
seconds.
When is displayed, batteries are
OK.
If flashes, batteries are low,
have spares handy.
If is displayed continuously,
batteries should be replaced
immediately.
* When the battery power is low, the
flash will take longer to recharge.
* Before replacing the batteries, set
the power switch to OFF.
Checking the
batteries
7
Page 9
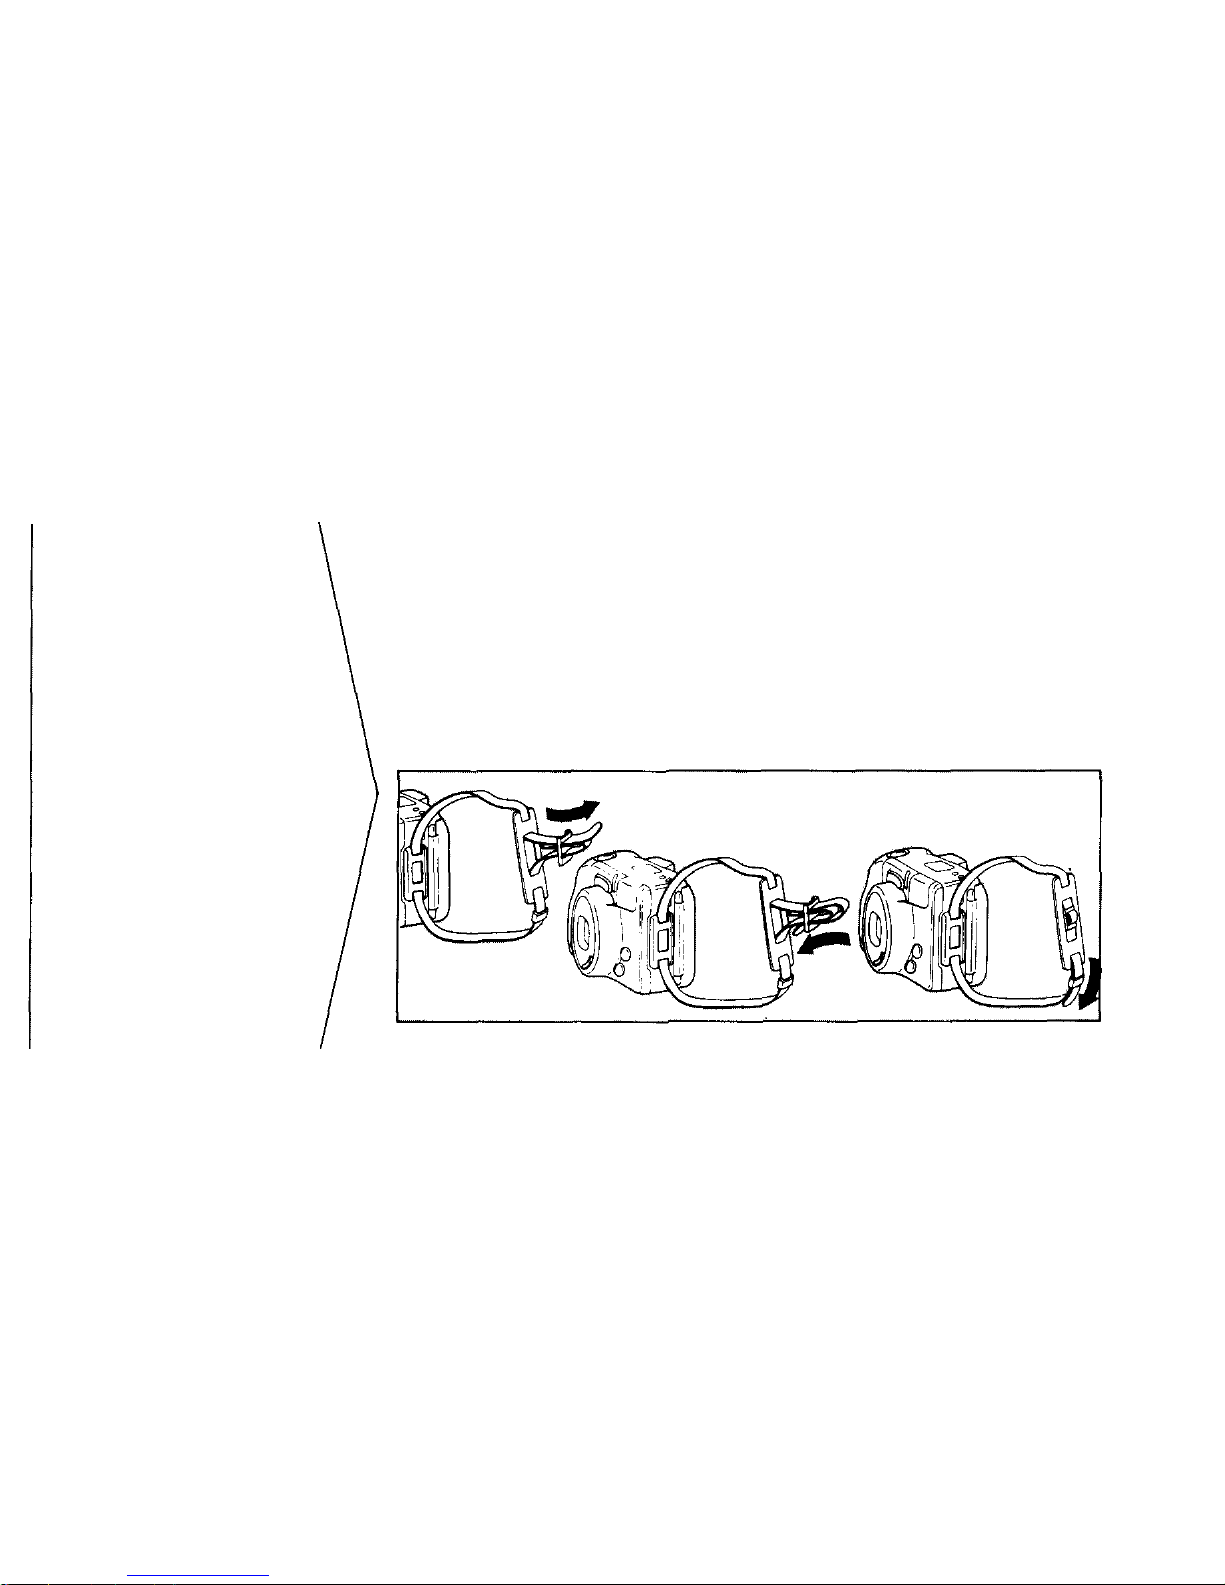
Attaching the
strap
8
Page 10
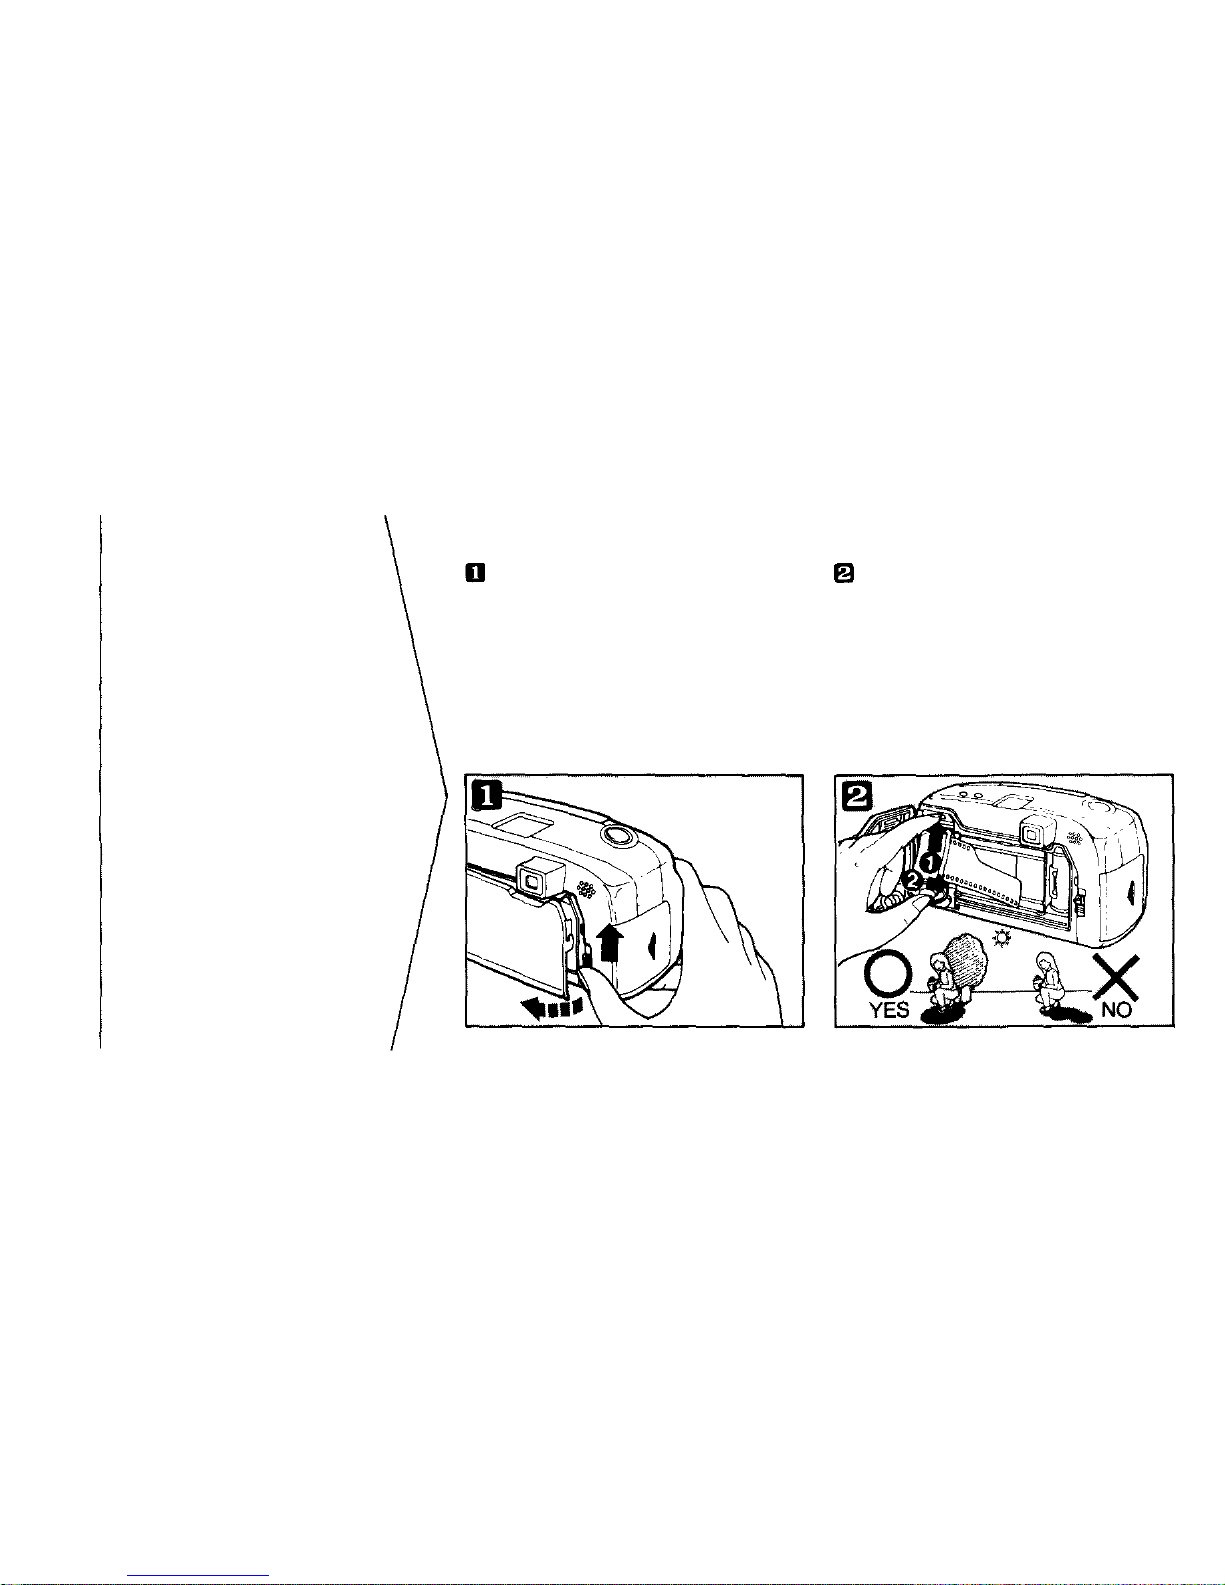
Open the back cover by sliding the
back cover release toward the top of
the camera.
Insert the film cartridge into the
camera. Always avoid direct sunlight
when loading the film.
Loading t he film
This camera is designed to
use DX-coded 35mm film.
DX coding, used by
virtually all major film
manufacturers, allows the
camera to identify and set
the film speed automatically. If DX-coded film is
unavailable, use ISO 100
film.
9
Page 11
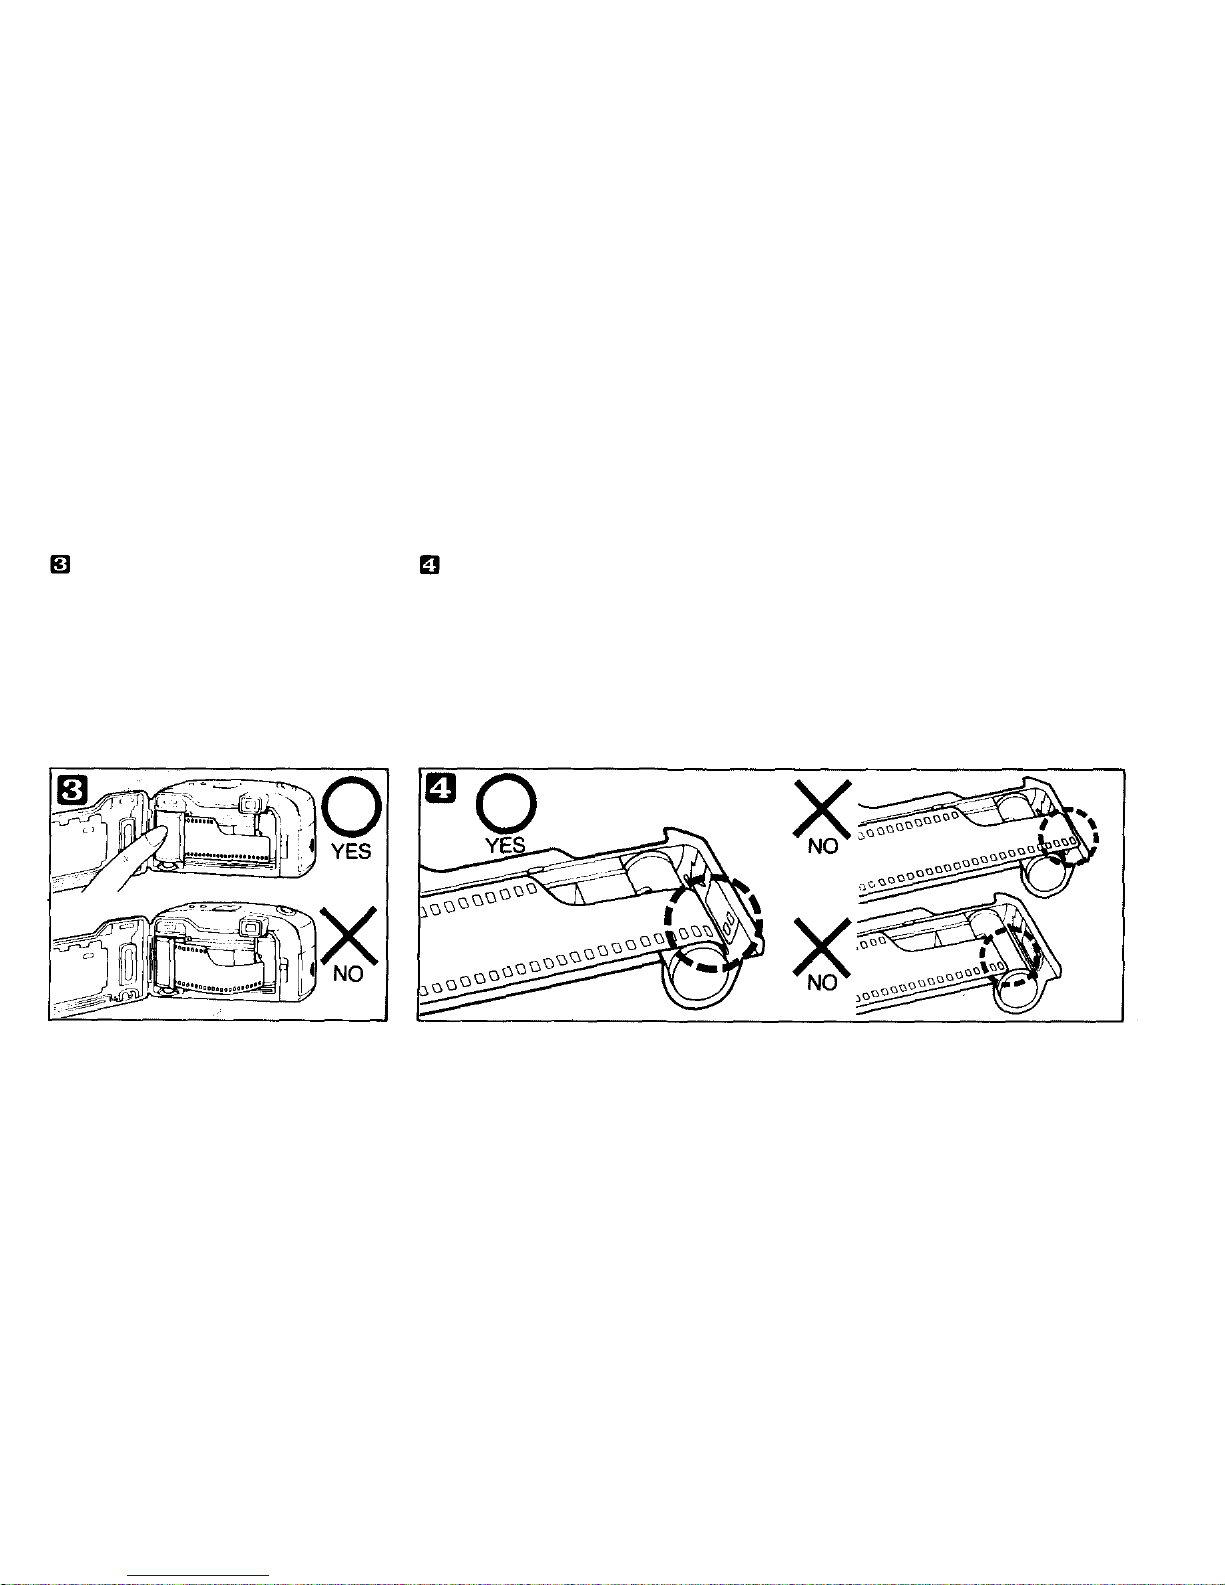
Make sure the film lies flat.
Align the film leader with the red
film loading indicator.
Unless the film leader matches the
film loading indicator, the film may
not be loaded.
* Do not touch the lens inside the
body with your fingers or the film
leader.
10
Page 12
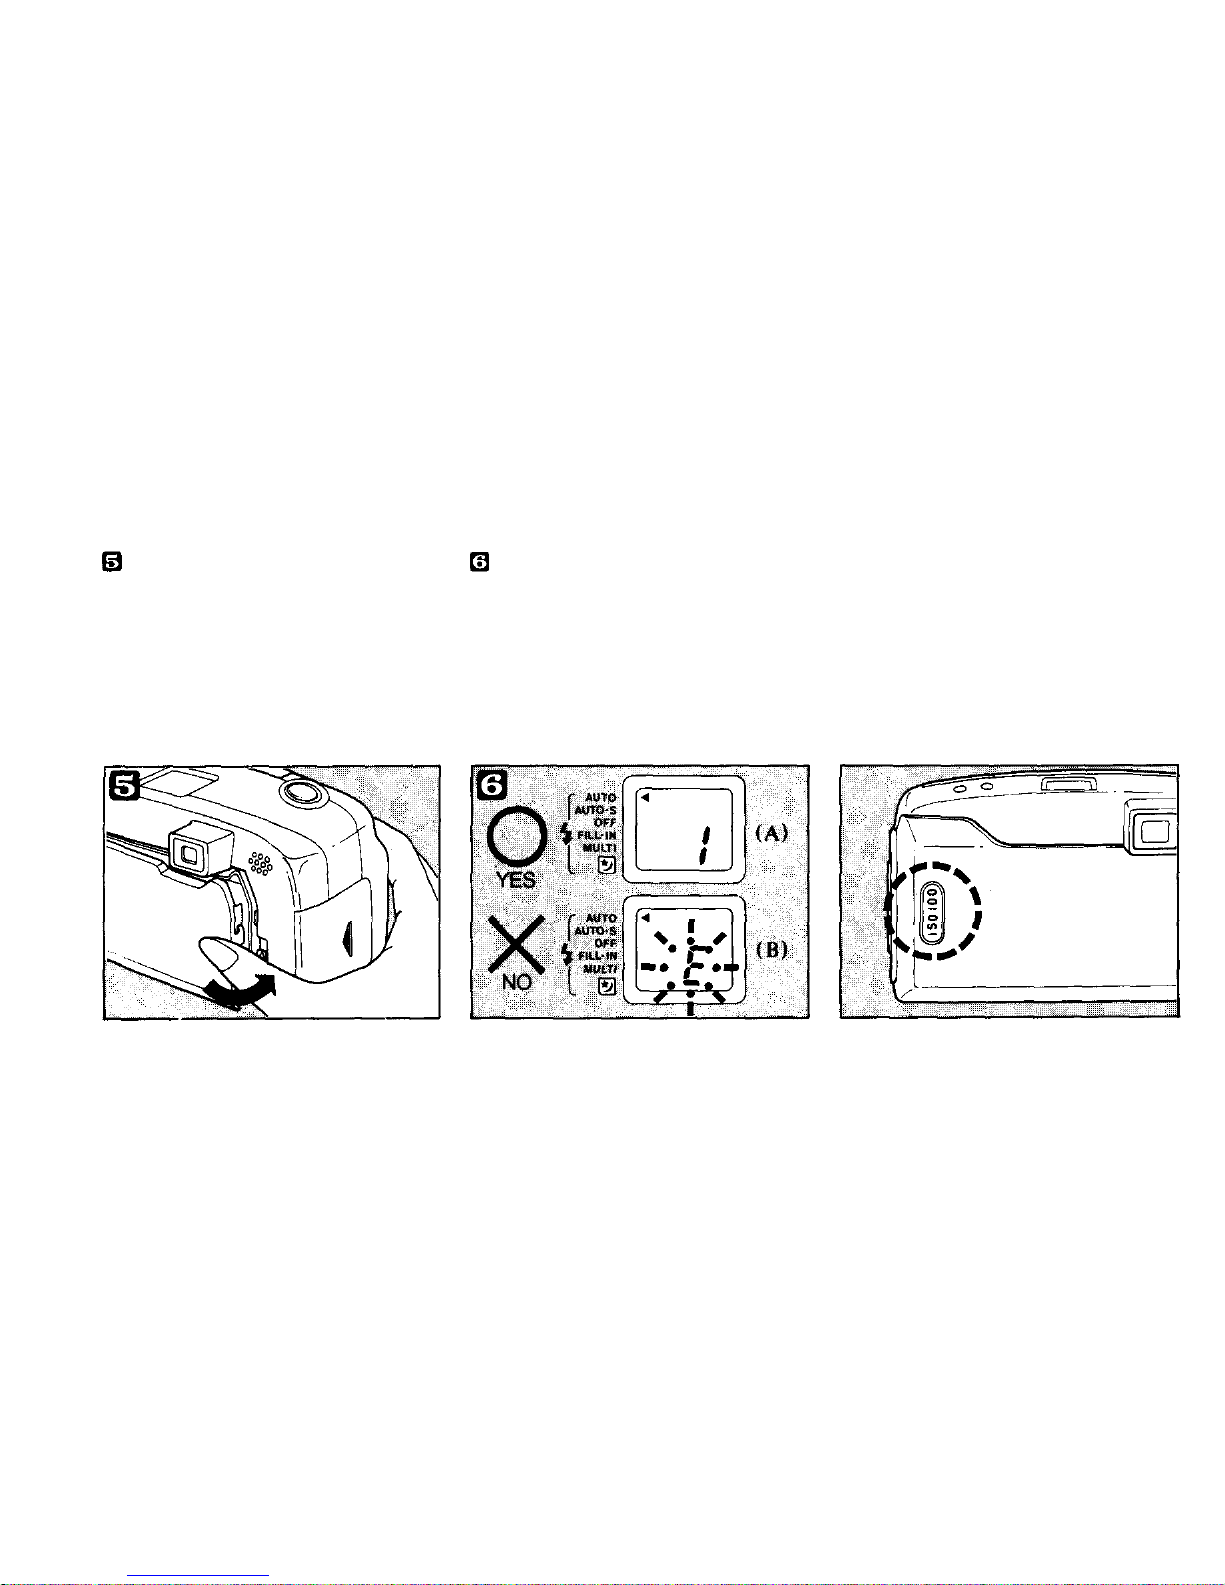
Close t he ba ck cover. The film
automatically advances to the first
frame.
Set the power switch to ON to make
sure that the exposure counter shows
"1".
If film is improperly loaded, the LCD
panel will display a blinking "E". In
this case, open the back cover, and
realign the film leader.
Use the window in the camera back
to check type of film loaded.
11
Page 13
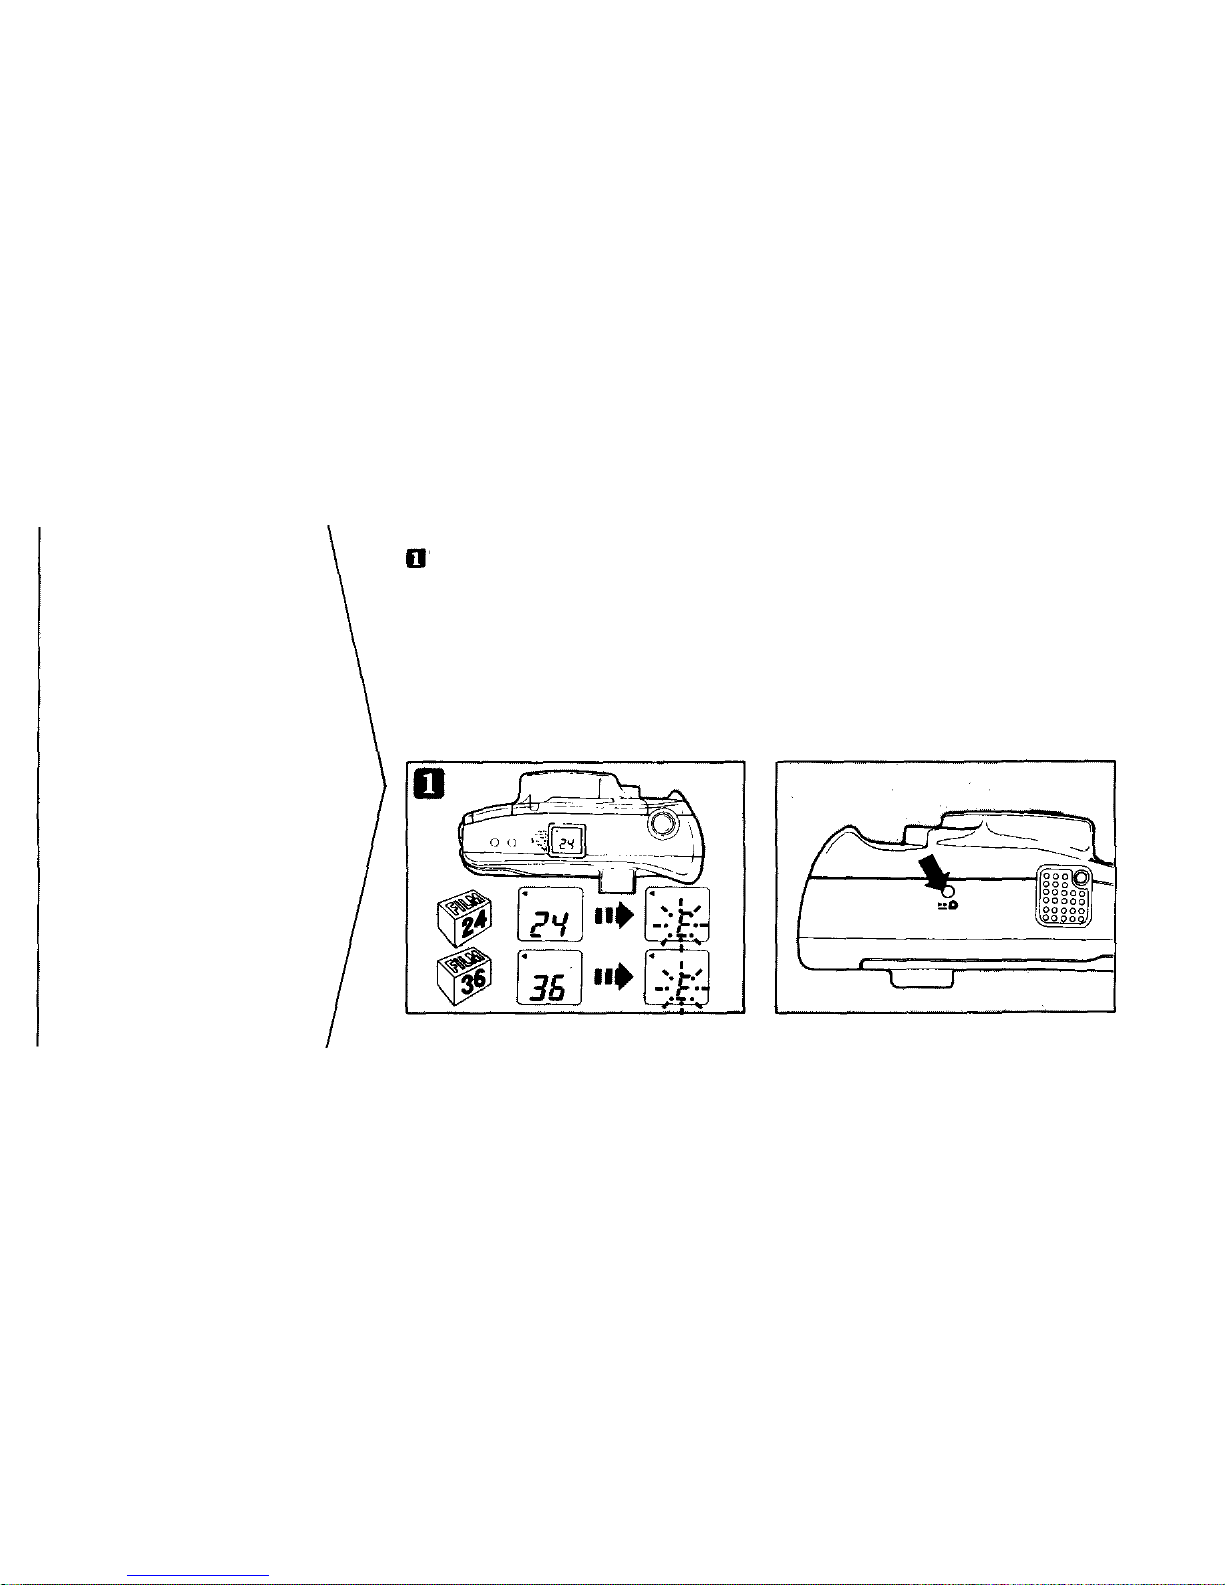
The camera automatically rewinds
the film when you reach the end of a
roll. The exposure counter on the LCD
panel counts down as the film is
rewinding.
* The final reading of the exposure counter
before rewinding may be more than the
number of exposures specified for the film.
If you want to rewind the film before
the end of the roll, press the rewind
button with the tip of a ballpoint pen.
Do not use any device wi th a sharp
tip.
Unloading the film
12
Page 14
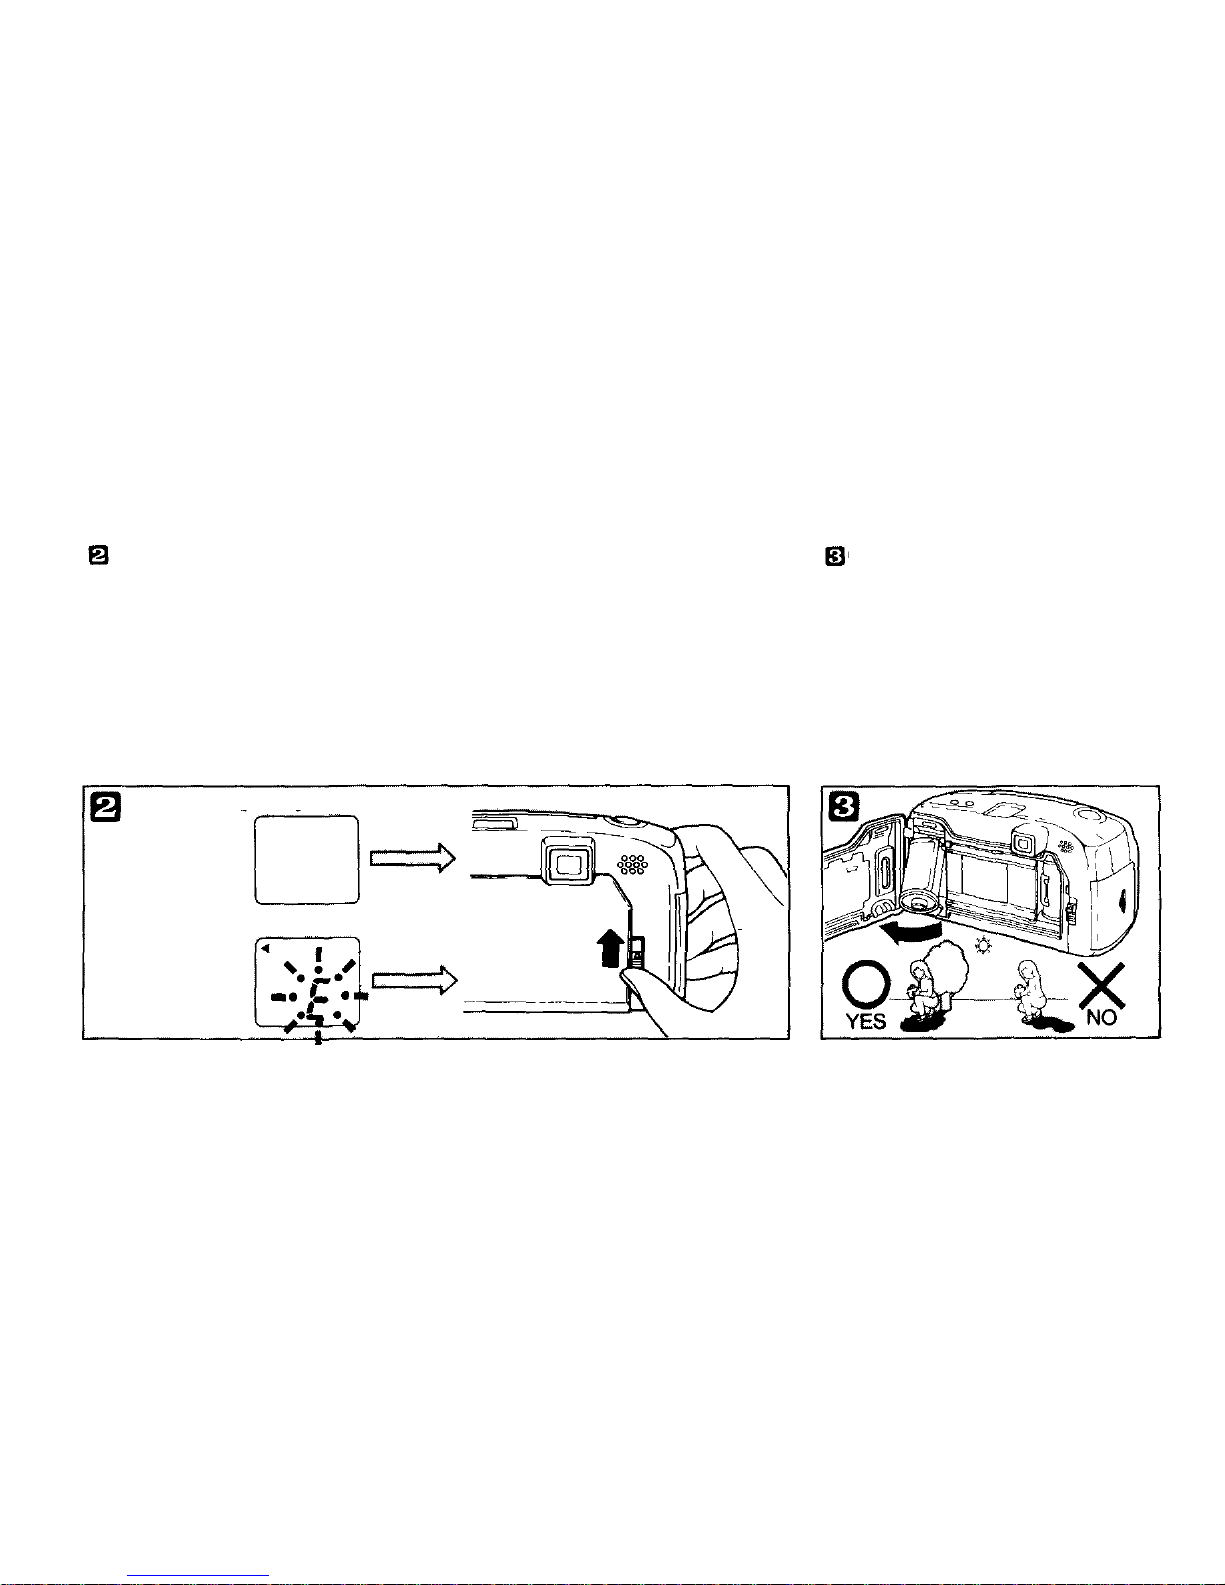
Once the film has been rewound, a
blinking "E" will be displayed on the
LCD panel. Further operations are not
possible until the rewound film
cartridge is removed.
Open the back cover, and remove
the film cartridge from the camera.
Avoid direct sunlight when removing
the film.
13
"Rewinding completed" indicator
When the
power switch
is OFF, there
will be no
indication on the LCD panel.
When the
power switch
is ON
Page 15
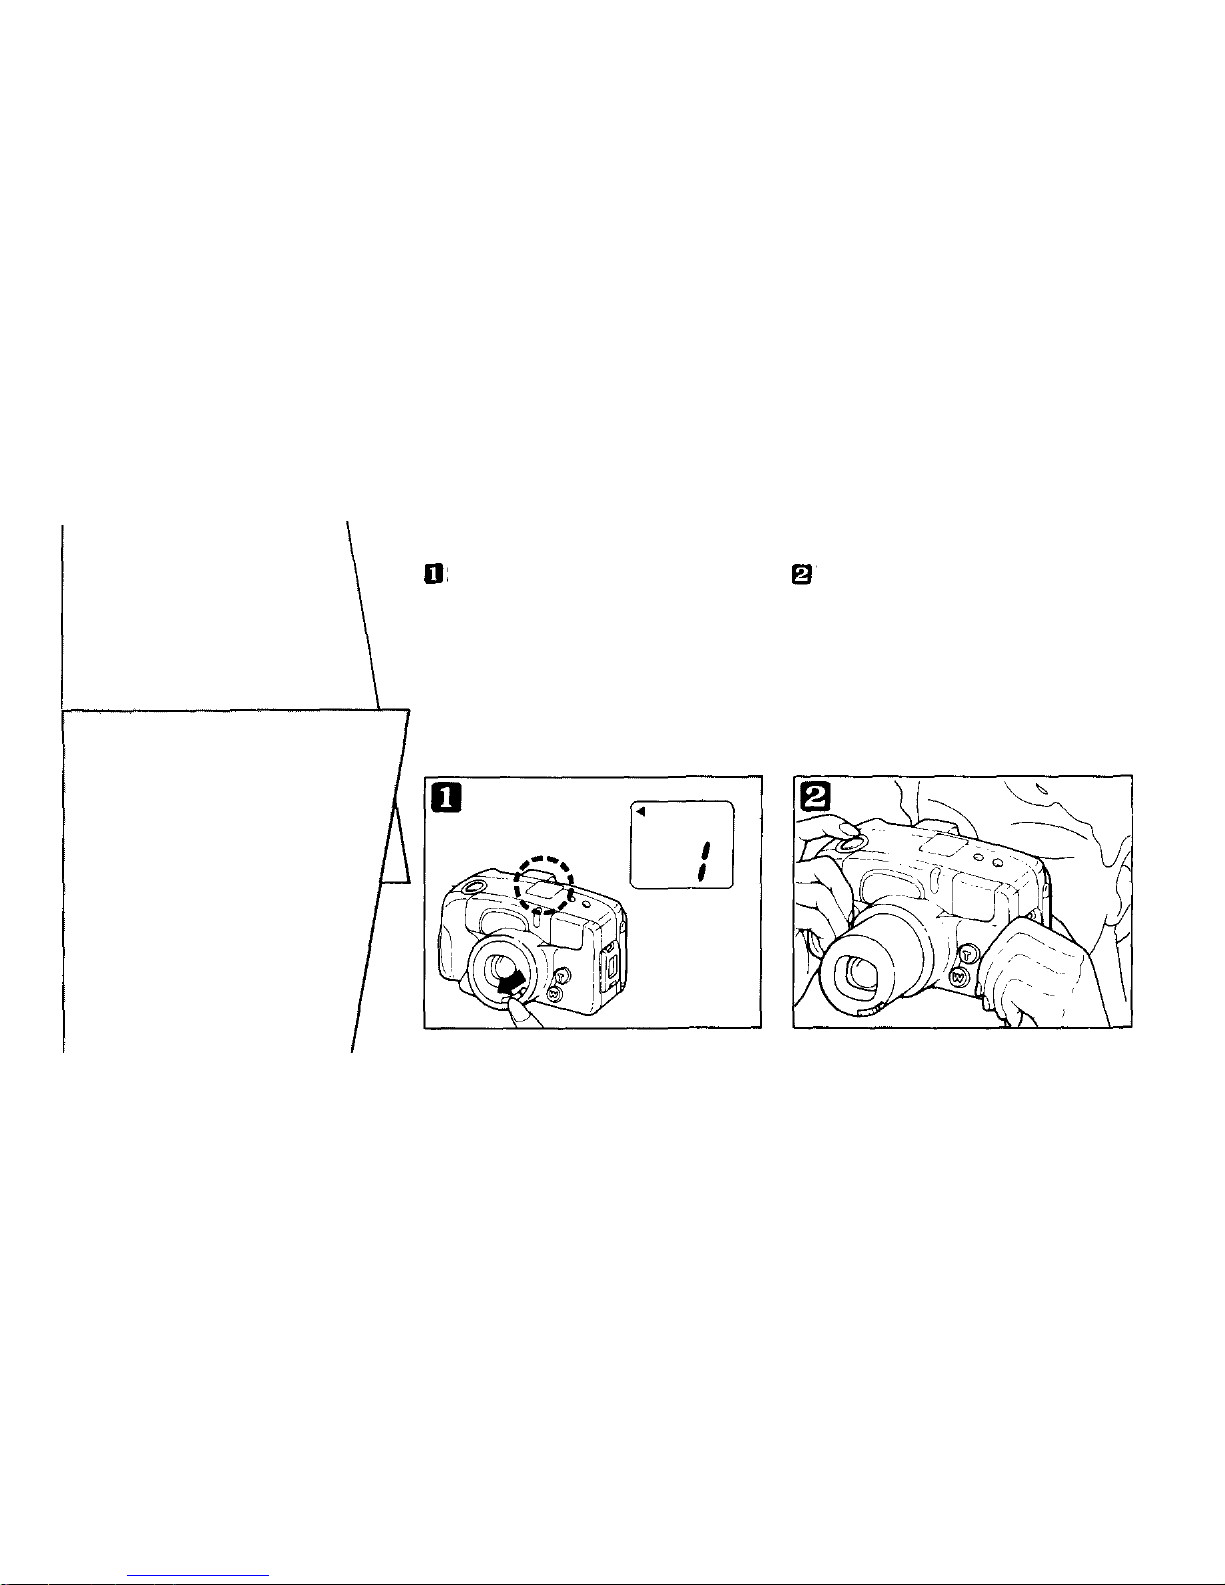
Set the power switch to ON.
* When the c ame ra is not in us e,
always set the power switch to OFF
so that the shutter cannot be
activated accidentally.
While looking through the
viewfinder, aim the camera at y our
subject.
Simple point &
shoot
photography
H ow to take pictures
When t h e power switch is O N ,
the LCD panel lights.
The LCD panel goes out after 4 to
5 minutes to minimize battery
drain. The lens will then zoom to
the wide-angle position. After 4
hours the power is automatically
turned to OFF. To resume
operation, set the power swi tch
to OFF and then to ON again.
14
Page 16
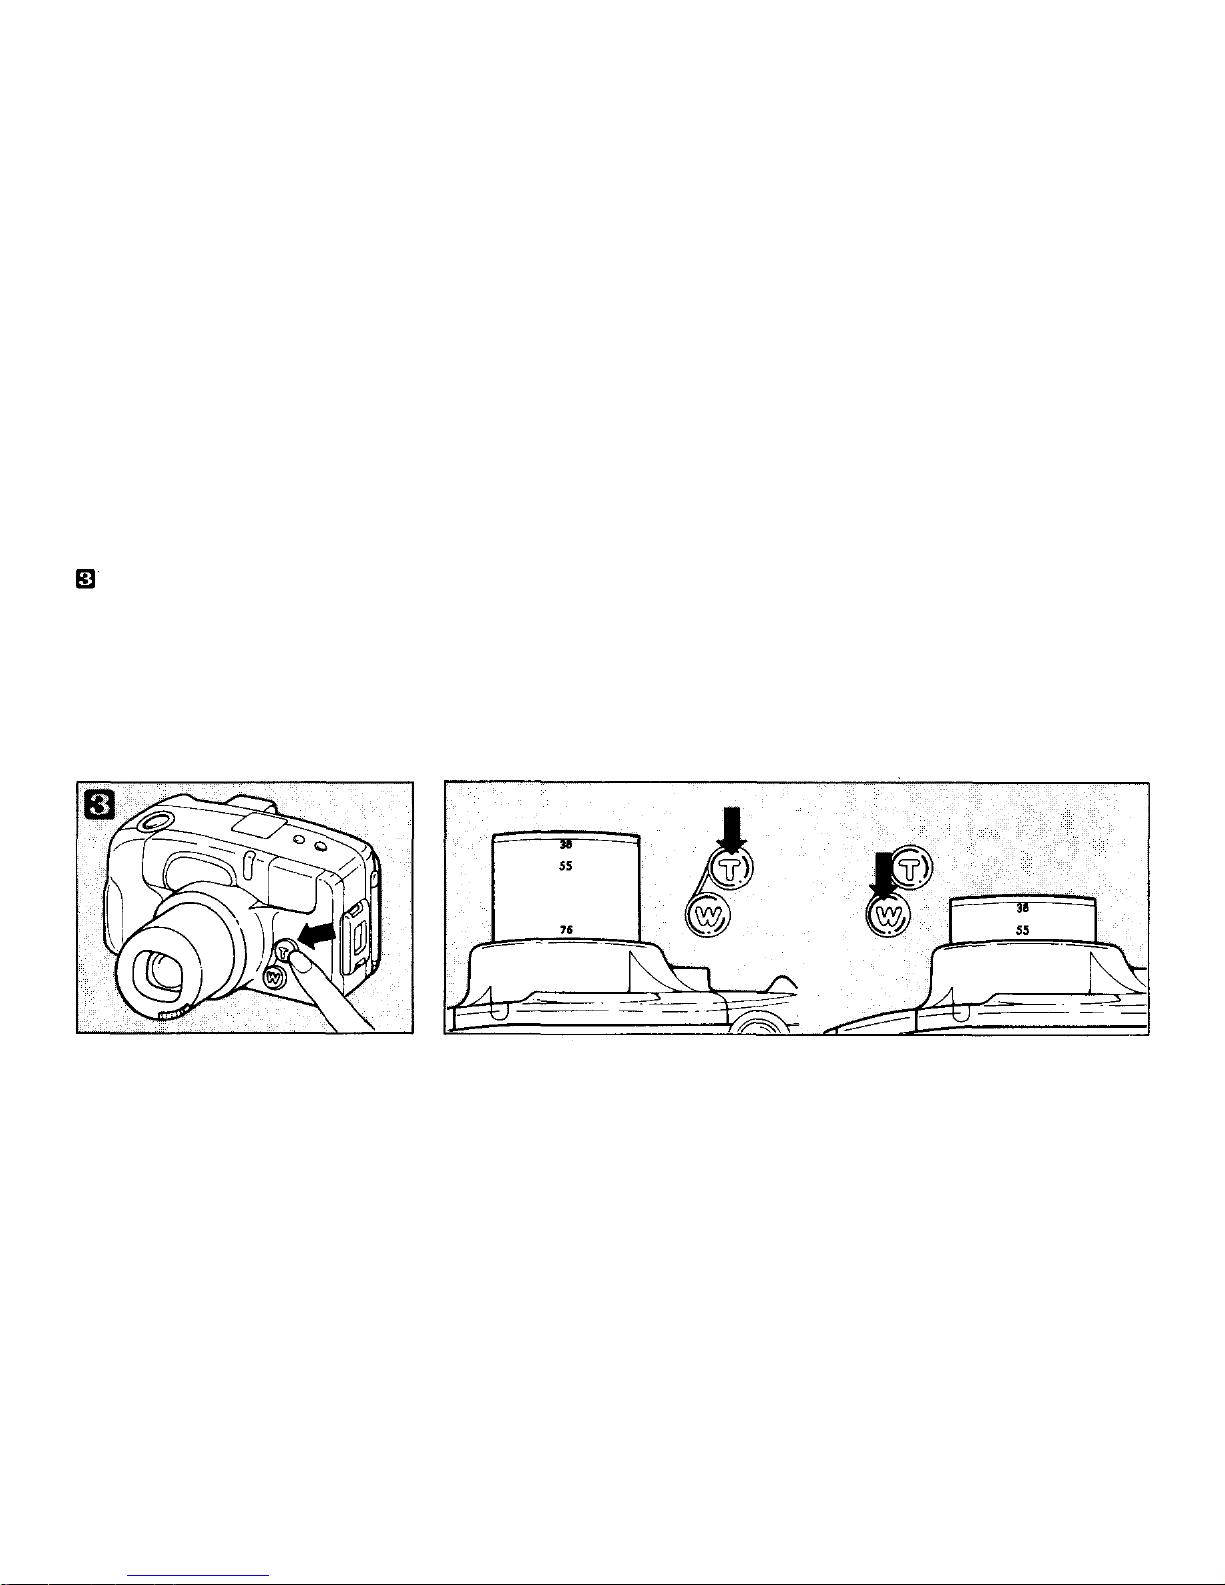
Use the zoom button to adjust the
size of your subject in the frame.
(telephoto or wide-angle)
The shutter release cannot be operated
while zooming.
Press the "T" (Telephoto) on the
zoom but to n to zoom in . (The
maximum focal length in the "T"
position is 76mm.)
Press th e "W" (Wide-angle) on the
zoom button to zoom out. (The
minimum focal length in the "W"
position is 38mm).
15
Page 17
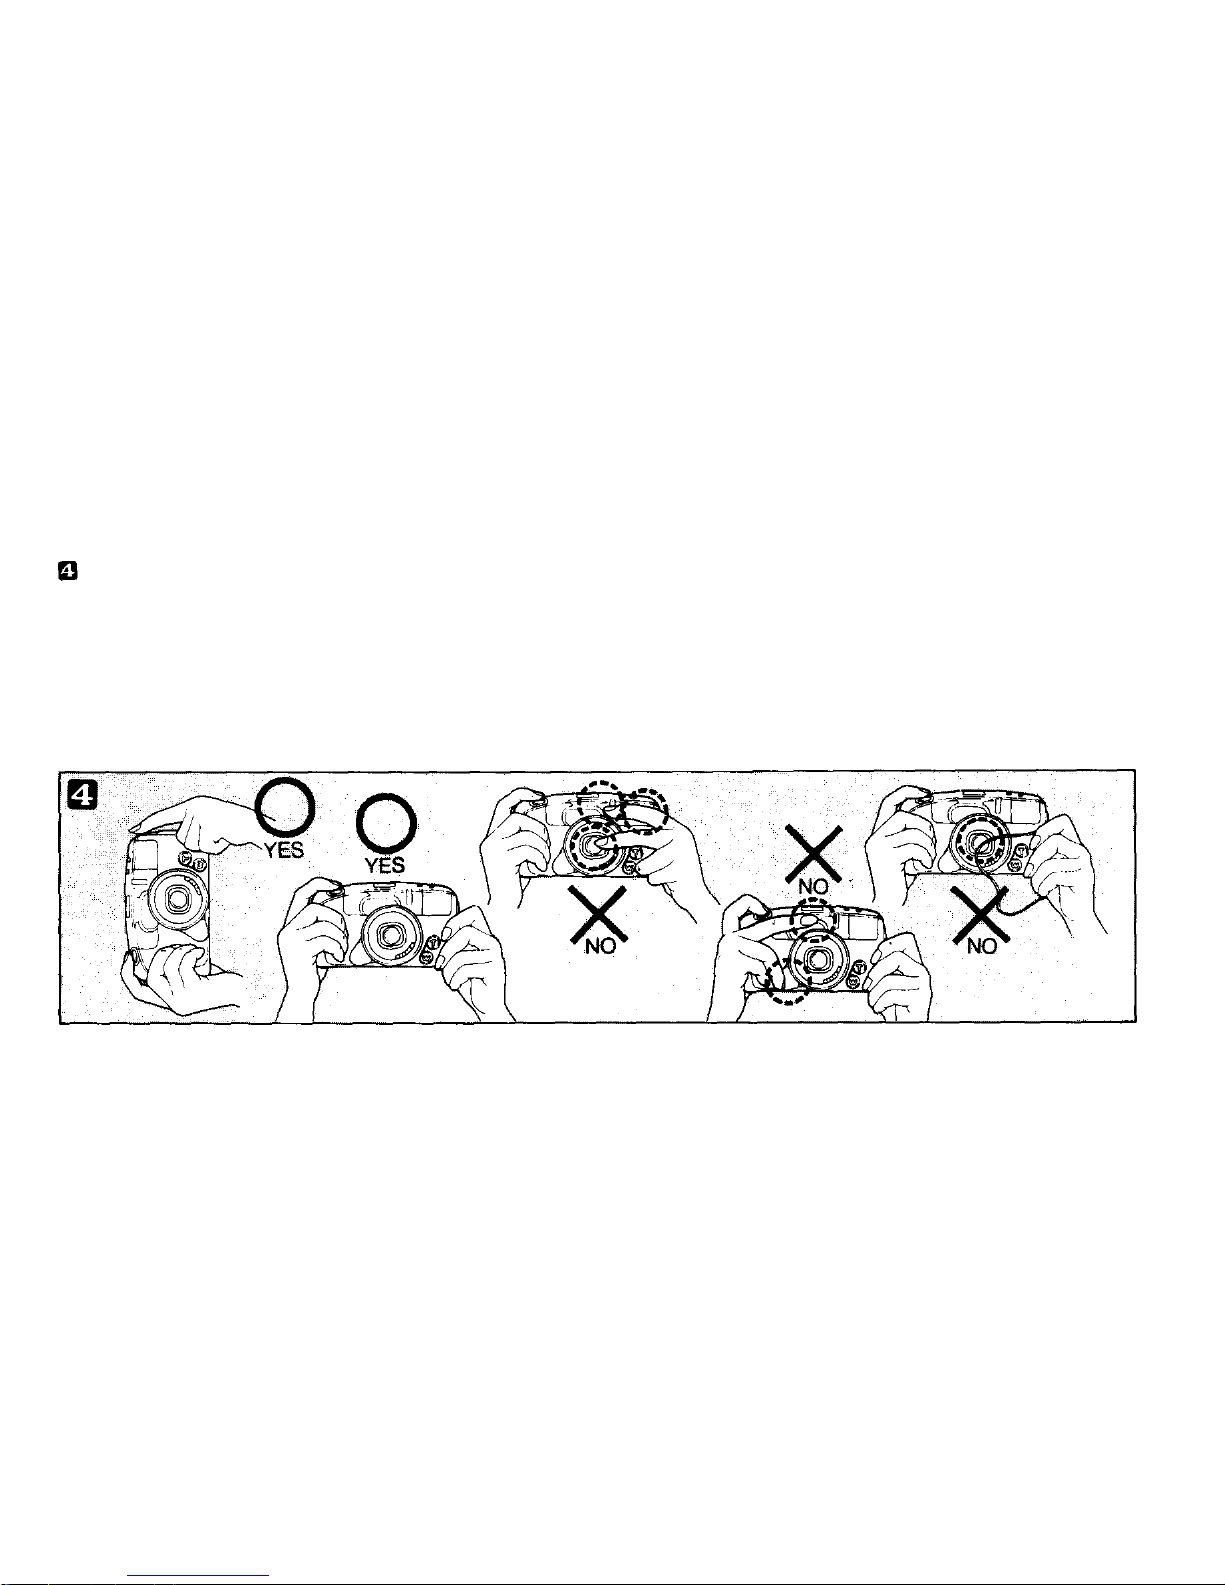
Hold t he camera correctly.
It is particularly important to hold the
camera steady when shooting at a
longer focal length; use both hands
for maximum stability.
* Keep your fingers and the strap
away from the lens and flash.
16
Page 18
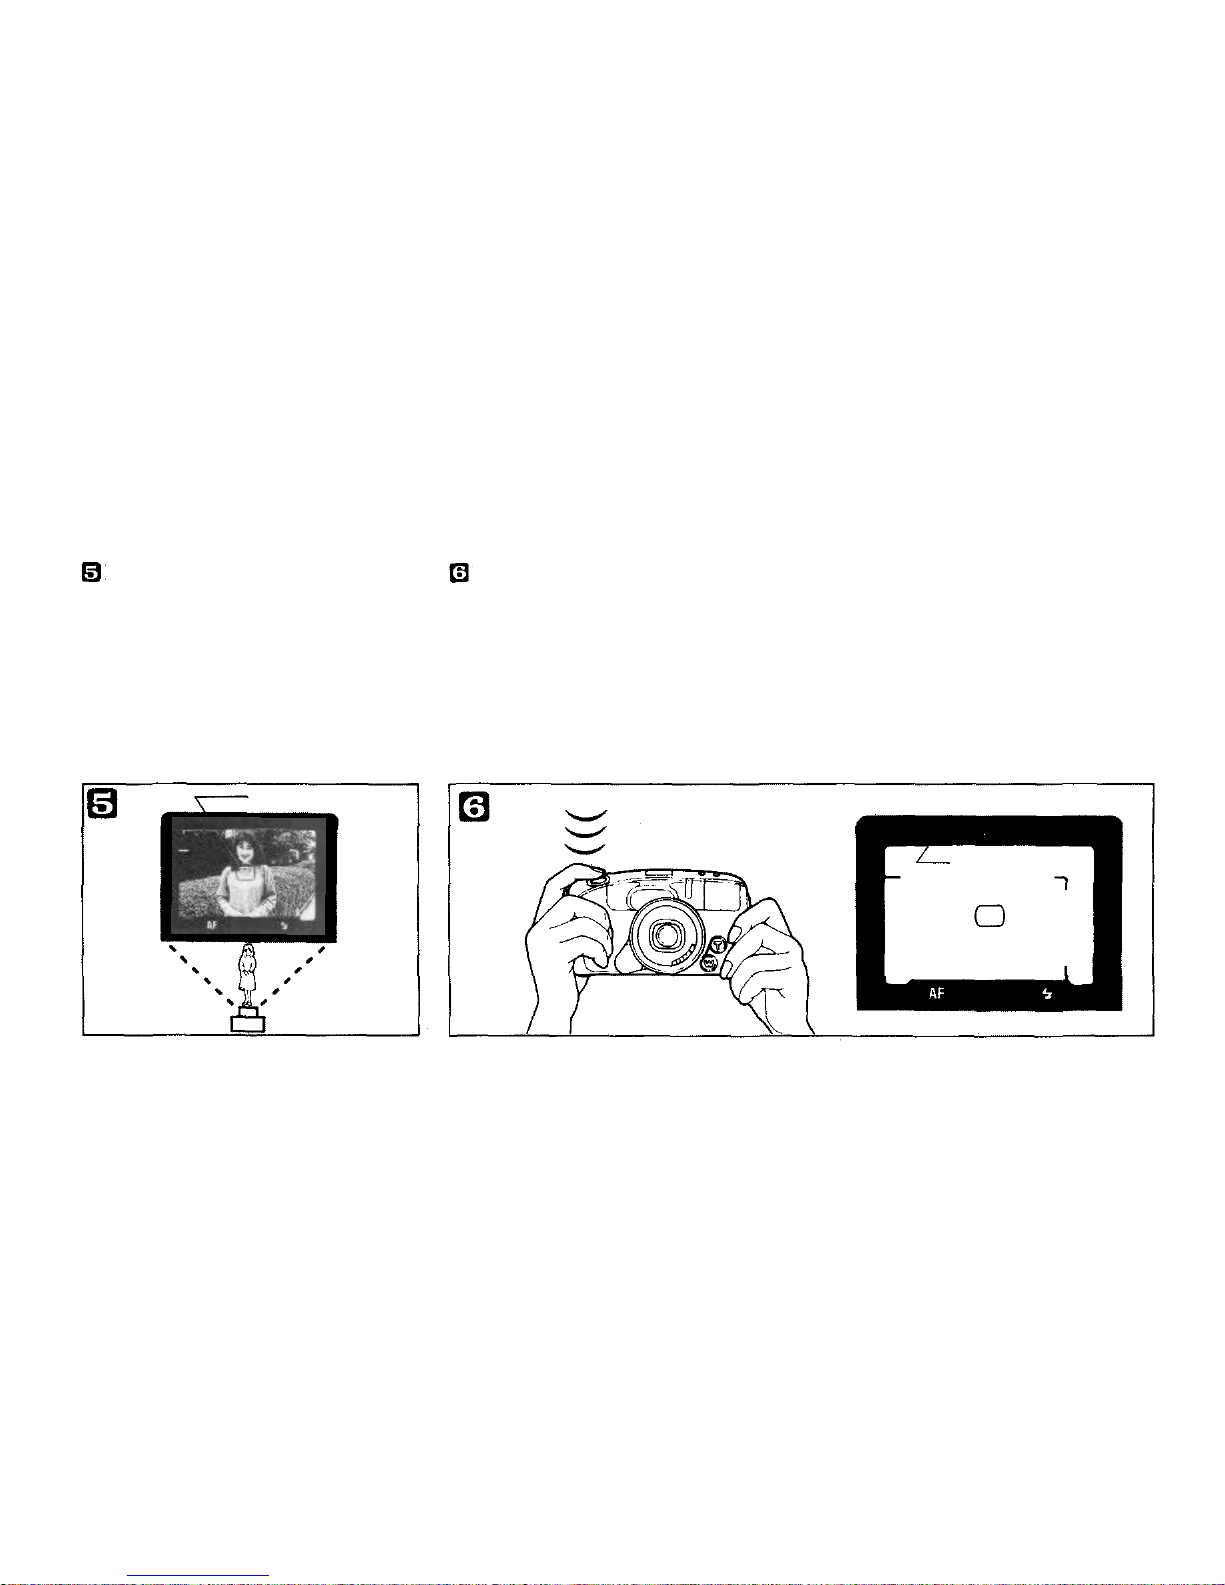
Position your subject within the
autofocus frame in the center of the
viewfinder.
Press the shutter release button
halfway to focus.
When correct focus has been
achieved, the autofocus indicator
(green) will light up in the viewfinder.
If the autofocus indicator is blinking,
correct focus was not achieved. If this
occurs, let go of the shutter release
button. Make sure your subject is
within the autofocus frame in the
center of the viewfinder and press the
shutter release button halfway again.
17
Autofocus frame
Picture frame
Page 19
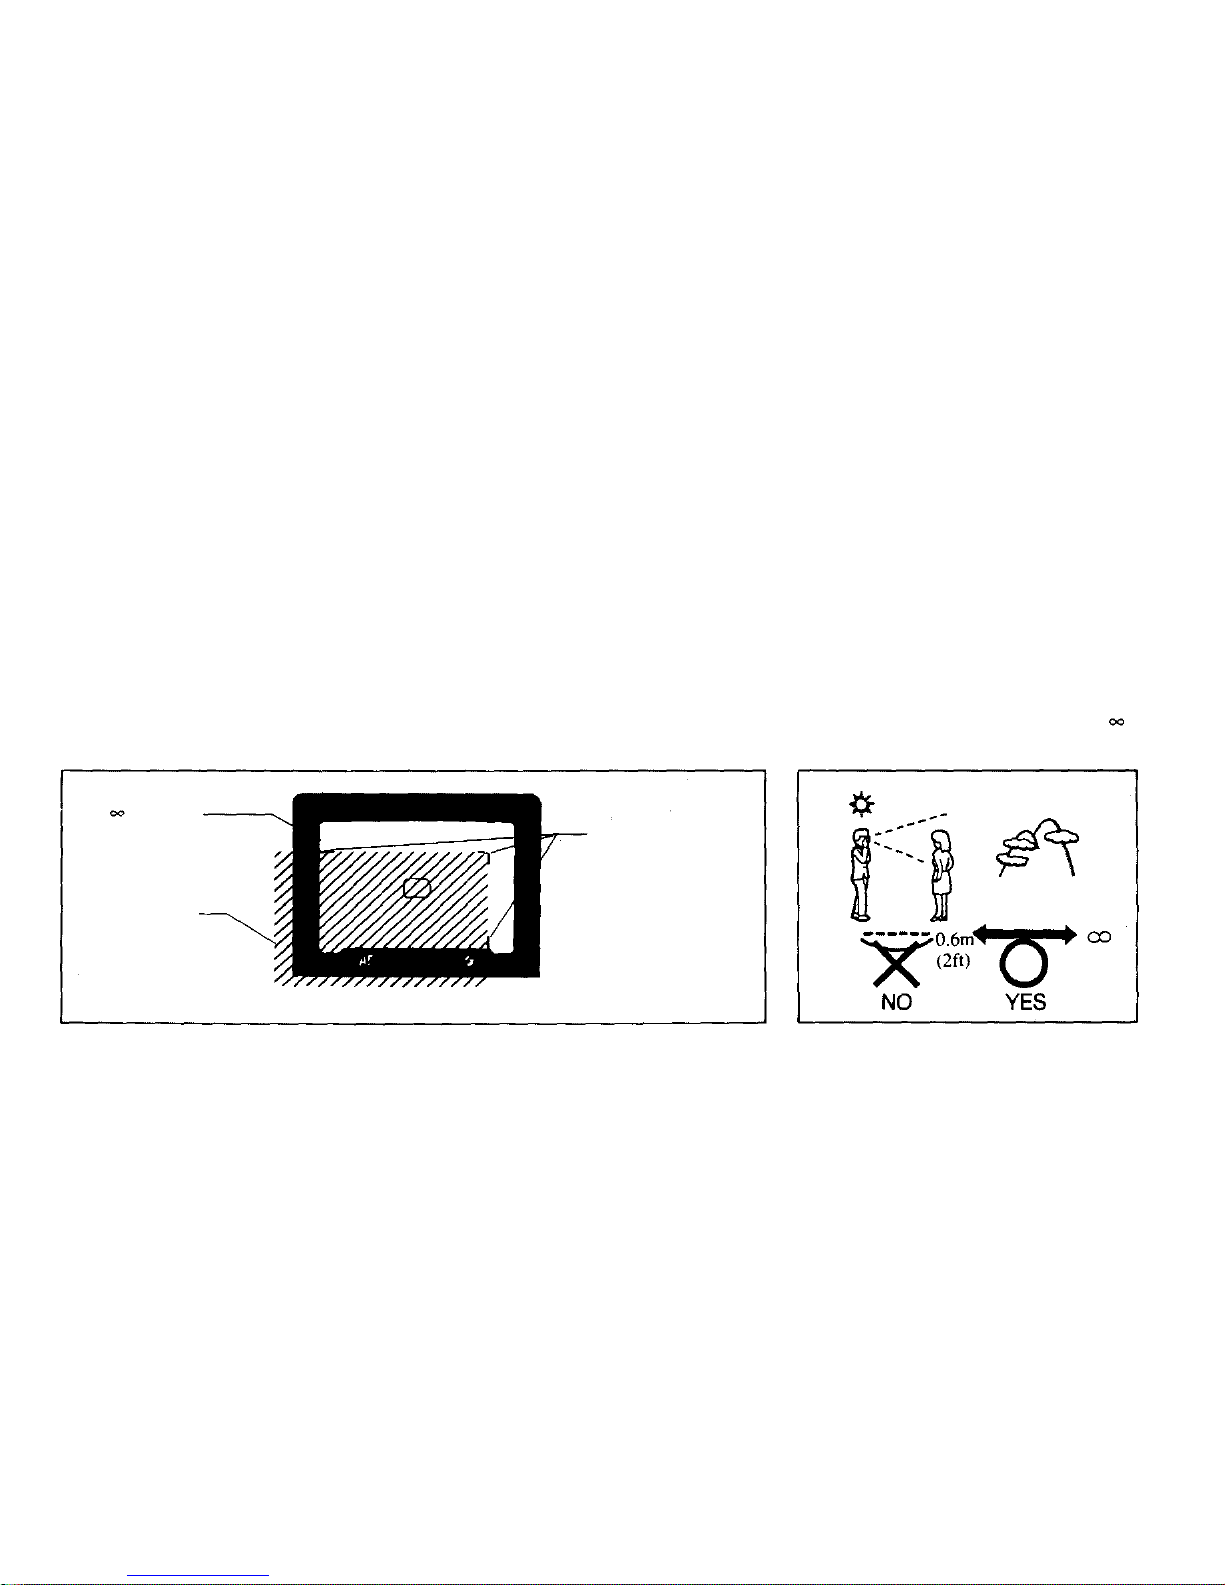
The entire subject should normally be
positioned within the picture frame,
however, the actual available image
area will become smaller as you get
nearer to the subject. At 0.6m(2ft), the
subject should be positioned within
the close-up correction marks.
Shooting range: from 0 .6m(2ft) to
(infinity).
Picture frame
at (infinity)
Picture frame
at 0.6m
(2ft)
Close-up
correction marks
18
Page 20
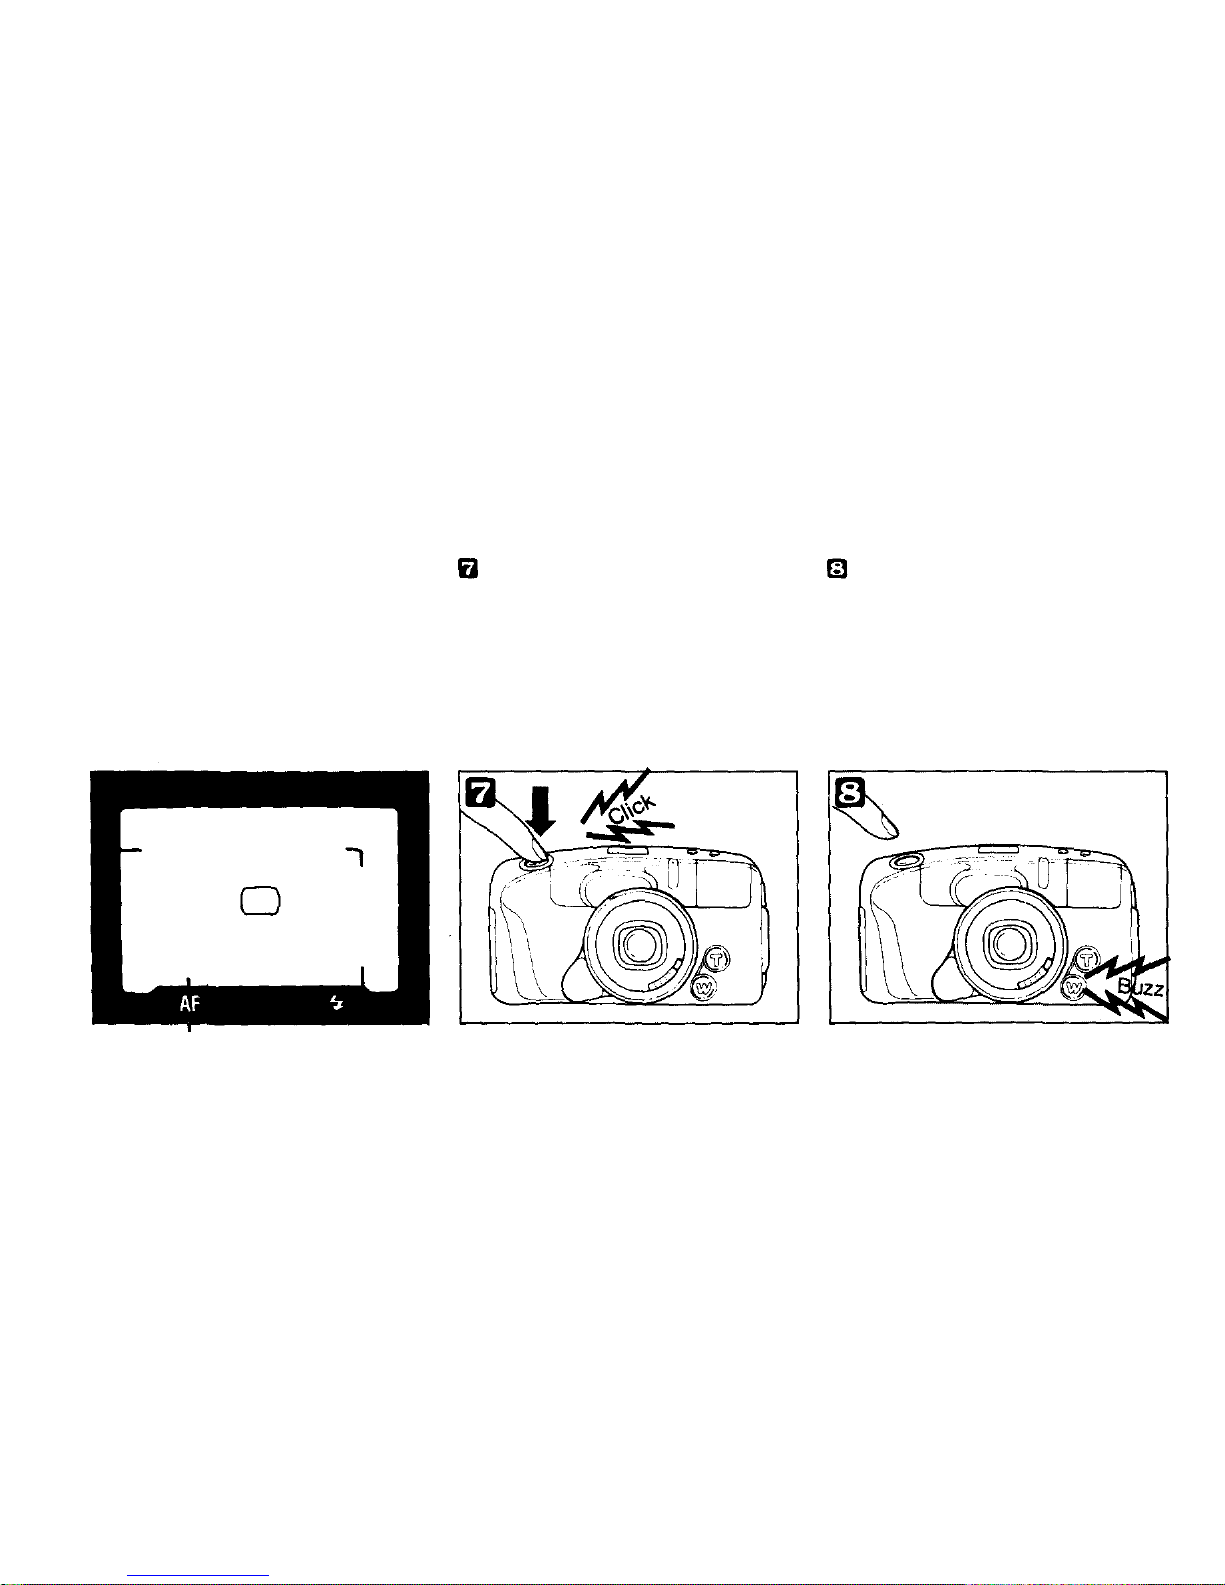
If the subject is nearer than 0.6m(2ft),
the autofocus indicator (green) will
blink and the shutter will not release.
However, the shutter may sometimes
be released erroneously when the
subject is extremely close to th e
camera.
When correct focus has been
achieved (the autofocus indicator has
li t up) , press the shutter release button
fully (gently, to minimize camera
shake).
As soon as th e shutter is released,
film will automatically advance to the
next frame. The LCD exposure
counter shows the next frame number.
19
Page 21
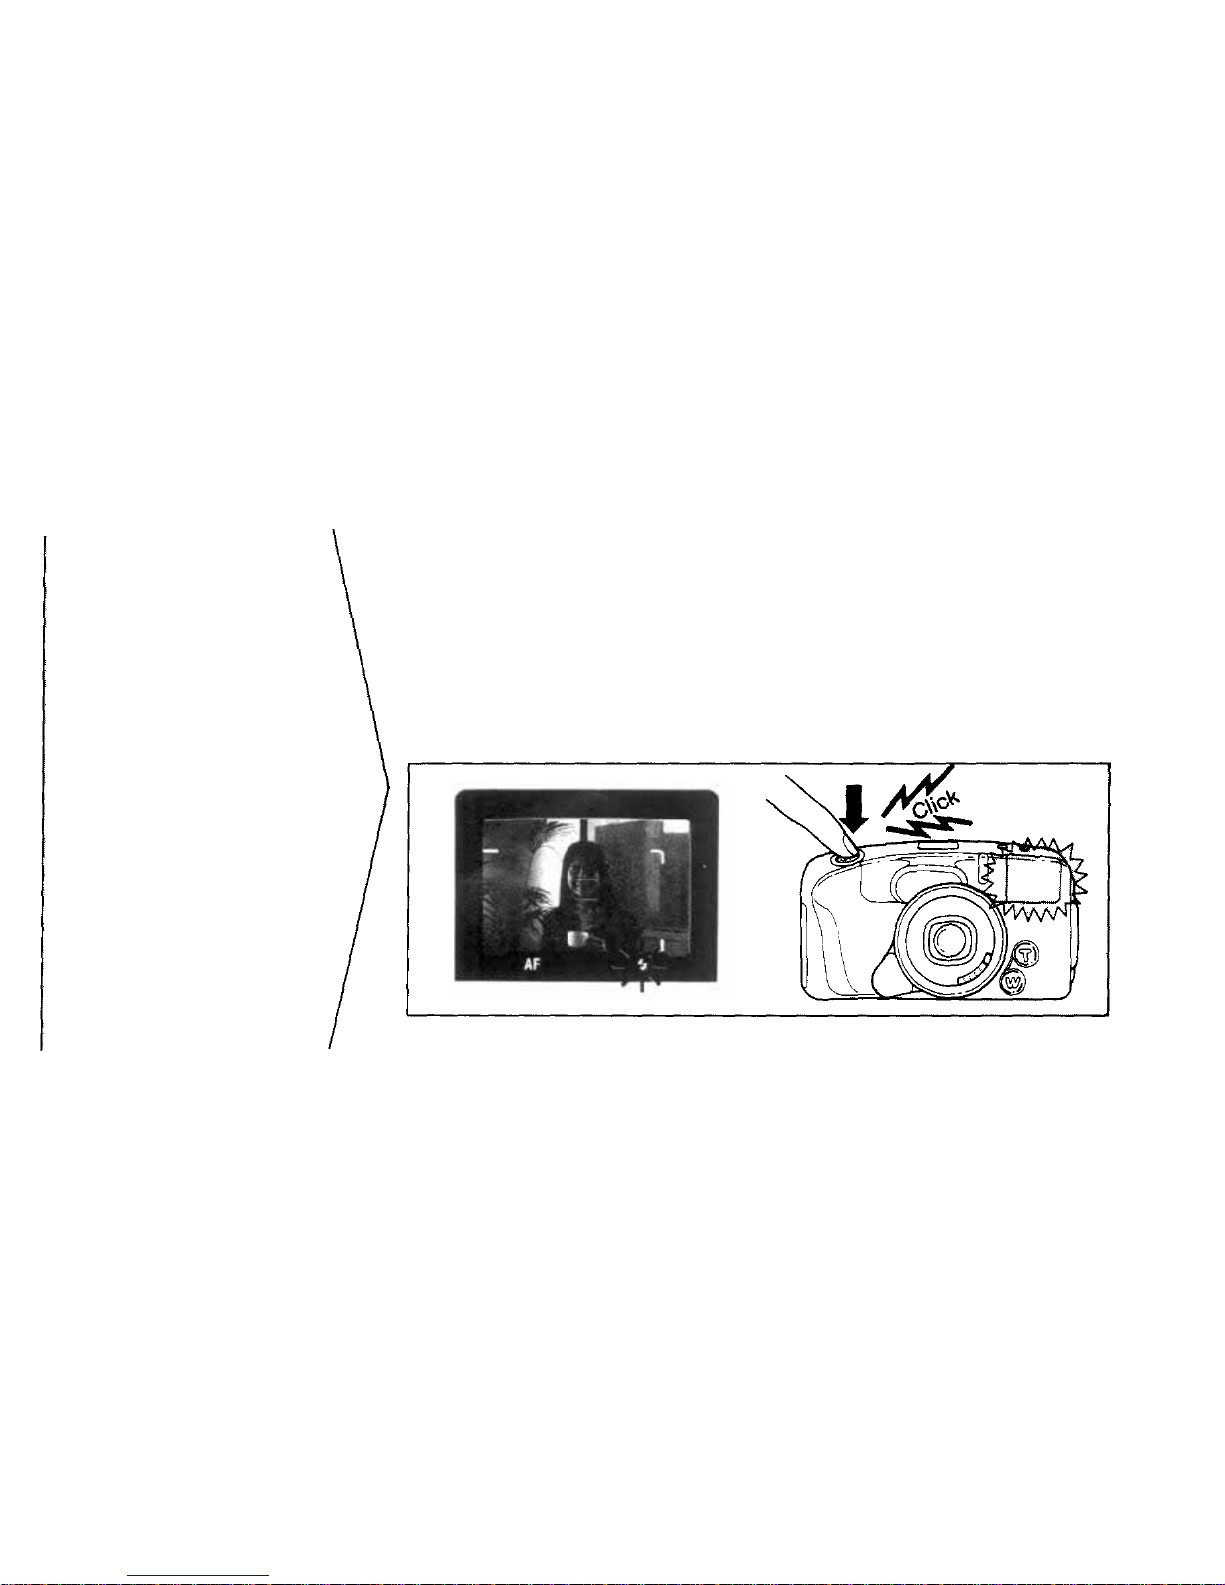
Confirm flash charge by pressing the
shutter release button halfway. The
flash indicator (orange) will light up
in the viewfinder when the flash is
charged. Compose your shot and
press the shutter release button. The
flash will fire automatically.
The shutter release cannot be
operated while the flash is still
charging. It takes about 0.2-3.5
seconds after the film is advanced to
recharge the flash (at normal
temperatures with new batteries).
Use the AUTO-S flash mode to
prevent the red-eye phenomenon
(P.35).
Auto flash
photography
(1)Taking pictures
in low light
When the flash mode is set
to AUTO or AUTO-S, the
flash will fire automatically
in low light conditions.
20
Page 22
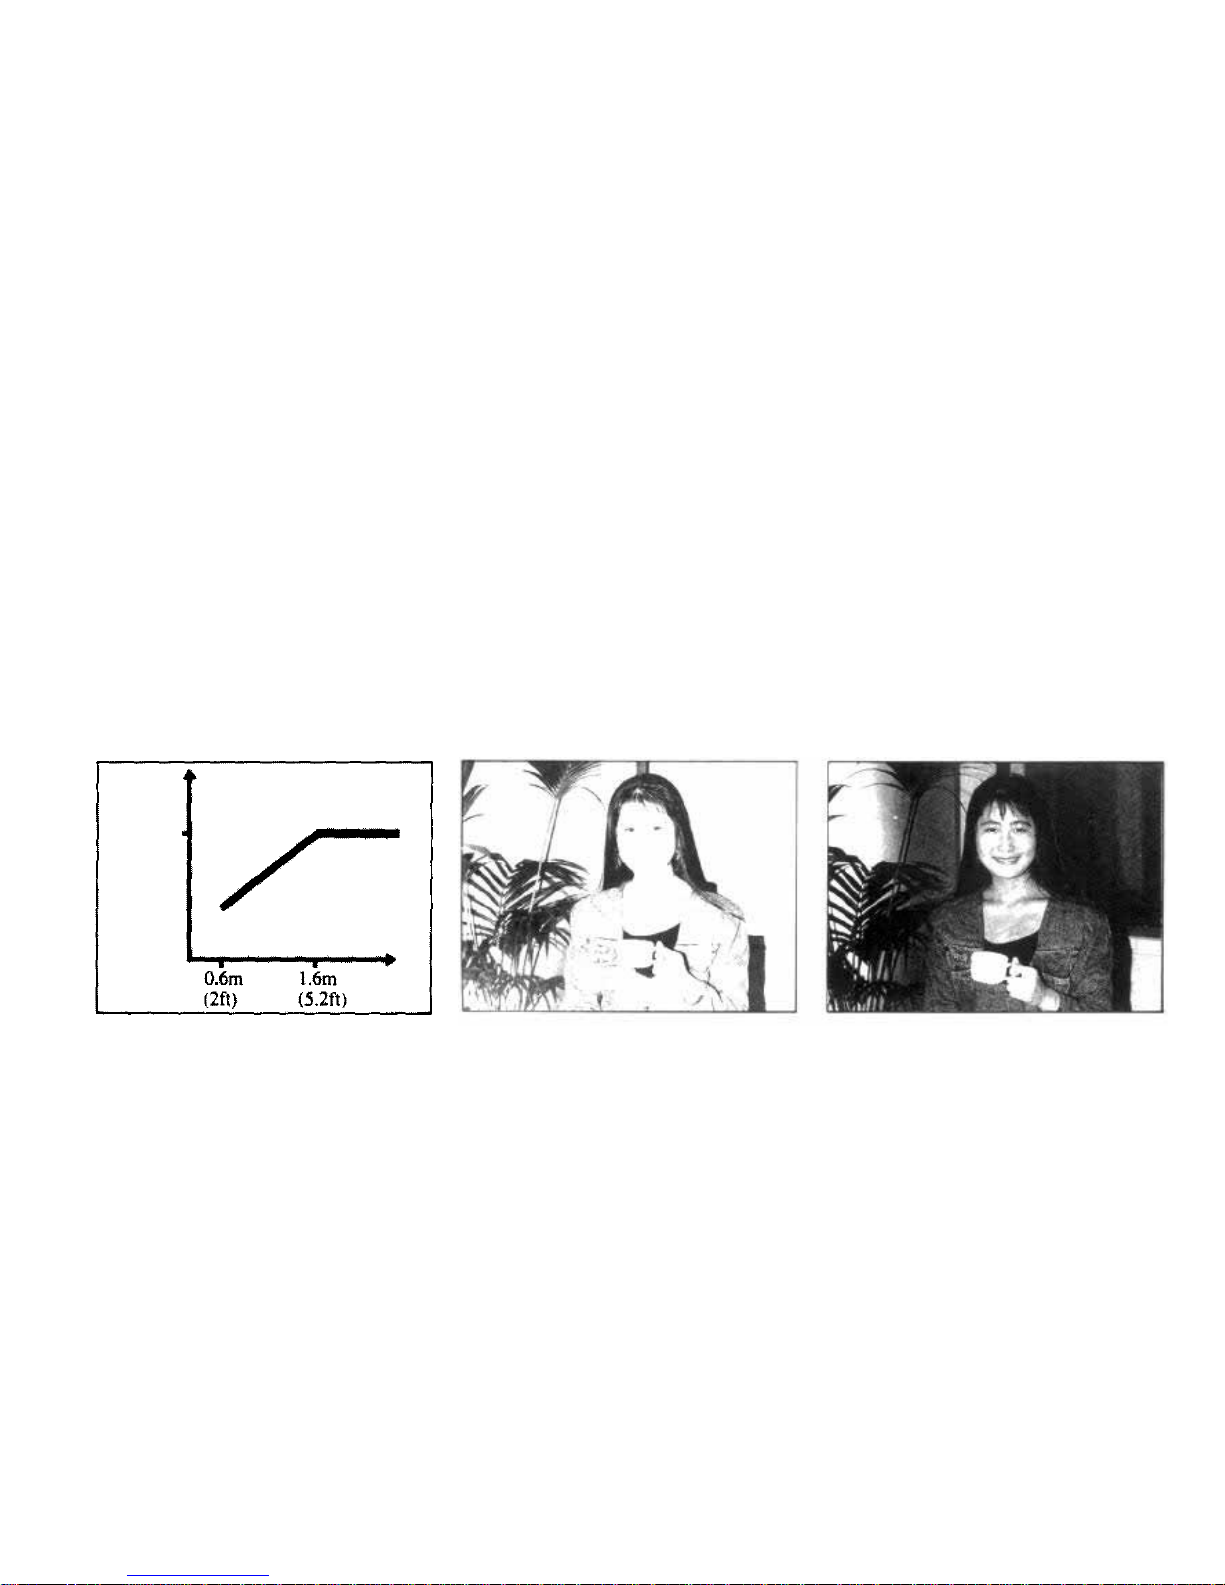
From 0.6m(2ft) .to 1.6m(5.2ft), the
flash strength is controlled automatically as shown. This soft flash
mechanism prevents pictures from
being overexposed.
Soft flash: Overexposed (with conventional flash).
Properly exposed (with soft flash).
Flash
strength
Maximum
ISO100
Distance
21
Page 23
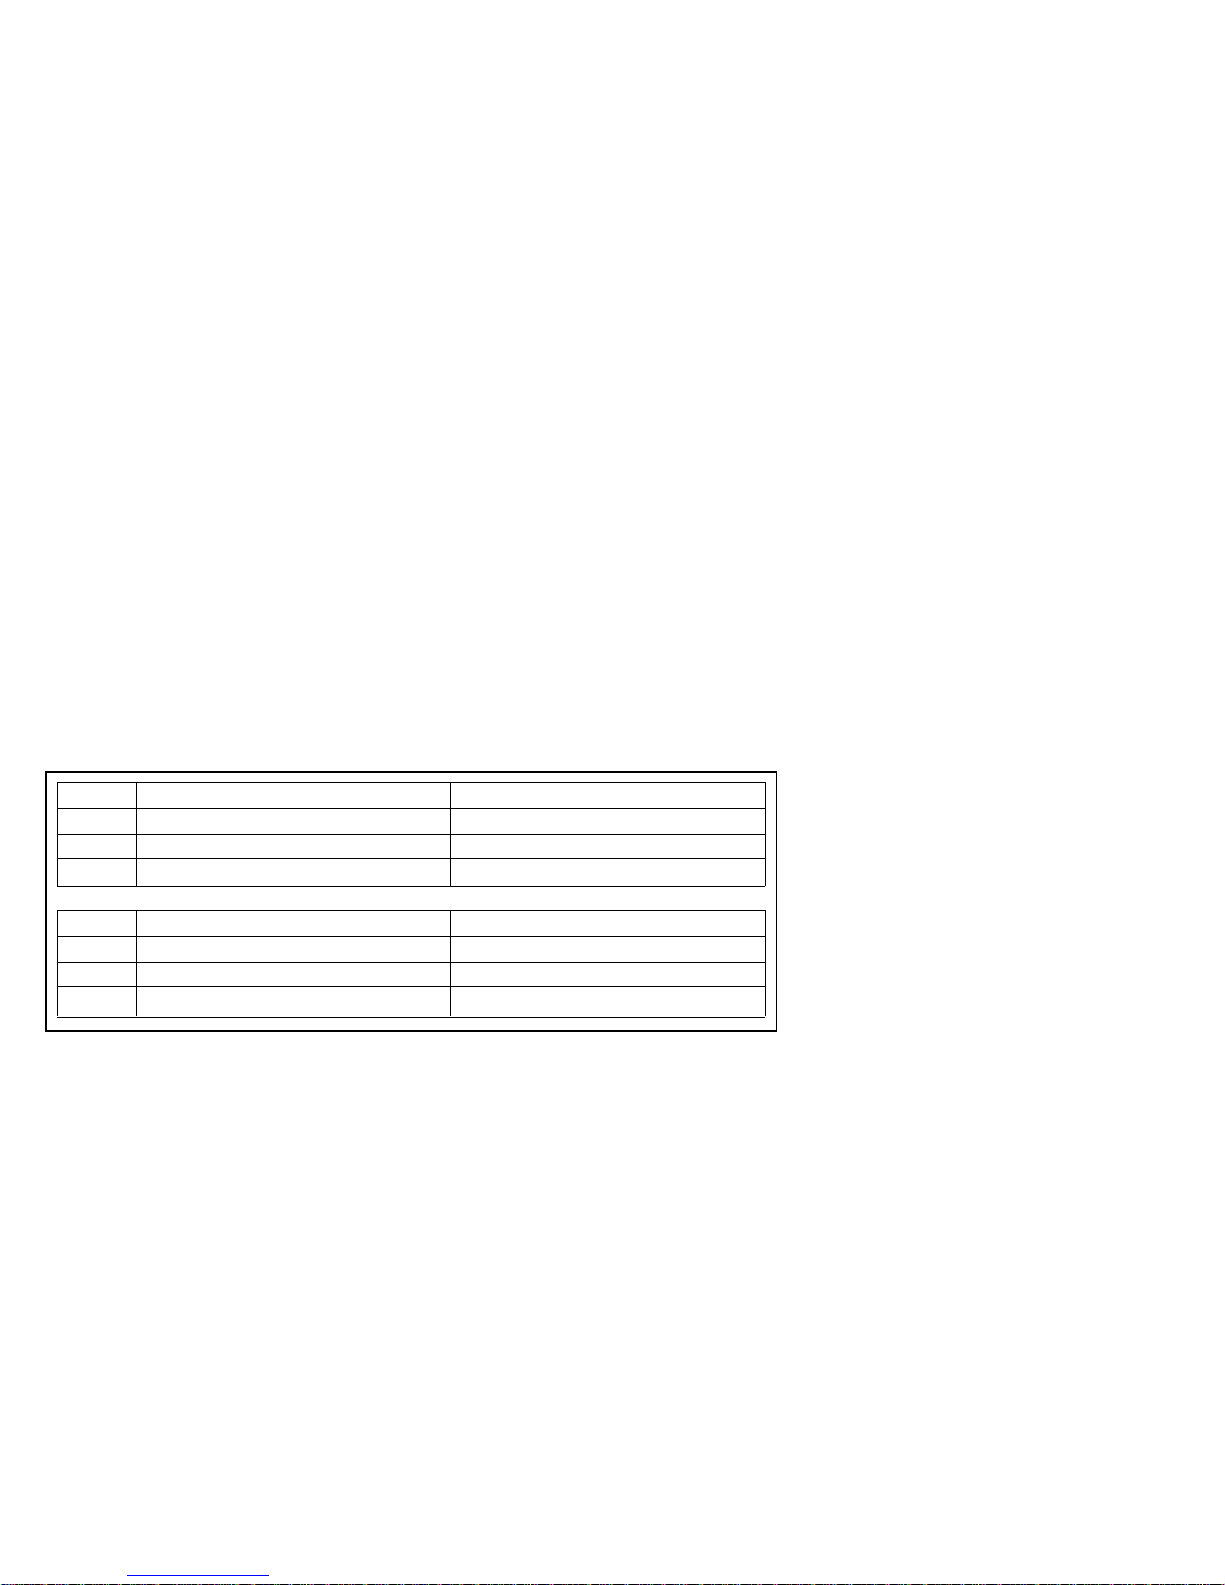
Color negative film offers the widest
exposure latitude, compensating for
over and underexposure more readily
than other films. The flash working
range shown below is optional for
color negative film. Actual flash
working range for other film type may
vary.
Flash worki ng range:
ISO
200
WIDE(38mm)
0.6m - 4.1m(2ft - 13.4ft)
0.6m - 5.8m(2ft - 19ft)
0.6m - 8.2m(2ft - 26.9ft)
TELE(76mm)
0.6m - 3m(2ft - 9.8ft)
0.6m - 4.2m(2ft - 13.8ft)
0.6m - 6m(2ft - 19.7ft)
ISO
100
200
400
WIDE(38mm)
0.6m - 2.9m(2ft - 9.5ft)
0.6m - 4.1m(2ft - 13.4ft)
0.6m - 5.8m(2ft - 19ft)
TELE(76mm)
0.6m - 2m(2ft - 6.6ft)
0.6m - 3m(2ft - 9.8ft)
0.6m - 4m(2ft - 13.1ft)
In continuous mode
22
100
400
Page 24
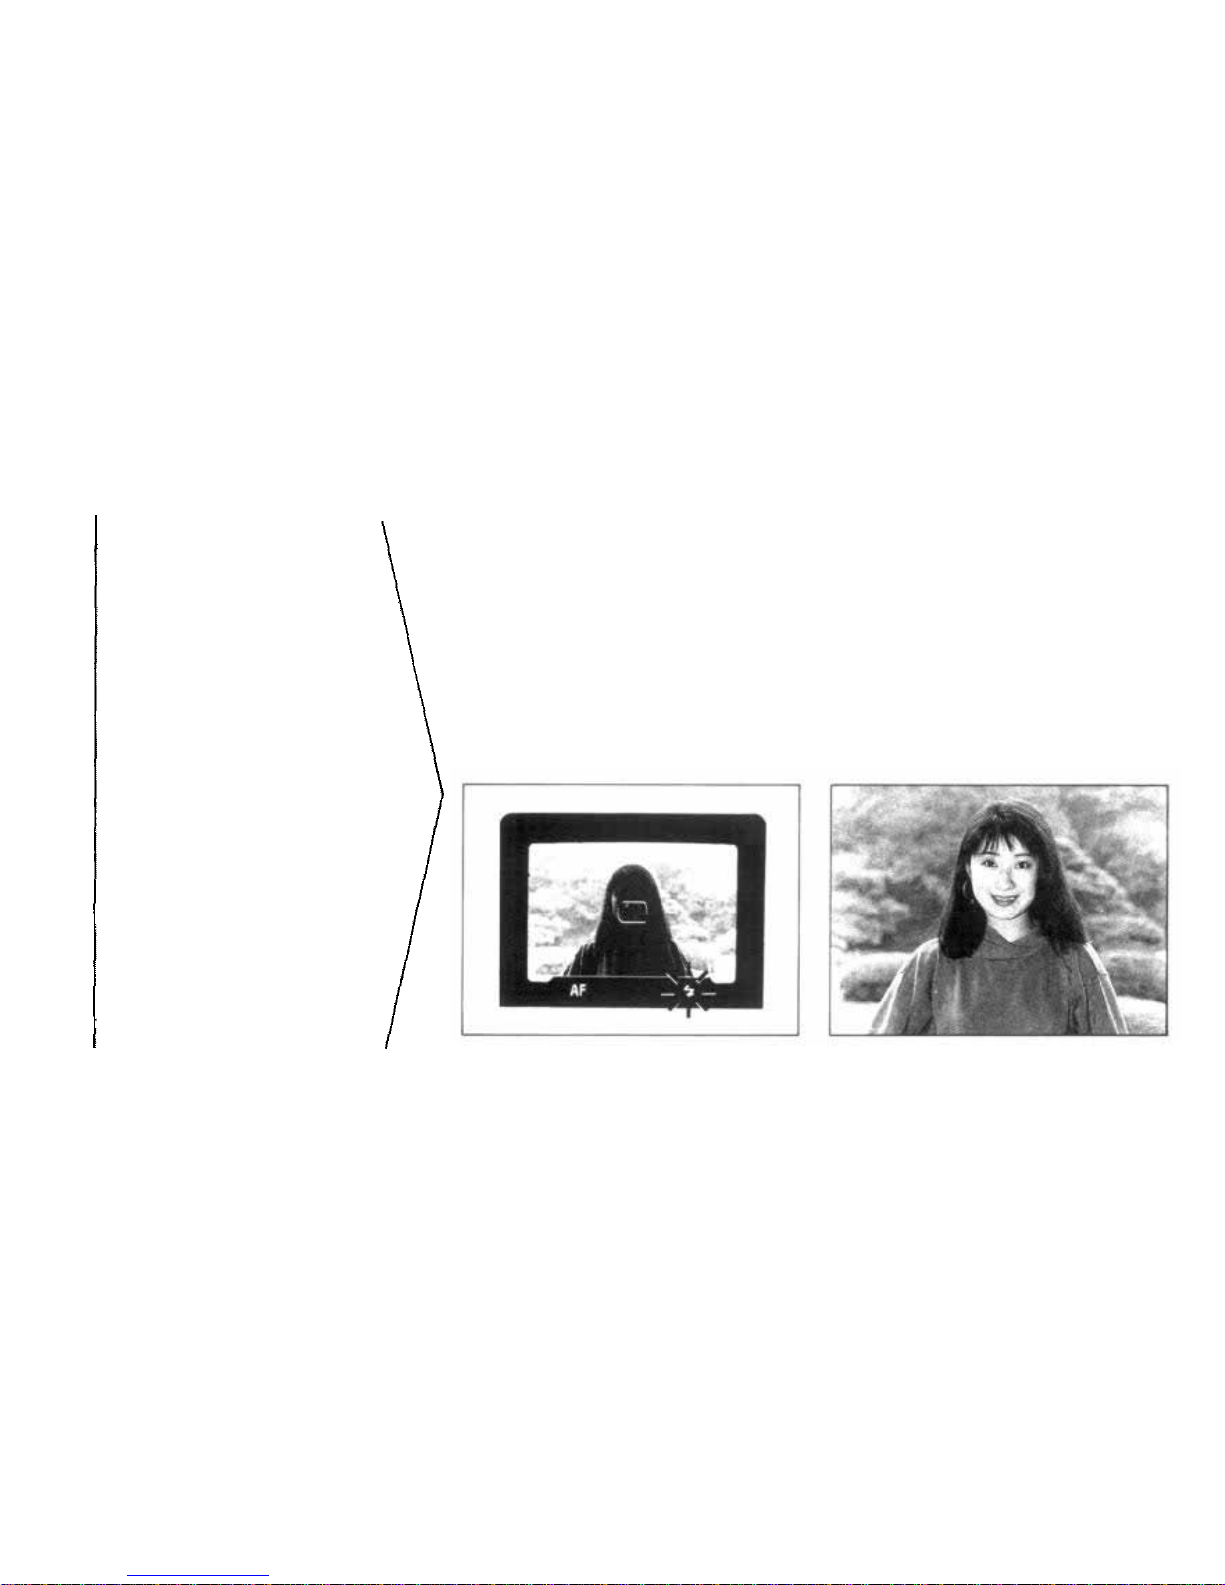
Confirm flash charge by pressing the
shutter release button halfway. The flash
indicator (orange) w ill light up in the
viewfinder when the flash is charged.
* If the backlit subject is very small
and does not fully cover the
autofocus frame, the flash may not
fire automatically.
Aut o flash
photography
(2)Taking backlit
subjects
When the flash mode is set
to AUTO or AUTO-S, the
flash will fire automatically
in backlit situations.
23
Page 25
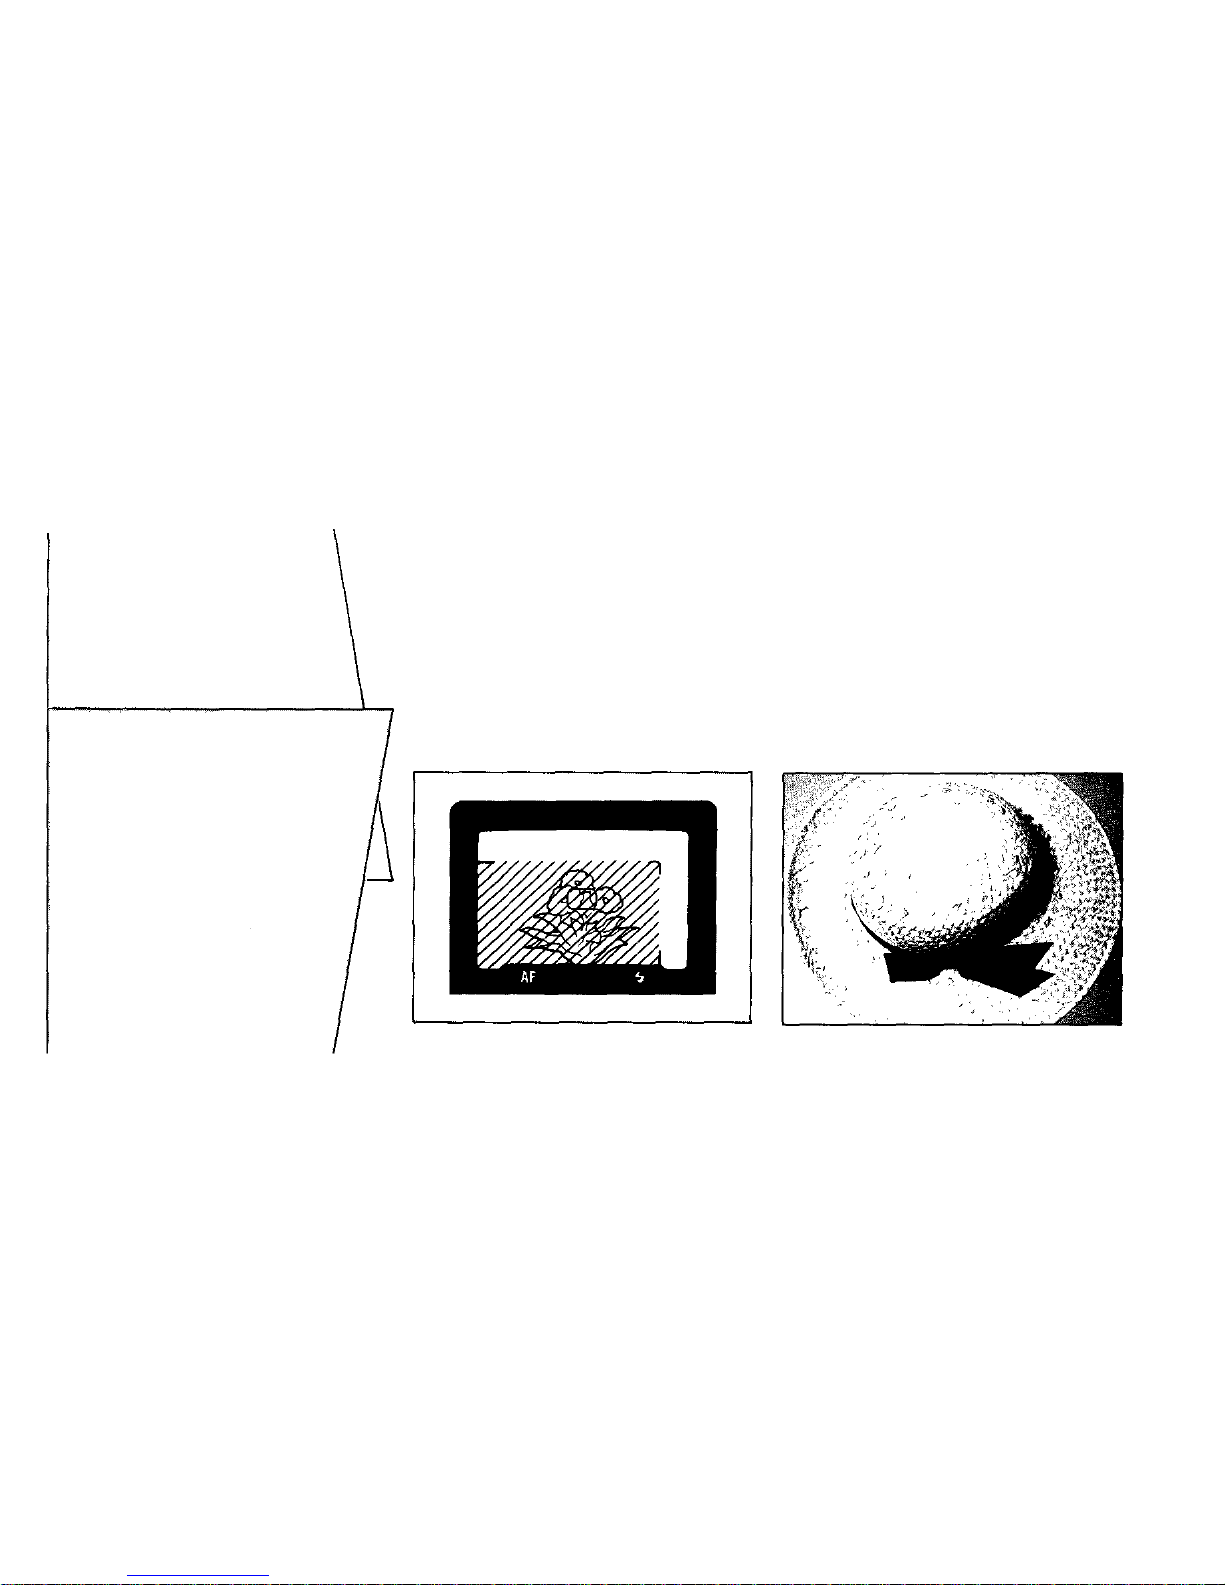
At 0.6m(2ft), position your subject
within the area outlined by the close-
up correction marks.
* When the subject is close to the
camera, use a tripod or other camera
support to prevent the effects of
camera shake.
Focal length of 38mm at 0.6m(2ft).
Advanced
shooting
techniques
Macro
photography
Macro photography is
possible a t a n y focal length.
Without performing any
special operations, it is
possible to take close-up
pictures up to a distance of
0.6m(2ft).
24
Page 26
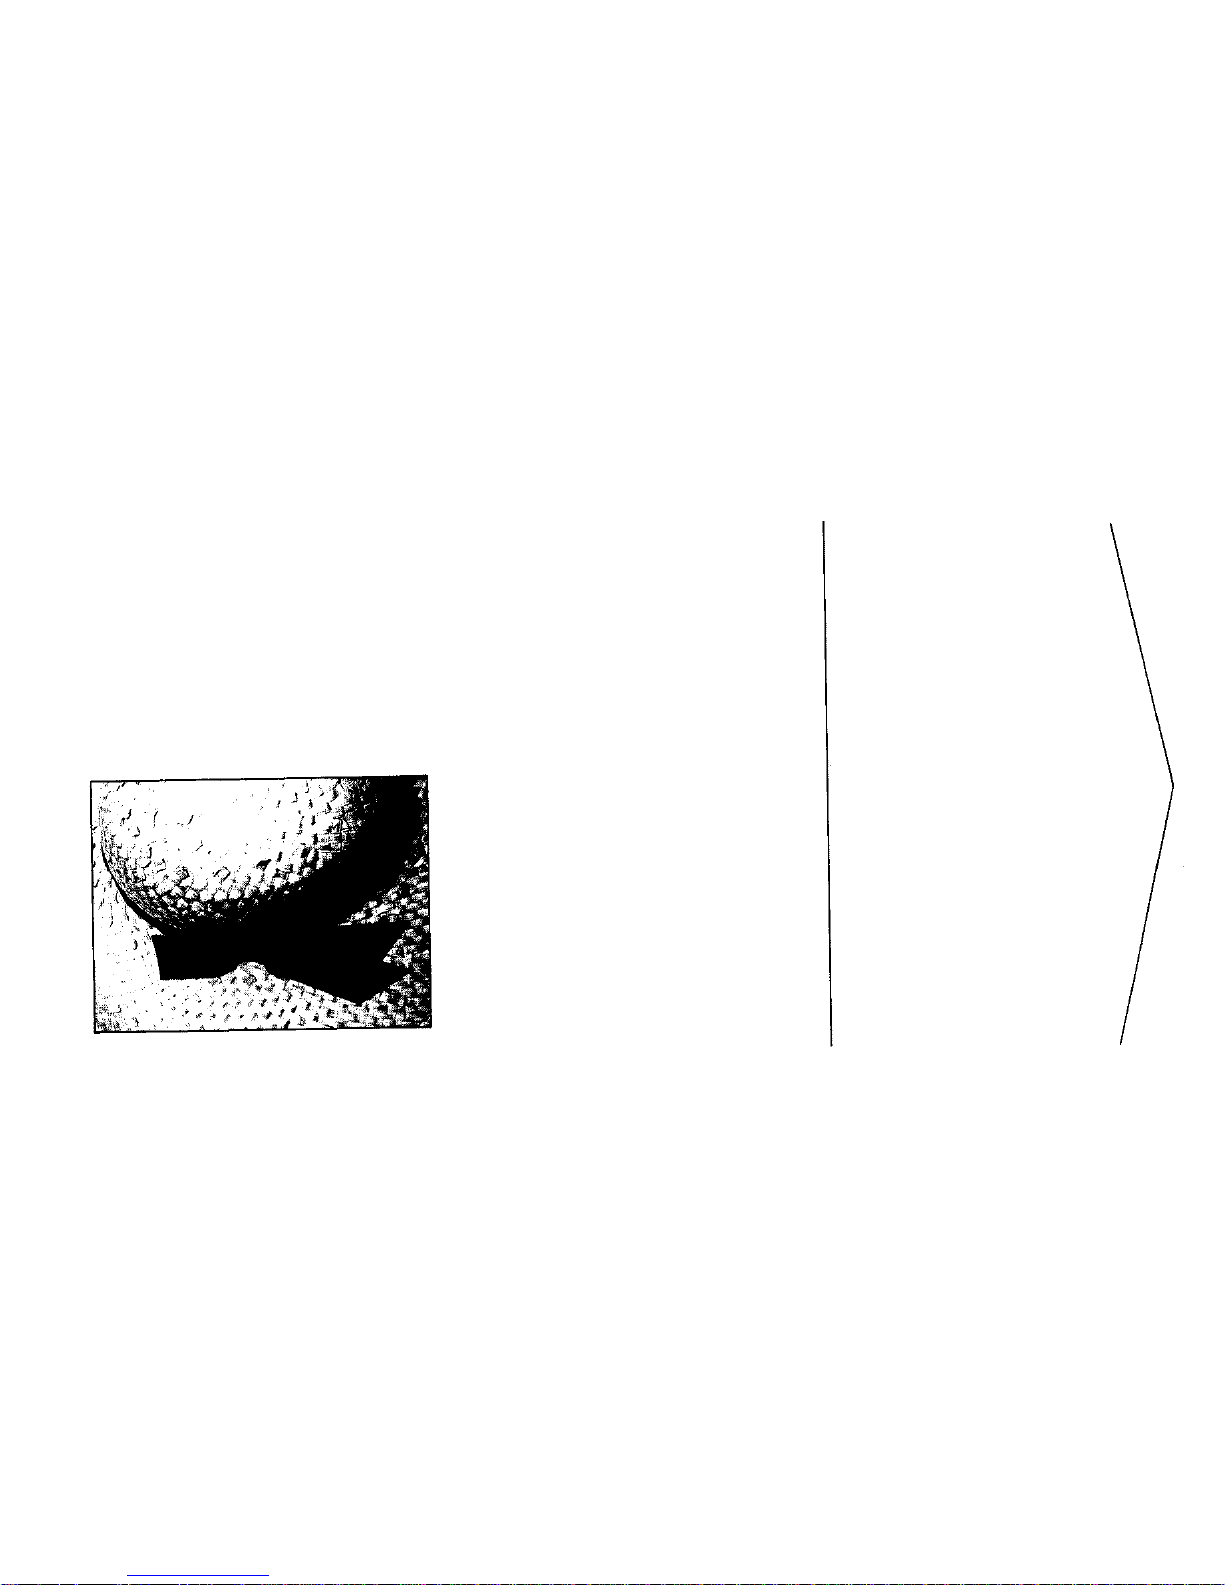
Focal length of 76mm at 0.6m(2ft).
Focus lock
Using the focus lock, your
subject will be in focus
even if it is not in the center
of the picture.
25
Page 27
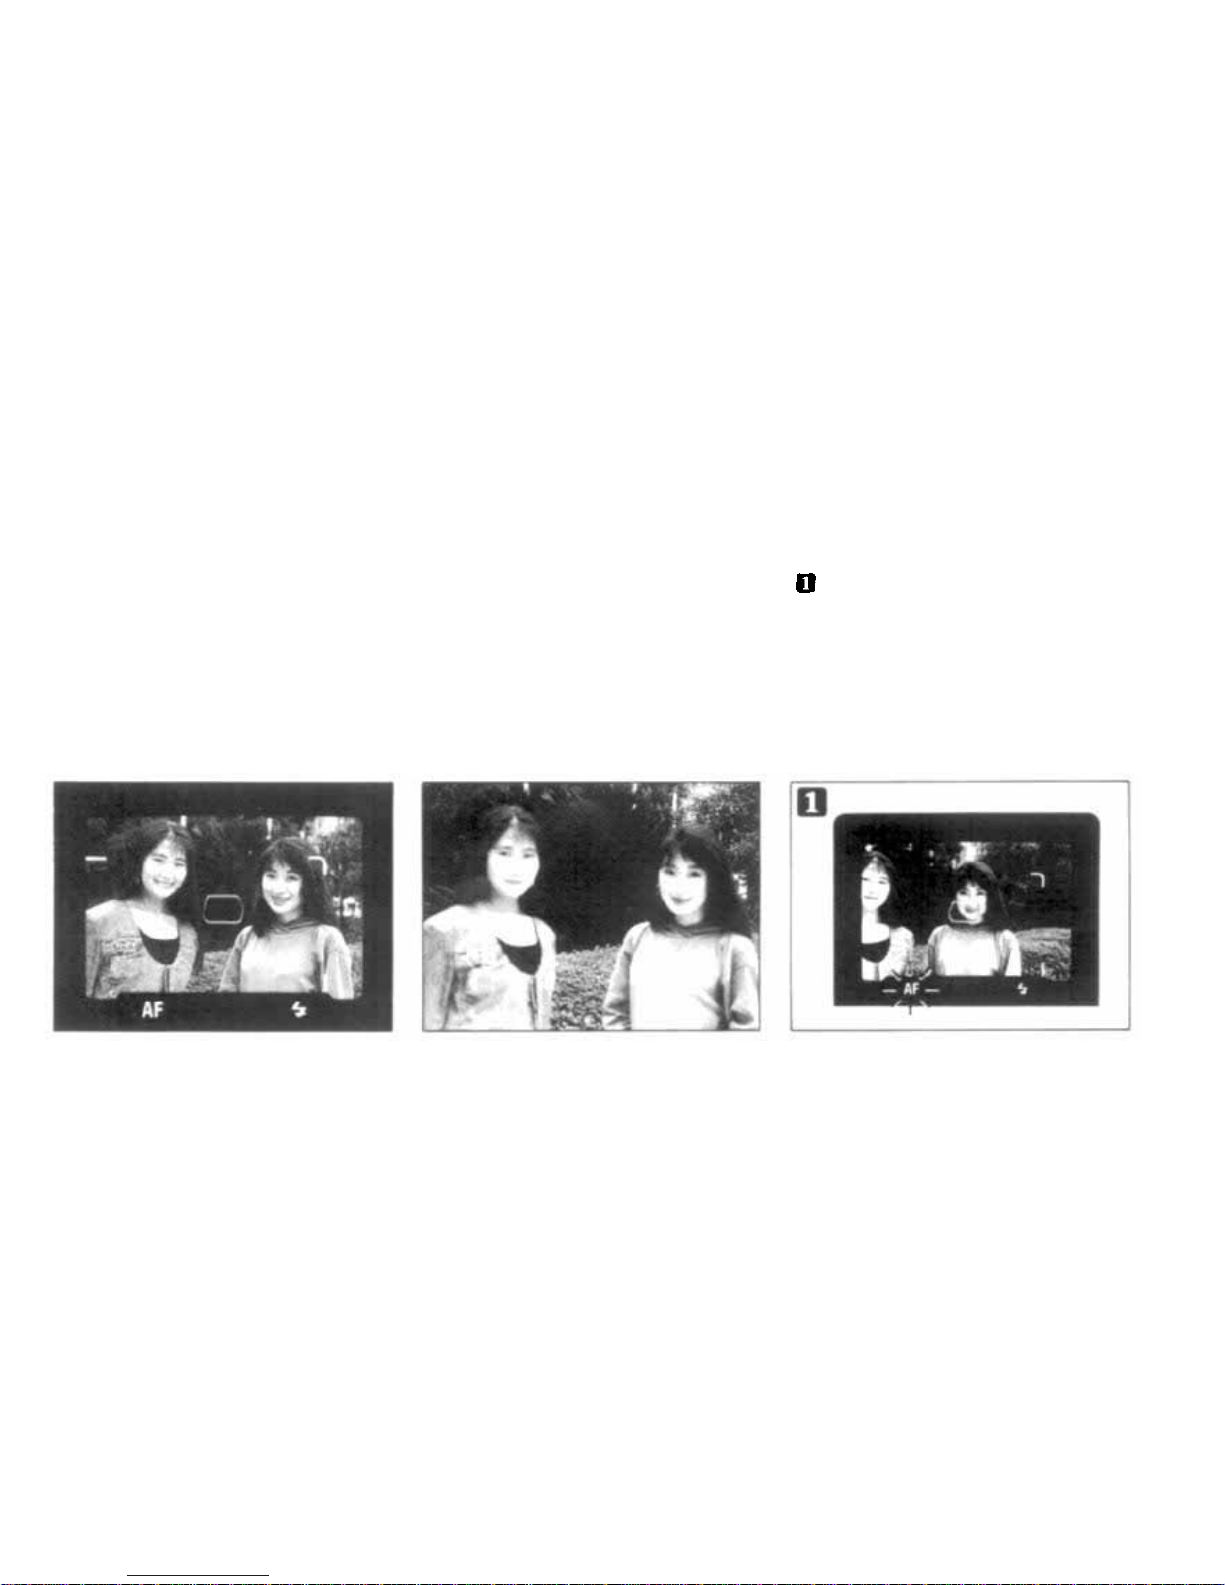
When the main subject is not in the
autofocus frame, use the focus lock.
Otherwise the camera wi ll focus on
the background and the subject will
not be in focus.
Position your subject in the
autofocus frame and press the shutter
release button halfway.
Whe n correct focus has been
achieved, the autofocus indicator
(green) will light up in the viewfinder.
The focus and the exposure will be
locked.
26
Page 28
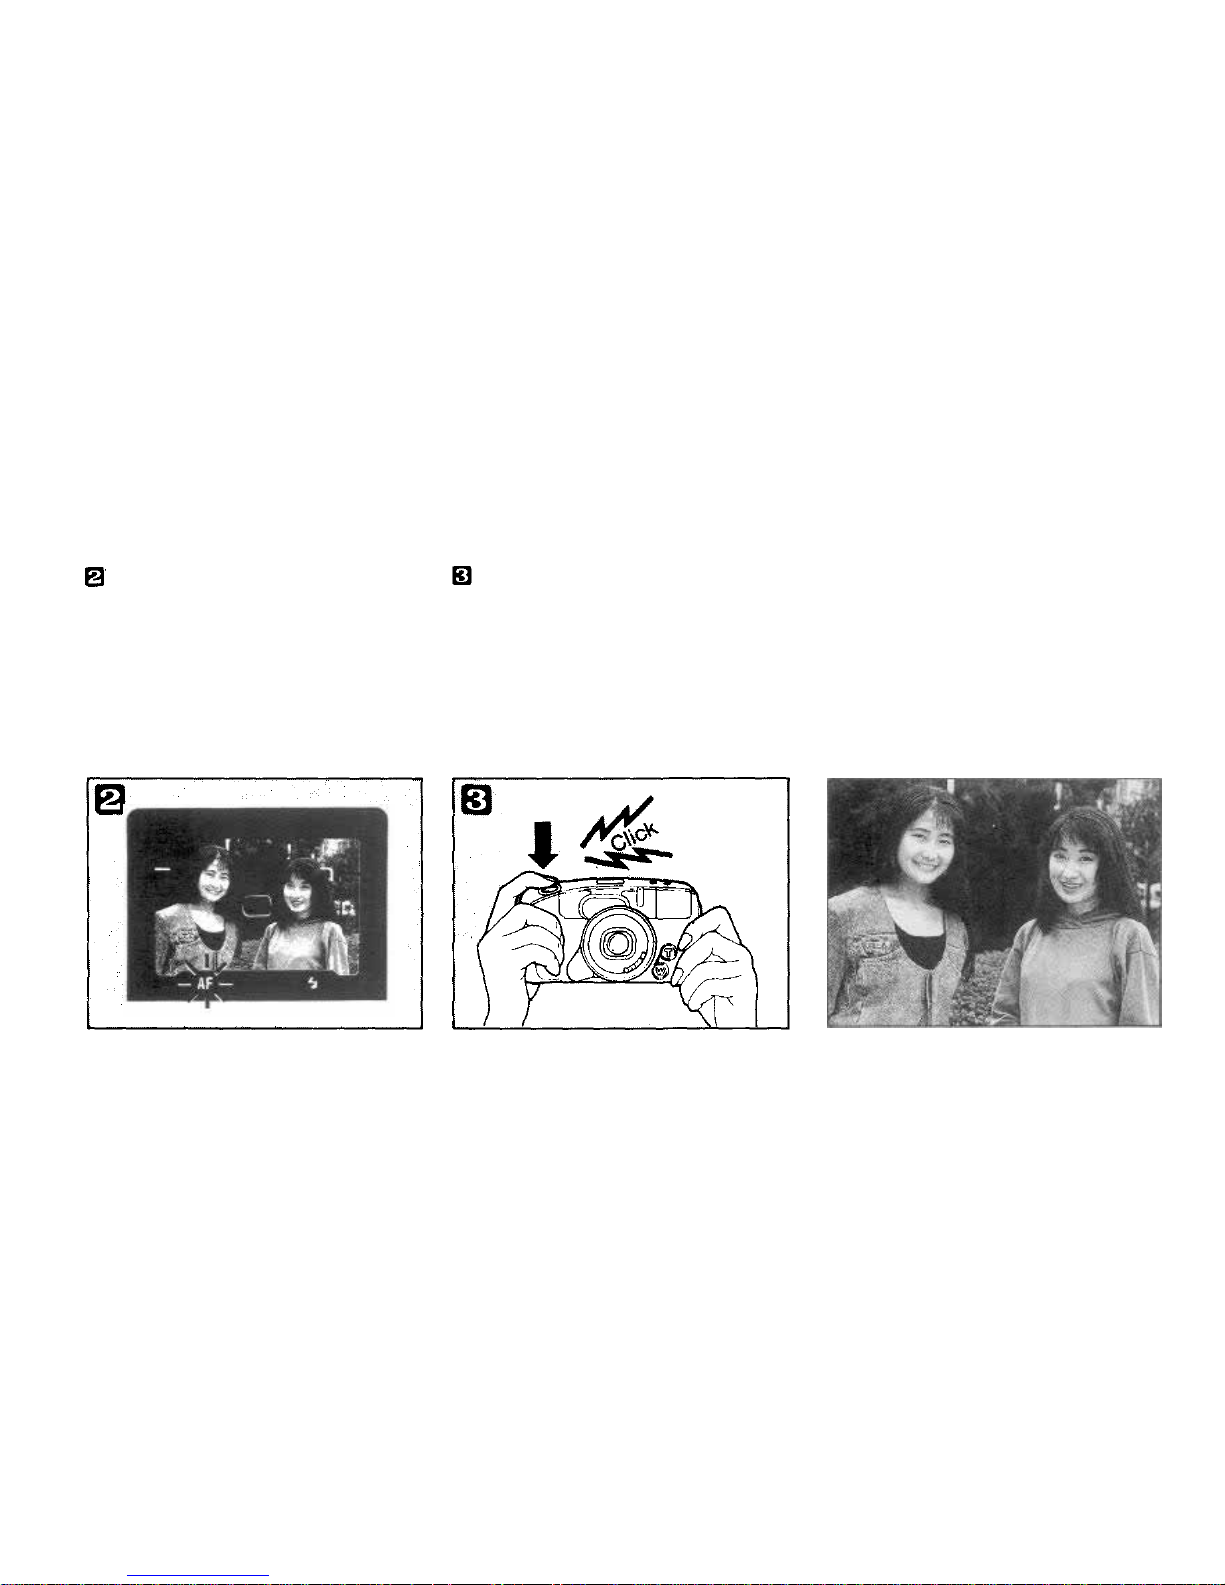
While keeping the shutter release
button pressed halfway, change the
position of your subject in the
viewfinder to achieve the desired
composition.
Press the shutter release button fully
to take the picture.
27
Page 29
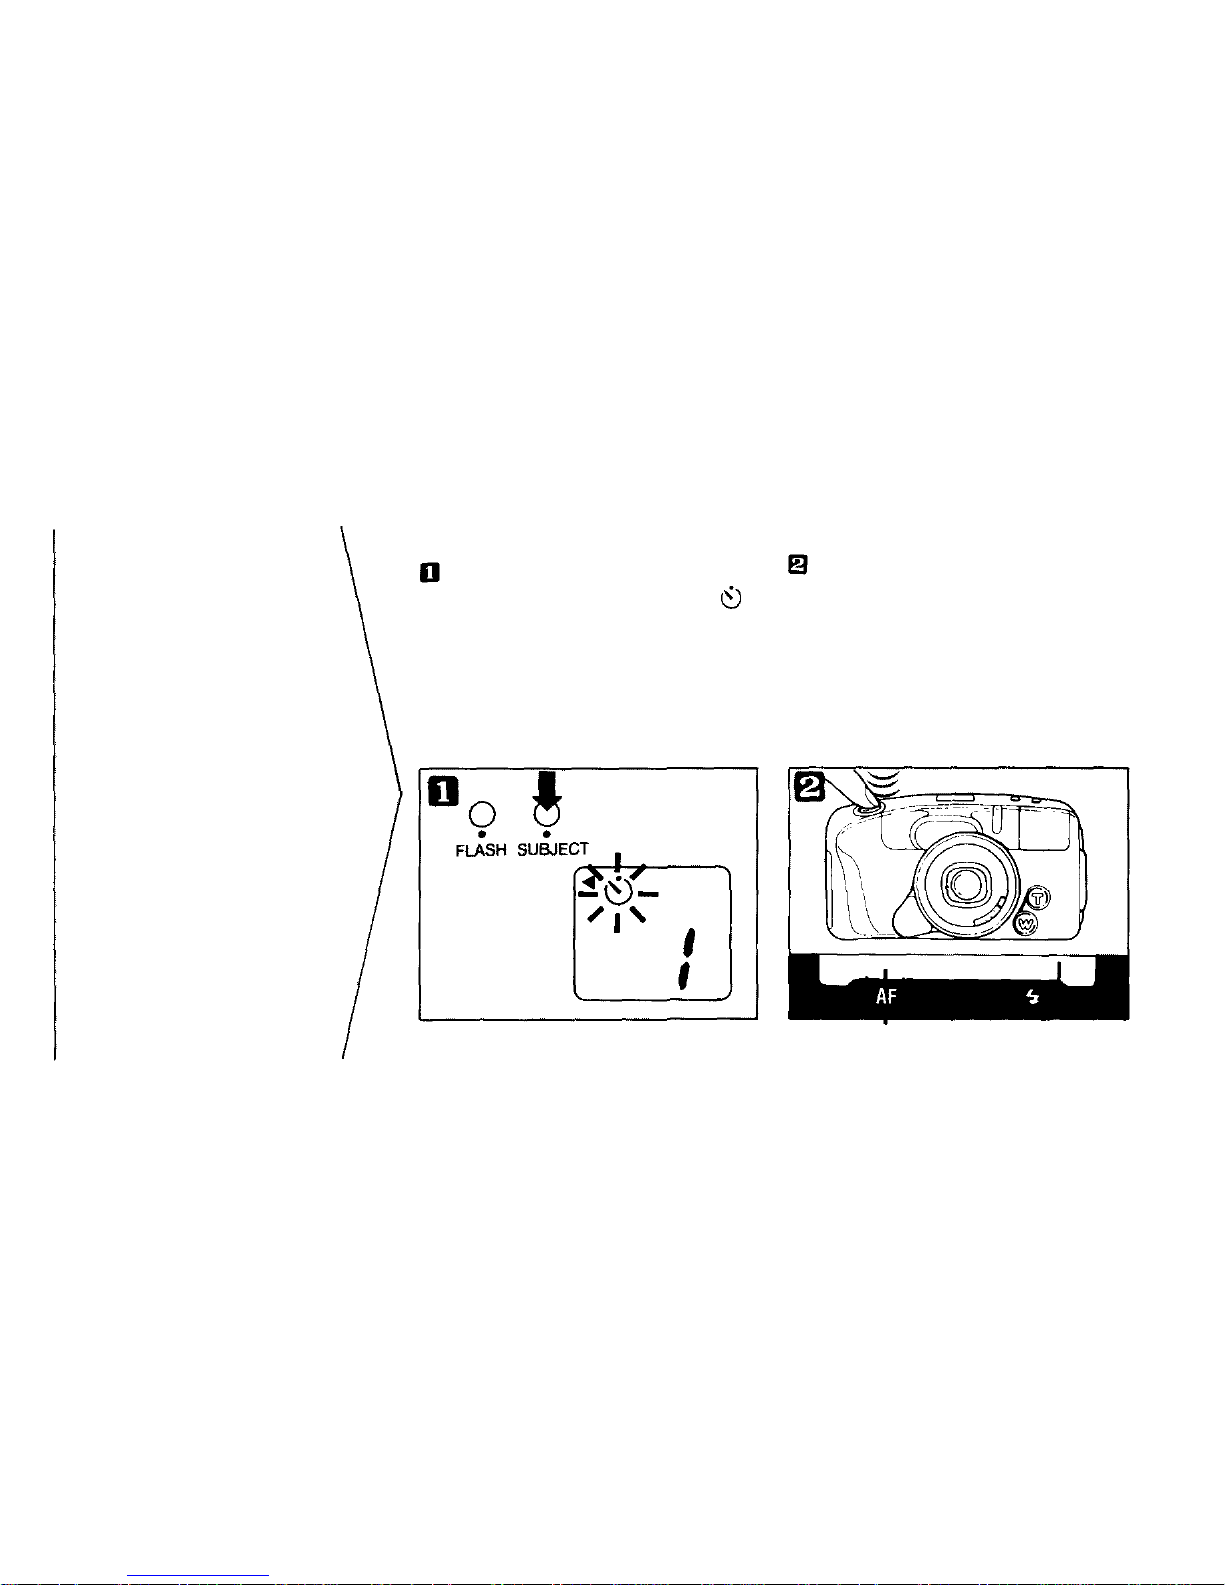
Press th e shutter release button
halfway to focus. When correct focus
has been achieved, th e autofocus
indicator (green) will light up in the
viewfinder.
Selftimer
28
Set the camera firmly in position.
Press the SUBJECT button until
is displayed on the LCD panel.
Page 30
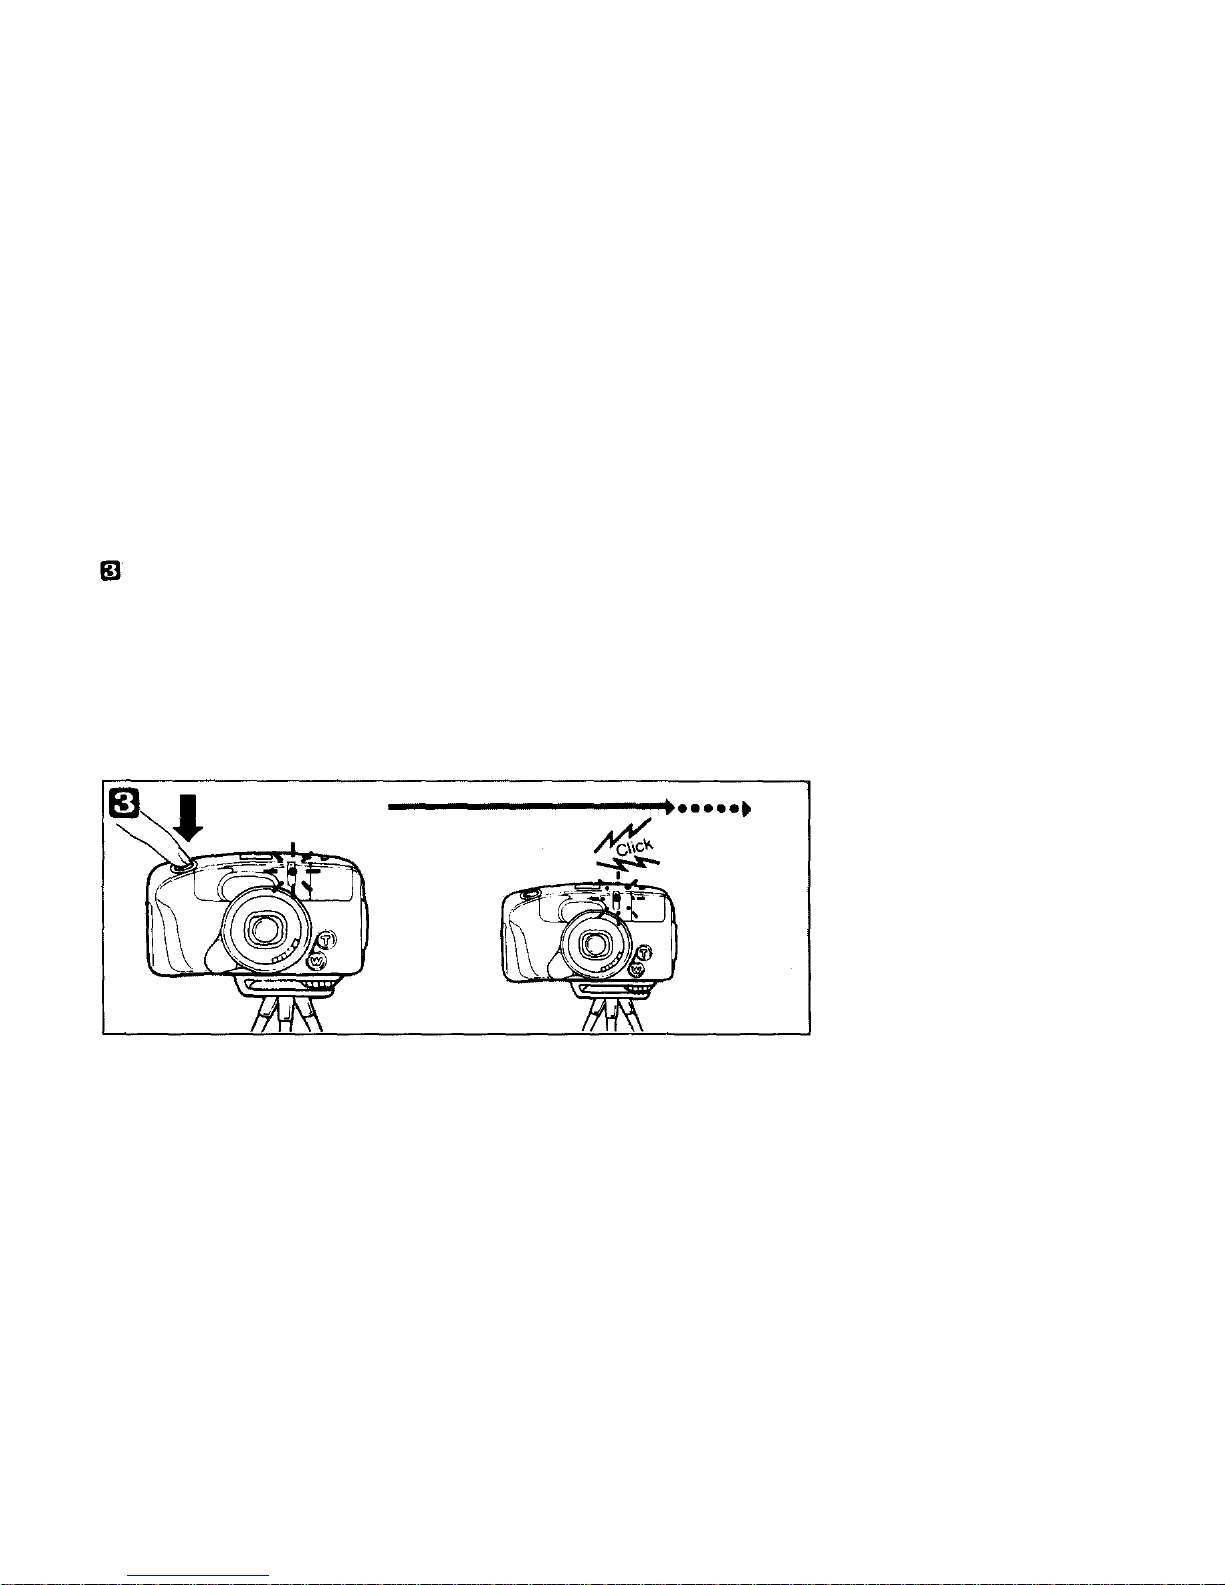
Press the shutter release button fully
to start the selftimer. The shutter will
be released 12 seconds later.
The selftimer indicator on the front of
the camera will light up for the first
10 seconds, the n blink rapidly for 2
seconds until the shutter is released.
* During selftimer operation, the
focus and exposure will be locked
wh en th e s hut ter release bu tto n is
pressed.
* To cancel the selftimer after it has
been activated, press th e SUBJECT
button or set the power switch to
OFF.
29
Selftimer indicator lights
for the first 10 sec.
Selftimer
indicator
then blinks
for 2
sec.
Page 31
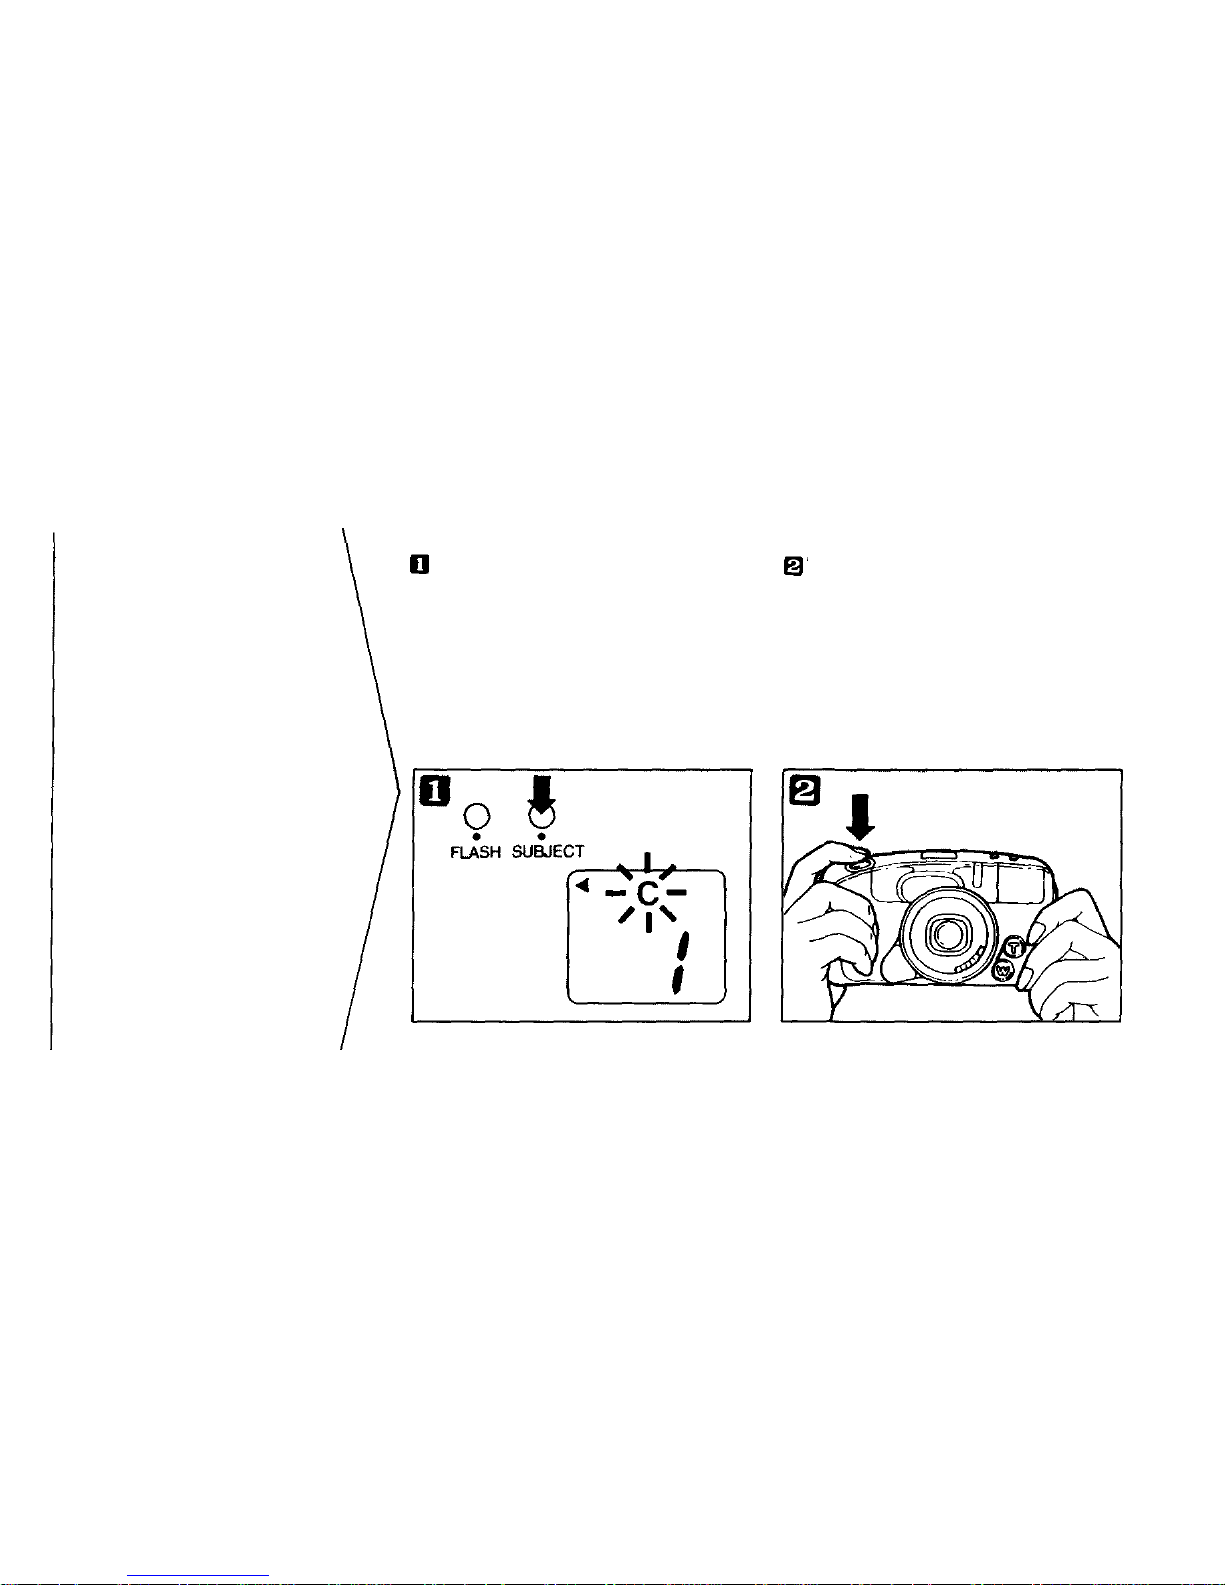
Press t he SUBJECT button until
"C" is displayed on the LCD panel.
The camera will shoot repeatedly as
long as the shutter release button is
pressed.
Outside the shooting range (P. 18) the
shutter will automatically stop.
Continuous mod e
Use continuous mode to
shoot a continuous series of
pictures at approx. 1 frame
per 1.7 seconds.
(1 frame per approx. 4
seconds whe n t he flash is
fired.)
30
Page 32
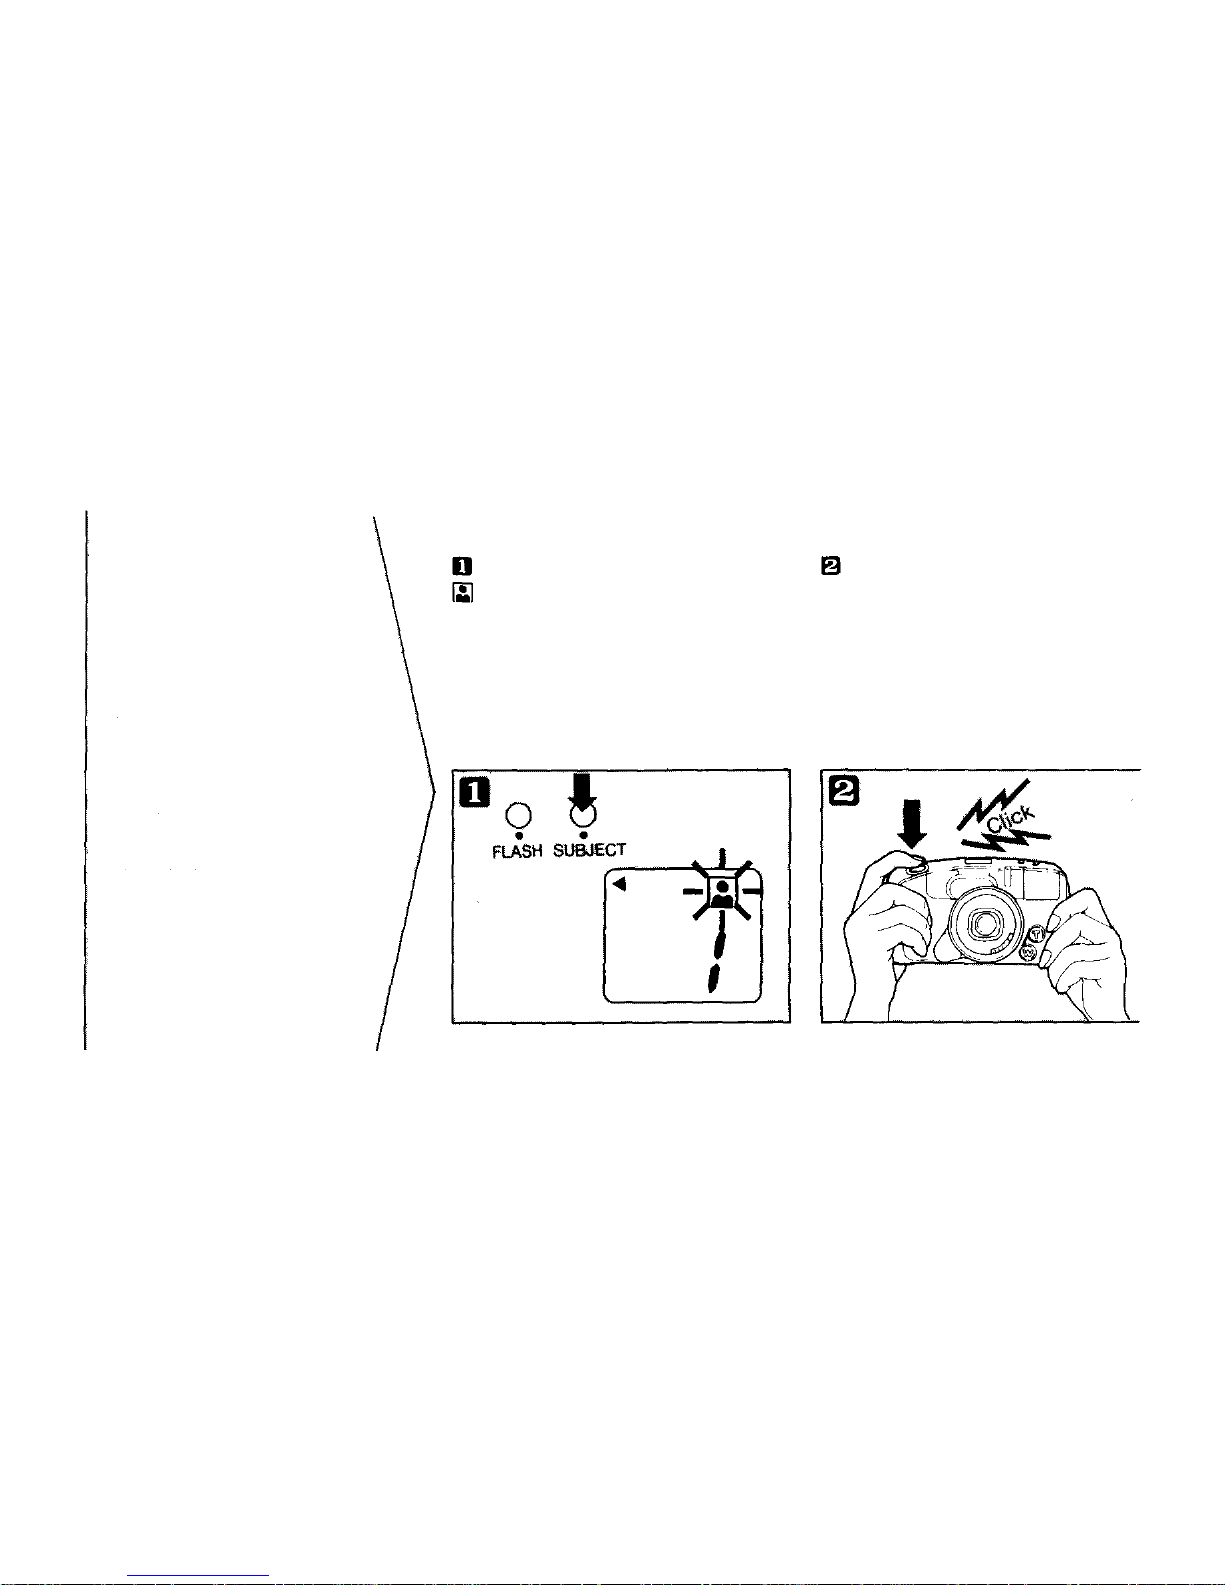
Press the SUBJECT button until
is displayed on the LCD panel.
Press the shutter release button. The
lens will automatically zoom and after
the appropriate subject size has been
achieved the shutter will be released.
Auto-zoom mode
Use auto-zoom mode to
maintain a constant head
and shoulders subject size
within the frame, even
though the distance to the
subject may vary.
31
Page 33
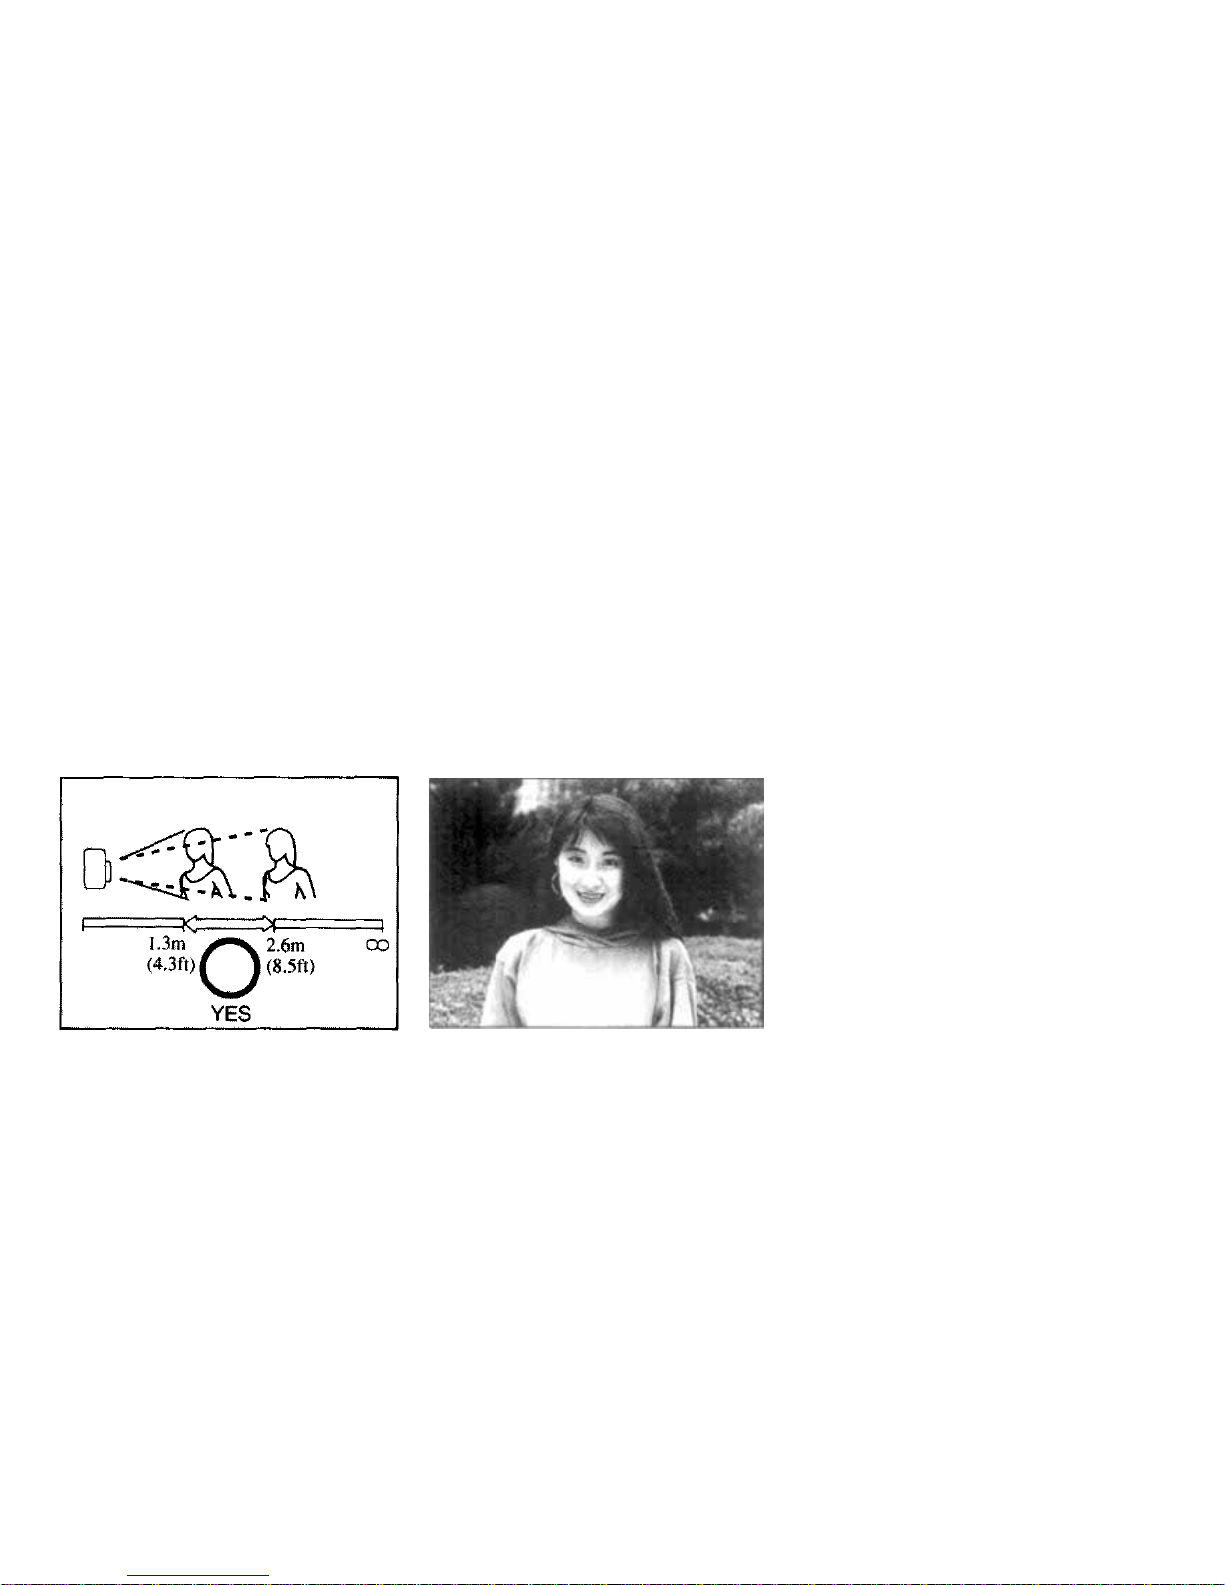
Auto-zoom mode working range:
from 1.3m (4.3ft) to 2.6m (8.5ft).
* Outside the ranges as shown, auto-
zoom may not operate.
* Even in the auto-zoom mode, t he
zoom button can be operated to
override the automatic zoom s ettin g.
32
Page 34
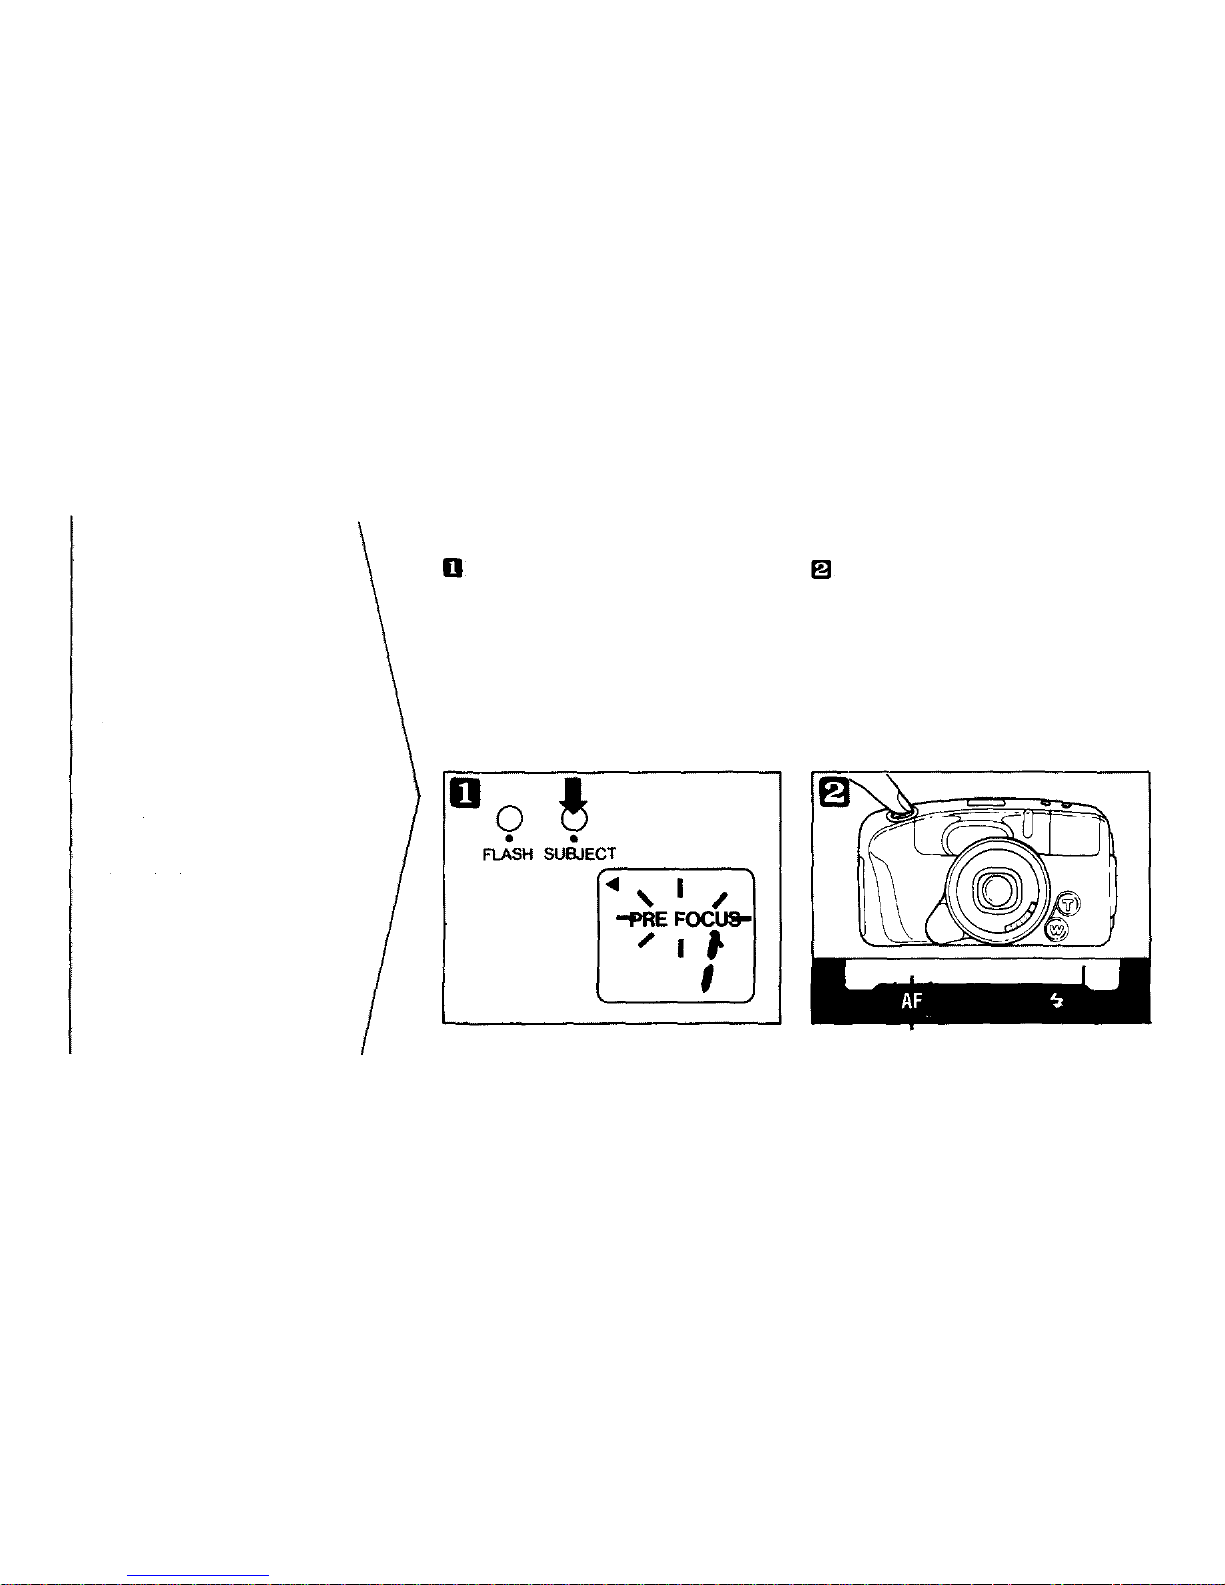
Press the SUBJECT button until
"PRE FOCUS" is displayed on the
LCD panel.
Press the shutter release button
halfway to focus on your subject.
The autofocus indicator (green) wi l l
light up and you will hear a "click".
Pre-focus mode
Use pre-focus m ode whe n
you want the shutter to
release the moment you press
the shutter release button. It
is useful when taking moving
subjects such as at a sports
event.
33
Page 35
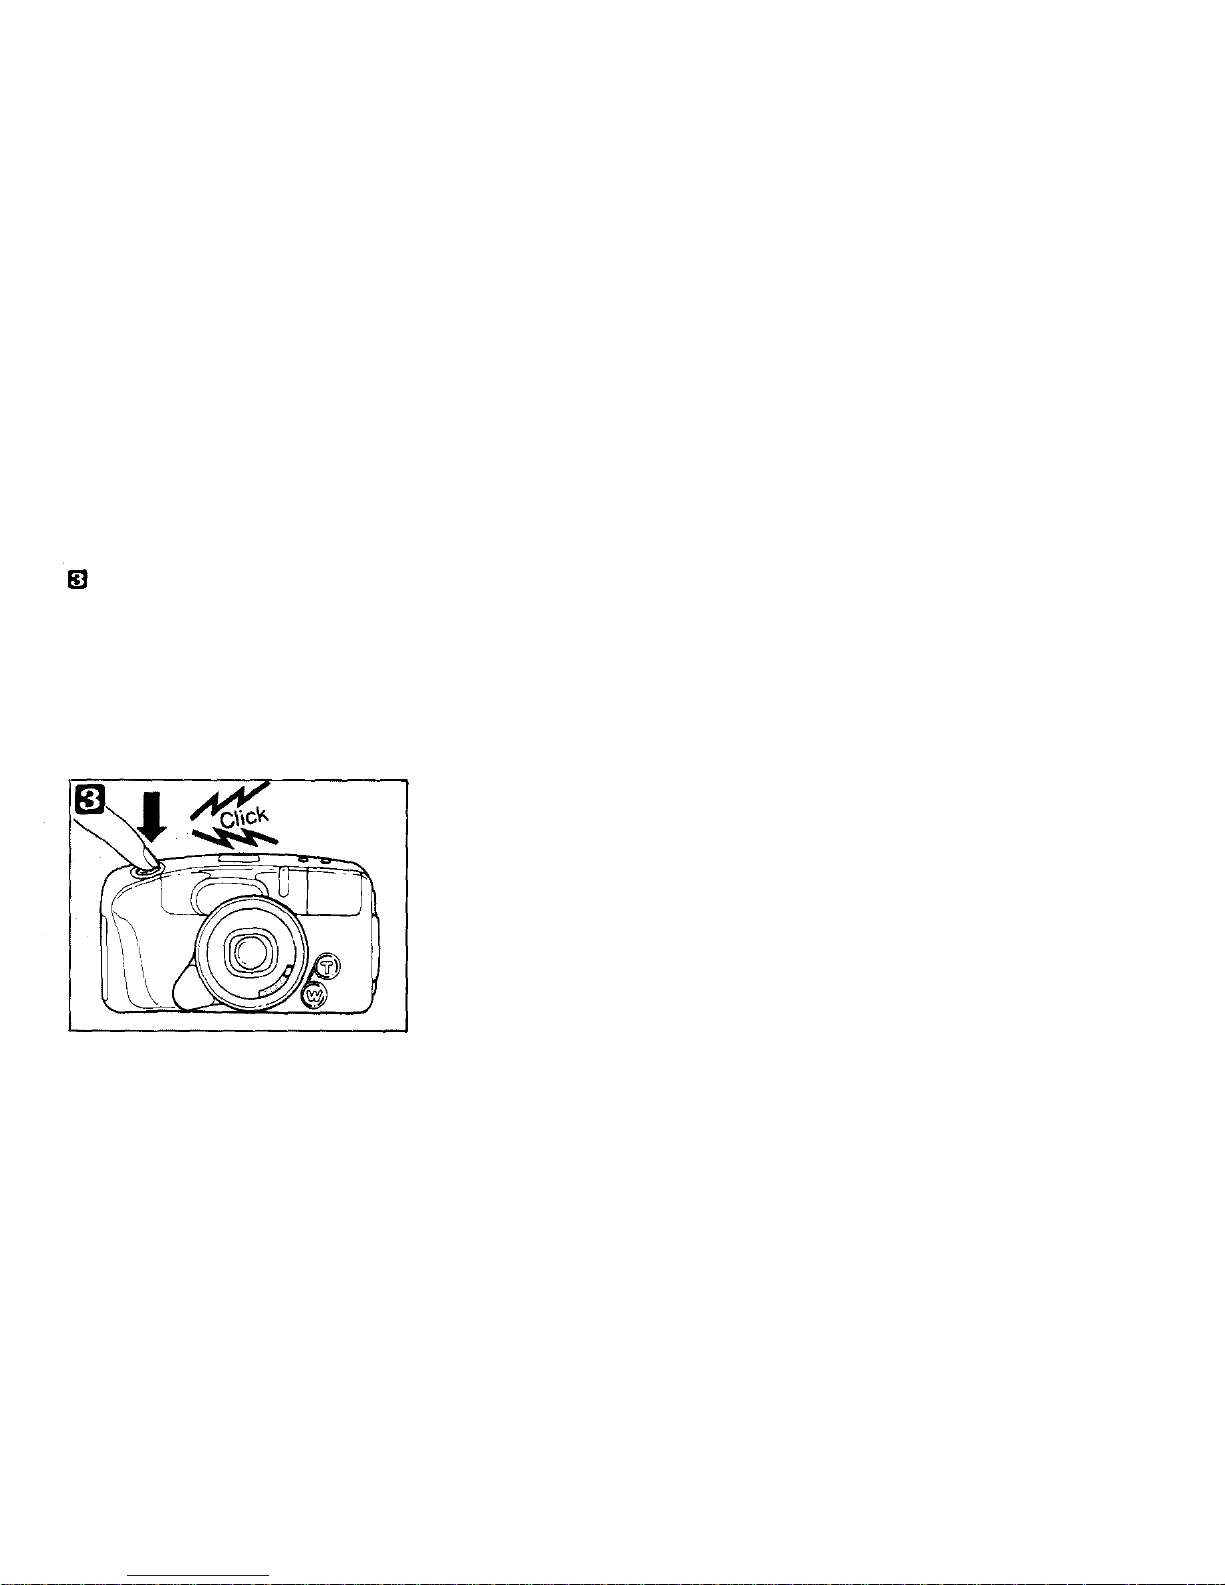
Press the shutter release button
fully. The shutter will be immediately
released.
By using this mode, the time lapse
between when the shutter button is
released and when the picture is
actually taken is reduced.
34
Page 36
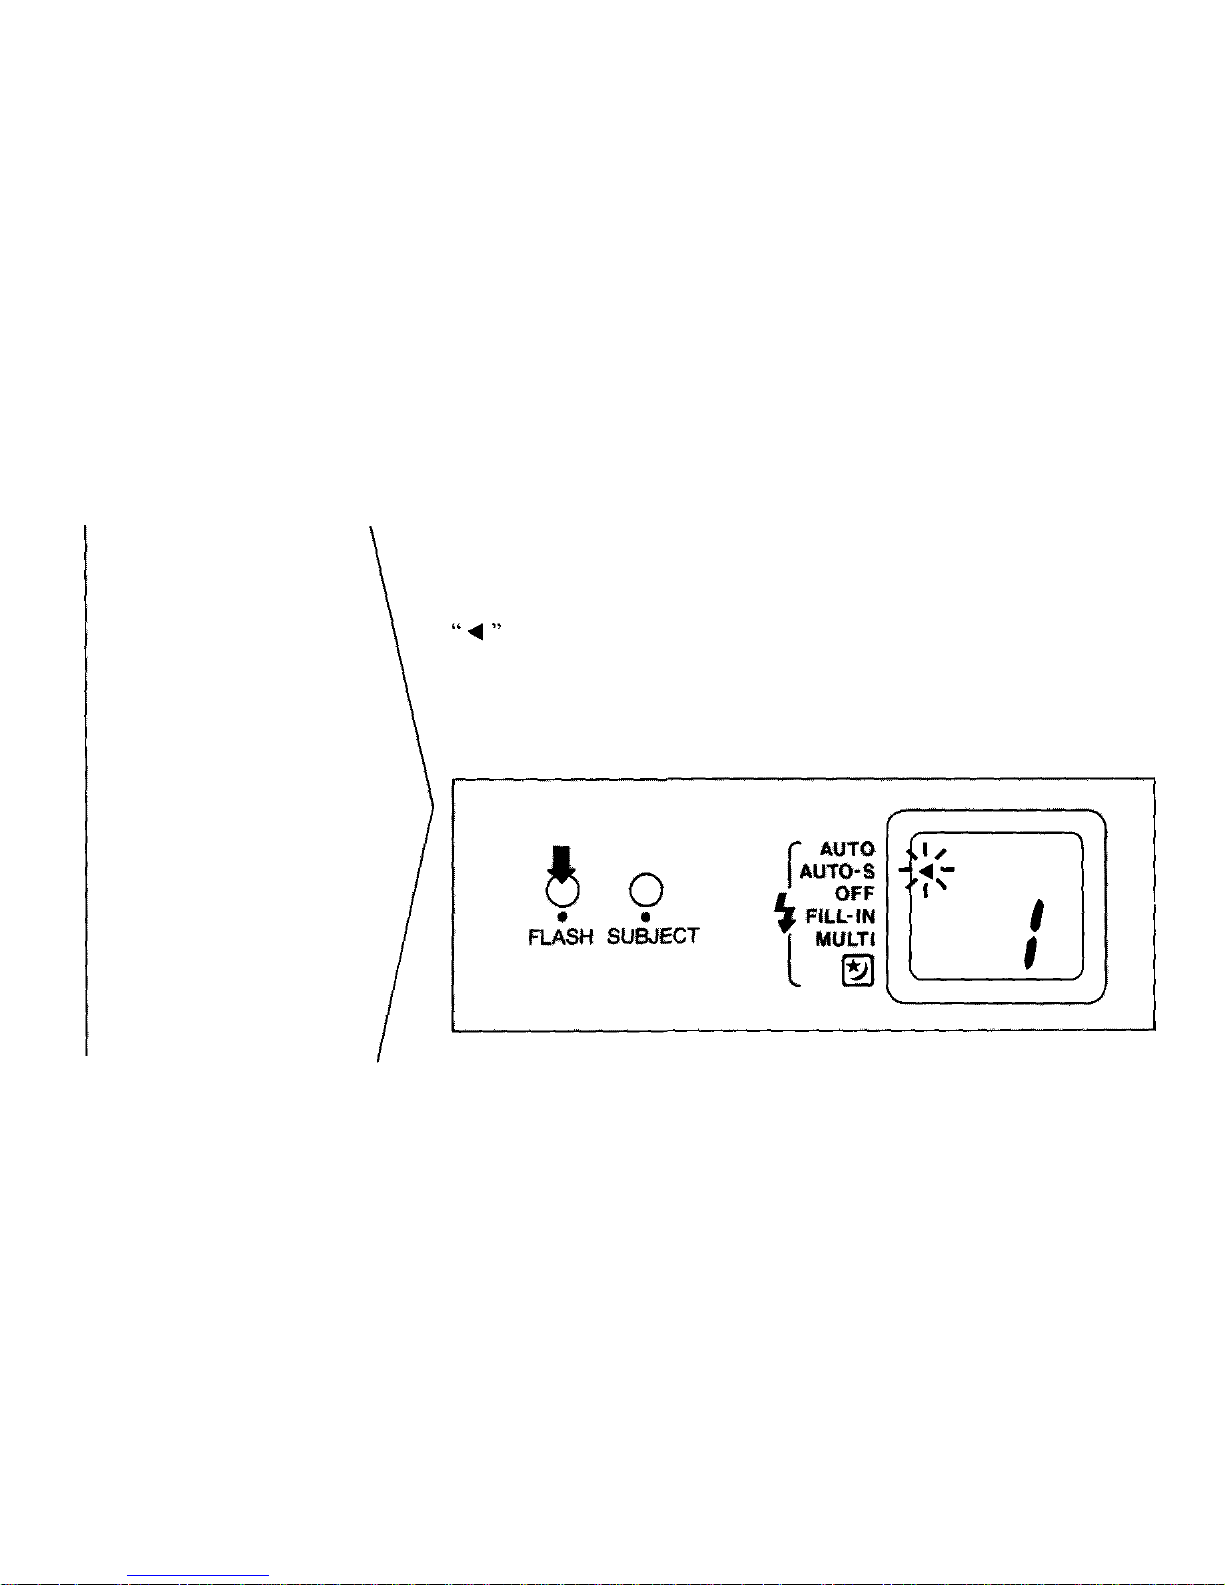
Press the FLASH button to set the
mode to AUTO-S.
will light on the LCD panel.
Compose yo u r shot and press th e
shutter release button. T h e flash will
emit a rapid series of low power preflashes, followed directly by the main
flash.
AUTO-S flash
photography
Auto-S flash significantly
reduces "red-eye"
phenomenon (when a subject's
eyes appear red) in flash
portraits and group photos.
Red-eye ph enomenon is most
likely to occur in very low
light, and at longer focal
lengths (telephoto).
35
Page 37
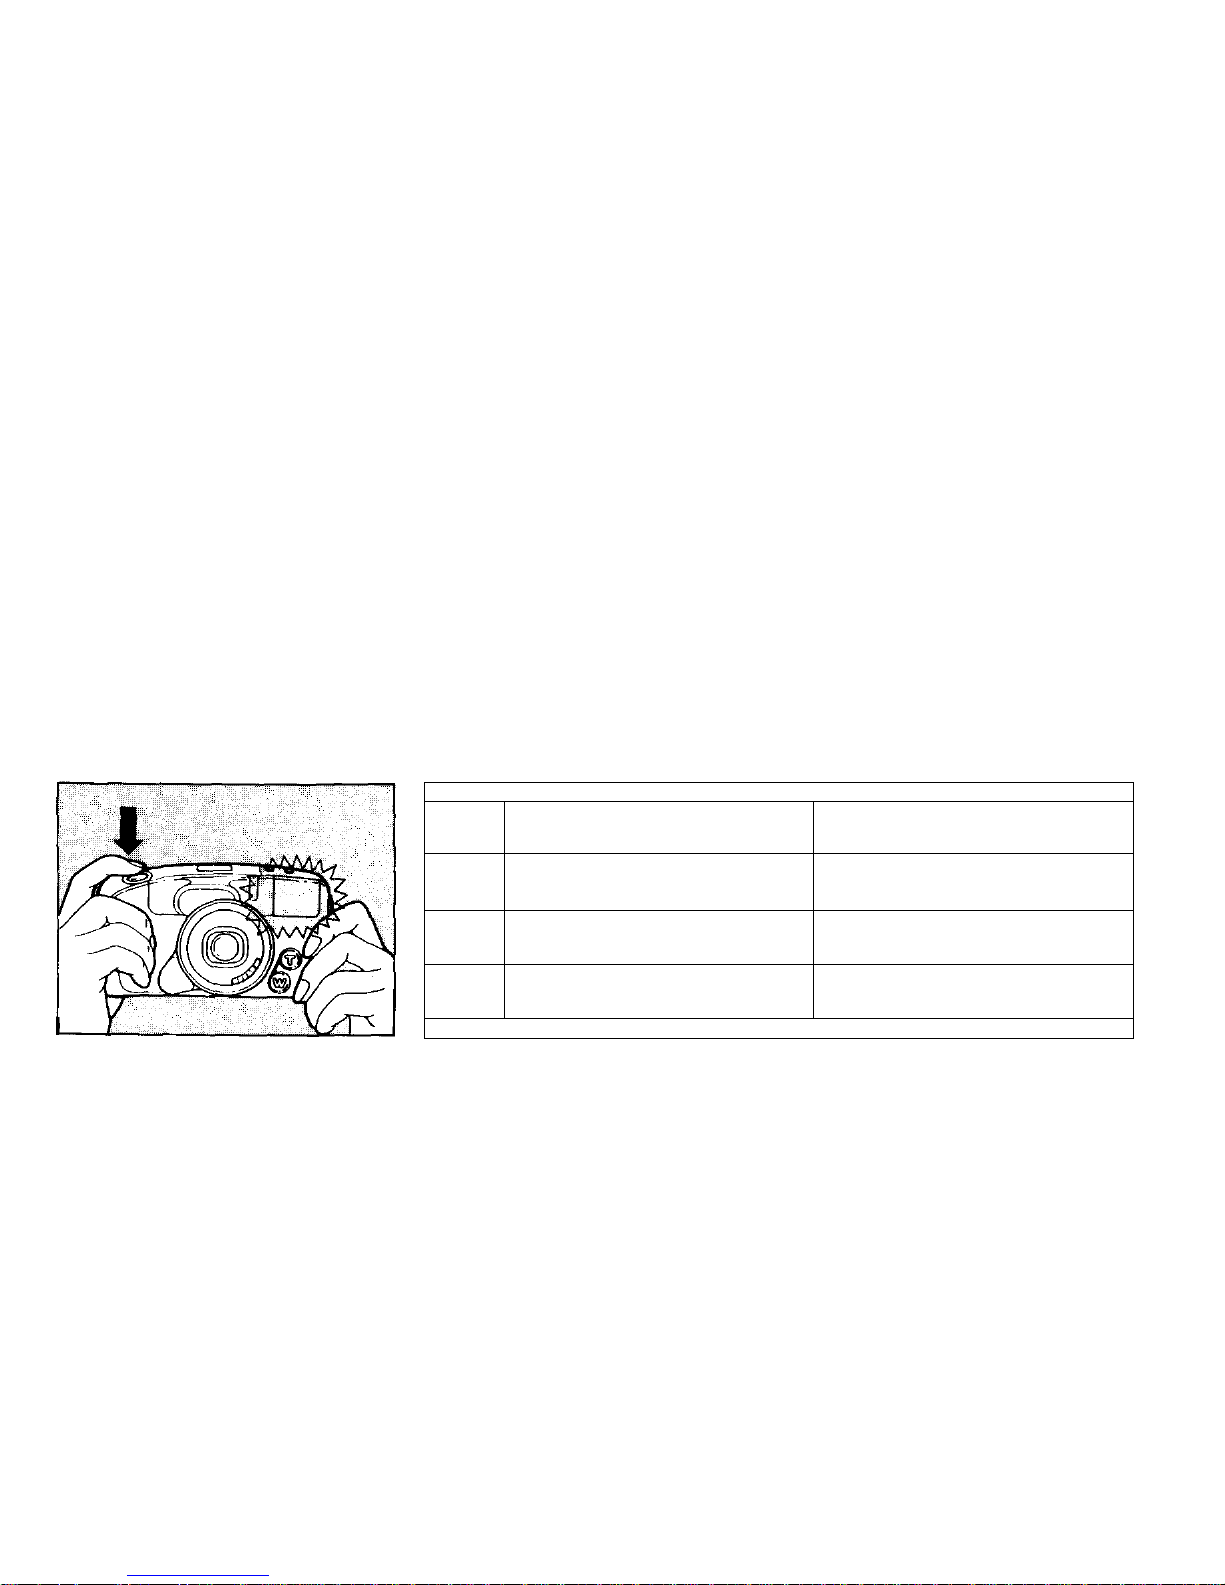
* Hold the camera firmly while
pressing the shutter release button.
* Auto-S mode will not be cancelled
when power is switched OFF.
To cancel AUTO-S mode, press the
FLASH button.
AUTO-S flash mode working range:
ISO
100
200
400
WIDE(38mm)
0.6 - 4.1m (2 - 13.4ft)
0.6 - 5.8m (2 - 19ft)
0.6 - 8.2m (2 - 26.9ft)
TELE(76mm)
0.6 - 3m (2 - 9.8ft)
0.6 - 4.2m (2 - 13.8ft)
0.6 - 6m (2 - 19.7ft)
36
Page 38
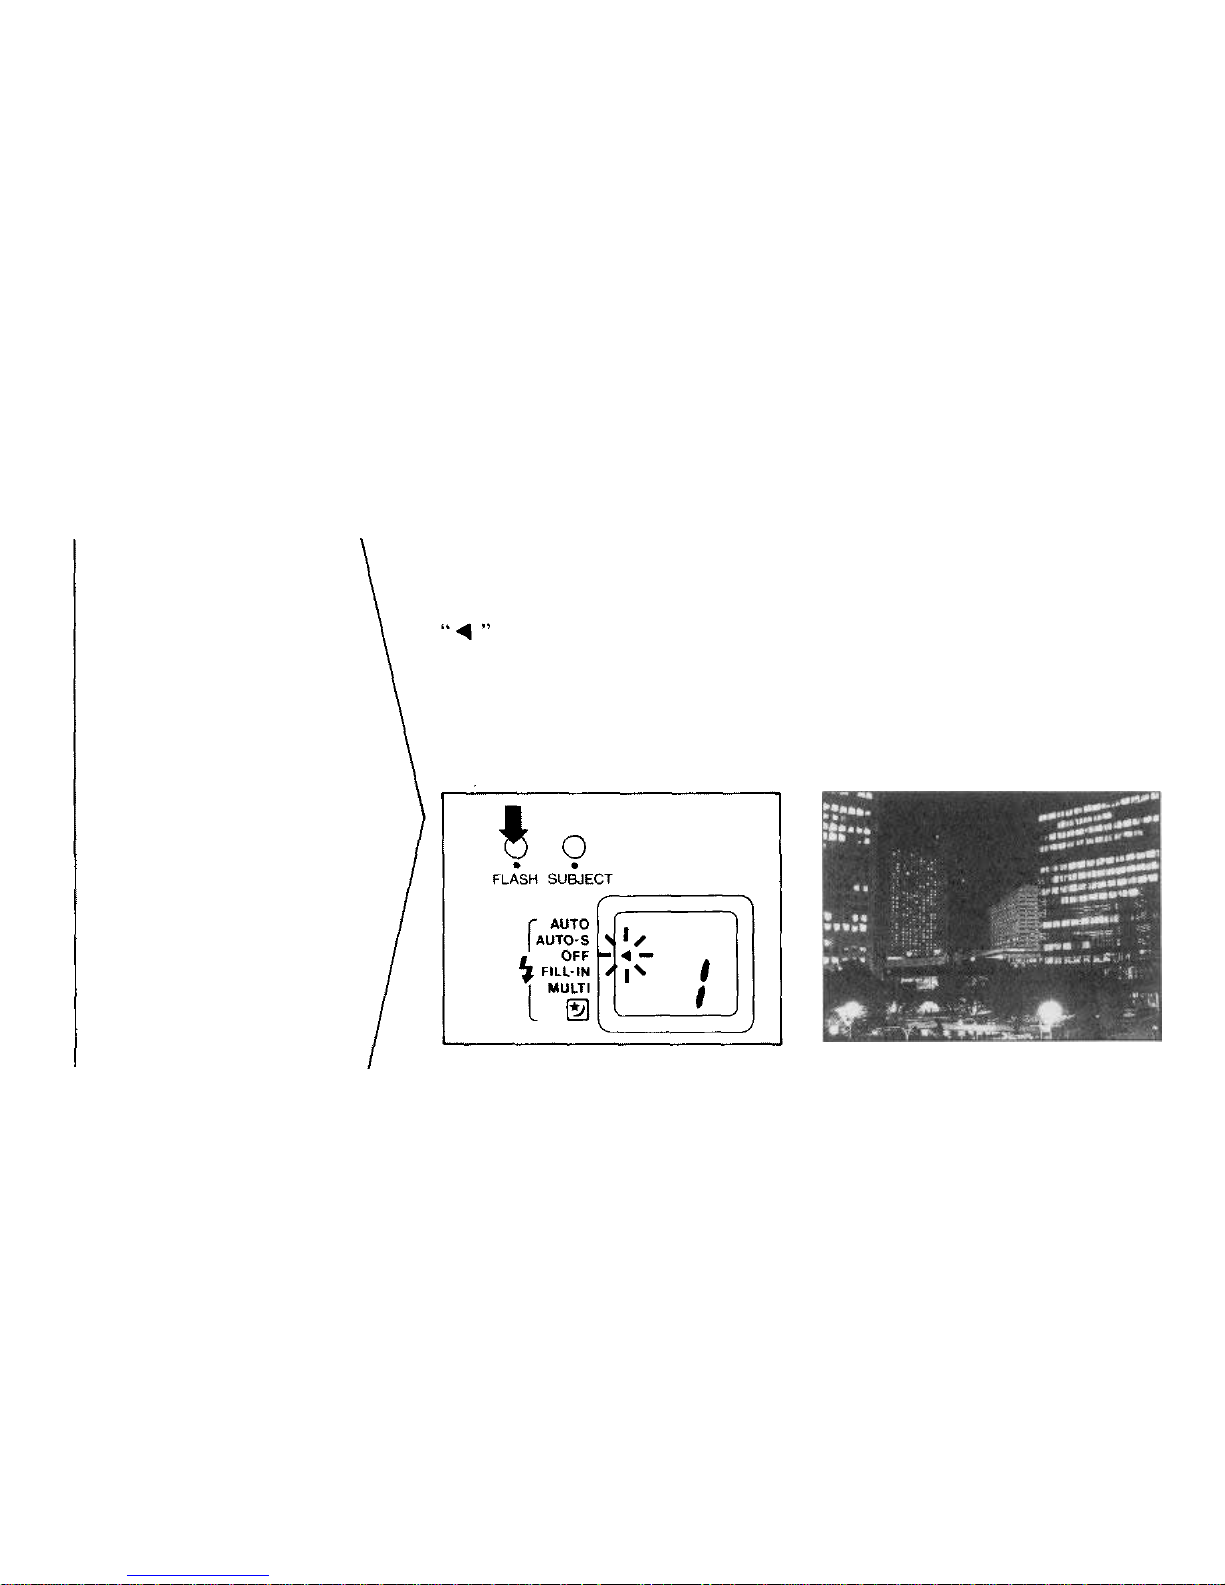
Press the FLASH button to set the
flash mode to OFF.
will light on the LCD panel.
* In low lit conditions, the necessary
shutter speed m ay be v er y slow ( up
to 2 seconds) to attain proper
exposure. To prevent blurred
pictures resulting from camera
shake, the camera should be set
firmly in position (with a tripod for
example).
Flash OFF
Use this mode for
photography utilizing
available light, in situations
where flash photography is
prohibited or when you
don't want the flash to fire,
such as for a night scene.
37
Page 39
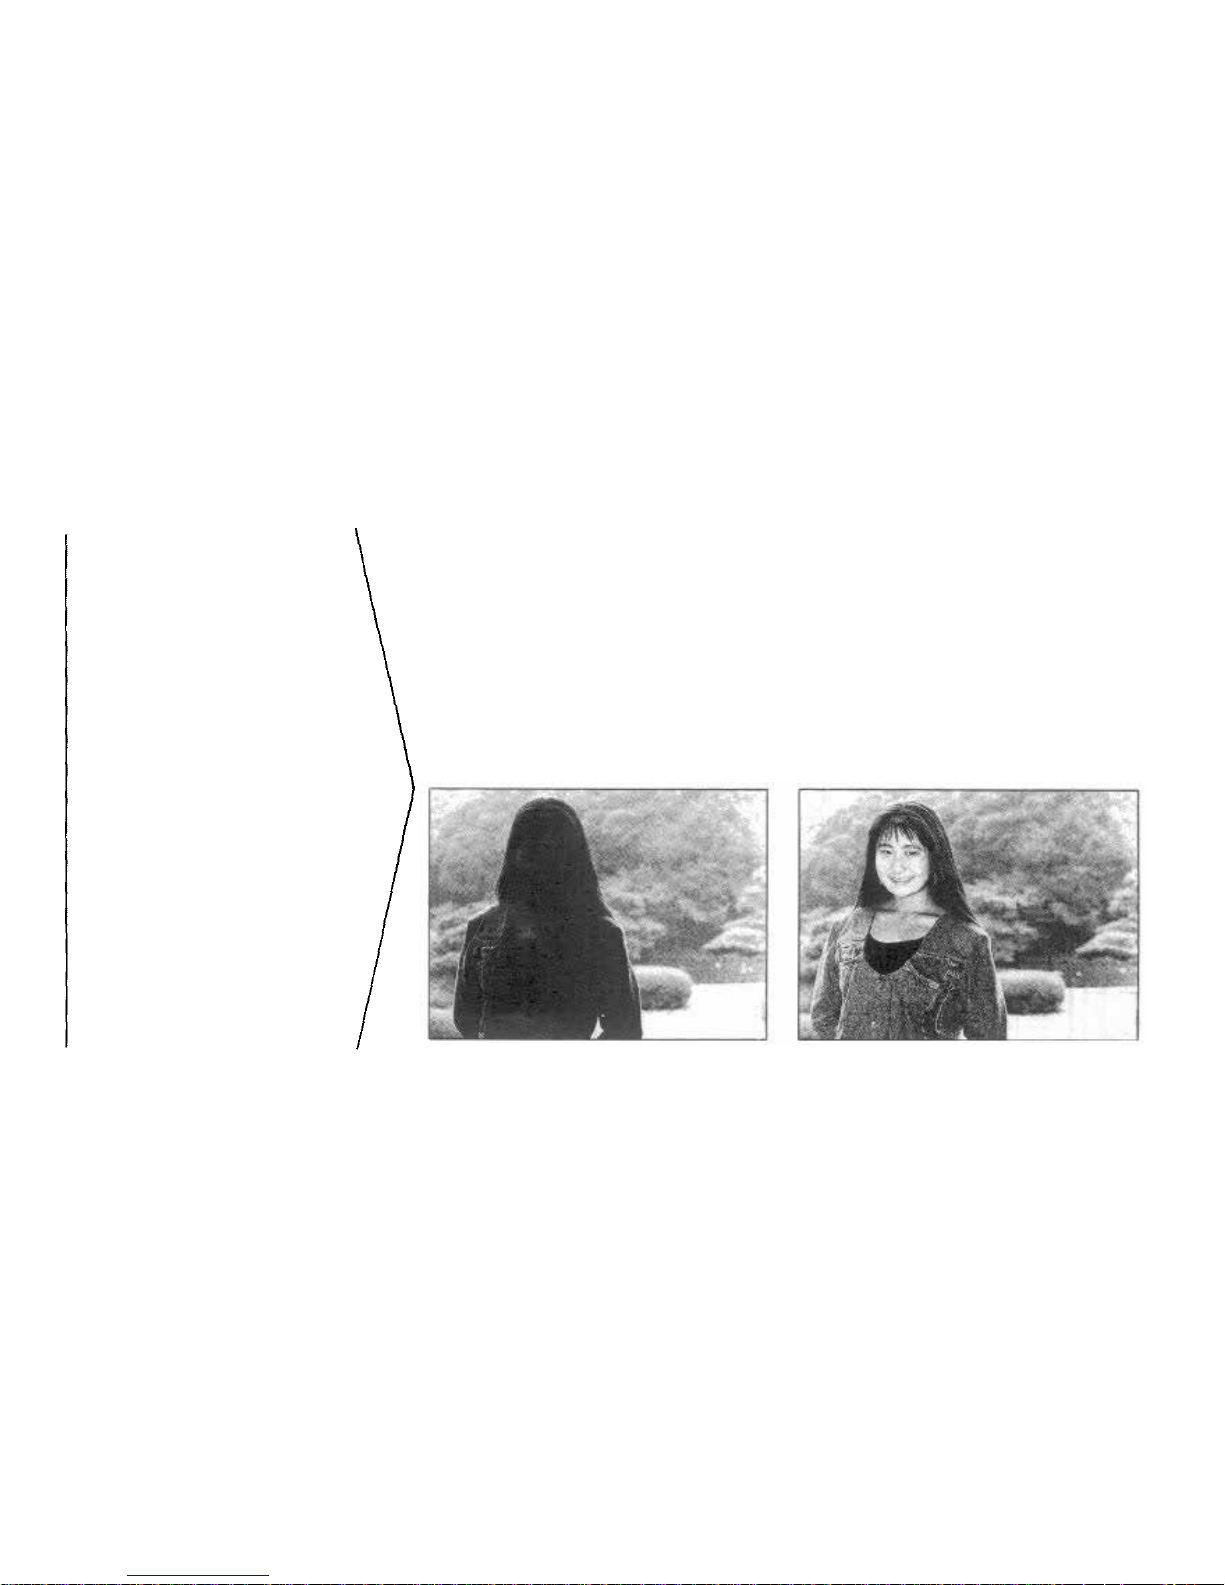
In this mode, the flash always fires
regardless of available light. Use this
mode for daylight shooting in backlit
conditions to compensate for
backlighting which may make the
subject appear too dark.
By using the FILL-IN mode, the
subject will be properly lit by the
flash.
FILL-IN flash
38
Page 40
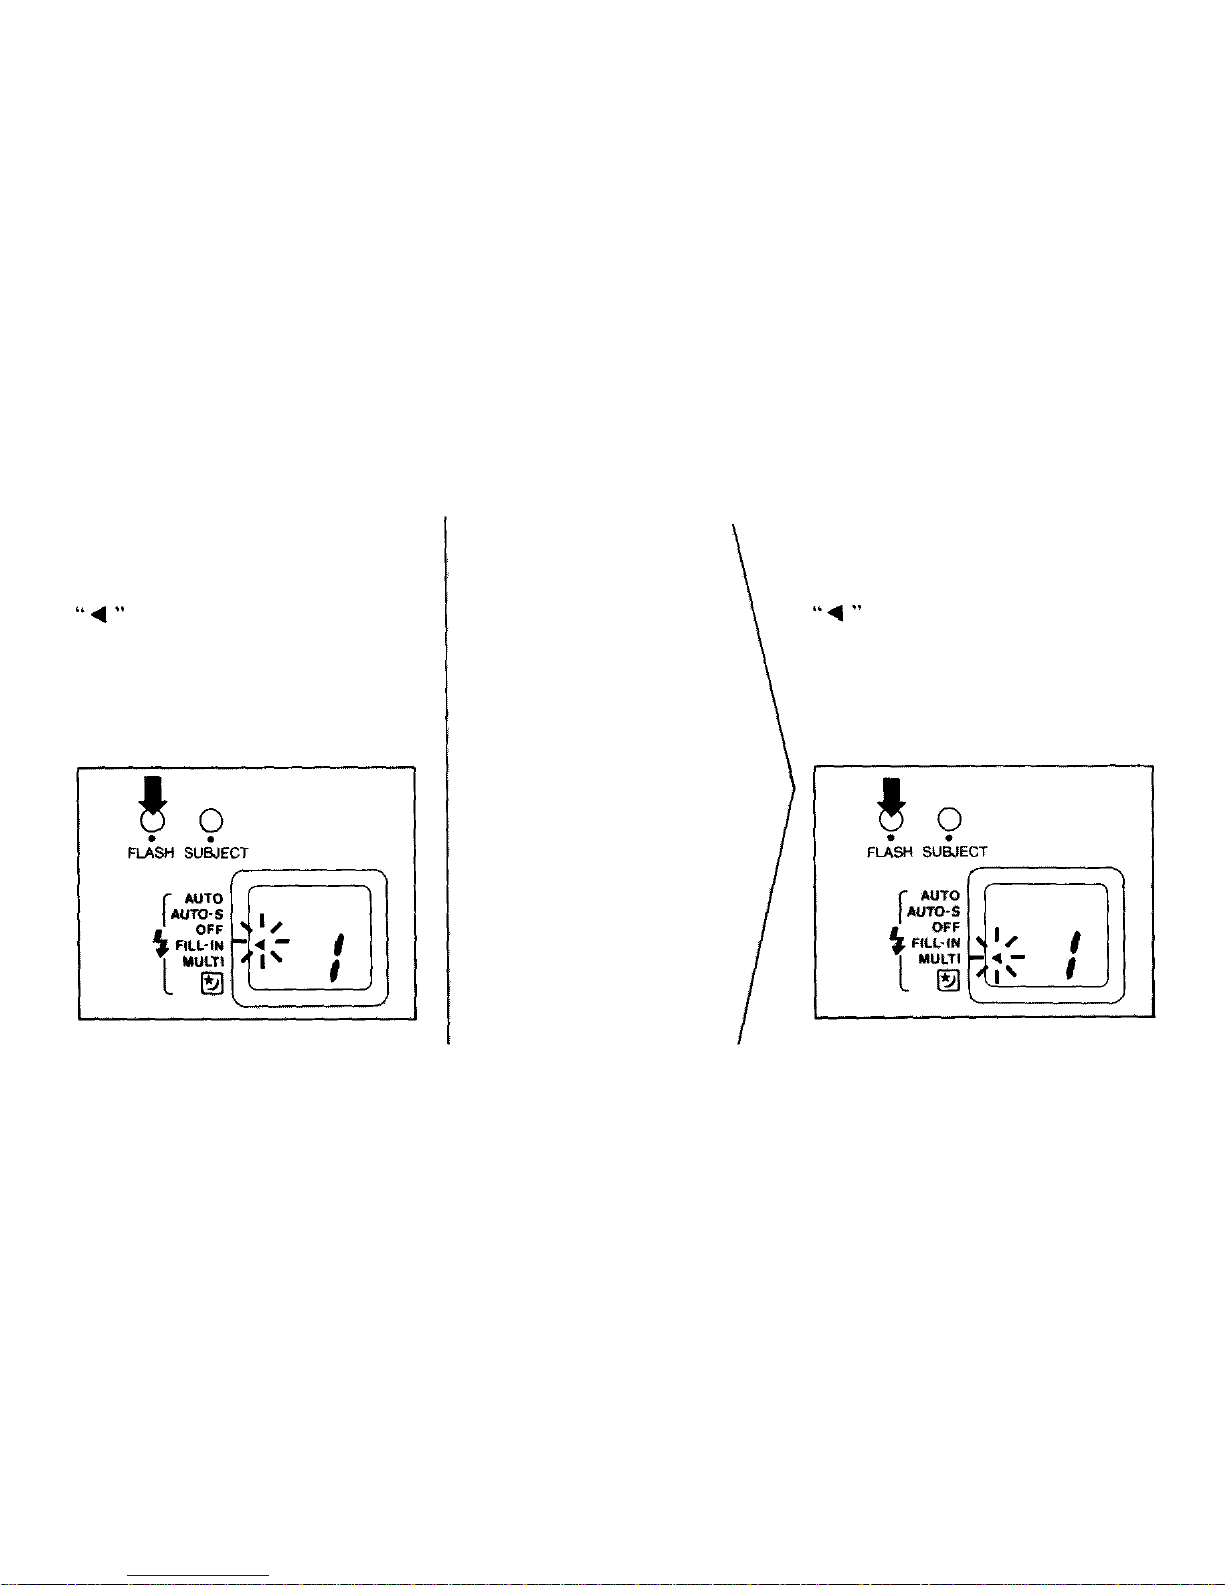
Press the FLASH button to set the
flash mode to FILL-IN.
will light on the LCD panel.
Press the FLASH b ut to n to set t he
flash mode to MULTI.
will light on the LCD panel.
The flash will fire four times.
The shutter speed is set to 1/6 sec.
MULTI flash
Use this mode, when you
want to segment a motion
sequence — such as a golf
swing — in 1 frame.
For best results use
together with pre-focus
mode.
39
Page 41
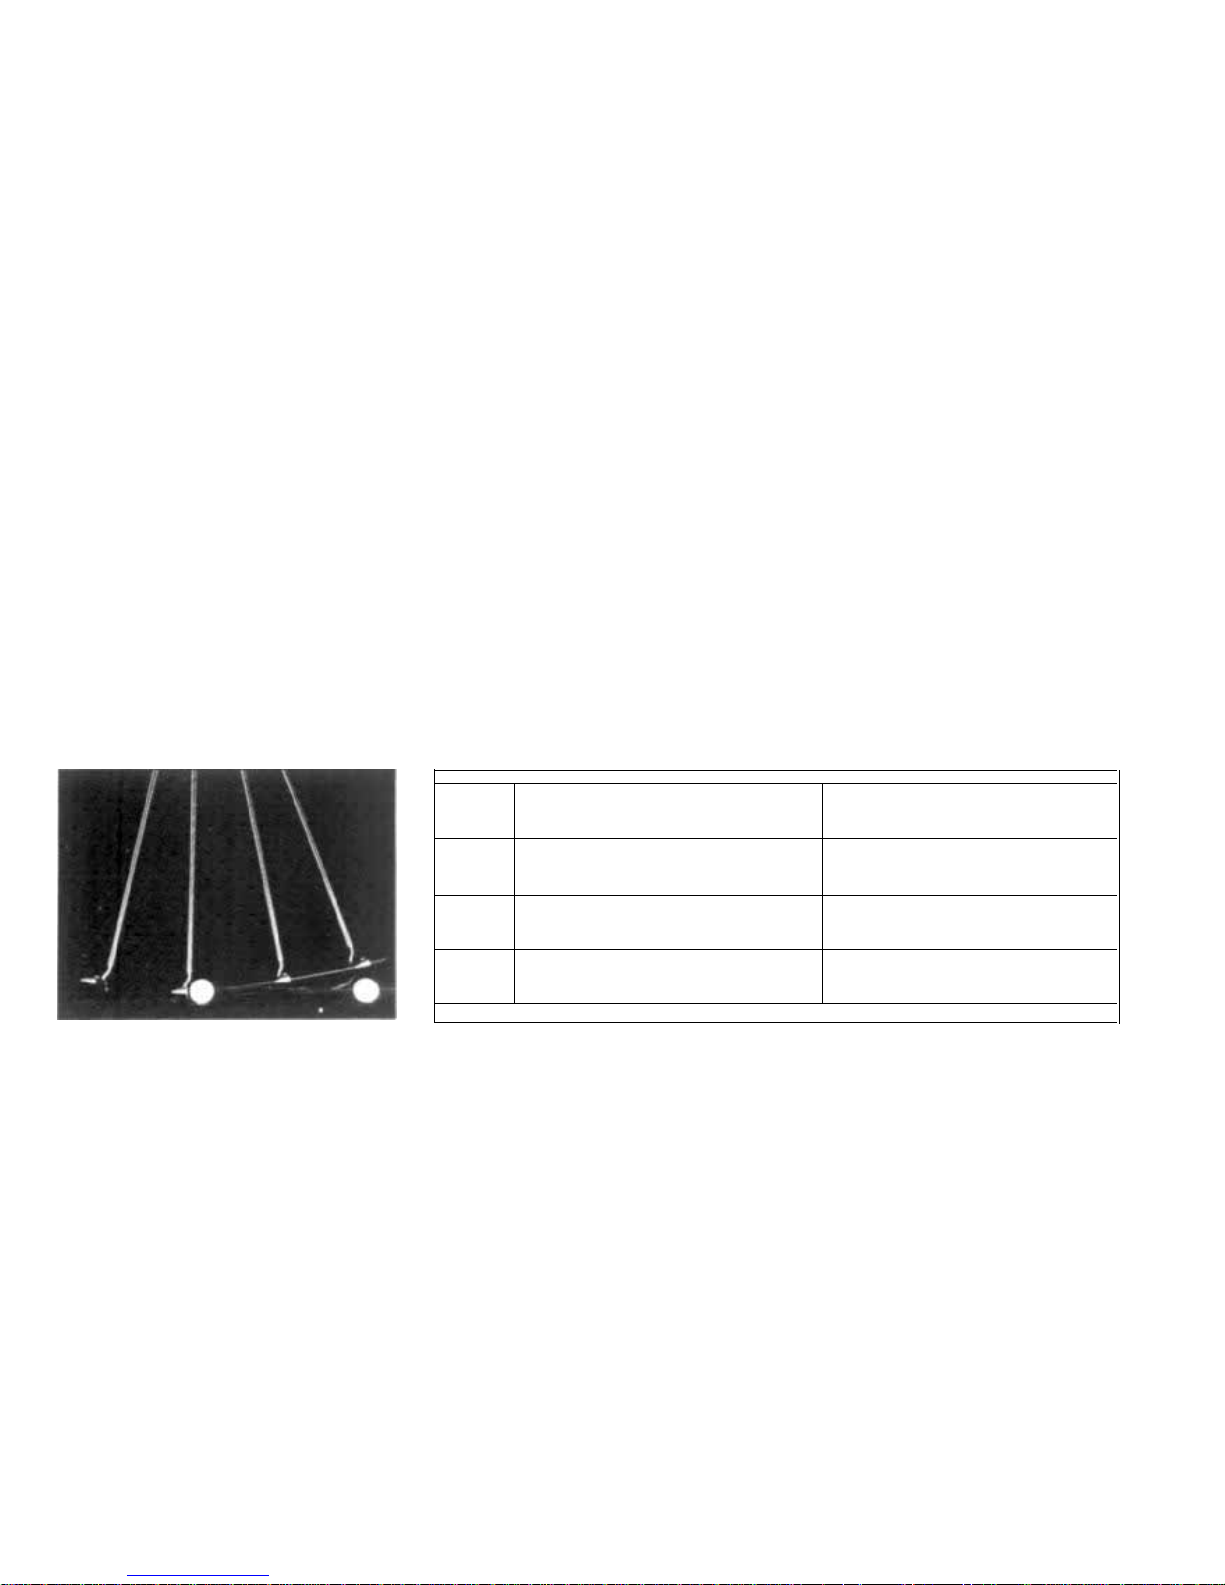
* Use this mode in low light. If you
use it in bright conditions, your
picture will be overexposed.
* Use a tripod or other camera support
to prevent the effects of camera
shake.
MULTI flash mode working range:
ISO
100
200
400
WIDE(38mm)
0.6 - 3.1m (2 - 10.2ft)
0.6 - 4.4m (2 - 14.4ft)
0.6 - 6.2m (2 - 20.3ft)
TELE(76mm)
0.6 - 2.2m (2 - 7.2ft)
0.6 - 3.1m (2 - 10.2ft)
0.6 - 4.4m (2 - 14.4ft)
40
Page 42
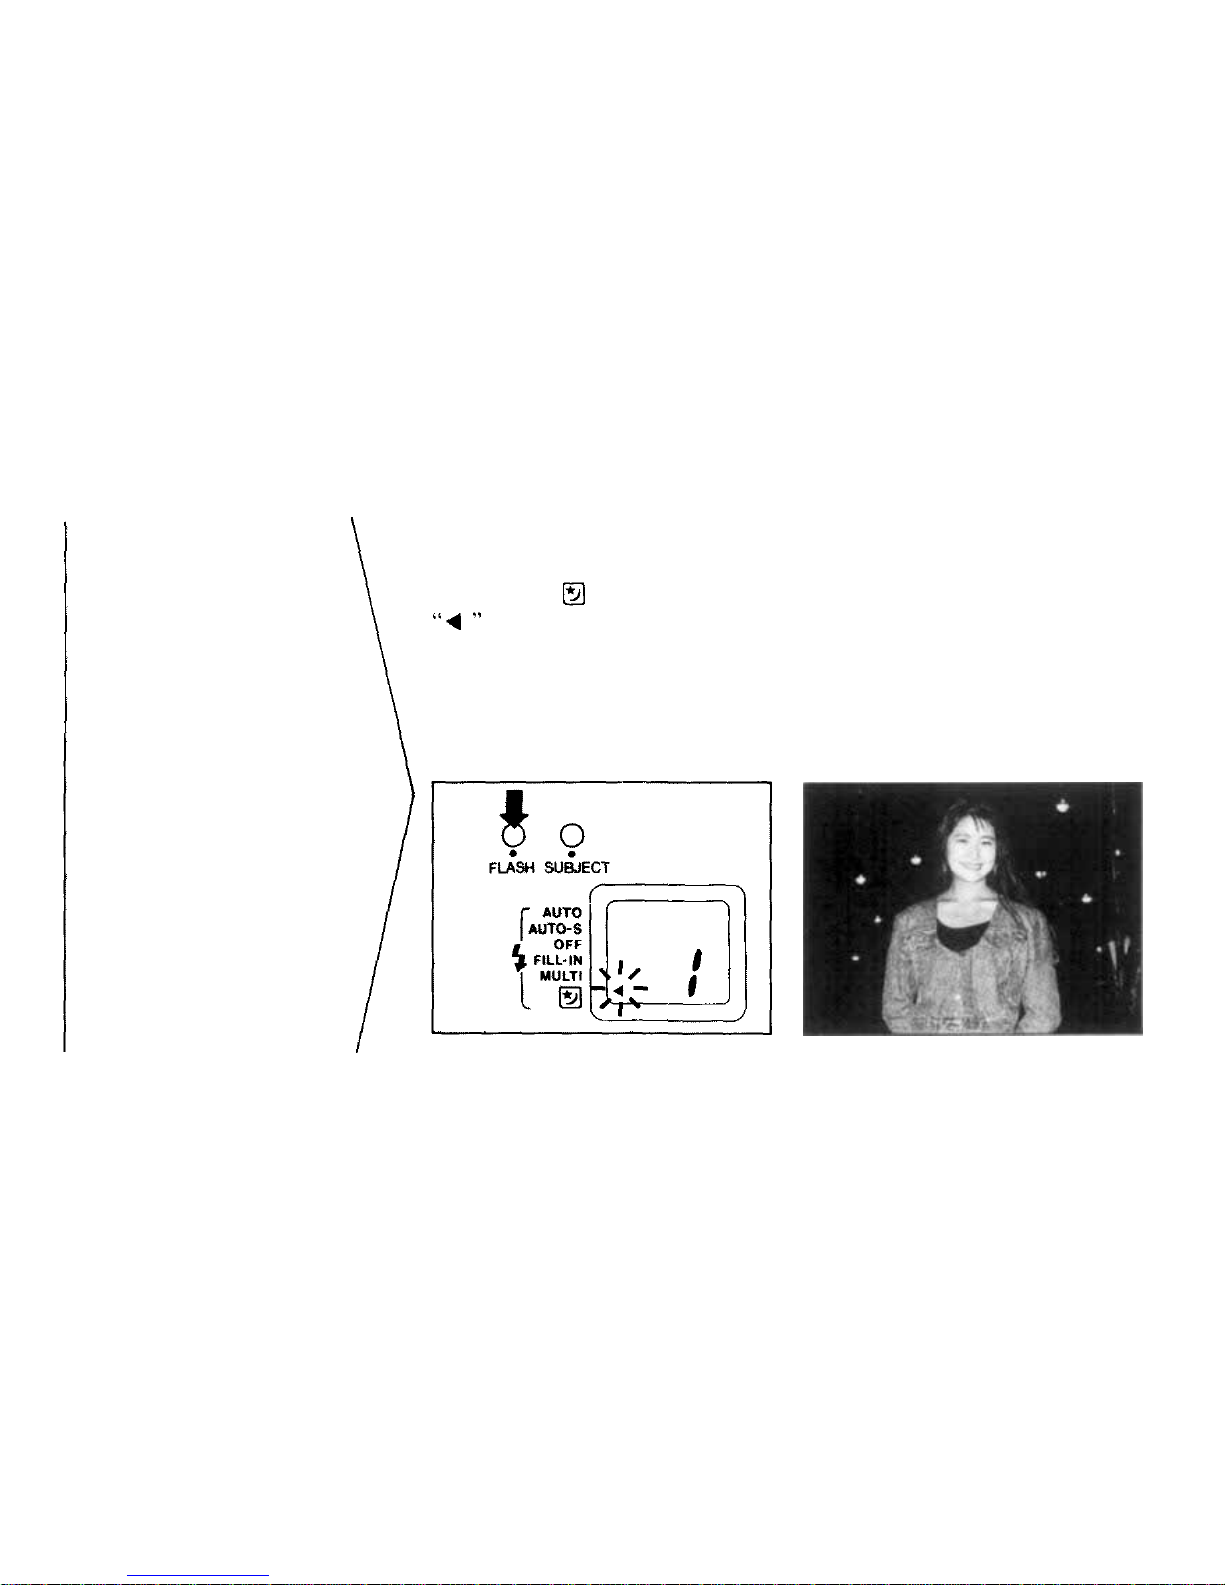
Press the FLASH button to set the
flash mode to
will light on the LCD panel.
With the flash AUTO mode, on ly the
subject can be taken.
Ni ght scene flash
photography
Use slow-synchoro FILL-
IN flash to capture dim ly li t
backgrounds, such as the
sky at dusk, while properly
lighting the foreground
with flash.
41
Page 43
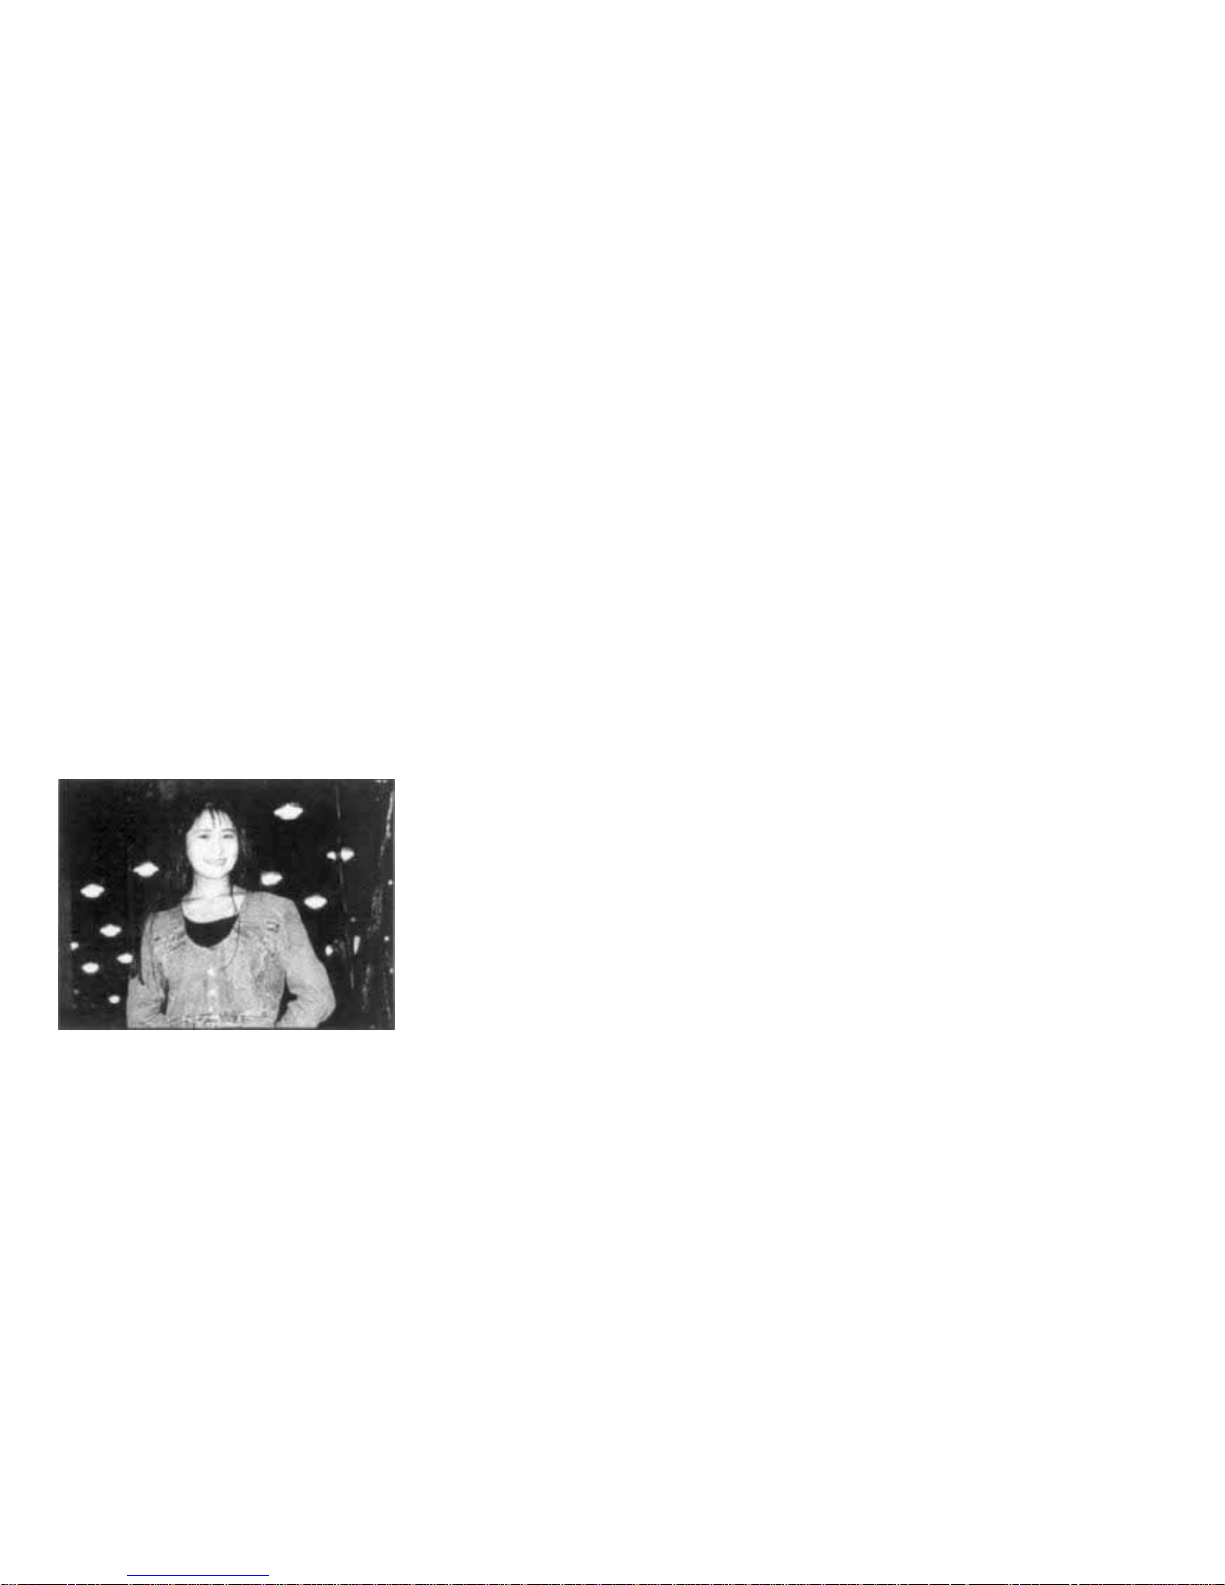
By using the flash mode fo r night
scene photography, you can take both
the subject in the foreground and the
ni gh t scene in the background.
* The necessary shutter speed m a y be
very slow (u p t o 2 seconds) to
attain proper exposure. To prevent
blurred pictures resulting from
camera shake, the camera should be
set firmly in position (with a tripod
for example).
42
Page 44
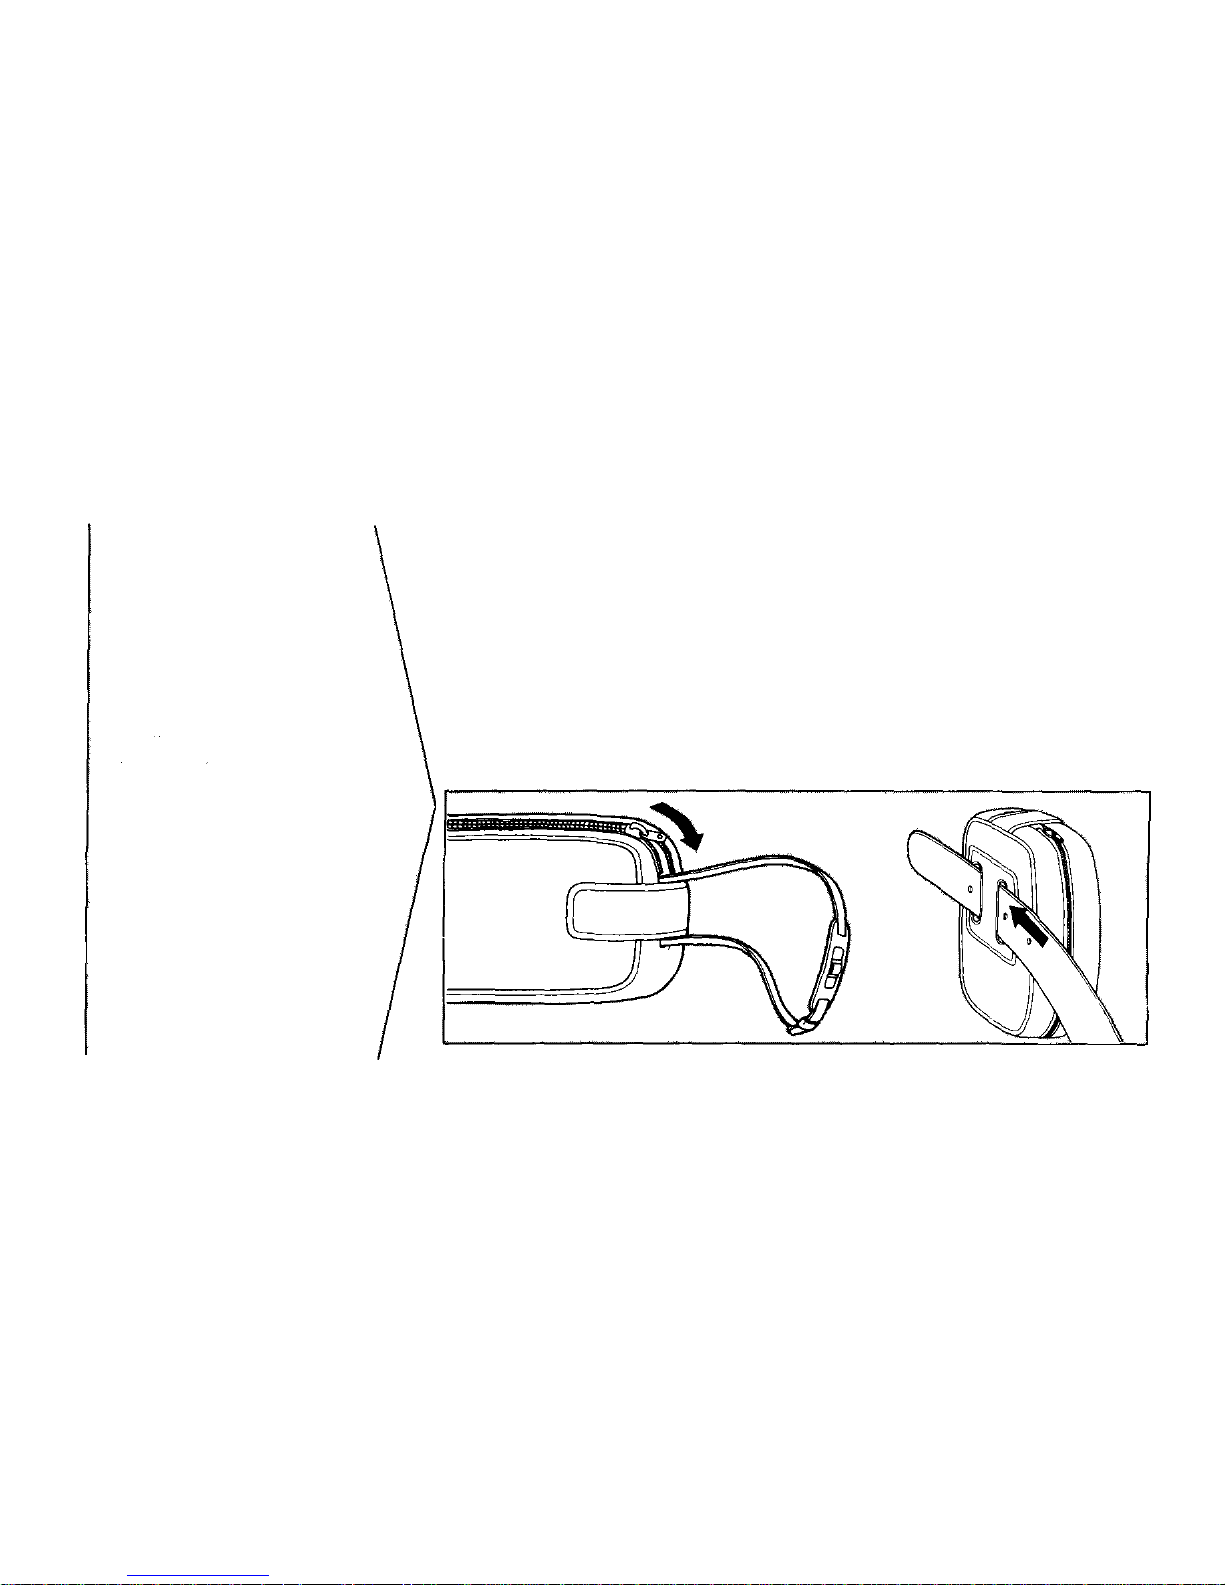
Make sure to set the power switch to
OFF before the camera is inserted into
the case.
How to use the
soft case
(optional)
43
Page 45
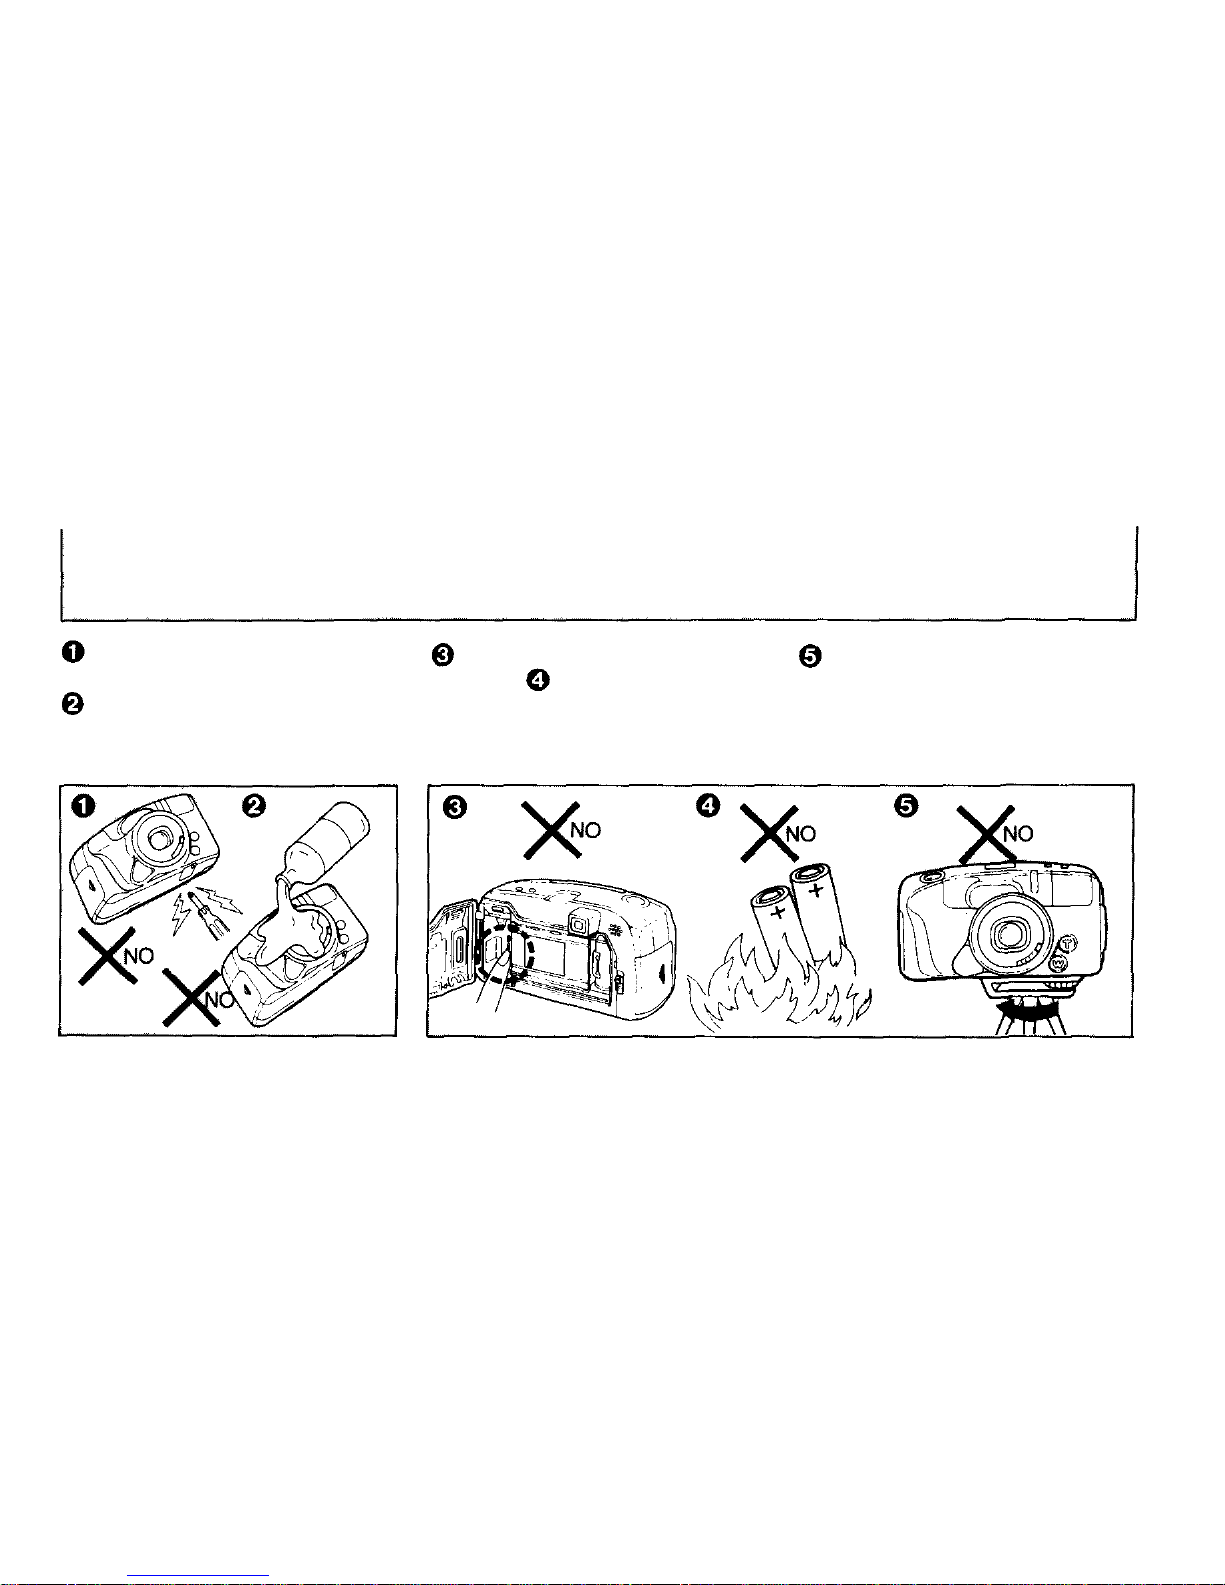
Never disassemble the camera; it
contains a high-voltage circuit.
Do not use thinner, benzine or
organic solvents to clean the camera.
Care and storage
Do not touch the DX read-off
contacts. Do not disassemble or
expose batteries to excessive heat.
Do not rotate the camera once it is
mounted on a tripod. Use the tripod
swivel to vary direction. Do not open
the back cover while it is mounted on
a tripod.
44
Page 46
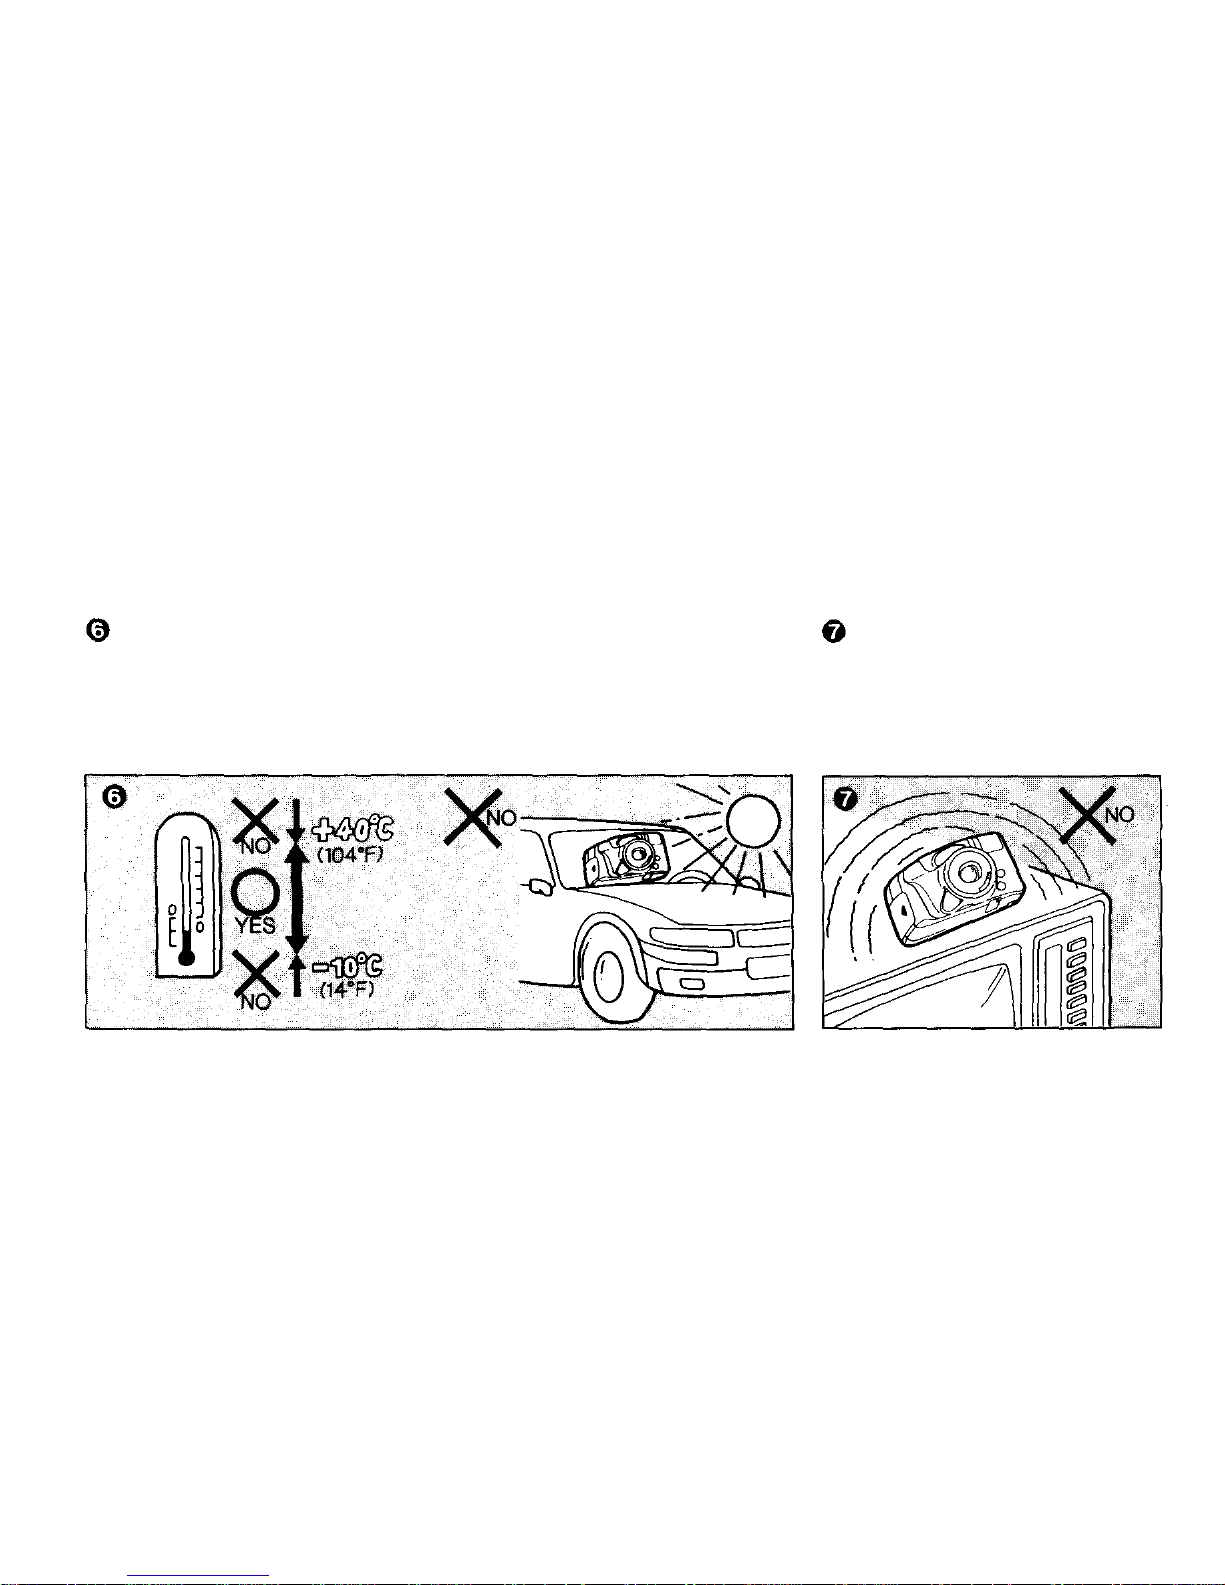
Do not expose the camera to
extreme heat (over 40°C/104°F), such
as inside a car during the hot summer
weather, or to extreme cold (below
-10°C/14°F).
Do not leave the camer a near
magnetic fields, like on top of a TV
set, or radio.
In case of malfunction, take the
camera to your nearest Olympus
dealer or service center.
45
Page 47
Questions and answers
Q: What kind of batteries should I use?
A: Use two 3V lithium batteries (DL123A or CR123A). Do not
mi x new and old batteries at the same time. Change them
both at the same time.
Q: How long will the battery last?
A: If you use 24-exposure rolls of f ilm and expose half of all
your pictures wi th flash, two new 3V lithium batteries
(DL 123A/CR123A) will allow you to take 30 or more rolls
of film. If you do not use flash and zoom so often, the
batteries wil l last mu ch longer.
Q: The camera does not operate. What should I do?
A: (1)Make sure the power swit ch is ON. (2)Make sure there
are batteries in the camera, and that they are inserted
correctly. (Refer to page 6.) (3)If the film has been rewound,
the camera wi ll not operate until the back cover is opened.
(4)While the flash is being charged, the shutter will not
release. (5)If the distance range to the subject is less than
0.6m, the shutter wil l not release.
Q: The camera does not focus correctly. What should I do?
A: (1) In the following situations, the camera's autofocus
mechanism may not function properly. Compose your
picture by focusing on a different subject which is in the
sam e range as your subject.
Objects that reflect too muc h light Black objects
Pictures taken through a glass window or wire screening
Pictures including flames or smoke Wh en the sun is
included in the picture
(2) Use the focus lock when the subject is not in the center of
the picture. (Refer to P.25)
Q: The flash does n ot fire.
A: Make sure the flash mode is not set to OFF mode.
Q: The camera fails to operate in cold weather. What can I
do?
A: Generally, low temperatures will reduce the battery
performance temporarily. Try to keep the camera warm
before using them.
46
Page 48

Type: Full-automatic 35mm autofocus lens-shutter camera w it h
built-in 38 - 76 zoom lens.
Fi lm format: 35mm standard DX coded film (24 x 36mm)
Lens: Olympus lens 38 - 76mm F4.5 - 6.2, 7 elements in 7
groups.
Shutter: Programmed el ectronic shutter.
Focusing: Active type infrared autofocus system, focus lock
possible.
Focusing range: 0.6m (2ft) - (infinity)
Viewfinder: Kepler type zoom-finder (with autofocus frame,
close-up correction marks, autofocus indicator and flash
indicator).
Exposure control: Programmed automatic exposure control.
Center-weighted average light metering.
Auto exposure range:
Wide-angle: EV 3.4 (F4.5, 2 sec.) to EV16 (Fl 1 1/500 sec.)
Telephoto: EV4.3 (F6.2, 2 sec.) to EV 17 (F16, 1/500 sec.).
Exposure counter: Progressive type with automatic reset,
display ed on LCD panel.
Selftimer: Electronic selftimer with 12 sec. delay.
Fil m speed range: Automatic setting wi th DX coded fi lm ISO 50
- 3200. (color negative film). Actual setting points at ISO 50,
100 , 2 0 0, 40 0, 80 0, 1600, 3200.
For non-DX coded film, film speed is set to ISO 100.
Fil m loading: Automatic loading (aut omatically advances to first
frame when camera back is closed).
Film advance: Automatic film winding.
Film rewind: Automatic film rewind (automatic rewind
activation at end of film, automatic rewind stop). Rewind
possible at any point with rewind button.
Flash: Built-in flash.
Recycling time: approx 0.2 - 3.5 sec. (at normal
temperature with new batteries).
Flash working range (I SO 100 color negative film):
Wide-angle: 0.6m - 4.1m (2ft - 13.4ft),
Telephoto: 0.6m - 3m (2ft - 9.8ft)
Specifications
47
Page 49

Flash working range (ISO 400 color negative film):
Wide-angle: 0.6 - 8.2m (2ft - 26.9ft),
Telephoto: 0.6m - 6m (2ft - 19.7ft)
Flash modes:
AUTO (Automatic flash activation in low light and
backlight)
Auto-S (Red-eye reducing, in low light and backlight)
OFF (No flash)
FI LL - IN (Forced activation)
MULTI (4 activations at fixed shutter speeds of 1/6 sec.)
(For night scene at a maximum shutter speed of 2
seconds.)
Battery check: Displayed on LCD panel
Power source: Two 3V lithium batteries (DL123A/CR123A)
Dimensions: 138(W) x 74(H) x 64(D)mm (5-7/16 x 2-15/16 x
2-1/2 in.)
Weight: 360g (12.7oz) (without battery).
*Specifications and design are subject to change without notice.
48
Page 50

OLYMPUS OPTICAL CO., LTD.
San-Ei Build i n g , 22-2. N ish i S hinjuku 1-chome, Shinjuku-ku, Tokyo, Japan Te l: 03-3340-2211
OLYMPUS CORPORATION
Crossways Park, Woodbury, New York 11797-2087, U.S.A. Tel: 516-364-3000
OLYMPUS OPTICAL CO. (EUROPA) GMBH
Postfach 104908, Wendenstrasse 14-16, 2000 Hamburg 1, Germany Tel: 040-23773-0
OLYMPUS OPTICAL CO. (U.K.) LTD.
2-8 Honduras Street, London EC1Y OTX, England Tel: 01-253-2772
 Loading...