

Oliver MODEL 732-R Instruction Manual

Walker, Michigan, U.S.A. 49534-7564
USER’S OPERATING AND INSTRUCTION MANUAL
MODEL 732-R
BREAD SLICER
0732S20000-CV2

732-R FRONT LOAD SLICER
INDEX
Section Description
SAFETY INSTRUCTIONS -------------------------------------- 0732S20019 --------------------------- 1-1
DESCRIPTION/SPECIFICATIONS --------------------------- 0732S20020---------------------------- 2-1
Description -------------------------------------------------------------------------------------------------- 2-1
Specifications----------------------------------------------------------------------------------------------- 2-1
INSTALLATION INSTRUCTIONS ---------------------------- 0732S20021 --------------------------- 3-1
Slicer Installation ------------------------------------------------------------------------------------------ 3-1
OPERATING INSTRUCTIONS -------------------------------- 0732S20022 --------------------------- 4-1
TROUBLESHOOTING ------------------------------------------- 0732S20023 --------------------------- 5-1
The Slicer Will Not Start (Motor is Not Humming) ------------------------------------------------ 5-1
The Slicer Will Not Start (Motor is Humming) ------------------------------------------------------ 5-2
The Slicer Stops Before Slicing is Complete ------------------------------------------------------- 5-2
The Slicer Does Not Automatically Stop Upon Completion of Slicing ------------- -- -------- 5-2
Bread Slices Vary in Thickness ------------------------------------------------------------------------ 5-3
The Blade Frames are Knocking ---------------------------------------------------------------------- 5-3
The Slicer Vibrates Excessively ----------------------------------------------------------------------- 5-3
The Hand Lever Pulls Hard ----------------------------------------------------------------------------- 5-3
The Bread is Cutting Slowly or is Being Damaged ----------------------------------------------- 5-4
MAINTENANCE --------------------------------------------------- 0732S20024 --------------------------- 6-1
Removing the Blade Frames --------------------------------------------------------------------------- 6-1
Replacing the Blade Frames --------------------------------------------------------------------------- 6-4
Changing the Blades ------------------------------------------------------------------------------------- 6-5
Tightening the Belt --------------------- ------------------------------------------------------------------- 6-7
Replacing the Belt ---------------------------------------------------------------------------------------- 6-8
Replacing the Gas Spring ------------------------------------------------------------------------------ 6-9
Adjusting the Gas Spring ------------------------------------------------------------------------------ 6-12
Adjusting the Blade Frames When Slices Vary in Thickness -------------------------------- 6-13
Adjusting the Clearance Between the Blade Frames ------------------------------------------ 6-14
Lubrication ------------------------------------------------------------------------------------------------- 6-15
Cleaning ---------------------------------------------------------------------------------------------------- 6-15
RECOMMENDED SPARE PARTS -------------------------- 0732S20025 --------------------------- 7-1
REPLACEMENT PARTS SECTION
MAIN FRAME ---------------- ------------------------------------- 0732S20026 --------------------------- 8-1
Drawing ------------------------------------------------------------------------------------------------- 8-1
Parts List ----------------------------------------------------------------------------------------------- 8-2
Continued
Document No. Page No.
0732S20018 0-1

732-R FRONT LOAD SLICER
INDEX (Continued)
REPLACEMENT PARTS SECTION (Continued)
Section Description
COVERS ------------------------------------------------------------ 0732S20027 --------------------------- 9-1
Drawing ------------------------------------------------------------------------------------------------ 9-1
Parts List ----------------------------------------------------------------------------------------------- 9-2
PUSHER ------------------------------------------------------------ 0732S20028 -------------------------- 10-1
Drawing ----------------------------------------------------------------------------------------------- 10-1
Parts List ---------------------------------------------------------------------------------------------- 10-2
ROCKER ----------------------------------------------------------- 0732S20029 -------------------------- 11-1
Drawing ----------------------------------------------------------------------------------------------- 11-1
Parts List ---------------------------------------------------------------------------------------------- 11-2
DRIVEN PULLEY ------------------------------------------------- 0732S20030 -------------------------- 12-1
Drawing ----------------------------------------------------------------------------------------------- 12-1
Parts List ---------------------------------------------------------------------------------------------- 12-2
SLICE PARTS ----------------------------------------------------- 0732S20031 -------------------------- 13-1
Drawing ----------------------------------------------------------------------------------------------- 13-1
Parts List ---------------------------------------------------------------------------------------------- 13-2
ELECTRICAL ------------------------------------------------------ 0732S20032 -------------------------- 14-1
Drawing ----------------------------------------------------------------------------------------------- 14-1
Parts List ---------------------------------------------------------------------------------------------- 14-2
WIRING DIAGRAM 1-60-115/230 --------------------------- 0732S20033 -------------------------- 15-1
WARRANTY ---------------------------------------------------- --- GEN 040228
WARRANTY PROCEDURE------------------------------------ GEN 040226
RETURNED PARTS POLICY --------------------------------- GEN 040227
Document No. Page No.
0732S20018 0-2

732-R FRONT LOAD SLICER
SAFETY INSTRUCTIONS
WARNING
VARIOUS SAFETY DEVICES AND METHODS OF GUARDING HAVE BEEN
PROVIDED ON THIS MACHINE. IT IS ESSENTIAL HOWEVER THAT THE MACHINE
OPERATORS AND MAINTENANCE PERSONNEL OBSERVE THE FOLLOWING
SAFETY PRECAUTIONS. IMPROPER INSTALLATION, MAINTENANCE, OR
OPERATION OF THIS EQUIPMENT COULD CAUSE SERIOUS INJURY OR DEATH.
1. Read this manual before attempting to operate your machine. Never allow an
untrained person to operate or service this machine.
2. Connect the machine to a properly grounded electrical supply that matches the
requirements shown on the electrical specification plate and follow all specifications
of local electrical codes.
3. Disconnect and lock-out the machine from the power supply before cleaning or
servicing.
4. Check and secure all guards before starting the machine.
5. Observe all caution and warning labels affixed to the machine.
6. Use only proper replacement parts.
7. Do not wear loose fitting clothing or loose hair when working near this machine.
Shirt tails should be tucked in.
8. Wear proper, personal, protective, safety equipment.
9. Keep Hands away from the moving parts of this machine while it is in operation.
10. In addition to these general safety instructions, please follow the more specific safety
instructions in the rest of this operating instruction manual.
DO NOT USE FOR OTHER THAN ORIGINALLY INTENDED PURPOSE.
0732S20019 1-1
WARNING

732-R FRONT LOAD SLICER
DESCRIPTION/SPECIFICATIONS
Description
The Oliver Model 732-R Counter Top Bread Slicer is of a compact, sturdy, time tested
design, which has been used in bakeries worldwide for many years. The machine is
easy to operate and can be loaded and unloaded from the front of the machine. It is
capable of slicing either hard crusted breads or soft-textured sandwich loaves with ease
and precision. After slicing, the bread can be easily packaged with the use of its
convenient front mounted bagging scoop. Its design will provide years of efficient,
trouble-free operation requiring a minimum of maintenance.
The Model 732-R Bread Slicer is of stainless, plated, and painted steel construction for
easy cleaning and maintenance. As with other Oliver slicers it is so easy to change the
blades, when that becomes necessary, that most operators will feel comfortable enough
to do it themselves eliminating the need of a service call.
Oliver Products Company, who has a reputation of serving the Baking Industry for over
70 years, backs this slicer.
Specifications
Space Requirements:
Model 732-R (All Dimensions are Approximate)
0732S20020 2-1

732-R FRONT LOAD SLICER
Product Capacities:
Length 16 Inches
Width 5-1/2 inches (See Note)
Height 5-1/2 inches (See Note)
NOTE
WIDTH AND HEIGHT DIMENSIONS ARE FOR A SQUARE PRODUCT. LOWER AND
WIDER PRODUCTS MAY ALSO BE SLICED BY TAKING CARE IN LOADING T HE
PRODUCT. INDIVIDUAL DETERMINATIONS WOULD HAVE TO BE MADE.
Standard Electrical Options: (Others consult factory).
1 phase, 60 hz, 115VAC, 7 Amps.
1 phase, 60 hz, 230VAC, 3.5 Amps.
1 phase, 50 hz, 220VAC, 3.5 Amps.
Standard Slice Spacings,
7/16, 1/2, 9/16 (inches)
Optional Slice Spacings, (At additional cost). (Specials available -- consult factory).
3/8, 5/8, 11/16, 3/4, 13/16, 7/8, 1, 1-1/4 (inches)
Shipping Weight
300 lbs. (approximate)
Net Weight
250 lbs. (approximate)
0732S20020 2-2
732-R FRONT LOAD SLICER
INSTALLATION INSTRUCTIONS
Slicer Installation:
Before starting the Installation process make sure you observe the following three
caution notes.
CAUTION
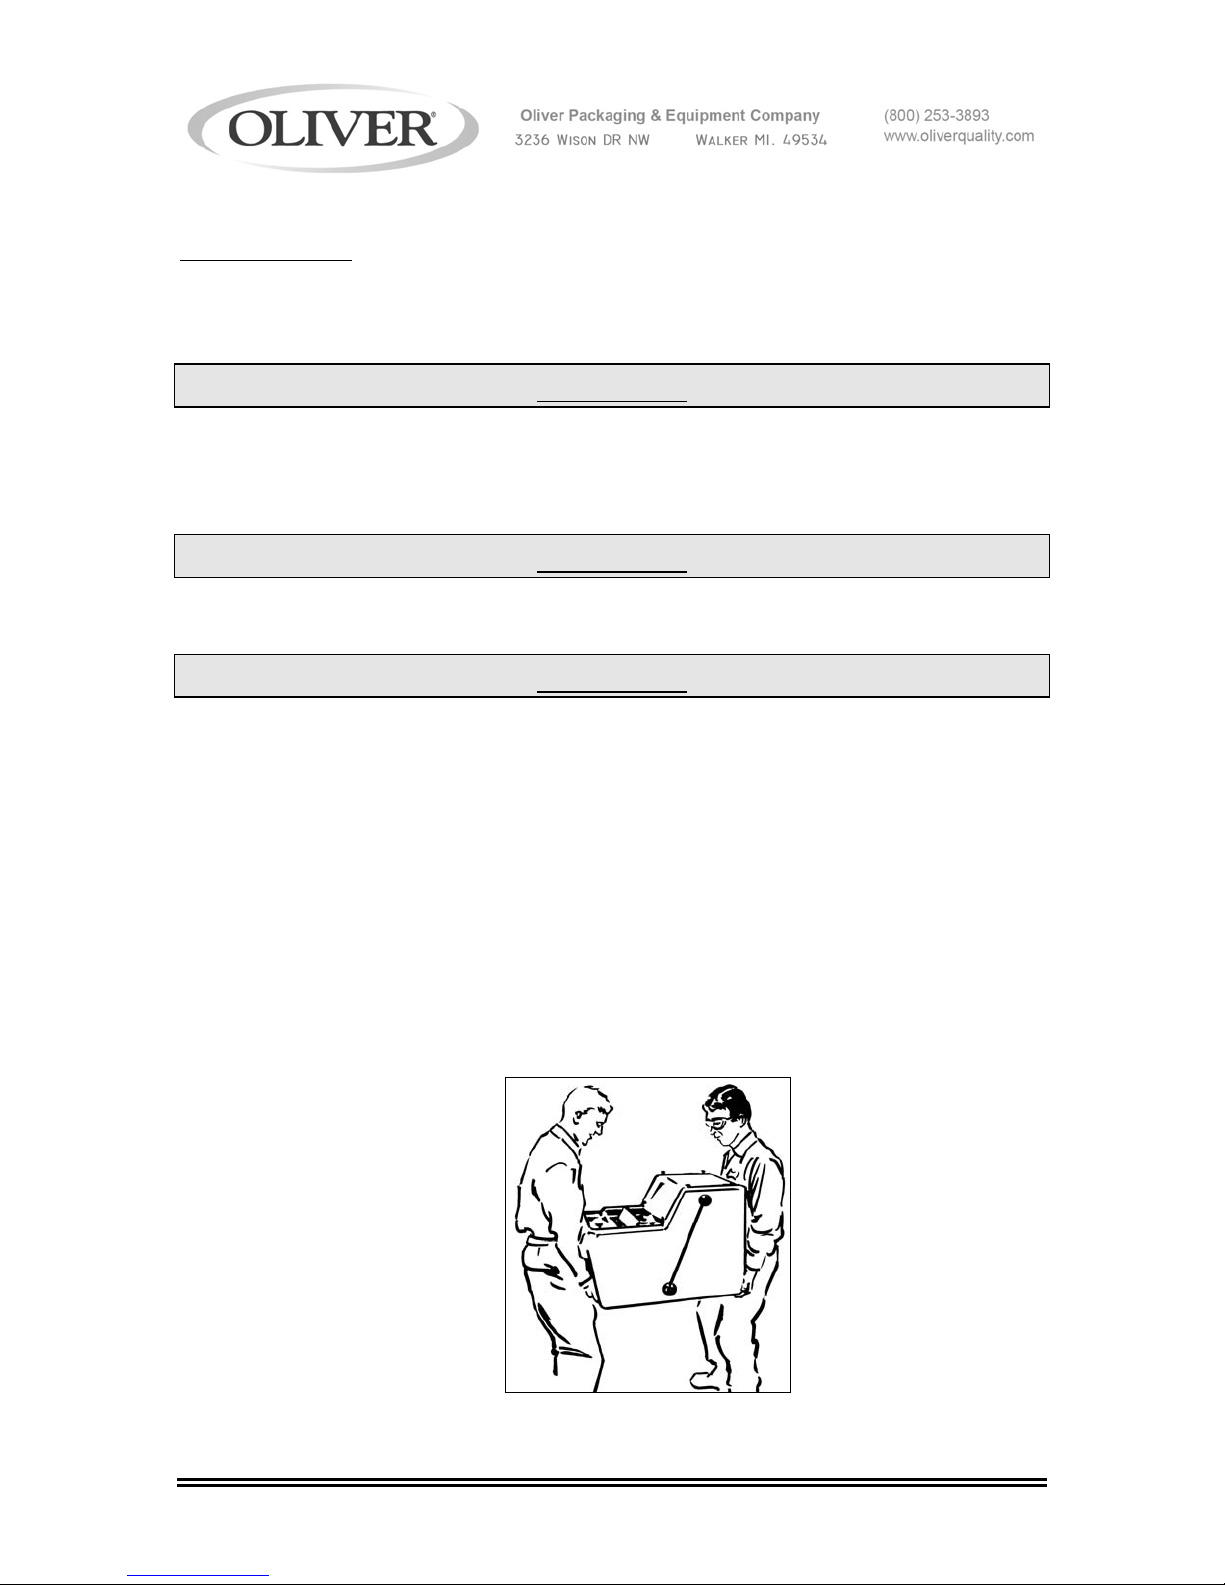
THE SLICER IS HEAVY, USE PROPER TECHNIQUE WHEN LIFTING.
KEEP BACK STRAIGHT, KNEES BENT, AND LIFT WITH LEGS.
USE GLOVES TO PROTECT HANDS.
CAUTION
NEVER LIFT THE SLICER BY ITS SIDE COVERS.
CAUTION
BEFORE PLACING THE SLICER ON THE TABLE OR COUNTER MAKE SURE THAT
IT CAN SUPPORT THE SLICER’S WEIGHT WHICH IS APPROX. 250 POUNDS.
Select a location for your slicer which has a substantial mounting surface, (see the
caution note above), and which has electrical service compatible with the load the
machine will place on it as indicated on the electrical data plate of the machine.
Position the machine while it is still in its packaging as close as possible to the desired
end location. Expose the machine by removing the outer packaging and remove its
crumb tray. Using at least two people, (one in the front and one at the back of the
machine), lift the slicer from the resting surface of the packaging and set the machine
onto the counter or table as close as possible to the desired end location. Make final
location adjustments by sliding the machine to its desired location.
0732S20021 3-1
732-R FRONT LOAD SLICER
OPERATING INSTRUCTIONS
WARNING
ALWAYS USE CARE WHENEVER WORKING NEAR THE CUTTING KNIVES.
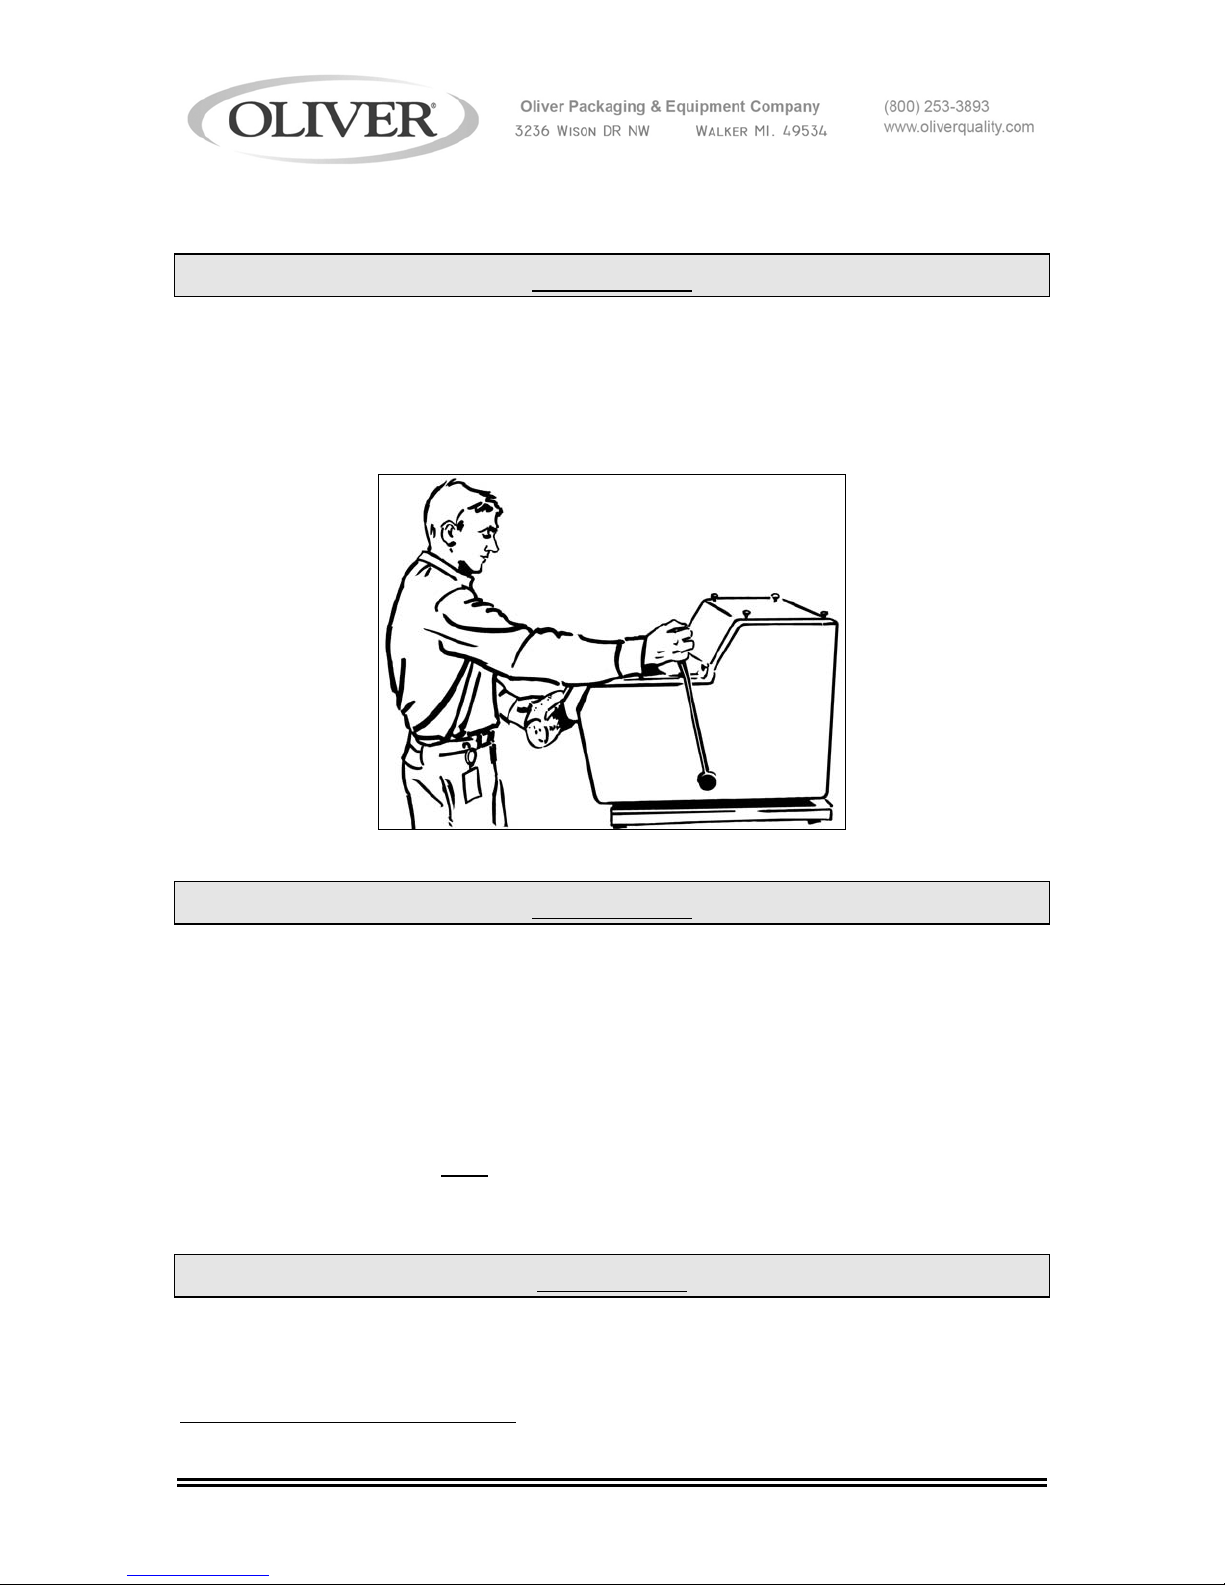
To operate the slicer, stand in front of the machine and grasp the lever with your right
hand. Pull the lever all the way down and hold it in that position. Using your left hand
load the product into the machine.
WARNING
NEVER START THE MACHINE BEFOE LOADING THE PRODUCT.
Make sure that the product does not hang over either edge of the cradle. While holding
the lever completely forward, (the machine will not start unless this is done), push the
Green “Start” button with your left hand.
After starting the machine restrain the hand lever slightly allowing it to return slowly until
the knives have contacted AND
the lever to return at its own speed.
penetrated the crust on the product. At this point allow
CAUTION
NEVER PUSH THE HAND LEVER.
Operating Instructions (Continued)
0732S20022 4-1
732-R FRONT LOAD SLICER
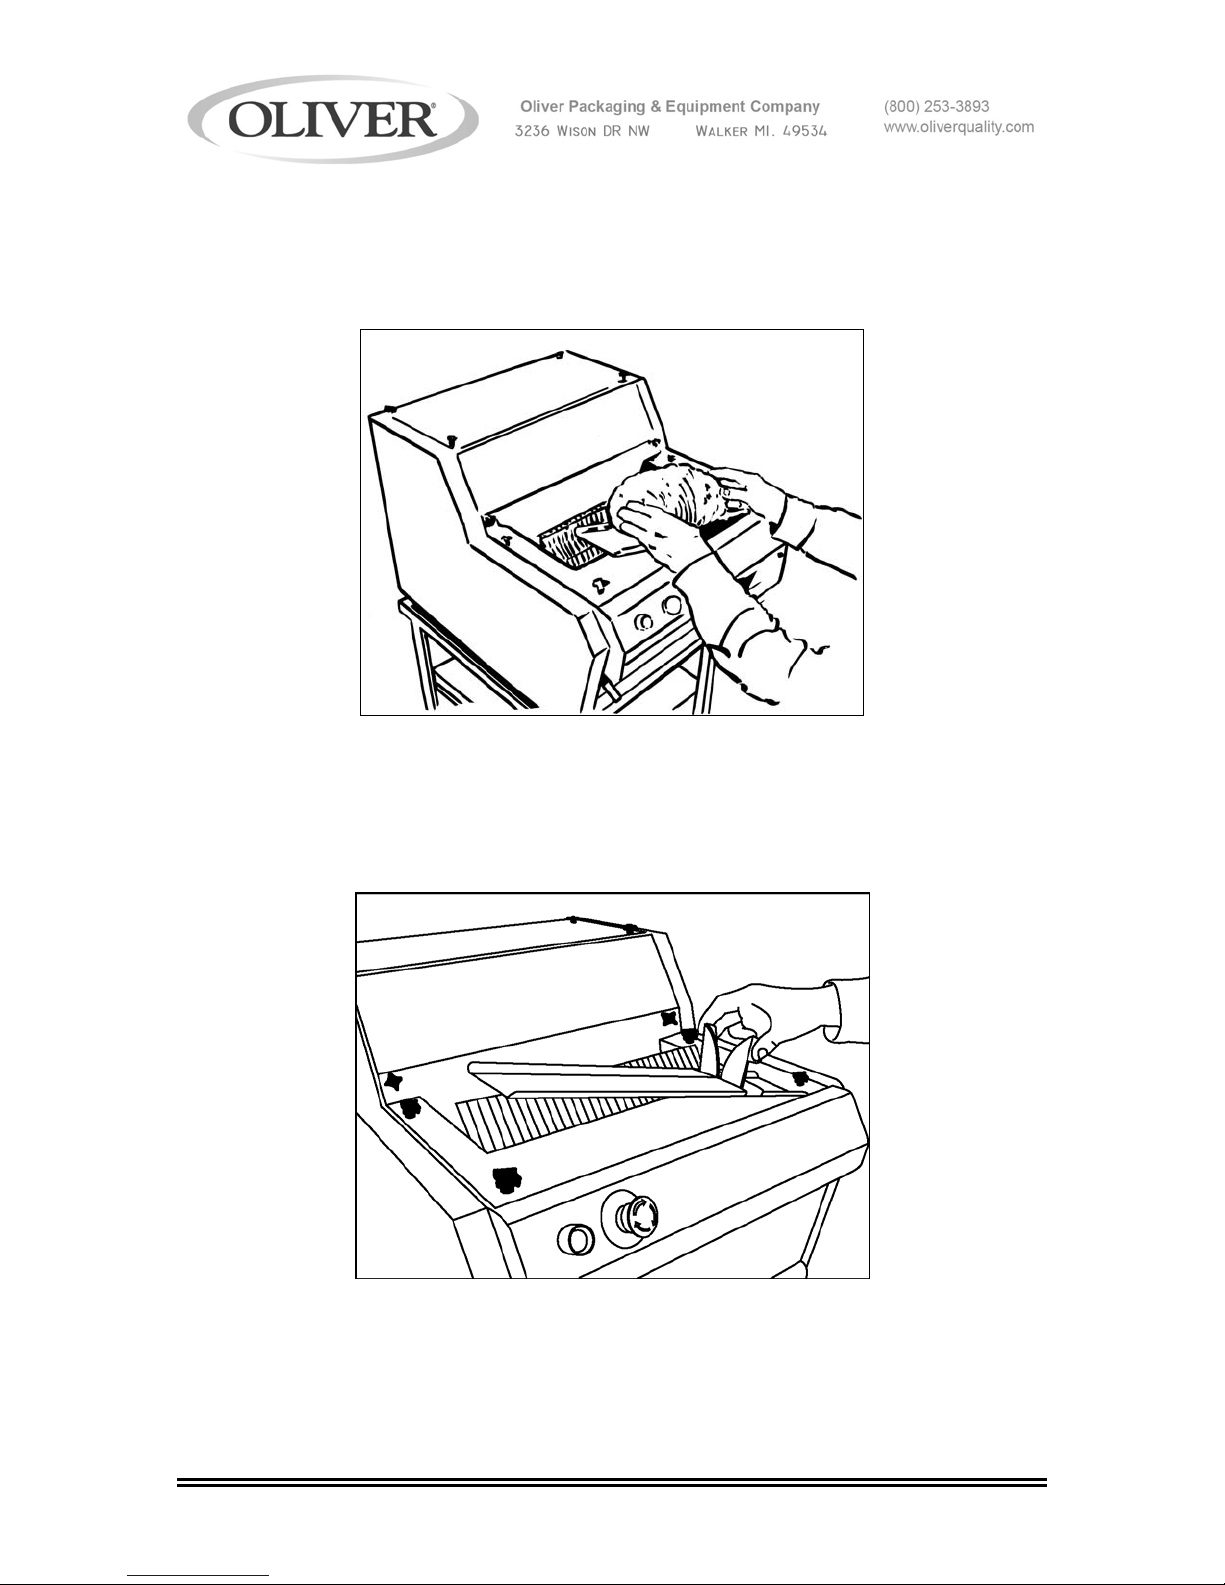
When the slicing operation is complete the machine will automatically stop. Once
stopped, remove the product from the cradle. Use of the standard front mounted
bagging scoop will ease packaging of your product.
The bagging scoop’s bread stop is adjustable to accommodate various size loaves. To
adjust, apply pressure to the outside edges of the bread stop and slide it along the scoop
to the desired position.
0732S20022 4-2

732-R FRONT LOAD SLICER
TROUBLE SHOOTING
WARNING
ALWAYS DISCONNECT THE SLICER FROM THE POWER SUPPLY BEFORE
ATTEMPTING ANY TYPE OF MAINTENANCE TASK, INCLUDING
TROUBLESHOOTING.
The Slicer Will Not Start (Motor Is Not Humming)
• The machine is not plugged in.
• There is no power at the outlet. (Check by plugging in a small working appliance,
like a lamp. Check to see if a circuit breaker has tripped. If the circuit breaker has
not tripped and the circuit is still not working have a qualified electrician check the
circuit.)
• The Emergency “Stop” button has been pushed. Twist the Red button in the
direction of the arrow on the button to release it to its run position.
• The lever is not being HELD
• There are bread crumbs beneath the cradle bracket or in the cradle guide tracks at
each side of the cradle bracket preventing it from going all the way down, which it
must do before the lower limit switch can be tripped.
• The lower limit switch is not adjusted properly. (Have a qualified service agent
adjust the switch.)
• The lower limit switch is defective. (Have a qualified electrician check and replace
the switch if required.)
• The problem is somewhere else in the electrical system of the machine. (Have a
qualified electrician find and repair the problem.)
Continued
in the forward most position.
0732S20023 5-1

732-R FRONT LOAD SLICER
Trouble Shooting (Continued)
The Slicer Will Not Start (Motor Is Humming)
CAUTION
DO NOT ALLOW THE MOTOR TO HUM WITHOUT STARTING.
OVERHEATING CAN PERMANENTLY DAMAGE THE MOTOR.
NOTE
A SPECIAL NON-VENTILATED MOTOR MUST BE USED WITH THIS SLICER.
• The drive system is binding. (Have a qualified service agent check for defective
bearings or other restrictions to free movement.)
• There is mechanical interference between other parts of the slicer. (Have a qualified
service agent evaluate the machine for adjustment or replacement of defective
parts.)
• The motor has failed. (Have it checked by a qualified electrician.)
The Slicer Stops Before Slicing is Complete
• The upper limit switch is not adjusted properly. (Have a qualified service agent
adjust the switch.)
The Slicer Does Not Automatically Stop Upon Completion of Slicing
• The upper limit switch is not adjusted properly. (Have a qualified service agent
adjust the switch.)
• The upper limit switch is defective. (Have a qualified electrician check and replace
the switch if required.)
• A bread crust or other foreign object is preventing the cradle from returning to the top
of its travel.
Continued
0732S20023 5-2

732-R FRONT LOAD SLICER
Trouble Shooting (Continued)
Bread Slices Vary in Thickness
• The blade frames are out of adjustment. (See the “Maintenance” section of this
manual under “Adjusting the Blade Frames When Slices Vary in Thickness” on how
to correct this problem.)
The Blade Frames Are Knocking
• The blade frames are out of adjustment. (See the “Maintenance” section of this
manual under “Adjusting the Clearance Between the Blade Frames” on how to
perform this adjustment.)
The Slicer Vibrates Excessively
• The drive belt is loose or worn. (See the “Maintenance” section of this manual under
“Tightening the Belt” or “Replacing the Belt” on how to make these corrections.)
• One or more of the bearings on the machine are failing. (Have a qualified service
agent check for defective bearings and replace them as required.)
• The pins, (two eccentrics and two regular), and links at the top of the blade frames
are worn. We suggest that these be replaced together. Mixing worn parts with new
will shorten the life of the replacement parts. Remember, after replacing the pins
and links the clearance between the blade frames must be re-adjusted. (See the
“Maintenance” section of this manual under “Adjusting the Clearance Between the
Blade Frames” on how to perform this adjustment.)
The Hand Lever Pulls Hard
• Check the Cradle guide tracks at each end of the cradle bracket for a build-up of
foreign material.
Continued
0732S20023 5-3

732-R FRONT LOAD SLICER
Trouble Shooting (Continued)
The Bread is Cutting Slowly or is Being Damaged
• The product you are attempting to slice is below the minimum height capacity of the
machine.
• You are pushing the lever of the machine in an attempt to speed slicing. This may
not only damage the product but may also damage the machine.
• If only certain products are cutting slowly the cutting speed you are experiencing may
be normal for that particular product.
• The knives of the machine have become worn, (dull). (See the “Maintenance” section
of this manual under “Changing the Cutting Knives”). Most owners can perform this
item of maintenance without calling a service company.
• The blades are not aligned properly. (See the “Maintenance” section of this manual
under “Adjusting the Clearance Between the Blade Frames” on how to perform this
adjustment.)
• The Gas spring may require adjustment or replacement. (See the Maintenance
section of this manual under “Gas Spring Replacement” on how to perform this task.)
0732S20023 5-4
732-R FRONT LOAD SLICER
MAINTENANCE
Removing The Blade Frames
WARNING
ALWAYS UNPLUG THE SLICER BEFORE PERFORMING
ANY TYPE OF MAINTENANCE TASK.
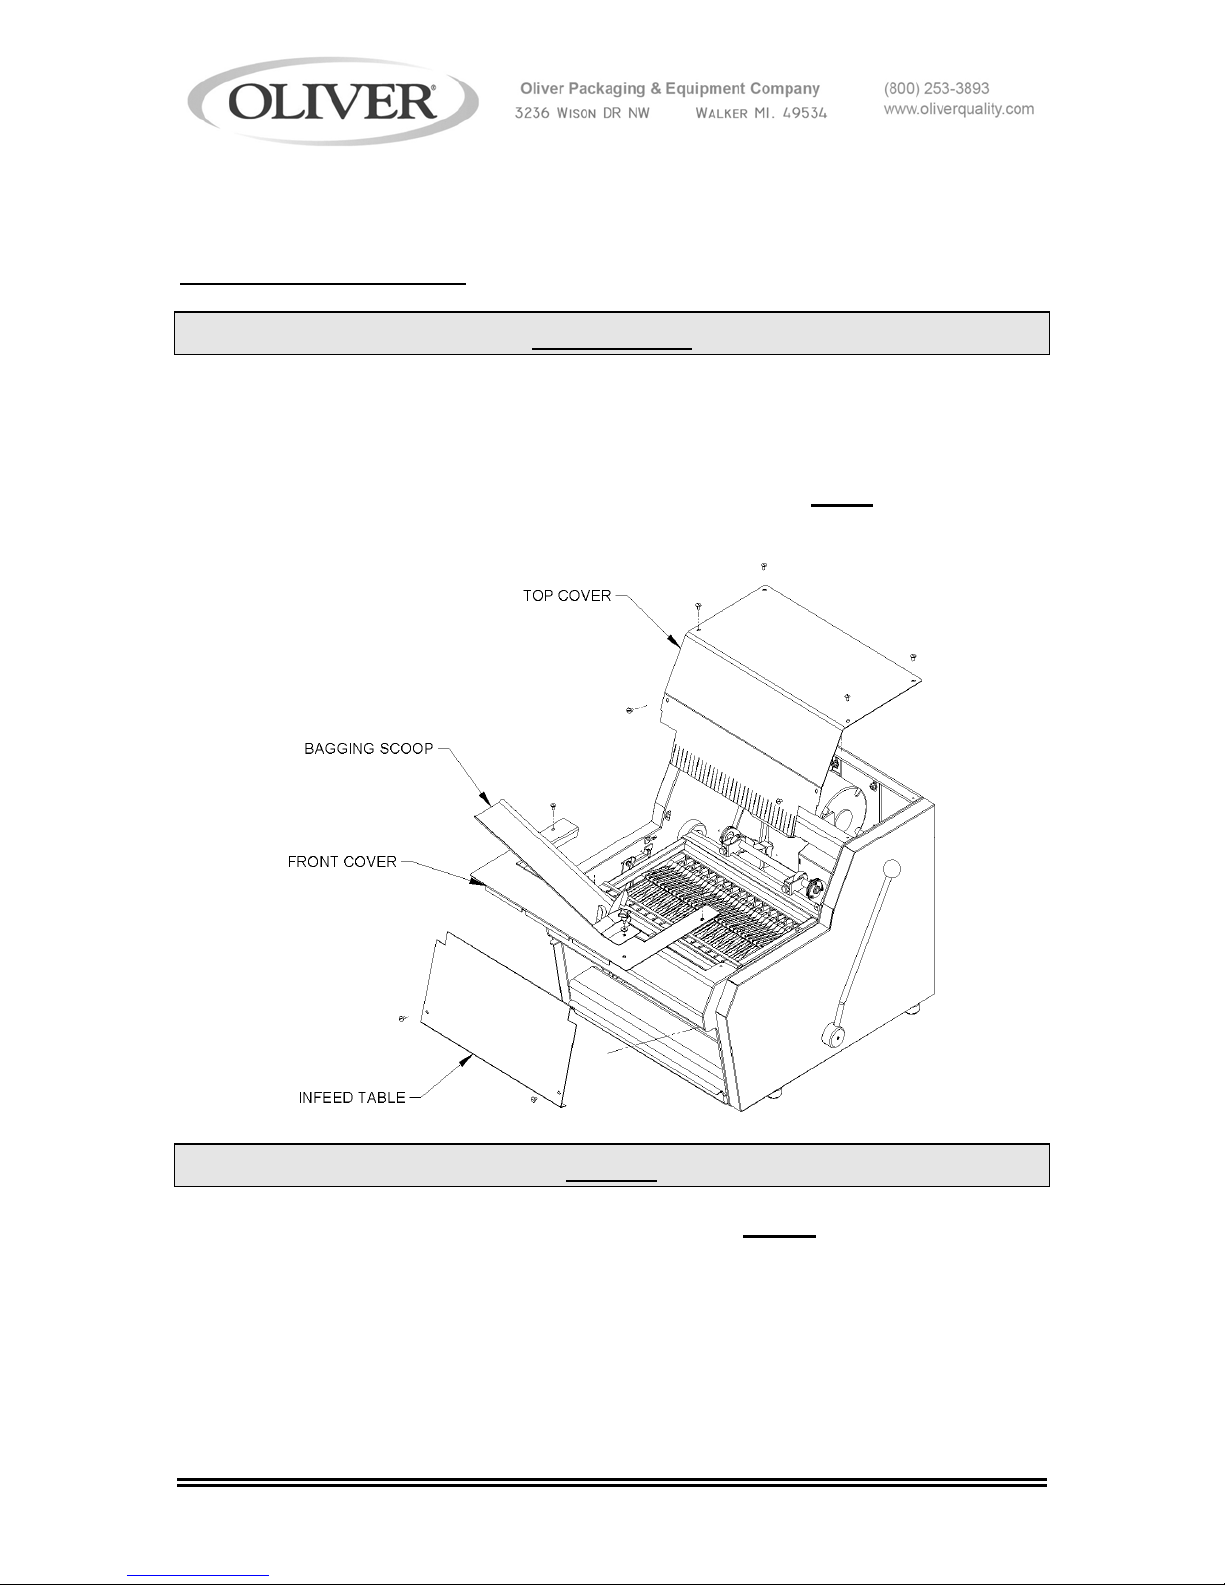
Remove the bagging scoop, the top and front covers by removing the ten screws which
secure them. Only remove the infeed table in the event that you MUST
lower blade frame. See the note below.
remove the
REMOVAL OF THE LOWER BLADE FRAME IS NOT
Should it be necessary to remove the lower blade frame you must first remove the infeed
table by removing the two screws which secure it in place and then by pulling the table
down out of the clips and out through the infeed opening. See above illustration.
0732S20024 6-1
NOTE
REQUIRED
TO CHANGE ITS BLADES
Continued
732-R FRONT LOAD SLICER
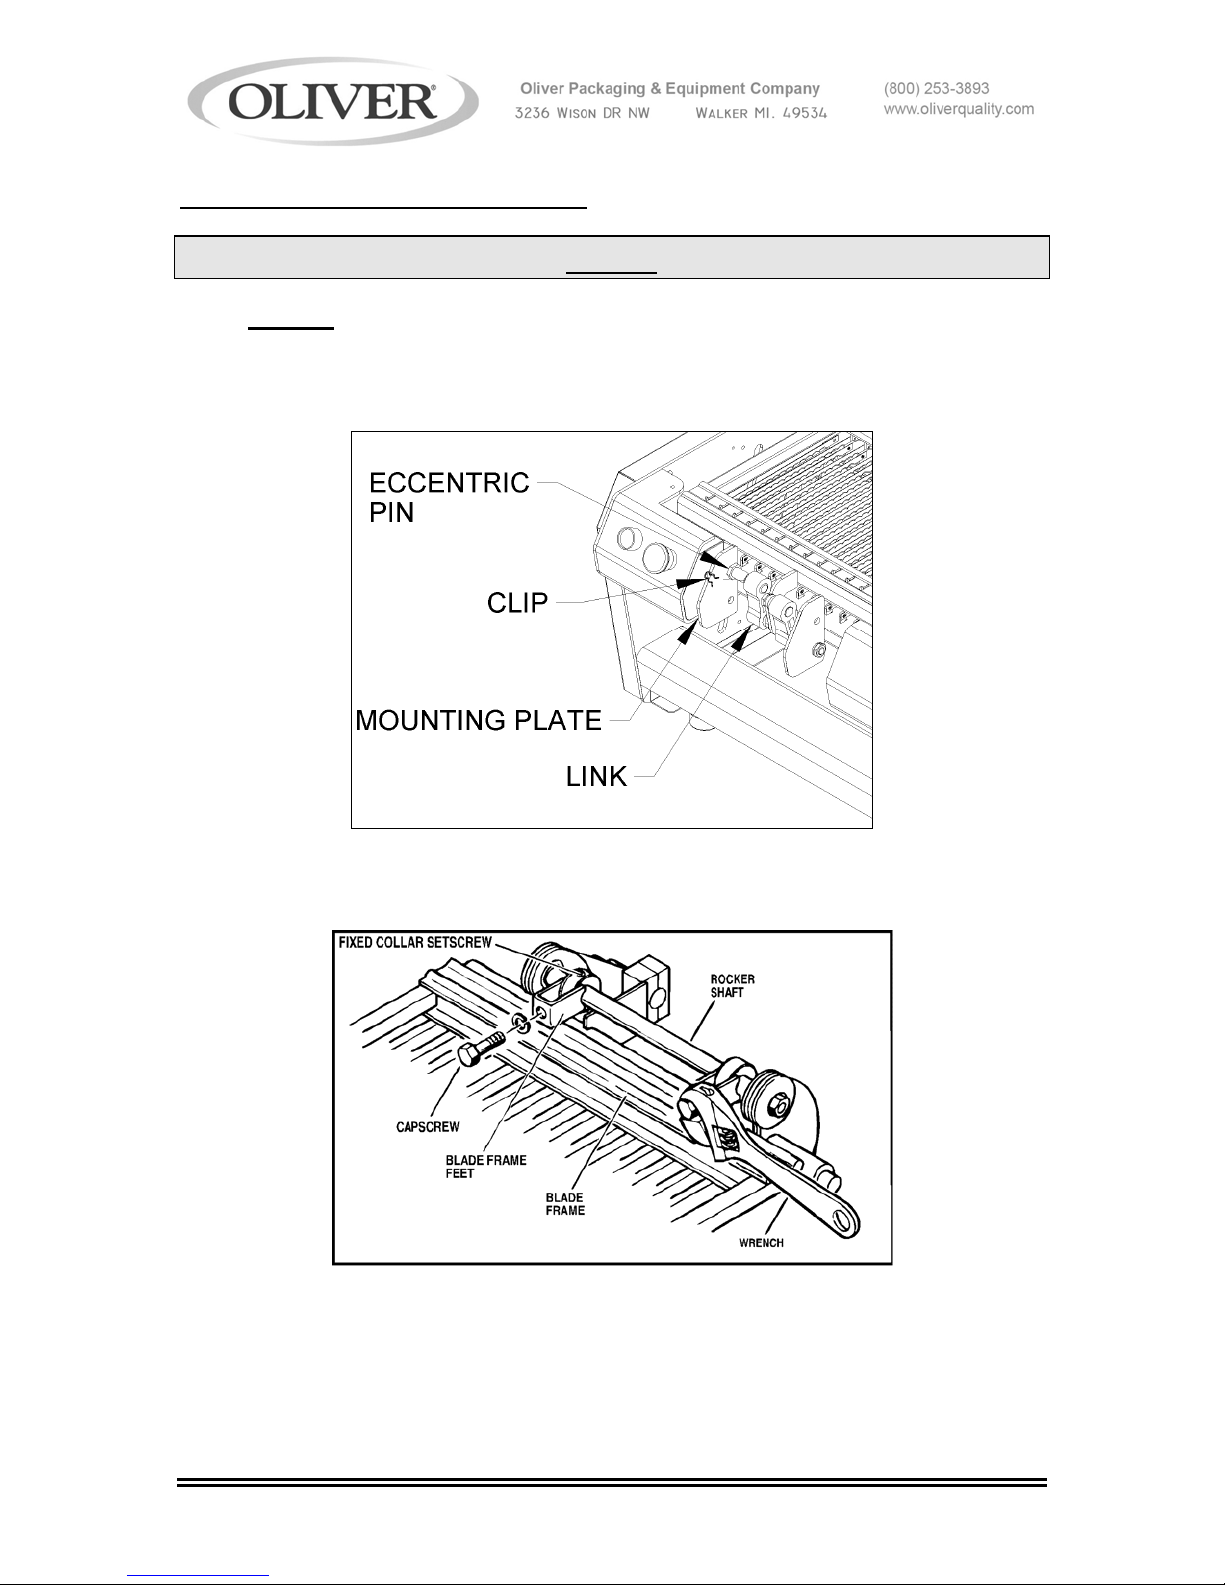
Removing The Blade Frames (Continued)
NOTE
DO NOT
Pull the clip from the eccentric pin and slide the link toward the eccentric pin mounting
plate. See the illustration below.
LOOSEN THE NUTS WHICH SECURE THE ECCENTRIC PINS.
After removing the pair of bolts and lock washers, which secure each blade frame to the
rocker’s swing shaft, the blade frame can be lifted from the machine.
Continued
0732S20024 6-2
 Loading...