

Oliver 1208 Installation Manual

Grand Rapids, Michigan, U.S.A. 49504-5298
USER’S OPERATING AND INSTRUCTION MANUAL
MODEL 1208, 1208-N, & 1208-NLG
HEAT SEALER
MFG DATE: _________________________
MODEL NUMBER: ____________________
SERIAL NUMBER: ____________________
1208S20000CV2

INDEX
Description and Specifications--------------------------------------------- pg. 1-2
Description and Specifications ContinuedSafety
Machine Components and Set Up----------------------------------------- pg. 1-5
Set up Continued---------------------------------------------------------- pg. 1-6
Operating Procedures----------------------------------------------------- pg. 1-7
Adjustment and Quality--------------------------------------------------- pg. 1-8
Technical Specifications-------------------------------------------------- pg. 1-9
Cleaning and Maintenance----------------------------------------------- pg. 1-10
Trouble Shooting--------------------------------------------------------- pg. 1-13
Electrical----------------------------------------------------------------- pg. 1-14
Parts Lists---------------------------------------------------------------- pg. 1-15--1-17
---------------------------------------------------------------------- pg. 1-4
Changing Cutter-------------------------------------------------- pg. 1-11
Replacing and Checking Gaskets-------------------------------- pg. 1-12
--------------------------------- pg. 1-3
Tray Carrier Parts Lists
Warranty---------------------------------- GEN 050816
Warranty Procedure----------------------- GEN 050817
Returned Parts Policy--------------------- GEN 050818
--------------------------------------------------- pg. 1-18--1-19
1-1 1208S20003
DESCRIPTION/SPECIFICATIONS
Description
The Oliver Models 1208, 1208-N, and 1208-NLG Heat Sealers are designed and
manufactured to ensure a user friendly operation of producing film lidded trays with a
cost effective approach.
The manually operated machine operates with a 115 or 230 V.A.C. outlet. The machine
was designed to be a compact to limit the amount of table space needed to operate.
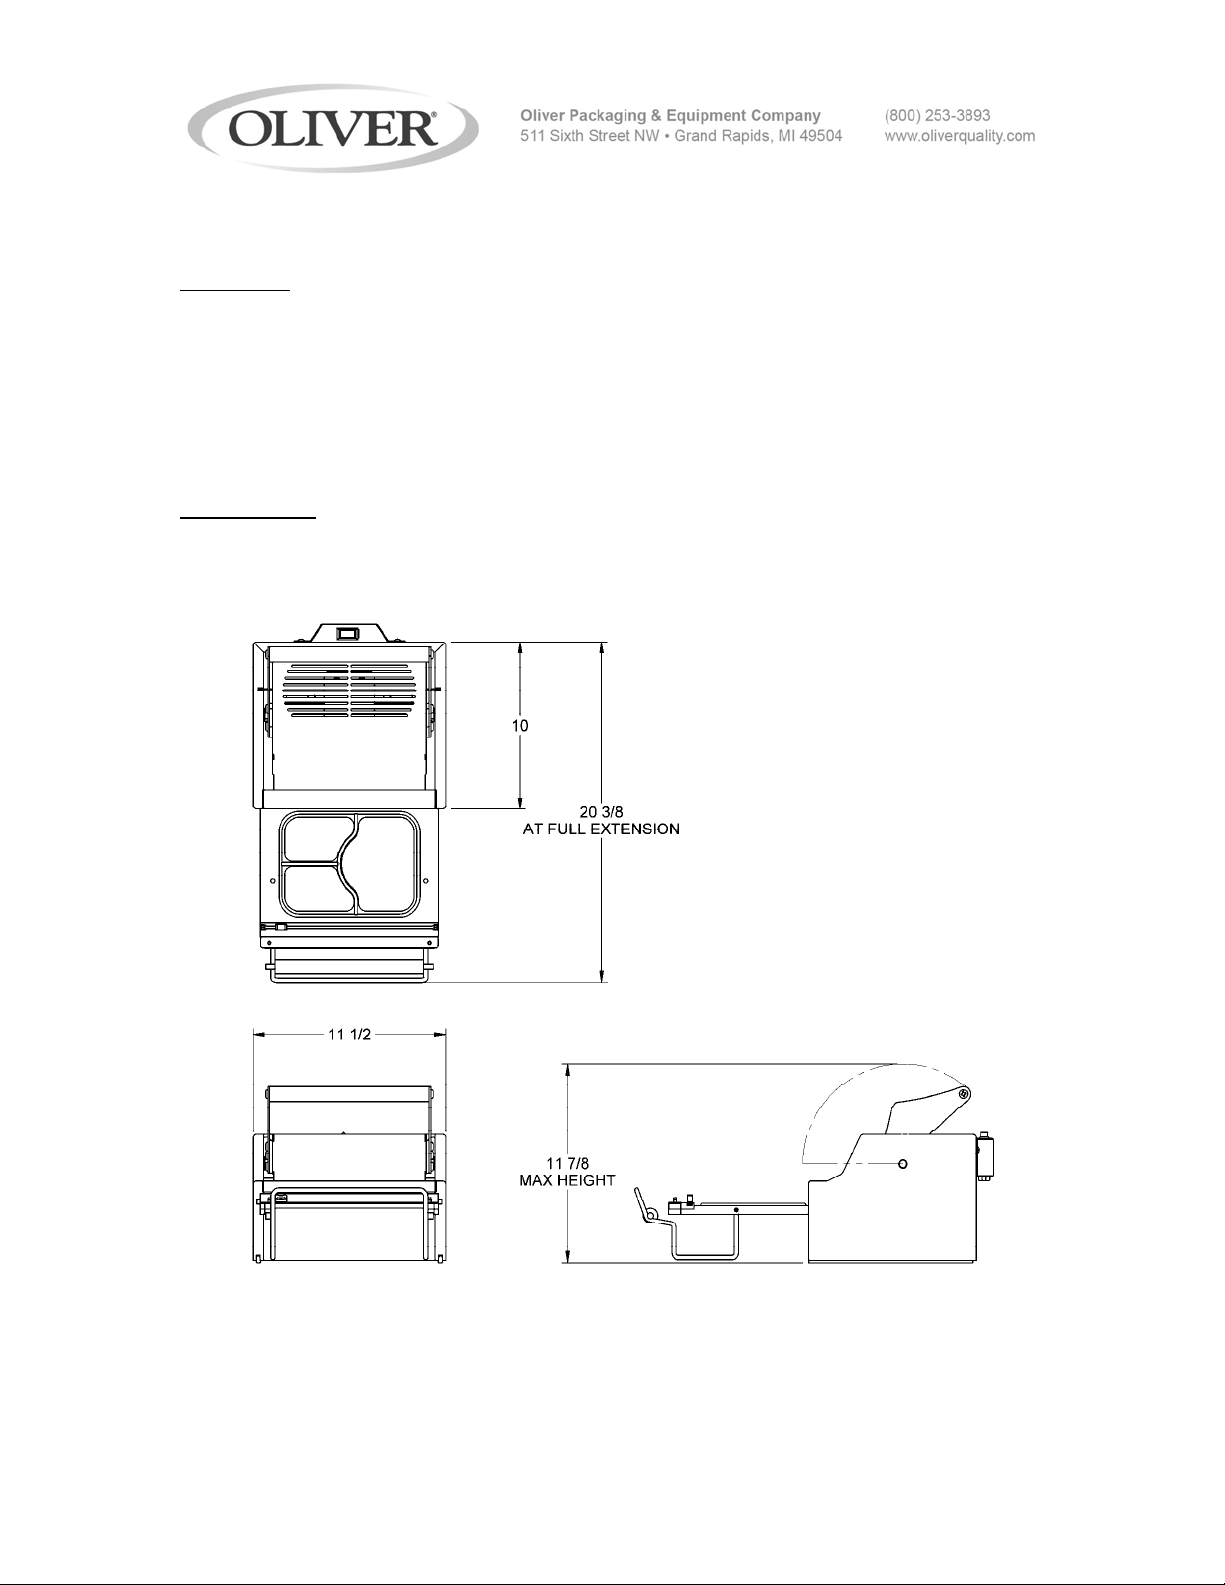
Specifications
Space Requirements, (Shown with Standard Options):
Model 1208 & 1208-N (All Dimensions are Approximate)
Shipping Weight – 22 lbs. (approximate)
Net Weight – 18 lbs. (approximate)
1-2 1208S20003
DESCRIPTION/SPECIFICATIONS CONTINUED
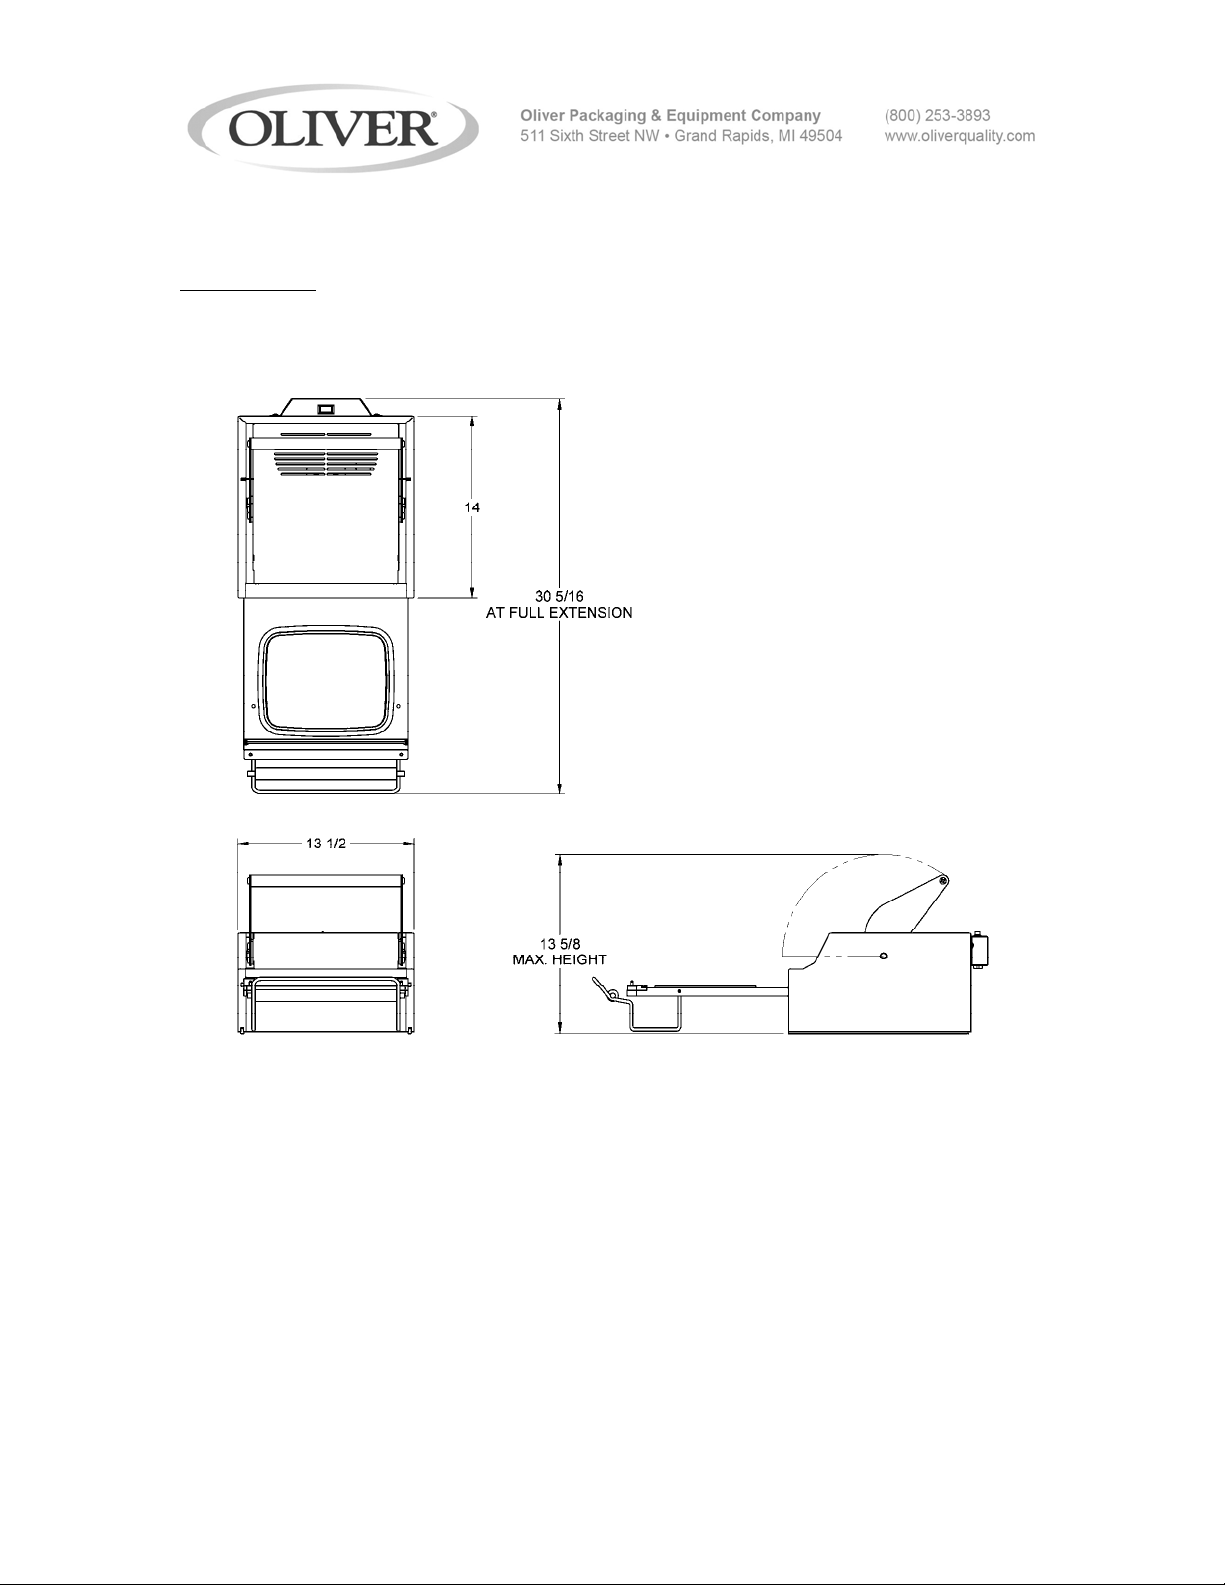
Specifications
Space Requirements, (Shown with Standard Options):
Model 1208-NLG (All Dimensions are Approximate)
Shipping Weight – 24 lbs. (approximate)
Net Weight – 20 lbs. (approximate)
(REV. 12/18/06)
1-3 1208S20003

GENERAL SAFETY INSTRUCTIONS
WARNING
IT IS ESSENTIAL THAT ALL OPERATORS AND MAINTENANCE PERSONNEL
OBSERVE THE FOLLOWING SAFETY PRECAUTIONS. IMPROPER
INSTALLATION, MAINTENANCE, OR OPERATION OF THIS EQUIPMENT
COULD CAUSE SERIOUS INJURY.
1. Read this manual before attempting to operate your heat sealer. Never allow an
untrained person to operate or service this unit.
2. Observe all caution and warning labels affixed to the machine.
3. Always unplug the machine before cleaning or servicing.
4. Use only proper replacement parts.
5. Wear proper, personal, protective, safety equipment if necessary.
6. Keep hands away from moving parts of the machine while it is operating.
7. In addition to these general safety instructions, please follow the more specific safety
instructions provided throughout the rest of this operating and instruction manual.
WARNING
DO NOT USE FOR OTHER THAN ORIGINALLY INTENDED PURPOSE.
1-4 1208S20003
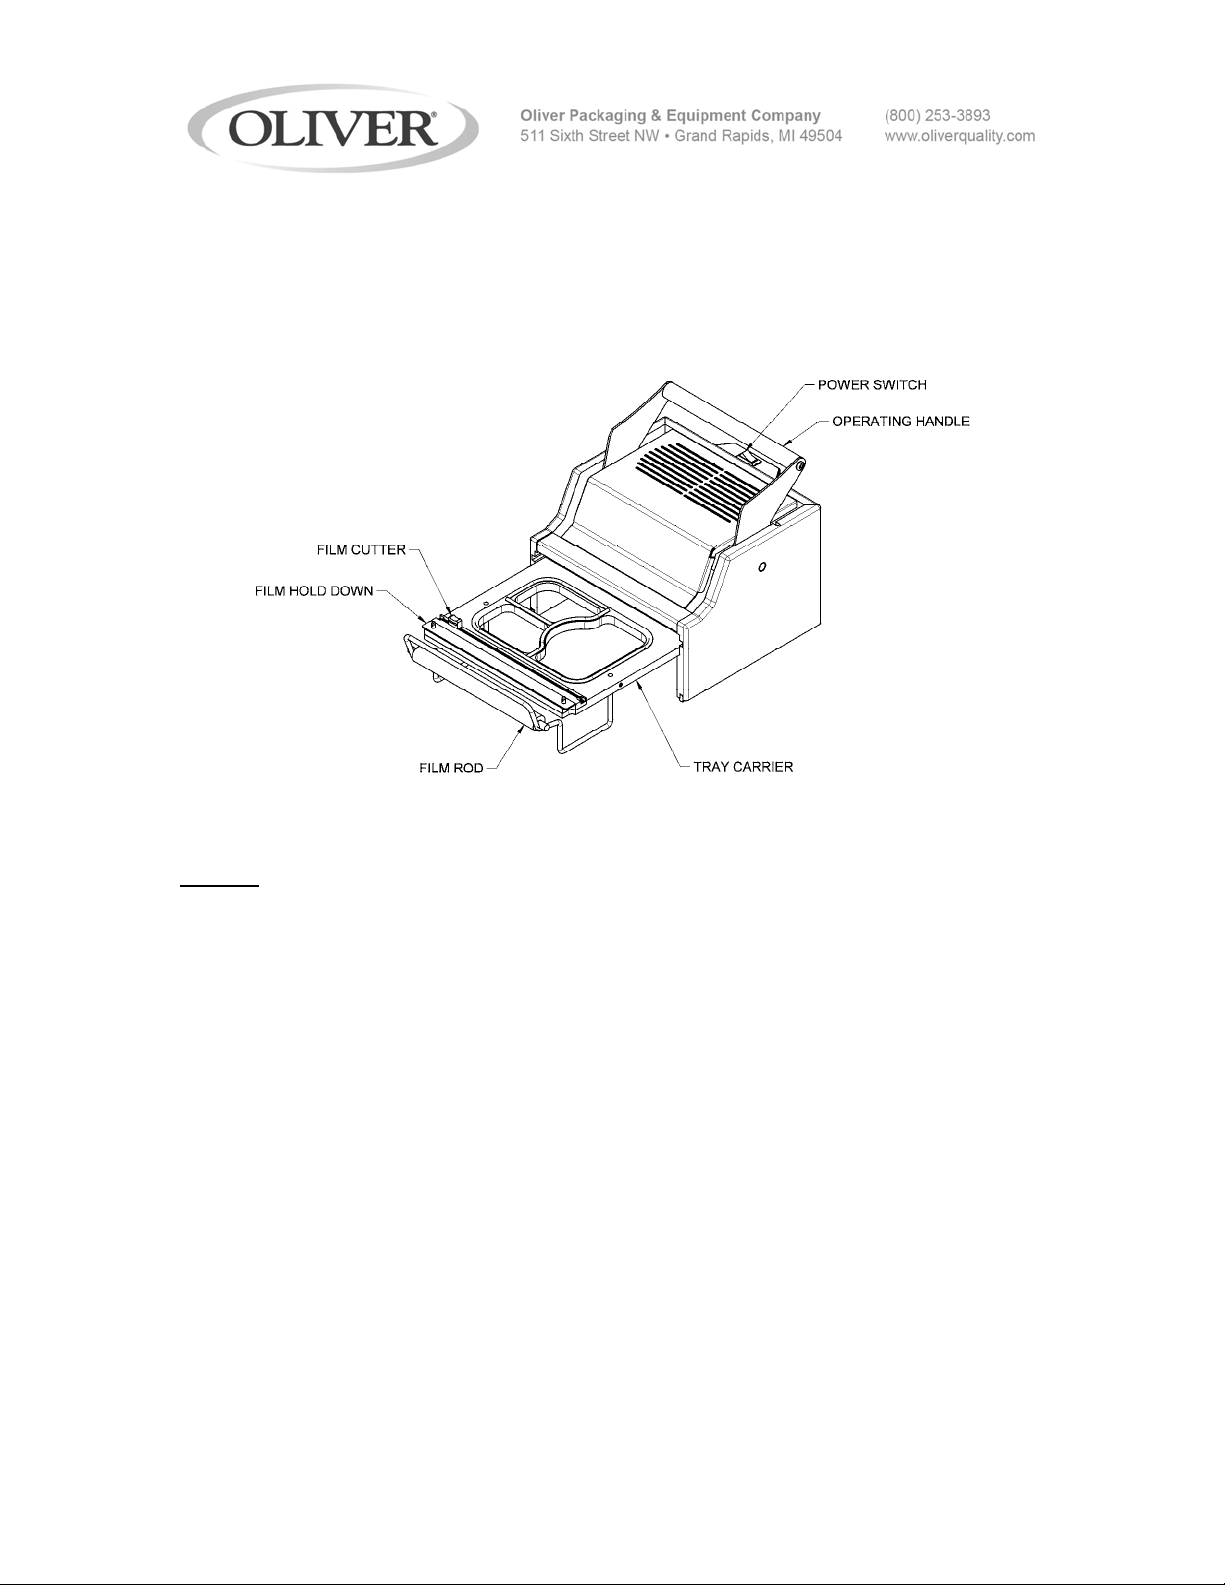
BASIC MACHINE COMPONENTS AND SET UP
Before proceeding further, take a moment to familiarize yourself with the identification of
the machine components as shown in the illustration below.
SET UP
1. Carefully remove the Model 1208 from the box. Check to make sure the order is
complete, and it has not been damaged during shipment.
2. Place the unit in a suitable location which provides an adequate working space.
The location must be sturdy, level, and capable of holding 18lbs. per machine.
3. Remove all packaging materials and shipping restraints such as plastic ties and
tape.
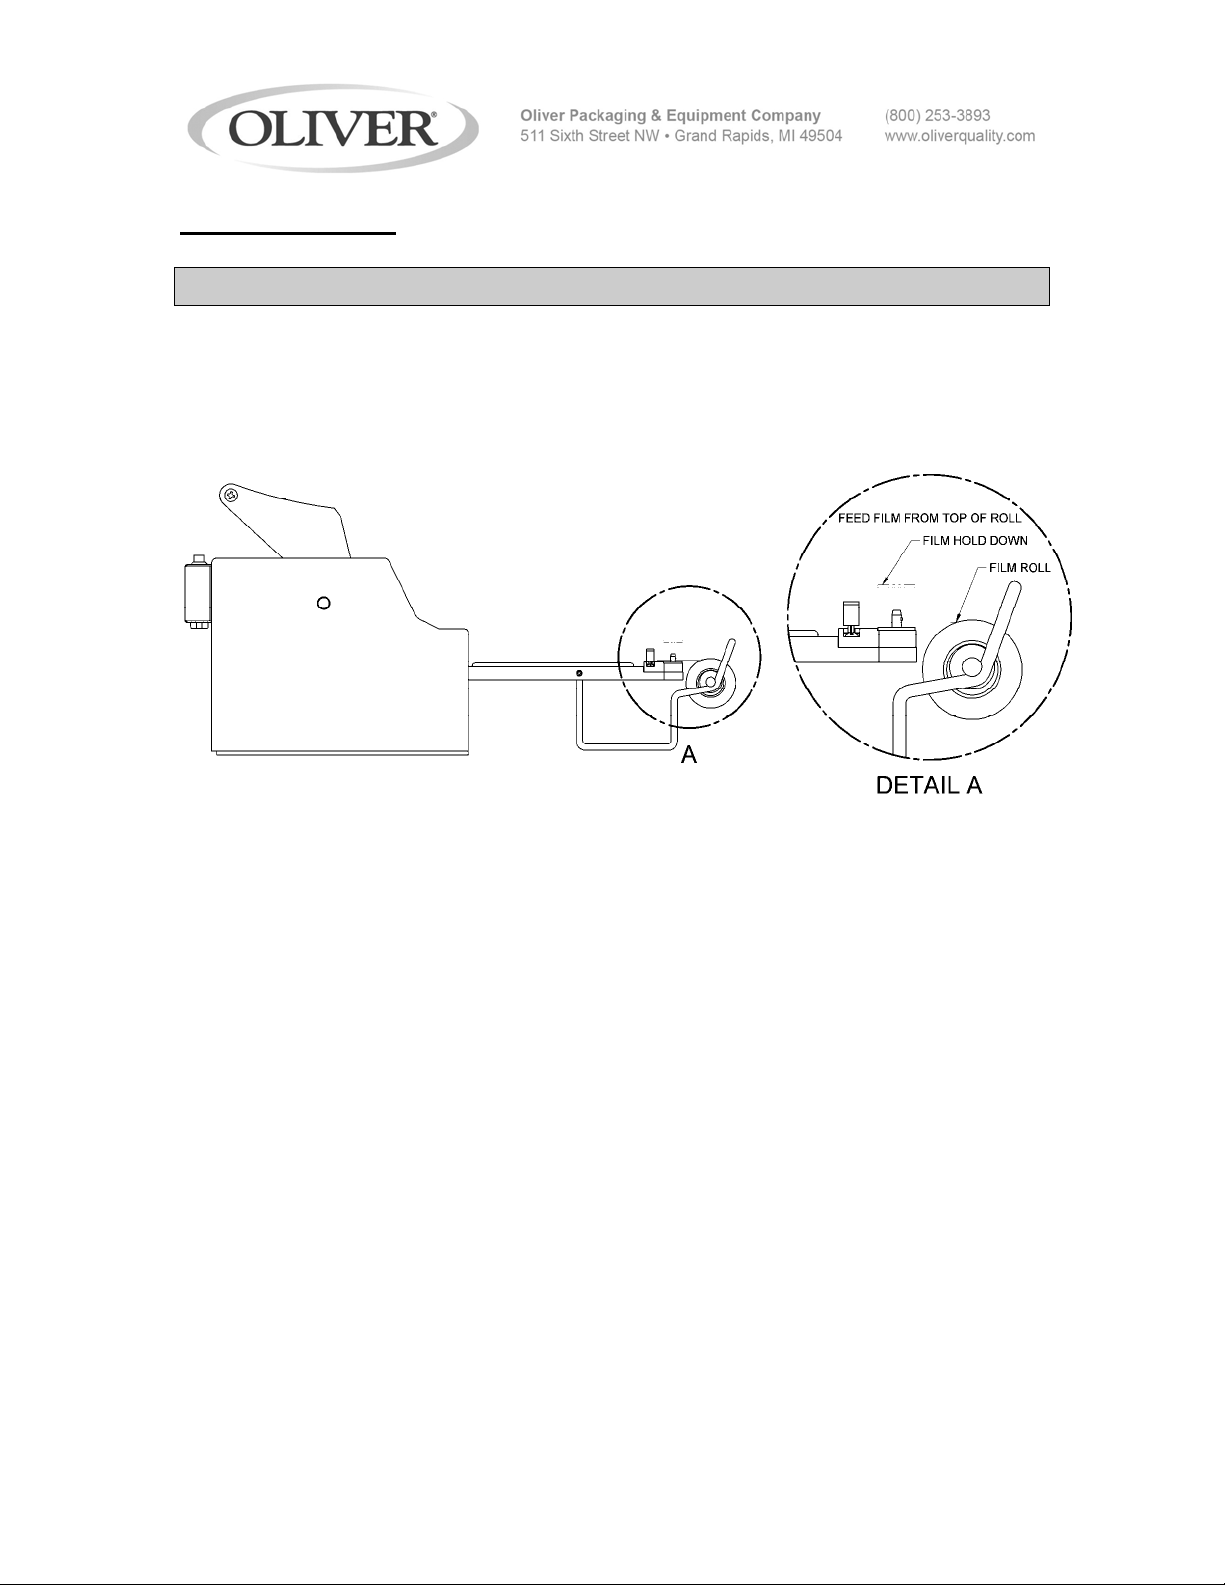
4. Raise the handle to full extension.
5. Place film rod into the center of the roll of film.
6. Place film on the machine, and thread film through the film hold down, as shown
below.
1-5 1208S20003
SET UP CONTINUED
NOTE:
FILM SUPPLIED BY OLIVER PRODUCTS COMPANY IS WOUND WITH THE
ADHEASIVE SIDE IN. FEED FILM FROM THE TOP OF THE ROLL AS SHOWN
IN DETAIL “A”.
1-6 1208S20003
 Loading...