

Page 1
OKIPAGE 8w Lite
Setup Guide
Page 2

Preface
EEC compatibility
Every effort has been made to ensure that the information in this document is comp lete, accurate, and up to
date. Oki assumes no responsibility for the results of
errors beyond its control. Oki also cannot guarantee that
changes in software and equipment made by other manufacturers and referred to in this guide will not affect
the applicability of the informati on in it. Mention of
software products manufactured by other companies
does not necessarily constitute endorsement by Oki.
© 2000 by Oki. All rights reserved.
Oki and OKIPAGE are registered trademarks of Oki
Electric Industry Company Ltd.
Energy Star is a trademark of the United States
Environmental Protection Agency.
Apple, Macintosh, Mac, MacOS and True Type are
registered trademarks of Apple Computer Corporation.
Microsoft, MS-DOS and Windo ws are re gistered trade-
marks of Microsoft Corporation.
This product complies with the requirements of the Council Directives
89/336/EEC (amended by 92/31/
EEC) and 73/23/EEC (amended by
93/68/EEC) on the approximation of
the laws of the member states relating
to electromagnetic compatibility and
low voltage.
Energy Star
As an Energy Star Partner, Oki
has determined that this product
meets the Energy Star guidelines
for energy efficiency.
Universal Serial Bus
This printer is fitted with an industry standard Universal Serial Bus
(USB) data interface.
ii OKIPAGE 8w Lite
Page 3

Table of contents
English
Preface . . . . . . . . . . . . . . . . . . . . . . . . . . . . . . . . . . ii
EEC compatibility. . . . . . . . . . . . . . . . . . . . . . . . . . ii
Energy Star . . . . . . . . . . . . . . . . . . . . . . . . . . . . . . . ii
Universal Serial Bus . . . . . . . . . . . . . . . . . . . . . . . . ii
Table of contents. . . . . . . . . . . . . . . . . . . . . . . . . . .iii
Safety instructions. . . . . . . . . . . . . . . . . . . . . . . . . . .1
Toner cartridge and image drum handling . . . . .2
Emergency first aid . . . . . . . . . . . . . . . . . . . . . . .3
Printer features . . . . . . . . . . . . . . . . . . . . . . . . . . . . .4
Unpacking. . . . . . . . . . . . . . . . . . . . . . . . . . . . . . . . .5
Printer components. . . . . . . . . . . . . . . . . . . . . . . . . .6
Setting up. . . . . . . . . . . . . . . . . . . . . . . . . . . . . . . . . 7
Attaching paper input tray . . . . . . . . . . . . . . . . . 7
Protective sheet removal . . . . . . . . . . . . . . . . . . 7
Toner cartridge installation . . . . . . . . . . . . . . . . 8
Loading paper. . . . . . . . . . . . . . . . . . . . . . . . . . . 9
Printer connection . . . . . . . . . . . . . . . . . . . . . . . 9
Parallel data connection . . . . . . . . . . . . . . . 10
USB cable connection . . . . . . . . . . . . . . . . 10
Power connection. . . . . . . . . . . . . . . . . . . . . . . 10
Printer driver installation . . . . . . . . . . . . . . . . . . . . 11
Macintosh. . . . . . . . . . . . . . . . . . . . . . . . . . . . . 11
Windows. . . . . . . . . . . . . . . . . . . . . . . . . . . . . . 12
Parallel connection . . . . . . . . . . . . . . . . . . . 12
USB connection . . . . . . . . . . . . . . . . . . . . . 12
Index . . . . . . . . . . . . . . . . . . . . . . . . . . . . . . . . . . . 13
Setup Guide iii
Page 4

iv OKIPAGE 8w Lite
Page 5

Safety instructions
English
This printer has been carefully designed to give years of
safe, reliable performance. As with all electrical equipment, however, there are a few basic precautions that
should be taken to avoid personal injury or damaging
the printer:
• Read this setup guide carefully and save it for
future reference.
• Read and follow all warning and instruction
labels on the printer itself.
• Disconnect the printer before cleaning. Use only
a damp cloth. Do not use liquid or aerosol cleaners to clean the printer.
• Place the printer on a firm, solid surface. If the
printer is placed on something unsteady, it may
fall and become damaged or injure someone. If
the printer is placed on a soft surface, such as a
rug, sofa, or bed, the vents may become blocked
causing the printer to overheat.
• Do not put the printer on or near a heat source,
such as a radiator or heat register. Keep it out of
direct sunlight. Allow enough room around the
printer for adequate ventilation and easy access.
• Do not use the printer near water, or spill liquid
of any kind into it.
• Make sure that the power source matches the rating listed on the back of the printer. If you are not
sure, check with your dealer or with your local
power company.
• This printer has an earthed plug as a safety feature and will only connect to an earthed outlet. If
this plug cannot be connected to a power outlet,
then it is possible that the power outlet is of the
older, non-earthed type. Contact an electrician to
have the power outlet replaced. Do not use an
adapter to defeat the earthing.
• To avoid damaging the power cable, do not put
anything on it or place it where it will be walked
on. If the cable becomes damaged or frayed,
replace it immediately .
• If an extension cable or power strip is being used
with the printer, make sure that the total of the
amperage rating required by all the equipment is
less than the rating of the extension cable or
power strip. The total ratings of all equipment
Setup Guide 1
Page 6

plugged into the outlet should not exceed 13
amperes.
• The printer has been dropped, or the cabinet is
damaged.
• The power outlet into which the printer is connected must remain accessible at all times.
• Opening any cover may expose hot surfaces.
These are clearly labelled. Do NOT touch them.
• Do not insert anything into the ventilation slots
on the printer; you could get a shock or cause a
fire.
• Aside from the routine maintenance described in
the user’s guide, do not try to service the printer
yourself. Opening a cover may expose you to
shocks or other hazards.
• Do not make any adjustments other than those
outlined in the user’s guide as damage may be
caused to the printer.
If anything happens that indicates that the printer is not
working properly or has been damaged, disconnect the
printer from the power source and contact your dealer.
These are some of the things to look for:
• The power cable or plug is frayed or damaged.
• Liquid has been spilled into the printer, or it has
been exposed to water.
• The printer does not function normally w hen following the operating instructions.
Toner cartridge and image drum handling
• Leave unused toner cartridges and image drum
units in their packages until needed. When
replacing a toner cartridge or image unit, reuse
the packaging to dispose of the old toner cartridge
or image drum unit.
• Do not expose the toner cartridges and image
drum units to light for more than five minutes.
Never expose the green drum (inside the image
drum unit) to direct sunlight.
• Always hold the image drum unit by the ends —
never by the middle. Never touch the green drum
inside the image drum unit.
• To avoid damage to the image drum unit, always
use original toner cartridges.
• Exercise care when removing the toner cartridge.
Do not let it touch your clothing or porous materials. The toner powder causes permanent stains.
2 OKIPAGE 8w Lite
Page 7

• Small amounts of toner spilled on skin or clothing can be readily removed with soap and cold
water. Using heated water will make removing
the stain much more difficult.
Emergency first aid
• IF TONER IS SWALLOWED: Induce vomit-
ing and seek medical attention. Never attempt to
induce vomiting or give anything by mouth to a
person who is unconscious.
• IF TONER IS INHALED: Take the person to an
open area for fresh air. Seek medical attention.
• IF TONER GETS IN THE EYES: Flush eyes
with large quantities of cool, NOT cold, water for
a minimum of 15 minutes keeping eyelids open
with fingers. Seek medical attention.
English
Setup Guide 3
Page 8

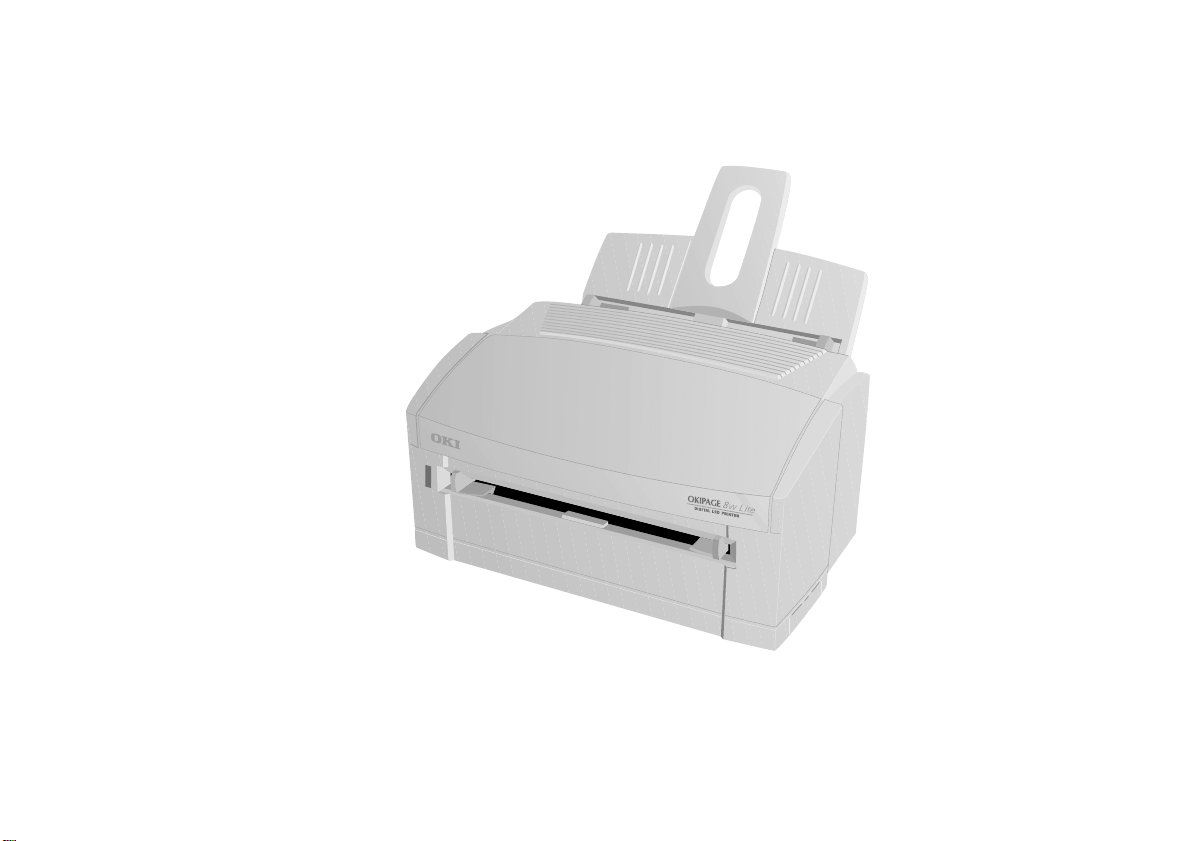
Printer features
• 8 pages per minute (ppm) output
• Genuine 300 dpi print head
• 100 sheet universal paper feeder
• 2 Mb of memory as standard with enhanced
memory management
• Manual feed for envelopes, transparencies, etc.
• Bidirectional Centronics IEEE 1284 parallel
interface
• USB interface
• Combined ready and power on indicator
4 OKIPAGE 8w Lite
Page 9

Unpacking
English
1
3
4
After unpacking the printer and choosing a suitable
place to put it, check that you have all the necessary
parts to continue:
1. Paper feed and exit tray
2. Printer
3. Image drum cartridge (normally installed inside
the printer)
2
6. Lightproof plastic bag for storing image drum if
printer must be shipped (not illustrated)
7. Setup guide (not illustrated)
8. CD-ROM containing printer drivers and documentation (not illustrated)
If anything is missing, contact your dealer for a replacement.
4. Toner cartridge
5. Power cable (not illustrated)
Setup Guide 5
Page 10

Printer components
1. Paper feed and exit tray
2. Manual feed slot
3. Ready/power on indi cator
4. Printer cov er
4
8
1
7
6
5
9. LED array
10. Image drum
3
2
11. Toner cartridge
5. Power switch
6. Power cable socket
9
7. Parallel interface connector
8. USB port
6 OKIPAGE 8w Lite
10
11
Page 11

Setting up
English
Before connecting this printer to a computer and power
supply, the toner cartridge must be installed and paper
inserted in the paper tray.
Attaching paper input tray
1. Insert the paper tray so that the hooks on the
lower edge latch with the printer.
2. Push the paper tray forward until it latches and is
secured on both sides.
Protective sheet removal
1. Open the printer cover.
CAUTION:
Never expose the image drum unit to light for more than 5
minutes. Never expose the image drum unit to direct sunlight. Always hold the image drum unit by the ends. Never
touch the surface of the green drum inside the image drum
unit.
2. Remove the image drum (1) from the printer.
1
Setup Guide 7
Page 12

3. Remove the protective sheet (1) from the image
1
drum (2).
2
1
4. Insert the cartridge into the printer, left end (1)
first as illustrated.
4. Replace the image drum.
1
Toner cartridge installation
WARNING
Be careful when handling the toner cartridge. Do not let
toner spill on your clothing or other porous materials.
5. Push the coloured tab (2) forward to release the
1. Remove the tape and shipping insert from the
image drum.
toner into the toner hopper.
6. Close the printer cover.
2. Shake the toner cartridge to distribute toner
evenly.
3. Unwrap the new toner cartridge and carefully
peel off the sealing tape (1).
8 OKIPAGE 8w Lite
2
Page 13

Loading paper
English
Printer connection
Note:
Please refer to the user guide for the types of
paper to use in this printer.
1. Set the left paper guide to the marker for the
required paper size and move the right guide to a
position slightly wider than your paper width.
2. Insert the paper so that it is up against and flush
with the left paper guide.
3. Adjust the right paper guide to fit snugly but not
tightly against the edge of the paper.
For envelopes, transparencies, other print media and
using the manual feed slot, refer to the user’s guide.
CAUTION:
Make sure the printer is disconnected from the power
supply and the computer is turned off.
The printer can be connected to a computer using one
of two methods:
• Parallel port connection for Windows.
• USB port connection for Macintosh and Windows 98
Note:
If the printer is connected using both USB and
parallel ports, the printer cannot accept simultaneous print jobs. It can only accept, process and
print one job at a time.
The following precautions should be observed when
connecting/disconnecting the interface cable:
• Disconnect the interface cable from the computer
first, then disconnect from the printer.
• Wait a minimum of 5 seconds before reconnecting the interface cable.
• Do not disconnect the interface cable or switch
the printer off while the printer is printing.
Setup Guide 9
Page 14

• Connect the interface cable to the printer first,
then connect to the computer.
Parallel data connection
1. Connect the interface cable to the parallel socket
(1) on the printer.
2
1
2. Connect the Type A (small, flat) connector on the
other end of the cable to the host computer’s USB
port.
See ‘Printer driver installation’ for further information
on printer installation.
Power connection
1. Connect the power cable into the power socket
(3) on the printer, then into a grounded outlet.
2. Switch the printer on using the main power
switch (4).
3
4
USB cable connection
The printer comes with a USB interface as standard.
This requires a Type A to Type B cable, not more than
5m in length.
1. Connect the Type B (square) connector on the
cable to the USB interface connector at the rear of
the printer (2).
10 OKIPAGE 8w Lite
Page 15

Printer driver installation
English
A printer driver is software that accepts data from software programs and applications. It then converts this
data into a format that the printer can understand to produce one or more printed pages.
Note:
Check the Readme file on the disk before carrying out installation of the printer driver. This file
may contain information that is required during
installation of the printer driver.
The printer can be connected to a computer using one
of two methods:
• Parallel port connection for Windows.
• USB port connection for Macintosh and
Windows
Note:
If the printer is connected using both USB and
parallel ports, the printer cannot accept simultaneous print jobs. It can only accept, process
and print one job at a time.
Macintosh
1. Switch on the printer then the computer and
allow the MacOS and Finder to load normally.
2. Make sure that any virus protection software that
may be running is temporarily switched off.
3. Insert the disk into the CD-ROM drive on the
computer then double click on the Installer icon.
4. Click on the Language button then choose the
required language.
5. Click on the Install button.
6. When the installation is complete, click on the
Quit button and restart the computer .
7. After the computer has restarted, open the
Chooser from the Apple menu.
8. Click on the OKIPAGE 8w Lite (USB) icon then
select the printer name that appears in the dialogue box.
9. Close the Chooser.
Setup Guide 11
Page 16

10. From the File menu, select Page Setup. Choose
the required page size and orientation, then click
on the OK button.
Windows
Parallel connection
1. Insert the OKIPAGE 8w Lite Manuals and Software CD that came with the printer into the CDROM drive.
2. Click on Start - Run.
3. Type D:\setup.exe (where “D” represents your
CD-ROM drive letter). Click OK.
4. Follow the on-screen instructions
USB connection
Note:
The USB port capability can only be used with
Windows 98.
1. Connect the printer and USB cable (see “USB
connection”) to your computer and switch on the
printer.
2. Windows will report that it has detected unknown
hardware.
3. Click Next and follow on-screen instructions.
4. Insert the CD into the CD-ROM drive. Click
Next, then select the CD-ROM drive to search for
a USB driver.
5. Click on Next again to install the USB driver following the on-screen instructions.
6. After installing the USB driver, Windows will
report that it has detected a new Okipage printer.
Note:
Allowing Windows to automatically intsall the
driver for an Okipage printer does NOT fully install the necessary software. Installation of the
printer driver must be done using the setup routine from the CD that came with the Okipage
printer.
7. Click on Cancel to close the window, then click
on Start - Run.
8. Type D:\setup.exe (where D represents the CDROM drive letter). Click OK.
9. Select Install Printer Driver. Follow the on-screen
instructions, selecting USB port conn ection for
the printer.
12 OKIPAGE 8w Lite
Page 17

Index
English
C
Component identification. . . . . . . . . . . . . . . . . . . . . 5, 6
Connection
Parallel interface . . . . . . . . . . . . . . . . . . . . . . . . . .10
Power cable . . . . . . . . . . . . . . . . . . . . . . . . . . . . . .10
USB interface . . . . . . . . . . . . . . . . . . . . . . . . . . . .10
F
Features. . . . . . . . . . . . . . . . . . . . . . . . . . . . . . . . . . . . . .4
P
Paper
Loading . . . . . . . . . . . . . . . . . . . . . . . . . . . . . . . . . .9
Paper types . . . . . . . . . . . . . . . . . . . . . . . . . . . . . . .9
Paper input tray. . . . . . . . . . . . . . . . . . . . . . . . . . . . . . . .7
Parallel interface connection . . . . . . . . . . . . . . . . . . . .10
Power cable connection . . . . . . . . . . . . . . . . . . . . . . . .10
Printer
Component identification . . . . . . . . . . . . . . . . . 5
Features . . . . . . . . . . . . . . . . . . . . . . . . . . . . . . . . . .4
Setting up. . . . . . . . . . . . . . . . . . . . . . . . . . . . . . . . .7
Unpacking . . . . . . . . . . . . . . . . . . . . . . . . . . . . . . . .5
,
Printer driver installation. . . . . . . . . . . . . . . . . . . . . . . 11
Macintosh. . . . . . . . . . . . . . . . . . . . . . . . . . . . . . . 11
Windows parallel connection. . . . . . . . . . . . . . . . 12
Windows USB connection . . . . . . . . . . . . . . . . . . 12
Protective sheet removal . . . . . . . . . . . . . . . . . . . . . . . . 7
S
Safety. . . . . . . . . . . . . . . . . . . . . . . . . . . . . . . . . . . . . . . 1
Setting up
Loading paper . . . . . . . . . . . . . . . . . . . . . . . . . . . . . 9
Paper input tray . . . . . . . . . . . . . . . . . . . . . . . . . . . 7
Parallel interface connection . . . . . . . . . . . . . . . . 10
Power cable connection . . . . . . . . . . . . . . . . . . . . 10
Protective sheet removal . . . . . . . . . . . . . . . . . . . . 7
Toner cartridge installation . . . . . . . . . . . . . . . . . . 8
USB interface connection. . . . . . . . . . . . . . . . . . . 10
T
6
Toner cartridge installation . . . . . . . . . . . . . . . . . . . . . . 8
U
Unpacking . . . . . . . . . . . . . . . . . . . . . . . . . . . . . . . . . . . 5
USB interface connection . . . . . . . . . . . . . . . . . . . . . . 10
Setup Guide 13
Page 18

OKI SYSTEMS COMPANIES
Oki Systems (UK) Limited
550 Dundee Road
Slough Trading Estate
Slough
Berks SL1 4LE
Tel: +44 (0) 1753 819 819
Fax: +44 (0) 1753 819 899
http://www.oki.co.uk
Oki Systems (Ireland) Limited
The Square Industrial Complex
Tallaght
Dublin 24
Tel: +353 (01) 459 8666
Fax: +353 (01) 459 8840
http://www.oki.ie
Hawthorn Business Centre
Adelaide Industrial Estate
Falcon Road
Belfast BT12 6HP
Tel: +44 (01232) 572 355
Fax: +44 (01232) 572 350
http://www.oki.ie
14 OKIPAGE 8w Lite
 Loading...