

Page 1
SetupSetup
Setup
SetupSetup
GuideGuide
Guide
GuideGuide
OverviewOverview
Overview
OverviewOverview
ChecChec
Chec
ChecChec
k Contentsk Contents
k Contents
k Contentsk Contents
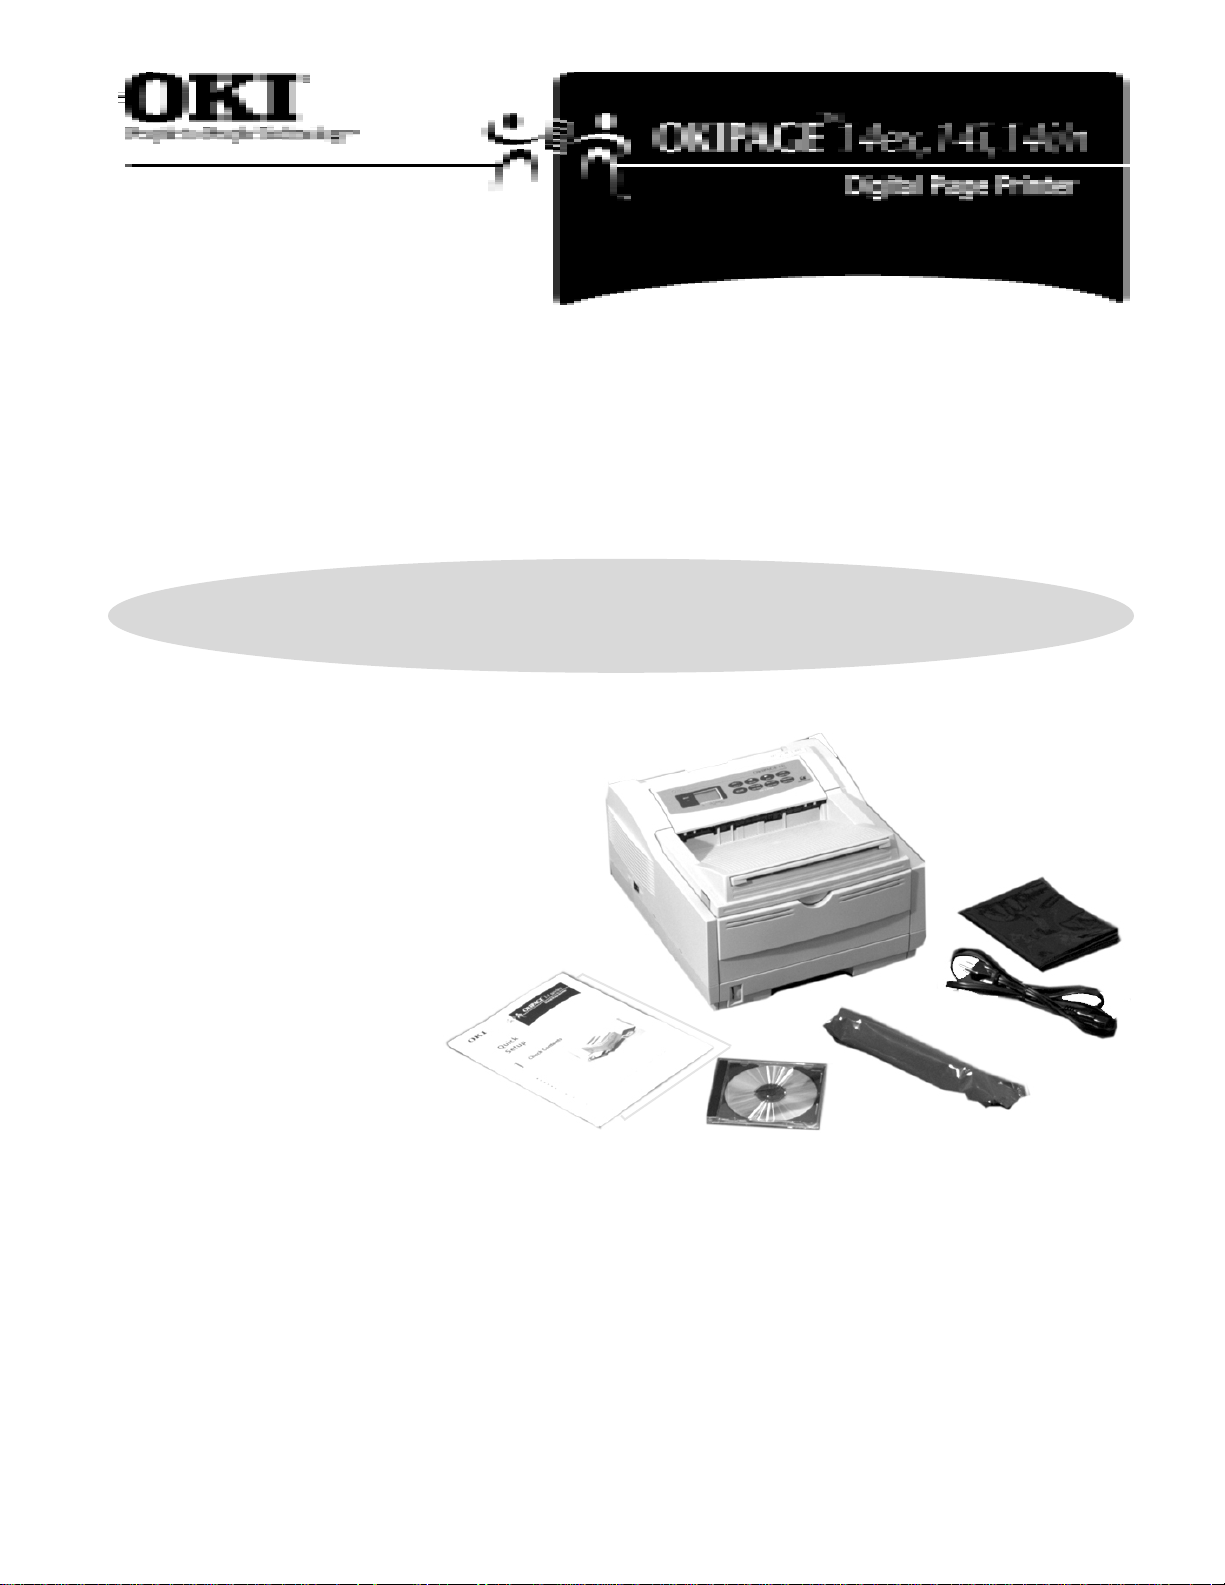
1
➊➊
➊ Printer
➊➊
➋➋
➋ Toner
➋➋
➌➌
➌ Power Cord
➌➌
➏➏
➏
➍➍
➍ CD
➍➍
➎➎
➎ Light-Shield Bag
➎➎
(to protect image drum from
light when it is removed from printer)
➏➏
➏ Setup Guide, Warranty and Regulatory
➏➏
Information
If anything is missing, contact Oki Data for a replacement.
➏➏
➊➊
➊
➊➊
➍
➋➋
➋
➋➋
➌➌
➌
➌➌
➎➎
➎
➎➎
Interface cable is not included. For information on cable requirements,
!!
see the on-line User’s Guide.
!
!!
11
1
11
Page 2
RemoRemo
Remo
RemoRemo
vv
e the Pre the Pr
v
e the Pr
vv
e the Pre the Pr
otectiotecti
otecti
otectiotecti
vv
e Sheete Sheet
v
e Sheet
vv
e Sheete Sheet
2
❑❑
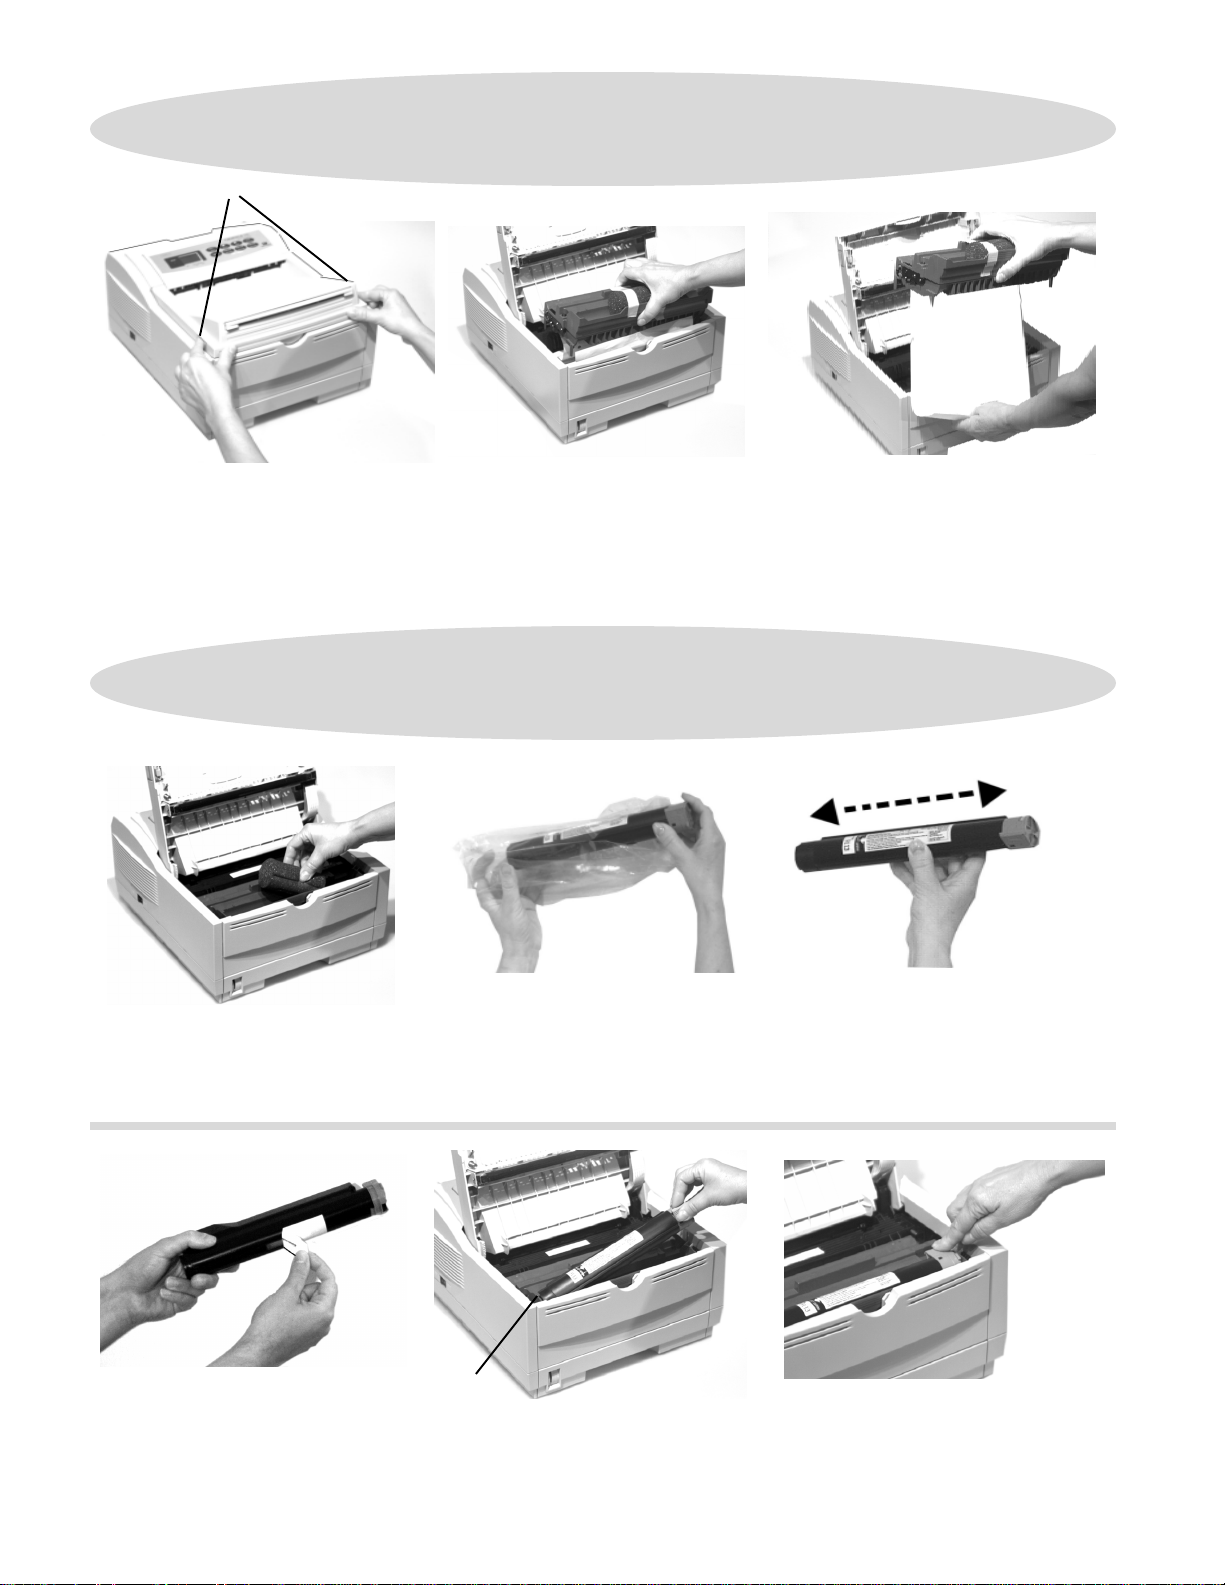
❑ Remove any shipping tape from the
❑❑
front and rear of the printer.
❑❑
❑ Press both release buttons
❑❑
the cover.
➊➊
➊
➊➊
➊➊
➊
and open
➊➊
3
❑❑
❑ Lift the image drum from the printer.
❑❑
Caution: Do not touch the imageCaution: Do not touch the image
Caution: Do not touch the image
Caution: Do not touch the imageCaution: Do not touch the image
drdr
um’um’
s gs g
rr
s g
s gs g
een surfeen surf
r
een surf
rr
een surfeen surf
dr
um’
drdr
um’um’
the image drum to direct sunlight or tothe image drum to direct sunlight or to
the image drum to direct sunlight or to
the image drum to direct sunlight or tothe image drum to direct sunlight or to
indoor light for more than 5 minutes.indoor light for more than 5 minutes.
indoor light for more than 5 minutes.
indoor light for more than 5 minutes.indoor light for more than 5 minutes.
Install the Install the
Install the
Install the Install the
aceace
. Do not e. Do not e
ace
. Do not e
aceace
. Do not e. Do not e
xposexpose
xpose
xposexpose
TT
oneroner
T
oner
TT
oneroner
❑❑
❑ Holding the image drum firmly, pull
❑❑
out the sheet.
❑❑
❑ Replace the image drum.
❑❑
❑❑
❑ Remove any shipping tape, then
❑❑
lift out the shipping sponge and
discard.
❑❑
❑ Pulling firmly, remove tape from
❑❑
bottom.
22
2
22
❑❑
❑ Shake side to side to distribute toner.
❑❑
❑ Unwrap the toner cartridge.
❑❑
Small amounts of toner on skin or clothing can easily be removed with soap
!!
!
and cold water. Hot water make
!!
➊➊
➊
➊➊
❑❑
❑ With label up, place left side
❑❑
under tab (
cartridge into the toner well.
➊➊
➊), then lower
➊➊
❑❑
s s
s toner harder to remove.
s s
❑❑
❑ Push the lock lever towards rear until
❑❑
it stops.
❑❑
❑ Close the cover.
❑❑
Page 3
4
Load PLoad P
Load P
Load PLoad P
aa
perper
a
per
aa
perper
❑❑
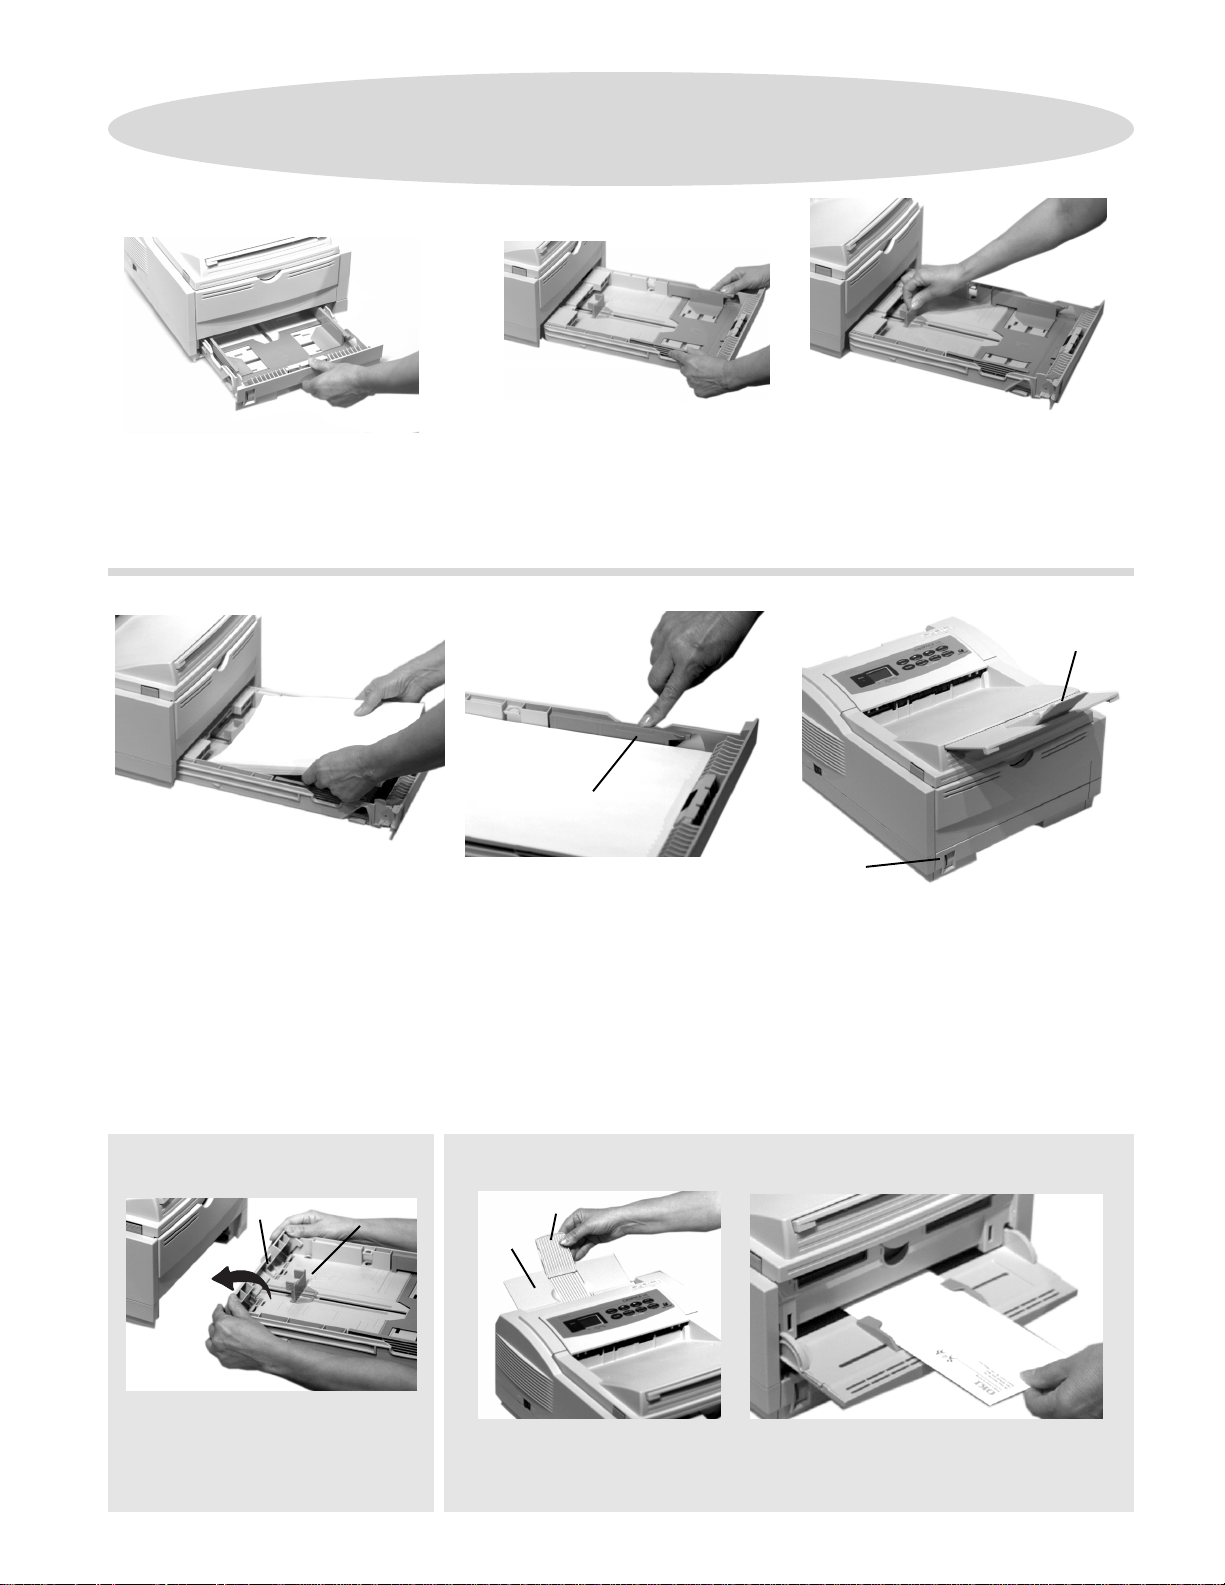
❑ Slide the paper tray out of the
❑❑
printer.
❑❑
❑ Fan a stack of paper and place it
❑❑
in the tray.
The tray holds approximately 250 sheets of 20 lb. paper. See the on-line
!!
!
User’s Guide for more information on print media and print quality
!!
adjustments.
❑❑
❑ Adjust the guides for the paper width.
❑❑
➊➊
➊
➊➊
❑❑
❑ Do not fill above the “PAPER FULL”
❑❑
➊➊
mark (
➊).
➊➊
❑❑
❑ Slide the tray back into the printer.
❑❑
❑❑
❑ Lift and slide the rear paper support
❑❑
to adjust for the paper length.
➊➊
➊
➊➊
➋➋
➋
➋➋
❑❑
❑ Pull out the front tray extender and
❑❑
support bar (
The paper gauge
!!
!
!!
amount of paper left in the printer.
➊➊
➊).
➊➊
(➋)
indicates
Using LeUsing Le
Using Le
Using LeUsing Le
To load legal size paper, open out
the tray extender (
rear paper support (
gg
al Sizal Siz
g
al Siz
gg
al Sizal Siz
➊➊
➊
➊➊
➊➊
))
➊
) and adjust the
➊➊
))
➋➋
➋
➋➋
e Pe P
e P
e Pe P
))
).
))
aa
a
aa
perper
per
perper
➋
Using En Using En
Using En
Using En Using En
➋➋
➋
➋➋
➊➊
➊
➊➊
Use manual feed with rear exit. Pull out the rear exit tray (
place and lift out the support bar
the document face up between the paper guides.
vv
elopes,elopes,
v
elopes,
vv
elopes,elopes,
La La
La
La La
bels,bels,
TT
rr
bels,
bels,bels,
ansparanspar
T
r
anspar
TT
rr
ansparanspar
((
➋➋
))
(
➋
). Open the manual feed tray and place
((
➋➋
))
encies,encies,
encies,
encies,encies,
Hea Hea
Hea
Hea Hea
vy Pvy P
aa
perper
vy P
a
per
vy Pvy P
aa
perper
➊➊
))
➊
) until it locks in
➊➊
))
33
3
33
Page 4
5
Connect to Connect to
Connect to
Connect to Connect to
YY
our Systemour System
Y
our System
YY
our Systemour System
Connecting to a PConnecting to a P
Connecting to a P
Connecting to a PConnecting to a P
RequirRequir
es IEEE 1284-compliant bi-dires IEEE 1284-compliant bi-dir
Requir
es IEEE 1284-compliant bi-dir
RequirRequir
es IEEE 1284-compliant bi-dires IEEE 1284-compliant bi-dir
cable.cable.
cable.
cable.cable.
❑❑
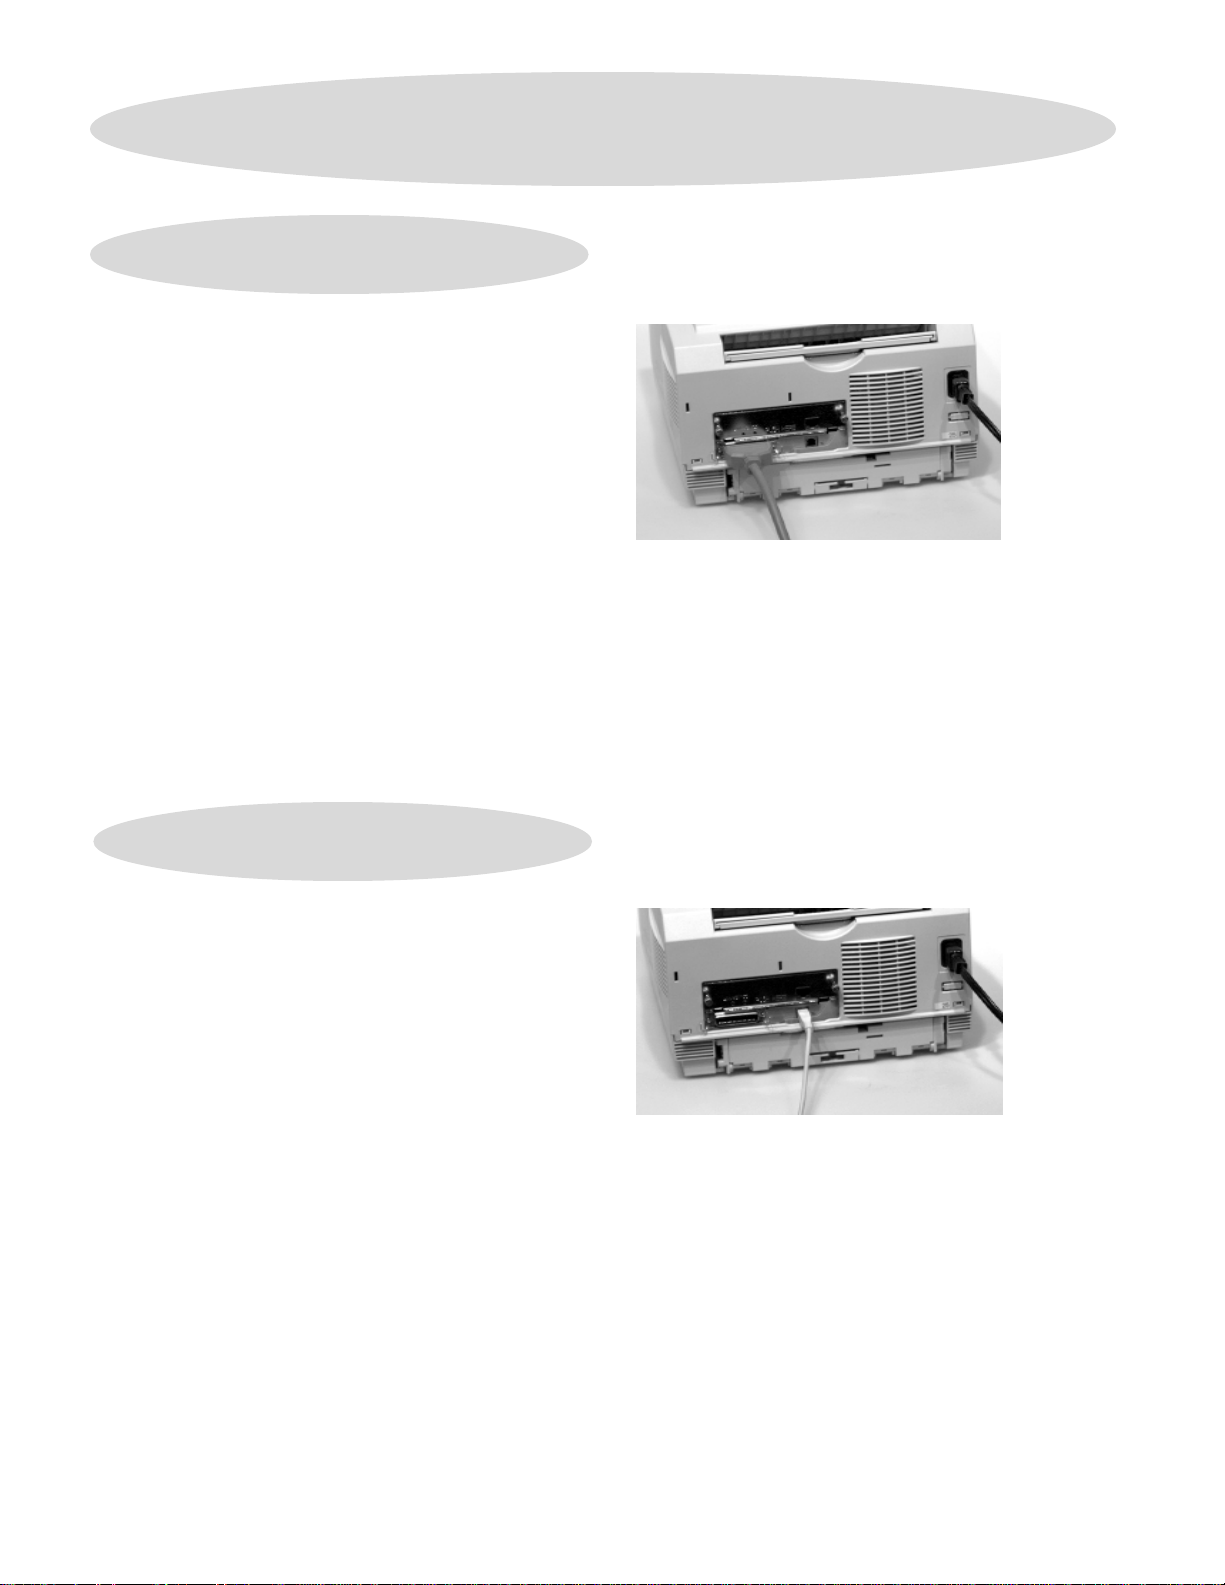
❑ Make sure the computer and printer are turned off.
❑❑
❑❑
❑ Connect the parallel cable to the computer’s parallel
❑❑
port. Secure the screws.
❑❑
❑ Connect the other end of the cable to the printer’s
❑❑
parallel port. Secure it with the wire clips.
PP
oo
ww
er Caer Ca
P
o
w
er Ca
PP
oo
ww
er Caer Ca
❑❑
❑ Connect the power cord into the printer, then into a
❑❑
grounded electric outlet.
bb
lele
b
le
bb
lele
arar
allel Pallel P
ar
allel P
arar
allel Pallel P
ectional parectional par
ectional par
ectional parectional par
oror
or
oror
tt
t
tt
allelallel
allel
allelallel
Connecting to a USB PConnecting to a USB P
Connecting to a USB P
Connecting to a USB PConnecting to a USB P
FF
or or
WW
indoindo
F
or
FF
or or
Computers with a USB port. Computers with a USB port.
Computers with a USB port.
Computers with a USB port. Computers with a USB port.
❑❑
❑ Connect the USB cable to the computer’s USB port.
❑❑
❑❑
❑ Connect the other end of the USB cable to the printer’s
❑❑
USB port.
PP
oo
ww
P
o
w
PP
oo
ww
❑❑
❑ Connect the power cord into the printer, then into a
❑❑
grounded electric outlet.
ws 98/2000/Millennium and Macintoshws 98/2000/Millennium and Macintosh
W
indo
ws 98/2000/Millennium and Macintosh
WW
indoindo
ws 98/2000/Millennium and Macintoshws 98/2000/Millennium and Macintosh
Requires USB cable.Requires USB cable.
Requires USB cable.
Requires USB cable.Requires USB cable.
er Caer Ca
er Ca
er Caer Ca
bb
lele
b
le
bb
lele
oror
or
oror
tt
t
tt
44
4
44
Page 5

Install the PrInstall the Pr
Install the Pr
Install the PrInstall the Pr
inter Softwinter Softw
inter Softw
inter Softwinter Softw
arar
ar
arar
ee
e
ee
6
❑❑
❑ Determine y our computer’s interface connection and operating system, then proceed to the page listed
❑❑
below for instructions to install the appropriate printer software.
PP
arar
allel Connectionallel Connection
P
ar
allel Connection
PP
arar
allel Connectionallel Connection
USB ConnectionUSB Connection
USB Connection
USB ConnectionUSB Connection
If you are using Parallel interface and your operating
system is:
WW
indoindo
ws 2000ws 2000
W
indo
ws 2000, see page ......................6
WW
indoindo
ws 2000ws 2000
WW
indoindo
ws 98ws 98
W
indo
ws 98, see page........................... 7
WW
indoindo
ws 98ws 98
WW
indoindo
ws Millenniumws Millennium
W
indo
ws Millennium, see page...........8
WW
indoindo
ws Millenniumws Millennium
WW
indoindo
ws 95ws 95
W
indo
ws 95, see page........................... 9
WW
indoindo
ws 95ws 95
WW
indoindo
ws NT 4.0ws NT 4.0
W
indo
ws NT 4.0, see page ...................10
WW
indoindo
ws NT 4.0ws NT 4.0
If you are using USB interface and your operating
system is:
WW
indoindo
ws 2000ws 2000
W
indo
ws 2000, see page ......................11
WW
indoindo
ws 2000ws 2000
WW
indoindo
ws 98ws 98
W
indo
ws 98, see page...........................12
WW
indoindo
ws 98ws 98
WW
indoindo
ws Millenniumws Millennium
W
indo
ws Millennium, see page...........13
WW
indoindo
ws Millenniumws Millennium
MacintoshMacintosh
Macintosh, see page .............................14
MacintoshMacintosh
55
5
55
Page 6
Install the PrInstall the Pr
Install the Pr
Install the PrInstall the Pr
PP
arar
allel Connectionallel Connection
P
ar
allel Connection
PP
arar
allel Connectionallel Connection
WW
indoindo
indo
indoindo
ws 2000ws 2000
ws 2000
ws 2000ws 2000
osoft osoft
WW
osoft
osoft osoft
or it duror it dur
or it dur
or it duror it dur
indoindo
W
indo
WW
indoindo
ing theing the
ing the
ing theing the
ws 2000 CD handws 2000 CD hand
ws 2000 CD hand
ws 2000 CD handws 2000 CD hand
installation.installation.
installation.
installation.installation.
W
WW
These instructions assume “D” is your CD-ROM drive.These instructions assume “D” is your CD-ROM drive.
These instructions assume “D” is your CD-ROM drive.
These instructions assume “D” is your CD-ROM drive.These instructions assume “D” is your CD-ROM drive.
!!
!
!!
HaHa
vv
e ye y
our orour or
igig
Ha
v
HaHa
vv
YY
ou maou ma
Y
ou ma
YY
ou maou ma
e y
e ye y
our or
our orour or
y be pry be pr
y be pr
y be pry be pr
inal Micrinal Micr
ig
inal Micr
igig
inal Micrinal Micr
ompted fompted f
ompted f
ompted fompted f
inter Softwinter Softw
inter Softw
inter Softwinter Softw
❑❑
❑ Clear Automatically detect.... Select
❑❑
printer. Click
NetwNetw
oror
Netw
NetwNetw
yy
..
y
.
yy
..
❑❑
❑ Follow the on-screen instructions to complete the
❑❑
k Prk Pr
or
k Pr
oror
k Prk Pr
installation.
NeNe
Ne
NeNe
inter Connection:inter Connection:
inter Connection:
inter Connection:inter Connection:
xtxt
xt.
xtxt
arar
ar
arar
ee
e
ee
LocalLocal
Local or
LocalLocal
NetwNetw
Netw
NetwNetw
oror
or
oror
kk
k
kk
Install the PCL5e DriverInstall the PCL5e Driver
Install the PCL5e Driver
Install the PCL5e DriverInstall the PCL5e Driver
❑❑
❑ Turn on your computer.
❑❑
❑❑
❑ Turn on your printer.
❑❑
❑❑
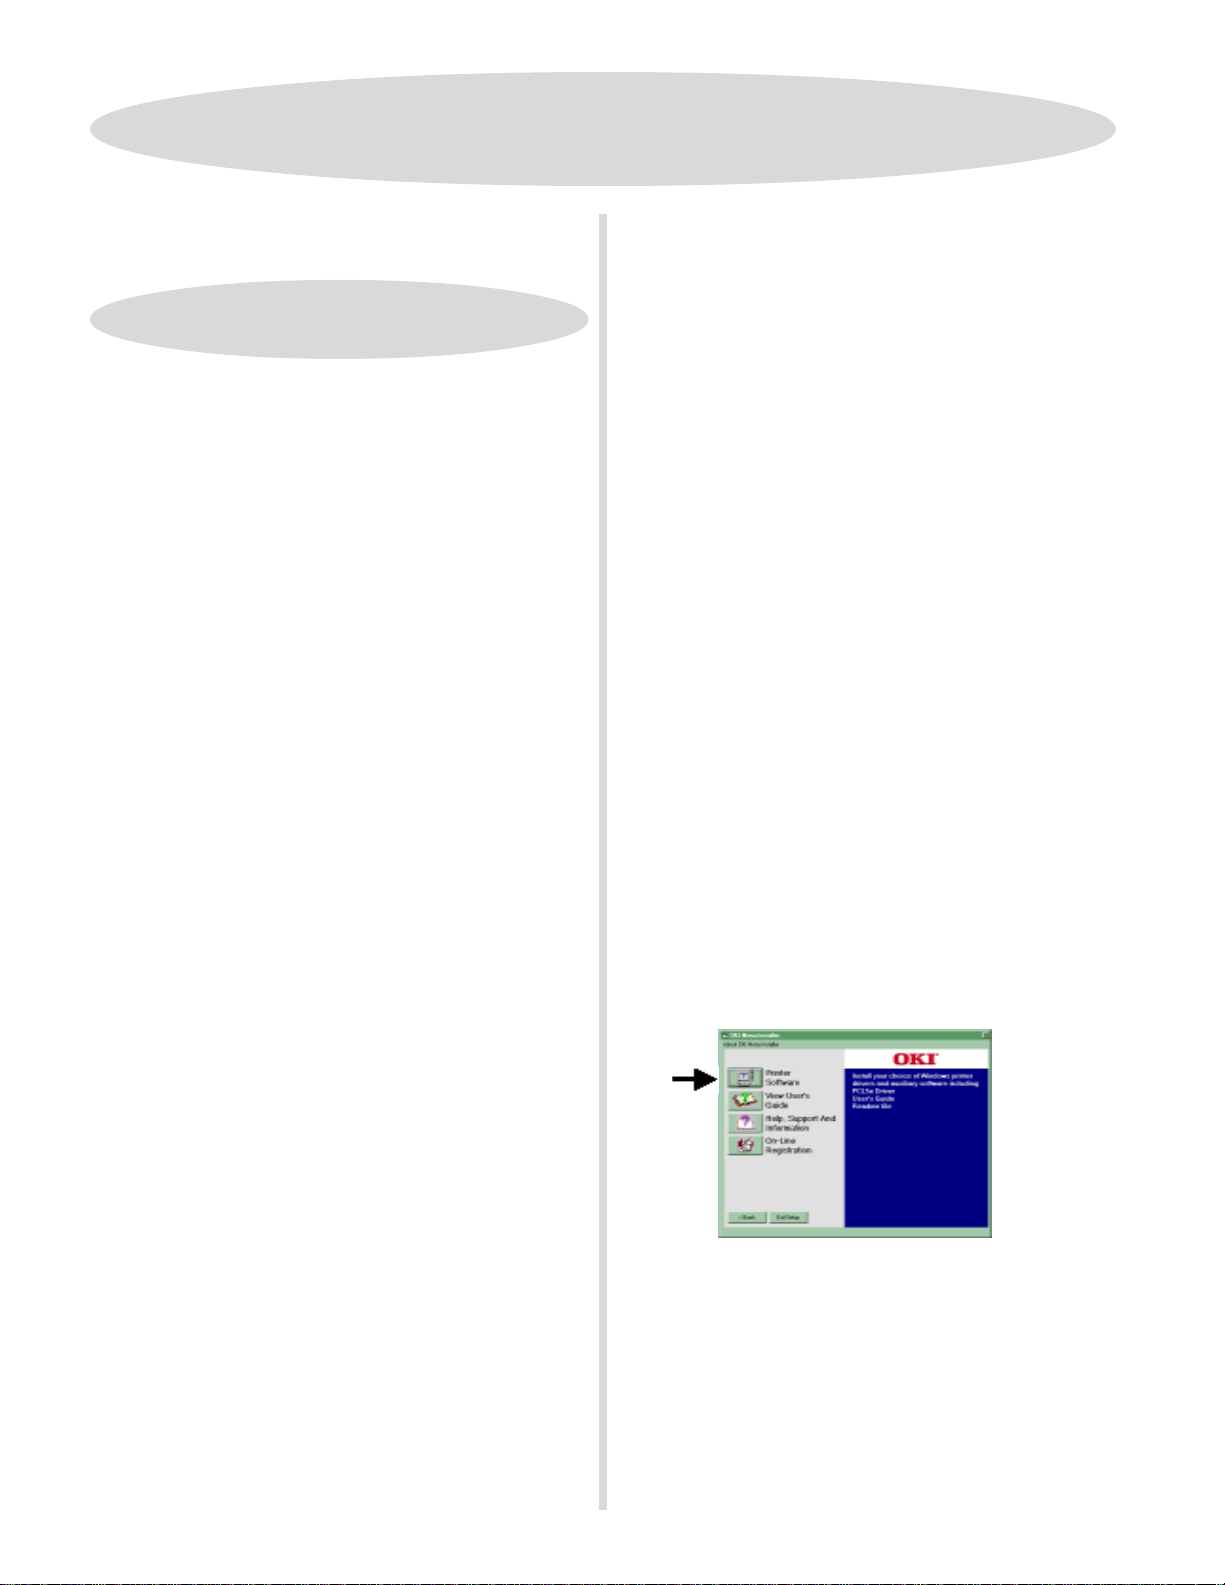
❑ Insert the OKIPAGE CD into your CD-ROM drive.
❑❑
❑❑
❑ From the taskbar, click
❑❑
❑❑
❑ Double-click
❑❑
appears. Click
❑❑
❑ Clear Automatically detect.... Select
❑❑
printer.
❑❑
❑ Click on your printer model. Click
❑❑
NetwNetw
oror
Netw
NetwNetw
❑❑
❑ Follow the on-screen instructions to complete the
❑❑
Local PrLocal Pr
Local Pr
Local PrLocal Pr
❑❑
❑ Select the printer port. Click Next.
❑❑
❑❑
❑ Select
❑❑
k Prk Pr
or
k Pr
oror
k Prk Pr
installation.
AdAd
Ad
AdAd
NextNext
Next.
NextNext
inter Connection:inter Connection:
inter Connection:
inter Connection:inter Connection:
inter Connection:inter Connection:
inter Connection:
inter Connection:inter Connection:
Have DiskHave Disk
Have Disk.
Have DiskHave Disk
StarStar
t t
→→
t
→
t t
→→
Settings Settings
Settings
Settings Settings
LocalLocal
Local or
LocalLocal
Continue Continue
Continue.
Continue Continue
Star
StarStar
d Prd Pr
interinter
d Pr
inter. The Add Printer Wizard
d Prd Pr
interinter
→→
→
→→
Pr Pr
Pr
Pr Pr
interinter
inter
interinter
NetwNetw
Netw
NetwNetw
oror
or
oror
Local PrLocal Pr
Local Pr
Local PrLocal Pr
❑❑
❑ Select the printer port. Click
❑❑
❑❑
❑ Select
❑❑
❑❑
❑ Type in
❑❑
❑❑
❑ Select the
❑❑
❑❑
❑ OKIPAGE 14iPS displays. Click
ss
s.
ss
kk
k
kk
❑❑
❑❑
❑ Complete the installation following the instructions on
❑❑
Install the User’s GuideInstall the User’s Guide
Install the User’s Guide
Install the User’s GuideInstall the User’s Guide
❑❑
❑ Insert the OKIPAGE CD into your CD-ROM drive.
❑❑
❑❑
❑ Click
❑❑
❑❑
❑ Type in
❑❑
❑❑
❑ When Menu Installer appears, click on your printer model.
❑❑
❑❑
❑ Click the
❑❑
inter Connection:inter Connection:
inter Connection:
inter Connection:inter Connection:
Have DiskHave Disk
Have Disk.
Have DiskHave Disk
D:\ D:\
D:\ (or your CD-ROM drive). Click
D:\ D:\
OKIPOKIP
OKIP
OKIPOKIP
your screen.
Start Start
Start
Start Start
D:\install.e D:\install.e
D:\install.e
D:\install.e D:\install.e
Continue.Continue.
Click
Continue.
Continue.Continue.
PrPr
Pr
PrPr
AA
GE 14iPSGE 14iPS
A
GE 14iPS printer. Click
AA
GE 14iPSGE 14iPS
→→
Run.Run.
→
Run.
→→
Run.Run.
xx
ee
. .
. Click
. .
arar
ee
ar
e button.
arar
ee
OK. OK.
OK.
OK. OK.
x
e
xx
ee
inter Softwinter Softw
inter Softw
inter Softwinter Softw
NextNext
Next.
NextNext
NeNe
Ne
NeNe
xt.xt.
xt.
xt.xt.
NeNe
Ne
NeNe
OKOK
OK.
OKOK
xt.xt.
xt.
xt.xt.
❑❑
❑ Type in
❑❑
❑❑
❑ Select your printer model. Click
❑❑
❑❑
❑ Your printer model displays. Click
❑❑
❑❑
❑ Complete the installation following the instructions on
❑❑
your screen.
Install the PInstall the P
Install the P
Install the PInstall the P
Turn on your computer.
Turn on your printer.
Insert the OKIPAGE CD into your CD-ROM drive.
From the taskbar, click
❑❑
❑ Double-click
❑❑
appears. Click
66
6
66
D:\ D:\
D:\ (or your CD-ROM drive). Click
D:\ D:\
Next.Next.
Next.
Next.Next.
NeNe
xt.xt.
Ne
xt.
NeNe
xt.xt.
ostScrostScr
ostScr
ostScrostScr
AdAd
Ad
AdAd
ipt Dript Dr
ipt Dr
ipt Dript Dr
Star Star
Star
Star Star
d Prd Pr
interinter
d Pr
inter. The Add Printer Wizard
d Prd Pr
interinter
NextNext
Next.
NextNext
t t
→→
t
→
t t
→→
ii
vv
er fer f
i
v
er f
ii
vv
er fer f
settings settings
settings
settings settings
or or
or
or or
→→
→
→→
14i,14i,
14i,
14i,14i,
Pr Pr
Pr
Pr Pr
OKOK
OK.
OKOK
14i/n 14i/n
14i/n
14i/n 14i/n
interinter
inter
interinter
ss
s.
ss
YY
ou can cou can c
Y
ou can c
YY
ou can cou can c
!!
!
• Vie w the User’s Guide
!!
• View Help Support and Information
• Register your printer on-line
❑❑
❑ Follow the instructions on your screen to complete the
❑❑
installation.
When you have completed installing the printer software,
!!
go to page 15 for more information on using your printer.
!
!!
liclic
k a bk a b
utton on the Menutton on the Men
lic
k a b
utton on the Men
liclic
k a bk a b
utton on the Menutton on the Men
u Installer to:u Installer to:
u Installer to:
u Installer to:u Installer to:
Page 7
Install the PrInstall the Pr
Install the Pr
Install the PrInstall the Pr
PP
arar
allel Connectionallel Connection
P
ar
allel Connection
PP
arar
allel Connectionallel Connection
WW
indoindo
indo
indoindo
or it duror it dur
or it dur
or it duror it dur
ws 98ws 98
ws 98
ws 98ws 98
osoft osoft
WW
osoft
W
osoft osoft
WW
ing the installaing the installa
ing the installa
ing the installaing the installa
NeNe
xtxt
Ne
xt.
NeNe
xtxt
indoindo
ws 98 CD handws 98 CD hand
indo
ws 98 CD hand
indoindo
ws 98 CD handws 98 CD hand
tion.tion.
tion.
tion.tion.
W
WW
These instructions assume “D” is your CD-ROM drive.These instructions assume “D” is your CD-ROM drive.
These instructions assume “D” is your CD-ROM drive.
These instructions assume “D” is your CD-ROM drive.These instructions assume “D” is your CD-ROM drive.
!!
!
!!
HaHa
vv
e ye y
our orour or
igig
Ha
v
e y
our or
HaHa
vv
e ye y
our orour or
YY
ou maou ma
ou ma
ou maou ma
y be pry be pr
y be pr
y be pry be pr
Y
YY
Install the PCL5e DriverInstall the PCL5e Driver
Install the PCL5e Driver
Install the PCL5e DriverInstall the PCL5e Driver
❑❑
❑ Turn on your printer.
❑❑
❑❑
❑ Turn on your computer.
❑❑
❑❑
❑ The Add New Hardware Wizard appears, and
❑❑
OKIPAGE14 is found. Click
❑❑
❑ Insert the OKIPAGE 14 CD into your CD-ROM drive.
❑❑
inal Micrinal Micr
ig
inal Micr
igig
inal Micrinal Micr
ompted fompted f
ompted f
ompted fompted f
inter Softwinter Softw
inter Softw
inter Softwinter Softw
YY
ou can cou can c
Y
ou can c
YY
ou can cou can c
!!
!
• View the User’s Guide
!!
• View Help Support and Information
• Register your printer on-line
yy
..
y
.
yy
..
❑❑
❑ To install the PostScript driver and the User’s Guide on
❑❑
your hard drive, click the Printer Software button.
liclic
lic
liclic
arar
ar
arar
k a bk a b
utton on the Menutton on the Men
k a b
utton on the Men
k a bk a b
utton on the Menutton on the Men
ee
e
ee
u Installer to:u Installer to:
u Installer to:
u Installer to:u Installer to:
❑❑
❑ Select “Search for the best driver for your device
❑❑
ii
vv
er fer f
i
v
er f
ii
vv
er fer f
ee
e. Click
ee
NextNext
Next.
NextNext
or 14i,or 14i,
or 14i,
or 14i,or 14i,
OKOK
OK.
OKOK
14i/n 14i/n
14i/n
14i/n 14i/n
Next.Next.
Next.
Next.Next.
Next.Next.
Next.
Next.Next.
NextNext
Next.
NextNext
(Recommended).” Click
❑❑
❑ Select “CD-ROM drive.” Clear other choices. Click
❑❑
❑❑
❑ Select “The updated driver (Recommended).” Click
❑❑
❑❑
❑ Confirm that the driver is ready to be installed. Click
❑❑
❑❑
❑ Select a name for your printer, or accept OKIPAGE 14.
❑❑
Next Next
Click
Next.
Next Next
❑❑
❑ Select “Yes (Recommended)” to print a test page. Click
❑❑
FF
inish.inish.
F
inish. The files are copied.
FF
inish.inish.
❑❑
❑ Click
❑❑
Install the On-line User’s Guide andInstall the On-line User’s Guide and
Install the On-line User’s Guide and
Install the On-line User’s Guide andInstall the On-line User’s Guide and
the Pthe P
the P
the Pthe P
With the CD in your CD-ROM drive:
❑❑
❑ Click
❑❑
❑❑
❑ Type
❑❑
Finish.Finish.
Finish.
Finish.Finish.
ostScrostScr
ostScr
ostScrostScr
YY
eses
Y
es to “Did the test page print correctly?” Click
YY
eses
ipt Dript Dr
ipt Dr
ipt Dript Dr
Start Start
→→
→
→→
RunRun
Run.
RunRun
xx
x
xx
Start
Start Start
D:\install.eD:\install.e
D:\install.e
D:\install.eD:\install.e
❑❑
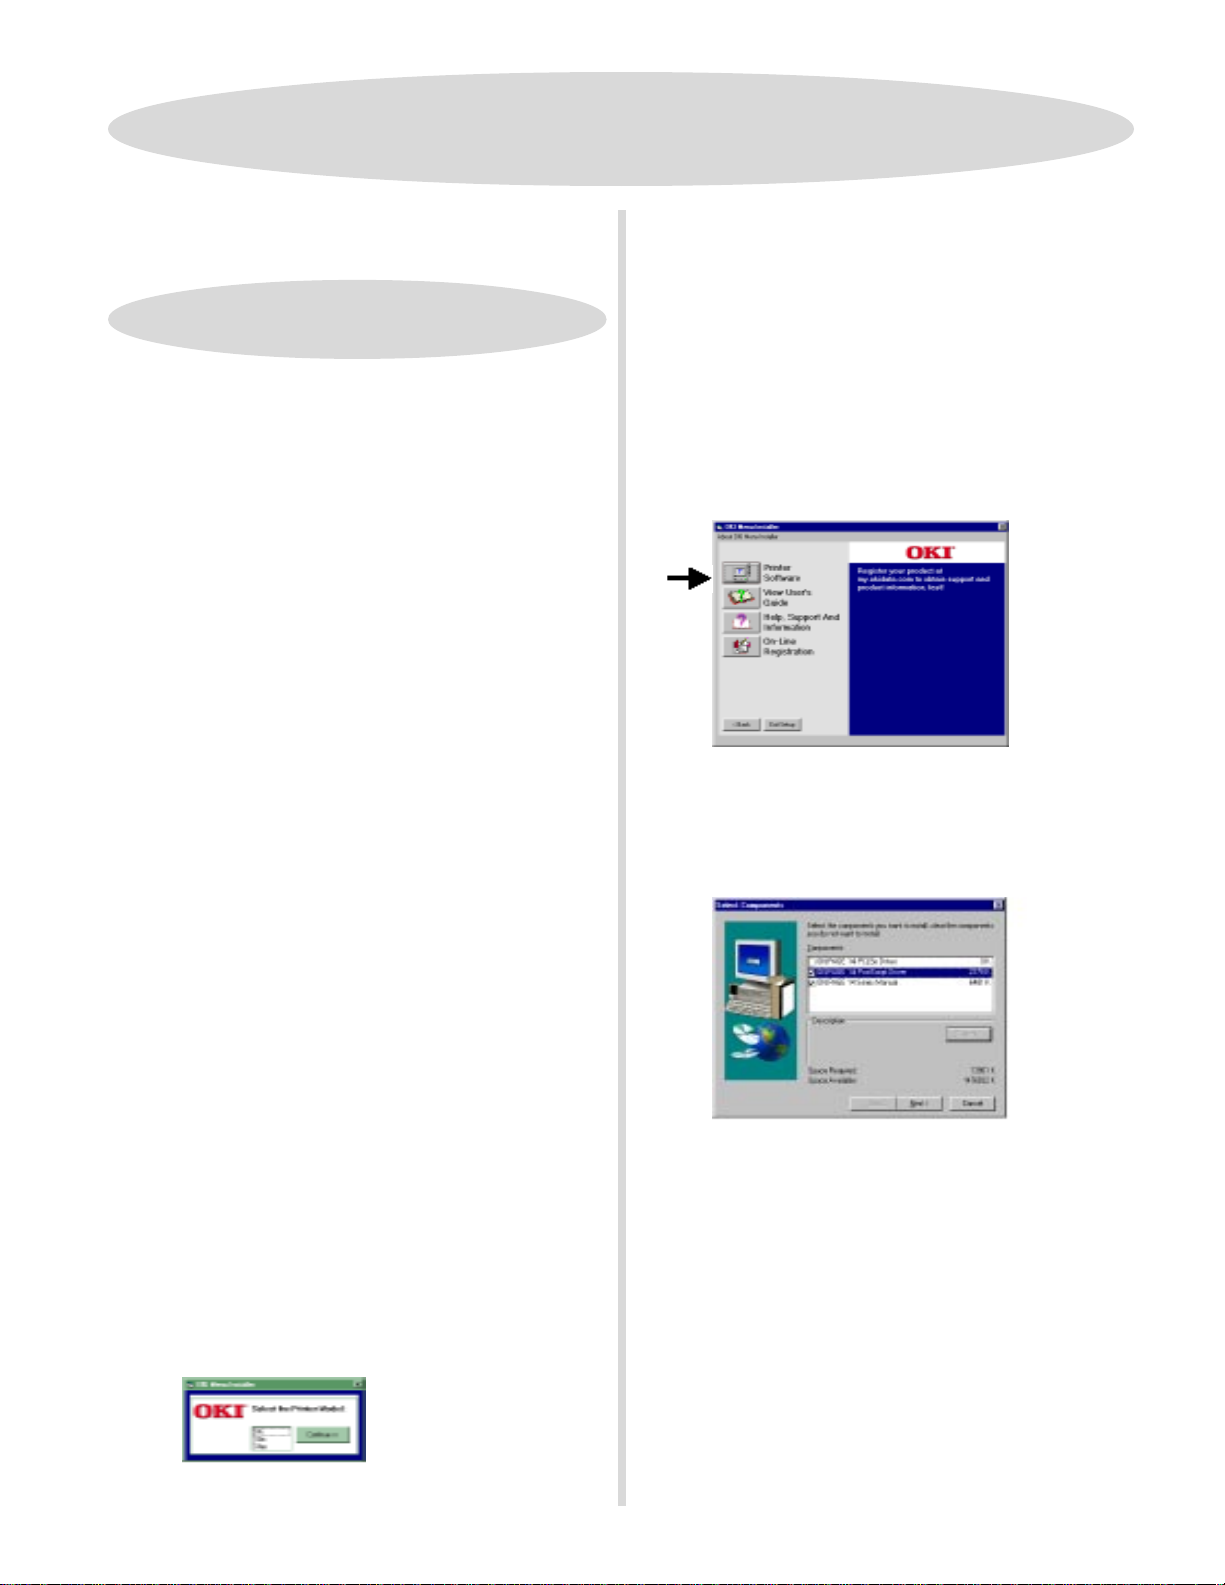
❑ When the Select Components screen appears, check the
❑❑
components you want to install.
driver: it has already been installed via the Windows
Wizard
.
❑❑
❑ Follow the instructions on your screen.
❑❑
When you have completed installing the printer software,
!!
!
go to page 15 for more information on using your printer.
!!
Note:Note:
Note: Clear the PCL5e
Note:Note:
❑❑
❑ Click on your printer model. Click
❑❑
Continue Continue
Continue.
Continue Continue
77
7
77
Page 8
Install the PrInstall the Pr
Install the Pr
Install the PrInstall the Pr
PP
arar
allel Connectionallel Connection
P
ar
allel Connection
PP
arar
allel Connectionallel Connection
WW
indoindo
W
WW
These instructions assume “D” is your CD-ROM drive.These instructions assume “D” is your CD-ROM drive.
These instructions assume “D” is your CD-ROM drive.
These instructions assume “D” is your CD-ROM drive.These instructions assume “D” is your CD-ROM drive.
!!
!
!!
HaHa
vv
e ye y
our orour or
Ha
v
e y
our or
HaHa
vv
e ye y
our orour or
CDCD
handhand
yy
. .
hand
handhand
OKOK
OK.
OKOK
Next.Next.
Next.
Next.Next.
YY
y
.
Y
yy
. .
YY
CD
CDCD
installation.installation.
installation.
installation.installation.
Install the PCL5e DriverInstall the PCL5e Driver
Install the PCL5e Driver
Install the PCL5e DriverInstall the PCL5e Driver
❑❑
❑ Turn on your printer.
❑❑
❑❑
❑ Turn on your computer.
❑❑
❑❑
❑ Add New Hardware Wizard appears, OKIPAGE 14 is
❑❑
detected.
❑❑
❑ Insert the OKIPAGE 14 CD into your CD-ROM drive.
❑❑
❑❑
❑ Select “Automatic search for a better driver,
❑❑
(Recommended).” Click
❑❑
❑ Select the proper driver in the Select Other Driver dialog.
❑❑
Click
❑❑
❑ Select a name for your printer, or accept OKIPAGE 14.
❑❑
Click
ws Millenniumws Millennium
indo
ws Millennium
indoindo
ws Millenniumws Millennium
igig
inal Micrinal Micr
ig
inal Micr
igig
inal Micrinal Micr
ou maou ma
ou ma
ou maou ma
y be pry be pr
y be pr
y be pry be pr
NextNext
Next.
NextNext
osoft osoft
osoft
osoft osoft
ompted fompted f
ompted f
ompted fompted f
WW
indoindo
ws Millenniumws Millennium
W
indo
ws Millennium
WW
indoindo
ws Millenniumws Millennium
or it duror it dur
or it dur
or it duror it dur
ing theing the
ing the
ing theing the
inter Softwinter Softw
inter Softw
inter Softwinter Softw
❑❑
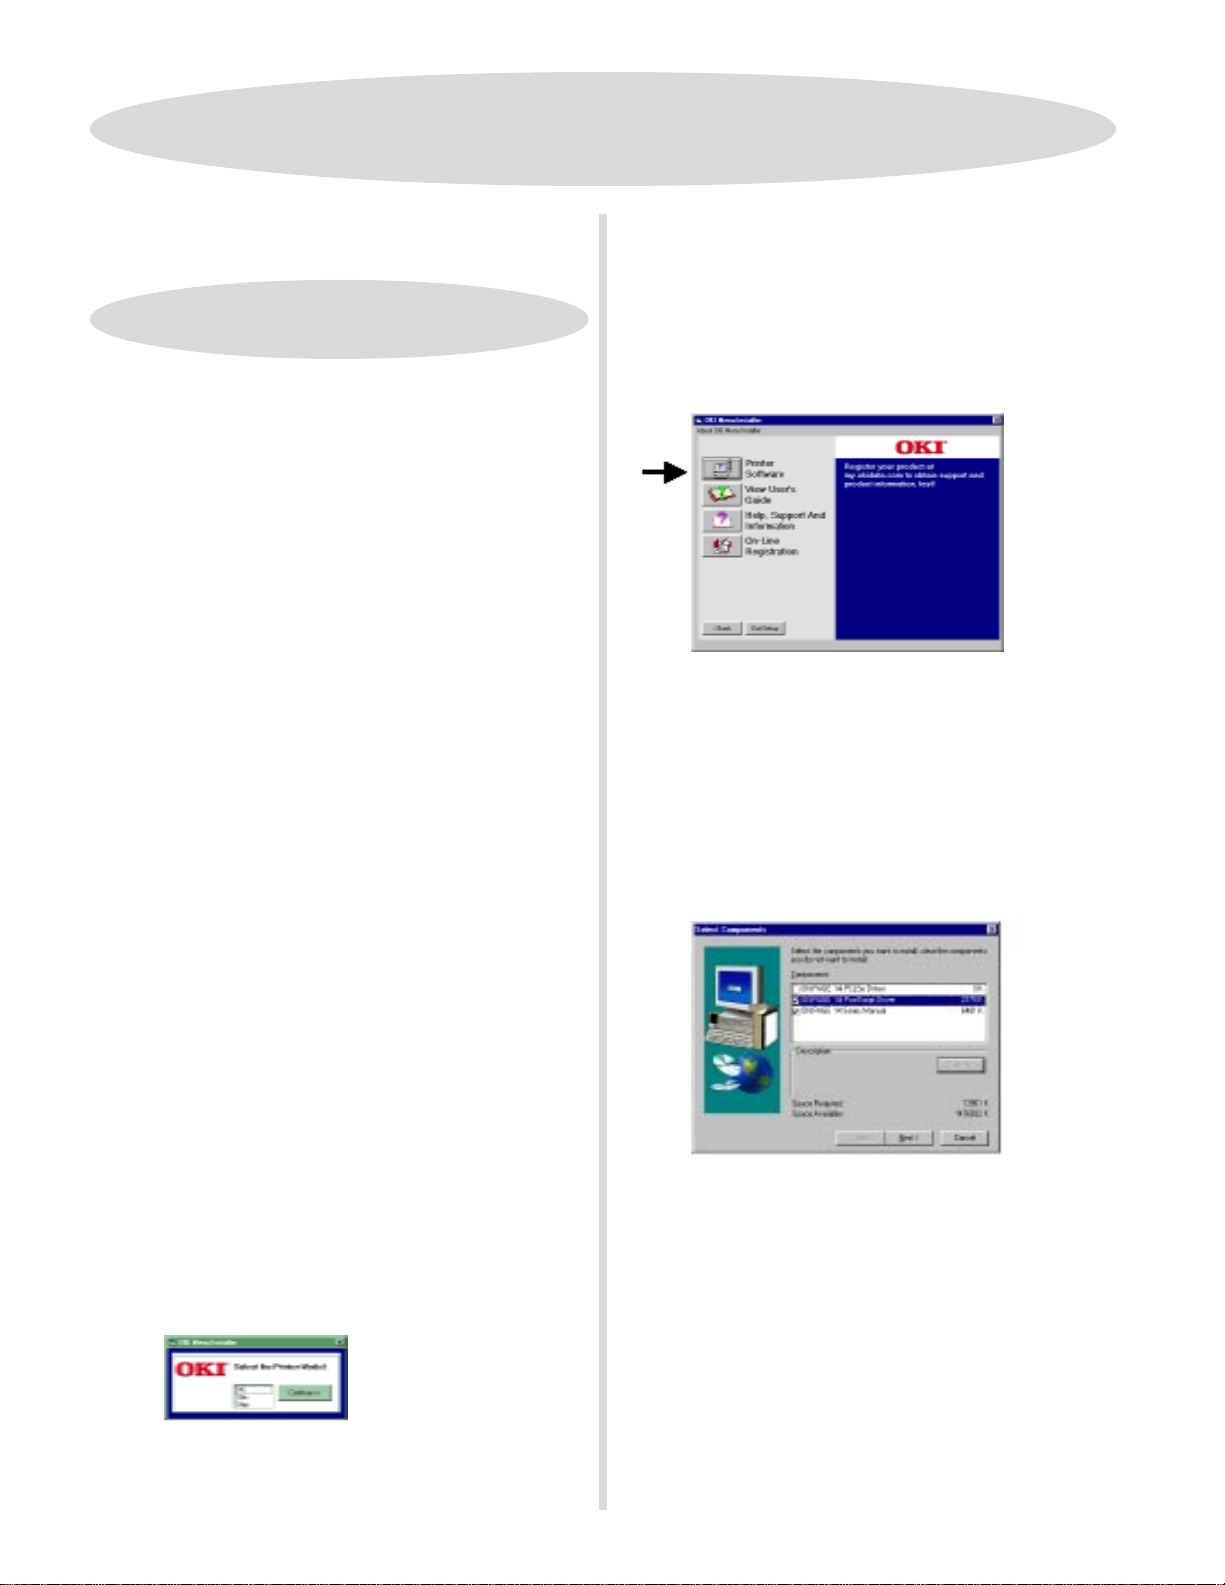
❑ The OKI Menu Installer appears. To install the User’s
❑❑
Guide or PostScript driver on your hard drive, click the
PrPr
inter Softwinter Softw
Pr
inter Softw
PrPr
inter Softwinter Softw
YY
ou can cou can c
Y
ou can c
YY
ou can cou can c
!!
• View the User’s Guide
!
!!
• View Help Support and Information
• Register your printer on-line
❑❑
❑ When the Select Components screen appears, check the
❑❑
components you want to install.
driver: it has already been installed via the Windows
Wizard
arar
ee
ar
e button.
arar
ee
liclic
k a bk a b
lic
k a b
liclic
k a bk a b
.
arar
ee
ar
e
arar
ee
utton on the Menutton on the Men
utton on the Men
utton on the Menutton on the Men
Note:Note:
Note: Clear the PCL5e
Note:Note:
u Installer to:u Installer to:
u Installer to:
u Installer to:u Installer to:
❑❑
❑ In the Print Test
❑❑
FinishFinish
click
Finish.
FinishFinish
❑❑
❑ Click
❑❑
Install the On-line User’s Guide andInstall the On-line User’s Guide and
Install the On-line User’s Guide and
Install the On-line User’s Guide andInstall the On-line User’s Guide and
the Pthe P
the P
the Pthe P
With the CD in your CD-ROM drive:
❑❑
❑ Click
❑❑
❑❑
❑ Type in
❑❑
❑❑
❑ Click on your printer model. Click
❑❑
88
8
88
YESYES
YES on the Printer Test Page Completed dialog.
YESYES
Finish.Finish.
Click
Finish.
Finish.Finish.
ostScrostScr
ostScr
ostScrostScr
Start Start
Start
Start Start
D:\install.eD:\install.e
D:\install.e
D:\install.eD:\install.e
dialog box, select
ipt Dript Dr
ipt Dr
ipt Dript Dr
→→
→
→→
RunRun
Run.
RunRun
ii
vv
er fer f
i
v
er f
ii
vv
er fer f
xx
ee
x
e. Click
xx
ee
YY
es es
Y
es to print a test page,
YY
es es
or the 14i,or the 14i,
or the 14i,
or the 14i,or the 14i,
OKOK
OK.
OKOK
Continue Continue
Continue.
Continue Continue
14i/n 14i/n
14i/n
14i/n 14i/n
❑❑
❑ Follow the instructions on your screen.
❑❑
When you have completed installing the printer software,
!!
!
go to page 15 for more information on using your printer.
!!
Page 9

PP
arar
allel Connectionallel Connection
P
ar
allel Connection
PP
arar
allel Connectionallel Connection
Install the PrInstall the Pr
Install the Pr
Install the PrInstall the Pr
inter Softwinter Softw
inter Softw
inter Softwinter Softw
arar
ar
arar
ee
e
ee
WW
indoindo
indo
indoindo
osoft osoft
osoft
osoft osoft
or it duror it dur
or it dur
or it duror it dur
→→
Contr Contr
→
Contr
→→
Contr Contr
ws 95ws 95
ws 95
ws 95ws 95
WW
indoindo
ws 95 CD handws 95 CD hand
W
indo
ws 95 CD hand
WW
indoindo
ws 95 CD handws 95 CD hand
ing the installaing the installa
ing the installa
ing the installaing the installa
ol Pol P
anelanel
ol P
anel. Double-click
ol Pol P
anelanel
SystemSystem
System. Beneath
SystemSystem
tion.tion.
tion.
tion.tion.
yy
y
yy
W
WW
These instructions assume “D” is your CD-ROM drive.These instructions assume “D” is your CD-ROM drive.
These instructions assume “D” is your CD-ROM drive.
These instructions assume “D” is your CD-ROM drive.These instructions assume “D” is your CD-ROM drive.
!!
!
!!
HaHa
vv
e ye y
our orour or
igig
erer
er
erer
t t
t
t t
sion?sion?
sion?
sion?sion?
→→
→
→→
TT
T
TT
inal Micrinal Micr
ig
inal Micr
igig
inal Micrinal Micr
ompted fompted f
ompted f
ompted fompted f
Settings Settings
Settings
Settings Settings
ype ype
AA
ype
A
ype ype
AA
Ha
v
e y
our or
HaHa
vv
e ye y
our orour or
YY
ou maou ma
Y
YY
WW
indoindo
W
indo
WW
indoindo
Before you can install the printer software, you need to
determine the version of Windows you are using. To do this:
❑❑
❑ Turn on your computer.
❑❑
❑❑
❑ Click
❑❑
SystemSystem
System.
SystemSystem
❑❑
❑ On the
❑❑
“Microsoft Windows 95” a version number appears, for
example 4.00.950. If that number is followed by the letter
“B” you have Type B, if not, you have Type A.
Install the PCL5e DriverInstall the PCL5e Driver
Install the PCL5e Driver
Install the PCL5e DriverInstall the PCL5e Driver
WW
indoindo
W
indo
WW
indoindo
❑❑
❑ Turn on your printer.
❑❑
y be pry be pr
ou ma
y be pr
ou maou ma
y be pry be pr
ws ws
VV
ws
V
ws ws
VV
StarStar
Star
StarStar
GeneralGeneral
General tab, look under
GeneralGeneral
ws 95 ws 95
ws 95
ws 95 ws 95
❑❑
❑ In the Please Insert the Disk Labeled
❑❑
SoftwSoftw
arar
Softw
SoftwSoftw
❑❑
❑ In the Copying Files dialog box, click
❑❑
locate
❑❑
❑ Click
..
.
..
❑❑
❑❑
❑ In the Print Test Page Completed dialog, click
❑❑
Install the On-line User’s Guide andInstall the On-line User’s Guide and
Install the On-line User’s Guide and
Install the On-line User’s Guide andInstall the On-line User’s Guide and
the Pthe P
the P
the Pthe P
With the CD in your CD-ROM drive:
❑❑
❑ Click
❑❑
❑❑
❑ Type
❑❑
❑❑
❑ Click on your printer model. Click
❑❑
❑❑
❑ The OKI Menu Installer appears. To install software on
❑❑
your hard drive, click the
e CD-Re CD-R
ar
e CD-R
arar
e CD-Re CD-R
D:\OP14GDI.CNTD:\OP14GDI.CNT
D:\OP14GDI.CNT. Click
D:\OP14GDI.CNTD:\OP14GDI.CNT
OK OK
OK until all files are copied.
OK OK
ostScrostScr
ostScr
ostScrostScr
Start Start
Start
Start Start
D:\install.eD:\install.e
D:\install.e
D:\install.eD:\install.e
OMOM
OM message box, click
OMOM
ipt Dript Dr
ipt Dr
ipt Dript Dr
→→
→
→→
RunRun
Run.
RunRun
xx
x
xx
ii
vv
er fer f
i
v
er f
ii
vv
er fer f
ee
e. Click
ee
or 14i,or 14i,
or 14i,
or 14i,or 14i,
OKOK
OK.
OKOK
PrPr
inter Softwinter Softw
Pr
inter Softw
PrPr
inter Softwinter Softw
OKIPOKIP
OKIP
OKIPOKIP
OKOK
OK.
OKOK
14i/n 14i/n
14i/n
14i/n 14i/n
Continue Continue
Continue.
Continue Continue
BrBr
Br
BrBr
OKOK
OK.
OKOK
oo
o
oo
arar
ar
arar
ee
e button.
ee
AA
GE PrGE Pr
A
GE Pr
AA
GE PrGE Pr
wsewse
wse, then
wsewse
YY
eses
Y
es.
YY
eses
interinter
inter
interinter
❑❑
❑ Click “Driver from disk provided by hardware
❑❑
manufacturer.” Click
❑❑
❑ Insert the OKIPAGE 14 CD into your CD-ROM drive.
❑❑
❑❑
❑ In the Copy Manufacturer’s Files field, click
❑❑
d:\oemsetupd:\oemsetup
locate
d:\oemsetup. Click
d:\oemsetupd:\oemsetup
❑❑
❑ In the Install From Disk dialog box, click
❑❑
❑❑
❑ Select a Name for Your Printer dialog box appears. Click
❑❑
NextNext
Next.
NextNext
❑❑
❑ In the Print Test Dialog box, select
❑❑
❑❑
❑ Click
❑❑
WW
W
WW
❑❑
❑ Turn on your printer.
❑❑
❑❑
❑ Insert the OKIPAGE 14 CD into your CD-ROM drive.
❑❑
❑❑
❑ When the Update Device Driver Wizard appears, click
❑❑
❑❑
❑ Select a Name for your printer dialog appears. Click
❑❑
❑❑
❑ In the Print Test Dialog box, Select
❑❑
YY
eses
Y
es on the Printer Test Page Completed dialog.
YY
eses
indoindo
ws 95 ws 95
indo
ws 95
indoindo
ws 95 ws 95
Next. Next.
Next. Click
Next. Next.
TT
ype Bype B
T
ype B
TT
ype Bype B
Finish. Finish.
Finish.
Finish. Finish.
OKOK
OK.
OKOK
OKOK
OK.
OKOK
YY
eses
Y
es. Click
YY
eses
YY
eses
Y
es. Click
YY
eses
OKOK
OK.
OKOK
BrBr
Br
BrBr
FF
F
FF
FF
F
FF
oo
o
oo
inishinish
inish.
inishinish
inishinish
inish.
inishinish
wsewse
wse, then
wsewse
NextNext
Next.
NextNext
YY
ou can cou can c
Y
ou can c
YY
ou can cou can c
!!
• View the User’s Guide
!
!!
• View Help Support and Information
• Register your printer on-line
Note:Note:
Note:
Note:Note:
registration or viewing the User’s Guide from the CD.
❑❑
❑ When the Select Components screen appears, check the
❑❑
components you want to install.
driver: it has already been installed via the Windows
Wizard
❑❑
❑ Follow the instructions on your screen.
❑❑
When you have completed installing the printer software,
!!
!
go to page 15 for more information on using your printer.
!!
liclic
k a bk a b
lic
liclic
Windows 95 Type A does not support on-line
.
utton on the Menutton on the Men
k a b
utton on the Men
k a bk a b
utton on the Menutton on the Men
u Installer to:u Installer to:
u Installer to:
u Installer to:u Installer to:
Note:Note:
Note: Clear the PCL5e
Note:Note:
99
9
99
Page 10

PP
arar
allel Connectionallel Connection
P
ar
allel Connection
PP
arar
allel Connectionallel Connection
Install the PrInstall the Pr
Install the Pr
Install the PrInstall the Pr
inter Softwinter Softw
inter Softw
inter Softwinter Softw
❑❑
❑ The License agreement appears. Click
❑❑
arar
ar
arar
ee
e
ee
YY
eses
Y
es.
YY
eses
WW
indoindo
W
WW
These instructions assume “D” is your CD-ROM drive.These instructions assume “D” is your CD-ROM drive.
These instructions assume “D” is your CD-ROM drive.
These instructions assume “D” is your CD-ROM drive.These instructions assume “D” is your CD-ROM drive.
!!
!
!!
HaHa
vv
e ye y
our orour or
igig
Ha
v
e y
our or
HaHa
vv
e ye y
our orour or
handhand
yy
. .
hand
handhand
installation.installation.
installation.
installation.installation.
❑❑
❑ Turn on your computer.
❑❑
❑❑
❑ Turn on your printer.
❑❑
❑❑
❑ Insert the OKIPAGE 14 CD into your CD-ROM drive.
❑❑
❑❑
❑ From the Taskbar, click
❑❑
❑❑
❑ Type in
❑❑
❑❑
❑ When the Menu Installer appears, click on your printer
❑❑
model. Click
❑❑
❑ Click the
❑❑
YY
y
.
Y
yy
. .
YY
D:\install.eD:\install.e
D:\install.e
D:\install.eD:\install.e
PrPr
Pr
PrPr
inal Micrinal Micr
ig
inal Micr
igig
inal Micrinal Micr
ou maou ma
y be pry be pr
ou ma
y be pr
ou maou ma
y be pry be pr
ContinueContinue
Continue.
ContinueContinue
inter Softwinter Softw
inter Softw
inter Softwinter Softw
ws NT 4.0ws NT 4.0
indo
ws NT 4.0
indoindo
ws NT 4.0ws NT 4.0
ompted fompted f
ompted f
ompted fompted f
StarStar
Star
StarStar
xx
ee
x
e. Click
xx
ee
arar
ar
arar
osoft osoft
WW
osoft
W
osoft osoft
WW
or it duror it dur
or it dur
or it duror it dur
t t
→→
RunRun
t
→
Run.
t t
→→
RunRun
OKOK
OK.
OKOK
ee
e button.
ee
indoindo
ws NT 4.0 CDws NT 4.0 CD
indo
ws NT 4.0 CD
indoindo
ws NT 4.0 CDws NT 4.0 CD
ing theing the
ing the
ing theing the
❑❑
❑ Choose Destination Location dialog appears. Select
❑❑
❑❑
❑ Select Program Folder appears. Click
❑❑
❑❑
❑ Select
❑❑
NetwNetw
Netw
NetwNetw
❑❑
❑ Complete the installation following the instructions on
❑❑
Local PrLocal Pr
Local Pr
Local PrLocal Pr
❑❑
❑ Select the printer port. Click
❑❑
❑❑
❑ Network Shared screen appears.
❑❑
Local Printer:Local Printer:
Local Printer:
Local Printer:Local Printer:
❑❑
❑ Click
❑❑
SharShar
Shar
SharShar
❑❑
❑ Check the
❑❑
locallocal
local or
locallocal
oror
k Prk Pr
or
k Pr
oror
k Prk Pr
you screen.
inter Connection:inter Connection:
inter Connection:
inter Connection:inter Connection:
NextNext
Next to install the software on your system and
NextNext
complete the installation.
ed Pred Pr
ed Pr
ed Pred Pr
Name box and Operating system List appear.
networknetwork
network printer connection. Click
networknetwork
inter Connection:inter Connection:
inter Connection:
inter Connection:inter Connection:
NextNext
Next.
NextNext
inter:inter:
inter:
inter:inter:
SharShar
e with other Netwe with other Netw
Shar
e with other Netw
SharShar
e with other Netwe with other Netw
oror
or
k user
oror
NextNext
Next.
NextNext
k userk user
k userk user
ss
s box. Shared
ss
NextNext
Next.
NextNext
NextNext
Next.
NextNext
YY
ou can cou can c
Y
ou can c
YY
ou can cou can c
!!
!
!!
•
•
• Register your printer on-line
❑❑
❑ The Select Components screen appears. Check the
❑❑
components you want to install. Click
1010
10
1010
liclic
k a bk a b
lic
liclic
View the User’s Guide
View Help Support and Information
utton on the Menutton on the Men
k a b
utton on the Men
k a bk a b
utton on the Menutton on the Men
u Installer to:u Installer to:
u Installer to:
u Installer to:u Installer to:
NextNext
Next.
NextNext
❑❑
❑ Type in a shared name.
❑❑
❑❑
❑ Select the operating system(s) the users on your shared
❑❑
NeNe
network are using. Click
When you have completed installing the printer software,
!!
!
go to page 15 for more information on using your printer.
!!
xtxt
Ne
xt. The software is installed.
NeNe
xtxt
Page 11

Install the PrInstall the Pr
Install the Pr
Install the PrInstall the Pr
USB ConnectionUSB Connection
USB Connection
USB ConnectionUSB Connection
inter Softwinter Softw
inter Softw
inter Softwinter Softw
arar
ar
arar
ee
e
ee
WW
indoindo
indo
indoindo
ompted fompted f
ompted f
ompted fompted f
NextNext
Next.
NextNext
ws 2000ws 2000
ws 2000
ws 2000ws 2000
osoft osoft
WW
osoft
osoft osoft
indoindo
W
indo
WW
indoindo
or it duror it dur
or it dur
or it duror it dur
CD-ROM driveCD-ROM drive
CD-ROM drive.
CD-ROM driveCD-ROM drive
ws 2000 CDws 2000 CD
ws 2000 CD
ws 2000 CDws 2000 CD
ing theing the
ing the
ing theing the
YY
eses
Y
es. The
YY
eses
NextNext
Next.
NextNext
W
WW
These instructions assume “D” is your CD-ROM drive.These instructions assume “D” is your CD-ROM drive.
These instructions assume “D” is your CD-ROM drive.
These instructions assume “D” is your CD-ROM drive.These instructions assume “D” is your CD-ROM drive.
!!
!
!!
HaHa
vv
e ye y
our orour or
igig
ou maou ma
ou ma
ou maou ma
inal Micrinal Micr
ig
inal Micr
igig
inal Micrinal Micr
y be pry be pr
y be pr
y be pry be pr
Ha
v
e y
our or
HaHa
vv
e ye y
our orour or
handhand
yy
. .
YY
hand
y
.
Y
handhand
yy
. .
YY
installation.installation.
installation.
installation.installation.
Install the PCL5e DriverInstall the PCL5e Driver
Install the PCL5e Driver
Install the PCL5e DriverInstall the PCL5e Driver
❑❑
❑ Turn on your computer
❑❑
❑❑
❑ Turn on your printer. The USB port driver installs.
❑❑
❑❑
❑ The Found New Hardware wizard displays. Click
❑❑
❑❑
❑ Select “Search for a suitable driver for my device
❑❑
(recommended). Click
❑❑
❑ Insert the OKIPAGE CD into your CD-ROM drive.
❑❑
❑❑
❑ Locate Driver Files displays. Select
❑❑
NextNext
Click
Next.
NextNext
❑❑
❑ The Driver Files Search Result screen appears. Click
❑❑
❑❑
❑ In the Digital Signature Not Found box, click
❑❑
printer driver is installed.
❑❑
❑ Click
❑❑
FinishFinish
Finish to complete the installation.
FinishFinish
NextNext
Next.
NextNext
❑❑
❑ Click
❑❑
❑❑
❑ Select the
❑❑
❑❑
❑ Complete the installation following the instructions on
❑❑
Install the User’s GuideInstall the User’s Guide
Install the User’s Guide
Install the User’s GuideInstall the User’s Guide
❑❑
❑ Insert the OKIPAGE CD into your CD-ROM drive.
❑❑
❑❑
❑ Click
❑❑
❑❑
❑ Type in
❑❑
❑❑
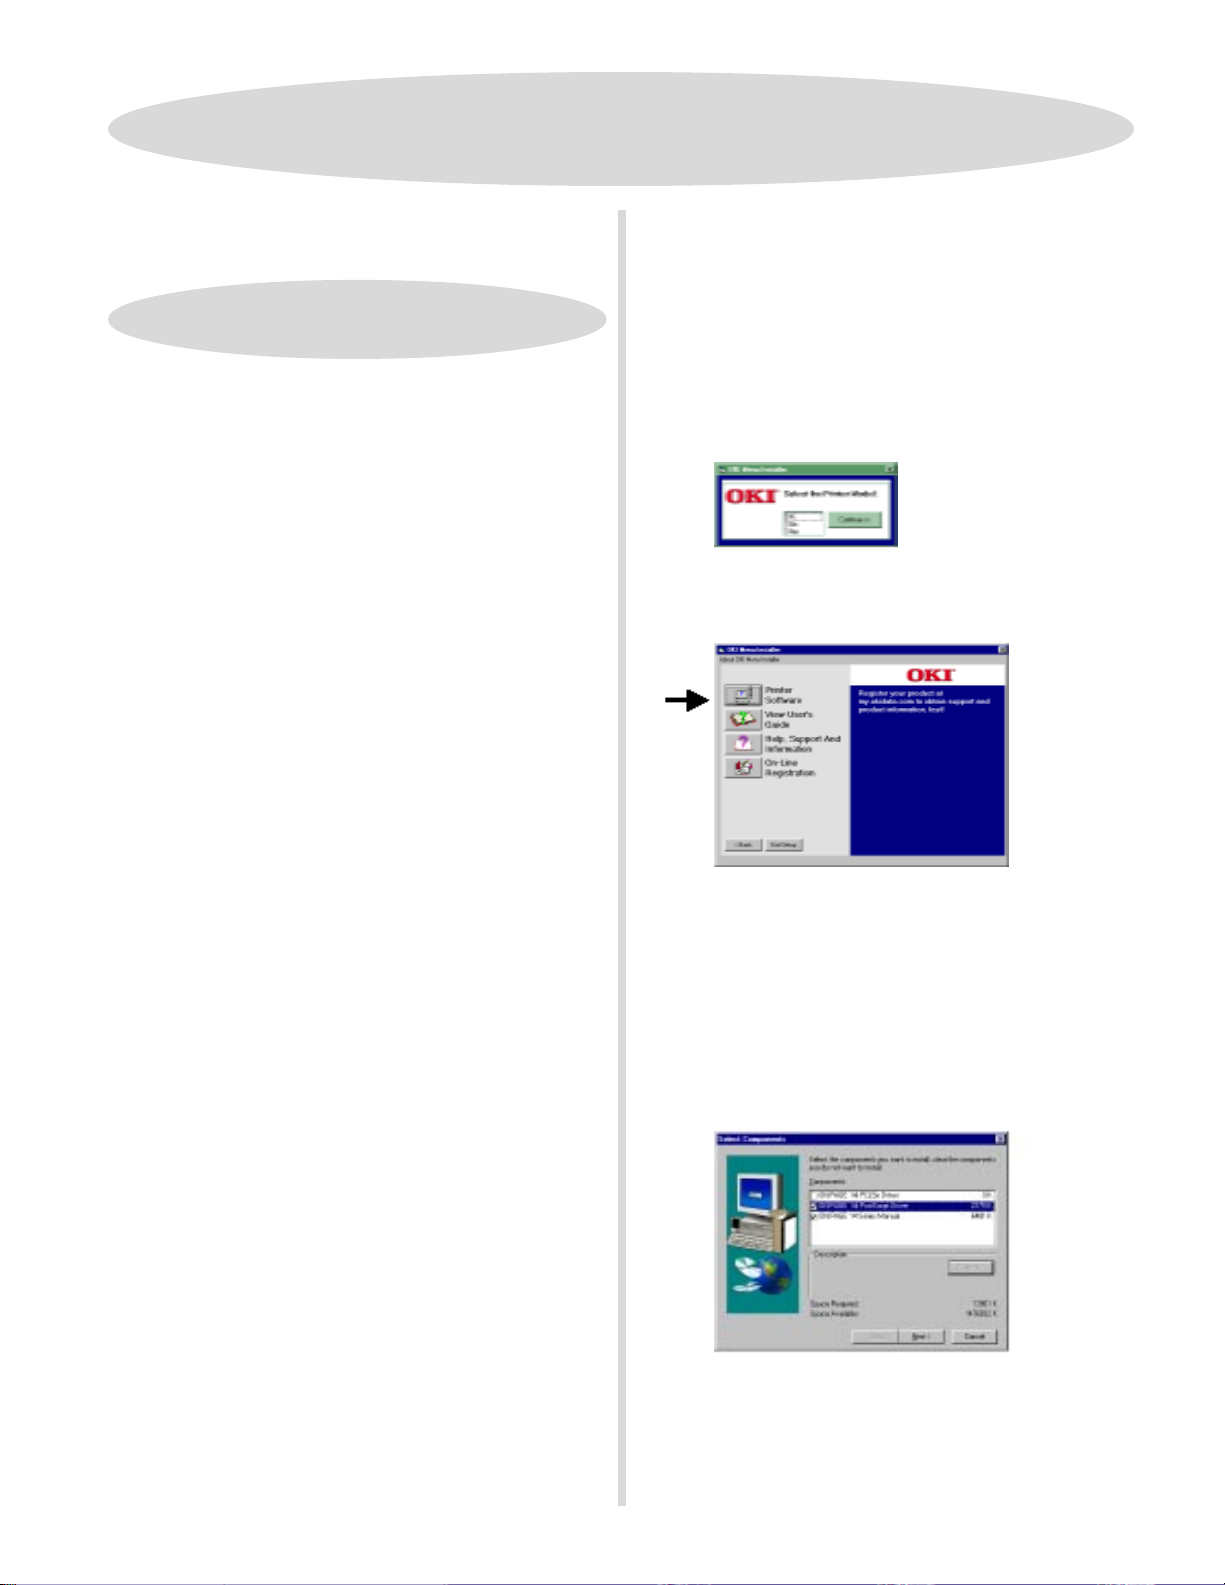
❑ When the Menu Installer appears, click on your printer
❑❑
❑❑
❑ Click the
❑❑
HaHa
vv
Ha
v
HaHa
vv
OKOK
Click
OK.
OKOK
your screen.
Start Start
Start
Start Start
D:\install.e D:\install.e
D:\install.e
D:\install.e D:\install.e
model.
Click
PrPr
Pr
PrPr
e Diske Disk
e Disk. Type in
e Diske Disk
OKIPOKIP
AA
OKIP
OKIPOKIP
GE 14iPSGE 14iPS
A
GE 14iPS printer. Click
AA
GE 14iPSGE 14iPS
→→
Run.Run.
→
Run.
→→
Run.Run.
xx
ee
. .
x
e
. Click
xx
ee
. .
Continue.Continue.
Continue.
Continue.Continue.
inter Softwinter Softw
inter Softw
inter Softwinter Softw
arar
ar
arar
D:\D:\
D:\ (or your CD-ROM drive).
D:\D:\
NeNe
xtxt
Ne
xt.
NeNe
xtxt
OK. OK.
OK.
OK. OK.
ee
e button.
ee
❑❑
VV
erer
ify thaify tha
❑
V
er
VV
erer
❑❑
From the Windows Taskbar, click
→→
PrPr
→
Pr
→→
PrPr
PrPr
operoper
Pr
oper
PrPr
operoper
OK.OK.
OK.
OK.OK.
Install the PInstall the P
Install the P
Install the PInstall the P
❑❑
❑ Insert the OKIPAGE CD into your CD-ROM drive.
❑❑
❑❑
❑ From the taskbar, click
❑❑
❑❑
❑ Double-click
❑❑
appears. Click
❑❑
❑ Clear Automatically detect.... Select
❑❑
Printer. Click
NetwNetw
oror
Netw
or
NetwNetw
oror
❑❑
❑ Complete the installation following the instructions on
❑❑
you screen.
Local PrLocal Pr
Local Pr
Local PrLocal Pr
❑❑
❑ Scroll down and select
❑❑
t the USB port the USB por
ify tha
t the USB por
ify thaify tha
t the USB port the USB por
interinter
s. s.
inter
s. Right-click
interinter
s. s.
ties\Pties\P
oror
ties\P
ties\Pties\P
k Prk Pr
k Pr
k Prk Pr
inter Connection:inter Connection:
inter Connection:
inter Connection:inter Connection:
ts. ts.
or
ts. Make sure
oror
ts. ts.
ostScrostScr
ostScr
ostScrostScr
AdAd
d Prd Pr
Ad
d Pr
AdAd
d Prd Pr
NextNext
Next.
NextNext
NeNe
xtxt
Ne
xt.
NeNe
xtxt
inter Connection:inter Connection:
inter Connection:
inter Connection:inter Connection:
t is actit is acti
t is acti
t is actit is acti
the
ipt ipt
DrDr
ipt
Dr
ipt ipt
DrDr
StarStar
Star
StarStar
interinter
inter. The Add Printer W izard
interinter
USB001USB001
USB001. Click
USB001USB001
vv
e:e:
v
e:
vv
e:e:
StarStar
t t
→→
Star
t
→
StarStar
t t
→→
OKIP OKIP
AA
OKIP
OKIP OKIP
t t
t
t t
GE 14 icon,GE 14 icon,
A
GE 14 icon,
AA
GE 14 icon,GE 14 icon,
USB001 USB001
USB001 is checked
USB001 USB001
ii
vv
er fer f
or 14i,or 14i,
i
v
er f
or 14i,
ii
vv
er fer f
or 14i,or 14i,
→→
Settings Settings
→
Settings
→→
Settings Settings
→→
→
→→
LocalLocal
Local or
LocalLocal
NextNext
Next.
NextNext
SettingsSettings
Settings
SettingsSettings
14i/n 14i/n
14i/n
14i/n 14i/n
Pr Pr
interinter
Pr
inter
Pr Pr
interinter
NetwNetw
Netw
NetwNetw
then click
,,
,
click
,,
s.s.
s.
s.s.
oror
or
oror
YY
ou can cou can c
Y
ou can c
YY
ou can cou can c
!!
• V ie w the User’s Guide
!
!!
• View Help Support and Information
• Register your printer on-line
❑❑
❑ Follow the instructions on your screen to complete the
❑❑
installation.
When you have completed installing the printer software,
!!
go to page 15 for more information on using your printer.
!
!!
kk
k
kk
liclic
lic
liclic
k a bk a b
utton on the Menutton on the Men
k a b
utton on the Men
k a bk a b
utton on the Menutton on the Men
u Installer to:u Installer to:
u Installer to:
u Installer to:u Installer to:
1111
11
1111
Page 12

Install the PrInstall the Pr
Install the Pr
Install the PrInstall the Pr
USB ConnectionUSB Connection
USB Connection
USB ConnectionUSB Connection
WW
indoindo
W
indo
WW
indoindo
ws 98ws 98
ws 98
ws 98ws 98
inter Softwinter Softw
inter Softw
inter Softwinter Softw
Install the PInstall the P
Install the P
Install the PInstall the P
and the On-line User’s Guideand the On-line User’s Guide
and the On-line User’s Guide
and the On-line User’s Guideand the On-line User’s Guide
With the CD in your CD-ROM drive:
❑❑
❑ Click
❑❑
Start Start
Start
Start Start
ostScrostScr
ostScr
ostScrostScr
→→
Run Run
→
Run.
→→
Run Run
arar
ar
arar
ipt Dript Dr
ipt Dr
ipt Dript Dr
ee
e
ee
ii
i
ii
vv
er fer f
v
er f
vv
er fer f
or 14i,or 14i,
or 14i,
or 14i,or 14i,
14i/n 14i/n
14i/n
14i/n 14i/n
These instructions assume “D” is your CD-ROM drive.These instructions assume “D” is your CD-ROM drive.
These instructions assume “D” is your CD-ROM drive.
These instructions assume “D” is your CD-ROM drive.These instructions assume “D” is your CD-ROM drive.
!!
!
!!
HaHa
vv
e ye y
our orour or
igig
Ha
v
e y
our or
HaHa
vv
e ye y
our orour or
YY
ou maou ma
Y
YY
ChecChec
Chec
ChecChec
USB port on your PC is enabled. If it is not, checkUSB port on your PC is enabled. If it is not, check
USB port on your PC is enabled. If it is not, check
USB port on your PC is enabled. If it is not, checkUSB port on your PC is enabled. If it is not, check
yy
y
yy
Install the PCL5e DriverInstall the PCL5e Driver
Install the PCL5e Driver
Install the PCL5e DriverInstall the PCL5e Driver
❑❑
❑ Turn on your printer.
❑❑
❑❑
❑ Turn on your computer
❑❑
❑❑
❑ Unknown device appears. Click
❑❑
❑❑
❑ Insert the OKIPAGE 14 CD into your CD-ROM drive.
❑❑
❑❑
❑ Select “Search for the best driver for your device
❑❑
(Recommended).” Click
❑❑
❑ Select “CD-ROM drive.” Clear other choices. Click
❑❑
❑❑
❑ A search for the OKI USB device begins. Device is
❑❑
detected and OKI USB Driver displays. Click
continue.
❑❑
❑ The Oki USB driver files are copied to the system. Select
❑❑
FinishFinish
Finish.
FinishFinish
❑❑
❑ The printer is detected, the Add New Hardware Wizard
❑❑
appears. Click
y be pry be pr
ou ma
y be pr
ou maou ma
y be pry be pr
k k
WW
k
W
k k
WW
our system’our system’
our system’
our system’our system’
inal Micrinal Micr
ig
inal Micr
igig
inal Micrinal Micr
ompted fompted f
ompted f
ompted fompted f
indoindo
ws Dews De
indo
ws De
indoindo
ws Dews De
s documentas documenta
s documenta
s documentas documenta
NextNext
Next.
NextNext
osoft osoft
osoft
osoft osoft
or it duror it dur
or it dur
or it duror it dur
vice Manavice Mana
vice Mana
vice Manavice Mana
tion ftion f
tion f
tion ftion f
NextNext
Next.
NextNext
WW
indoindo
ws 98 CD handws 98 CD hand
W
indo
ws 98 CD hand
WW
indoindo
ws 98 CD handws 98 CD hand
ing the installaing the installa
ing the installa
ing the installaing the installa
gg
er to ver to v
erer
oror
or
oror
er
erer
ify thaify tha
ify tha
ify thaify tha
mama
tion.tion.
ma
tion.
mama
tion.tion.
g
er to v
gg
er to ver to v
or infor inf
or inf
or infor inf
NextNext
Next.
NextNext
tion.tion.
tion.
tion.tion.
t thet the
t the
t thet the
NextNext
Next to
NextNext
yy
y
yy
Next.Next.
Next.
Next.Next.
❑❑
❑ Type in
❑❑
❑❑
❑ Click on your printer model. Click
❑❑
..
.
..
❑❑
❑ The OKI Menu Installer screen appears.To install the
❑❑
software on your hard drive, click the Printer Software
button.
!!
• View the User’s Guide
!
!!
• View Help Support and Information
• Register your printer on-line
❑❑
❑ When the Select Components screen appears, check the
❑❑
components you want to install.
driver—it has already been installed via Windows Wizard
Click
YY
ou can cou can c
Y
ou can c
YY
ou can cou can c
Next.Next.
Next.
Next.Next.
D:\install.eD:\install.e
D:\install.e
D:\install.eD:\install.e
liclic
k a bk a b
lic
k a b
liclic
k a bk a b
xx
ee
x
e. Click
xx
ee
utton on the Menutton on the Men
utton on the Men
utton on the Menutton on the Men
OKOK
OK.
OKOK
Continue Continue
Continue.
Continue Continue
Note: Note:
Note: Clear the PCL5e
Note: Note:
u Installer to:u Installer to:
u Installer to:
u Installer to:u Installer to:
.
❑❑
❑ Select “Search for the best driver for your device
❑❑
the
NextNext
Next.
NextNext
Next Next
Click
Next.
Next Next
t is actit is acti
vv
t is acti
t is actit is acti
OKIP OKIP
OKIP
OKIP OKIP
e:e:
v
e:
vv
e:e:
StarStar
Star
StarStar
AA
GE 14 GE 14
A
GE 14 icon, then click
AA
GE 14 GE 14
OP1USB1:OKIPOP1USB1:OKIP
OP1USB1:OKIP
OP1USB1:OKIPOP1USB1:OKIP
t t
→→
t
→
t t
→→
Settings Settings
Settings
Settings Settings
AA
A
AA
. .
. Click
. .
(recommended).” Click
❑❑
❑ Select “CD-ROM drive.”
❑❑
❑❑
❑ Complete the installation following the instructions.
❑❑
❑❑
VV
erer
ify thaify tha
❑
V
er
VV
erer
❑❑
From the Windows Taskbar, click
PrPr
interinter
Pr
inter
PrPr
interinter
PrPr
operoper
Pr
oper
PrPr
operoper
appears in the “Print to the following port” box
1212
12
1212
t the USB port the USB por
ify tha
t the USB por
ify thaify tha
t the USB port the USB por
s. s.
s. Right-click
s. s.
ties\Details. ties\Details.
ties\Details. Make sure
ties\Details. ties\Details.
→→
→
→→
GE 14GE 14
GE 14
GE 14GE 14
OKOK
OK.
OKOK
❑❑
❑ Follow the instructions on your screen to complete the
❑❑
installation.
When you have completed installing the printer software,
!!
!
go to page 15 for more information on using your printer.
!!
Page 13
Install the PrInstall the Pr
Install the Pr
Install the PrInstall the Pr
USB ConnectionUSB Connection
USB Connection
USB ConnectionUSB Connection
WW
indoindo
W
WW
ws Millenniumws Millennium
indo
ws Millennium
indoindo
ws Millenniumws Millennium
inter Softwinter Softw
inter Softw
inter Softwinter Softw
Install the PInstall the P
Install the P
Install the PInstall the P
and the On-line User’s Guideand the On-line User’s Guide
and the On-line User’s Guide
and the On-line User’s Guideand the On-line User’s Guide
With the CD in your CD-ROM drive:
❑❑
❑ Click
❑❑
Start Start
Start
Start Start
ostScrostScr
ostScr
ostScrostScr
→→
Run Run
→
Run.
→→
Run Run
arar
ar
arar
ipt Dript Dr
ipt Dr
ipt Dript Dr
ee
e
ee
ii
i
ii
vv
v
vv
er fer f
er f
er fer f
or 14i,or 14i,
or 14i,
or 14i,or 14i,
14i/n 14i/n
14i/n
14i/n 14i/n
These instructions assume “D” is your CD-ROM drive.These instructions assume “D” is your CD-ROM drive.
These instructions assume “D” is your CD-ROM drive.
These instructions assume “D” is your CD-ROM drive.These instructions assume “D” is your CD-ROM drive.
!!
!
!!
HaHa
vv
e ye y
our orour or
igig
Ha
v
e y
our or
HaHa
vv
e ye y
our orour or
handhand
yy
. .
YY
hand
y
.
Y
handhand
yy
. .
YY
installation.installation.
installation.
installation.installation.
ChecChec
k k
WW
Chec
k
W
ChecChec
k k
WW
USB port on your PC is enabled. If it is not, checkUSB port on your PC is enabled. If it is not, check
USB port on your PC is enabled. If it is not, check
USB port on your PC is enabled. If it is not, checkUSB port on your PC is enabled. If it is not, check
yy
our system’our system’
y
our system’
yy
our system’our system’
Install the PCL5e DriverInstall the PCL5e Driver
Install the PCL5e Driver
Install the PCL5e DriverInstall the PCL5e Driver
❑❑
❑ Turn on your printer.
❑❑
❑❑
❑ Turn on your computer.
❑❑
❑❑
❑ Insert the OKIPAGE 14 CD into your CD-ROM drive.
❑❑
❑❑
❑ A new hardware device is detected, the Add New
❑❑
Hardware Wizard appears. Select “Automatic search for a
better driver (Recommended).” Click
❑❑
❑ The Oki USB driver files are copied to the system. Click
❑❑
FinishFinish
Finish.
FinishFinish
❑❑
❑ Add New Hardware Wizard appears with OKIPAGE 14
❑❑
listed. Select “Automatic search for a better driver
(Recommended).” Wizard will search for and install
software for the OKIPAGE 14. Click
❑❑
❑ Select the proper driver in the Select Other Driver dialog.
❑❑
OKOK
Click
OK.
OKOK
❑❑
❑ Select a name for your printer, or accept OKIPAGE 14.
❑❑
Next Next
Click
Next.
Next Next
inal Micrinal Micr
ig
inal Micr
igig
inal Micrinal Micr
ou maou ma
y be pry be pr
ou ma
y be pr
ou maou ma
y be pry be pr
indoindo
ws Dews De
indo
ws De
indoindo
ws Dews De
s documentas documenta
s documenta
s documentas documenta
osoft osoft
osoft
osoft osoft
ompted fompted f
ompted f
ompted fompted f
vice Manavice Mana
vice Mana
vice Manavice Mana
tion ftion f
tion f
tion ftion f
WW
indoindo
ws Millennium CDws Millennium CD
W
indo
ws Millennium CD
WW
indoindo
ws Millennium CDws Millennium CD
or it duror it dur
or it dur
or it duror it dur
gg
er to ver to v
g
er to v
gg
er to ver to v
or infor inf
or inf
or infor inf
erer
er
erer
oror
mama
or
ma
oror
mama
NextNext
Next.
NextNext
NeNe
xtxt
Ne
xt.
NeNe
xtxt
ing theing the
ing the
ing theing the
ify thaify tha
ify tha
ify thaify tha
tion.tion.
tion.
tion.tion.
t thet the
t the
t thet the
❑❑
❑ Type in
❑❑
❑❑
❑ Click on your printer model. Click
❑❑
❑❑
❑ To install software on your hard drive, click the
❑❑
SoftwSoftw
Softw
SoftwSoftw
!!
!
• View the User’s Guide
!!
• View Help Support and Information
• Register your printer on-line
❑❑
❑ When the Select Components screen appears, check the
❑❑
components you want to install.
driver: it has already been installed via the Windows
Wizard
arar
ar
arar
YY
ou can cou can c
Y
ou can c
YY
ou can cou can c
.
D:\install.eD:\install.e
D:\install.e
D:\install.eD:\install.e
ee
e button.
ee
liclic
k a bk a b
lic
k a b
liclic
k a bk a b
xx
ee
x
e. Click
xx
ee
utton on the Menutton on the Men
utton on the Men
utton on the Menutton on the Men
OKOK
OK.
OKOK
Continue Continue
Continue.
Continue Continue
Note:Note:
Note: Clear the PCL5e
Note:Note:
PrPr
Pr
PrPr
u Installer to:u Installer to:
u Installer to:
u Installer to:u Installer to:
interinter
inter
interinter
❑❑
❑ In the Print Test
❑❑
FinishFinish
click
Finish.
FinishFinish
❑❑
❑ In the Print Test Page Completed dialog, click
❑❑
FinishFinish
Finish.
FinishFinish
❑❑
VV
erer
ify thaify tha
❑
V
er
ify tha
VV
erer
ify thaify tha
❑❑
From the Windows Taskbar, click
PrPr
interinter
Pr
PrPr
PrPr
Pr
PrPr
appears in the “Print to the following port” box
OKOK
OK.
OKOK
s. s.
inter
s. Right-click
interinter
s. s.
operoper
ties\Details. ties\Details.
oper
ties\Details. Make sure
operoper
ties\Details. ties\Details.
Page dialog, click
t the USB port the USB por
t the USB por
t the USB port the USB por
the
t is actit is acti
t is acti
t is actit is acti
OKIP OKIP
OKIP
OKIP OKIP
vv
v
e:
vv
Star
AA
GE 14 GE 14
A
GE 14 icon, then click
AA
GE 14 GE 14
OP1USB1:OKIPOP1USB1:OKIP
OP1USB1:OKIP
OP1USB1:OKIPOP1USB1:OKIP
YY
es es
Y
es to print a test page,
YY
es es
e:e:
e:e:
StarStar
t t
→→
Settings Settings
t
→
StarStar
Settings
t t
→→
Settings Settings
YY
eses
Y
es, click
YY
eses
AA
GE 14GE 14
A
GE 14
AA
GE 14GE 14
. .
. Click
. .
→→
→
→→
❑❑
❑ Follow the instructions on your screen.
❑❑
When you have completed installing the printer software,
!!
go to page 15 for more information on using your printer.
!
!!
1313
13
1313
Page 14

Install the PrInstall the Pr
Install the Pr
Install the PrInstall the Pr
USB ConnectionUSB Connection
USB Connection
USB ConnectionUSB Connection
MacintoshMacintosh
Macintosh
MacintoshMacintosh
TT
he OKIPhe OKIP
T
he OKIP
TT
he OKIPhe OKIP
!!
higherhigher
higher
!
higherhigher
!!
❑❑
❑ Turn on your computer.
❑❑
❑❑
❑ Turn on your printer.
❑❑
❑❑
❑ Insert the OKIPAGE 14 CD into your CD-ROM Drive.
❑❑
AA
GE 14 USB drGE 14 USB dr
A
GE 14 USB dr
AA
GE 14 USB drGE 14 USB dr
..
.
..
ii
vv
er supporer suppor
i
v
er suppor
ii
vv
er supporer suppor
ts Mac OS 9.04 orts Mac OS 9.04 or
ts Mac OS 9.04 or
ts Mac OS 9.04 orts Mac OS 9.04 or
inter Softwinter Softw
inter Softw
inter Softwinter Softw
Install the On-line User’s GuideInstall the On-line User’s Guide
Install the On-line User’s Guide
Install the On-line User’s GuideInstall the On-line User’s Guide
RequirementsRequirements
Requirements
RequirementsRequirements
• Microsoft Internet Explorer version 4.0 or higher
• Netscape Communicator version 4.7 or higher
In orIn or
der to open the User’der to open the User’
In or
der to open the User’
In orIn or
der to open the User’der to open the User’
!!
!
have your Macintosh set to run .htm extension fileshave your Macintosh set to run .htm extension files
have your Macintosh set to run .htm extension files
have your Macintosh set to run .htm extension fileshave your Macintosh set to run .htm extension files
!!
under yunder y
under y
under yunder y
our brour br
our br
our brour br
oo
o
oo
wserwser
wser
wserwser
..
.
..
arar
ar
arar
ee
e
ee
s Guides Guide
s Guide
s Guides Guide
,,
y y
,
y
,,
y y
ou mou m
ou m
ou mou m
ustust
ust
ustust
❑❑
❑ Double-c lick the
❑❑
appears on the desktop.
❑❑
❑ Double-c lick the
❑❑
❑❑
❑ Double-click the
❑❑
❑❑
❑ Double-click the
❑❑
❑❑
❑ Double-click the
❑❑
❑❑
❑ Click
❑❑
❑❑
❑ Click
❑❑
❑❑
❑ When “Installation is complete
❑❑
❑❑
❑ Double-click the Macintosh HD icon.
❑❑
❑❑
❑ Double-click the Apple Extras folder.
❑❑
❑❑
❑ Double-click the Apple Laser Writer Software folder.
❑❑
❑❑
❑ Double-click the Desktop Printer Utility icon.
❑❑
❑❑
❑ Select Printer (USB) from the list. Click
❑❑
❑❑
❑ Click the Change button in the PostScript Printer
❑❑
ContinueContinue
Continue.
ContinueContinue
InstallInstall
Install on the Printer Driver Installer screen.
InstallInstall
Installation begins.
Description (PPD) file window.
OKIPOKIP
AA
OKIP
OKIPOKIP
MacMac
Mac folder.
MacMac
PSDRPSDR
PSDR
PSDRPSDR
English English
English folder.
English English
Mac Installer Mac Installer
Mac Installer icon.
Mac Installer Mac Installer
GE 14 CD-RGE 14 CD-R
A
GE 14 CD-R
AA
GE 14 CD-RGE 14 CD-R
V V
V folder.
V V
”
appears, click
OMOM
OM icon that
OMOM
QuitQuit
Quit.
QuitQuit
OKOK
OK.
OKOK
❑❑
❑ Create a folder in which to store the User's Guide.
❑❑
❑❑
❑ Place the OKIPAGE 14 CD in your CD-ROM drive.
❑❑
❑❑
❑ Copy the folder
❑❑
created.
TT
o o
VV
ieie
T
TT
To use the on-line User's Guide, go to the folder where you
placed it and double-click the
!!
!
!!
w the User’w the User’
o
V
ie
w the User’
o o
VV
ieie
w the User’w the User’
When you have completed installing the printer software,
go to page 15 for more information on using your printer.
Manual\Html\EnglishManual\Html\English
Manual\Html\English to the folder you
Manual\Html\EnglishManual\Html\English
s Guides Guide
s Guide
s Guides Guide
start_e.htmstart_e.htm
start_e.htm file.
start_e.htmstart_e.htm
❑❑
❑ Select the OKIPAGE 14i PS driver. Click
❑❑
❑❑
❑ Click the
❑❑
Window.
❑❑
❑ Select the OKIPAGE 14i. Click
❑❑
❑❑
❑ Click
❑❑
❑❑
❑ Click
❑❑
❑❑
❑ The OKIPAGE 14i printer icon will appear on the desktop.
❑❑
1414
14
1414
ChangeChange
Change button in the USB Printer Selection
ChangeChange
OKOK
OK.
OKOK
CrCr
eaea
tete
..
Cr
ea
te
.
CrCr
eaea
tete
..
SaveSave
Save.
SaveSave
SelectSelect
Select.
SelectSelect
Page 15

LanguageLanguage
Language
LanguageLanguage
If you need to change the language displayed on the front panel, do the following:
❑❑
❑ Press the ON-LINE button so the display reads OFF-LINE.
❑❑
❑❑
❑ Press and hold MENU 1/Menu2 until PRINT MODE appears.
❑❑
❑❑
❑ Press MENU 1/Menu2 until Language appears.
❑❑
❑❑
❑ Press ENTER.
❑❑
❑❑
❑ Press the © /Reset button until the language you want appears.
❑❑
❑❑
❑ Press ENTER.
❑❑
❑❑
❑ Press the ON-LINE button so the display reads ON-LINE.
❑❑
1515
15
1515
Page 16

Sample PrintoutsSample Printouts
Sample Printouts
Sample PrintoutsSample Printouts
Demo PDemo P
Demo P
Demo PDemo P
To print a demo page showing some of the printer features:
❑❑
❑ Press the ON-LINE button so the display reads OFF-LINE.
❑❑
❑❑
❑ Press the FORM FEED/Print Demo button for at least 2 seconds. DEMO HP PCL6 displays.
❑❑
❑❑
❑ Press ENTER.
❑❑
❑❑
❑ PRINT DEMO displays and a demo page prints.
❑❑
Sample FSample F
Sample F
Sample FSample F
To print a list showing fonts that are resident in the printer:
❑❑
❑ Press the ON-LINE button so the display reads OFF-LINE.
❑❑
❑❑
❑ Press the TRAY TYPE/Print Fonts button for at least 2 seconds. FONTS HP PCL6 displays.
❑❑
❑❑
❑ To print the typeface list for the HP emulation, press ENTER.
❑❑
❑❑
❑ To print the typeface list for the PostScript (14i, 14i/n) emulation, press > / Reset until
❑❑
aa
gg
ee
a
g
e
aa
gg
ee
ont Listont List
ont List
ont Listont List
the emulation you want appears on the second line of the display, then press ENTER.
Menu ListMenu List
Menu List
Menu ListMenu List
Certain printer functions can be changed using the keys on the operator panel. To print a menu of these functions:
❑❑
❑ Press the ON-LINE button so the display reads OFF-LINE.
❑❑
❑❑
❑ Press and hold the PAPER SIZE/Print Menu button for at least 2 seconds. MENU HP PCL6 displays.
❑❑
❑❑
❑ Press ENTER.
❑❑
❑❑
❑ The message PRINT MENU displays and a configuration list showing the factory default and current user setting prints.
❑❑
Note:Note:
Note: See the on-line User’s Guide for information on printer menu settings.
Note:Note:
1616
16
1616
Page 17

See the On-line User’s GuideSee the On-line User’s Guide
See the On-line User’s Guide
See the On-line User’s GuideSee the On-line User’s Guide
for more information about your printer. Find out about:
• Features
• Print Media Recommendations
• Printing on Transparencies and Labels
• Printing Envelopes
• Printer Settings
• Changing the Printer Menu Settings
• Purchasing Accessories
• Purchasing Supplies
• Warranty and Overnight Exchange
WW
indoindo
indo
indoindo
AA
A
AA
ws Userws User
ws User
ws Userws User
GE 14 SerGE 14 Ser
GE 14 Ser
GE 14 SerGE 14 Ser
Start Start
Start
Start Start
W
WW
If you have installed the User’s Guide when you installed the
printer software, click
OKIPOKIP
OKIP
OKIPOKIP
the Windows taskbar.
You can also view the User’s Guide from the
Okipage 14 CD-ROM:
❑❑
❑ Insert the OkiPage 14 CD into your CD-ROM drive.
❑❑
❑❑
❑ Click
❑❑
→→
→
→→
s:s:
s:
s:s:
ies ies
ies
ies ies
RunRun
Run.
RunRun
Star Star
Star
Star Star
→→
OKIP OKIP
→
OKIP
→→
OKIP OKIP
t t
→→
Run Run
t
→
Run
t t
→→
Run Run
AA
A
AA
→→
Pr Pr
oo
gg
→
Pr
o
g
→→
Pr Pr
oo
gg
GE 14 User’GE 14 User’
GE 14 User’
GE 14 User’GE 14 User’
rr
amsams
r
ams
rr
amsams
s Guides Guide
s Guide from
s Guides Guide
• Maintenance
• Replacing the Toner Cartridge
• Replacing the Image Drum Cartridge
• Cleaning the LED head
• Transporting the Printer
• Troubleshooting
• LCD Messages
• Paper Jams
• Power Saving Mode
Macintosh Users:Macintosh Users:
Macintosh Users:
Macintosh Users:Macintosh Users:
Go to the folder where you placed the User’s Guide and
double-click the
start_e.htmstart_e.htm
start_e.htm file.
start_e.htmstart_e.htm
❑❑
❑ Type in
❑❑
❑❑
❑ Click on your printer. Click
❑❑
❑❑
❑ Click the
❑❑
Note:Note:
Note:
Note:Note:
User’s Guide from the CD-ROM. Install the User’s Guide on
your hard drive when you install the printer driver.
D:\install.eD:\install.e
D:\install.e
D:\install.eD:\install.e
VV
ieie
V
ie
VV
ieie
Windows 95 (Type A) does not support viewing the
w User’w User’
w User’
w User’w User’
xx
ee
x
e. Click
xx
ee
s Guides Guide
s Guide button.
s Guides Guide
OKOK
OK.
OKOK
Contin Contin
Contin
Contin Contin
ueue
ue.
ueue
-
1717
17
1717
Page 18

PrPr
oduct Reoduct Re
Pr
oduct Re
PrPr
oduct Reoduct Re
Register your printer and create your own personalized support center with
news and information, and the latest software upgrades especially tailored to your printer. To register:
gg
istristr
g
istr
gg
istristr
aa
tiontion
a
tion
aa
tiontion
mm
m
mm
yy
.okida.okida
y
.okida
yy
.okida.okida
ta.comta.com
ta.com. Get support,
ta.comta.com
• Via the OKI Menu Installer (
11
1 Insert the OKI CD in your CD-ROM Drive.
11
22
2 From the Windows Taskbar, click
22
33
3 Type
33
44
4 Select your printer model. Click
44
55
5 When the OKI Menu Installer screen appears,
55
• Visit our website at
PrPr
oduct Reoduct Re
Pr
oduct Re
PrPr
oduct Reoduct Re
YY
ou can also rou can also r
Y
ou can also r
YY
ou can also rou can also r
• By filling out the enclosed registration form and mailing it or faxing it in.
Install.eInstall.e
Install.e
Install.eInstall.e
click the
gg
istristr
g
istr
gg
istristr
ee
gg
e
g
ee
gg
On-LineOn-Line
On-Line
On-LineOn-Line
http://wwwhttp://www
http://www
http://wwwhttp://www
aa
tion.tion.
a
tion.
aa
tion.tion.
ister yister y
ister y
ister yister y
PC Users
xx
ee
x
e.
xx
ee
RegistrationRegistration
Registration button.
RegistrationRegistration
.okida.okida
.okida
.okida.okida
our prour pr
interinter
our pr
inter
our prour pr
interinter
)
StarStar
t t
→→
Star
StarStar
ContinueContinue
Continue.
ContinueContinue
ta.com. ta.com.
ta.com. Simply click on
ta.com. ta.com.
Run.Run.
t
→
Run.
t t
→→
Run.Run.
1818
18
1818
Page 19

SupporSuppor
Suppor
SupporSuppor
If yIf y
ou need furou need fur
If y
ou need fur
If yIf y
ou need furou need fur
• See our web site:
http://mhttp://m
http://m
http://mhttp://m
•
In the U.S. and Canada
– 1-800-OKI-DATA (1-800-654-3282)
24 hours a day, 7 days a week.
•
In Latin America
– Oki Data de Mexico, S.A. de C.V., (525) 263-8780
– Oki Data do Brasil, Ltda., 5511-5011-1518
yy
.okida.okida
y
.okida
yy
.okida.okida
t or Sert or Ser
t or Ser
t or Sert or Ser
ther assistance or hather assistance or ha
ther assistance or ha
ther assistance or hather assistance or ha
ta.comta.com
ta.com
ta.comta.com
, call:
, call:
vicevice
vice
vicevice
vv
e questionse questions
v
e questions
vv
e questionse questions
Windows® and Windows NT® are registered trademarks of Microsoft Corporation in the U.S. and other countries.
Macintosh is a registered trademark of Apple Computer, Inc.
1919
19
1919
Page 20

Oki Data Americas, Inc. 2000 Bishops Gate Blvd., Mt. Laurel, NJ 08054-4620
1-800-OKI-DATA (1-800-654-3282) Fax: 856-222-5247 http://www.okidata.com
5933310159333101
59333101
5933310159333101
 Loading...