

Page 1
Help Guide
Page 2

Every effort has been made to ensure that the information in
this document is complete, accurate, and up-to-date. Oki
assumes no responsibility for the results of errors beyond its
control. Oki also cannot guarantee that changes in software
and equipment made by other manufacturers and referred to
in this guide will not affect the applicability of the
information in it. Mention of software products manufactured
by other companies does not necessarily constitute
endorsement by Oki.
Copyright 1997 by Oki. All rights reserved.
First edition 08/1997.
Oki is a registered trademark of Oki Electric Industry
Company Ltd.
ENERGY STAR is a trademark of the United States
Environmental Protection Agency
TrueType is a registered trademark of Apple Computer
Company
Hewlett-Packard, HP, and LaserJet are registered trademarks
of Hewlett-Packard Company.
IBM is a registered trademark of International Business
Machines Corp.
Written and produced by the Oki Documentation Dept.
Microsoft and MS-DOS are registered trademarks and
Windows is a trademark of Microsoft Corporation.
OKIPAGE 10i2
Page 3

Contents
Safety Instructions .......................................................... 4
Important Wiring Instructions ....................................... 5
Printer Control Panel ...................................................... 7
The Ready Light .......................................................... 7
The Display Window................................................... 7
Printer Buttons ............................................................ 7
Button Functions ......................................................... 8
Printer Menus .................................................................. 9
Viewing and Modifying Menu Settings .................... 9
Level 1 Menu ............................................................ 10
Level 2 Menu ............................................................ 12
Paper ............................................................................. 14
Choosing Paper ........................................................ 1 4
Transparencies/Adhesive Labels ............................ 14
Paper Sizes ................................................................ 1 4
Paper Weight ............................................................. 1 4
Installing Paper ........................................................ 1 5
Printing Envelopes ................................................... 16
Choosing Envelopes ................................................ 1 6
Printing Transparencies ........................................... 1 6
Feeding Heavyweight Paper or Cardstock ............. 16
Print Quality Adjustments for Different Paper ...... 1 6
Toner ............................................................................. 1 7
When to Replace the Toner Cartridge .................... 1 7
Toner Cartridge Life ................................................ 1 7
Replacing the Toner Cartridge ................................ 1 7
Image Drum .................................................................. 19
When to Replace the Image Drum Cartridge ......... 19
Image Drum Cartridge Life ..................................... 19
Replacing the Image Drum Cartridge .................... 19
Resetting the Drum Counter .................................... 21
Fonts .............................................................................. 22
What Is a Font? ........................................................ 22
Printing a Font List .................................................. 22
Using Fonts ............................................................... 2 2
Symbol Sets .............................................................. 2 3
Status Messages ........................................................... 2 4
Printer Maintenance ..................................................... 2 8
Maintenance Menu .................................................. 2 8
Generating a Cleaning Page .................................... 2 9
Cleaning the LED Array .......................................... 30
Basic Trouble Shooting ............................................... 31
Paper Jams ................................................................ 3 1
Input Jam from Cassette Tray ................................. 31
Feed Jam or Exit Jam ............................................... 32
Print Quality Problems ............................................ 33
Software Problems ................................................... 3 6
Hardware Problems .................................................. 37
Index ............................................................................. 3 9
English
Help Guide 3
Page 4

Safety Instructions
Your Oki printer has been carefully designed to give you
years of safe, reliable performance. As with all electrical
equipment, however, there are a few basic precautions you
should take to avoid hurting yourself or damaging the printer:
• Read the setup instructions in this handbook carefully.
Be sure to save it for future reference.
• Read and follow all warning and instruction labels on
the printer itself.
• Unplug the printer before you clean it. Use only a damp
cloth; do not use liquid or aerosol cleaners.
• Place your printer on a firm, solid surface. If you put it
on something unsteady, it may fall and be damaged; if
you place it on a soft surface, such as a rug, sofa, or bed,
the vents may become blocked, causing the printer to
overheat.
• To protect your printer from overheating, make sure all
openings on the printer are not blocked. Do not put the
printer on or near a heat source, such as a radiator or
heat register. Keep it out of direct sunlight. Allow enough
room around the printer for adequate ventilation and
easy access to the paper trays.
• Do not use your printer near water, or spill liquid of any
kind into it.
• Be certain that your power source matches the rating
listed on the back of the printer. If you are not sure, check
with your dealer or with your local power company.
• Your printer has an earthed, 3-pin plug as a safety feature,
and it will only fit into an earthed outlet. If you can not
plug it in, chances are you have an older, non-earthed
outlet; contact an electrician to have the outlet replaced.
Do not use an adapter to defeat the earthing.
• To avoid damaging the power cable, do not put anything
on it or place it where it will be walked on. If the cable
becomes damaged or frayed, replace it immediately.
• If you are using an extension cable or power strip with
the printer, make sure that the total of the amperes
required by all the equipment on the extension is less than
the extension’s rating. The total ratings of all equipment
plugged into the outlet should not exceed 13 amperes.
• This printer must be installed near to a power outlet
switch which shall remain easily accessible.
• It is recommended that the printer be switched off prior
to opening or removing covers.
• Do not insert anything into the ventilation slots on the
printer; you could get a shock or cause a fire.
OKIPAGE 10i4
Page 5
Important Wiring Instructions
• Aside from the routine maintenance described in this
handbook, do not try to service the printer yourself;
opening the cover may expose you to shocks or other
hazards.
• Lifting the top cover exposes hot surfaces. These are
clearly labelled. Do NOT touch them.
• Do not make any adjustments other than those outlined
in the handbook, you may cause damage requiring
extensive repair work.
If anything happens that indicates that your printer is not
working properly or has been damaged, unplug it
immediately and contact your dealer.
These are some of the things to look for:
• The power cable or plug is frayed or damaged.
• Liquid has been spilled into the printer, or it has been
exposed to water.
• The printer has been dropped, or the cabinet is damaged.
• The printer does not function normally when you are
following the operating instructions.
The wires in the power cable are coloured in accordance with
the following code:
Green and Yellow — Earth
Blue — Neutral
Brown — Live
If the colours of the wires in the power cable of this printer
do not correspond with the markings of the terminals of your
plug, proceed as follows:
• Green and Yellow must be connected to the terminal
marked with the letter E (or the safety earth symbol) or
the terminal coloured Green or Green & Yellow.
• Brown must be connected to the terminal marked with
the letter L or coloured Red.
• Blue must be connected to the terminal marked with the
letter N or coloured Blue or Black.
This printer must be earthed.
If you are in any doubt regarding the wiring, please contact
a qualified electrician.
English
Help Guide 5
Page 6

This product complies with the requirements of the Council
Directives 89/336/EEC and 73/23/EEC on the approximation of
the laws of the member states relating to electromagnetic
compatibility and low voltage.
NERGY STA R Partner, Oki has determined that this product
As an E
meets the ENERGY STAR guidelines for energy efficiency .
OKIPAGE 10i6
Page 7
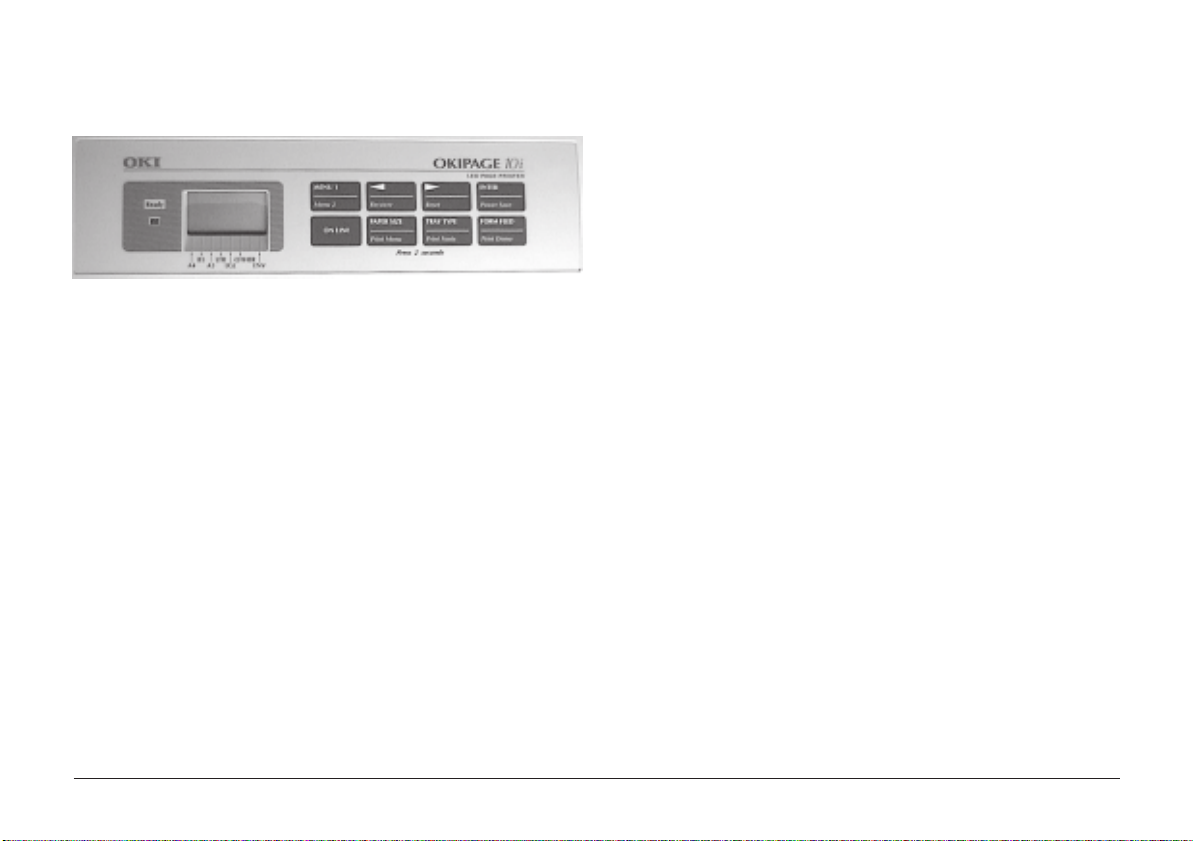
Printer Control Panel The Ready Light
ON
OFF
BLINKING
Printer is on-line ready to receive data.
Printer is off-line, cannot receive data. All
button functions are now active.
Printer is receiving data.
The Display Window
Indicates the following:
• What the printer is doing during normal operation.
• When you need to add paper or change consumables.
• When there is something wrong with the printer.
Printer Buttons
These allow the user to access, view and change printer
settings. Quick menus are also available from the panel to
allow rapid access to more frequently used functions.
English
Help Guide 7
Page 8

Button Functions
To access the primary function on a button, press momentarily
and release. To gain access to the secondary function, press
and hold the button for at least two seconds.
MENU 1/Menu 2
When printer is off-line:
press to access printer menu 1.
press and hold to access printer menu 2.
/Recover
When in printer menu mode:
press to reverse through items in a menu category.
When printer is offline:
press and hold to resume printing after an error
condition (if possible, depending on nature of error).
/Reset
When in printer menu mode:
press to advance through items in a menu category.
When printer is offline:
press and hold to reset the printer.
ENTER/Power Save
When in printer menu mode:
press to make current setting active. An asterisk (*) will
appear in the display.
When printer is offline:
press and hold to enter power save menu.
ON LINE
When printer is off-line:
switches printer to on-line.
When printer is on-line:
switches printer to off-line.
When in menu mode:
press to end Menu session.
PAPER SIZE/Print Menu
When the printer is off-line:
press to enter the Paper Size Quick Menu.
press and hold to print the current Menu Settings. When
the display shows
TRAY TYPE/Print Fonts
MENU HP PCL6
, press ENTER.
When the printer is off-line:
press to enter the Tray Type Quick Menu.
press and hold to print a sample of all the resident, card
and soft fonts present. When the display shows
HP PCL6
FORM FEED/Print Demo
, press ENTER.
Press to print all the remaining data in the printer buffer
and eject the page.
When the printer is off-line:
press and hold to print the Demo page. When the display
shows
DEMO HP PCL6
, press ENTER.
FONTS
OKIPAGE 10i8
Page 9

Printer Menus
Viewing and Modifying Menu Settings
It is possible, using the front panel buttons, to change the
default configuration of your printer to accommodate your
software application, specific paper size, method of paper
feed and interface connection.
The menu structure consists of three levels:
Category
Each category consists of several items, selected by pressing
the MENU 1/Menu 2 button (with the printer off-line). When
the required category is displayed press the ENTER button to
display a list of items.
Item
Each item consists of several parameters displayed on the
upper line in the message window by pressing the MENU 1/
Menu 2
Parameter
The parameter will be displayed on the lower line of the
message window by pressing the left & right buttons. When
the required parameter is displayed press the ENTER button.
button.
If your software can control a feature that is also controlled in the
printer menu, the software will override the menu setting. Use your
software to control printer features whenever possible.
Two menus are available:
1. Press ON LINE to place the printer off-line.
2. Enter Menu 1 or Menu 2 as required.
Menu 1 is selected by momentarily pressing and releasing
the MENU 1/Menu 2 button.
Menu 2 is selected by holding down the MENU 1/Menu 2
button for at least two seconds.
3. Once the first menu category is displayed, further presses
of the MENU 1/Menu 2 button move on to the next
category.
4. To enter a category and display an item, press the ENTER
button. The display will show the item in the top line and
the current parameter in the bottom line.
5. The current active parameter is indicated with an asterisk*.
To alter the parameter, press the buttons. To make a
new parameter active, press the ENTER button when that
parameter is displayed.
6. To move on to a new item or category, press the MENU 1/
Menu 2
button.
The following tables list printer menu selections. Factory
default settings are indicated in bold type.
button. To exit the menu, press the ON LINE
English
Help Guide 9
Page 10

Level 1 Menu
Category
PERSONALITY
TRAY SELECT
EDIT SIZE
P APER SIZE
MEDIA TYPE
Items
EMULA TE
MANUAL
P APER IN
AUTO TRAY (if Tray 2 is installed)
EDT SIZE
TRAY 1
MANUAL
TRA Y 2 (appears if installed)
FEEDER (appears if installed)
TRAY1/TRAY 2 (if installed)
FEEDER (if installed)
MANUAL
Parameters
AUTO, HP PCL 6, EPSONFX, IBM PPR, ADOBE PS (if installed)
OFF, ON
TRA Y 1, TRA Y 2 (if installed), FEEDER (if installed)
OFF, ON
CASSETT, LETTER, EXEC, LEGAL14, LEGAL13, A4 SIZE, A5 SIZE, A6 SIZE,
B5 SIZE, COM-9, COM-10, MONARCH, DL ENV, C5 ENV
A4 SIZE, A5 SIZE, A6 SIZE, B5 SIZE, LETTER, EXEC,
A4 SIZE, A5 SIZE, B5 SIZE, COM-9, COM-10, MONARCH, DL ENV, C5 ENV,
LETTER, EXEC, LEGAL14, LEGAL13
A4 SIZE, A5 SIZE, A6 SIZE, B5 SIZE, LETTER, EXEC, LEGAL14, LEGAL13
A4 SIZE, A5 SIZE, A6 SIZE, B5 SIZE, COM-9, COM-10, MONARCH, DL ENV,
C5 ENV, LETTER, EXEC, LEGAL14, LEGAL13
MEDIUM, M HEAVY, HEAV Y, LIGHT, M LIGHT
MEDIUM, M HEAVY, HEAV Y, LIGHT, M LIGHT
MEDIUM, M HEAVY, TRANSPR, HEA VY, LIGHT , M LIGHT
LEGAL14, LEGAL13
OKIPAGE 10i10
Page 11

Category
Items
Parameters
English
PAPER SIZE CHK
COPIES
FONTS & SYMBOLS
PAGE LAYOUT 1
PAGE LAYOUT 2
SIZE CHK
COPIES
FONT SRC
DLLSOFT (appears if loaded)
FONT NO.
FONT CPI (appears if selected font is scalable/fixed spaced)
FONT HGT (appears if selected font is scalable proportional spaced)
SYMBOL
A4 WIDTH
BLNKSKIP
CR FUNCTION
LF FUNCTION
ORIENT
LINES/PG
ENABLE, DISABLE
1 to 999
RESIDENT, CARD (appears if installed)
I000 to I047
10.00, 0.44 to 99.99
12.00, 4.00 to 999.75
PC-8, (89 symbol sets are available)
78 COL, 80 COL
OFF, ON
CR, CR+LF
LF, LF+CR
PORTRT, LANDSCP
64 LNS, 5 to 128 LNS
Help Guide 11
Page 12

Level 2 Menu
Category
PRINT MODE
MEMORY USAGE
AUTO OPERATION
DARKNESS CONTROL
POWER SAVING
LOW TONER
TONER SAVING
Items
MODE (resolution)
RST BUF
FONT PROT
FREE MEM
AUTOCONT
WAIT TIME
MAN TIME
PR PROTEK
DARKNESS
POWER SAVING
LOW TNR
TONER
Parameters
600, V1200 (600 × 1200 dpi), 300
AUTO, 480KB to 1.44MB
AUTO, OFF, 100Kb, 200Kb.....1.1Mb
##### KB
OFF, ON
OFF, ON, 5 secs, 6 secs....300 secs
60 secs, OFF, 30 secs
GOOD, BETTER, BEST
0, +1, +2, -2, -1
0 SEC, 8 MIN, DISABLE
ON, OFF
DISABLE, MEDIUM, LIGHT
OKIPAGE 10i12
Page 13

Category
Items
Parameters
English
CLEARABLE WARNINGS
ERROR REPORT
P ARALLEL I/F
LANGUAGE
CLR WRNG
ERREPORT
SPEED
BI-DIRCT
I-PRIME
LANGUAGE
ON, JOB
OFF, ON
HIGH, MEDIUM
ENABLE, DISABLE
OFF, ON
ENGLISH, DEUTSCH, FRANCIS, ITALIAN, CASTLAN, SVENSKA, NORSK,
DANSK, NEDERL, TÜRKCE, PORTUG, POLSKI
Help Guide 13
Page 14

Paper
Choosing Paper
• For best results, use paper that is smooth and of high
quality, like copier type paper or paper with a Sheffield
rating of 100-250.
• Store paper in its ream wrapper until you are ready to
use it. Keep it away from moisture or other conditions
that can cause it to wrinkle or curl.
• Preprinted forms must not scorch, melt, offset, or release
hazardous emissions when heated to 392° F (200° C) for
0.1 second.
• Avoid printing on both sides of the paper or on
preprinted documents that have been in a photocopier.
• Try paper before you buy it in quantity.
Transparencies/Adhesive Labels
• Always use Manual Feed
• Always use rear output.
• Media must be specifically made for laser printers or
photocopiers.
• Must be able to withstand 200°C for 0.1 sec.
• Labels should cover entire carrier sheet.
• Carrier sheet or adhesive must not be exposed to any
part of the printer.
Paper Sizes
LETTER COM-9
EXEC COM-10
LEGAL 14 MONARCH
LEGAL 13 DL ENV
A4 C5 ENV
A5
A6
( * manual feed only)
B5
*
*
*
*
*
Paper Weight
Paper Tray: 16 - 24 lb (60 - 90 g/m²)
Manual Feed: 16 - 32 lb (60 - 120 g/m²)
OKIPAGE 10i14
Page 15

Installing Paper
English
1. Remove the paper tray from the bottom of the printer and
place plain paper in the tray, carefully keeping the level
of the paper in the tray below the guide marks (1).
1
2. Adjust the rear paper support (2) to the size of paper you
are using by lifting up and sliding forwards or backwards
as necessary.
2
3. Adjust the paper guides (1).
1
4. Replace the tray in the printer. The paper level indicator
(3) provides a visual indication of how much paper is
left in the tray.
3
Help Guide 15
Page 16

Printing Envelopes
Feeding Heavyweight Paper or Cardstock
1. Pull out the rear exit extender until it locks and lift out
the support bar. Pull down the manual feed tray and adjust
the paper guides.
2. Insert the envelope, flap down and to the left, until the
printer grips it.
3. Set envelope size and landscape orientation in your
software, then issue the print command.
Choosing Envelopes
• Always use rear output.
• No windows or metal clasps.
• Media no heavier than 28 lbs.
• Smooth even surface.
• No self-sealing flaps.
• Seams down the sides, not across the middle.
• Squared-off flaps that do not cover the print area.
Printing T ransparencies
Select and print transparencies using the
option under
ensure the correct fusing temperature is set. Damage may
occur to your transparencies if an incorrect setting is used.
MEDIA TYPE
in
MENU 1
MANUAL FEED
. Select
TRANSPR
to
The normal paper path from a main paper tray to the top
output stack involves two complete U-turns. This may
sometimes cause very heavyweight paper or cardstock to jam
or misfeed.
Use the front tray to feed this type of paper and the rear paper
exit to collect your printed output. This gives a nearly straight
paper path through the machine, and may prove more reliable
in this type of application.
Print Quality Adjustments for Different Paper
The process used to fuse (fix) the printed image to the paper
involves a mixture of pressure and heat. Too much heat will
cause lightweight paper to crease or curl, while too little heat
will cause the image not to fuse fully into heavyweight paper.
Use the
thicknesses of paper.
MEDIA TYPE
setting in
MENU 1
to adjust for different
OKIPAGE 10i16
Page 17

Toner
When to Replace the Toner Cartridge
Replace the toner cartridge after
printer control panel window. After
the printer will print about 100 more pages, then display
TONER EMPTY
new toner cartridge has been installed.
and stop printing. Printing will resume after a
The use of OKI toner is highly recommended. Using compatible or
counterfeit toners can seriously damage your printer .
TONER LOW
displays in the
TONER LOW
displays,
T oner Cartridge Life
How long your toner cartridge lasts depends on the print
density; the percentage of the page that prints black. A typical
letter has 3% to 5% print density; graphics usually have higher
density. Higher print density means toner is used up faster.
At 5% print density, a toner cartridge will print an average of
2,000 pages. Remember, this is only an average: actual results
may vary.
The first toner cartridge in your new printer has to fill the drum
reservoir and saturate the developing roller with toner. It
normally produces about 1,000 pages.
Replacing the Toner Cartridge
Do NOT remove cartridge from packaging.
Use OKI Type 5 image drum and toner cartridges only.
1. Open the cover and remove the used toner cartridge.
2. Shake the toner cartridge to evenly distribute toner.
English
Help Guide 17
Page 18

3. Unwrap the new cartridge.
4. Remove the tape.
6. Push the coloured tab forward to release the toner into
the toner hopper.
5. Insert the cartridge into the printer, left end first as
illustrated.
2
1
7. Close the printer cover.
OKIPAGE 10i18
Page 19

Image Drum
When to Replace the Image Drum Cartridge
When the drum reaches 90% of its life, the
message will display in the printer control panel window.
Change the image drum cartridge when the print becomes
faint or begins to deteriorate. Ideally you should keep a new
cartridge on hand.
CHG DRUM
Image Drum Cartridge Life
The life of an image drum depends on a number of factors,
including temperature and humidity, the type of paper you
use, and the number of pages per job.
The image drum cartridge should last about 10,000 pages at
one page per job, 16,000 pages at three pages per job and
20,000 pages at fifteen pages per job. These numbers are
approximate, since you do not print the same number of pages
each time, and environmental conditions and paper type used
may vary.
Replacing the Image Drum Cartridge
The image drum is fragile. To avoid damage to the new drum,
take these precautions while handling the new image drum
cartridge:
• Do not touch the green drum surface.
• Do not set the cartridge down on anything that might
scratch the surface of the drum.
• Do not expose the drum to direct sunlight and do not
expose it to room light for more than 5 minutes. Leave it
in the package until you are ready to install it into the
printer.
1. Open the cover and remove the used image drum
cartridge.
English
Help Guide 19
Page 20

2. Remove the new image drum from the package.
3. Remove the protective paper.
4. Install the new image drum cartridge into the printer
placing the alignment pins on each end into the slots in
the printer.
5. Remove the shipping insert from the toner well and
discard. Reset the drum counter (see below), and install
a new toner cartridge following the instructions in the
previous section.
OKIPAGE 10i20
Page 21

Resetting the Drum Counter
After replacing the image drum cartridge, reset the drum
counter to keep a correct count of the number of pages printed
on the image drum.
1. Turn the printer on while holding the MENU 1/Menu 2
button.
USERMNT
displays in the control panel window.
English
2. Press MENU 1/Menu 2 three times.
displays.
3. Press ENTER. The counter will reset and the printer will
go
ON-LINE
Help Guide 21
.
DRUM CNT RESET
Page 22

Fonts
What Is a Font?
Strictly speaking, a font refers to a set of printable characters
in a particular typeface of a specific size (e.g. 12 point) and
style (e.g. roman, bold or bold-italic). In computer printing,
however, this term has been used in a wider context to refer
to all sizes and styles of a particular typeface. In printers,
fonts may be divided into two basic types: bitmap fonts and
scalable (or outline) fonts.
Bitmap fonts are made up of a pattern of dots (at the printer
resolution) to form the image of each printable character.
These are of a fixed size, and scaling makes them look ragged.
Scalable fonts are stored as a set of mathematical curves. At
print time the printer uses the stored curves to make up a
bitmap of each character required, at the required size, and
in the required style, at the full printer resolution. Such fonts
are therefore said to be scalable, and do not appear ragged at
enlarged sizes.
Your printer has 49 built-in fonts as standard, including 44
HP LaserJet 5 compatible MicroType (scalable), 1 TrueType
(scalable), and 4 bitmapped fonts.
Printing a Font List
1. Press the ON-LINE button to take the printer off line.
2. Press the TRAY TYPE/Print Fonts button for at least two
seconds. The display shows
3. Press the ENTER button.
4. After a short delay two pages of font information will be
printed, including samples.
FONTS HP PCL6
.
Using Fonts
Some MS-DOS and most Windows programs provide an easy
method of font selection within documents. In these cases
the printer’s font selection is controlled by the host PC
software application (or by Windows itself). On other
software platforms special codes (escape sequences) must
be embedded with the print data. This topic is beyond the
scope of this Help Guide. However, the font list referred to
in the previous topic contains a list of the required codes.
Use of these codes is best left to a professional programmer.
OKIPAGE 10i22
Page 23

Symbol Sets
Your pr inter provides special sets of characters for technical,
legal and foreign language uses, as well as sets of drawing
characters and standard alphanumeric characters. Each font
uses symbols from one or more of these sets.
English
Help Guide 23
Page 24

Status Messages
4
3
Message Status
This section contains explanations of the different messages
you will see, displayed on one, or both lines in the LCD
window of your printer.
Ready Light Status
ON
OFF
BLINK
23
UNDEFINED
Control Panel Messages
tttttt = TRAY1, FEEDER, TRAY2 (option).
TRAY1 = upper tray
TRAY2 = lower tray
FEEDER = multi media feeder
»
Indicates that the second line is a scrolling display.
Ready
Ready
Ready
Ready
2
Ready
Ready
Ready
Ready
ON-LINE
XXX
OFF-LINE
PROCSING
XXX
DA TA
XXX
PRINTING
NO PS
PWR SAVE
TONERLO W
Indicates the printer is in ON LINE mode.
XXX = HP PCL6, FX, PPR, WIN, AUTO.
Indicates the printer is in OFF-LINE mode.
Indicates that the printer is receiving data.
Indicates that there is data in the printer
buffer.
Printer is printing.
Indicates that the PJL command has
selected a printer language that is not
installed in the printer.
Indicates that the printer is operating in
power saving mode.
Indicates the amount of toner left in the
toner cartridge is low. Print quality may be
affected.
OKIPAGE 10i24
Page 25

Message Status Message Status
Ready
Ready
Ready
Ready
Ready
Ready
Ready
TONERSNS
CHG DRUM
PRINTING
nnn/mmm
RESET
PRINT
FONTS
PRINT
CLEANING
PRINT
DEMO
Toner sensor error.
Indicates that the printer has reached the
end of its life (image drum).
Print quality may be affected
Indicates that copy pages are being printed.
nnn = current page.
mmm = total pages.
The printer clears the remaining data in its
buffer and resets the menu to user default
settings. Temporary DLL/Macro data is
also cleared.
The printer will print all the available fonts.
Ready ON
Ready BLINK
– initiated by software command.
– initiated by button.
Indicates that the printer is cleaning.
The printer will print a demo page.
Ready ON
Ready BLINK
– Initiated by software command.
– Initiated by button.
Ready
Ready
Ready
Ready
Ready
Ready
PRINT
MENU
MANUAL
#REQUEST
CLEANING
MANUAL #
tttttt
PAPEROUT
COVER T2
OPEN
tttttt
mmm»
P APER»
REQUEST
The printer will print current menu settings.
Ready ON
Ready BLINK
– Initiated by software command.
– Initiated by button.
The printer is asking you to insert requested
size paper. # = Paper Size.
The printer is requesting # size paper to be
inserted for cleaning process.
Indicates that the paper tray is empty.
Indicates that the cover to tray 2 is open.
A request for paper of size mmm.
tttttt = TRAY1, FEEDER, TRAY2 (option).
English
Help Guide 25
Page 26

Message Status Message Status
Ready
Ready
Ready
Ready
MEMORY
OVERFLOW
REC BUF
OVERFLOW
PRINT
OVERRUN
HOST I/F
ERROR
Memory has overflowed for one of the
following reasons.
• Too much data on page.
• Too much macro data.
• Too much DLL data.
Press RECOVER to continue. Install extra
memory or reduce data on page.
The receive buffer memory has overflowed.
Press RECOVER to continue. The PC
ignores printer busy signal in the interface,
check cable pin assignments.
Print processing speed could not follow the
paper feed speed. Press RECOVER to
continue. Simplify page formatting data or
select Page Protection menu.
Indicates an error in the network or RS232C
interface. Check protocols of printer and
host. Press RECOVER to continue.
Ready
Ready
Ready
Ready
Ready
Ready
TONER
EMP
tttttt
SIZE ERR
tttttt
INPUTJAM
tttttt
FEED JAM
tttttt
EXIT JAM
MENU
Indicates that TONER LOW has been
exceeded and the cartridge should be
replaced.
Wrong paper size found. Open and close
printer cover to continue. Check paper size
or paper double feed.
Paper jam found, when fed from paper tray.
Check paper in the tray. Open and close
printer cover to continue.
Paper jam found, during paper feed.
Remove misfed paper and close printer
cover to continue.
Paper jam found in paper exit area. Open
printer cover, remove paper, close printer
cover to continue.
Settings Menu.
OKIPAGE 10i26
Page 27

Message Status
3
Message Status
Ready Ready
COVER
Cover is open. Press down firmly to close.
OPEN
Ready
Ready
Ready
Ready
2
EEPROM
RESETING
ERROR nn
ERROR 0n
aaaaaaaa
SIMM-ROM
ERROR
EEPROM ID check error. Press RECOVER
to reset EEPROM to factory default.
Abnormality found in the printer. Switch
printer off then on again to clear, if problem
persists, contact service representative.
Abnormality found in the controller. Switch
printer off then on again to clear, if problem
persists, contact service representative.
aaaaaaaa = error address
Flash SIMM sum check error.
Ready
Ready
INITIALIZING
RESET TO
SAVE
Displayed in window for one second after
switching on power, for test purposes.
Printer is in initialization mode after
switching on, prior to on- line mode.
Printer is requesting RESET button to be
pressed for more than 2 seconds, to write
new menu data to EEPROM.
English
Help Guide 27
Page 28

Printer Maintenance
Maintenance Menu
This menu includes printer maintenance and operating functions. To enter the Maintenance Menu:
1. Turn off the printer.
2. Press and hold MENU 1/Menu 2 and turn the printer on.
3. Press MENU 1/Menu 2 repeatedly to advance to the category you want.
4. Press ENTER to invoke a function; or press to see other options, then press ENTER to select the option you want.
Press ON LINE to exit.
MENU RESET
HEX DUMP
DRUM CNT RESET
OP MENU
REC BUFF
X ADJUST
Y ADJUST
2ND TRAY
Reset Level 1 menu to factory settings.
Print a hexadecimal dump of received data for diagnostics. T o exit, turn off the printer .
Reset the drum counter after replacing the image drum cartridge.
DISABLE
ENABLE
Auto, 8KB, 20KB, 50KB, 100KB. (Default = Auto.)
Adjust horizontal print position in 0.25 mm increments. Plus (+) indicates right movement, minus
(-) indicates left movement.
Adjust vertical print position in 0.25 mm increments. Plus (+) indicated downward movement,
minus (-) indicates upward movement.
1…16. (2nd paper tray address. Default = 5.)
= Disables all control panel buttons except
= All buttons are active.
USER MNT
displays.
ON LINE
.
OKIPAGE 10i28
Page 29

Generating a Cleaning Page
English
If your printer shows signs of fading, streaking or erratic
marks, you may be able to clear the problem by generating a
drum cleaning page as follows:
1. Press the ON-LINE button to take the printer off line.
2. Hold down the buttons together for at least two
seconds.
The display will show
REQUEST
3. Carefully pull the tab (1) until the panel is in the fully
lowered position.
.
CLEANING
and
MANUAL A4 SIZE
1
4. Insert a sheet of A4 plain paper into the manual feed tray.
5. The display will show
The paper will emerge from the printer with grey shading.
This sheet may be discarded.
6. Return the printer on line by pressing the ON LINE button.
If subsequent printing appears faded or uneven, try
replacing the toner cartridge.
PRINT CLEANING
as the paper is fed.
Help Guide 29
Page 30

Cleaning the LED Array
Clean the LED array
• whenever you install a new toner cartridge.
• if you see faded vertical areas or light printing down a
page.
1
Wipe the LED array (1) gently with the cleaning pad that
came with your toner cartridge. You can also use a clean,
soft cloth with a small amount of rubbing alcohol on it.
OKIPAGE 10i30
Page 31

Basic T roub le Shooting
Paper Jams
Your printer may experience a paper jam in one of three
areas. The display message will indicate which area has
caused the jam:
INPUT JAM
FEED JAM
EXIT JAM
Paper has failed to leave the selected tray and
enter the printer’s internal paper path.
Paper has entered the printer but failed to
reach the exit.
Paper has reached the exit but has failed to
exit completely from the printer.
Input Jam from Cassette Tray
1. Remove the paper tray (1) from the printer.
2. Remove any crumpled or folded paper.
2
1
3. Remove any paper from the underside (2) of the printer.
4. Replace the paper tray. After successfully removing any
damaged or misfed paper the printer should continue
printing.
English
Help Guide 31
Page 32

Feed Jam or Exit Jam
1. Remove the tray and clear any mis-fed sheets, as
described in the previous example.
2. Open the cover.
The fuser area will be hot. This area is clearly marked.
Do not touch it.
3. Carefully lift out the image drum unit, complete with the
toner cartridge. Be careful not to touch or scratch the
green drum surface.
4. Remove any jammed sheets from the paper path.
5. Re-install the image drum cartridge, ensuring that it
correctly locates into the slots on each side of the printer.
6. Close the top cover and press down to latch it closed.
The printer will warm up and commence printing when
ready. The page lost through the jam will normally be
reprinted.
OKIPAGE 10i32
Page 33

Print Quality Problems
Before consulting a service representative regarding a print quality problem, check the table below to see if there is a
solution, or something you might have overlooked.
Symptom
Blank sheets printed.
Entire page prints faintly.
Page has grey background.
Page prints all black.
Page has repetitive marks.
Problem
Image drum cartridge not properly installed.
Empty or missing toner cartridge.
Empty toner cartridge. Pages get fainter when
toner is used up.
LED array is dirty.
Static electricity , generally from dry en vironments ,
causes toner to stick to background.
Hardware problem.
Damaged image drum cartridge causes repetitive
marks every 1.6 inches (4.06 cm) due to surface
nicks and scratches.
Solution
Reinstall image drum cartridge.
Install new toner cartridge.
Install new toner cartridge.
Clean LED array.
Change papers to a smoother laser bond or
use a humidifier.
Contact your service representative.
Generate a Cleaning Page, repetitive marks
may be temporary.
English
Help Guide 33
Page 34

Symptom
Problem
Solution
Oblong area of faint print
appears on each page.
Vertical white streaking or faint
areas on page.
Vertical black lines.
Fuzzy print.
Distorted print.
Faded print.
Smeared or blotched print.
Dropout caused by using paper exposed to high
humidity.
Toner is low and does not distribute properly, o r
the drum is worn out.
LED array is dirty.
Hardware problem.
LED array is dirty.
Paper path, lamp assembly, or fusing unit
problem.
Toner cartridge is not correctly installed.
Dirty rollers; toner dropped inside printer or image
drum problem.
Change paper stocks, check paper storage
environment or use a dehumidifier; check
toner level.
Replace toner cartridge. Check drum and
replace the drum, if necessary. Contact
service.
Clean LED array.
Contact service.
Clean LED array.
Generate Cleaning Page.
Contact service.
Install toner cartridge correctly.
Contact service.
OKIPAGE 10i34
Page 35

Symptom
Printed page is light/blurred.
Problem
Is toner low?
Solution
English
Replace toner cartridge.
Is paper meant for laser printers?
LED array is dirty.
Bold characters and dark lines
are smeared.
Print is darker than usual.
Pages curl excessively.
Toner is low.
Darkness setting is too high.
Printing on wrong side of paper.
Moisture in paper. Improper storage.
High humidity.
Use recommended paper.
Clean LED array.
Install new toner cartridge.
Change darkness setting.
Tu rn paper over in tray. (Note arrow on paper
package). Install paper print side down in
tr ay.
Avoid storing paper in areas of excessive
temperature and humidity. Store paper in
protective wrapping.
Recommended operating humidity:
20-80%
Help Guide 35
Page 36

Software Problems
Your software (operating environment, applications and printer drivers) controls the printing process. Make sure you have
selected the right driver for use with your printer. See your software documentation for more information.
Symptom
Printing is “garbled”.
Printer’s output is below rated
speed.
Size of top margin increases
with each page printed.
Problem
Incorrect driver is installed.
Much of the printing delays will be caused by
your application. Sometimes purely text
documents will print slowly depending on the
selected fonts and how they are transferred to
the printer.
“Creeping text.” Number of lines per page in
software is not equal to number of lines per page
of printer.
Solution
Install an appropriate driver.
For maximum speed, use text in your
document and use a printer resident font.
Many software packages assume 66 lines
per page, but your printer’s default is 64.
Adjust software accordingly , or set LINES P er
PAGE in the soft control panel to equal lines
per page in your software.
OKIPAGE 10i36
Page 37

Hardware Problems
Symptom
Graphic image prints partly on
one page, partly on the next.
When you try to print nothing
happens, but printer indicates
it is ready to receive data.
“Garbage” prints.
Printer freezes or displays
error message when computer
is rebooted.
Odours.
Printer is on but must “warm
up” before a job is printed.
Problem
Insufficient printer memory for this image at this
resolution.
Configuration error.
Incorrect cable configuration.
(Also, see “Software Problems.”)
Booting the computer while the printer is on can
cause a communications error.
Gases are given off by forms or adhesives
passing through the hot fusing unit.
Power Save mode is set on to conserve energy.
The fuser must heat up before you can begin
printing the next job.
Solution
English
Change the resolution, reduce the image
size, or install more memory in your printer.
Check cable connection. If more than one
printer is available, make sure your printer
has been selected.
Check cable configuration, continuity, and
length.
Turn printer off before rebooting computer.
Make sure the forms you use can withstand
heating, and provide adequate ventilation.
To eliminate warm up delay, change Power
Save setting in the soft control panel.
Help Guide 37
Page 38

Specifications
Printing Process:
LED array imaging to organic photoconductive drum.
V oltage:
230V -14% – 240V +10% A C
Frequency:
50/60Hz ±2%
Power Consumption:
Power Save: 1 8W
Idle: 6 1 W
Normal: 215W
Peak: 460W
Power Cable:
1.8m separate cable, terminated with country specific plug.
Dimensions:
200 × 330 × 377 (mm) H × W × D
W eight:
10.0 kg with legal/universal cassette installed.
Oki Systems (UK) Limited
550 Dundee Road
Slough T rading Estate
Slough
Berks. SL1 4LE
T el: 01753-819819
Fax: 01753-819899
http://www.oki.co .uk
Oki Systems (Ireland) Limited
The Square Industrial Complex Hawthorn Business Centre
T allaght Adelaide Industrial Estate
Dublin 24 Falcon Road
Belfast BT12 6HP
T el : (01) 4598666 T el: (01232) 572355
Fax: (01) 4598840 F ax:(01232) 572350
http://www.oki.ie http://www.oki.ie
OKIPAGE 10i38
Page 39

Index
A
AUTO OPERATION 12
B
bitmapped fonts 22
black lines printed 34
blank sheets printed 33
blurred output 35
buttons 7, 8
C
cable 5
cardstock 16
Cartridge Life 17
CHG DRUM message 19
CLEANING
cleaning the led array 30
drum cleaning Page 29
CLEARABLE WARNINGS 13
COPIES 11
D
DARKNESS CONTROL 12
Distorted print 34
DRUM CNT RESET 21, 28
E
EDIT SIZE 10
emulation 10, 24
ERROR (nn) 27
ERROR 0n 27
EXIT JAM 26
Exit Jam 32
F
Faded print 34
faint print 33
FEED JAM 26
Feed Jam 32
Fonts 22
FONTS & SYMBOLS 11
fuser unit 32
Fuzzy print 34
G
Garbage printed 37
Gases 37
grey background 33
H
HEX DUMP 28
humidity 35
I
Image Drum
life 19
replacing 19
when to replace 19
INPUT JAM 26
Input jam 31
Interface cable. see Parallel cable
L
LANGUAGE 13
LED array 30
Level 1 Menu 10
Level 2 Menu 12
Low toner message 24
M
maintenance 28
Maintenance Menu 28
MANUAL REQUEST 25
MEDIA TYPE 10
MEMORY USAGE 12
Menu 9
Menu features 21
MENU RESET 28
English
Help Guide 39
Page 40

O
Odours 37
OP MENU 28
P
PAGE LAYOUT1 11
PAGE LAYOUT2 11
Pages curl 35
Paper Jams 31
PAPER SIZE 10
PARALLEL I/F 13
Power cable 5
Power Save 12
POWER SAVING 24
PRINT CLEANING 29
PRINT MODE 12
Print quality 33
print quality adjustments 16
PRINTER
buffer 26
LANGUAGE 13
Menus 9
PRINT OVERRUN 26
Problems 31
protective sheet 20
Q
Quick Menus 8
R
rated speed 36
REC BUFF 28
REC BUFOVERFLOW 26
repetitive marks 33
RESET 25
RESET TO SAVE 27
S
scalable fonts 22
SECOND TRAY 28
smeared print 34
streaking 34
symbol Sets 23
T
Toner
cartridge life 17
replacing 17
when to replace 17
TONER LOW message 24
top margin 36
TRAY SELECT 10
X
X ADJUST 28
Y
Y ADJUST 28
OKIPAGE 10i40
 Loading...