

Page 1
OkiLAN 8100e
Internal Print Server
Installation Instructions
Print Server Part Number: 70042101
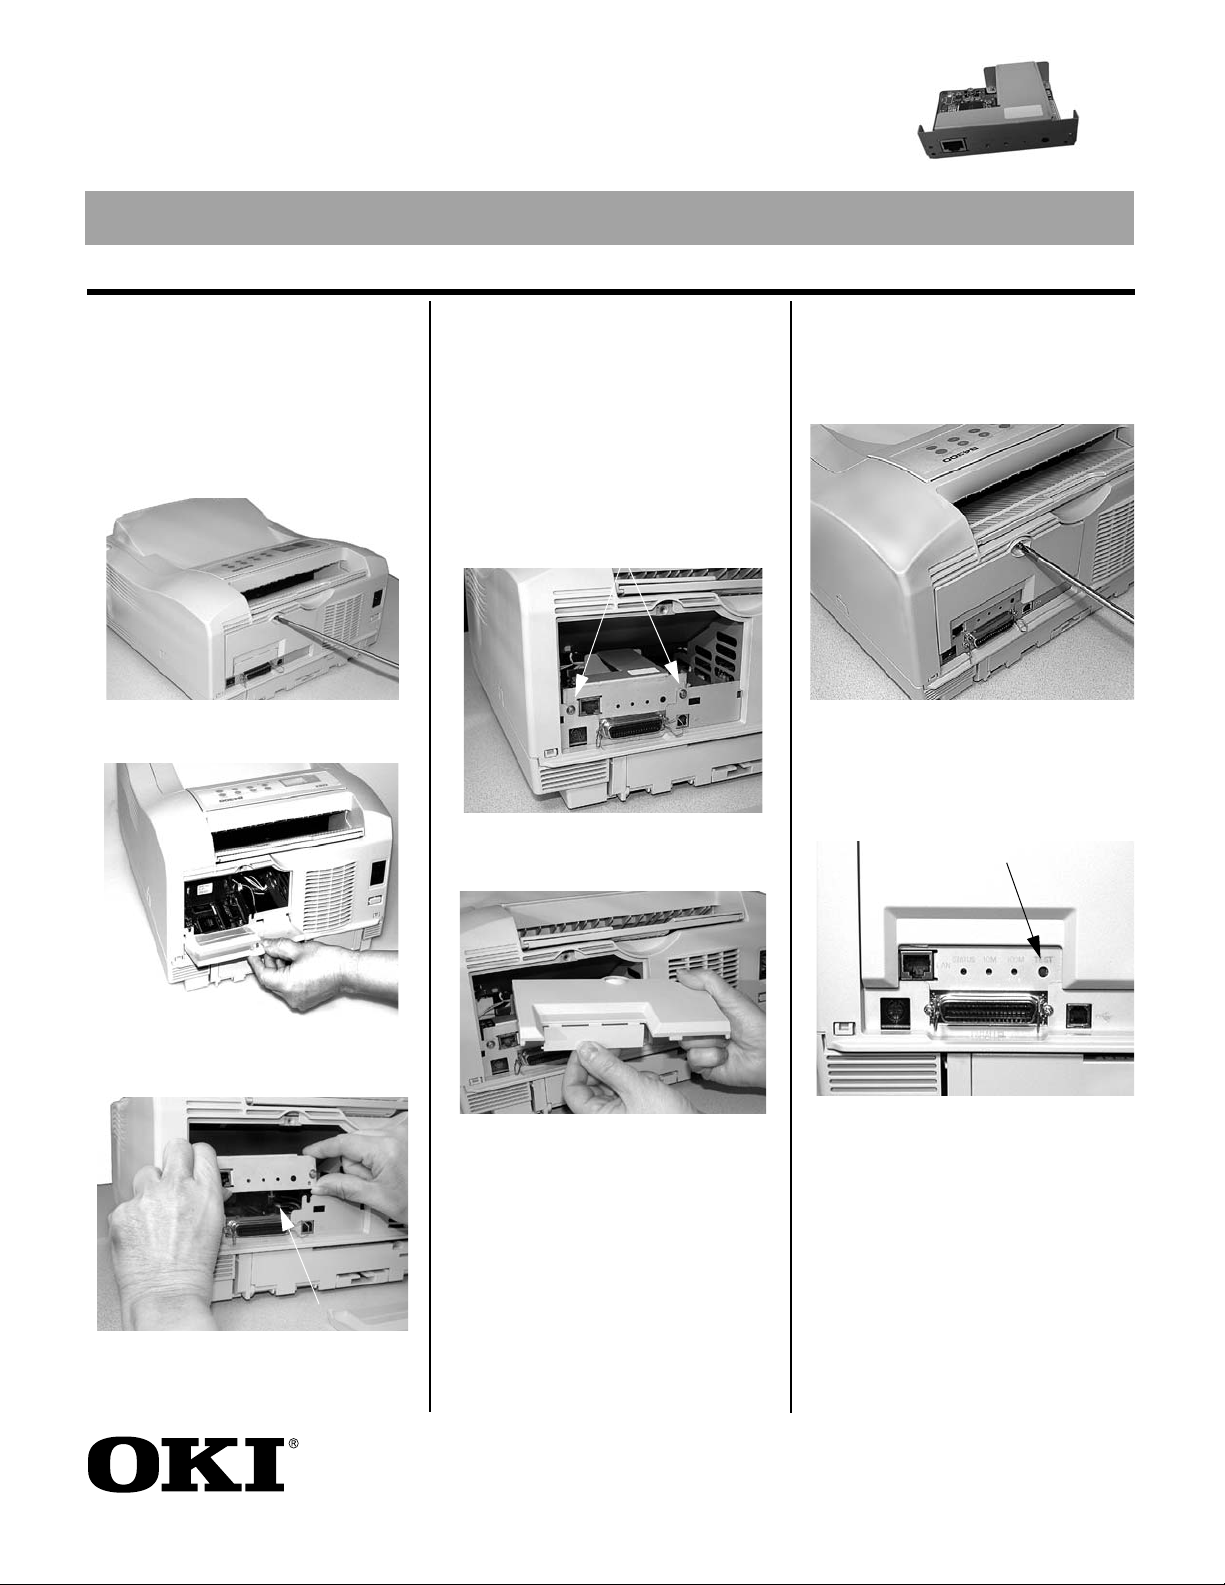
1. Unpack the print server and
remove any shipping materials.
2. Turn off the printer, and remove
the power cord and interface
cable.
3. Remove the access panel screw.
4. Lift off the access panel.
the connector on the main
board.
b. Press down until connectors are
fully engaged.
c. Make sure the print server is
securely installed.
6. Tighten the 2 screws at each end
of the metal plate.
7. Snap off the access panel tab.
8. Replace the access panel:
a. Align panel tabs at bottom.
b. Swing panel up and in place.
c. Tighten the screw.
9. To perform a test, press the test
button for 3 seconds. The self
diagnostic test and configuration
settings are printed.
5. Install the print server:
a. Align the connector at the
bottom of the print server with
Oki Data Americas, Inc., Mt. Laurel, NJ 08054
http://www.okidata.com
To install the printer software and
view the SoftNIC User’s Guide, see
the CD-ROM included with your
printer.
58366101
 Loading...