


™
MANUAL
®
®
©2004 OAKLEY, INC. ONE ICON FOOTHILL RANCH CA 92610 WWW.OAKLEY.COM 70N810 8/04 REV. A

1
TABLE OF CONTENTS
Getting Started |
1 |
Setting Up OAKLEY THUMP™ to Play Music |
2-4 |
Supported Music File Formats |
5 |
Store Any Kind of File |
6 |
Charging the Battery |
7 |
Accessories |
8 |
Troubleshooting |
9-10 |
Safety and Handling |
11-13 |
Cleaning |
14 |
Specifications |
15-17 |
Service and Support |
18-22 |
Communication Regulation Information |
243-245 |
2
GETTING STARTED
OAKLEY THUMP™ allows you to transfer MP3, WMA and WAV files from your computer and listen to music anywhere. You can also use OAKLEY THUMP to backup important files and transport any kind of file from one computer to another.
OAKLEY THUMP combines a digital music player with Oakley’s world-class sunglass technology. Patented XYZ Optics® maintains critical clarity at all angles of vision, even at the periphery of raked-back lens contours that maximize protection against sun, wind and side impact. Lightweight O Matter® frame material offers all-day comfort. The flip-up lenses are made of pure Plutonite®, a material that blocks 100% of all UVA, UVB, UVC and harmful blue light.
WHAT YOU NEED TO GET STARTED
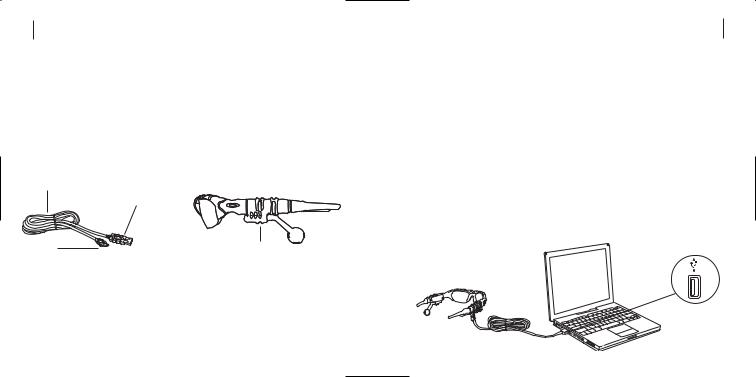
Your OAKLEY THUMP comes with the following components:
USB Cable
USB Connector
Mini-B |
OAKLEY THUMP |
To use OAKLEY THUMP with a Microsoft® Windows® PC, you must have:
•Windows XP, Windows 2000 or Windows ME. Windows 98SE users must download the USB Mass Storage Device Driver from www.oakley.com/thump or call Oakley in the U.S. at 1 (800) 969-2895 and arrange to have a CD sent. Customers outside of the U.S. should contact their local corporate office. See the end of this manual for international contact information. (Note that OAKLEY THUMP cannot be used with Windows NT.)
•A USB 2.0 or USB 1.1 connection port
To use OAKLEY THUMP with a Macintosh®, you must have:
•Mac® OS 9.2.2, Mac OS 10.1.5, Mac OS 10.2 or Mac OS 10.3
•A USB 2.0 or USB 1.1 connection port
3
SETTING UP OAKLEY THUMP TO PLAY MUSIC
To set up OAKLEY THUMP, first charge the battery. The battery will reach 80% charge after one hour, but a full three-hour charge is recommended. Then with OAKLEY THUMP connected to your computer, drag-and-drop files from your computer hard drive to the OAKLEY THUMP drive icon or folder. OAKLEY THUMP will play song files in MP3, WMA or WAV file format.
STEP 1: CHARGE THE BATTERY.
With the USB cable, connect OAKLEY THUMP directly to your computer’s USB port. OAKLEY THUMP will draw a small amount of electricity from your computer to charge its internal battery. (The USB cable can also connect OAKLEY THUMP to an optional Wall Charger, or you can use your OAKLEY THUMP Car Charger, both sold separately. See the Accessory card for more information.) The USB cable plugs into the bottom of OAKLEY THUMP, behind the ear boom on the right side. Be sure the earphone extender is pushed in (fully forward) to expose the Mini-B USB receptacle in the eyewear frame. Release the protective cover from the connection port. When plugging in the USB cable, be sure to align the plug correctly. If the plug will not go in, try flipping it over. Use only the USB cable included with OAKLEY THUMP and be sure you have the right connection port on your computer.
USB PORT
4
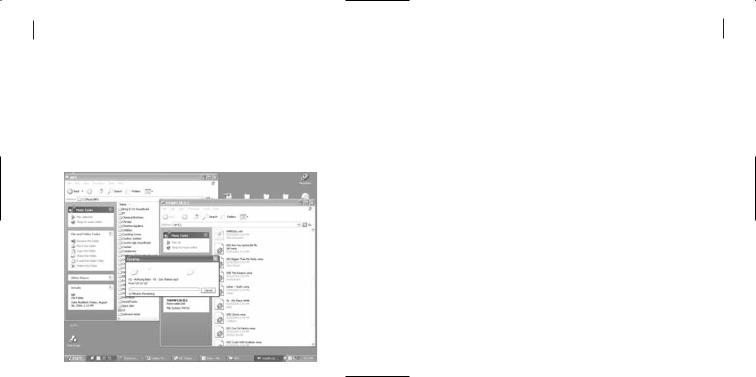
STEP 2: TRANSFER THE MUSIC FILES.
If your OAKLEY THUMP is not already attached to your computer, attach it now with the USB cable. In Windows Explorer, OAKLEY THUMP will show up as a removable disk drive. Double-Click the disk drive called “THUMP256” or “THUMP512”. This will show songs that come preloaded in the OAKLEY THUMP memory.
Open a second folder window that shows the MP3, WMA or WAV music files currently stored on your computer. (See “Transferring Music from CDs” for information on how to convert CD music to these compressed file formats.) Now drag-and-drop the files from your hard drive folder to the OAKLEY THUMP folder window. The songs will play back in the order in which you drag-and-drop them. You can also play them at random. See the Quick Reference guide for more information.
5
STEP 3: DISCONNECT WITH “EJECT”.
Because your computer recognizes OAKLEY THUMP as a removable disk drive, you must “eject” OAKLEY THUMP from the computer using a software command. Unplugging the USB cable without ejecting OAKLEY THUMP may result in data loss.
•For Windows: In the Windows Task Bar (the row of small icons which is usually located at the bottom right of the screen), double-click the icon for Safely Remove Hardware (  ). A list of connected devices will appear. Select your OAKLEY THUMP from the list then click the Stop button. Finish by clicking the Close button.
• For Macintosh: Go to the Finder and click on “File” (for OS 9, click on “Special”), then Eject “OAKLEY THUMP.”
Alternative method: Click on the “OAKLEY THUMP” icon on the Mac Desktop and drag it to the “Eject” icon on the Dock. (For OS 9, Drag it to the “Trash” icon on the Desktop.)
STEP 4: PLAY MUSIC.
After OAKLEY THUMP has been properly “ejected” from your computer, disconnect the USB cable. Adjust the earphone extenders to fit your ears. Note that the earphones pivot in and out, and each earphone is mounted on a telescoping boom for moving forward and back. Press and hold the Play / Pause button until the power-up tone is heard. THUMP will begin playing the first song. See the Quick Reference guide for information on controls.
 Loading...