

NorthStar EXPLORER D210 Installation And Operation Manual
www.northstarnav.com
Explorer D210
Installation and Operation Manual

Northstar Explorer D210 Installation and Operation Manual2
FCC Statement
Note: This equipment has been tested and found to comply with the limits for a Class B digital device,
pursuant to Part 15 of the FCC Rules. These limits are designed to provide reasonable protection against
harmful interference in a normal installation. This equipment generates, uses and can radiate radio
frequency energy and, if not installed and used in accordance with the instructions, may cause harmful
interference to radio communications. However, there is no guarantee that interference will not occur in
a particular installation. If this equipment does cause harmful interference to radio or television reception,
which can be determined by turning the equipment off and on, the user is encouraged to try to correct
the interference by one or more of the following measures:
Re orient or relocate the receiving antenna.
Increase the separation between the equipment and receiver.
Connect the equipment into an output on a circuit different from that to which the receiver is
connected.
Consult the dealer or an experienced technician for help.
A shielded cable must be used when connecting a peripheral to the serial ports.
IMPORTANT SAFETY INFORMATION
Please read carefully before installation and use.
This is the safety alert symbol. It is used to alert you to potential
personal injury hazards, Obey all safety messages that follow this symbol to
avoid possible injury or death.
WARNING indicates a potentially hazardous situation which, if not avoided,
could result in death or serious injury
CAUTION indicates a potentially hazardous situation which, if not avoided, could
result in minor or moderate injury.
CAUTION used without the safety alert symbol indicates a potentially
hazardous situation which, if not avoided, may result in property damage.
DISCLAIMER: It is the owner’s sole
responsibility to install and use the instrument
and transducers in a manner that will not cause
accidents, personal injury or property damage.
The user of this product is solely responsible for
observing safe boating practices.
BRUNSWICK NEW TECHNOLOGIES INC. AND ITS
SUBSIDIARIES AND AFFILIATES DISCLAIM ALL
LIABILITY FOR ANY USE OF THIS PRODUCT IN A
WAY THAT MAY CAUSE ACCIDENTS, DAMAGE OR
THAT MAY VIOLATE THE LAW.
Governing Language: This statement,
any instruction manuals, user guides and
other information relating to the product
(Documentation) may be translated to, or
has been translated from, another language
(Translation). In the event of any conflict
between any Translation of the Documentation,
the English language version of the
Documentation will be the official version of the
Documentation.
This manual represents the Explorer D210
as at the time of printing. Brunswick New
Technologies Inc. and its subsidiaries and
affiliates reserve the right to make changes to
specifications without notice.
Copyright © 2006 Brunswick New Technologies
Inc. Northstar™ is a registered trademark of
Brunswick New Technologies Inc

Northstar Explorer D210 Installation and Operation Manual 3
Contents
1 Operation .............................................................................................................................................. 4
Alarms . . . . . . . . . . . . . . . . . . . . . . . . . . . . . . . . . . . . . . . . . . . . . . . . . . . . . . . . . . . . . . . . . . . . . . . . . . . . . . . 4
Alarms On/Off . . . . . . . . . . . . . . . . . . . . . . . . . . . . . . . . . . . . . . . . . . . . . . . . . . . . . . . . . . . . . . . . . . . . . . . 4
Shallow Alarm . . . . . . . . . . . . . . . . . . . . . . . . . . . . . . . . . . . . . . . . . . . . . . . . . . . . . . . . . . . . . . . . . . . . . . . . 4
Deep Alarm . . . . . . . . . . . . . . . . . . . . . . . . . . . . . . . . . . . . . . . . . . . . . . . . . . . . . . . . . . . . . . . . . . . . . . . . . . 4
2 Instrument Setup .................................................................................................................................. 5
Keel/Surface Offset . . . . . . . . . . . . . . . . . . . . . . . . . . . . . . . . . . . . . . . . . . . . . . . . . . . . . . . . . . . . . . . . . 5
Transducer Setting . . . . . . . . . . . . . . . . . . . . . . . . . . . . . . . . . . . . . . . . . . . . . . . . . . . . . . . . . . . . . . . . . . 5
Units of Measure . . . . . . . . . . . . . . . . . . . . . . . . . . . . . . . . . . . . . . . . . . . . . . . . . . . . . . . . . . . . . . . . . . . . 5
3 Dual Station Operation ......................................................................................................................... 6
Master/Slave Selection . . . . . . . . . . . . . . . . . . . . . . . . . . . . . . . . . . . . . . . . . . . . . . . . . . . . . . . . . . . . . . 7
Linked or Separate Selection . . . . . . . . . . . . . . . . . . . . . . . . . . . . . . . . . . . . . . . . . . . . . . . . . . . . . . . . 7
4 Maintenance ........................................................................................................................................ 8
5 Installation .......................................................................................................................................... 8
Instrument Installation . . . . . . . . . . . . . . . . . . . . . . . . . . . . . . . . . . . . . . . . . . . . . . . . . . . . . . . . . . . . . . 8
6 Wiring .................................................................................................................................................. 9
Appendix A - Specifications ................................................................................................................... 10
Appendix B - Troubleshooting ................................................................................................................ 11
Appendix C - How to contact us ................................................................................................................ 12
Northstar Explorer D210 Installation and Operation Manual4
Whenever power is applied the depth sounder is
active and water depth is displayed. If the sonar
signal does not show a bottom the display will
indicate “- -”. This can occur if the water is aerated
or the maximum depth is exceeded.
Note: The maximum depth decreases as boat speed
increases.
Alarms
Two types of alarms can be set; the Deep Alarm
and the Shallow Alarm. The Deep Alarm can be
set as high as 184 metres (605 feet) while the
Shallow Alarm can be set as low as 0.3 metre (1
foot).
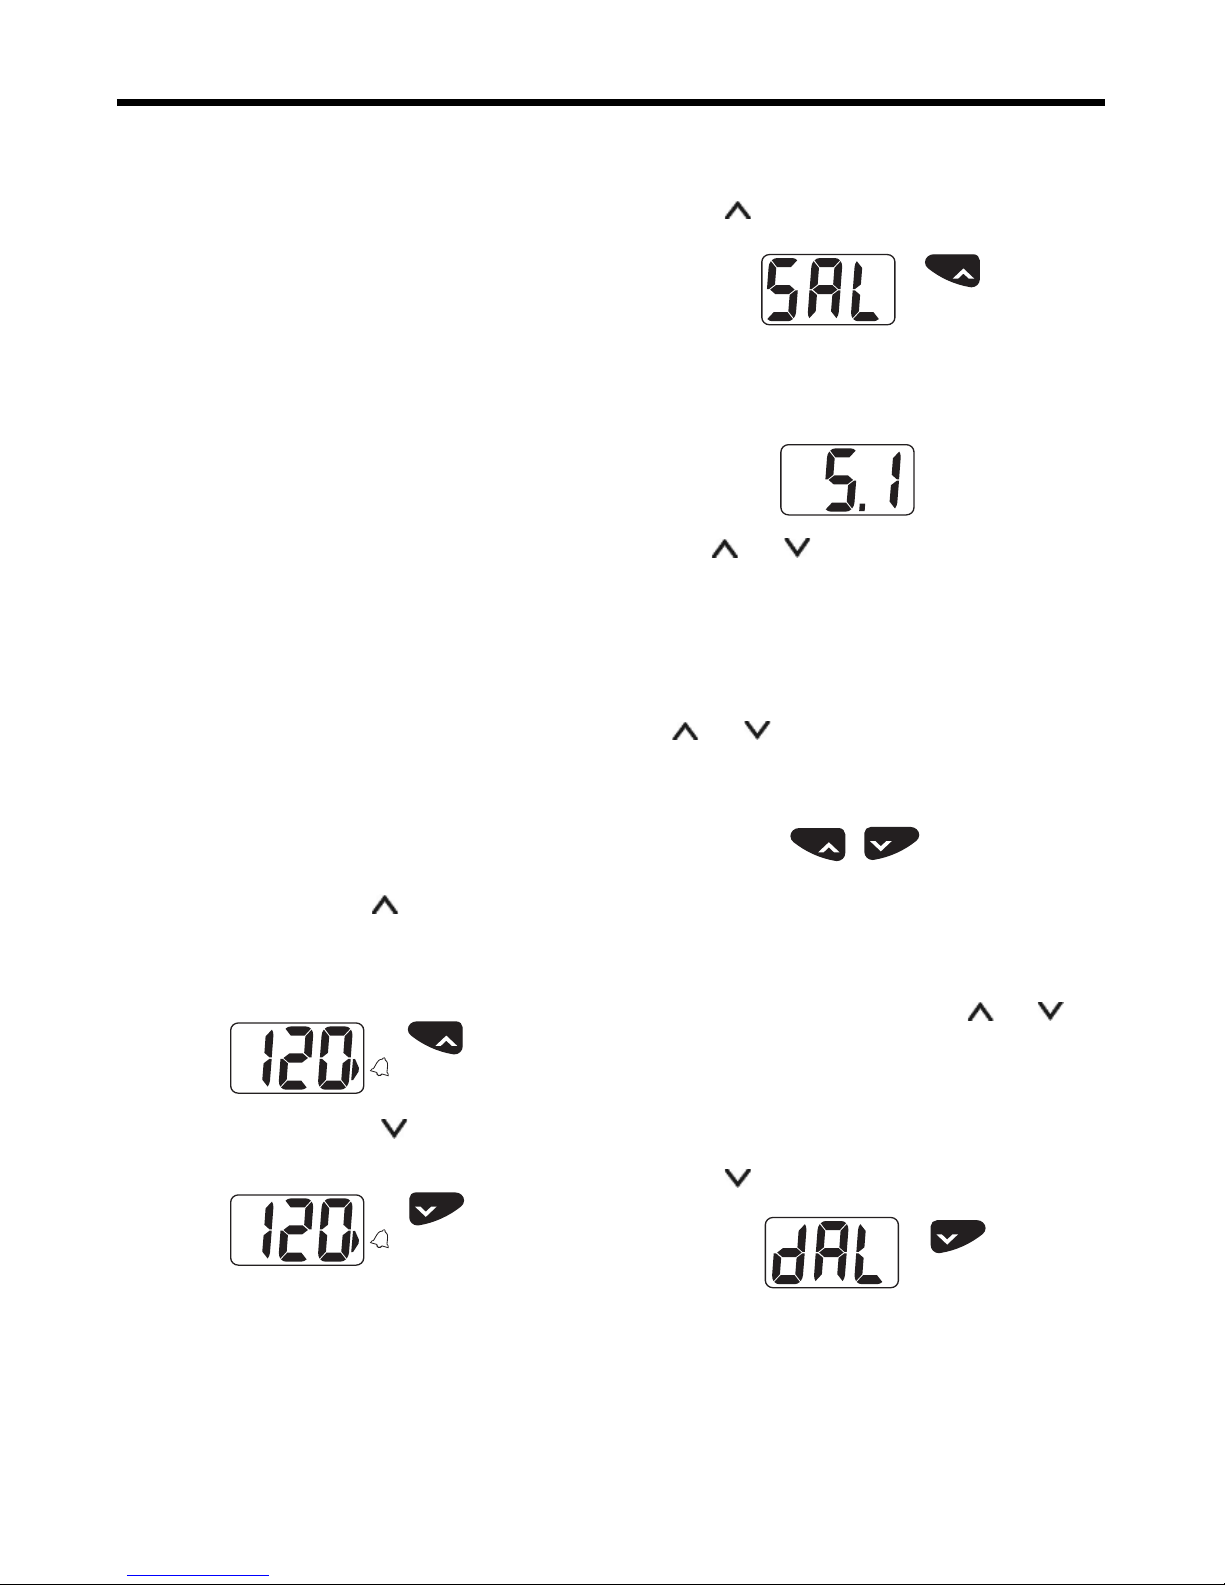
Whenever the water depth is greater than the
Deep Alarm setting and the alarm is enabled an
alarm will sound. The alarm repeats two short
beeps and alternates DAL and the water depth
on the display.
Whenever the water depth is less than the
Shallow Alarm setting and the alarm is enabled
an alarm will sound. The alarm repeats a single
long beep and alternates SAL and the water
depth on the display.
Alarms On/Off
Alarm settings are saved in memory.
To turn the alarm on, press
(ON). An arrow on
the lower right corner of the display will show
(next to the Alarm Bell), to indicate that the
alarms are on.
To turn the alarms off, press
(OFF). The arrow
in the lower right corner will extinguish.
Note: The arrow will flash if alarms are turned ON
but the shallow alarm is individually set to OFF. See
next section.
Shallow Alarm
To set the shallow alarm:
1. Press
for three seconds. The display will
show:
2. After a few seconds the display will indicate
the current Shallow Alarm depth setting.
3. Use
and to change the value. If either
key is held depressed for more than one
second the reading will increase or decrease
rapidly.
4. When the alarm is set, exit by pressing both
and simultaneously. Alternatively, if no
keys are pressed for a period of 5 seconds the
normal depth display will resume.
Press simultaneously to exit
Note: If the reading is decreased to below
1.5 feet (or equivalent) the display will
show OFF and the alarm will be disabled. The alarm
can also be disabled by pressing both
and for
5 seconds. The word OFF will be displayed but the
alarm depth will be retained for future use.
Deep Alarm
To set the deep alarm:
1. Press
for three seconds. The display will
show:
2. After two seconds the display will indicate
the current Deep Alarm depth setting.
1 Operation
OFF
ON
ON
OFFON
OFF
OFFON
Press for 3
Seconds
OFF
ON
ON
OFFON
OFF
OFFON
OFF
Press for 3
Seconds
OFFON
OFF
ON
ON
 Loading...