


User Guide
Lumia 640
Issue 1.0 EN-US

User Guide
Lumia 640
Contents
For your safety 4
Get started 5
Keys and parts 5
Insert the SIM and memory card 5
Remove the SIM and memory card 8
Switch the phone on 10
Lock the keys and screen 11
Charge your phone 13
Connect the headset 14
Antenna locations 14
Your first Lumia? 16
Set up your phone 16
Explore your tiles, apps, and settings 17
Navigate inside an app 19
Use the touch screen 20
Back, start, and search keys 23
Transfer content to your Lumia phone 23
Basics 27
What’s new in this release? 27
Get to know your phone 27
Accounts 33
Personalize your phone 38
Cortana 43
Accessibility 44
Take a screenshot 46
Extend battery life 46
Save on data roaming costs 48
Write text 49
Scan codes or text 53
© 2015 Microsoft Mobile. All rights reserved.
Clock and calendar 54
Browse your SIM apps 57
Store 58
People & messaging 61
Calls 61
Contacts 66
Social networks 71
Messages 72
Mail 76
Camera 81
Get to know Lumia Camera 81
Open your camera quickly 81
Change the default camera 81
Camera basics 82
Advanced photography 84
Photos and videos 87
Maps & navigation 92
Switch location services on 92
Find a location 92
Get directions to a place 92
Download maps to your phone 93
Positioning methods 93
Internet 94
Define internet connections 94
Use your data plan efficiently 94
Web browser 95
Search the web 97
Close internet connections 98
Entertainment 99
2

Watch and listen 99
FM radio 103
Sync music and videos between your
phone and computer 104
Games 105
Lifestyle apps and services 107
Office 110
Microsoft Office Mobile 110
Write a note 113
Continue with a document on
another device 113
Use the calculator 113
Use your work phone 114
Tips for business users 114
Phone management &
connectivity 116
Update your phone software 116
Use a secure VPN connection 117
Wi-Fi 118
NFC 119
Bluetooth 120
Memory and storage 123
Copy content between your phone
and computer 125
Security 127
Wallet 130
Access codes 130
Troubleshooting and support 132
Find your model number and serial
number (IMEI) 133
Product and safety info 133
© 2015 Microsoft Mobile. All rights reserved.
3
For your safety
Read these simple guidelines. Not following them may be dangerous or against local laws and
regulations.
TURN OFF IN RESTRICTED AREAS
Turn the device off when mobile phone use is not allowed or when it may cause
interference or danger, for example, in aircra ft, in hospita ls or near medical equipment,
fuel, chemicals, or blasting areas. Obey all instructions in restricted areas.
ROAD SAFETY COMES FIRST
Obey all local laws. Always keep your hands free to operate the vehicle while driving.
Your first consideration while driving should be road safety.
INTERFERENCE
All wireless devices may be susceptible to interference, which could affect performance.
QUALIFIED SERVICE
Only qualified personnel may install or repair this product.
BATTERIES, CHARGERS, AND OTHER ACCESSORIES
Use only batteries, chargers, and other accessories approved by Microsoft Mobile for
use with this device. Third-party chargers that comply with the IEC/EN 62684 standard,
an d t hat can c on nec t t o yo ur d ev ice mi cro US B co nnec to r, m ay b e compatible. Do not connect
incompatible products.
KEEP YOUR DEVICE DRY
Your device is not water-resistant. Keep it dry.
GLASS PARTS
The device screen is made of glass. This glass can break if the device is dropped on a
ha rd su rfa ce or recei ves a s ubsta ntial impa ct. If the gl ass br eaks, do not touch the glass
parts of the device or attempt to remove the broken glass from the device. Stop using the
device until the glass is replaced by qualified service personnel.
PROTECT YOUR HEARING
To prevent possible hearing damage, do not listen at high volume levels for long
periods. Exercise caution when holding your device near your ear while the
speakerphone is in use.
© 2015 Microsoft Mobile. All rights reserved.
4

Get started
Get to grips with the basics, and have your phone up and running in no time.
Keys and parts
Explore the keys and parts of your new phone.
1Front camera
2Earpiece
3Volume keys
4 Power/Lock key
5Microphone
6 Micro-USB connector
7 Audio connector AHJ 3.5 mm
8 Camera lens
9 Camera flash
10 Microphone
11 Antenna area
Some of the accessories mentioned in
this user guide, such as charger,
headset, or data cable, may be sold
separately.
Insert the SIM and memory card
Read on to learn how to insert a SIM card into your phone.
Important: Your device uses a micro-SIM card, also known as a mini-UICC SIM card.
Use only original micro-SIM cards. Use of incompatible SIM cards, or use of SIM card
adapters, may damage the card or the de vic e, and may cor rupt data stored on the c ard.
© 2015 Microsoft Mobile. All rights reserved.
5
Note: Turn the device off and disconnect the charger and any other device before
re mov ing any cov ers . Av oid tou ching electronic components while changing any covers.
Always store and use the device with any covers attached.
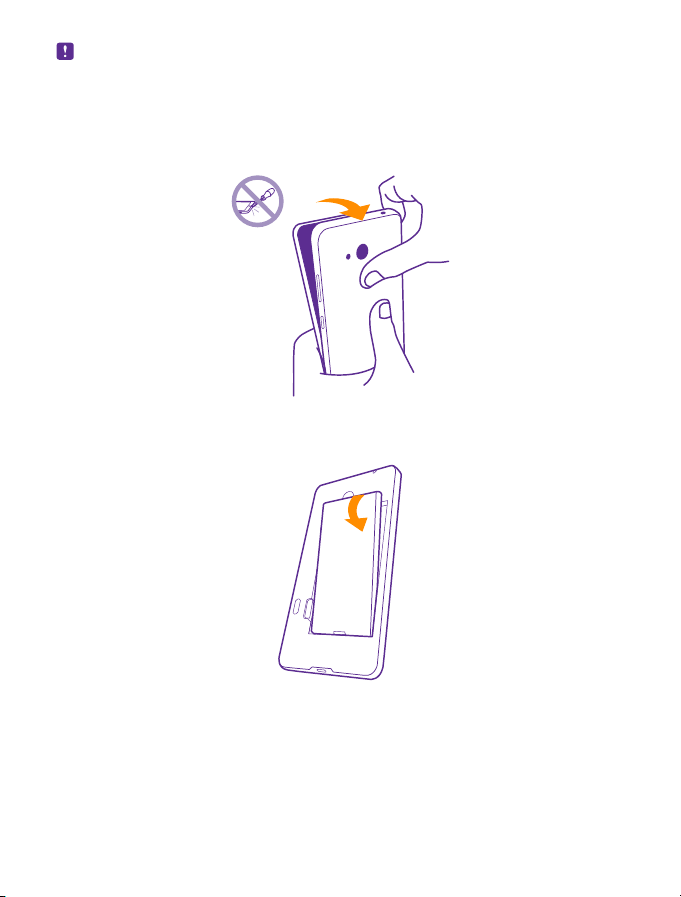
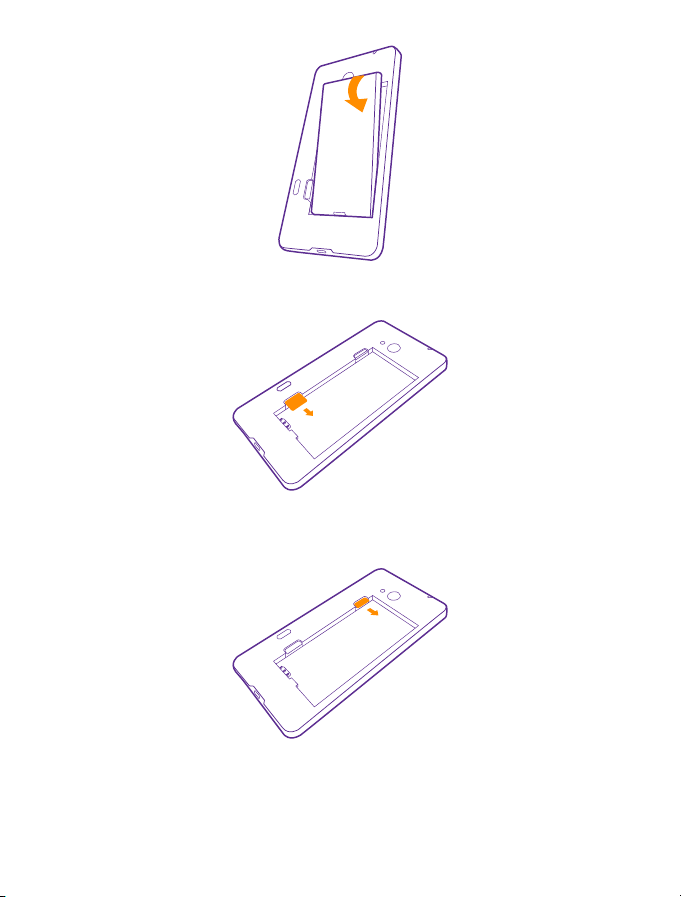
1. Switch your phone off.
2. On the corner of the phone, put the tip of your index finger in the seam between the screen
frame and the back cover. Press the middle of the back cover, bend the cover open, and
remove it.
Do not use any sharp tools, as they may damage the screen.
3. If the battery is in, lift it out.
4. Push the SIM card into the SIM slot with the metal contact area down.
© 2015 Microsoft Mobile. All rights reserved.
6
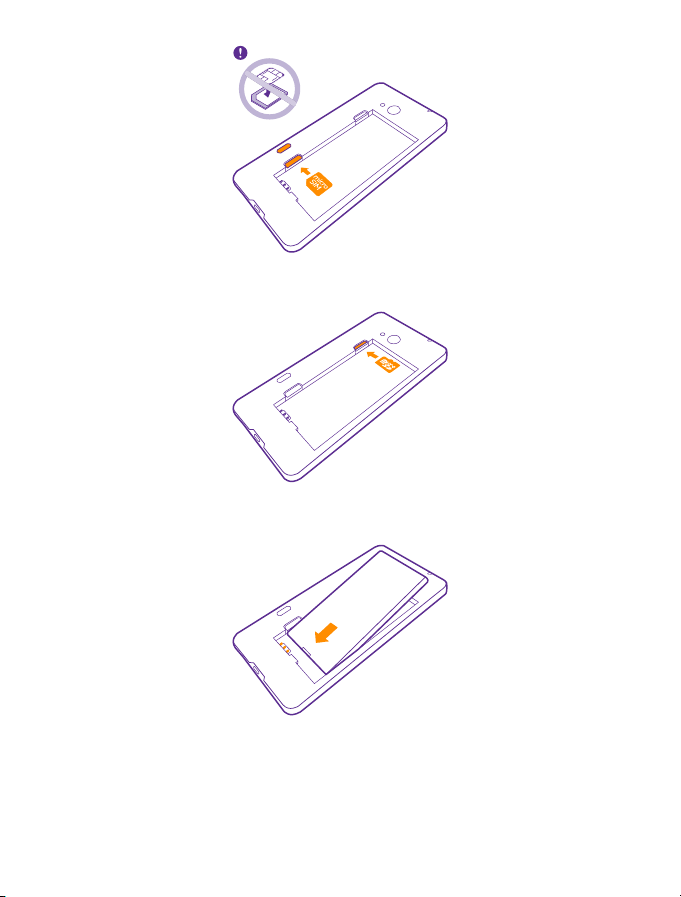
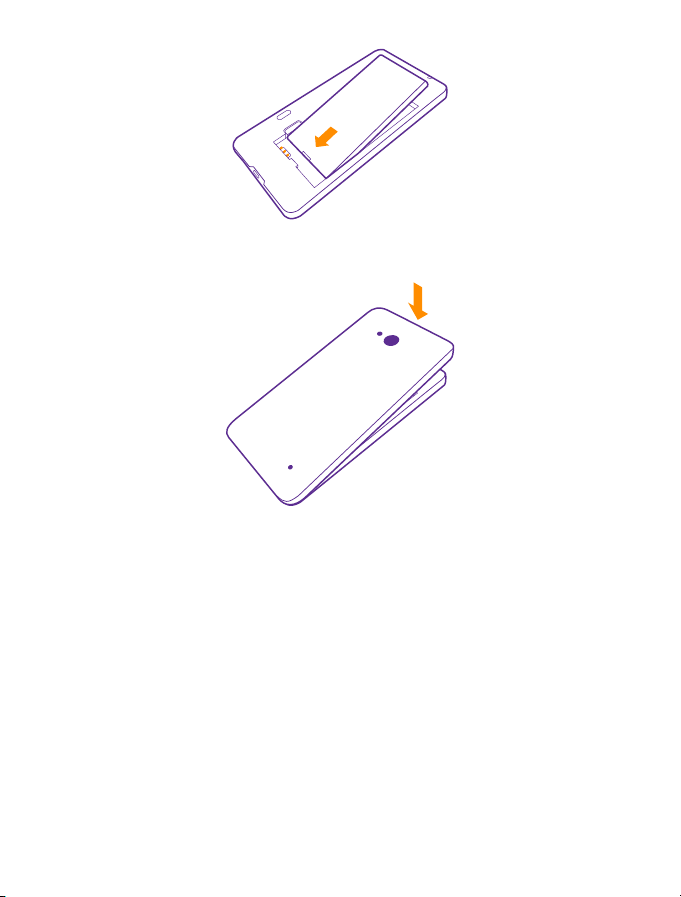
5. If you have a memory card, push the card into the memory card slot.
6. Line up the battery contacts, and put the battery in.
7. Press the bottom edge of the back cover agains t the bott om edge of your phone, and snap
the cover into place.
© 2015 Microsoft Mobile. All rights reserved.
7
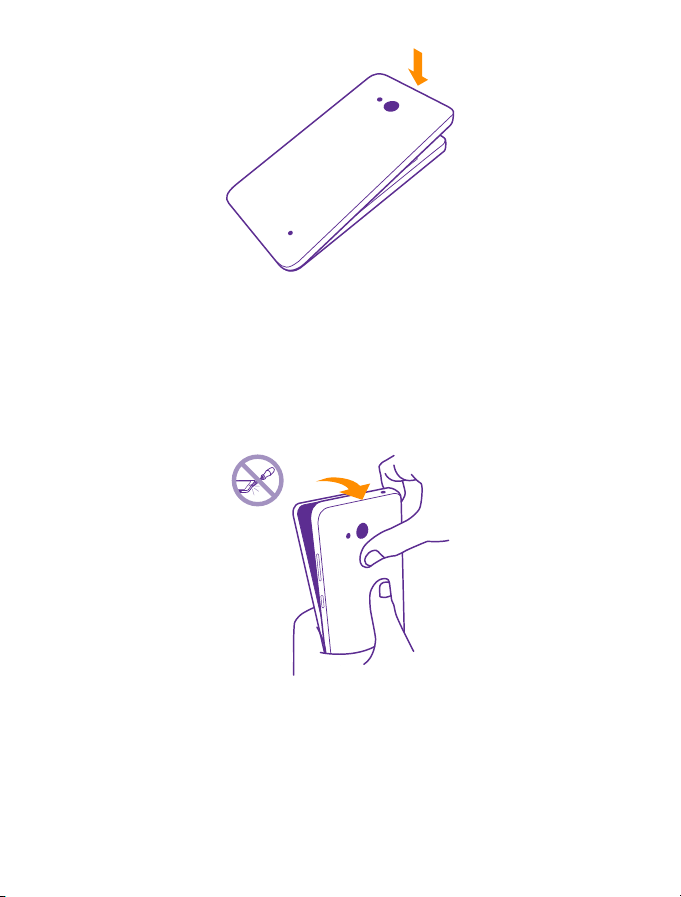
8. Switch your phone on.
Remove the SIM and memory card
Got a new SIM or memory card? Learn how to remove the previous card from your phone.
1. Switch your phone off.
2. On the corner of the phone, put the tip of your index finger in the seam between the screen
frame and the back cover. Press the middle of the back cover, bend the cover open, and
remove it.
3. If the battery is in, lift it out.
© 2015 Microsoft Mobile. All rights reserved.
8
4. To remove the SIM card, pull it out from the slot.
5. To remove the memory card, pull it out from the slot.
6. Line up the battery contacts, and put the battery in.
© 2015 Microsoft Mobile. All rights reserved.
9
7. Press the bottom edge of the back cover agains t the bott om edge of your phone, and snap
the cover into place. Don't press the keys while attaching the cover.
8. Switch your phone on.
Switch the phone on
Switch your phone on, and start exploring it.
Press the power key until the phone vibrates.
© 2015 Microsoft Mobile. All rights reserved.
10
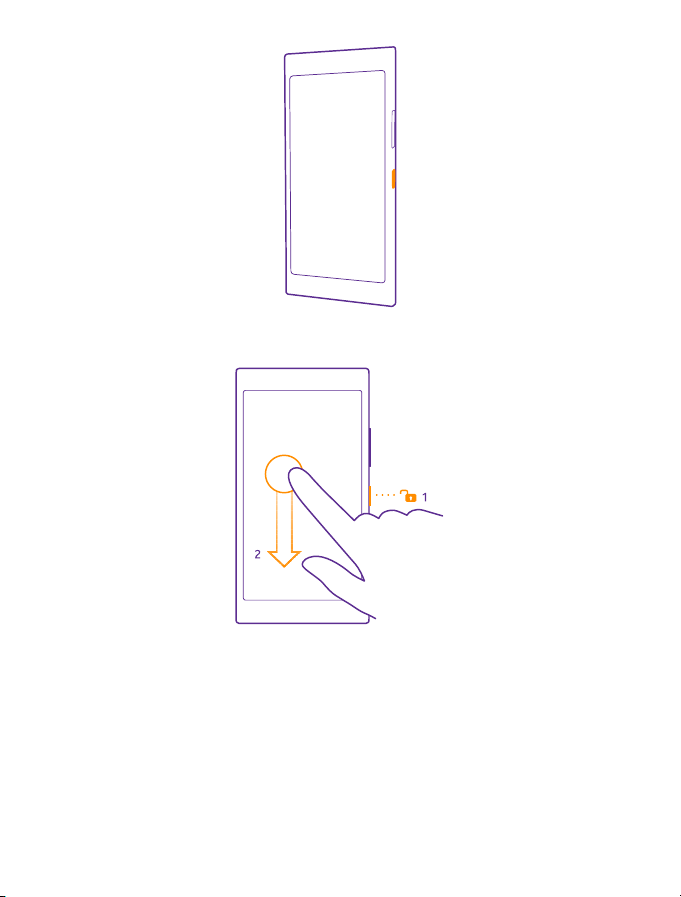
Switch the phone off
Press and hold the power key, and drag the lock screen down.
Lock the keys and screen
If you want to avoid acciden tally making a call when your pho ne is in your p ock et or bag, you
can set your keys and screen to lock automatically.
Press the power key.
© 2015 Microsoft Mobile. All rights reserved.
11
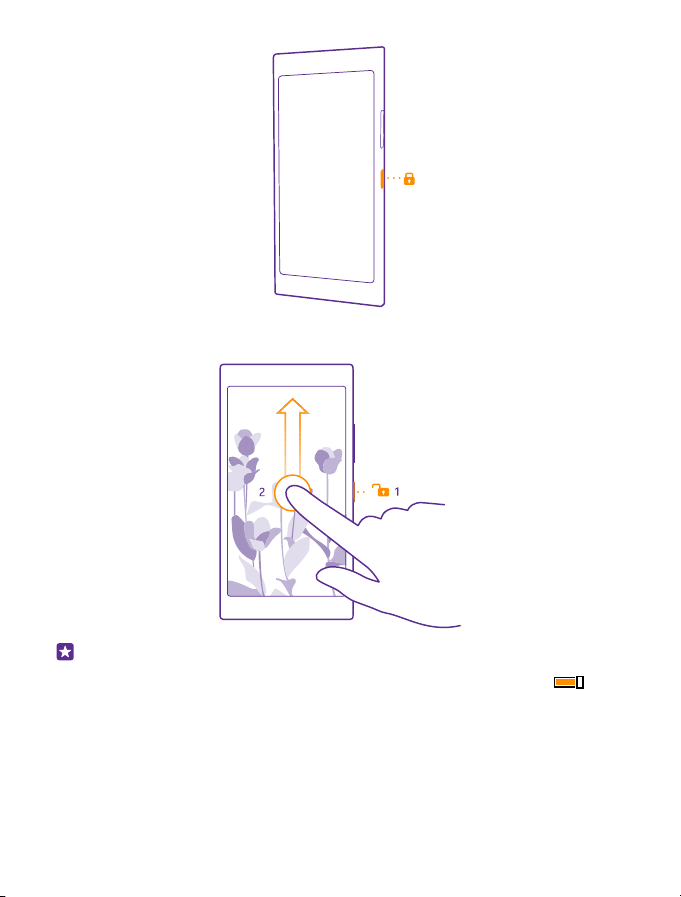
Unlock the keys and screen
Press the power key, and drag the lock screen up.
Tip: Instead of pressing the power key, you can also double-tap the screen if doubletap is switched on. To switch on double-tap, on the start screen, swipe down from the
top of the screen, tap ALL SETTINGS > touch, and switch Wake up to On
Set the keys and screen to lock automatically
On the start screen, swipe down from the top of the screen, tap ALL SETTINGS > lock
screen > Screen times out after, and select the length of time after which the keys and screen
are locked automatically.
.
© 2015 Microsoft Mobile. All rights reserved.
12
Charge your phone
Learn how to charge your phone.
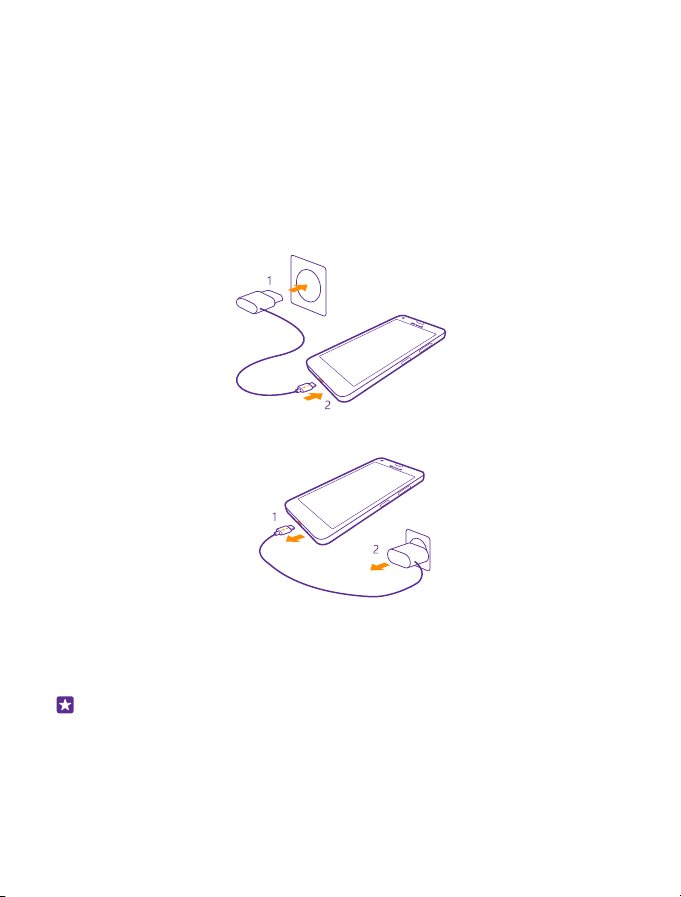
Charge your phone with a USB charger
Your battery h as been partia ll y charged at th e f ac tory, but yo u may need to rechar ge it before
you can switch the phone on for the first time.
Mak e sure yo u use a co mpatibl e USB cha rger t o charge your phone . The charger may be sold
separately.
1. Plug the charger into a wall outlet. If necessary, connect the USB cable to the charger.
2. Connect the micro-USB end of the charger's cable to your phone.
3. When the battery is full, disconnect the charger from the phone, then from the wall outlet.
You don't need to charge the batt ery for a sp ecific length of time, and you can use the phon e
while it's charging.
If the battery is completely discharged, it may take up to 20 minutes before the charging
indicator is displayed.
Tip: You can use USB charging when a wall outlet is not available. Data can be transferred
while charging the device. The efficiency of USB charging power varies significantly, and
it may take a long time for charging to start and the device to start functioning.
Make sure your computer is switched on.
© 2015 Microsoft Mobile. All rights reserved.
13
First connect the USB cable to the computer, then to your phone. When the battery is
full, first disconnect the USB cable from your phone, then from the computer.
The battery can be charged and discharged hundreds of times, but it will eventually wear out.
When the talk and standby times are noticeably shorter than normal, replace the battery.
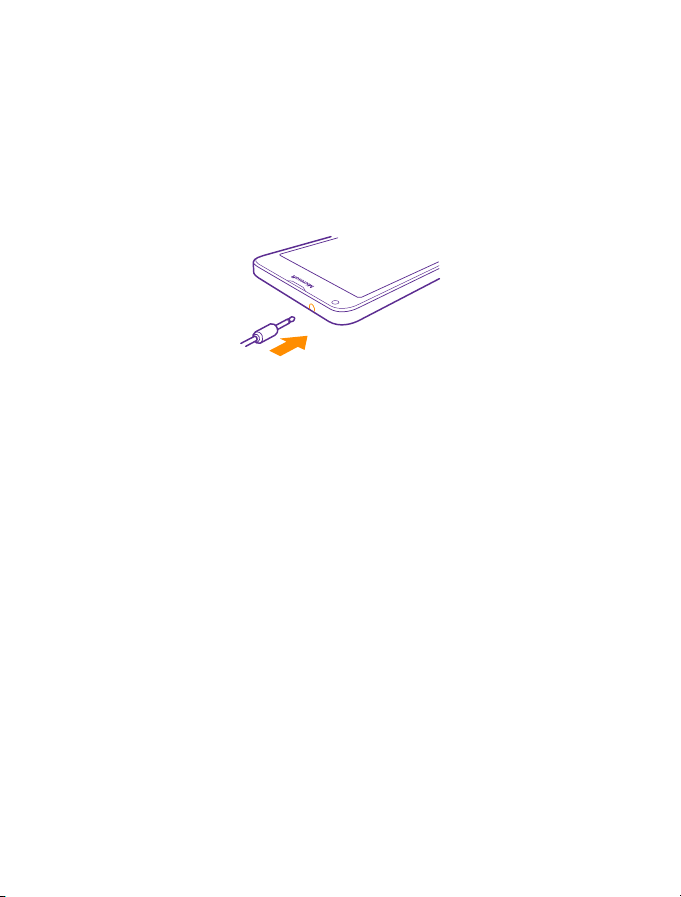
Connect the headset
Enjoy your favorite music, or free your hands for other things when in a call.
The headset may be sold separately.
Connect the headset to your phone.
Do not connect to products that create an output signal, as this may damage the device. Do
not connect any voltage source to the audio connector. If you connect an external device or
headset, other than those approved for use with this device, to the audio connector, pay
special attention to volume levels.
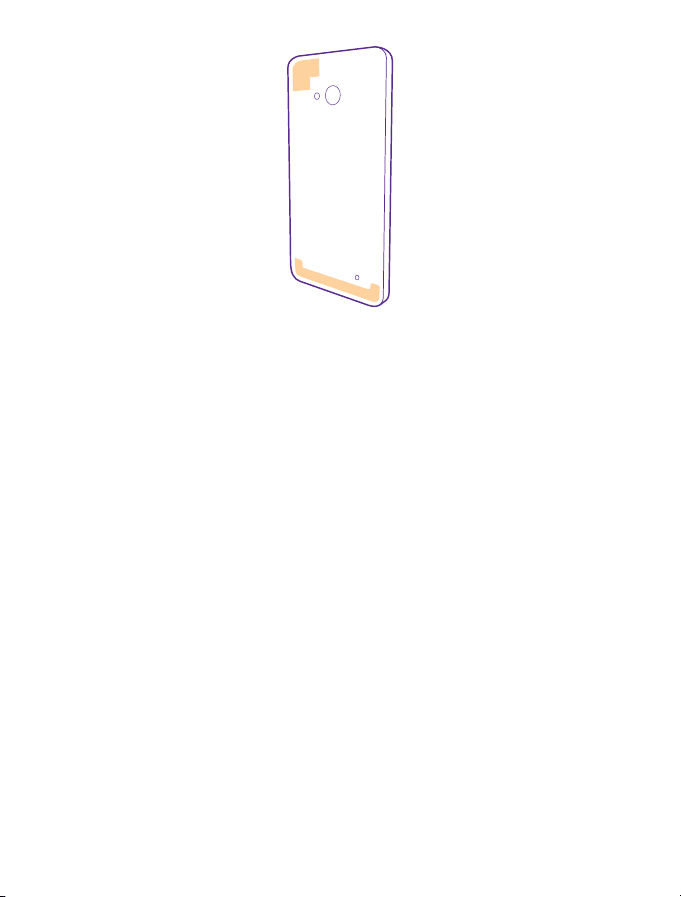
Antenna locations
Learn where the antennas are located on your phone to get the best possible performance.
Avoid touching the antenna area while the antenna is in use. Contact with antennas affects
the communication quality and may reduce battery life due to higher power level during
operation.
The antenna areas are highlighted.
© 2015 Microsoft Mobile. All rights reserved.
14
© 2015 Microsoft Mobile. All rights reserved.
15
Your first Lumia?
Let’s get started. Set up your new phone, explore your phone’s views and menus, and learn
how to use the touch screen.
Set up your phone
Make the most out of your phone’s features from the get-go.
When you turn your phone on for the first time, your phone guides you to set up your network
connections, phone settings, and Microsoft account in one sitting.
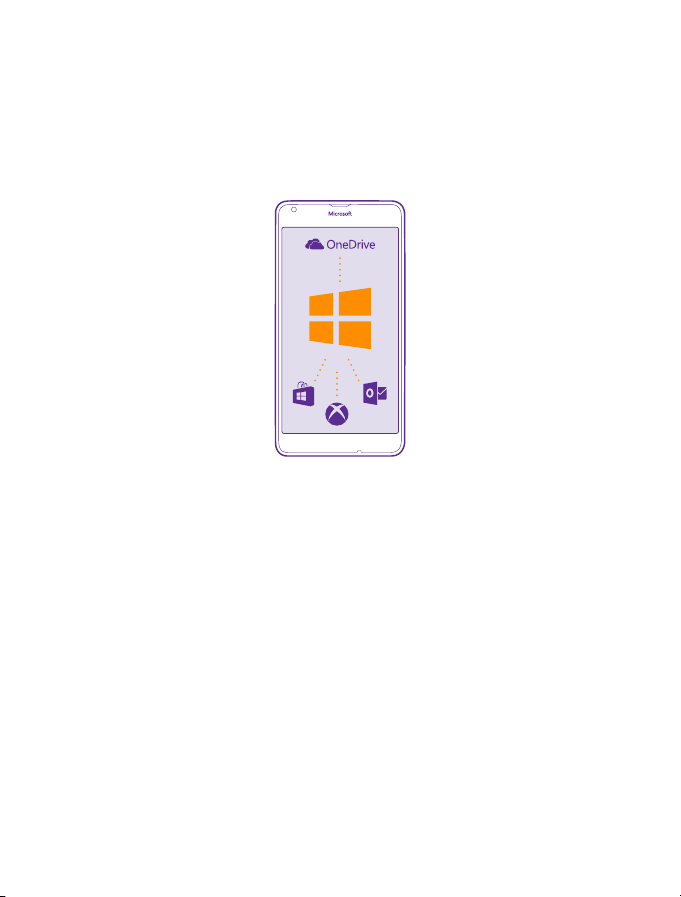
You need a Microsoft account to back up and restore your phone, to buy, install, and update
apps, and to access some Microsoft services, such as:
•Xbox
•Xbox Music and Xbox Video
•OneDrive
•Hotmail
•Outlook
You can use the same username and password on your computer and phone.
1. Turn your phone on, and follow the instructions shown on your phone.
2. When asked, create a Microsoft account. If you already have an account for Microsoft
s er vi c es , s u ch as X bo x L i ve .c o m, Ho t ma il . co m, o r O ut l oo k. c om , o r you have created a Microsoft
account on your Surface tablet or Windows PC, sign in with that username.
Make sure you remember the credentials for the Microsoft account you added to your
phone. You need them if you want to reset your phone or change the reset protection settings.
© 2015 Microsoft Mobile. All rights reserved.
16
Reset protection prevents a thief from resetting and reusing your phone if your phone gets
stolen.
Tip: You can also create a Microsoft account later. On the start screen, swipe down from
the top of the screen, and tap ALL SETTINGS > email+accounts > add an account >
Microsoft account.
Parents must approve the account for children under the age of 13. To approve the account,
on the start screen, swipe down from the top of the screen, tap ALL SETTINGS > email
+accounts > Microsoft account, and follow the instructions shown on the phone.
You can also create or manage your account at www.live.com.
3. Fill in your account details.
4. Type in your phone number or an alternative email address. They are used to send you a
one-time verification code and to protect your data.
5. Select how you want to get your one-time verification code.
6. When asked, type in the last 4 digits of your phone number or your email address.
7. When you rece ive the c ode, typ e it in, and y ou are read y to back up your data and use your
phone.
Tip: If your screen turns off, press the power key, and drag the lock screen up.
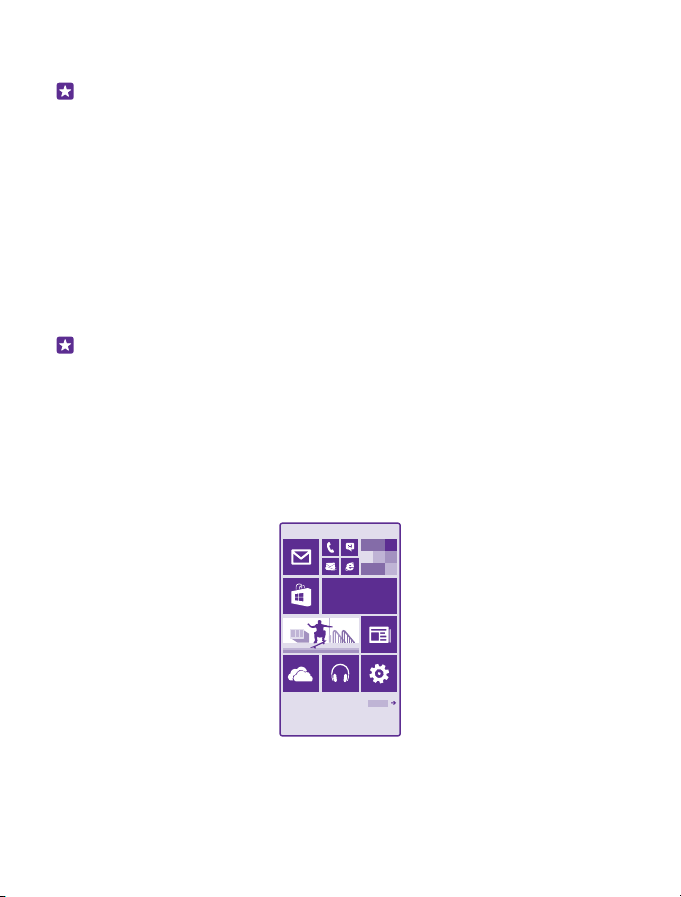
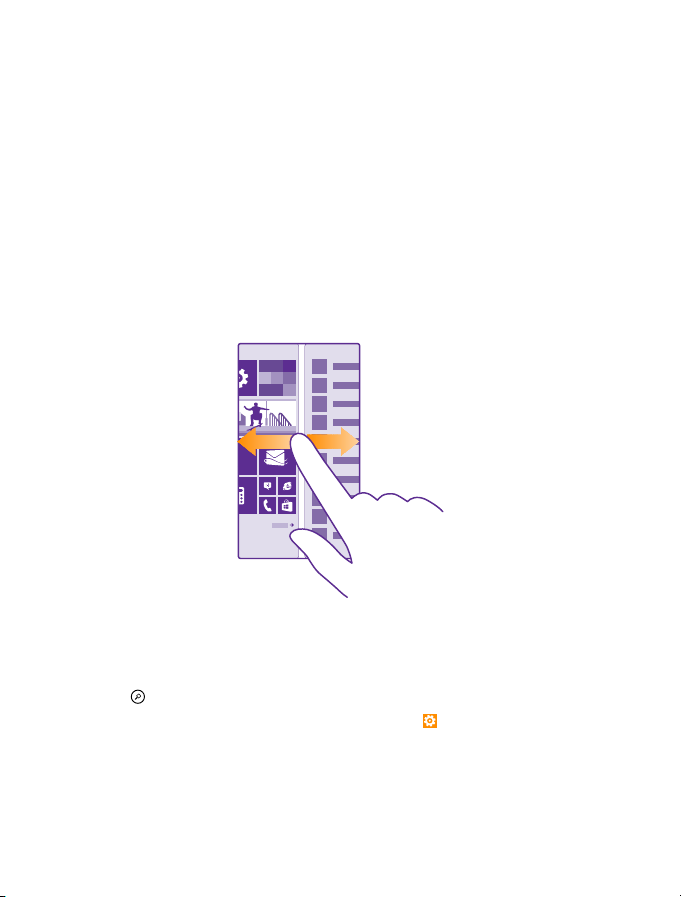
Explore your tiles, apps, and settings
Everything you need is on 2 views: the start screen and apps menu. Fill the start screen with
shortcuts to your favorite apps and the contacts you need the most, and find all your apps
easily in the apps menu.
The start screen consists of tiles, which are shortcuts to your apps, contacts, browser
bookmarks, and more. Some tiles may show you notifications and updates, such as your
missed calls, received messages, and the latest news.
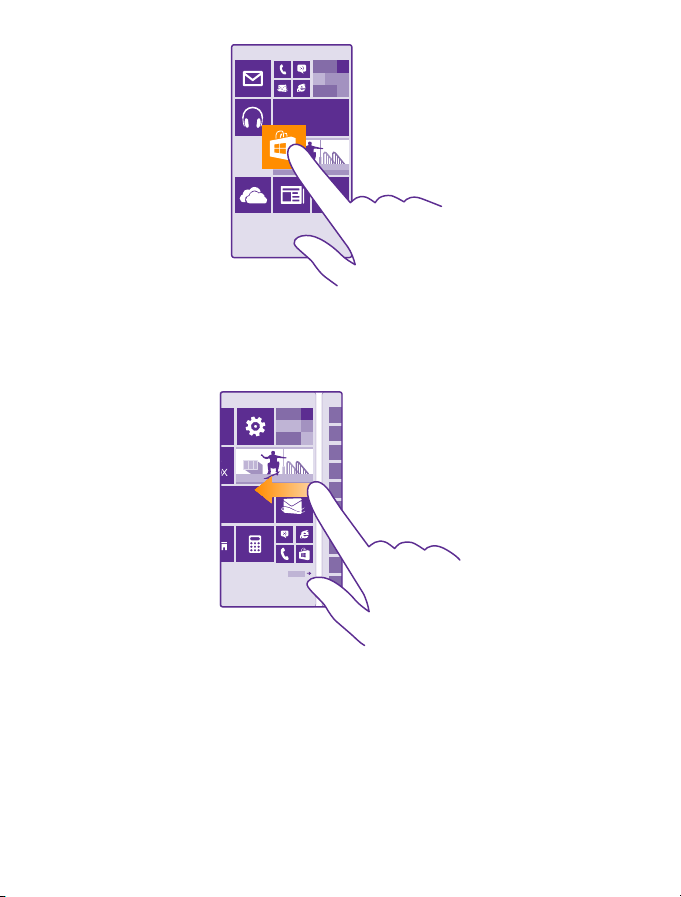
1. To see all the apps on your phone, on the start screen, simply swipe left. To return to the
start screen, swipe right.
© 2015 Microsoft Mobile. All rights reserved.
17
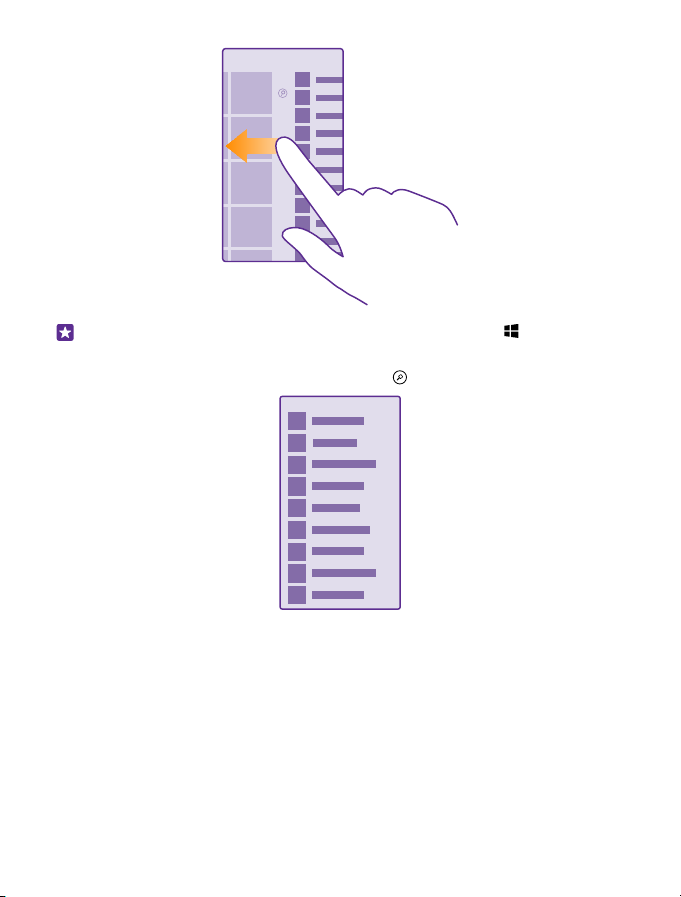
Tip: To go back to the start screen from any view, tap the start key .
The apps m en u is t he home to al l your a pps – in neat alph ab etical order. All the installed apps
end up here. To look up an app in the apps menu, tap
2. To add an app shortcut to your start screen, in the apps menu, tap and hold the app, and
tap pin to start.
Check notifications and change settings quickly
Swipe down from the top of the screen.
, or tap a letter.
© 2015 Microsoft Mobile. All rights reserved.
18
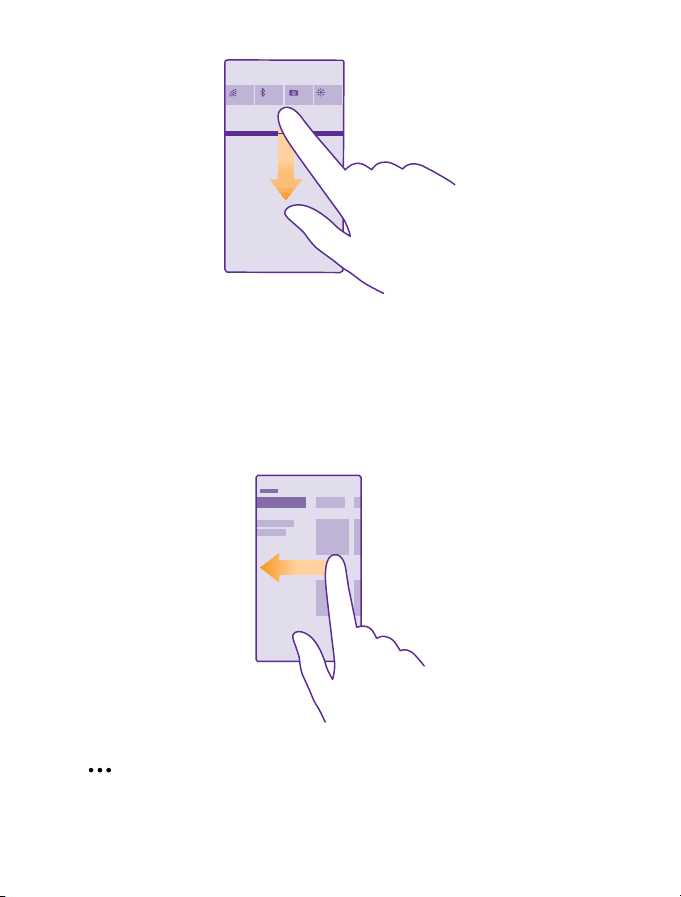
In the action center, you can quickly see notifications, such as your missed calls and unread
mails and messages, open the camera, and access all phone settings.
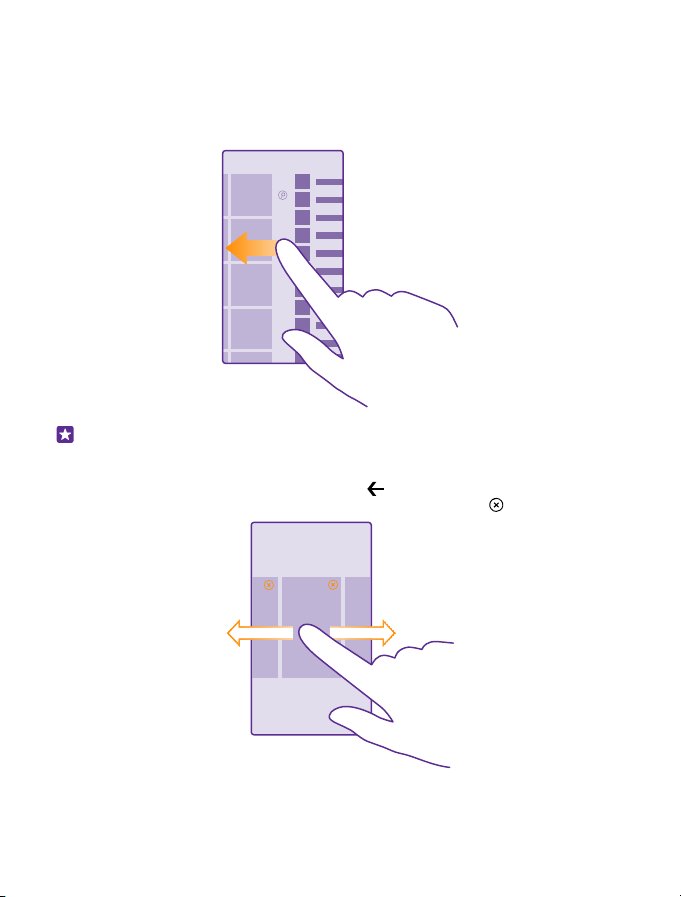
Navigate inside an app
There’s more to your apps than meets the eye. To find more views in an app, swipe left. To
discover more actions, use the options menu.
In most apps, to go to another view, swipe left.
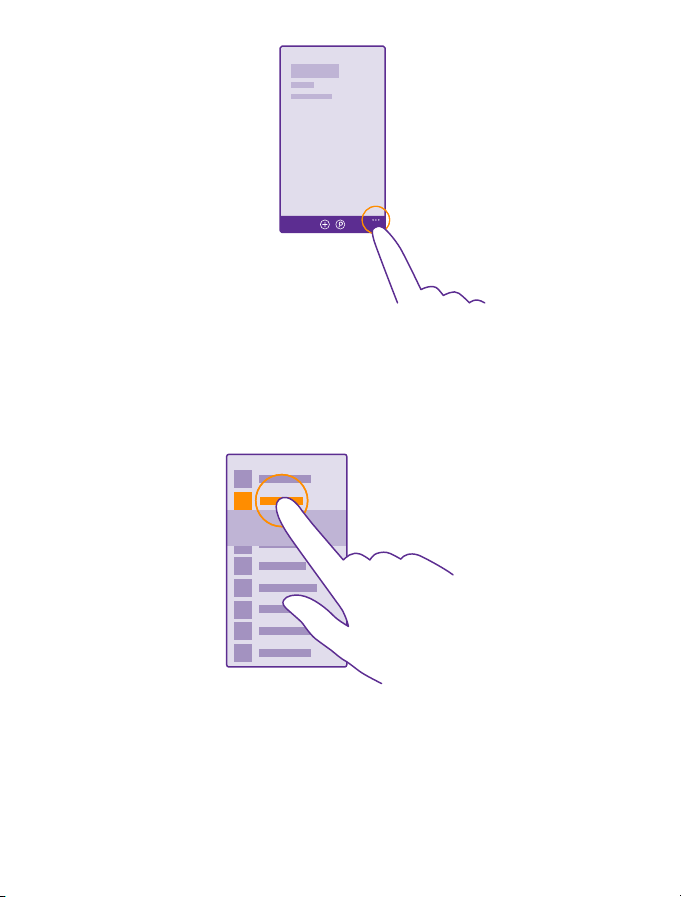
Find more options in an app
Tap
In t he options menu, yo u can find a ddition al setting s and act ions that are not shown as icons.
© 2015 Microsoft Mobile. All rights reserved.
.
19
Use the touch screen
Explore your phone with a tap, swipe, or drag.
To open an app or other item, tap the app or item.
Tap and hold to open further options
Place your finger on an item until the menu opens.
Tap and hold to drag an item
Place your finger on the item for a couple of seconds, and slide your finger across the screen.
© 2015 Microsoft Mobile. All rights reserved.
20
Swipe
Place your finger on the screen, and slide your finger in the direction you want.
For example, swipe left or right between the start screen and the apps menu, or between
different views in the hubs.
Scroll through a long list or menu
Slide your finger quickly in a flicking motion up or down the screen, and lift your finger. To
stop the scrolling, tap the screen.
© 2015 Microsoft Mobile. All rights reserved.
21
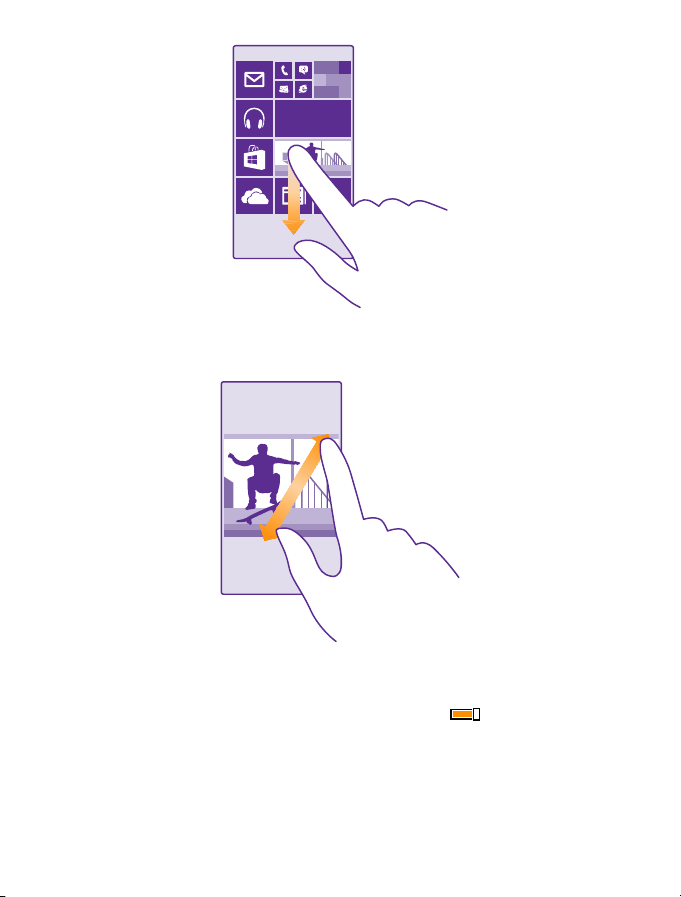
Zoom in or out
Place 2 fingers on an item, such as a map, photo, or web page, and slide your fingers apart or
together.
Lock the screen orientation
The screen rotates automatically when you turn the phone 90 degrees. To lock the screen in
its current orientation, on the start screen, swipe down from the top of the screen, and tap
ALL SETTINGS > screen rotation. Switch Rotation lock to On
Screen rotation may not work in all apps or views.
.
© 2015 Microsoft Mobile. All rights reserved.
22
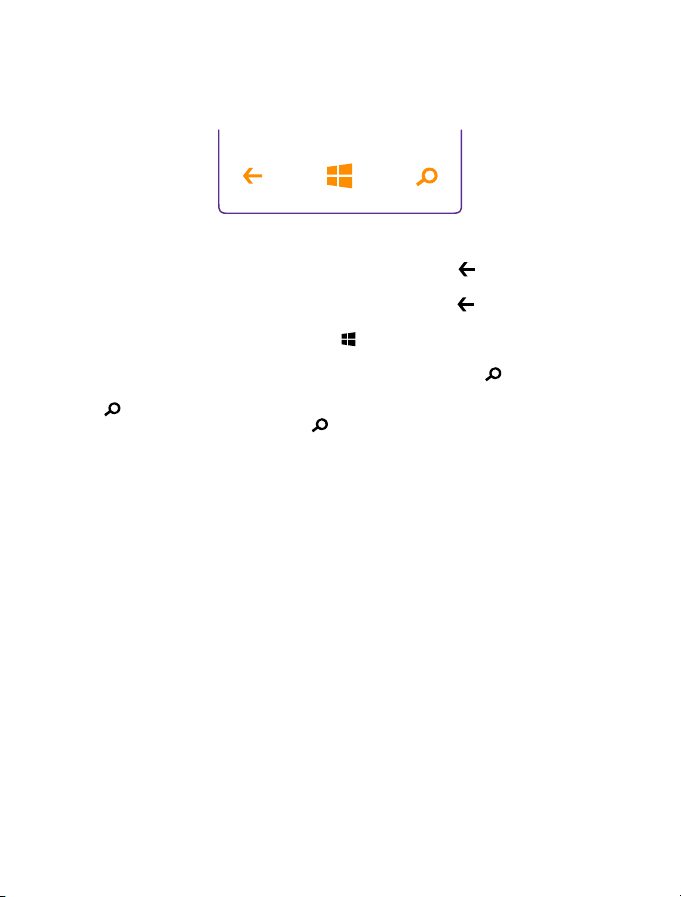
Back, start, and search keys
The back, start, and search keys help you navigate your phone.
• To see which apps you have open, tap and hold the back key . You can then switch to
another app or close the ones you don’t need.
• T o g o b ac k to th e p re vi ou s s cr ee n y ou we re i n, ta p t he ba ck ke y
all the apps and websites you've visited since the last time your screen was locked.
• To go to the start screen, tap the start key
background.
• To search the web or for items on your phone, tap the search key
• If you r phone has Cor tana, to control you r phone with you r voice, tap and hold the search
• To switch the vibration of these keys on or off, on the start screen, swipe down from the
, and say what you want to do. Or, to change the Cortana settings or use other
key
Cortana functions, tap the search key
Cortana is not available in all regions and languages. For information on the supported
languages, go to www.windowsphone.com.
top of the screen, tap ALL SETTINGS > touch, and change the setting for navigation
bar. Changing the vibration setting for incoming calls doesn’t affect the vibration of the
keys.
. The app you were in stays open in the
.
. Your phone remembers
.
Transfer content to your Lumia phone
Learn how to transfer content to your Lumia phone.
Transfer content to your new Lumia phone
There are nifty ways to transfer your photos, videos, and other important stuff from your old
to your new phone.
These instructions may not apply to all phone models and manufacturers.
You may need to install some apps on your phone or computer for the transfer. Depending
on what you need to install and how much content you are transferring, the transfer may take
a while.
Some file formats may not be transferred. Some third-party converter apps may be available
to convert the files to a format that can be transferred.
© 2015 Microsoft Mobile. All rights reserved.
23
For more info, go to www.microsoft.com/mobile/switch-easy.
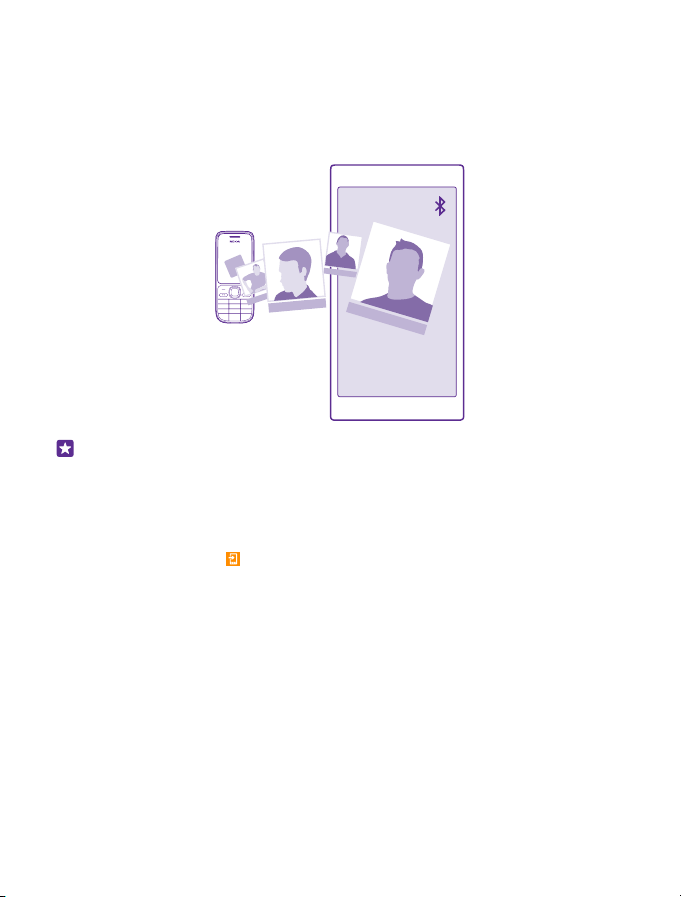
Copy contacts
Have your nearest and dearest instantly at your fingertips. Use the Transfer my Data app to
ea sily copy y our co ntact s, te xt messages, and pictures from your old phone. The app does not
work with all phone models.
Tip: If your old phone is a Windows Phone device, or if you have previously backed up
your contacts to your Microsoft account, to import your contacts from the service, just
sign in to your account on your phone. The contacts are imported automatically.
Your old phone needs to support Bluetooth. The contacts on your ol d p ho ne ne e d t o b e s to re d
in the phone memory, not on the SIM.
1. On your old phone, switch Bluetooth on, and make sure the phone is visible to other devices.
2. On your new phone, tap
3. Tap continue, and switch Bluetooth on.
4. Select your old phone from the list of found devices, and follow the instructions shown on
both phones.
If your contacts are written in a language that is not supported b y yo ur ne w p hon e, the con ta ct
info may not be shown correctly.
If you don't yet have the Transfer my Data app, you can download it from
www.windowsphone.com.
Transfer my Data.
© 2015 Microsoft Mobile. All rights reserved.
24

Transfer content using your Microsoft account
If your old phone is a Windows Phone, the easiest way to transfer your contacts, calendar, and
text messages to your new Lumia phone is your Microsoft account.
If you don't have a Microsoft account set up on your new Lumia phone yet, on the start screen,
swipe down from the top of the screen, tap ALL SETTINGS > email+accounts > add an
account, and create a Microsoft account following the instructions shown on the screen.
1. To select what you want to back up to your Microsoft account, on your previous Windows
Phone device, tap
Your contacts and calendar are backed up automatically to your Microsoft account.
2. On your new Lumia phone, sign in to your Microsoft account. Your contacts, calendar, and
text messages are automatically transferred to your new Lumia phone.
Transfer content using OneDrive
Upload your Office documents, photos, and videos to OneDrive to easily transfer them from
your old phone to your new Lumia phone.
To easily upload and manage your content in OneDrive, download and install the OneDrive
app from:
• Google Play for an Android phone
• iTunes Store for an iPhone
• Store for Windows Phones (if not already in phone)
• Mac App Store for an Apple Mac
• support.microsoft.com for your PC
You need a Microsoft account to sign in to OneDrive.
OneDrive may not be available for all phone models.
1. On your old phone, open the OneDrive app.
, and select what you want to upload.
2. Tap
3. Select upload.
You can now sign in to OneDrive with your Microsoft account to access your content on any
device and download it when you need it.
Tip: To transfer Office documents, you can also save them directly to OneDrive. To access
your documents, on your new Lumia phone, tap
Using services or downloading content, including free items, may cause the transfer of large
amounts of data, which may result in data costs.
Settings > backup.
Office > OneDrive.
© 2015 Microsoft Mobile. All rights reserved.
25

Transfer content from a Symbian or S40 phone
Us e Nok ia Sui te to t ransfer your c ontac ts, c alend ar ent ries , and photos from a Symbian or S40
phone to your Lumia phone.
Make sure you have the latest Nokia Suite installed on your PC. You can download it from
www.microsoft.com/mobile/nokiasuite.
You need a Microsoft account to sign into OneDrive.
1. Use a compatible USB cable to connect your Symbian or S40 phone to your PC.
2. Open Nokia Suite on your PC.
3. Select Copy co nte nt to N ok ia L um ia, and follow the instructions shown on your computer.
Your files are copied to OneDrive. Your photos are copied to the Pictures folder in OneDrive,
and your contacts and calendar events to your Outlook.com.
4. To access your photos, on your Lumia phone, swipe left, and tap OneDrive. Your contacts
and calendar events are synced automatically.
Tip: Your Symbian or S40 phone doesn’t support Nokia Suite? Or want to transfer other
content, such as your videos? You can also connect your phone to your computer and
drag and drop the files you want to transfer onto your computer. If you have the
OneDrive desktop app, drag and drop the files straight to the OneDrive folder for
automatic upload.
Transfer Outlook info from an Android phone or iPhone
Use your Microsoft account to transfer your Outlook contacts, calendar entries, and to-dos
from your Android phone or iPhone to your Lumia phone.
You need a Microsoft account to sync your Lumia phone with Outlook.com.
1. Use a compatible USB cable to connect your phone to your computer.
2. On your computer, set the appropriate sync software, such as Samsung Kies, HTC Sense,
Sony PC Companion, or iTunes, to sync the items to Outlook, and sync contacts, calendar
entries, and to-dos from your phone to your computer.
3. In Outlook, add the Microsoft account to Outlook using Microsoft Outlook Hotmail
Connector. Go to www.office.microsoft.com, search for Hotmail Connector, and download
it to your computer. You may need to configure the Hotmail Connector settings.
4. Sync the content you want from Outlook to your Microsoft account. It may take a while
before the content is available on your Microsoft account.
5. To sync the content to your Lumia phone, simply sign into your Microsoft account.
For more info, go to www.windowsphone.com, and see the FAQs on how to sync your
Outlook contacts and calendar to Windows Phone.
© 2015 Microsoft Mobile. All rights reserved.
26
Basics
Learn how to get the most out of your new phone.
What’s new in this release?
Check some of the key things in this release at a glance.
• Find the settings you’re looking for easily – settings are now reorganized into groups, and
you can even search them.
• Switch your calendar to show week numbers in the monthly view.
• Turn mobile data on and off easily – add a shortcut to the action center.
Get to know your phone
Your phone has two views, start screen and apps menu. To switch between the views, simply
swipe left or right.
Start screen: The animated live tiles show your missed calls and received messages, t he latest
news and weather forecasts, and more. Updates of your pinned contacts are shown on the
tile, and you can view your contacts' details directly from the start screen.
Apps menu: All your apps are listed here, all neatly ordered. If you have a lot of apps, to look
one up, tap
To access the Windows Phone software license terms, select
the terms. Note that by using the software, you accept the terms. If you do not accept the
terms, do not use the device or software. Instead contact Microsoft Mobile or the party from
which you purchased the device to determine its return policy.
.
Settings > about. Please read
© 2015 Microsoft Mobile. All rights reserved.
27
Switch between views and apps
Not all your apps are on the start screen – swipe to the apps menu to find them. Or check
what’s already running on your phone and switch between the apps.
To see all the apps on your phone, on the start screen , simply swipe left. To return to the start
screen, swipe right.
Tip: To find an app quickly, tap any letter in the apps menu, and in the following menu,
tap the first letter or character for the app you want.
View, switch between, and close open apps
To view the open apps, tap and hold the back key
you want, and tap the app. To close the apps you no longer need, tap
. To switch the app, swipe to the app
.
© 2015 Microsoft Mobile. All rights reserved.
28
Navigate the settings menu
On the start screen, swipe down from the top of the screen, and tap ALL SETTINGS. To go to
a settings group, tap any settings group title, and select the group you want. To search for a
particular setting, tap
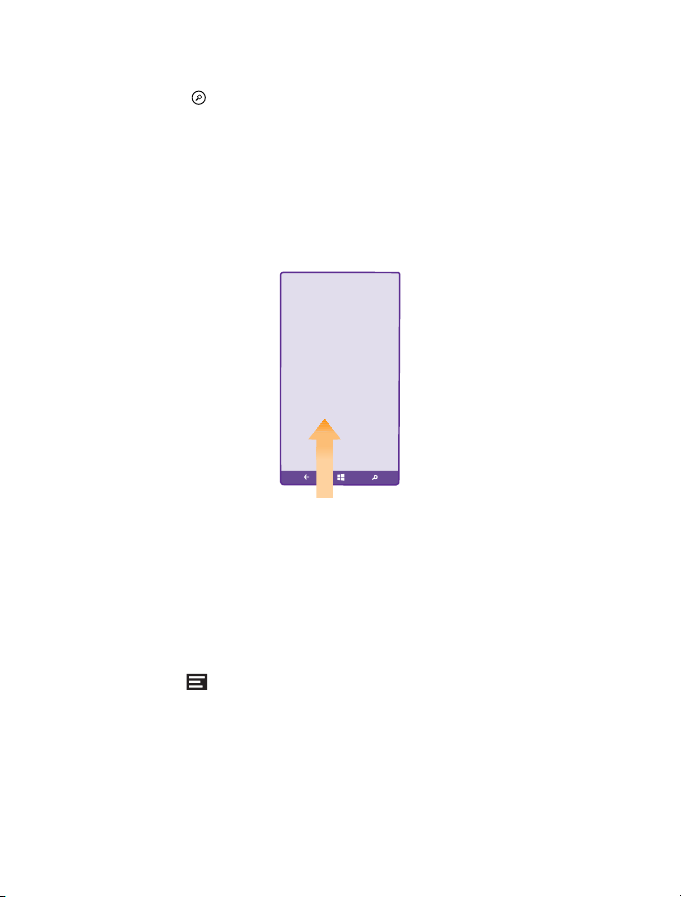
Personalize the navigation bar
All Lumia phones have 3 keys across the bottom: the back, start, and search key. You can
change the way this navigation bar behaves – or even hide it from the start screen when you
don’t need it.
To hide the navigation bar from the start screen when it’s not needed, swipe up from the
bottom of the screen. To see the navigation bar again, swipe up.
Change the navigation bar color
You can change the navigation bar color to make it pop out better, or even match your theme.
On the start screen, s wip e down from the top of the screen, tap ALL SETTINGS > navigation
bar, and change the setting for Navigation bar.
Check notifications on your phone
You can quickly check notifications, change some settings, or add shortcuts to some apps in
the action center that opens from the top of the screen.
The notification icon
1. Swipe down from the top of the screen.
, and start typing the name of the setting.
shows you have unread notifications.
© 2015 Microsoft Mobile. All rights reserved.
29
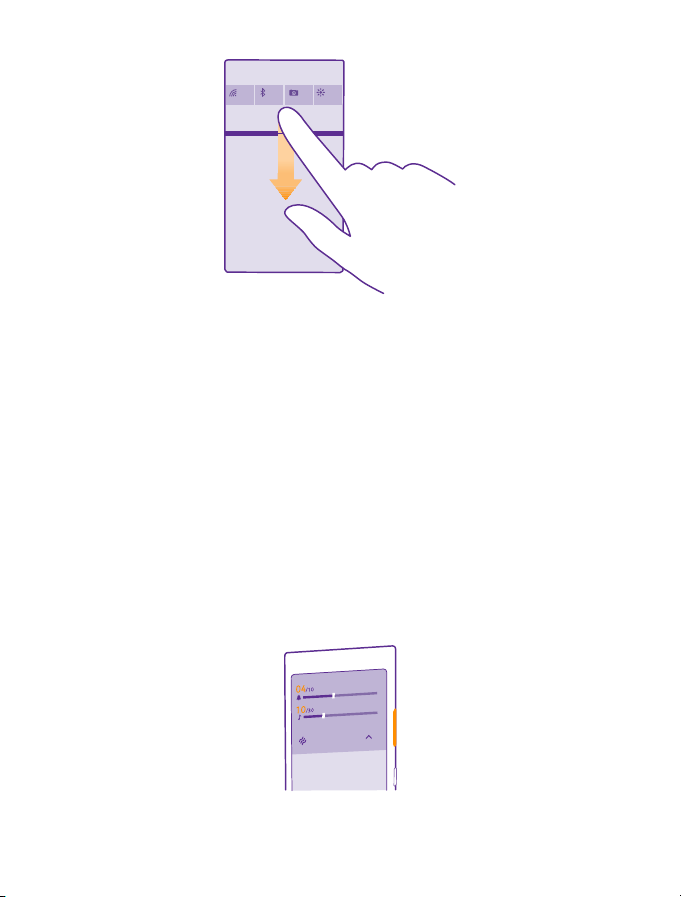
In this screen, you can:
• See your missed calls and recent unread emails and messages
• Check any notifications, such as available app updates in Store
•Open apps
• Check for Wi-Fi networks, and connect to them
• Quickly jump to settings
2. To close the menu, swipe up from the bottom of the screen.
Personalize the action center
On the start screen, swipe down from the top of the screen, and tap ALL SETTINGS >
notifications+actions. To change a shortcut, tap the shortcut and the app you want. You can
also select which notifications you want to receive and how.
Change the volume
If you have trouble hearing your phone ringing in noisy environments, or calls are too loud,
you can change the volume to your liking.
Use the volume keys. The maximum volume level is 10.
© 2015 Microsoft Mobile. All rights reserved.
30
 Loading...