

Page 1
Nokia 88xx series and 8210
03.02.00
This Quick Guide is a generic guide for all Nokia 88xx series and 8210 phones. When you are asked to select the
modem you will see
Nokia 8810 Nokia 8810
Nokia 8850 Nokia 8850
Nokia 8210 Nokia 8210
Nokia ****
, please select one of the following:
Quick Guide to Using your Nokia Phone with Dial-Up Networking
1. Installing and setting up
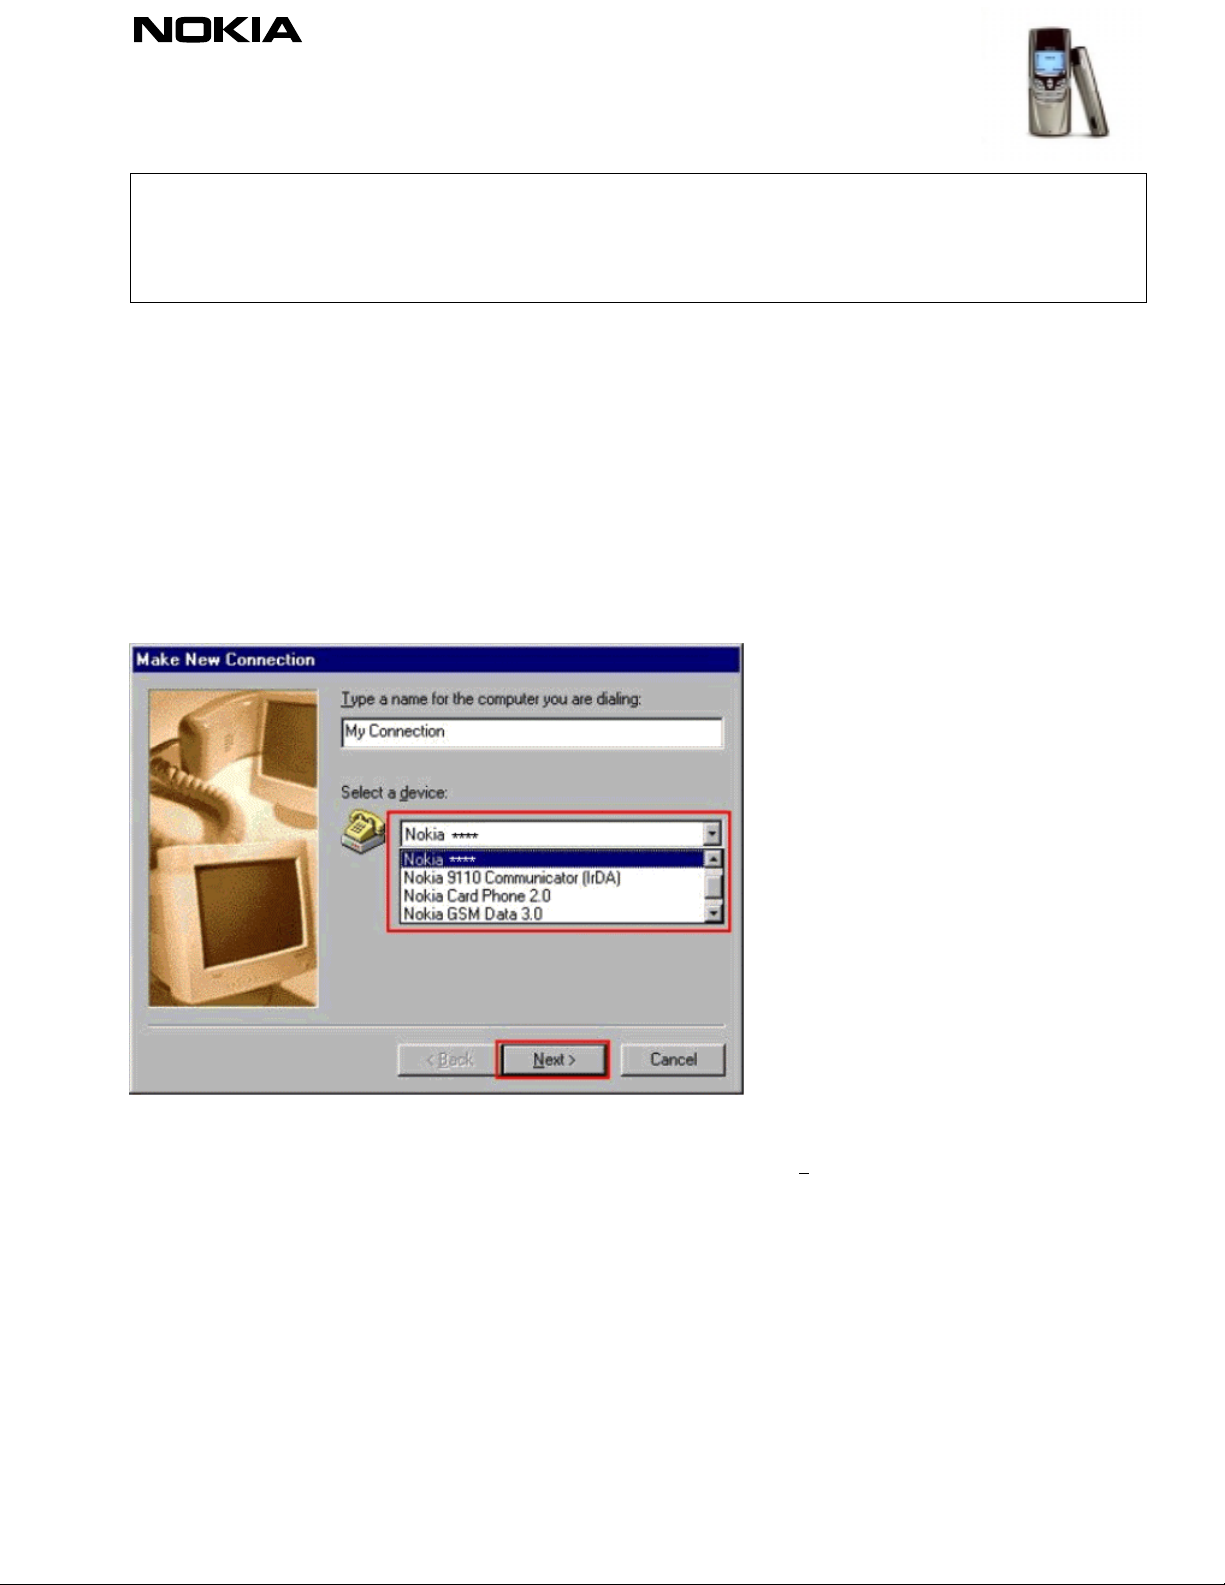
First you have to create a new connection for your Nokia phone. Choose the My computer icon àààà Dial-up
networking àààà Make a new connection. This opens a Window where you can choose the right modem and name the
connection (Figure 1).
Figure 1. Making a new connection.
Enter a name for the connection and choose the appropriate modem, click Next> and enter the correct number which
you have obtained from your provider; also choose the correct area and country codes (Figure 2). Choose Next> to
continue.
Copyright ã 1995 - 2000. Nokia. All rights reserved.
1(6)
Page 2
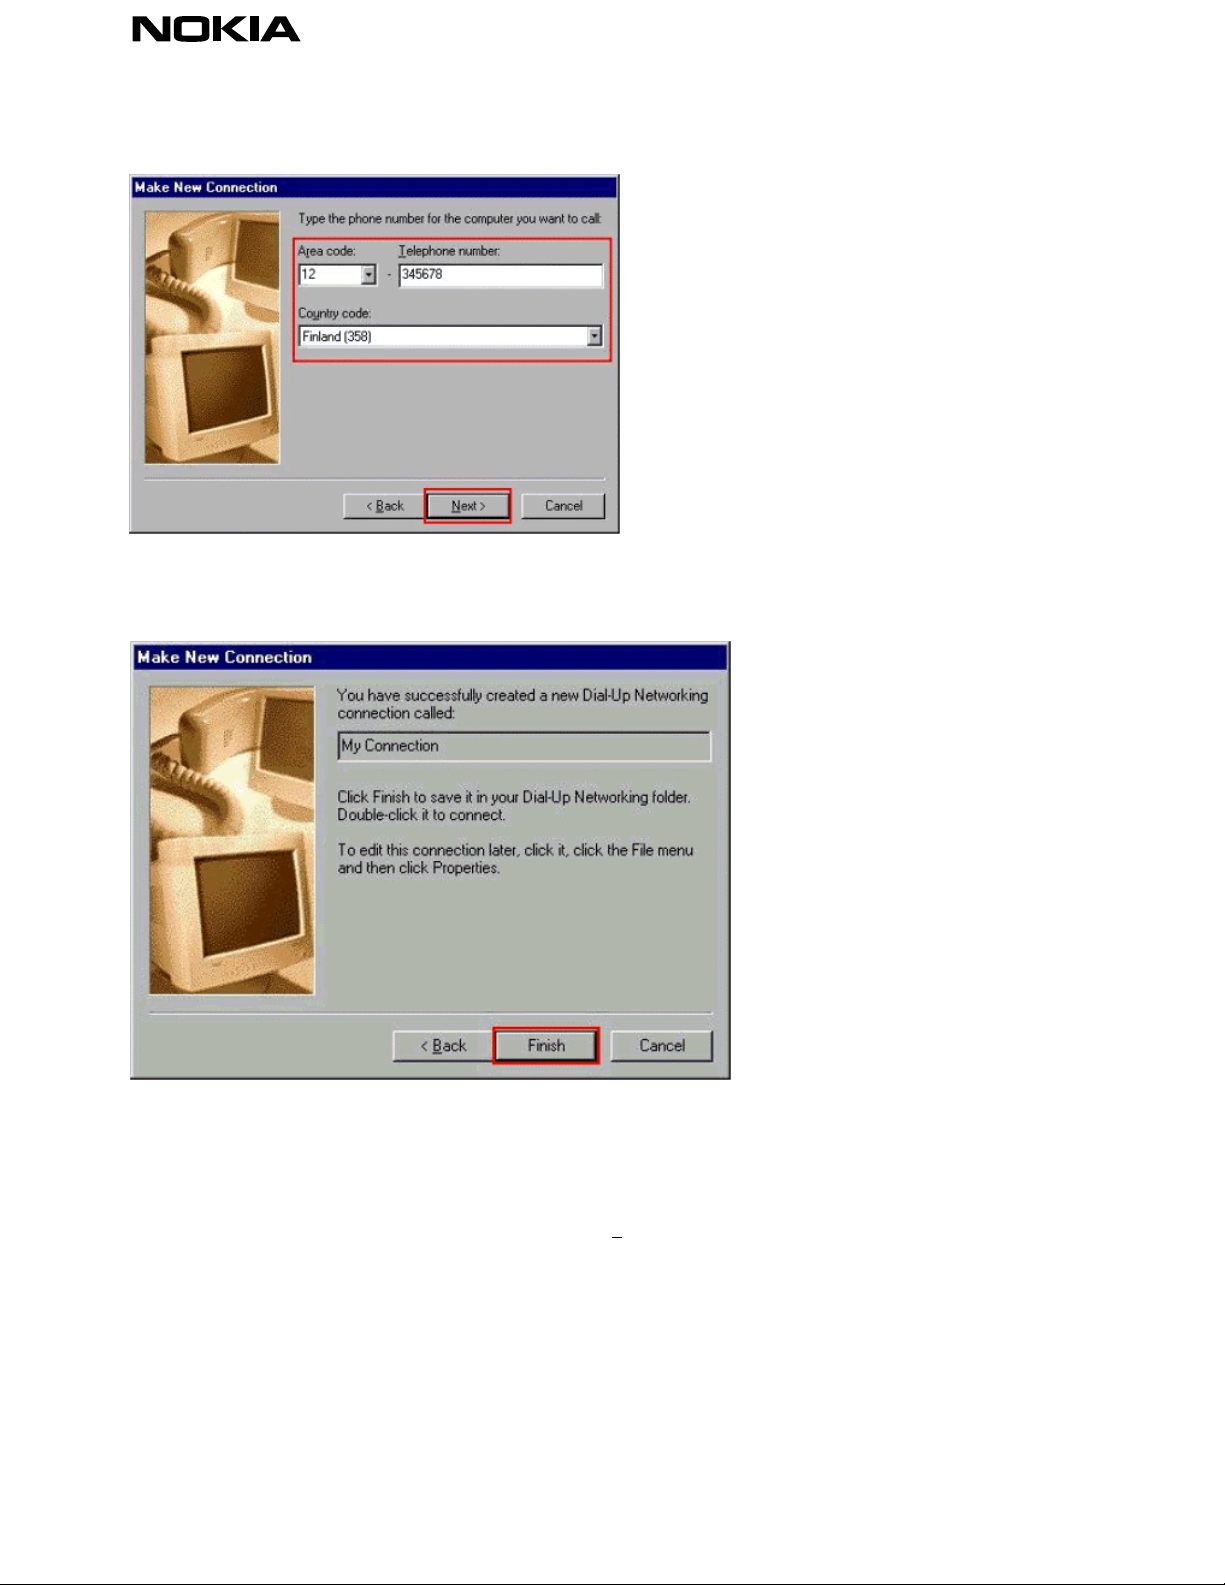
Figure 2. Number and codes.
Choosing the Finish- button will close the setup and create an icon for the dial-up networking folder (Figure 3).
Figure 3. Finishing the creation of a new connection.
Click the newly created icon with the right button of the mouse and choose the Properties (Figure 4). (NOTE: If you
are going to connect to an ISDN number you must add the following line to the extra settings option: S35=0. This can
be done by choosing Configure… àààà Connection àààà Advanced… àààà Extra settings). If you want to change this
connection to a “normal” line please remember this.
Copyright ã 1995 - 2000. Nokia. All rights reserved. 2(6)
Page 3

Figure 4. Entering General settings.
Copyright ã 1995 - 2000. Nokia. All rights reserved. 3(6)
Page 4

Under the Server Type…-button please check that all apply. I e if you are dialing to your company's intranet then you
must select "Log on to network". (Figure 5).
Figure 5. Server types.
Copyright ã 1995 - 2000. Nokia. All rights reserved. 4(6)
Page 5

1.1 Making a connection
Double-click the icon that you have just created. Add the username and password information (you will get these
from your service provider). When you open this connection, you can choose Save password to save the password for
the next time (so you do not have to retype the password). Start to establish the connection by clicking Connect
(Figure 6).
Figure 6. Connect to…
When you have clicked the Connect button, the computer should start to dial the number that y ou have
specified in the set-up for your Internet service provider (Figure 7).
Figure 7. Making a connection…
When the connection is established a modem icon will appear in your taskbar (with two flashing red/green dots in it)
and it is then possible to open, for example, Netscape or Internet Explorer to browse the Internet.
Copyright ã 1995 - 2000. Nokia. All rights reserved. 5(6)
Page 6

LEGAL NOTICE
Copyright © Nokia Mob ile Phones 2000. All rights reserved.
Reproduction, transfer, distribution or storage of part or all of the contents of this document in any form without the prior written permission of
Nokia is prohibited.
Nokia and Nokia Connecting People are registered trademarks of the Nokia Corporation. Other product and company names mentioned herein
may be trademarks or tradenames of their respective owne rs.
Nokia operates a policy of continuous development. Therefore we reserve the right to make changes and improvements to any of the products
described in this document without prior notice.
Under no circumstances shall Nokia be responsible for any loss of data or income or any special, incidental, consequential or indirect damages
howsoever caused.
The contents of this document are provided "as is". Except as required by the applicable law, no warranties of any kind, either express or implied,
including, but not limited to, the implied warranties of merchantability and fitness for a particular purpose, are made in relation to the accuracy,
reliability or contents of this document. Nokia reserves the right to revise this document or to withdraw it at any time without prior notice.
Copyright ã 1995 - 2000. Nokia. All rights reserved. 6(6)
 Loading...