

Page 1
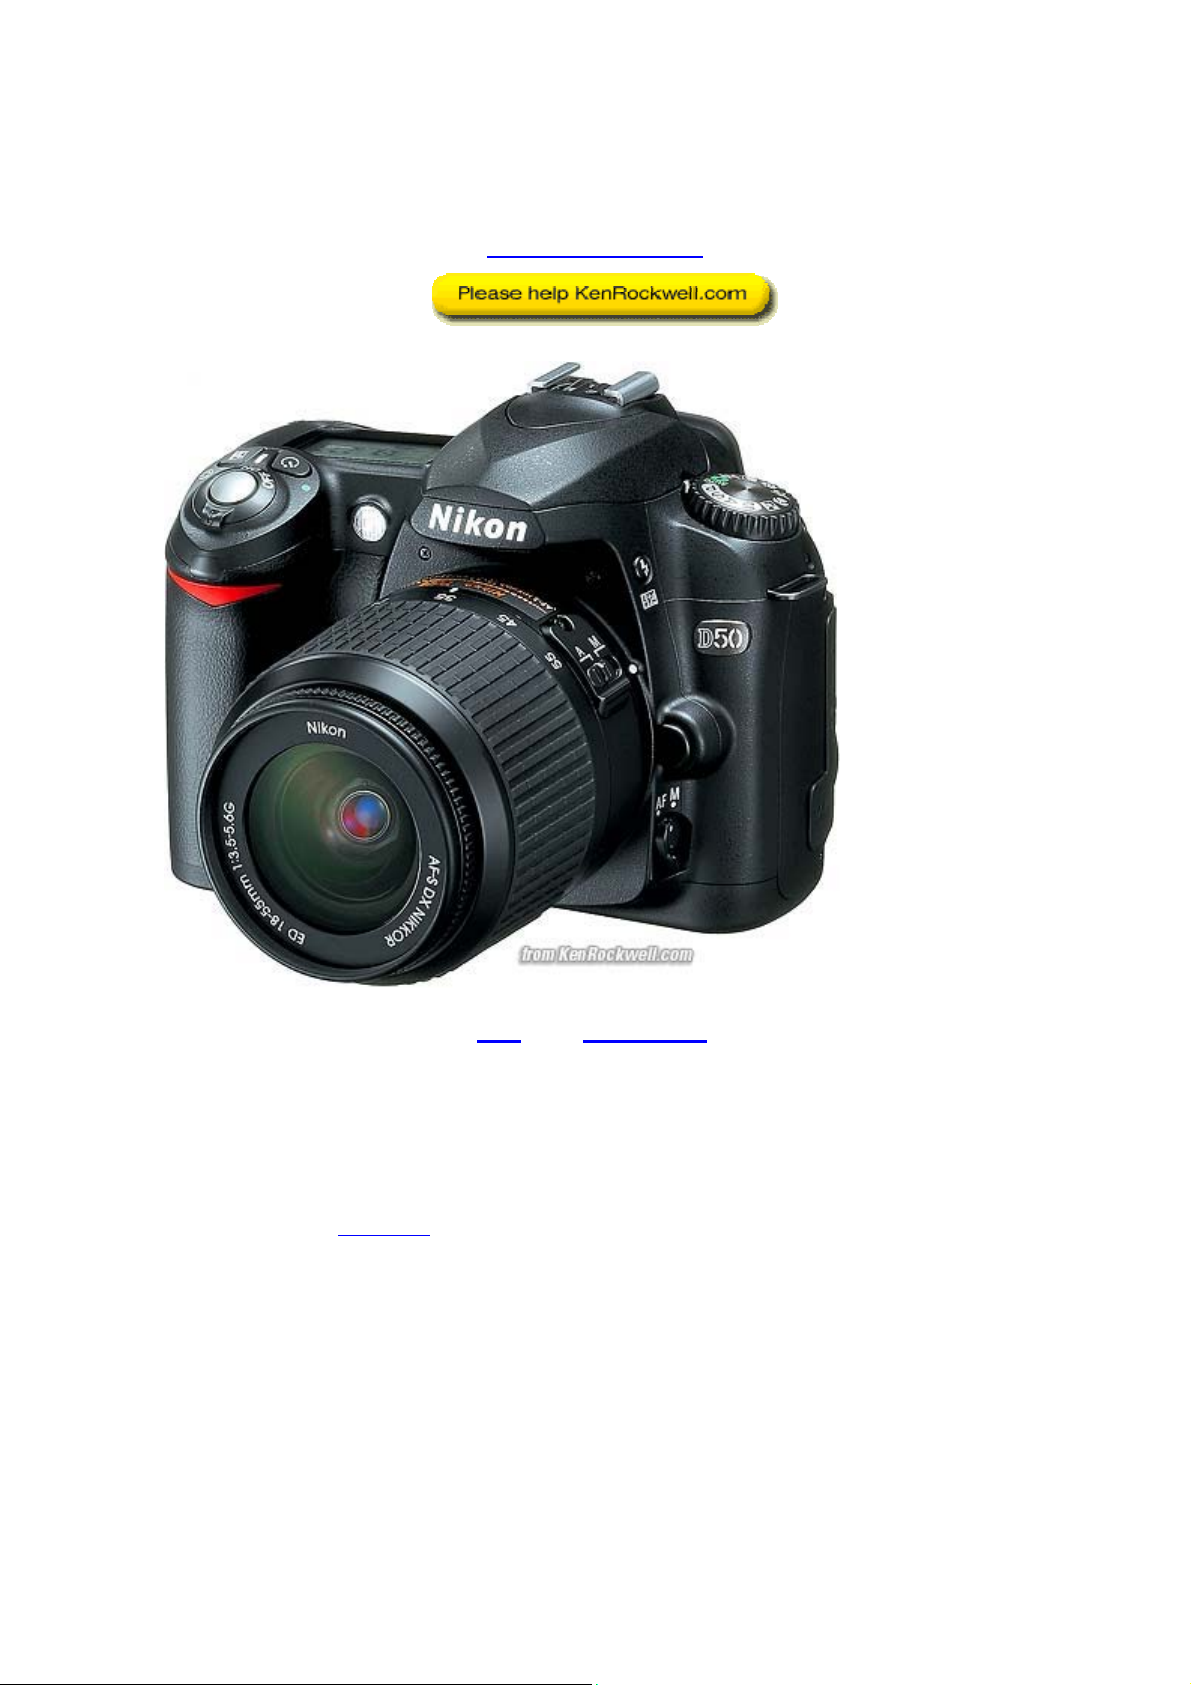
Nikon D50 User's Guide
© 2006 KenRockwell.com
About these reviews
with 18 - 55 mm.
D50
If you find this as helpful as a book you might have had to buy, feel free to help me
write more with a donation
. Thanks! Ken.
1
Page 2

Nikon D50 User’s Guide
Table of Contents
INTRODUCTION 2
CONTROLS (every button and knob)
FRONT 5
TOP PANEL 7
BACK 8
MENUS (every menu item in detail)
PLAYBACK 10
SHOOTING 11
CUSTOM SETTINGS 14
SETUP 17
INTRODUCTION
This is how I use and set up a D50
Want free live phone support, 24 hours a day, 365 days a year? If you're in the
USA, call (800) NIKON-UX! Nikon also has some of it's own operator's tutorials
here.
Looking for something specific? Use my Search page. Be sure to mention the D50
in your search.
.
I start off explaining things so simply my mom can understand, and get on to
deciphering every menu item for advanced users at the bottom.
For more examples of why you'd want to change these settings and why, also see
my Maui Photo Expedition
page.
2
Page 3

BASICS:
CAMERA
Many of these adjustments require you to be in be in the P, S, A or M exposure
modes. You set that on the top dial. The cute preset modes often lock out some
adjustments.
I leave most settings at their defaults and use the Program exposure mode. I never
use the cute little preset icon modes because I prefer to set anything special myself.
ISO: I use 200. If the light gets dim and my images would get blurry from slower
shutter speeds I increase the ISO to 400, 800 or 1,600. I never bother with inbetween settings like 250 or 640. The D50 looks fine at ISO 1,600 if you need it. I'd
much rather have a slightly grainy but sharp image than a less grainy but blurry
one. Unlike film, the D50 looks great at high ISOs, so I use them anytime I need
them.
I would love to use ISO AUTO, but usually don't because it also remains active in
Manual exposure mode. This firmware defect defeats the purpose of the manual
exposure mode. Using menus to deactivate AUTO ISO for manual exposure mode
takes more time than AUTO ISO saves. Rats.
White Balance (WB): I'd use AUTO and an 81A glass warming filter on the lens. I
prefer warmer (oranger) images. I explain white balance on my White Balance page
and explain more about how to adjust it on the D50 later.
QUAL: I shoot JPG NORMAL. This is called NORM and L on the top LCD, which
stands for NORMal JPG compression and Large (3,008 x 2,000) image size.
I've made 12 x 18" prints of the same shot made in BASIC, NORMAL, FINE and
raw. I saw NO difference! Seriously, if you saw these prints you wouldn't be able to
sort them out either. I can see only the slightest differences on my monitor enlarged
to 100%, which is similar to a 20 x 30" print, and my digital LCD monitor has 100%
MTF pixel-to-pixel, which prints don't. Don't worry: if you need space, shoot BASIC
and no one will see the difference. The only way to tell is by looking at the file size.
I'll use BASIC for parties and sports when I'm shooting many hundreds and
hundreds of images at once. In these cases I'm more concerned with time wasted
for the files to transfer, copy and archive. Basic looks 99% the same as FINE, even
blown up big.
I'll use FINE on rare occasions where I'm shooting just a few images and expect to
peer at them very closely. In these cases the extra size isn't significant if I expect to
be spending a lot of time analyzing each image.
I don't use raw, as you can read on my Raw vs. JPG page.
3
Page 4

I avoid FINE JPG because NORM gives me the same results, with half the file size.
If I shot FINE I might run out of room on a card and miss a shot. Missing a shot is a
very visible defect, and I see no defects in NORM. Nikon knows what they're doing.
That's why they call it Normal and that's why I normally use Normal JPG.
OPTIMIZE IMAGE: I prefer the vivid color I get from Fuji's Velvia 50 film, so I tweak
a D50 to give color as vivid as I can get. To do this go to MENU > Shooting Menu
(camera icon) > Optimize Image > Custom > (set Saturation to + and Color Mode to
IIIa) > - - Done > OK. If you forget to select "- - Done" and hit OK it won't remember
these settings! Details are on the Shooting Menu page.
For photos of people I either set the colors back to normal, or cheat and use the
Portrait preset mode on the top dial.
FOCUS: AF.
METERING: Matrix.
LENS
Many lenses have no switches or settings. If so, don't worry.
More advanced lenses have focus mode settings, which will be either "M/A - A," or
"A - M" on older lenses.
On older lenses I leave it at "A," which is Autofocus. "M" is manual focus.
Sometimes you also have to move the switch on the camera, which is a pain.
If the switch says "M/A - A" then I use M/A. This gives autofocus, and if I grab the
focus ring it instantly lets me make manual corrections. As soon as I tap the shutter
button again I get autofocus. This M/A setting, if the lens has it, provides both kinds
of focus without ever having to move any switches . It's the best.
Non-G lenses will have an aperture ring where the lens is attached to the camera.
Set this this ring to the largest number, usually 22, if not 32 or 16. This number will
be in orange on autofocus lenses. There usually is a lock to keep this ring set there,
since if it comes off that setting you'll get an error message from the D50.
MORE
These are the basics. Keep reading for far more explicit details at the end.
4
Page 5

CONTROLS: FRONT of CAMERA
Focus Mode (the little lever at the bottom of the lens marked AF and M): I set it to
AF. This means Auto Focus. M means manual focus. In manual focus you have to
twist the focus ring yourself and look for a sharp image in the viewfinder. In manual
you also can look for the green dot at the bottom left in the viewfinder. The green dot
lights up when you're in focus.
Flash Bolt Button (left side of flash hump, as seen from the rear): This does several
things depending on how and when you press it.
1.) If the flash is down, press the flash button and the flash pops up. You need to
have a lens attached and the camera turned on.
2a.) If the flash is up, press and hold the flash button and turn the rear dial to change
the flash sync mode. You'll see it on the top LCD in the box with the bolt. I explain
why you'd want to use which mode below.
2b.) If the flash is too bright or dim (as seen playing back your shots on the LCD) you
can change its brightness using flash exposure compensation. If the flash is up,
press and hold the flash button and the +/- button to the right of the power/shutter
button at the same time. While holding these two buttons down, rotate the rear dial to
change the flash exposure compensation. This sets the brightness of the flash. +
makes the flash brighter, - makes it dimmer. This setting only changes the brightness
of the flash. It leaves the background ambient exposure alone. Set it to - if your
subjects are getting washed out. If you run out of flash power beyond 10 to 20 feet
then setting it to + can't make the flash any brighter.
If you set flash exposure compensation to anything other than zero you'll see a little
"+/- bolt" icon in the finder and on the top LCD.
This sounds difficult, but it's actually very easy. You can do it without taking your eye
away from the viewfinder, since all the indications appear there, too!
You won't need to use this very often. That's the beauty of the D50: flash exposures
are almost always perfect without needing adjustment.
FLASH SYNC MODES
Select these by holding down the flash button on the left side of the flash hump and
spinning the rear dial. Your selection is shown on the top LCD in the box with the
bolt.
Normal (blank, which is the default): In Program and A exposure modes, the shutter
won't stay open longer than 1/60 second.
In this mode you won't get blur indoors, but you may not get more than a very black
background either.
5
Page 6

I usually use Normal mode, since if I don't I can get some scary long exposures if I'm
not expecting them in the dark.
Red-Eye (eyeball icon): I never use this. It shines an obnoxious light in your subject's
eyes for a couple of seconds and then releases the shutter. If I set this mode by
accident it bugs the heck out of me, because the camera doesn't go off until several
seconds after I've pressed the shutter, but I've set no self timer! It doesn't do much to
reduce redeye anyway. Skip this mode.
SLOW (called SLOW on the top LCD): This mode is very useful. It lets the shutter
stay open as long as it needs to so dim ambient light can expose properly with flash.
Of course if it's dark these exposure times can get long. You can get blur from
subject motion and camera shake. In daylight SLOW is the same as NORMAL, since
exposure times are short. SLOW unlocks the camera in P and A exposure modes to
make exposures as long as it wants to in dim light.
Have a look at most issues of National Geographic and you'll see many indoor shots
made in this mode. The background exposes correctly, people may be blurred, and a
burst of flash freezes them along with the blurry ghost images.
Normal and SLOW are the same in S and M exposure modes, since you or the
camera may select any shutter speed in these modes regardless of flash sync.
In dim light I'd suggest using M to fix the shutter speed around 1/8 or so if you want
the ambient light to fill in. Otherwise you either get stuck with 1/60, which leave the
backgrounds black, or a very long exposure in other modes that will almost
guarantee blurry everything. Play around, it's only digital.
Red-Eye SLOW (eye and SLOW icon): This is the SLOW mode and redeye. I don't
use it for the same reason I don't use Redeye.
REAR (called REAR on the top LCD): Normally the flash goes off the instant the
shutter opens. With long exposures and blurred ghost images you ordinarily get the
ghost streaming out in front of the subject. Think about it: if a car is driving, the flash
goers off and freezes it, then the car moves forward. You'll have a ghost image
ahead of the car, which usually looks stupid. Select REAR mode to have the flash go
off as the shutter closes. Now you'll have motion blurring behind the frozen flash
image.
Another reason to select REAR is because the flash goes off at the end of the
exposure. People presume photos are made the instant a flash fires, then leave.
This wreaks havoc with long exposures. If you use REAR mode with long exposures
they'll stay put and not move until the end. Of course you'll also want to select flash
lock to eliminate the preflash. Read about flash lock later on my Custom Menus
pages.
REAR doesn't do anything with short exposures. REAR also engages SLOW, but
SLOW doesn't light up on the LCD. This lack of the SLOW indication is a flaw in the
6
Page 7

firmware. No big deal. In REAR the D50's exposure setting in Program mode
chooses slower shutter speeds and small apertures if you're in daylight.
CONTROLS AND SETTINGS: TOP PANEL
From left to right:
Exposure Mode Dial (Left side): I use "P" for program auto exposure. In this mode
the camera chooses the f/stop and shutter speed for you. If I want to use different
apertures or shutter speeds I rotate the rear command dial, which selects alternate
combinations of f/stops and shutter speeds which give the same exposure. Nikon
calls this "Program Shift." A "*" is added next to the P on the top LCD to let you know
you've chosen a different combination for exposure.
If you want to use only one aperture or one shutter speed then use S or A mode. If
you want to set it the hard way, use M, manual, mode.
Self timer (looks like a little clock): Hold this and spin the rear dial. You'll see the
same icon appear on the top LCD to set self timer mode. If you turn it a little further
you'll see a a little black rectangle with a whiter dot in it. That's a picture of the
remote control. Set this mode to let the camera fire from the very handy (but
optional) ML-L3 remote control. I got mine here for $16.95.
* Green Dot (combined with self timer button). This resets many of the camera's
controls to their defaults when held in along with the other green dot button on the
top left of the back of the camera. This is handy at the beginning of each day, since it
will reset everything from whatever whacky ISO, white balance, file format and other
settings you were using the night before.
Power Switch (right side around shutter release): ON, unless the camera is put
away in a case. The D50 only wakes up when you tap the shutter, so it's off even
when the switch is set to ON. There is no battery drain unless the shutter is tapped
and the camera wakes up.The only thing the OFF position does is act as a lock
against unintended operation.
+/- Exposure Compensation. This makes the picture lighter or darker. Hold it and
spin the rear dial to change the brightness of your pictures. Remember to set it back
to zero when you're done. If you don't you'll see a "+/-" in the viewfinder and the top
LCD. You can read the value of this setting on the top LCD and through the
viewfinder, which is great!. See more at How to Set Exposure. Ignore Nikon when
they suggest you don't use this with Matrix Metering; I do it all the time.
Aperture Button (icon of a camera iris, this is also the same button as the
compensation button above): Hold this and spin the rear control knob to change the
aperture setting in Manual (M) exposure mode.
7
Page 8

CONTROLS and SETTINGS: BACK of CAMERA
From left to right:
Rectangles (also doubles as one of the two Green Dot * buttons): This controls the
frame advance mode. You hold this and spin the rear control dial. When you see [S]
on the top LCD you have the normal mode I use, which gives one shot each time
you press the shutter. Hold and spin to show several nested rectangles on the top
LCD and you're in Continuous mode. In Continuous mode the camera keeps taking
pictures for as long as you hold down the shutter button. Pro cameras label the
rectangles as C, for Continuous.
AE-L AF-L (Top center): Hold this to lock settings while shooting. You can alter what
this button does in the custom menus. I get into more details under custom settings
for this button.
Play [>] Button: Press it to see your pictures.
ISO/Checkerboard, WB/?, and QUAL/ENTER/Magnifying Glass Buttons: these do
different things depending on whether the camera is taking a picture or showing one.
If the camera is idle, or you tap the shutter, the camera is in the taking mode and the
buttons do what the silver letters say: ISO, WB and QUAL. If the camera is
displaying an image the buttons do what they say in yellow: checkerboard, ? and
ENTER. I'll explain each of these as if they are seven different buttons below.
Often the camera is in playback mode from the last shot. I need to tap the shutter to
put the camera back into taking mode for the ISO, WB and QUAL functions to work. I
make it a habit to tap the shutter button first before using those buttons just in case.
ISO: I use 200 as explained of the first page
the shutter button to return the camera to the taking mode. If you don't and are
viewing a photo you just made the button will swap among the various multi-image
playback modes!
WB (White Balance): I use AUTO (A) and use an 81A glass warming filter as
explained of the first page
this adjustment does and why you care. To choose different settings, press and hold
the WB button and turn the rear knob. Look at the top LCD and you'll see the little
sun and cloud etc. icons cycle as you turn the knob.
. See my White Balance page for more details about what
. If you just took a picture be sure to tap
To set the D50 to give accurate color under any arbitrary weird combination of
lighting you can use a manual white balance mode called PRE(set). It's shown as the
PRE icon on the far right of the top LCD, just past the Shade icon. Spin the knob
while holding WB until you get to PRE. Release the button. Press and hold the WB
button again for several seconds until it makes PRE blink. Point the camera at
something white or gray that's in the same light as the subject and press the shutter.
8
Page 9

If "Gd" flashes you're good. If "nG" (no good) flashes, try again. You can cheat (I do)
and point the camera at a broad light source, like a fluorescent fixture, and get great
results without having to carry or find a gray or white card.
The PREset mode is used to tell the camera what's supposed to be neutral. Once
you've set this the camera corrects all the colors to keep neutral grays and whites as
neutral grays and whites. This usually gives great colors for everything else in the
same light.
QUAL: I use NORM - L, or NORMal compression, Large (3,008 x 2,000) JPEG, as
explained of the first page.
Checkerboard: this lets you see one, four or nine images on the screen during
playback. Press the button to switch among these modes.
? / Key: In playback it protects (locks) the image from erasure. Warning 1.): it marks
the file so well that it won't empty out of my trash on my computer unless I go in and
remark the file on my computer first. Warning 2.): these images are erased from your
memory card when you format anyway. I don't use this lock feature. When setting
menus the "?" will give more information about your settings.
Magnifying Glass: Press to zoom in on image. When you do this you can zoom in
more by pressing the checkerboard button and spinning the rear dial. You can use
the thumb switch to scroll around the image.
ENTER: Used while playing with the menus.
Trash Can: Press once, then press again to confirm and delete an image during
playback.
9
Page 10

MENUS: PLAYBACK MENU ("[ > ]" icon) back to top
Press MENU and then select the "[ > ] " (play) icon to get into the play menu.
Delete: This is helpful if you want to delete all images while saving those for which
you pressed the "? / Key" button to lock. I don't use this. I do all my editing and
selection in my computer and I do my in-camera deletions one-by-one with the trash
can key, so I don't use this.
Playback Folder: The camera can record and play back from different folders. I
leave this set to ALL. CURRENT ignores photos in different folders. You'd only have
different folders on your card if you shot them in a different camera without
reformatting ( a bad idea) or played with your camera deliberately to create new
folders. This is difficult with the D50 and I cover it later.
Rotate Tall: I set this to NO. If you set this to ON and if you have vertical images
and set autorotate to ON, vertical shots will rotate themselves on playback. I prefer
to rotate the camera physically on playback. When the camera does this
electronically the resulting image is very tiny, since the screen is much less tall than
it is wide.
Slide Show: Lets you amaze your friends with an exciting slide show on the tiny
screen. I don't bother with this.
Print Set: I ignore this. You can mark which images to print, how many of each and
if you want data and dates imprinted. I do all this in my computer.
Small Picture: This is a cute feature makes smaller copies of your images which are
perfect for emailing, blogging, or posting on eBay. It saves you from having to do all
this in PhotoShop. Choose your size (640 x480, 320 x 240 or 160 x 120) first. 640 x
480 fills a web page while 320 x 240 is perfect for blogging. You mark the image(s)
to copy by moving the thumb selector left and right to highlight images, and select or
unselect each image by moving the thumb selector up or down. When you press
ENTER it will ask you if you want to make so many copies, and if you select YES it
will think for a while while it creates all the new little pictures. Each new picture will
have a file name starting with SSC (instead of DSC) and will have a new number
starting above the last one on the card. Sorry if this is confusing; I didn't design it.
10
Page 11

MENUS: SHOOTING MENU (camera icon)
Press MENU and then select the camera (shooting) icon to get to the shooting
menu.
OPTIMIZE IMAGE: This is where you can program the look of an image. You can
mimic the effects for which we used to have to select different kinds of film. There
are choices of several canned presets, as well as CUSTOM, which lets you set your
own.
Remember to select DONE or OK when playing with the Optimize Image settings,
otherwise it won't remember!
You can swap between your custom setting below and a canned preset, like
PORTRAIT, by spinning the top left mode knob. Custom settings apply in the P, S, A
and M modes, but not in the SPORTS, PORTRAIT, etc. modes. The dummy modes
like PORTRAIT override most of your manual settings, and the camera reverts to
your special settings when you return from one of the dummy modes. There's
nothing wrong with the dummy modes; use them if they save you time. I use the
PORTRAIT mode for people since I usually have my camera's colors cranked up.
The mode knob makes it easy to swap.
Canned Settings: I don't use Nikon's canned Optimize Image presets of Normal,
Vivid, Sharper, Softer, Direct Print, Portrait or Landscape. Feel free to play with them
yourself. This is a beauty of the D50: you can use whatever works for you.
I prefer my custom settings below because I prefer to leave the chroma cranked all
the way up and let the camera automatically control contrast and sharpening as
conditions change. Your style of photography will differ.
You can look at the images made with each of the canned settings directly to see
how you like them. You also can use Nikon's free Nikon View software or look at the
data on the D50 itself to read what values of contrast, sharpening, color, etc, were
used for each preset. The reason I skip the VIVID preset is because it selects Mode
IIIa, but leave the saturation at normal. I explain these below.
For photos of people I either set the colors back to normal, or cheat and use the
Portrait preset mode on the top dial. As mentioned on the top page, using the preset
scene modes on the top dial often override any settings you've made. I only use P,
S, A and M modes which unlock all the adjustments. Of course using the top dial's
Portrait mode sets the colors optimally for portraits, and sets it all back when I spin
that dial back to P, S, A or M. This trick saves me a lot of clicking around under
Optimize Image, but also eliminates my ability to alter the White Balance while in the
top dial's portrait scene mode.
11
Page 12

Optimize Image Custom Settings
As mentioned on the first page, I prefer the vivid color I get from Fuji's Velvia 50 film,
so I tweak the D50 to give color as vivid as I can get. To do this I go to MENU >
Shooting Menu (camera icon) > Optimize Image > Custom > (set Saturation to + and
Color Mode to IIIa) > - - Done > OK. If you forget to select "- - Done" and hit OK it
won't remember these settings!
Here are what each setting inside the Custom option of Optimize Image does.
Sharpening: I leave mine on AUTO. I've never messed with the manual settings.
Sharpening is an artificial effect not to be confused with sharpness. When I first got a
digital camera I thought: "cool, I'm cranking this to 11," and realized my error. Don't
turn it up for no reason, since the image can start to look artificial. Play with it if you
want. I've played with it out of curiosity, and always leave it on AUTO.
Tone Compensation: This is Nikon's code word for Contrast.. I always leave mine
set to AUTO. In AUTO the D50 automatically applies the Zone System and adjusts
contrast to match your subject, for each and every shot! The D50 automatically
lowers contrast and increases dynamic range for very contrasty subjects, and cranks
it up for dull subjects. I've played with the manual settings out of curiosity. Saturation
varies a little with contrast, too. If you crank it to +2 it looks vivid and bold for flatter
subjects, but when you have a contrasty subject it's too much and blows out. Leave it
in AUTO and you won't have to piddle with it. AUTO works great.
The CUSTOM Tone Compensation setting (scroll down) is for hackers. If you pay
Nikon $100 for Nikon Capture software you can create your own crazy H&D curves
and then go out of your way to load them into your D50. Once you create and load
them you no longer need the software. Custom curves are way beyond anything with
which I want to bother. Real photographers pay more attention to their subject's
lighting.
Color Mode has three settings:
Mode Ia is default. It's Nikon's secret code for standard sRGB. sRGB is the world
standard for digital images and the Internet.
Mode II is secret code for Adobe RGB, which only hackers use. Adobe RGB
gives dull colors when used by anyone other than an expert in color management
who prints his own work. Even if you're an expert, if you send your work out for
printing, 90% of the time the people doing the printing aren't experts and screw it up
for you. Ignore desktop armchair hobbyists who bleat on about the broader color
gamut of Adobe RGB. I've created and printed 100% chroma grads in Adobe RGB
and sRGB and saw no difference when printed either on Inkjets or on the $250,000
Lightjet 5000 on Fuji Supergloss. Oh well! Using Adobe RGB is asking for trouble
unless you really know what you're doing and have complete control over your
process. If you have to ask, don't use Adobe RGB.
12
Page 13

Mode IIIa is secret code for a standard sRGB mode which gives bolder color. I
use this all the time.
No, I have no idea how Nikon cooked up these numeric designations.
Saturation is the vividness of colors.
+ Enhanced: I prefer violent color, so I crank it up to +. I'd use ++ or +++ if my
D50 had it.
0 Normal: For normal people shots you're probably better off with 0. This is the
default. There is no AUTO saturation as on the D200, and on my D200 I leave it
cranked to + anyway.
- Moderate: - tones down the colors, which I've never liked. Moderate sounds like
British understatement. In America we call this "dull and boring." Personally I want
colors so bright you have to put on sunglasses, or go directly to B/W. Your interests
and taste will differ. There is no native B/W mode in the D50.
Hue Adjustment: Don't touch this! This rotates all your colors to different spots
around the color wheel. If you use this to fix one color it screws up all the other
colors. God only knows why this adjustment is here.
- - DONE: This is important: after you play with all the above Optimize Image
settings you must select "- - DONE" and "OK" for them to be remembered and take
effect. I never trust this and go back in and check that my settings took hold.
LONG EXPOSURE NOISE REDUCTION (NR): Forget this. It slows the camera
frame rate down to half! If you make exposures of a minute or more it will get rid of
the minor purple haze in the corners, but in exchange you have to wait around in the
dark for another blank exposure as long as your first time exposure! The D50 uses
the second exposure as a reference to subtract from the first image to eliminate any
camera-induced hot pixels or haze. Engineers call this "dark frame subtraction." You
can see examples of this haze on my D200 Dark Exposure page. I've never seen
this haze in any real night photography. It only becomes apparent for astronomically
long exposures of darkness (pun intended). The D50 isn't smart enough to disable
this automatically at normal shutter speeds, so if you forget and leave it on your
frame rate slows to a crawl even in daylight. I never use this setting.
IMAGE QUALITY: This duplicates half of the QUAL button. I only use this menu if I
want to see this on the back of the camera instead of the top LCD.
IMAGE SIZE: This duplicates the other half of the QUAL button. I only use this if I
want to see this on the back of the camera instead of the top LCD.
WHITE BALANCE: This duplicates the WB button. I only use this menu if I want to
see this on the back of the camera instead of the top LCD.
13
Page 14

ISO: This duplicates the ISO button. I only use this menu if I want to see this on the
back of the camera instead of the top LCD. I explain the buttons duplicated by these
menus here. (see “back of camera”)
CUSTOM (CSM) MENU (pencil icon)
Press MENU and select the pencil icon to get to the Custom Settings Menu.
First select the "Detailed" mode under Menu > Setup (wrench) Menu > CSM menu,
otherwise you'll only to get the first few items!
[R] Menu Reset: This returns everything below to factory default. Play with
everything below to your heart's content, since if you do screw anything up this reset
will fix it.
01: Beep. For God's sake, turn this to OFF. Beeping cameras annoy everyone and
scream "RUDE AMATEUR!" If you insist, set this to ON only in private.
02: Autofocus: Use AF-S (still or single) for still subjects, and set AF-C (continuous)
to track moving subjects, like sports. Default is AF-A, for Auto Autofocus Mode,
which chooses between two previous modes automatically depending on if the
subject is moving. AF-A mode works great, I'd use it. More at my Sports page.
03: AF Area Mode:
Set Single area (the default) for still subjects.
Set Dynamic area for moving subjects. Dynamic Area lets the camera select the
AF areas by magic as the subject moves. This really works and is perfect for birds
and sports.
Use Closest Subject when you hand your camera to a non-photographer. It uses
all the AF sensors and guesses that the closest one is your subject. This prevents
the common problem with people shots where the camera focuses in the middle, on
the wall behind them!
I see no magic mode to select among these automatically.
04: NO CF Card?: Leave this to LOCK. if you turn it off it will let you take pictures
with no card! You accidentally could shoot a wedding and not realize you have no
card. When set to ON it locks the camera if you have no card.
05: Image Review: This shows the photo you just took on the monitor after you take
it. I set mine to ON, unless I don't plan to look at the monitor after each shot. When
you use this remember that the functions of the ISO, WB and QUAL buttons will do
things you don't expect after you take a photo, since the camera goes into playback
14
Page 15

mode for a few seconds after each shot. Because of this I make a habit of tapping
the shutter button to return to shooting mode before I make any ISO, WB or QUAL
adjustments. Otherwise I often would change something related to playback by
accident!
06: Flash Level: This is the hard way to set flash exposure compensation. I prefer
using the buttons on the top and front of the camera as I described earlier.
07: AF Assist: This is the annoying little light that helps the camera focus in the
dark. Default is ON. Set it to OFF if you're spying on people and don't want to be
noticed.
08: AF Area Illumination: This lights up the AF areas in the finder. I leave it at
AUTO, in which it turns it on in the dark. OFF never turns it on, which is silly, and ON
leaves them on even in bright light, which is stupid.
09: ISO Control: This can stump the advanced user. It is only available in the menu
if you've chosen one of the preset scene modes. It goes away in P, S, A or M
exposure modes. In preset scene modes ISO Control: ON lets the camera set the
best ISO depending on the scene chosen with the knob on the top left of the D50. I'd
leave this ON. If turned OFF it lets you drive and set the ISO in the scene modes. If
you're using the scene modes you may as well let Nikon drive.
10: ISO AUTO: This lets the camera increase the ISO automatically as the light
fades. I would use it all the time, except that a firmware flaw leaves this active even
in manual exposure mode. If you set it to ON you have the option to select the lowest
shutter speed the camera will use before it starts to increase the ISO.
11: EV Step: Your choice of 1/3 or 1/2 stop increments when adjusting exposure. . I
prefer the default of 1/3.
12: BKT Set: This controls bracketing, which are multiple shots made at different
guesses of exposure or white balance. This is also called exposure guessing and
was popular in film days. Today I use Modern Exposure Techniques
and don't need
to bracket.
You may select bracketing to alter the exposure or the white balance.
Bracketing is never simple with Nikon; you wind up having to count how many shots
you made in each bracket sequence. I find it easier to set the exposure correctly in
the first place. The only potential use I see is this is the only way to make slight
adjustments to the white balance in the D50. Every other Nikon SLR lets you trim the
WB without having to bracket. The D50 is aimed at people who have no idea what
I'm talking about here, which is why they dropped the adjustment from the D50. See
also my page about White Balance
.
13 Metering: I always use the default of Matrix, which is shown by an icon with four
corners. Center weighted (a circle) only meters from the middle of the image. Spot (a
dot) only meters from the selected focus area.
15
Page 16

14: AE-L/AF-L: This sets what the AE-L AF-L button locks when held, and how. I
leave mine in AE lock only, since in AF-S the AF locks when I press the shutter half
way. I use this lock in strong backlight. I point the camera down at something as dark
as my subject, press and hold the AE-L button, point the camera at the subject,
press and hold the shutter to lock focus, move the camera again to compose, then
release the shutter. This gyration of three camera positions saves me from having to
use manual exposure and manual focus. The AE-L button locks exposure and the
shutter locks the focus. Slick!
Flash Tip for the AE-L/AF-L Button:
Normal Flash: Blinking Set and use FV Lock : No Blinking
To lock the flash exposure and stop the preflashes which make people and pets
blink, set custom function 14 to FV lock. Now tap the AE-L/AF-L button and the flash
pops once to meter flash exposure, and uses that measurement instead of needing a
preflash for each consecutive shot. Be sure to tap it again to turn it off when you
change distance.
15: AE Lock: more of the same. I leave this OFF. If you turn it on it locks the
exposure when you hold the shutter halfway. This would mimic cheaper point-andshoot cameras, but is silly since 1.) the camera has a dedicated AE-L button and 2.)
one usually wants to lock exposure and focus on different things. If your subject is
conducive to locking everything at the same place you probably don't need locks at
all.
16: Flash Mode: I leave it in TTL, which lets the built in flash expose properly and
automatically. Manual sets the power manually.
17: Monitor Off: This sets how long the rear LCD stays lit each time. I leave it at 10
seconds. Set it longer if you want the screen to stay lit longer without having to hit
any keys. Luckily the camera has such great battery life there's no reason not to set
it for as long as you like.
18: Meter Off: This sets how long the meter stays on each time you tap the shutter. I
leave it at 6 seconds. Set it longer if you like; I've never had any battery life issues
with this camera.
16
Page 17

19: Self Timer: I leave it at 2 seconds, since I use the self timer to replace a cable
release. Set it to 10 seconds (default) for enough time to run to get into a picture.
You can set it to 2, 5, 10 or 20 seconds.
20: Remote: This sets how long the camera stays awake ready to release as
controlled by the remote infra-red shutter release. If you set this too short the camera
may go to sleep and ignore the wonderful little wireless release before you get to
pressing it. Set it longer and the battery may run down faster, but I've never had a
problem. I set this to 5 minutes. After 5 minutes I'll have to use the rectangles button
to set the camera back to remote release mode again.
SET UP MENU (wrench icon)
Select the Set Up menu by pressing MENU and selecting the wrench icon.
Format: this how to format a card. Professionals always reformat a card every time
it's put back into a camera to prevent any potential for card errors.
CSM Menu/SetUp: As I've suggested, set this to Detailed to get the complete
Custom Settings Menu. Otherwise you only get a few custom settings.
DATE sets the time and date.
LCD Brightness sets the viewing angle for the LCD, not necessarily the brightness
of the backlight. I leave it on 0. Only play with it if you look at the LCD from odd
angles or work in very hot or cold temperatures.
Video Mode sets the format of the video output. Use NTSC (525 lines, 59.94Hz) in
the Americas and Japan, and PAL (625 lines, 50Hz) in Europe.
Language: Set yours to Swedish, then see if you can navigate back to English. Fun!
Image Comment: This lets you encode a secret text message into every file. Mine is
set to (c) KenRockwell.com with my phone number! You see this text looking at the
EXIF data in software on a computer. Our Japanese friends have still not provided
us with a real © symbol here.
You set this by going to MENU > Setup Menu (wrench) > Image Comment > Input
Comment > (add your message like you did on 1970s video games) > Enter. If you
forget to hit ENTER the Japanese will have a laugh on you, since you have to start
over. So sorry!
When you get your text message spelled out, go to Attach Comment and hit SET so
a small checkmark shows. Now go to and select DONE. If you forget to check Attach
17
Page 18

it won't attach, and if you forget to hit DONE it will also forget everything you just did.
So Sorry! I don't write the firmware.
To edit or remove a character, select it in the Input Comment screen by holding the
checkerboard button and spinning the rear control dial. Now press the Trash button
to delete, or add a new character with the four-way navigation switch and press the
WB/?/key button to add it.
It's great having everything you shoot have your contact info embedded. It also
allows you to prove ownership in a third-world country when catching a thief with
your camera. Help the cop go through the menus and read your personal ID
information.
USB: I leave it at mass storage. Use whichever works better with your computer.
Folders: You can create, select and rename folders on your memory card. Normal
people never use this menu. The pro cameras have a trick which creates a new
folder if you hold the "?" button on power on, but the D50 has no such automatic
feature. It's more of a pain to make new folders than it is to sort the images later from
the same folder, so I don't bother.
Select Folder chooses the folder into which new photos are recorded.
New lets you make a new folder and name it.
Rename and Delete are self explanatory.
File Number Sequence: This lets the camera number your images starting at the
last shot you made, even if you've formatted your card. I leave this to ON. If you turn
this feature off you'll start from 0001.JPG each time, which is stupid. It's stupid
because In time you'll have 150 files all called DSC_0012.JPG on your hard drive.
You'll thank me when you try to put together a slide show and don't have to rename
them all! Also it lets you keep track of how many shots you've made, since it runs up
to 9,999 shots before it resets.
Mirror Lock-Up isn't. This setting is used to lock up the mirror to clean the CCD. I
never use this, since I find it easier to set the camera to Bulb and hold open the
shutter. It's not a lock up for telephoto lenses on tripods.
Dust Ref Photo is used to take a picture of the dust on your sensor. If you pay
Nikon another $100 for Nikon Capture software you can use this to erase the dust
more easily from your images shot in Raw. You people know who you are. I don't do
this!
Firmware Version lets you check the firmware version. This lets you confirm if your
camera is up-to-date with Nikons' free firmware updates.
Image Rotation sets a flag in vertical images which keys most software to display
the image vertically. It does not actually rotate the images; it just sets a flag.
18
Page 19

Someday the camera's firmware will work properly and rotate the image itself, but no
camera does that yet.
That's It! Enjoy! If you find this as helpful as a book you might have had to buy, feel
free to help me write more with a donation. Thanks! Ken.
19
 Loading...