

Page 1

En
Install Guide
Page 2

Table of Contents
Introduction: About This Manual ....................................................................................................1
Overview ..........................................................................................................................................2
Windows.............................................................................................................................................3
Installing Nikon Capture 4 Under Windows ...................................................................................4
Easy Install ........................................................................................................................................7
Custom Install.................................................................................................................................16
Connecting to a Computer............................................................................................................. 27
Starting Nikon Transfer.................................................................................................................... 29
Uninstall: Uninstalling Nikon Capture 4 and Nikon View 6 ......................................................... 32
Uninstalling Nikon Capture 4 ..........................................................................................................32
Uninstalling Nikon View 6 ............................................................................................................... 33
Device Registration.........................................................................................................................34
D100/D2H/COOLPIX-Series Cameras ............................................................................................... 35
COOLPIX990/COOLPIX 880............................................................................................................. 48
D1-Series Cameras..........................................................................................................................68
Macintosh.........................................................................................................................................99
Installing Nikon Capture 4 on a Macintosh................................................................................. 100
Installing Software from the Software Tab....................................................................................102
Connecting to a Computer........................................................................................................... 112
Starting Nikon Transfer.................................................................................................................. 114
Uninstall: Uninstalling Nikon Capture 4 and Nikon View 6 ....................................................... 116
Uninstalling Nikon Capture 4 ........................................................................................................116
Uninstalling Nikon View 6 ............................................................................................................. 117
Page 3

About This Manual
Introduction
About This Manual
Thank you for your purchase of Nikon Capture 4. This install guide explains how to install
and uninstall Nikon Capture 4 on your Windows or Macintosh computer, and how to connect
your camera to your computer. It also explains how to insert a camera memory card in a card
reader or PC card slot, how to start Nikon Capture 4, and how to register the camera with the
system. Before reading this guide, be sure to read the Nikon Capture 4 User’s Manual.
The procedure for installing Nikon Capture 4 varies with the model of camera and computer
op er at ing system you are using. Be sure to read the sections of this guide that apply to your
model of camera and computer operating system.
1
Page 4

Introduction
Overview
This guide is divided into two main parts, one for Windows and the other for Macintosh
computers.
Windows
This section explains how to install and uninstall Nikon Capture 4 on your Windows com put er,
and how to connect your camera to your computer. It also explains how to insert the memory
card in a card reader or PC card slot, and how to start Nikon Capture 4 under Win dows. Note
that when you connect your camera to a Windows computer after installing Nikon Capture 4,
the computer will automatically identify the camera as a new device and initiate device reg is tra tion. For information on confi rming that the camera is correctly reg is tered with the system,
see “Device Reg is tra tion” in this manual, which describes how to con fi rm device reg is tra tion
with different models of camera and different versions of Windows.
Macintosh
This section explains how to install and uninstall Nikon Capture 4 on your Macintosh com put er,
and how to connect your camera to your computer. It also explains how to insert the memory
card in a card reader or PC card slot, and how to start Nikon Capture 4 from a Macintosh.
Illustrations
The illustrations in this guide are from Windows XP and Mac OS X. Depending on the op er at ing system
used, the dialogs and menus displayed on your computer may differ slightly from those shown here.
2
Page 5

Windows
This section explains how to install and uninstall Nikon
Capture 4, how to connect your camera and insert the
cam era mem o ry card in a card reader or PC card slot, how
to start Nikon Transfer, and how to register the camera with
the sys tem.
3
Page 6
Windows
Installing Nikon Capture 4 Under Windows
Before installing Nikon Capture 4, make sure that your computer meets the following system
requirements.
Pre-installed versions of Windows XP Home Edition, Windows XP Professional,
OS
CPU 300 MHz Pentium or better
RAM
(Nikon Capture 4)
RAM
(Nikon View 6)
Hard-disk space
Video resolution
Interface
Supported
cameras
Miscellaneous
* The camera may not function as expected when connected to an IEEE 1394 hub.
† A list of boards and cards that have been tested and approved for use with the D1, D1
available on-line at the sites listed page 2 of the User’s Guide.
‡ The camera may not function as expected when connected to a USB hub or keyboard.
** Camera fi rmware version 2.00 or later.
Windows 2000 Professional, Windows Millennium Edition (Me), Windows 98
Second Edition (SE)
128 MB (256 MB or more recommended)
64 MB (128 MB with RAW images) or more recommended
200 MB required for installation, with additional free disk space of 10 MB plus an
amount equal to double the capacity of camera memory card available on system
disk when Nikon Capture 4 is running
800 × 600 pixels or more with 16-bit color (High Color). 24-bit color (True Color)
recommended.
Open Host-Controller Interface (OHCI) compliant IEEE 1394 interface board or
IEEE
*
card† required for connection to D1, D1x, and D1H
1394
Built-in USB interface required for connection to D100, D2H, and COOLPIX-series
‡
cam er as with USB interface. Direct connection to other COOLPIX-series cameras
USB
not supported.
• All functions, including Camera Control: D1, D1X, D1H, D100**, and D2H
• All functions except Camera Control: USB-equipped COOLPIX cameras
• CD-ROM drive required for installation
• Internet connection required for upload to the Web; e-mail program required
when sending pictures by e-mail
X, and D1H is
Windows XP Home Edition, Windows XP Professional, Windows 2000 Professional
Installing Nikon Capture 4 under a multi-user operating system requires Administrator privileges. When
installing Nikon Capture 4, log in as:
Windows XP Home Edition/Professional Computer administrator
Windows 2000 Professional Administrator
4
Page 7

Installing Nikon Capture 4 Under Windows
When installing Nikon Capture 4, you can choose between Easy Install and Custom Install
options.
Easy Install
The following software will be installed in the order given below.
Driver for D1-series cameras
1
COOLPIX camera drivers (Windows 98 SE only)
2
QuickTime 5.0.2
3
Custom Install
Choose from the following (software will be installed in the order listed):
COOLPIX camera drivers (Windows 98 SE only)
1
PTP driver (installed under Windows XP only)
2
Driver for COOLPIX 880 and 990 cameras
3
Driver for D1-series cameras
4
Nikon Capture 4
4
Nikon View 6
5
QuickTime 5.0.2
5
Nikon Capture 4
6
Nikon View 6
7
Before installing Nikon Capture 4
• Uninstall any earlier versions of Nikon Capture or Nikon View before installing Nikon Capture 4.
• Exit all applications, including any virus-checking software that may be running.
5
Page 8
Windows
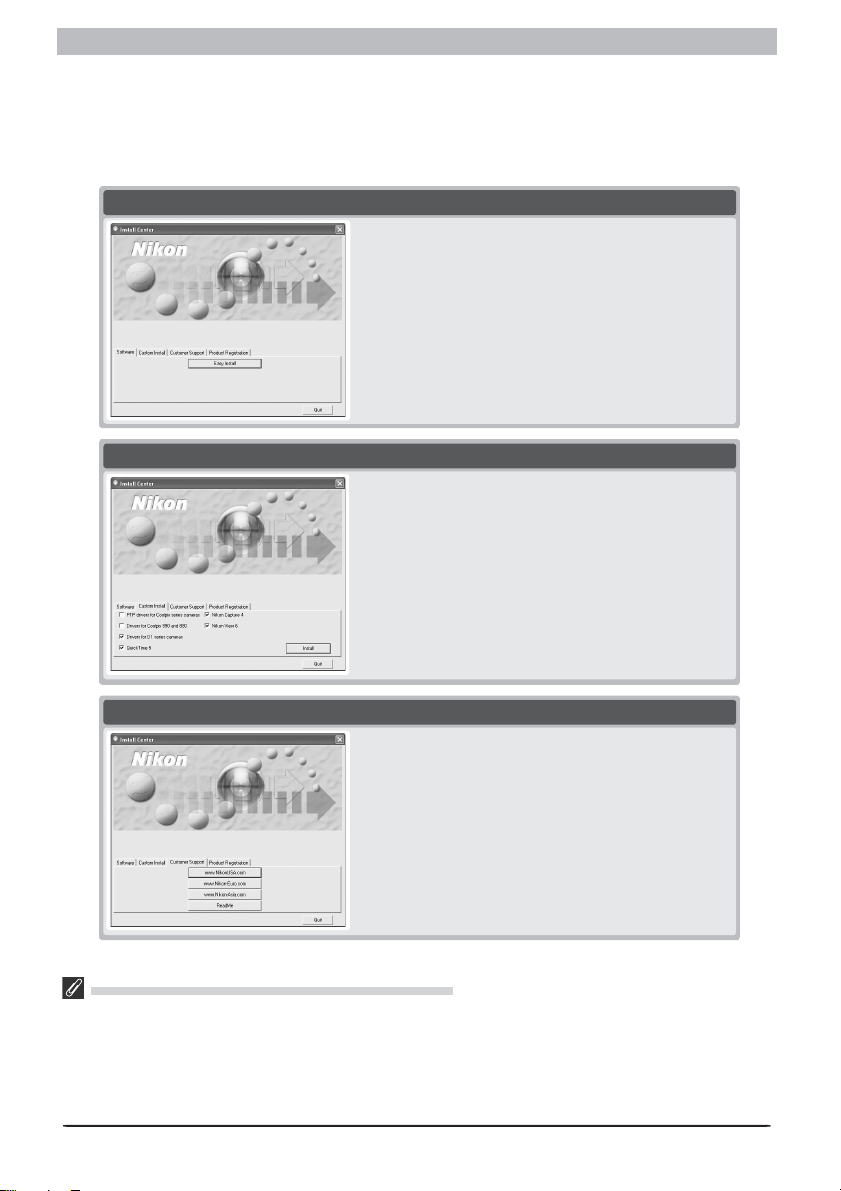
When the Nikon Capture 4 CD is inserted into a CD-ROM drive, a “Select Language” dialog
will open automatically. Select a language from the list and click Next to display the Install
Center window. The Install Center window contains fi ve tabs: Software, Custom Install,
Customer Support, and (in some areas) Product Registration. Clicking Quit will interrupt
installation and close the Install Center window.
Software
Clicking the Easy Install button in the Software tab
begins installation of the driver for D1 series cameras,
the COOLPIX camera drivers (Windows 98 SE only),
QuickTime 5.0.2, Nikon Capture 4, and Nikon View 6.
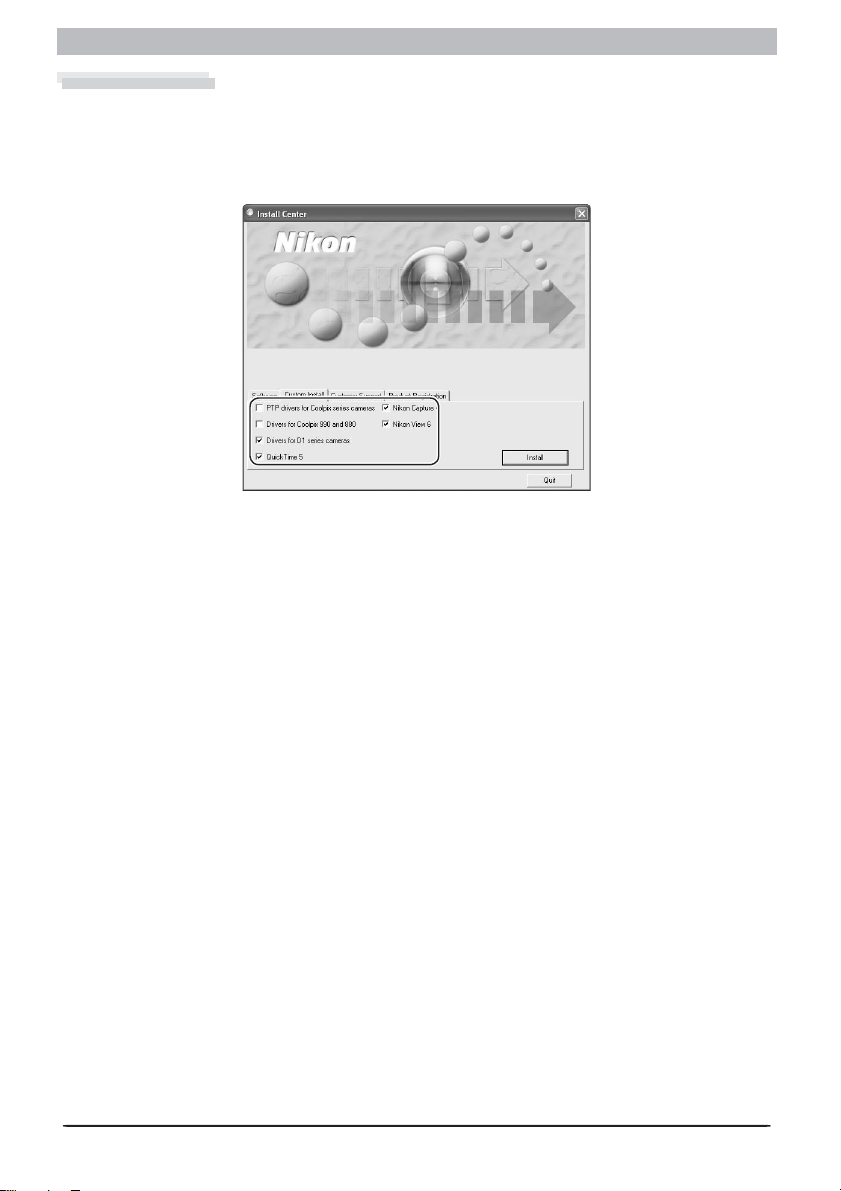
Custom Install
This tab lists the software that can be installed from the
Install Center window. Check the desired items and
click Install to begin installation.
Customer Support
Customer Support
Click the button for your area to view the Nikon technical support web site (Internet connection required).
ReadMe
Click ReadMe to view the ReadMe fi le. We recommend that you view the ReadMe fi le before installing
Nikon Capture 4.
If the “Select Language” Dialog Is Not Displayed
If the “Select Language” dialog is not displayed when the Nikon Capture 4 CD is inserted:
1. Under Windows XP Home Edition and Windows XP Professional, select My Computer from the Start
menu. In other versions of Windows, double click the My Computer icon on the desktop.
2. Click the icon for the CD-ROM drive containing the Nikon Capture 4 CD with the right mouse button.
3. Choose AutoPlay from the menu that appears.
6
Page 9
Installing Nikon Capture 4 Under Windows
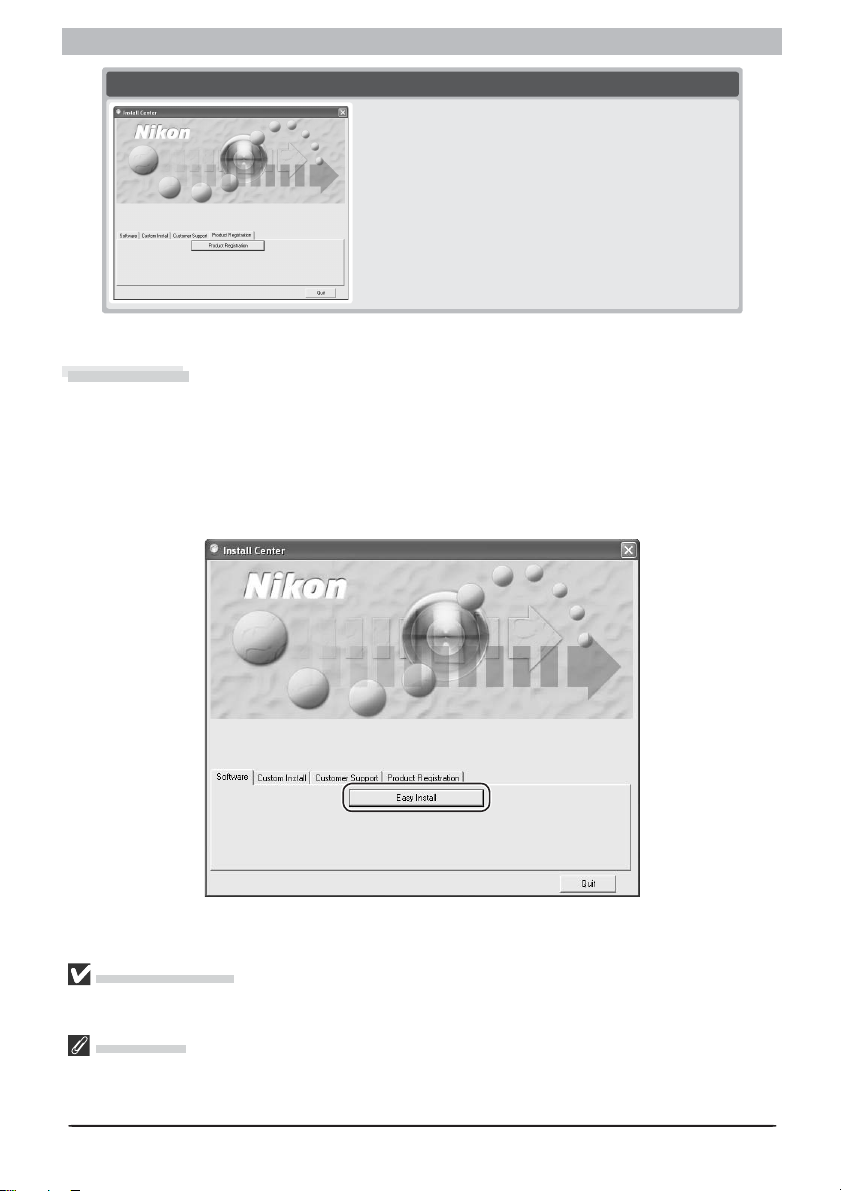
Product Registration
Product Registration
Click Product Registration to view the Nikon Product
Registration web site (Internet connection required).
*
* Not available in some areas.
Easy Install
The standard installation procedure involves two steps: choosing the Easy Install option and
installing the soft ware.
Step 1: Choose the Easy Install option
In the Software tab, click Easy Install to begin installation of the driver for D1-series cam er as,
the Coolpix camera drivers (Windows 98 SE only), QuickTime 5.0.2, Nikon Capture 4, and
Nikon View 6.
Before installation
Before installing Nikon Capture 4 and the device driver, make sure the camera is not con nect ed to the
computer. If the Device Wizard is displayed, click Cancel to exit the Wizard.
Product Key
When you start Nikon Capture 4 Editor or Nikon Capture 4 Camera Control after installation, you may
be prompted to enter a product key. Enter the Nikon Capture 4 product key exactly as given, including
spaces.
7
Page 10
Windows
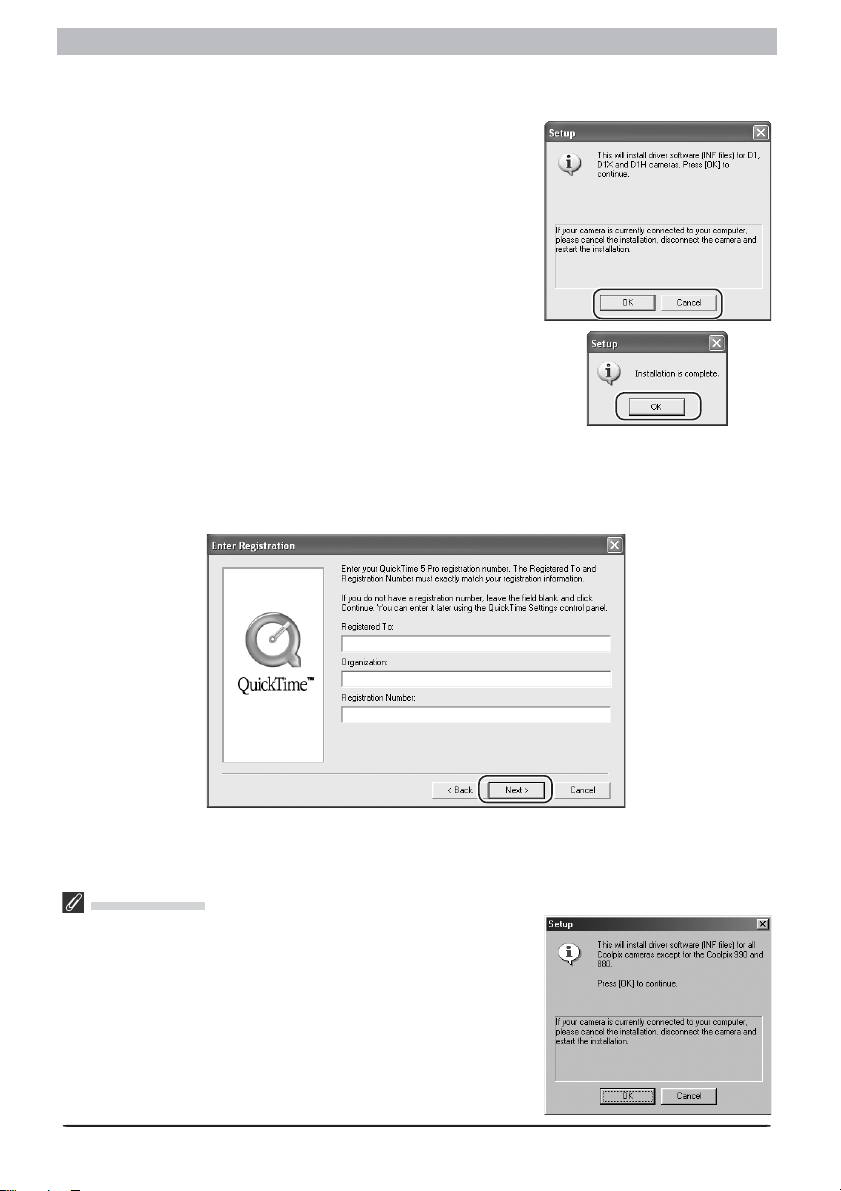
Step 2: Complete installation
2.1 — Install the driver for D1-series cameras
If you are using one of the D1 series of cameras, fi rst install
the driver for your camera. If you are using a different model
of camera, click Cancel and go to the next step. To install the
driver for D1 series cameras, click OK.
The system will display a message stating that installation is
complete. Click OK.
2.2 — Install Quick Time 5.0.2
Installation of QuickTime 5.0.2 opens with the dialog shown below. Leave the registration
information blank and click Next. Follow the on-screen instructions to complete installation
and proceed to the next step.
Windows 98 SE
If you are using Windows 98 SE, the Coolpix Camera Drivers (all
models except 990 and 880) will be installed before the driver for
D1 series cameras. The dialog box shown right will be displayed.
Click OK to continue.
8
Page 11
Installing Nikon Capture 4 Under Windows
2.3 — Install Nikon Capture 4
Once installation of QuickTime 5.0.2 is complete, installation of Nikon Capture 4 will begin.
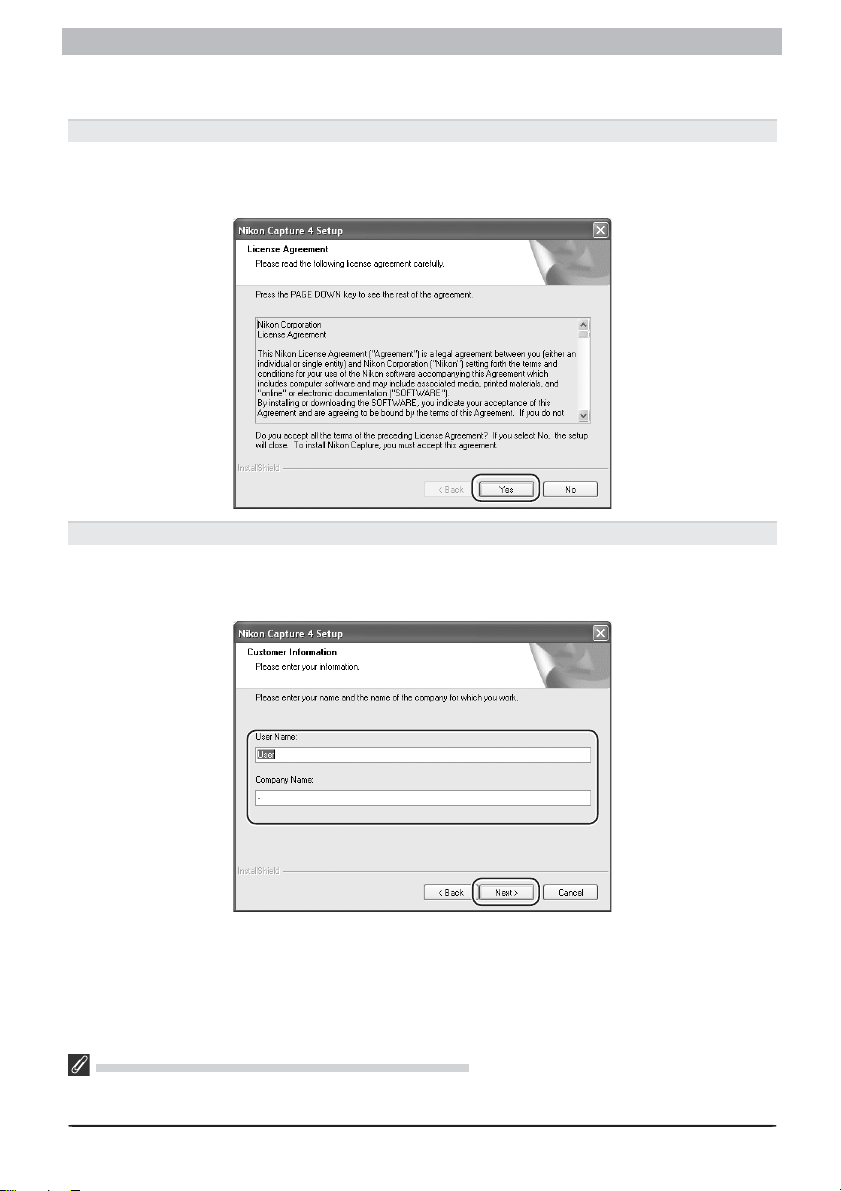
2.3.1 — Accept the license agreement
Installation of Nikon Capture 4 begins with the license agreement. After making sure that
you have read and understood the contents of the agreement, click Yes to continue instal-
lation.
2.3.2 — Personalize your copy of Nikon Capture 4
Enter your name and company (if applicable) to activate the Next button. Clicking Next will
display a confi rmation dialog; if the information you entered is correct, click Yes to pro ceed
to the next step.
Earlier Versions of Nikon Capture and Nikon View
Before you can install Nikon Capture 4, you must uninstall any earlier versions of Nikon Capture or Nikon
View.
9
Page 12

Windows
2.3.3 — Choose a location
The folder to which Nikon Capture 4 will be installed is shown in the Des ti na tion Folder area
(the default location is …\Program Files\Nikon\NCapture4). To install to this folder, click Next.
To select a new folder, click the Browse… button and navigate to the desired location.
If the chosen folder does not already exist, clicking Next will display the following dialog.
Click Yes to create a folder in the location shown.
2.3.4 — Start installation
While installation is in progress, the dialog shown below will be displayed.
10
Page 13

Installing Nikon Capture 4 Under Windows
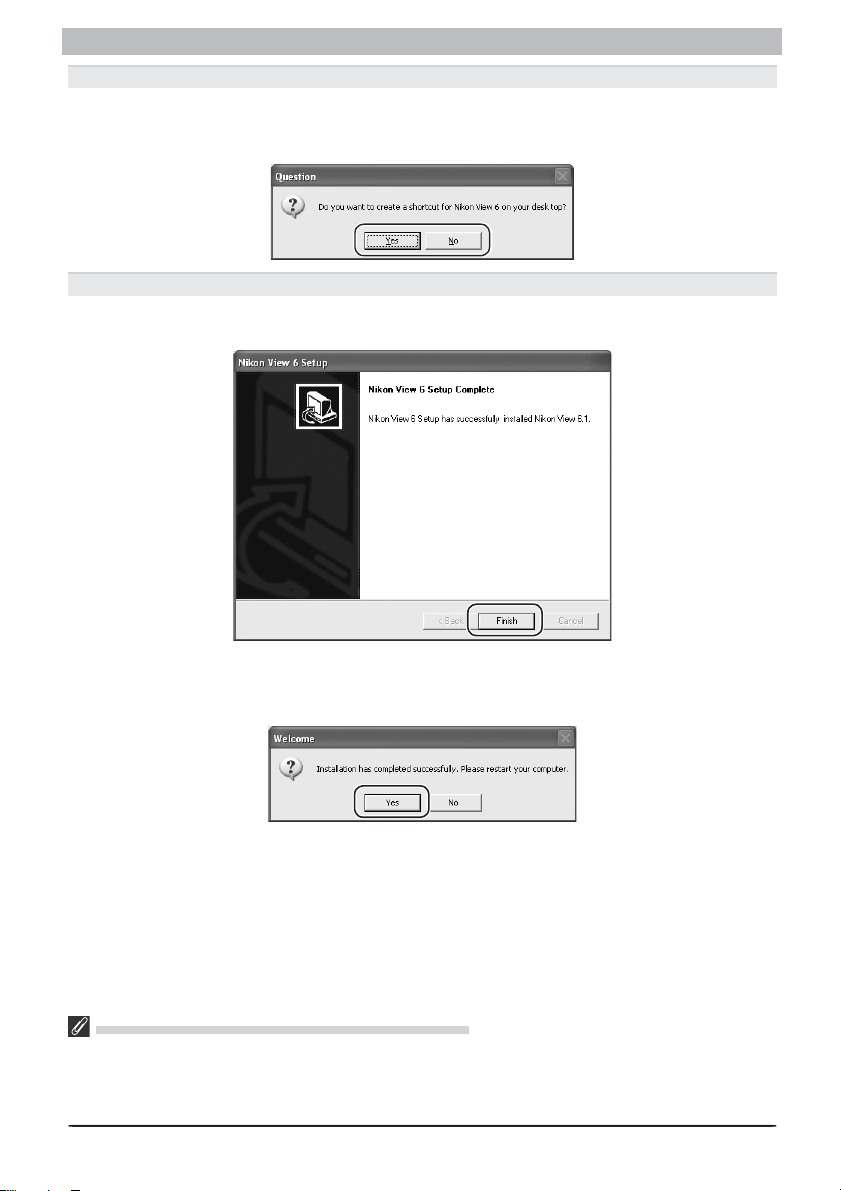
2.3.5 — Create a shortcut on the desktop
When the progress indicator reaches 100%, the dialog shown below will appear. Click Ye s to
cre ate a short cut, al low ing you to start Nikon Capture 4 directly from an icon on the desk top.
If you do not want to create a shortcut, click No.
Associating File Extensions with Nikon Capture 4
If Nikon Scan or other software that uses the same fi le extensions as Nikon Capture is installed, a dialog
will be displayed asking whether you would like to as so ci ate Nikon Capture 4 with the ex ten sions for
color balance settings (*.nca), tone curves (*.ncv), and other image ad just ment set tings fi les. To associate
Nikon Capture 4 with these extensions (recommended), click Yes .
Choosing an Application for Opening Image Files
If Adobe Photoshop is installed on your system, the dialog for choosing an application for opening image
fi les will be displayed. Click Ye s to select Photoshop as the application that will be used to open image
fi les.
11
Page 14
Windows
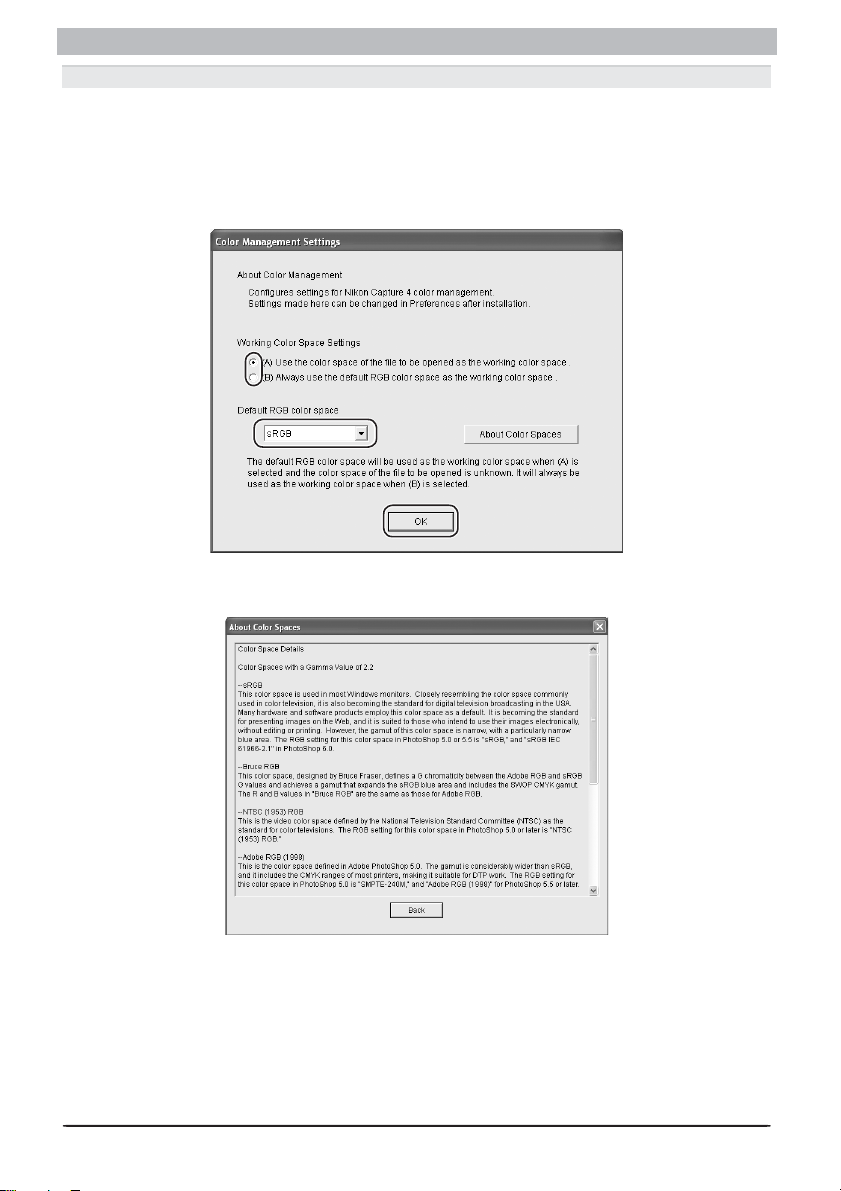
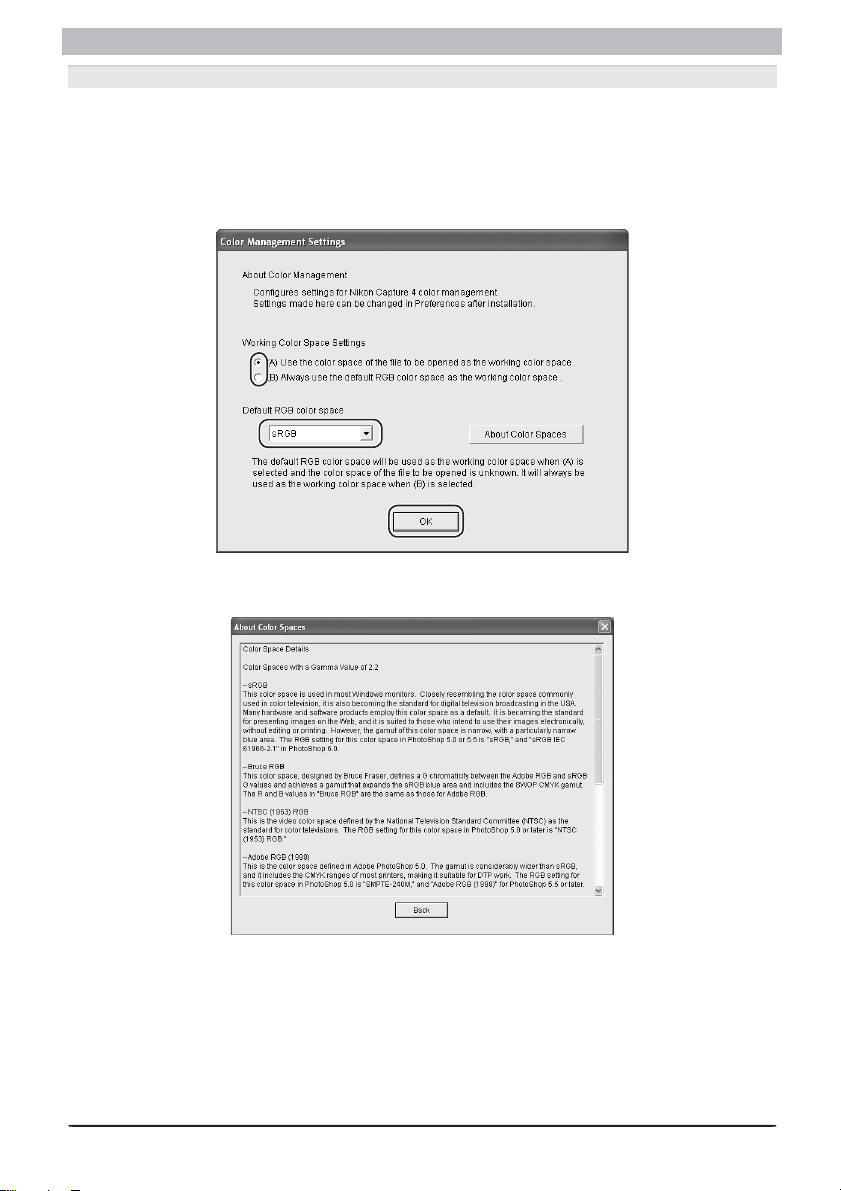
2.3.6 — Choose default color management settings
To use the color-space profi le embedded in images opened in Nikon Capture 4, choose (A)
Use the color space of the fi le to be opened as the working color space. To choose a
default RGB color-space profi le for the work ing color space in Nikon Capture 4, choose (B)
Always use the default RGB color space as the work ing color space. When this option
is se lect ed, you can choose the default color-space profi le from a pull-down menu. Click OK
to put changes into effect and proceed to the next step.
Clicking About Color Spaces displays a description of the different color-space profi les. Use
this ex pla na tion to help you choose a color-space profi le.
The default output color-space profi le can be changed at any time after installation in the
Color Man age ment tab of the Nikon Capture 4 Editor or Nikon Capture 4 Camera Control
Preferences dialog.
12
Page 15
Installing Nikon Capture 4 Under Windows
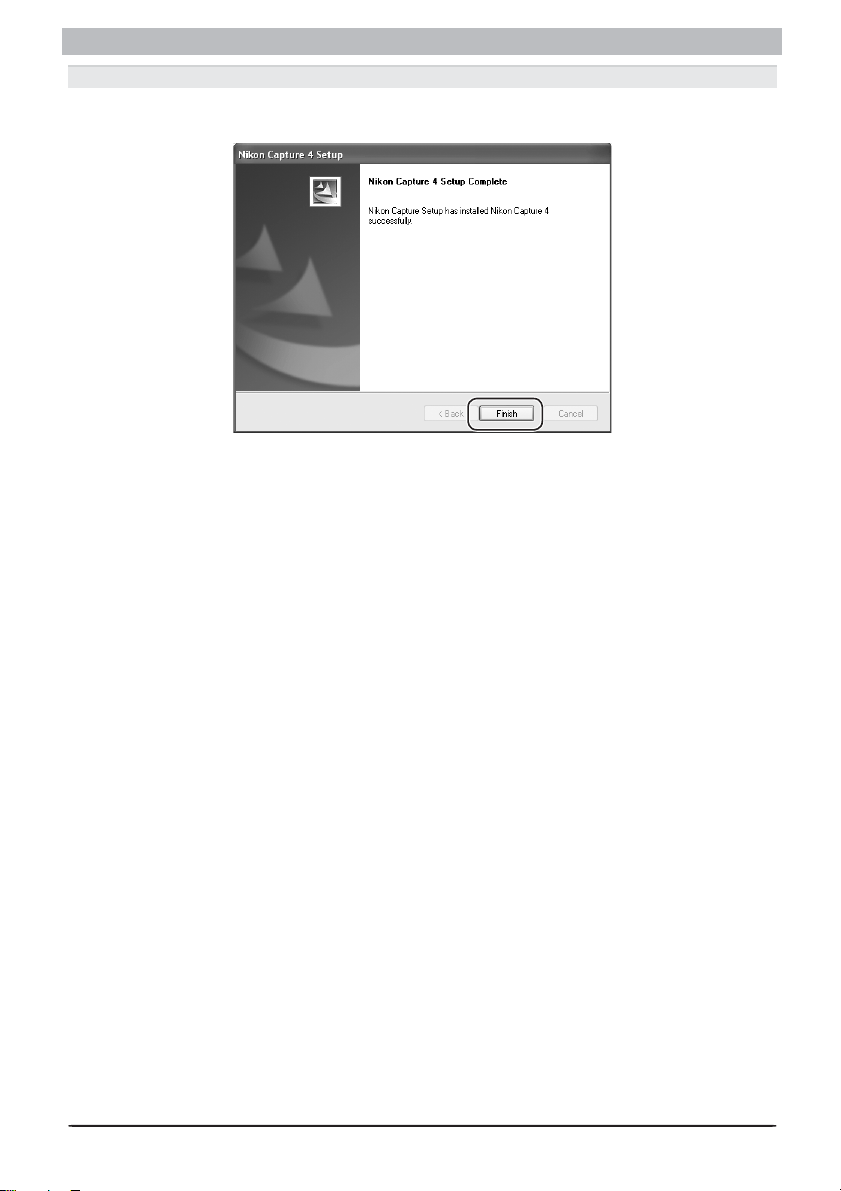
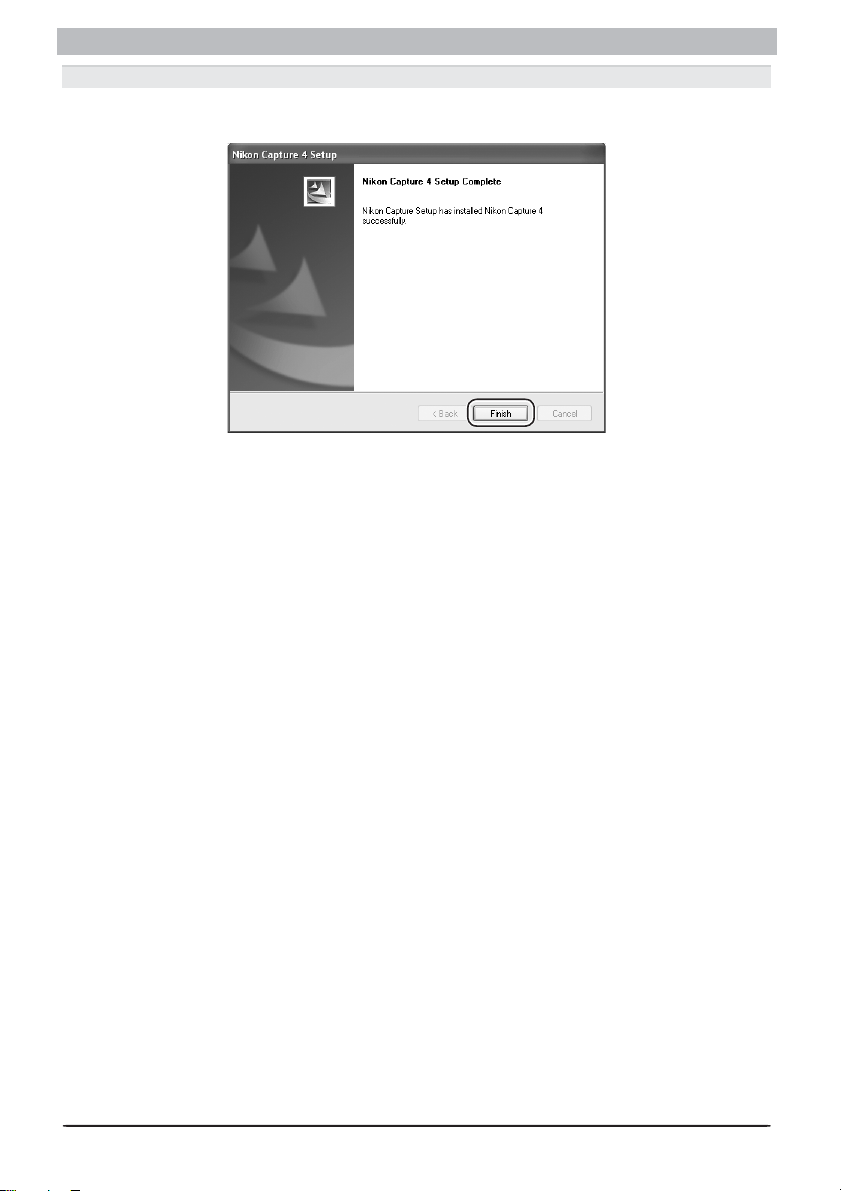
2.3.7 — Complete installation of Nikon Capture 4
The following dialog is displayed when installation of Nikon Capture 4 is complete. Click Finish to proceed to the next step.
13
Page 16
Windows
2.4 — Install Nikon View 6
Installation of Nikon View 6 begins with the license agreement shown in Step 2.4.1.
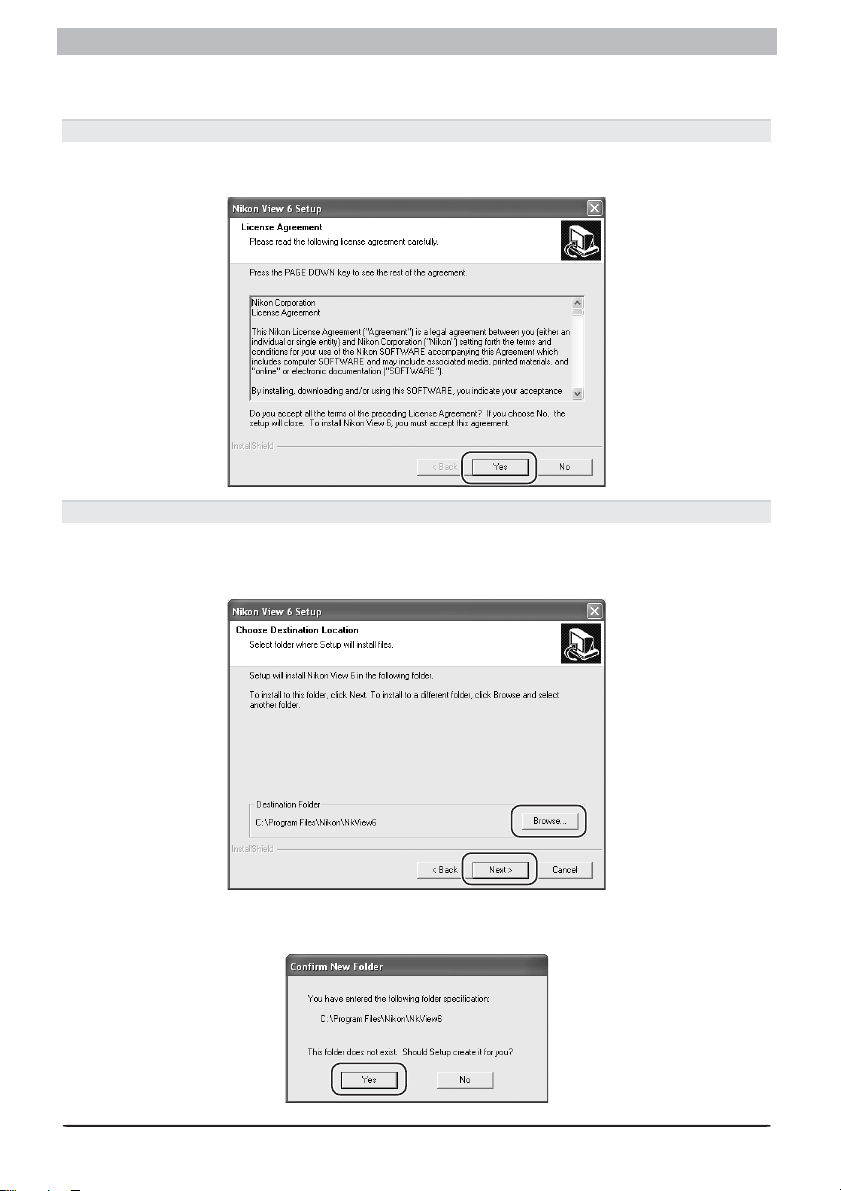
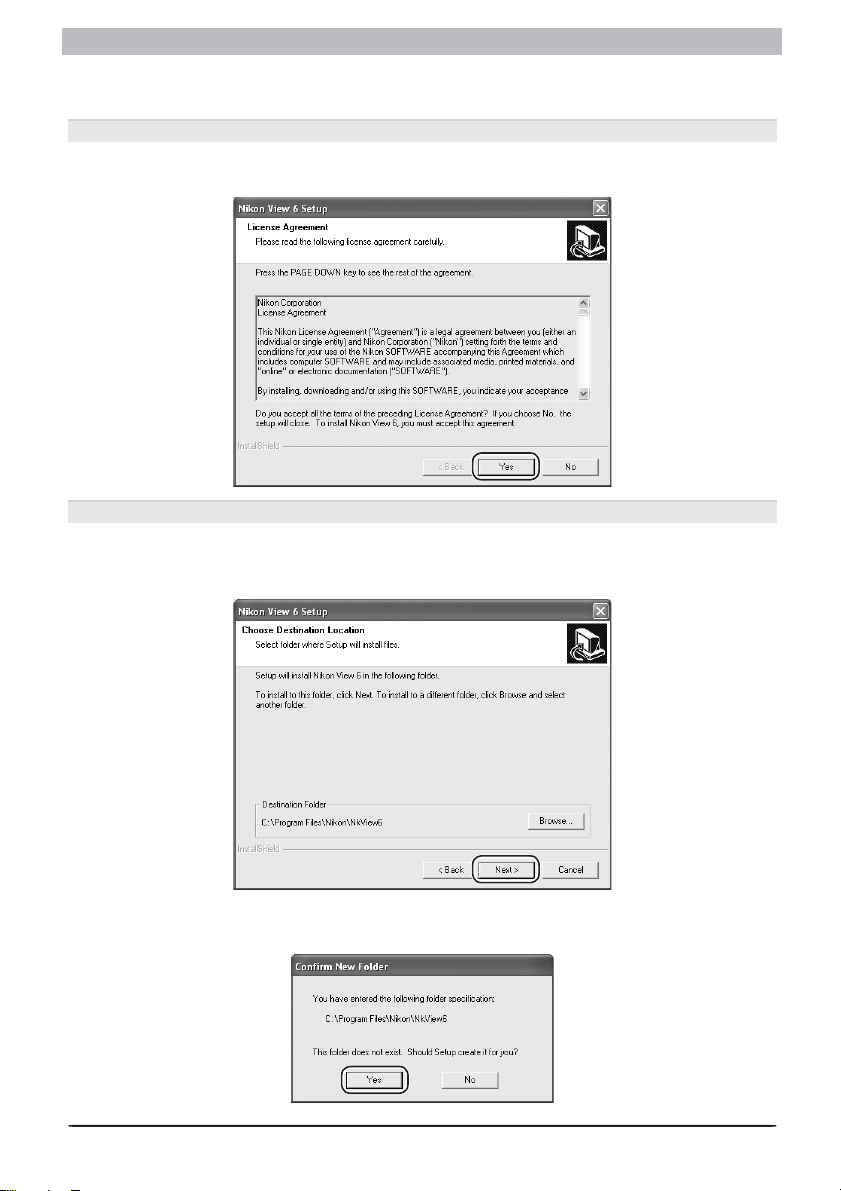
2.4.1 — Accept the license agreement
After making sure that you have read and understood the contents of the agreement, click
Yes to continue installation.
2.4.2 — Choose a location
The folder to which Nikon View 6 will be installed is shown in the Des ti na tion Folder area
(the default location is …\Program Files\Nikon\NKView6). To install to this folder, click Next.
To select a new folder, click the Browse… button and navigate to the desired location.
If the chosen folder does not already exist, clicking Next will display the following dialog.
Click Yes to create a folder in the location shown.
14
Page 17
Installing Nikon Capture 4 Under Windows
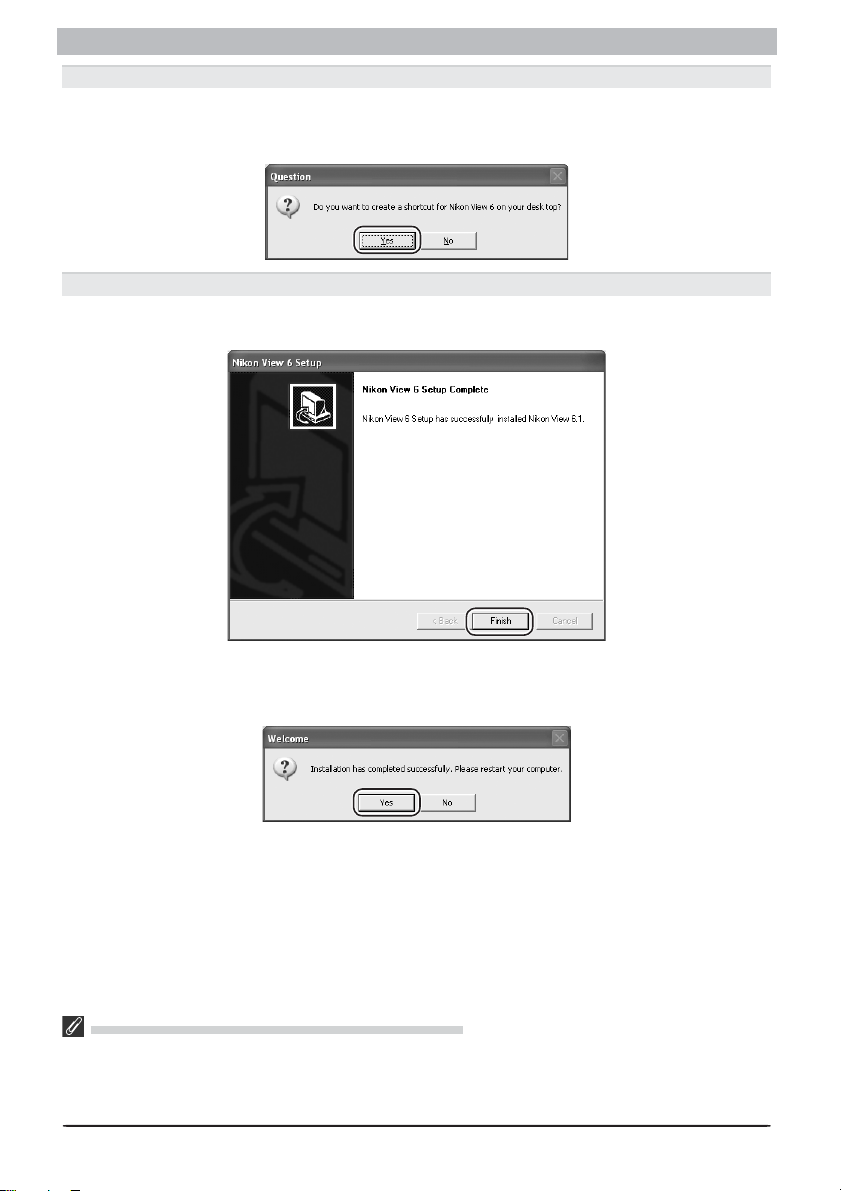
2.4.3 — Create a shortcut on the desktop
When the Nikon View application fi les have been installed, the dialog shown below will ap pear. Click Yes to cre ate a short cut, al low ing you to start Nikon View 6 directly from an icon
on the desk top. If you do not want to create a shortcut, click No.
2.4.4 — Complete installation of Nikon View 6
The following dialog is displayed when installation of Nikon View 6 is complete. Click Finish
to pro ceed to the next step.
2.5 — Restart your computer
The dialog shown below will appear when installation is complete. Click Yes to re start your
com put er. This completes the Easy Install procedure.
Earlier Versions of Nikon Capture and Nikon View
Before you can install Nikon View 6, you must uninstall any earlier versions of Nikon Capture or Nikon
View. Note that Nikon View 6 does not support connection of COOLPIX 950, 910, 900, 800, or 700
digital cameras. It can however be used to view photographs taken with these cameras if the camera
memory card is inserted in a card reader or PC card slot.
15
Page 18
Windows
Custom Install
The standard installation procedure involves two steps: choosing the Custom Install option
and in stall ing the soft ware.
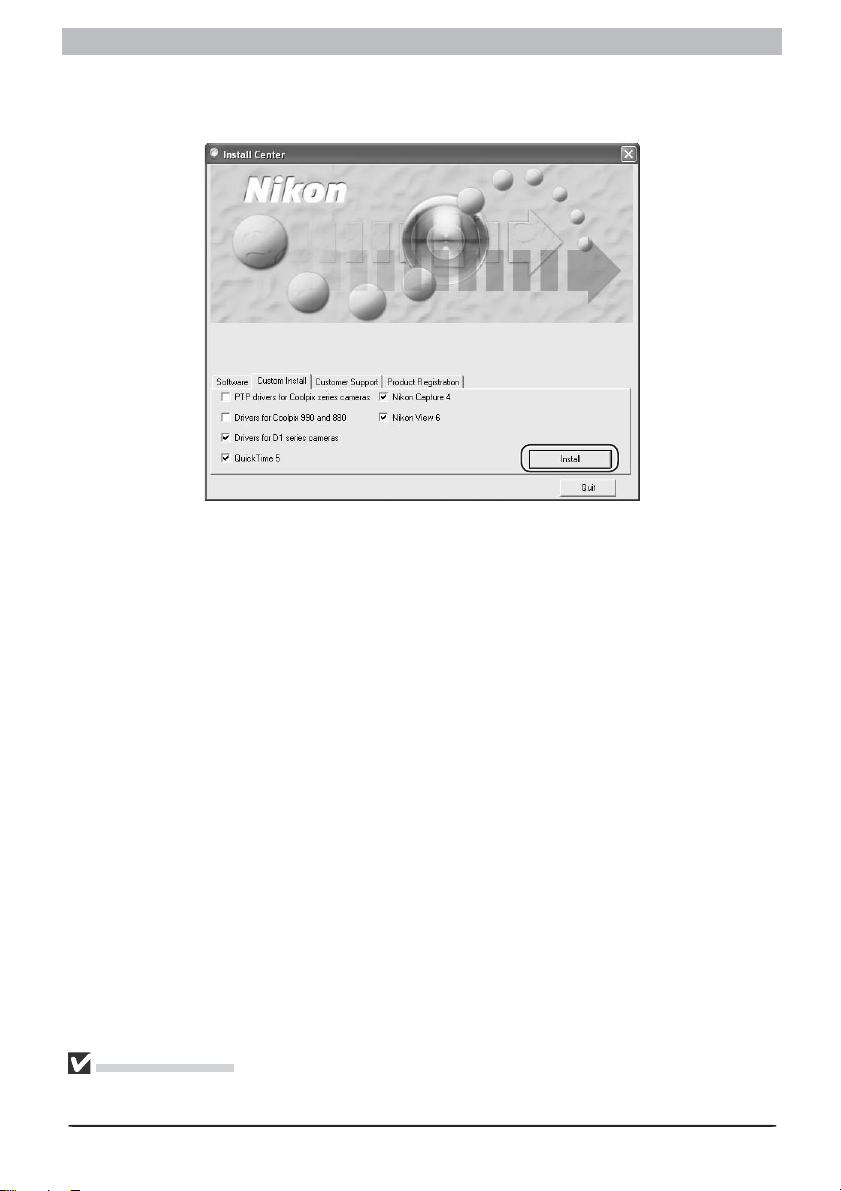
Step 1: Choose the Custom Install option
Click the Custom Install tab and check the software you want to install.
Coolpix Camera Drivers (all models except 990 and 880)
This check box is only displayed under Windows 98 Second Edition (SE). Check this box to
in stall the Mass Storage driver for Windows 98 SE.
PTP Driver
Check this box to install the driver needed for a PTP (Picture Transfer Protocol) USB connection. This check box is only dis played if you are using Win dows XP Home Edition or Windows
XP Professional.
Driver for Coolpix 990 and 880
Check this box to install the drivers for the COOLPIX 990 and 880.
Driver for D1 series cameras
Check this box to install the drivers for the D1 series.
QuickTime 5.0.2
Check this box to install QuickTime 5.0.2 from Apple Computer.
Nikon Capture 4
Check this box to install Nikon Capture 4.
Nikon View 6
Check this box to install Nikon View 6.
16
Page 19
Installing Nikon Capture 4 Under Windows
Step 2: Complete installation
To begin installation of the selected software, click the Install button in the Custom Install
tab. If more than one option is selected, the software will be installed in the order listed.
Before installation
Before installing Nikon Capture 4 and the device drivers, make sure the camera is not con nect ed to the
computer. If the Device Wizard is displayed, click Cancel to exit the Wizard.
17
Page 20
Windows
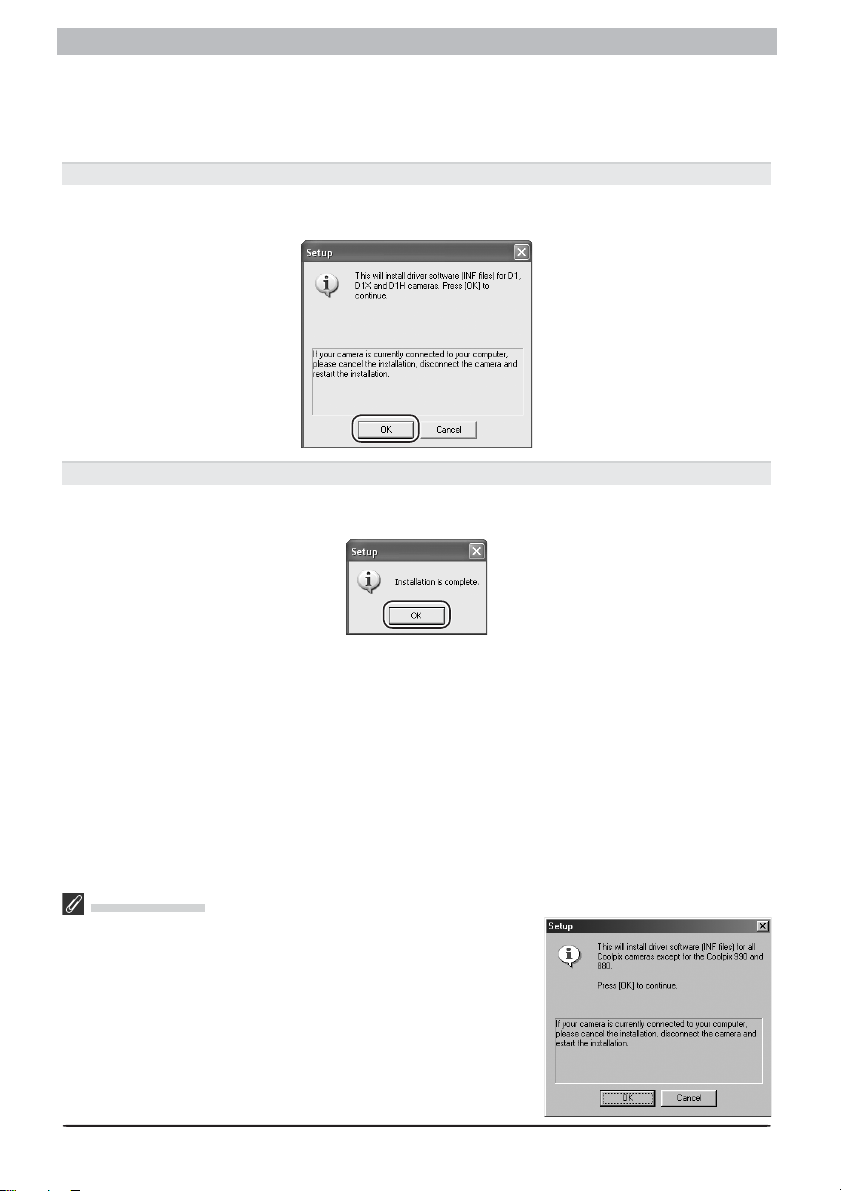
2.1 — Install drivers
If you selected PTP driver, Driver for COOLPIX 990/880, or Driver for D1-series cam er as,
installation will begin with the selected drivers. The explanation that follows takes the driver
for D1-series camera as an example.
2.1.1 — Begin driver installation
If you selected Driver for D1-series cameras, the fol low ing dialog will be displayed. Click
OK to begin installation.
2.1.2 — End driver installation
When installation is complete, the following dialog will be displayed. Click OK to proceed to
the next step.
Win dows 98 SE
If you are us ing Windows 98 SE and selected Coolpix Camera Driv ers (all mod els except 990 and 880) in the Custom Install tab, the
Coolpix Cam era Drivers (all models ex cept 990 and 880) will be
in stalled. In stal la tion of the driver begins with the dialog shown at
right. Click OK to con tin ue.
18
Page 21
Installing Nikon Capture 4 Under Windows
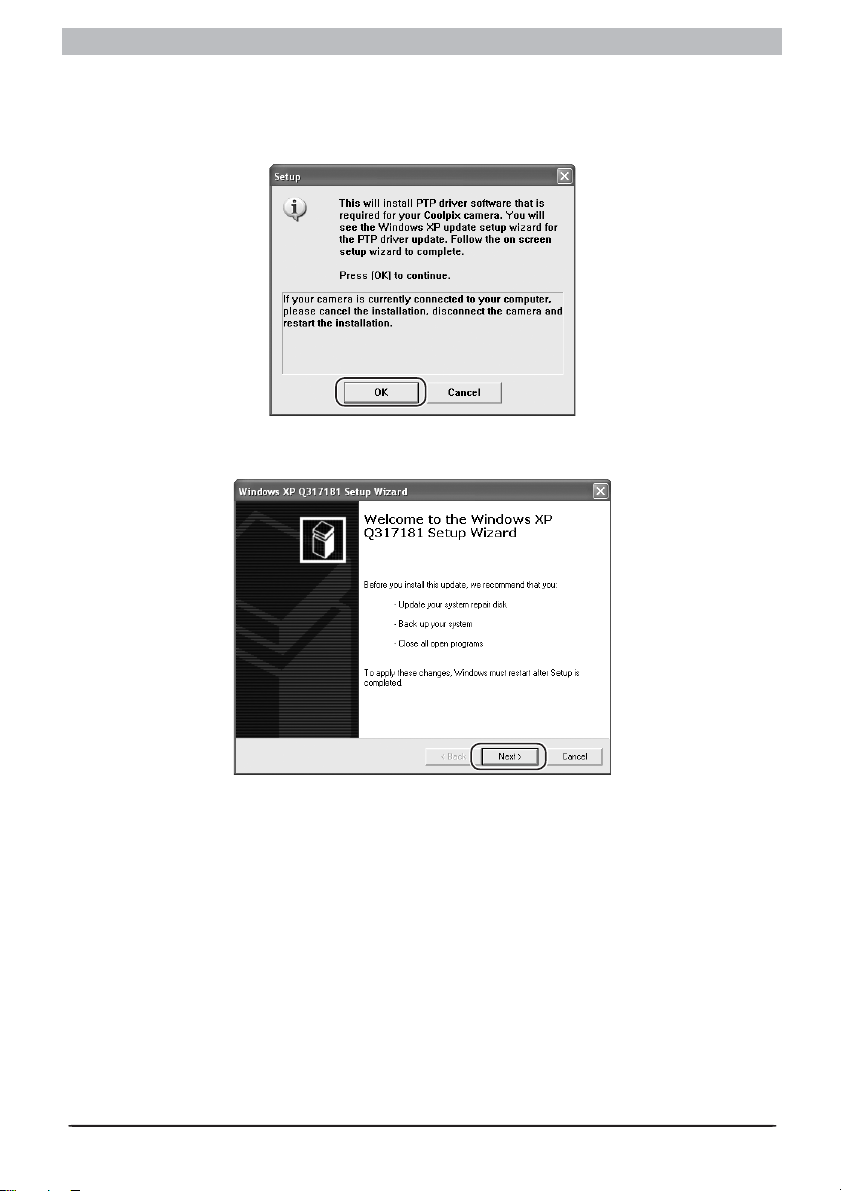
PTP Driver
The PTP driver supports transfer of pictures using the camera transfer button under Picture
Transfer Protocol (PTP). It is installed only under Win dows XP Home Edi tion or Win dows XP
Professional. If the dialog shown below is displayed, click OK to install the PTP driver.
Once the PTP driver has been installed, the Windows XP Updater shown below may be dis played de pend ing on your operating environment.
If the Updater is displayed, complete the update by following the on-screen instructions. Do
not restart your computer when the update is complete; instead, continue with installation.
If the Updater dialog is not displayed, complete installation normally.
19
Page 22
Windows
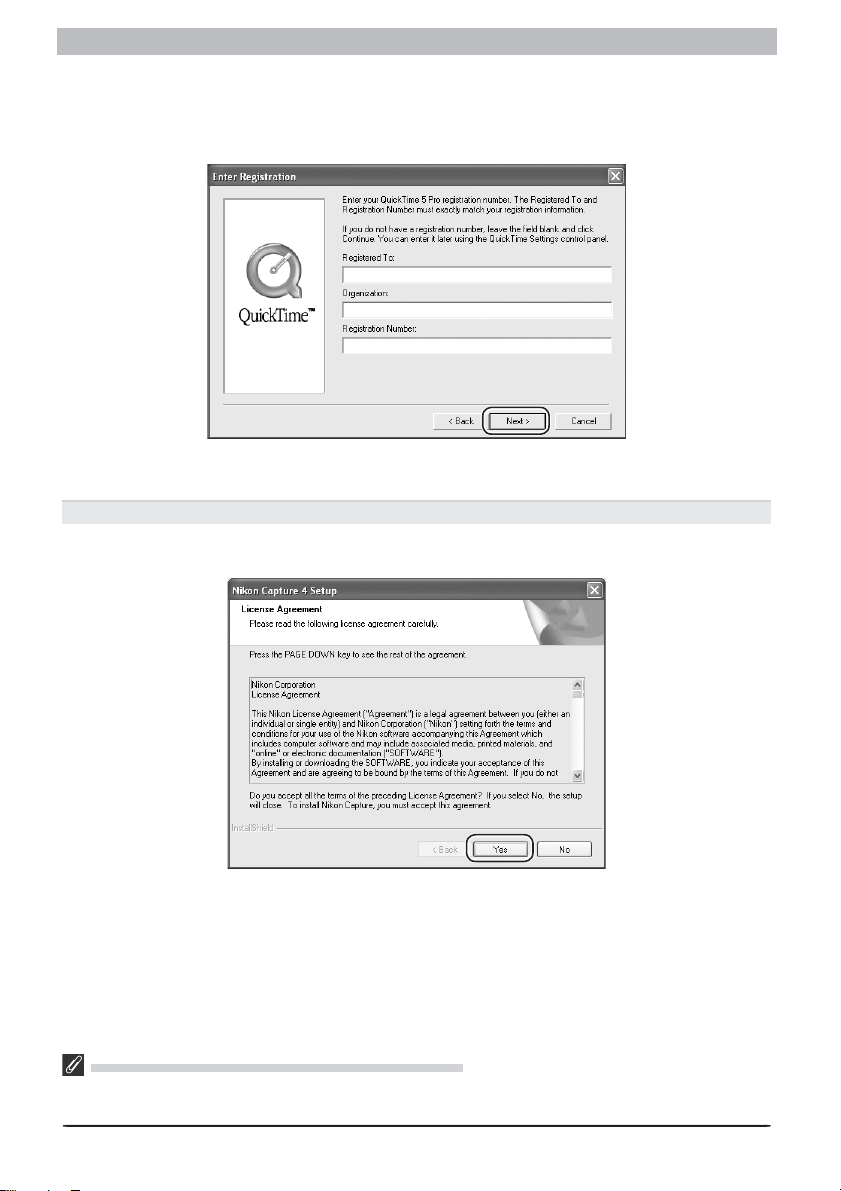
2.2 — Install Quick Time 5.0.2
If you opted to install QuickTime 5.0.2, installation will open with the dialog shown below.
Leave the reg is tra tion in for ma tion blank and click Next. Follow the on-screen instructions to
complete in stal la tion and proceed to the next step.
2.3 — Install Nikon Capture 4
Installation of Nikon Capture 4 begins with the license agreement.
2.3.1 — Accept the license agreement
After making sure that you have read and understood the contents of the agreement, click
Yes to continue installation.
Earlier Versions of Nikon Capture and Nikon View
Before you can install Nikon Capture 4, you must uninstall any earlier versions of Nikon Capture or Nikon
View.
20
Page 23
Installing Nikon Capture 4 Under Windows
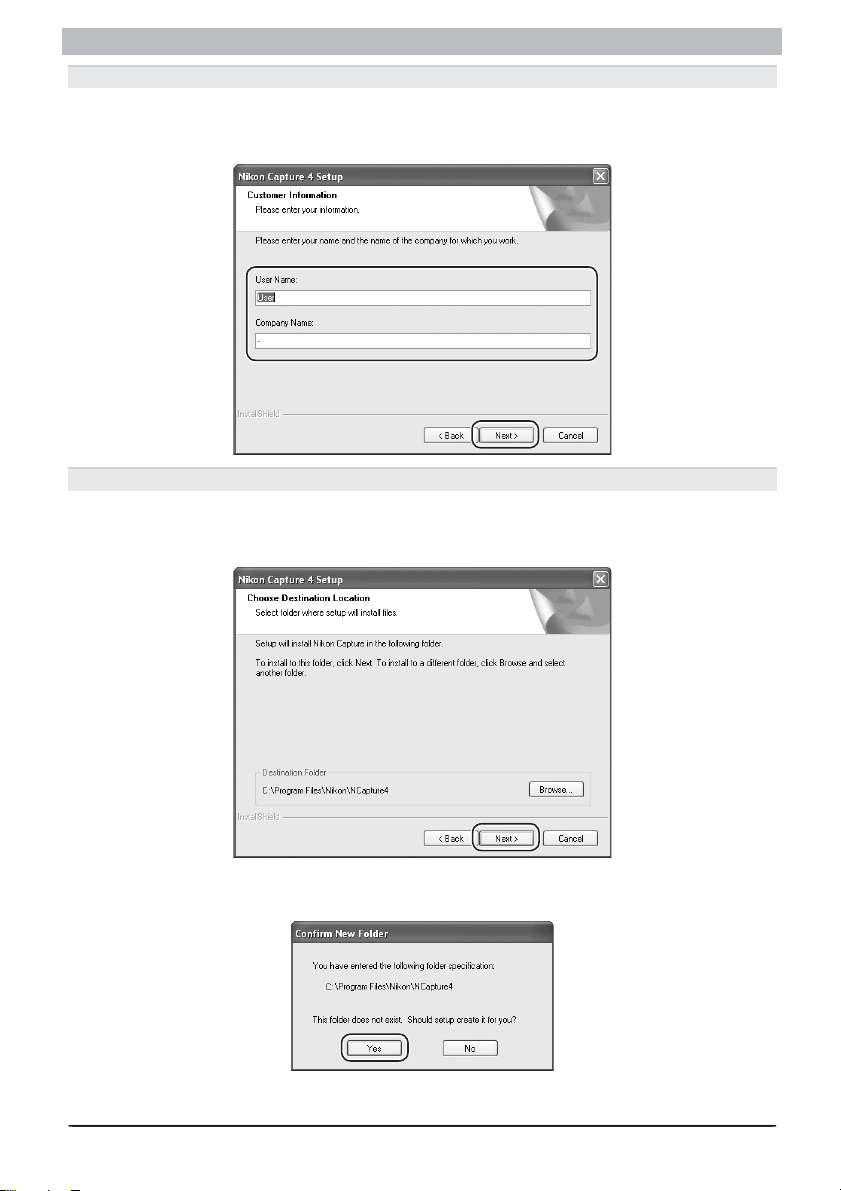
2.3.2 — Personalize your copy of Nikon Capture 4
Enter your name and company (if applicable) to activate the Next button. Clicking Next will
display a confi rmation dialog; if the information you entered is correct, click Yes to proceed
to the next step.
2.3.3 — Choose a location
The folder to which Nikon Capture 4 will be installed is shown in the Des ti na tion Folder area
(the default location is …\Program Files\Nikon\NCapture4). To install to this folder, click Next.
To select a new folder, click the Browse… button and navigate to the desired location.
If the chosen folder does not already exist, clicking Next will display the following dialog.
Click Yes to create a folder in the location shown.
21
Page 24
Windows
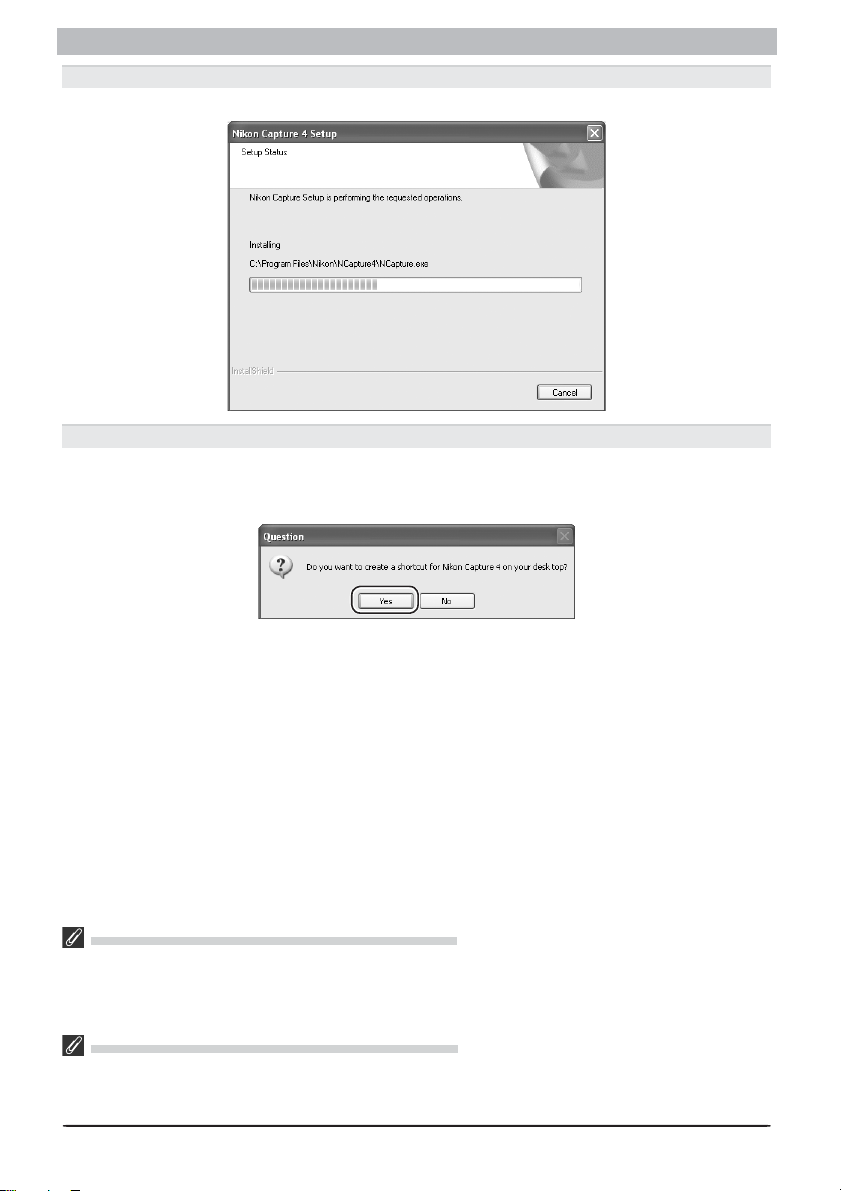
2.3.4 — Start installation
While installation is in progress, the dialog shown below will be displayed.
2.3.5 — Create a shortcut on the desktop
When the progress indicator reaches 100%, the dialog shown below will appear. Click Ye s to
cre ate a short cut, al low ing you to start Nikon Capture 4 directly from an icon on the desk top.
If you do not want to create a shortcut, click No.
Associating File Extensions with Nikon Capture 4
If Nikon Scan or other software that uses the same fi le extensions as Nikon Capture is installed, a dialog
will be displayed asking whether you would like to as so ci ate Nikon Capture 4 with the ex ten sions for
color balance settings (*.nca), tone curves (*.ncv), and other image ad just ment set tings fi les. To associate
Nikon Capture 4 with these extensions (recommended), click Yes .
Choosing an Application for Opening Image Files
If Adobe Photoshop is installed on your system, a dialog will be displayed asking if you want to use Photoshop to open image fi les saved in Nikon Capture 4. Click Yes to select Photoshop as the ap pli ca tion
that will be used to open image fi les.
22
Page 25
Installing Nikon Capture 4 Under Windows
2.3.6 — Choose default color management settings
To use the color-space profi le embedded in images opened in Nikon Capture 4, choose (A)
Use the color space of the fi le to be opened as the working color space. To choose a
default RGB color-space profi le for the work ing color space in Nikon Capture 4, choose (B)
Always use the default RGB color space as the work ing color space. When this option
is se lect ed, you can choose the default color-space profi le from a pull-down menu. Click OK
to put changes into effect and proceed to the next step.
Clicking About Color Spaces displays a description of the different color-space profi les. Use
this ex pla na tion to help you choose a color-space profi le.
The default output color-space profi le can be changed at any time after installation in the
Color Man age ment tab of the Nikon Capture 4 Editor or Nikon Capture 4 Camera Control
Preferences dialog.
23
Page 26
Windows
2.3.7 — Complete installation of Nikon Capture 4
The following dialog is displayed when installation of Nikon Capture 4 is complete. Click Finish to proceed to the next step.
24
Page 27
Installing Nikon Capture 4 Under Windows
2.4 — Install Nikon View 6
Installation of Nikon View 6 begins with the license agreement shown in Step 2.4.1.
2.4.1 — Accept the license agreement
After making sure that you have read and understood the contents of the agreement, click
Yes to continue installation.
2.4.2 — Choose a location
The folder to which Nikon View 6 will be installed is shown in the Des ti na tion Folder area
(the default location is …\Program Files\Nikon\NKView6). To install to this folder, click Next.
To select a new folder, click the Browse… button and navigate to the desired location.
If the chosen folder does not already exist, clicking Next will display the following dialog.
Click Yes to create a folder in the location shown.
25
Page 28
Windows
2.4.3 — Create a shortcut on the desktop
When the Nikon View application fi les have been installed, the dialog shown below will ap pear. Click Yes to cre ate a short cut, al low ing you to start Nikon View 6 directly from an icon
on the desk top. If you do not want to create a shortcut, click No.
2.4.4 — Complete installation of Nikon View 6
The following dialog is displayed when installation of Nikon View 6 is complete. Click
Finish to pro ceed to the next step.
2.5 — Complete installation
The dialog shown below will appear when installation is complete. Click Yes to restart your
computer.
Earlier Versions of Nikon Capture and Nikon View
Before you can install Nikon View 6, you must uninstall any earlier versions of Nikon Capture or Nikon
View. Note that Nikon View 6 does not support connection of COOLPIX 950, 910, 900, 800, or 700
digital cameras. It can however be used to view photographs taken with these cameras if the camera
memory card is inserted in a card reader or PC card slot.
26
Page 29
Connecting to a Computer
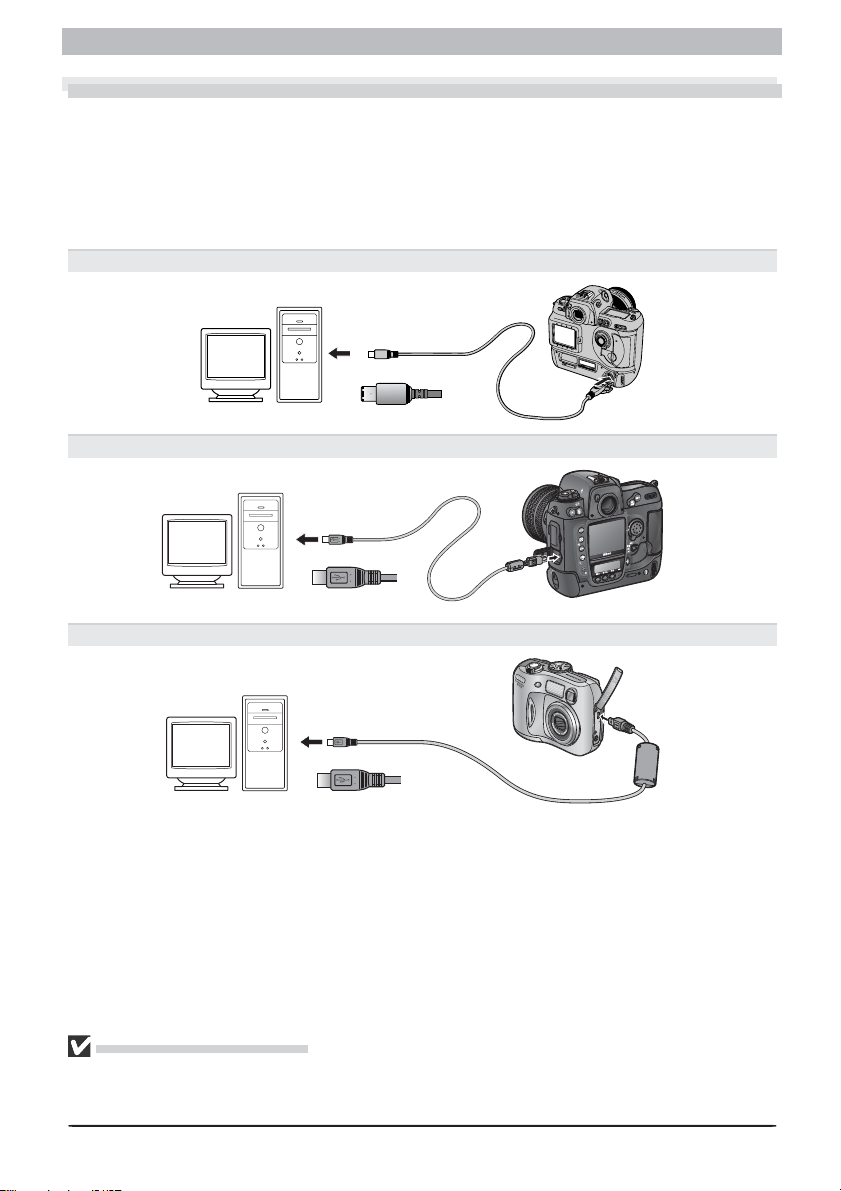
Connecting to a Computer
If you are using a computer running Windows, make sure that you install Nikon Capture 4
before connecting your camera to the computer for the fi rst time. After installing Nikon Capture 4, turn the camera on and con nect it to the computer, or insert the memory card into a
card reader or a PC card slot.
For more information about connecting your camera to a computer, see the doc u men ta tion
provided with your camera.
D1 / D1
X / D1H (IEEE 1394 / Firewire Interface)
D100 / D2H (USB Interface)
C
L
C
S
A
/
V
O
U
T
D
C
I
N
COOLPIX Series (USB Interface)
Use a Reliable Power Source
To ensure that data transfer is not interrupted, be sure that the battery is fully charged. If in doubt,
charge the battery before use or use an AC adapter (available separately). If the battery is ex haust ed
during transfer, transfer will be interrupted and data may be lost.
27
Page 30
Windows
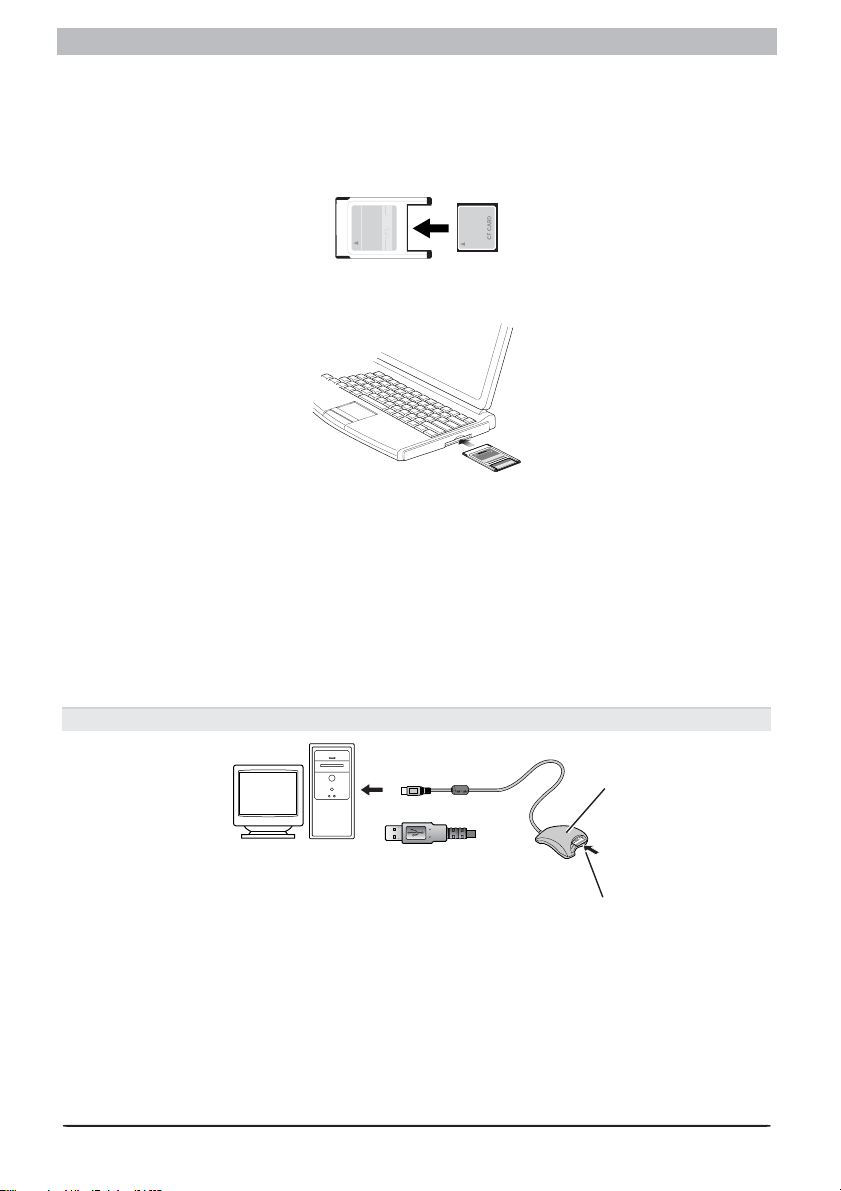
Using a PC Card Slot
When inserted in a PC-card adapter (available separately), the camera memory card func tions
as a Type II PCMCIA ATA card, allowing images to be read from the card.
Inserting a Memory Card
Remove the memory card from the camera and insert it in the adapter.
Insert the adapter into a PCMCIA TYPE II ATA card slot on your computer. For more in for ma tion on inserting the adapter, see the documentation pro vid ed with your com put er.
1
M
T
D
d
A
r
-
a
C
C
E
h
s
a
l
F
t
c
a
p
m
R
o
C
E
T
P
M
T
A
F
d
r
C
D
a
4
C
6
A
-
h
s
C
a
l
F
E
t
c
a
p
m
o
C
Depending on your computer’s operating environment, you may need to install software,
register the card adapter, or adjust OS settings when the adapt er is in sert ed into the card slot.
For more in for ma tion, refer to the instruction manual for your operating system.
Using a Card Reader
Images on the memory card can also be viewed using a card reader.
Inserting a Memory Card
After removing the memory card from the camera, insert it in the card reader and con nect
the reader to the computer. See the documentation provided with the card reader for more
in for ma tion on connecting it to a computer.
Card reader (USB interface)
28
Card reader
Memory card
Page 31

Connecting to a Computer
Starting Nikon Transfer
Once in stal la tion is com plete, Nikon Trans fer will start au to mat i cal ly when ev er your Nikon
digital cam era is con nect ed to your com put er and turned on, or when the camera mem o ry
card is inserted in a PC card slot or in a card reader connected to the computer. Note that only
one camera can be connected to the computer at a time.
For information on using other components of Nikon Capture 4, see the Nikon Capture 4
User’s Manual.
If Nikon Transfer Does Not Start
If Nikon Transfer does not start, refer to Device Registration to confi rm that the cam era is reg is tered as a
device with your computer.
Auto Start
Nikon Transfer will start automatically when:
• A supported camera is connected while on and with a memory card in place
• A supported camera with a memory card in place is connected and then turned on
• A memory card from a supported camera (COOLPIX 600 excluded) is in sert ed in a card reader or PC card
slot
29
Page 32

Windows
Starting Nikon Transfer under Win dows XP
The procedure for starting Nikon Transfer under Windows XP Home Edi tion/Pro fes sion al dif fers from that for other operating systems. Under Windows XP, the Removable Disk dialog
is displayed when you con nect the camera to the computer or insert the memory card into
a card reader or PC card slot. Select Copy pictures to a folder on my com put er using
Nikon View 6 in this dialog to start Nikon Transfer.
Note that the Removable Disk dialog is not displayed when a D1, D1X, D1H, or COOLPIX990/
880 camera is connected; instead, Nikon Trans fer starts au to mat i cal ly. Note also that the
Removable Disk dialog is not dis played if the memory card contains only movies.
Removable Disk dialog
Starting Nikon Transfer from the Removable Disk Dialog
To start Nikon Transfer under Windows XP, follow the steps below.
1. Connect the camera to your computer using an interface cable or in sert the memory card
in a card reader or PC card slot.
2. Turn the camera on. The Removable Disk dialog will be displayed.
3. Select Copy pic tures to a folder on my computer using Nikon View 6.
4. Click OK. Nikon Transfer will start.
30
Select Nikon
View 6
Page 33

Connecting to a Computer
“Always do the selected action”
If Always do the selected action is checked when Copy pictures to a folder on my com put er (using Nikon View 6) is selected in the Re mov able Disk dialog, the Re mov able Disk
dialog will not be dis played the next time you connect a camera to the com put er or insert
a mem o ry card in a card reader or PC card slot. Instead, Nikon Trans fer will start automatically.
If Always do the selected action is not checked, the Removable Disk dialog will be dis played.
Even if you check Always do the selected action, Removable Disk dialog will ap pear when:
• you use a different cam era from the one you were using when you checked Al ways do
the se lect ed action
• you use a different USB port from the one you were using when you checked Always do
the selected action
The Removable Disk Dialog
The Removable Disk dialog will not be displayed when:
• A D1, D1
• You connect a camera using PTP. The Select the program to launch for this action dialog will be
displayed instead.
• A memory card containing only hidden pictures or no pictures at all is inserted in a camera con nect ed
using Mass Stor age.
X, D1H,COOLPIX 990, or COOLPIX 880 is connected. Nikon Transfer will start automatically.
31
Page 34

Windows
Uninstall
Uninstalling Nikon Capture 4 and Nikon View 6
This section describes how to uninstall the Windows versions of Nikon Capture 4 and Nikon
View 6.
Uninstalling Nikon Capture 4
From the Start menu, select All Programs > Nikon
1
Capture 4 > Nikon Capture 4 Uninstall (Windows
XP) or Programs > Nikon Capture 4 > Nikon Capture
4 Uninstall (other versions of Windows). The uninstall
program will start.
The uninstall pro gram will display the message, “Do you want to completely remove the
2
se lect ed ap pli ca tion and all of its components?” Click OK to uninstall Nikon Capture 4.
If any of the components used by Nikon Capture 4 are read-only or are used by other
3
pro grams, a confi rmation dialog will be displayed. Follow the instructions in the dialog to
remove components or leave them untouched.
The dialog shown below will be displayed when the uninstall program has fi nished re-
4
mov ing Nikon Capture 4 from your system. Confi rm that Yes, I want to restart my
com put er now is selected and click Finish to restart your computer.
32
Page 35

Uninstall
Uninstalling Nikon View 6
From the Start menu, se lect All Programs > Nikon
View 6 > Nikon View 6 Uninstall (Win dows XP) or
1
Programs > Nikon View 6 > Nikon View 6 Uninstall
(oth er ver sions of Windows). The uninstall program will
start.
The uninstall program will display the message, “Do you want to completely remove the
2
se lect ed ap pli ca tion and all of its components?” Click OK to uninstall Nikon View 6.
If any of the components used by Nikon View 6 are read-only or are used by other pro-
3
grams, a confi rmation dialog will be displayed. Follow the instructions in the dialog to
remove com po nents or leave them untouched.
The dialog shown below will be displayed when the uninstall program has fi nished remov-
ing Nikon View 6 from your system. Confi rm that Yes, I want to restart my com put er
4
now is selected and click Finish to restart your computer.
Windows XP Home Edition, Windows XP Professional, Windows 2000 Professional
Uninstalling Nikon Capture 4 and Nikon View 6 under a multi-user operating system requires Ad min is tra tor priv i leg es. When uninstalling Nikon Capture 4 or Nikon View 6, log in as:
Windows XP Home Edition/Professional Computer administrator
Windows 2000 Professional Administrator
33
Page 36

Windows
Device Registration
If you connect a supported digital camera to a Windows computer after installing Nikon Capture 4 and restarting the computer, Windows will automatically identify the camera as a new
device and register the camera with the system. This section explains how to confi rm that the
camera is correctly registered. Read the section for your camera and operating system.
Camera Operating system
Windows XP Home Edition /Pro fes sion al 35
USB cameras (D100/ D2H /COOLPIX se ries)
COOLPIX990
COOLPIX880
Nikon D1
Nikon D1X
Nikon D1H
Nikon D1 previously registered under Nikon
View DX or Nikon Capture 2 or earlier
Windows 2000 Professional
Windows Millennium Edition (Me)
Windows 98 Second Edition (SE) 41
Windows XP Home Edition /Pro fes sion al
Windows 2000 Professional
Windows Millennium Edition (Me)
Windows 98 Second Edition (SE) 62
Windows XP Home Edition /Pro fes sion al 68
Windows 2000 Professional
Windows Millennium Edition (Me) 83
Windows 98 Second Edition (SE) 90
Windows 2000 Professional
Windows Millennium Edition (Me) 87
Windows 98 Second Edition (SE) 95
37
39
48
53
58
72
78
34
Page 37

Device Registration: D100/D2H/COOLPIX-Series Cameras
D100/D2H/COOLPIX-Series Cameras
Windows XP Home Edition/Professional
The following explanation uses D100 as an example.
After installing Nikon Capture 4 and restarting the computer,
connect your camera to the computer using a USB cable and
turn the camera on. The camera will be registered automatically.
If the Removable Disk dialog is displayed after registration, click Cancel to close the dialog
box.
Follow the instructions below to check that the camera has been correctly registered with the
system.
Step 1
Select Control Panel from the Start menu. In the Control Panel window, click the Performance and Maintenance icon to open the Performance and Maintenance window. Click
the System icon in the Performance and Maintenance window to open the System Properties
window. Select the Hardware tab and click the Device Manager button.
Step 2
The Device Manager will be displayed. After confi rming that
Disk drives, Storage volumes, and Universal Serial Bus
controllers are listed in the Device Manager, click the plus
sign (+) next to each of these device types.
Logging On
You will need to log on as Computer Administrator to register the camera.
Before Connecting the Camera
Be sure to install Nikon Capture 4 before connecting your camera to the computer.
35
Page 38

Windows
Step 3
Confi rm that NIKON D100 USB Device, Generic Volume,
and USB Mass Storage Device are listed respectively under
Disk drives, Storage volumes, and Universal Serial Bus
controllers. Double-click each of these listings to open the
associated Properties window.
If the NIKON D100 USB Device is listed under Other de-
vices, delete this entry and then turn the camera off and
then on again.
Step 4
The Properties dialogs for the selected devices will be displayed. Click the General tab and
confi rm that This device is working properly appears under Device status. Click OK.
Device registration is now complete. Click OK to close the System Properties dialog.
PTP
If the USB option in the camera setup menu is set to PTP, confi rm
that the camera is listed under
“Imaging devices.”
36
Page 39

Device Registration: D100/D2H/COOLPIX-Series Cameras
Windows 2000 Professional
The following explanation uses D100 as an ex am ple.
After in stall ing Nikon Capture 4 and re start ing
the com put er, con nect your cam era to the
com put er us ing a USB ca ble and turn the
cam era on. The cam era will be registered
au to mat i cal ly.
Follow the instructions below to check that the camera has been correctly registered with the
system.
Step 1
Right-click the My Computer icon on the
desk top. Open the System Prop er ties dialog
by se lect ing Properties from the menu that
ap pears. Open the Hardware tab and click
the Device Man ag er… button in the De vice
Man ag er area.
Step 2
The Device Manager will be displayed. After
con fi rm ing that Disk drives, Storage vol-
umes, and Uni ver sal Serial Bus con trol lers
are listed in the Device Manager, click the plus
sign (+) next to each of these device types.
Logging On
Log on as Administrator to register the camera.
Before Connecting the Camera
Be sure to install Nikon Capture 4 before connecting your camera to the computer.
37
Page 40

Windows
Step 3
irm that
Conf
Ge ner ic vol ume, and USB Mass Stor age De-
vice are list ed re spec tive ly un der Disk drives,
Stor age volumes, and Uni ver sal Se ri al Bus
con trol lers. Double-click each of these listings
to open the as so ci at ed Prop er ties win dow.
If the NIKON D100 USB Device is list ed un der
Other de vic es, de lete this entry and then turn
the cam era and off and then on again.
Step 4
The Properties dialogs for the selected devices will be displayed. Click the General tab and
confi rm that This device is work ing prop er ly appears under Device status. Click OK.
NIKON D100 USB Device
,
Device reg is tra tion is now complete. Click OK to close the System Prop er ties dialog.
38
Page 41

Device Registration: D100/D2H/COOLPIX-Series Cameras
Windows Millennium Edition (Me)
The following explanation uses D100 as an example.
After in stall ing Nikon Capture 4 and re start ing
the com put er, con nect your cam era to the
com put er us ing a USB ca ble and turn the
cam era on. The cam era will be registered
au to mat i cal ly.
Follow the in struc tions below to check that the camera has been cor rect ly reg is tered with the
system.
Step 1
Right-click the My Computer icon on the
desk top. Open the Sys tem Prop er ties dialog
by se lect ing Properties from the menu that
ap pears. Click the Device Manager tab.
Step 2
After confi rming that Disk drives, Stor age
de vice, and Universal Se ri al Bus con-
trol lers are listed in the De vice Manager tab,
click the plus sign (+) next to each of these
device types.
Before Connecting the Camera
Be sure to install Nikon Capture 4 before con nect ing your cam era to the com put er.
39
Page 42

Windows
Step 3
Confi rm that NIKON D100, USB Disk, and USB Mass Stor age De vice are listed re spec tive ly
under Disk drives, Stor age de vice, and Uni ver sal Serial Bus con trol lers. Double-click
each of these list ings to dis play the as so ci at ed Properties window.
If the NIKON D100 is listed under Other devices, delete this entry and then turn the camera
off and then on again.
Step 4
The Properties dialogs for the selected devices will be displayed. Click the General tab and
confi rm that This device is working prop er ly appears under De vice status. Click OK.
Device reg is tra tion is now complete. Click OK to close the System Prop er ties dialog.
40
Page 43

Device Registration: D100/D2H/COOLPIX-Series Cameras
Windows 98 Second Edition (SE)
The following ex pla na tion uses D100 as an ex am ple.
After in stall ing Nikon Capture 4 and re start ing
the computer, connect your camera to the
com put er using a USB ca ble and turn the
cam era on. The cam era will be reg is tered
au to mat i cal ly.
Follow the instructions below to check that the camera has been cor rect ly reg is tered with the
system.
Step 1
Right-click the My Com put er icon on the
desk top and select Prop er ties from the menu
that appears. The System Prop er ties dialog will
be dis played. Click the Device Manager tab.
Step 2
After confi rming that Disk drives, Hard disk
controllers, and Uni ver sal Se ri al Bus con trol lers are listed in the Device Man ag er tab,
click the plus sign (+) next to each of these
device types.
Before Connecting the Camera
Be sure to install Nikon Capture 4 before con nect ing your camera to the com put er.
41
Page 44

Windows
Step 3
Confi rm
Mass Storage Driver are listed re spec tive ly under Disk drives, Hard disk con trol lers, and
Uni ver sal Se ri al Bus con trol lers. Double-click each of these listings to open the as so ci at ed
Prop er ties window.
If the Nikon D100 is listed under Other de-
vic es, reinstall the device driv er as instructed
in “Reinstalling the De vice Driver” ( 43).
If the three drivers above are not listed in the Device Manager and NIKON D100 is not listed
under Other de vic es, dis con nect the camera and re start the com put er. When the computer
has re start ed, re con nect the cam era to the computer.
Step 4
The properties for the selected devices will be displayed. Click the Gen er al tab and confi rm
that This device is working prop er ly appears un der De vice status. Click OK.
that NIKON D100, Nikon Dig i tal Cam era Con trol ler, and Nikon Digital Cam era
Device reg is tra tion is now complete. Click OK to close the System Prop er ties dialog.
42
Page 45

Device Registration: D100/D2H/COOLPIX-Series Cameras
Reinstalling the Device Driver — Windows 98 Second Edition (SE)
If NIKON D100 is listed under Other devices, you will need to reinstall the device driver.
Step 1
Double-click the NIKON D100 listing under
Oth er de vic es.
Step 2
The NIKON D100 Properties dialog will be
dis played. Open the Gen er al tab and click
Re in stall Driver.
Step 3
The Update Device Driver Wizard will be dis played; click Next.
43
Page 46

Windows
Step 4
The dialog box shown at right will be dis played. Select Search for a better driver
than the one your device is using now
and click Next.
Step 5
Insert the
drive. To prevent the Install Center dialog from
open ing automatically, hold down the shift key
while inserting the CD. Check the CD-ROM
drive option and click Next.
The Install Center Dialog
If the Install Center dialog appears when the
CD is inserted, click Exit to close the di a log.
Nikon Capture 4 CD into a CD-ROM
Step 6
The dialog shown at right will be displayed.
Click Next.
No Driver Found
If a message is displayed stating that Win dows was un able to fi nd a suit able driver,
this may indicate that the Nikon Capture 4
CD was not correctly inserted in the CD-ROM
drive or that the ap pro pri ate check box was
not selected. Click Back to return to the di a log shown in Step 5, and confi rm that your
settings are cor rect.
44
Page 47

Device Registration: D100/D2H/COOLPIX-Series Cameras
Step 7
A dialog will be displayed indicating that driv er
update was successful. Click Finish to close
the dialog.
Step 8
Click the General tab in the Nikon Digital
Cam era Mass Storage Driver dialog and con fi rm that This de vice is working prop er ly
ap pears un der De vice sta tus. Click Close.
Step 9
The wizard will now start installation of the
Nikon Dig i tal Cam era Con trol ler with the
di a log shown at right. Click Next.
45
Page 48

Windows
Step 10
Select Search for the best driver for your
device and click Next.
Step 11
After confi rming that the Nikon Capture 4 CD
is inserted in the CD-ROM drive, check the
CD-ROM drive option and click Next.
Step 12
A dialog will be displayed stating that Win dows has found the drivers for “Nikon Dig i tal
Camera Controller”; click Next.
No Driver Found
If a message is displayed stating that Win dows
was un able to fi nd a suit able driver, this may
in di cate that the Nikon Capture 4 CD was not
cor rect ly in sert ed in the CD-ROM drive or that
the ap pro pri ate check box was not selected.
Click Back to re turn to the di a log shown in
Step 11, and confi rm that your settings are
correct.
46
Page 49

Device Registration: D100/D2H/COOLPIX-Series Cameras
Step 13
A dialog will be displayed indicating that driv er
update was successful. Click Finish to close
the dialog.
Step 14
Click the General tab in the Nikon Digital Cam era Con trol ler Prop er ties dialog and confi rm
that This device is working properly ap pears un der De vice status. Click OK.
Step 15
Click OK to close the System Properties
di a log.
47
Page 50

Windows
COOLPIX990/COOLPIX 880
Windows XP Home Edition/Professional
The following explanation uses COOLPIX990 as an example.
After installing Nikon Capture 4 and restarting the computer, connect your camera to the
computer using a USB cable and turn the camera on. The camera will be registered automatically.
Follow the instructions below to check that the camera has been correctly registered with the
system.
Step 1
Select Control Panel from the Start menu. In the Control
Panel window, click the Performance and Maintenance
icon to open the Performance and Maintenance window.
Click the System icon in the Performance and Maintenance
window to open the System Properties window. Select the
Hardware tab and click the Device Manager button to open
Device Manager dialog.
When the Camera Is Not Registered Automatically
If the computer fails to register the camera automatically, a message will appear instructing you to insert
the system disk. Insert the Windows XP CD into the CD-ROM drive and click OK. If a warning is dsiplayed,
click Continue Anyway to install the device drivers.
Logging On
You will need to log on as Computer Administrator to register the camera.
Before Connecting the Camera
Be sure to install Nikon Capture 4 before connecting your camera to the computer.
48
Page 51

Device Registration: COOLPIX990/COOLPIX880
Step 2
After confi rming that Imaging devices is listed in the Device
Manager dialog, click the plus sign (+) to its left. If no Imaging
devices listing appears or if Nikon Digital Camera E990 is listed
under Other Devices, reinstall the device driver as instructed in
“Reinstalling the Device Driver” (
If Imaging devices is not listed in the Device Manager and
Nikon Digital Camera E990 is not listed under Other devices,
disconnect the camera and restart the computer. Reconnect the
camera after the computer has restarted.
Step 3
After confi rming that Nikon COOLPIX990 is listed under Imaging devices, double-click the listing to open the Properties
window.
50).
Step 4
Click the General tab in the Nikon COOLPIX990 Properties dialog
and confi rm that This device is working properly appears
under Device status. Click OK.
Device registration is now complete. Click OK to close the System Properties dialog.
49
Page 52

Windows
Reinstalling the Device Driver — Windows XP Home Edition/Professional
If Nikon Digital Camera E990 (E880) is listed under Other devices, you will need to reinstall
the device driver.
Step 1
Double-click the listing for the Nikon Digital
Camera E990 that appears under Other
devices.
Step 2
The Nikon Digital Camera E990 Properties
dialog will be displayed. Open the General
tab and click Reinstall Driver.
Step 3
The Hardware Update Wizard will be displayed. Select Install from a list or specifi c
location and click Next.
50
Page 53

Step 4
The dialog shown at right will be displayed. Select
Search removable media and click Next.
Step 5
The dialog shown at right will be displayed.
Step 6
A dialog will be displayed indicating that
driver update was successful. Click Finish
to close the dialog.
Device Registration: COOLPIX990/COOLPIX880
51
Page 54

Windows
Step 7
Click the General tab in the Nikon COOLPIX990
Properties dialog and confi rm that This device
is working properly appears under Device
status. Click Close.
Click OK to close the System Properties dialog.
52
Page 55

Device Registration: COOLPIX990/COOLPIX880
Windows 2000 Professional
The following explanation uses COOLPIX990 as an example.
After installing Nikon Capture 4 and restarting the computer, connect your camera to
the computer using a USB cable and turn the
camera on. The camera will be registered
automatically.
Follow the instructions below to check that the camera has been correctly registered with the
system.
Step 1
Right-click the My Computer icon on the
desktop and select Properties from the
menu that appears. The System Properties
dialog will be displayed. Open the Hardware
tab and click the Device Manager button in
the Device Manager area.
Step 2
After confi rming that Imaging devices is
listed in the Device Manager dialog, click the
plus sign (+) to its left.
Logging On
Log on as the Administrator when registering the camera.
Before Connecting the Camera
Be sure to install Nikon Capture 4 before connecting your camera to the computer.
When the Camera Is Not Registered Automatically
If the computer fails to register the camera automatically, a message will appear instructing you to insert
the system disk. Insert the Windows 2000 Professional CD into the CD-ROM drive and click OK. A warning dialog may be displayed; click Yes to install the device drivers.
53
Page 56

Windows
If no Imaging devices listing appears or if
Nikon Digital Camera E990 is listed under
Other Devices, reinstall the device driver as
instructed in “Reinstalling the Device Driver”
(
55).
If Imaging devices is not listed in the Device
Manager and Nikon Digital Camera E990
is not listed under Other devices, disconnect the camera and restart the computer.
Reconnect the camera after the computer
has restarted.
Step 3
After confi rming that Nikon COOLPIX990 is
listed under Imaging devices, double-click
the listing to open the Properties window.
Step 4
Click the General tab of the Nikon COOLPIX990 Properties dialog and confi rm that
This device is working properly appears
under Device status. Click OK.
Device registration is now complete. Click OK to close the System Properties dialog.
54
Page 57

Device Registration: COOLPIX990/COOLPIX880
Reinstalling the Device Driver — Windows 2000 Professional
If Nikon Digital Camera E990 (E880) is listed under Other devices, you will need to reinstall
the device driver.
Step 1
Double-click the listing for the Nikon Digital
Camera E990 that appears under Other
devices.
Step 2
The Nikon Digital Camera E990 Properties
dialog will be displayed. Open the General
tab and click Reinstall Driver.
Step 3
The Upgrade Device Driver Wizard will be
displayed; click Next.
55
Page 58

Windows
Step 4
The dialog shown at right will be displayed.
Select Search for a suitable driver for my
device and click Next.
Step 5
The dialog shown at right will be displayed.
Insert the Nikon Capture 4 CD into the CDROM drive. To prevent the Install Center
dialog from opening automatically, hold down
the shift key while inserting the CD. Select the
CD-ROM drives option and click Next.
The Install Center Dialog
If the Install Center dialog appears when the
CD is inserted, click Exit to close the dialog.
Step 6
The dialog shown at right will be displayed.
Click Next.
No Driver Found
If a message is displayed stating that Windows
was unable to fi nd a suitable driver, this may
indicate that the Nikon Capture 4 CD was
not correctly inserted in the CD-ROM drive
or that the appropriate check box was not
selected. Click Back to return to the dialog
shown in Step 5, and confi rm that your settings are correct.
56
Page 59

Step 7
A dialog will be displayed indicating that driver
update was successful. Click Finish to close
the dialog.
Step 8
Click the General tab of the Nikon COOLPIX990 Properties dialog and confi rm that
This device is working properly appears
under Device status. Click Close.
Device Registration: COOLPIX990/COOLPIX880
Click OK to close the System Properties dialog.
57
Page 60

Windows
Windows Millennium Edition (Me)
The following ex pla na tion uses COOLPIX990 as an example.
After in stall ing Nikon Capture 4 and re start ing
the com put er, con nect your cam era to the
com put er us ing a USB ca ble and turn the
cam era on. The cam era will be reg is tered
au to mat i cal ly.
If a message is displayed prompting you to insert a disk, insert the Windows Millennium Edi tion
CD into a CD-ROM drive and click OK.
Follow the instructions below to check that the camera has been correctly registered with the
system.
Step 1
Right-click the My Computer icon on the
desk top and select Properties from the
menu that appears.
dialog will be displayed.
The System Prop er ties
Click the
Device
Man ag er tab.
Step 2
After confi rming
that Imaging Device is list ed
in the Device Man ag er tab, click the plus sign
(+) to its left.
Before Connecting the Camera
Be sure to install Nikon Capture 4 before connecting your camera to the computer.
58
Page 61

If no Imaging Device listing appears or if
Nikon Digital Cam era E990 is listed under
Other devices, re in stall the de vice driver as
in struct ed in “Re in stall ing the Device Driv er”
( 60).
If Imaging
Manager and Nikon Digital Cam era E990 is
not listed Other de vic es, dis con nect the cam-
era and restart the com put er. Re con nect the
camera af ter the com put er has re start ed.
Step 3
Aft
er confi rming that
list ed under Imaging De vice, dou ble click the
list ing to open the Prop er ties window.
Step 4
The Nikon COOLPIX990 Properties dialog will be
dis played. Click the Gen er al tab and con fi rm
that This device is working properly ap pears
under Device status. Click OK.
Device
is not listed in the De vice
Nikon COOLPIX990
is
Device Registration: COOLPIX990/COOLPIX880
Devic
e registration is now complete. Click OK to close the Sys tem Prop er ties dialog.
59
Page 62

Windows
Reinstalling the Device Driver — Windows Millennium Edition (Me)
If Nikon Digital Camera E990 (E880) is listed under Other devices, you will need to re in stall
the de vice driver.
Step 1
Double-click the listing for the Nikon Digital
Cam era E990 that ap pears un der Oth er
de vic es.
Step 2
The Nikon Digital Camera E990 Properties
di a log will be dis played. Open the Gen er al
tab and click Re in stall Driver.
Step 3
The Update Device Driver Wizard will be dis played. Insert the Nikon Capture 4 CD into
the CD-ROM drive. To prevent the Install
Center dialog from opening au to mat i cal ly,
hold down the shift key while inserting the
CD. After confi rming that Automatic search
for a bet ter driv er is se lect ed, click Next to
up date the device driver au to mat i cal ly.
The Install Center Dialog
If the Install Center dialog appears when the
CD is in sert ed, click Exit to close the dialog.
60
Page 63

Step 4
A dialog will be displayed indicating that driv er
update was successful. Click Fin ish to close
the dialog.
Step 5
Click
the General tab in the Nikon COOLPIX990
Prop er ties dialog and con fi rm that This de vice
is work ing properly appears under Device
status. Click Close.
Device Registration: COOLPIX990/COOLPIX880
Step 6
Click OK to close the System Properties
di a log.
61
Page 64

Windows
Windows 98 Second Edition (SE)
The following explanation uses COOLPIX990 as an example.
After in stall ing Nikon Capture 4 and re start ing
the com put er, con nect your cam era to the
com put er us ing a USB ca ble and turn the
cam era on. The cam era will be registered
au to mat i cal ly.
If a message is displayed prompting you to insert a disk, insert the Windows Second Edition
CD into the CD-ROM drive and click OK.
Follow the instructions below to check that the camera has been correctly registered with the
system.
Step 1
Right-click the My Computer icon on the
desk top and select Properties from the menu
that appears. The System Prop er ties dialog will
be dis played. Click the Device Man ag er tab.
Step 2
After confi rming that Imaging Device is list ed
in the Device Man ag er tab, click the plus sign
(+) to its left.
Before Connecting the Camera
Be sure to install Nikon Capture 4 before connecting your camera to the computer.
62
Page 65

If no Imaging Device listing appears or if
Nikon Digital Cam era E990 is listed under
Oth er devices, reinstall the de vice driver as
in struct ed in “Reinstalling the Device Driv er”
(
64).
If Imaging Device is not listed in the Device
Manager and Nikon Digital Camera E990 is
not listed Other devices, disconnect the cam era and restart the com put er. Reconnect the
cam era after the computer has restarted.
Step 3
After confi rming that Nikon COOLPIX990 is
list ed under Imaging De vice, double-click the
list ing to open the Prop er ties window.
Device Registration: COOLPIX990/COOLPIX880
Step 4
The Nikon COOLPIX990 Properties di a log will
be dis played. Click the General tab and con fi rm that This de vice is work ing properly
appears un der Device sta tus. Click OK.
Device registration is now complete. Click OK to close the System Prop er ties dialog.
63
Page 66

Windows
Reinstalling the Device Driver — Windows 98 Second Edition (SE)
If Nikon Digital Camera E990 (E880) is list ed under Other devices, you will need to re in stall
the device driver.
Step 1
Double-click the listing for the Nikon Digital
Camera E990 that ap pears under Oth er
de vic es.
Step 2
The Nikon Digital Camera E990 Properties
di a log will be dis played. Open the Gen er al
tab and click Reinstall Driver.
Step 3
The
Update Device Driver Wizard will be dis-
played; click Next.
64
Page 67

Step 4
The dialog shown at right will be displayed.
Se lect Search for a better driv er than the
one your device is using now and click
Next.
Step 5
The dialog shown at right will be displayed.
In s
ert the Nikon Capture 4 CD into the CD-ROM
drive. To prevent the Install Center dialog from
opening automatically, hold down the shift key
while inserting the CD. Select the CD-ROM
drive option and click Next.
The Install Center Dialog
If the Install Center dialog appears when the
CD is in sert ed, click Exit to close the dialog.
Device Registration: COOLPIX990/COOLPIX880
Step 6
The dialog shown at right will be displayed;
click Next.
No Driver Found
If a message is displayed stating that Win dows
was un able to fi nd a suit able driver, this may
in di cate that the Nikon Capture 4 CD was
not cor rect ly in sert ed in the CD-ROM drive
or that the ap pro pri ate check box was not
se lect ed. Click Back to re turn to the di a log
shown in Step 5, and con fi rm that your set tings are cor rect.
If prompted to insert a disk, insert the Windows 98 (Second Edi tion) CD and click OK.
65
Page 68

Windows
If the computer displays a dialog stating that usbscan.sys was not found, click Browse….
Double-click the win98 folder and click OK.
Confi rm that the win98 folder on the CDROM is displayed under Copy fi les from and
click OK.
The Windows 98 (Second Edition) CD
If the opening dialog for the Windows 98
(Sec ond Edi tion) CD is displayed, click the
close box to exit the dialog.
Step 7
A dialog will be displayed indicating that driv er
update was successful. Click Fin ish to close
the dialog.
Step 8
Click the General tab in the Nikon COOLPIX990 Properties dialog and con fi rm that
This de vice is working properly ap pears
under Device status. Click Close.
66
Page 69

Step 9
Click OK to close the System Properties
di a log.
Device Registration: COOLPIX990/COOLPIX880
67
Page 70

Windows
D1-Series Cameras
Windows XP Home Edition/Professional
Before You Begin
Confi rm that your OHCI-compliant IEEE 1394 interface board or card has been correctly reg is tered with the system.
Select Control Panel from the Start menu. In the
Control Panel window
and Main te nance icon to open the Per for mance and Main te nance win dow. Click the
Sys tem icon in the Per for mance and Main te nance window to open the Sys tem Prop er ties
win dow. Select the Hardware tab and click
the Device Man ag er button to open Device
Man ag er window shown at right.
If “IEEE 1394 Bus host controllers” is not list ed in the Device Manager, or if your IEEE 1394
in ter face board or card is listed as an un known or mis cel la neous device or is pre ced ed by a
red or yellow warning icon, follow the in struc tions in the manual provided with the board to
ensure that the drivers are properly in stalled.
After installing Nikon Capture 4 and re start ing the computer, connect your cam era to the
computer using an IEEE 1394 cable and turn the camera on. The camera will be reg is tered
automatically.
Follow the instructions below to check that the camera has been correctly registered with the
system.
Step 1
Select Control Pan el from the Start menu
to open the Control Pan el window. Click
the Performance and Main te nance icon
inside the Control Panel window to open the
Per for mance and Main te nance window. Click
the System icon in side the Per for mance and
Main te nance win dow to open the Sys tem
Prop er ties window. Select the Hard ware
tab and click the Device Manager but ton
to open Device Manager window.
fi rm ing that “Nikon 1394 Pro to col De vice” is
listed in the Device Man ag er, click the “+”
sign to its left.
, click the Per for mance
Af ter con-
The bus controller for
your IEEE 1394 board
or card should be list ed
un der “1394 Bus host
con trol lers.”
Logging On
You will need to log on as the “Computer Administrator” to register your camera.
Before Connecting the Camera
Be sure to install Nikon Capture 4 before connecting your camera to the com put er.
68
Page 71

If no “Nikon 1394 Pro to col Device” listing appears or if
is list ed under Other Devices, re in stall the
de vice driv er as instructed in “Re in stall ing the
Device Driv er”
If “Nikon 1394 Protocol Device” is not listed
in the Device Manager and “NIKON D1X” (or
“D1” or “D1H”) is not listed under Other De-
vices, dis con nect the camera, and restart the
com put er. When the computer has re start ed,
reconnect the camera.
Step 2
After confi rming that “Nikon Digital Camera
D1 Series” is list ed under “Nikon 1394 Protocol
De vice,” double-click the listing to open the
Prop er ties win dow.
“NIKON D1X” (or “D1” or “D1H”)
( 70).
Device Registration: D1-Series Cameras
Step 3
The Nikon Digital Camera D1 Series Prop er ties
di a log will be displayed. Click the Gen er al
tab and confi rm that “This device is work ing
prop er ly” ap pears under “Device sta tus”.
Click OK.
Close the Device Manager, then click OK to close the System Properties win dow. De vice
reg is tra tion is now complete.
69
Page 72

Windows
Reinstalling the Device Driver — Windows XP Home Edition /Professional
If “NIKON D1X” (or “D1” or “D1H”) appears under “Other Devices,” reinstall the de vice
driver as in struct ed below.
Step 1
Open the Device Manager dialog. Doubleclick the listing for the Nikon D1X (or D1 or
D1H) that ap pears under “Other devices.” The
Prop er ties di a log will be displayed.
Step 2
Open the General tab and click Reinstall
Driv er… .
Step 3
The “Hardware Update Wizard” dialog will
appear. Holding down the shift key to pre vent the Install Center dialog from open ing
au to mat i cal ly, insert the Nikon Capture 4
CD into the CD-ROM drive. (If the shift key
is not held down, the Install Center di a log
will appear when the CD-ROM is inserted.)
Select Install the software automatically
and click Next.
70
Page 73

Step 4
When the driver installation has been com plet ed, the dialog shown at right will be dis played; click Finish to close the wizard.
Step 5
Confi rm that “This device is working properly”
appears under “De vice sta tus” in the Gen er al
Ta b of the Nikon Digital Cam era D1 Series Prop er ties di a log. Click Close.
Device Registration: D1-Series Cameras
Step 6
Close the Device Manager, then click OK to close
the System Properties win dow.
71
Page 74

Windows
Windows 2000 Professional
Before You Begin
Confi rm that your OHCI-compliant IEEE 1394 interface board or card has been correctly reg is tered with the system.
Click the My Computer icon on the desktop
with the right mouse button and select Prop er -
ties from the menu that appears to display the
Sys tem Properties dialog. Open the Hard ware
tab and click the Device Man ag er… button
The bus controller for
your IEEE 1394 board
or card should be list ed
un der “1394 Bus host
con trol lers.”
in the Device Manager section.
If “1394 Bus host controllers” does not ap pear in the Device Manager, or if your IEEE 1394
in ter face board or card is listed as an unknown or miscellaneous device or is pre ced ed by a
red or yellow warning icon, follow the in struc tions in the manual provided with the board to
ensure that the drivers are prop er ly installed.
After installing Nikon Capture 4 and re start ing the computer, connect your camera to the
com put er using an IEEE 1394 cable and turn on the camera. The camera is registered au to mat i cal ly.
Follow the instructions below to check that the camera has been correctly registered with the
system.
Step 1
Once registration is complete, check that
the D1X (or D1 or D1H) has been cor rect ly
reg is tered with the system. Click the My
Com put er icon on the desk top with the
right mouse but ton and select Properties
from the menu that ap pears to dis play the
Sys tem Prop er ties di a log. Open the Hardware
tab and click the Device Man ag er… button
in the De vice Man ag er sec tion.
Log ging On
You will need to log on as “Administrator” to reg is ter the D1, D1X, or D1H.
Before Connecting the Camera
Be sure to install Nikon Capture 4 before connecting your camera to the computer.
Updating the Drivers for the D1
If you are already using the D1 with Nikon View DX or an earlier version of Nikon Capture, you will need
to update the camera drivers as described under “Updating the Drivers for the D1” (
78).
72
Page 75

Step 2
The Device Manager will be displayed. After
con fi rm ing that “Nikon 1394 Pro to col De vice”
is list ed in the Device Manager, click the “+”
sign to its left.
If no “Nikon 1394 Pro to col Device” listing appears or if “NIKON D1X” (or “D1” or “D1H”)
is list ed under Other Devices, re in stall the
de vice driver as instructed in “Re in stall ing the
De vice Driv er” (
If “Nikon 1394 Protocol Device” is not list ed
in the Device Manager and “NIKON D1X” (or
“D1” or “D1H”) is not listed under Other De-
vices, dis con nect the camera, and re start the
com put er. When the computer has re start ed,
reconnect the camera.
Step 3
After con fi rm ing that “Nikon Digital Camera
D1 Se ries” is listed under “Nikon 1394 Pro to col Device,” double-click the listing to open
the Prop er ties window.
74).
Device Registration: D1-Series Cameras
73
Page 76

Windows
Step 4
The Nikon Digital Camera D1 Series Prop er ties
dialog will be displayed. Click the Gen er al
tab and confi rm that “This device is work ing
prop er ly” appears under “Device sta tus”.
Click Close.
Close the Device Manager, then click OK to close the System Properties win dow. De vice
reg is tra tion is now complete.
Reinstalling the Device Driver — Windows 2000 Professional
If “Nikon 1394 Protocol Device” is listed under “Other Devices,” reinstall the device driver as
de scribed below.
Step 1
Click the My Computer icon on the desk top
with the right mouse button and select Prop-
er ties from the menu that appears to display
the Sys tem Properties di a log. Open the Hard ware tab and click the Device Man ag er…
button in the Device Man ag er sec tion.
74
Page 77

Step 2
The Device Manager will be displayed. Dou ble-click the listing for the Nikon D1X (or D1
or D1H) that appears under “Other De vic es”
or “Mis cel la neous Devices.”
Step 3
Open the General tab and click Reinstall
Driv er….
Device Registration: D1-Series Cameras
Step 4
The Upgrade Device Driver Wizard will be
dis played; click Next.
75
Page 78

Windows
Step 5
Select the search option and click Next.
Step 6
The dialog shown at right will be displayed.
Holding down the shift key to pre vent the Install
Center dialog from opening automatically, insert
the Nikon Capture 4 CD into the CD-ROM drive.
Se lect CD-ROM drives and click Next.
The Welco5me Dialog
If the Install Center dialog ap pears when the
CD is in sert ed, click the Quit button to close
the di a log.
Step 7
The dialog shown at right will be displayed;
click Next.
No Driver Found
If the message, “Windows was un able to fi nd
a suit able driv er for this de vice,” is dis played,
this may in di cate that the Nikon Capture 4 CD
was not cor rect ly in sert ed in the CD-ROM drive
or that the cor rect search lo ca tion was not
spec i fi ed. Click Back to re turn to the di a log
shown in Step 6, where you can con fi rm that
the cor rect lo ca tion has been specifi ed.
76
Page 79

Step 8
The dialog shown at right will be displayed;
click Finish.
Step 9
Confi rm that “This device is working properly”
appears under “De vice sta tus” in the General
Ta b of the Nikon Digital Camera D1 Series Prop er ties di a log. Click Close.
Device Registration: D1-Series Cameras
Step 10
Close the Device Manager, then click OK to
close the System Properties window.
77
Page 80

Windows
Updating the Drivers for the D1 — Windows 2000 Professional
If you are already using the D1 with Nikon View DX or Nikon Capture, you will need to update
the camera driver.
Step 1
Click the My Computer icon on the desk top
with the right mouse button and select Prop er -
ties from the menu that appears to display the
Sys tem Properties di a log. Open the Hard ware
tab and click the Device Man ag er… button
in the De vice Man ag er section.
Step 2
The Device Manager will be displayed. Under
the entry “Nikon 1394 De vice,” dou ble-click
“Nikon Digital Camera D1.”
Step 3
The Nikon Digital Camera D1 Properties di a log
will be displayed. Open the Driv er tab and
click Update Driver….
Log ging On
You will need to log on as “Administrator” to update the device drivers.
78
Page 81

Step 4
The Upgrade Device Driver Wizard will be
dis played; click Next.
Step 5
The dialog shown at right will be displayed.
Se lect the search option and click Next.
Device Registration: D1-Series Cameras
Step 6
The dialog shown at right will be displayed.
Hold ing down the shift key to pre vent the Install
Center di a log from opening automatically, insert
the Nikon Capture 4 CD into the CD-ROM drive.
Select CD-ROM drives and click Next.
The Install Center Dialog
If the Install Center dialog ap pears when the
CD is in sert ed, click the Quit button to close
the dialog.
79
Page 82

Windows
Step 7
The dialog shown at right will be displayed.
Select “Install one of the oth er drivers” and
click Next.
Step 8
Select Nikon Digital Camera D1 Series from the
dialog at right and click Next.
Step 9
The dialog shown at right will be displayed;
click Fin ish.
80
Page 83

Step 10
Confi rm that “This device is working prop er ly”
appears under “De vice sta tus” in the General
Ta b of the Nikon Digital Camera D1 Series Prop er ties di a log. Click Close.
Step 11
Close the Device Manager, then click OK to close
the System Properties win dow.
Device Registration: D1-Series Cameras
81
Page 84

Windows
Troubleshooting
• If “1394 Bus host Controller” is not displayed in the Device Man ag er, if the IEEE 1394 board
or card is listed under “Other Devices” or “Mis cel la neous Devices,” or if the listing for the
IEEE 1394 board or card is preceded by a red or yellow warning icon…
…the computer does not recognize the IEEE 1394 board or card. Refer to the doc u men ta tion
provided with your com put er or IEEE 1394 board or card for information on reg is ter ing the
board or card with the system.
• If “1394 Bus host Controller” is listed in the Device Manager but the entry for the Nikon
D1 (or D1X or D1H) does not appear…
…check the following:
• Is the camera on?
• Is the battery fully charged? If you are using an AC adapter (available sep a rate ly), is it
properly connected?
• Is the mode dial set to “PC”?
• Is the IEEE 1394 cable properly connected?
82
Page 85

Device Registration: D1-Series Cameras
Windows Millennium Edition (Me)
Before You Begin
Confi rm that the OHCI-compliant IEEE 1394 interface board has been cor rect ly reg is tered
with the system.
Click the My Computer icon on the desk top with the right mouse but ton and select
Prop er ties from the menu that appears. The
Sys tem Prop er ties dialog will be dis played; click
The bus controller for your
IEEE 1394 board or card
should be list ed un der “1394
Bus Con trol ler.”
the De vice Man ag er tab.
If “1394 Bus Controller” is not listed in the Device Manager, or if your IEEE 1394 interface
board or card is listed as an unknown or miscellaneous device or is pre ced ed by red or yellow
warning icons, follow the in struc tions in the manual pro vid ed with the board to ensure that
the drivers are properly installed.
After installing Nikon Capture 4 and restarting the computer, connect your camera to the
com put er using an IEEE 1394 cable and turn on the camera. The camera will be registered
automatically.
Follow the instructions below to check that the camera has been correctly registered with the
system.
Step 1
Once registration is complete, check that the
D1X (or D1 or D1H) has been cor rect ly reg is tered with the system. Click the
My Com put er
icon on the desktop with the right mouse but ton and select Properties
from the menu that
ap pears. The System Prop er ties di a log will be
dis played; click the De vice Man ag er tab.
Before Connecting the Camera
Be sure to install Nikon Capture 4 before connecting your camera to the computer.
Updating the Drivers for the D1
If you are already using the D1 with Nikon View DX or Nikon Capture, you will need to update the camera
drivers as described in “Updating the Drivers for the D1” ( 87).
83
Page 86

Windows
Step 2
The Device Manager sheet will be displayed.
Af ter confi rming that “Nikon 1394 Pro to col
De vice” is list ed in the Device Manager, click
the “+” sign to its left.
If no “Nikon 1394 Pro to col Device” listing ap pears or if
is listed un der Other Devices, reinstall the
de vice driv er as instructed in “Reinstalling the
Device Driv er”
If “Nikon 1394 Protocol Device” is not listed in the Device Manager and “NIKON D1X” (or
“D1” or “D1H”) is not listed under Other Devices, disconnect the camera, and restart the
com put er. When the computer has restarted, reconnect the camera to the computer.
Step 3
After confi rming that “Nikon Digital Camera
D1 Series” is listed under “Nikon 1394 Protocol
De vice,” double click the listing to open the
Prop er ties win dow.
Step 4
The Nikon Digital Camera D1 Series Prop er ties
di a log will be displayed. Click the Gen er al
tab and confi rm that “This device is work ing
properly” ap pears under “Device status.”
Click OK.
“NIKON D1X” (or “D1” or “D1H”)
(
85).
Click OK to close the System Properties window. Device registration is now complete.
84
Page 87

Device Registration: D1-Series Cameras
Reinstalling the Device Driver — Windows Millennium Edition (Me)
If “Nikon 1394 Protocol Device” is listed Other Devices, reinstall the device driver as de scribed
below.
Step 1
Click the My Computer icon on the desktop with the right mouse but ton and select
Prop er ties from the menu that appears. The
Sys tem Prop er ties dialog will be dis played; click
the De vice Manager tab.
Step 2
The Device Manager sheet will be displayed.
Dou ble-click the listing for the Nikon
D1 or D1H)
or “Mis cel la neous Devices.”
Step 3
The NIKON D1X (or D1 or D1H) Properties
di a log will be dis played. Open the General
tab and click Reinstall Driver….
that appears under “Other De vic es”
D1X (or
Step 4
The Update Device Driver Wizard will be dis played. Hold ing down the shift key to pre vent
the Install Center dialog from opening au to mat i cal ly, in sert the Nikon Capture 4 CD into
the CD-ROM drive. Con fi rm that “Au to mat ic
search for a better driv er (Rec om mend ed)”
is selected and click Next. The wiz ard will
au to mat i cal ly up date the de vice driv ers.
The Install Center Dialog
If the Install Center di a log ap pears when the
CD is in sert ed, click the Quit button to close
the dialog.
85
Page 88

Windows
Step 5
The dialog shown at right will be displayed;
click Fin ish.
Step 6
Confi rm that “This device is working properly”
ap pears under “De vice sta tus” in the General
Ta b of the Nikon Digital Camera D1 Series Prop er ties di a log. Click Close.
Step 7
Click OK to close the System Properties
win dow.
86
Page 89

Device Registration: D1-Series Cameras
Updating the Drivers for the D1 — Windows Millennium Edition (Me)
If you are already using the D1 with Nikon View DX or Nikon Capture, you will need to update
the camera driver.
Step 1
Click the My Computer icon on the desktop with the right mouse but ton and select
Prop er ties from the menu that appears. The
Sys tem Prop er ties dialog will be dis played; click
the Device Manager tab.
Step 2
The Device Manager sheet will be displayed.
Under the entry “Nikon 1394 De vice,” dou bleclick “Nikon Digital Camera D1.”
Step 3
The Nikon Digital Camera D1 Series Prop er ties
dialog will be displayed. Open the Driv er tab
and click Update Driver….
Step 4
The Update Device Driver Wizard will be dis played. Holding down the shift key to pre vent
the Install Center dialog from opening au to mat i cal ly, insert the Nikon Capture 4 CD into
the CD-ROM drive, select Automatic Search
for a Better Driver (Rec om mend ed), and
click Next. The wiz ard will au to mat i cal ly
up date the device drivers.
The Install Center Dialog
If the Install Center di a log ap pears when the
CD is in sert ed, click the Quit button to close
the dialog.
87
Page 90

Windows
Step 5
The dialog shown below will be displayed. Select the driver located at “(Drive let ter for CDROM drive):\” and click OK.
Step 6
The dialog shown at right will be displayed;
click Finish.
Step 7
Confi rm that “This device is working prop er ly”
ap pears under “De vice sta tus” in the General
Ta b of the Nikon Digital Camera D1 Series
Prop er ties di a log. Click Close.
88
Page 91

Device Registration: D1-Series Cameras
Step 8
Click OK to close the System Properties
win dow.
Troubleshooting
• If “1394 Bus Controller” is not displayed in the Device Man ag er, if the IEEE 1394 board
or card is listed under “Other De vic es” or “Mis cel la neous De vic es,” or if the list ing for the
IEEE 1394 board or card is pre ced ed by a red or yel low warn ing icon…
…the computer does not recognize the IEEE 1394 board or card. Re fer to the doc u men ta tion
provided with your com put er or IEEE 1394 board or card for in for ma tion on reg is ter ing the
board or card with the sys tem.
• If “1394 Bus Controller” is listed in the Device Manager but the entry for the Nikon D1X
(or D1 or D1H) does not appear…
…check the following:
• Is the camera on?
• Is the battery fully charged? If you are using an AC adapt er (avail able sep a rate ly), is it
properly con nect ed?
• Is the mode dial set to “PC”?
• Is the IEEE 1394 cable prop er ly connected?
89
Page 92

Windows
Windows 98 Second Edition (SE)
Before You Begin
Confi rm that your OHCI-compliant IEEE 1394 interface board or card has been correctly reg is tered with the system.
Click the My Computer icon on the desk top with the right mouse but ton and se lect
Prop er ties from the menu that ap pears. The
Sys tem Prop er ties dialog will be displayed; click
The bus controller for your
IEEE 1394 board or card
should be list ed un der “1394
Bus Con trol ler.”
the De vice Manager tab.
If “1394 Bus Controller” is not listed in the Device Manager, or if your IEEE 1394 in ter face
board or card is listed as an unknown or miscellaneous device or is preceded by a red or yellow
warning icon, follow the in struc tions in the manual provided with the board to ensure that
the drivers are properly installed.
After installing Nikon Capture 4 and restarting the computer, connect your camera to the
com put er using an IEEE 1394 cable and turn on the camera. The camera is registered au to mat i cal ly.
Follow the instructions below to check that the camera has been correctly registered with the
system.
Step 1
Once registration is complete, check that the
D1X
(or D1 or
with the sys tem. Click the
D1H
) has been cor rect ly reg is tered
My Com put er icon
on the desktop with the right mouse but ton
and select Prop er ties
from the menu that
ap pears. The System Prop er ties dialog will be
dis played; click the De vice Man ag er tab.
Updating the Drivers for the D1
If you are already using the D1 with Nikon View DX or an earlier version of Nikon Capture, you will need
to update the camera drivers as described in “Updating the Drivers for the D1” ( 95).
Before Connecting the Camera
Be sure to install Nikon Capture 4 before connecting your camera to the computer.
90
Page 93

Device Registration: D1-Series Cameras
Step 2
The Device Manager sheet will be displayed.
Af ter confi rming that “Nikon 1394 Pro to col
De vice” is list ed in the Device Manager, click
the “+” sign to its left.
If no “Nikon 1394 Pro to col Device” listing ap pears or if
is listed under Other Devices, re in stall the
de vice driver as instructed in “Reinstalling the
Device Driv er”
If “Nikon 1394 Protocol Device” is not listed in the Device Manager and “NIKON D1X” (or
“D1” or “D1H”)
com put er. When the computer has restarted, reconnect the camera to the computer.
Step 3
After confi rming that “Nikon Digital Camera
D1 Series” is listed under “Nikon 1394 Pro to col De vice,” double click the listing to open
the Prop er ties window.
Step 4
The Nikon Digital Camera D1 Series Prop er ties
di a log will be displayed. Click the Gen er al
tab and confi rm that “This device is work ing
prop er ly” ap pears under “Device status.”
Click OK.
“NIKON D1X” (or “D1” or “D1H”)
(
92).
is
not listed under Other Devices, disconnect the camera, and restart the
Click OK to close the System Properties window. Device registration is now complete.
91
Page 94

Windows
Reinstalling the Device Driver — Windows 98 Second Edition (SE)
If “Nikon 1394 Protocol Device” is listed under Other Devices, reinstall the device driver as
de scribed below.
Step 1
Click the My Computer icon on the desktop with the right mouse but ton and select
Prop er ties from the menu that appears. The
Sys tem Prop er ties dialog will be dis played; click
the De vice Manager tab.
Step 2
The Device Manager sheet will be displayed.
Double-click the listing for the Nikon
D1 or D1H)
vic es” or “Mis cel la neous Devices.”
Step 3
The NIKON D1X (or D1 or D1H) Properties
di a log will be displayed. Open the General
tab and click Reinstall Driver.
that appears under “Other De-
D1X (or
Step 4
The Update Device Driver Wizard will be dis played; click Next.
92
Page 95

Step 5
The dialog shown at right will be displayed.
Se lect “Search for a better driv er than the one
your device is using now. (Rec om mend ed)”
and click Next.
Step 6
The dialog shown at right will be displayed.
Holding down the shift key to prevent the
Install Center dialog from opening automatically, in sert the Nikon Capture 4 CD into the
CD-ROM drive. Select CD-ROM drive and
click Next.
The Install Center Dialog
If the Install Center di a log ap pears when the
CD is in sert ed, click the Quit button to close
the dialog.
Device Registration: D1-Series Cameras
Step 7
A dialog will be displayed stating that Win dows has found the drivers for “Nikon Dig i tal
Cam era D1 Series”; click Next.
No Driver Found
If the message, “Windows was un able to fi nd
a suit able driv er for this de vice,” is dis played,
this may in di cate that the Ni kon Capture 4 CD
was not cor rect ly in sert ed in the CD-ROM drive
or that the cor rect search lo ca tion was not
spec i fi ed. Click Back to re turn to the di a log
shown in Step 6, where you can con fi rm that
the cor rect lo ca tion has been specifi ed.
93
Page 96

Windows
Step 8
The dialog shown at right will be displayed;
click Finish.
Step 9
Confi rm that “This device is working prop er ly”
appears under “De vice sta tus” in the General
Ta b of the Nikon Digital Camera D1 Series
Prop er ties di a log. Click Close.
Step 10
Click OK to close the System Properties
win dow.
94
Page 97

Device Registration: D1-Series Cameras
Updating Driver for the D1 — Windows 98 Second Edition (SE)
If you are already using the D1 with Nikon View DX or Nikon Capture, you will need to update
the camera driver.
Step 1
Click the My Computer icon on the desktop with the right mouse but ton and select
Prop er ties from the menu that appears. The
Sys tem Prop er ties dialog will be dis played; click
the Device Manager tab.
Step 2
The Device Manager sheet will be displayed.
Under the entry “Nikon 1394 De vice,” dou bleclick “Nikon Digital Camera D1.”
Step 3
The Nikon Digital Camera D1 Series Prop er ties
di a log will be displayed. Open the Driv er tab
and click Update Driver….
Step 4
The Update Device Driver Wizard will be dis played; click Next.
95
Page 98

Windows
Step 5
The dialog shown at right will be displayed.
Select “Search for a better driver than the one
your device is using now. (Recommended)”
and click Next.
Step 6
The dialog shown at right will be displayed.
Holding down the shift key to prevent the Install
Center dialog from opening automatically, in sert the Nikon Capture 4 CD into the CD-ROM
drive. Select CD-ROM drive and click Next.
The Install Center Dialog
If the Install Center di a log ap pears when the
CD is in sert ed, click the Quit button to close
the dialog.
Step 7
A dialog will be displayed stating that
Win dows has found the drivers for “Nikon
Dig i tal Cam era D1 Series.” Click Next.
No Driver Found
If the message, “Windows was un able to fi nd
a suit able driver for this de vice,” is dis played,
this may in di cate that the Ni kon Capture 4 CD
was not cor rect ly in sert ed in the CD-ROM drive
or that the correct search lo ca tion was not
spec i fi ed. Click Back to re turn to the di a log
shown in Step 6 where you can con fi rm that
the cor rect lo ca tion has been specifi ed.
96
Page 99

Step 8
The dialog shown at right will be displayed;
click Finish.
Restart
If a message is displayed prompt ing you to
re start Win dows, click Restart.
Step 9
Confi rm that “This device is working prop er ly”
appears under “De vice sta tus” in the General
Ta b of the Nikon Digital Camera D1 Series
Prop er ties di a log. Click Close.
Device Registration: D1-Series Cameras
Step 10
Click OK to close the System Properties
win dow.
97
Page 100

Windows
Troubleshooting
• If “1394 Bus Controller” is not displayed in the Device Manager, if the IEEE 1394 board
or card is listed under “Other Devices” or “Mis cel la neous De vic es,” or if the listing for the
IEEE 1394 board or card is preceded by a red or yellow warning icon…
…the computer does not recognize the IEEE 1394 board or card. Re fer to the doc u men ta tion
provided with your computer or IEEE 1394 board or card for information on registering the
board or card with the system.
• If “1394 Bus Controller” is listed in the Device Manager but the entry for the Nikon D1X
(or D1 or D1H) does not appear…
…check the following
• Is the camera on?
• Is the battery fully charged? If you are using an AC adapter (avail able sep a rate ly), is it
properly connected?
• Is the mode dial set to “PC”?
• Is the IEEE 1394 cable properly connected?
98
 Loading...