

Page 1

WN3100RP Universal Pass Through
WiFi Range Extender
Installation Guide
Page 2
Getting Started
The WN3100RP WiFi Extender lets you extend WiFi coverage to
locations outside the range of your wireless router or gateway.
• Arrow LEDs help you find the best location for the extender.
• With the extender pass-through socket, you retain the use of a
socket in your electrical outlet.
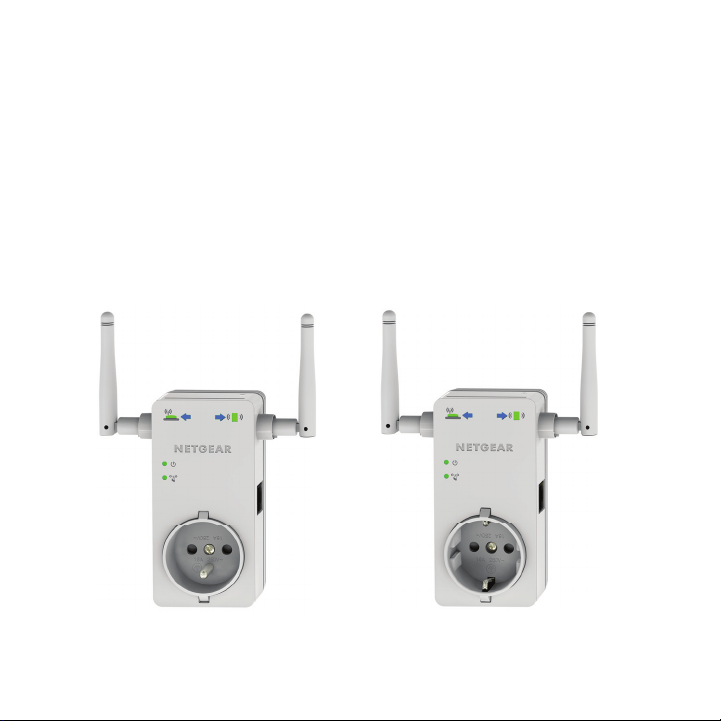
The appearance of the extender varies according to country or
region.
France
Germany
2
Page 3

Find the Best Location
WiFi router
Extender
Client
When you install the extender and join the extender network, the
arrow LEDs guide you to the best location to plug in the extender. If
no arrow is lit, the location is good.
Blinking left arrow. The extender is too far away from
the router or gateway.
Blinking right arrow. The extender is too far away
from your computer or wireless device.
3
Page 4

Install the Extender
Place the extender, apply power, and connect it to your WiFi network.
Place the Extender and Power It On
1. Place the extender halfway between your router and the location
that has poor WiFi coverage.
If it is not possible to place the extender at the halfway point,
move the extender closer to the location with poor coverage, but
still within the wireless range of the router.
2. Turn the
of the extender to the On position.
3. Plug the extender into a power
outlet and wait 1 minute until the
extender starts.
On/Off switch on the side
On/Off
switch
The Power LED lights green.
4
Page 5

Connect the Extender to Your WiFi Network
Do not cable the extender to the router. The extender connects to
your wireless network only with WiFi. You can use the extender’s
Wi-Fi Protected Setup (WPS), or the web browser method.
To connect using WPS:
1. Press the WPS button on the side
of the extender.
The Secure WiFi LED blinks.
2. Within 2 minutes, press the WPS
button on your wireless router.
The Router Link LED lights.
The Secure WiFi LED lights green.
The extender network name changes. See New Extender WiFi
Network Name on page 6.
To connect with the web browser method:
1. On your computer or wireless device, find and join the
NETGEAR_EXT WiFi network.
The Client Link LED lights.
2. Open a web browser.
3. When prompted, select a language from the list.
5
Page 6

NETGEAR genie displays.
4. Follow the steps to connect the extender to the WiFi network.
When the extender connects, the Router Link LED lights.
If the network is secure, the Secure WiFi LED lights green.
New Extender WiFi Network Name
The first time the extender connects to a WiFi network, the extender
WiFi network name (SSID) changes to that network name, with _EXT
at the end. For example:
WiFi network name: MyNetworkName
Extender network name: MyNetworkName_EXT
If the extender does not connect to the WiFi network, move the
extender to a different location with a better WiFi signal. For example,
you might need to move it closer to the router or gateway.
6
Page 7

Join the Extender WiFi Network
After you install the extender, you can join the extender WiFi network.
To join the extender network:
1. Take your computer or wireless device to the location with poor
WiFi coverage.
2. Find the new extender network name (MyNetworkName_EXT).
3. Select this network and enter the same WiFi password that you use
for your home network.
4. Within 2 minutes, check the arrow LEDs on the extender.
• If no arrow is lit, the location is good.
• When the extender connects to a network and a client joins
the extender network, an arrow LED blinks for 2 minutes if
the WiFi signal strength is weak to or from the extender.
Blinking left arrow. The extender is too far away from
the router or gateway.
Blinking right arrow. The extender is too far away
from your computer or wireless device.
Note: If you are having trouble getting a good WiFi signal, try to
create a better line of sight. For example, move the router up off the
floor onto a table or desk, or move furniture that might be blocking the
extender.
7
Page 8

Extender Performance
The Router Link LED indicates performance between the
router and the extender. If this LED is off, the extender is not
connected to a WiFi network.
The Client Link LED indicates the performance between the
extender and the client. If this LED is off, no computer or wireless
device is connected to the extender network.
These LEDs display the following colors:
• Green indicates the best performance.
• Amber indicates a workable performance.
• Red indicates a poor connection or no connection.
8
Page 9

Change the Extender Network Settings
After installation, you can change the extender network settings if you
want. For example, if you change your network name, you can log in
to the extender and change its network name to match.
To log in to the extender to change its settings:
1. Launch a web browser.
2. Enter mywifiext.net.
3. Enter admin for the user name and enter password for the
password.
The simplest way to change the settings is to use the setup
wizard.
4. Select Setup Wizard.
The wizard helps you through these steps:
• Select the WiFi network that you want to extend.
• Enter the WiFi password for this network.
• Name the extender network.
• Connect your wireless computer or device to the extender
network.
9
Page 10

Ethernet Port Connection
You can connect equipment such as a computer, TV, Blu-ray player,
or gaming console to the Ethernet port on the extender.
Range extender
Wireless router
in a home office
Access the Internet
with a Blu-ray player
in the family room
10
Page 11

Restore Factory Settings
You can use the extender Reset button to restore the factory settings.
To restore factory settings:
1. Insert a paper clip into the Reset hole and hold it until the Power
LED blinks amber.
2. Release the button.
All LEDs turn off for about 3 seconds.
The Power LED lights solid amber for about 30 seconds.
The Power LED lights solid green.
11
Page 12

Support
Thank you for selecting NETGEAR products.
After installing your device, locate the serial number on the label of your product
and use it to register your product at https://my.netgear.com.
You must register your product before you can use NETGEAR telephone support.
NETGEAR recommends registering your product through the NETGEAR website.
For product updates and web support, visit http://support.netgear.com.
NETGEAR recommends that you use only the official NETGEAR support
resources.
You can get the user manual online at http://downloadcenter.netgear.com or
through a link in the product’s user interface.
Trademarks
NETGEAR, the NETGEAR logo, and Connect with Innovation are trademarks
and/or registered trademarks of NETGEAR, Inc. and/or its subsidiaries in the
United States and/or other countries. Information is subject to change without
notice. © NETGEAR, Inc. All rights reserved.
Compliance
For the current EU Declaration of Conformity, visit:
http://support.netgear.com/app/answers/detail/a_id/11621/.
NETGEAR, Inc.
350 East Plumeria Drive
San Jose, CA 95134, USA
June 2013
 Loading...