

Page 1
NETGEAR, Inc.
350 East Plumeria Drive
San Jose, CA 95134, USA
April 2012
Technical Support
Thank you for selecting NETGEAR products.
After installing your device, locate the serial number on the label
of your product and use it to register your product at
www.NETGEAR.com/register. Registration is required before you
can use our telephone support service. Registration through our
website is strongly recommended.
Go to http://support.netgear.com for product updates and web
support.
GPL might be included in this product; to view the GPL license
agreement, go to ftp://downloads.netgear.com/files/
GPLnotice.pdf.
Dual Band 11ac WiFi Router R6300
Installation Guide
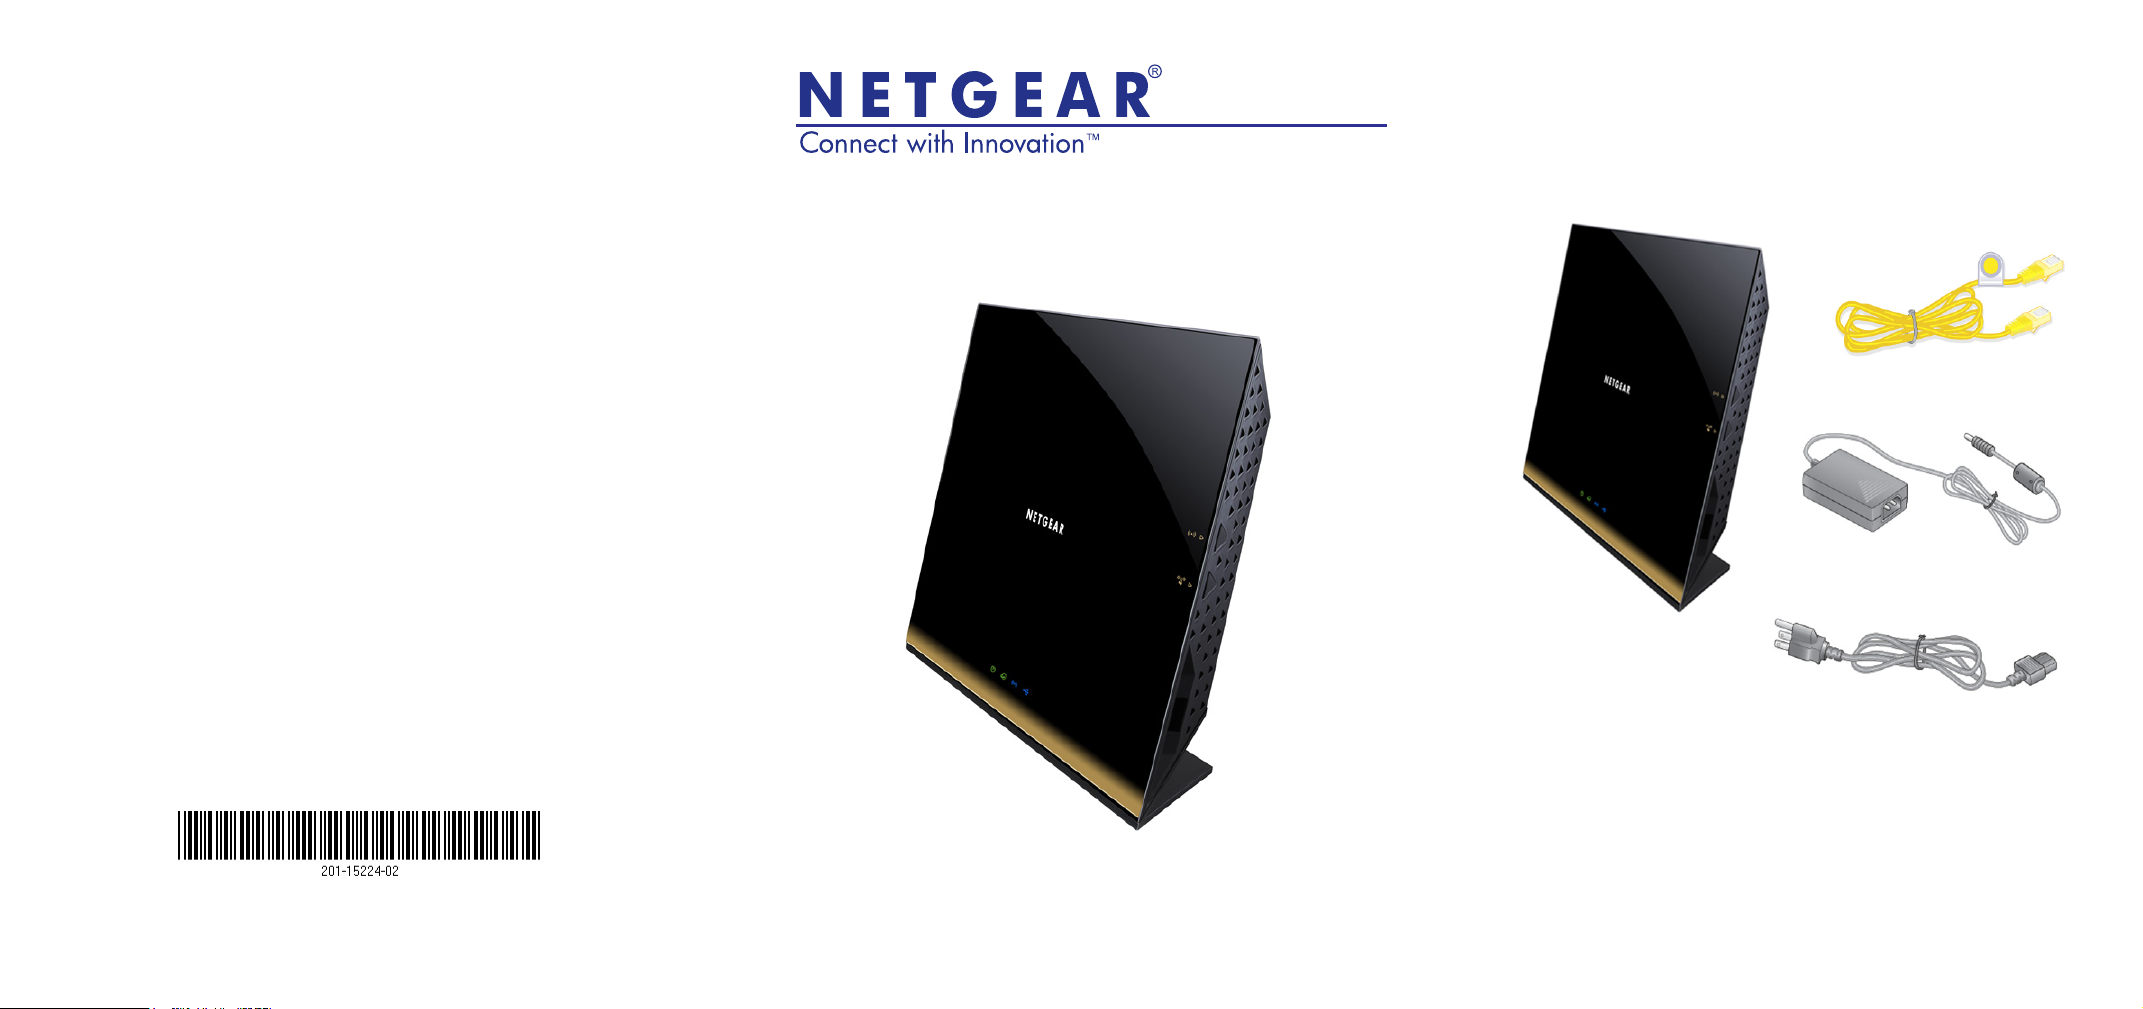
Package Contents
The box should contain the following items. If any items are
incorrect, missing, or damaged, contact your NETGEAR dealer.
Note: In some regions, a Resource
CD is included with your
product.
Important: Be sure to remove the plastic
film from the router before using it.
Ethernet cable
Power cord
Dual Band WiFi Router
Power adapter
Page 2

You can use this diagram to connect your router or follow the detailed instructions in this booklet.
1. Prepare your modem.
4. Connect
3. Power on the router.
5. Launch a browser.
2. Connect your modem.
Unplug your modem. If it has a battery
backup, remove the battery.
Plug in your modem. Put the battery
back in. Then cable the modem to the
router Internet port.
Modem
Internet
Router
DSL or Cable
a computer.
Compliance
Declarations of Conformity
For complete DoC please visit the NETGEAR EU Declarations of Conformity
website at: http://support.netgear.com/app/answers/detail/a_id/11621/.
For GNU General Public License (GPL) related information, please visit
http://support.netgear.com/app/answers/detail/a_id/2649
This symbol is placed in accordance with the European Union
Directive 2002/96 on the Waste Electrical and Electronic Equipment
(the WEEE Directive). If disposed of within the European Union, this
product should be treated and recycled in accordance with the laws of
your jurisdiction implementing the WEEE Directive.
Page 3

Contents
Install Your Router. . . . . . . . . . . . . . . . . . . . . . . . . . . . . . . . . . . 2
Prepare your modem . . . . . . . . . . . . . . . . . . . . . . . . . . . . . 2
Connect your modem . . . . . . . . . . . . . . . . . . . . . . . . . . . . . 2
Power on the router . . . . . . . . . . . . . . . . . . . . . . . . . . . . . . 3
Connect a computer . . . . . . . . . . . . . . . . . . . . . . . . . . . . . . 3
Launch a browser . . . . . . . . . . . . . . . . . . . . . . . . . . . . . . . . 4
Preset Wireless Security . . . . . . . . . . . . . . . . . . . . . . . . . . . . . . 4
Wireless Network Settings . . . . . . . . . . . . . . . . . . . . . . . . . . 5
Add Wireless Devices to the Network . . . . . . . . . . . . . . . . . . . . 6
WPS Method. . . . . . . . . . . . . . . . . . . . . . . . . . . . . . . . . . . . . 6
Manual Method . . . . . . . . . . . . . . . . . . . . . . . . . . . . . . . . . . . 6
Access the Router to Make More Changes. . . . . . . . . . . . . . . . . 7
Troubleshooting. . . . . . . . . . . . . . . . . . . . . . . . . . . . . . . . . . . . . . 9
ReadySHARE Access . . . . . . . . . . . . . . . . . . . . . . . . . . . . . . . . 9
ReadySHARE Printer . . . . . . . . . . . . . . . . . . . . . . . . . . . . . . . 10
Other Features . . . . . . . . . . . . . . . . . . . . . . . . . . . . . . . . . . . . . 15
1
Page 4
Install Your Router
Make sure that your Internet service is active before you install the
router. Follow steps 1 through 5.
1. Prepare your modem.
a. Unplug your modem’s
power.
b. If the modem has a battery
backup, remove its
batteries.
c. If your modem was already
connected to another
router, disconnect the cable
between your modem and
that router.
Now your modem should be
completely turned off, and
cabled only to the wall jack for your Internet service.
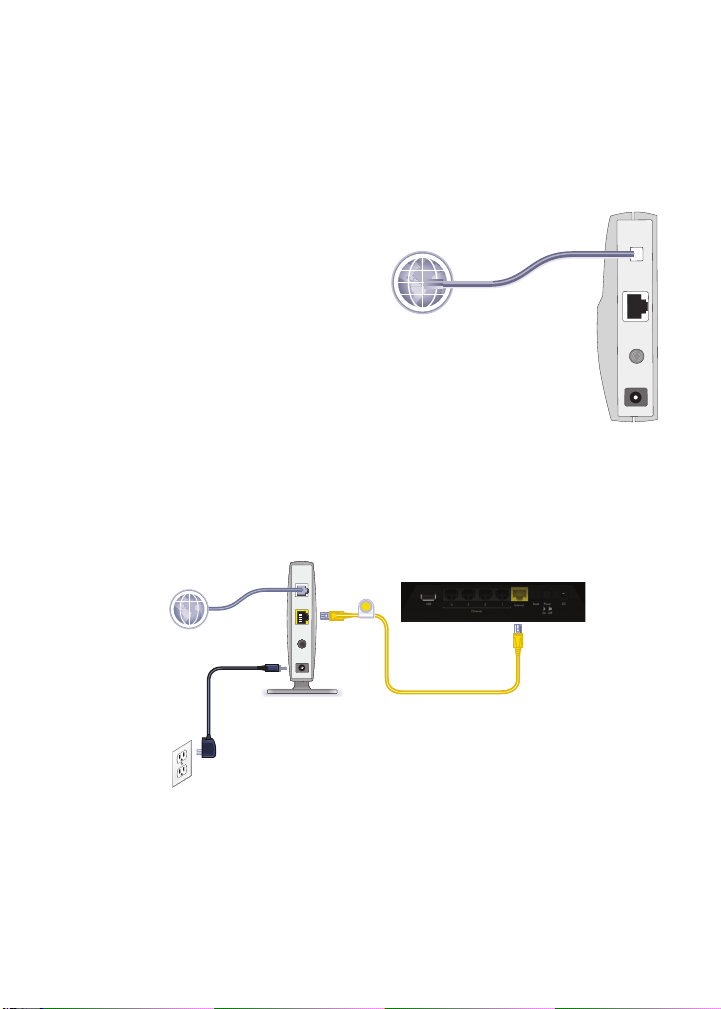
2. Connect your modem.
Internet
2
b
a
Modem
1
DSL or cable
Modem
Router
a. Plug in, then turn on your modem. (Replace the batteries if
you removed them previously.)
b. With the yellow Ethernet cable that came with the router,
connect your modem to the Internet port of your router.
2
Page 5
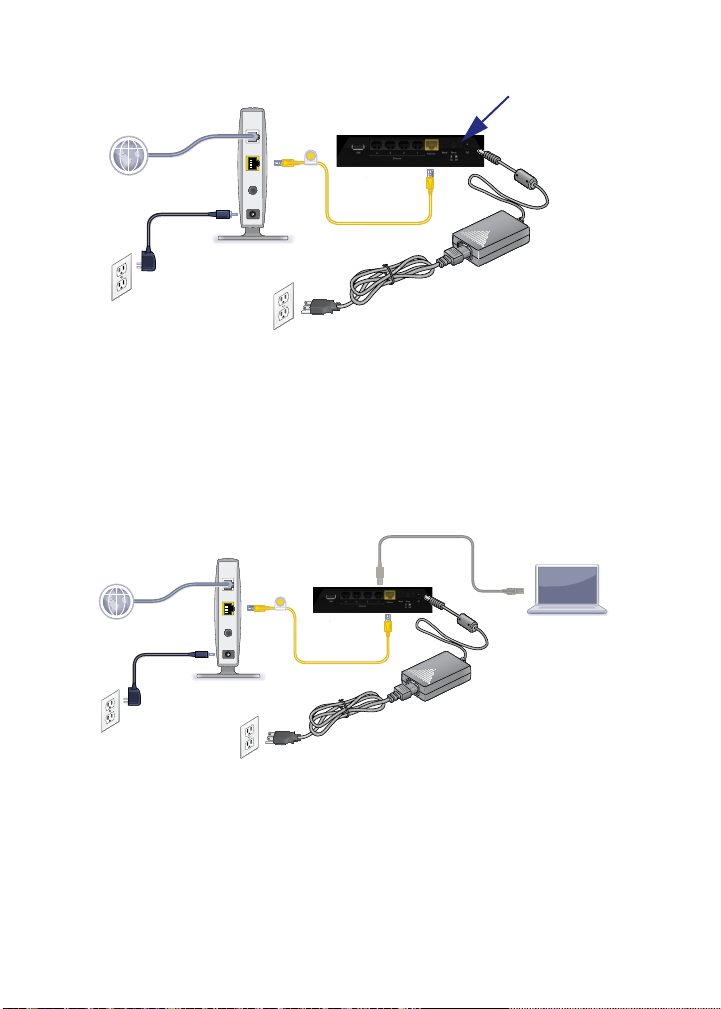
3. Power on the router.
b
On/Off
Router
Modem
a
3
a. Connect the power adapter to the router and plug the power
adapter into an outlet.
b. Before going to Step 4, wait for the wireless LED on the front
panel of the router to turn on. If none of the LEDs on the
front panel are on, press the Power On/Off button on the
rear panel of the router.
4. Connect a computer.
Router
Modem
Computer
4
You can use an Ethernet cable (not included) or connect
wirelessly.
• Use the Ethernet cable to connect your computer to an
Ethernet port on your router.
• Or, connect wirelessly by using the preset wireless security
settings located on the label on the bottom of the router.
3
Page 6
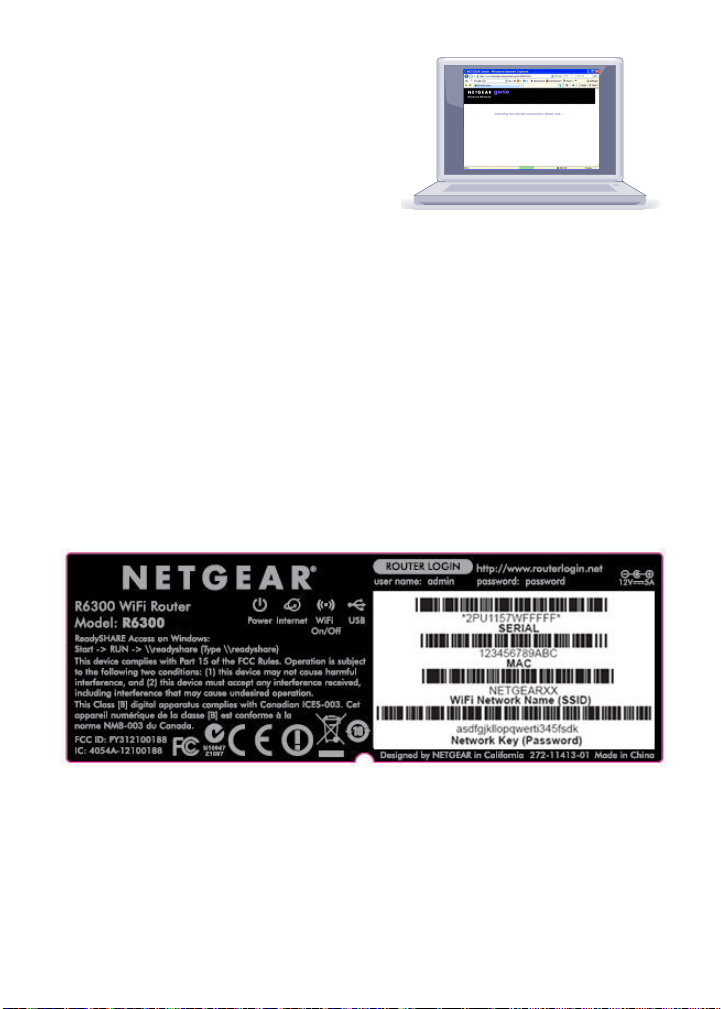
5. Launch a browser.
If a web page does not open,
close and reopen the browser
and type http://routerlogin.net
in the address bar, or see
Troubleshooting on page 9.
5
Preset Wireless Security
This product has a unique WiFi network name (SSID) and network
key (password). The default SSID and network key (password) are
uniquely generated for every device, like a serial number, to protect
and maximize your wireless security. This information is located on
the label on the bottom of the product.
NETGEAR recommends that you do not change the preset WiFi
network name (SSID) and network key (password). If you do change
the settings, the security SSID and password on the bottom of the
product no longer apply.
4
Page 7

Wireless Network Settings
Record the default preset wireless settings that are printed on the
label in the space below for easy reference.
WiFi Network Name (SSID):
Network Key (Password):
If you change the default settings, record them here for easy
reference, and then store this booklet in a safe place:
WiFi Network Name (SSID):
Network Key (Password):
To retrieve or update your wireless password, type
www.routerlogin.net in a web browser and log in using the default
user name (admin) and password (password).
Select Wireless Settings to locate your wireless password.
5
Page 8

Add Wireless Devices to the Network
Choose either the manual or Wi-Fi Protected Setup (WPS) method to
add wireless computers and other devices to your wireless network.
WPS Method
If your wireless device supports WPS—NETGEAR calls this method
Push 'N' Connect—you might be prompted to press the WPS button
on the router instead of entering a password. If this happens:
1. Press the WPS button on the router.
2. Within 2 minutes, press the WPS button on the client device, or
follow the WPS instructions that came with your wireless device to
complete the WPS process. Then the device connects to the router.
3. Repeat this process to add other WPS wireless devices.
Note: WPS does not support WEP security. If you try to connect a
WEP client to your network using WPS, it does not work.
Manual Method
1. On the wireless device that you want to connect to your router
(iPhone, laptop, computer, gaming device), open the software
utility that manages its wireless connections. This utility scans
for all wireless networks in your area.
2. Look for the preset NETGEAR WiFi network name (SSID) and
select it. The SSID is located on the product label on the bottom of
the router.
Note: If you changed the name of your network during the setup
process, look for that network name.
3. Enter the preset password (or your custom password if you
changed it), and click Connect.
Repeat steps 1–3 to add other wireless devices.
6
Page 9

Access the Router to Make More Changes
After you use NETGEAR Genie to set up the router, you can log in to
the router to view its settings or make changes.
To log in to the router:
1. Launch a web browser from a computer or wireless devices that
is connected to the router.
2. Type www.routerlogin.net or www.routerlogin.com in the
address field of the browser. A login screen displays:
admin
********
3. Enter admin for the user name and password for the password.
The router Basic Home screen displays:
See the User Manual for more information about the router
screens.
7
Page 10

To change the password for the router user name:
1. Log in to the router.
2. Select Administration > Set Password to display the Set
Password screen:
3. Type your old password, and type the new password twice.
NETGEAR recommends that you use the password recovery
feature when you change your password.
4. Select the Enable Password Recovery check box.
5. Click Apply.
6. You are prompted to answer questions, which are saved.
To use password recovery to retrieve a forgotten password:
You need to enable password recovery as described in the previous
section in order to use this feature.
1. Launch a web browser from a computer or wireless devices that
is connected to the router.
2. Type www.routerlogin.net or www.routerlogin.com in the
address field of the browser.
3. When the login screen displays, click Cancel.
You are prompted to enter your saved answers so that you can
log in to the router.
8
Page 11

Troubleshooting
If the browser does not display the web page:
• Make sure that the PC is connected to one of the four LAN
Ethernet ports, or wirelessly to the router.
• Make sure that the router is fully up and running. Its WiFi LED
should turn on.
• Close and reopen the browser to make sure that the browser
does not cache the previous page.
• Type http://routerlogin.net.
• If the PC is set to a static or fixed IP address (this is uncommon),
change it to obtain an IP address automatically from the router.
ReadySHARE Access
After installation and set up, you can insert a USB storage device into
the USB port on the router and share the contents with other network
users. (If your USB device has special drivers, it is not compatible.)
Note: If your USB device requires a power supply, you must use it
when connecting your USB device to a NETGEAR router or gateway.
It may take up to 2 minutes before the USB drive is ready for sharing
after it is connected to the router.
To access your USB device:
On Windows systems, use any of these methods:
• Select Start > Run and enter \\readyshare in the dialog box.
Click OK.
• Open Explorer or Safari and enter \\readyshare in the address
bar.
• Open My Network Places and enter \\readyshare in the address
bar.
9
Page 12

On Mac systems, do this:
1. Select Go > Connect to Server.
2. Enter smb://readyshare as the Server Address.
3. Click Connect.
The readyshareconnect.exe file (for Windows) is available to
download here: www.netgear.com/readyshare
ReadySHARE Printer
ReadySHARE Printer lets you connect a USB printer to the router’s
USB port, and access it wirelessly.
To set up ReadySHARE Printer:
Step 1: Connect the USB printer to the router’s USB port with a USB
printer cable.
Step 2: Install the USB printer driver software on each computer that
will share the printer. If you do not have the printer driver, contact the
printer manufacturer to find and download the most recent printer
driver software.
Step 3: On each computer that will share the printer, download the
NETGEAR USB Control Center utility. The NETGEAR USB utility has
a Mac version and a Windows version, which you can access in two
different ways:
• From the ReadySHARE Printer area of this URL:
www.netgear.com/readyshare
10
Page 13

• From the ReadySHARE tab of the Desktop NETGEAR Genie.
NOTE:
• You must install this utility before you can use the ReadySHARE
Printer feature.
• For the ReadySHARE Printer feature to work, this utility must be
run in the background.
Step 4: Follow the instructions to install the NETGEAR USB Control
Center utility.
11
Page 14

Step 5: After you have installed the utility, select the language.
Step 6: If this is the first time you are accessing the utility, you are
asked to select the printer and click the Connect button.
Once the connection is established, the status changes to Manually
connected by xxx..
12
Page 15

Step 7: Click the Disconnect button at any time to release the
connection. The status then changes to Available.
Once the Connect button has been clicked once on all computers in
the network, the utility on each of them automatically handles the
printing queue and handling. The status of the printer should appear
as Available on all of the computers.
NOTE:
• When the status is Available, you can use the USB printer.
• When the status is Manually connected by xxx, only the xxx
computer can use the printer. Other network devices must wait
until the xxx computer has released the connection, or until the
connection times out (the default time-out value is 30 seconds).
• You can set the value for the default time-out time from the Tools
> Configuration screen.
13
Page 16

• The USB Control Center utility must be running for the computer
to be able to print to the USB printer attached to the router. If you
exit the utility, printing does not work.
• Some firewall software, such as Comodo, blocks the
ReadySHARE Print utility from accessing the USB printer. If you
do not see the printer in the utility, you can disable the firewall
temporarily to allow the utility to work.
Step 8: If your printer supports scanning, make sure that the printer is in
the Available state, and click the Network Scanner button. This
activates the Scanner window so you can use the printer for scanning.
For more detailed information about ReadySHARE Printer, see the
User Manual by clicking the Documentation link in the router
management interface or on the R6300 product page on the Support
website http://support.netgear.com).
14
Page 17

Other Features
For additional features, including Live Parental Controls, Traffic
Metering, ReadySHARE, Guest Access, and more, please log into
your router at http://routerlogin.net.
Download the free Desktop NETGEAR Genie from
www.NETGEAR.com/genie.
Internet
STATUS GOOD
Network Map
Number of devices 16
WiFi Connection
STATUS Connected
Parental Controls
Click here
Router Settings
Click here
ReadySHARE
Click here
Automatically fix common network problems and easily manage your
home network connections.
15
Page 18

© 2012 NETGEAR, Inc. All rights reserved.
No part of this publication may be reproduced, transmitted, transcribed,
stored in a retrieval system, or translated into any language in any form or by
any means without the written permission of NETGEAR, Inc.
DO NOT stack equipment, or place equipment in tight spaces or in drawers.
Be sure your equipment is surrounded by at least 2 inches of air space.
Trademarks
NETGEAR, the NETGEAR logo, and Connect with Innovation are trademarks
and/or registered trademarks of NETGEAR, Inc. and/or its subsidiaries in the
United States and/or other countries. Information is subject to change without
notice. Other brand and product names are registered trademarks or
trademarks of their respective holders. © 2012 NETGEAR, Inc. All rights
reserved.
Statement of Conditions
In the interest of improving internal design, operational function, and/or
reliability, NETGEAR reserves the right to make changes to the products
described in this document without notice. NETGEAR does not assume any
liability that may occur due to the use or application of the product(s) or circuit
layout(s) described herein.
16
 Loading...