

Page 1

Arlo Baby
Quick Start Guide
Page 2
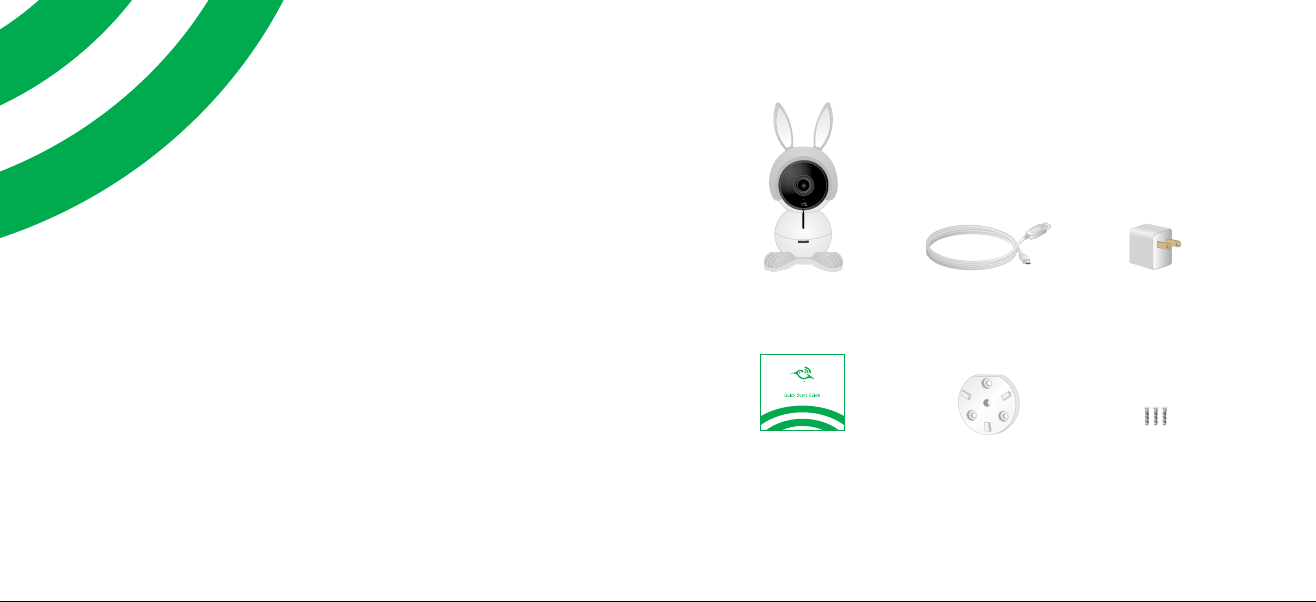
What’s Included
Welcome
Thank you for choosing Arlo Baby.
Getting started is easy.
Arlo Baby
camera
Quick Start Guide
USB power
cable
Wall-mount
plate
USB power
adapter
(varies by region)
Mounting
screws
Page 3
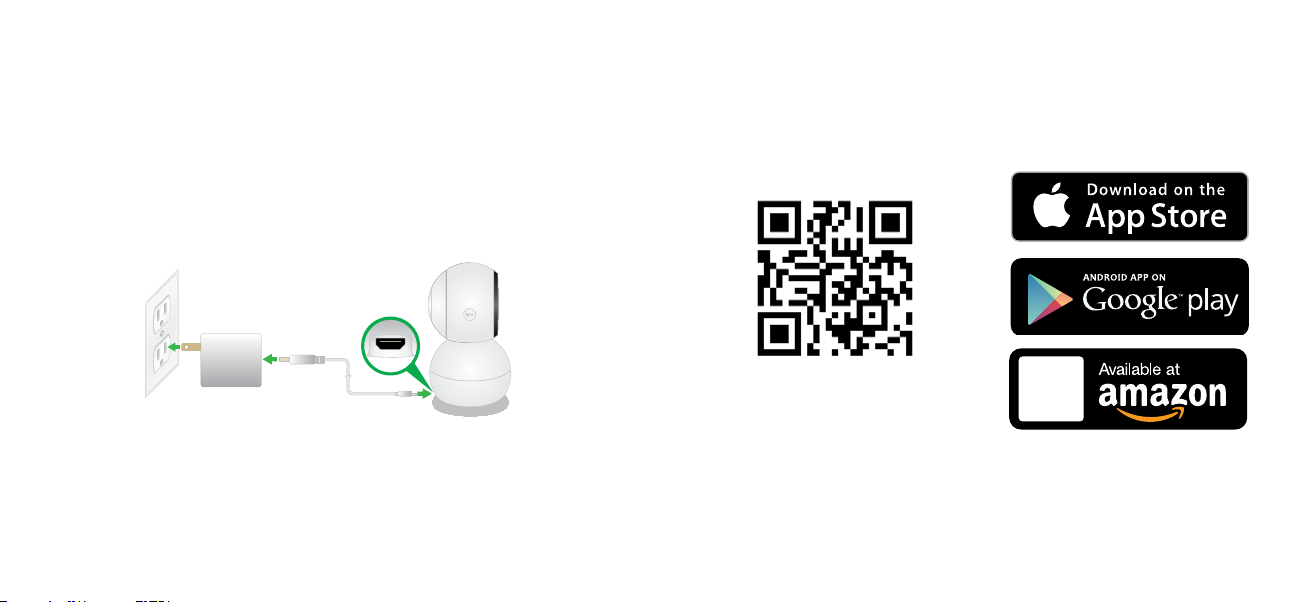
Plug In Your Camera Get the App
Connect one end of the USB power cable to the port on the
camera.
Plug the other end of the USB cable into the power adapter.
Plug the USB power adapter into a wall socket and wait for the
camera LED to blink amber.
4
For the best experience, download the Arlo app for your
smartphone by scanning this QR code or searching for Arlo in the
app store.
arlo.netgear.com
Note: If you already use the Arlo app, make sure that you
are using the latest version. To find out if an update is
available, go to the App store and search for Arlo.
5
Page 4

Get a New Account or Log In
Connect Your Camera
¾ To create a new Arlo account:
1. Launch the Arlo app from your smartphone, tap New to
Arlo?, and select Arlo Baby.
If you are using a computer, visit arlo.netgear.com.
2. Follow the onscreen instructions.
¾ To add an Arlo Baby camera to an existing Arlo
account:
1. If you already set up an Arlo account, log in and click or tap
Add Device.
2. Follow the onscreen instructions.
Note: For information about the camera LED colors, visit
support.arlo.com and scroll down to select the user
manual.
6
Follow the onscreen instructions either in the Arlo app or on a
computer to connect your camera to your router.
Note: If you own an Arlo Wire-Free system, do not connect your
Arlo Baby camera to the Arlo base station.
7
Page 5

Place Your Camera
You can place your camera on a shelf or other flat surface, or
you can mount it on the wall.
Note: Do not cover or obstruct the inlet holes for the sensors.
STRANGULATION HAZARD – Children can STRANGLE in
cords. Keep the cord out of the reach of children (more
than 3 feet (.9 meters) away).
8
If you are mounting the camera on a wall, place the wall plate
and secure it with the included screws.
Align the wall plate with the holes on the base of the camera
and rotate the base until it snaps into place.
9
Page 6

You’re Done!
Use Arlo Baby’s tilt and swivel functions to position the camera
so that it captures the area that you want to monitor.
10
Congratulations! Your Arlo Baby camera is set up and ready
to go.
To view useful tutorial videos, find troubleshooting tips, or get
support, visit support.arlo.com.
11
Page 7

Arlo Baby Characters
Arlo Baby Features
Your Arlo Baby camera might come with a character set. You can
remove the character set altogether or replace it with other
Arlo Baby characters.
• Pull the character ears
up to remove them.
• To install character
ears, align the ears
with the camera lens
and press them onto
the camera.
12
• Rotate the character
feet and pull them o
to remove them.
• To install character
feet, align the foot
plate with the holes
on the bottom of the
camera and rotate
the foot plate until it
clicks into place.
¾ Rechargeable Battery
Your Arlo Baby camera includes a built-in rechargeable
battery and can work for several hours at a time without
being plugged in. You can place the camera in locations
where you cannot connect it to a power outlet.
O
Use the switch on the bottom
of the camera to power the Arlo
Baby camera’s battery o. The
camera’s battery is on when the
green color is visible.
If the camera is unplugged and you don’t want the battery
to lose its charge, set the switch to o.
On
13
Page 8

¾ Night Light
Use the app or the top
button on the right side of
the camera to turn the night
light on and o.
¾ Music
Use the app or the bottom
button on the right side
of the camera to play and
pause music.
¾ Local Streaming
Enjoy minimal video lag by
connecting your mobile device to
the same WiFi network (SSID) as
the one Arlo Baby is connected to.
14
15
Page 9

©NETGEAR, Inc., NETGEAR, the NETGEAR Logo, and Arlo are trademarks of
NETGEAR, Inc.
Compliance
Si ce produit est vendu au Canada, vous pouvez accéder à ce document en
français canadien à arlo.com/docs .
(If this product is sold in Canada, you can access this document in Canadian
French at arlo.com/docs.)
For the current EU Declaration of Conformity, visit http://kb.netgear.com/11621.
For regulatory compliance information, visit netgear.com/about/regulatory/.
350 East Plumeria Drive
San Jose, CA 95134, USA
NETGEAR INTL LTD
Building 3, University Technology Centre
Curraheen Road, Cork, Ireland
August 2017
 Loading...