

Nec VERSA SX HARD DISK DRIVE Installation guide
Upgrading the Hard Disk Drive on the
NEC Versa® SX
Con grat ulations on becoming t he own e r of the NEC Ve rsa S X s ystem.
No need t o wor ry about out g rowing your current hard disk drive because NEC offers a variety
of hard disk drive configurations to meet your growing data needs. You can replace your
existing hard disk drive with a larger hard disk drive in most models of the NEC Versa SX
notebook comp uter .
Note
represen tativ e replace the intern al hard disk drive. See the follo w ing instructions t o det er mine if
you can replace/upgrade the hard disk drive yourself.
Som e NEC Versa SX models require tha t an aut horized NECC Customer Support
Onc e you replace your new hard di s k, you m ay als o want to restore your NEC Ver sa to its
orig in al shipping stat e. You can restore your system to its original state usin g the Product
Recovery CD, which also shipped with your NEC Versa system.
Note
partition as shipped from the factory. If you want to create a single partition for your hard disk, run
the Part ition Magic sof tware (version 4.1 or higher ) after the rest ore process com pletes. P artition
Magic can either be downloaded from a URL address provided by NECC Customer Support, or
installed from t he Appl ication and Driver CD that ships with your sys tem (not available o n all
CDs). See the document,
your 12-GB or larger hard disk, for detailed instructions on using the Product Recovery CD and/or
creating a single partition with Partition Magic.
For hard di sks, 12-G B or larger , t he res tore process creates two partitions, n ot a single
Restoring the 12- and 18-GB Hard Disk Drive,"
which s hipp ed with
To be sur e th at you own a uni t wi th a user-replaceable har d d isk drive, check th e fol lowing.
Turn your system over. Note the label on the back of th e un it, which contains the Doc ID
(model name), Model Number, and NEC Serial Number for the unit.
Look at th e 1 4-alphanumeri c ch ar acters in th e model num ber. A unit with a user-replaceable
hard disk drive has the letter “A” in the next to last position of the model number. An
example of a model number for a un it with a user-replaceable hard disk drive is
VS210010-0000A0.
Note
not
assistance in rep laci ng/ upgradin g your h ard disk dr ive.
If your model number does not contain the letter “A” in the next to last position, you can
replace the hard disk drive yourself. Contact your NECC Customer Support representative for
You can increase the system’s storage capacity by replacing the standard hard disk drive. The
hard disk drive is located under the keyboard in your NEC Versa notebook computer. You must
remove the keyboar d reta i ner and lift th e keyboard bef ore replacin g t he hard disk dri ve.
Replace t he hard d i s k drive as follo ws.
Note
disk. Failure to do so could result in loss of data.
Be sure to back up all important data files before you remove and/or replace the hard
Upgrading the Hard Disk Drive o n the NEC Versa SX 1
1.
Save your files, exit Windows, and turn off system power.
2.
Tilt th e LC D panel back sl ightly to pr ovi d e sufficient access to the k eyb oa rd retainers.
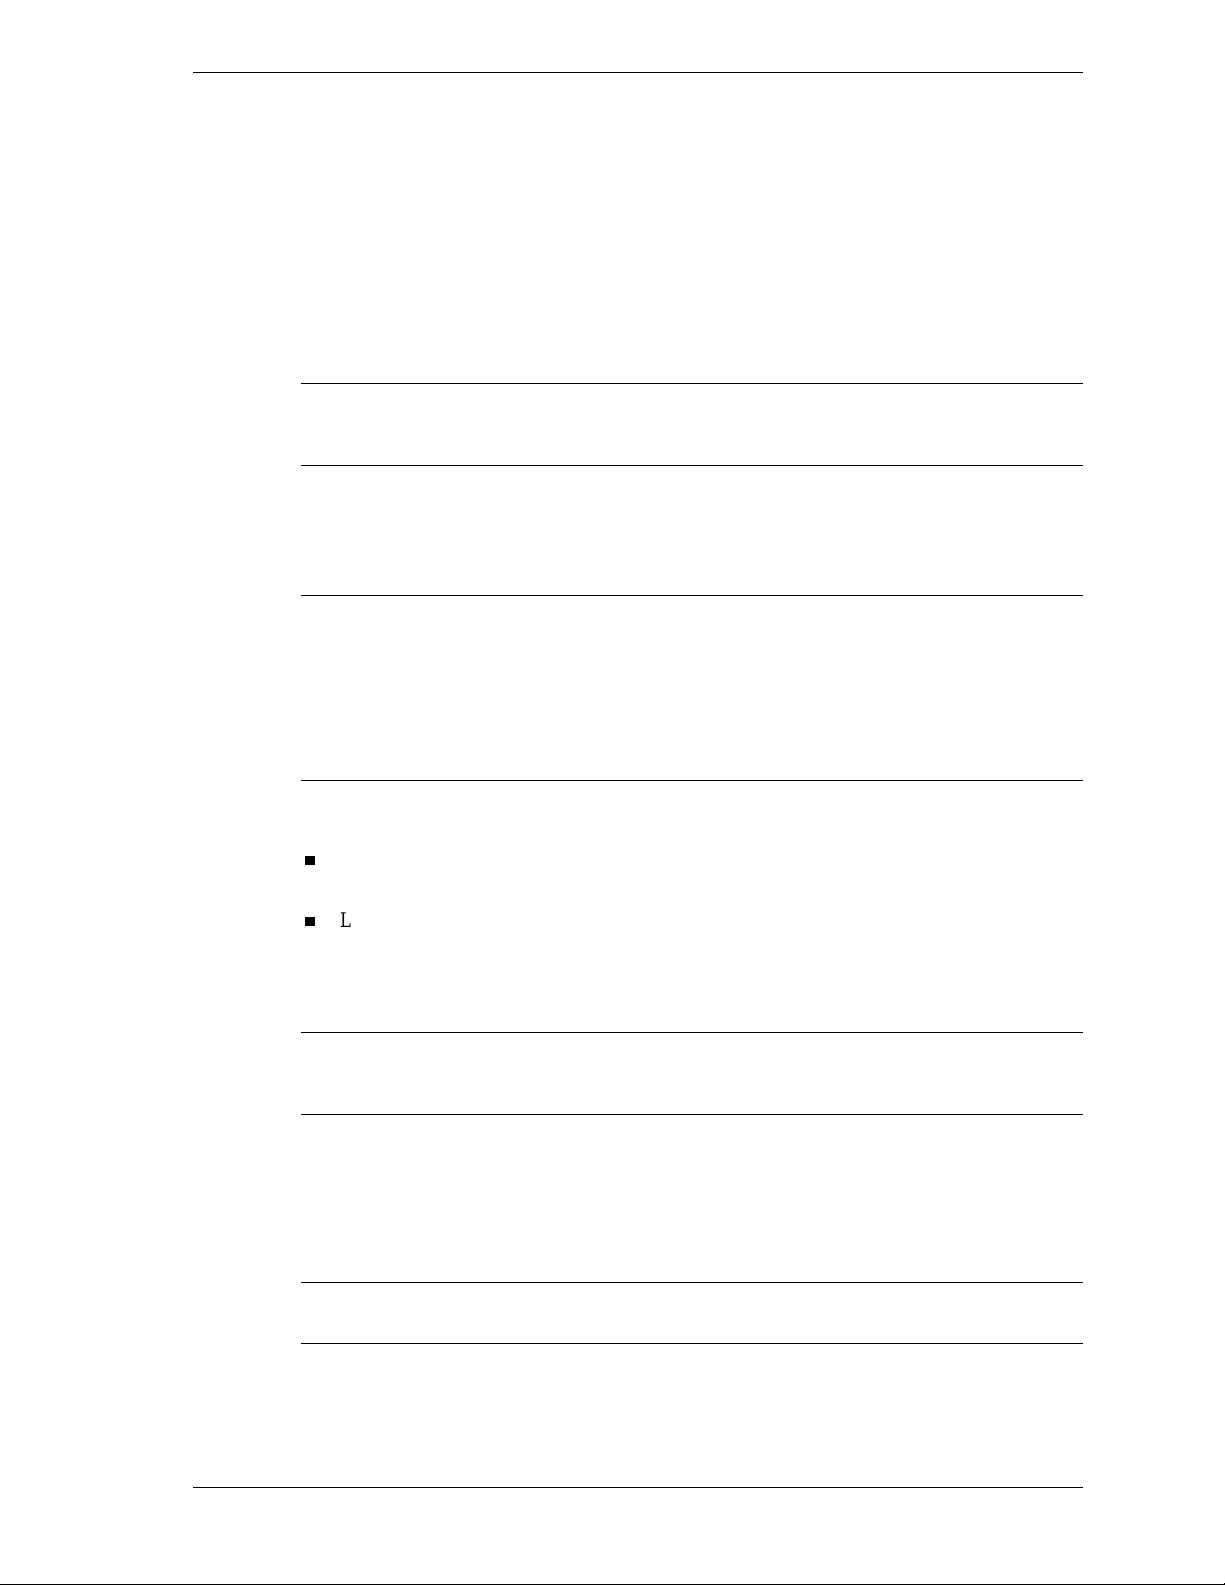
3.
Use the notch on the left end of the keyboard retainer to lift it as you apply slight pressure to
the righ t hand s i de of the keyboard ret a iner .
4.
Slid e the keyboar d retain er t o the left and lift it to rem ove.
Remo ving the keyboard retainer
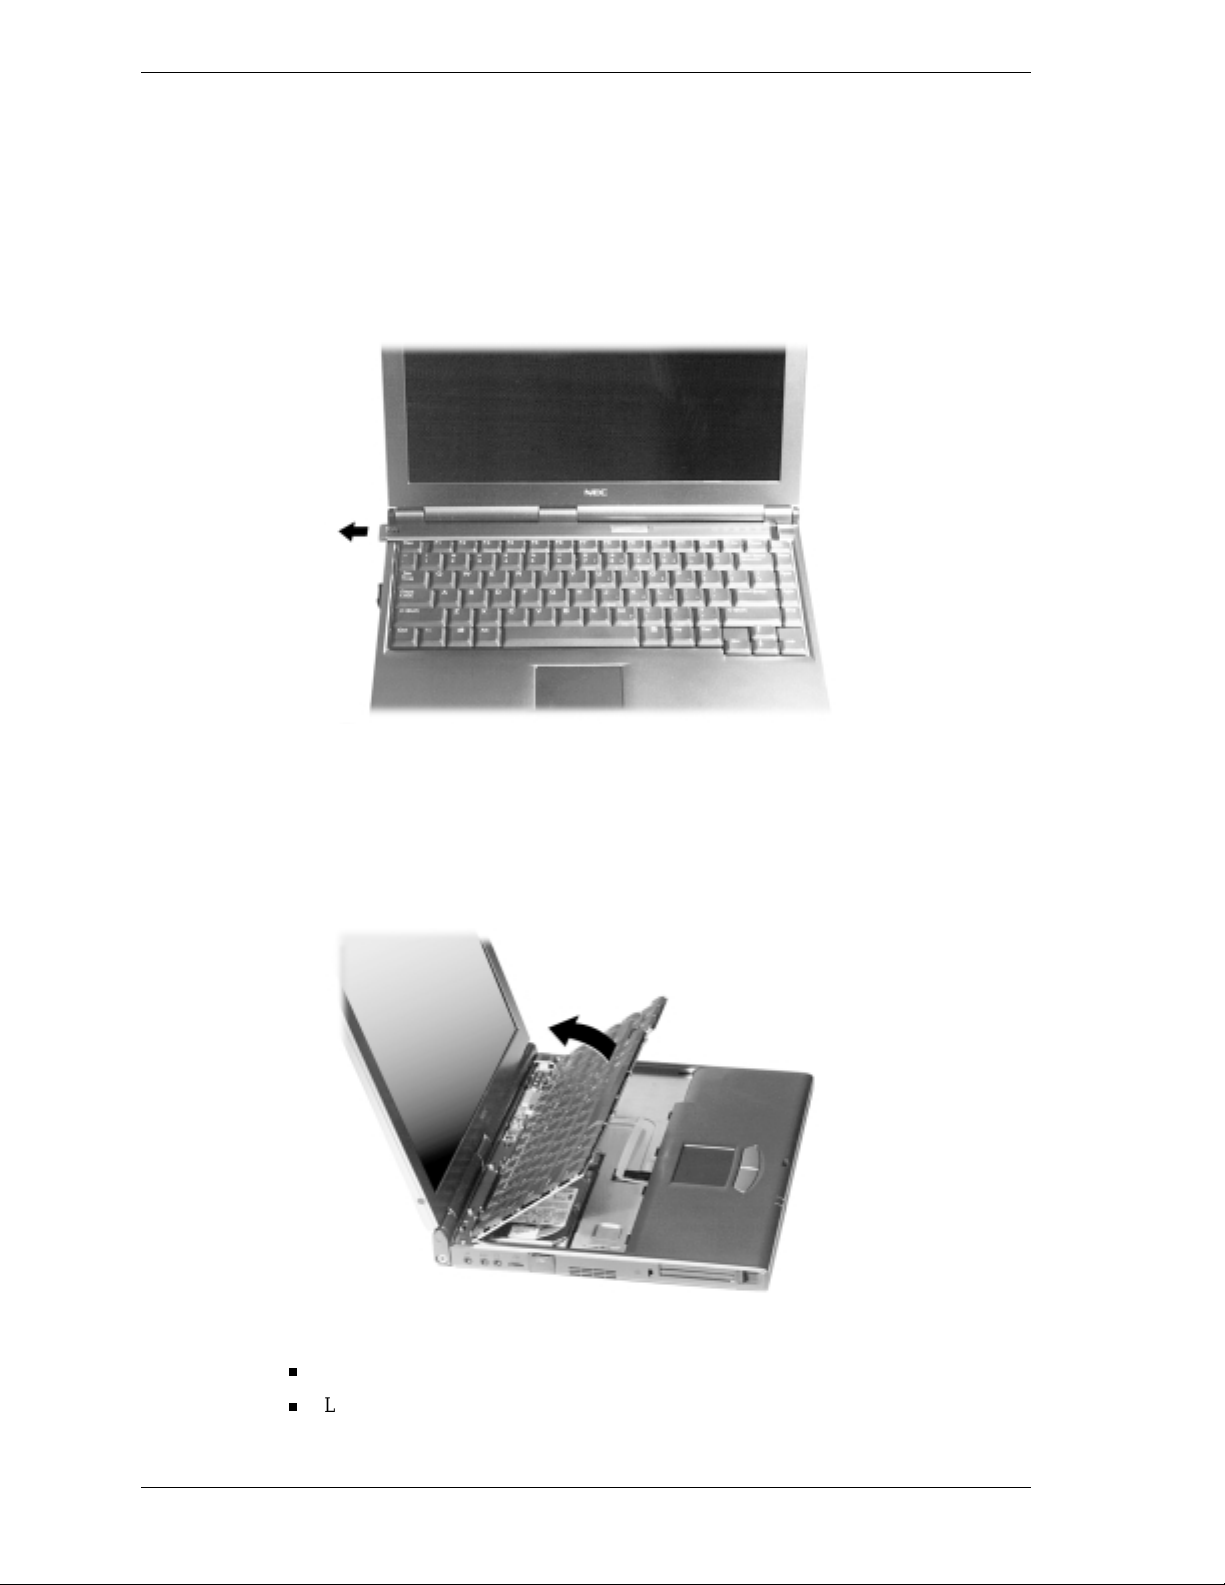
5.
Gen tly lift up the edg e of the keyboard n ea rest t he LC D pa nel and slide th e keyboa rd
toward the LCD screen to release the tabs that s ecure it.
6.
Carefully place the keyboard against the LCD panel. Be careful not to twist or disconnect
the keyboa rd c able.
Lifting the keyboa rd
7.
Remove the disk drive as follows.
Remove the screw that secures the hard disk drive.
Locate the hard d isk drive ta b and firmly pull th e tab t o d isconnect the drive.
2 Upgrading th e Hard Disk Drive on the NEC Versa SX
 Loading...