How it Works
Log In / Sign Up
Buy Points
How it Works
FAQ
Contact Us
Questions and Suggestions
Users
NEC
Loading...
T
Topaz
2
Topaz AT-21
Traveler PSIII
TriDigital HD10K
TriDigital HD4K
TriDigital HD6K
TT820e
TWINPOS G3
TX7-i9610
2
U
u
U18849EE1V0UM00
U250X
12
U260W
12
U300X
13
U300X-WK1
2
U310W
15
U310W-WK1
U321H
5
U321Hi (Multi-Pen)
U321Hi (Multi-Touch)
U321Hi-TM
2
U321Hi-WK
2
U321H-WK
2
UCD-XL
2
Ultra CallAnalyst
UM280W
5
UM280WI
2
UM280X
7
UM280Xi
UM301W
5
UM301WI
UM301X
5
UM301Xi (Multi-Pen)
2
UM330W
8
UM330Wi
2
UM330Wi2-WK
UM330Wi-WK
UM330Wi-WK1
2
UM330W-WK1
2
UM330X
8
UM330Xi
UM330Xi2-WK
UM330Xi-WK1
2
UM330X-WK1
2
UM351W
6
UM351Wi (Multi-Touch)
UM351Wi-WK
UM351W-WK
UM352W
6
UM352Wi
UM352Wi (Multi-Touch)
UM352W-TM
2
UM352W-WK
2
UM361X
7
UM361Xi-TM
UM361Xi-WK
UM361X-WK
UM383WL
2
UM383WL-WK
2
UM8000
UN462A
3
UN462VA
2
UN551S
5
UN551VS
3
UN552
3
UN552A
3
UN552V
UNIVERGE
UNIVERGE Aspire UX
UNIVERGE BLUE CONNECT
UNIVERGE DT300
Univerge DT310
Univerge DT330
UNIVERGE DT700
Univerge DT710
Univerge DT730
Univerge DT750
2
Univerge DT820
UNIVERGE DT830G(DG)
Univerge DV8100
UNIVERGE MH110
3
UNIVERGE MH120
2
UNIVERGE MH20
UNIVERGE MH240
Univerge MH250
UNIVERGE NEAX
UNIVERGE NEAX 2000 IPS
3
Univerge NEAX 2000 IPS Command
Univerge SC8100
UNIVERGE SL2100
UNIVERGE SV7000
6
UNIVERGE SV810
UNIVERGE SV8100
44
UNIVERGE SV8100 DT3
Univerge SV8100 DT310
Univerge SV8100 DT330
UNIVERGE SV8100 DT7
Univerge SV8100 DT710
Univerge SV8100 DT730
Univerge SV 9500
Loading...
Loading...
Nothing found
UM352W-WK
Product Sheet
3 pgs
1.44 Mb
0
User Manual
151 pgs
5.43 Mb
0
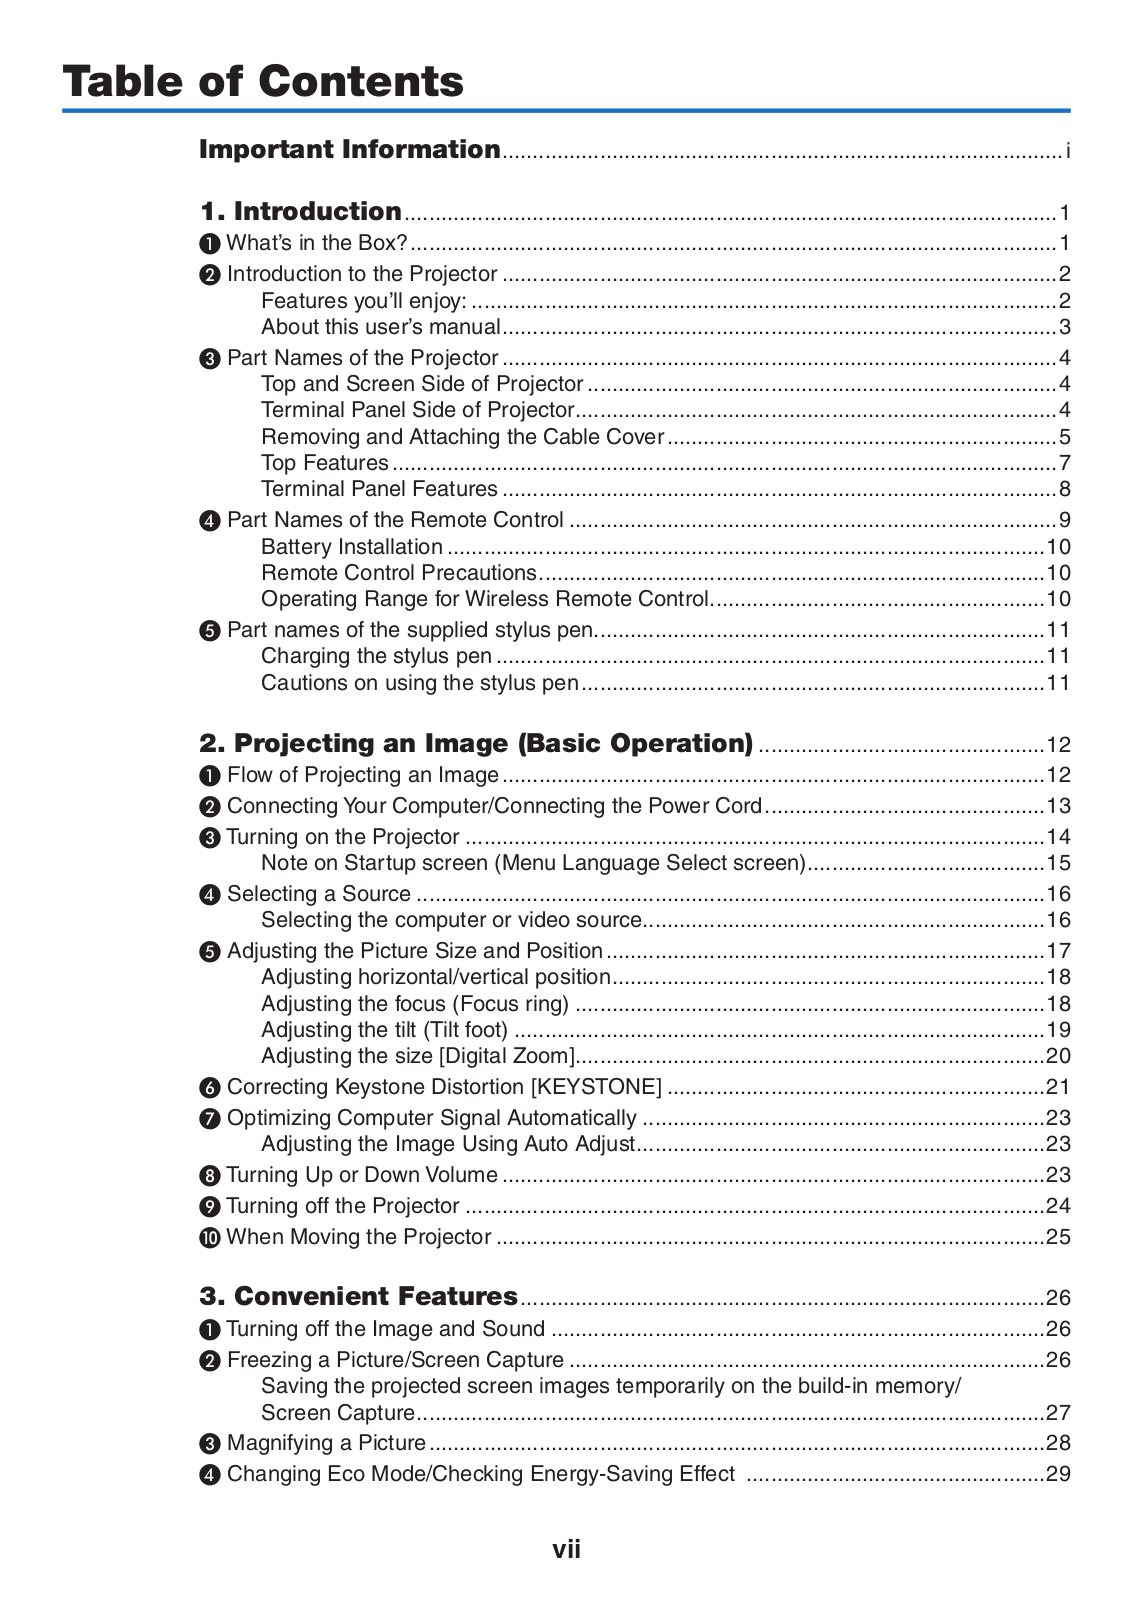
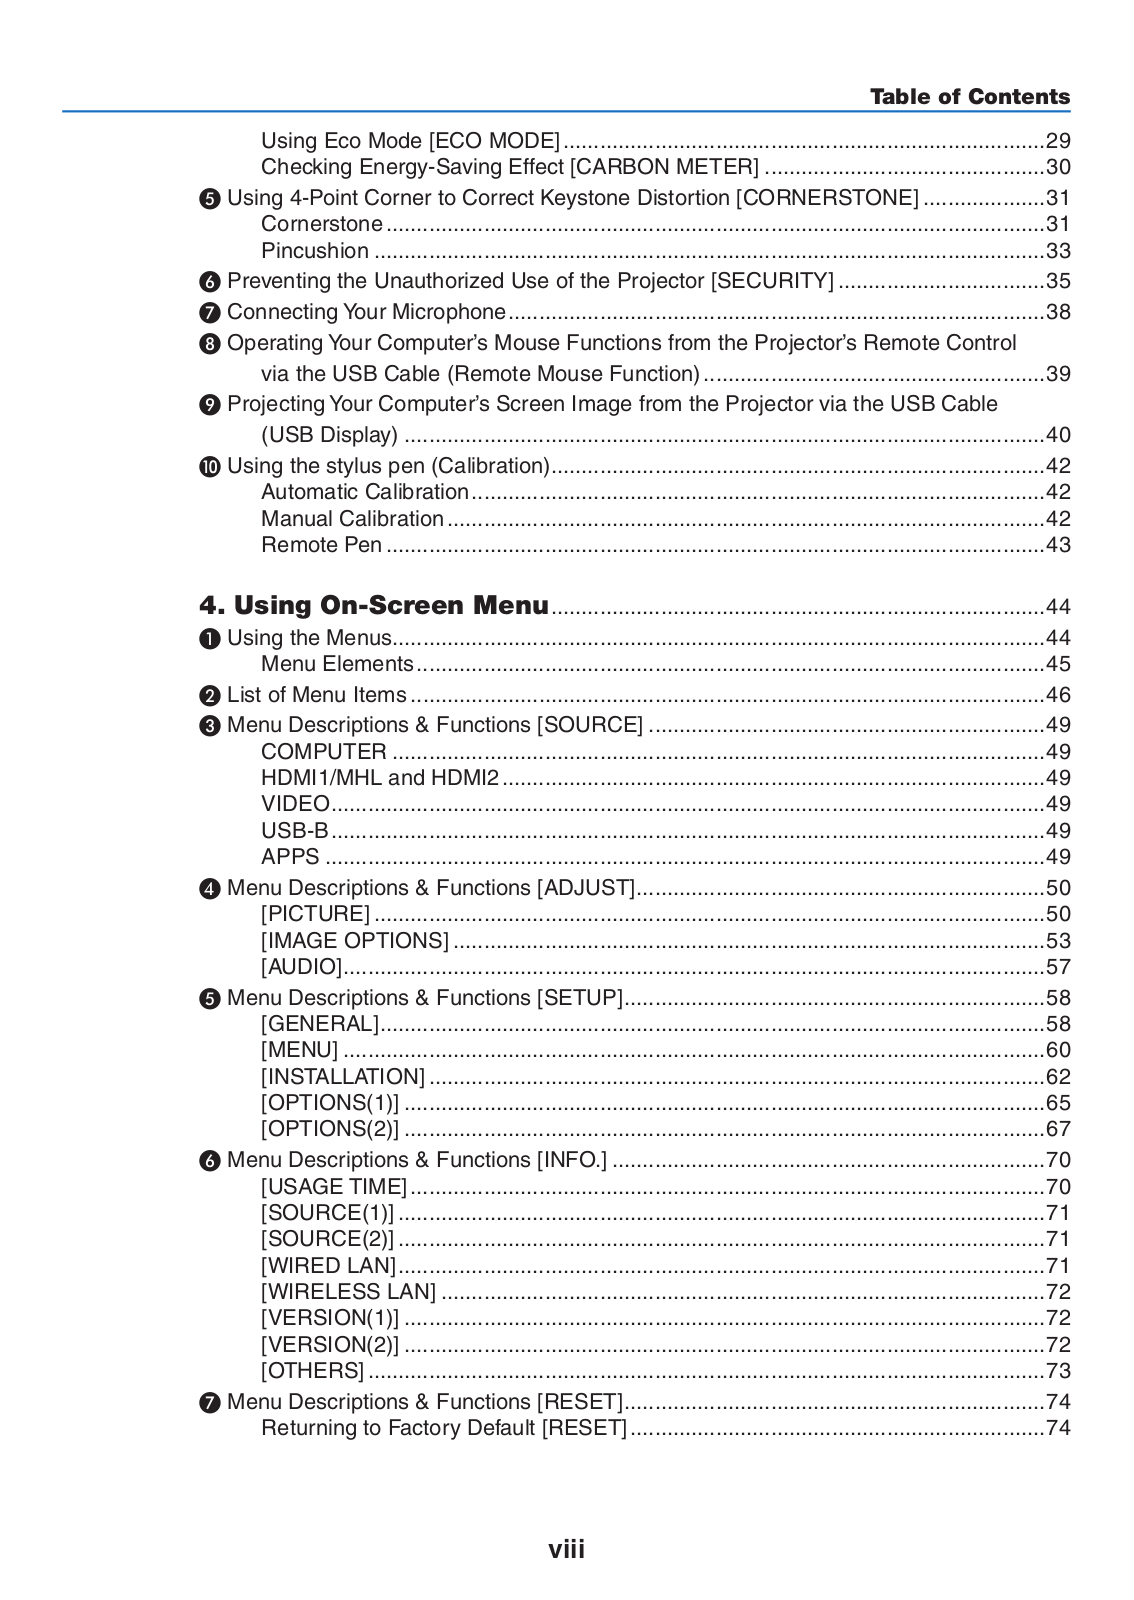
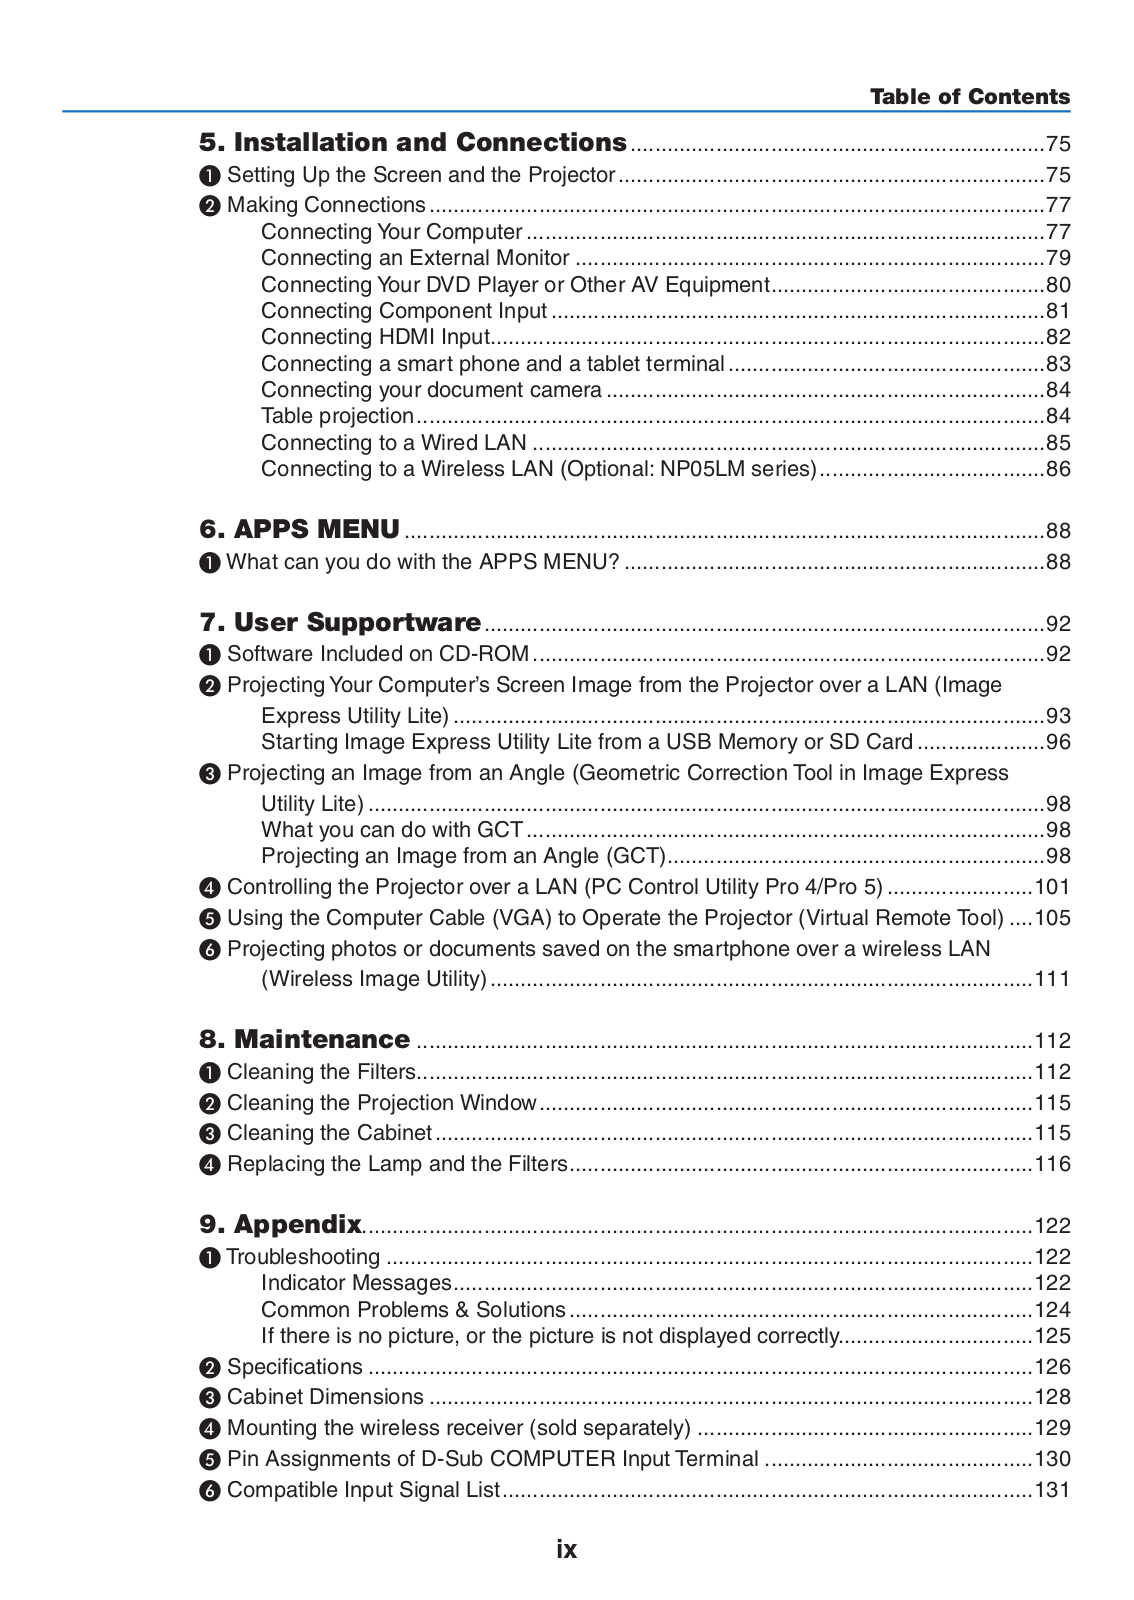
Table of contents
Loading...
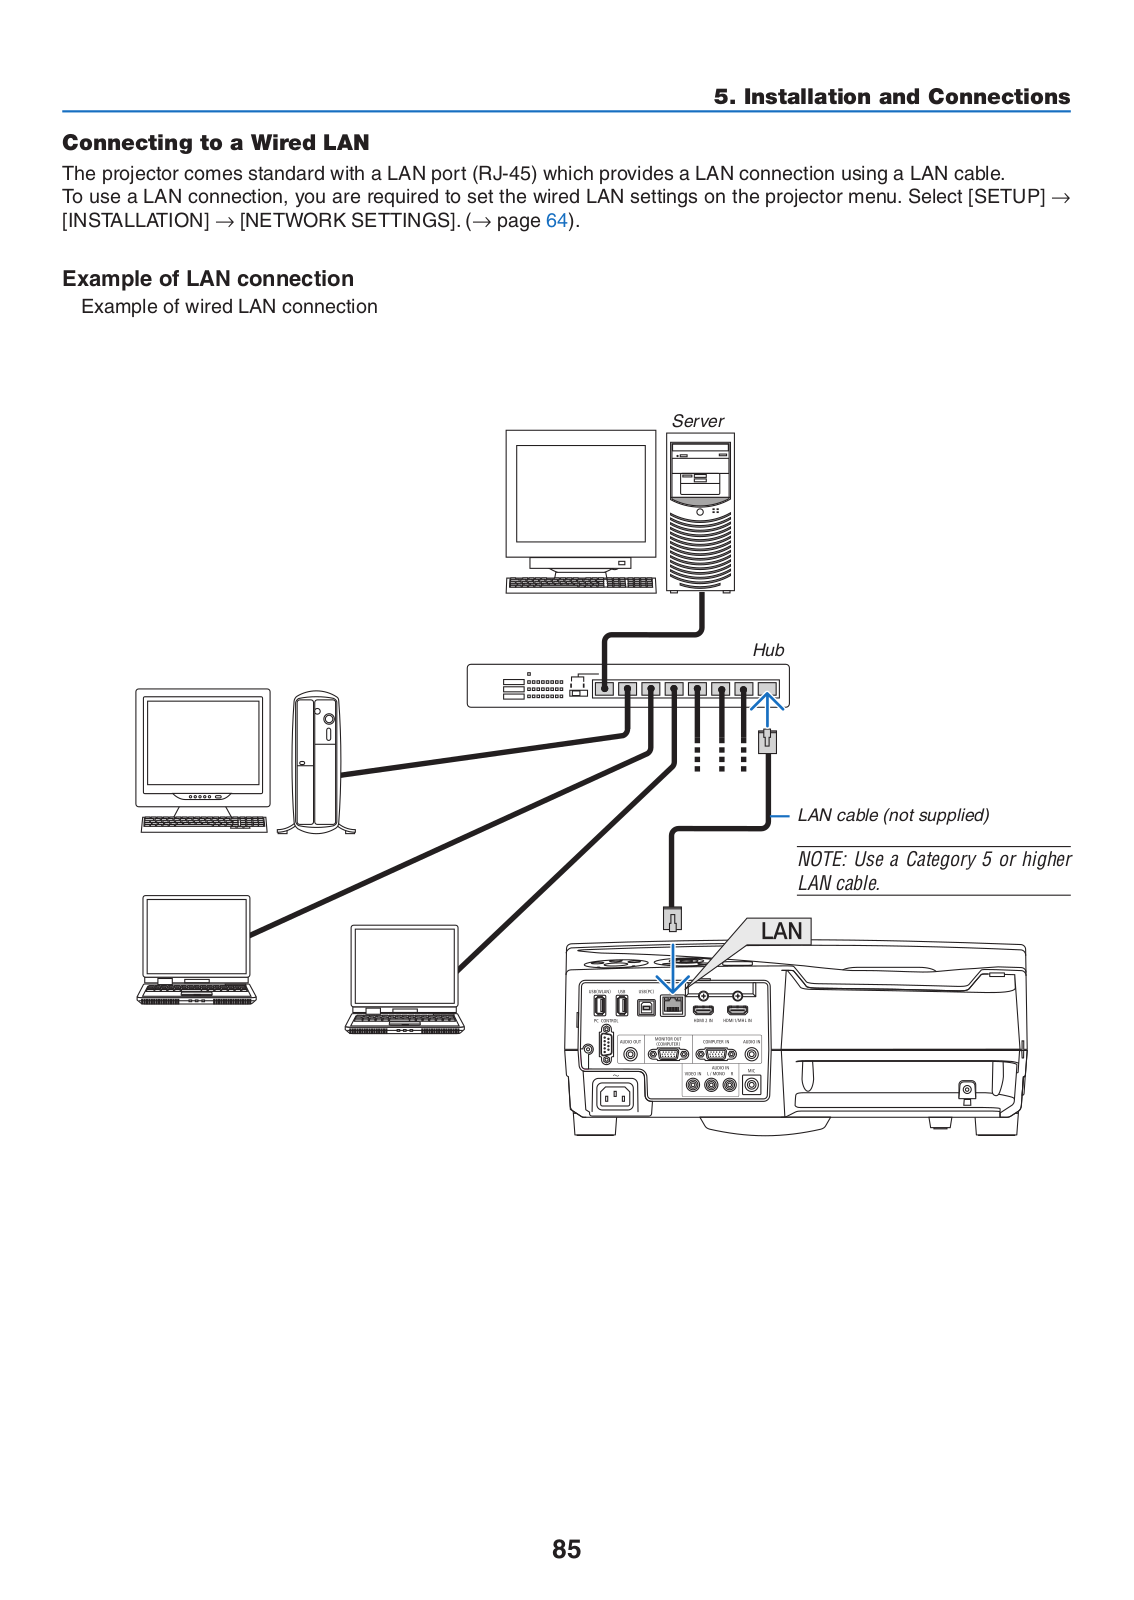
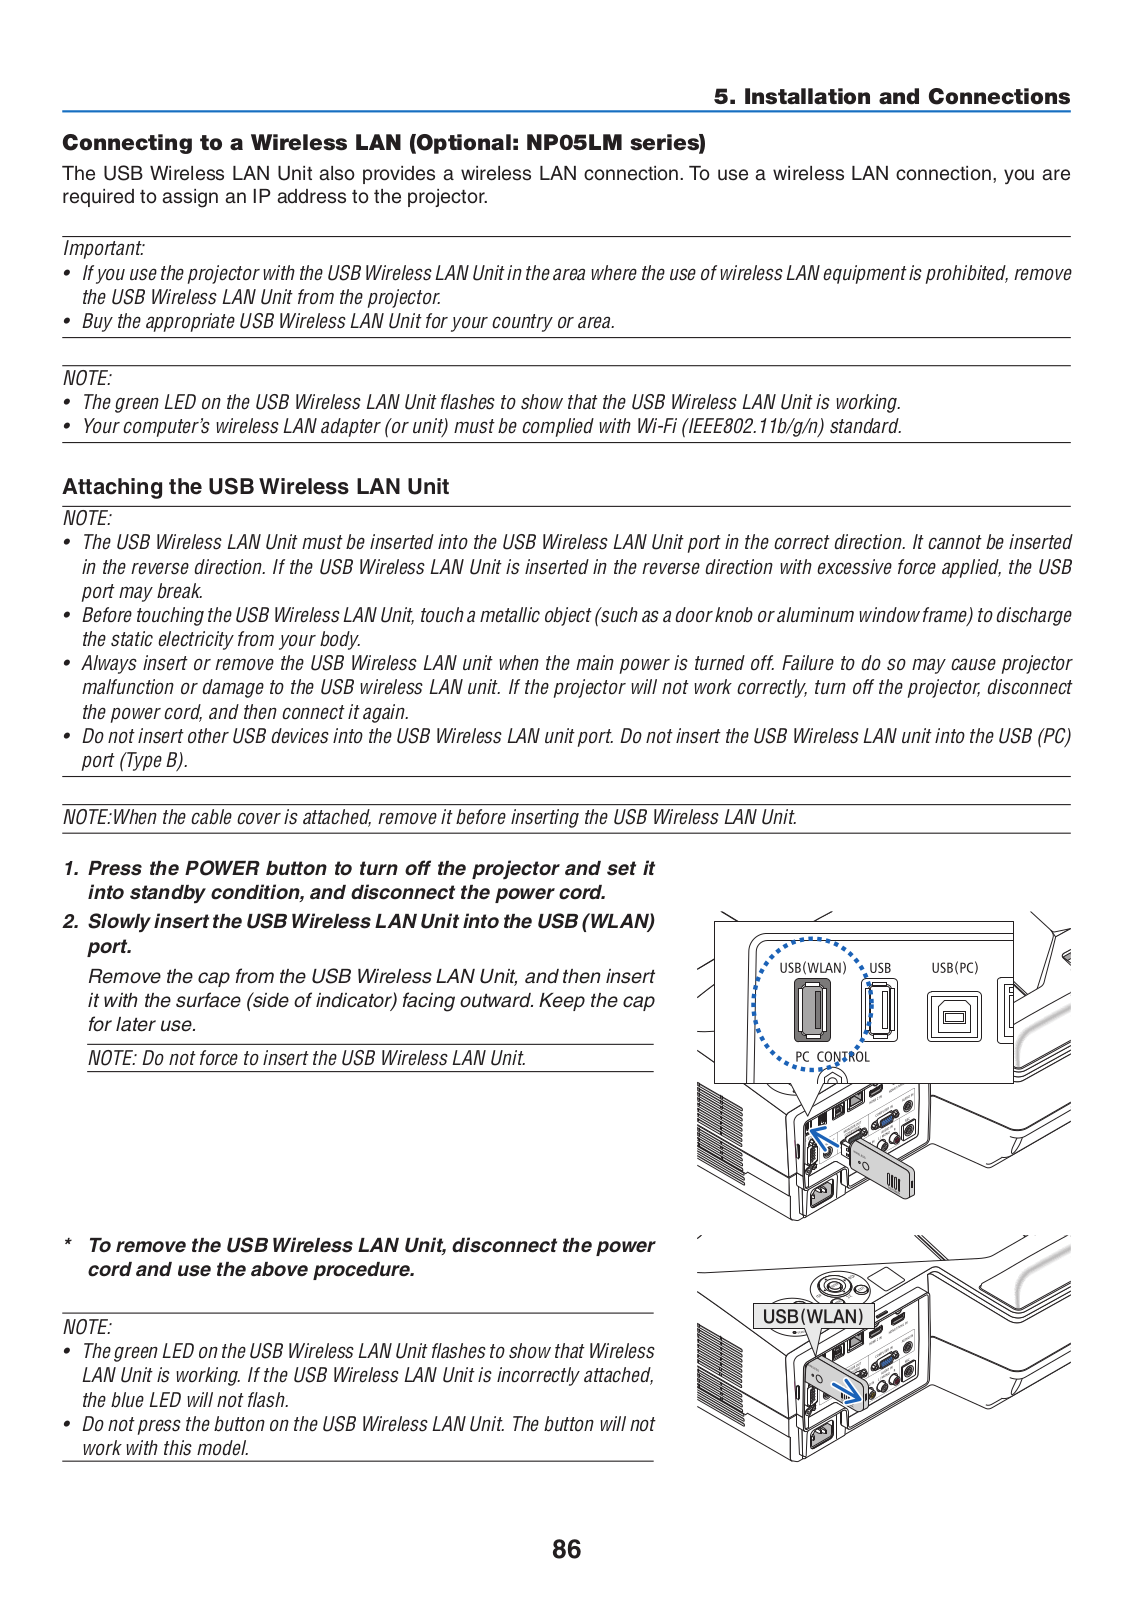
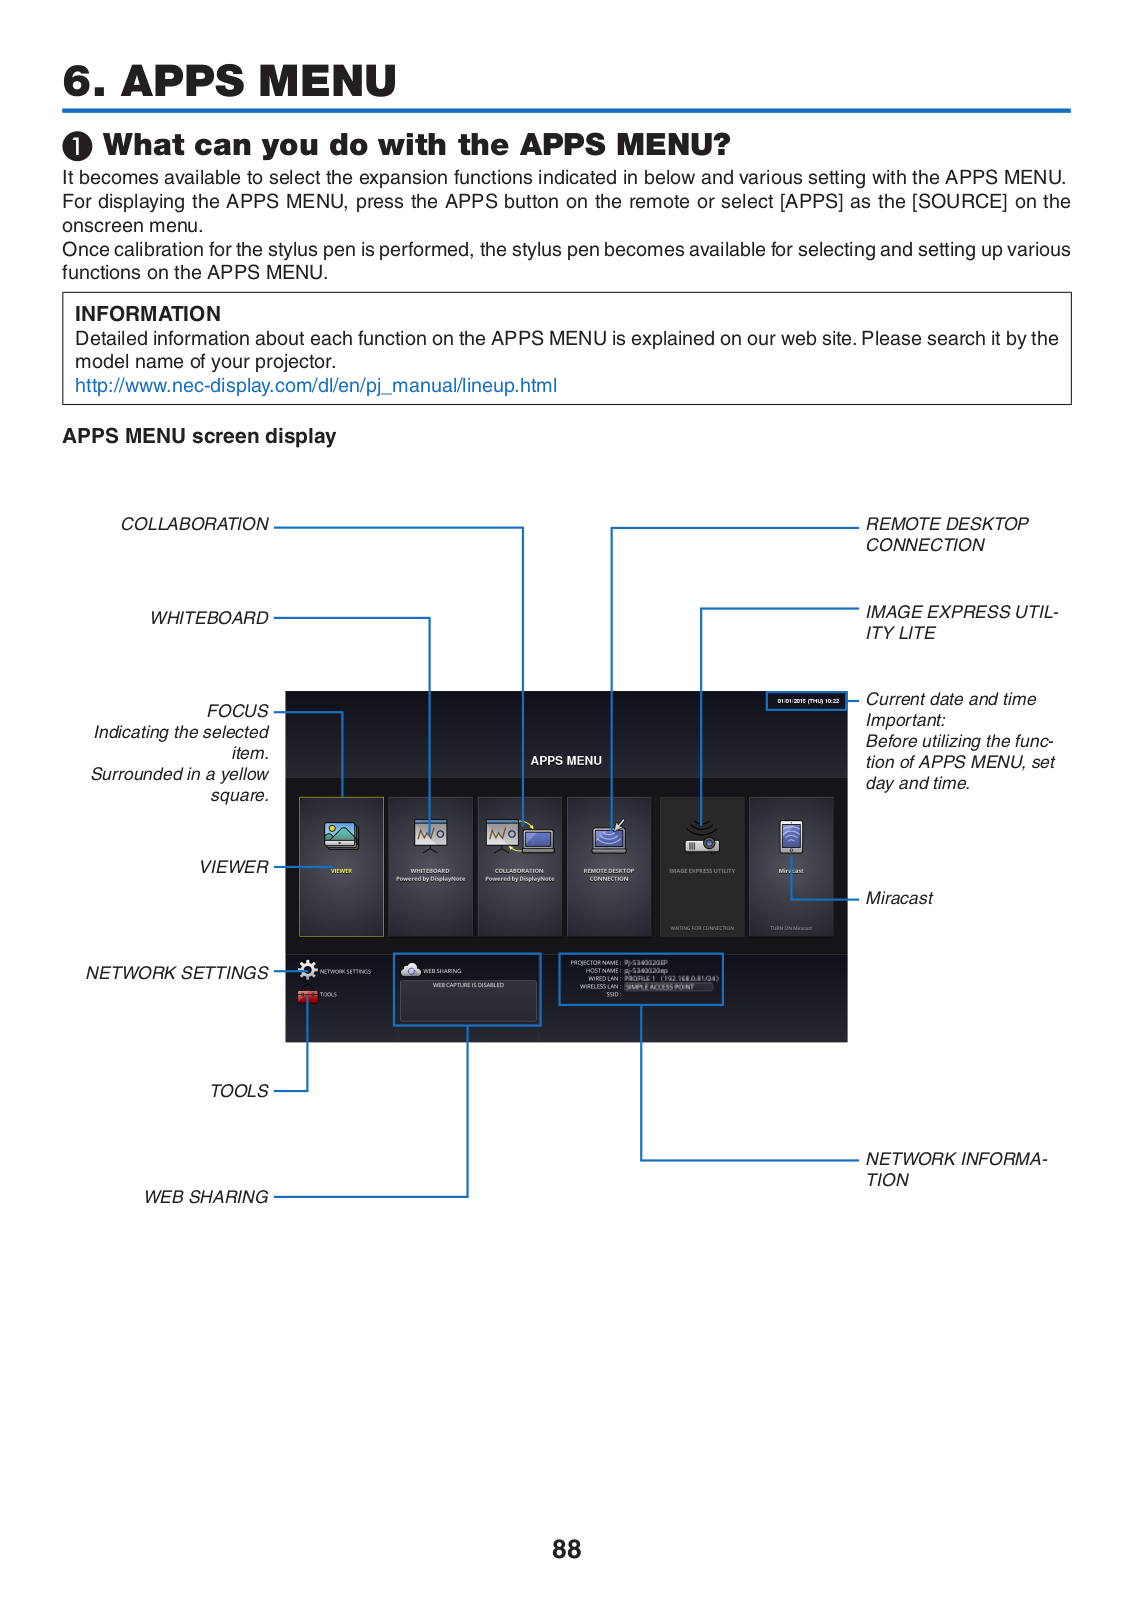
NEC UM352W-WK, UM352W-TM, UM352W User Manual
...
NEC User Manual
Download
Specifications and Main Features
Frequently Asked Questions
User Manual
Download
Loading...
+
hidden pages
Unhide
You need points to download manuals.
1 point = 1 manual.
You can buy points or you can get point for every manual you upload.
Buy points
Upload your manuals
 Loading...