How it Works
Log In / Sign Up
Buy Points
How it Works
FAQ
Contact Us
Questions and Suggestions
Users
NEC
Loading...
T
TileMatrix LCD4020-2-AV
TileMatrix LCD4620-2-AV
TileMatrix LCD5220-AV
TIM VIDEO WINNER PRESS RELEASE
TL-12CG-3
TM1200
TM700
TNETPC-ION
Topaz
2
Topaz AT-21
Traveler PSIII
TriDigital HD10K
TriDigital HD4K
TriDigital HD6K
TT820e
TWINPOS G3
TX7-i9610
2
U
u
U18849EE1V0UM00
U250X
12
U260W
12
U300X
13
U300X-WK1
2
U310W
15
U310W-WK1
U321H
5
U321Hi (Multi-Pen)
U321Hi (Multi-Touch)
U321Hi-TM
2
U321Hi-WK
2
U321H-WK
2
UCD-XL
2
Ultra CallAnalyst
UM280W
5
UM280WI
2
UM280X
7
UM280Xi
UM301W
5
UM301WI
UM301X
5
UM301Xi (Multi-Pen)
2
UM330W
8
UM330Wi
2
UM330Wi2-WK
UM330Wi-WK
UM330Wi-WK1
2
UM330W-WK1
2
UM330X
8
UM330Xi
UM330Xi2-WK
UM330Xi-WK1
2
UM330X-WK1
2
UM351W
6
UM351Wi (Multi-Touch)
UM351Wi-WK
UM351W-WK
UM352W
6
UM352Wi
UM352Wi (Multi-Touch)
UM352W-TM
2
UM352W-WK
2
UM361X
7
UM361Xi-TM
UM361Xi-WK
UM361X-WK
UM383WL
2
UM383WL-WK
2
UM8000
UN462A
3
UN462VA
2
UN551S
5
UN551VS
3
UN552
3
UN552A
3
UN552V
UNIVERGE
UNIVERGE Aspire UX
UNIVERGE BLUE CONNECT
UNIVERGE DT300
Univerge DT310
Univerge DT330
UNIVERGE DT700
Univerge DT710
Univerge DT730
Univerge DT750
2
Univerge DT820
UNIVERGE DT830G(DG)
Univerge DV8100
UNIVERGE MH110
3
UNIVERGE MH120
2
UNIVERGE MH20
UNIVERGE MH240
Univerge MH250
UNIVERGE NEAX
UNIVERGE NEAX 2000 IPS
3
Univerge NEAX 2000 IPS Command
Univerge SC8100
UNIVERGE SL2100
UNIVERGE SV7000
6
Univerge SV 9500
Loading...
Loading...
Nothing found
UM330Xi-WK1
Product Sheet
2 pgs
1.1 Mb
0
User Manual
149 pgs
6.32 Mb
0
Table of contents
Loading...
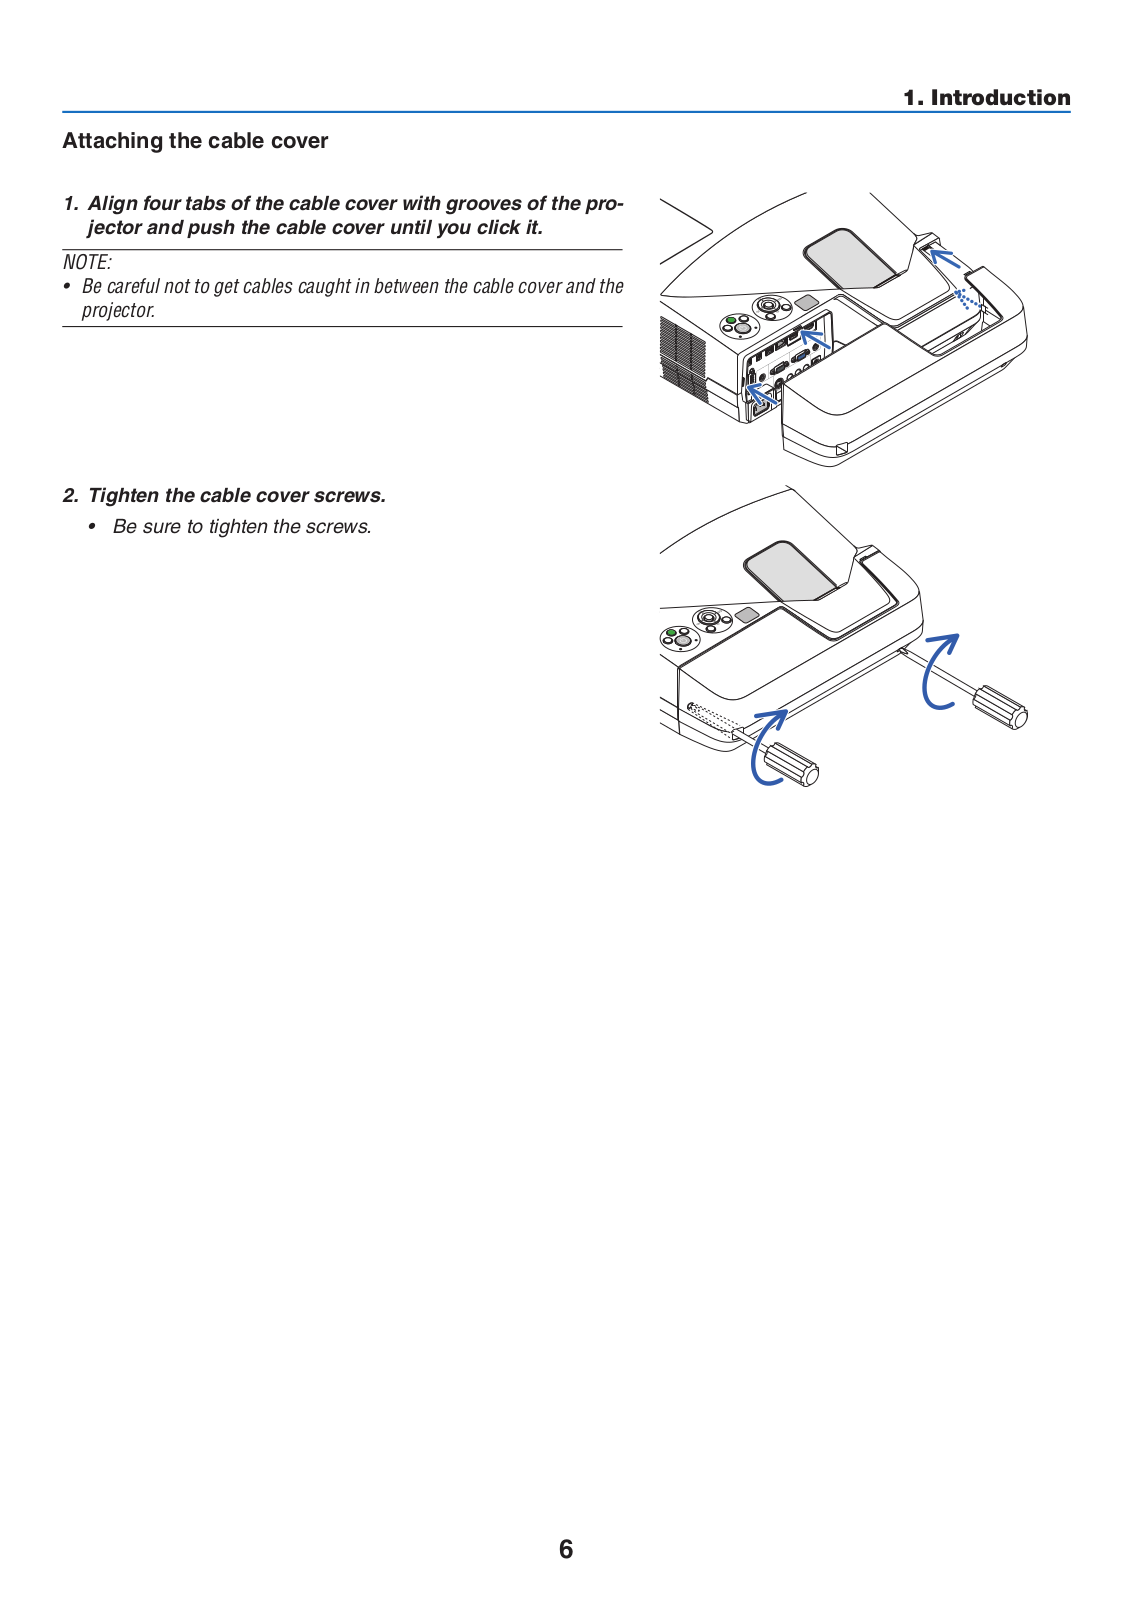
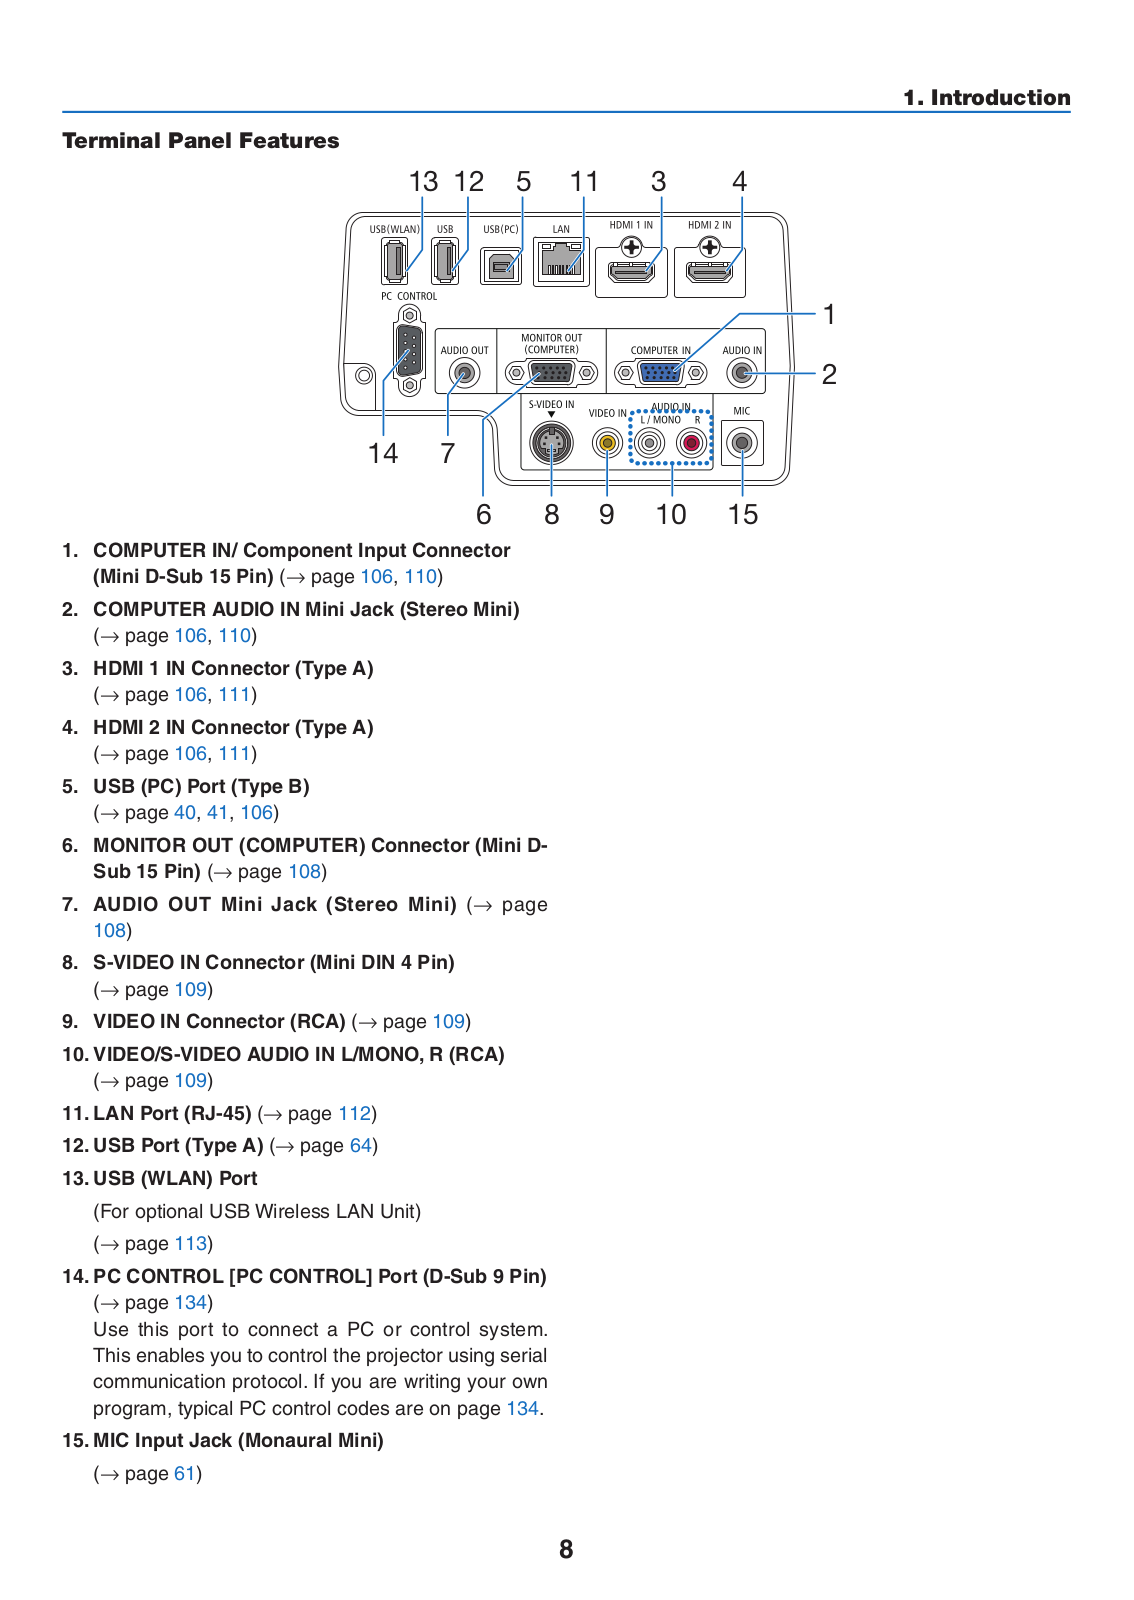
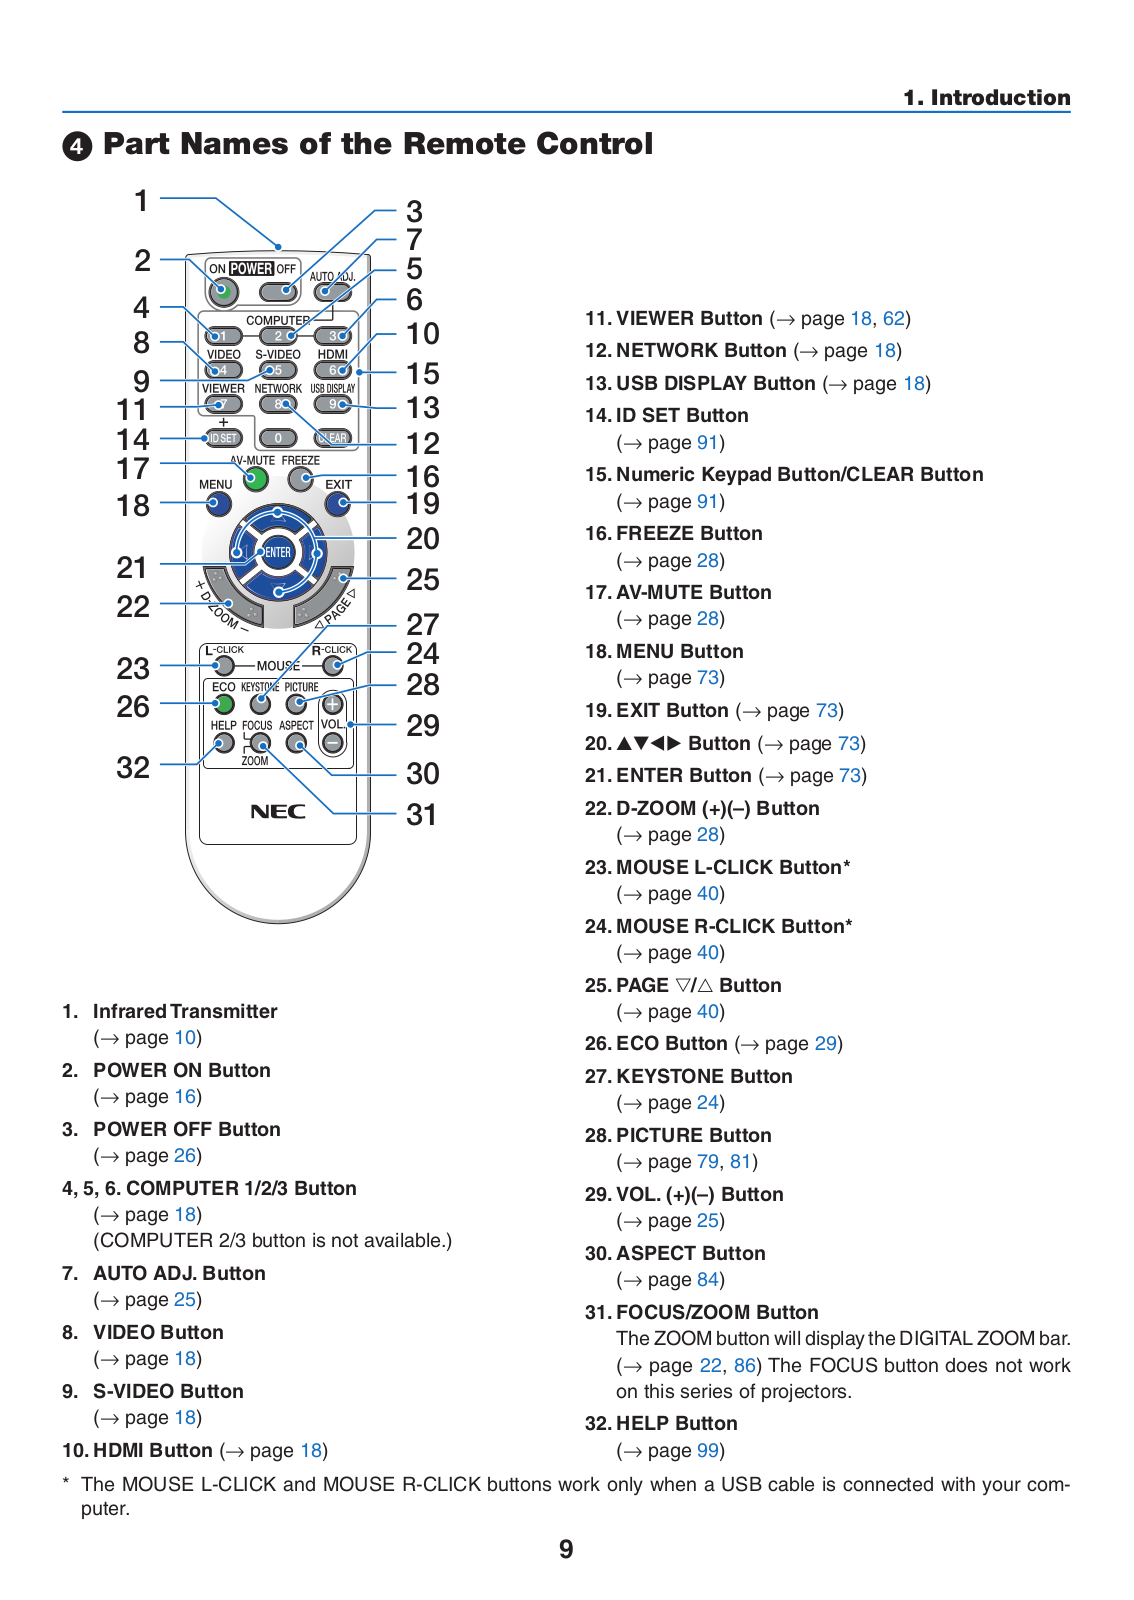
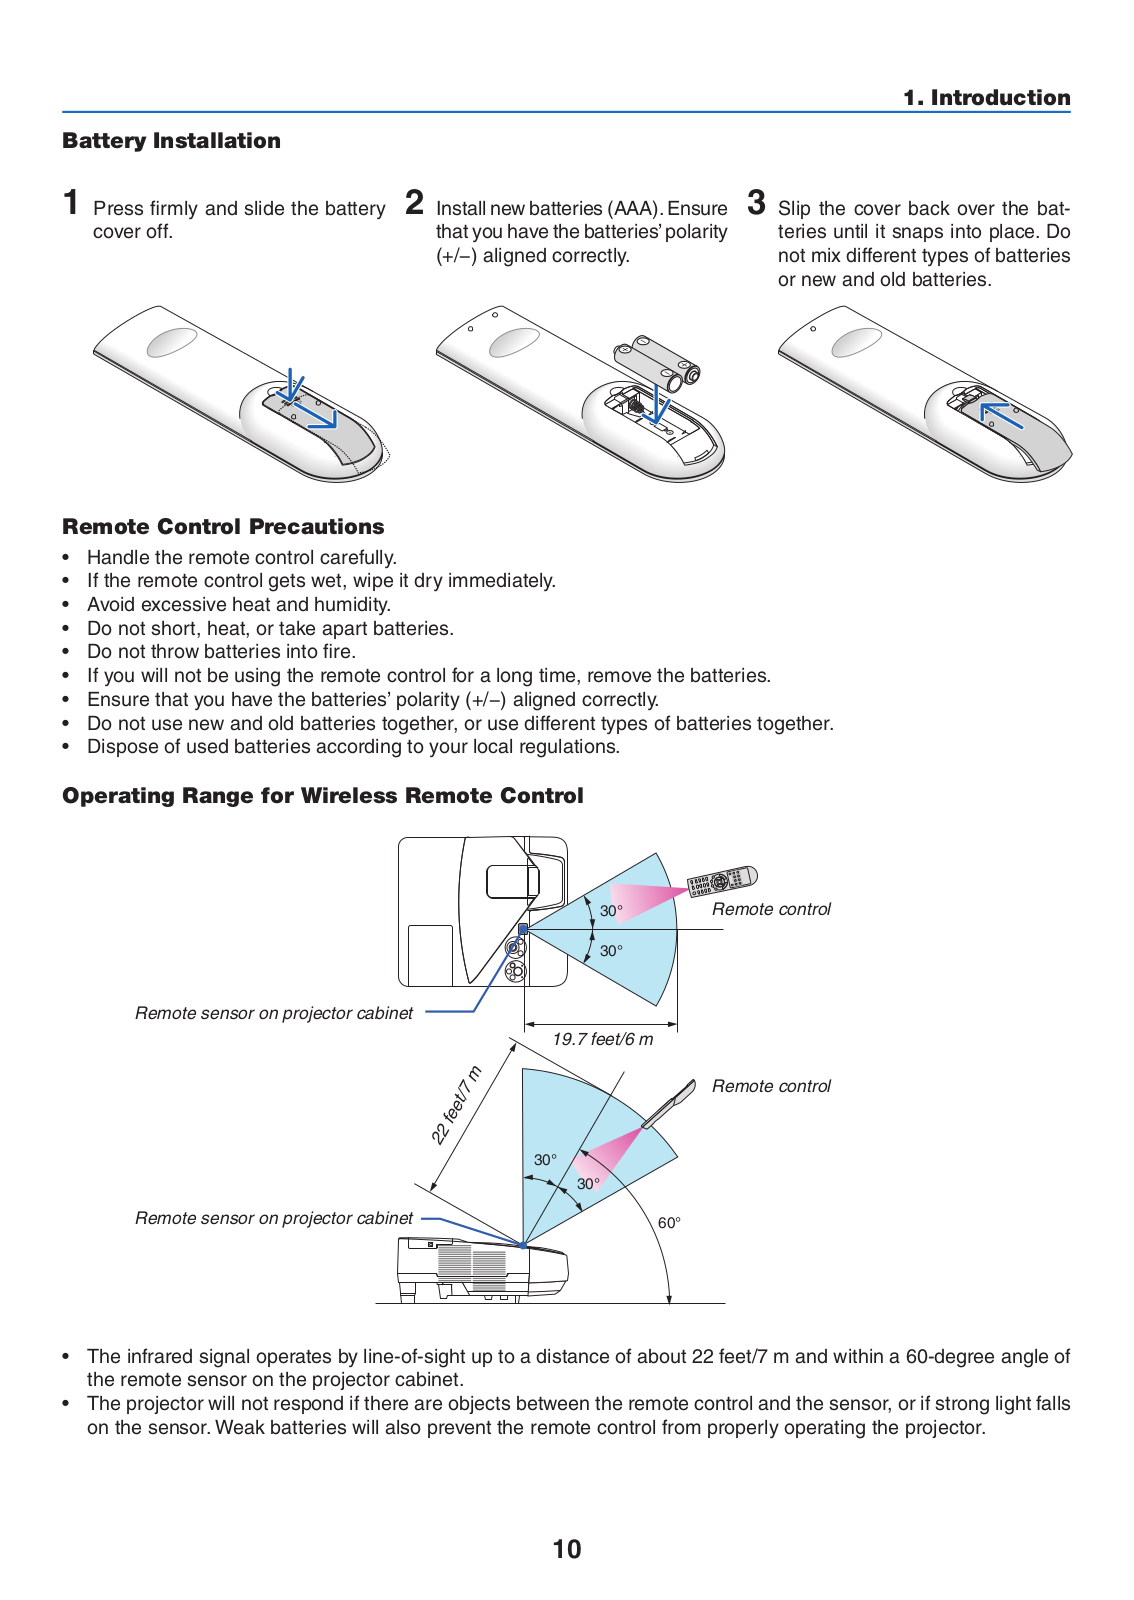
NEC UM330Xi-WK1, UM330X-WK1, UM330X, UM330Wi-WK1, UM330W-WK1 User Manual
...
NEC UM330Xi-WK1, UM330X-WK1, UM330X, UM330Wi-WK1, UM330W-WK1, UM330W User Manual
Download
Specifications and Main Features
Frequently Asked Questions
User Manual
Download
Loading...
+
hidden pages
Unhide
You need points to download manuals.
1 point = 1 manual.
You can buy points or you can get point for every manual you upload.
Buy points
Upload your manuals