


Digital Talk 2000
Owner's Manual

ATTENTION
Before Using the Phone:
It is necessary that you fully CHARGE the phone battery
before attempting to make or receive a call.
Battery Disposal:
DO NOT PLACE USED BATTERIES IN YOUR REGULAR
TRASH. THIS NICKEL-CADMIUM (Ni-Cd) BATTERY MUST
BE COLLECTED, RECYCLED OR DISPOSED OF IN AN
ENVIRONMENTALLY SOUND MANNER.
:
Battery Recommendations:
The NEC Digital Talk 2000 Series IS-136 TDMA cellular phone
you have purchased is designed to deliver quality
performance and provide you with years of use. To maintain
optimum performance, NEC recommends only using NEC
Authentic Accessories with all NEC cellular phones.
The incineration, landfilling, or mixing of nickel-cadmium
(Ni-Cd) batteries with any municipal solid waste stream is
PROHIBITED BY LAW in most areas.
Return this battery to a federal or state approved nickelcadmium (or “sealed lead”) battery recycler. This may be
where you purchased the battery or a local seller of
automotive batteries. In all states, call 1-800-637-5917, except
Minnesota, if further disposal information is required. In
Minnesota, call 1-800-225-PRBA.
Contact local waste management officials for other information
regarding the environmentally sound collection, recycling and
disposal of this battery.
Hands-Free Adapter:
NEC does not recommend using a hands-free adapter
with the Digital Talk 2000 Series portable cellular
telephone.
i

IMPORTANT
READ THIS INFORMATION BEFORE
USING YOUR HAND-HELD PORTABLE
CELLULAR TELEPHONE
First introduced in 1984, the hand-held portable cellular
telephone is one of the most exciting and innovative electronic
products ever developed. With it you can stay in contact with
your office, your home, emergency services, and others.
For the safe and efficient operation of your phone,
observe these guidelines.
Your cellular telephone is a radio transmitter and receiver.
When it is ON, it receives and also sends out radio frequency
(RF) energy. The phone operates in the frequency range of
824 MHz to 894 MHz and employs commonly used frequency
modulation (FM) techniques. When you use your phone, the
cellular system handling your call controls the power level at
which your phone transmits. The power level can range from
0.006 of a watt to 0.6 of a watt.
Exposure to Radio Frequency Energy
In 1991 the Institute of Electrical and Electronics Engineers
(IEEE), and in 1992 the American National Standards Institute
(ANSI) updated the 1982 ANSI Standard for safety levels with
respect to human exposure to RF energy. Approximately 120
scientists, engineers, and physicians from universities,
government health agencies, and industry, after reviewing the
available body of research, developed this updated Standard.
In March, 1993, the Federal Communications Commission
(FCC) proposed the adoption of this updated Standard.
The design of your phone complies with this updated
Standard. Of course, if you want to limit RF exposure even
further than the updated ANSI Standard, you may choose to
control the duration of your calls and operate your phone in
the most power efficient manner.
Efficient Phone Operation
For your phone to operate at the lowest power level,
consistent with satisfactory call quality, please observe the
following guidelines:
ii

If your phone has an extendable antenna, extend it fully.
Some models allow you to place a call with the antenna
retracted. However, your phone operates more efficiently with
the antenna fully extended.
Hold the phone as you would any other telephone. While
speaking directly into the mouthpiece, position the antenna up
and over your shoulder. Do not hold the antenna when the
phone is "IN USE". Holding the antenna affects call quality
and may cause the phone to operate at a higher power level
than needed.
Antenna Care and Replacement
Do not use the phone with a damaged antenna. If a damaged
antenna comes into contact with the skin, a minor burn may
result. Replace a damaged antenna immediately. Consult
your manual to see if you may change the antenna yourself. If
so, use only a manufacturer-approved antenna. Otherwise,
take your phone to a qualified service center for repair.
Use only the supplied or approved antenna. Non-approved
antennas, modifications, or attachments could impair call
quality, damage the phone, and violate FCC regulations.
Driving
Check the laws and regulations on the use of cellular
telephones in the areas where you drive. Always obey them.
When using your phone while driving, please:
* give full attention to driving, and
* pull off the road and park before making or
answering a call if driving conditions so require.
Hearing Aids
Some digital wireless phones may interfere with some hearing
aids. In the event of such interference, you may want to
consult your service provider [ or call the customer service line
to discuss alternatives.]
Electronic Devices
Most modern electronic equipment is shielded from RF
energy. However, RF energy from cellular telephones may
affect inadequately shielded electronic equipment.
iii

RF energy may affect improperly installed or inadequately
shielded electronic operating and entertainment systems in
motor vehicles. Check with the manufacturer or its
representative to determine if these systems are adequately
shielded from external RF energy . You should also check with
the manufacturer of any equipment that has been added to
your vehicle. Consult the manufacturer of any personal
medical devices (such as pacemakers, hearing aids, etc.) to
determine if they are adequately shielded from external RF
energy. Turn your phone OFF in health care facilities when
any regulations posted in the areas instruct you to do so.
Hospitals or health care facilities may be using equipment that
could be sensitive to external RF energy.
Aircraft
Turn your phone OFF before boarding any aircraft.
* Use it on the ground only with crew permission.
* Do not use it in the air.
To prevent possible interference with aircraft systems, Federal
Aviation Administration (FAA) regulations require you to have
permission from a crew member to use your phone while the
plane is on the ground. To prevent interference with cellular
systems, FCC regulations prohibit using your phone while the
plane is in the air.
Children
Do not allow children to play with your phone. It is not a toy.
Children could hurt themselves or others (by poking
themselves or others in the eye with the antenna, for
example). Children also could damage the phone, or make
calls that increase your telephone bills.
Blasting Areas
To avoid interfering with blasting operations, turn your unit
OFF when in a “blasting area” or in areas posted: "Turn off
two-way radio."
Construction crews often use remote control RF devices to set
off explosives.
Air Bags
An air bag inflates with great force. DO NOT place objects,
including both installed or portable wireless equipment, in the
area over the air bag or in the bag deployment area. If invehicle wireless equipment is improperly installed and the air
bag inflates, serious injury could result.
iv

Potentially Explosive Atmospheres
Turn your phone OFF when in any area with a potentially
explosive atmosphere. It is rare, but your phone or its
accessories could generate sparks. Sparks in such areas
could cause an explosion or fire resulting in bodily injury or
even death.
Areas with a potentially explosive atmosphere are often, but
not always, clearly marked. They include fueling areas such
as gas stations; below deck on boats; fuel or chemical transfer
or storage facilities; areas where the air contains chemicals or
particles, such as grain, dust, or metal powders; and any other
area where you would normally be advised to turn off your
vehicle engine.
Do not transport or store flammable gas, liquid, or explosives
in the compartment of your vehicle which contains your phone
or accessories.
Vehicles using liquefied petroleum gas (such as propane or
butane) must comply with the National Fire Protection
Standard (NFPA-58). For a copy of this standard, contact the
National Fire Protection Association, One Batterymarch Park,
Quincy, MA 02269, Attn: Publication Sales Division.
P ACEMAKER/ICDs
Research sponsored by the Wireless Technology Research,
LLC ("WTR"), indicates that some wireless telephones cause
interference with pacemakers. Accordingly, NEC America
endorses the following recommendations issued by the WTR:
Wireless phones should be kept at a safe distance from a
pacemaker. Existing data indicate that the greater the
distance between a pacemaker and a wireless phone, the less
risk of interference. These data further indicate that six inches
is the proper separation distance for minimal risk.
Practical steps to achieve this separation distance include:
o The wireless telephone should not be placed over the
pacemaker, such as in a breast pocket, when it is in the
"ON" position. (A phone is "ON" when power is being
supplied to the telephone by the battery).
o The phone should be used at the ear opposite the pacemaker.
Note: There is nothing in the comprehensive data to suggest
that bystanders with pacemakers would be at risk of
interference from others who are using wireless phones.
v

CONTROLS AND FEATURES
Volume
Antenna
Earpiece
Receiver
Liquid Crystal
Display
Call Control
Keys
Function Keys
Dialing/SMS
Scroll Keys
Symbol Keys/
Scroll Keys
Rechargeable
Battery Pack
Battery Charging
Jack
Microphone
Battery Locking Catch
Sounder/Speaker
Battery
Charging
Contacts
External Connector
CONTENTS
vi
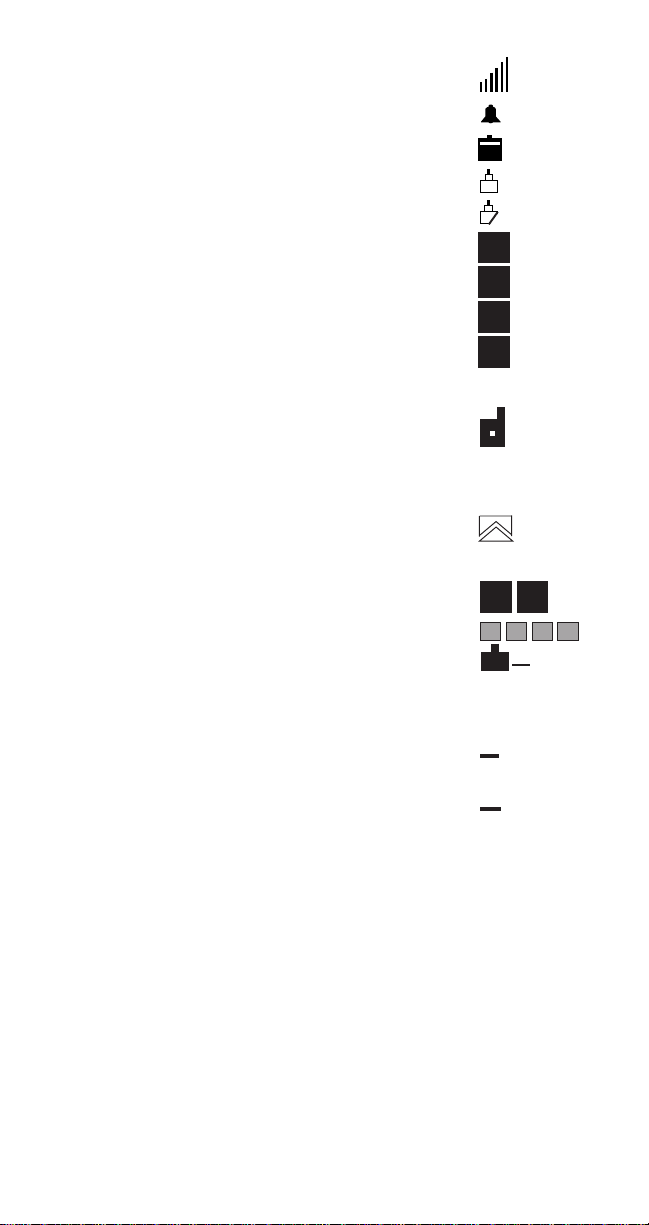
DISPLAY INDICATORS
Signal Strength Indicator
Clock Alarm Indicator
Battery Charge Indicator
Full Lock Indicator
Partial Lock Indicator
Digital Service Indicator
Analog Service IndicatorH
Home Service IndicatorR
Roam Service Indicator
Function Mode Indicator FCN
In Conversation Indicator
Call Timer Indicator 03m06s
Short Message Indicator *
Voice Mail Indicator
Repeat Dial R
System Indicator
No Service
Battery Charging flashing
D
A
H
R
D
A B
c
SMS KEYS
First Message U
Last Message V
Scroll Up U
Scroll Down V
Previous Message U
Next Message V
Left T
Right S
Delete Message CLR
Lock Message MEM
vii
U
V

Getting Started
Installing and Removing the Battery 3
The Battery Charge Indicator 4
Charging and Recharging the Battery 4
Display Indicators 5
Quick Reference Guide 6
List of Menu Functions 7
Operation of the Phone
Turning On or Off 8
Placing a Call 8
Receiving a Call 9
Signal Strength 9
Volume Keys 9
Last Number Redial 10
Speed Dialing 10
Menu
Facility 11
Shortcuts 11
The Memory
Permanent Memory 12
Storing Information 13
Group Storing 13
Recalling Phone Numbers From Memory 14
Keying In Names 15
Editing Names or Numbers 16
Displaying “Hidden” Digits 16
Deleting Phone Numbers From Memory 16
Recalling A Memory Location Number 17
Scanning Phone Numbers Sequentially 17
Scanning Phone Numbers Alphabetically 17
Scratchpad 18
Displaying Your Own Phone Number, Day of the Week, 18
and Network Selection
Additional Features
Locking/Unlocking the Phone 18
Length of Your Calls 21
Total Call Time Counters 21
Setting the Backlight 22
Setting the Key Tone Volume Level 23
Setting the Ringing Volume 23
Selecting Alert Tone Type 24
Using the Phone on Two Networks 24
DTMF Tone Transmission 25
Tone Generator 26
Pauses 27,28
Memory Linking 28
CONTENTS
-1-

System Selection (Including Roaming) 29
Call Lists 31
Muting/Unmuting 32
Low Battery Alarm 33
Error Tone 34
Alarm Clock, Auto Power On, and Auto Off Function 34
Setting the Alarm 34
Setting Automatic Power On 36
Setting Automatic Power Off 37
Escalating Alert 39
Automatic Locking 40
Fixed Digit Dialing 41
Speed Dial Memory Locking 44
Temporary Lock Code Set 45
Reset User Settings (Default) 47
Wake-Up Message Programming 48
Call Type 49
Automatic Repeat Dialing 50
One-Touch Dialing 51
Multiple Language Selection 52
Clock/Calendar Setting 53
Minutes Reminder Tone 55
SID Management 56
Short Messaging Service 56
Short Message Alerts 57
Message Memory 59
Periodic Message Notification 60
Message View Mode 60
Message View Mode Keypad Summary 61
Message Headers 62
Message Separators 63
Deleting Messages 64
Callback Feature 64
Exiting Message Review Mode 65
Sort Order Feature 65
Voice Mail Feature 66
Roll Off Feature 66
Word Wrap Feature 67
SMS Initialize Feature 67
SID Management (System Identifier) 67
Non-Public Mode 68
NAM Programming 72
Maintenance
Care and Maintenance 72
Troubleshooting 73
Limited Warranty 74
Technical Information 77
NEC Service Support 78
GETTING STARTED
-2-

Your phone is powered by a rechargeable battery.
A new battery must be fully charged
before being used for the first time.
If left unused, a fully charged battery will discharge itself in
about a month. Store batteries uncharged in a cool, dark, and
dry place.
The battery pack is a sealed unit with no serviceable parts
inside. Do not attempt to open the case.
WARNING: Use only NEC approved batteries, antennas,
and chargers. The use of any other types will invalidate
any approval or warranty applying to the telephone.
INSTALLING AND REMOVING THE BATTERY
To Install the Battery:
1. Insert the bottom of the battery into the
base of the phone.
2. Fasten it to the phone by
pressing slightly downward
on the battery until the locking
catch snaps into place.
3. Make sure the battery is properly installed.
To Remove the Battery:
Remember to switch the power off before removing the
battery.
1. Slide the locking latch located at the top of the battery
upward and gently pull the battery away from the phone.
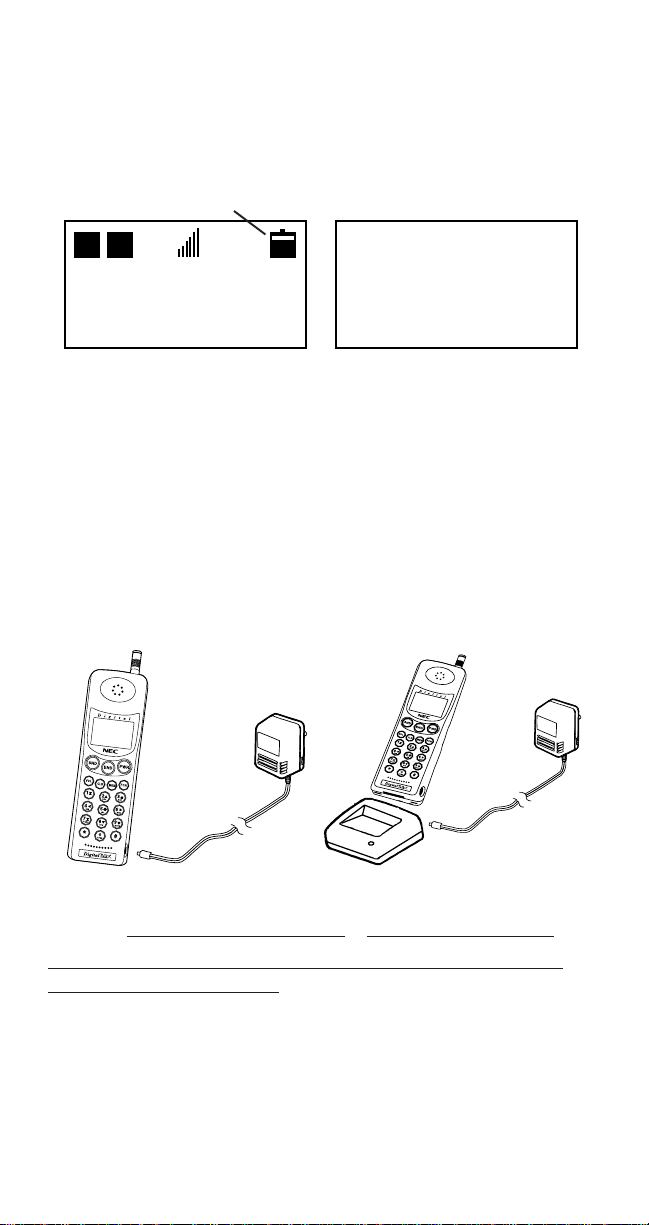
THE BATTERY CHARGE INDICATOR
-3-
D
HB
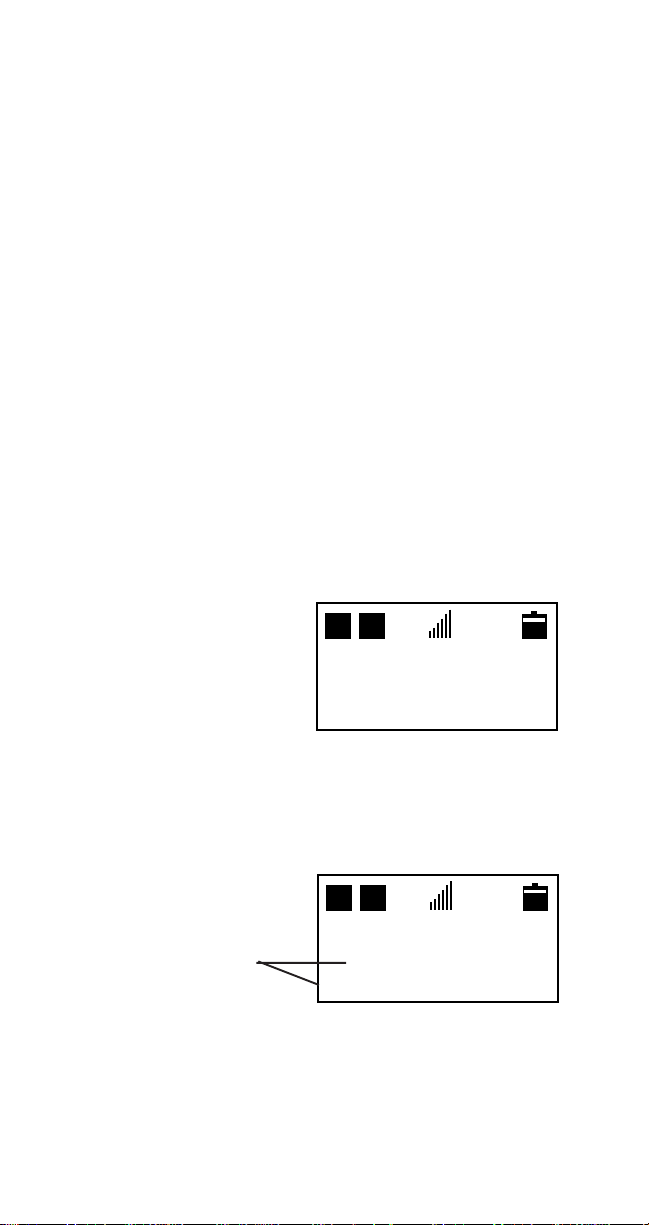
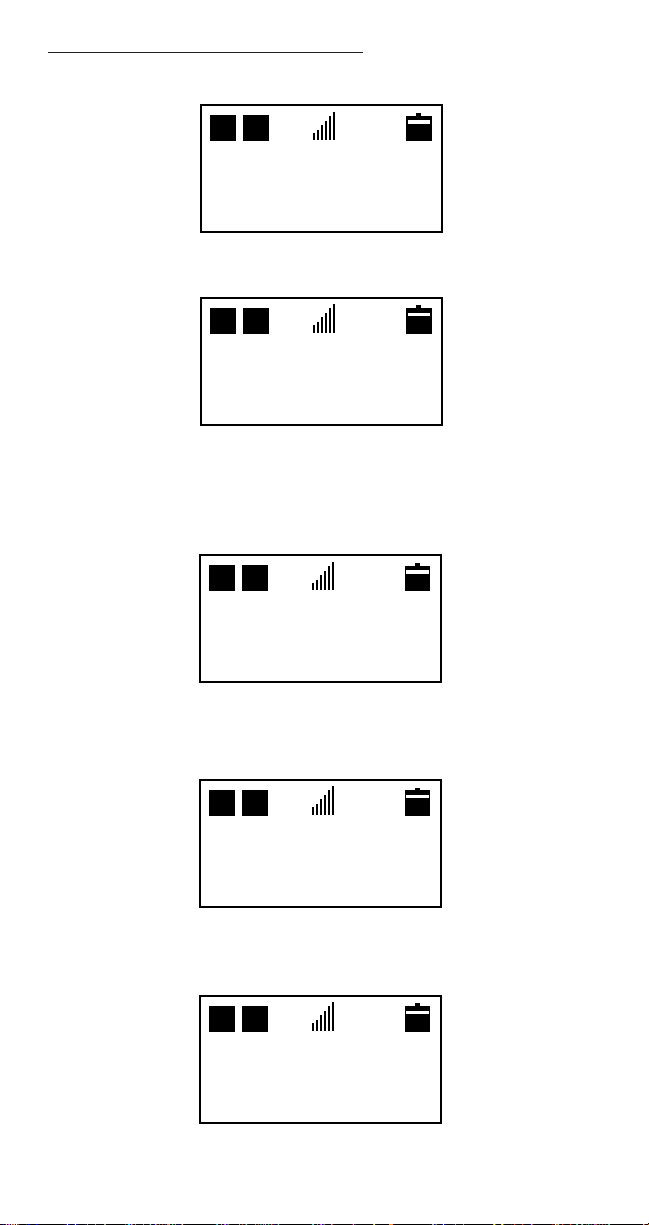
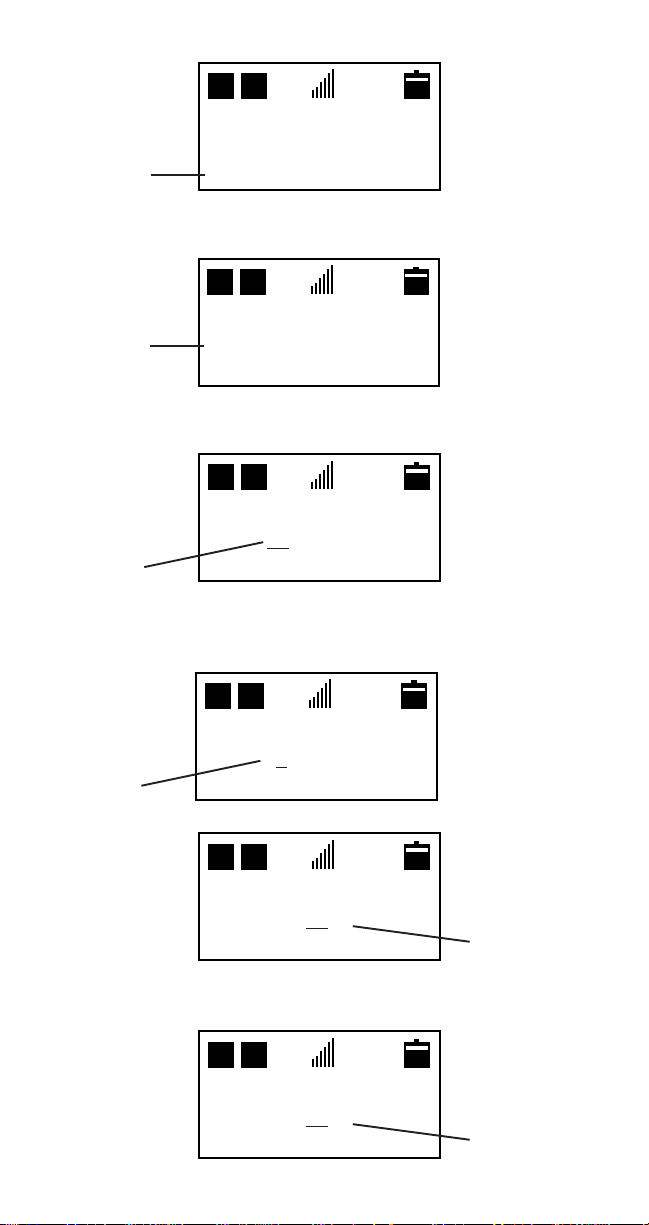
The Battery Charge Indicator is visible on the upper right corner
of the display . When the battery charge falls to a preset level,
the phone displays a warning message, RECHARGE
BA TTERY, and an audible double beep sounds six times at 10second intervals. The phone then automatically powers off.
Battery Charge Indicator
D
HB
J A N 01
RECHARGE
BATTERY
12:00 am
SYSTEM?
CHARGING AND RECHARGING THE BATTERY
Charging the battery can be accomplished two ways.
(A) By direct connect of the AC Adapter to the charging jack if
you purchased the NiCd Battery configuration, or
(B) By placing the phone into the charging stand.
(A)
1. Plug the AC Adapter into a standard 110V AC outlet.
2. Insert the DC plug into the phone battery jack.
(B)
1. Plug the AC Adapter into a standard 110V AC outlet.
2. Insert the DC plug into the charging stand jack.
3. Place the phone in the charging stand.
(A) (B)
NiCd and NiMH Battery Charging/Recharging Times
With Standard Charger With Rapid Charger
NiCd ~8 hours ~1.5 hours
A new battery must be fully charged before being
NiMH ~10 hours ~2.5 hours
used for the first time.
Batteries last longer and perform better if allowed to discharge
fully at least once a week. You can do this by leaving the phone
switched on overnight, or until the message RECHARGE
BA TTERY is displayed and the phone shuts itself off.
NOTE: If the battery is too hot or cold, charging will be
interrupted until the battery reaches a normal temperature.
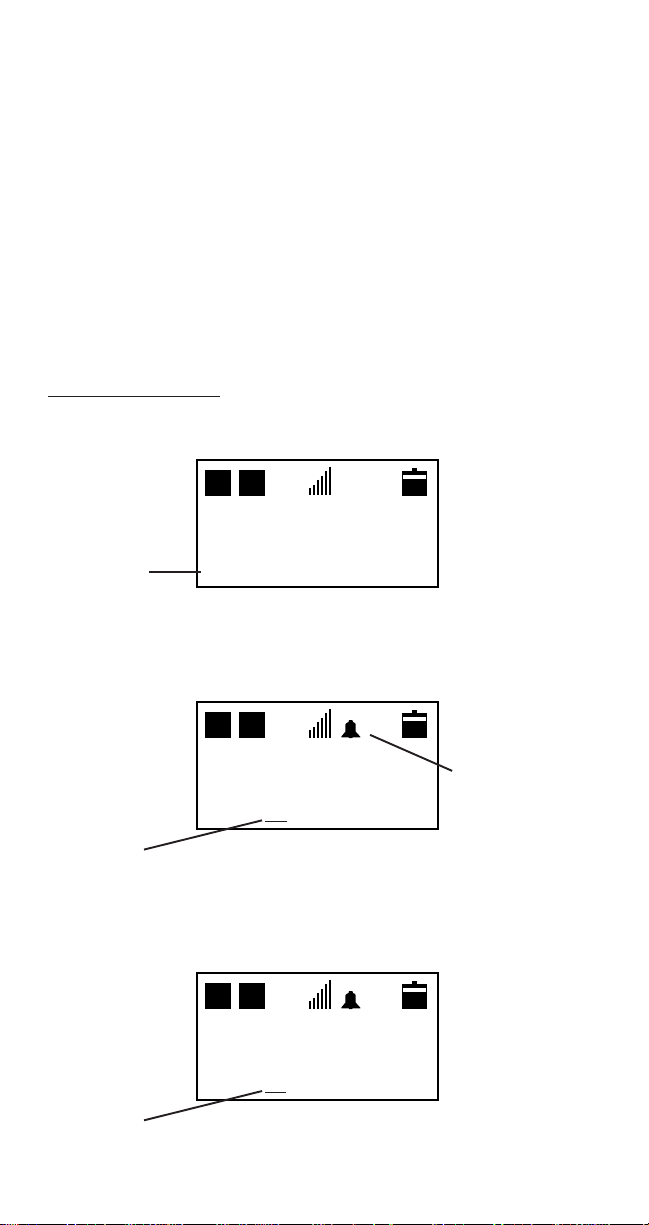
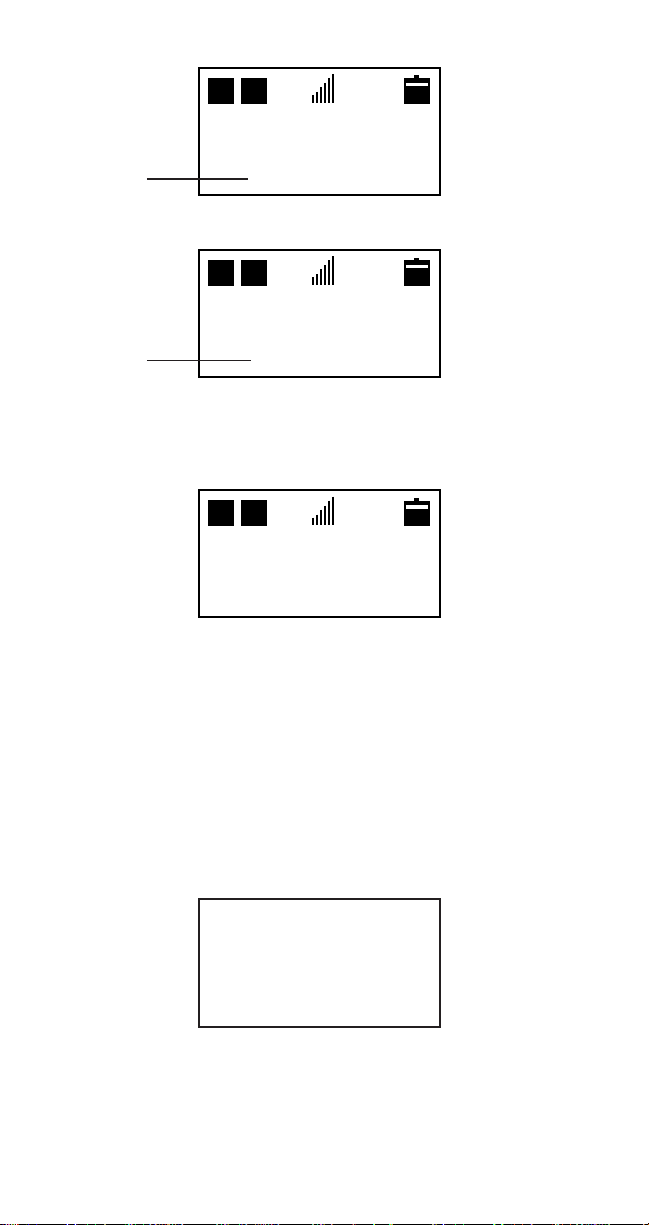
DISPLAY INDICATORS
-4-
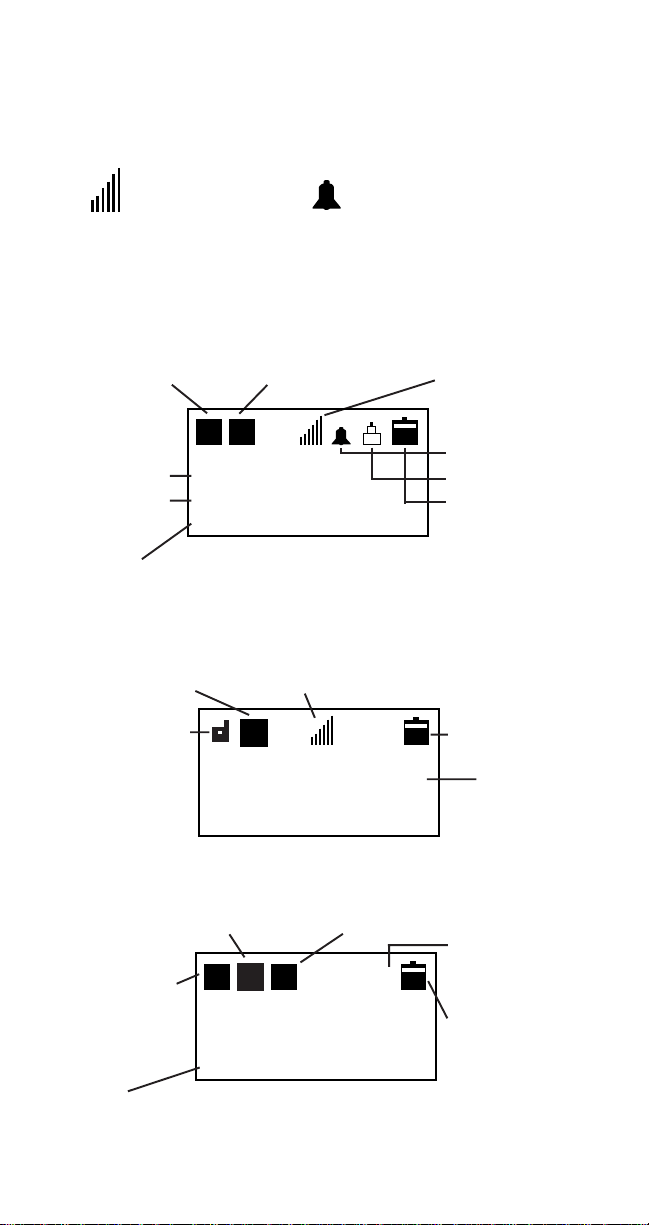
CLOCK ALARM
Shows cellular Indicates clock
signal strength. alarm is on.
Analog/Digital DD
Service Indicator
Home/Roam Indicator Signal Indicator
Alarm Indicator
D
Current Date Lock Indicator
Current Time Battery Charge
HB
FEB 0 2
12:00 a m
Indicator
SYSTEM?
System Identifier
NOTE: If system identifier alphanumeric name exceeds
10 digits, the system identifier name is not displayed.
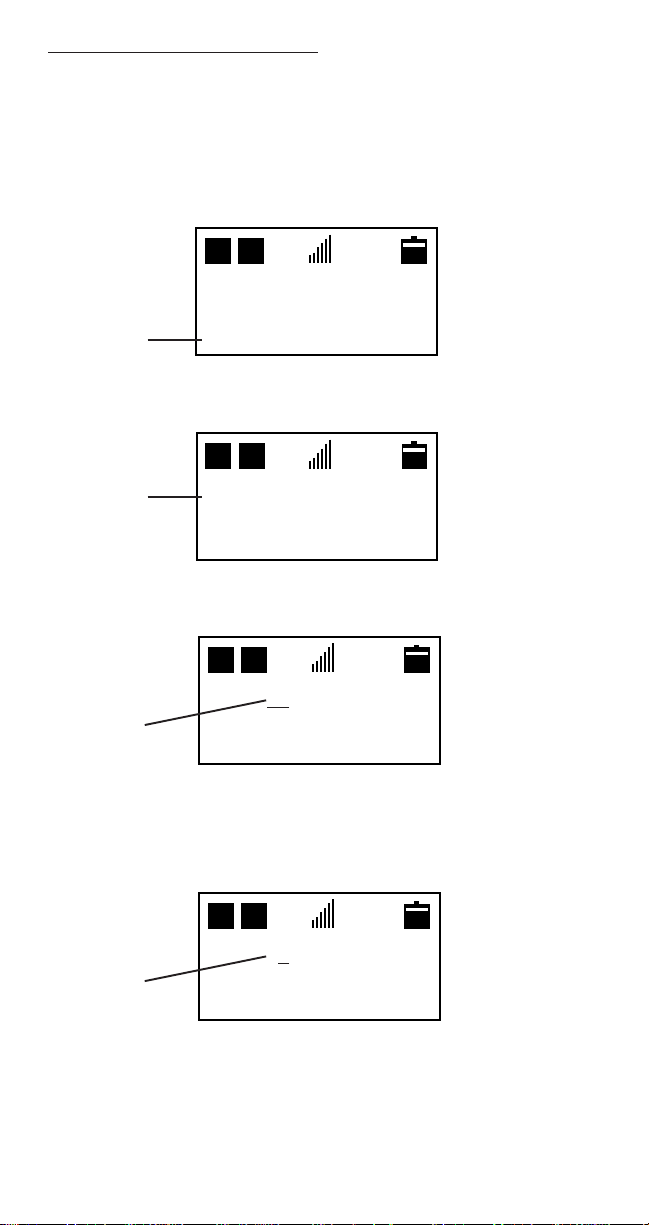
Analog/Digital Conversation
Indicator Signal Indicator
In Conversation Battery ChargeD
Indicator Indicator
D
HB
D
Call Timer
0 0 m 1 7 s
Home/Roam Indicator System Indicator
Repeat Dial
Analog/Digital Indicator
Service
Indicator Battery Charge
R
D
HB
FEB 0 2
R
D
Indicator
12:00 a m
System
SYSTEM?
Identifier
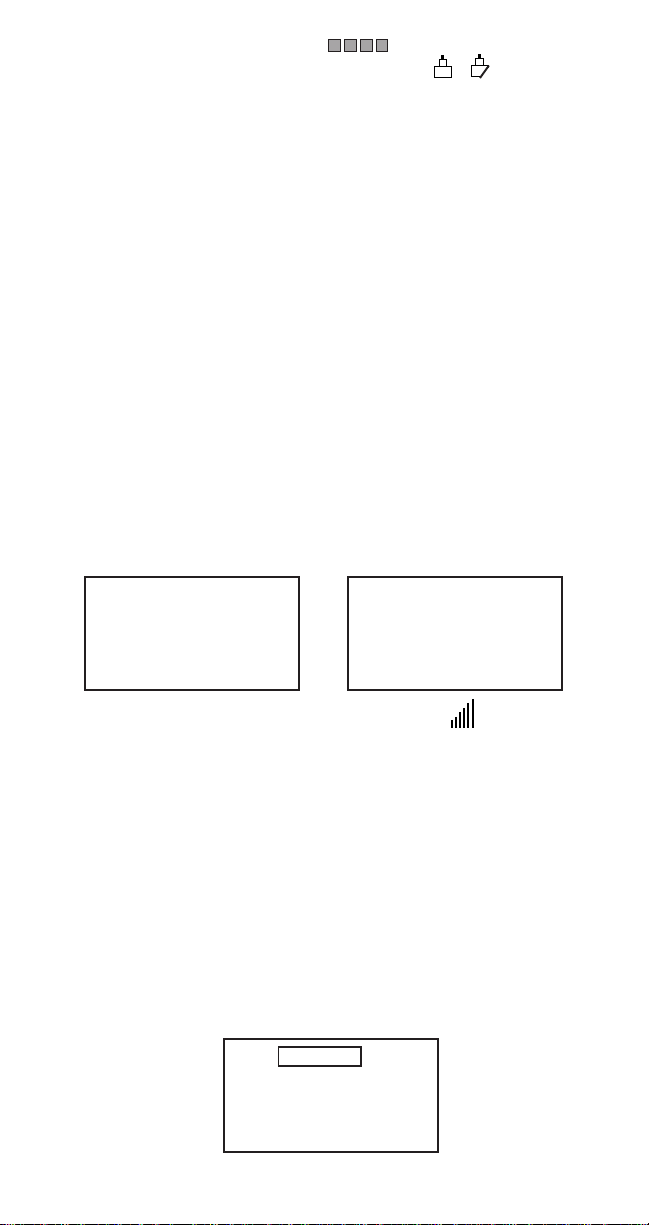
QUICK REFERENCE GUIDE
-5-

Turn on/off Press and hold PWR.
Make call Key in number, press SND.
End call Press END.
Answer call Press SND.
(Any key if Any Key Answer is,
ON [See FCN 53]).
Clear digit Press CLR briefly.
Clear display Press CLR and hold.
Last number redial Press SND.
Adjust earpiece volume Press VOL (In conversation)
Adjust ringer volume Press FCN + 4 + 5
Adjust keytone volume Press VOL (In Standby)
Retrieve Text Msgs Press MEM+MEM
Retrieve Voice Mail Press MEM+SND
Call Lists Press MEM (Hold)
____________________The Memory___________________
Store a phone number Key in number and/or (name [using
automatically in next FCN 3]). Press FCN + MEM (Hold).
available location The number is automatically stored in
the first empty memory location.
Speed Dialing Key in the number of the memory
location. Press SND.
Store in a Location Press FCN+MEM+X+Y
Recall a Location Press MEM+X+Y
Scan through Memory Press MEM + 0 + 1+ # or
Scan alphabetically for Press MEM + # or
a name
WW
W ....
WW
WW
W ....
WW
_____________________The Menu____________________
Enter menu Press FCN (Hold) or FCN+FCN
Scroll Press # or
Select function Press flashing menu number (1)(2)....
Scroll Press # or
Select status Press MEM.
Short Msg Memory Press MEM + MEM.
Shortcut facility Press FCN. Press the number of
the function. (Example FCN+4+1)
_______________List of Menu Functions_______________
-6-
WW
W ,....
WW
WW
W ,....
WW

TOTAL TIME FCN + 1
Home,Roam
ALARM CLOCK FCN + 2
On,Off,Alm
ALPHA TAG FCN + 3
Names
TONE FUNCTION FCN + 4
Alert,Escalating,
DTMF,Call Tone,Ring Volume
CALL PROCESSING FCN + 5
Auto ans, Any key answer,
Sys Sel,Multi NAM,
One touch, Language,
Backlight
LOCK PHONE FCN + 6
Call lists,Auto lock,
Fixed dial,End to End,
Memo lock,Temp Code,
Initialize,Total Time,
Wake up msg
DA TE AND TIME FCN + 7
Time,Date,Year
SPECIAL FUNCTION FCN + 8
Call Type,Ext Cont,VM Number,
Roll Off, Word Wrap,Erase SMS Msgs,
SID Mgt
MIC MUTE CONTROL FCN + 9
FULL MUTE CONTROL FCN + 9 (Hold)
P AUSE DIAL FCN + 0 + 0
AUTO PAUSE FCN + 0 + 1
MEMORY LINK FCN + 0 + 2
FULL LOCK FCN + #
P ARTIAL LOCK FCN + W
AUTOMATIC REPEAT DIAL FCN + SND
HIDDEN DIGITS FCN (Hold)
-7-

OPERATION OF THE PHONE
1) Press the PWR key and hold it for at least 2 seconds.
The phone will carry out a short self-test sequence, then
briefly display a default wake-up message or your wake-up
message if you have programmed one into the phone.
2) When the Signal Strength Indicator, Date and Time
Home or Roam indicator appears on the display, the phone
is ready for use.
If "No Service" appears it means that you are outside the
cellular service area and the network cannot serve you.
A cellular phone can only send and receive calls when it
is switched on, and has service (as indicated in 2 above)
3) Press the PWR key and hold it for at least 2 seconds to
switch the phone off.
PLACING A CALL
Fully extend the antenna before sending or receiving a call.
Note: Push in the antenna when you are not using the
phone.
You can use the phone without extending the antenna in a
good coverage area.
1) Key in the number (include 1 + area code if you’re
making a long distance call).
Note: If you make a mistake, press the CLR key briefly to
delete the last keystroke; or press and hold the CLR key
to clear the whole display.
2) The number will appear on the display as it is keyed in.
3) Press SND.
4) The IN USE indicator will appear, and the number will
disappear from the display. The call timer will appear and start
counting upward.
5) Lift the phone to your ear, and wait until your call is
answered.
6) When you have finished the call, press END.
-8-
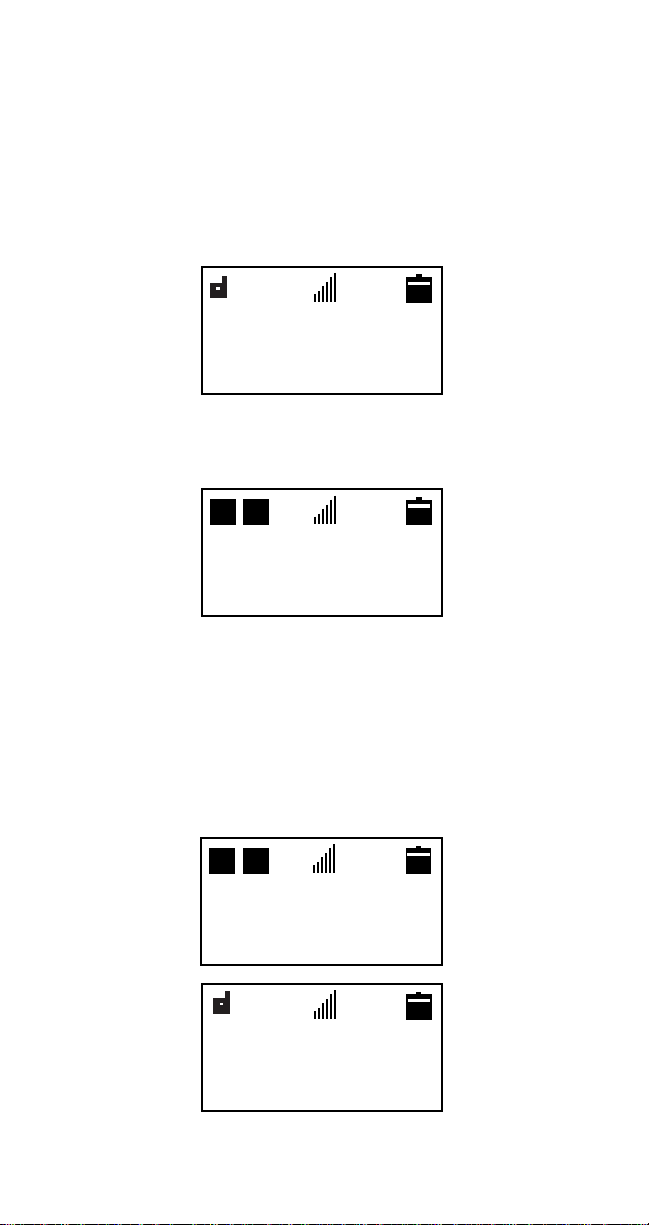
If the No Service Bars appear, , you are outside your
cellular service area. If the lock indicators, , appear on
the display, your phone has been electronically LOCKED (see
Locking/Unlocking the Phone). Y ou can still make emergency
calls when the phone is locked.
RECEIVING A CALL
1) When there is an incoming call, the phone rings, and the
CALL message flashes on the display . If Caller ID is available
in your area, the number and/or name may also be displayed.
If the ringing tone has been switched off the flashing of the
display and keypad will alert you of an incoming call.
2) Press SND (Any Key if Any Key Answer has been turned
on) and lift the phone to your ear.
3) When you have finished your conversation, press END.
If you do not answer the call, the "Missed Call Indicator"
remains on the display (indicating someone attempted to
phone you). Press MEM to view the missed calls (use # or W
to scroll the list) or press CLR to clear the display . (See page
31, Call Lists.)
1 M i s s e d
c a l l s.
P r e s s M E M
t o v i e w
1 2 : 0 0 a M o n
0 1 ]
8 1 7 1 2 3 4 5 6 7
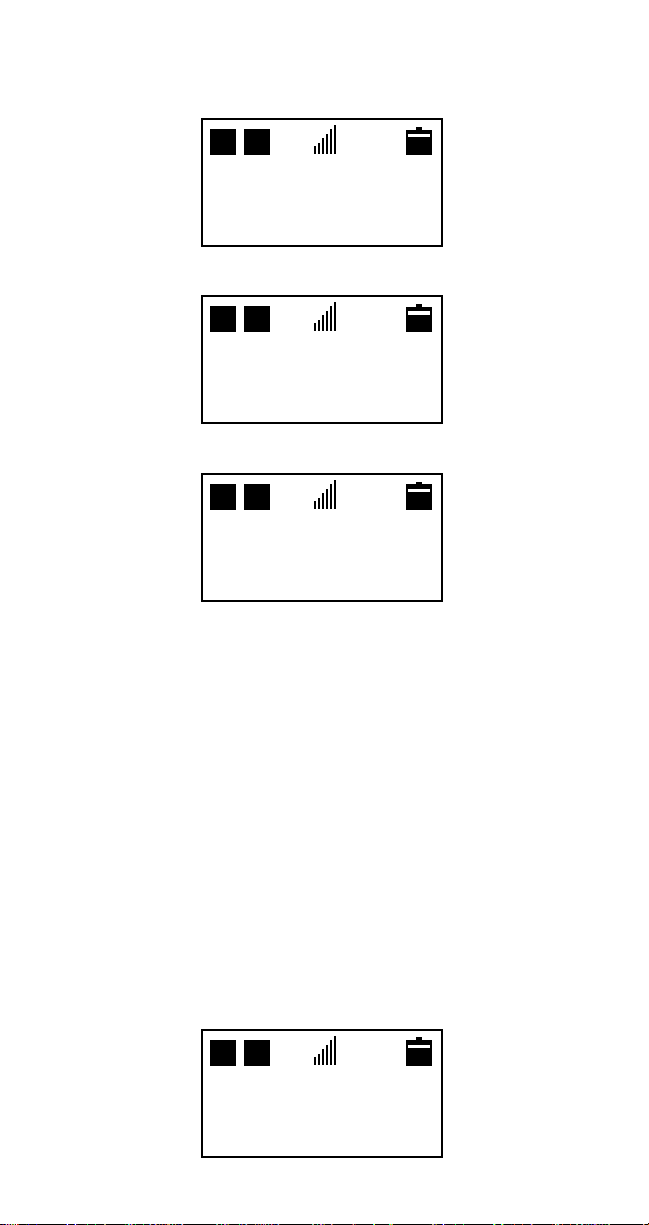
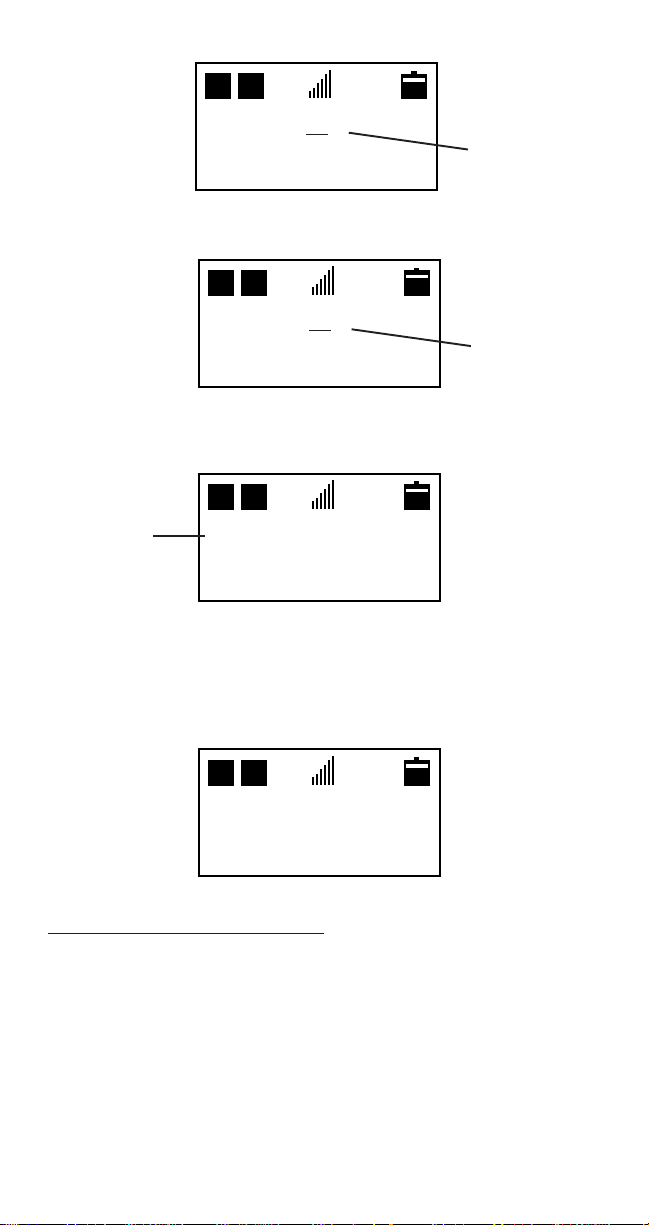
SIGNAL STRENGTH
The quality of your call depends on the strength of the cellular
signal in your area. The phone displays current signal strength
as a series of bars running up and down the display screen.
The more bars, the better the signal. If the signal is poor, try
moving the phone slightly to improve reception. If you are
using the phone in a building, it may be necessary to move
near a window, or outdoors for better reception.
VOLUME KEY
The volume key controls the volume of the earpiece during
conversation mode and the keypad tones during standby mode.
VOL
nnnnnnn
J a n 0 1
1 2 : 0 0 a m
SYSTEM?
-9-
LAST NUMBER REDIAL
The last number dialed can be redialed automatically without
re-entering it. (The number can still be retrieved even if the
phone has been switched off and back on.)
1) With the display cleared, press SND.
2) The number you last called will appear on the display and is
automatically redialed.
D
HB
2 1 4 1 2 3 4 5 6 7
I n U s e
Last number redial can also be retrieved from the memory;
1) Press MEM + 0 + 0.
D H
D
D H
HB
L N )
2 1 4 1 2 3 4 5 6 7
2) Press SND to make the call.
SPEED DIALING
The phone dials quickly by recalling phone numbers from
memory using the memory location number and the SND key.
1) Press Memory Location Number (Example 01)
D
HB
01
D H
2) Press SND.
Note: Names associated with the memory location you
have selected will not be shown.
D
HB
2 1 4 1 2 3 4 5 6 7
I n U s e
-10-

MENU FACILITY
The menu allows you to operate or check the setting of certain
features. Although the menu method can take longer than the
alternative shortcut method, it is often easier to remember.
D
HB
F C N 1
D H
1) Press FCN (Hold).
2) The display will read FCN 1 Total Time with the 1 flashing.
Use # or W to step forward or backward through the list of
function menus. Press the flashing number to access the
desired displayed function menu. Use # or
forward or backward through the list of selections available
within the function menu. Press MEM to change a setting
within a displayed function menu selection.
3) Use the CLR key to save the selection and exit the function
menu.
T o t a l T i m e
WW
W to step
WW
MENU SHORTCUTS
Each Menu function can also be controlled by a shortcut. By
using the shortcut you can get to the function you want to
change or check without scrolling. To activate the shortcut
function simply press FCN followed by the shortcut number,
(Example FCN 4 + 1 for Alert Set).
The menu functions available are:
Menu Function/Description Shortcut
Total Time FCN + 1
Alarm Set FCN + 2
Character Entering FCN + 3
Tone Function FCN + 4
Alert Set FCN + 4 + 1
Escalating Tone FCN + 4 + 2
Long DTMF FCN + 4 + 3
Call Tone FCN + 4 + 4
Ring Volume FCN + 4 + 5
Call Processing FCN + 5
Auto Answer FCN + 5 + 1
Any Key Answer FCN + 5 + 3
System Select FCN + 5 + 4
Mullti NAM FCN + 5 + 5
One Touch FCN + 5 + 7
-11-

Menu Function/Description Shortcut
Language FCN + 5 + 8
Backlight FCN + 5 + 9
Lock Code Function FCN + 6
Time Stamp Clear FCN + 6 + 1
Auto Lock FCN + 6 + 2
Fixed Dial FCN + 6 + 3
End to End FCN + 6 + 4
Memo Lock FCN + 6 + 5
Temp Code FCN + 6 + 6
Initialize FCN + 6 + 7
Total Time Clear FCN + 6 + 8
Wake Up Message FCN + 6 + 9
Clock Set FCN + 7
Special Function FCN + 8
Call Type FCN + 8 + 1
Voice Mail Number FCN + 8 + 4
Roll Off Order FCN + 8 + 5
Word Wrap FCN + 8 + 6
SMS Initialize FCN + 8 + 7
SID Management FCN + 8 + 8
Mute Function FCN + 9 (Mic Mute)
FCN + 9 Hold (Full Mute)
Pause Dial FCN + 0 + 0
Auto Pause FCN + 0 + 1
Memory Link FCN + 0 + 2
Full Lock FCN + #
Partial Lock FCN +
Automatic Repeat Dialing FCN + SND
HF Audio Switch FCN + VOL
Review Hidden Digits FCN (Hold)
WW
W
WW
For further information on menu functions see the Additional
Features section.
THE MEMORY
Your phone has 99 memory locations which allow you to store
numbers (up to 32 digits) and names associated with the
numbers (up to 10 letters). Your phone can also use memory
locations 70 through 99 as permanent memory. Only
authorized dealers, (using special adapters) can write the
phone numbers into the permanent memory locations.
Your phone also keeps and displays the various information
about the last 20 incoming, outgoing, and missed calls. The
information shows actual talk time of the call, when the call
was established (time and day of the week) and whether the
call was received, or sent. These locations can only be
accessed by pressing MEM (Hold).
-12-
STORING INFORMATION
D
HB
D
HB
1) Key in the phone number.
2) Press FCN + 3.
3) Enter in the name (see
Keying in Names, page 15).
4) If you want the information stored in the first available
memory location, simply press FCN+MEM (hold).
5) The message Stored will be shown on the display along
with the first vacant memory location.
6) Press CLR.
Otherwise, press FCN+MEM followed by a memory location
number (for example, 20).
α)
2 1 4 1 2 3 4 5 6 7
WORK
S t o r e d
03
Note: If the memory location you have selected is already
occupied, an alarm tone will sound, the display will flash
and the contents of the memory location will be
displayed.
Note: If all the memory locations are used, an alarm tone
will sound, automatic store mode will be cancelled and
the phone will go back to the manual store mode.
7) If you wish to overwrite the contents in this memory
location, simply press MEM.
8) If you do not want to overwrite the contents of the memory
location, simply press CLR.
GROUP STORING
Group storing allows you to store information in 10 dedicated
memory area groups (for example, group 0 may be used for
all persons whose names begin with the letter "A"). The phone
searches for the vacant memory locations in that group and
automatically stores the phone number and name in that
group.
-13-
1) After entering phone number and/or
D
HB
name (or after recalling a phone number)
D
HB
α)
1 2 3 4 5 6 7
WORK
12)
1 2 3 4 5 6 7
WORK
2) Press FCN+MEM+ W. D H
D
HB
G r o u p i n g
A u t o S t o r e
P r e s s 0 - 9
3) Press group number (Example 1).
The phone searches the vacant memory according to the
entered number. The entered digits are stored in the
first vacant location in that group.
D H
D
HB
S t o r e d
1 3
Example
The phone stores the number and names into the grouped
vacant memory area as follows:
Input Key Memory Area Input Key Memory Area
[0] 01 to 09 [5] 50 to 59
[1] 10 to 19 [6] 60 to 69
[2] 20 to 29 [7] 70 to 79
[3] 30 to 39 [8] 80 to 89
[4] 40 to 49 [9] 90 to 99
NOTE: An alarm will sound if all memory locations are
full.
RECALLING PHONE NUMBERS FROM MEMORY
Numbers stored in any of the 99 memory locations can be
recalled for viewing and or changing as the user prefers,
provided locations 70 through 99 have not been assigned as
permanent memory.
-14-
1) Press MEM + Memory Location Number (for example, 12
if known). If not known use # or
location.
D
HB
1 2 )
1 2 3 4 5 6 7
WORK
WW
W to find the desired memory
WW
KEYING IN NAMES
1) Press FCN + 3. The cursor appears on the display to
indicate that the phone is in the name or character entry
mode. When you press a key, the letters listed on the key are
displayed.
2) Select the key labeled with the letter you want to display.
Press it once to enter the first letter listed on the key, twice to
enter the second letter, three times to enter the third letter,
four times to enter the key digit, and five or more times to
enter lower case letters. If you miss the desired letter,
continue to press the key until it is displayed again.
D
HB
α)
3) Select additional letters in the same way.
4) If you want to enter the same letter consecutively or enter
another letter also on the key, press the # key to advance the
cursor to the next position. You advance one space and can
now press the same key again to select the desired letter.
5) Note that you can enter up to 10 characters with any
space or symbol counted as characters. Blank spaces
can be inserted by pressing the # key; the "&", "-", "#",
WW
and "
W" symbols can be inserted by pressing the
WW
6) If you begin your memory store procedure in the name or
character entry mode when you have finished keying in the
name, you must store this information to a vacant memory
location before you can key in the phone number. Press MEM
to recall the memory location where you stored the name. You
can then key in the phone number to store with the name.
-15-
WW
W key.
WW
EDITING NAMES OR NUMBERS
If you make a mistake while keying in a name or a number,
you can correct it as follows:
1) Press CLR to delete the last character or digit.
2) Press and hold CLR to clear the whole display . Note that
this clears both the name and the number entered.
DISPLAYING “HIDDEN” DIGITS
The phone can display up to 16 digits. If you key in more than
this, the first digits will disappear off the side of the display.
If you want to check these hidden digits, press and hold FCN.
The hidden digits and the letters "HD" appear on the display.
When you release the FCN key, the original 16 digit display
reappears.
Remember to clear the whole display (press CLR and hold)
after having displayed a long number.
DELETING PHONE NUMBERS FROM MEMORY
D
1) Press and hold CLR to
clear display. D H
2) Press FCN+MEM.
3) The display will read.
HB
)
4) Key in the number of the memory location you want to
delete.
5) An alarm tone will sound, and the contents of the memory
location will be displayed and flashing. D H
D
HB
1 2 )
flashing
6) Press MEM. The contents of the memory location will be
deleted.
1234567
WORK
-16-
RECALLING A MEMORY LOCATION NUMBER
1) Press MEM. The display will show.
D
HB
)
2) Key in memory location number (Example 12).
D
HB
1 2 )
1234567
WORK
If the memory location is empty, the display will show.
D
HB
1 2 )
3) Call the number by pressing SND.
SCANNING PHONE NUMBERS SEQUENTIALLY
1) To scan the entire memory, press MEM + 0 + 1 to display
the contents of the first memory location. Use # or W keys to
display the next or previous memory location.
2) When you find the number you want, press SND to make
the call.
SCANNING PHONE NUMBERS
ALPHABETICALL Y
1) Press MEM # to display the name memory locations from A
to Z. The memory locations are displayed in alphabetical
order by the first character. Press MEM
memory locations from Z to A (reverse alphabetical order).
D
HB
22)
2141234567
BILLS PC
-17-
WW
W to display the name
WW

2) Pressing # or
3) When you find the name you want, make the call by
pressing SND.
WW
W will allow you to scroll through the memory.
WW
SCRATCHPAD
Digits can be entered during a conversation. These digits
appear on the display and are also transmitted over the air (if
the End-to-End setting has not been turned off). These digits
remain on the screen when the called is ended. If you want to
store these digits into a memory location, press FCN + MEM +
location number or FCN + MEM(hold). If you do not want to
store these digits, press CLR to clear the digits from the
display.
DISPLAYING YOUR OWN PHONE NUMBER,
DAY OF THE WEEK, AND
NETWORK SELECTION
1) Press FCN.
D
HB
FCN
NAM-1
2 1 4 1 2 3 4 5 6 7
Mon
Note: If your phone is registered on two cellular
networks, the number displayed indicates the network
that is currently being used.
ADDITIONAL FEATURES
LOCKING/UNLOCKING THE PHONE
Your phone has a simple security system. It can be locked by
using a four-digit lock code to prevent unauthorized use.
The lock code is supplied by the dealer. If you forget your
lock code contact your dealer. The factory default lock
code is 0000.
The two lock settings are full lock and partial lock.
-18-
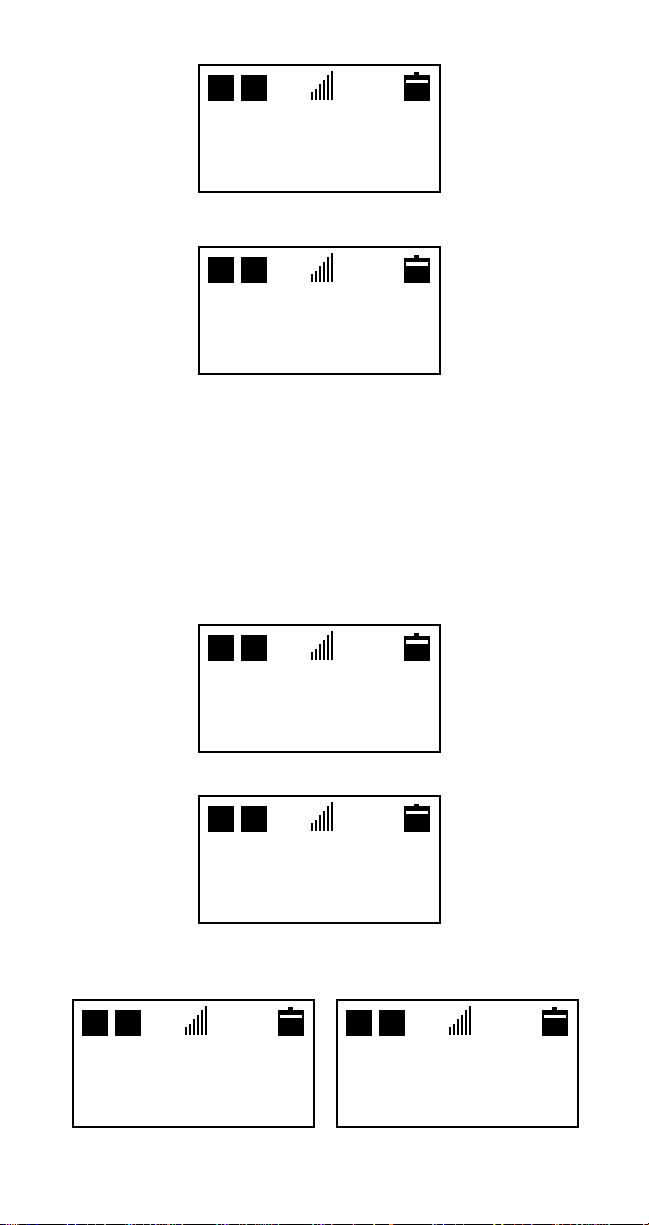
FULL LOCK
D
HB
D
HB
When the phone is fully locked, only emergency calls (911)
can be made, but any call can be received. Note that with the
phone in full lock, emergency calls to 911 can be sent, but the
dialed digits, 911, do not appear on the display. Storing to
memory is also not available when the phone is fully locked.
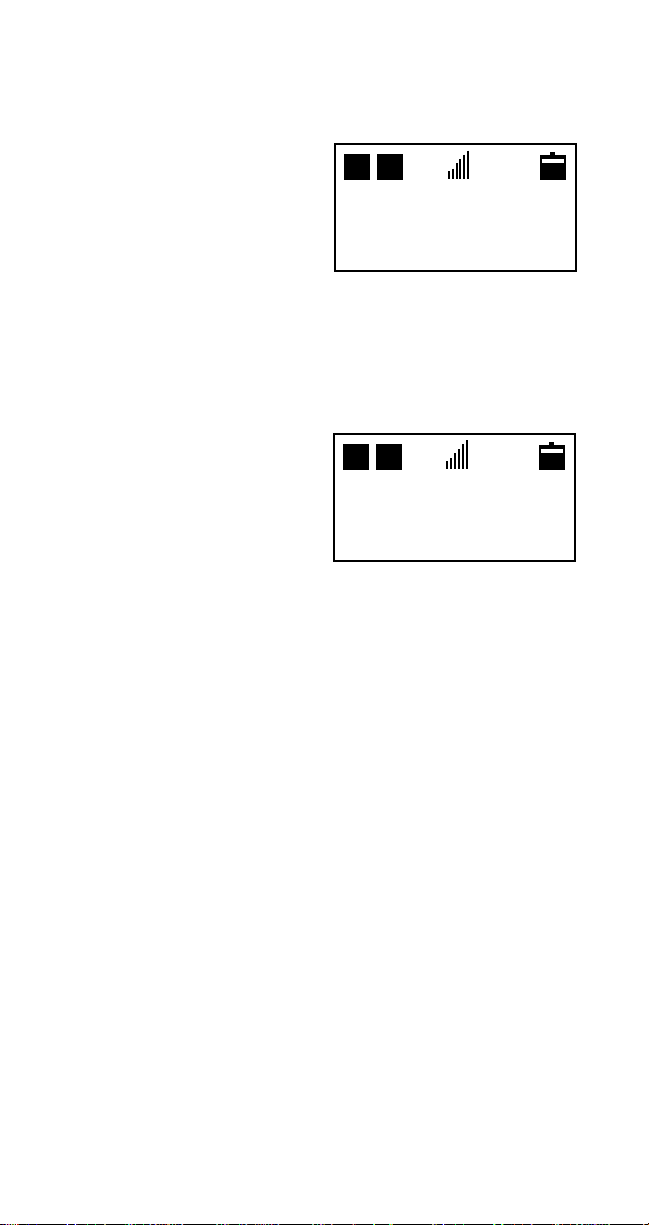
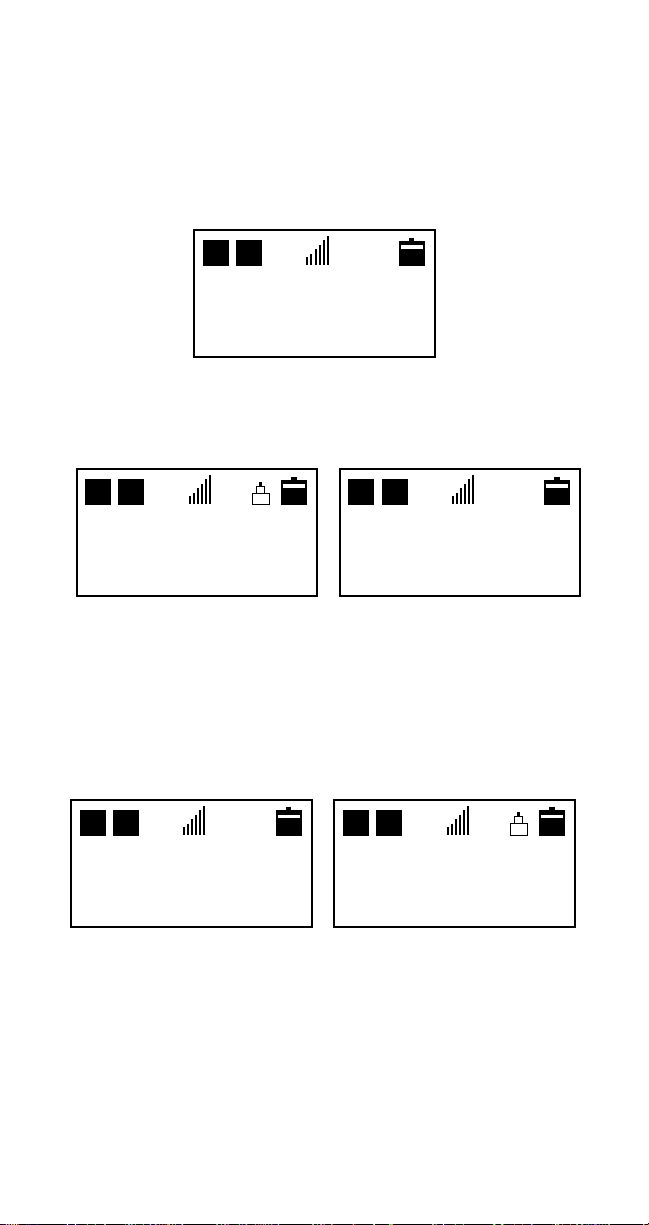
1) Press FCN + #. The display will read:
D
HB
Enter
Lock Code
2) Enter the 4-digit lock code. If you key in the correct code, the
full lock icon appears in the upper right corner of the display. If
the entered code is not correct, the full lock icon is not
displayed.
D
HB
Feb 0 2
12:00 a m
SYSTEM?
Feb 0 2
12:00 a m
SYSTEM?
FULLY LOCKED NOT LOCKED
Note: For security the display will not show the 4-digit
lock code.
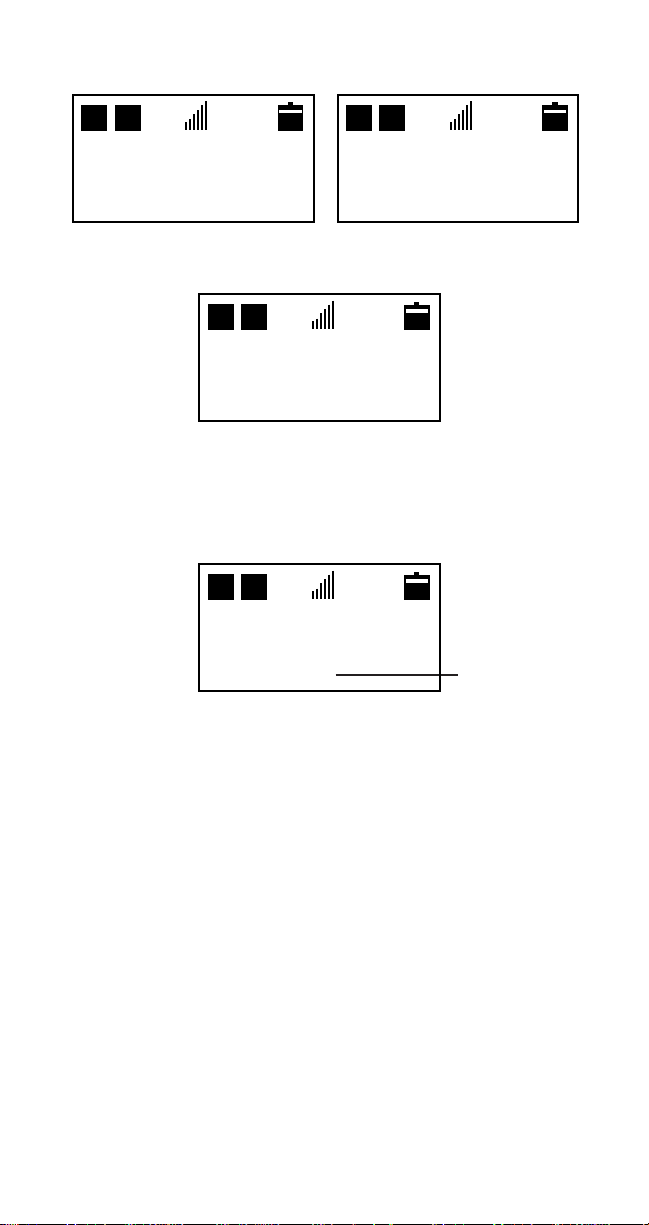
3) Unlocking is carried out in the same way. Press FCN + #,
and enter in your four (4) digit code. If the code is entered
correctly, the full lock icon is removed from the display. If the
incorrect code is entered, the full lock icon is still displayed.
D
HB
D H
Feb 0 2
12:00 a m
SYSTEM?
D H
Feb 0 2
12:00 a m
SYSTEM?
UNLOCKED STILL LOCKED
-19-
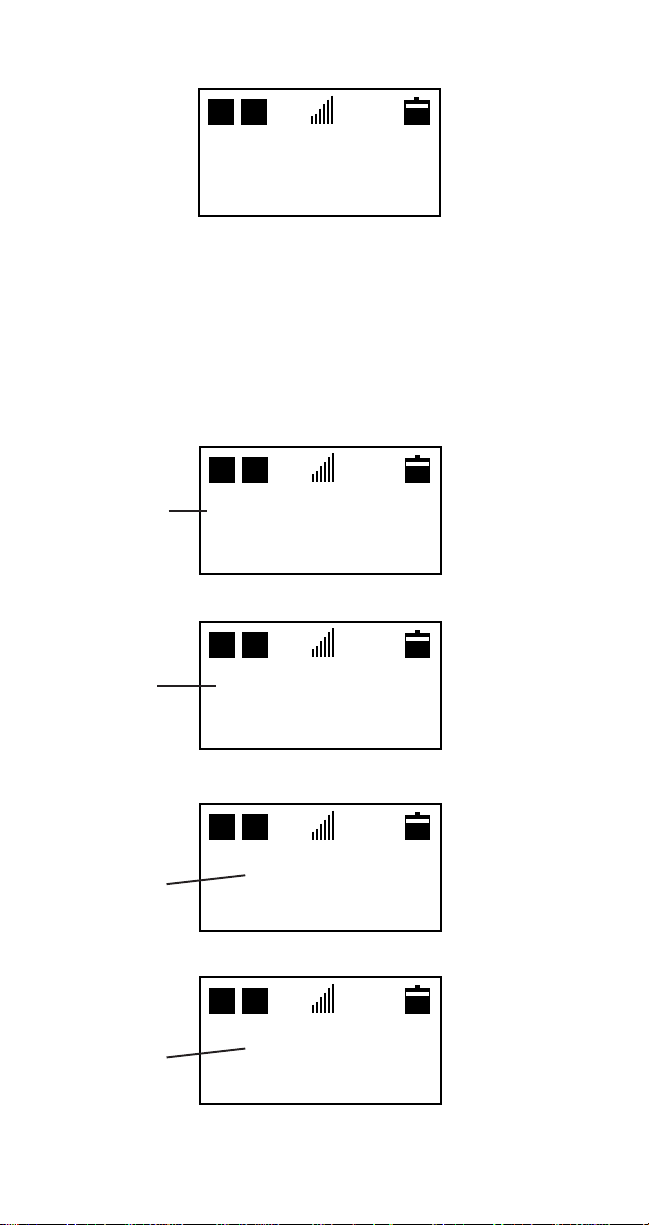
P ARTIAL LOCK
D
HB
D
HB
When the phone is partially locked, only emergency calls
(911) and any numbers stored in memory locations 1 through
9 can be made, but any call can be received. Note that with
the phone in partial lock, emergency calls to 911 can be sent,
but the dialed digits, 911, do not appear on the display. Storing
to memory is also not available when the phone is partially
locked.
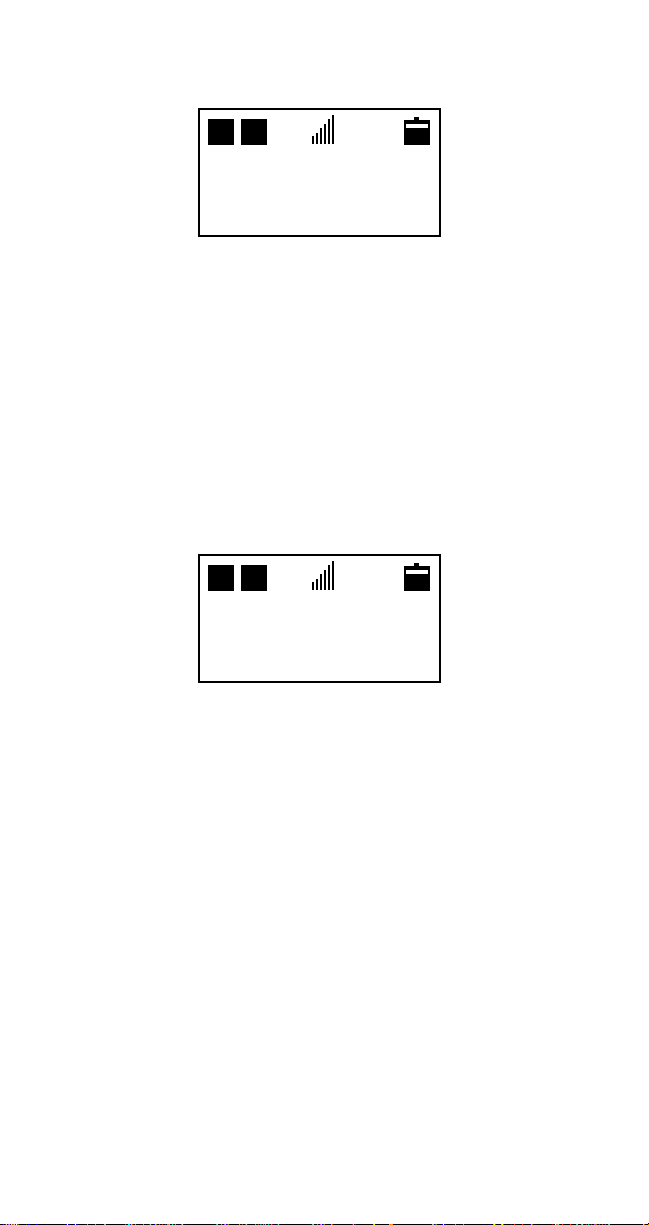
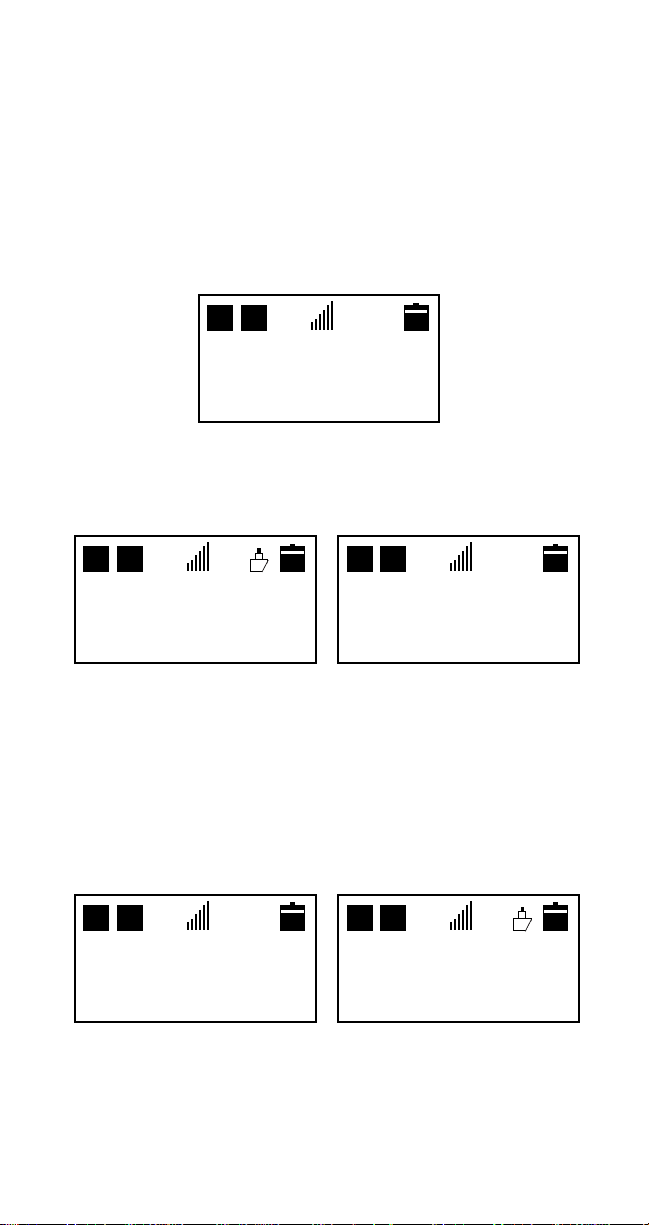
1) Press FCN + W . The display will read:
D
HB
Enter
Lock Code
2) Enter 4-digit lock code. If you enter the correct code, the
partial lock icon appears in the upper right corner of the
display. If you enter an incorrect code, the partial lock icon is
not displayed.
D
HB
Feb 0 2
12:00 a m
SYSTEM?
Feb 0 2
12:00 a m
SYSTEM?
PARTIALLY LOCKED NOT LOCKED
Note: For security the display will not show the 4-digit
lock code.
3) Unlocking is carried out in the same way. Press FCN + W .
When the correct code is entered, the partial lock icon is
removed from the display. If the incorrect code is entered, the
partial lock icon remains on the display.
D
HB
Feb 0 2
12:00 a m
SYSTEM?
Feb 0 2
12:00 a m
SYSTEM?
UNLOCKED STILL LOCKED
-20-

LENGTH OF YOUR CALLS
The phone allows you to check the duration of your current
call. Upon making or receiving a call, the current call timer
begins counting. This is shown on the display.
D
HB
D
Talk time of
call in
45 m 59 s
progress
At the end of the call, the timer stops counting.
TOTAL CALL TIME COUNTERS
The total call time counters are used to let you know how
much air time you are using both in the home and roam
modes. This will allow you to keep track of your air time. The
total call time counters can be reset to zero at any time.
To view your total call time counters:
1) Press FCN + 1.
D
HB
Total Time
005 h 08 m H
002 h 17 m R
Home
Roam
Note: You must have your phone's lock code before you
can reset your call time counters. The lock code is
supplied by the dealer. If you forget your lock code
contact your dealer. The factory default lock code is 0000.
To reset the total call time counters:
1) Press FCN + 6.
D H
D
HB
Enter
Lock Code
-21-

2) Enter your 4-digit lock code.
D
HB
FCN 6
Lock Code
Function
Note: For security the display will not show the 4-digit
lock code.
3) Press 8.
D
HB
FCN 68
Total Time
Clear
4) Press MEM.
D
HB
FCN 68
Total Time
CLEARED
Your total call time counters are now reset to zeros.
D H
D
HB
Total Time
000 h 00 m H
000 h 00 m R
Home
Roam
5) Press CLR (Hold) to return to standby mode.
SETTING THE BACKLIGHT
When any key except PWR is pressed, the phone keypad and
display backlight is illuminated for ease in viewing. The
backlight remains displayed for 10 seconds after the last key
is pressed. When a key is pressed again, the phone keypad
and display backlight is again illuminated.
With the phone connected to a vehicle power adapter, the
keypad and display backlight can be set to remain illuminated
continuously.
-22-

To turn the backlight setting on or off with the phone
connected to a vehicle power adapter:
1) Press FCN + 5.
D
HB
F C N 5 _
C a l l P r o c
F u n c t i o n
2) Press 9.
D
HB
F C N 5 9
B a c k l i g h t
o n
3) Press MEM to turn the backlight setting on or off; press
CLR to save the selection and return to the standby mode.
SETTING THE KEY TONE VOLUME LEVEL
These tones sound each time you press a key. You can turn
the keypad tones on, off or adjust them using four levels of
loudness.
1) Press VOL when not in conversation (in standby mode).
VOL n n n n
FEB 0 2
12:00 a m
SYSTEM?
Note: When the key tones are switched off, DTMF tones
can still be sent over the air.
SETTING THE RINGING VOLUME
The ringing tone sounds when there’s an incoming call, you
can select the volume of the tone or switch it off (SILENT
MODE).
1) Press FCN + 4 + 5 .
D
HB
D H
Ring Volume
Low
-23-

2) Use MEM key to select Off,Min,Low,Mid or Max.
3) Press 1 to hear the ring tone.
4) Press CLR to exit and save selection
If you select Off, when a call is coming in, the display will
flash, the CALL message will appear and flash.
SELECTING ALERT TONE TYPE
The Alert Tone on your phone can be selected from four
different tone combinations.
1) Press FCN + 4.
D
HB
FCN 4 _
Tone
2) Press 1.
Function
D
HB
FCN 41
Alert Set
1
3) Press MEM to select between the four different tone
combinations.
Note: You can listen to each tone combination by
pressing 1 again after the initial pressing of FCN + 4 + 1.
Make sure your ringer volume is up.
4) Press CLR to exit and save selection.
USING THE PHONE ON TWO NETWORKS
The phone’s two number capability feature lets you subscribe
to both cellular services in your area or other areas, using a
different Number Assignment Module, referred to as a NAM,
for each network.
Note: You cannot change from one network to the other
during a call.
-24-

To Change the Network:
1) Press FCN + 5.
D
HB
FCN 5 _
Call Proc
Function
D H
2) Press 5. D H
D
HB
FCN 5 5
Multi NAM
NAM - 1
3) Press MEM to select between NAM 1 and NAM 2.
D
HB
FCN 55
Multi NAM
NAM - 2
Note: If only one NAM has been programmed and you
press the MEM key, an alarm tone will sound and the
display will show NAM-1.
D
HB
FCN 55
Multi NAM
NAM - 1
4) Press CLR to activate the NAM. Phone will power cycle.
DTMF TONE TRANSMISSION
When end-to-end is "ON" you can transmit numerical
information as a series of tones using the DTMF tone feature
(for example, to check for messages in your answering
machine). To set end-to-end "ON" or "OFF":
1) Press FCN + 6.
D
HB
Enter
Lock Code
-25-

2) Enter in your lock code.
D
HB
FCN 6 _
Lock Code
Function
Note: The lock code is supplied by the dealer. If you
forget your lock code contact your dealer. The factory
default lock code is 0000.
3) Press 4.
D
HB
FCN 64
End to End
on
4) Press MEM to turn End to End on or off.
Note: End to End has to be in the ON state before DTMF
Tones can be transmitted, or the PAUSE/MEM LINK
feature is operational.
D H
5) Press CLR.
D
HB
Feb 0 2
12:00 a m
SYSTEM?
TONE GENERATOR
There are two alternative ways to use the DTMF feature.
First, make a call in the usual way. Key in numbers onto
the display. Each number is directly sent as a DTMF tone.
The length of the tone depends on how you have the DTMF
tone generator set.
Note: The Long DTMF Tone Generator has two settings,
off and on. If the DTMF Tone Generator is set to off, the
phone sends each Long DTMF signaling tone for 100 milli
seconds. With the Long DTMF Tone Generator set to on,
the phone sends each DTMF signaling tone as long as the
key is pressed, up to 3 seconds max.
-26-

1) Press FCN + 4.
D H
D
HB
FCN 4_
Tone
Function
2) Press 3.
D
HB
FCN 43
Long DTMF
off
3) Press MEM to turn Long DTMF on or off.
4) Press CLR. The phone returns to normal standby.
Second, recall a number from a memory location and send it
as a DTMF tone. (MEM, and the memory location number).
Send the DTMF tones by pressing SND.
A series of tones, each representing a number, will be heard.
Hints for Storing a DTMF Number in the Memory
If you need to place a manual pause between DTMF digits
press FCN + 0 + 0. If you want to place a automatic pause
between DTMF digits press FCN + 0 + 1 (P = 3 Seconds). If
you want to link memory locations for a long DTMF number
press FCN + 0 + 2.
D
HB
0 : Pause
1 : Auto - P
2 : MemLink
PAUSES - (Manual) [FCN + 0 + 0] This function creates pauses
while sending out DTMF signaling tones during conversation mode.
When a manual pause is encountered in the DTMF string, the phone
will pause indefinitely, until the user presses the SND key.
More than one pause may be placed in a sequence, separating
several groups of DTMF digits.
-27-

For example, this function may be used for calling a paging system
and sending commands, ID numbers (PIN), and/or numeric messages:
(1) (2) (3) (4) (5)
“123456789” + “P” + “123456789#” + SND + SND
(1) This is the phone number to be called via the cellular system.
(2) This character indicates a Manual Pause. The user will wait for
the initial prompt from the paging system before pressing the SND
key.
(3) This a DTMF digit sequence which may represent the PIN of the
called pager.
(4) This is the initial send keypress which causes the phone to initiate
a call using the number up to the first pause mark.
(5) This is the second send keypress, while in conversation mode,
which will end the manual pause and start the sending of DTMF
digits.
PAUSES - (Automatic) [FCN + 0 + 1] This function creates pauses
while sending out DTMF signalling tones during conversation mode.
When an automatic pause is used, the phone will pause for three (3)
seconds and then continue dialing the DTMF sequence.
Multiple pauses may be placed together to extend the duration of the
pause - i.e. 6, 9, 12 seconds etc.
For example, this function may be used for calling a paging system
and sending commands, ID numbers (PIN, and/or numeric
messages:
(1) (2) (3) (4) (5) (6) (7)
“123456789” + “,” + “,” + “123456789#” + “,” + “987654321#” + SND
(1) This is the phone number to be called via the cellular system.
(2) This is an Automatic Pause character which indicates a 3 second
delay.
(3) This is a second Automatic Pause character indicating a 3 second
delay. The phone will wait a total of 6 seconds before continuing with
the following DTMF digits.
(4) This is a DTMF digit sequence which may represent the PIN of
the called pager.
(5) This is an additional Automatic Pause mark. The phone will wait 3
seconds before continuing with the following DTMF digits.
(6) This is a continuation of the DTMF digit sequence which may
represent the numeric message to be sent to the pager.
(7) This is the Send keypress which causes the phone to initiate a
call.
MEMORY LINKING - [FCN + 0 + 2] Memory Linking is a
function that allows a phone number to be chained together
with a memory recall number for the purpose of adding DTMF
signalling digits after a number is to be sent.
-28-

For example, this function may be used to link individual longdistance recall numbers to a single recall number which holds
credit card information. The primary recall number(s) would
contain the link information:
Recall #01
(1) (2) (3) (4)
“123456789” + “L” + “99” + SND
(1) This is the phone number to be called via the cellular
system.
(2) This is a linking mark which indicates that the following two
digits represent the recall number to be linked.
(3) This is the number of the memory recall location to be
linked, and therefore treated as DTMF signalling.
(4) This is the Send keypress which causes the phone to
initiate a call.
Note: Once the call is placed a pause is automatically
inserted and the user must press the SND key in order to
output the linked DTMF sequence.
System Selection (Including Roaming)
Each cellular service area can have two cellular service
suppliers called carriers. One carrier is called the ‘A’ system
and the other carrier is called the ‘B’ system. Your phone is
designed to work with either or both carriers. The system
priority feature allows you to program your phone for optimum
operation when in your home serving area or when away from
your home area. This is called roaming. When you buy your
phone, you may register (receive a phone number) with
either or both of your local carriers. Contact the office of your
home cellular phone company for information about the
roaming agreements they have with other cellular phone
companies. In some areas, roaming telephones are
automatically recognized by the cellular system’s computer. In
other areas, you must contact the cellular phone operator
before it can recognize your phone. The company needs to
know your telephone number, your phone’s ESN (electronic
serial number), and how you plan to pay for your calls. There
is usually an additional charge for roaming calls.
Note: The ESN for your phone is located in the battery
compartment of the phone, and comprises of the first 8
digits preceded by NEC’s company code of 229.
-29-
To Change the System Selection:
1) Press FCN + 5. D H
D
HB
FCN 5_
C a l l P r o c
F u n c t i o n
2) Press 4. The phone will display its current roaming mode.
D
HB
FCN 54
Sys Select
Standard
3) Press MEM to advance through the system selections.
Home Only
This service is limited to the Home Area. Will go to
"No Svc" if home system is not detected.
D
HB
FCN 54
Sys Select
Home only
Sys A only
This service is limited to the ‘A’ carrier only.
D
HB
FCN 54
Sys Select
Sys A only
Sys B only
This service is limited to the ‘B’ carrier only.
D
HB
FCN 54
Sys Select
Sys B only
-30-

Standard
D
HB
Standard allows the phone to first search for a free
channel in the Home system. If the phone cannot find
a free channel, it searches the other system.
D
HB
FCN 54
Sys Select
Standard
Note: The home system depends on the current NAM
selection.
The ROAM indicator [A] or [B] will be displayed when you are
using a system that is not your home system.
D
HB
R A R B
Feb 0 2
12:00 am
Feb 0 2
12:00 am
CALL LISTS
The phone keeps and displays the various information about
the last 20 missed, incoming, and outgoing calls. The
information shows the actual talk time of the call and when the
call was established (time and day of the week).
1) Press MEM(Hold).
Time Stamp
1. Missed
2. Incoming
3. Outgoing
2) Press 1, 2 or 3 keys to show Missed, Incoming or Outgoing
calls.
-31-

3) Press # or
WW
W to scroll through calls.
WW
2:30 a Tue
01] 59 m 59s
2141234567
NEC ELECT
Outgoing Incoming Call
2:30 a Tue
01]
2141234567
Missed Call
4) Press SND to call a displayed phone number; press FCN +
MEM + Memory Location (for example, 12) or FCN + MEM
(hold) to store a number; or press CLR to exit.
5) To clear all call lists in memory, press FCN + 6. Enter the
four (4) digit lock code. Press 1. Display shows Time Stamp
Clear. Press MEM. Display shows Cleared. Press CLR.
Display returns to standby.
2:30 a Tue
01] 59 m 59s
2141234567
MUTING/UNMUTING
The Mute function operates only when the phone is in the
conversation mode. There are two (2) Mute positions, MIC
MUTE or FULL MUTE.
MIC MUTE - This function switches off the microphone while
in the conversation mode.
FULL MUTE - In the portable configuration, this function
switches off both the microphone and the earpiece while in the
conversation mode.
MIC MUTE:
1) Press FCN + 9. This switches off the microphone.
D
HB
D
03m 06s
M i c M u t e
-32-

2) Press FCN + 9. This switches the microphone back on.
D
HB
D
03m 06s
I n U s e
FULL MUTE:
1) Press FCN + 9 (Hold) This switches off both the
microphone and earpiece or speaker.
D
D
HB
D
03m 06s
F u l l M u t e
2) Press FCN + 9. This switches the microphone, earpiece
and speaker back on.
D
D
HB
D
03m 06s
I n U s e
LOW BATTERY ALARM
The Low Battery Alarm warns the user when the battery
power is getting low, by emitting a short double tone. The
double tone will sound 6 times at 10 second intervals and the
display will show RECHARGE BA TTER Y . After the sixth
consecutive alarm tone, the phone shuts itself off.
RECHARGE
BATTERY
If you have a call in progress, the phone terminates the call
and turns off the phone automatically. The phone may sense
the battery low right after power on. In this case, it will turn off
the phone immediately.
-33-
ALARM CLOCK, AUTO POWER ON,
AND AUTO POWER OFF FUNCTION
The alarm clock function allows the user to set the time at
which the phone alarm sounds with the phone alarm being
used as an alarm clock. The phone powers on automatically if
the power is off at the alarm set time. The clock alarm
operates only once; therefore, it is necessary to reset the
phone alarm clock for the next necessary alarm time. The
clock alarm sounds for 20 seconds unless the [CLR] key is
pressed. If the phone is powered on at the alarm set time, the
alarm still sounds. If any key except [CLR] is pressed, the
alarm continues for 20 seconds and phone remains powered
on.
Setting the Alarm:
1) Press FCN + 2.
D
HB
ON - - : - OFF - - : - -
flashing
ALM - - : - -
2) Press VOL. The Alarm Icon appears on the screen
and the flashing indicator moves to the hour field. (01 to 12
are valid entries for hours.)
D
HB
ON - - : - -
Alarm Icon
OFF - - : - ALM 12 : 00 a
flashing
3) Enter Alarm Time (i.e., 11). Press MEM anytime the hour or
minute fields are flashing to change to either am or pm.
D
HB
ON - - : - OFF - - : - ALM 11 : 00 a
flashing
-34-

4) Press VOL. The flashing moves to the minutes field.
D
HB
ON - - : - OFF - - : - ALM 11 : 00 a
flashing
5) Enter Alarm Time (i.e., 31). (00 to 59 are valid entries for
Minutes.)
D
HB
ON - - : - OFF - - : - ALM 11 : 31 a
flashing
6) Press VOL. The phone alarm is set at 1 1:31 AM and the
flashing minute field stops flashing. The setting mode ends
and the display shows:
D
HB
ON - - : - OFF - - : - -
flashing
ALM 11 : 31 a
7) Pressing MEM turns the Alarm Indicator on or off.
D
HB
ON - - : - -
Alarm Off
OFF - - : - -
flashing
ALM - - : - -
8) Press CLR. The phone returns to normal standby with
the Alarm Indicator either On or Off.
D
HB
Feb 2
Alarm On
12 : 00 a m
SYSTEM?
-35-
Setting Automatic Power On:
The phone user can set a specified time that the phone
automatically powers on each day. Once the selection is set,
the phone automatically powers on every day at the same
time. This function can be set and reset by pressing MEM.
1) Press FCN + 2.
D
HB
ON - - : - OFF - - : - -
flashing
ALM - - : - -
2) Press # or
WW
W. Place the flashing indicator to the ON
WW
position.
D
HB
flashing
ON - - : - OFF - - : - ALM - - : - -
3) Press VOL. The flashing indicator moves to the hour field.
D
HB
ON 12 : 00
flashing
OFF - - : - ALM - - : - -
4) Enter Automatic On Time (i.e., 8). (01 to 12 are valid entries
for hour.) Press MEM anytime the hour or minute fields are
flashing to change to either am or pm.
D
HB
ON 8 : 00 a
flashing
OFF - - : - ALM - - : - -
-36-
5) Press VOL. The flashing moves to the minutes field.
D
HB
ON 8 : 00 p
OFF - - : - -
flashing
ALM - - : - -
6) Enter Automatic On Time (Example 59) (00 to 59 are valid
entries for Minutes.)
D
HB
ON 8 : 59 p
OFF - - : - -
flashing
ALM - - : - -
7) Press VOL. The phone sets at 8:59PM and the flashing
minute stops flashing. The setting mode ends and the display
shows:
D
HB
flashing
ON 8 : 59 p
OFF - - : - ALM - - : - -
8) Pressing MEM turns the automatic power on feature on or
off by displaying the power on time when it is on and all
dashes when the feature is off.
9) Press CLR. The phone returns to normal standby.
D
HB
Feb 2
12 : 0 0 a m
SYSTEM?
Setting Automatic Power Off:
The phone user can set a specified time that the phone
automatically powers off each day. Once the selection is set,
the phone automatically powers off every day at the same
time. This function can be set and reset by pressing MEM.
-37-
1) Press FCN + 2.
flashing
D
HB
ON - - : - OFF - - : - ALM - - : - -
2) Press # or
WW
W . Place the flashing indicator to the OFF
WW
position.
D
HB
ON - - : - -
flashing
OFF - - : - ALM - - : - -
3) Press VOL. The flashing indicator moves to the hour field.
D H
D
HB
ON - - : - OFF 12 : 00 a
flashes
ALM - - : - -
4) Enter Automatic Off Time (i.e., 8). (01 to 12 are valid entries
for hour.) Press MEM anytime the hour or minute field is
flashing to change to either am or pm.
D
HB
ON - - : - OFF 8 : 00 a
flashes
ALM - - : - -
5) Press VOL. The flashing moves to the minutes field.
D
HB
ON - - : - OFF 8 : 00 a
ALM - - : - -
flashes
6) Enter Automatic Off Time (Example 30) (00 to 59 are valid
entries for Minutes)
D
HB
ON - - : - OFF 8 : 30 a
ALM - - : - -
flashes
-38-

7) Press VOL. The phone sets at 8:30PM and the flashing
minute stops flashing. The setting mode ends and the
display shows:
D
HB
ON - - : - -
flashing
OFF 8 : 30 p
ALM - - : - -
8) Pressing MEM turns the automatic power off feature on or
off by displaying the power off time when its on and all dashes
when the feature is off.
9) Press CLR. The phone returns to normal standby.
D
HB
Feb 2
12:00 a m
ESCALA TING ALERT
If this function is set to ON, at the incoming call, Alert tones
get louder and louder. The volume will automatically increase
from Min, Low, Mid, to Max every six (6) seconds at each
level. The starting volume will always be Min, regardless of
the ringer volume setting, unless the volume setting is off.
1) Press FCN + 4. D H
D
HB
F C N 4 _
T o n e
2) Press 2.
F u n c t i o n
D
HB
F C N 4 2
E s c a l a t i n g
o f f
-39-

3) Press MEM. This turns the function on or off.
D H
D
HB
F C N 4 2
E s c a l a t i n g
o n
4) Press CLR. The phone returns to normal standby.
D
HB
F e b 0 2
1 2 : 0 0 a m
SYSTEM?
AUTOMATIC LOCKING
With this function activated, the phone places itself into
Full Lock condition automatically upon power on. The four (4)
digit lock code or the three (3) digit Temporary Lock Code
must be used to unlock the phone.
1) Press FCN + 6.
D
HB
E n t e r
L o c k C o d e
2) Enter four (4) digit lock code.
Note: The lock code is supplied by the dealer. If you
forget your lock code, contact your dealer. The factory
default lock code is 0000.
D H
D
HB
F C N 6 _
L o c k C o d e
F u n c t i o n
-40-

3) Press 2.
D
HB
F C N 6 2
A u t o L o c k
o f f
4) Press MEM. To turn Auto Lock on or off.
D
HB
F C N 6 2
A u t o L o c k
o n
5) Press CLR. The phone returns to normal standby.
D
HB
F e b 0 2
1 2 : 0 0 a m
SYSTEM?
FIXED DIGIT DIALING
The phone allows you to restrict the number of digits on
outgoing overseas calls or other long distance phone
numbers.
The phone will verify the number’s digit count after the SND
key is pressed. The range of entry digits is from ‘0’ through
‘31’. Entering ‘0’ resets the function to normal, unrestricted
dialing.
1) Press FCN + 6.
D
HB
E n t e r
L o c k C o d e
-41-

2) Enter four (4) digit lock code.
Note: The lock code is supplied by the dealer. If you
forget your lock code, contact your dealer. The factory
default lock code is 0000.
D
HB
F C N 6 _
L o c k C o d e
F u n c t i o n
3) Press 3.
D
HB
F C N 6 3
F i x e d D i a l
n o r m a l
4) Press the digit key as follows:
For No Restriction (Normal), Press 0 + 0.
flashing
D
HB
F C N 6 3
D H
F i x e d D i a l
0
-42-
For 7-Digit Restriction, Press 0 + 7.
D
HB
F C N 6 3
F i x e d D i a l
flashing
7
For 11-Digit Restriction, Press 1 + 1.
D
HB
F C N 6 3
F i x e d D i a l
flashing
1 1
5) Press MEM. The entered number stops flashing and the
data is stored to memory. If a ‘0’ was entered, the display
changes to indicate normal which is no dialing restriction.
D
HB
F C N 6 3
F i x e d D i a l
n o r m a l
6) Press CLR. The phone returns to normal standby.
Note: If the incorrect lock code is entered, the phone will
return to the normal standby display.
Note: If the phone is in the 7-digit or 11-digit restriction
mode and the user tries to make a call with a phone
number containing more than 7 or 11 digits, or beginning
with zero (0), when the SND key is pressed the alarm tone
is heard and the phone displays Extra Dig Dialed Press
CLR.
E x t r a D i g
D i a l e d
P r e s s C L R
-43-

SPEED DIAL MEMORY LOCKING
This function prevents, either partially or completely,
unauthorized access to the speed dial numbers stored in the
memory. This function also prohibits memory access,
scrollpad memory access, last number dialed access, and call
lists.
There are three separate setting for the Speed Dial Memory
Lock.
off.................... No restriction.
read only ........ Reading allowed, Deleting and Rewriting
........................ prohibited, FCN + MEM keys ignored,
........................ Automatic Store Ignored.
on.................... DTMF Reading, Deleting and Rewriting
........................ prohibited, FCN + MEM keys ignored,
........................ MEM key ignored.
1) Press FCN + 6. D H
D
HB
E n t e r
L o c k C o d e
2) Enter four (4) digit lock code.
Note: The lock code is supplied by the dealer. If you
forget your lock code, contact your dealer. The factory
default lock code is 0000.
D H
D
HB
F C N 6 _
L o c k C o d e
F u n c t i o n
3) Press 5.
D
HB
F C N 6 5
M e m o L o c k
o f f
-44-

4) Press MEM. To Select Level of Speed Dial Memory Lock.
D
HB
D
HB
F C N 6 5
M e m o L o c k
o f f
D
HB
F C N 6 5
M e m o L o c k
r e a d o n l y
F C N 6 5
M e m o L o c k
o n
5) Press CLR. The phone returns to normal standby.
D
HB
F e b 0 2
1 2 : 0 0 a m
SYSTEM?
TEMPORARY LOCK CODE SET
This function allows the user to program any three (3) digit
temporary lock code to lock or unlock the phone without
revealing your personal four (4) digit lock code. If the phone is
set to full or partial lock using the temporary lock code, the
phone can still be unlocked by using the primary 4-digit lock
code. If the phone is set to full or partial lock using the primary
4-digit lock code, the phone cannot be unlocked by using the
temporary lock code; the primary lock code must be used.
Note: The three (3) digit temporary code cannot be the
same as the first three digits of your personal lock code.
1) Press FCN + 6.
D
HB
E n t e r
L o c k C o d e
D H
-45-

2) Enter four (4) digit lock code.
Note: The lock code is supplied by the dealer. If you
forget your lock code, contact your dealer. The factory
default lock code is 0000.
D
HB
F C N 6 _
L o c k C o d e
F u n c t i o n
3) Press 6. The phone shows current three (3) digit code.
Factory default code is 000.
D
HB
F C N 6 6
T e m p C o d e
X X X
(xxx = current
code)
4) Enter three (3) digits. Example 2 + 5 + 8.
D
HB
F C N 6 6
T e m p C o d e
2 5 8
Flashing
5) Press MEM. The flashing stops and the new code is set.
D H
D
HB
F C N 6 6
T e m p C o d e
2 5 8
6) Press CLR. The phone returns to normal standby.
D
HB
F e b 0 2
1 2 : 0 0 a m
D H
SYSTEM?
-46-

RESET USER SETTINGS (DEFAULT)
This function initializes all the phone’s user settings
to their default state.
1) Press FCN + 6 and Enter your 4-digit Lock Code.
D
HB
E n t e r
L o c k C o d e
2) Enter your four (4) digit Lock Code.
D
HB
F C N 6 _
L o c k C o d e
F u n c t i o n
3) Press 7.
D
HB
F C N 6 7
I n i t i a l i z e
4) Press MEM.
D
HB
F C N 6 7
I n i t i a l i z e
C o m p l e t e d
The Phone Resets to the Defaults listed below:
(1) Total Talk Time: [000h00m] (13) Escalating Alert: [Off]
(2) Call Lists: [00m00s] (14) Alert Type Select: [1]
(3) Clock Alarm: [Off,12:00am] (15) Last Number Memory: [Clear]
(4) Auto Power On: [Off,12:00am] (16) Reserved
(5) Auto Power Off: [Off,12:00am] (17) Long DTMF: [Off]
(6) Minutes Reminder: [Off] (18) One Touch Dialing: [Off]
(7) Reserved (19) Multiple Language: [English]
(8) Auto-Lock: [Off] (20) Any Key Answer: [On]
(9) Fixed Digit Dial: [Normal] (21) Backlight: [On]
(10) Memory Lock: [Off] (22) SMS Sort Order: [Urgency]
(1 1) End to End Switch: [On] (23) SMS Roll Off [Arrival]
(12) Temporary Lock Code: [000] (24) Clock: [12:00am Jan 01, 1996]
-47-

WAKE-UP MESSAGE PROGRAMMING
This function allows the user to enter a Wake-Up Message.
This message appears for 4.5 seconds each time the phone
is turned on.
1) Press FCN + 6.
D
HB
E n t e r
L o c k C o d e
2) Enter four (4) digit lock code.
Note: The lock code is supplied by the dealer. If you
forget your lock code, contact your dealer. The factory
default lock code is 0000.
D
HB
F C N 6 _
L o c k C o d e
F u n c t i o n
3) Press 9.
D
HB
F C N 6 9
W a k e U p
M e s s a g e
4) Press MEM.
D
HB
-
5) Enter your wake-up message using the same process as
as described on page 15, Keying in Names, Steps 2 through
5.
-48-

You can enter up to 30 characters with blank spaces and
D
HB
symbols also counted as characters. Pressing the CLR key
allows you to clear the digits one at a time to correct any
mistakes made.
D
HB
S A L E S
A G E N C Y
6) Press MEM. The wake-up message will be stored into
memory.
D
HB
F C N 6 9
W a k e U p
M e s s a g e
7) The phone returns to normal standby.
D
HB
F e b 0 2
1 2 : 0 0 a m
SYSTEM?
CALL TYPE
This function is used in conjunction with the type of call
required. Note that in a digital service area, the call type can
still be either digital or analog.
1) Press FCN + 8 + 1. D
D
HB
F C N 8 1
C a l l T y p e
d u a l m o d e
2) Press MEM to set call type to dual mode, analog, or digital.
D
HB
F C N 8 1
C a l l T y p e
d i g i t a l
-49-
F C N 8 1
C a l l T y p e
a n a l o g

3) Press CLR. The phone returns to normal standby.
D
HB
D
HB
D
HB
F e b 0 2
1 2 : 0 0 a m
SYSTEM?
AUTOMATIC REPEAT DIALING
The phone is capable of automatically redialing the same
phone number up to three times with a 60-second interval
between each try. After the third try, the phone will
automatically cancel the repeat dial mode and go back to
normal standby.
1) Enter a number (or Press MEM for a memory location)
D H
D
HB
1 2 3 4 5 6 7
SYSTEM?
2) Press FCN + SND. The phone will show the “RD” indicator,
sound a ringing tone, dial the number selected and place the
phone into Mic Mute. After thirty-five (35) seconds, the phone
automatically terminates the call if not answered and the
display shows:
D
HB
R
D
R
00m36s
1 2 3 4 5 6 7
M i c M u t e
SYSTEM?
After sixty (60) seconds, the phone will try to dial the same
number again. The phone will sound a ringing tone and redial
the number selected. After thirty-five (35) seconds, the phone
automatically terminates the call again if the call is not
answered and the display again will show:
D
HB
R
D
R
00m36s
1 2 3 4 5 6 7
SYSTEM?
M i c M u t e
-50-
D
D

This process is repeated three (3) times. If after the third
time the call is not answered the repeat dial mode ends and
the “RD” indicator disappears from the display. If the calling
number answers, Press CLR + FCN + 9 to talk.
D
HB
00m36s
SYSTEM?
3) Press CLR. The phone returns to normal standby.
D
HB
F e b 0 2
1 2 : 0 0 a m
SYSTEM?
ONE-TOUCH DIALING
When One-Touch Dialing is enabled, the user will have up to
nine (9) one-touch keys available. Each one-touch key
corresponds to one of the first nine (9) memory locations
(Example one-touch 1 = MEM 01). When turned on this
function will allow the user to press a single digit (1 through 9
Hold) and have the phone automatically display and dial
(SND) the number residing in that memory location.
1) Press FCN + 5. D H
D
HB
F C N 5 _
C a l l P r o c
F u n c t i o n
2) Press 7.
D
HB
F C N 5 7
O n e - T o u c h
o f f
-51-
3) Press MEM. This turns One-Touch on or off.
D
HB
D
HB
D H
F C N 5 7
O n e - T o u c h
o n
4) Press CLR. The phone returns to normal standby.
D
HB
F e b 0 2
1 2 : 0 0 a m
SYSTEM?
MULTIPLE LANGUAGE SELECTION
Your phone has the capability of displaying three (3) different
languages on the display. The user can select which language
(English, French, Spanish) they feel most comfortable with,
and the phone will remain in that language until changed. The
default language is English.
1) Press FCN + 5. D H
D
HB
F C N 5 _
C a l l P r o c
F u n c t i o n
2) Press 8. D H
D
HB
F C N 5 8
L a n g u a g e
E n g l i s h
3) Press MEM. This changes the language function from
English, French or Spanish.
D
HB
F C N 5 8
L a n g u a g e
F r a n c a i s e
F C N 5 8
L a n g u a g e
E s p a n o l
-52-
4) Press CLR. The phone returns to normal standby in a
different language.
D
HB
F E B 0 2
1 2 : 0 0 a m
SYSTEM?
CLOCK/CALENDAR SETTING
This function sets the year, month, day and time. The phone
automatically sets the day of the week every time when the
year, month and the day are set. The Year range is from 1996
to 2095. The display of "AM", "PM" is set in 24 hours.
1) Press FCN + 7. The display shows the date set screen:
D
HB
12 is flashing
1 2 : 0 0 a m
N o v 0 3 T h u
1 9 9 6
2) Key in correct hour (Example 9,11,4, etc.).
D
HB
9 is flashing
9 : 0 0 a m
N o v 0 3 T h u
1 9 9 6
3) Press #. The hour is set and the display moves to minutes.
D
HB
9 : 0 0 a m
00 is flashing
N o v 0 3 T h u
1 9 9 6
4) Key in correct minutes (Example 15,31,59, etc.).
D
HB
9 : 3 1 a m
31 is flashing
N o v 0 3 T h u
1 9 9 6
-53-

5) Press MEM to select either am or pm.
D
HB
9 : 3 1 a m
'am/'pm'
N o v 0 3 T h u
1 9 9 6
6) Press #. The minutes are now set and display moves
to month.
D
HB
9 : 3 1 a m
Nov is flashing
N o v 0 3 T h u
1 9 9 6
7) Enter Month Number (Example Jan=1,Feb=2,Mar=3 etc.).
D
HB
9 : 3 1 a m
5 is flashing
5 0 3 T h u
1 9 9 6
8) Press #. Month is now set and display shows day.
D
HB
9 : 3 1 a m
M a y 0 3 T u e
3 is flashing
1 9 9 6
9) Enter correct date (Example 1,10,21,30 etc.).
D
HB
9 : 3 1 a m
M a y 0 1 T u e
1 is flashing
1 9 9 6
10) Press #. Date is now set and phone automatically enters
in the day of the week (Example Mon,Tue,Wed,Thur,etc.).
D
HB
9 : 3 1 a m
M a y 0 1 T u e
1 9 9 6
1996 is flashing
-54-

11) Enter in correct year (Example 1996,1997,1998,etc.).
D
HB
9 : 3 1 a m
M a y 0 1 S u n
1 9 9 7
1997 is flashing
12) Press #. Year is now set and display goes back to hour
and flashes.
D
HB
9 : 3 1 a m
9 is flashing
M a y 0 1 M o n
1 9 9 7
Note: If correct year is already displayed press #.
13) Press CLR. The phone returns to normal standby with
the correct date and time.
D
HB
M a y 0 1
9 : 3 1 a m
SYSTEM?
MINUTES REMINDER TONE
During conversation on the phone, the phone will make short
tones every minute to remind you that one minute of air time
has been used. The Minutes Reminder can be set on or off
as you desire.
1) Press FCN + 4. The display will show the Tone Function
menu:
D
HB
F C N 4 _
T o n e
F u n c t i o n
-55-

2) Press 4. The display shows the currently selected Call
Tone mode.
D
HB
F C N 4 4
C a l l T o n e
o f f
3) Press MEM to select the setting on or off.
D
HB
F C N 4 4
C a l l T o n e
o n
4) Press CLR The phone returns to normal standby.
D
HB
F e b 0 2
1 2 : 0 0 a m
SYSTEM?
While in the conversation mode, a "Double Beep" will
sound at the end of each minute. A "Single Beep" will
sound ten seconds before the end of each minute.
SID MANAGEMENT
The SID Management feature lets the phone operate only
within specifically identified (Preferred) systems. The Service
Provider can enter up to thirty (30) preferred System ID
numbers that identify the systems that you want your phone to
access.
Programming of your System ID numbers is accomplished
by your service provider and is only associated with NAM1.
SHORT MESSAGING SERVICE
Short Messaging Service (SMS) provides the user with the
ability to receive and respond to alphanumeric messages. If
your cellular service provider offers Short Messaging
Services, you can use this feature of the phone to view your
messages like a pager. Callback numbers and short text
messages can be stored for your review.
-56-

The number of messages that can be stored is determined by
the number of text characters in the stored messages. For
example, the phone can store up to one hundred and sixty 37character messages, eighty 80-character messages, and 30
240-character messages. Your phone replaces messages,
based on message priority or arrival time, with new messages
as new messages are received.
When you access these features, you can view messages you
have received, or immediately place calls if a number is
included. To access these features from the standby mode,
press the MEM key twice.
SHORT MESSAGE ALERTS
Your DT2000 cellular phone receives and sounds a series of
tones to notify you of the type of message received. The alert
tones could vary depending on the cellular service provider.
EMERGENCY MESSAGE ALERT
When an Emergency Message is received, a dual tone
alert will sound and will repeat three times.
URGENT MESSAGE ALERT
When an Urgent Message is received, a dual tone alert will
sound and will repeat two times.
NORMAL MESSAGE ALERT
When a Normal Message is received, a dual tone alert will
sound and will repeat one time.
BULK MESSAGE ALERT
When Bulk Messages are received, a dual tone alert will
sound and will repeat one time.
VOICE MESSAGE ALERT
When a Voice Message is received, a dual tone alert will
sound and will repeat one time.
When the user is alerted to an incoming message the
following screens can appear depending on the type of
message being received.
-57-

EMERGENCY MESSAGE
XXX New
EMERGENCY
Messages
Press MEM
NOTE: Pressing MEM key allows you to go to the
message view mode and the incoming message will be
displayed on the screen.
URGENT MESSAGE
XXX New
URGENT
Messages
Press MEM
NOTE: Pressing MEM key allows you to go to the
message view mode and the incoming message will be
displayed on the screen.
NORMAL MESSAGE
XXX New
Messages
Press MEM
to read
NOTE: Pressing MEM key allows you to go to the
message view mode and the incoming message will be
displayed on the screen.
BULK MESSAGES
XXX Bulk
Messages
Press MEM
to read
NOTE: Pressing MEM key allows you to go to the
message view mode and the incoming message will be
displayed on the screen.
-58-

VOICE MAIL MESSAGES
You Have
Voice Mail
Press SND
to Access
NOTE: By pressing the SND key, the phone will call the
voice mail number programmed into your phone. If the
voice mail number is not programmed into your phone an
alarm tone will sound and the screen below will be
displayed. Press CLR to clear the message. To program
your voice mail number, see page 66, Voice Mail Feature.
No Voice
Mail
Number
Available
MESSAGE MEMORY
When the incoming message memory is full, an alert message
will be displayed every ten minutes and an alarm tone will
sound.
RCV MSG
MEMORY
FULL
NOTE: To clear this screen, press the CLR key.
Anytime a message is rejected by the phone due to the lack of
memory, an alarm tone will sound and the below screen will
appear:
RCV MSG
REJECTED MEMORY
FULL
NOTE: To clear this screen, press the CLR key.
-59-

PERIODIC MESSAGE NOTIFICATION
Your DT2000 cellular phone continually monitors for any
unread messages you may have received and will provide
user notification as follows:
EMERGENCY MESSAGES
Your cellular phone scans for any unread emergency
messages every 30 seconds and if any are found the
following screen will be displayed:
xxx Unread
EMERGENCY
Messages
Press MEM
NOTE: Pressing MEM key allows you to go to the
message view mode and the incoming message will be
displayed on the screen.
URGENT MESSAGES
Your cellular phone scans for any unread urgent
messages every 10 minutes and if any are found the
following screen will be displayed:
xxx Unread
URGENT
Messages
Press MEM
NOTE: Pressing MEM key allows you to go to the
message view mode and the incoming message will be
displayed on the screen.
NOTE: There will be no periodic message notification for
normal, bulk or voice mail messages.
MESSAGE VIEW MODE
The Message View Mode allows you to view the incoming
messages When this mode is entered, the display will show
the first message received in the order received.
Entering
Message
View
Mode
-60-
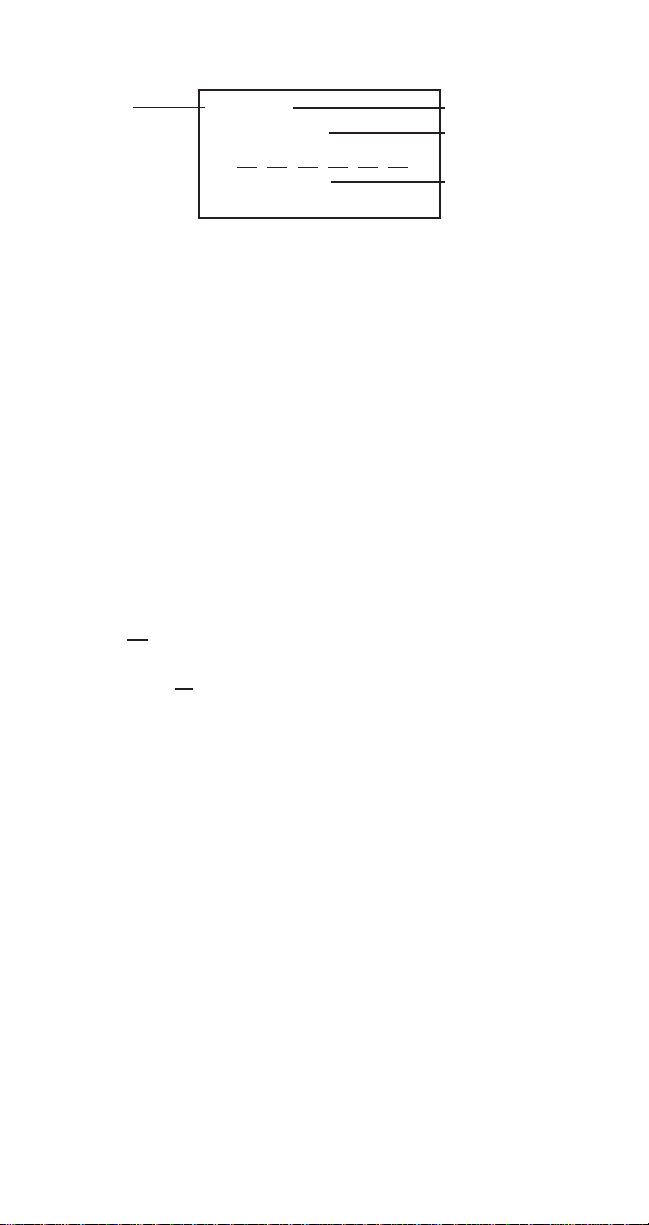
1) Press: the UP [U] or DOWN [V] keys to advance through
the message screens.
Message
Number
NOTE: A line of six dashes separates the header from the
message text.
001/008
12:45p MON
04/29/97
This is a test
Total No. of Msgs
Time/Day Msg
Received
Message Text
MESSAGE VIEW MODE KEYPAD SUMMARY
When in the Message View Mode, the following keypad
summary applies:
oUP [U] - Scroll up one line. When a message is being
displayed, the UP key scrolls up one line at a time.
o DOWN [V] - Scroll down one line. When a message is
being displayed the DOWN key scrolls down one line at a
time.
o PAGEUP [ ] - Moves to the top of the previous msg.
o PAGEDOWN [ ] - Moves to the top of the next msg.
o TOP [ U ] - Move to first message.
o BOTTOM [ V ] - Move to last message.
U
U
V
V
o ENTER [ ◆ ] - Send manual acknowledge with current
choice.
o CLR - Delete current message.
o MEM - Lock current message.
o SND - Call back.
o "0" - Sort Order Message
o END - Quit Message View.
o PWR - Power OFF.
o VOL - Toggles between the digits and the scroll keys.
o FCN - Scrollable Menu appears.
o "#" - Toggles between normal and expanded headers.
-61-

2) Pressing the UP [U] or DOWN [V] keys allows you to scroll
through the messages.
3) After entering the Message View Mode and no messages
exist, the phone will sound an alarm tone and the following
display will be shown:
No
Messages
Exist!
MESSAGE HEADERS
Two types of message headers are available in your
phone, Normal or Expanded. Press [ # ] to toggle
between normal and expanded headers.
NORMAL HEADER
The normal message header uses the following format and
content: (NOTE: Message lock can be turned on or off by
pressing MEM.)
No. of Msg's Message Lock Indicator
Message No
Msg Time
Stamp
Msg Text
Separator
EXPANDED HEADER
The expanded message header uses the following format and
content:
001/006
12:45p * MON
04/29/97
URGENT
––––––
-62-
Date Msg Rec
Msg Type

Msg Number 002/006 Total Msgs
Time Phone Rec Msg 12:47p MON Day of Week
04/10/97
Time Base Rec Msg 12:45p MON
04/10/97
Message Type URGENT!
CB#1:
2141234567 Call Back No.
CB#2:
2145671234 Call Back No.
Manual Acknowledge Man. Ack.
Request Locked Msg Locked
Update
Msg Text Follows MSG STAR T
MESSAGE SEPARATORS
Messages will be divided by message separators MSGEND.
This will allow the user to scroll up or down through the
message memory. (Example)
Love,
Ted
* * * * * * * * * *
* MSGEND *
* * * * * * * * * *
002/004
12:45p MON
- - - - - Meeting
canceled!
* * * * * * * * * *
* MSGEND *
* * * * * * * * * *
003/004
-63-

DELETING MESSAGES
UNLOCKED MESSAGES
When you want to delete an unlocked message from the
Short Messaging System, you must first be in the Message
View Mode. After entering the Message View Mode, select the
message you wish to delete. Press the CLR key. The display
will indicate:
DELETE
MESSAGE?
1. yes
2. no
If yes is selected the message will be deleted from memory. If
you select no the message deleting sequence will be aborted.
LOCKED MESSAGES
If the message you want to delete is locked, an alarm tone will
sound and the display will indicate:
CAN'T
DELETE,
MESSAGE
LOCKED
CALLBACK FEATURE
If a received message being viewed on the screen has only
one callback number attached to the message, a callback to
that number can be initiated by pressing the SND key. When
the SND key is pressed, the message view mode is exited
and a call orgination occurs to that callback number listed in
the message.
2141234567
Home
-64-

If the SND key is pressed when no callback number is
attached to a message an alarm tone will sound and the
following message will be displayed on the screen for
approximately two seconds.
NO
Callback
Number
Given!
If the SND key is pressed and there is more than one callback
number for the message, a menu that lists all the callback
numbers will be shown. Using the UP [U ], DOWN [V] keys
allows you to scroll the list and choose the callback number
you wish to use.
Pressing the SND key or the ENTER [◆] key on the selected
callback number will initiate the callback sequence to that
number.
EXITING MESSAGE REVIEW MODE
To exit the Message Review Mode Press END key. Upon
pressing the END key the following informational screen will
be displayed:
RCVD MSGS
Unread XXX
Locked YYY
Free XX%
No. of unread msgs
No. of locked msgs
Amount of free
memory left
SORT ORDER FEATURE
The Sort Order menu allows the user to select the messages
they wish to review. Upon selection the screen will display the
first message under that category.
SORT ORDER
1. urgent
2. oldest
3. newest
-65-

VOICE MAIL FEATURE
The Voice Mail Number feature allows you to enter your
voice mailbox number and send it automatically. Press
FCN + 8 + 4.
1) Enter in your voice mail number. Press MEM to store.
D
HB
F C N 8 4
V M N u m b e r
2 1 4 1 2 3 4 5 6 7
2) Press MEM + SND from standby mode to send your Voice
Mail Number.
NOTE: If more than 10 digits are desired for your voice mail
box number, enter a 1 or 2 digit memory location into the VM
Number screen. Go to that memory location and enter in your
voice mail box number. When SND is pressed upon
notification of voice mail, the voice mail will automatically go to
that location and send your voice mail box number.
flashing
ROLL OFF FEATURE
The Roll Off Feature allows you to select how you want to
replace messages in your Short Message Service Register
either by priority or arrival time. Press FCN + 8 + 5. Press
MEM to change.
D
HB
F C N 8 5
R o l l o f f
A r r i v a l
-66-

WORD WRAP FEATURE
D
HB
D
HB
The Word Wrap feature allows you to automatically or
manually select whether your message text lines return after
so many characters have been entered automatically or you
manually go from the end of one line to the beginning of
another.
1) Press FCN + 8 + 6. Press MEM to select Enabled or
Disabled.
D
HB
F C N 8 6
W o r d W r a p
D i s a b l e d
SMS INITIALIZE FEATURE
This feature will remove all messages that have been stored
in the phone.
1) Press FCN + 8 + 7. Press MEM to complete initalization.
D
HB
F C N 8 7
E r a s e SMS
M e s s a g e s
D
HB
A r e y o u
s u r e ?
1=Yes 0=No
E r a s e
1. A l l m s g s
2. U n l o c k e d
F C N 8 7
S M S M s g s
E r a s e d
2) Press CLR. The phone returns to normal standby.
SID MANAGEMENT (SYSTEM IDENTIFIER)
The SID is a 5 digit code that identifies each system area.
This feature allows the user to temporarily override the SID
feature of the telephone. Upon the next power on, the feature
goes back to active.
-67-
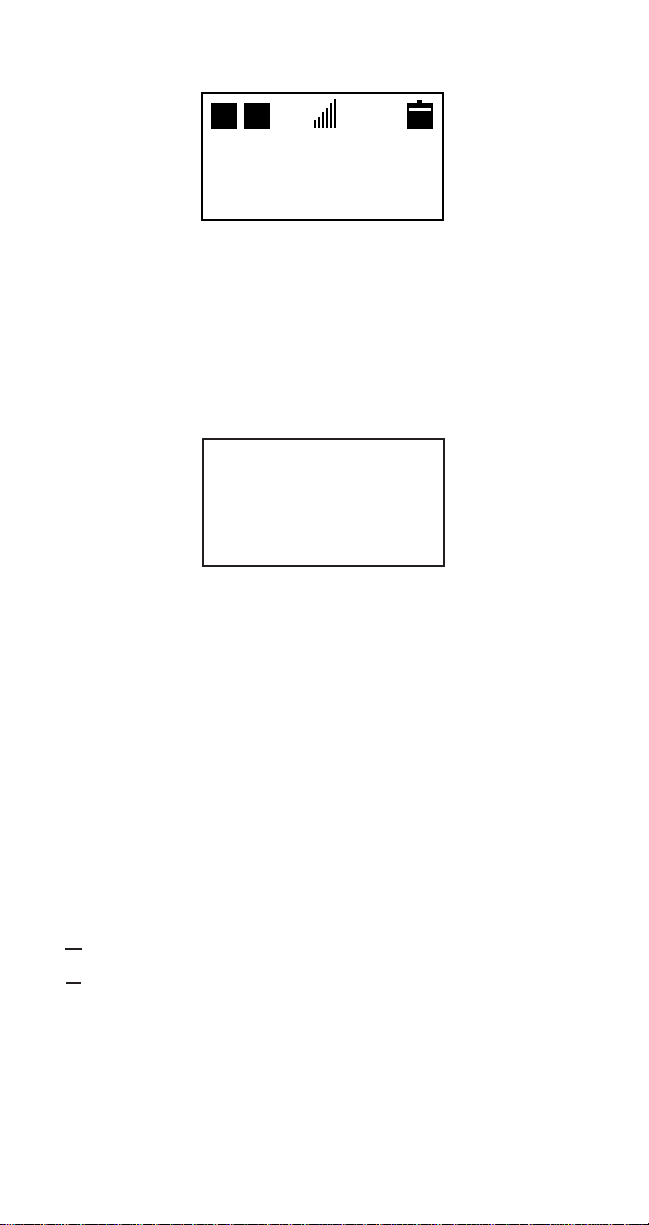
1) Press FCN + 8 + 8. Press MEM to make the SID Feature
Active or Overridden.
D
HB
F C N 8 8
S I D M G T
a c t i v e
NON-PUBLIC MODE
Non-Public Mode of operation allows the user to access the
services of a private base station if the user has authorization.
To access the Non-Public menu from the standby screen:
1) Press MEM + VOL keys
N o n P u b l i c
M o d e M e n u
U s e U V &
5 t o e n t e r
This screen will stay until you press any key, at which point a
menu with a list of options will appear.
Once the menu appears, the green arrow keys (digit keys) are
used to scroll through the menu.
ARROW KEYS SUMMARY
U UP..................... Scrolls up to the previous option.
V DOWN .............. Scrolls down to the next option.
U PAGEUP........... Moves up one screen of information
U
.......................... and highlights the option lowest
.......................... on the screen.
V PAGEDOWN .... Moves down one screen and
V
.......................... highlights option highest on the
.......................... screen.
U TOP .................. Moves to the top of the list.
V BOTTOM .......... Moves to the bottom of the list.
◆ ENTER ............. (5 or MEM) Enter or Accept key.
CLR .................. Exit to standby screen.
END .................. Exit to standby screen.
PWR ................. Power Off.
If the menu reaches the end or the beginning, an alarm tone
will sound. Otherwise, a keypress acknowledge tone will
sound.
-68-

NON-PUBLIC MENU
The available options from the Non-Public menu are, System
Acquire, System Search, and View Database.
N o n - P u b l i c
M e n u
>> S y s t e m
A c q u i r e
Currently
selected item
flashes
SYSTEM ACQUIRE
System Acquire allows the user to find a Private or Residential
system that might be available for service if the user has
rights to the base station. Once acquired, the system will be
stored in the phone's memory and the new system will be
available for use.
From the Non-Public menu with "System Acquire" flashing:
1) Press ENTER (digit 5) key.
S e a r c h i n
p r o g r e s s . .
This menu will stay until the search is completed or the user
presses the CLR key.
Search in progress scans all of the channels associated with
the system that it is currently registered on (System A or
System B) and determines if the Private or Residential
systems are available for use. If there are not any Non-Public
systems available or the user is not allowed to use them, the
screen will display No Systems Found!
N o S y s t e m s
F o u n d !
-69-

If there are systems available, they are presented to the user
in the same menu format as the Non-Public menu.
A v a i l a b l e
S y s t e m s
N E C O f f i c e
A T T W o s
--------------------------S W B E L L 1
C o n t i n u e
S e a r c h
If the Continue Search option is selected, Non-Public systems
on the next strongest system are displayed if they are
available. If none are available, the "No Systems Available"
message is displayed.
If a system is flashing and the ENTER (digit 5) key is
pressed, the standby screen returns and the letters "NP"
(Non-Public) are displayed in the upper left corner of the
screen. The alpha tag for the system is displayed on the
bottom.
D
HB
N P
F e b 0 2
1 2 : 0 0 am
N E C O f f i c e
Currently
selected item
flashes
Viewable area
ends
The private system is now in the database and the phone will
automatically select it when it determines that the Non-Public
system is available. The user can use System Search to
manually select a different system (either Public or another
Non-Public system) that is stored in the phone.
SYSTEM SEARCH
System Search allows the user to manually select an
available system that the phone is not currently on. Example,
the user is on a Non-Public system but plans to leave the area
where he/she would lose service from the Non-Public system.
The user would manually select the Public system so the call
would not be dropped. This "Manual" selection should stay in
effect until the user did a search for another system, or until
the power is cycled on the phone.
-70-

From the Non-Public menu, if the "System Search" is flashing
and the MEM key is pressed the following screen appears and
the MEM key is pressed the following screen appears:
S e a r c h i n
p r o g r e s s . .
The display will remain until the user presses the CLR key to
end the search or until available systems are found and the
display will then show those available systems.
A v a i l a b l e
S y s t e m s
P u b l i c
N E C O f f i c e
Once a system is selected, the display will return to the
standby screen and the alpha tag for that system and the
system type will be displayed.
If no systems are found, the following screen is displayed and
will remain until the CLR key is pressed.
Currently
selected item
flashes
N o S y s t e m s
F o u n d !
VIEW DATABASE
Once a series of private systems have been found, the user
may wish to see which ones are stored in the phone.
From the Non-Public menu, and the "View Database" option
flashing, Press MEM key. If there are no systems stored in the
phone, the following display will appear:
D a t a b a s e
E m p t y
P r e s s C L R
-71-

If there are systems stored, they will be displayed as in the
menu below. The Non-Public mode menu keypad keys can
be used to scroll this menu. This menu is for viewing
purposes only, therefore the ENTER key (digit 5) will
generate an alarm tone.
N A M
D a t a b a s e
N E C O f f i c e
SYSTEM?
NAM PROGRAMMING
Consult your Service Carrier for NAM Programming information.
CARE AND MAINTENANCE
Your phone is a product of superior design and craftsmanship
and should be treated with care. The suggestions below will
help you enjoy this product for many years.
Keep it dry. (Water contains minerals that will corrode
electronic circuits.) Avoid all liquid spills. Any form of liquid will
cause permanent damage to your phone.
Do not store in a hot area. High temperatures can shorten the
life of electronic devices, damage batteries, and warp or melt
certain plastics.
Do not drop it. This might cause permanent damage. The
internal circuit boards can be broken.
Do not use or store in dusty , dirty areas. This will cause
permanent damage to moving parts.
Do not use harsh chemicals, cleaning solvents, or strong
detergents to clean it. Wipe it with a soft cloth slightly
dampened in a mild soap-and-water solution. If the unit is not
working properly, take it to your nearest authorized dealer.
The personnel there will assist you, and, if necessary, arrange
for service.
-72-

TROUBLESHOOTING
If the power does not come on or stay on:
Make sure the battery is installed in the phone properly.
Be sure the contacts are clean on the battery and the
charger.
Battery charge may be too low for operation. Listen for
the low battery alarm or check battery level by pressing
FCN.
If the power comes on, but the phone does not work:
Check the NO Service message, you might be out of the
cellular service area.
Make sure that the antenna is extended to its full length.
-73-

LIMITED WARRANTY
1. What Products May Be Covered By This Limited
Warranty?
The following products (the "Products" or the "Product")
purchased through an NEC America, Inc. (NECAM), Wireless
Communications Division Authorized Dealer (the "Dealer") in
the United States on or after January 1, 1997, may be
covered by this warranty:
[DT2000 TDMA SERIES CELLULAR TELEPHONE AND
AUTHENTIC ACCESSORIES]
2. What Does This Warranty Cover?
NECAM warrants to the original end-user Product purchaser
("You") that the Products will conform to the applicable
published specifications in effect at the time of shipment from
NECAM to the Dealer, and that the Products will be free from
defects in materials or workmanship under normal use and
service during the warranty period described in Paragraph 4.
3. When Does Your Warranty Begin?
The warranty period wil begin on the date You purchase the
Product. Dated proof of purchase is necessary to accompany
any Product returned for warranty service consideration. Valid
proof of purchase must identify the point of purchase, date of
purchase, Product model or trade name, and Electronic Serial
Number or Mechanical Serial Number for transceivers and
boosters.
4. How Long Does The Coverage Last?
The warranty period for the Product is:
[ONE (1) YEAR]
Any Products repaired or replaced under the terms of this
warranty are covered under the warranty for the remainder of
the original warranty period or ninety (90) days from the date
of service return shipping, whichever is longer.
5. What Will The Manufacturer Do If The Product Becomes
Defective In Materials Or Workmanship During The
Warranty Period?
If any Product covered under this warranty becomes defective
in materials or workmanship during the applicable warranty
period, NECAM will, at its option, either repair the defective
Product without charge for parts and labor, or provide a
replacement in exchange for the defective Product.
-74-

6. What Is Not Covered By This Warranty?
(a) This warranty does not extend to:
(i) Products which have been subjected to misuse,
accident, physical damage, improper installation,
abnormal operation or handling, neglect, inundation, fire,
water, or other liquid intrusion, or;
(ii) Products which have been damaged due to repair,
altered, or modified by anyone other than an authorized
service warranty component-level representative of
NECAM, or;
(iii) Defects caused by components, parts, or accessories
not compatible with the warranted Product, or;
(iv) Products whose warranty/quality labels, product serial
number plates or electronic serial numbers have been
removed, altered, or rendered illegible, or;
(v) Accessory items such as antenna, cables, curl cords,
cases, etc., or;
(vi) Products shipped to NECAM for repair from outside
the United States.
(b) Any other warranties, including but not limited to the
implied warranties of merchantibility and fitness for a
particular purpose, shall be limited to the duration of this
warranty. Some states do not allow limitations on how
long an implied warranty lasts, so the above limitation
may not apply to you.
(c) NECAM's total liability for damages for any cause related
to or arising out of the use or inability to use the product,
whether in contract, negligence, strict tort, or based on
any other legal theory, shall not exceed the original price
paid for the product.
d) In no case shall NECAM be liable for any indirect, special,
incidental, or consequential damages based upon breach
of warranty, breach of contract, negligence, strict tort, or
any other legal theory. Such damages include, but are
not limited to, loss of profits, loss of savings or revenues,
inability to use the products or any associated equipment,
cost of capital, cost of any substitute equipment, facilities
or services, claims by third parties other than you, and
injury to property. These limitations do not apply to claims
for personal injury. Some states do not allow the exclusion
or limitation of incidental or consequential damages, so
the above limitation or exclusion may not apply to you.
-75-

7. How Do You Get Warranty Service?
If Your Product requires warranty service, it must be returned
to an NEC Authorized Service Center along with a description
of the Product malfunction or difficulty. You are required to
substantiate warranty status with a dated proof of purchase
(as explained in item #3), inclusive of Product's serial number
(if applicable). The address of the nearest NECAM Authorized
Service Center may be obtained by calling (800) 637-5917 or
(972) 751-750, or by writing to: NEC America, Inc., Attention:
Service Support & Administration, 1621 Walnut Hill Lane,
Irving, Texas, 75038. NECAM assumes no risk for damage or
loss in transit.
If, in NECAM's sole opinion, the Product failure is not covered
under this warranty, or proof of purchase does not meet the
terms of this warranty, You will be notified and Your
authorization will be requested for any further repair activity.
Products repaired under warranty will be returned to You,
transportation prepaid.
8. How Does State Law Apply To This Warranty?
This warranty gives You specific legal rights, and You may
also have other rights which vary from state to state.
9. This Warranty Is The Entire Agreement.
Unless modified in writing, signed by both You and NECAM,
this warranty is understood to be the complete and exclusive
agreement.
-76-
REV: LW012097

TECHNICAL INFORMATION
Dimensions 160x50x30mm*
(6.3"x2.0"x1.2")
Weight 10.0 ounces
Transmitting Power 0.6 W max. ERP
Operating Voltage 4.8V(int. battery)
Frequency Band 824.040 - 848.970 MHz (TX)
869.040 - 893.970 MHz (RX)
Standard Battery
Capacity 1200 mAh
Number of Channels 832
Memory Locations 99
Memory Capacity Numeric 32 digits per location
Alpha: 10 letters per location
LICENSED UNDER ONE OR MORE OF THE FOLLOWOING U.S. PATENTS
4,954,951 4,942,516 4,896,260 4,829,419 4,825,364 4,686,622 4,531,182
4,396,976 4,371,923 4,121,284 4,120,583 4,435,732 4,471,385 4,672,457
4,739,396 4,675,863 4,817,089 4,912,705 5,022,024 5,121,391
-77-

NEC SERVICE SUPPORT
NEC's Service Support group is ready to assist you with any
additional information that you may need in the operation and
integration of your NEC Cellular Telephone and NEC Authentic Accessories. Service Support can be obtained by contacting NEC at:
Telephone: Writing:
1-800-637-5917 * NEC America, Inc.
1-972-751-7500 Service Support
1621 Walnut Hill Lane
Irving, Texas 75038
* The 800 number listed above also provides access to the
NEC Repair Service and Parts Sales groups.
NEC Marketing & Sales
Marketing: Sales Agency:
NEC America Inc. NMI Corporation
Wireless Voice Terminals Div.141 1 0 N . Dallas Parkway
1555 Walnut Hill Lane Suite 300
Irving, Texas 75038 Dallas, T exas 75240
1-800-421-2141 1-800-CALL-NMI (225-5664)
Copyright A1998 by NEC Corporation
Manual Part Number: 621-0285
3rd Edition February 1998
All Rights Reserved. Printed in U.S.A.
All specifications and conditions subject to change without notice.
-78-

Alphabetical Index
Topic Page
-A-
Aircraft
Use on iv
Alarm
Battery, Low 33
Clock 34
Alert
Call 24
Escalating 39
Tone Type 24
Antenna
Care iii
Replacement iii
Automatic
Locking 40
Power Off 37
Power On 36
Repeat Dialing 50
-B-
Battery
Alarm. Low 33
Charge Indicator 4
Charging 4
Installing 3
Recharging 4
Removing 3
-C-
Call
Placing 8
Receiving 9
Length Of 21
Lists 31
Time Counter 21
Care 72
-D-
Deleting
Phone Number 16
Dialing
Tone 25
Fixed Digit 41
One-Touch 51
Speed 10
Topic Page
-D-
Display
Day of Week 18
Indicators vii, 5
Network Select 18
Own Number 18
Defaults
Reset 47
-F-
Features
Additional 18
-G-
Group
Storing 13
Guide
Quick Ref 6
-I-
Information
Deleting 16
Recalling 17
Storing 13
-K-
Key(s)
Names 15
Tones 23
Volume 9
Indicators vii
-L-
Language 52
Last # Redial 10
Lights 22
Locking 18
Full 19
Partial 20
Temporary 45

Alphabetical Index
Topic Page
-M-
Memory
Deleting 16
Group 13
Hidden Digits 16
Linking 28
Names 15
Recalling 14
Scanning 17
Scratchpad 18
Speed Dialing 10
Locking 44
Menu
Facility 11
Functions 7
Shortcuts 11
-N-
Names
Deleting 16
Editing 16
Keying In 15
Scanning 17
Storing 13
Non-Public Mode 68
Arrow Keys 68
Menu 69
System Acquire 69
System Search 70
View Database 71
-O-
Operation, Phone 8
Own No. View 18
-P-
Pauses
Automatic 28
Manual 27
Topic Page
-RRecalling 14
Receiving 9
Redialing 50
Resetting
Defaults 47
Total Call Timer 21
Counters
User Settings 47
Ring
Escalating 39
Type 24
Volume 23
Roaming 29
-SScanning
Alphabetically 17
Sequentially 17
Scratchpad 18
Service 78
Speed Dialing 10
Storing 13
-T-
Technical Info 77
Time/Date 53
Tones
Alert 24
Key 23
Minutes 55
-UUnlocking 18
Unmuting 32
-VVolume 9, 23
-W-
Wake-Up Msg 48

NEC Model Digital Talk 2000 Series Manual
OPERATION SUMMARY Page
__________________________________________
NOTES:
o [X][X] = Memory Address 01 to 99.
[X] = Memory Address 1 to 9.
KEY OPERATION TERMS:
o Press = Press Key firmly.
o Press (Hold) = Press and hold down key.
o Turn = Change Mode
o Key-In = Enter a series of digits
__________________________________________________
BASIC OPERATION:
Power On/Off:
o Press(Hold): [PWR]. For On or Off. 8
Place A Call:
o Key-in [Number]. Dial Number 8
Send A Number:
o Press [SND] 8
Receive A Call:
o Press [SND] 9
End A Call:
o Press [END] 8,9
__________________________________________________
CONVENIENCE FUNCTIONS:
Edit Display:
o Press [CLR]. Erase Digit. 16
Press [CLR Hold]. Erase display. 16
Backlight:
o Press [Any Key] Except [PWR]
For 10-second backlight. 22
View Hidden Digits:
o Press [FCN Hold].
With Number Displayed. 16
Earpiece Volume Control:
o Press VOL during call. 9
Keypad Volume Control:
o Press VOL during standby. 23
View Own Number:
o Press [FCN]18

OPERATION SUMMARY Page
__________________________________________________________
MEMORY STORING AND RECALL:
Store Number to Vacant Address:
o Key-in Number. Press [FCN+MEM Hold].
(1st Vacant Location)
Key-in Number. Press [FCN+MEM] +
[Memory Location]. 13
Store Number to Occupied Address:
o Key-in Number. Press [FCN+MEM] +
[Memory Location]. Press [MEM]
again to overwrite. 13
__________________________________________________________
Store Number From Scratchpad:
o Key-in Number During Conversation.
Press [FCN+MEM Hold]. (1st Vacant Location)
Key-in Number During Conversation.
Press [FCN+MEM] + [Mem Location]. 13
Recall Stored Numbers:
o Press [MEM] + [Memory Location]. 14
For Direct Recall.
Press [MEM] + [01]. Press # or W.
For Scrolling All Locations. 17
Press [MEM] # or W .
For Scrolling By Name. 17
___________________________________________________________
FCN KEY OPERATIONS:
FCN : View Own Number
Battery Check 18
FCN 1: Total Time (View/Reset) 21
FCN 2: Alarm Clock (Setting) 34/35/36/37/38/
39
FCN 3: Alpha Characters (Entering) 15
FCN 4: Tone Functions (Setting) 23/26/27/39/55
FCN 5; Call Processing (Selecting) 22/30/51/52
FCN 6: Lock Function 21/25/40/41/
44/45/47/48
FCN 7: Date and Time (Setting) 53
FCN 8: Call Type/Voice Mail 49/66
FCN 9: Mute Control 32/33
FCN 0: Memory Link/Pause(s) 27/28/29
FCN #: Full Locking/Unlocking 19
WW
FCN
W: Partial Locking/Unlocking 20
WW
VOL: Key Tone & Volume 9
FCN SND: Repeat Dialing 50
FCN (Hold): View Hidden Digits 16
 Loading...