

Page 1

The SL2100
Quick Install Guide:
Multiline IP Terminals
www.nec-enterprise.com
Page 2
Quick Install Guide – SL2100 Multiline IP Terminals rev 1.1
2 NEC SL2100 Communication System
Quick Start Guide:
Multiline IP Terminals
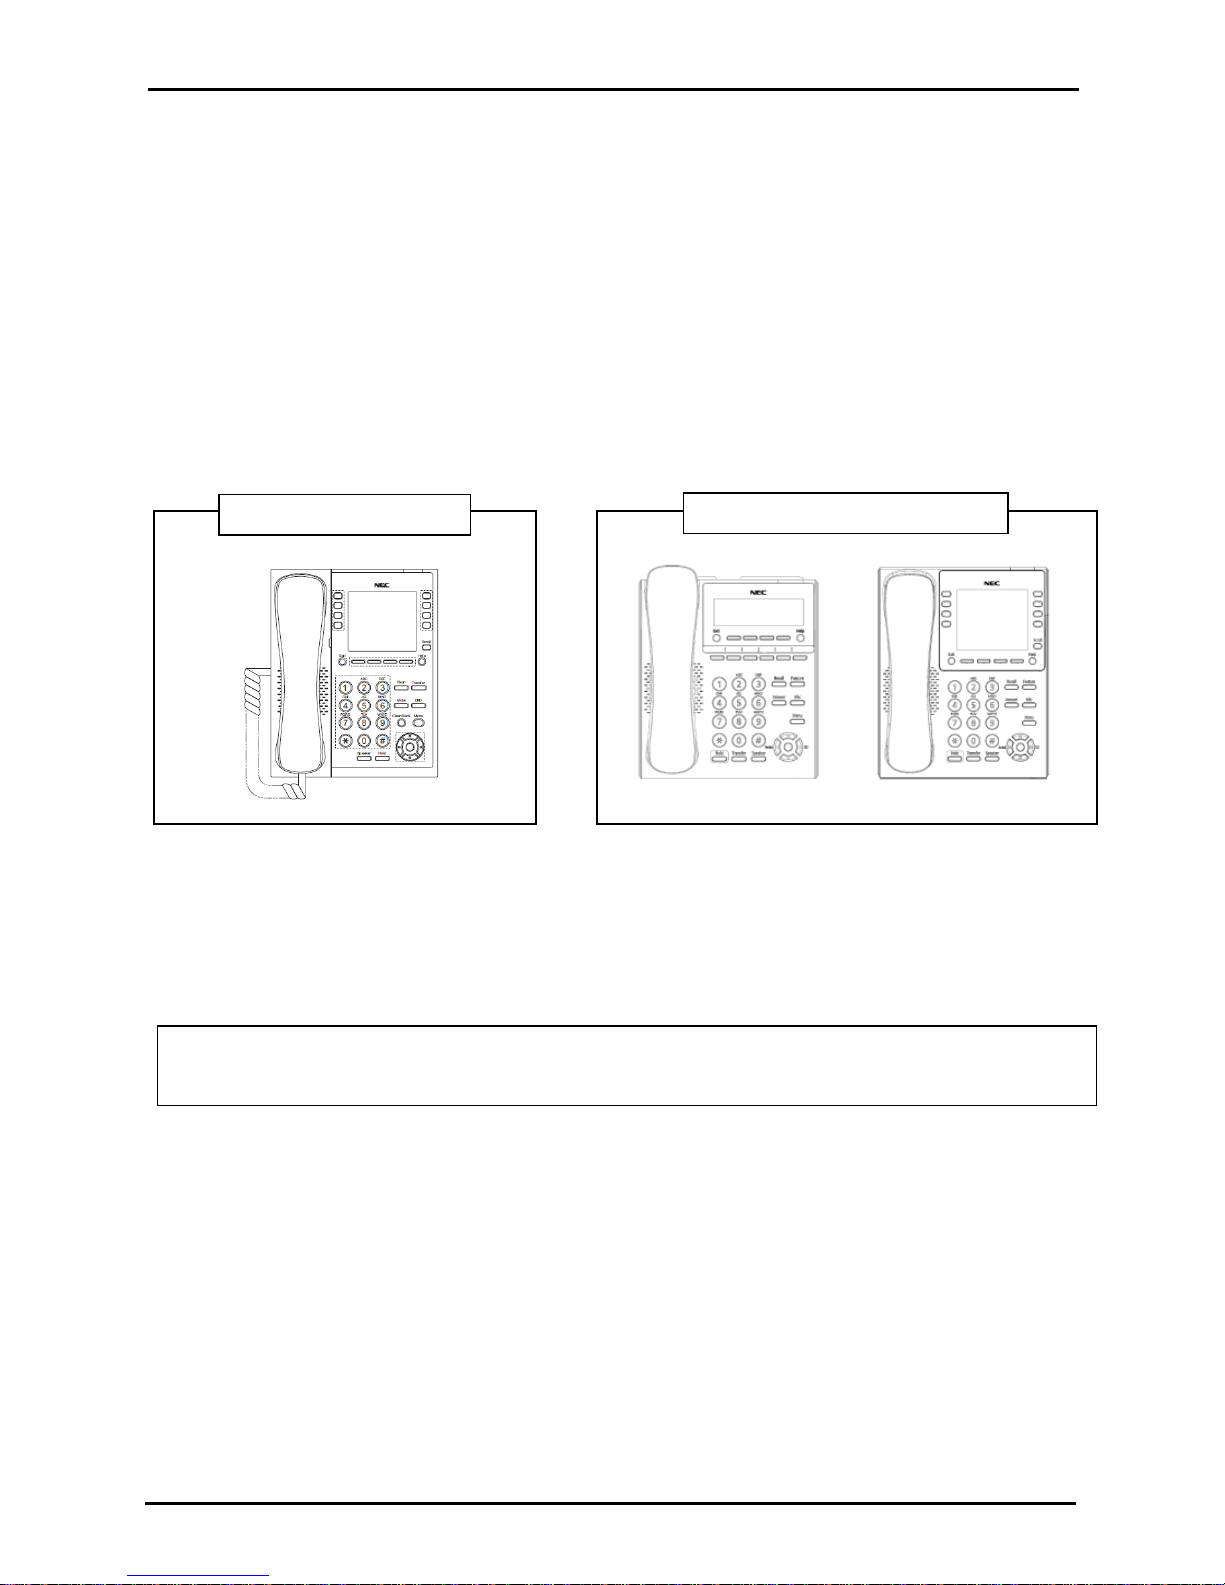
DT820 Phones (ITY-6D/ITY-8LDX)
8IPLD DESI-Less Phone
Note: For more information on your SL2100 Communications System and NEC Multiline IP Terminal,
including Quick User Guides and User Guides, navigate to your phone’s Support page on the NEC
Businessnet Portal.
Page 3

Quick Install Guide – SL2100 Multiline IP Terminals rev 1.1
NEC SL2100 Communication System 3
This guide explains the installation, configuration and operation of the SL2100 Multiline IP Telephones.
Further information for the SL2100 platform is available on BusinessNet.
Please keep all information supplied for future reference.
Regulatory Notice.
Refer to the Declaration of Conformity, Regulatory and Safety Considerations shown in the SL2100 Hardware
Manual.
Warning: This is a class A product. In a domestic environment this product may cause radio interference in which
case the user may be required to take adequate measures.
Other Documentation available:
SL2100 Hardware Manual
SL2100 Features and Specifications Manual
SL2100 Networking Manual
Page 4

Quick Install Guide – SL2100 Multiline IP Terminals rev 1.1
4 NEC SL2100 Communication System
Contents
SL2100 Multiline IP Terminals ............................................................................................................................... 5
Parts available for the SL2100 ........................................................................................................................... 6
1- Package Contents .............................................................................................................................................. 6
2- Features ............................................................................................................................................................... 7
3- System Connection Overview ........................................................................................................................... 9
4- Connect the Multiline IP Terminal ..................................................................................................................... 9
5- Applying Power to the Multiline IP Terminal ................................................................................................... 9
Ethernet sockets for VOIP ................................................................................................................................10
Check the IP Address of the SL2100 ...............................................................................................................11
6- IP7WW-8IPLD-C1 DESI-Less IP Terminal Leg Adjustment .......................................................................... 12
Low Position Setting .........................................................................................................................................12
High Position Setting ........................................................................................................................................13
7- DT820 IP Terminal Leg Adjustment (ITY-6D-1 and ITY-8LDX-1) .................................................................. 14
Low Position Setting .........................................................................................................................................14
High Position Setting ........................................................................................................................................15
8- Wall Mounting Multiline IP Terminals ............................................................................................................. 16
9- Multiline IP Terminal Configuration ................................................................................................................ 18
Multiline IP Terminal Boot Sequence ...............................................................................................................18
Multiline IP Terminal Programming Interface ...................................................................................................19
Configure 8IPLD Multiline IP Terminal .............................................................................................................20
Configure DT820 Multiline IP Terminals ..........................................................................................................24
Page 5
Quick Install Guide – SL2100 Multiline IP Terminals rev 1.1
NEC SL2100 Communication System 5
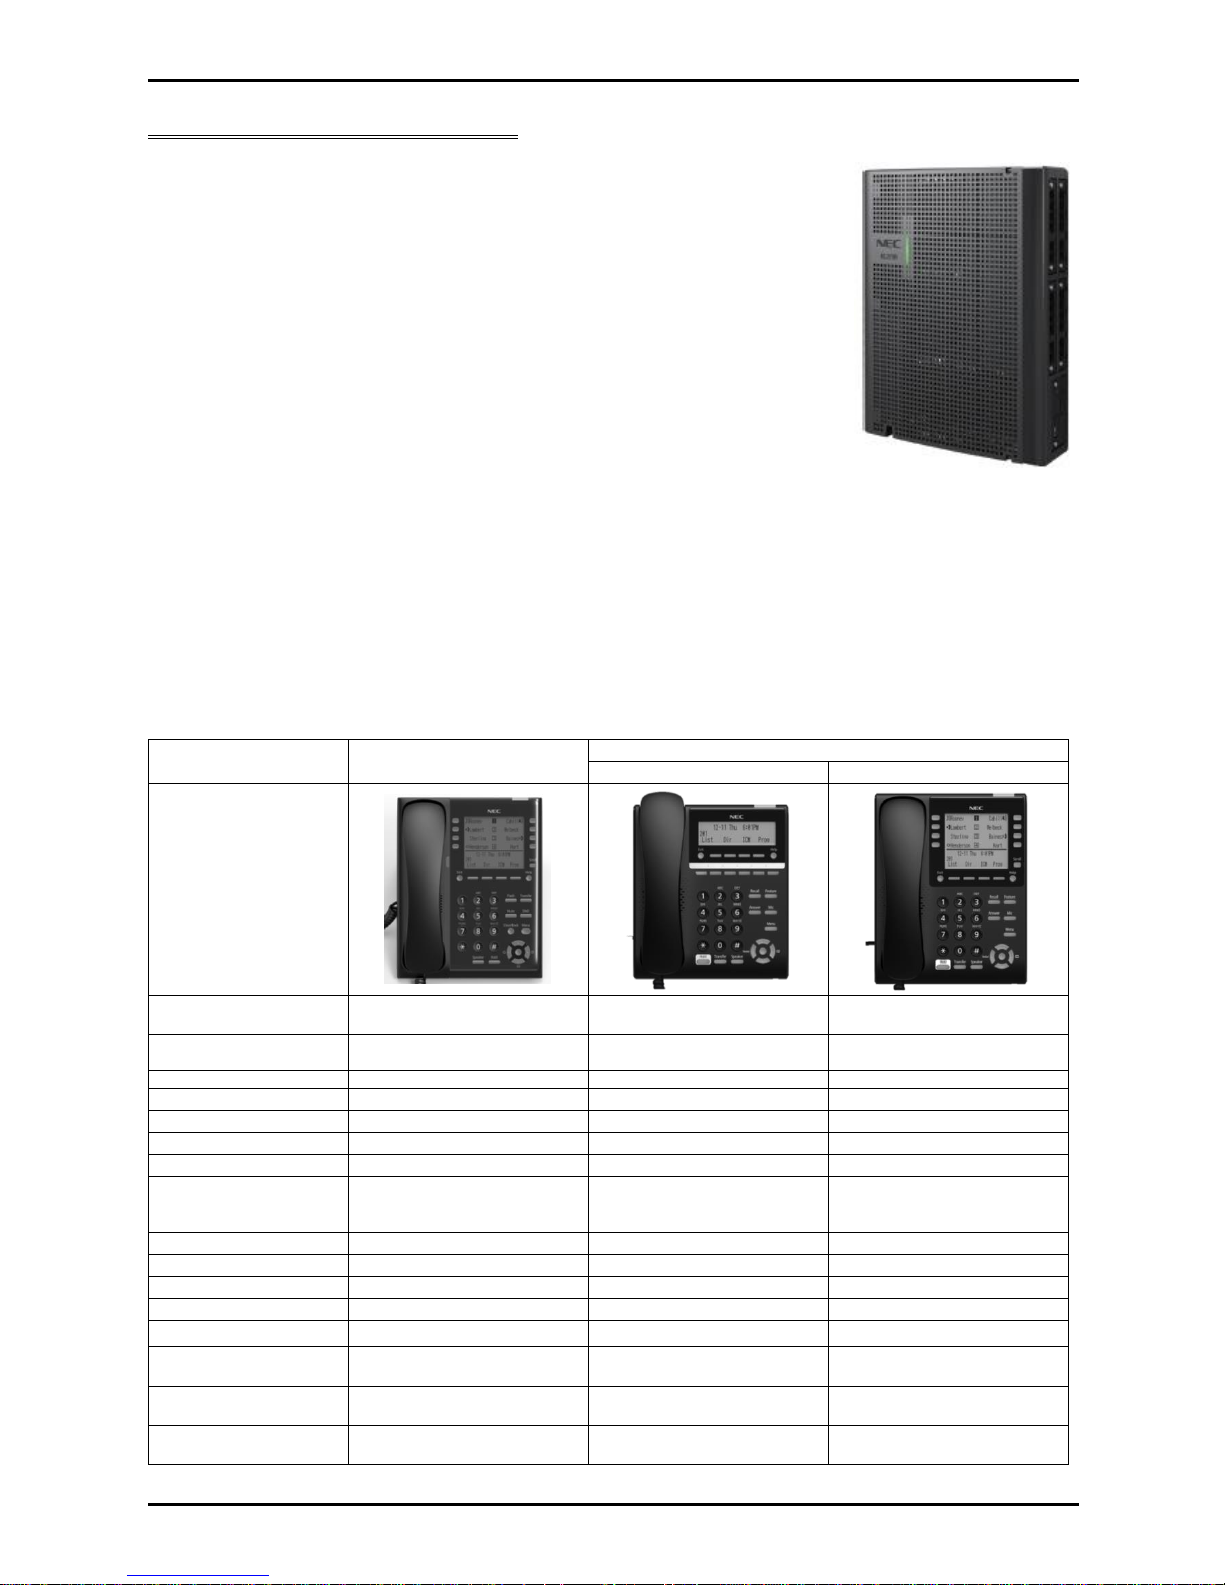
SL2100 Multiline IP Terminals
The SL2100 system consists of a chassis unit with a dedicated slot for the CPU
card and four universal slots for interface cards. Each universal slot supports an
extension interface card, each extension interface card can have an optional trunk
interface daughter card mounted.
Interface cards are available for Analogue and ISDN trunks, proprietary SL2100
terminals and analogue telephones.
The chassis unit is ventilation cooled (no fan) and can be wall mounted or rack
mounted with the optional rack mount shelf. Up to three chassis units can be
connected together to provide a total of twelve universal slots.
Multiline IP terminals are supported without the need for additional system
hardware as eight VoIP resources are built in to the CPU card. VoIP resources can
be expanded to 16 by adding the optional VOIPDB card and further to 128 with
licenses.
All equipment will operate in the default/factory setting when the SL2100 is installed.
With the default settings:
Each telephone will function and is assigned an extension number.
Calls received on the SIP trunk lines will ring at telephone number 200.
Each telephone can make outside calls by dialling 9.
Each trunk line is presented at a Function Key with busy lamp indication.
The system can be easily modified using SL2100 PCPro which has Quick Installation wizards for the majority of
system settings.
This guide details the installation of the following Multiline IP Terminals:
8IPLD
DT820
ITY-6D
ITY-8LDX
Part code & description
BE116517
IP7WW-8IPLD-C1 TEL(BK)
BE115113
ITY-6D-1P(BK)TEL
BE115114
ITY-8LDX-1P(BK)TEL
Connected to
Ethernet Port at LAN
(10M/100M/1000G)
Ethernet Port at LAN
(10M/100M)
Ethernet Port at LAN
(10M/100M)
Colour
Black
Black
Black
Programmable Keys
32 6 8
Soft Keys 4 4
4
LCD
168 x 128 Dots with Backlight
168 x 41 Dots with Backlight
168 x 128 Dots with Backlight
Hands free
Full-Duplex
Full-Duplex
Full-Duplex
Interfaces
2 (1 x LAN and 1 x PC Ethernet
Port (10Base T/100Base
TX/1000Base TX)
2 (1 x LAN and 1 x PC Ethernet
Port (10Base T/100Base TX)
2 (1 x LAN and 1 x PC Ethernet
Port (10Base T/100Base TX)
Power Feeding
PoE (IEEE802.3af) Only
PoE (IEEE802.3af) Only
PoE (IEEE802.3af) Only
CODEC Support
G.711/G.729a
G.711/G.729a
G.711/G.729a
Backlit Dial pad
No
No
No
Headset Port
Yes
Yes
Yes
Angle Adjustment
2 Positions
2 Positions
2 Positions
Wall Mounting Kit
IP4WW-WALL MOUNT UNIT
(Optional BE110790)
IP4WW-WALL MOUNT UNIT
(Optional BE110790)
IP4WW-WALL MOUNT UNIT
(Optional BE110790)
EHS Support
By EHS Cable (Plantronics
APD-80
By EHS Cable (Plantronics
APD-80
By EHS Cable (Plantronics
APD-80
License
Built-in Terminal
NEC SIP License
EU9093881
NEC SIP License
EU9093881
1
Requires one license per Terminal.
Page 6
Quick Install Guide – SL2100 Multiline IP Terminals rev 1.1
6 NEC SL2100 Communication System
Parts available for the SL2100
Not all parts are included within this guide, please refer to the other available SL2100 Quick Install Guides or the
SL2100 Hardware Manual for a full description and installation instructions of all parts available.
Please refer to Prophix for all parts and licenses available in your region.
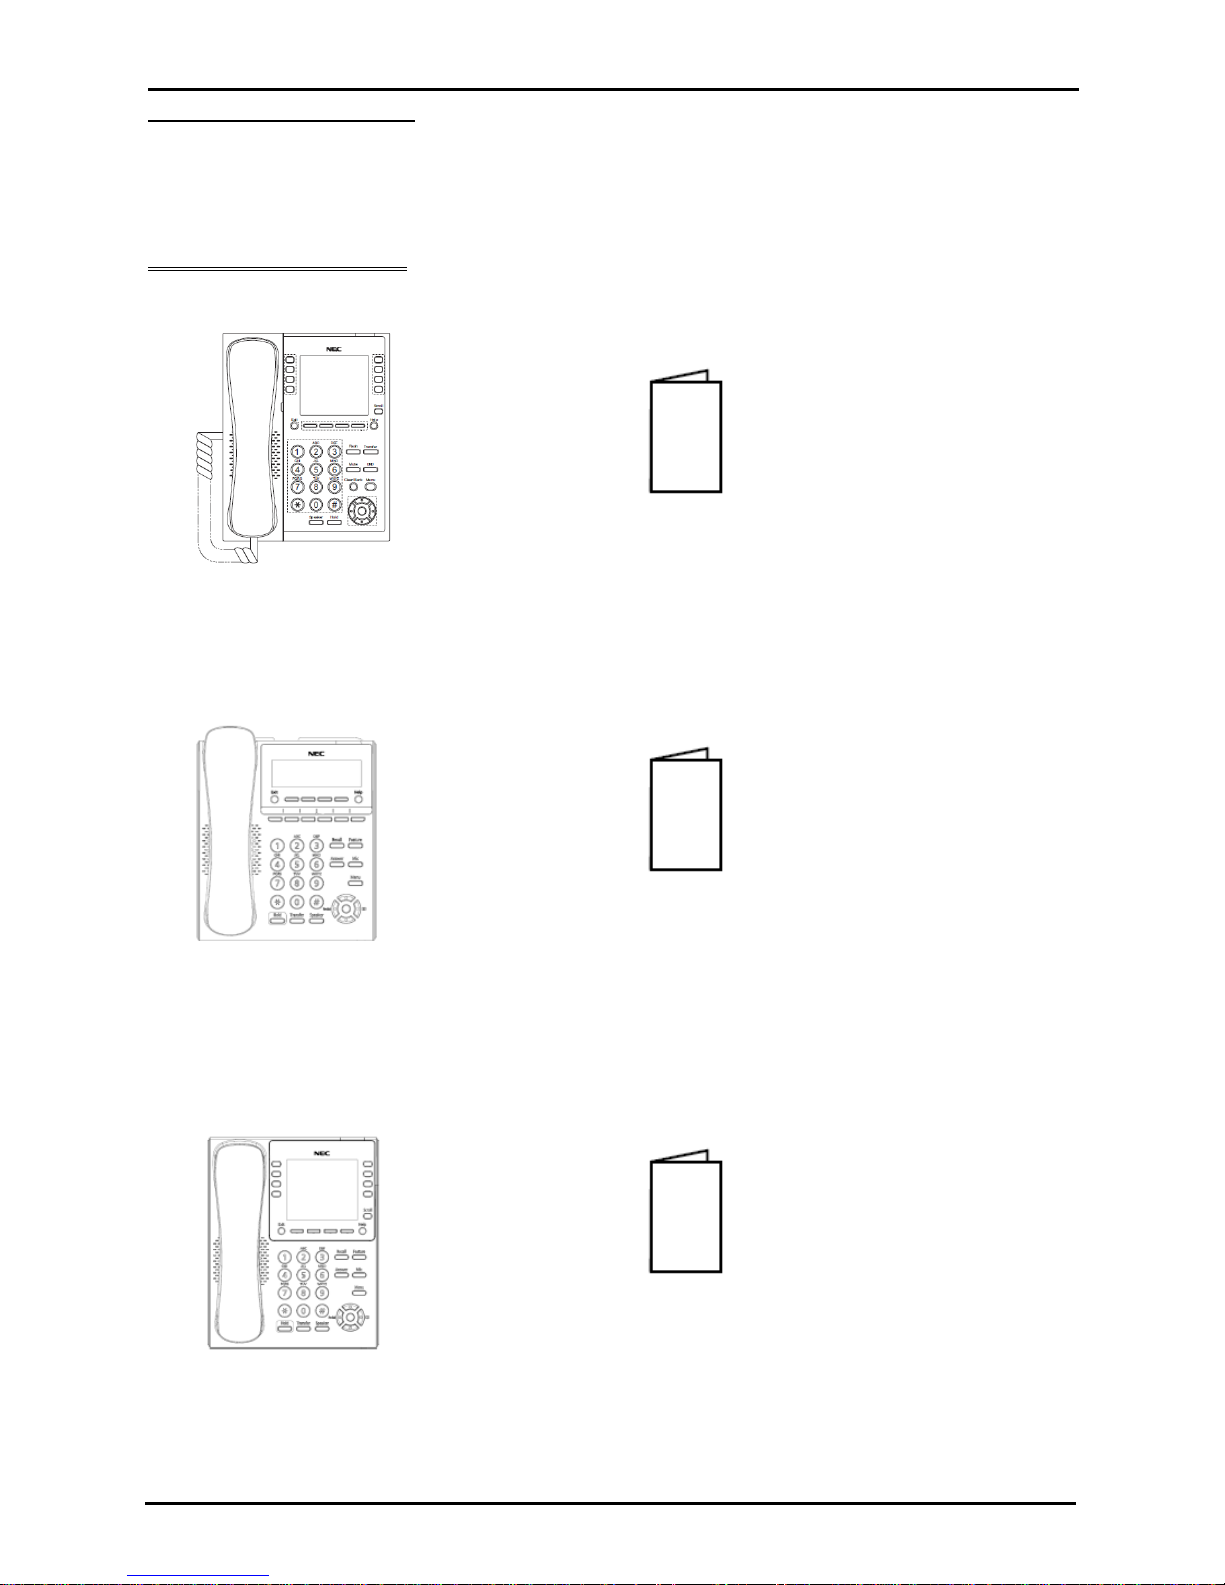
1- Package Contents
IP7WW-8IPLD-C1 DESI-Less Multiline IP Terminal
1 x IP7WW-8IPLD-C1 Multiline IP Terminal 1 x Declaration of Conformity
Additional Items Required:
Ethernet (cat5e/cat6) cable(s)
ITY-6D-1 (BK) TEL Multiline IP Terminal
1 x ITY-6D-1 Multiline IP Terminal 1 x Declaration of Conformity
Additional Items Required:
Ethernet (cat5e/cat6) cable(s)
NEC SIP License (Installed on SL2100)
ITY-8LDX-1 (BK) TEL Multiline IP Terminal
1 x ITY-8LDX-1 Multiline IP Terminal 1 x Declaration of Conformity
Additional Items Required:
Ethernet (cat5e/cat6) cable(s)
NEC SIP License (Installed on SL2100)
Page 7
Quick Install Guide – SL2100 Multiline IP Terminals rev 1.1
NEC SL2100 Communication System 7
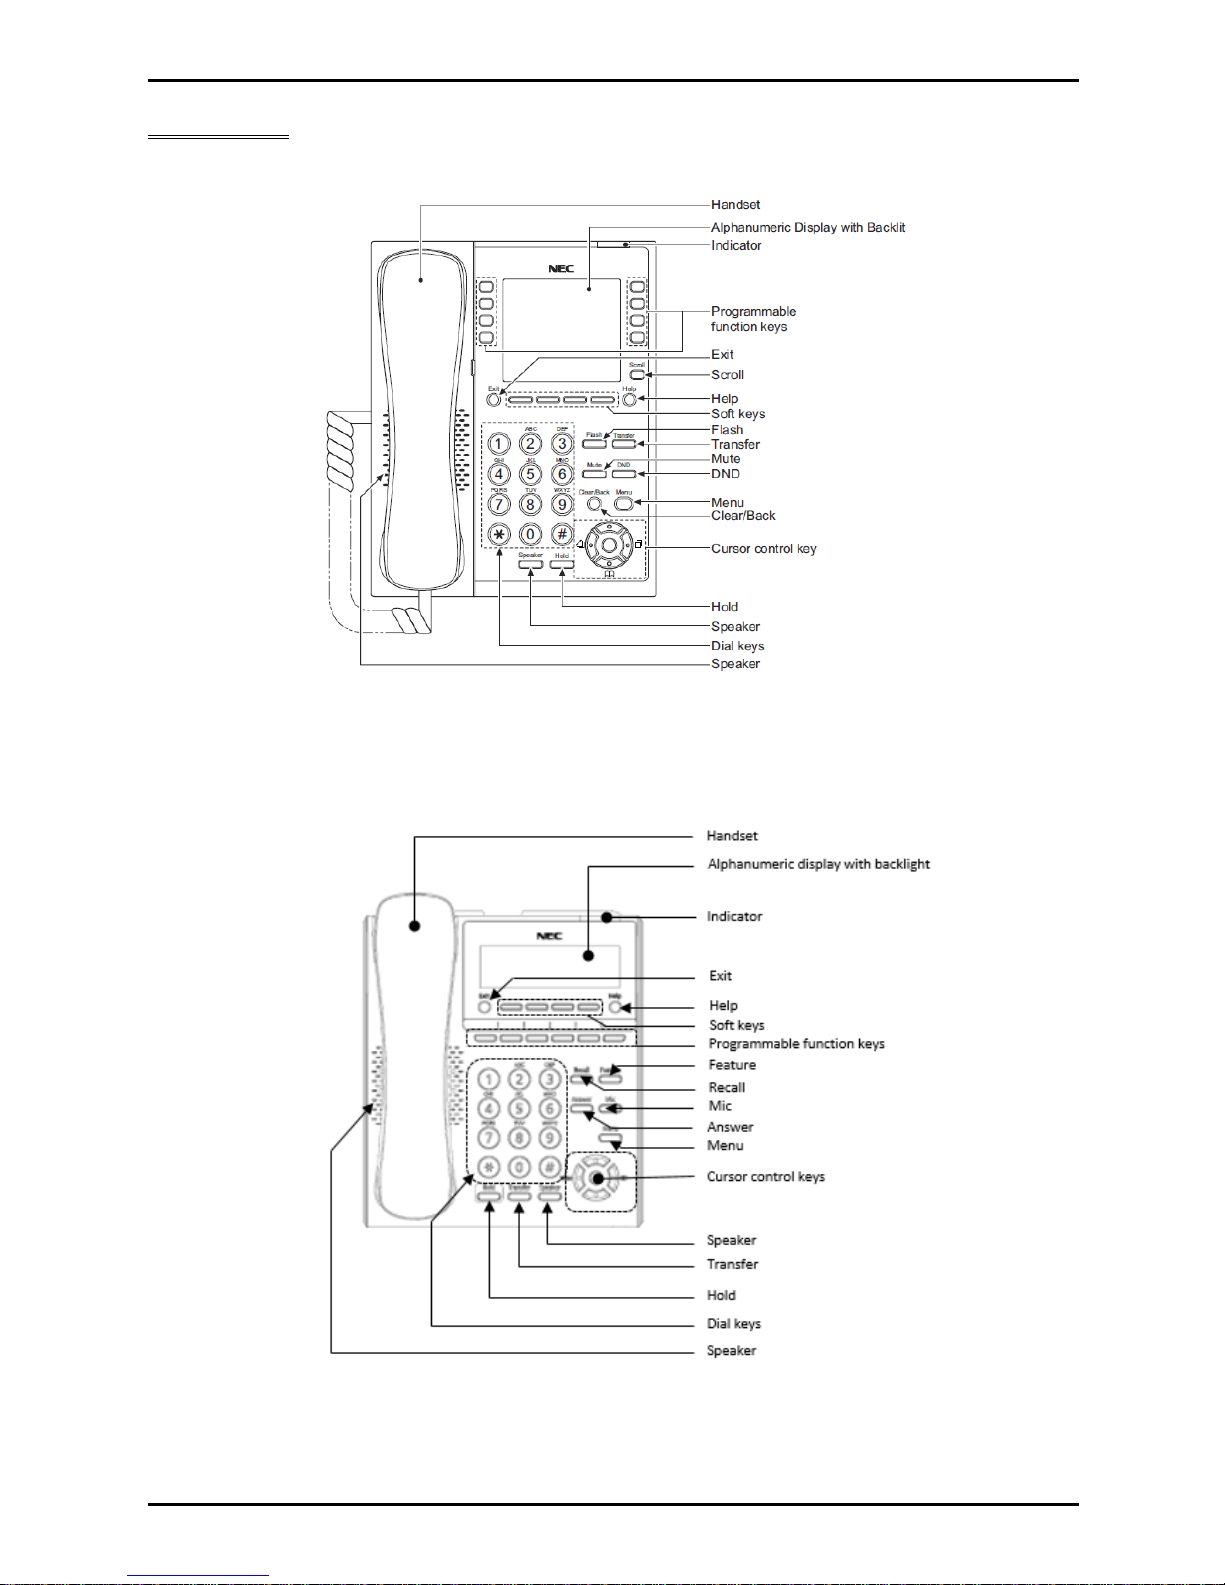
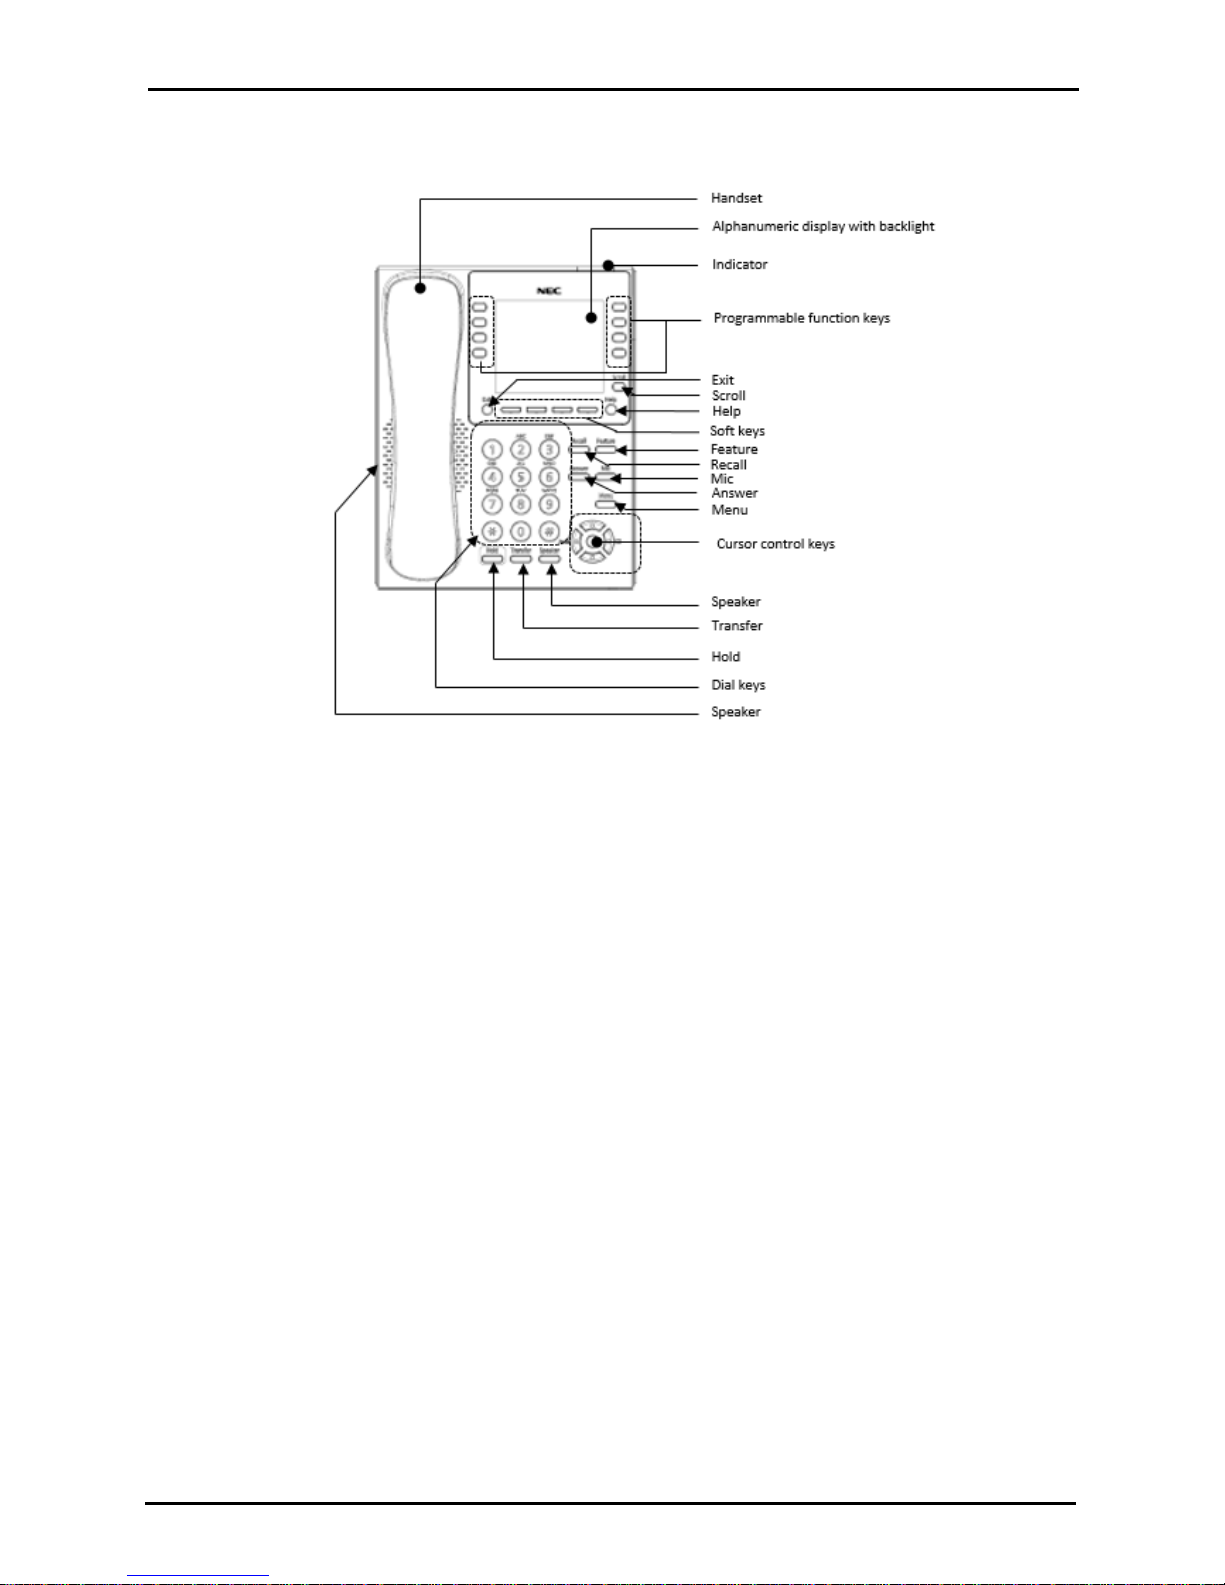
2- Features
IP7WW-8IPLD-C1 Multiline IP Terminal
ITY-6D-1 Multiline IP Terminal
Page 8
Quick Install Guide – SL2100 Multiline IP Terminals rev 1.1
8 NEC SL2100 Communication System
ITY-8LDX-1 Multiline IP Terminal
Page 9
Quick Install Guide – SL2100 Multiline IP Terminals rev 1.1
NEC SL2100 Communication System 9
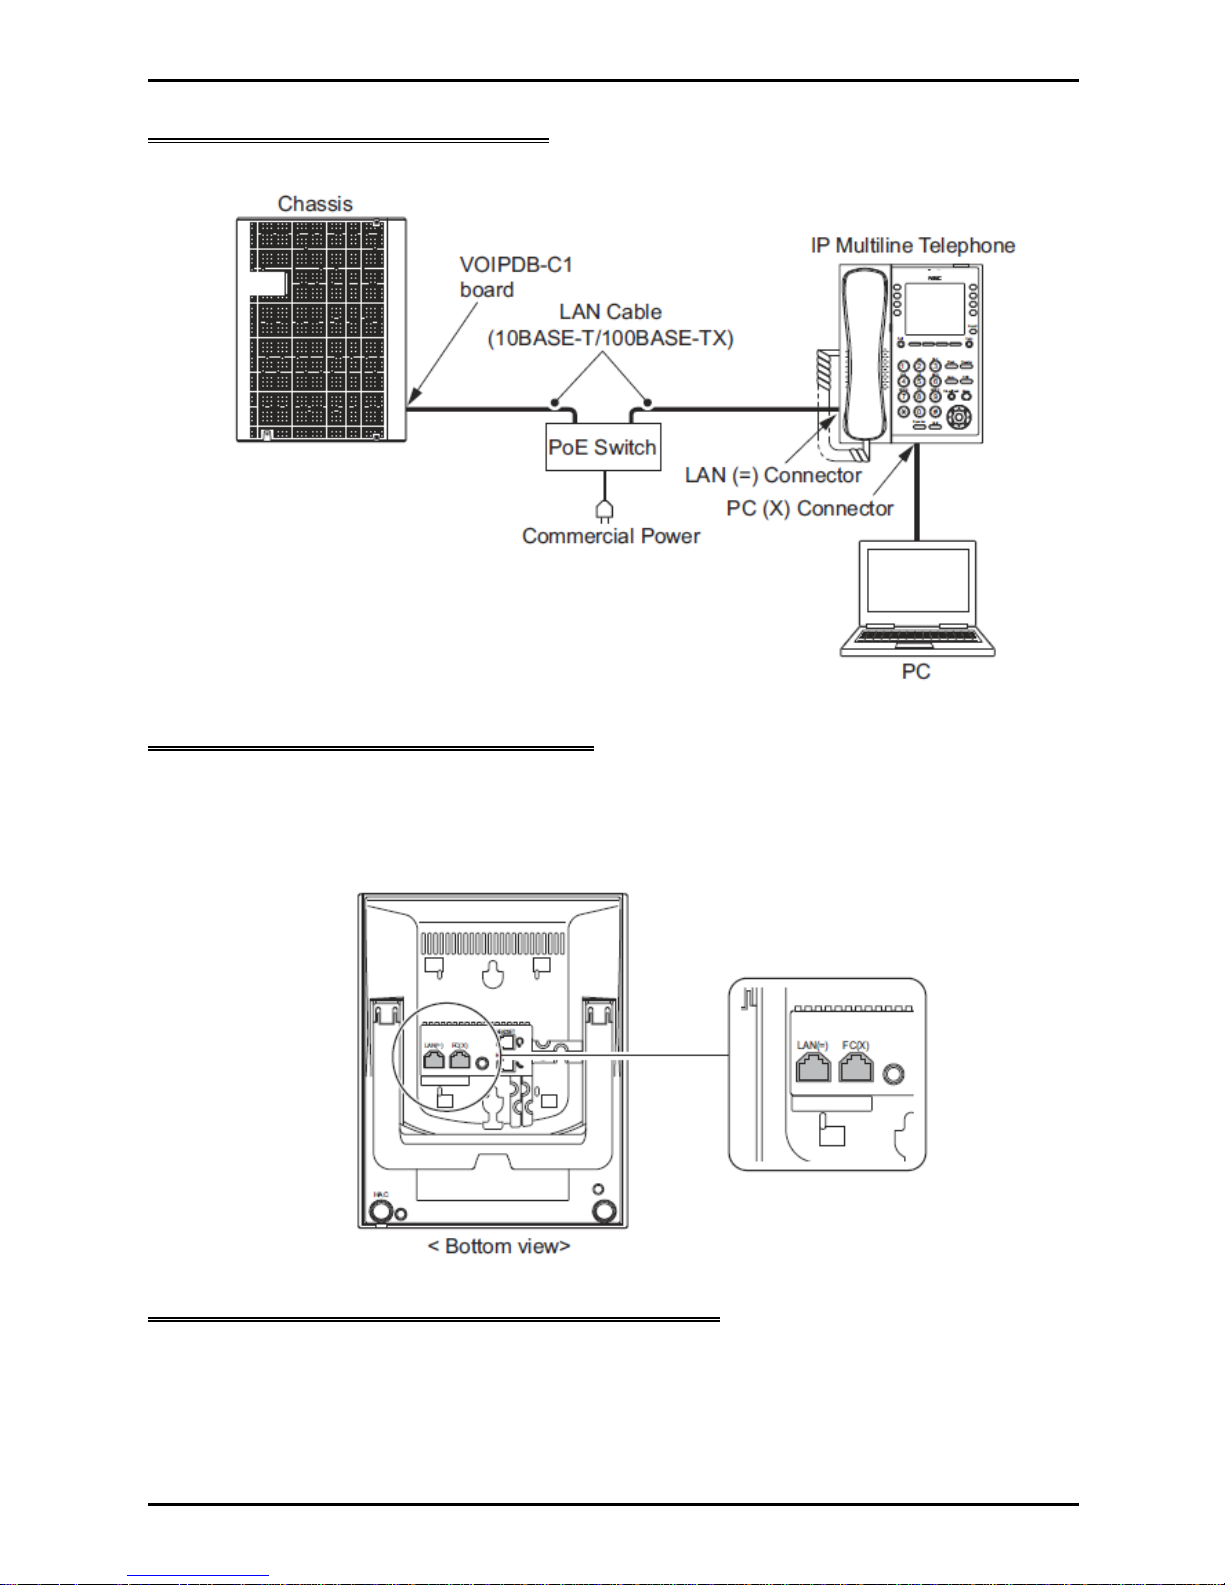
3- System Connection Overview
The Multiline IP terminals are connected via a PoE switch.
4- Connect the Multiline IP Terminal
1. Connect the LAN Network 10-Base-T/100Base-TX/1000Base-TX cable to the LAN(=) connector.
2. Power provisioning is provided by PoE, and AC/DC is not used.
3. The Multiline IP Telephones have a Switching Hub to connect a PC to the LAN network. Connect the
10Base-T/100Base-TX/1000Base-TX straight through cable used for connection to the PC to the PC(X)
connector and to the PC.
5- Applying Power to the Multiline IP Terminal
The Multiline IP Terminals support PoE power provisioning for the telephone.
PoE(IEEE802.3af)
PoE (Power Over Ethernet) is a LAN technology that allows standard 10-Base-T/100BaseTX/1000Base-TX data cables to pass electrical current from a power source to a requesting end device.
Page 10

Quick Install Guide – SL2100 Multiline IP Terminals rev 1.1
10 NEC SL2100 Communication System
Ethernet sockets for VOIP
There are two Ethernet sockets available with the SL2100: CPU card and optional VOIPDB card.
When the CPU card is installed – Use the Ethernet socket of the CPU.
8 VOIP resources built in with the CPU card are available
Use the VOIP IP address settings for VOIP devices
Note – do not use the CPU IP address settings as these will not support VOIP devices
SL2100 IP address
172.16.0.10
Subnet Mask
255.255.0.0
Supports
Data (eg PCPro/WebPro, SMDR etc)
VOIP
LAN speed
100 Mbps Full Duplex
Use the IP address and Subnet mask setup in PCPro Easy Edit - Quick Install - Cards-CPU Settings - CPU IP
Address: VOIP IP Address
When the optional VOIPDB card is installed – Use the Ethernet socket of the VOIPDB card
16~128 VOIP resources provided by the VOIPDB card + VOIP channel licenses are available
Use the VOIP IP address settings for VOIP devices
SL2100 IP address
172.16.0.10
Subnet Mask
255.255.0.0
Supports
Data (eg PCPro/WebPro, SMDR etc)
VOIP
LAN speed
100/1000 Mbps Full Duplex
Use the IP address and Subnet mask setup in PCPro Easy Edit - Quick Install - Cards-CPU Settings - CPU IP
Address: VOIP IP Address
CPU card
Ethernet socket
VOIPDB card
Ethernet socket
Page 11

Quick Install Guide – SL2100 Multiline IP Terminals rev 1.1
NEC SL2100 Communication System 11
Check the IP Address of the SL2100
You can check the IP address at any SL2100 system phone:
When the phone is idle (on hook)
Type-A Terminal
Press the centre Navigation Key and dial 841
Press the right navigation key to display the VoIPDB setting
Type-B Terminal
Press the centre Navigation Key and dial 841
PCPro
System IP address is setup in PCPro Easy Edit - Quick Install – Cards - CPU Settings - CPU IP Address: IP
Address
VoIPDB IP address is setup in PCPro Easy Edit - Quick Install – Cards - CPU Settings - CPU IP Address: VOIP
IP Address
Press centre navigation
key and dial 841
Press centre navigation
key and dial 841
Page 12

Quick Install Guide – SL2100 Multiline IP Terminals rev 1.1
12 NEC SL2100 Communication System
6- IP7WW-8IPLD-C1 DESI-Less IP Terminal Leg Adjustment
The Multiline IP 8IPLD Terminal provides adjustable legs for angling the phone to best suit each user. The leg
can be set for two different heights (Low/High).
Low Position Setting
1. Turn telephone over (button side down).
2. Adjust the legs to Low Position height.
3. Lead the Line and Handset cords through the applicable grooves.
4. Turn telephone over (button side up).
Page 13

Quick Install Guide – SL2100 Multiline IP Terminals rev 1.1
NEC SL2100 Communication System 13
High Position Setting
1. Turn telephone over (button side down).
2. Pull up the Leg Stoppers.
3. Adjust the legs to High Position height.
4. Lead the Line and Handset cords through the applicable grooves.
5. Turn telephone over (button side up).
Page 14

Quick Install Guide – SL2100 Multiline IP Terminals rev 1.1
14 NEC SL2100 Communication System
7- DT820 IP Terminal Leg Adjustment (ITY-6D-1 and ITY-8LDX-1)
The Multiline IP DT820 terminals provide adjustable legs for angling the phone to best suit each user. The leg
can be set for two different heights (Low/High).
Low Position Setting
1. Turn telephone over (button side down).
2. Adjust the legs to Low Position height.
3. Lead the Line and Handset cords through the applicable grooves.
4. Turn telephone over (button side up).
Page 15

Quick Install Guide – SL2100 Multiline IP Terminals rev 1.1
NEC SL2100 Communication System 15
High Position Setting
1. Turn telephone over (button side down).
2. Pull up the Leg Stoppers.
3. Adjust the legs to High Position height.
4. Lead the Line and Handset cords through the applicable grooves.
5. Turn telephone over (button side up).
Page 16

Quick Install Guide – SL2100 Multiline IP Terminals rev 1.1
16 NEC SL2100 Communication System
8- Wall Mounting Multiline IP Terminals
1. Arrange the cables and put down the legs as shown below.
2. Attach the IP4WW-WALL MOUNT UNIT to the bottom panel and arrange the cables as shown below.
3. Remove the switch-hook from the unit. Turn the tab toward the top. Then slide the hook-switch into
position.
4. Install two screws into a wall. The screw head must be remained about 3mm (0.12”).
Page 17

Quick Install Guide – SL2100 Multiline IP Terminals rev 1.1
NEC SL2100 Communication System 17
5. Mount the telephone on the wall.
Page 18

Quick Install Guide – SL2100 Multiline IP Terminals rev 1.1
18 NEC SL2100 Communication System
9- Multiline IP Terminal Configuration
There are 3 types of registration methods that can be used to connect Multiline IP terminals to the SL2100 system.
The 3 methods available are as follows;
Plug and Play
o Plug and Play requires no user name or password. Extension numbers are automatically assigned
by the system based on the next available free number.
o Advantage: Good for fast deployment. Used by default.
Automatic
o Automatic requires a User ID and Password entered into the configuration. The User ID and
Password need to be input also into the phone configuration so the user never has to enter this.
o Advantage: Good for secure environments and fixed numbers tagged to the phone set.
Manual
o Manual requires a User ID and Password entered into the configuration. The user is prompted to
enter the User ID and Password after the phone has initialized.
o Advantage: Good for hot-desking where you’re able to have extension mobility for the users. The
user can then logout from the terminal and the next user can login to the phone with their own
extension number assigned.
The SL2100 is by default configured to use Plug and Play registration. For the purpose of this Quick Install Guide
and simplicity we will use the Plug and Play method. For Automatic or Manual Registration modes please refer to
the SL2100 Networking Manual for further information.
Multiline IP Terminal Boot Sequence
When the Multiline IP Terminal has been connected to the LAN and power is provisioned, it will begin it’s boot
sequence and attempt to obtain a network IP configuration from a local DHCP server before then attempting to
connect to the SL2100. The Boot sequence for a default terminal will look similar to as described below, and a
default terminal will normally end the sequence displaying a message to inform that the SIP Server (SL2100) was
not found. This is because, at this point the terminal does not know the IP address of the SL2100 to connect to,
which needs to be configured next.
Terminal receives power and begins its initial boot sequence.
Terminals firmware is loaded into memory and applications started.
Page 19

Quick Install Guide – SL2100 Multiline IP Terminals rev 1.1
NEC SL2100 Communication System 19
DT820 Terminals Only an LLDP discovery request is sent to the
network and if supported by the network switch, configuration details of
the network such as VLAN and QoS configuration can be obtained by
the terminal.
A DHCP request is sent to the network to obtain IP configuration details.
DHCP can also be used to provision the SIP Server address information
but that is not covered in this Quick Start Guide. Please refer to the
SL2100 Networking Manual for further information.
The Terminal will by default normally display a ‘SIP Server Not Found’
message.
If the Terminal does not display this message and connects to the
SL2100, it is most likely that the DHCP server has been configured to
provision the SIP Server address details already.
Multiline IP Terminal Programming Interface
This section describes how to access the administration programming interface for Multiline IP Terminals. The
following describes how to gain access to the Admin Menu.
1. From a Multiline IP Terminal, press the following button sequence, HOLD + Transfer + * + # to enter
program mode. The Admin Menu login screen is displayed.
2. At the Admin Menu login screen, enter the default User Name and Password for the Multiline IP Terminal.
Use the BK soft key to remove an entered digit, Set soft key to switch between fields, Cancel soft key to
cancel the login, and press the OK soft key when ready to continue.
Programming Option
Default
User Name
ADMIN
Password
6633222
8IPLD
DT820 8LDX
Page 20

Quick Install Guide – SL2100 Multiline IP Terminals rev 1.1
20 NEC SL2100 Communication System
Configure 8IPLD Multiline IP Terminal
1. Once logged in successfully, the Admin Menu options will be available.
2. Press 2 to select SIP Settings and press the OK soft key.
3. The SIP Settings menu will now be displayed.
4. Press 2 to select Server Address & URI.
Page 21

Quick Install Guide – SL2100 Multiline IP Terminals rev 1.1
NEC SL2100 Communication System 21
5. The Server Address & URI menu will now be displayed.
6. Press 1 to select 1st Server Address.
7. The 1st Server Address data entry screen will now be displayed. Enter the VOIP IP address of the
SL2100. Press the OK soft key when finished.
8. Press 4 to select SIP Server Port.
Page 22

Quick Install Guide – SL2100 Multiline IP Terminals rev 1.1
22 NEC SL2100 Communication System
9. The SIP Server Port menu will now be displayed.
10. Press 1 to select 1st Server Port.
11. The 1st Server Port data entry screen will now be displayed. The value should be 5080, if it is not, then
enter 5080 here. Press the OK soft key when finished.
12. Press the Exit soft key 2 times. When you are back at the main Admin Menu press the Save soft key.
Page 23

Quick Install Guide – SL2100 Multiline IP Terminals rev 1.1
NEC SL2100 Communication System 23
13. The Terminal will now cycle through its boot procedure. Initializing > Starting > DHCP Connecting… >
Connecting…
The Connecting… phase is the terminal attempting to register at the SL2100 using the IP address
assigned above in step 7, and be allocated an un-carded available port to the terminal.
14. If successful the Multiline IP terminal will be allocated an available port on the system and display it’s
extension number information.
15. The IP terminal is now registered and ready to be used with the SL2100.
Page 24

Quick Install Guide – SL2100 Multiline IP Terminals rev 1.1
24 NEC SL2100 Communication System
Configure DT820 Multiline IP Terminals
Please note these screens are taken for the 8LDX model of DT820. The 6D configuration is identical to this
procedure only the display is smaller on that model.
1. Once logged in successfully, the Admin Menu options will be available.
2. Press 2 to select SIP Settings and press the OK soft key.
3. The SIP Settings menu will now be displayed.
4. Press 2 to select Server Address & URI.
Page 25

Quick Install Guide – SL2100 Multiline IP Terminals rev 1.1
NEC SL2100 Communication System 25
5. The Server Address & URI menu will now be displayed.
6. Press 1 to select 1st Server Address.
7. The 1st Server Address data entry screen will now be displayed. Enter the IP address of the SL2100
VoIPDB interface. Press the OK soft key when finished.
8. Press 4 to select SIP Server Port.
Page 26

Quick Install Guide – SL2100 Multiline IP Terminals rev 1.1
26 NEC SL2100 Communication System
9. The SIP Server Port menu will now be displayed.
10. Press 1 to select 1st Server Port.
11. The 1st Server Port data entry screen will now be displayed. The value should be 5080, if it is not, then
enter this value here. Press the OK soft key when finished.
12. Press the Exit soft key 2 times. When you are back at the main Admin Menu press the Save soft key.
Page 27

Quick Install Guide – SL2100 Multiline IP Terminals rev 1.1
NEC SL2100 Communication System 27
13. The Terminal will now cycle through its boot procedure. Initializing > Starting > LLDP Receiving… >
DHCP Connecting… > Connecting…
The Connecting… phase is the terminal attempting to register at the SL2100 using the IP address
assigned above in step 7, and be allocated an un-carded available port to the terminal.
14. If successful the Multiline IP terminal will be allocated an available port on the system and display it’s
extension number information.
15. The IP terminal is now registered and ready to be used with the SL2100.
 Loading...